

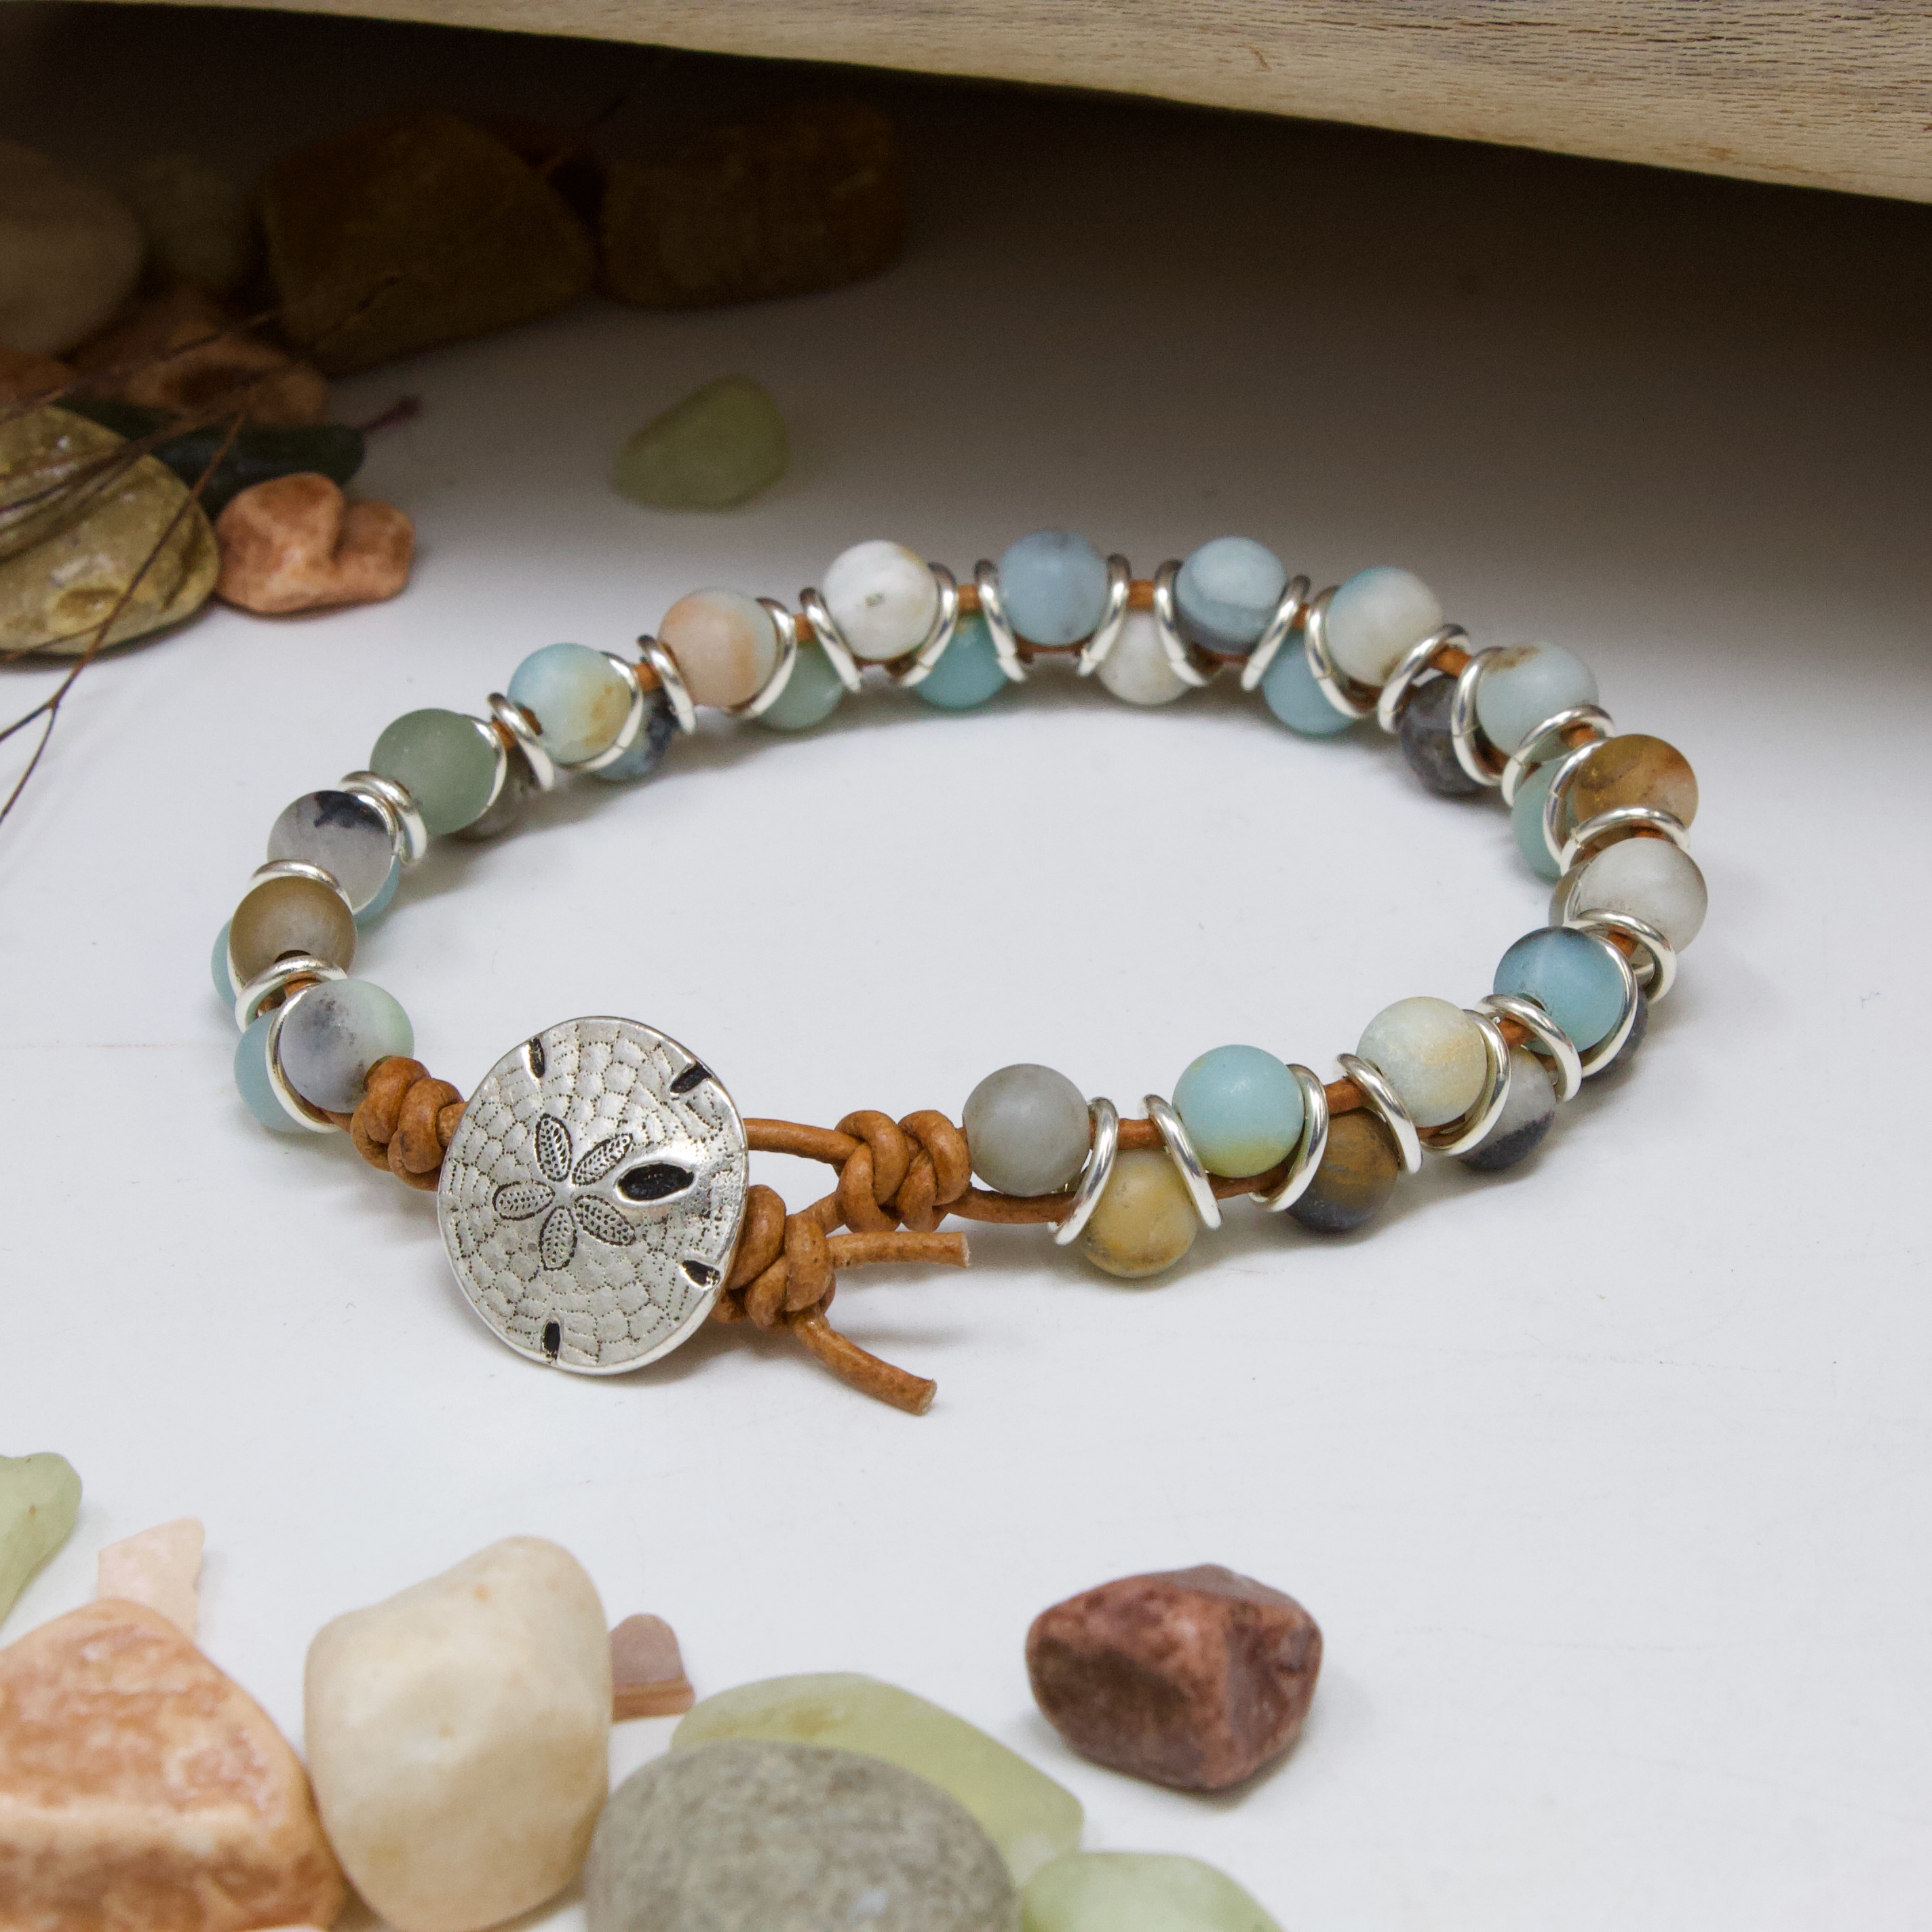
Dancing Gemstone Bracelet
Dancing Gemstone Bracelet
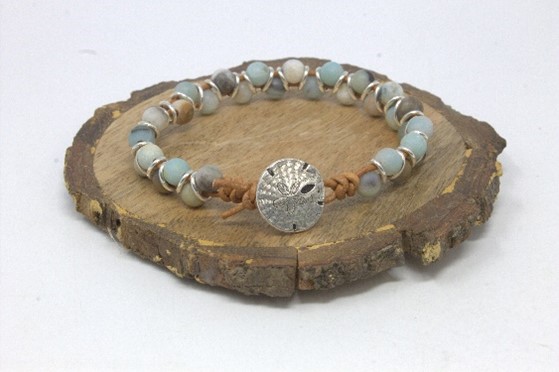
Materials:
- Natural 1.5mm leather (3 feet)
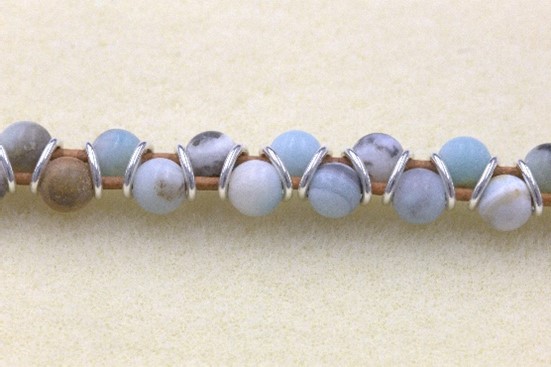
- Large hole gemstones - we used our Amazonite Multi Color Matte Round - 2mm Large Hole (28)
- Button - We used our TierraCast Sand Dollar Button - Silver (1)
- Silver Plated Large Oval Jump Rings (32)
Tools:
Cutter
Instructions:
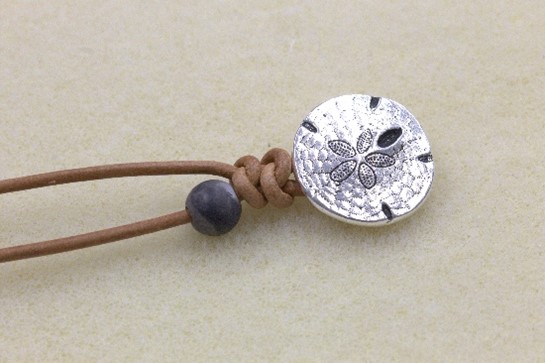
1.Place your button on the 3 feet of leather, halfway down. Hold the leather under the button with your left thumb and finger.
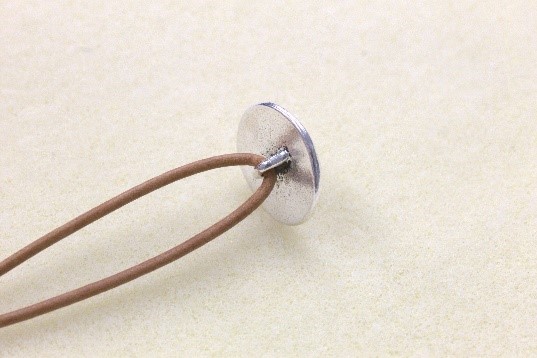
2.Hold the leather under the button with your left thumb and finger. Take right strand of leather and place it under the left strand. Hold it with your right hand where it crosses, forming a 1 inch “D”.
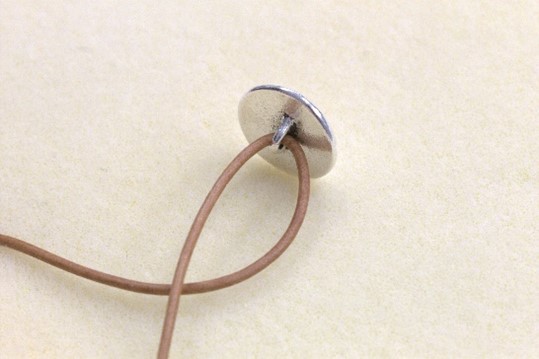
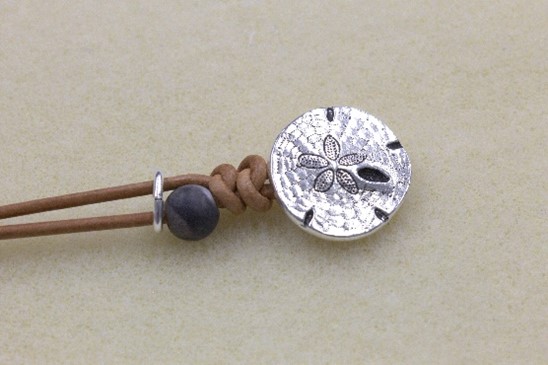
3.Flip the same strand of leather over the top of the center strand. Again, hold it where it crosses under the button.
4.Next, take the left strand of leather and place it over the strand going out to the right
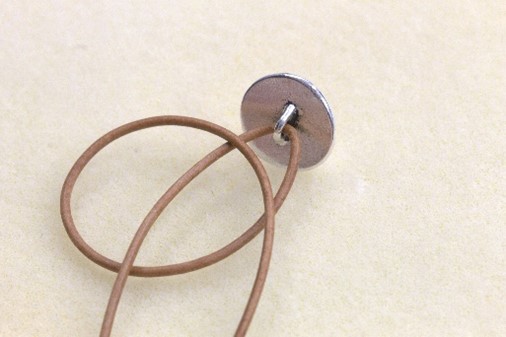
5.Then take the same strand under and pass through the loop to the left, towards you.

6.Pull until you have formed two 1-inch loops that look like a pretzel.
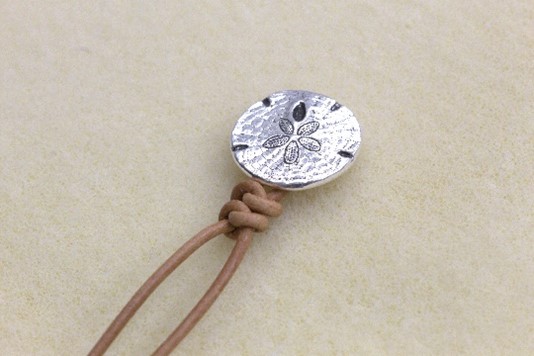
7.Still holding under the button pull each strand (left, then right) gradually reducing the size of the loops. The knot should be located ¼ inch down from the button.
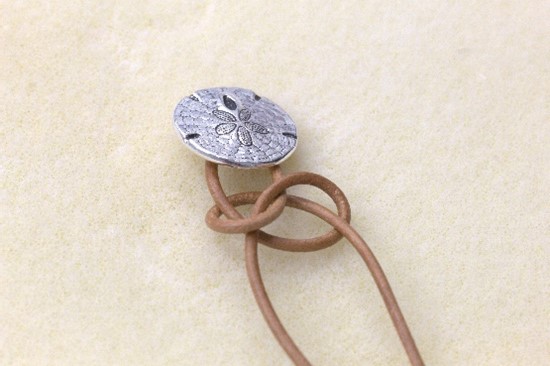
8.When the loops get to ¼ inch in size, pull on both strands at the same time. Push up on knot with right finger and thumb. To make the knot tight, turn button to face you.
9.Pull down on the knot towards you. At the same time, pull the two strands away from you. Do not pull too hard – you don’t want the leather to break! Just push and pull until it’s lightly in place.
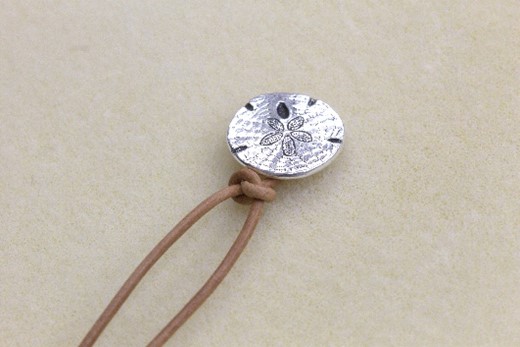
10.Repeat steps 2-9 to make another knot. Make the knots close together and make them the same size. Remember, if the knots are not tight enough, they will spread apart with wear making your bracelet too big.
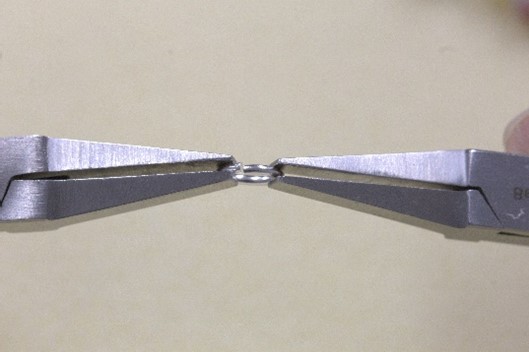
11.Use your pliers to ensure all jump rings are closed completely.
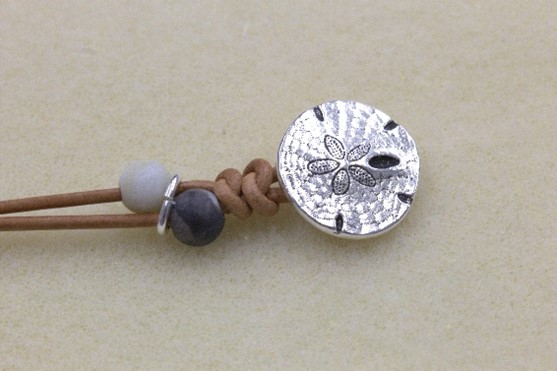
12.String one gemstone onto one strand of the leather, sliding it all the way up to the knot.
13.Slide one closed jump ring onto both strands of leather.
14.String one pearl onto the second strand of leather.
15.Slide one closed jump ring onto both strands of leather.
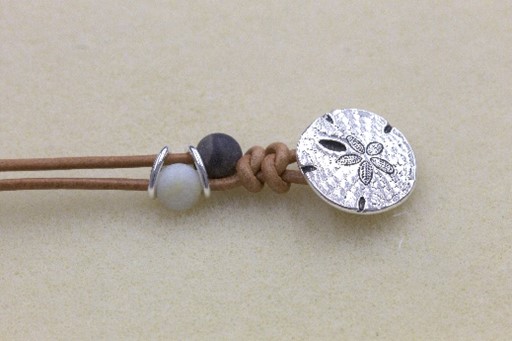
16.Repeat steps 12-15, adding pearls and chain links until you run out of chain links or until you reach the desired length.
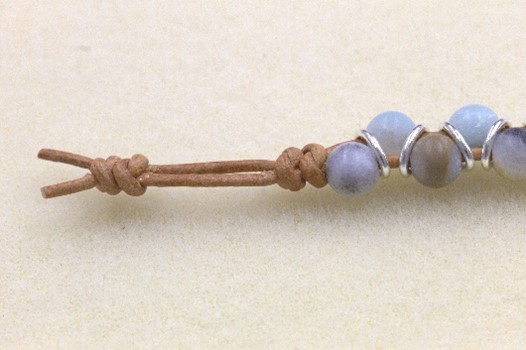
17.Repeat steps 2-9 to tie two Spanish knots directly below the final pearl.
18.Leave a space the same size as your button and tie a Spanish knot.
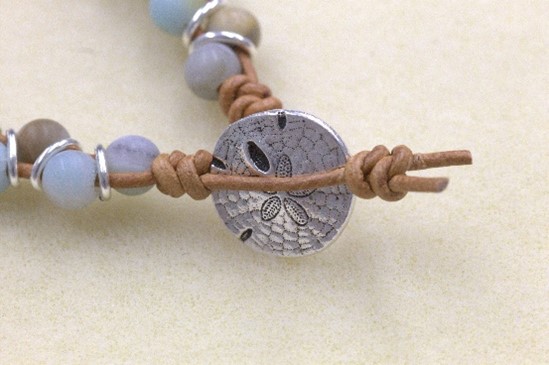
19. Add a second Spanish knot. If you like, you can leave a space the same size as your button and tie two Spanish knots. This makes your bracelet adjustable.
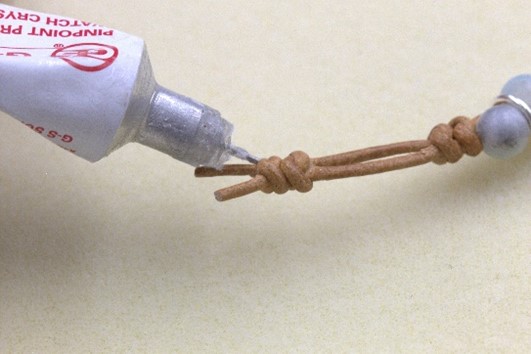
- 20.Complete the bracelet by putting GS Hypo Glue (Red) inside all the end knots to keep them coming undone.
21.Cut the leather strands off ¼ inch from the last knot.
22.Your finished bracelet will look like this:
Recent Posts
-

"Gem Keeper" Chain Cage Pendant Necklace
"Gem Keeper" Chain Cage Pendant NecklaceNo hole no problem! Keep anything from gems with no holes, b …29th Mar 2024 -

Layered Beaded Charm Necklaces
Layered Beaded Charm NecklacesLayered necklaces are a fashion staple that adds depth and dimension t …26th Feb 2024 -

"Be Mine" Necklace and Stretch Bracelet Set
"Be Mine" Necklace and Stretch Bracelet SetValentine's jewelry, crafted with love and precision, ser …17th Jan 2024