
Tutorials
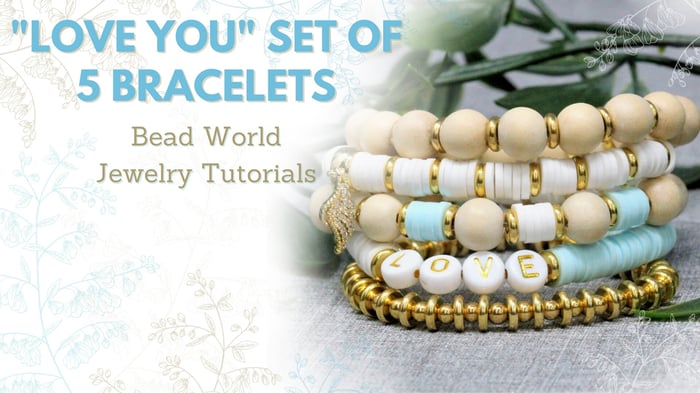
"Love You" Set of 5 Bracelets
"Love You" Set of 5 Bracelets
You are going to have so much fun making these 5 bracelets! Mix and Match colors, style, or even add your own words to create your perfect aesthetic.
 Materials Needed:
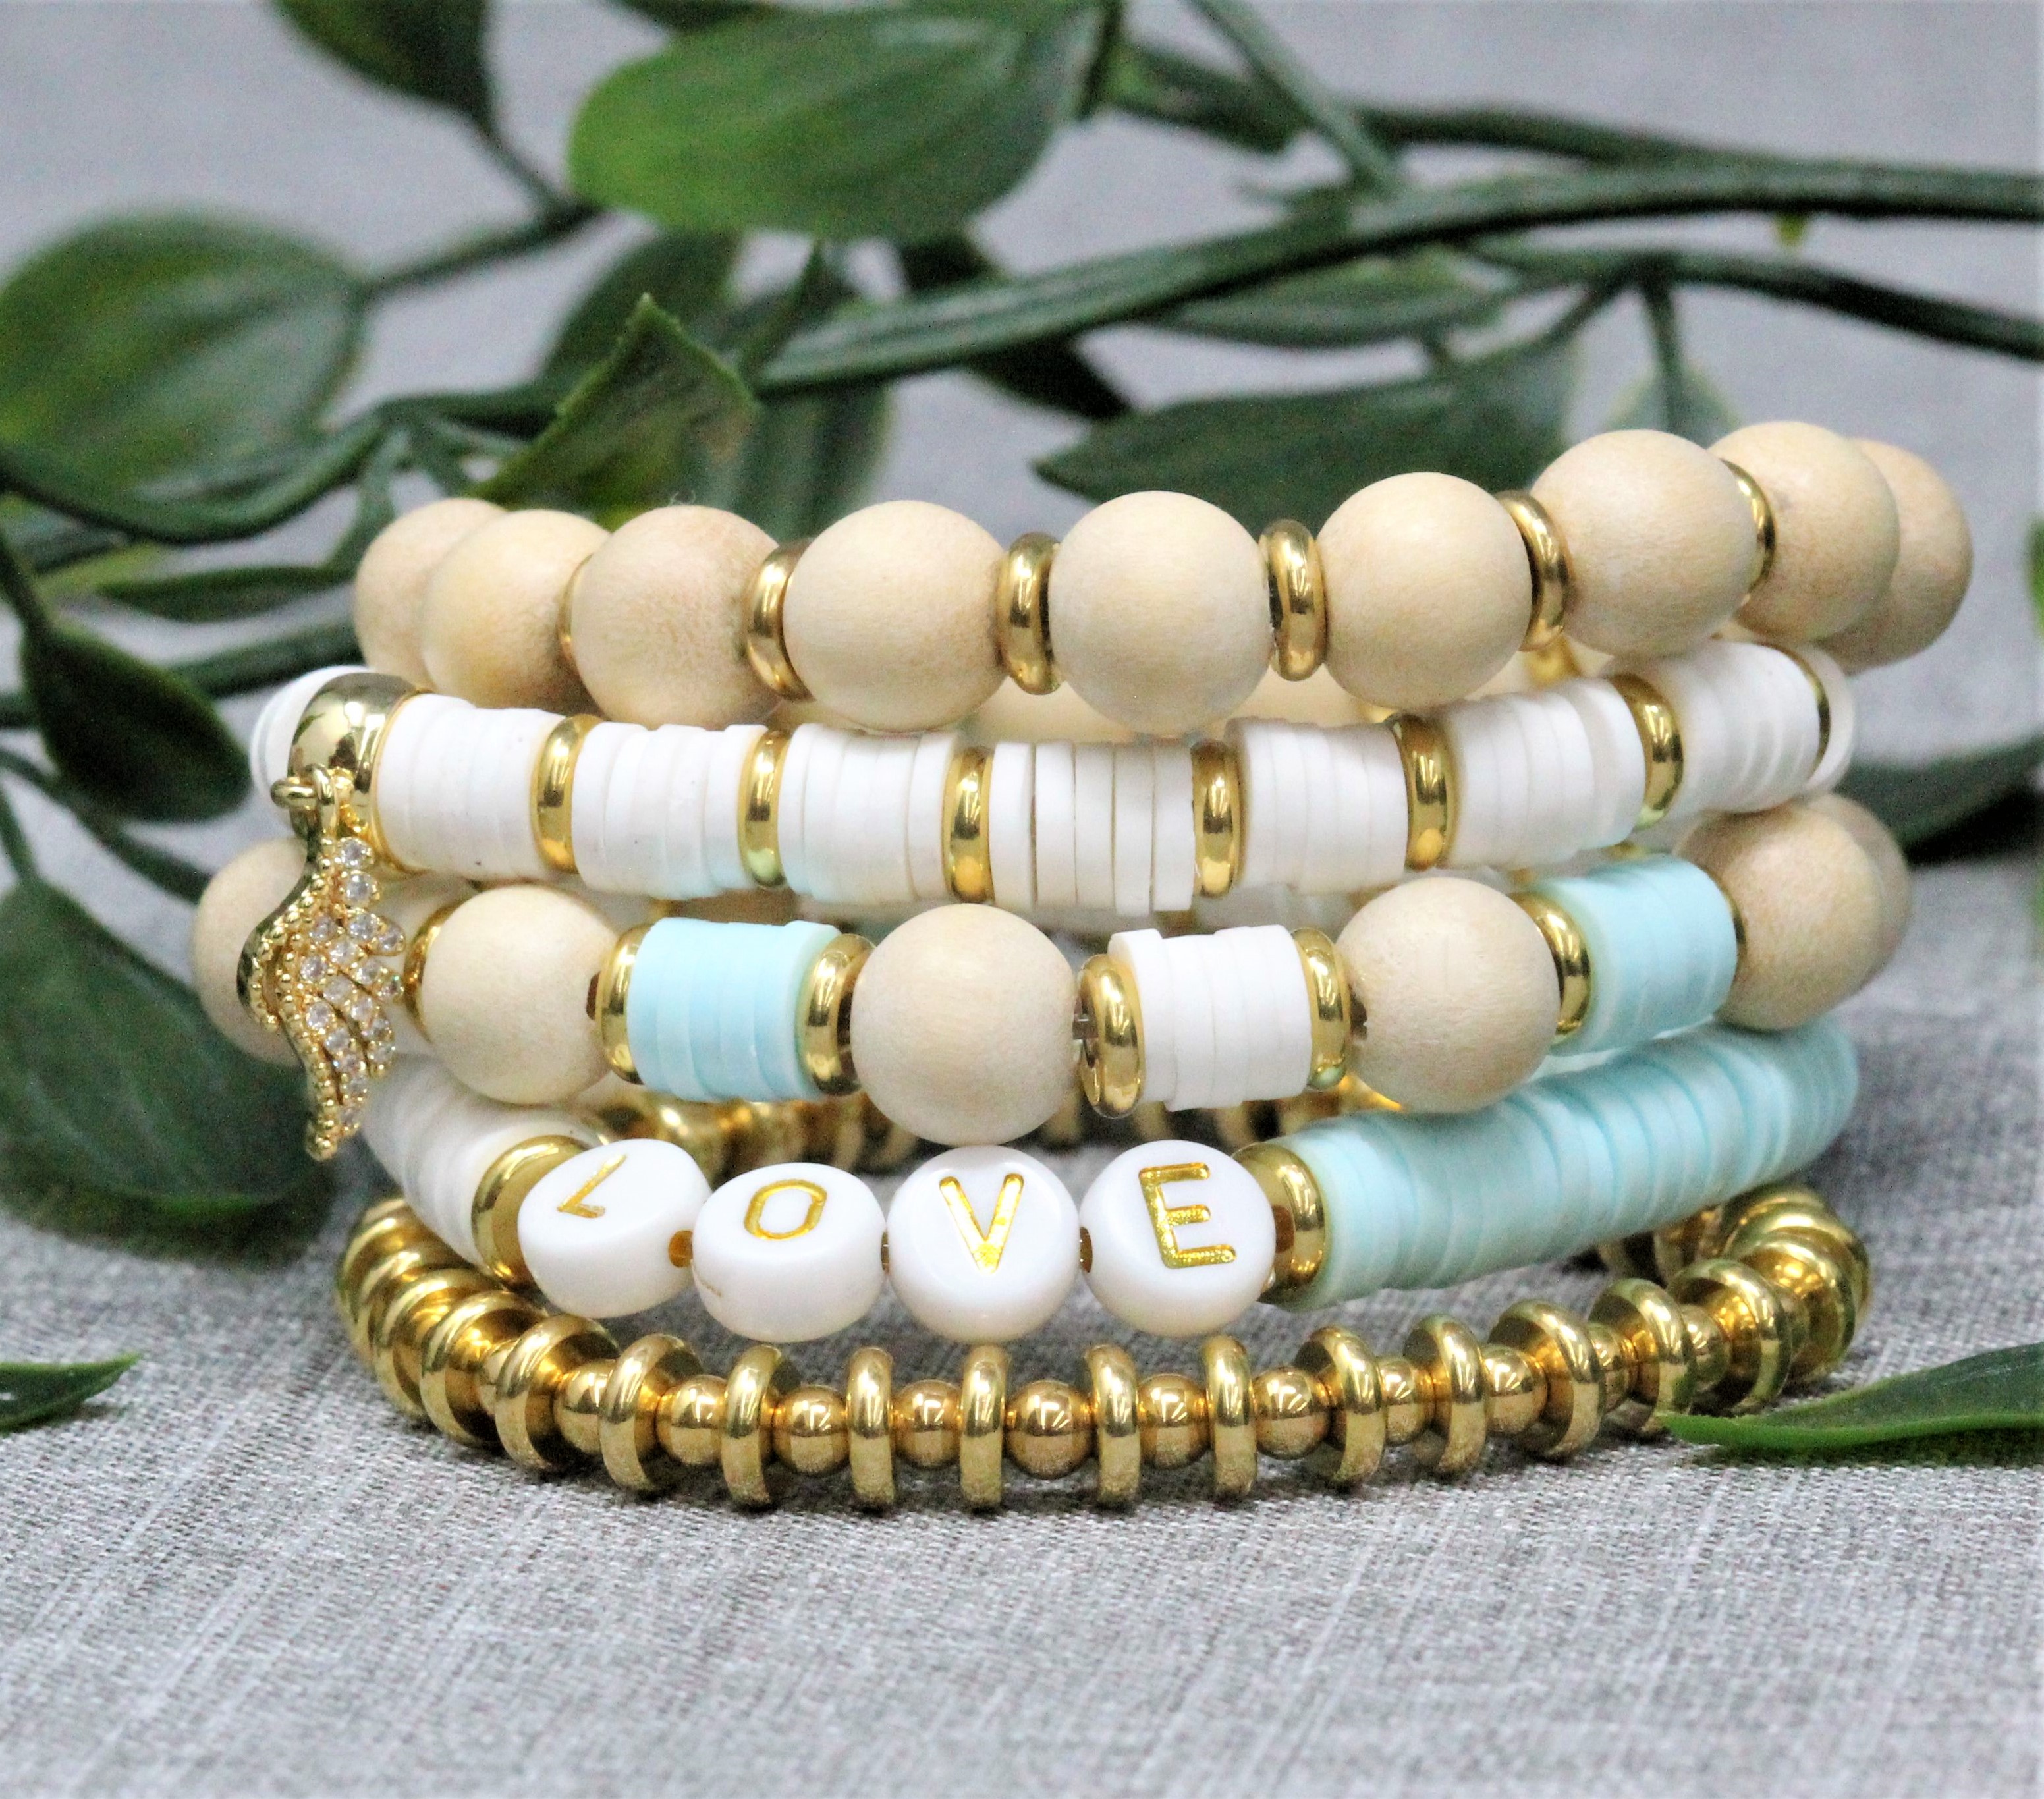
- Polymer Clay 6mm White Disc (1 Strand)
- Polymer Clay 6mm Light Aqua Disc (1 Strand)
- Cheese Wood Natural White Polished 8mm Round (1 Strand)
- Gold Plated Hematite 3mm Round (1 Strand)
- 1mm Stretch Magic, Crystal (48”)
- .5mm Stretch Magic, Clear (12")
- Gold and White Acrylic Alphabet Beads L (1), O (2), V (1), E (1), Y (1), U (1)
- Gold Micro Pave Wing with Ring Charm
- Gold Plated Brass Disc Rondels (1 packet or more depending on your measurements)
- G-S Hypo Cement
Size Approx. 6”
Tools Required:
Key Code for Beads: You can lay your beads out on mat with labels next to them to make it easier for stringing in correct sequence. * If you have a bead board you can lay the beads in correct sequence before stringing, this may be the easiest option.
A = 6mm Polymer Clay White, B = 6mm Polymer Clay Light Aqua, C = Gold Plated Hematite 3mm Round, D = Gold Heishi, E = Cheese Wood Natural White 8mm Round
Instructions on Construction:
First – Gold and Wood Bracelet
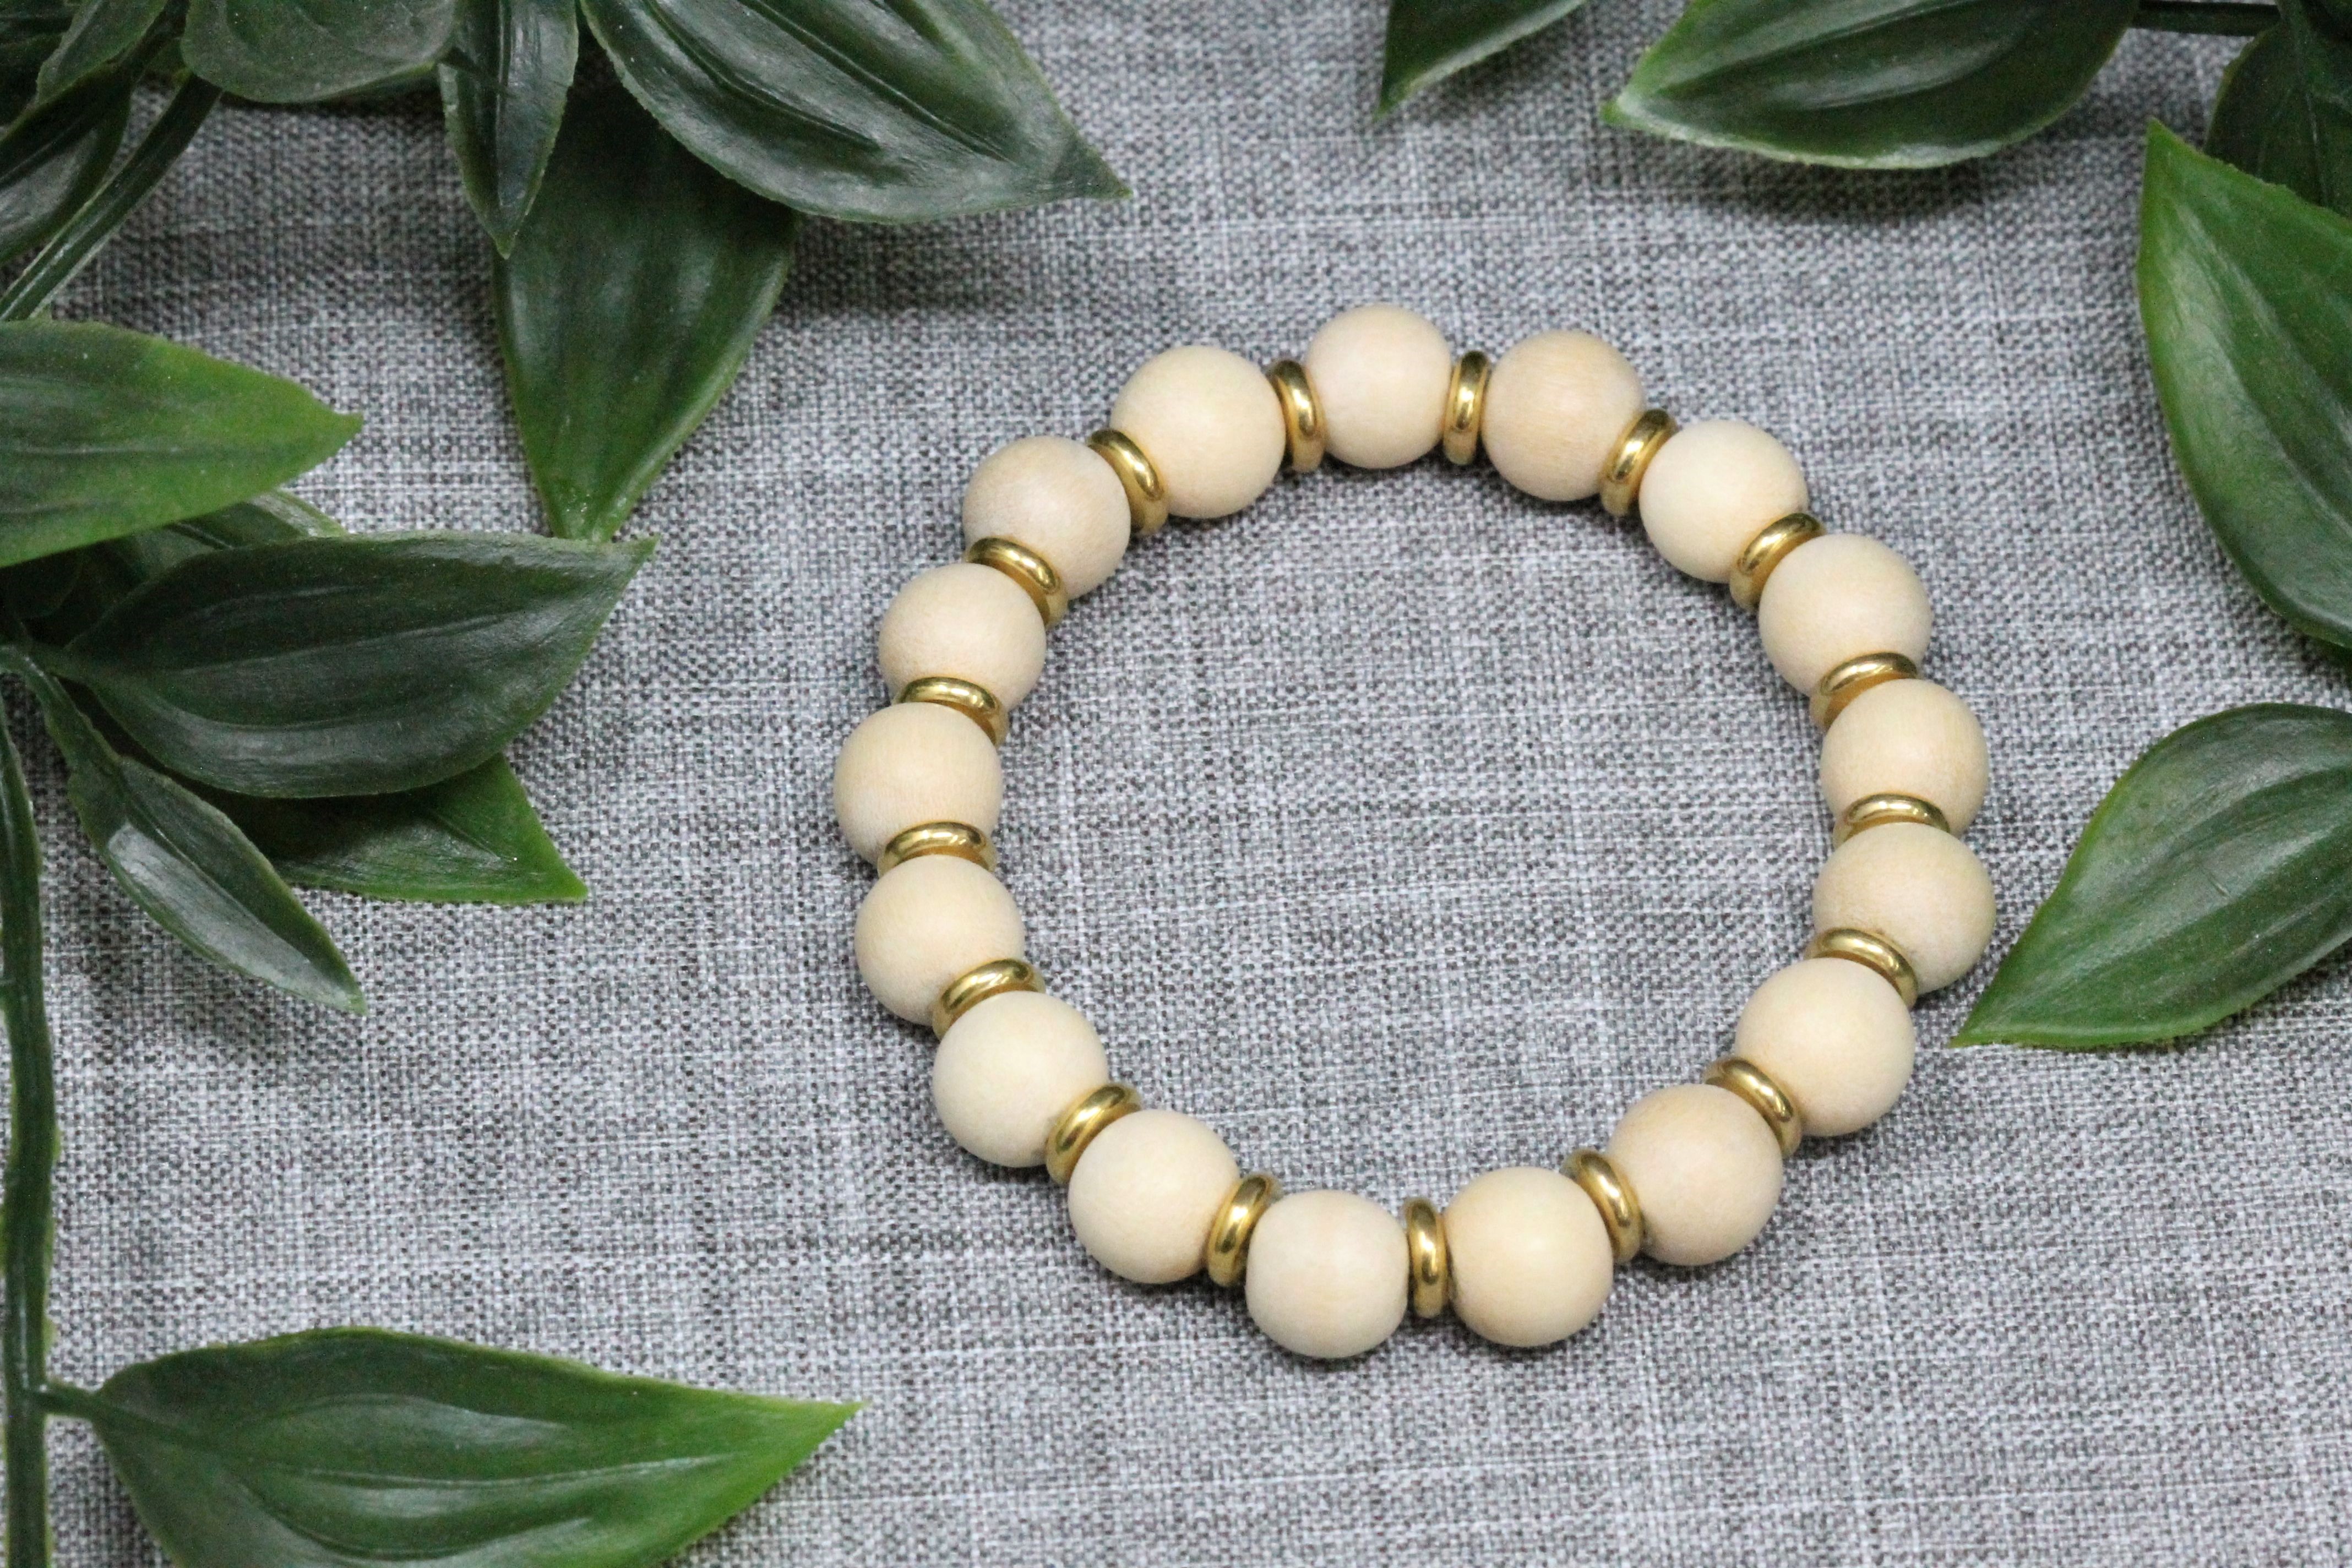
1. Cut 1 x 12” piece of 1mm Stretch Magic, pre-stretch cord then attach bead stop to one end of stretch cord about 2 1/2” from end.
2. String in this order: E, D, E, D, E, D ... and so on until you reach the desired length and ending with D
* Check sizing again before tying knots
3. Tie one square knot (or surgeon's knot) and tighten firmly.
4. Thread one of the tails back through the wood bead add a dab of hypo cement onto the knot (from all sides). Pull tail to center knot in the middle of the bead, you should have one tail sticking out either side of the bead.
5. Leave the bracelet for at least a couple of hours for the hypo cement to set up, then trim tails. You can hold onto one tail, pull the opposite tail & trim close as you can. The other side you just trim as close as you can as you have nothing to hold onto :)
Second – Angel Wing White and Gold Bracelet
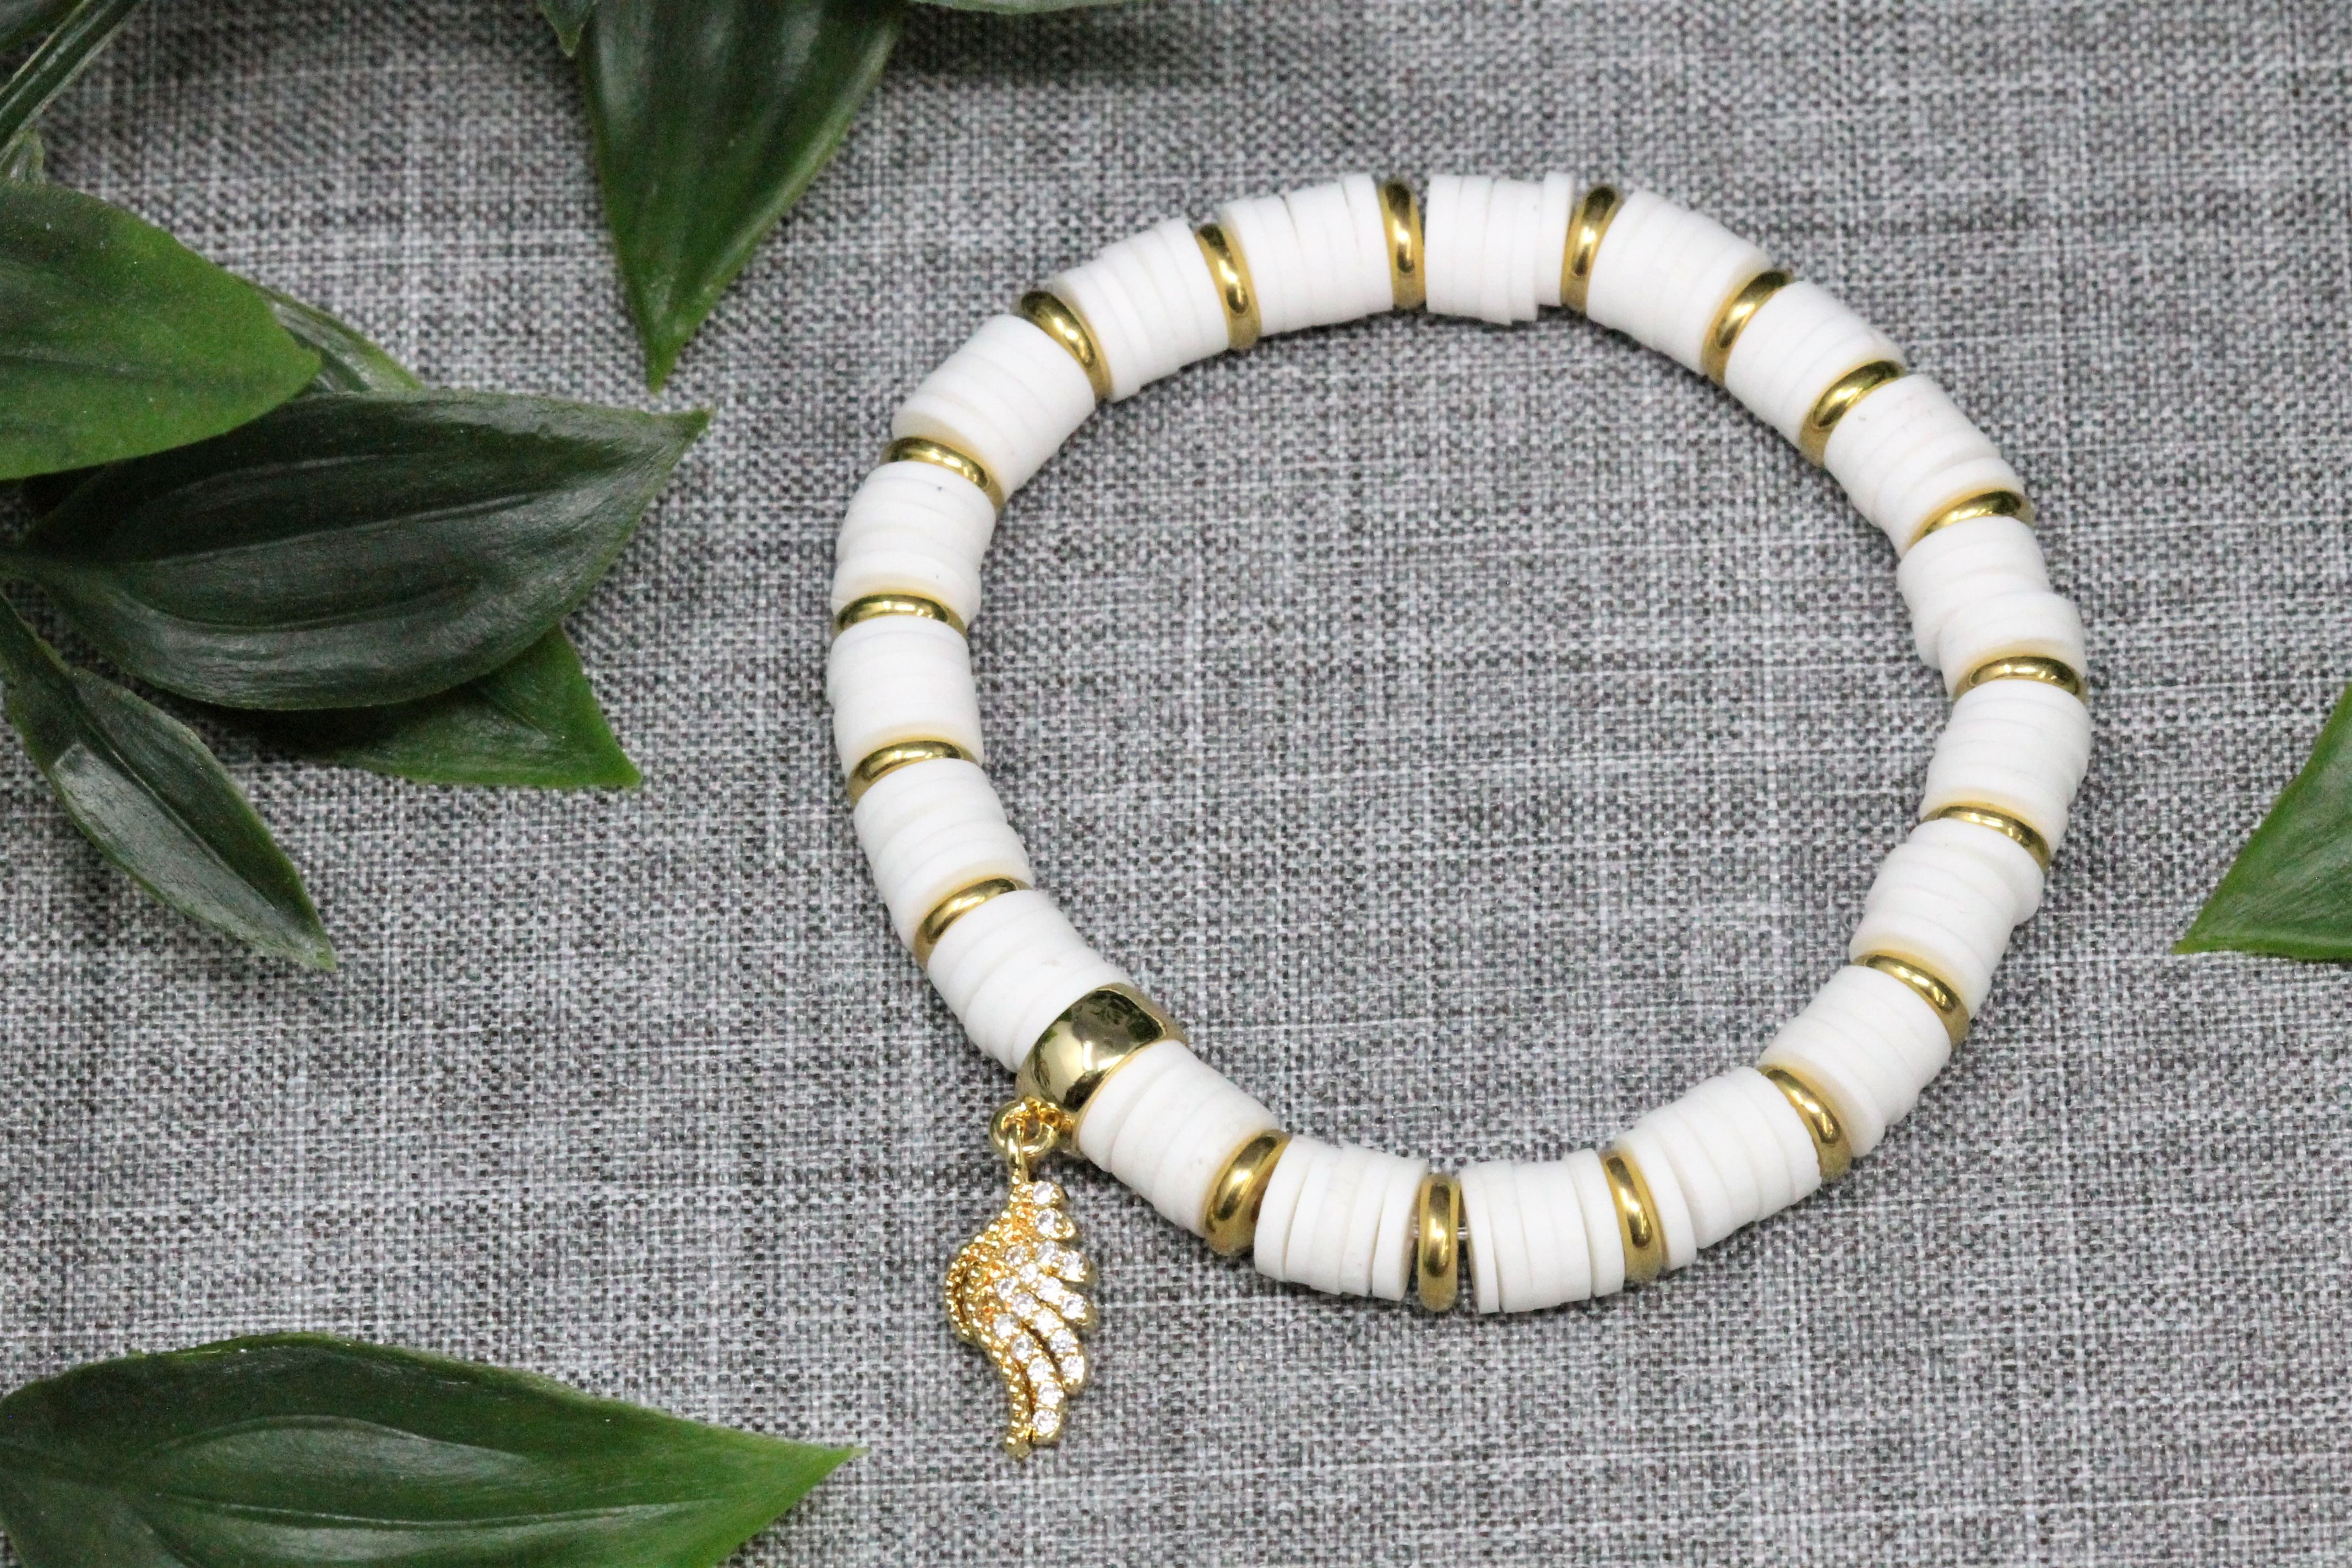
1. Cut 1 x 12” piece of 1mm Stretch Magic, pre-stretch cord then attach bead stop to one end of stretch cord about 2 1/2” from end.
2. String in this order: A (5), D (1), A (5), D (1) ... and so on until you reach your desired length ending with 5 (A) Discs
* Check the sizing of your bracelet, Add 5 more polymer clay discs separated by a gold heishi bead to make your bracelet larger if needed.
3. Thread on the micro pave wing with ring charm.
* Check sizing again before tying knots
4. Tie one square knot (or surgeon's knot) and tighten firmly.
5. Thread one of the tails back through the micro pave bead add a dab of hypo cement onto the knot (from all sides). Pull tail to center knot in the middle of the bead, you should have one tail sticking out either side of the bead.
6. Leave the bracelet for at least a couple of hours for the hypo cement to set up, then trim tails. You can hold onto one tail, pull the opposite tail & trim close as you can. The other side you just trim as close as you can as you have nothing to hold onto :)
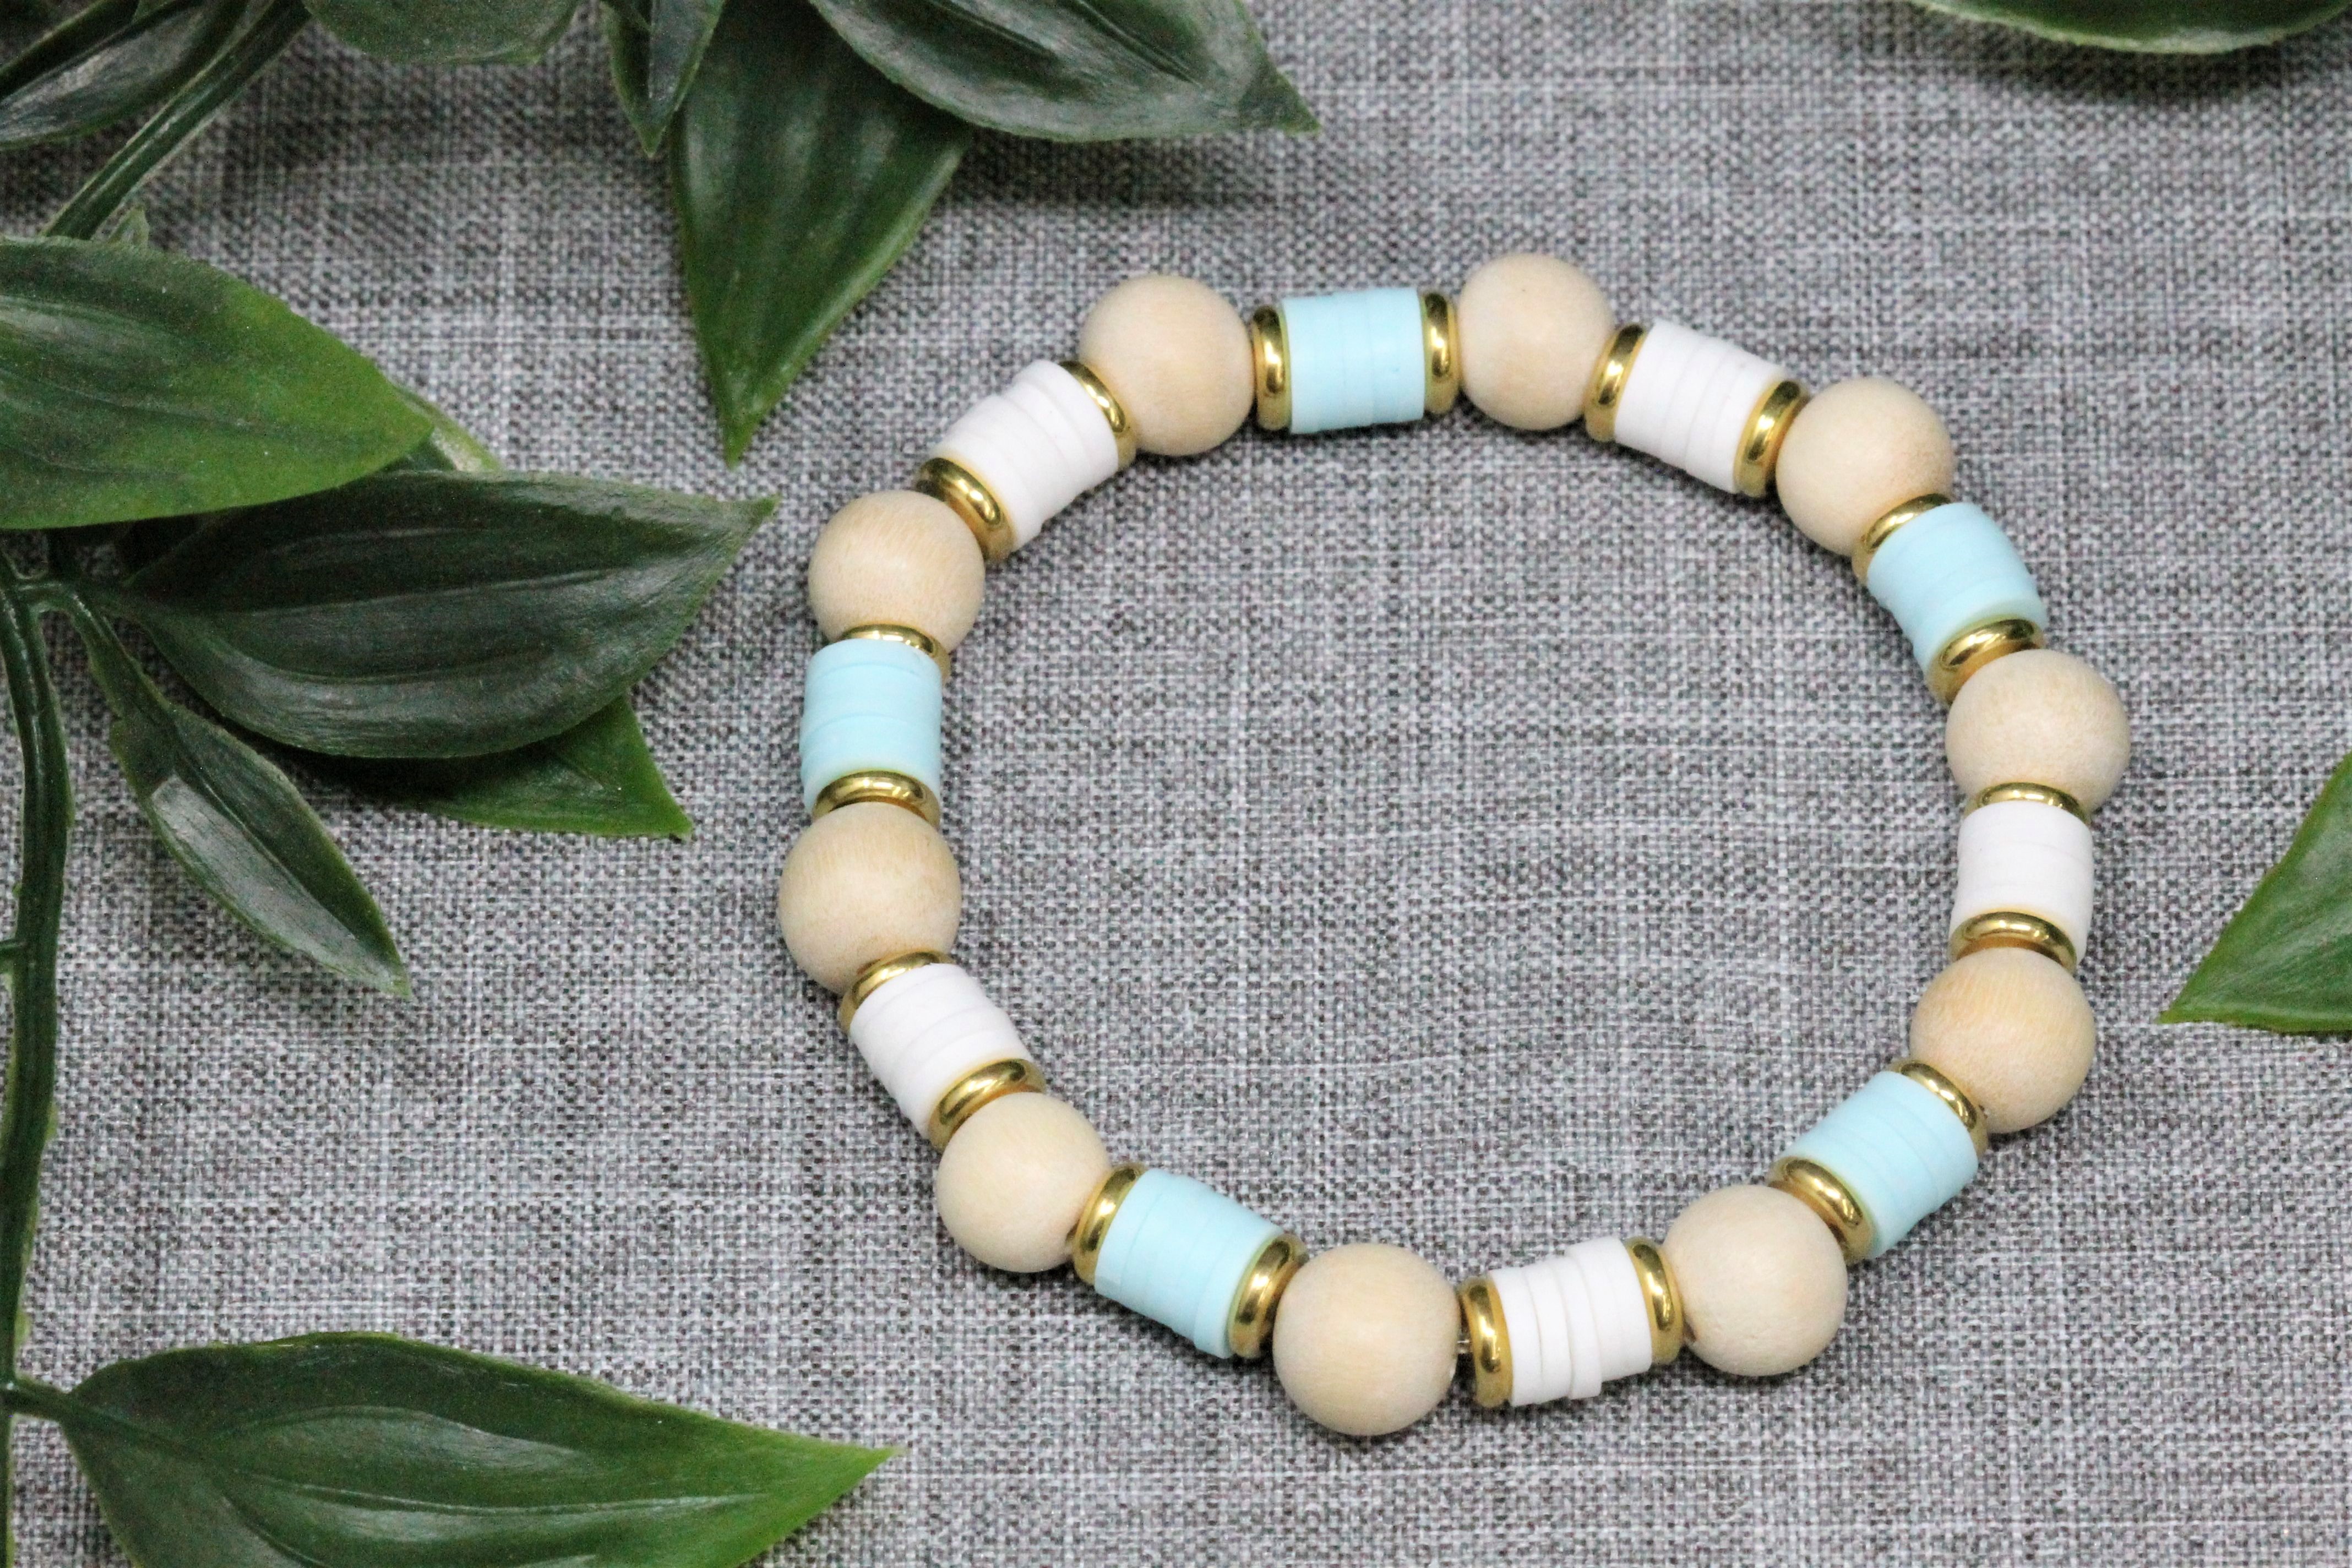
Third – Multi Color Heishi with Wood Bracelet
1. Cut 1 x 12” piece of 1mm Stretch Magic, pre-stretch cord then attach bead stop to one end of stretch cord about 2 1/2” from end.
2. String in this order: E (1) D (1), A (5), D (1), E (1) D (1), B (5), D (1), E (1) D (1), A (5), D (1), E (1) D (1), B (5), D (1) ... and so on until you reach the desired length ending in a D gold heishi bead
* Check the sizing of your bracelet, Add more beads in the same pattern to make your bracelet larger if needed.
* Check sizing again before tying knots
3. Tie one square knot (or surgeon's knot) and tighten firmly.
4. Thread one of the tails back through the wood bead add a dab of hypo cement onto the knot (from all sides). Pull tail to center knot in the middle of the bead, you should have one tail sticking out either side of the bead.
5. Leave the bracelet for at least a couple of hours for the hypo cement to set up, then trim tails. You can hold onto one tail, pull the opposite tail & trim close as you can. The other side you just trim as close as you can as you have nothing to hold onto :)
Fourth – "Love You" Bracelet

1. Cut 1 x 12” piece of 1mm Stretch Magic, pre-stretch cord then attach bead stop to one end of stretch cord about 2 1/2” from end.
*If you would like to do different wording, substitute the words LOVE YOU, with the words of your choosing. Be sure that there are equal polymer clay discs on each side (more or less)
2. String in this order: D (1), A (20), D (1), A (20), D (1), Beads L-O-V-E (right side up), D (1), B (20), D (1), B (20), D (1), Beads Y-O-U (right side up)
* Check the sizing of your bracelet, Add more polymer clay discs on each end of the strand to make your bracelet larger if needed. - you will need to remove and restring the gold heishi beads and Y-O-U beads
* Check sizing again before tying knots
3. Tie one square knot (or surgeon's knot) and tighten firmly.
4. Thread one of the tails back through the gold heishi bead add a dab of hypo cement onto the knot (from all sides). Pull tail to center knot in the middle of the bead, you should have one tail sticking out either side of the bead.
5. Leave the bracelet for at least a couple of hours for the hypo cement to set up, then trim tails. You can hold onto one tail, pull the opposite tail & trim close as you can. The other side you just trim as close as you can as you have nothing to hold onto :)
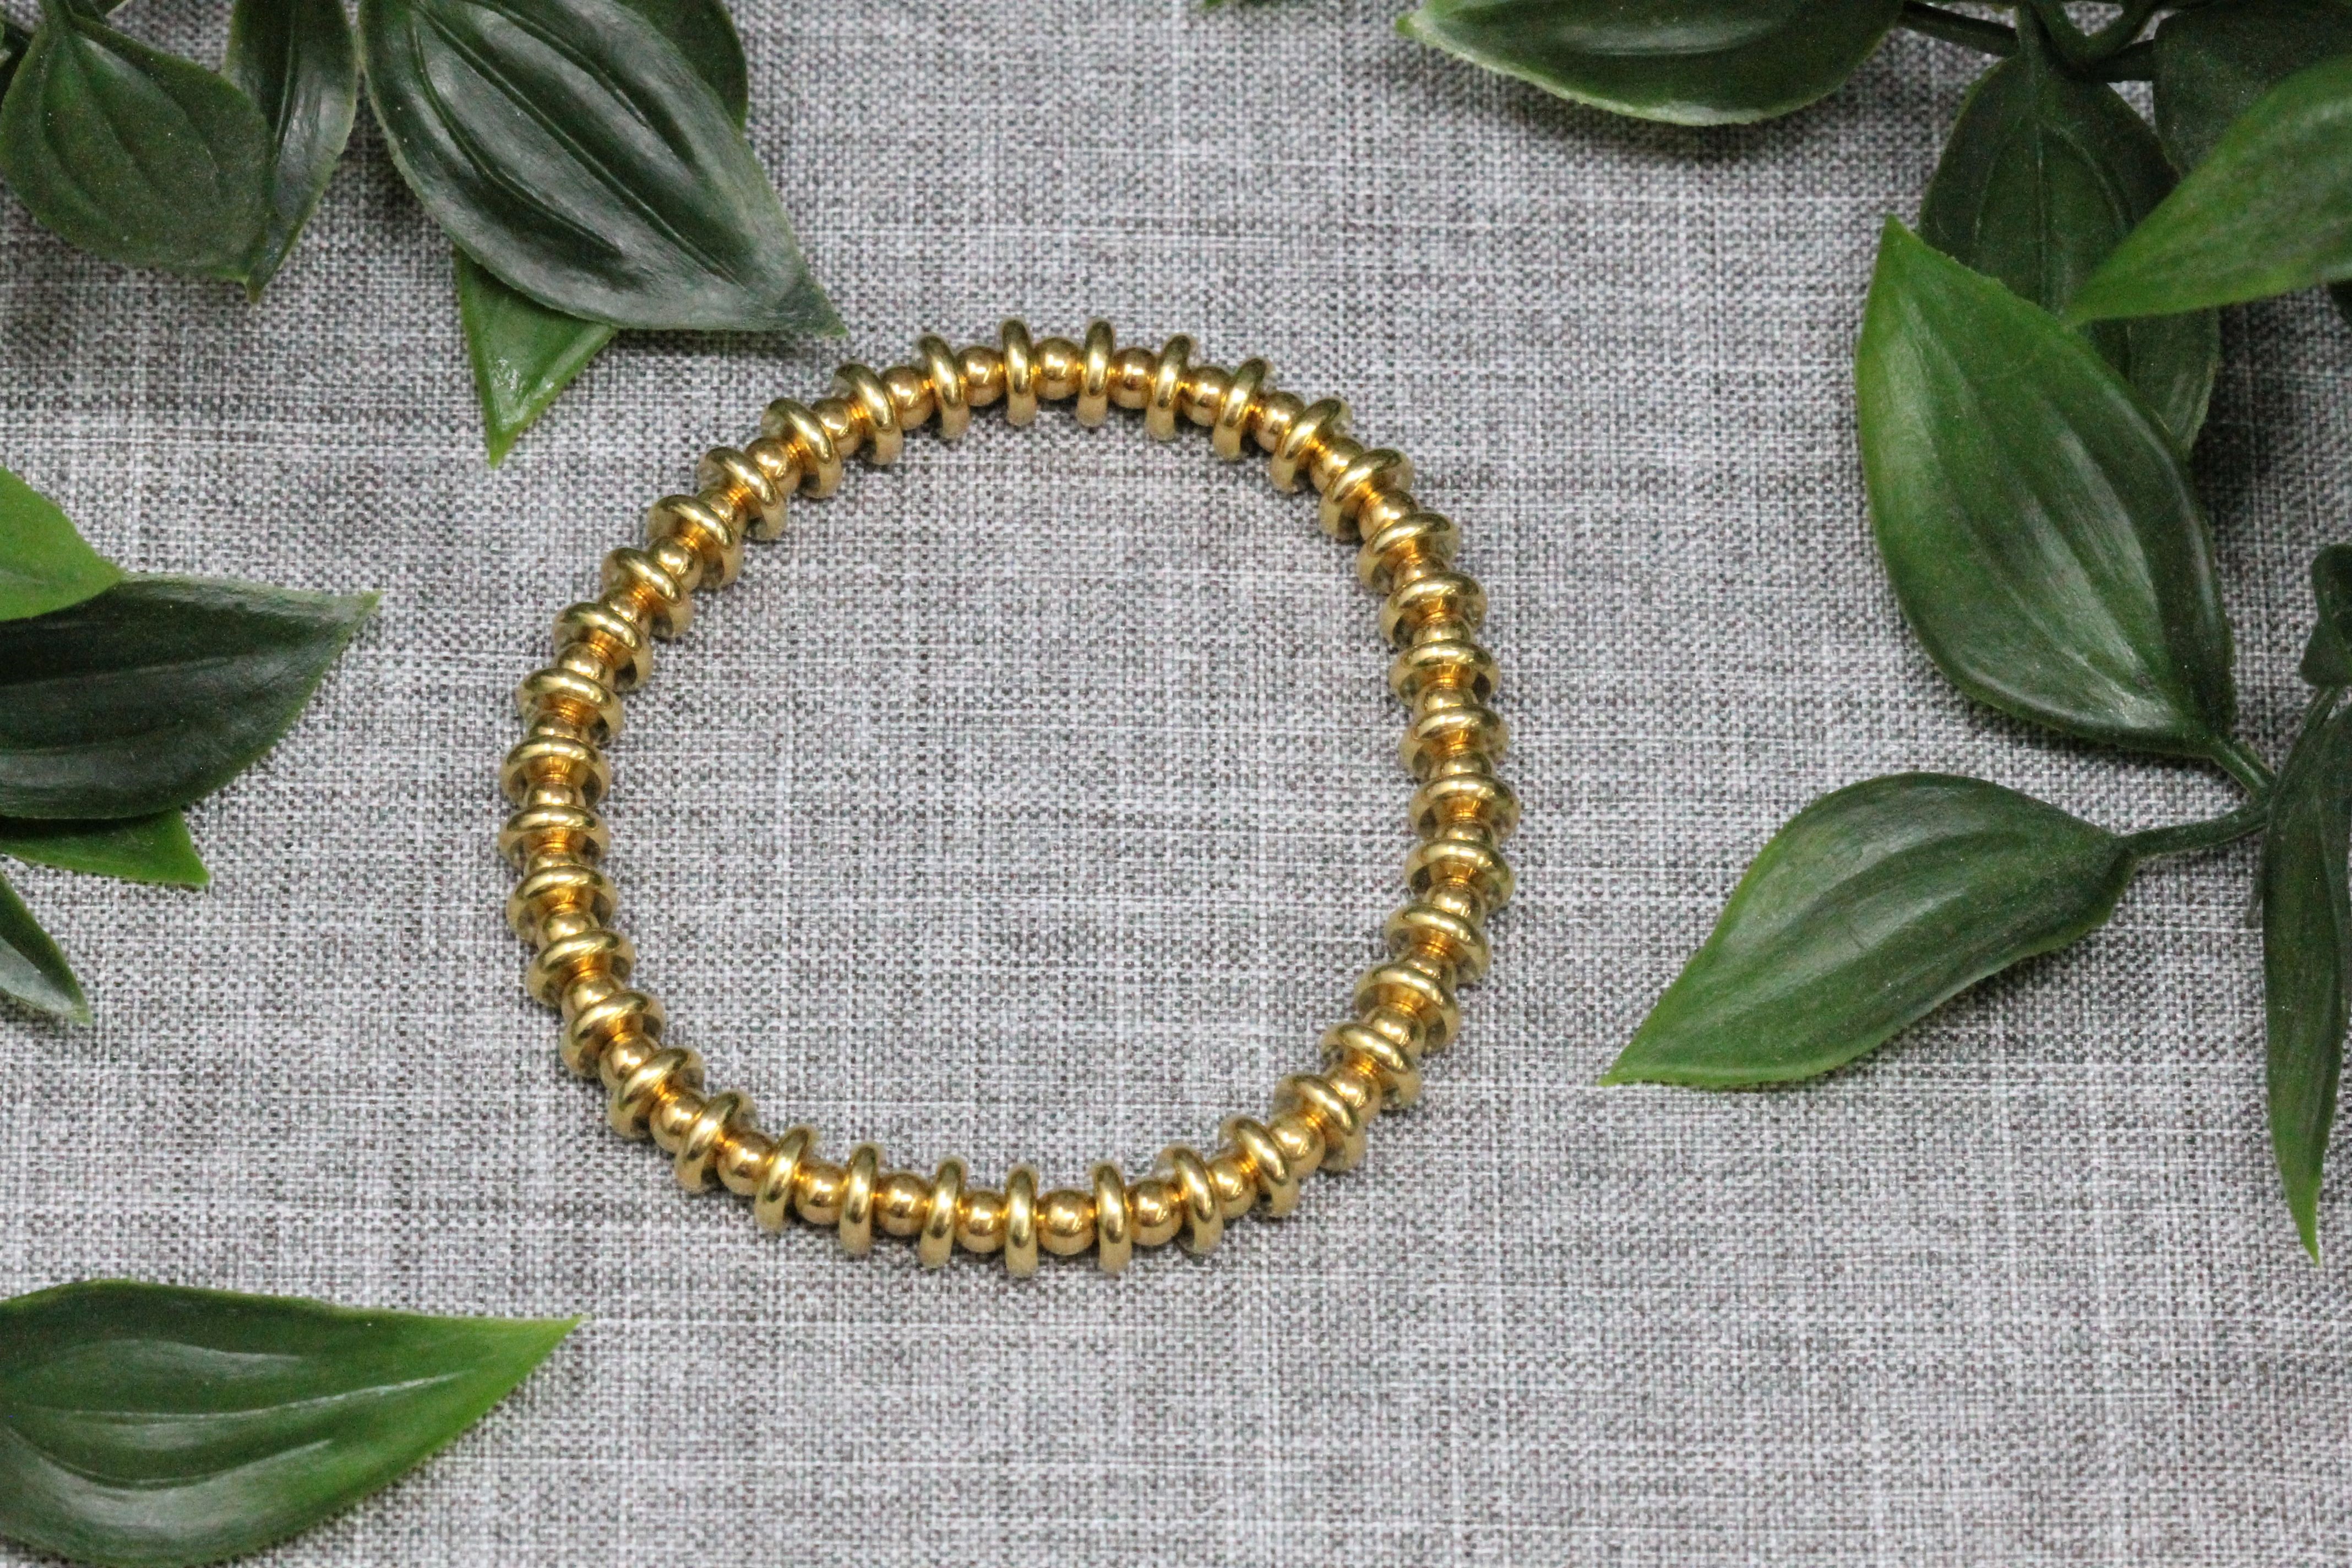
Fifth – Alternating Modern Gold Bracelet
1. Cut 1 x 12” piece of .5mm Stretch Magic, pre-stretch cord then attach bead stop to one end of stretch cord about 2 1/2” from end.
2. String in this order: D (1), C (1), D (1), C (1) ... continue until you reach your desired length
* Check the sizing of your bracelet, Add more beads in the same pattern to make your bracelet larger if needed.
* Check sizing again before tying knots
3. Tie one square knot (or surgeon's knot) and tighten firmly.
4. Thread one of the tails back through the gold heishi bead add a dab of hypo cement onto the knot (from all sides). Pull tail to center knot in the middle of the bead, you should have one tail sticking out either side of the bead.
5. Leave the bracelet for at least a couple of hours for the hypo cement to set up, then trim tails. You can hold onto one tail, pull the opposite tail & trim close as you can. The other side you just trim as close as you can as you have nothing to hold onto :)
Designed by Kiara Thompson
Related Articles
Rainbow Pearl Necklace
Rainbow Pearl Necklace Materials Needed: Finished Length 17” Tools Required Needle Nose Pliers...

“Early Morning Glow” 3-Drop Earrings
“Early Morning Glow” 3-Drop Earrings The beads in these earrings were laid out in the following order:...

“Early Morning Glow” - Diamond Drop Earrings
“Early Morning Glow” - Diamond Drop Earrings Materials Needed: Approx. Length: 2” from loop on ear wire...