
Tutorials

Rainbow, Pearl & Chain Beaded Choker
Rainbow, Pearl & Chain Beaded Choker
Finished Length 14 – 16” * Or your chosen length.
 Rainbow, Pearl & Chain Beaded Choker
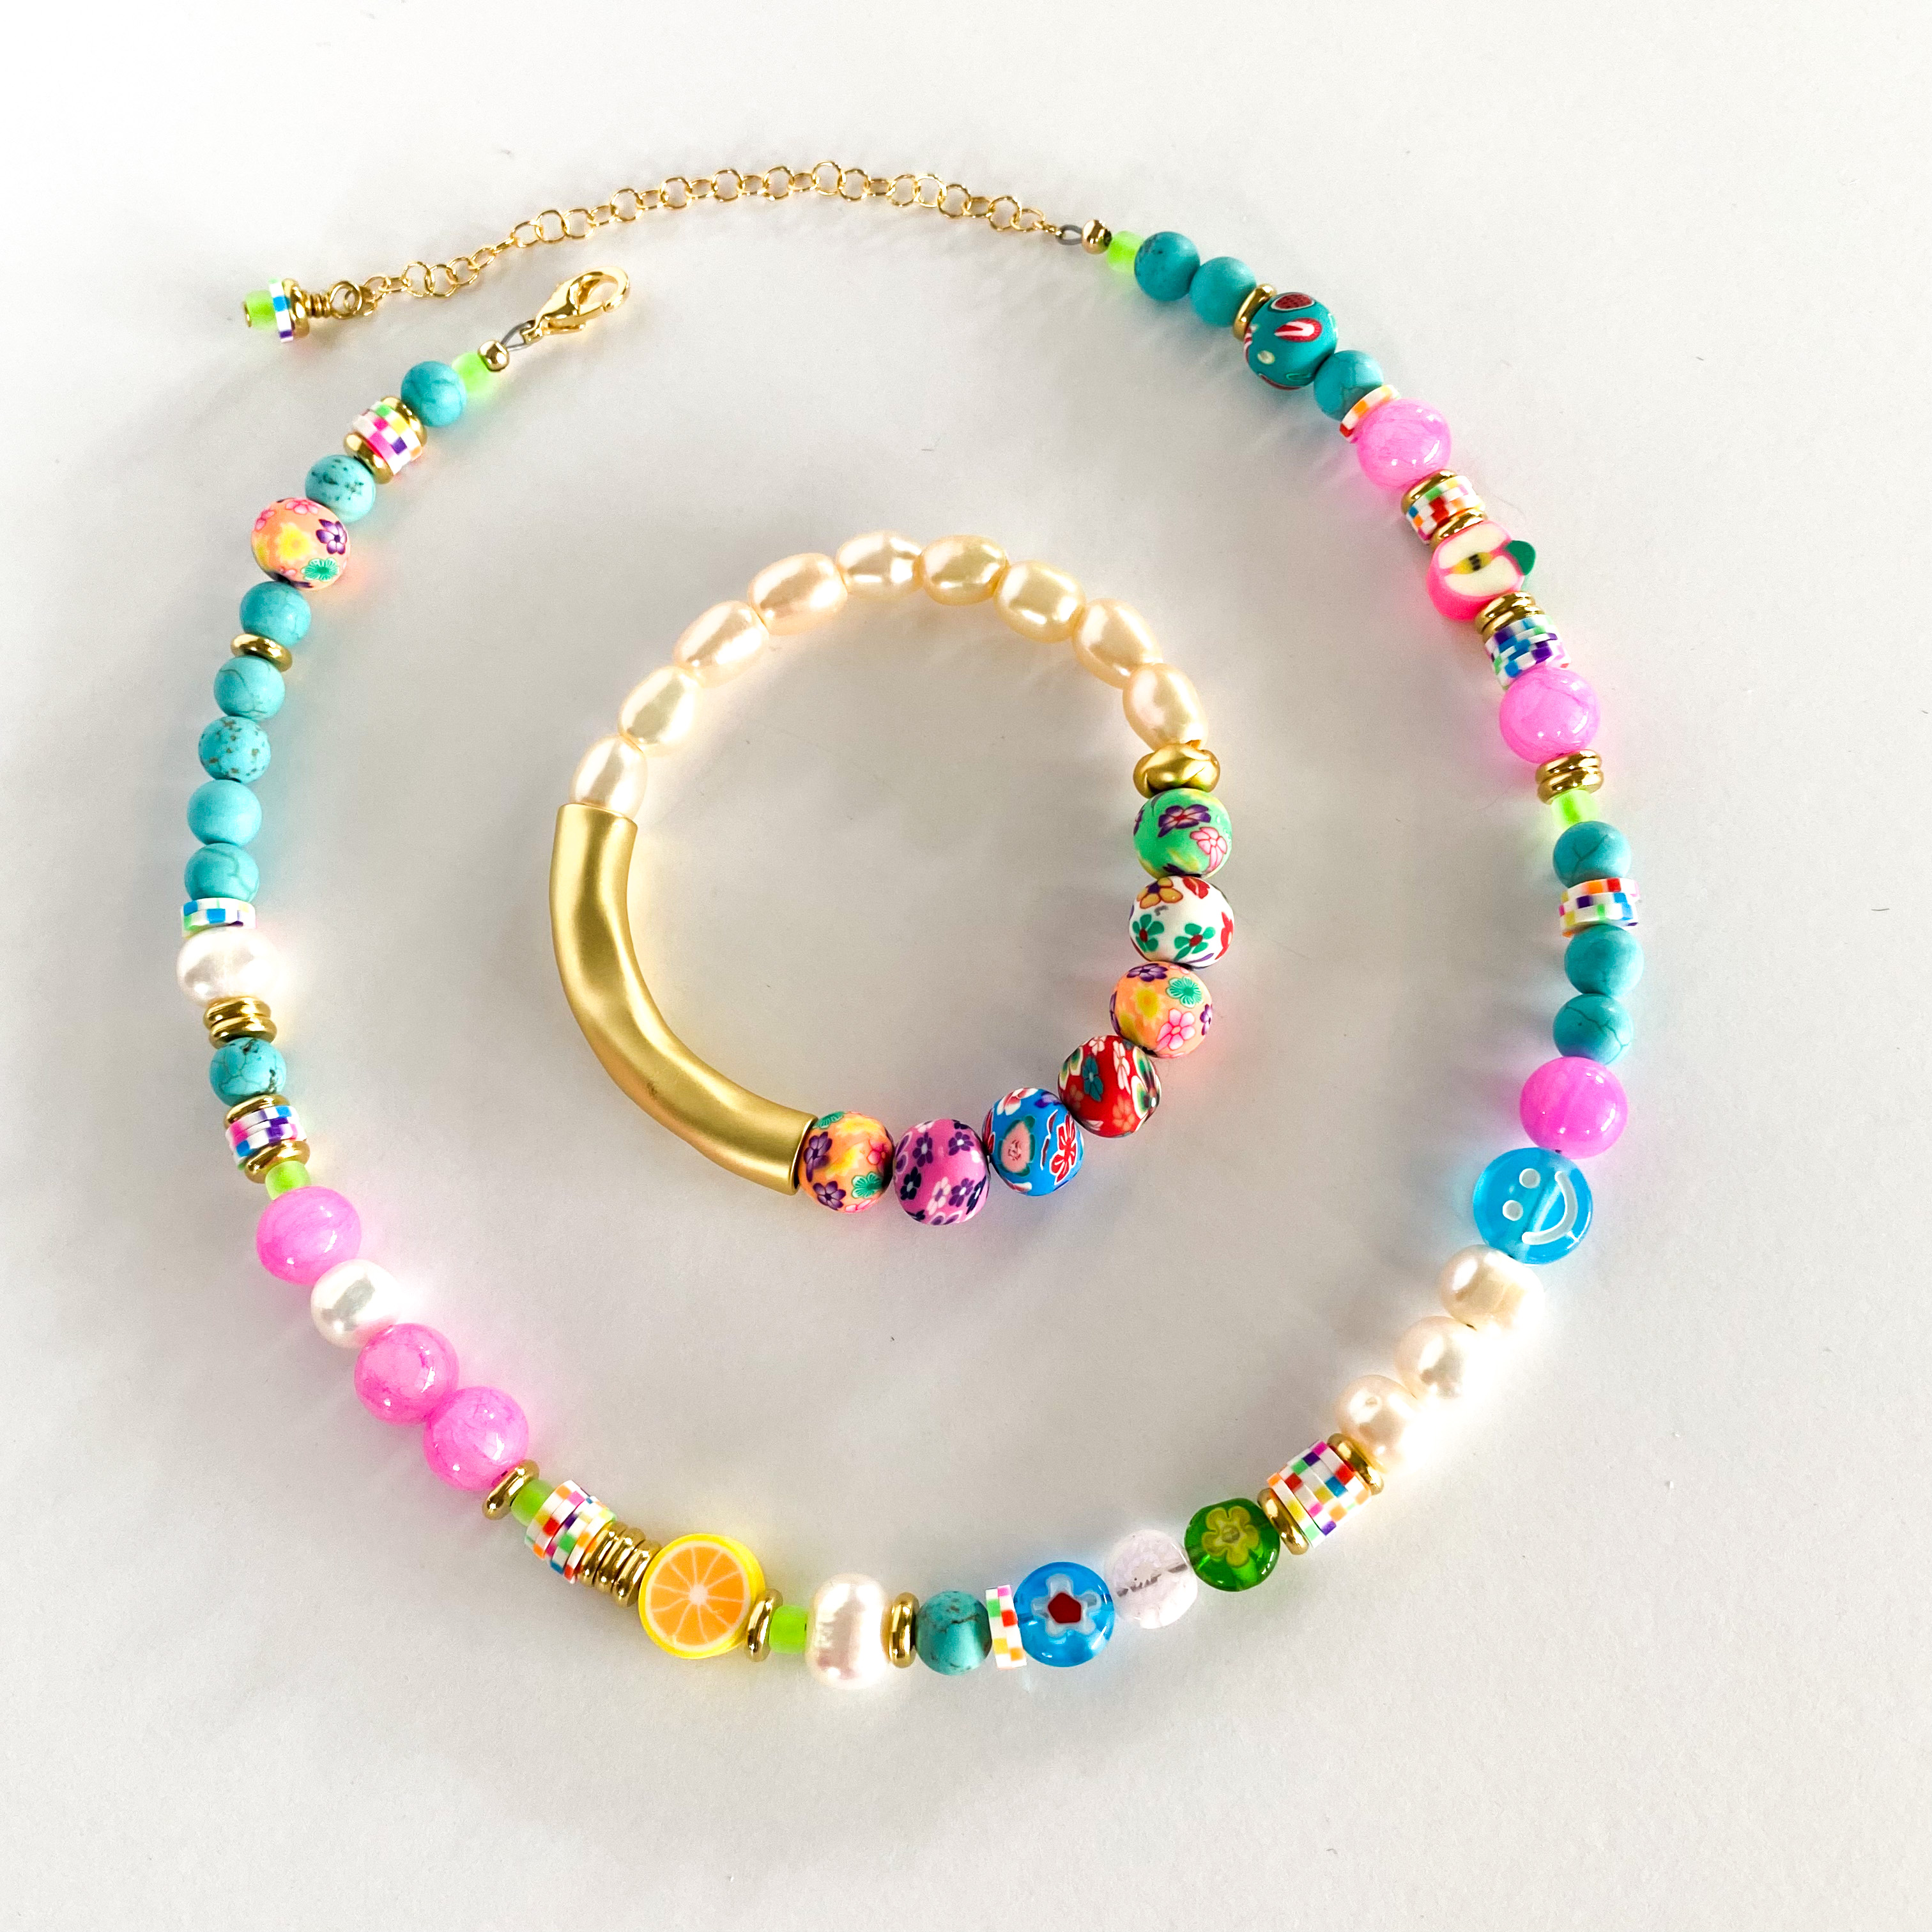
Materials Needed:
- 8-9mm Freshwater Pearls, Ivory/White (6)
- 6mm Fimo Polymer Clay Slices, Candy Stripe (Approx. 2-3”)
- 8mm Fimo Polymer Clay, Floral Round (2) Strand or Pack of 100
- 8mm Mashan Jade, Dyed Hot Pink (6)
- 6mm Blue Howlite Matte Round (14)
- 10x5mm Smiley Face Transparent Mix (1)
- Fimo Polymer Clay Fruit Shaped Beads (2)
- Size 6 Matsuno Seed Beads, #F206B Neon Crystal Matte/Lime Green (7)
- 8mm Millefiori Coins – Flower Beads (3)
- 6x1.5mm Gold Plated Brass Rondel Discs (24)
- 4.2x4mm Gold Plated Chain (Approx. 2 ¾”) * For Extension Chain
- 12x7mm Trigger Clasp – Gold Plated (1)
- Soft Touch Beading Wire – Satin Silver, Medium (18”) *Or your desired length.
- 2x2mm Crimps, Gold Filled (2)
- 4mm Crimp Cover, Gold Plated (2)
- Ball End Headpin Gold Plated (1)
Tools Required
Needle Nose Pliers (also known as chain nose)
Bead Stop (2)
Key Code:
A = 6mm Polymer Clay Slices, Candy Stripe B = Freshwater Pearls C = Polymer Clay, Floral Rd. D = Mashan Jade, Dyed Hot Pink E = Blue Howlite Matte Rd.
F = Smiley Face G = Polymer Clay Fruit H = Lime Green Seed Beads I = Gold Plated Brass Rondelles J = Millefiori Flower Coins
Instructions on Construction:
1. Cut 18” section of beading wire & attach a bead stop approx. 3” from end of wire.
2. String as follows: H (1), E (1), I (1), A (3 slices), I (1), E (1), C (1), E (1), I (1), E (4), A (2), B (1), I (2), E (1), I (1), A (3), I (1), H (1), D (1), B (1), D (2), I (1), H (1), A (5), I (3), G (1), I (1), H (1), B (1), I (1), E (1), A (2), J (3), I (1), A (5), I (1), B (3), F (1 Blue), D (1), E (2), A (3), E (1), H (1), I (2), D (1), A (5), I (2), G (1), I (1), A (3), I (1), D (1), I (1), E (1), C (1), I (1), E (1), H (1).
3. Place a bead stop on second side of wire.
4. Now is the time to double check size: Make any adjustments for desired length.
5. Attaching clasp: Take your beading wire (from the side you started at) thread on crimp tube and attach directly to loop on trigger clasp. Make a flat crimp using your needle nose pliers and then attach crimp cover.
6. Remove bead stop from second end of wire, thread on a crimp tube and thread through last link in the extension chain, then back through crimp tube. Before closing crimp do the following:
7. Lay your necklace on your bead mat in a circle to make sure you leave enough slack in the wire.
10. You are now ready to crimp your necklace and add the second crimp cover.
11. Take head pin and add H (1), A (1), I (1) now using needle nose and round nose pliers wire wrap this to the last link in the extension chain, trim and tamp in pointy end.
12. You are now ready to try on choker and to admire your handy work. Enjoy!
Jewelry designed by Steph Stirniman at magpiecollectives.com
Related Articles

Rainbow, Pearl & Chain Beaded Necklace
Rainbow, Pearl & Chain Beaded Necklace Finished Length 19 ½ – 22 ½” * Or your...

"Watermelon Sugar" Fruit Enamel and Pearl Necklace
"Watermelon Sugar" Fruit Enamel and Pearl Necklace Materials Needed: Finished Length 16.5” plus...

Pearl Chain Choker Necklace
Pearl Chain Choker Necklace Materials Needed: Finished Length 15.5” Tools Required Needle Nose...