Tutorials

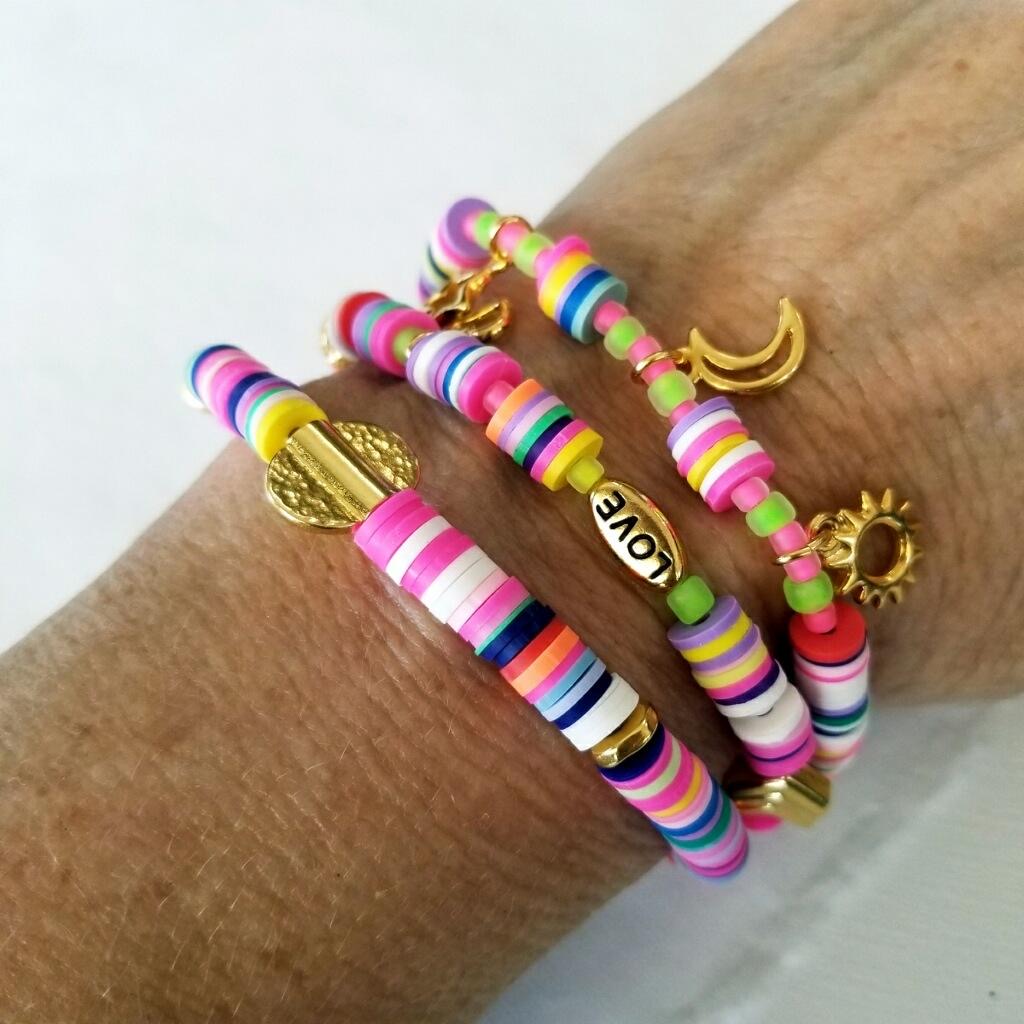
Set of Three Stretch Bracelets – “Love, Sun, Moon & Stars” Neon Candy Stripes
Set of Three Stretch Bracelets – “Love, Sun, Moon & Stars” Neon Candy Stripes
Materials Needed:
- 6mm Polymer Clay Slice Beads – Pink/White/Yellow Mix
- Size 6 Matsuno Seed Beads F206B Crystal Matte /Lime Lined (10-15)
- Size 8 Matsuno Seed Beads F207A Crystal Matte / Bright Pink Lined (17-20)
- Size 8 Matsuno Seed Beads F206C Crystal Matte / Bright Yellow Lined (6-10)
- Size 8 Miyuki Seed Bead F402A White Matte
- Tierra Cast:
- TC 7mm Nugget 2mm Hole, Gold Plated (5)
- TC 5mm Faceted Gold Plated (3)
- TC 7mm Hammertone Rondelle Gold Plated (1)
- TC Chevron Bead Gold Plated (3)
- TC Hammered Flag Bead Gold Plated (1)
- TC Hammered Baule Bead Gold Plated (1)
- TC Hammered Tube Bead (1)
- TC Love Bead Gold Plated (1)
- TC “X” Alphabet Bead Gold Plated (1)
- TC “O” Alphabet Bead Gold Plated (1)
- TC Open Heart charm Gold Plated (1)
- TC Radiant Sun Charm Gold Plated (1)
- TC Open Star Gold Plated(1)
- TC Crescent Moon Gold Plated (1)
- Neon Yellow 1” Cotton Tassel (1)
- Medium Oval Jump Rings Gold Plated (5)
- 1mm Stretch Magic, Crystal(36”)
- GS Hypo Cement (red tube)
Size Approx. 6 3/4”
Tools Required:
Key Code for Beads: You can lay your beads out on mat with labels next to them to make it easier for stringing in correct sequence. * If you have a bead board you can lay the beads in correct sequence before stringing, this may be the easiest option.
A = 6mm Polymer Clay Slices P = Size 8 Matsuno Seed Beads F207A Crystal Mat/ Bright Pink Lnd G = Size 6 Matsuno Seed Beads F206B Crystal Mat/Lime Lnd Y = Size 8 Matsuno Seed Bead F206C Crystal Mat/Bright Yellow
W = Size 8 Miyuki Seed Beads F402A White Matte
Instructions on Construction:
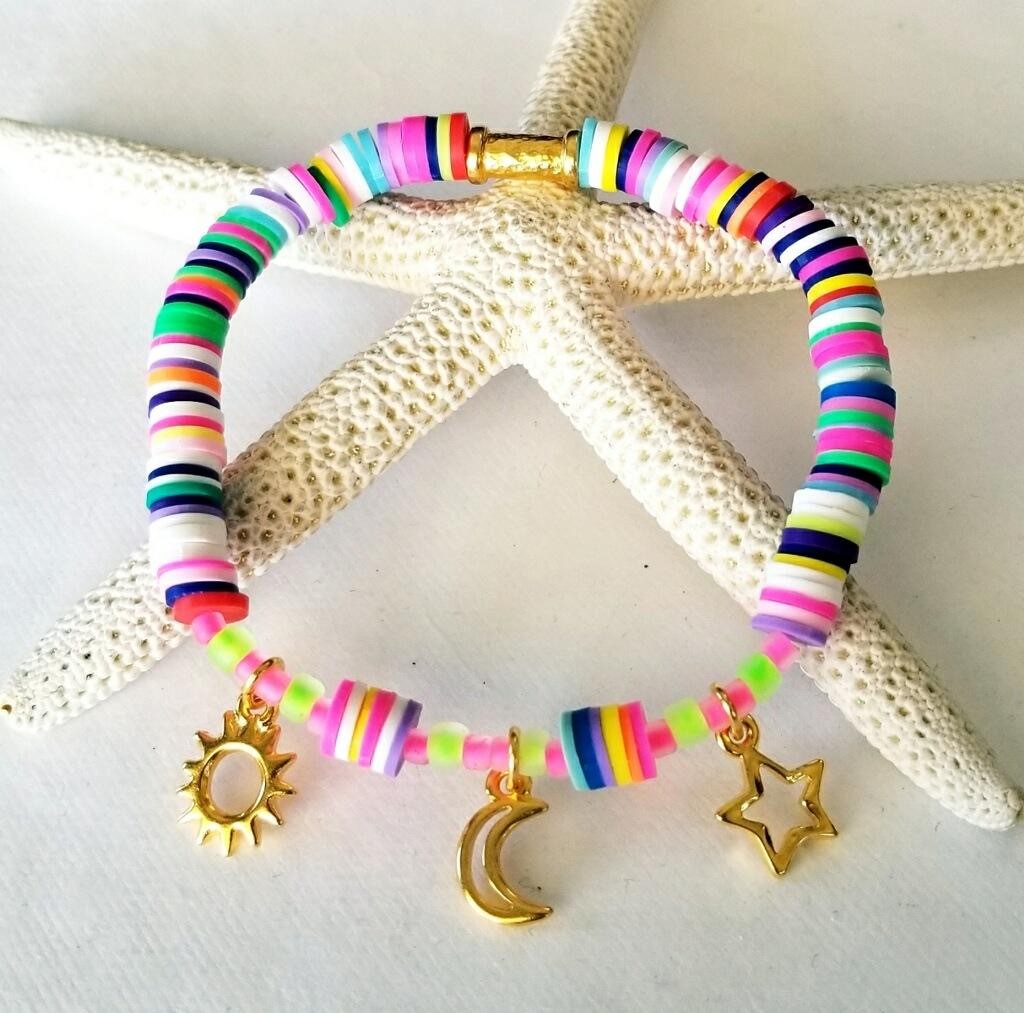
First Bracelet – “Sun, Moon & Stars” Bracelet
1. Cut 1 x 12” pieces of Stretch Magic, pre-stretch cord then attach bead stop to one end of stretch cord about 2 1/2” from end.
2. Attach one jump ring to each of the sun, moon and star charms using your needle nose and flat nose pliers
3. Add: Hammered Tube (1) (used to hide knot), A (Approx. 2 5/16”), P (1), G (1), P (1), Sun Charm (1), P (1),G (1), P (1), A (7 slices), P (1), G (1), P (1), Moon Charm, P (1), G (1), P (1), A (7), P (1), G (1), P (1), Star Charm, P (1), G (1), P (1), A (Approx. 2 5/16”)
4. Tie two square knots and tighten firmly between each knot.
5. Thread one of the tails back through the tube bead add a dab of hypo cement onto the knot (from all sides). Pull tail to center knot in the middle of the bead, you should have one tail sticking out either side of the bead.
6. Leave the bracelet for at least a couple of hours for the hypo cement to set up, then trim tails. You can hold onto one tail, pull the opposite tail & trim close as you can. The other side you just trim as close as you can as you have nothing to hold onto :)
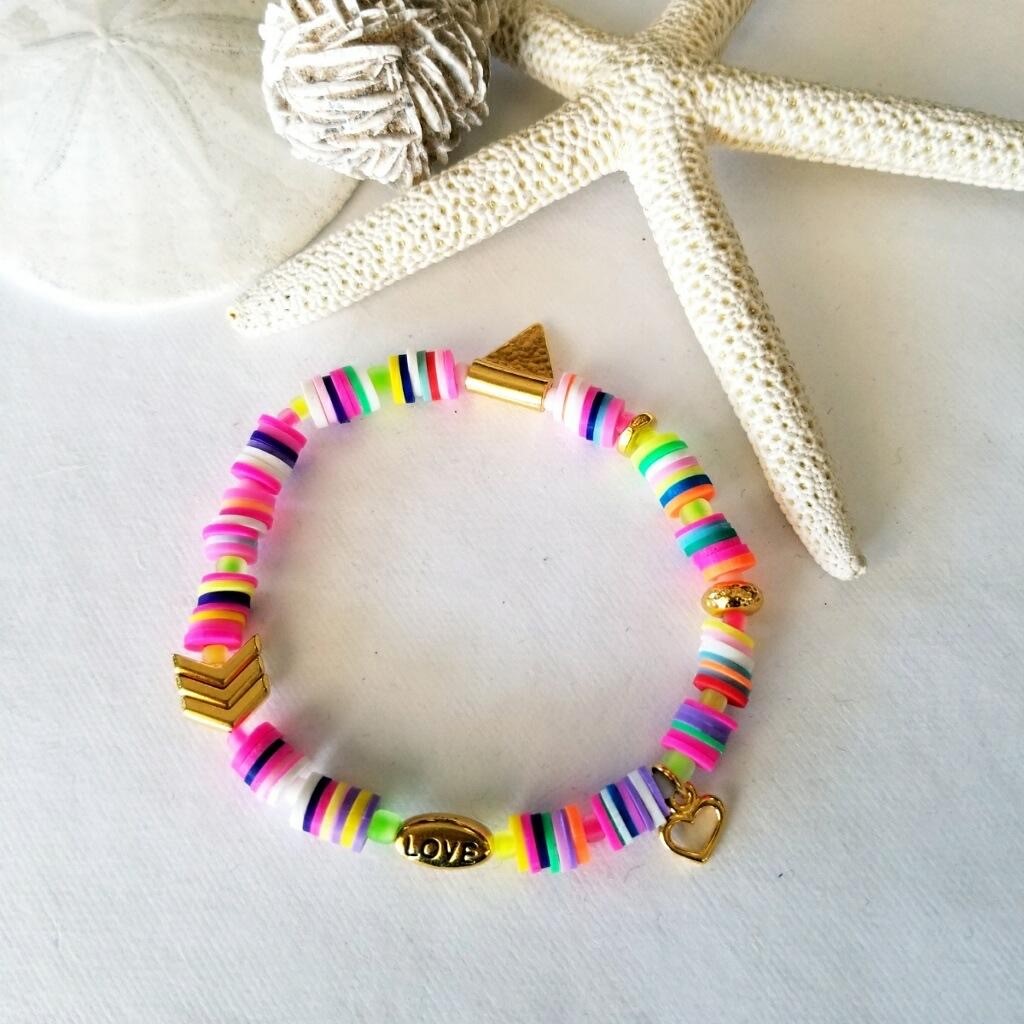
Second Bracelet – “3 Chevron Love” Bracelet
1. Cut 1 x 12” pieces of Stretch Magic, pre-stretch cord then attach bead stop to one end of stretch cord about 2 1/2” from end.
2. Attach one jump ring to Open Heart Bead using your needle nose and flat nose pliers.
3. Add: Hammered Flag Bead (1) (used to hide knot), W (1), A (7 slices), G (1), A (7), Y (1), P (1), A (7), P (1), A (7), G (1), A (7), Y (1), Chevron (3), P (1), A (7), W (1), A 7), G (1), Love Bead (1), Y (1), A (7), P (1), A (7), W (1), Open Heart Charm (1), G (1), A (7), Y (1), A (7), P (1), 7mm Hammer Tone Rondelle (1), W (1), A 7), G(1), A (7), Y (1), 7mm Nugget (1), P (1), A (7), W (1)
4. Tie two square knots and tighten firmly between each knot.
5. Thread one of the tails back through the flag bead add a dab of hypo cement onto the knot (from all sides). Pull tail to center knot in the middle of the bead, you should have one tail sticking out either side of the bead.
6. Leave the bracelet for at least a couple of hours for the hypo cement to set up, then trim tails. You can hold onto one tail, pull the opposite tail & trim close as you can. The other side you just trim as close as you can as you have nothing to hold onto :)
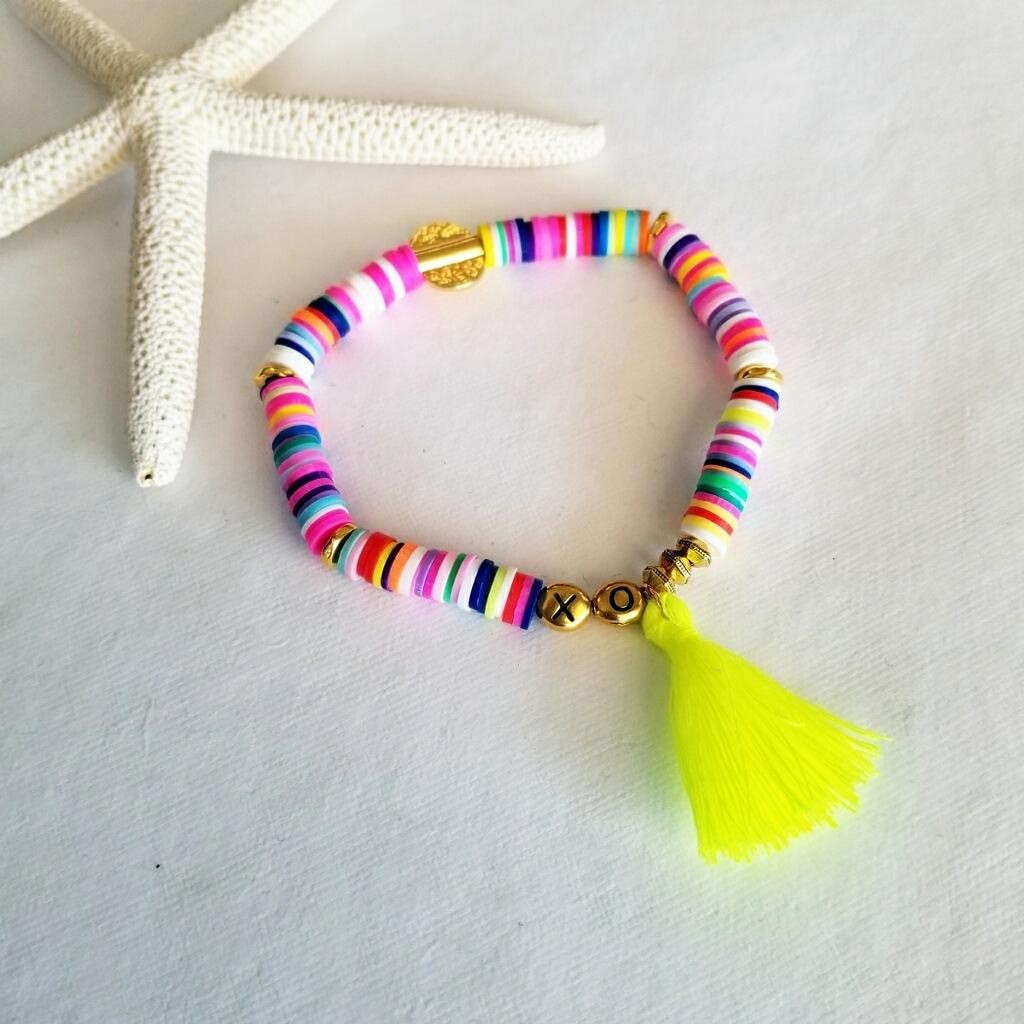
Third Bracelet – Yellow Tassel Bracelet
1. Cut 1 x 12” pieces of Stretch Magic, pre-stretch cord then attach bead stop to one end of stretch cord about 2 1/2” from end.
2. Attach one jump ring through top of yellow tassel using your needle nose and flat nose pliers.
3. Add: Hammered Baule Bead (1) (used to hide knot), A (approx. 1”), 7mm Nugget (1), A (1”), 7mm Nugget, A (1”), TC 5mm Fac (3), Yellow Tassel (1), Letter “O” (1), Letter “X” (1), A (1”), 7mm Nugget (1), A (1”), 7mm Nugget (1), A (1”)
4. Tie two square knots and tighten firmly between each knot.
5. Thread one of the tails back through the hammered baule bead add a dab of hypo cement onto the knot (from all sides). Pull tail to center knot in the middle of the bead, you should have one tail sticking out either side of the bead.
6. Leave the bracelet for at least a couple of hours for the hypo cement to set up, then trim tails. You can hold onto one tail, pull the opposite tail & trim close as you can. The other side you just trim as close as you can as you have nothing to hold onto :)
7. Try on your new bracelets & admire your handiwork
8. Enjoy!
Jewelry designed by Steph Stirniman at magpiecollectives.com

