
Tutorials
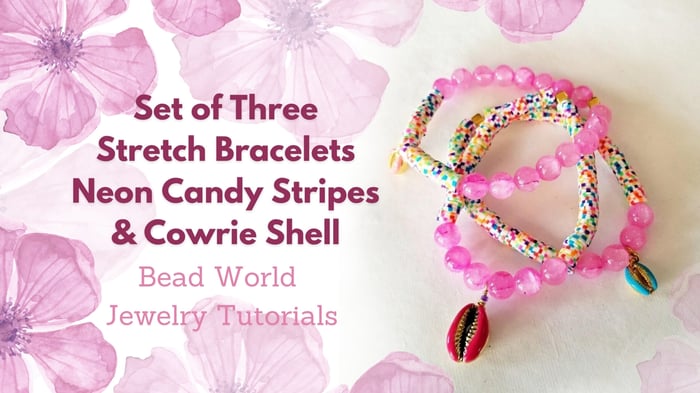
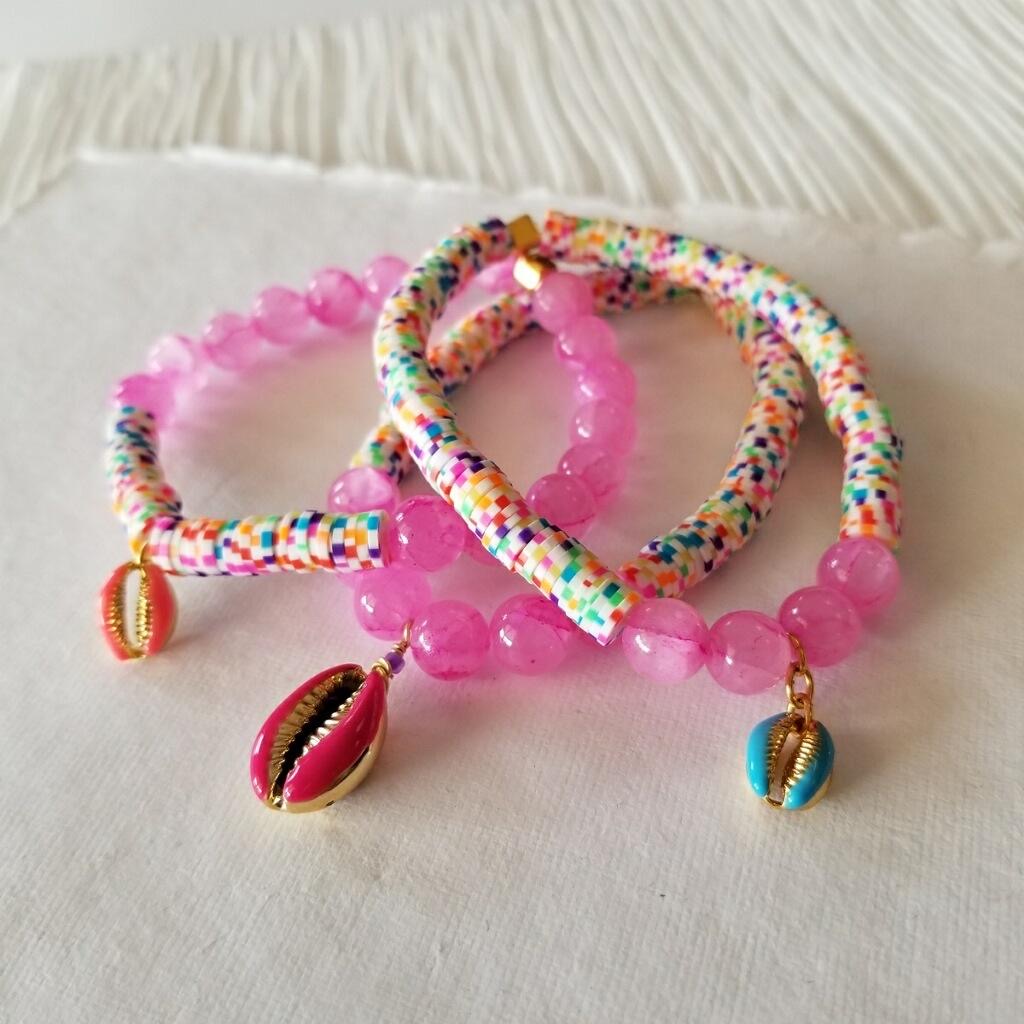
Set of Three Stretch Bracelets – Lush Pink, Neon Candy Stripes & Cowrie Shell
Set of Three Stretch Bracelets – Lush Pink, Neon Candy Stripes & Cowrie Shell
Materials Needed:
- 6mm Polymer Clay Slice Beads – Candy Stripe Mix (1 Strand)
- 8mm Round Mashan Jade Transparent Hot Pink (dyed) (1 Strand)
- TierraCast Cube Gold Plated (3)
- Medium Oval Jump Rings Gold Plated (1)
- Small Oval Jump Rings Gold Plated (3)
- 2” 24g Gold Filled Head Pin (1) * Option could also use 24g gold plate head pin, or craft wire – This is used to wire wrap the largest cowrie shell.
- Large Pink Cowrie Shell (1)
- Small Pink Cowrie Shell (1)
- Small Blue Cowrie Shell (1)
- Option: Size 11 Seed bead used in the largest cowrie shell dangle, only one needed. Any color seed bead will work.
- 1mm Stretch Magic - Crystal (36”)
- G-S Hypo Cement
Size Approx. 6 ½ - 6 ¾” - Custom Size as you are making.
Tools Required:
Key Code for Beads: You can lay your beads out on mat for easier for stringing in correct sequence. * If you have a bead board you can lay the beads in correct sequence before stringing.
F = 6mm Fimo Polymer Clay Slices J = 8mm Round Mashan Jade Transparent Hot Pink Dangle LPC = Large Pink Cowrie Dangle SBC = Small Blue Cowrie Dangle SOC =Small Orange Cowrie Dangle TCC = Tierra Cast Cube
Instructions on Construction:
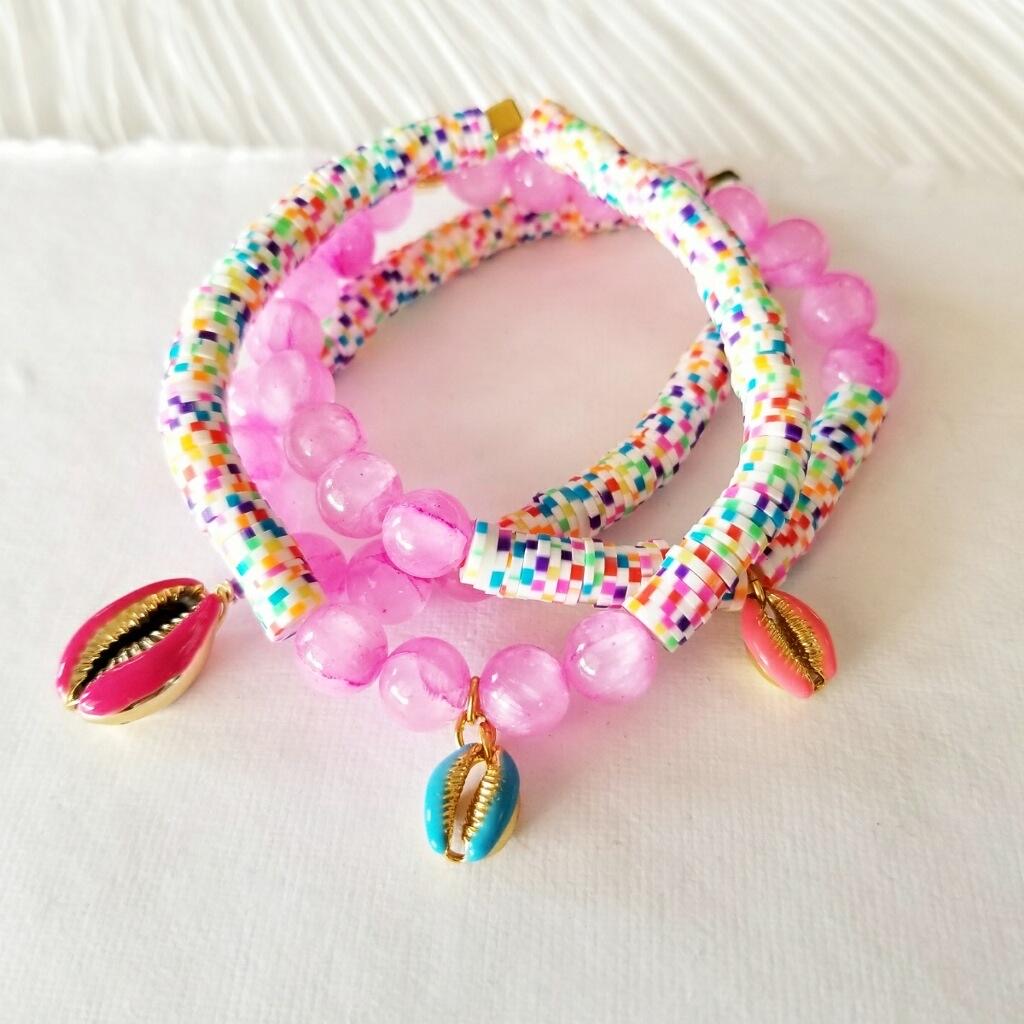
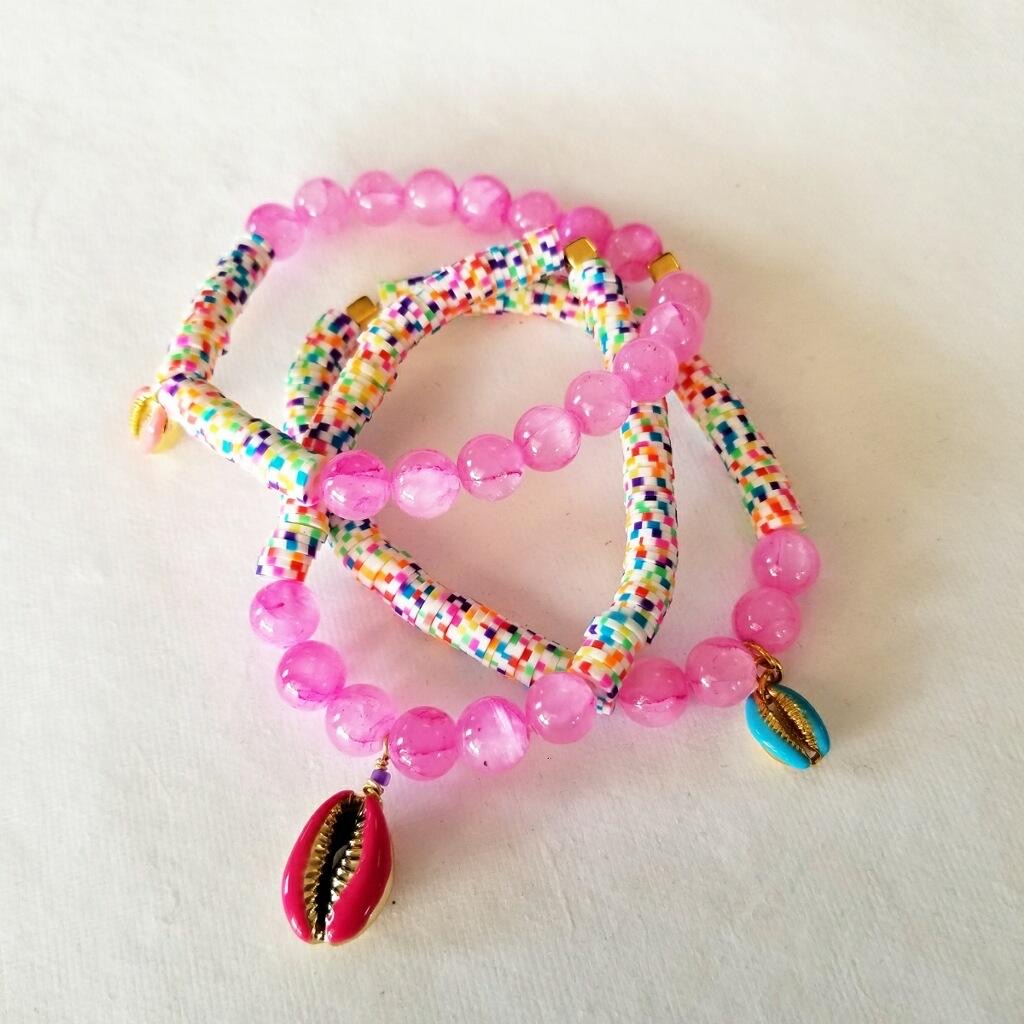
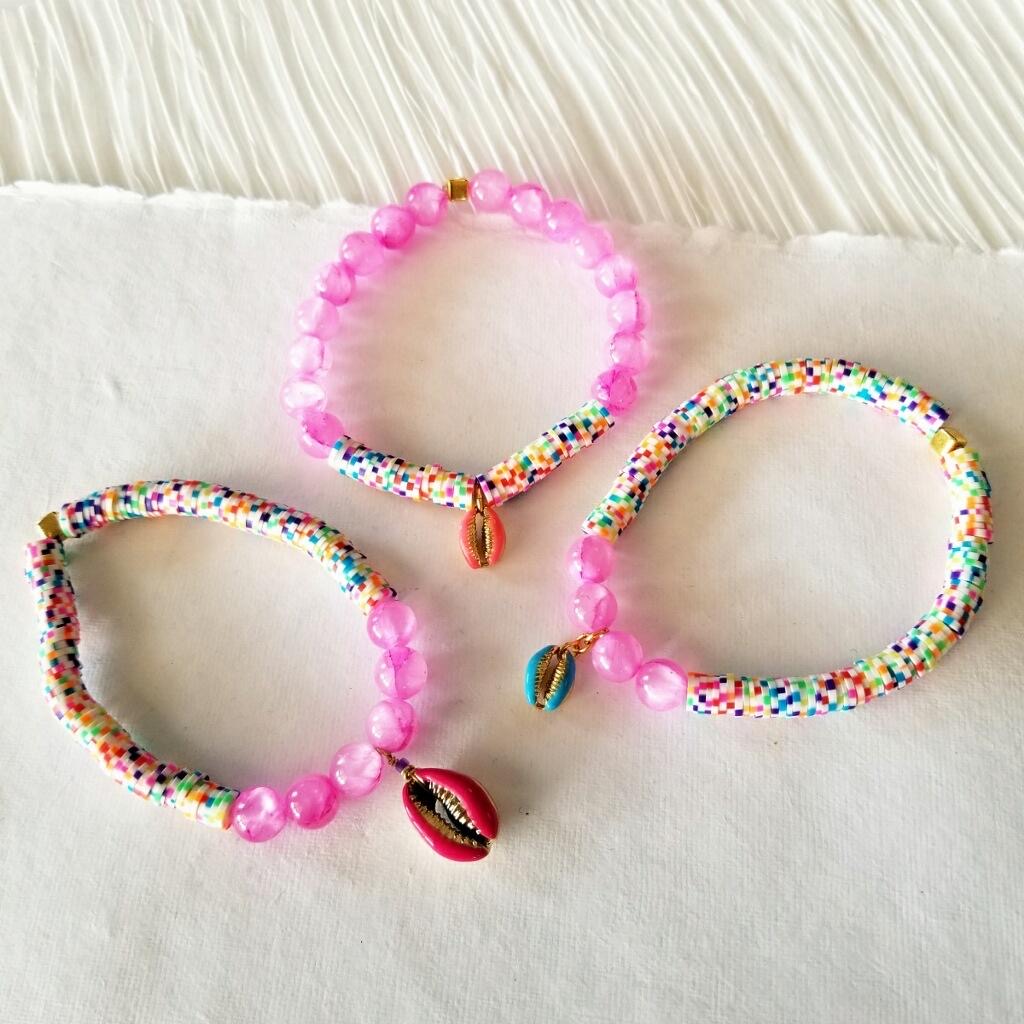
First Bracelet – Large Pink Cowrie Dangle
1. Start by making the dangle and then it will be ready to string with the rest of beads. You will need a 2” section of 24g gold wire (if using headpin, remove the head with wire cutters). Use a needle nose and round nose pliers to make wrap. Thread the wire through end section of cowrie (a bit like wrapping a top drill bead) then wrap wire a couple of times, trim and tamp in pointy end. Add one size 11 seed bead, then make a wire wrapped loop that will be used to thread onto stretch cord.
2. Cut 1 x 12” pieces of Stretch Magic, pre-stretch cord then attach bead stop to one end of stretch cord about 2 1/2” from end.
3. String as follows: TCC (1) (used to hide knot), F (approx. 2 2 ½”), J (3), LPC (1), J (3), F (approx. 2 ½”)
4. Tie one and a half square knots and tighten firmly between each knot (you may fit two square knots in the cube, I managed but it was a tight fit!)
5. Thread one of the tails back through the cube bead add a dab of hypo cement onto the knot (from all sides). Pull tail to center knot in the middle of the bead, you should have one tail sticking out either side of the bead.
6. Leave the bracelet for at least a couple of hours for the hypo cement to set up, then trim tails. You can hold onto one tail, pull the opposite tail & trim close as you can. The other side you just trim as close as you can as you have nothing to hold onto.
Second Bracelet – “Orange Small Cowrie Shell” Bracelet
1. Using needle nose and flat nose pliers add one medium oval jump ring to the orange cowrie shell, close carefully making sure that both sides come together neatly.
2. Cut 1 x 12” pieces of Stretch Magic, pre-stretch cord then attach bead stop to one end of stretch cord about 2 1/2” from end.
3. String as follows: TCC (1), J (8), F (approx. 1”), SOC (1), F (approx. 1”), J (8)
4. Repeat 4-6 above.
Third Bracelet – “Blue Small Cowrie Shell” Bracelet
1. Using needle nose and flat nose pliers add three small oval jump rings to the blue cowrie shell (in a chain, one into the next) close them carefully making sure that both sides come together neatly. * This will provide the correct orientation and length for the dangle.
2. Cut 1 x 12” pieces of Stretch Magic, pre-stretch cord then attach bead stop to one end of stretch cord about 2 1/2” from end.
3. String as follows: TCC (1), F (approx. 3”), J (2), SBC (1), J (2), F (approx. 3”)
4. (Repeat 4-6 above)
5. Try on your new bracelets & admire your handywork
6. Enjoy!
Jewelry designed by Steph Stirniman at https://magpiecollectives.etsy.com/
Related Articles
“Sparkling Mermaid Dreams” Kumihimo Necklace
“Sparkling Mermaid Dreams” Kumihimo Necklace ***Skills needed: beaded kumihimo & wire wrap...
Fiesta Collection – Black, Gold & Orange, Tassel Necklace
Fiesta Collection – Black, Gold & Orange, Tassel Necklace Materials Needed: Finished Length Approx....
Hope & Sunshine Mala – Pantone 2021 Colors
Hope & Sunshine Mala – Pantone 2021 Colors Finished Length: 41” - (Drop from Guru to bottom of...