

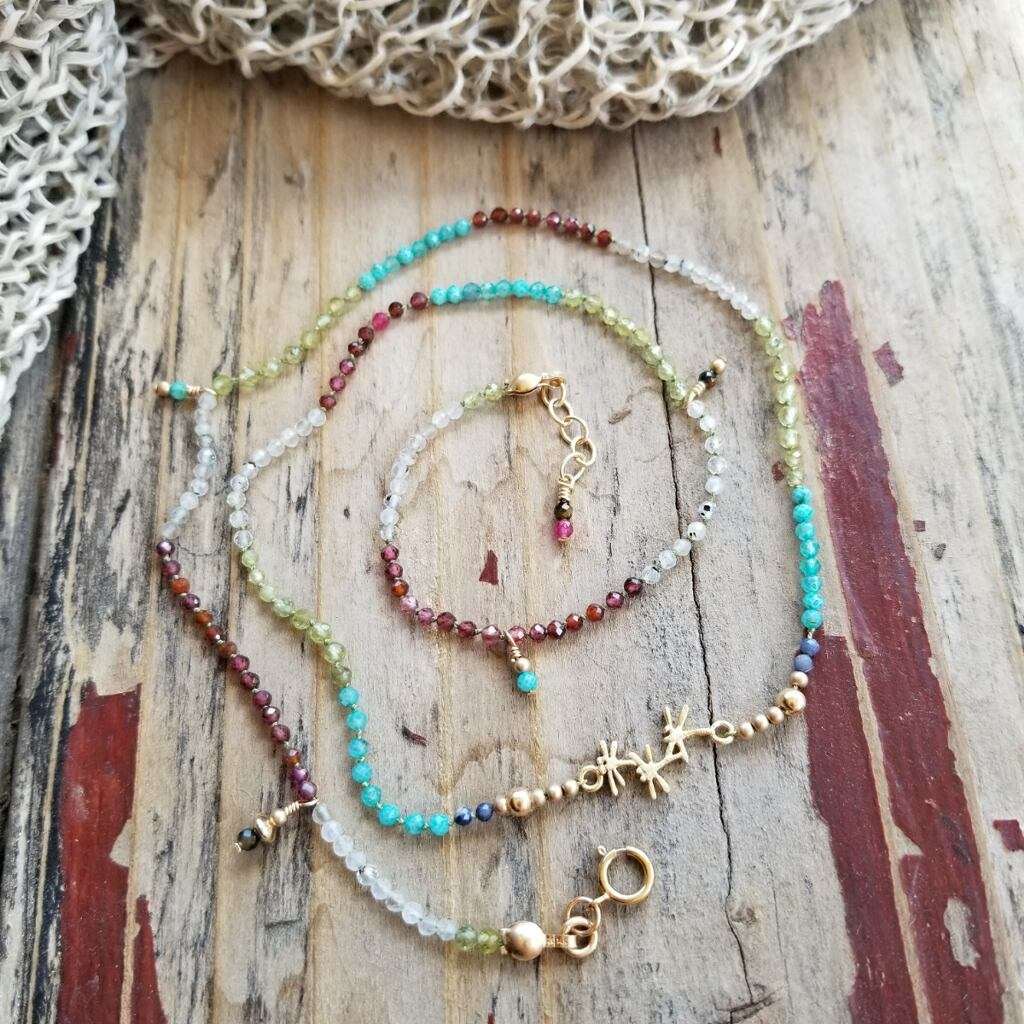
Delicate Dancing Dragonfly 3x Wrap Knotted Gemstone Bracelet
Delicate Dancing Dragonfly 3x Wrap Knotted Gemstone Bracelet
Materials Needed:
- 2mm Faceted Round Multi Gemstone
- Amoracast – Dragonfly Connector - Vermeille
- Griffin Silk #1 – Jade
- 3mm Crimp Covers 14k Gold Filled (used to hide knots after attaching dragonfly connector)
- Clamshells 14k Gold Filled
- 6mm Spring Clasp 14k Gold Filled
- Chain 14k Gold Filled (large enough links to fasten into, used for extension chain) 1” Used (add more for larger sizes)
- 4mm Round 19g 14k Gold Filled Jump Rings (used to attach clasp)
- 2mm Sandblast Beads, 14k Gold Filled 2 x Pack of 10
- 3.6 x 2mm Saucer Beads 14k Gold Filled
- Head Pins – 1 ½” 26g 14k Gold Filled
- Hypo Cement Glue
Finished Length 21” (Can add a longer chain to accommodate larger size wrist)
Tools Required
Instructions on Construction:
1. Before you start threading your beads you will need to make your four wire wrapped dangles. You will be using the 26g headpins for these wire wraps. I have used a combination of gemstones, 2mm sandblast gold beads and saucer beads, (you could copy the combinations shown or make your own) then make wire wrap to complete dangle, this loop should be small (but large enough to thread comfortably onto knotting cord).
I am not usually a big fan of ironing my Griffin silk but do find that when using the lower #’s (thinner cords) & smaller beads this helps a lot, it takes out the kinks that happen from the packaging. With heavier beads this isn’t usually a problem, the weight will pull the kinks out. Pre-stretch your cord which should help keeping knots where you want them to be!
2. The first thing you will do is attach the cord through the clamshell so that you have a means of attaching the finished, knotted gemstone, chain to the clasp. Tie an overhand knot at the end of your silk cord (the opposite end to where the needle attaches) leaving a small tail (I usually do a 2nd knot) and then take a size 11 seed bead & thread on so that it sits next the knot. At this stage you are ready to thread your needle & cord through the hole in the clamshell where your knotting will start.
* The reason I add a small seed bead on the inside of my clamshell is because it adds an extra layer of security against my knot pulling through the hole in the clamshell. This is especially important when using the smaller gauge knotting cords).
* Also note that some clamshells hinge at the back & some on the side, plus some have hole to use jump rings with & others (like the ones used here have a small arm that you bend to form the link that attaches to clasp. Phew, information overload!
3. The cord should now be exiting your clamshell at the appropriate place. Tie your first knot so that it sits tights against the opening of clamshell. Use you preferred way of knotting, tweezers, awl or fingers… just make sure that your knots are in the correct place before tightening fully…. It is a bear to try to undo knots!
4. The griffin silk has a built-in needle that helps a lot with threading your beads. I try to thread the beads straight from the strand they come on directly onto my griffin silk.
* You may find this easier if you trim the needle a little, not so bendy that way!
5. This bracelet has a dragonfly connector at the mid-point and you will work one side at a time. The beads are a mirror image on either side of the dragonfly. There are four basic color groups used in this bracelet, that I have labelled A – E (you can vary the colors assigned to the letters to make a mix that is most pleasing to you). For this design A = green, B = white, C = red, D = turquoise, E = 2mm gold sandblast.
6. The threading pattern from clamshell is as follows: 2 x A, 10 x B, add 1 dangle, 15 x C, 10 x B, add 1 dangle, 8 x A, 8 x D, 8 x C, 10 x B, 8 x A, 10 x D (within the color ranges there are lighter & darker colors, I finished this last D sequence with two of the darker blue colors), 4 x E
7. Let the knotting begin! In this piece I knotted between every bead, making sure that the knots were nice and tight against the previous bead. You will tie knots between all the beads until you reach the last four sand blast beads, now you will tie a knot after the first bead and then use your needle to go through the loop in the dragonfly connector and then reverse direction and go back through your last three gold beads. There are no knots tied between these three beads.
8. This is where you will tie off your cord & use a crimp cover to hide the knot. I used three square knots (made sure they were tight & very secure) & then carefully cut the cord. You can use a Thread Zap or
scissors, just make sure that you don’t leave a tail that will show.
* Reminder - a square knot is like tying shoelaces, you cross your cords & then you come from the back once, cross your cords again & then go from the front to the back and pull tight = 1 square knot. Make sure there is enough room to add the crimp cover over the knot and between the beads. Add a small dab of the hypo cement glue over the knot.
9. Add the 3mm crimp cover over the knot closing carefully with your needle nose pliers
10. Now you are ready to start the second side of your bracelet. Add 3 x sandblast beads and go to the end of your cord (just leave a tail long enough to tie your three x square knots). Now take the needle through the second ring on the dragonfly connector and then thread the needle back through the 3 x sandblast beads (there are no knots between these first three beads).
11. Repeat instructions 8 & 9
12. Now add the rest of the beads to mirror image the first side, thread as follows: 1 x E, 10 x D, 8 x A,10 x B, 8 x C, 8 x D, 8 x A, add 1 x dangle, 10 x B, 7 x C, add 1 x dangle, 8 x C, 10 x B, 2 x A
13. Tie your knots between all the beads, remember to do a final knot after the last bead.
14. Go into the second clamshell so that you are in the position with cord coming through from outside into the interior of the shell (the opposite of how you started your piece). You will now add a size 11 seed bead & tie several knots to tightly secure the seed bead.
15. At this stage I trim or use my Thread Zap to get rid of excess cord…make sure your knots are tight first! I use a little glue to secure the bead/knot to the inside of clam shell…. You do not want excess cord to show when clamshell is closed.
16. If you are using the type of clamshell with 2 rings you may now gently close your clamshell with your needle nose pliers & you can use jump rings to attach spring clasp to clamshell on one end & extension chain on the other end. Open your jump rings with flat nose plier & needle nose plier (one on either side of the break point) open to the side & only as much as needed to thread on clasp or chain, then close so that pieces line up nicely.
17. If you are using the other type of clamshell you will need to take your round nose pliers and manipulate the arm so that it will be enclosed when the clamshell is closed. This can act in place of a jump ring so don’t forget to thread on the extension chain before gently closing your clamshell with needle nose pliers. For this design I used 2 x 4mm 19g open jump rings to attach clasp.
* This gave a secure attachment while providing a little more flexibility with the clasp.
18. The chain is finished with a cool wire wrapped dangle. Take a headpin add 2 x gem & then wire wrap to the end of the chain. If you do not have wire wrapping in your skill set yet, you could add a petite charm to the end of the chain with a jump ring, this would also be a cool way to finish this bracelet.
19. Try on your new bracelet & admire your handiwork!
20. Enjoy!
Jewelry designed by Steph Stirniman
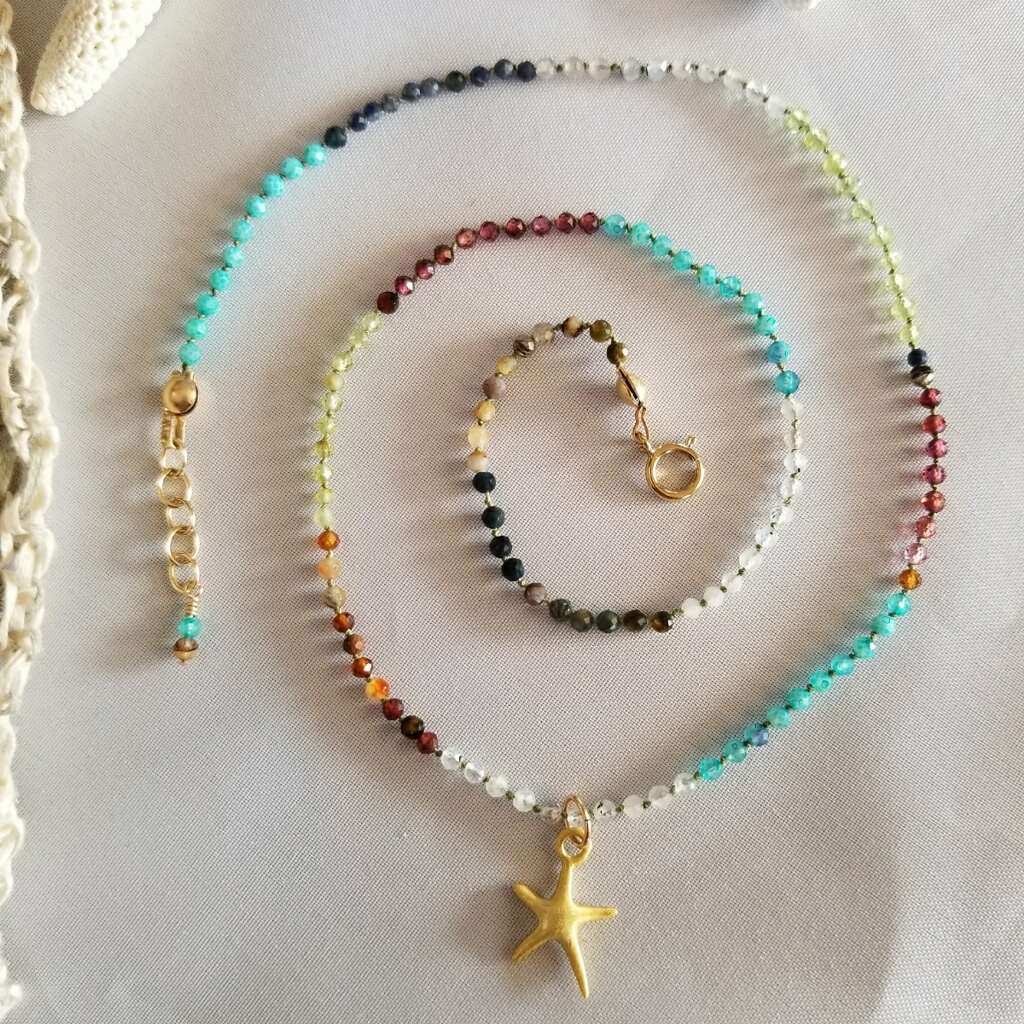
Check out our Delicate Dancing Star Knotted Gemstone Choker
Recent Posts
-

Pearly White Heart Earrings – Four Drop
Pearly White Heart Earrings – Four DropThese earrings are made from beautiful white shell in flat he …30th Jan 2025 -

Valentine Fringe Earrings
Valentine Fringe EarringsLearn how to make fringe earrings with a heart pattern that pops! The …13th Jan 2025 -

Dancing Pearl Cowboy Charm Leather Bracelet
Dancing Pearl Cowboy Charm Leather BraceletThis tutorial is a spin of our Dancing Gemstone Brac …17th Dec 2024