
Tutorials
Falling Leaves Collection - Choker Necklace
Falling Leaves Collection - Choker Necklace
Materials Needed:
- 2mm Faceted Round Zircon Crystal, Multi Color (1 strand)
- 2mm Faceted Round Zircon Crystal, Olive (1 strand) * These two strands listed of Zircon Crystal will be enough to complete necklace, bracelet & earrings
- Amoracast – Leaf Connector, Vermeille (1)
- 3x4mm 14k Gold Filled Chain (6”)
- 2” Long 24g, 14k Gold Filled Head Pins (4)
- 3.5x5.3mm Oval 22g, 14k Gold Filled Jump Rings (1)
- 4x10mm Lobster Clasp, Gold Filled (1) * Or clasp of your choice
- Soft Touch Beading Wire, Fine, Satin Silver Coat (16”)
- 2x2mm Crimps 14k Gold Filled (2)
Length 14 -17.5” (with extension chain)
Tools Required
Wire Cutter (for cutting beading wire)
Optional:
Triangular Scoop * Useful for separating small beads
Sharpie
Key Code for Beads: A = Olive Zircon B = Multi Zircon (use the orange, amber and yellow colors for this design)
Instructions on Construction:
1. Using your wire cutters cut a 2.5” section of chain (approx. 19 links).
2. Attach the lobster clasp to the end of chain, using flat nose & needle nose pliers to open and close jump ring (gold-filled clasps come with attached jump ring) make sure that the jump ring closes all the way.
3. Thread crimp tube onto beading wire then attach to end section of chain (opposite of clasp end), I used the two-part folded crimp method as this gives a sleek finish but you could also flat crimp and add crimp cover if that is your preference. Test pull the beading wire before you trim to make sure crimp is holding the wire securely, then use flex wire cutter to trim beading wire close to crimp.
4. Using bead mat sort, the multicolored zircon beads so that you have a pile of orange, amber and yellow beads to choose from (think Fall leaves). These are the beads that form the contrast colored spacers and are “B” on the key code.
5. Threading sequence is as follows: A (11), B (1), * Repeat underlined so that you have 5 repeats in total, A (11), B (7) * The underlined is the mid-section of necklace and the second side is a mirror image of the first side.
6. Thread on crimp tube and attach to the second section of chain (approx. 3.5”), in the same way as you attached at beginning of necklace.
7. Making dangle on end of chain: Take a headpin and thread B (3) * I used dark orange, amber and green, keeping in mind that this choker has a Fall color theme. Using needle nose and round nose pliers make a small loop and thread this loop onto the last link in chain, now complete wire wrap, trim and tamp in pointy ends, as needed. * Mark your round nose pliers with sharpie so that your loop sizes are consistent, just remember to line up on the mark each time you create desired size.
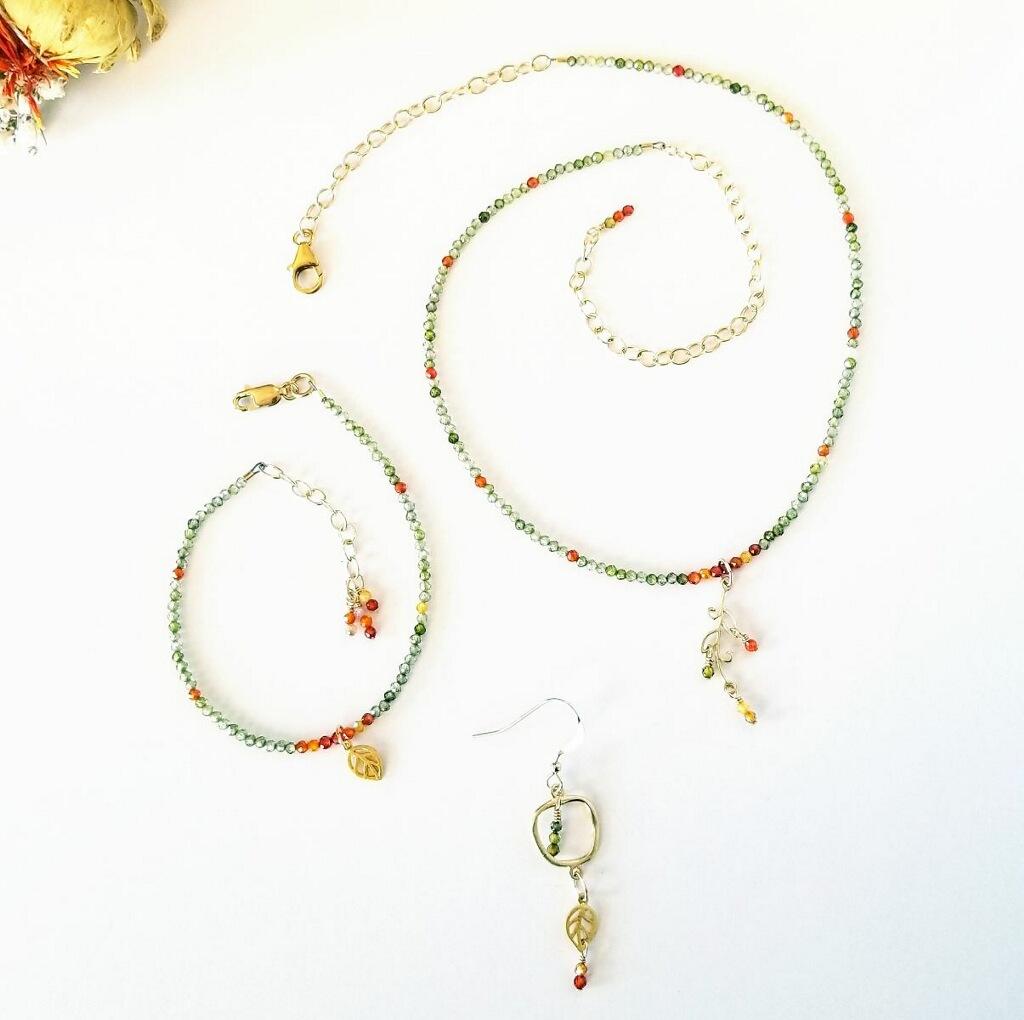
8. The final step is to create the central dangle: Start by adding the jump ring to one end of the connector link (this will attach to the necklace when dangle is finished). You will need four zircon beads to embellish the leaf connector * I picked orange, green and two yellows, the choice is yours, but again think of leaves changing color. Take headpin and thread orange bead, make small loop and thread onto top oval loop on leaf connector, then complete wire wraps, trim and tamp end. Take a second headpin add a green bead, make a small loop, and attach to the second oval loop on leaf connector, finish wire wraps and trim. Take the third headpin add two yellow beads, create a small loop and thread onto the bottom loop on the connector, finish wire wraps and trim.
9. You will now attach the jump ring to the mid-section of the necklace, using flat nose and needle nose pliers. Make sure that you close the jump ring securely so that both sides line up and there are no gaps. This jump ring will allow the dangle to free float over the zircon beads.
10. You are now ready to try on your necklace & to admire your handiwork.
11. Enjoy!
Jewelry designed by Steph Stirniman at magpiecollectives.com
Related Articles
Midnight Blue Faceted Pearl and Tassel Crochet Necklace
Midnight Blue Faceted Pearl and Tassel Crochet Necklace Materials Needed: Finished Length Approx. 36” Tassel...
"Mystic Canyon" - 3 Strand Bib Necklace
"Mystic Canyon" - 3 Strand Bib Necklace This necklace reminds me of Arizona, the colors are searing blue...
Nautica Collection – Set Sail Blue Agate Necklace
Nautica Collection – Set Sail Blue Agate Necklace Materials Needed: Finished Length 16 ½” * Can easily be...