Tutorials
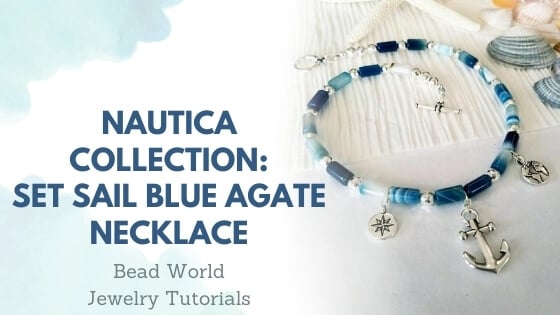
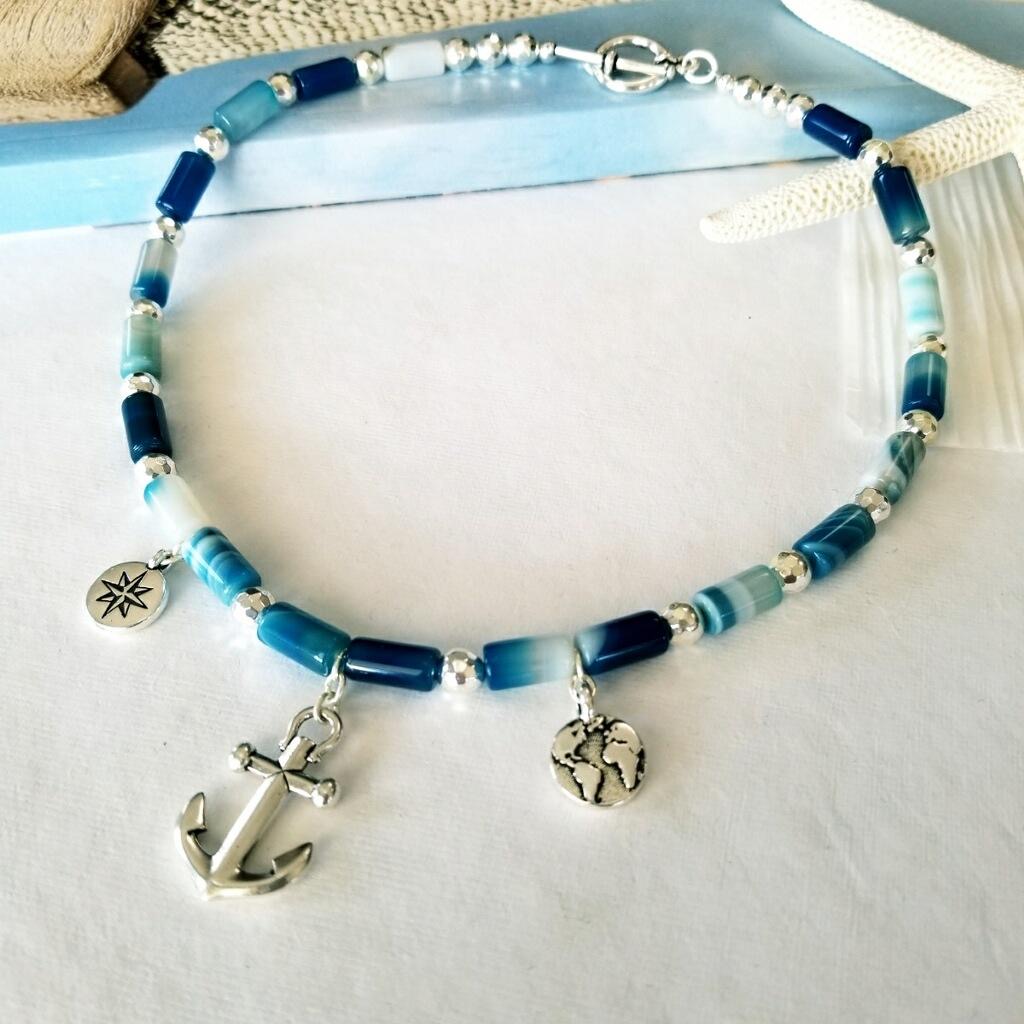
Nautica Collection – Set Sail Blue Agate Necklace
Nautica Collection – Set Sail Blue Agate Necklace
Materials Needed:
- Blue Striped Agate 6x12mm Tubes, Dyed (20)
- 6mm Sterling Silver Plated Hematite (22)
- 2x2mm Sterling Silver Crimps (2)
- 4mm Sterling Silver Crimp Covers (2)
- Tierra Cast – Tapered Toggle Clasp Silver Plated (1)
- TierraCast – Large Anchor, Silver Plated (1)
- TierraCast – Mini North Star, Silver Plated (1)
- TierraCast – Earth, Silver Plated (1)
- Small Oval Jump Rings, Silver Plated (7)
- Medium Oval Jump Rings Silver Plated (3)
- Soft Flex, Medium, Satin Silver (20”)
Finished Length 16 ½” * Can easily be made to your desired length
Tools Required
Optional:
Key Code for Beads: * If you do not have a bead board you can lay your beads out on mat to make it easier for stringing in correct sequence.
A = Blue Agate 6 x 12mm Tubes H6 = 6mm SS Plated Hematite NS = North Star Dangle LA = Large Anchor Dangle E = Earth Dangle
Instructions on Construction:
1. Using your flat nose and needle nose pliers attach jump rings to the three charms so that they are ready for stringing.
* Make sure that you open the jump rings to the side so that you are not “un-rounding” them. The “north star” charm has two small jump rings attached, this will drop it to the correct depth and orientation. The “large anchor” has three small jump rings attached and the “earth” charm will need two small jump rings.
2. Cut 20” section of beading wire, thread on crimp tube & attach to medium oval jump ring. Using a needle nose plier do a flat crimp and then place a crimp cover over crimp.
* Keep your wires parallel when crimping, this makes for a more secure attachment, give a test pull on your wire to make sure you have tamped down hard enough on the crimp.
3. Take a second, medium sized, jump ring and attach this the bar section of the clasp and into the jump ring with crimped wire attached.
* The second jump ring will make it a little easier to thread the bar through the loop clasp.
4. Beading sequence is as follows: H (3), A (1), H (1), Repeat underlined section seven times (giving a total of seven of each in this sequence), A (1), NS (1), A (1), H (1), A (1), LA (1), A (1), H (1), A (1), E (1), ), A (1), H (1), Repeat underlined section seven times (giving a total of seven of each in this sequence), A (1), H (3)
5. Add your crimp tube & thread the beading wire through medium oval jump ring and back through the crimp tube.
6. At this stage lay your necklace on your worktop in a circle & make sure you leave enough slack in the wire so that your beads have enough room to lay nicely.
* It is important to leave this slack because if you crimp your wire too tightly the necklace will be rigid and the wire may break! Now you are ready to close crimp.
7. Add crimp cover, being careful to line edges up evenly. Attach jump ring to the loop on the circular part of clasp.
8. You are now ready to try on your necklace & to admire your handiwork.
9. Enjoy!
Jewelry designed by Steph Stirniman at magpiecollectives.com

