
Tutorials
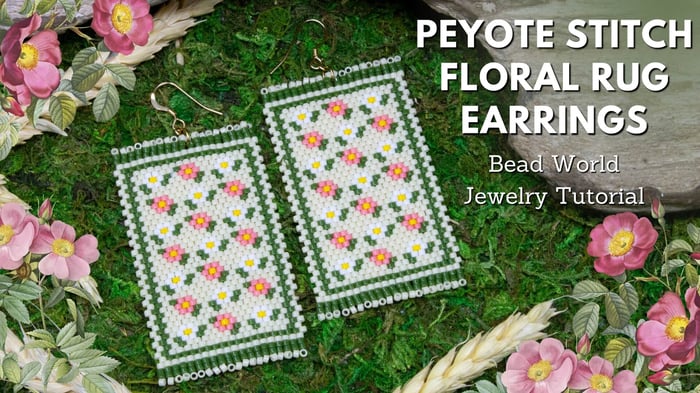
DIY Peyote Stitch Earrings Tutorial – Floral Rug Pattern with Double-Row Technique
DIY Peyote Stitch Earrings Tutorial – Floral Rug Pattern with Double-Row Technique
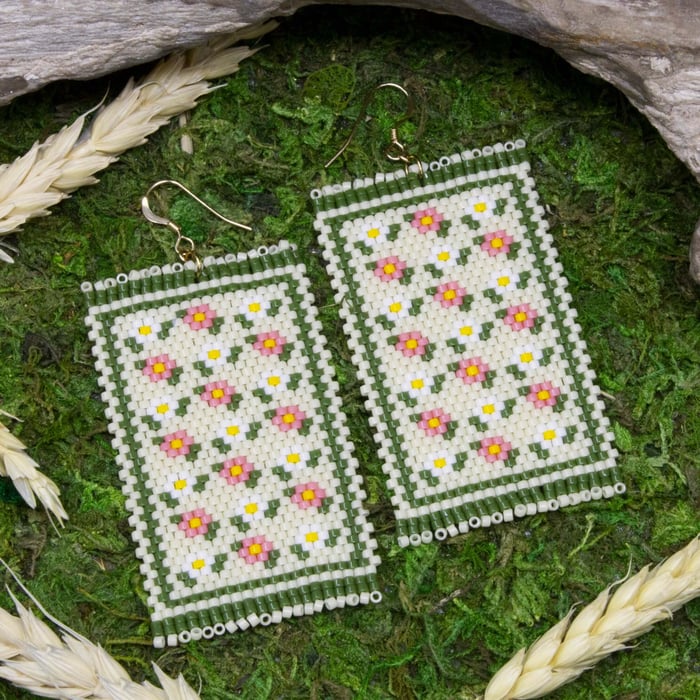
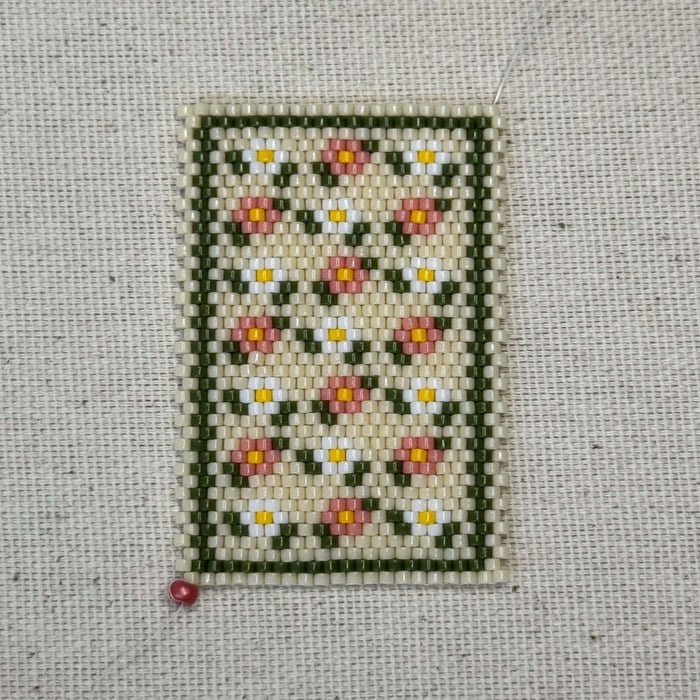
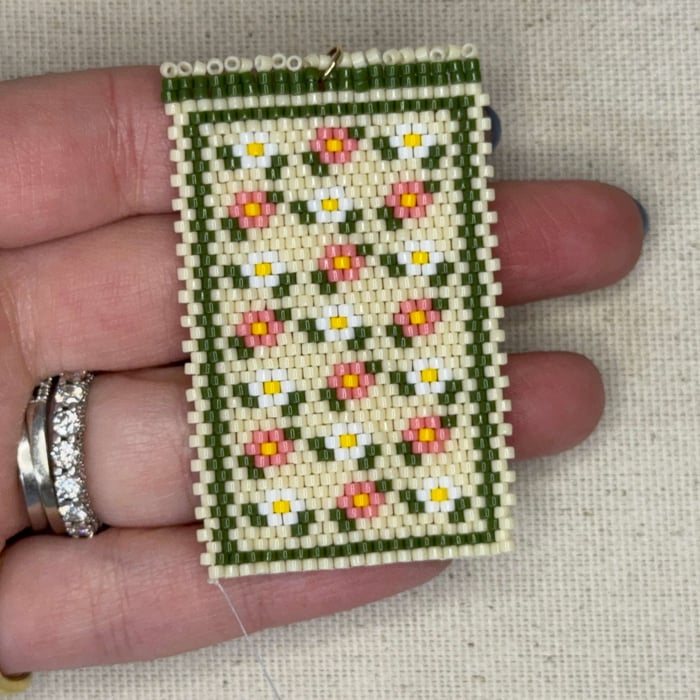
These peyote stitch earrings resemble a miniature floral rug, featuring small pink and white flowers accented by leafy green detailing. The earrings are made using a double-row peyote technique and finished with subtle tassels at the ends, giving them a distinct woven-rug appearance. This design combines traditional beading methods with a charming vintage feel, creating a unique and wearable accessory. Follow along with the tutorial below to make your own pair.
*Please use caution while creating this project, it is very easy to poke yourself with the needle*
Earrings measure Approx.: 2.25"x1.25"
Materials Needed:
- Delicas Size 11 Miyuki Seed Beads -- 732 Opaque Cream
- Delicas Size 11 Miyuki Seed Beads -- 200 Opaque Chalk White
- Delicas Size 11 Miyuki Seed Beads -- 1135 Avocado Opaque
- Delicas Size 11 Miyuki Seed Beads -- 2115 Duracoat Opaque Guava
- Delicas Size 11 Miyuki Seed Beads -- 1132 Opaque Canary
- Size 10 John James Needles
Fireline® - Crystal - 50 Yards - 4lb (9ft per earring - 18ft total)
Tools Needed:
Instructions on Construction:
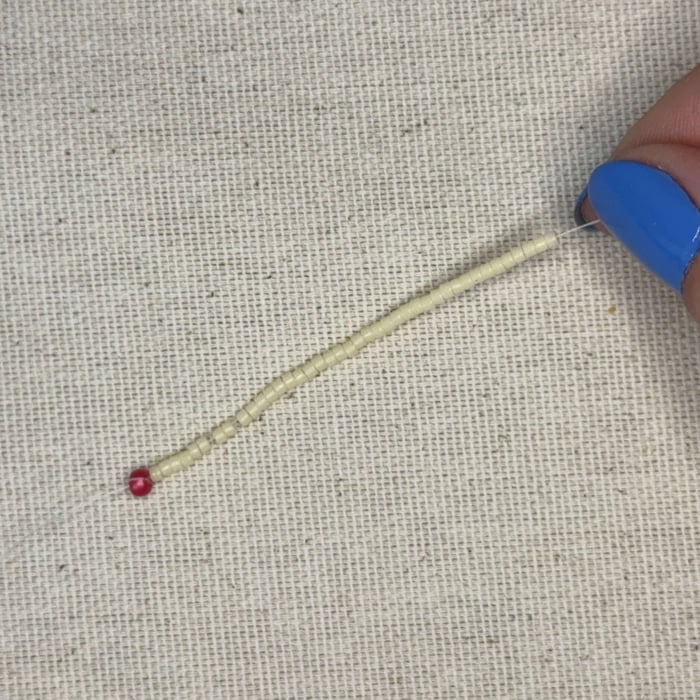
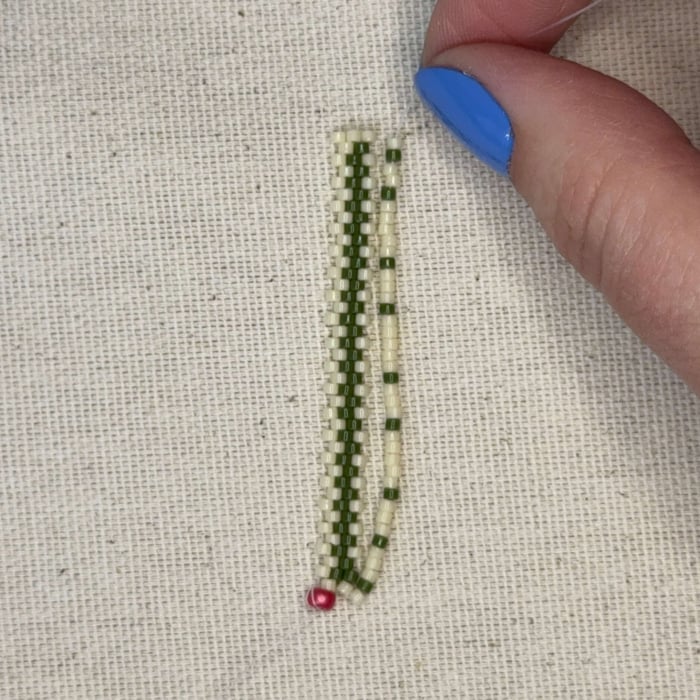
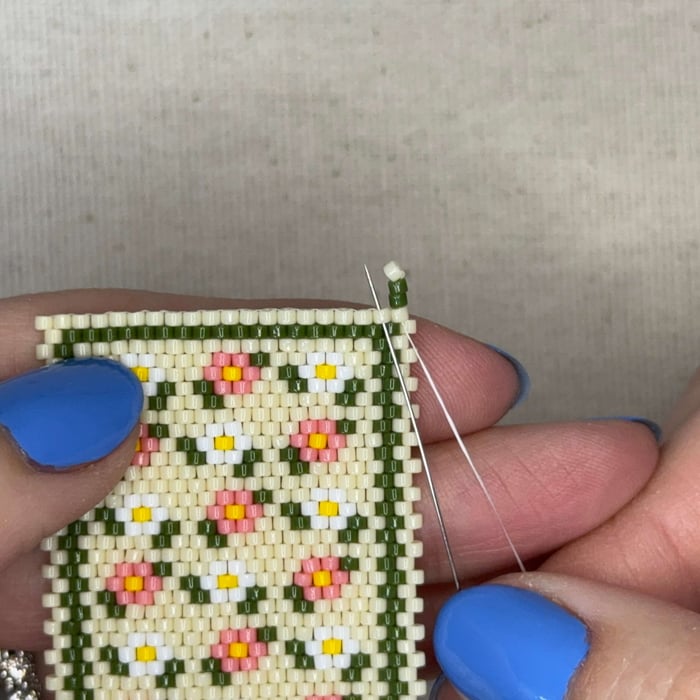
1. Wrap the end of your 9 ft of fireline around a spare bead 3 times, leave a tail of about 3 inches - do not knot (I used a size 8 seed bead left over from another project - you can use any spare round bead that is larger than a delica - this stopper bead will mark the bottom left corner of your project). String on 40 beads of 732 delicas
2. At the other end of your fireline, place on your needle and add one 732 delica bead then thread the needle through the second to last bead (shown above) at the end of the 40 732 delicas.
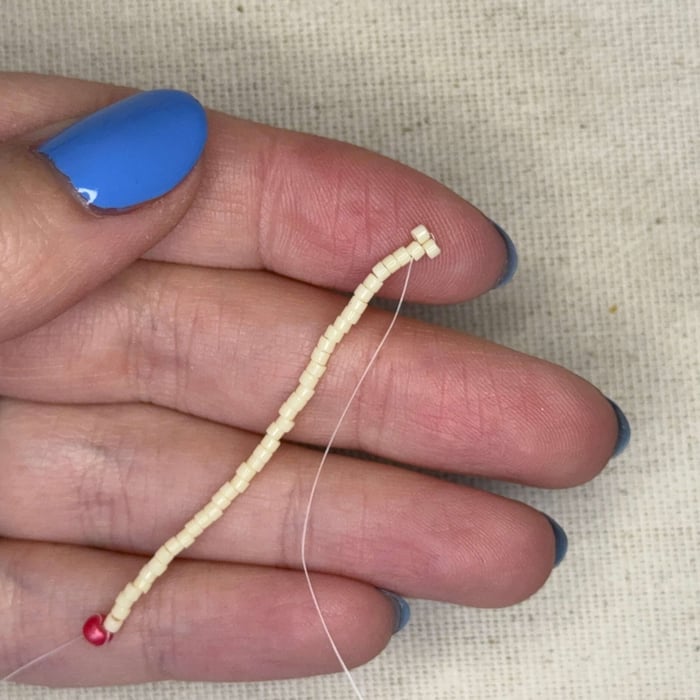
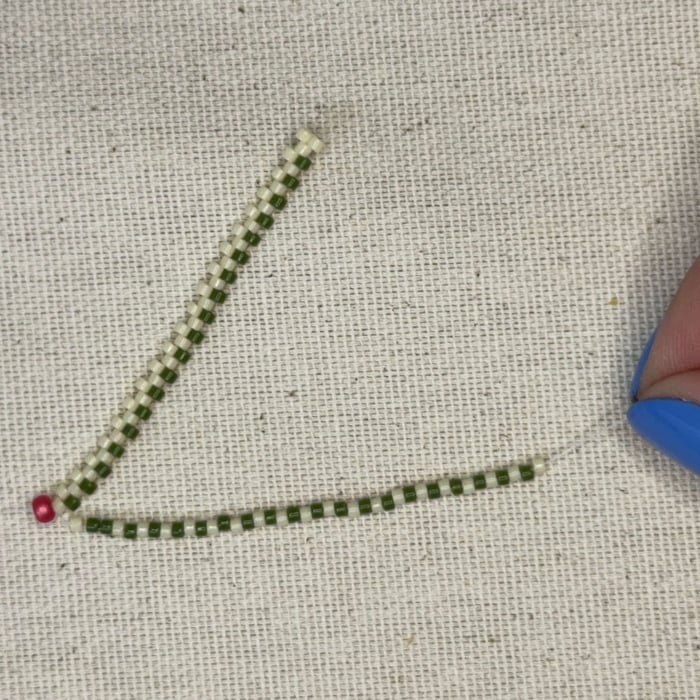
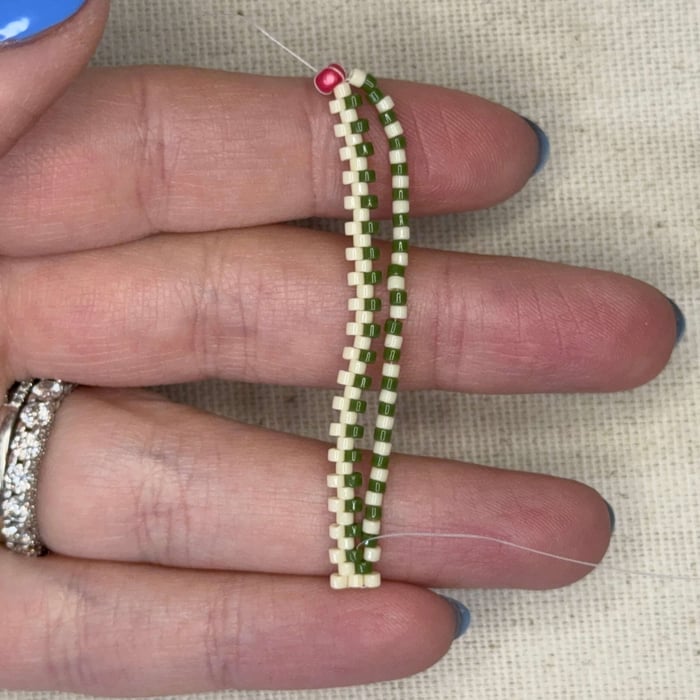
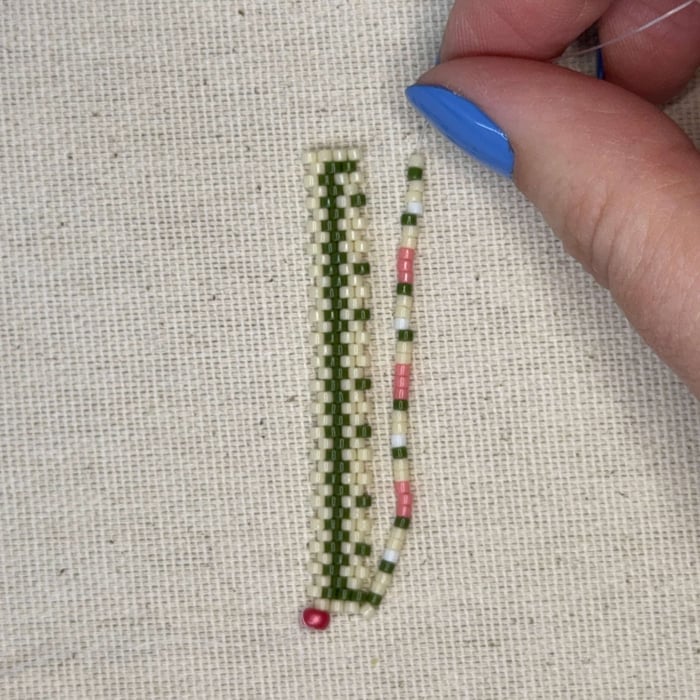
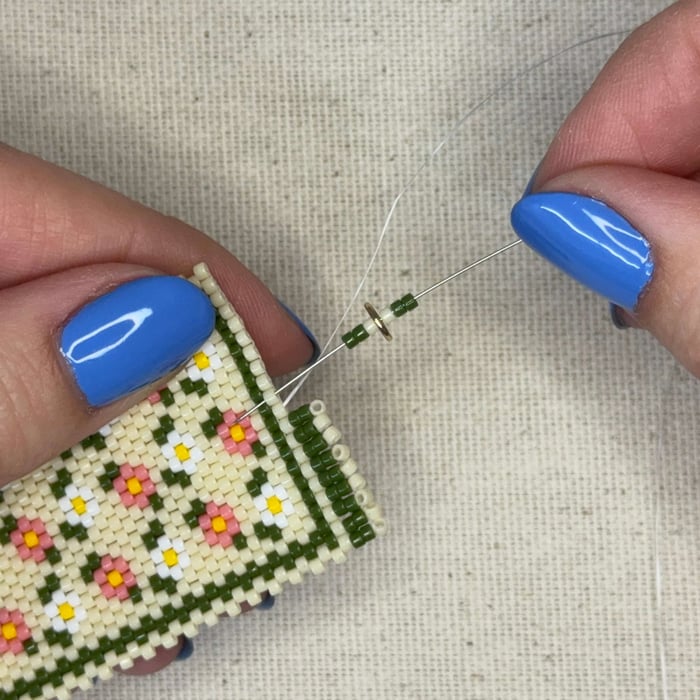
3. Pull your fireline tight and so the two beads sit parallel to each other so your project looks like this
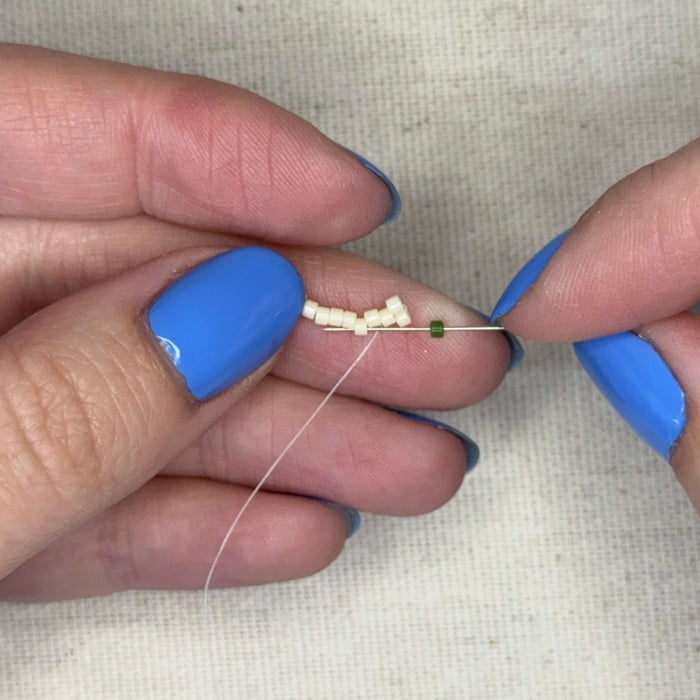
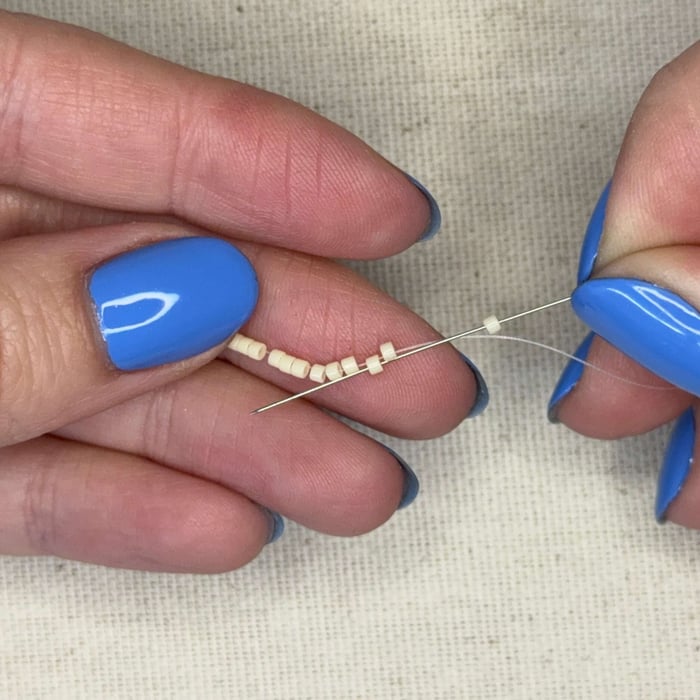
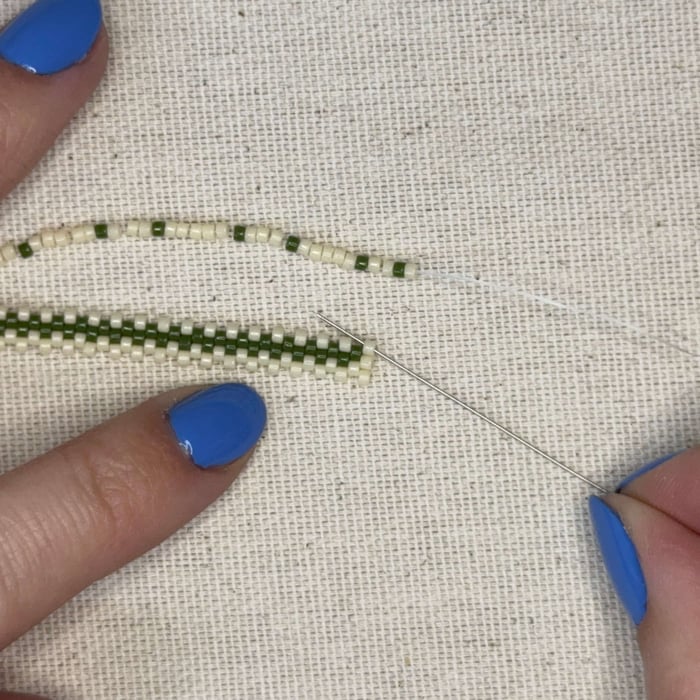
4. Now following along with the pattern, string on one 1135 delica and thread your needle through the second bead down (not the very next bead)
5. Repeat with another 1135 delica, you will start to see a brick like pattern being created
6. Follow along with the pattern until you reach the stopper bead (you will be stitching on 19 1135 delicas and 1 732 delica in total in this row)
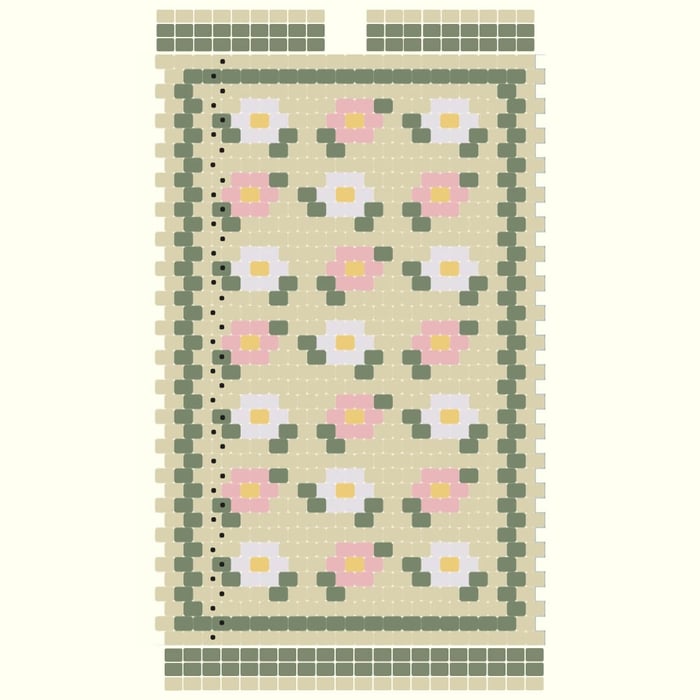
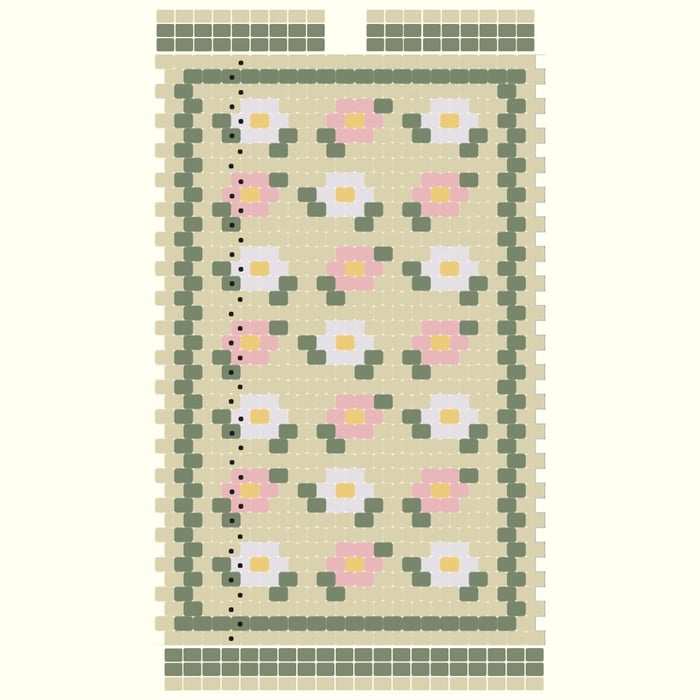
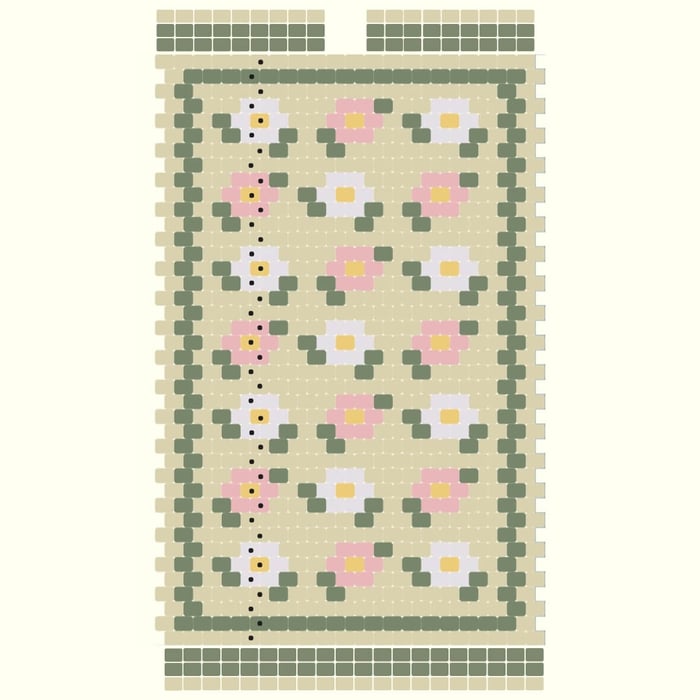
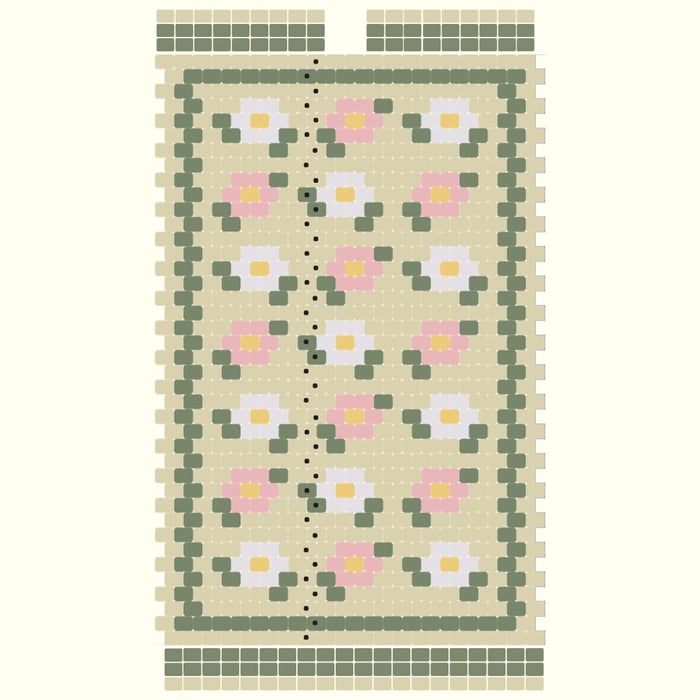
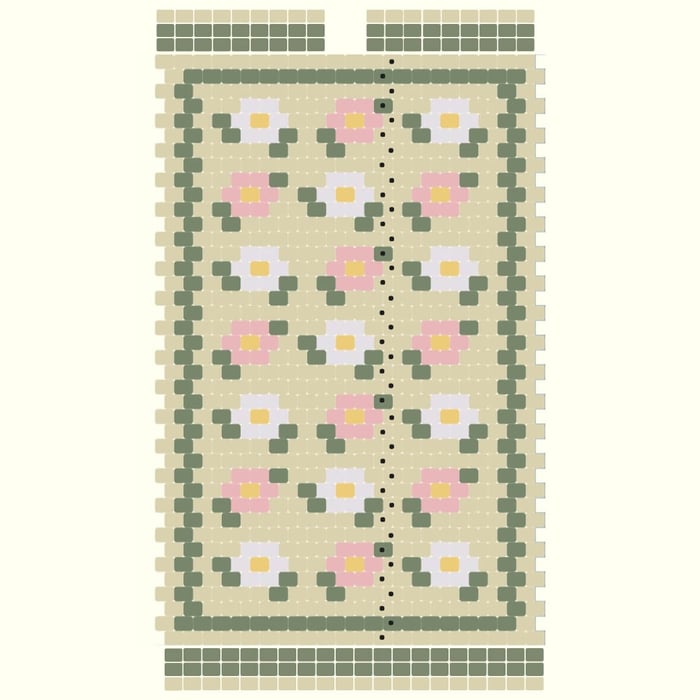
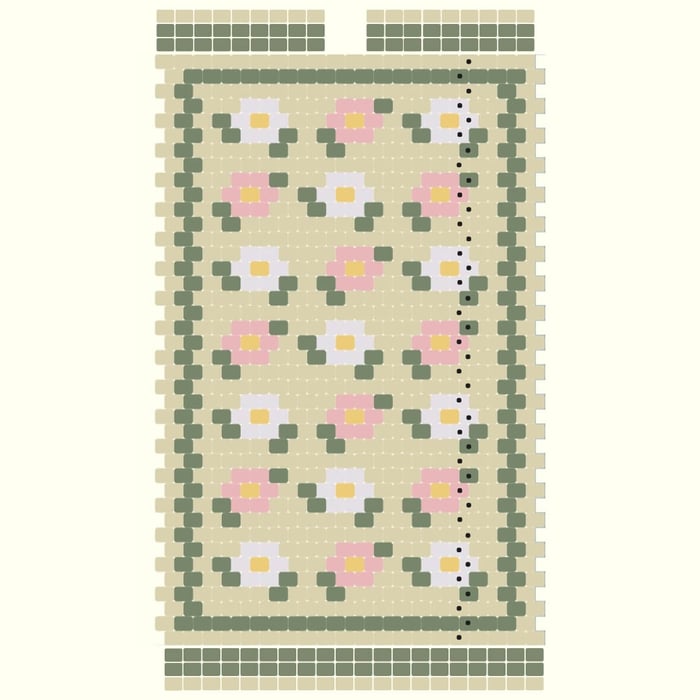
7. Now we will learn how to stitch on two rows at a time. I find it important to string beads on from the bottom to top of the pattern so it makes it easier to follow the pattern (as I've learned from trial and error), see below for pattern
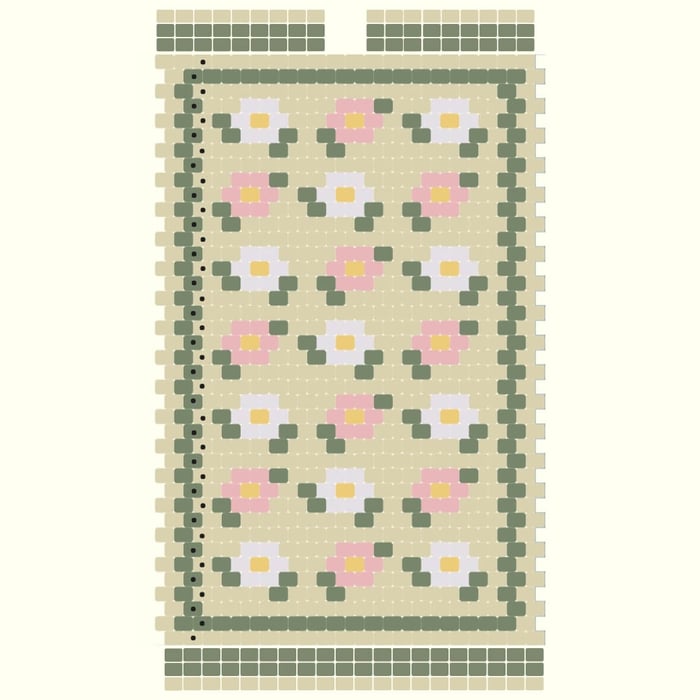
Pattern: follow along the black dots going up, one 732, two 1135, one 732, one 1135, and so on - there will be 40 beads strung
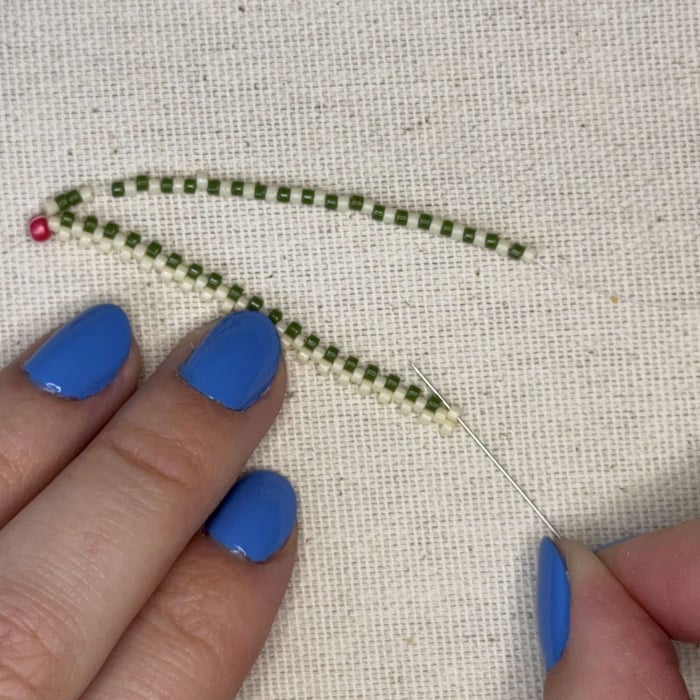
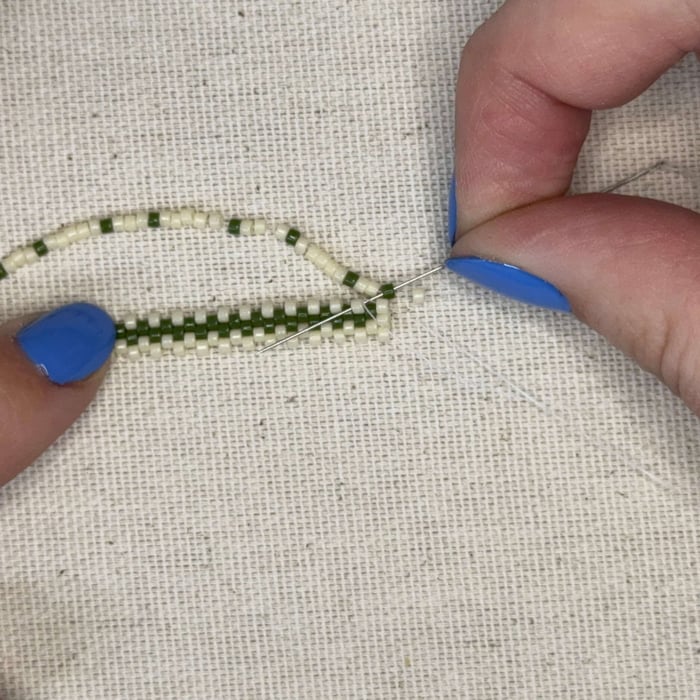
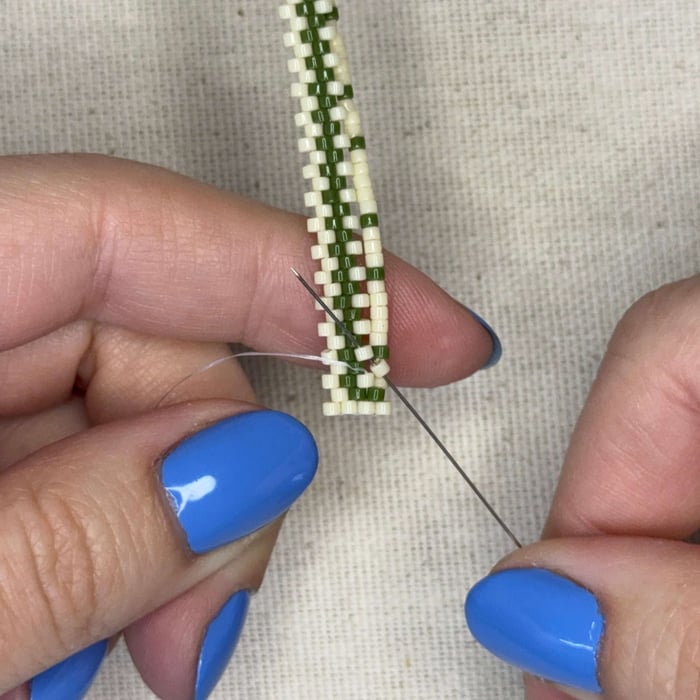
8. Now that we have our row of beads strung on, we will stitch them on. Take your needle and thread it through the 732 bead shown (on the side where the 1135 beads are)
***You'll notice I have the project upside down and facing away from me, I am right handed and find this the easiest stance to hold my project. You might have a different preference and that is okay, when we are stitching on our pre-strung beads, we don't need to worry too much about the pattern itself as we have already strung the beads on following the pattern in the previous steps.
9. And then thread your needle through the following 1135 bead and then the first 1135 bead in the peyote row.
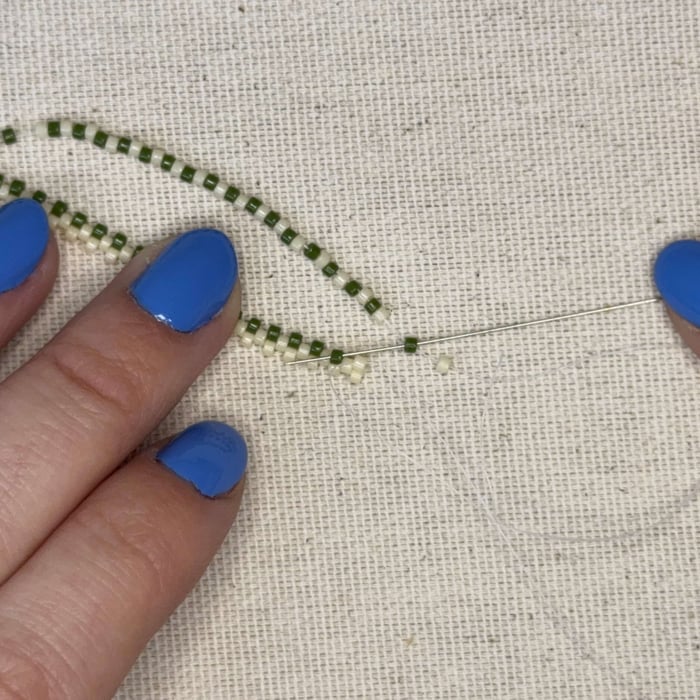
10. Pull the thread (not too tight, you want there to be a little give in your unstitched, strung row - it helps with getting the needle to zig zag through the beads)
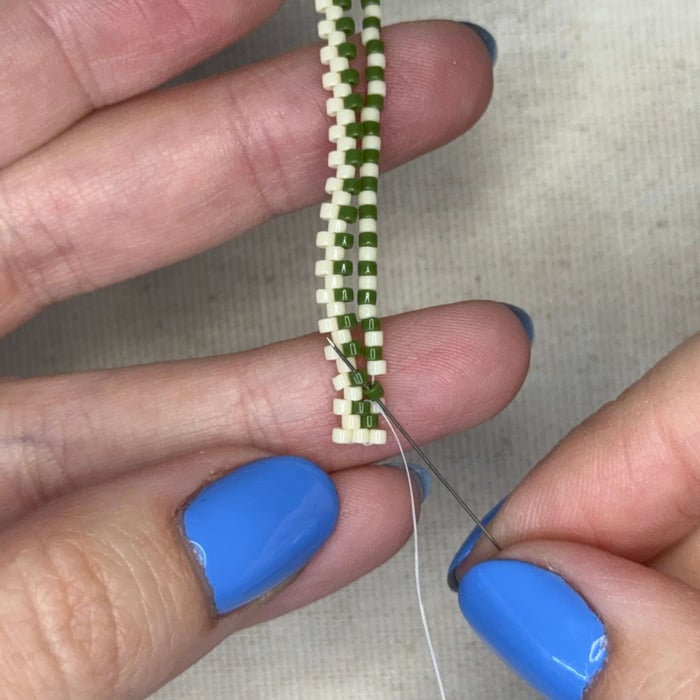
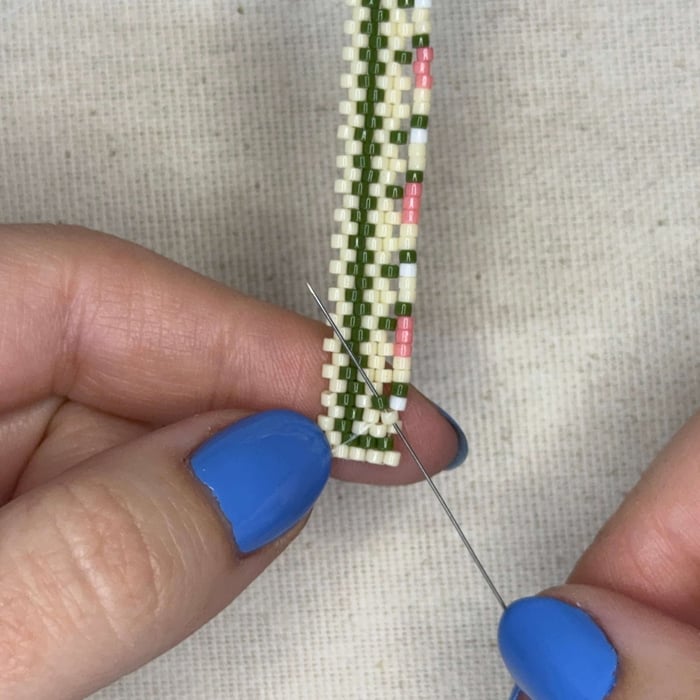
11. Like a zipper, zig zag your needle up through the beads, skipping over one bead every time going diagonally. This row is great to learn this method as you are only threading your needle through the green 1135 delica.
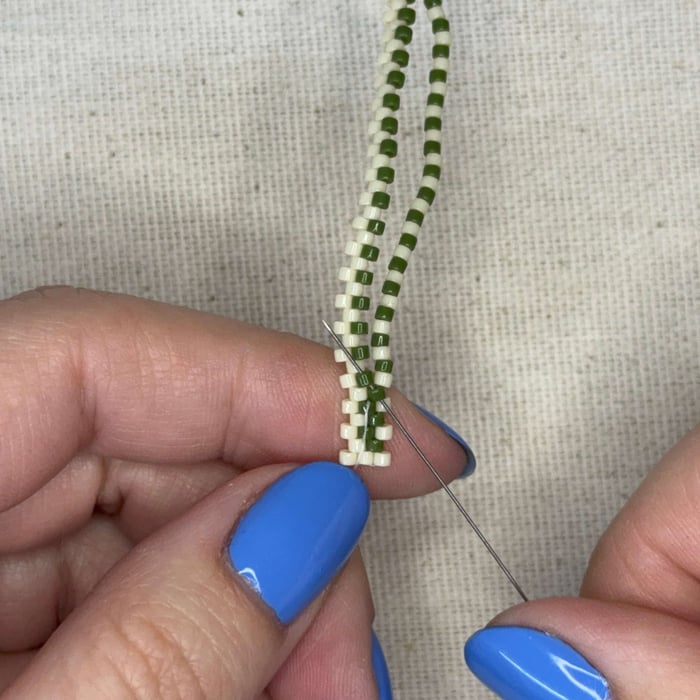
12. Keep threading your needle up
13. Keep going until you have completed the row, pull tight, and flip your project around so your stopper bead is at the bottom left corner
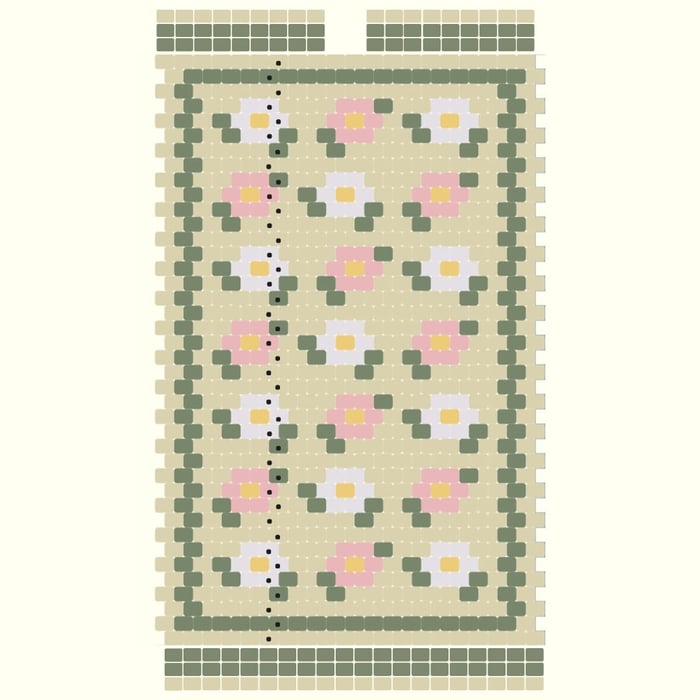
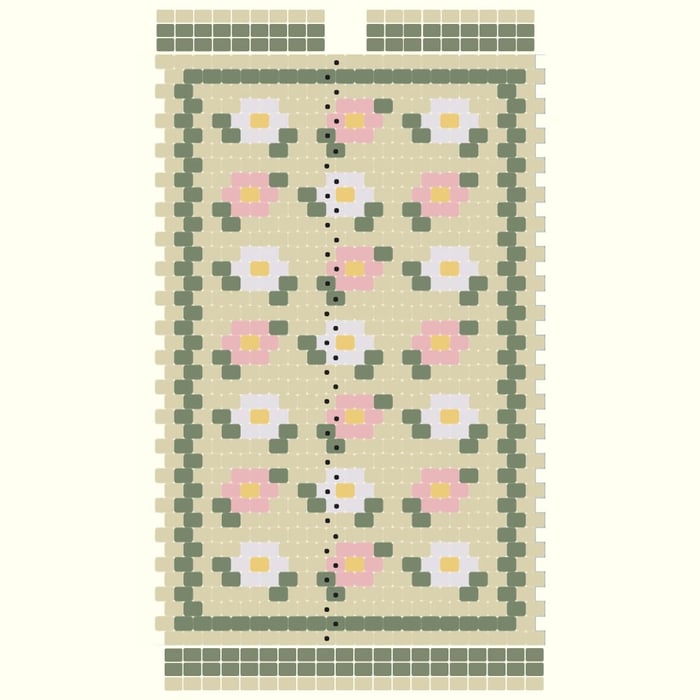
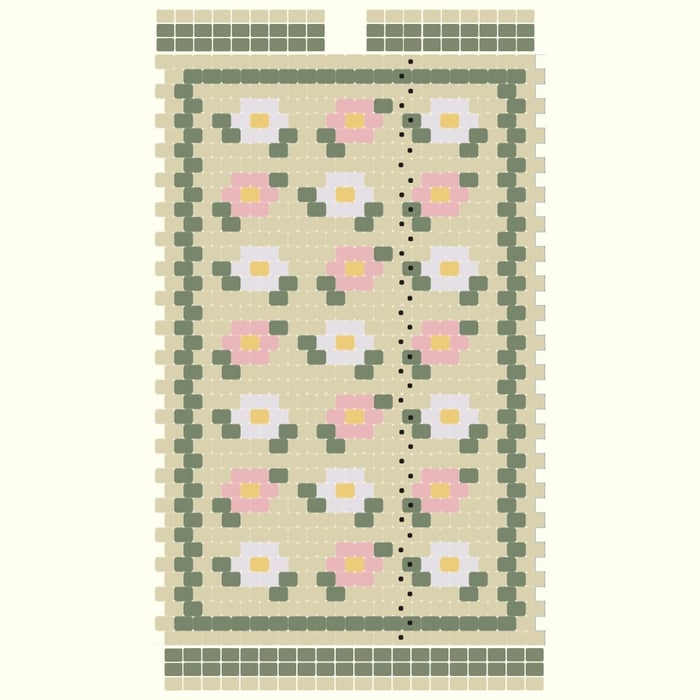
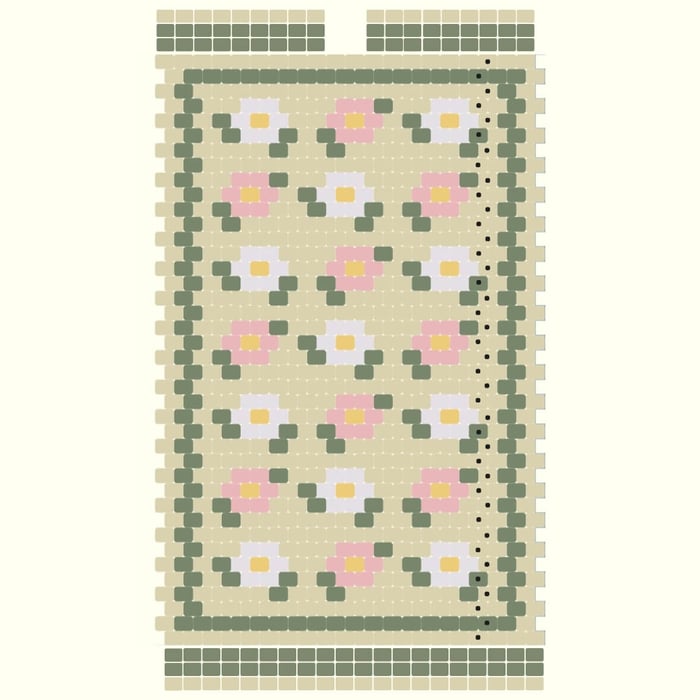
14. Now, following the pattern (also seen below), string on the next 40 beads which will create the next two rows.
15. Repeat step 8, turn your project around then thread your needle through the bottom of the 732 bead shown
16. And as before, thread your needle through the second bead in of the strung delicas then thread the needle through the third bead in on the peyote row.
17. Thread your needle up in a zig zag

18. Till you have stitched on every bead, then turn your project back around to ensure you have the placement right
***If you were to miss a bead, add an extra bead, or mix up the pattern, it is easy to unpick the row by pulling out the thread zippered through the beads
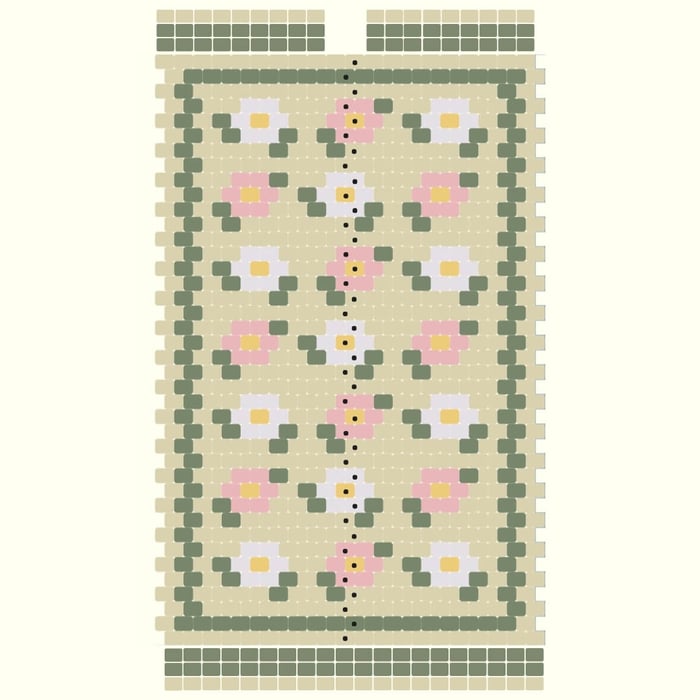
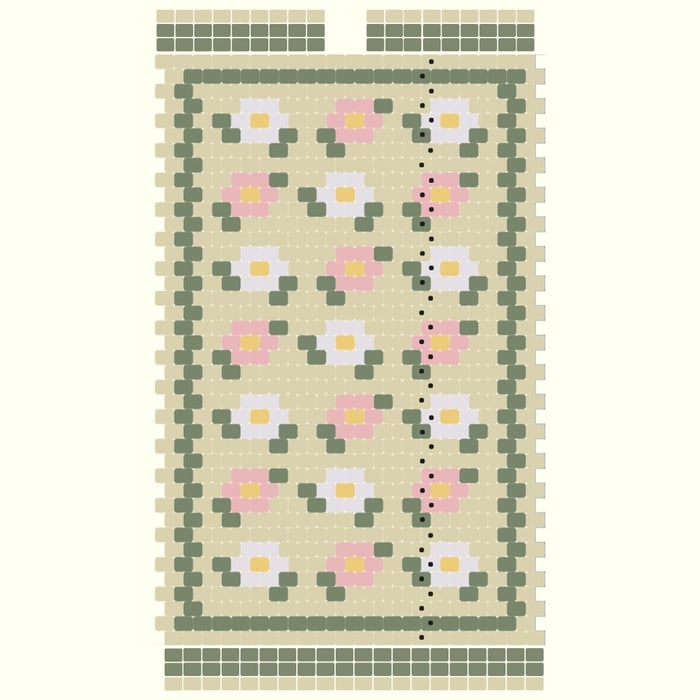
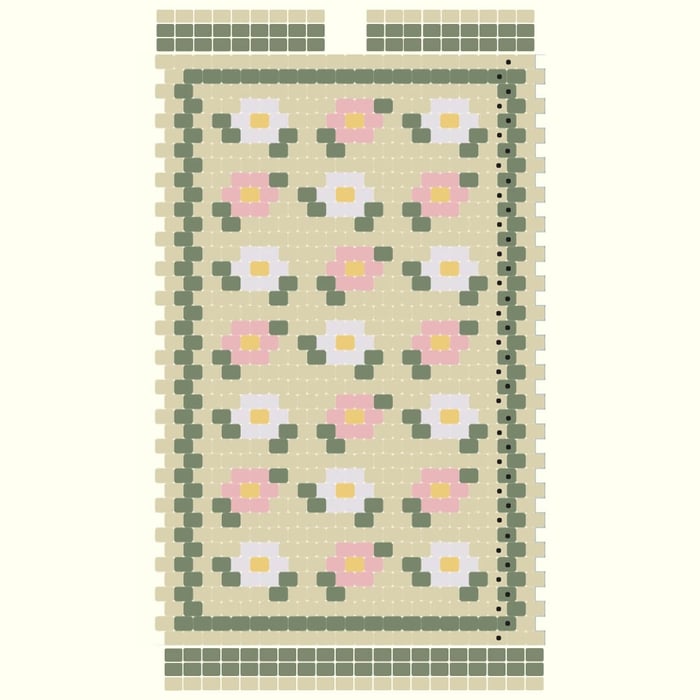
19. Now, following the pattern (seen below, follow the black dots going up), string on the next 40 beads which will create the next two rows.
20. Repeat step 8, turn your project around then thread your needle through the bottom of the 732 bead shown and then keep zig zagging up to stitch the beads together
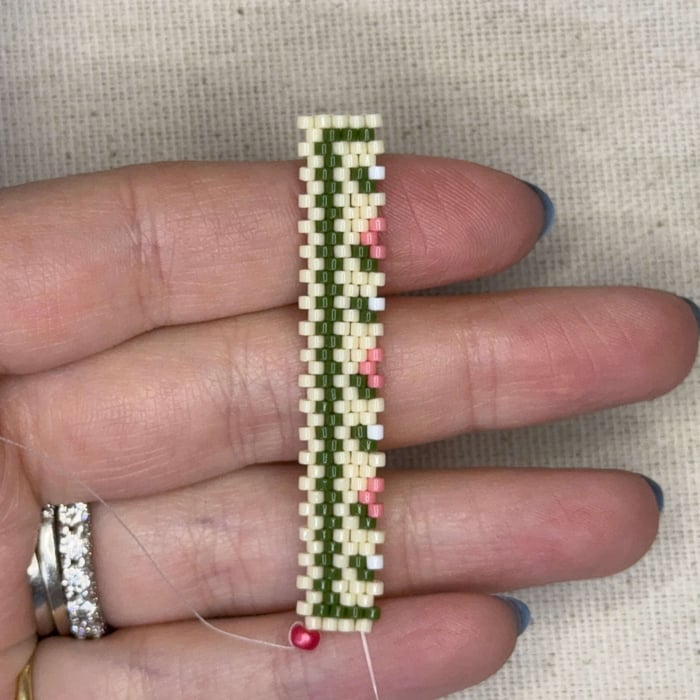
21. Flip your project back around and it will look like this so far.
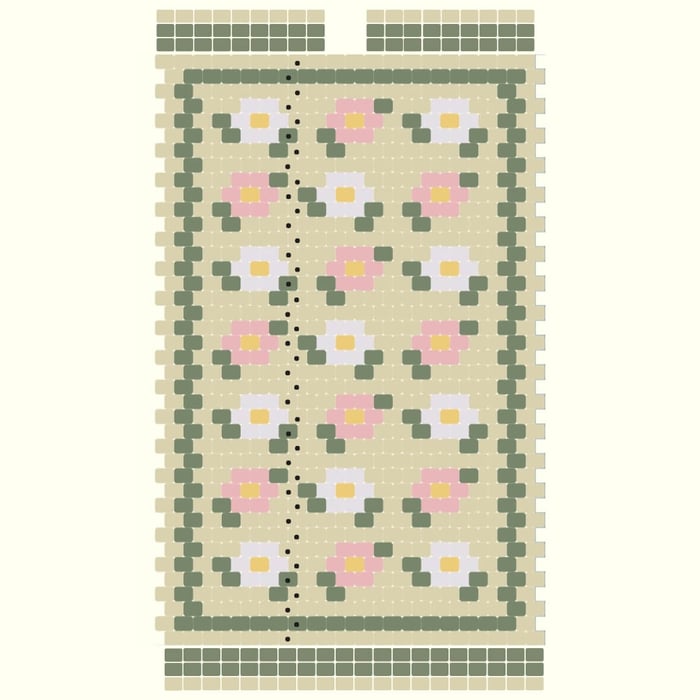
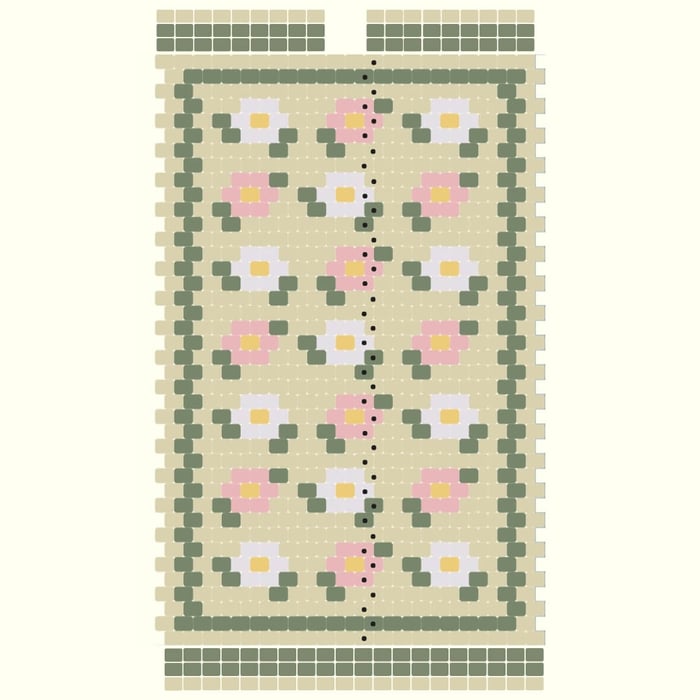
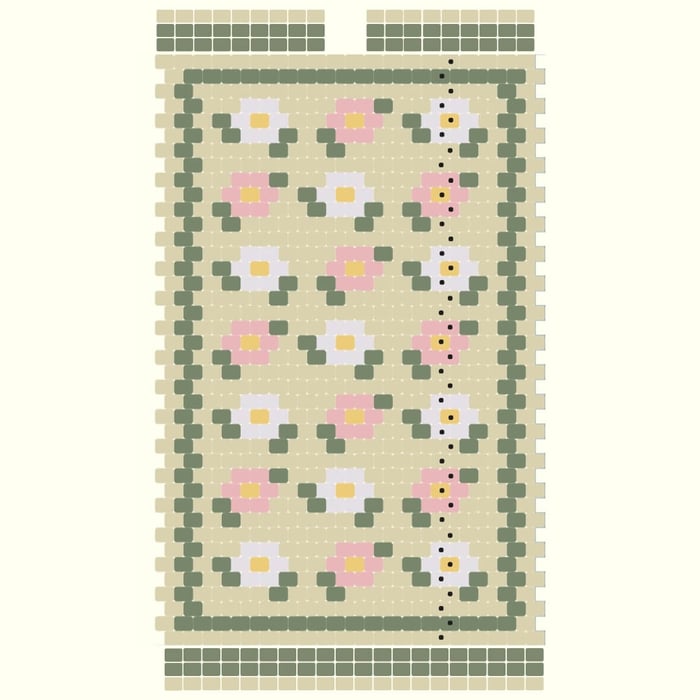
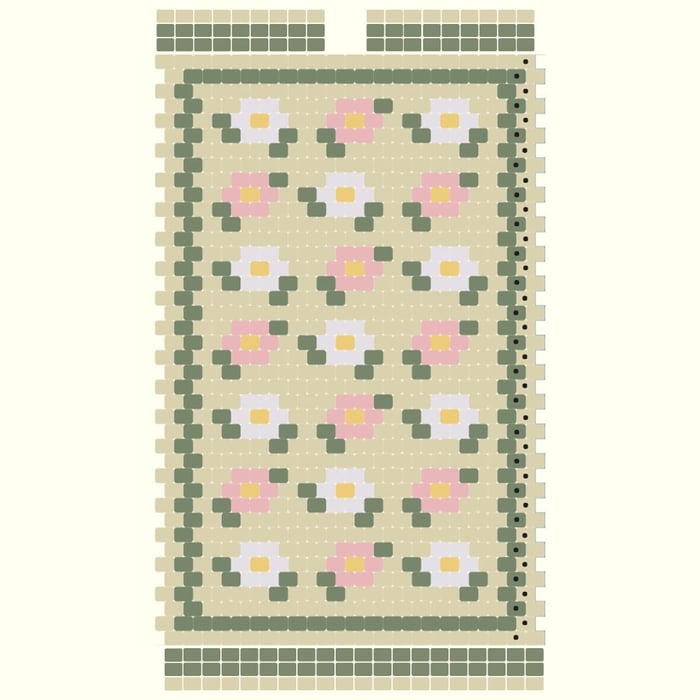
22. Follow the pattern to complete the next row. Below are each row you'll string and stitch in order. Remember you are stringing from bottom to top, then turning around your project, then stitching zig zag back to the *bottom* of the project, then flipping back around again.
23.
24.
25.
26.
27.
28.
29.
30.
31.
32.
33.
34.
35.
36.
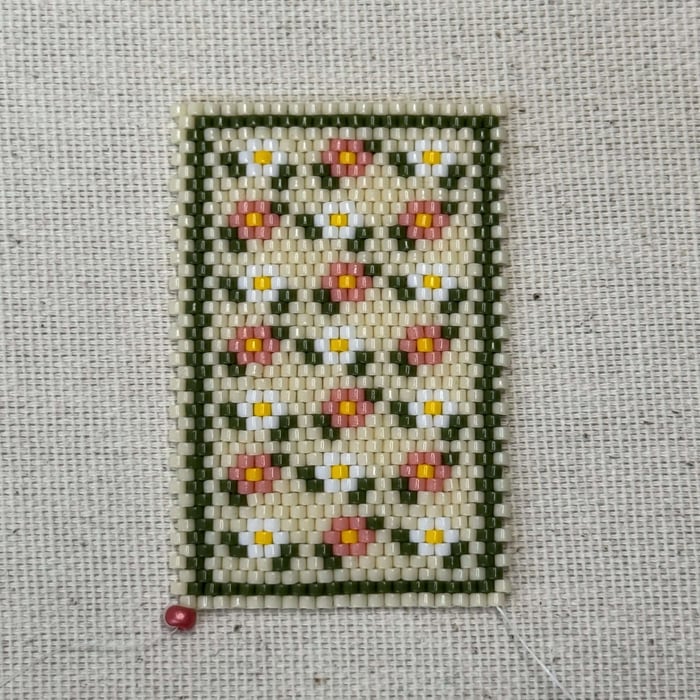
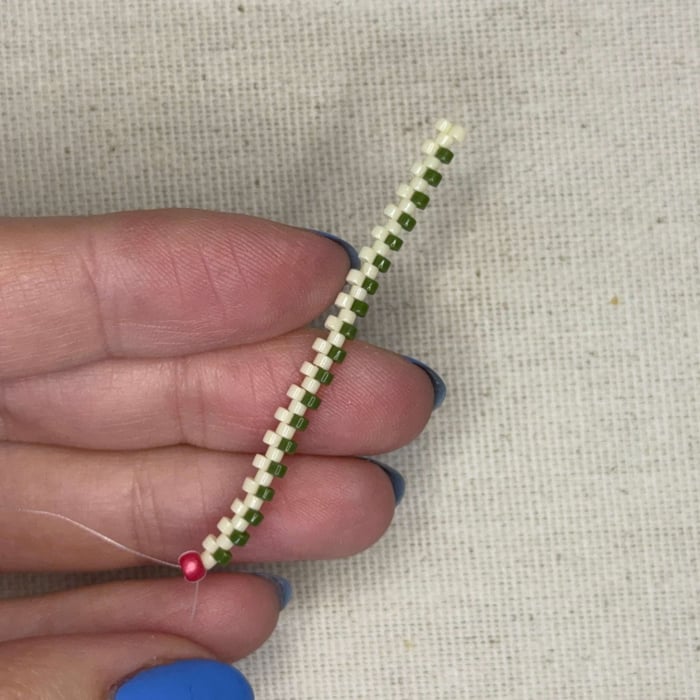
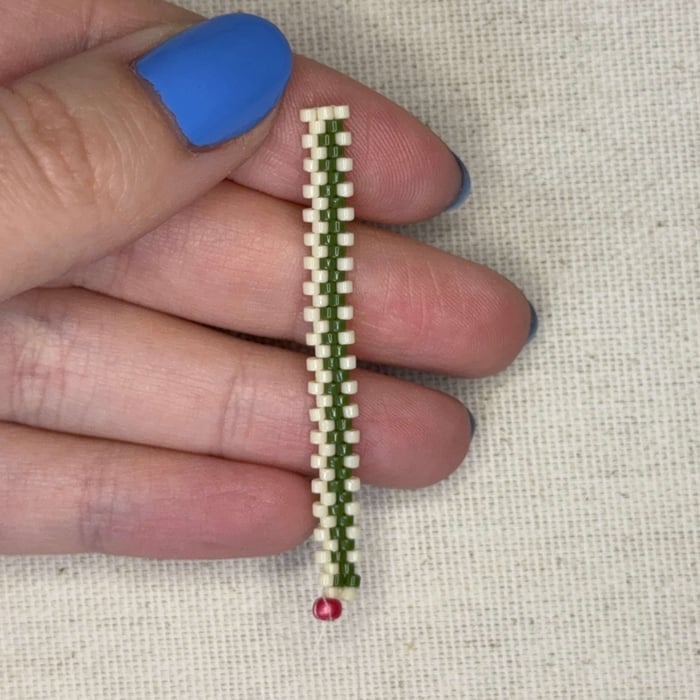
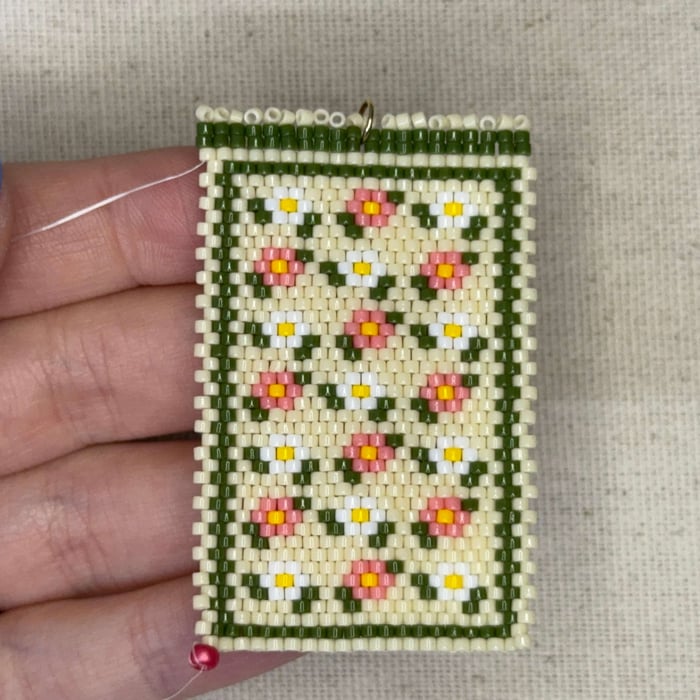
37. Here is what your project should look like so far.
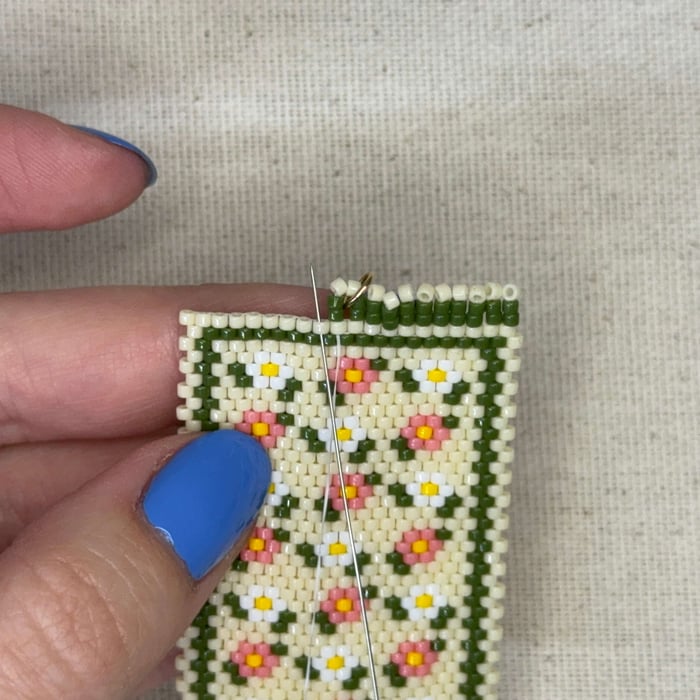
38. Now we will stitch on our last row of peyote. This row of just 20 - 732 delicas will be traditionally stitched one by one going up
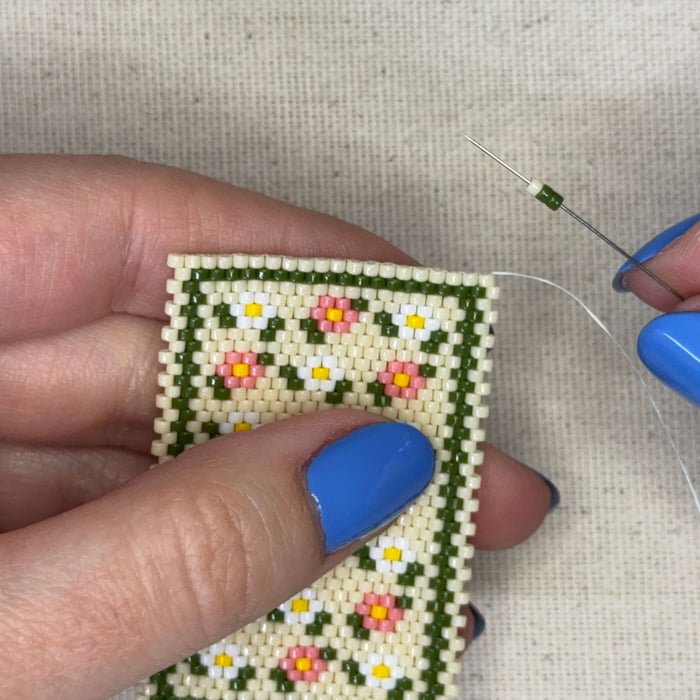
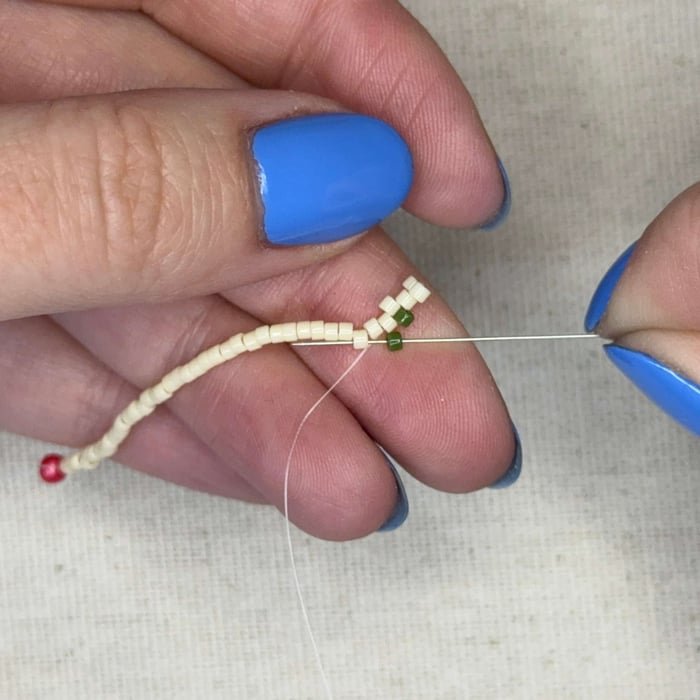
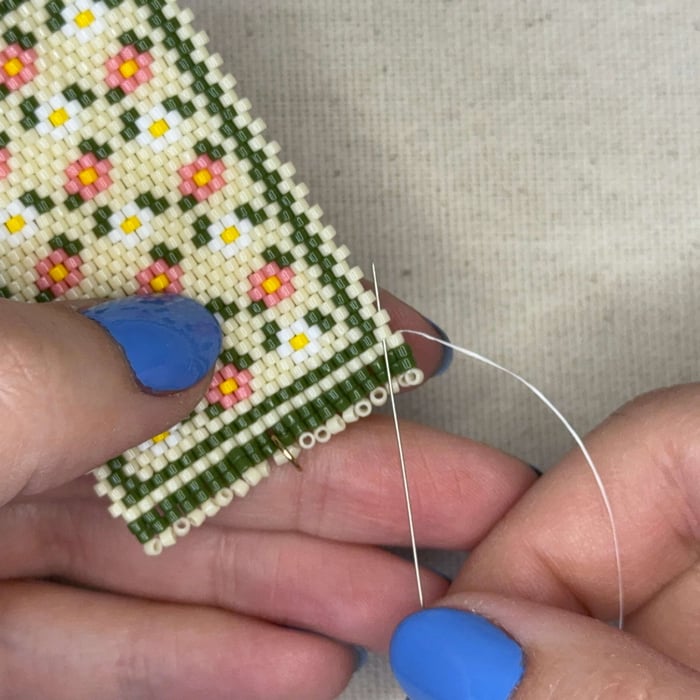
39. Now to create the rug's fringe! String on 2 - 1135 and 1 - 732 Delica beads onto your needle.
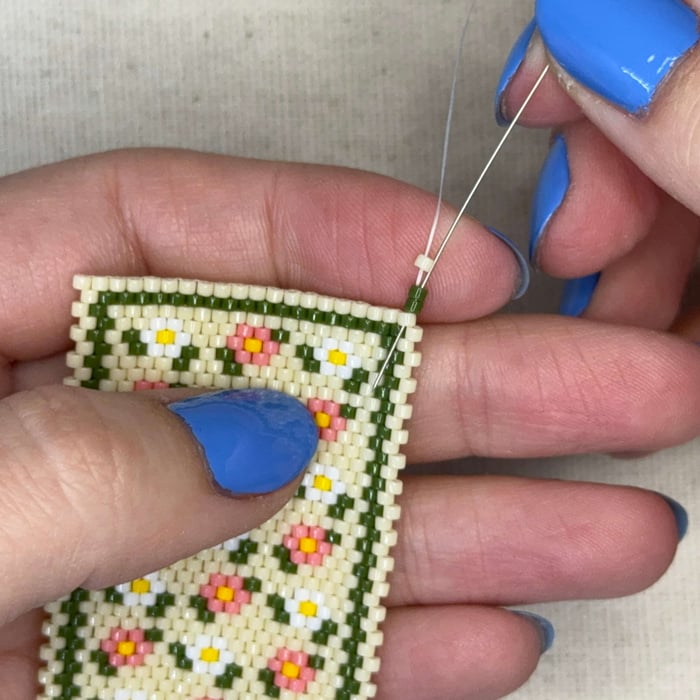
40. Take your needle and thread it back through the two green delicas, skipping the cream delica, then through the cream delica shown in your peyote rug
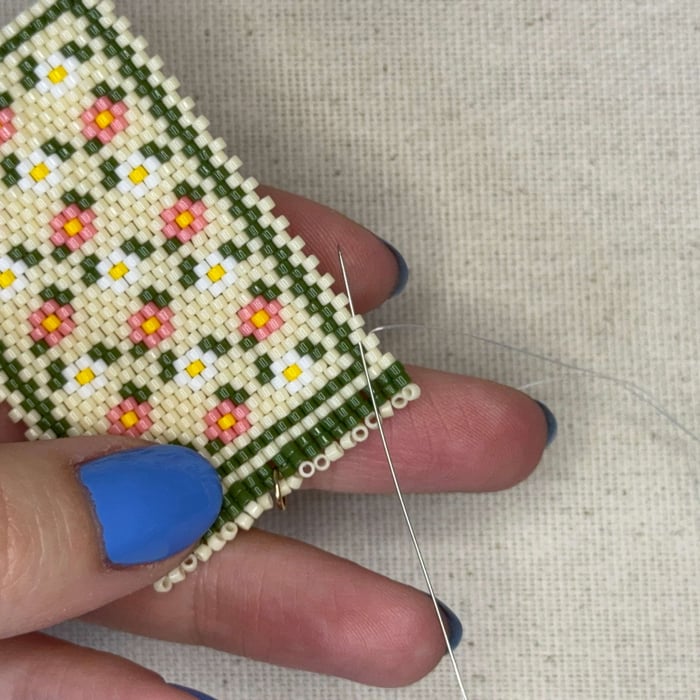
41. Pull tight and thread your needle up through the next delica bead
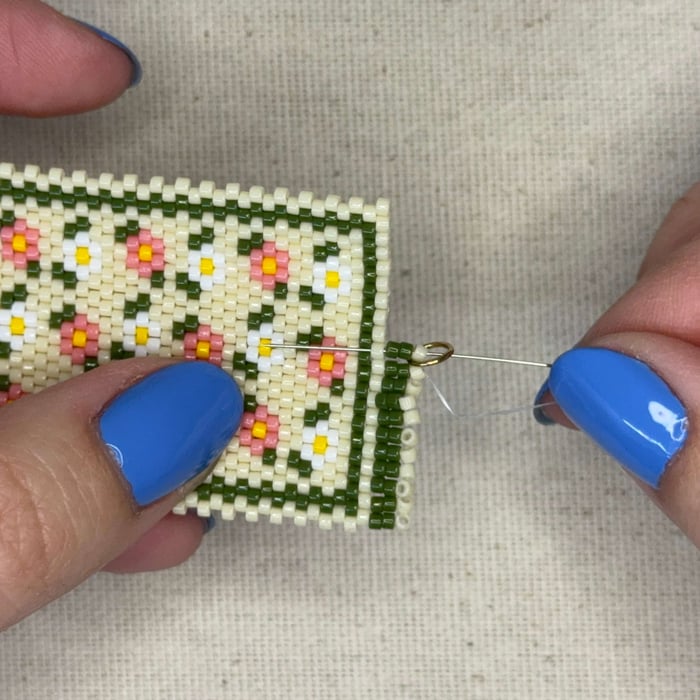
42. Keep repeating steps 39 - 41 until you have created 9 fringes. On the 10th, you will string on 2 green, 1 cream, jump ring, 1 cream, and then 2 green. Then thread your needle through where the 11th fringe would go.
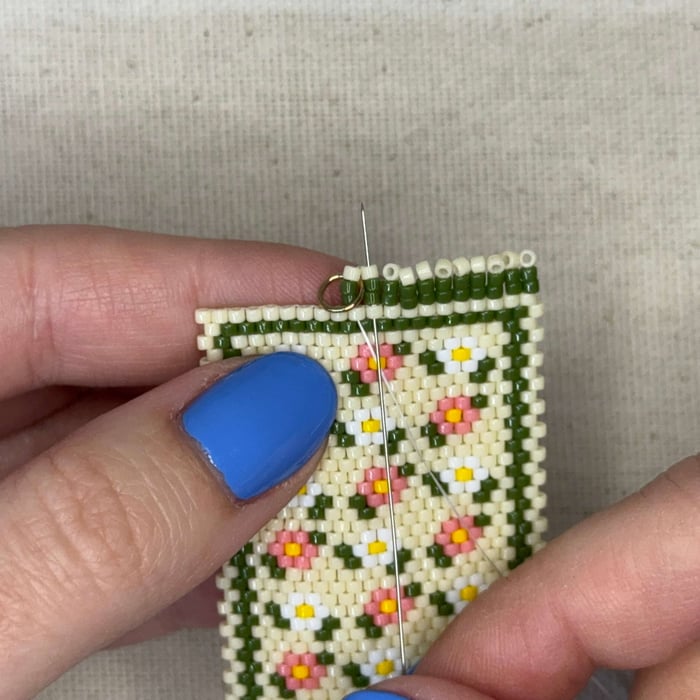
43. Pull tight and thread the needle back up through the 10th fringe
44. Then back again through the 11th fringe
45. Then thread your needle up through the next delica bead to create the 12th fringe
46. Keep going until you have completed all 20 fringes of the top of your peyote project
47. Turn your project around and thread your needle up through the line of cream delica beads going diagonally. You can easily go through 2 beads at a time.
48. Keep going up till you reach the other side of your project
49. Once you get to the other end, remove your stopper bead from the tail and tie two surgeons knots, trim the shorter tail, and add a dab of gs-hypo glue. Now you can continue creating the rest of the tassels for the bottom portion of your project. Once you have reached the end, slip your needle between the delica beads at the edge of the peyote and create two surgeons knots, glue, and trim the ends.
50. Attach your earring wire then repeat all the steps above for your second earring.
Related Articles

"Crochet" Granny Square Delica Bracelet - Sunflower
The "Crochet" Granny Square Delica Bracelet – Sunflower blends vintage crochet style...

Pearly White Heart Earrings – Four Drop
Pearly White Heart Earrings – Four Drop These earrings are made from beautiful white shell in flat...

Valentine Fringe Earrings
Valentine Fringe Earrings Learn how to make fringe earrings with a heart pattern that pops! The design...