Tutorials
Valentine Fringe Earrings
Valentine Fringe Earrings
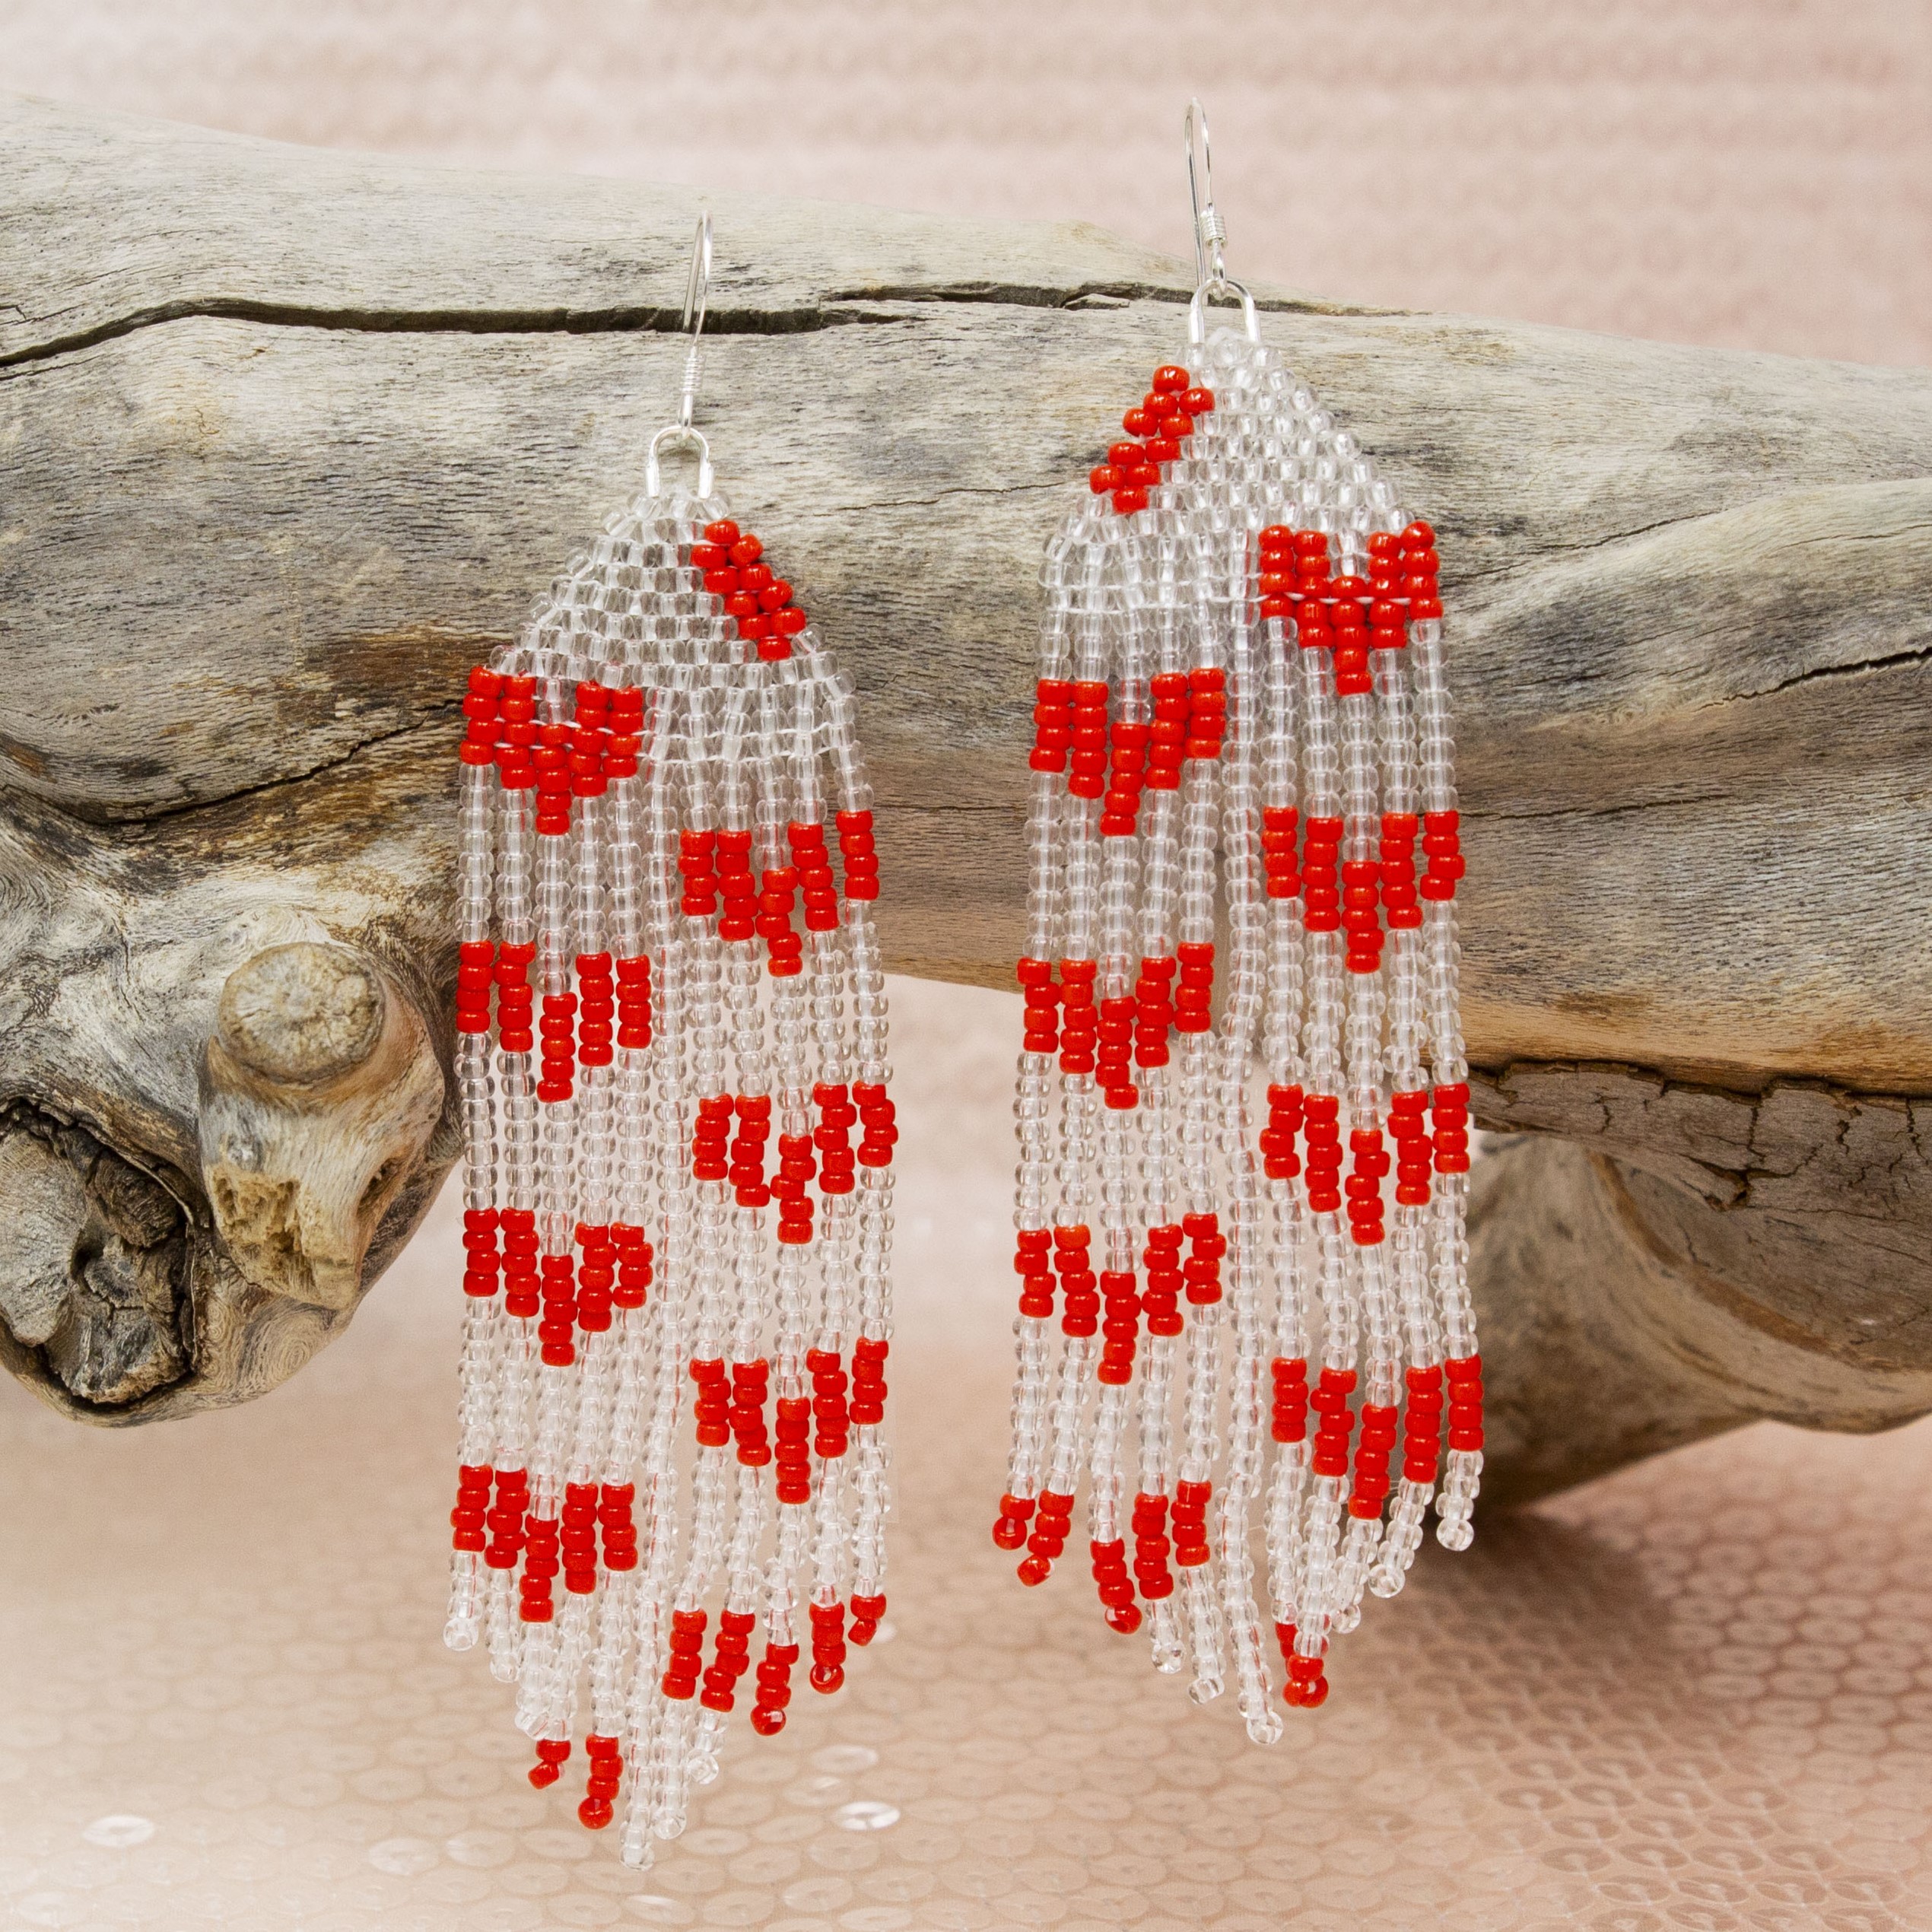
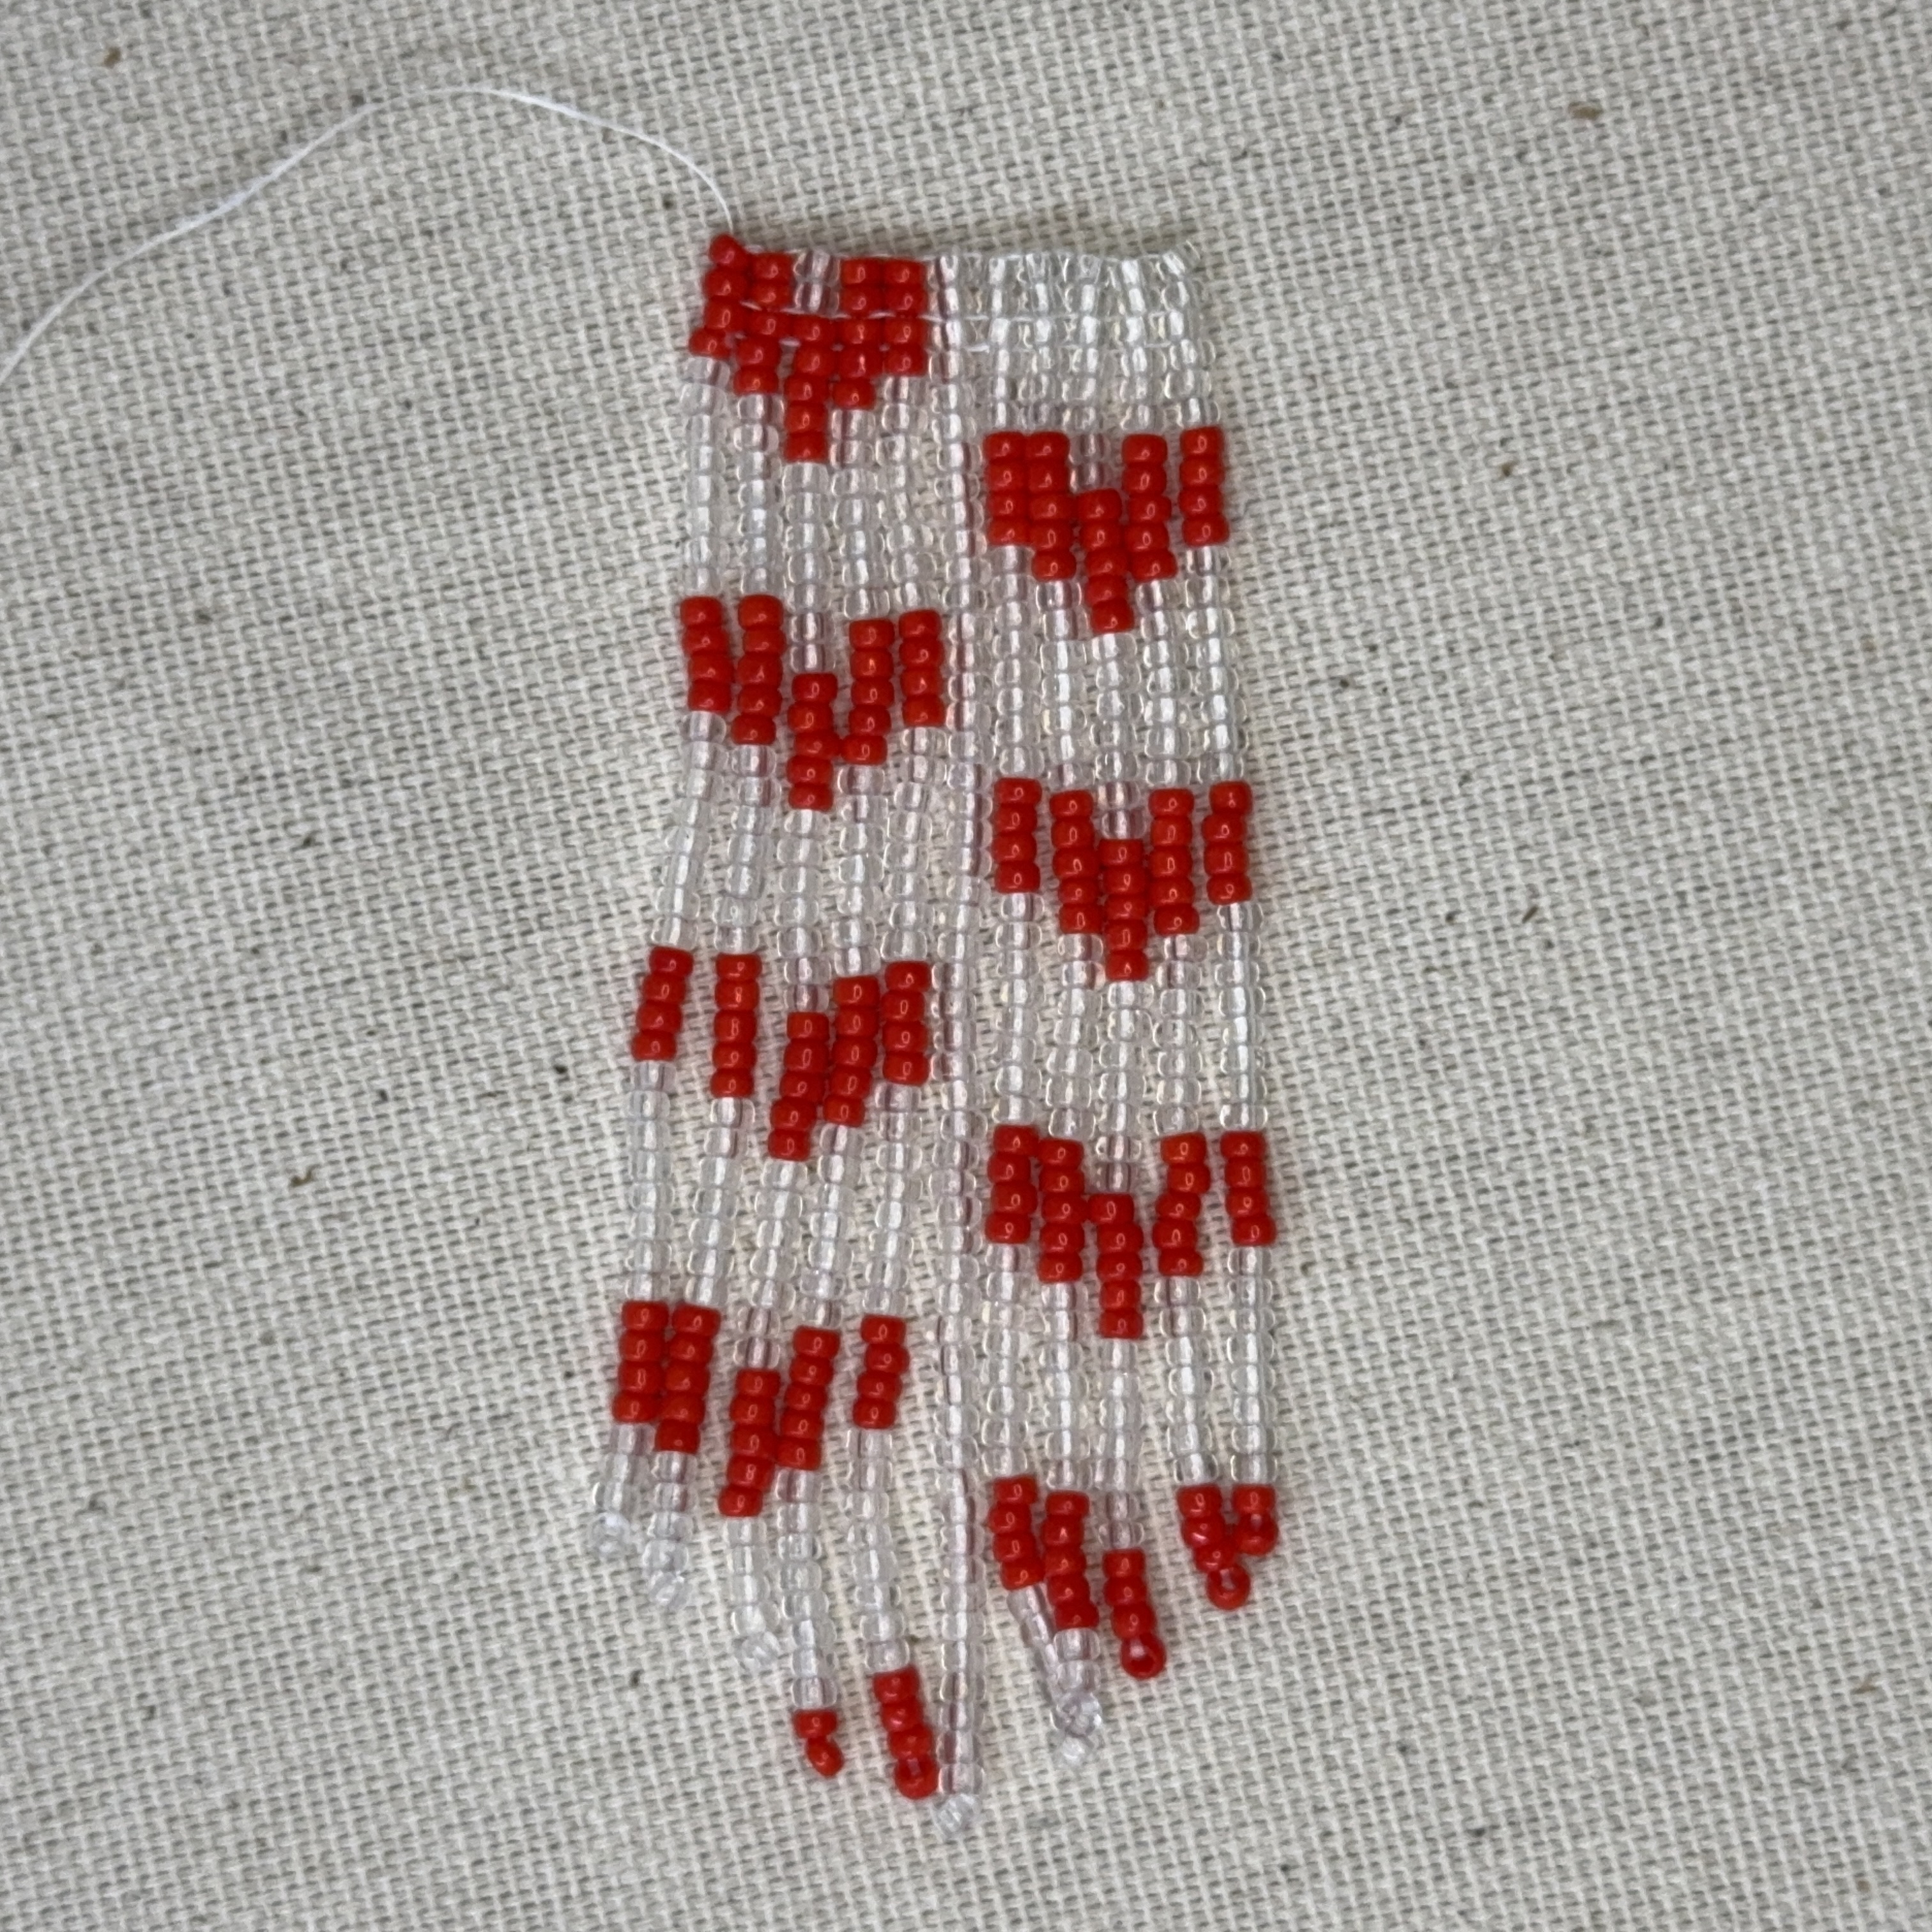
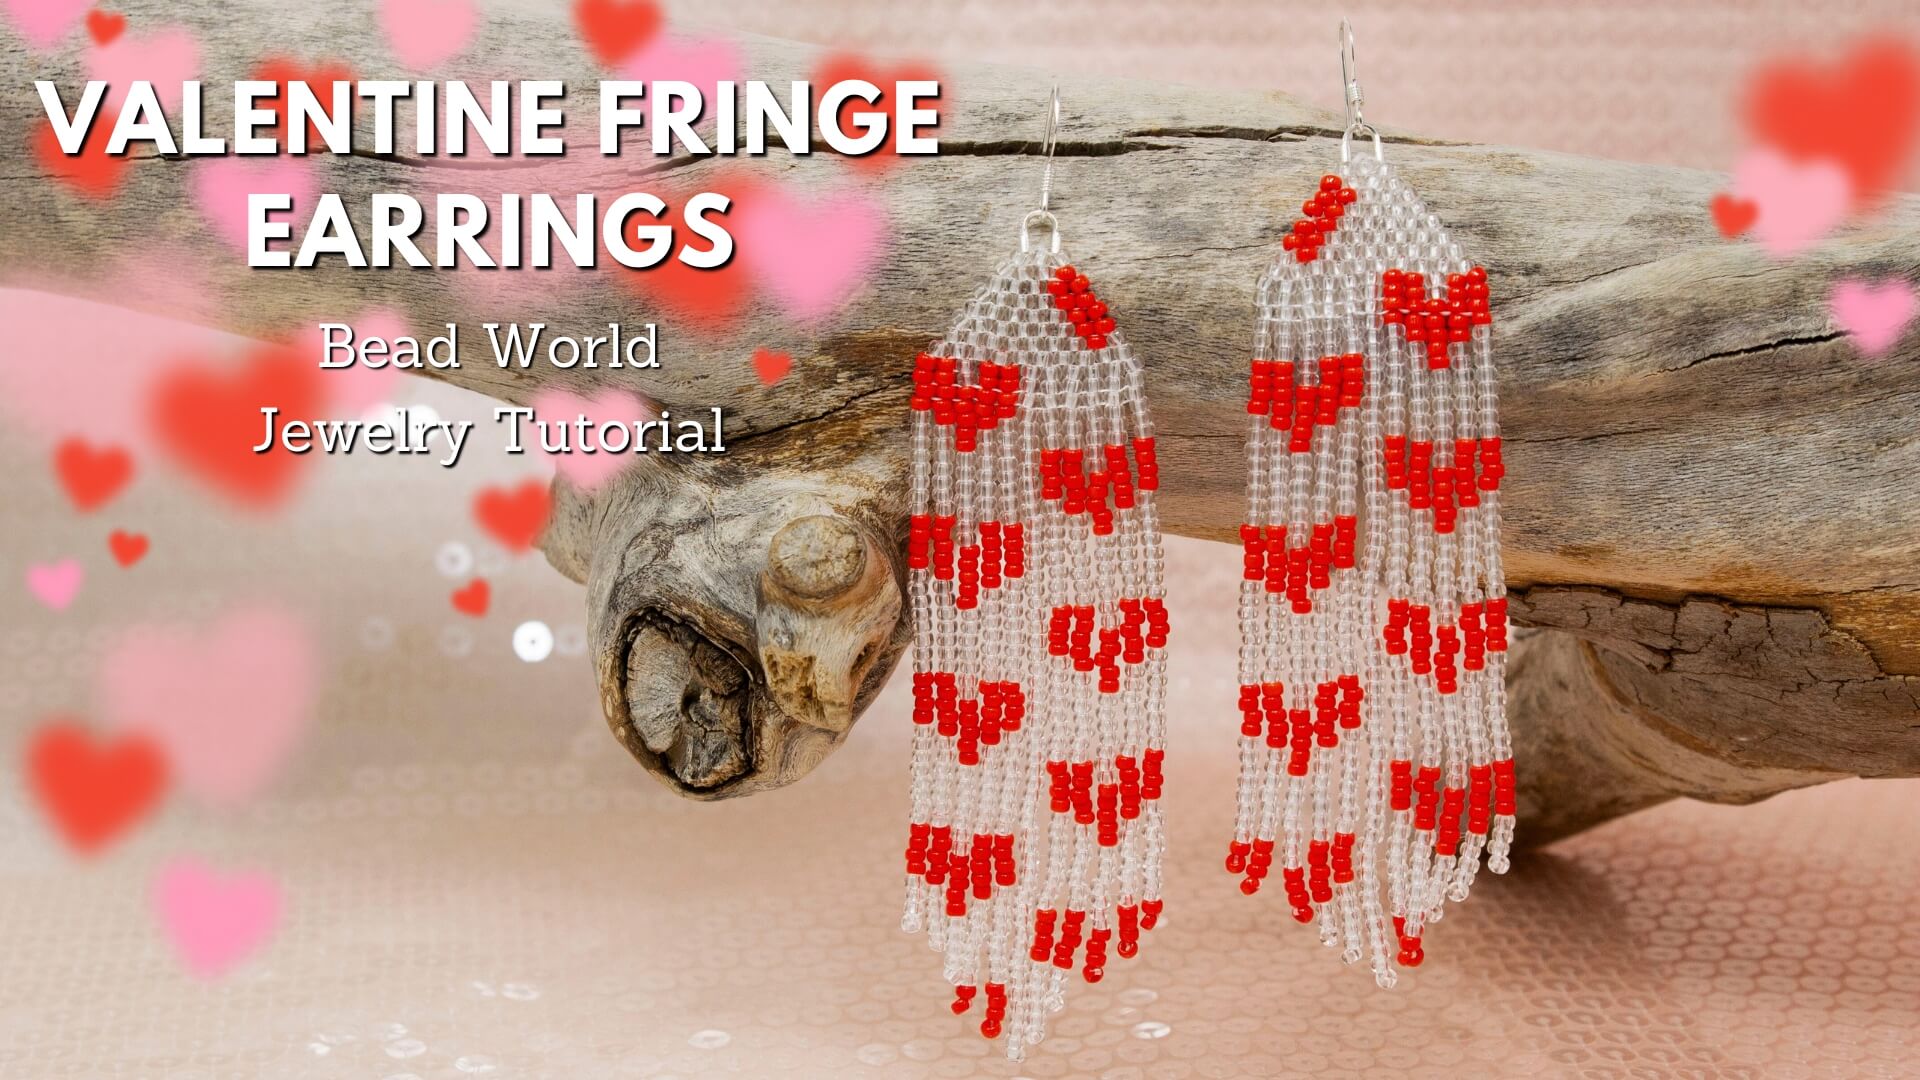
Learn how to make fringe earrings with a heart pattern that pops! The design showcases cascading strands of beads with bold red hearts worked into the pattern. The clear beads form the base, while the red beads create the heart shapes that repeat across the fringe. The fringe strands vary in length, creating a layered and dynamic look that sways beautifully with movement. Perfect for Valentines day or just a statement earring!
*Please use caution while creating these earrings, it is very easy to poke yourself with the needle*
Materials Needed:
- Size 11 Miyuki Seed Beads -- 131 Crystal (1 tube)
- Size 11 Miyuki Seed Beads -- 407 Opaque Red (1 tube)
- Sterling Silver Cable Thimbles .021" Hole (2)
- Sterling Silver Flat Ear Wires with Coil - or earring wires of your choice (1 pair)
- One G Thread - White (14ft - 7 ft per earring but you will use less)
- John James Needle Size 12 (1)
Tools Required:
Needle Nose Pliers (also known as chain nose)
Thread Snips or Scissors
Instructions on Construction:
Part 1:
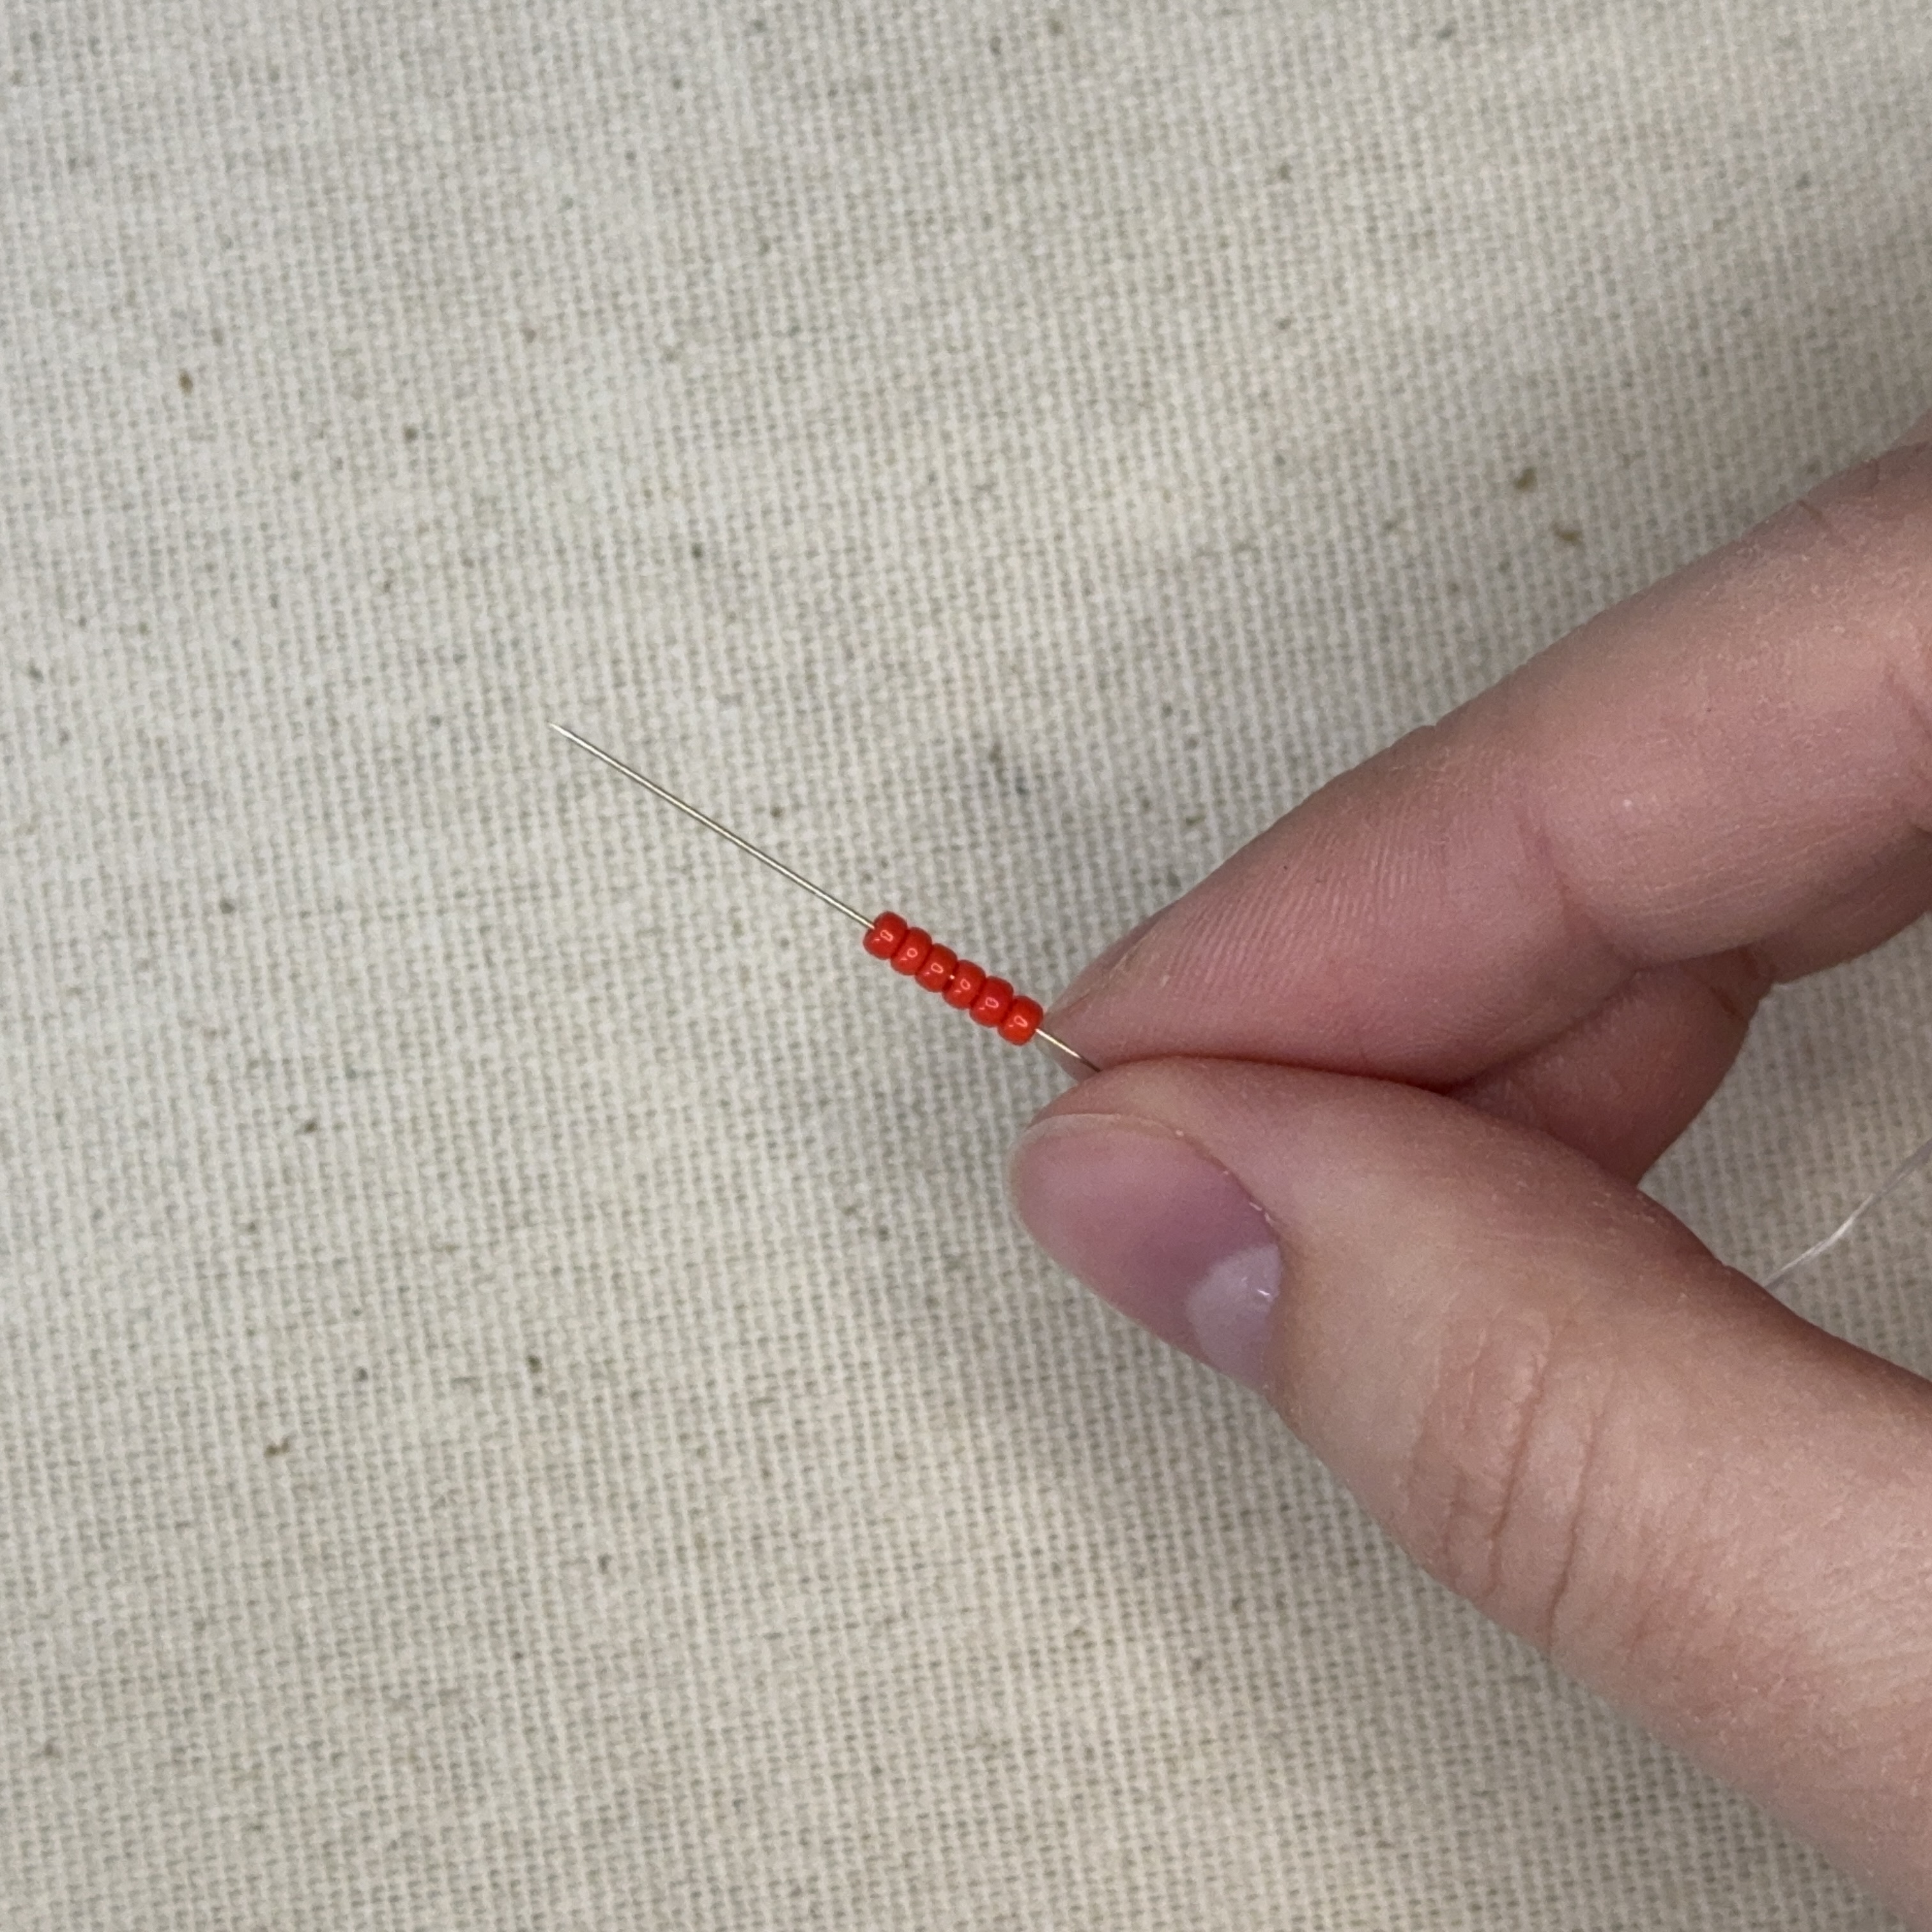
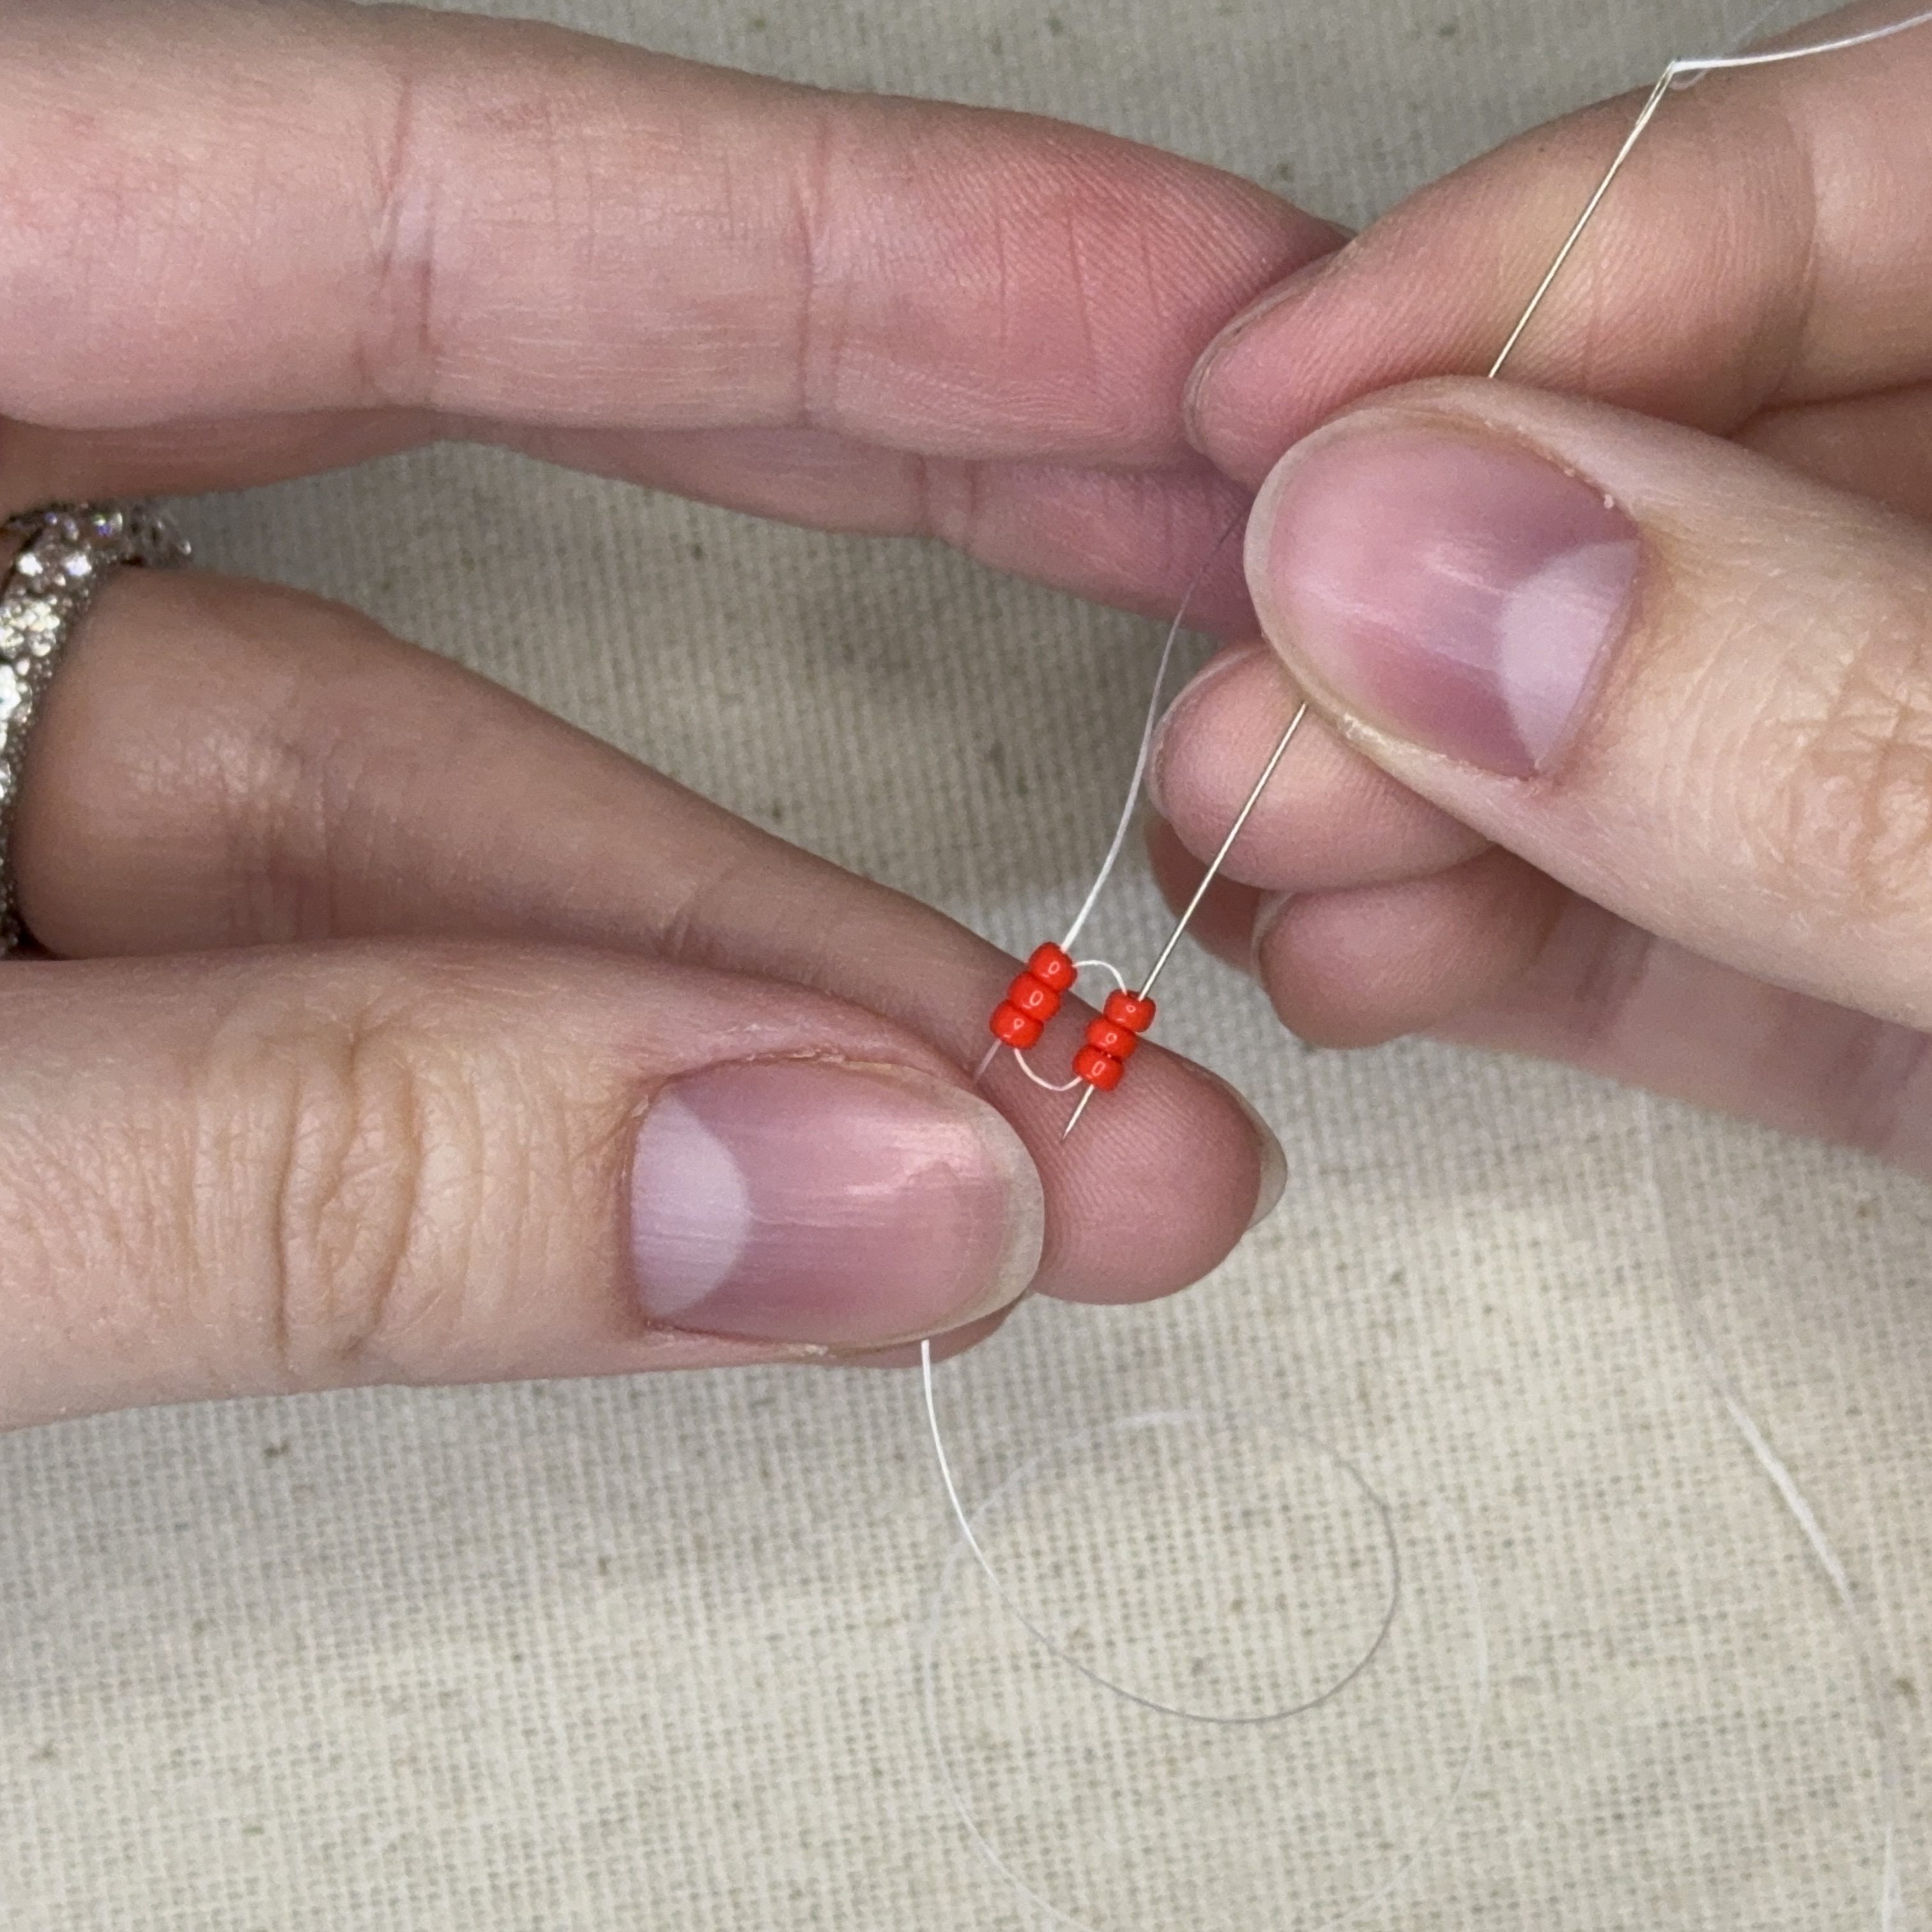
1. Thread on a needle onto your 7 ft of one g thread and then string on 6 red seed beads - pull the beads to the end of the one g thread and leave a tail of about 3 inches (we will use this for knotting and finishing later)
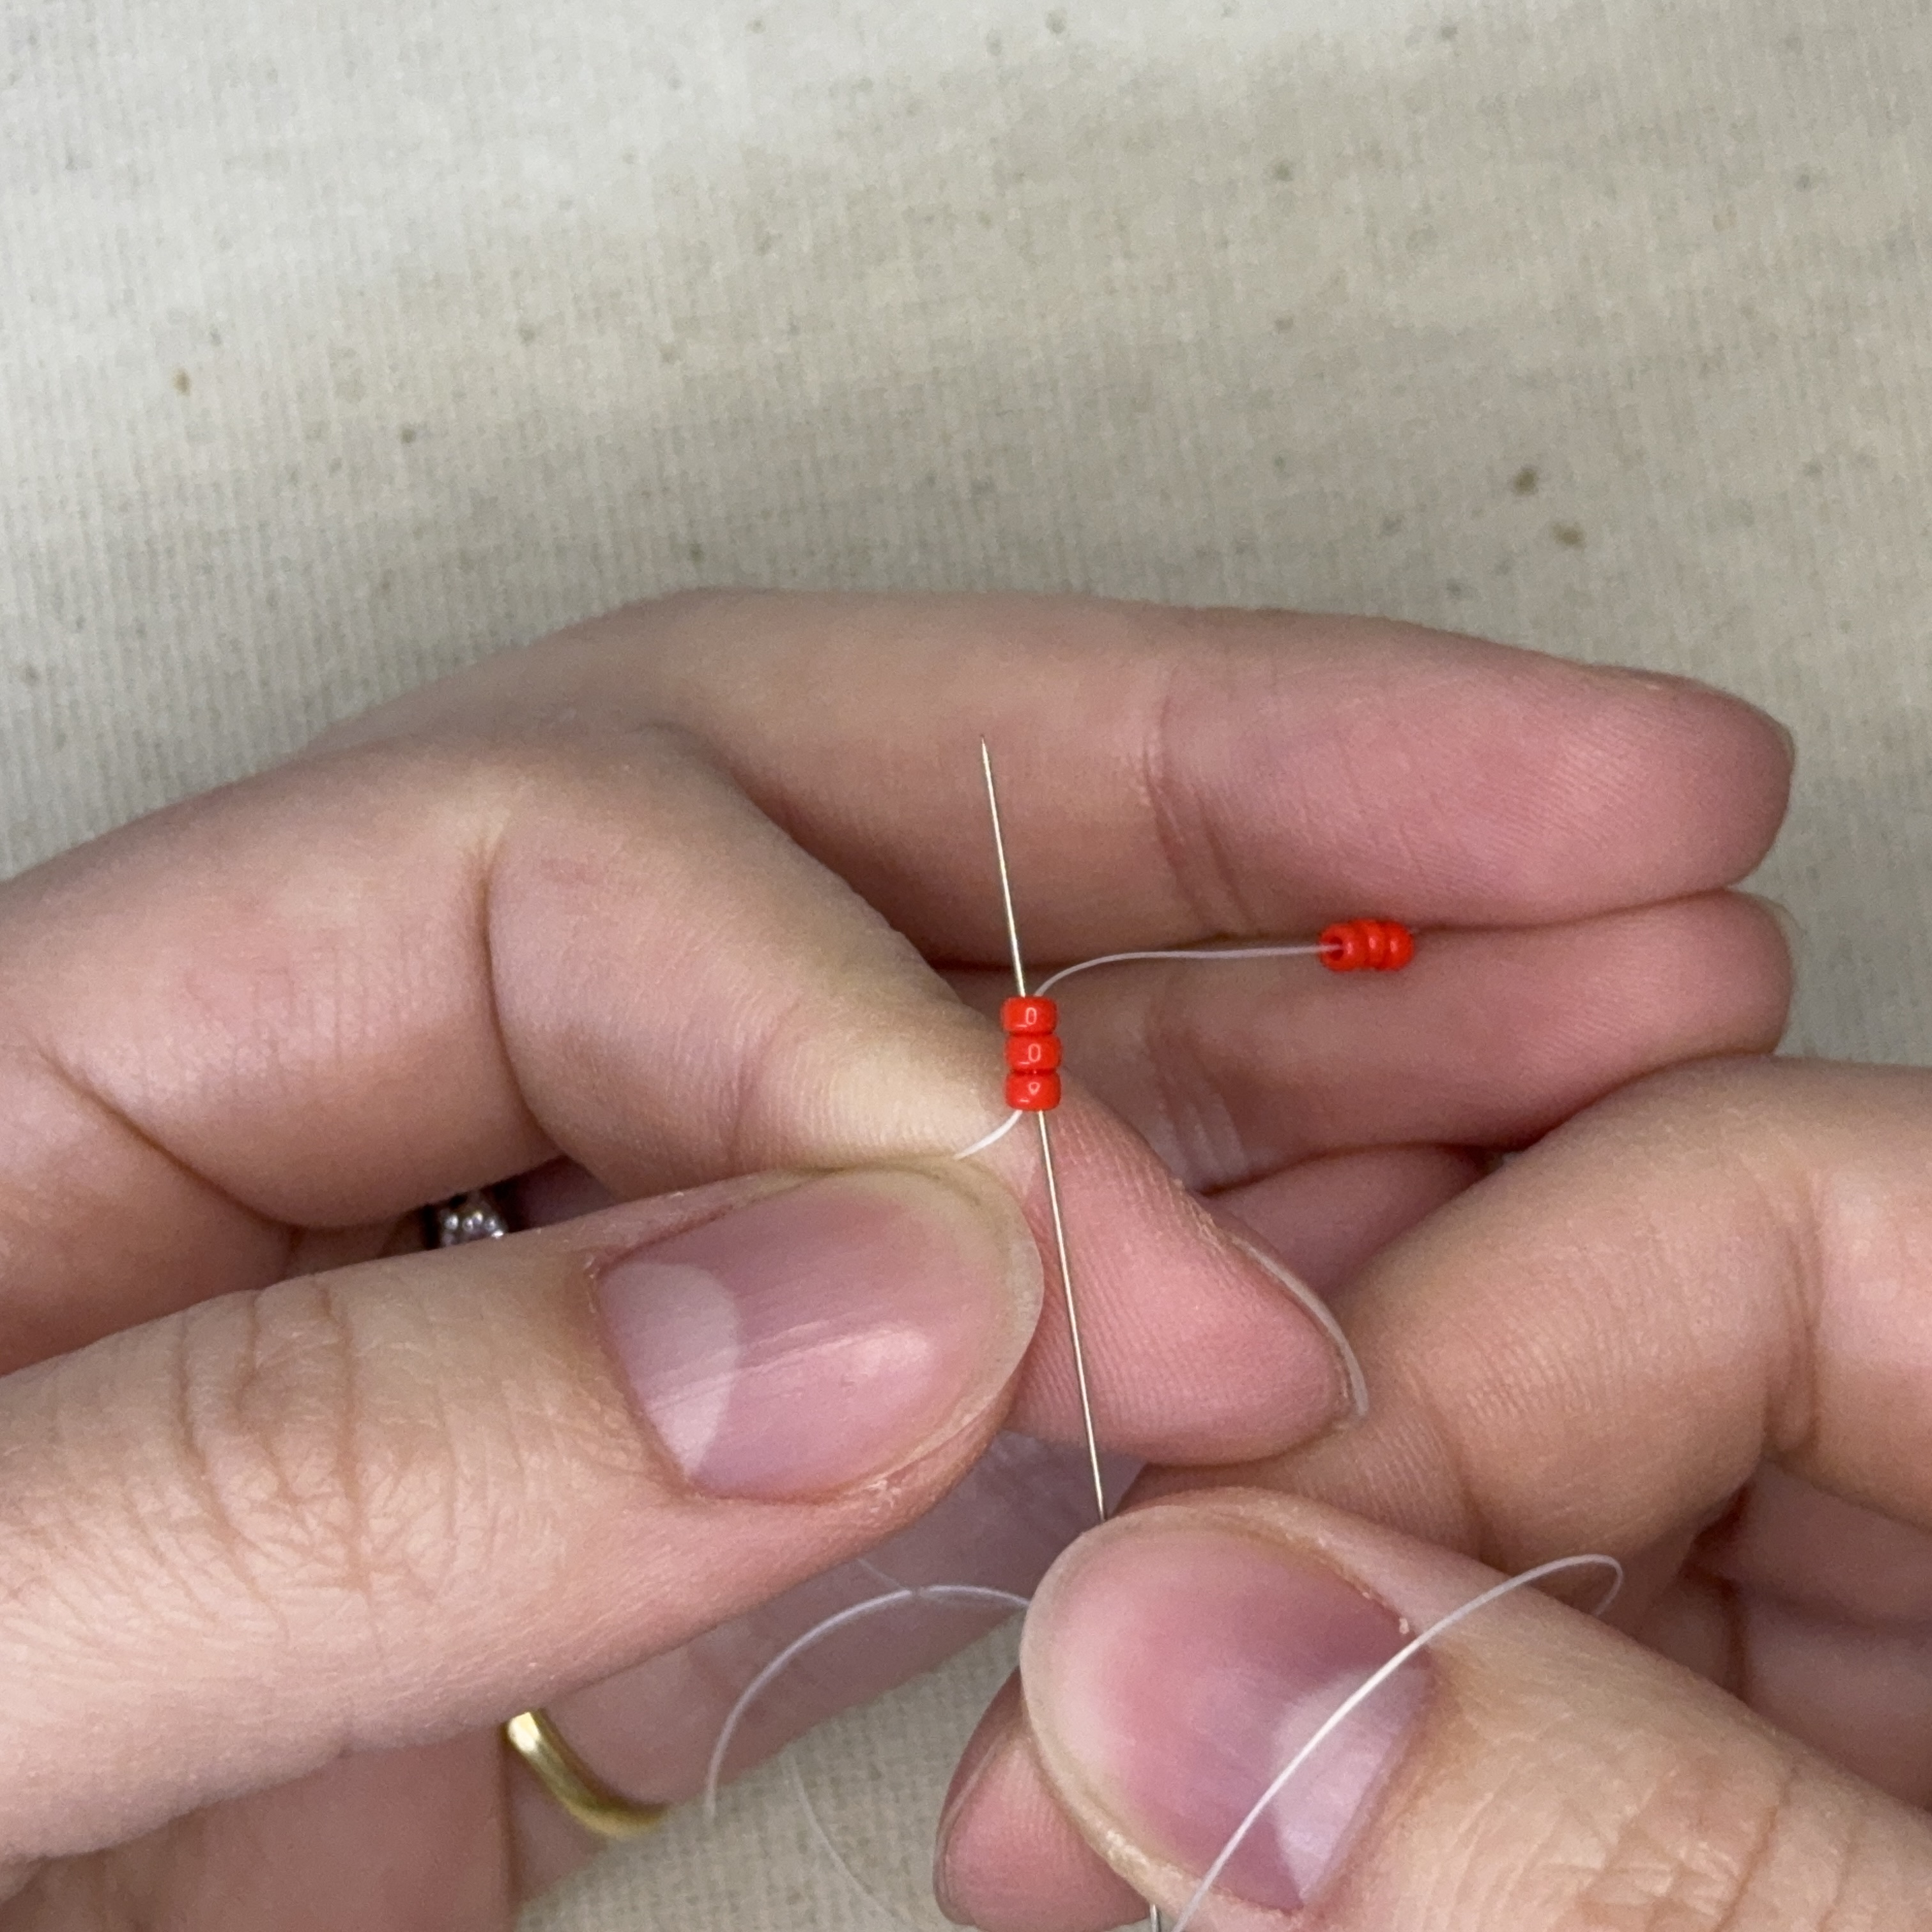
2. Thread the needle through the first 3 seed beads
3. And then through the next 3 seed beads
4. Then up through the 3 seed beads to the left
5. Then back down the 3 beads on the right
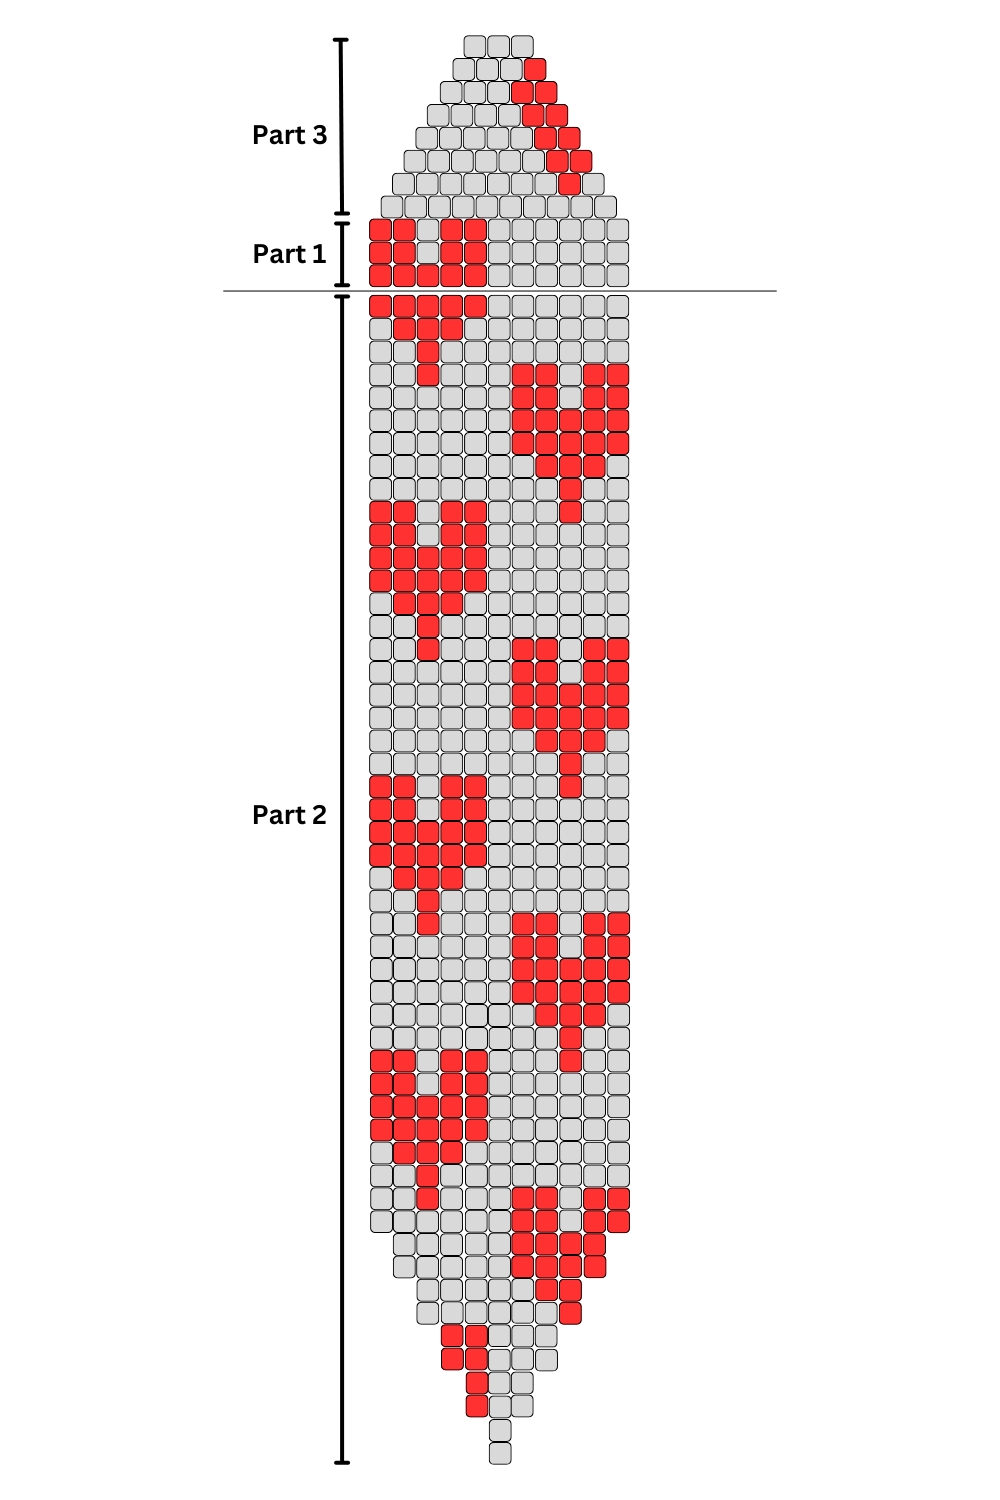
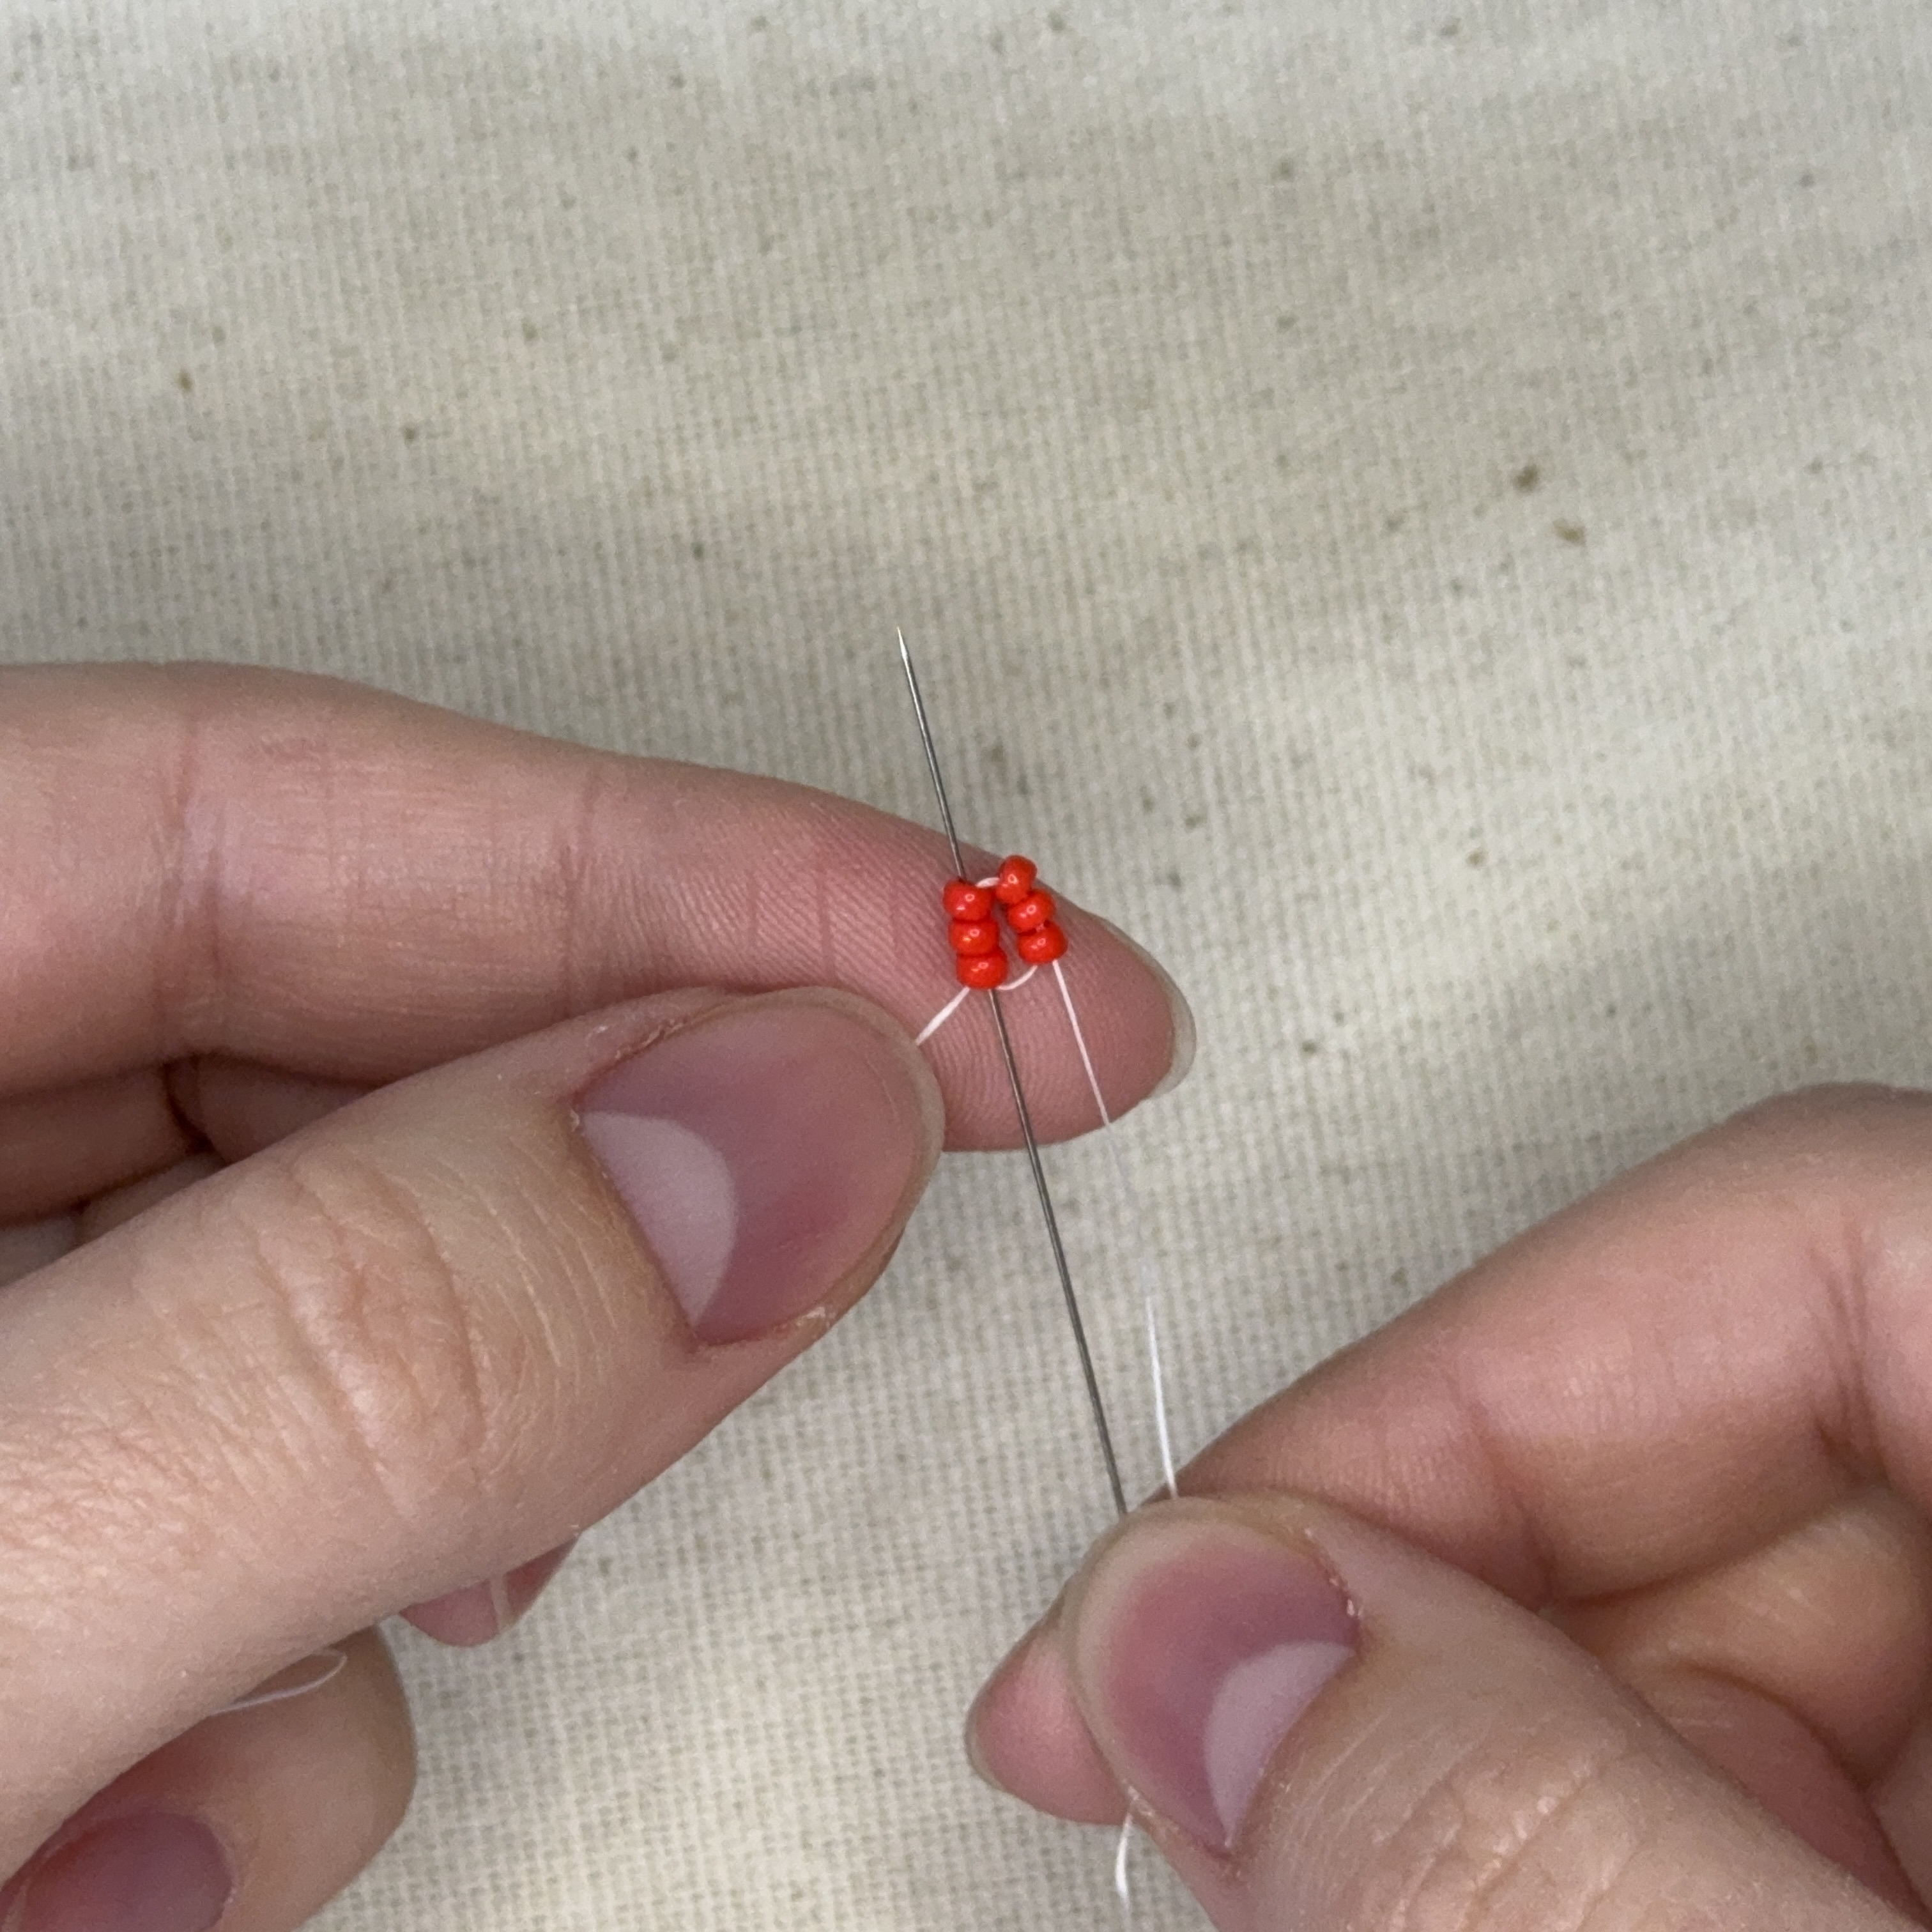
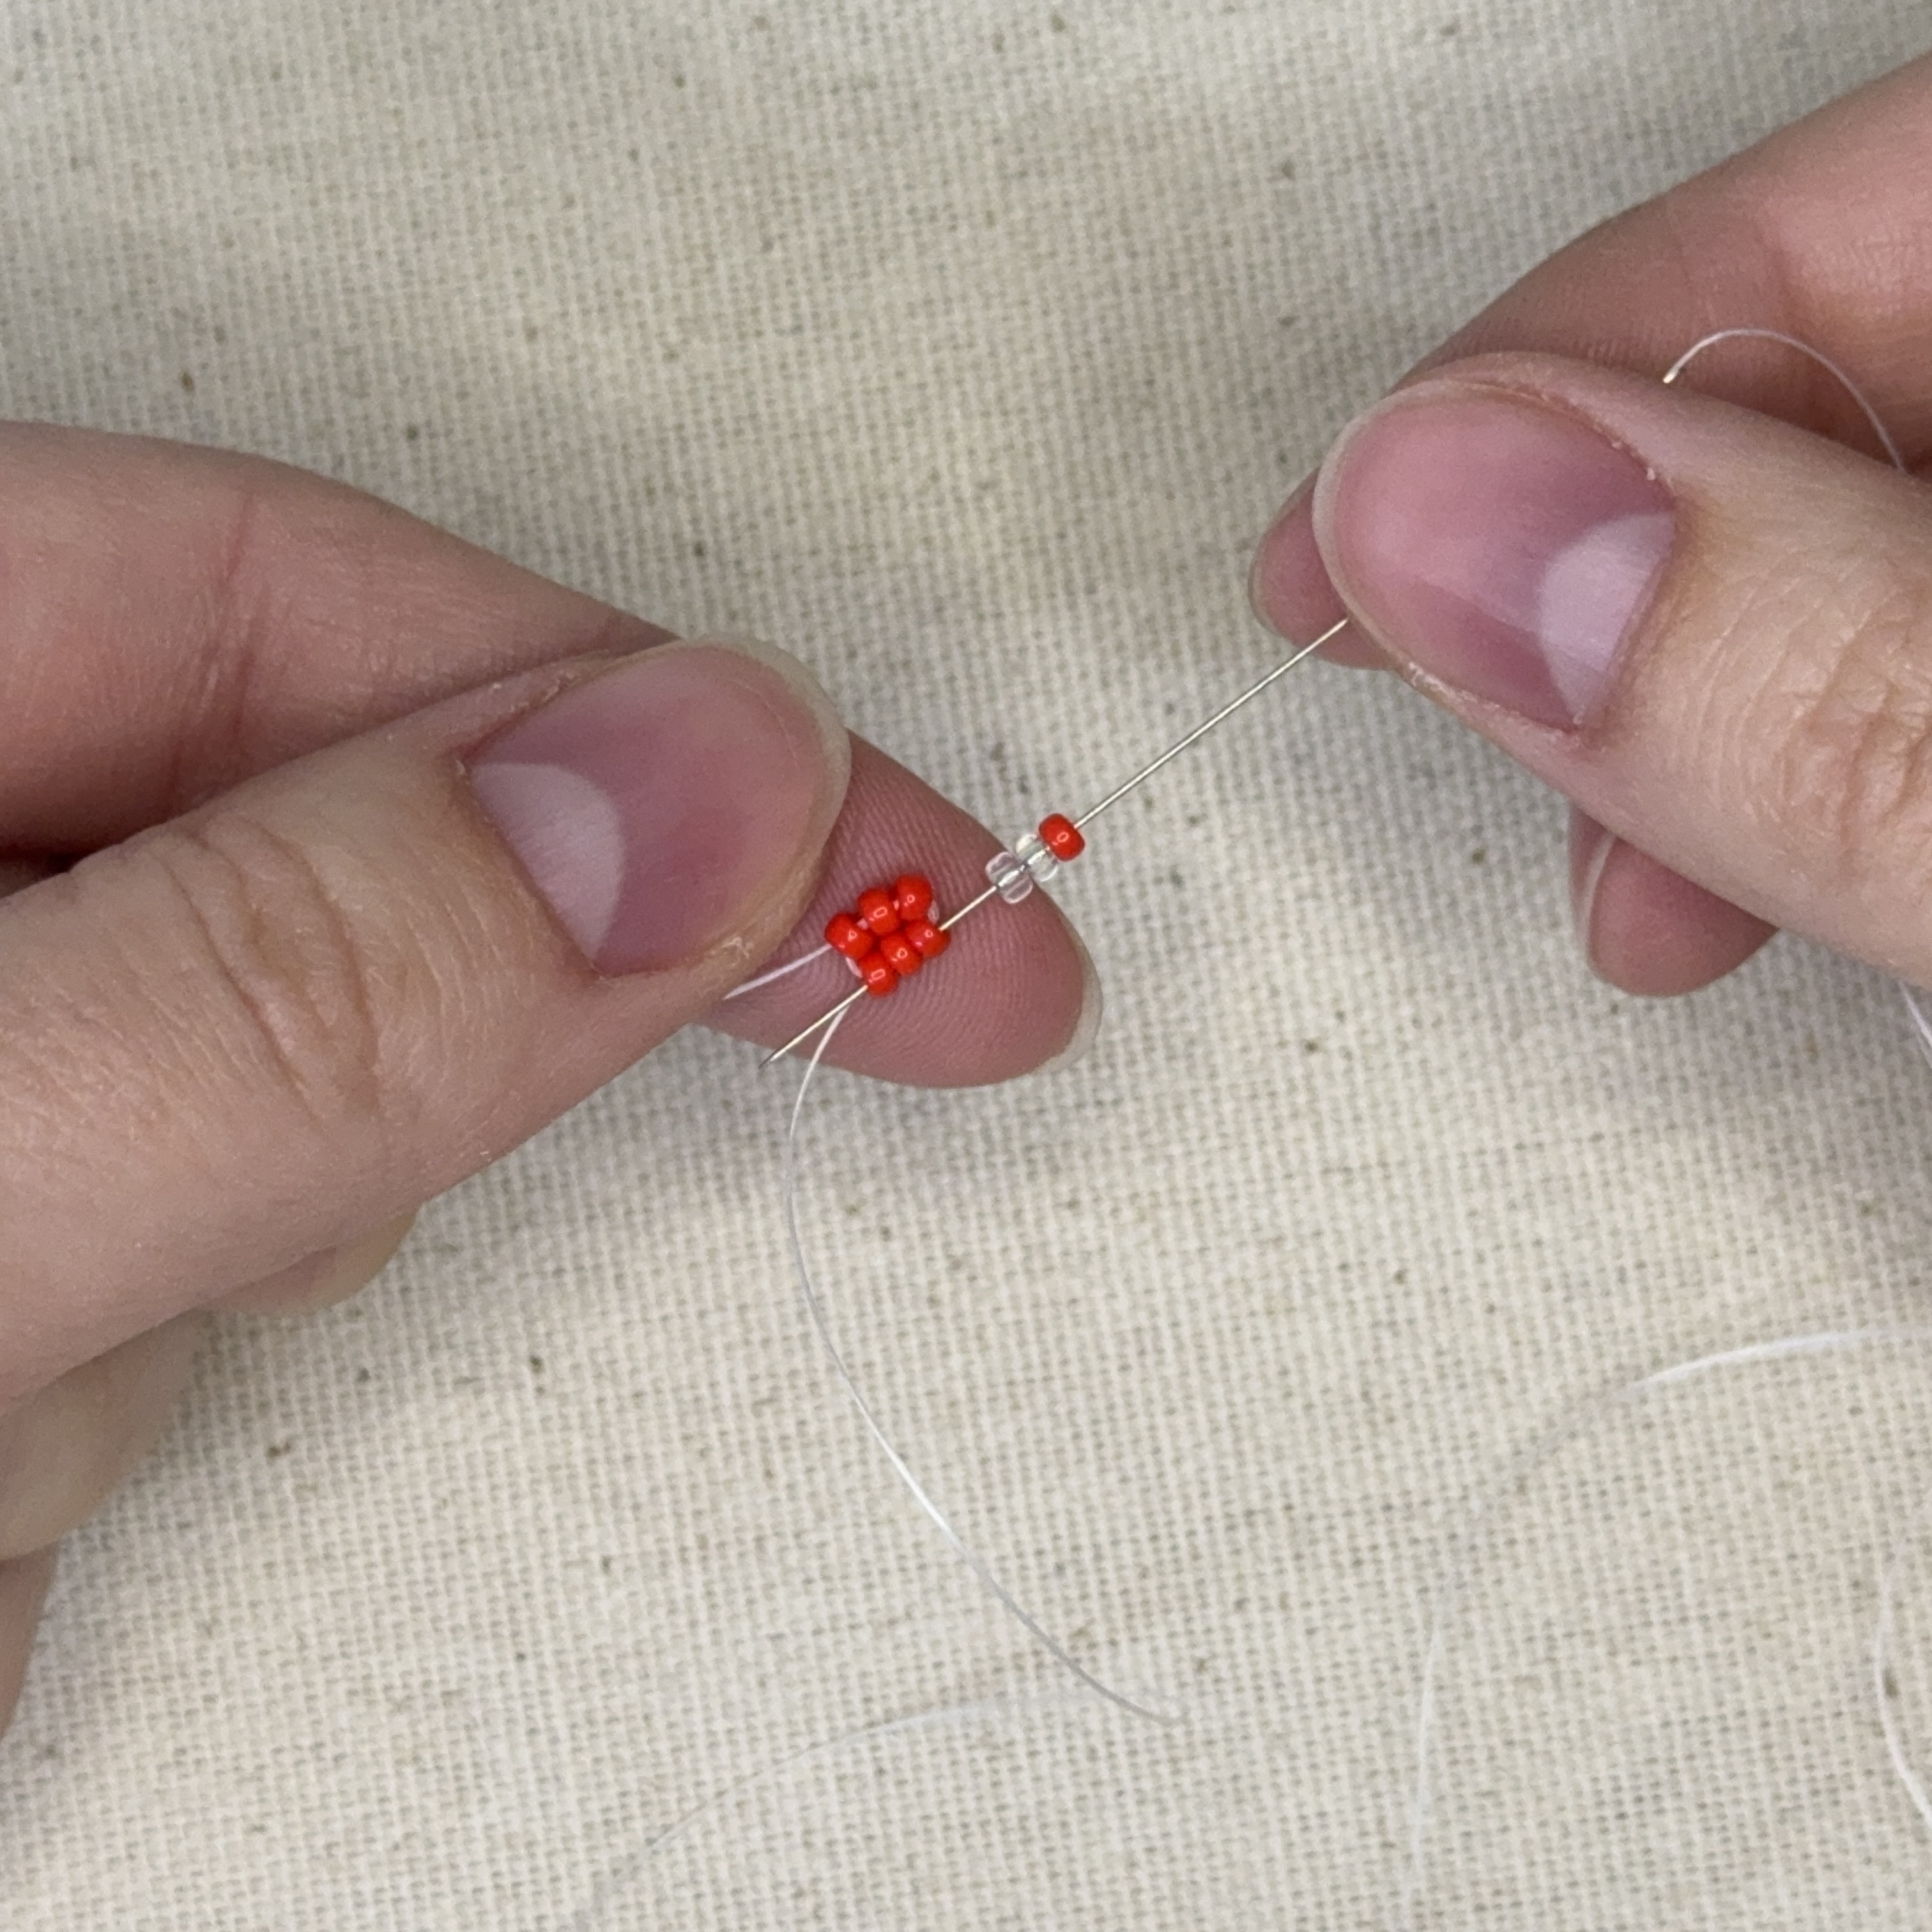
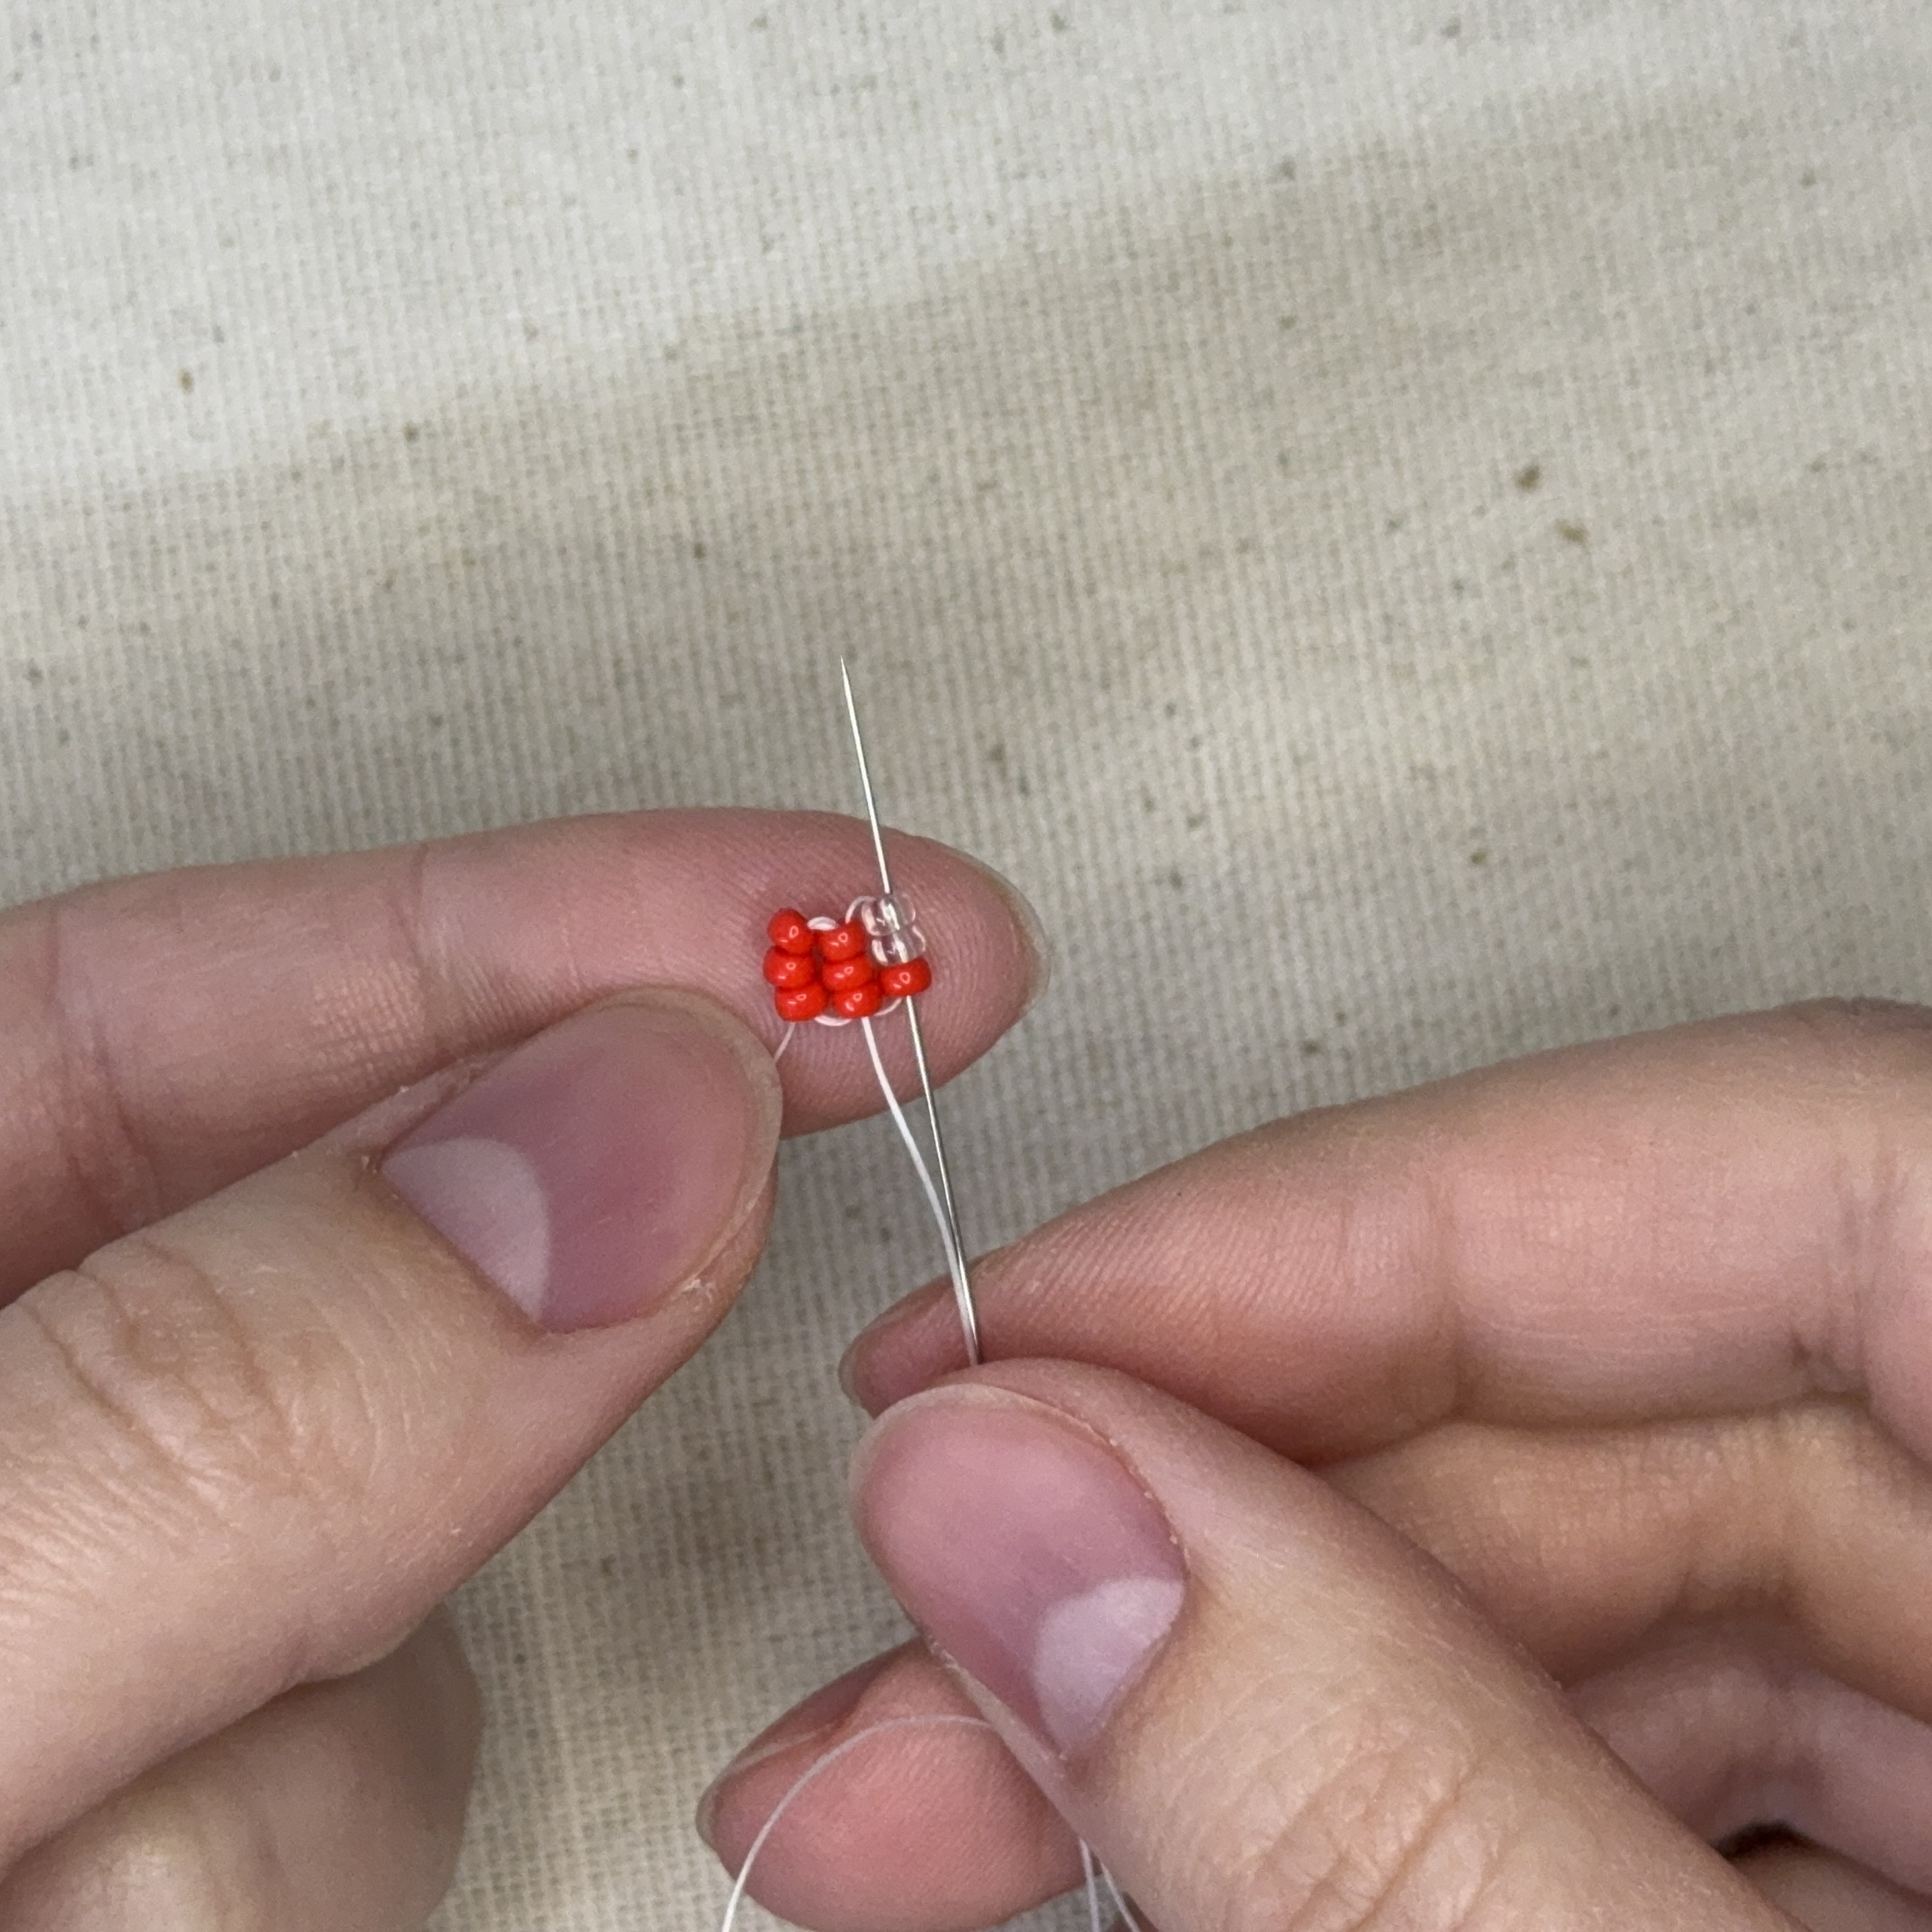
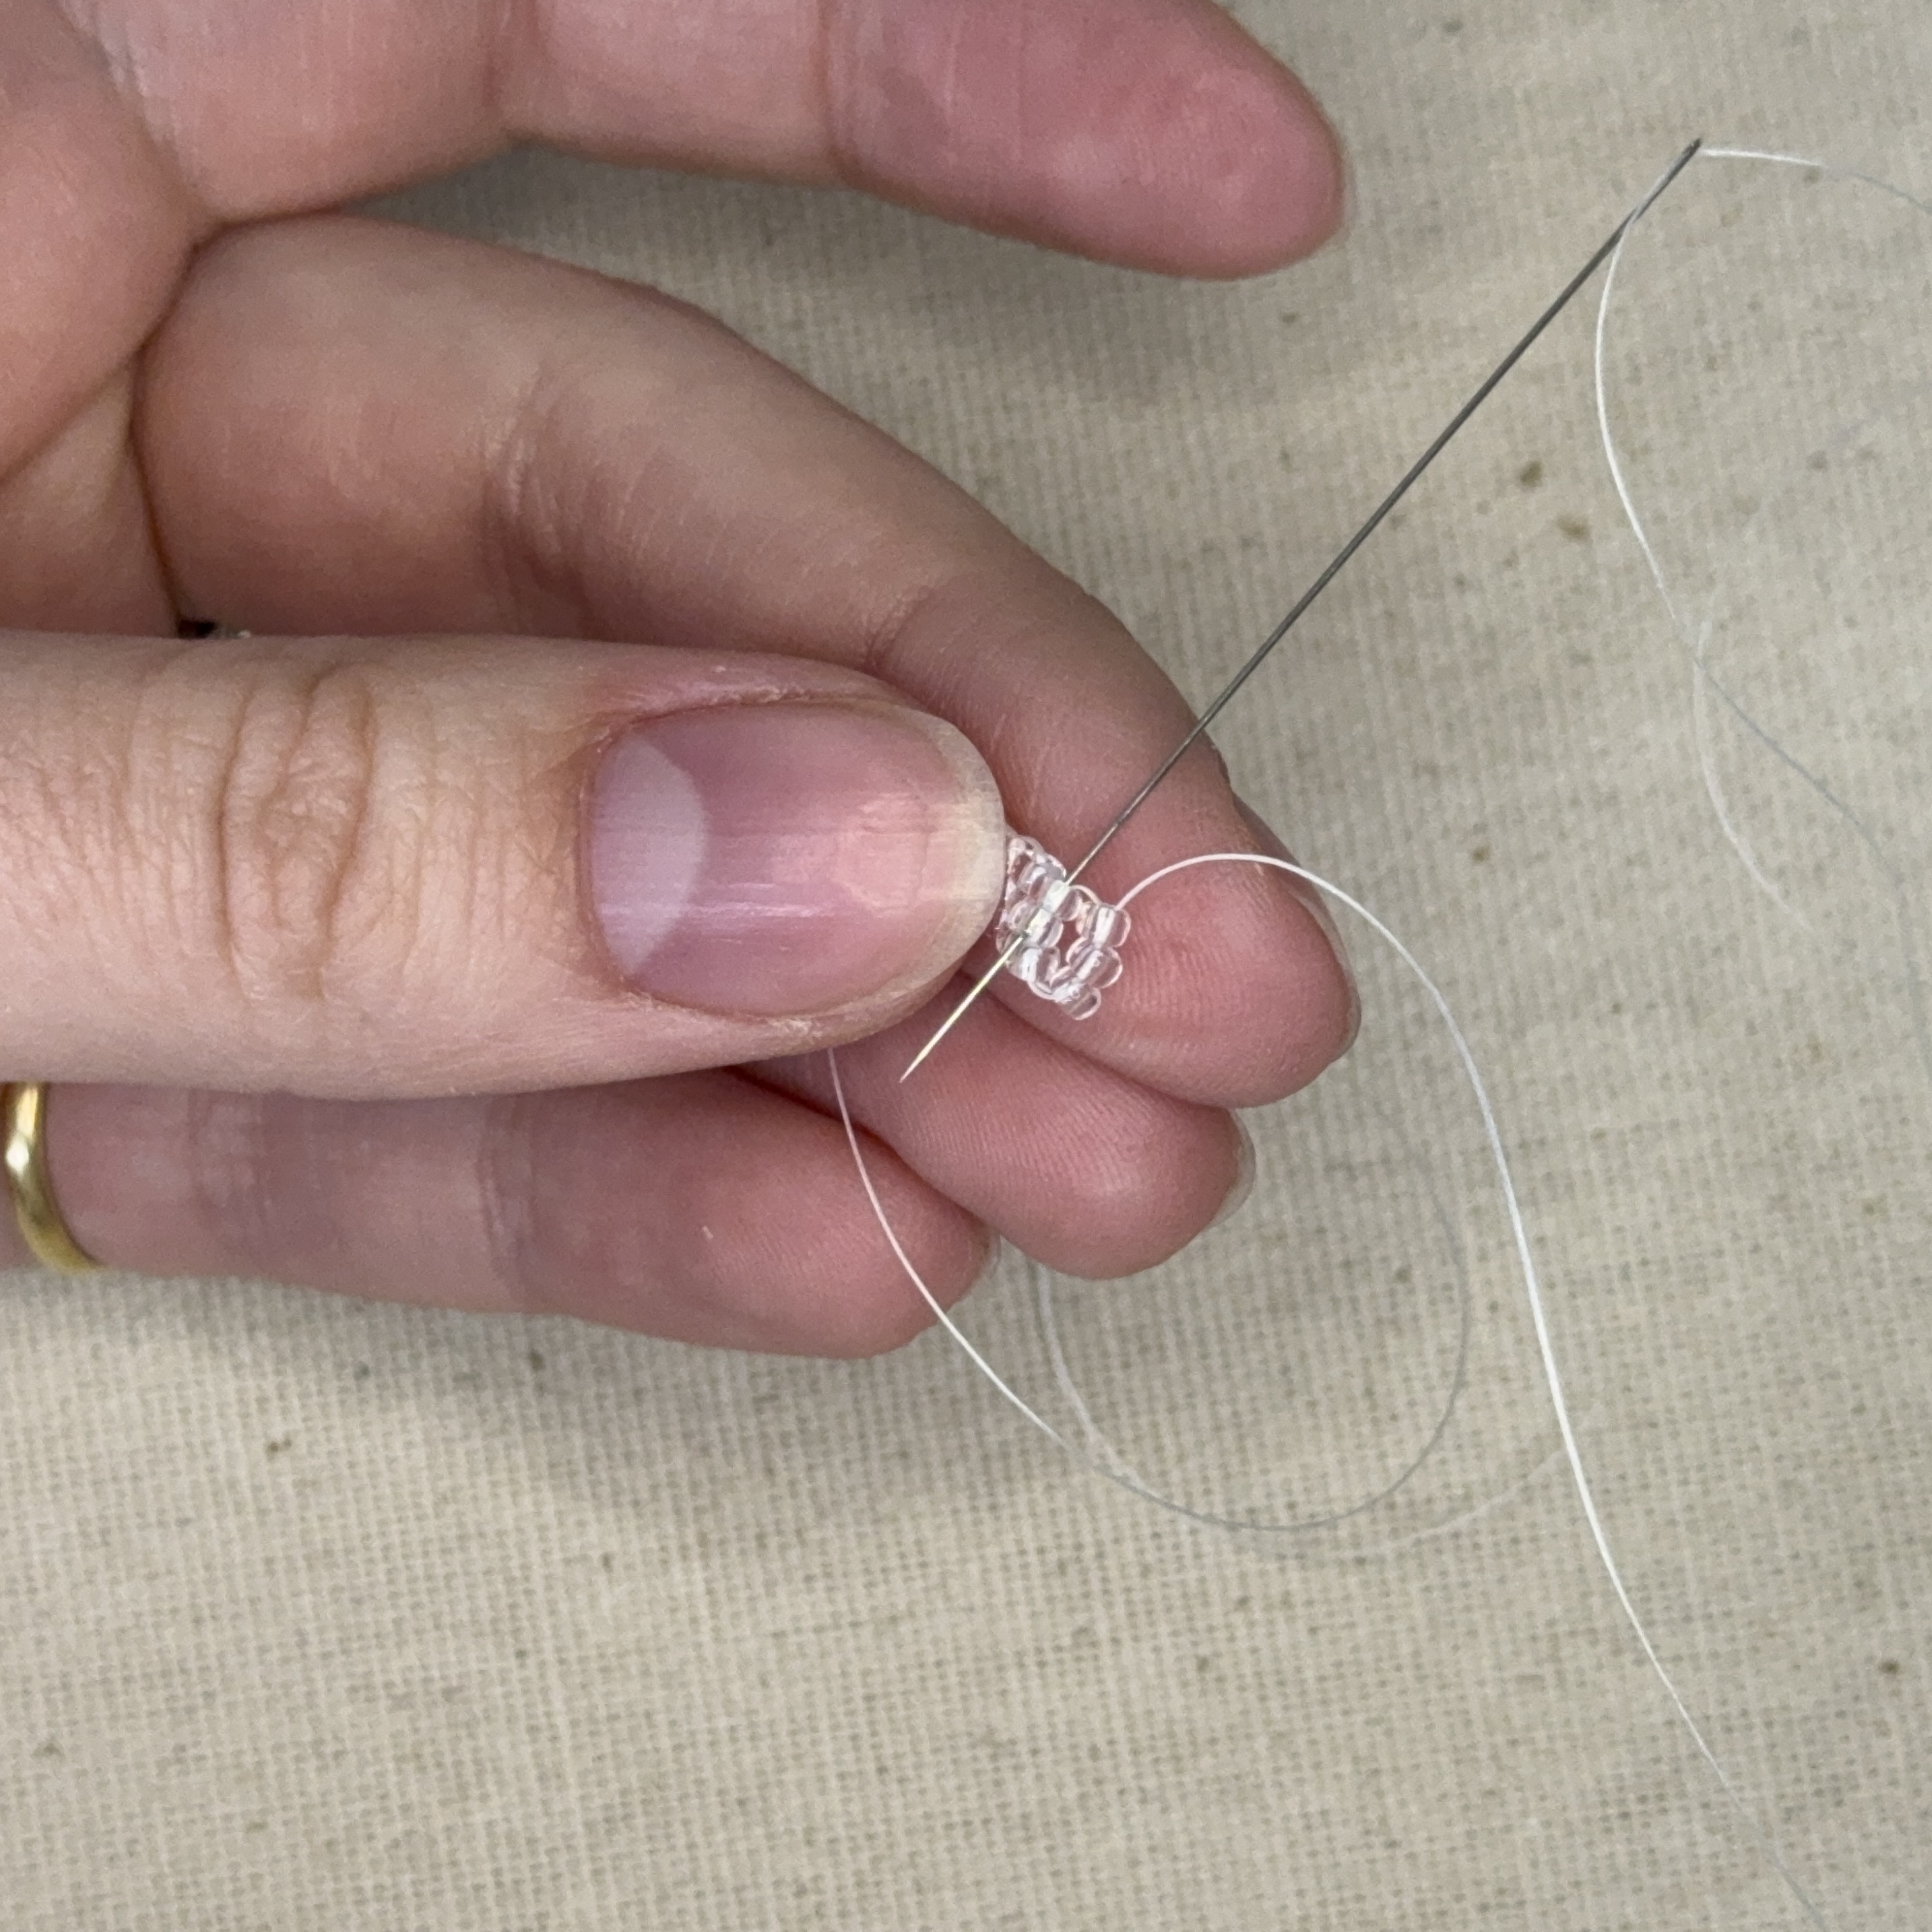
6. Following the pattern, string on a red bead then 2 clear beads, then thread the needle through the opposite end of the 3 seed beads (shown above) this will create a loop - Pull tight
7. Then thread the needle back up the beads you just strung on
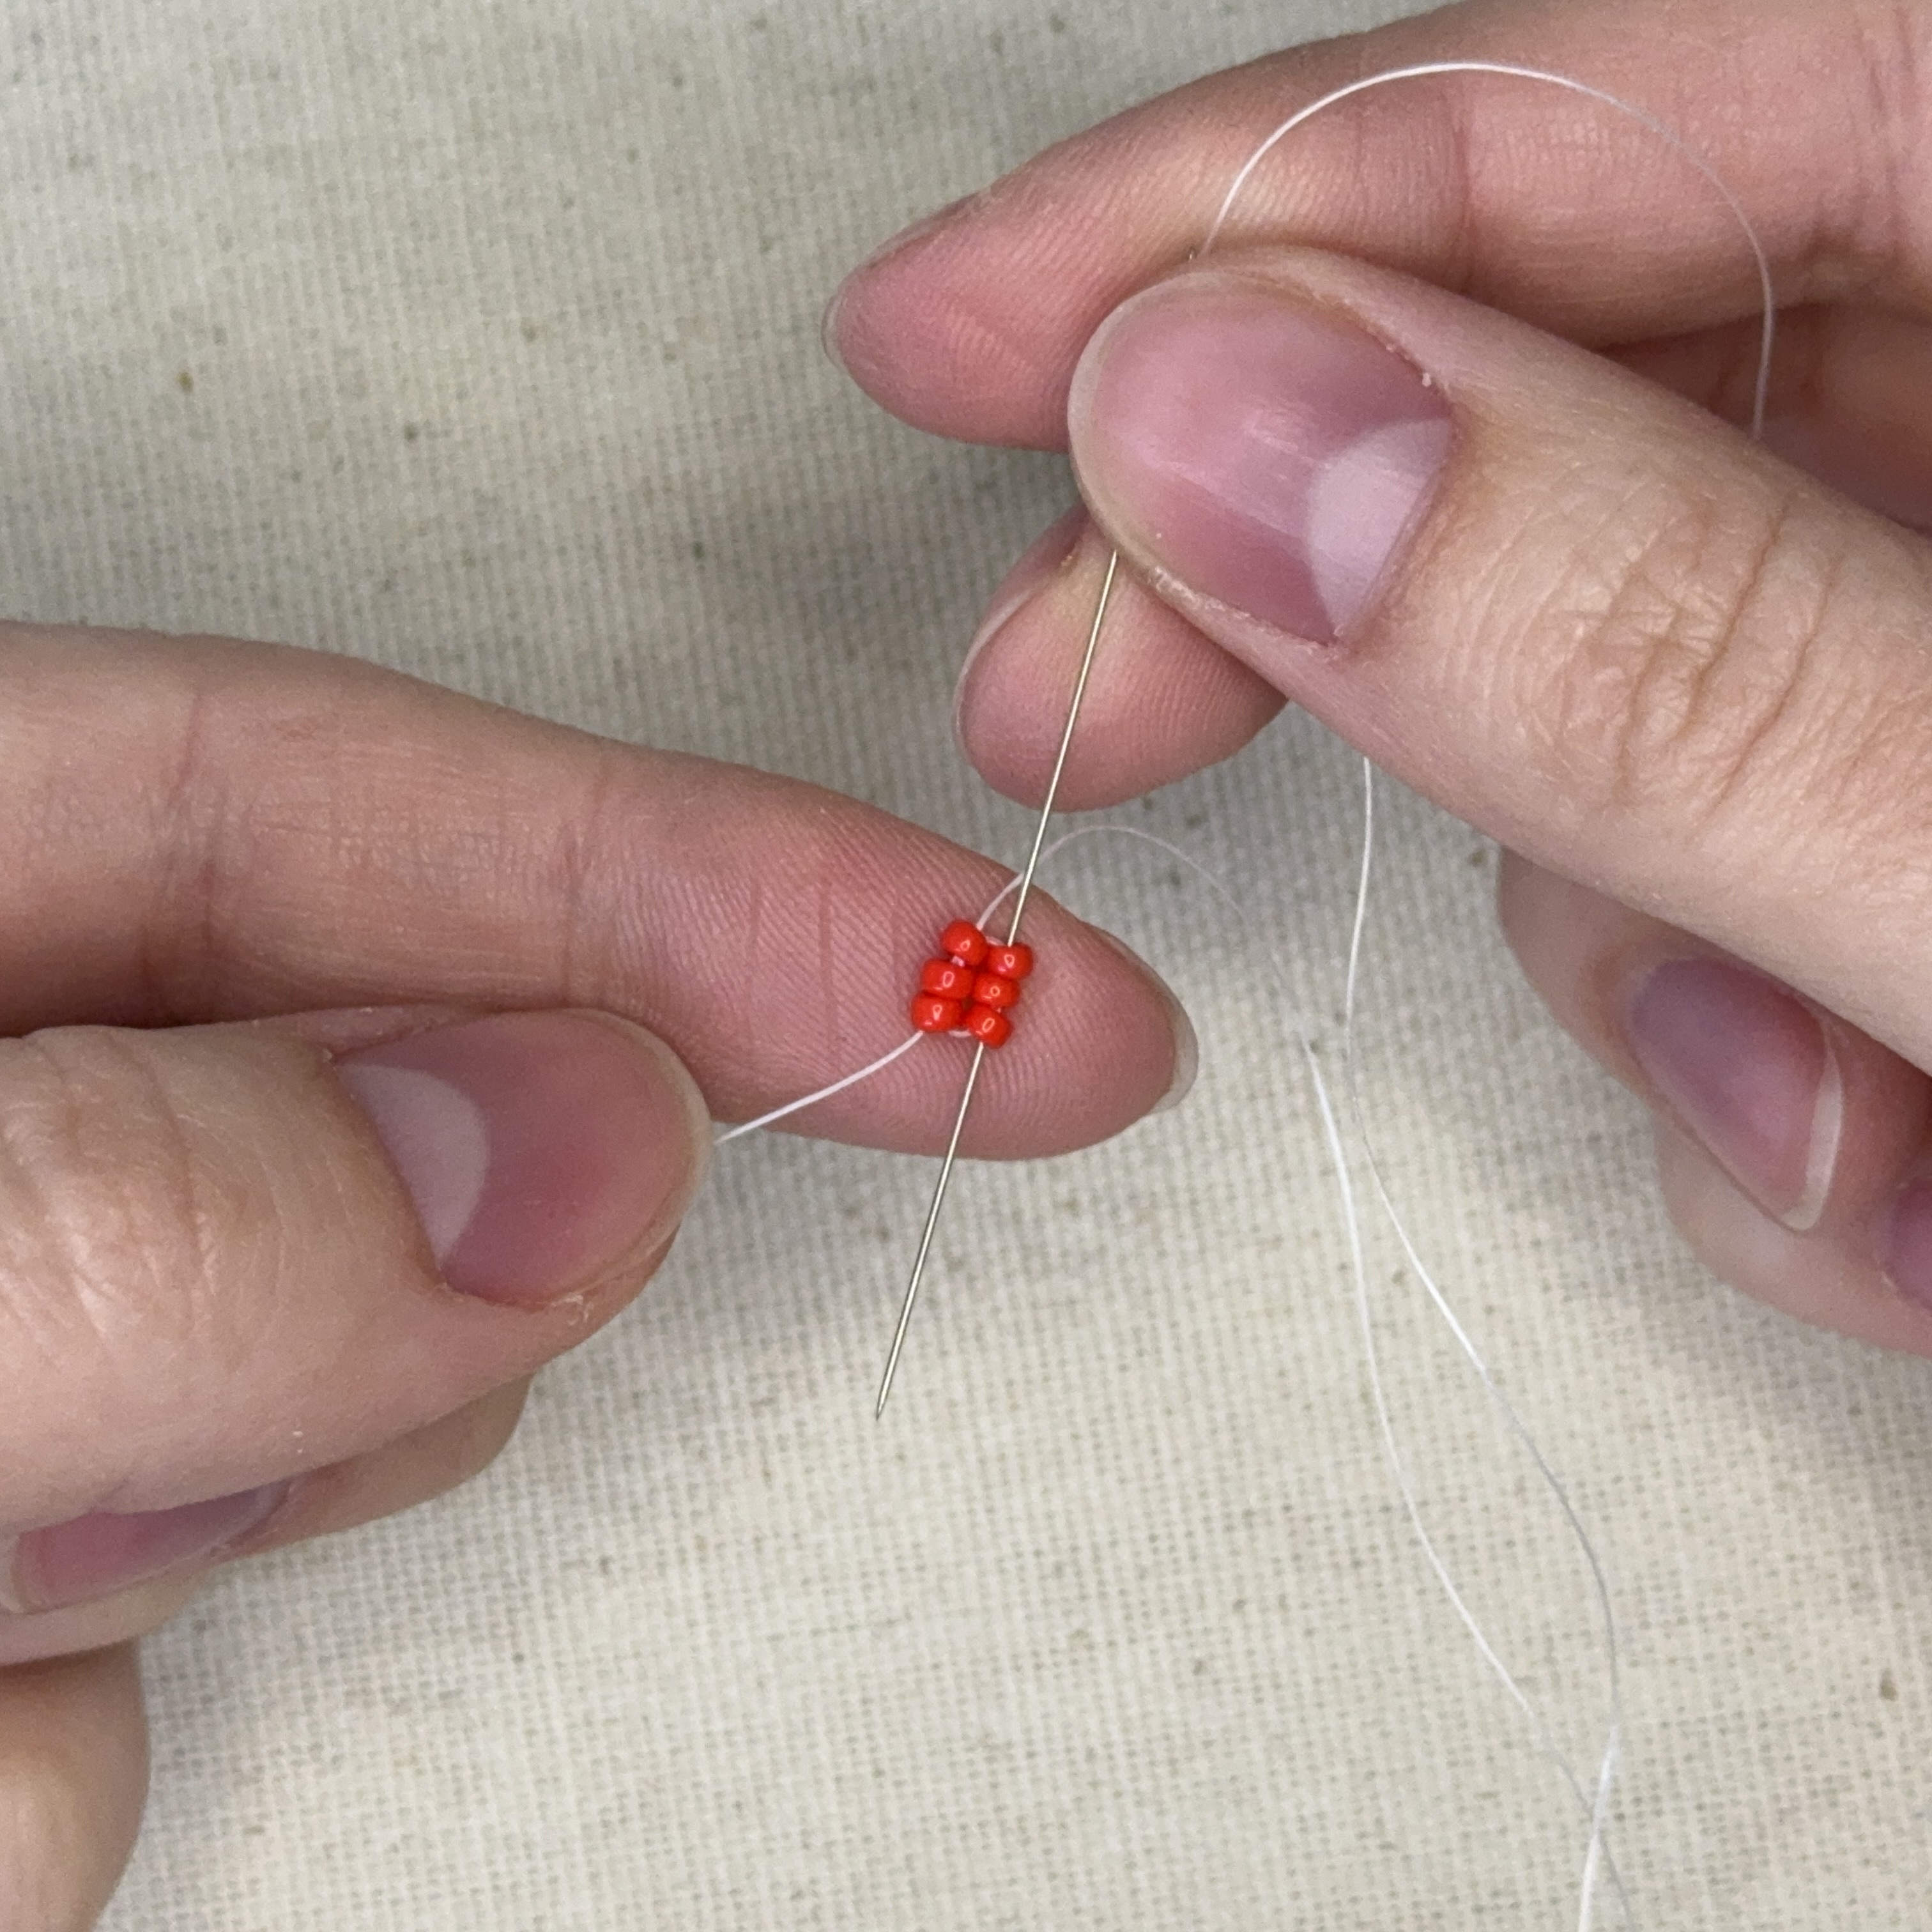
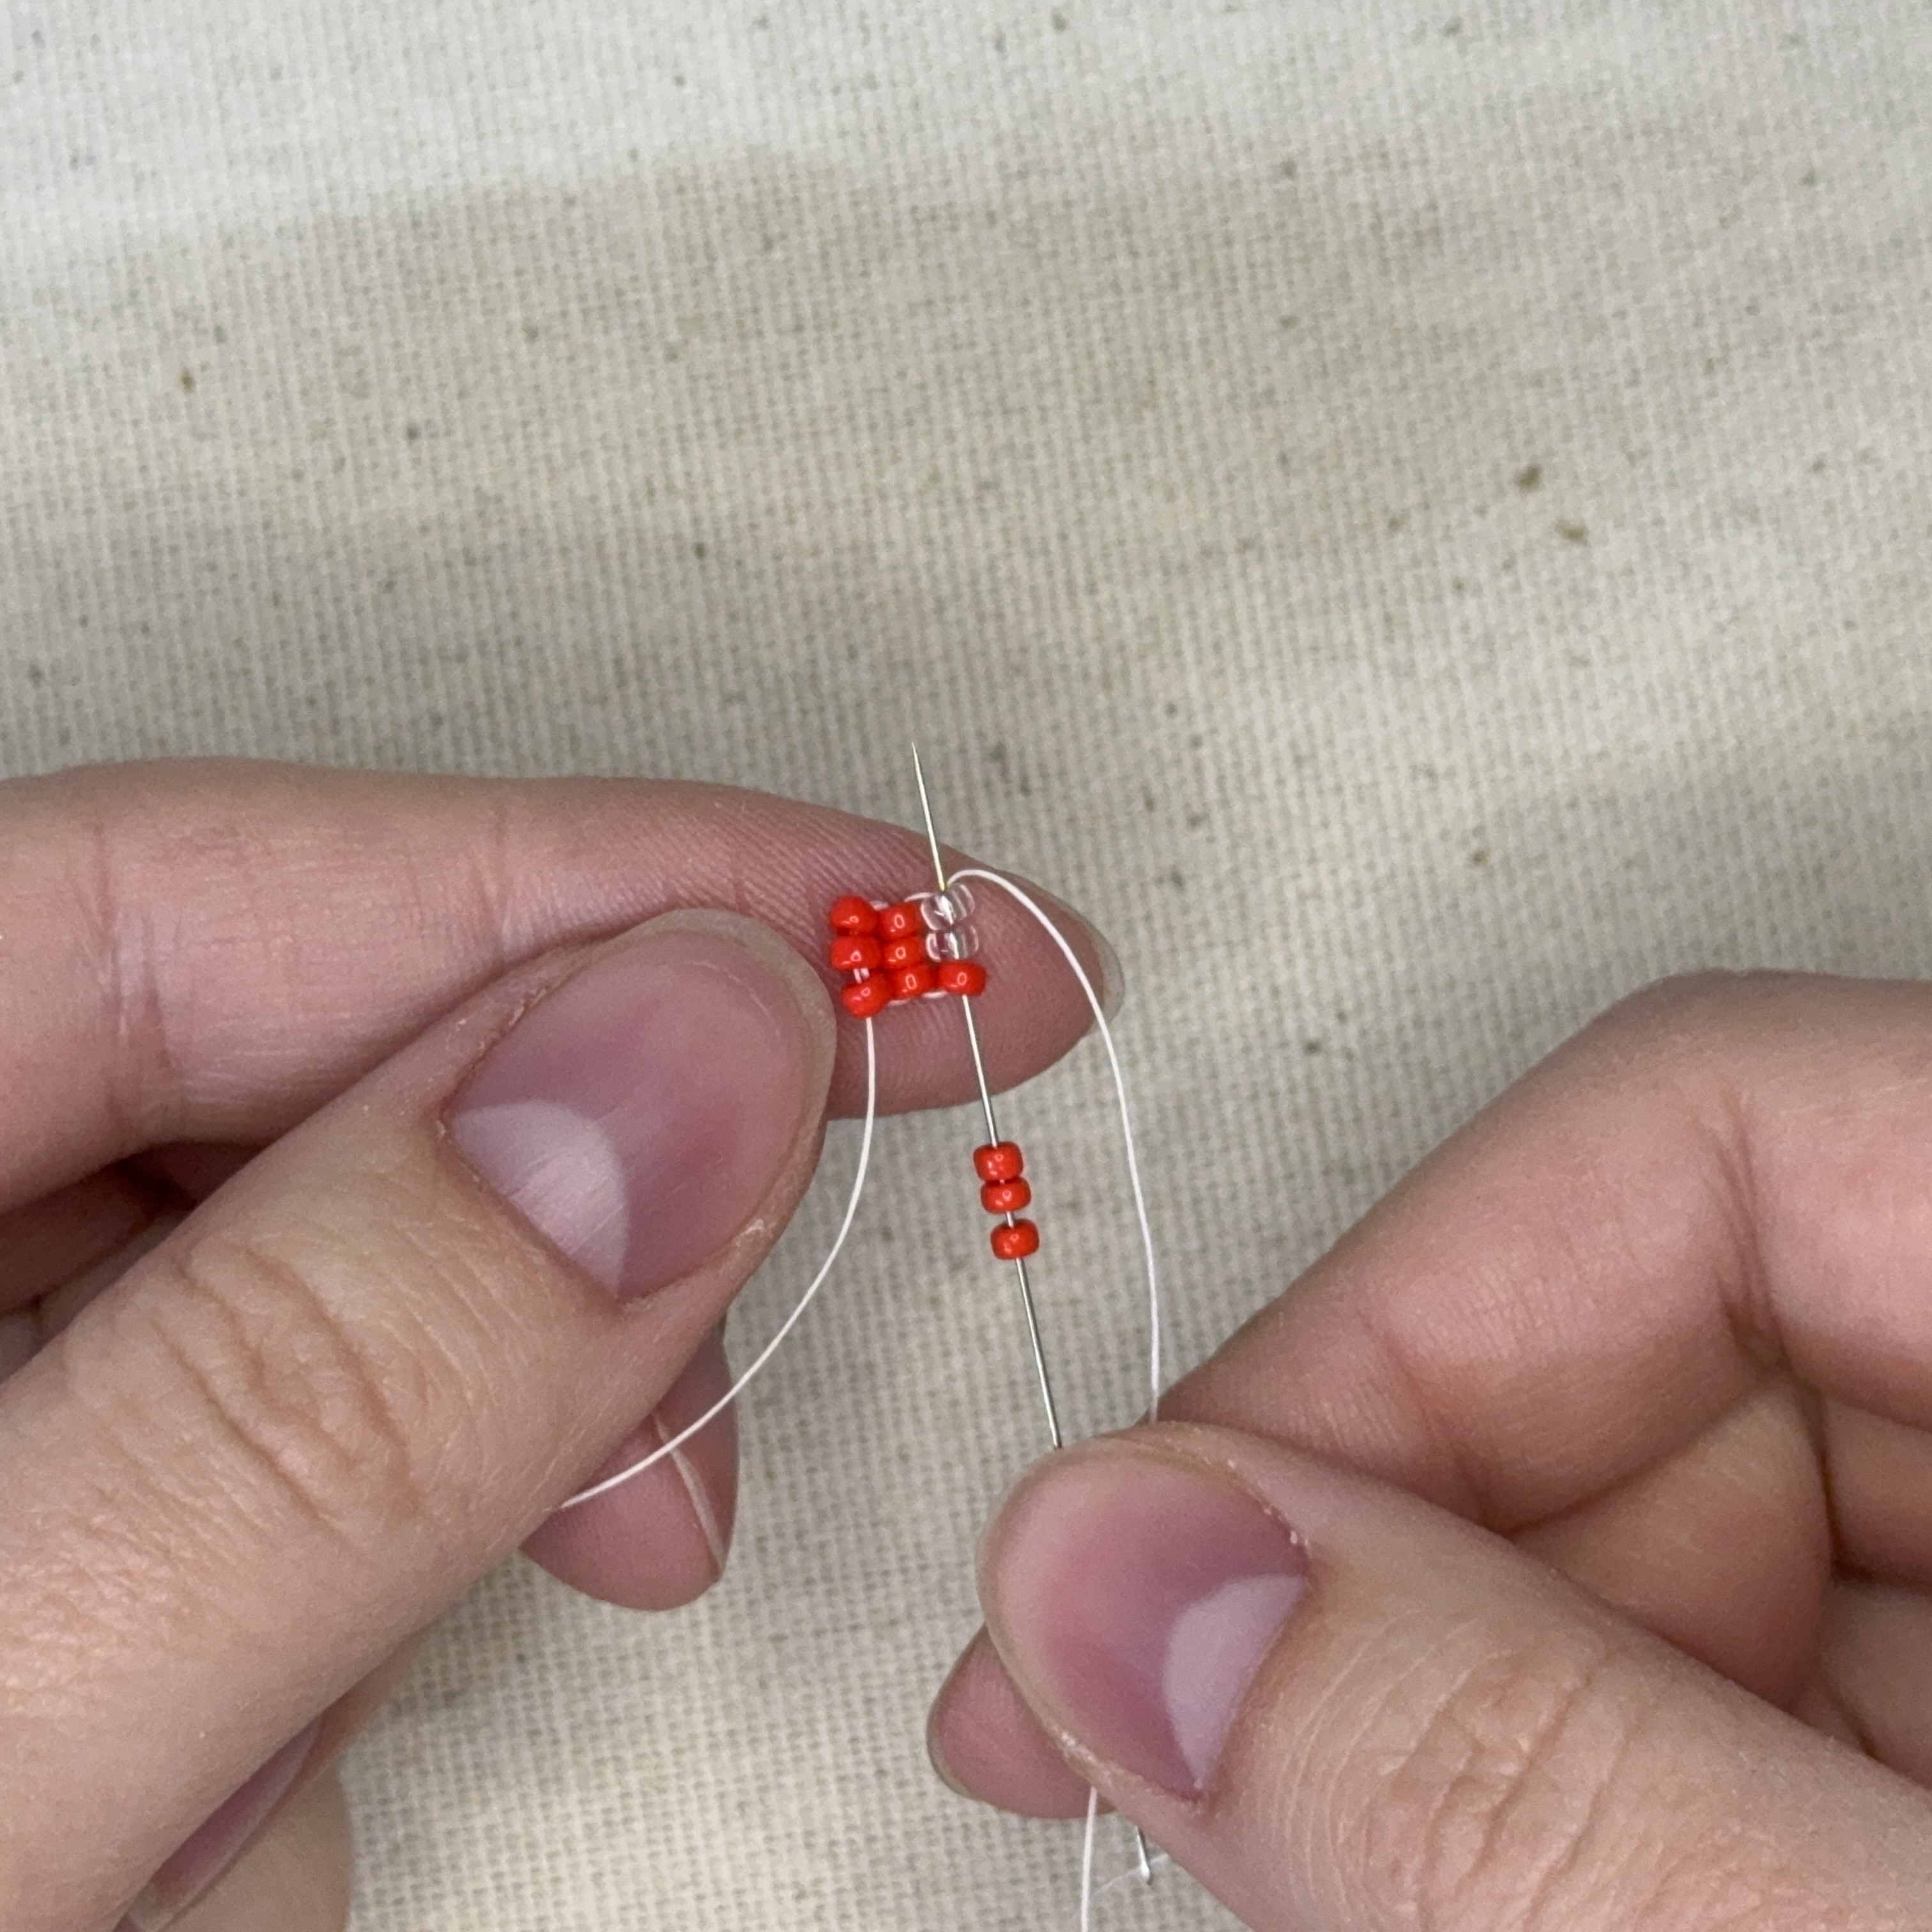
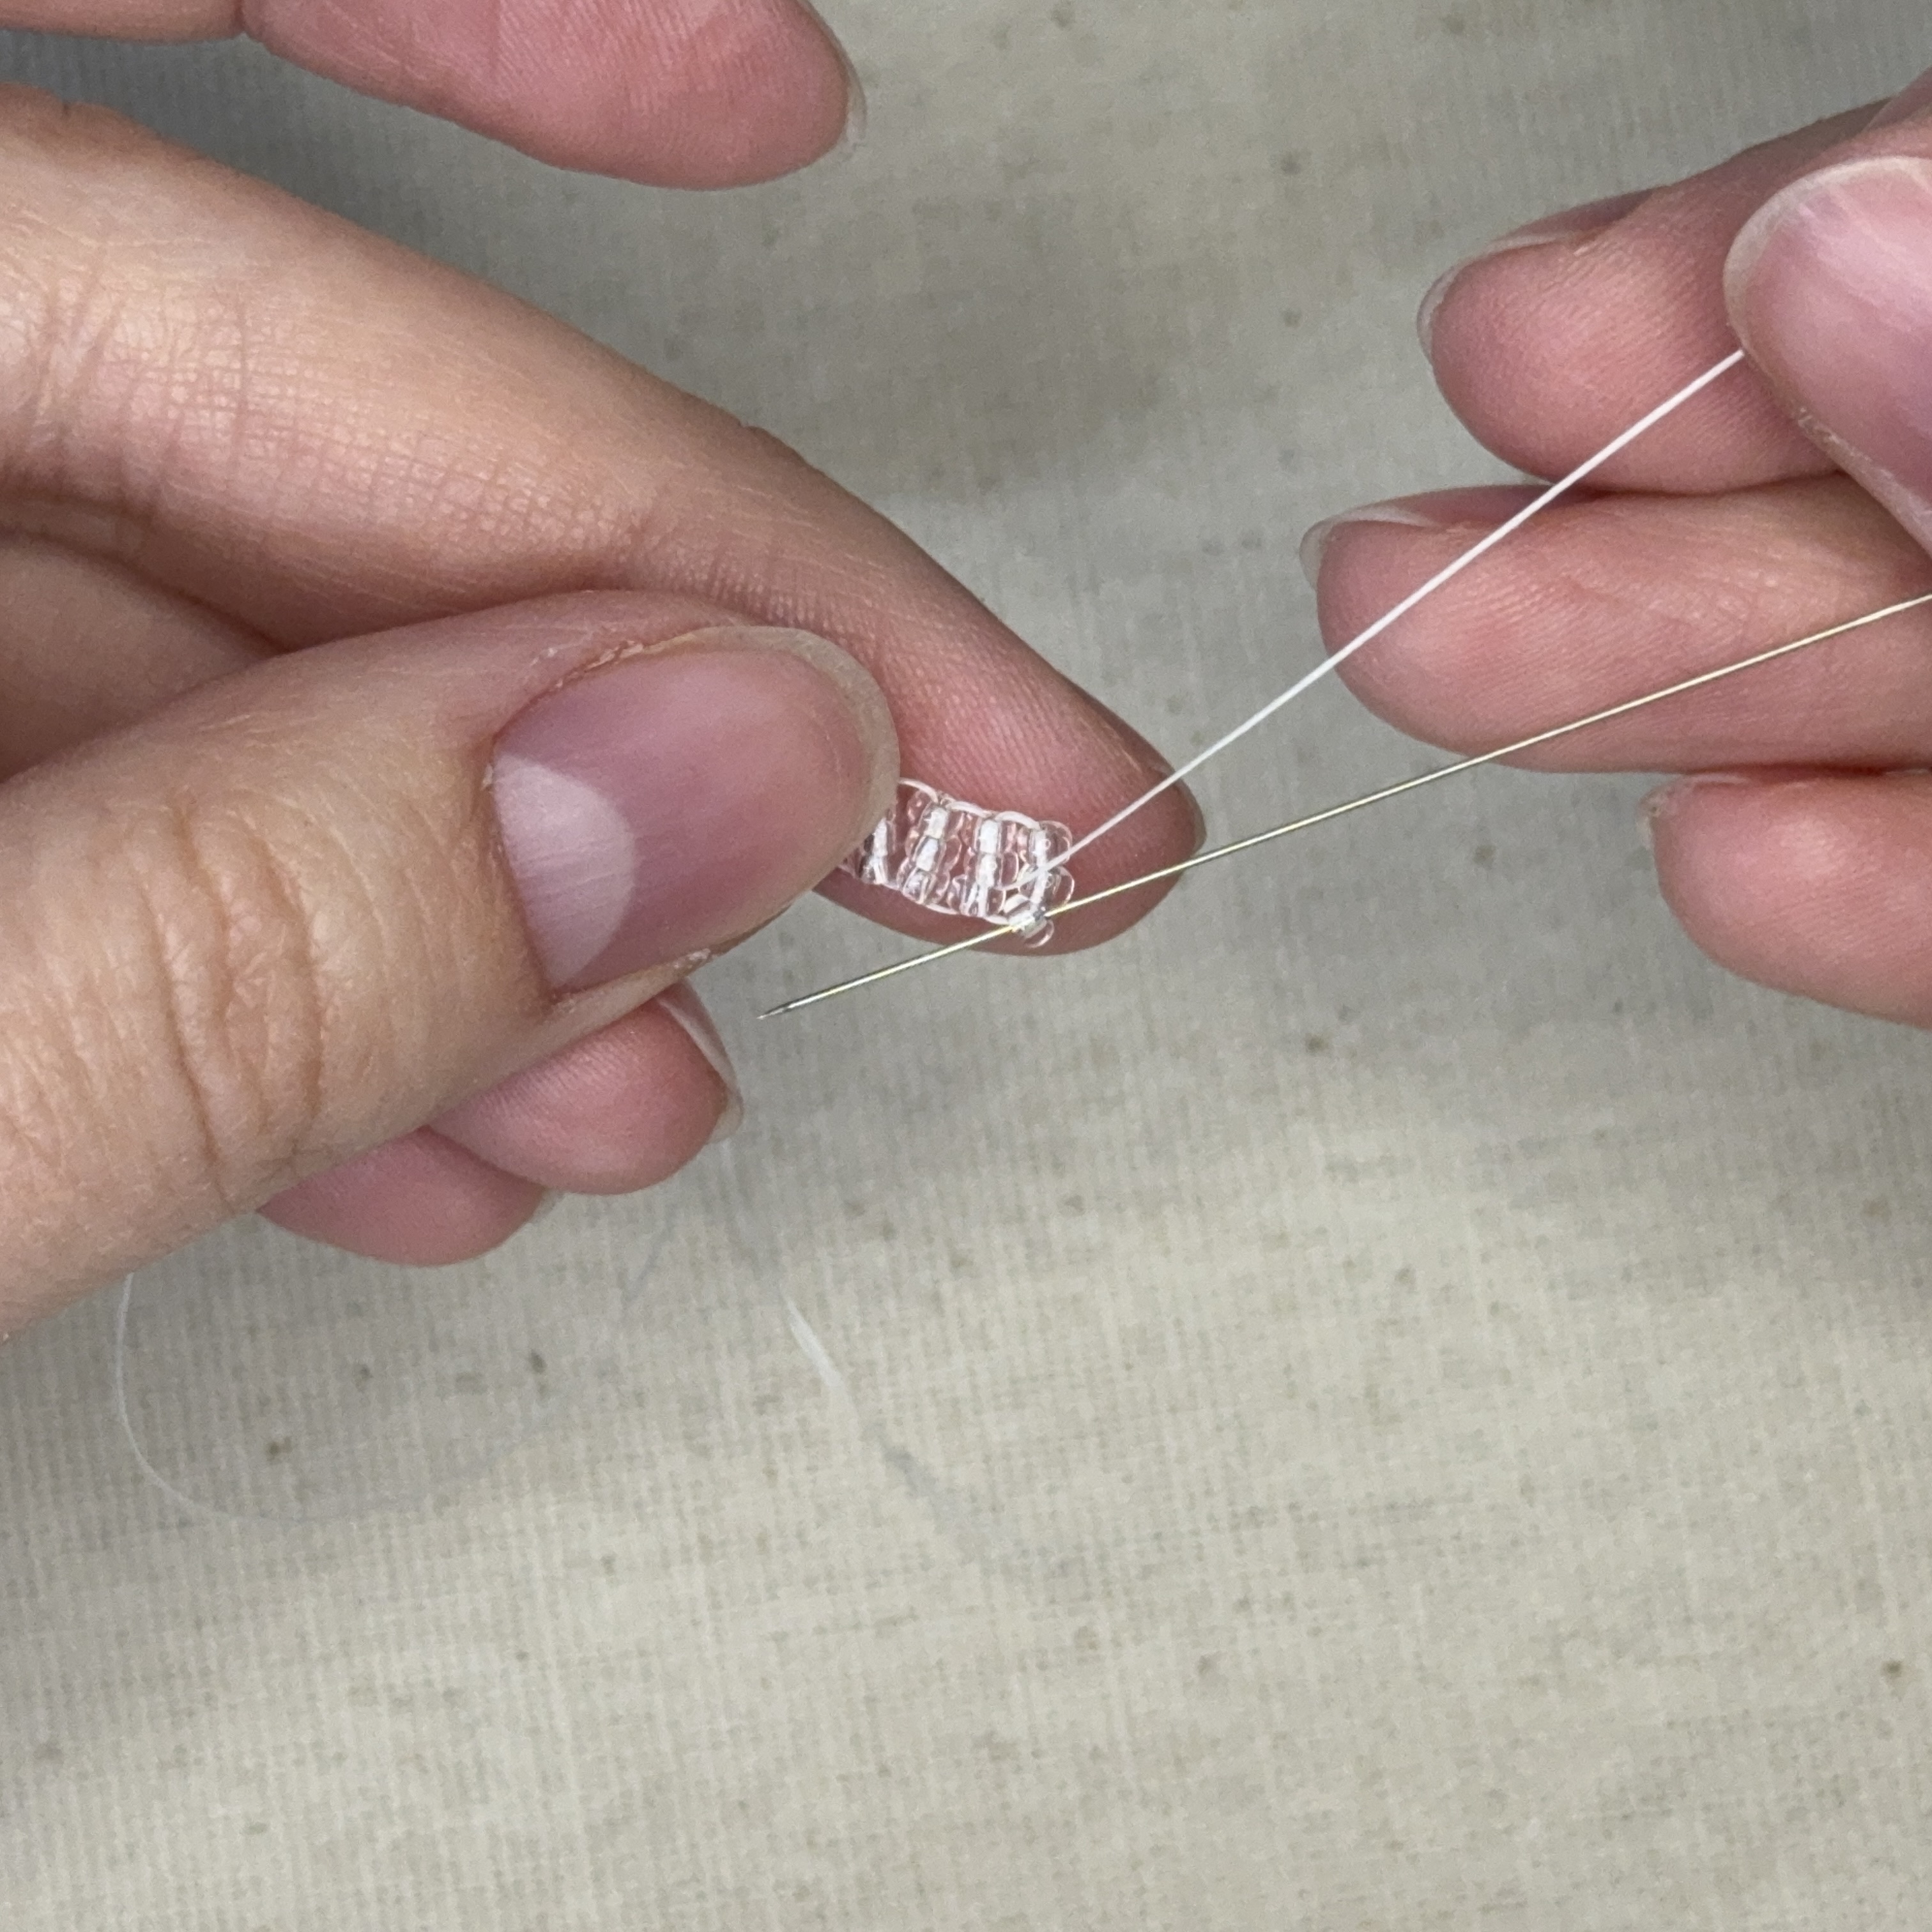
8. Next in the pattern is 3 red beads, string those onto your needle and then thread the needle up through the last 3 beads you had added - remember you are inserting the needle on the opposite end of where the thread is coming out
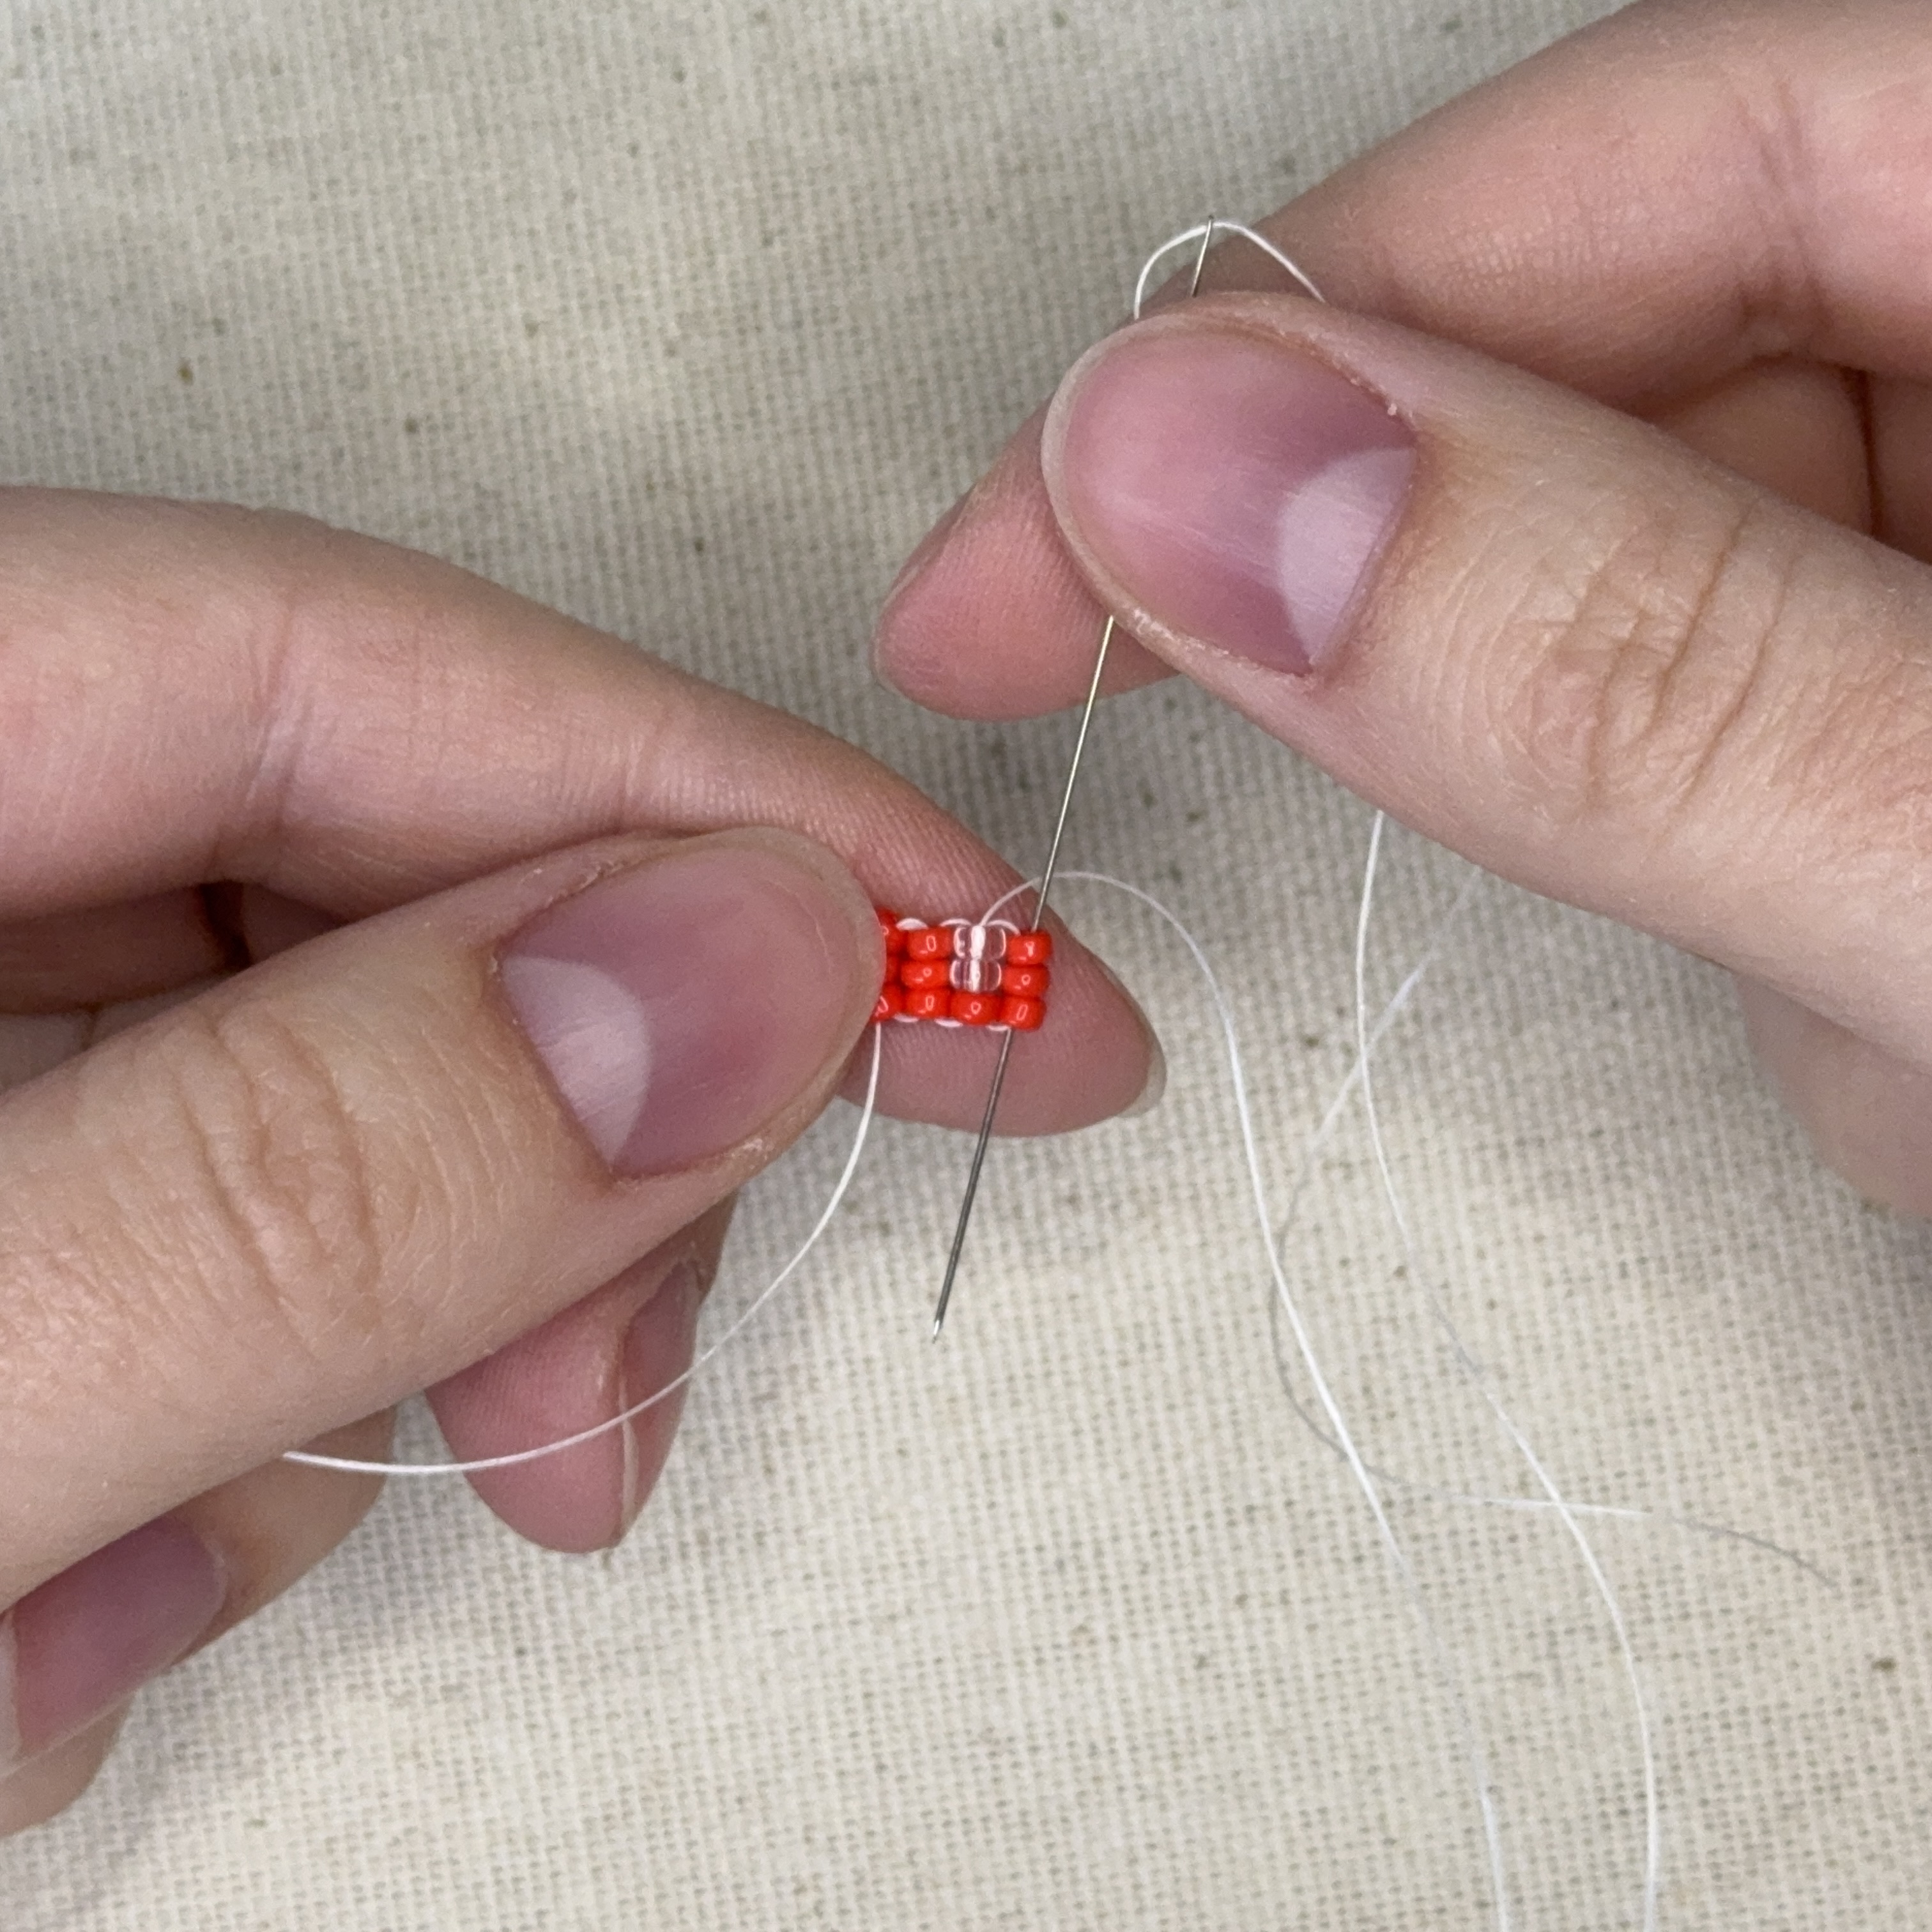
9. And then thread the needle back through the beads you just added
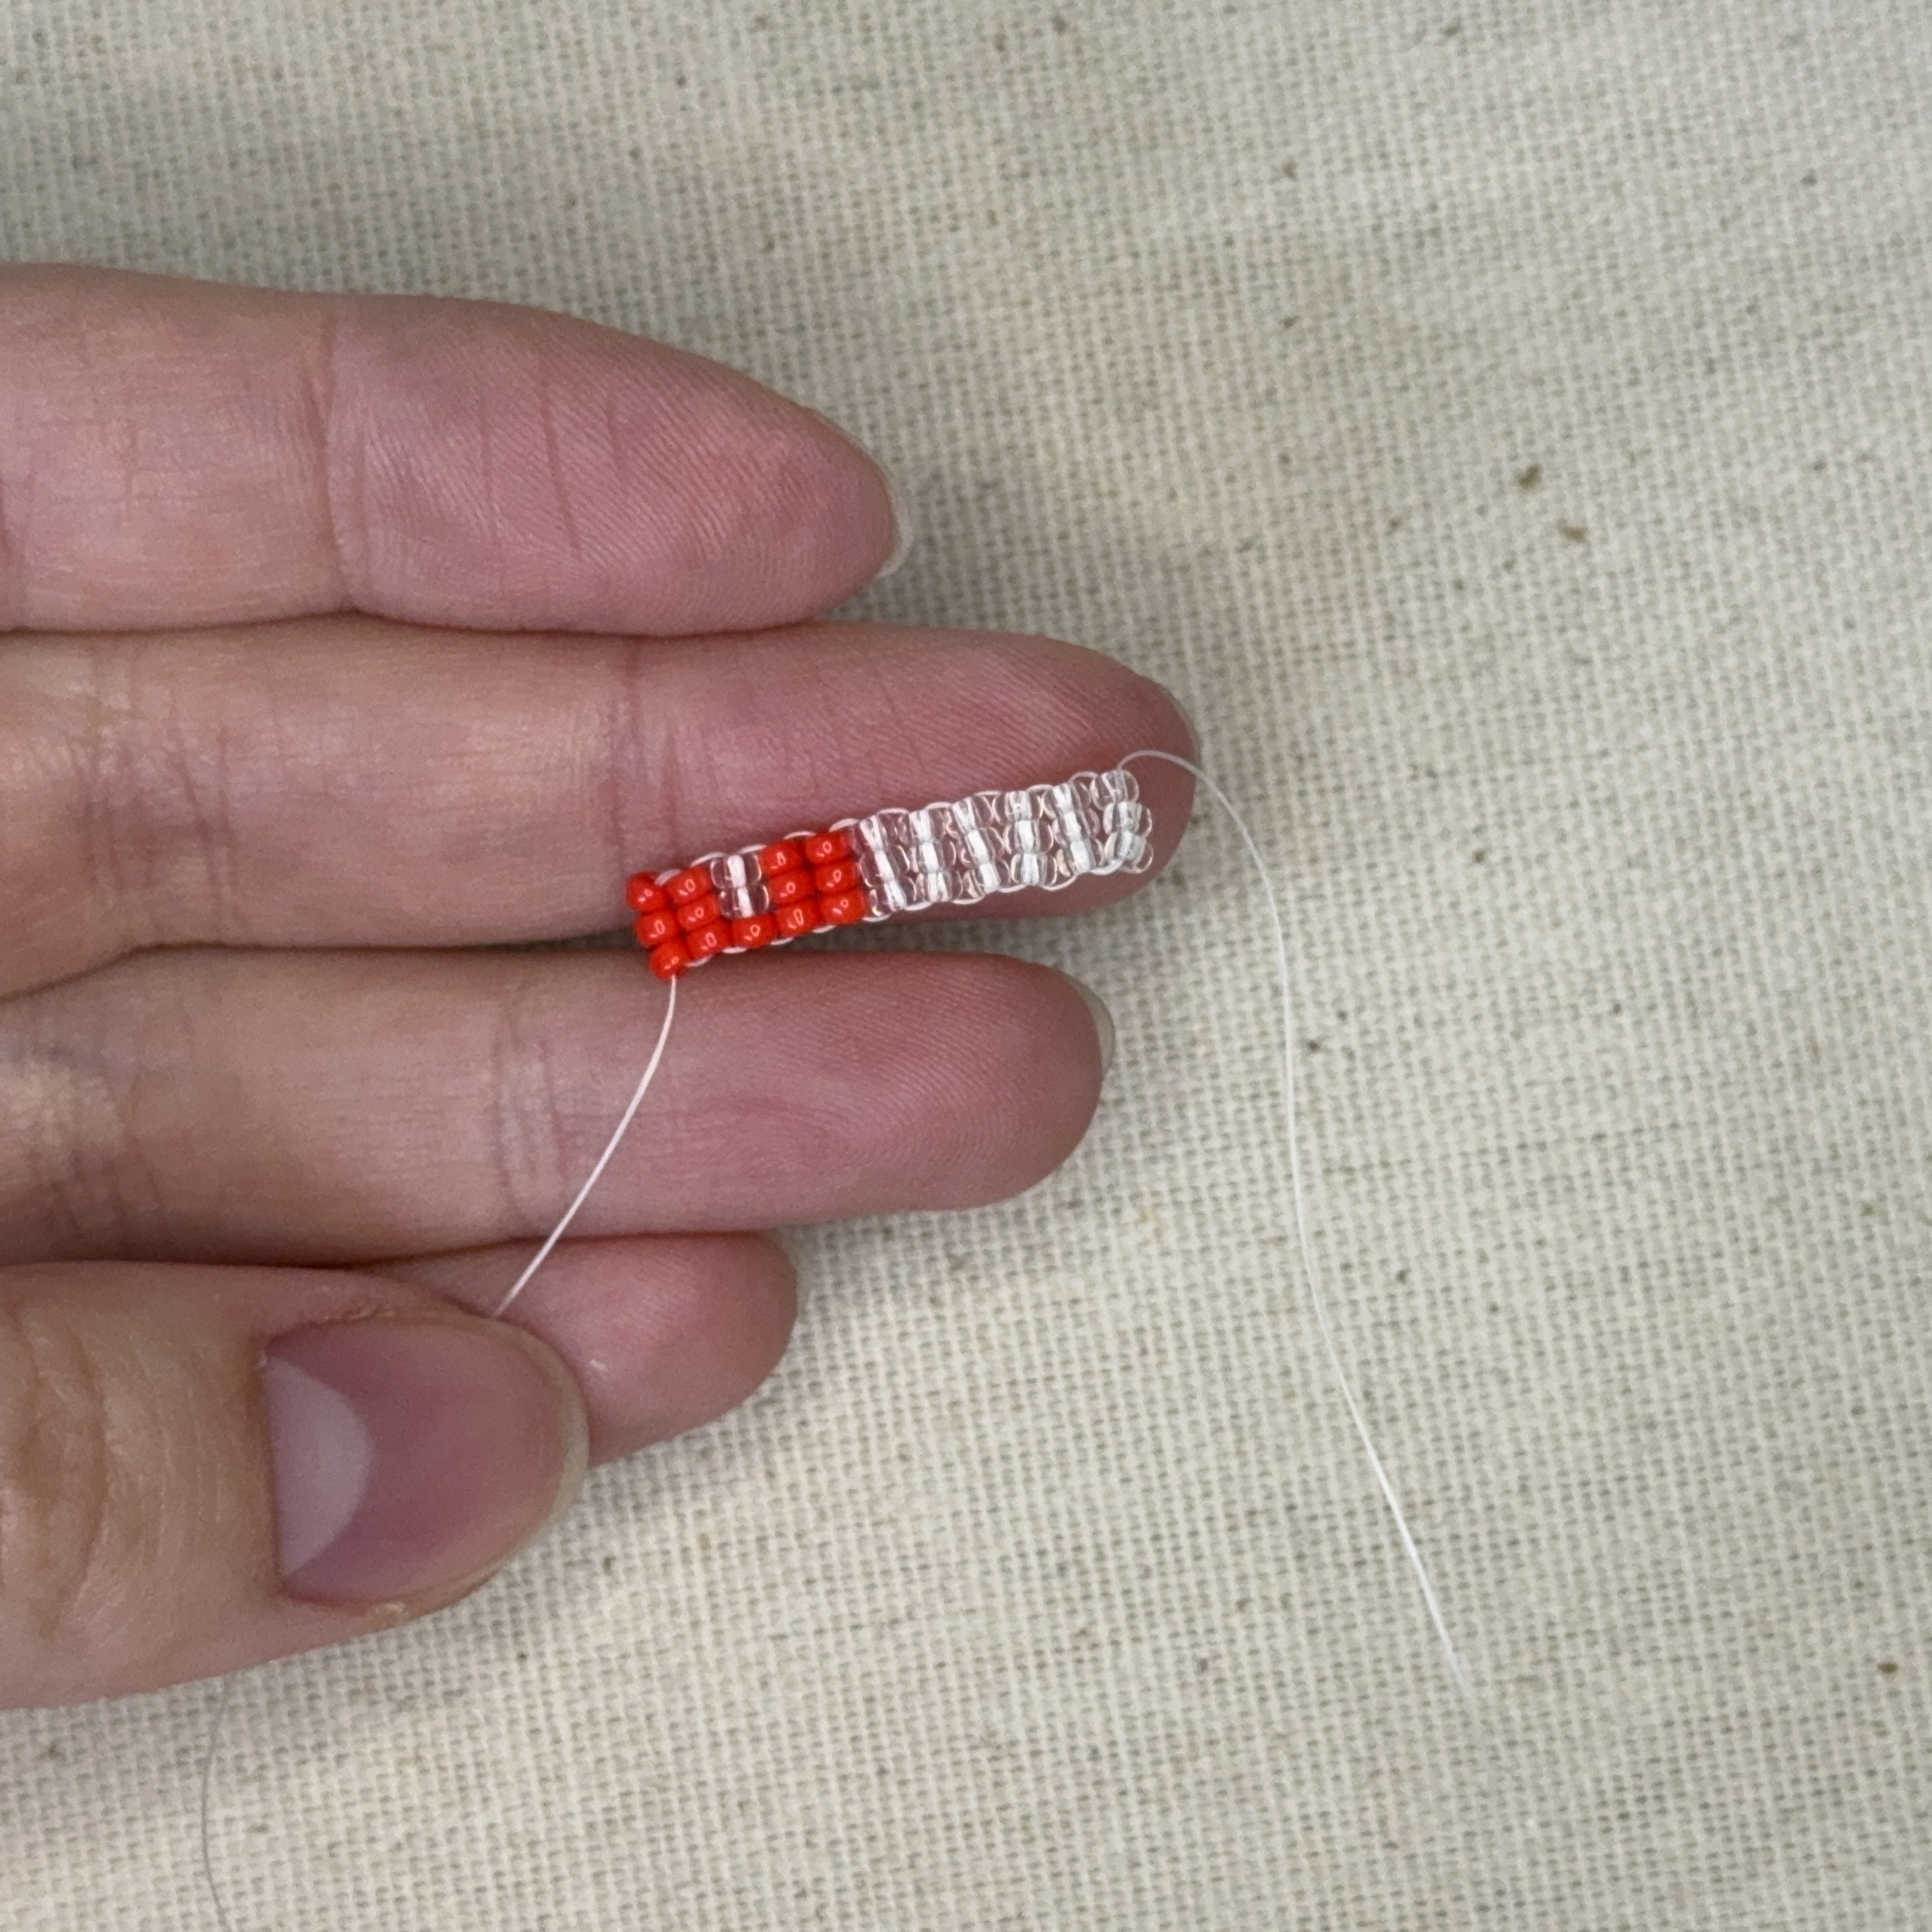
10. Keep following the pattern until you have completed part one
Part 2:
11. Thread the needle down 2 beads to the left
12. And then one bead to the right (some people prefer to do the brick stitch part of the earring first, I prefer to do the fringe first so I am not working with as much thread when completing the brick stitch)
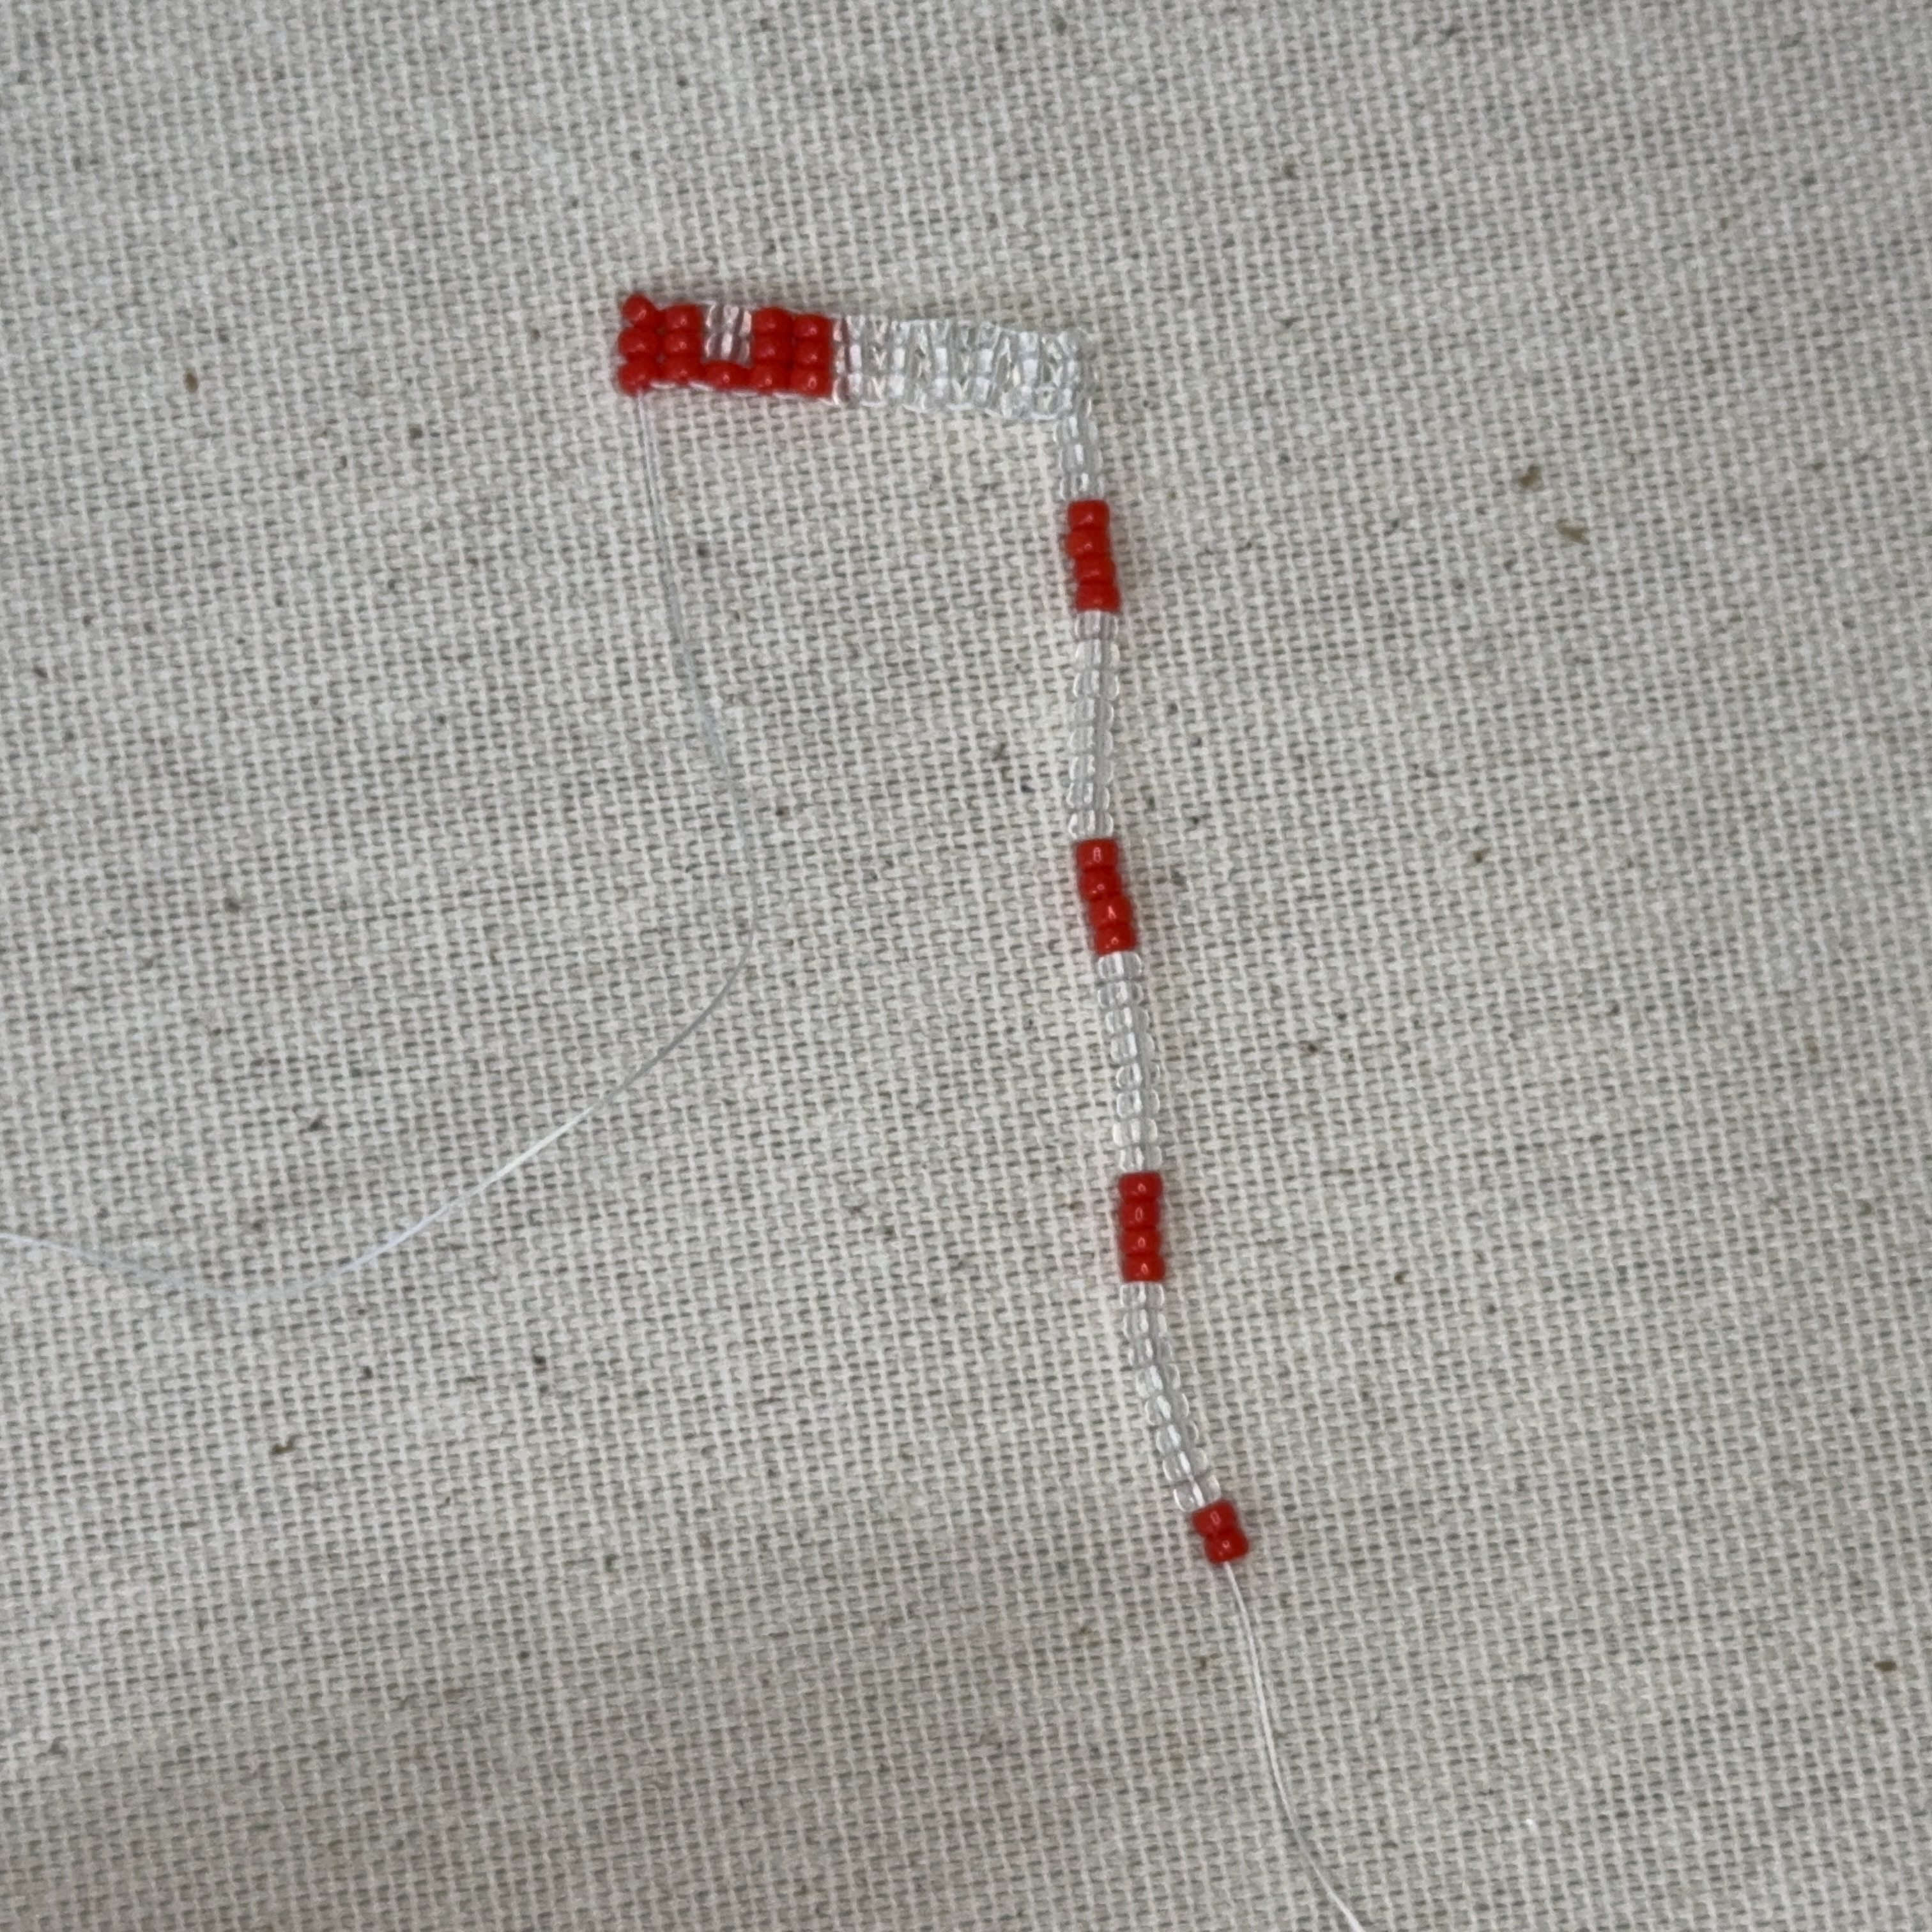
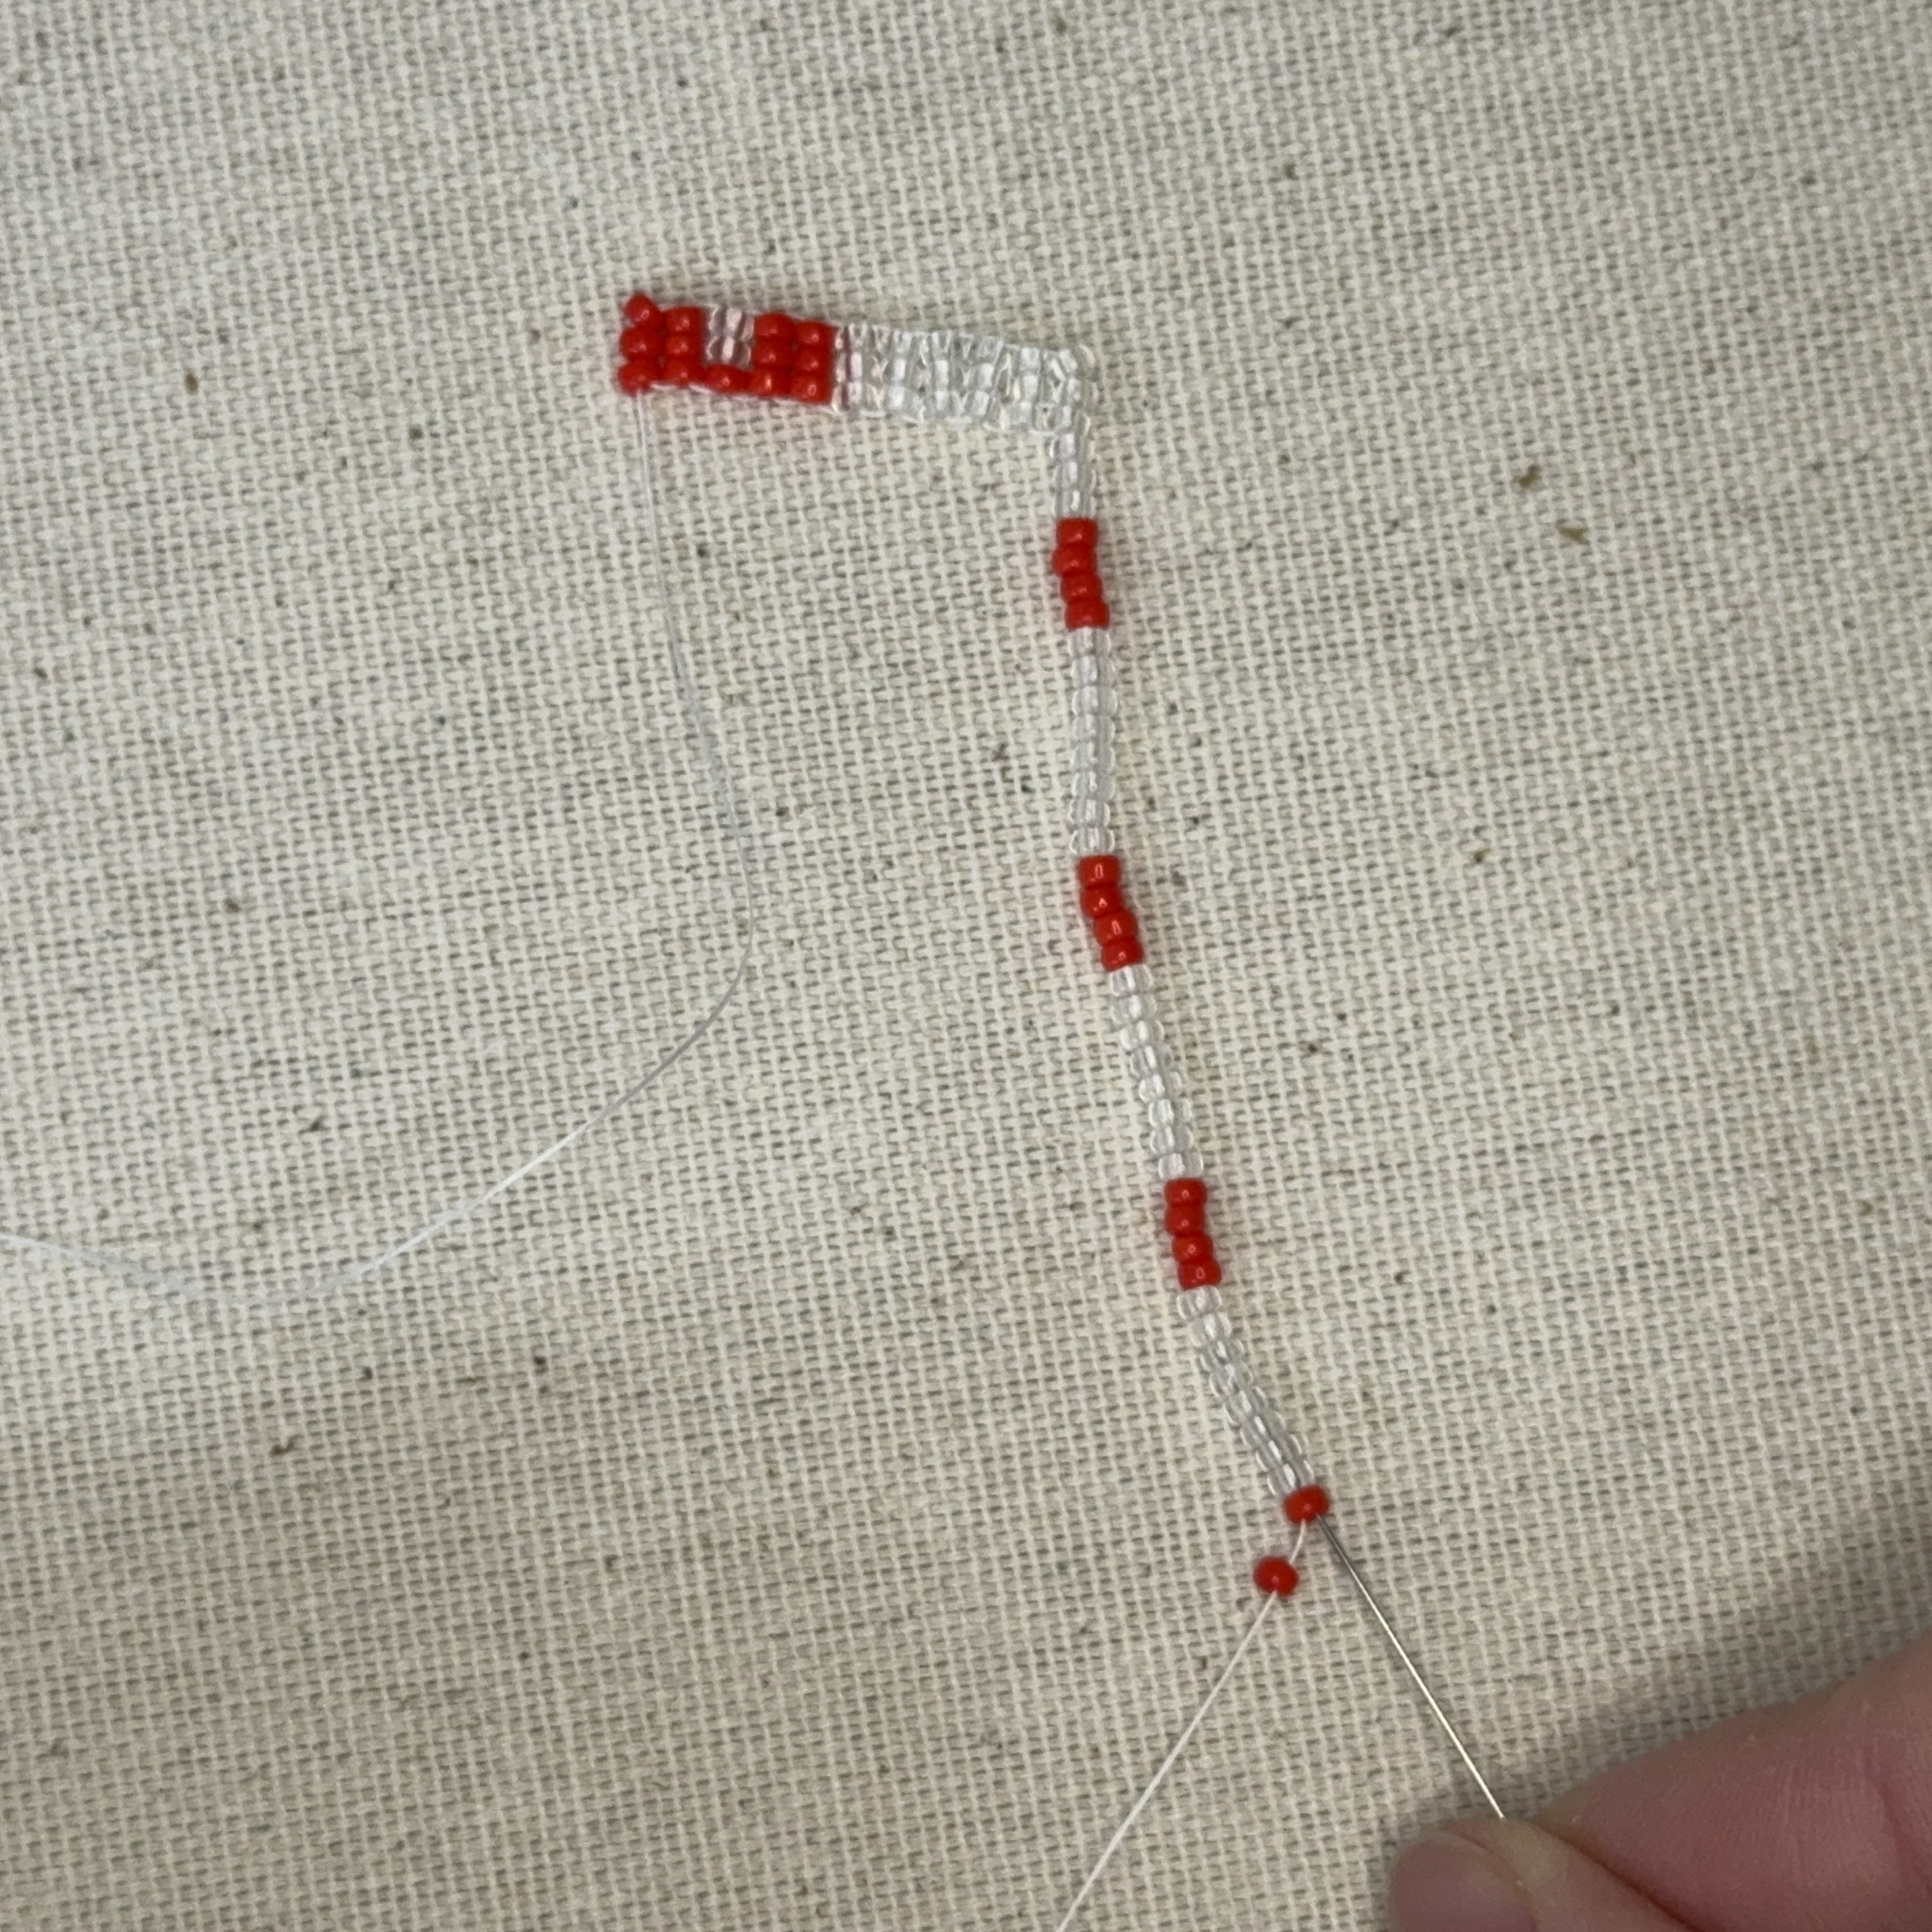
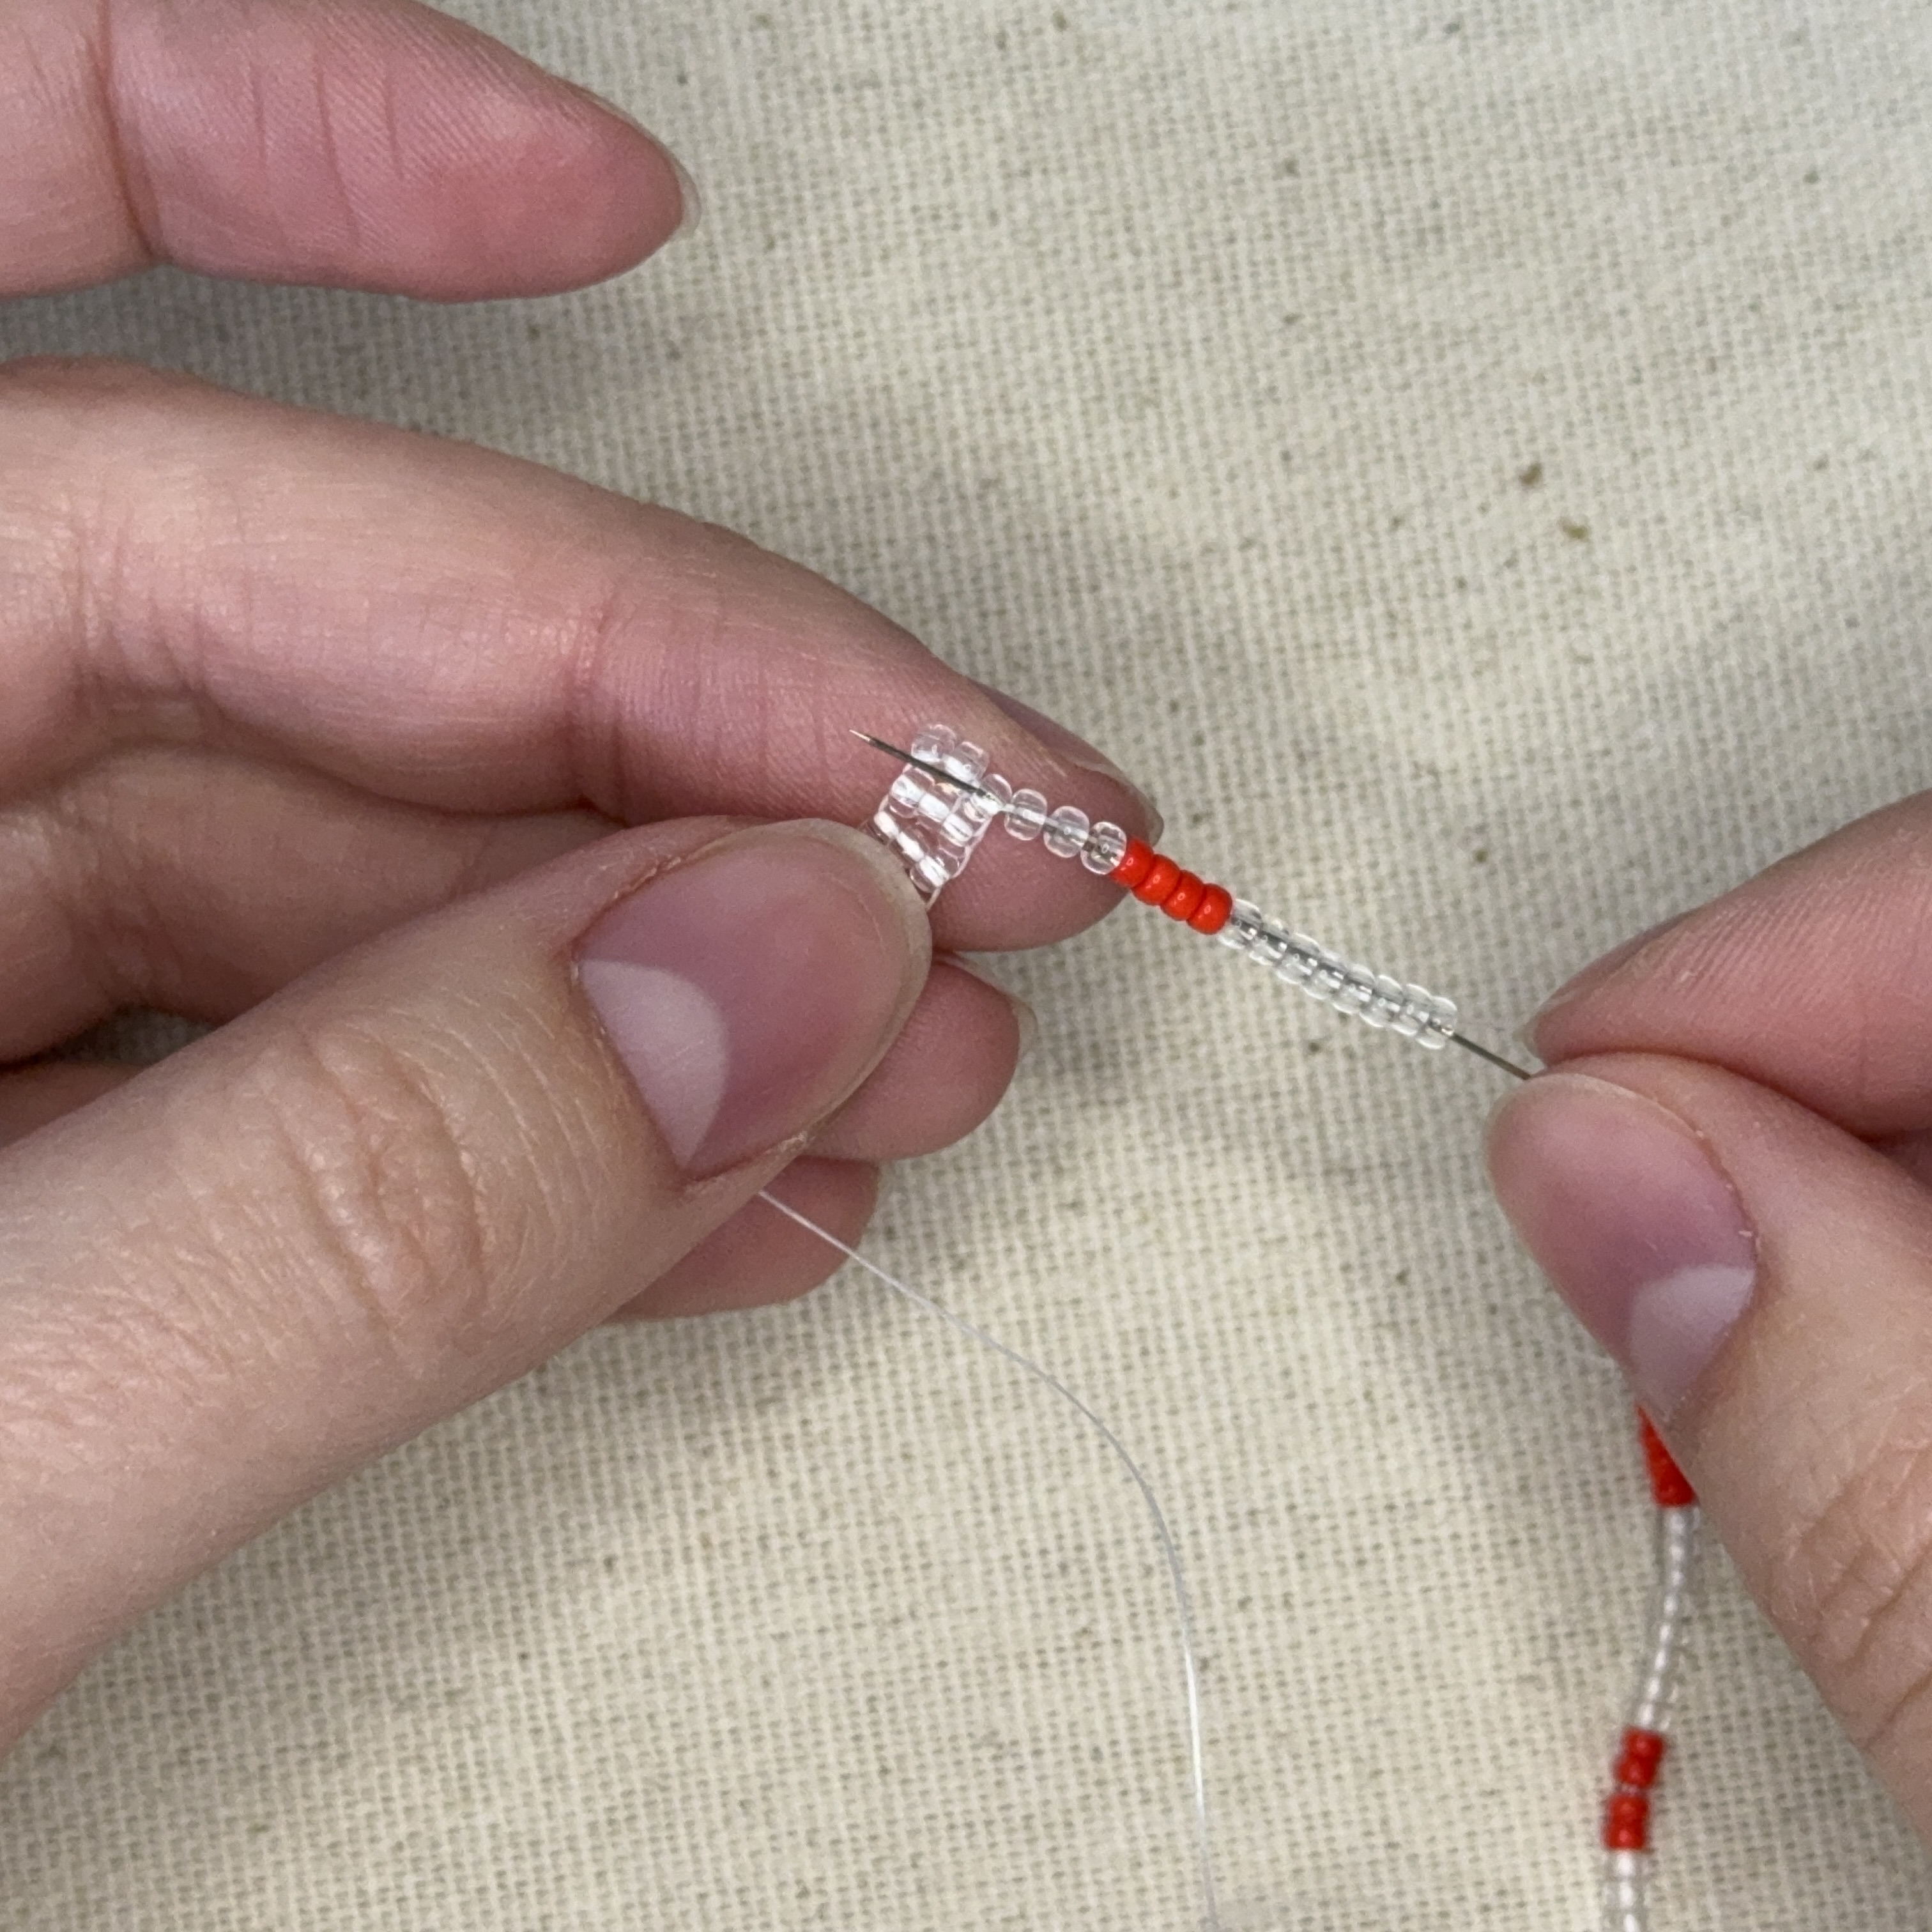
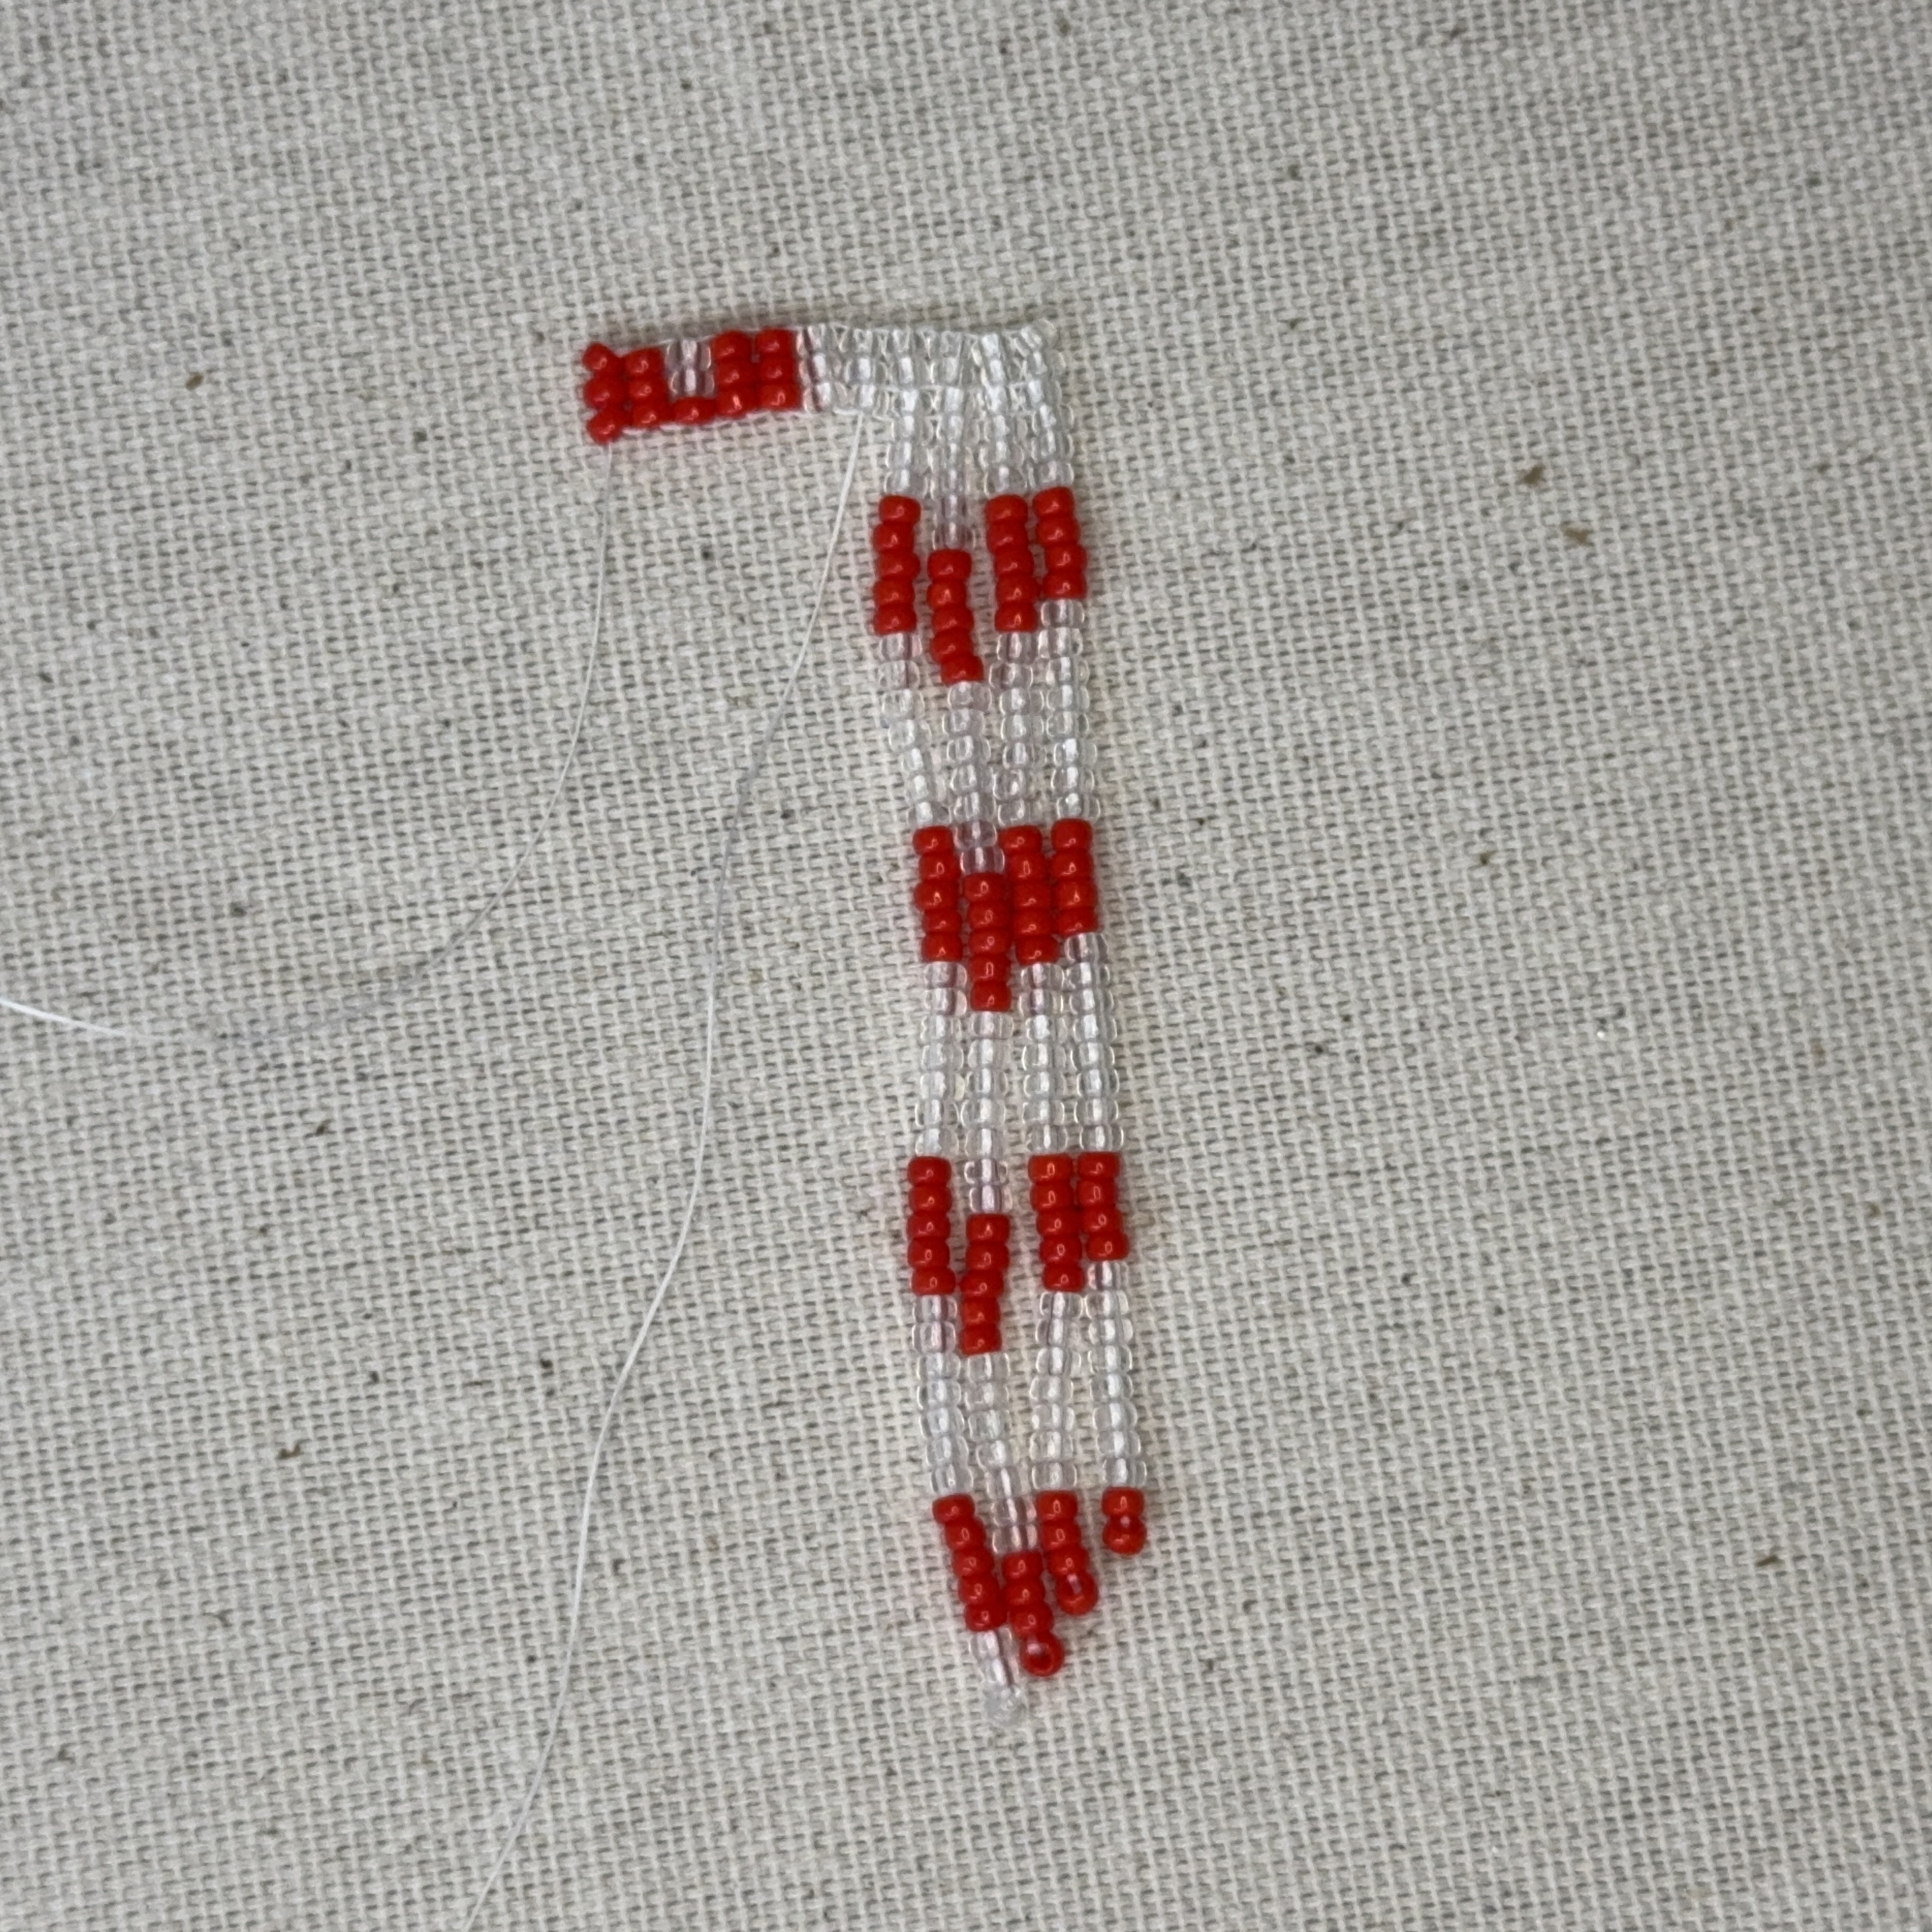
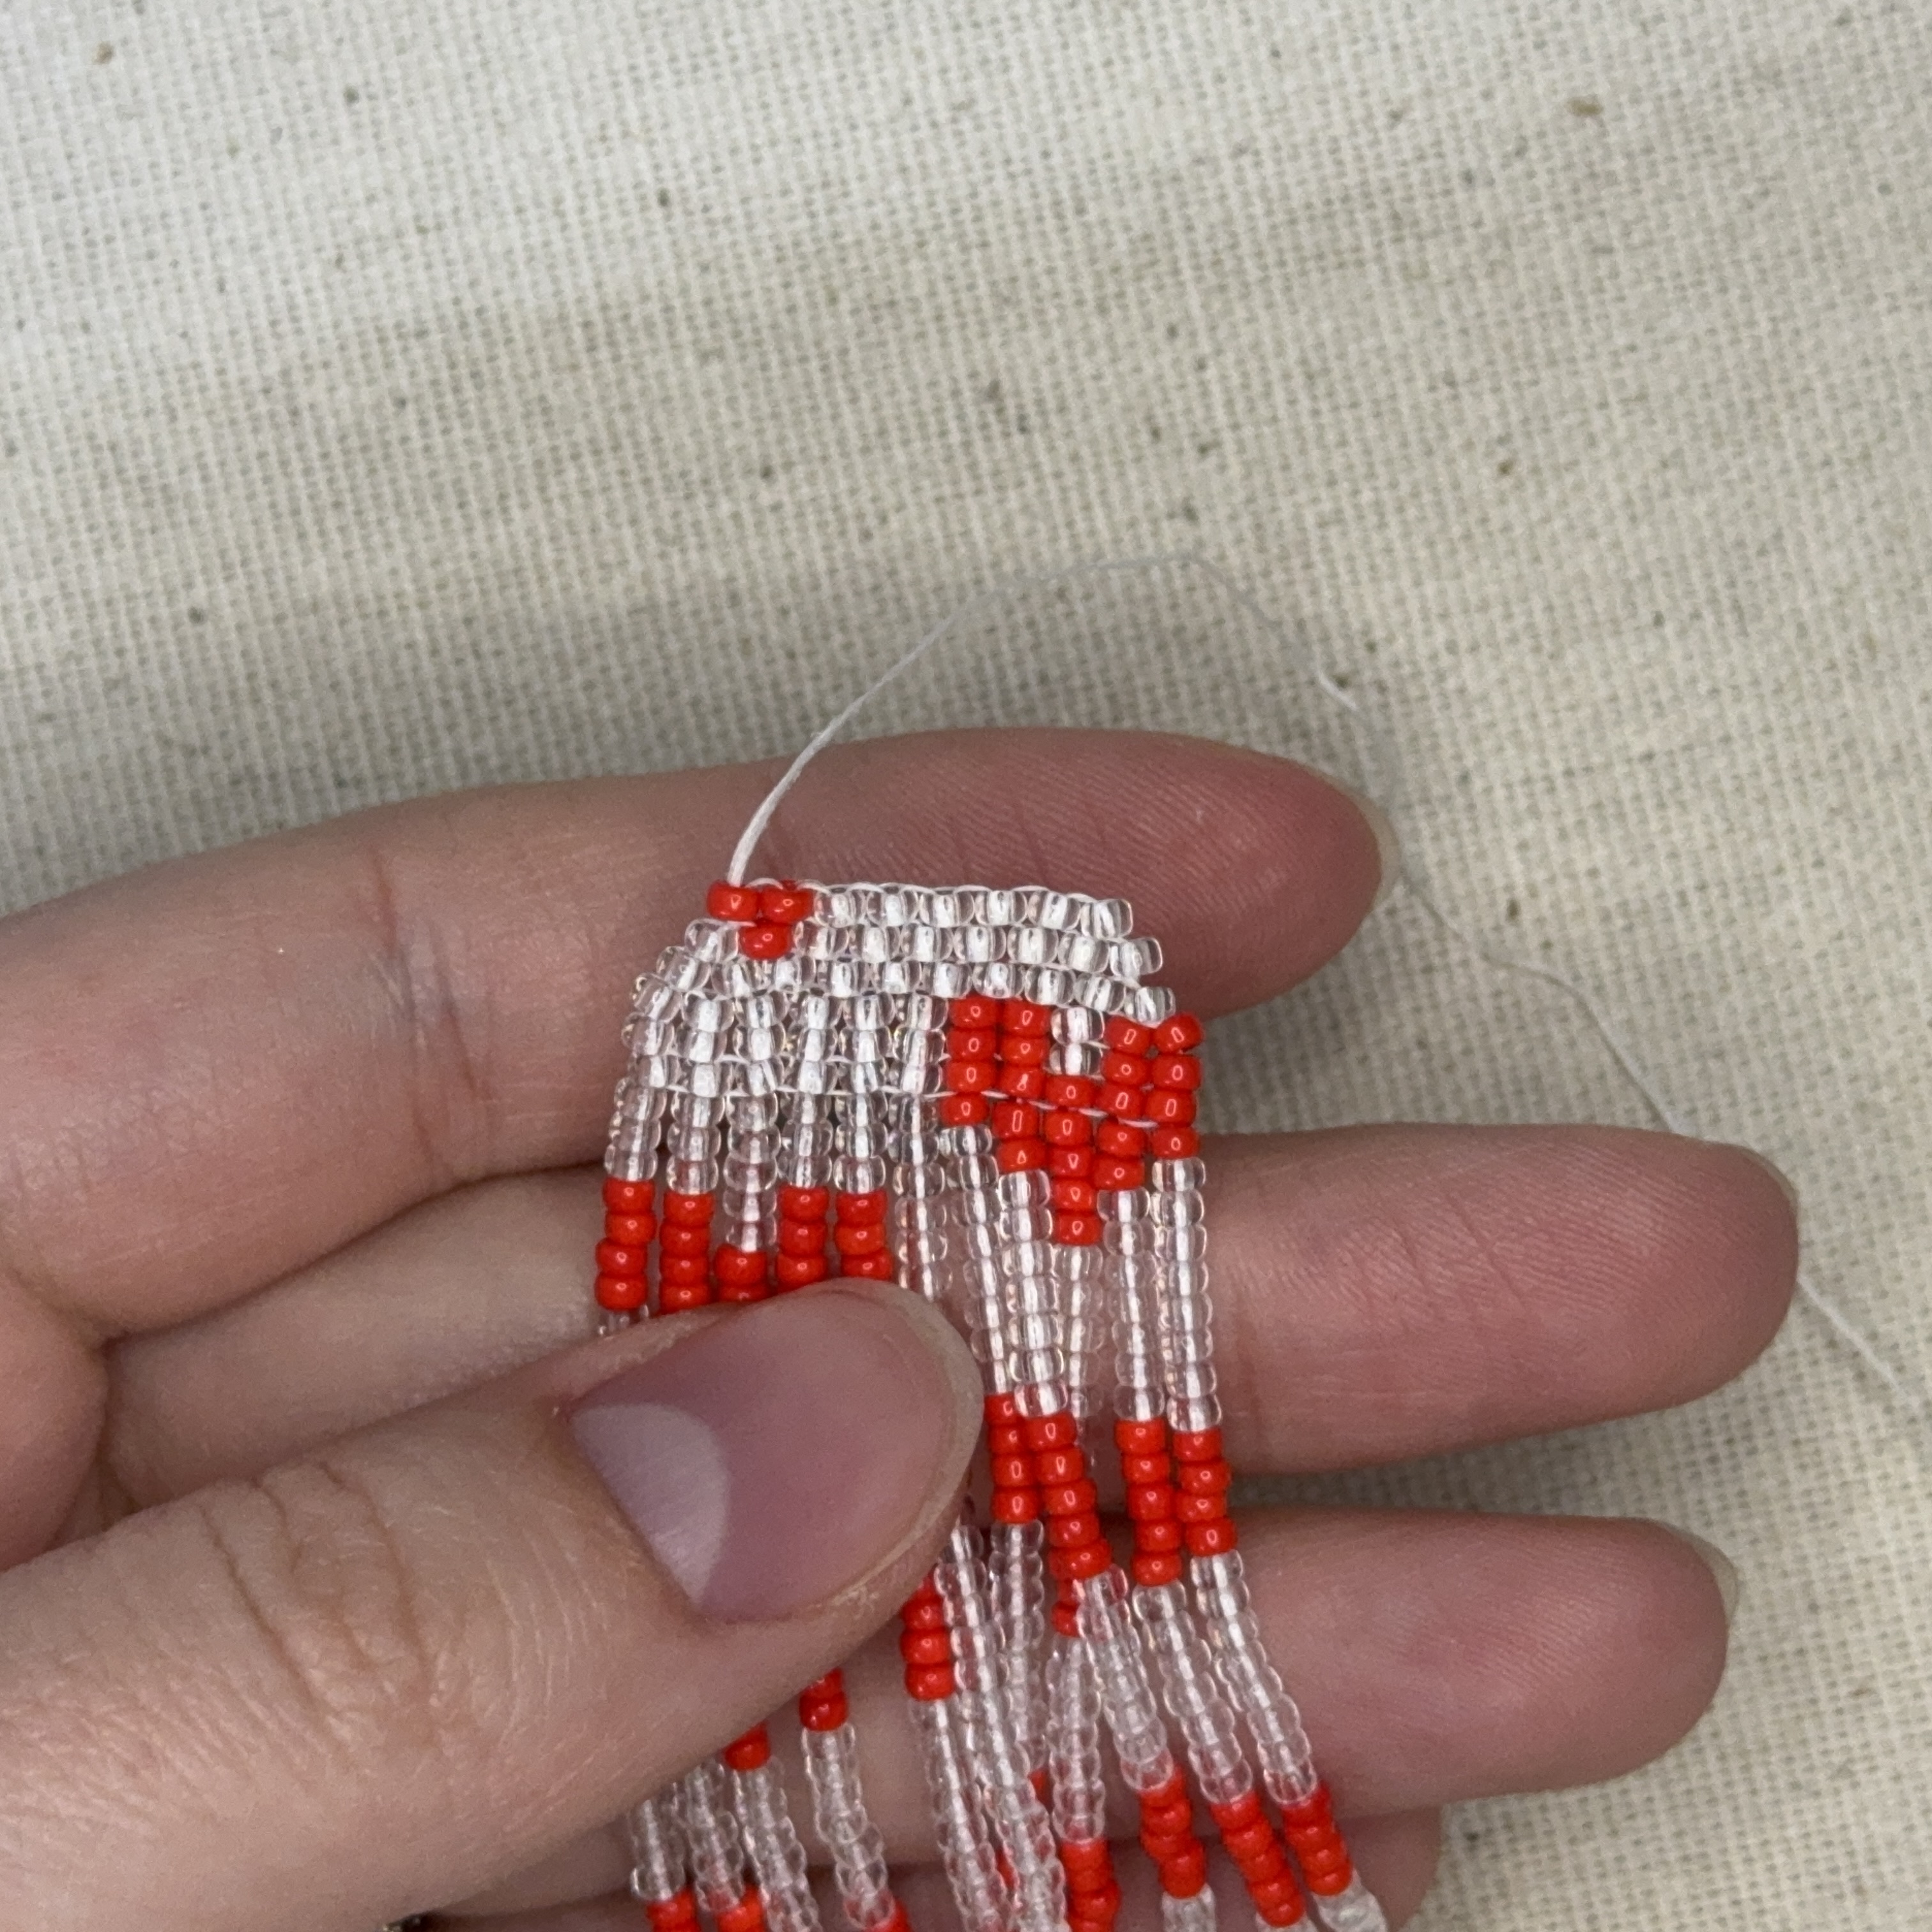
13. String on your beads, keeping to the pattern - it will be 3 clear, 4 red, 8 clear, 4 red, 8 clear, 4 red, 8 clear, 2 red
14. Skipping the very last bead on the fringe, thread your needle all the way back up the beads you just strung on
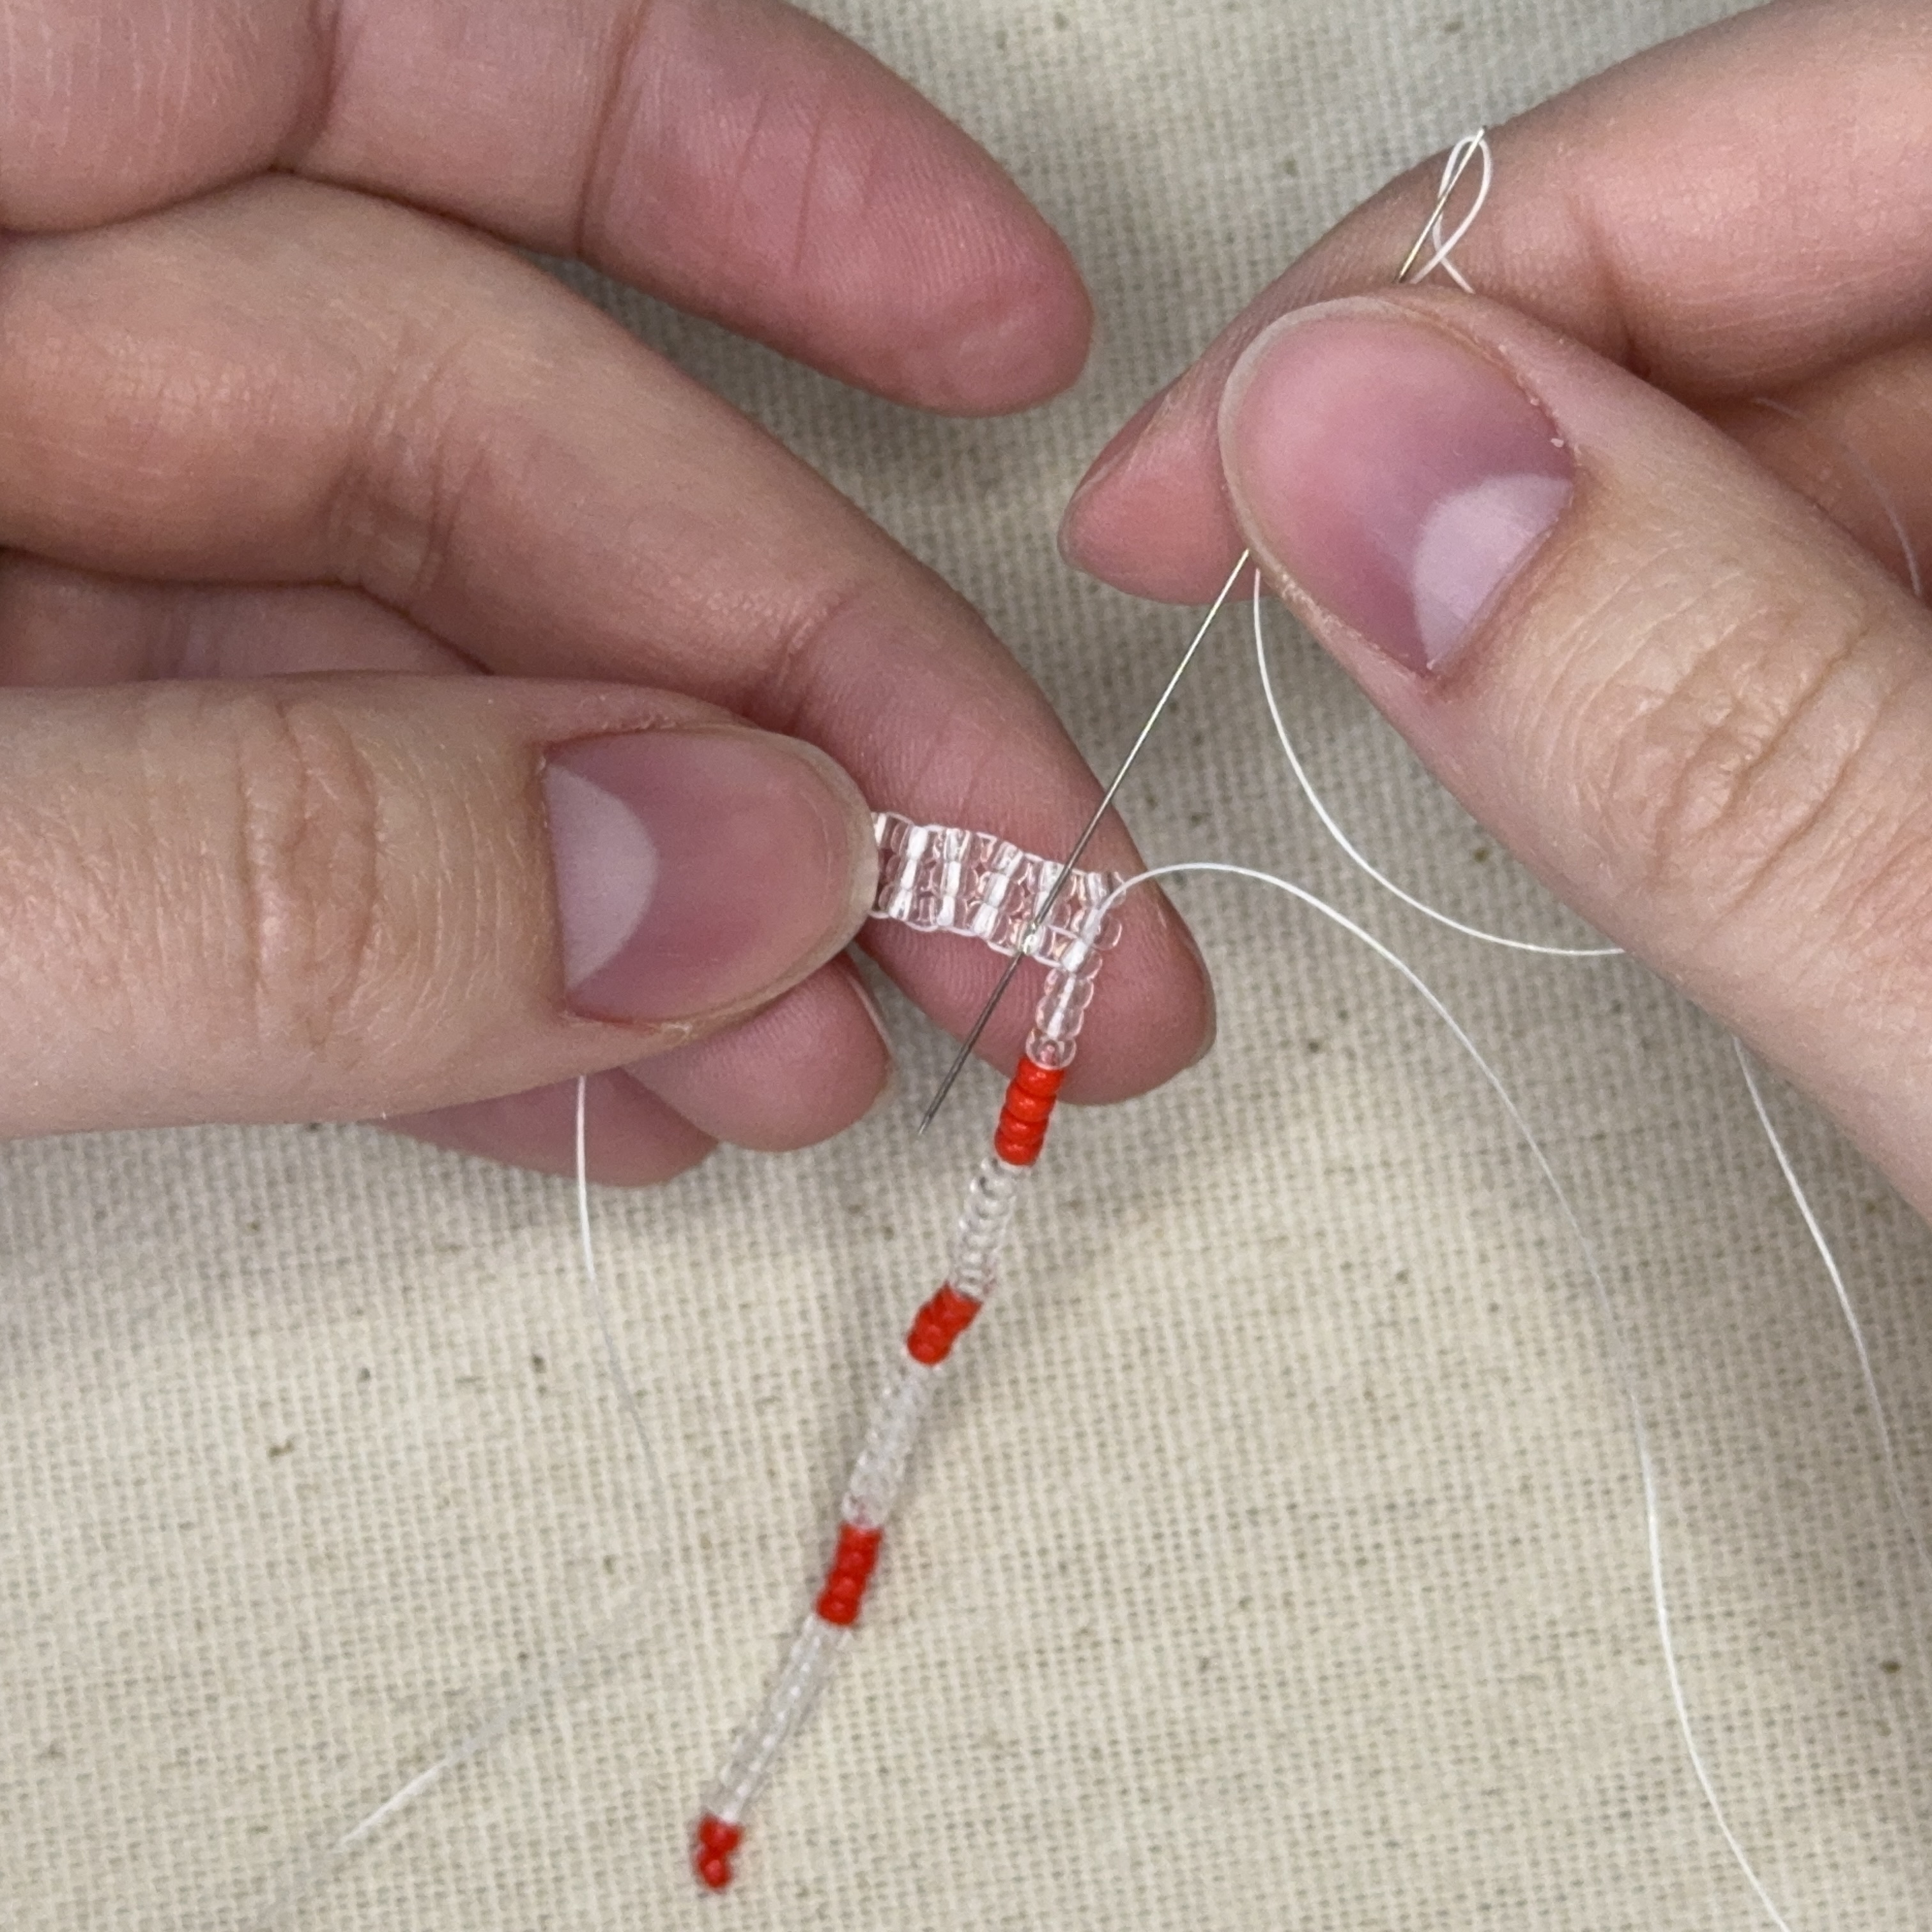
15. And thread the needle up through the first bead in the row of three
16. Thread your needle down through the next bead to the left, this will then start the second line of fringe
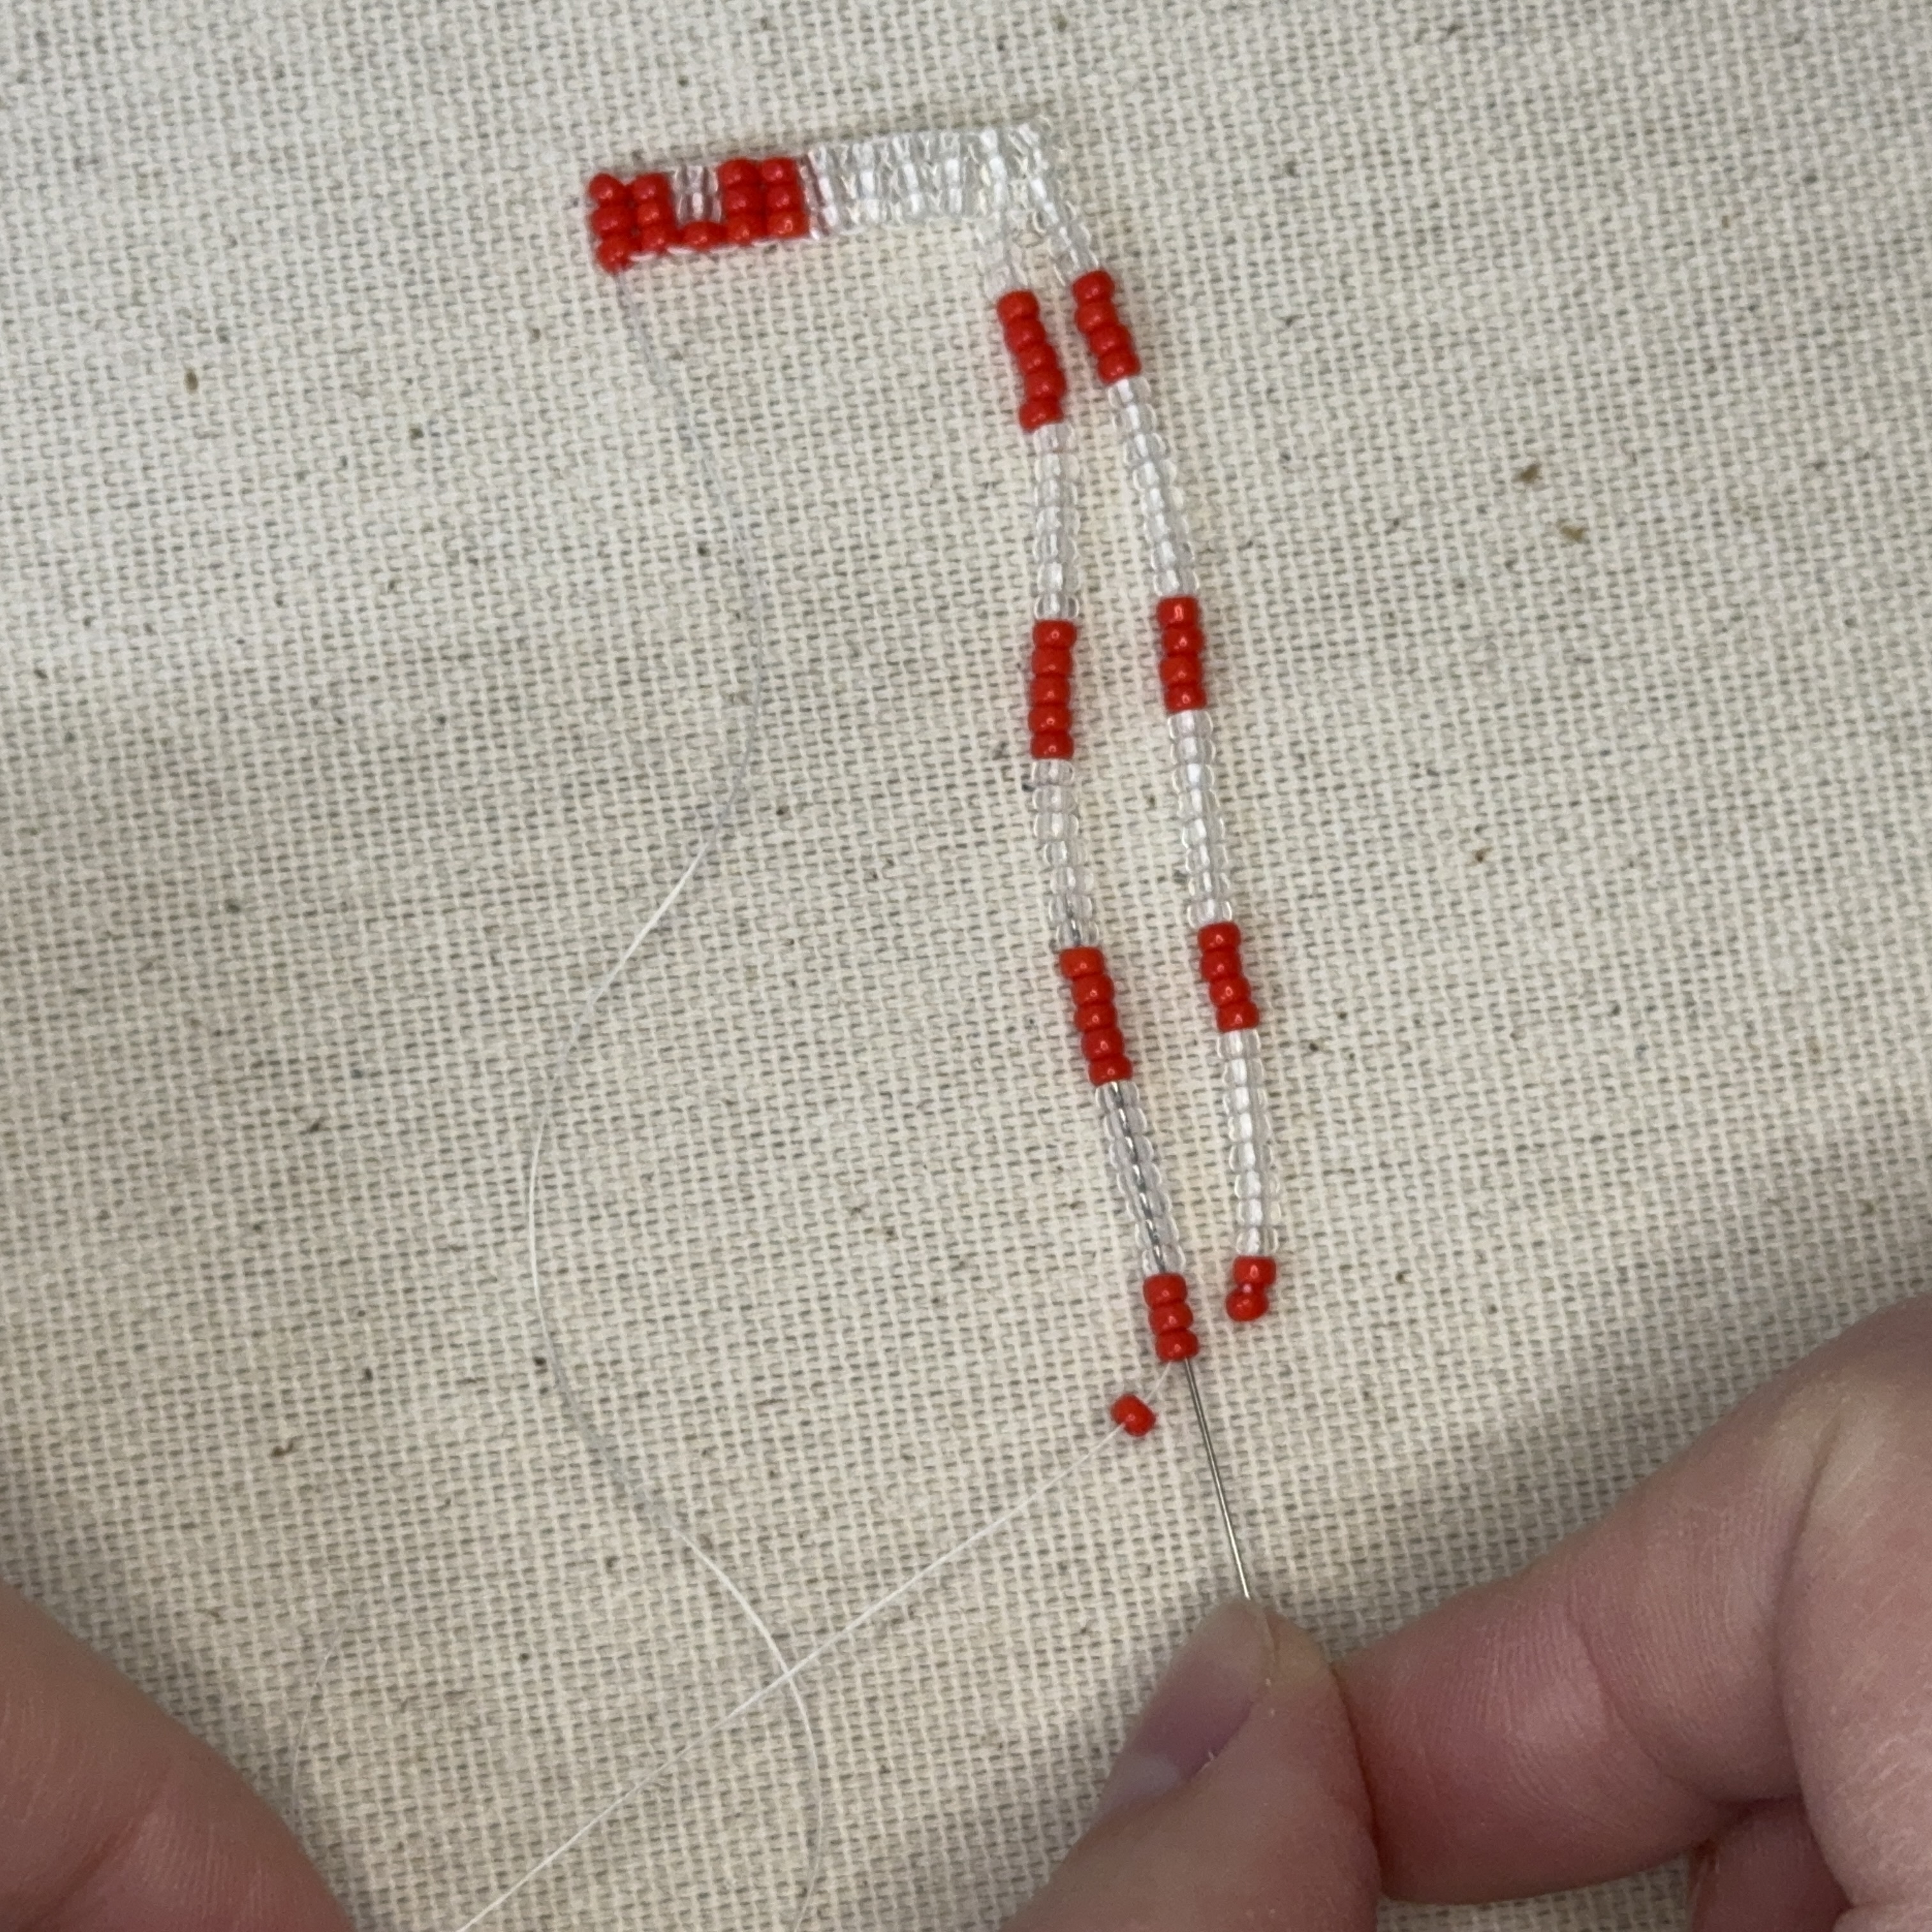
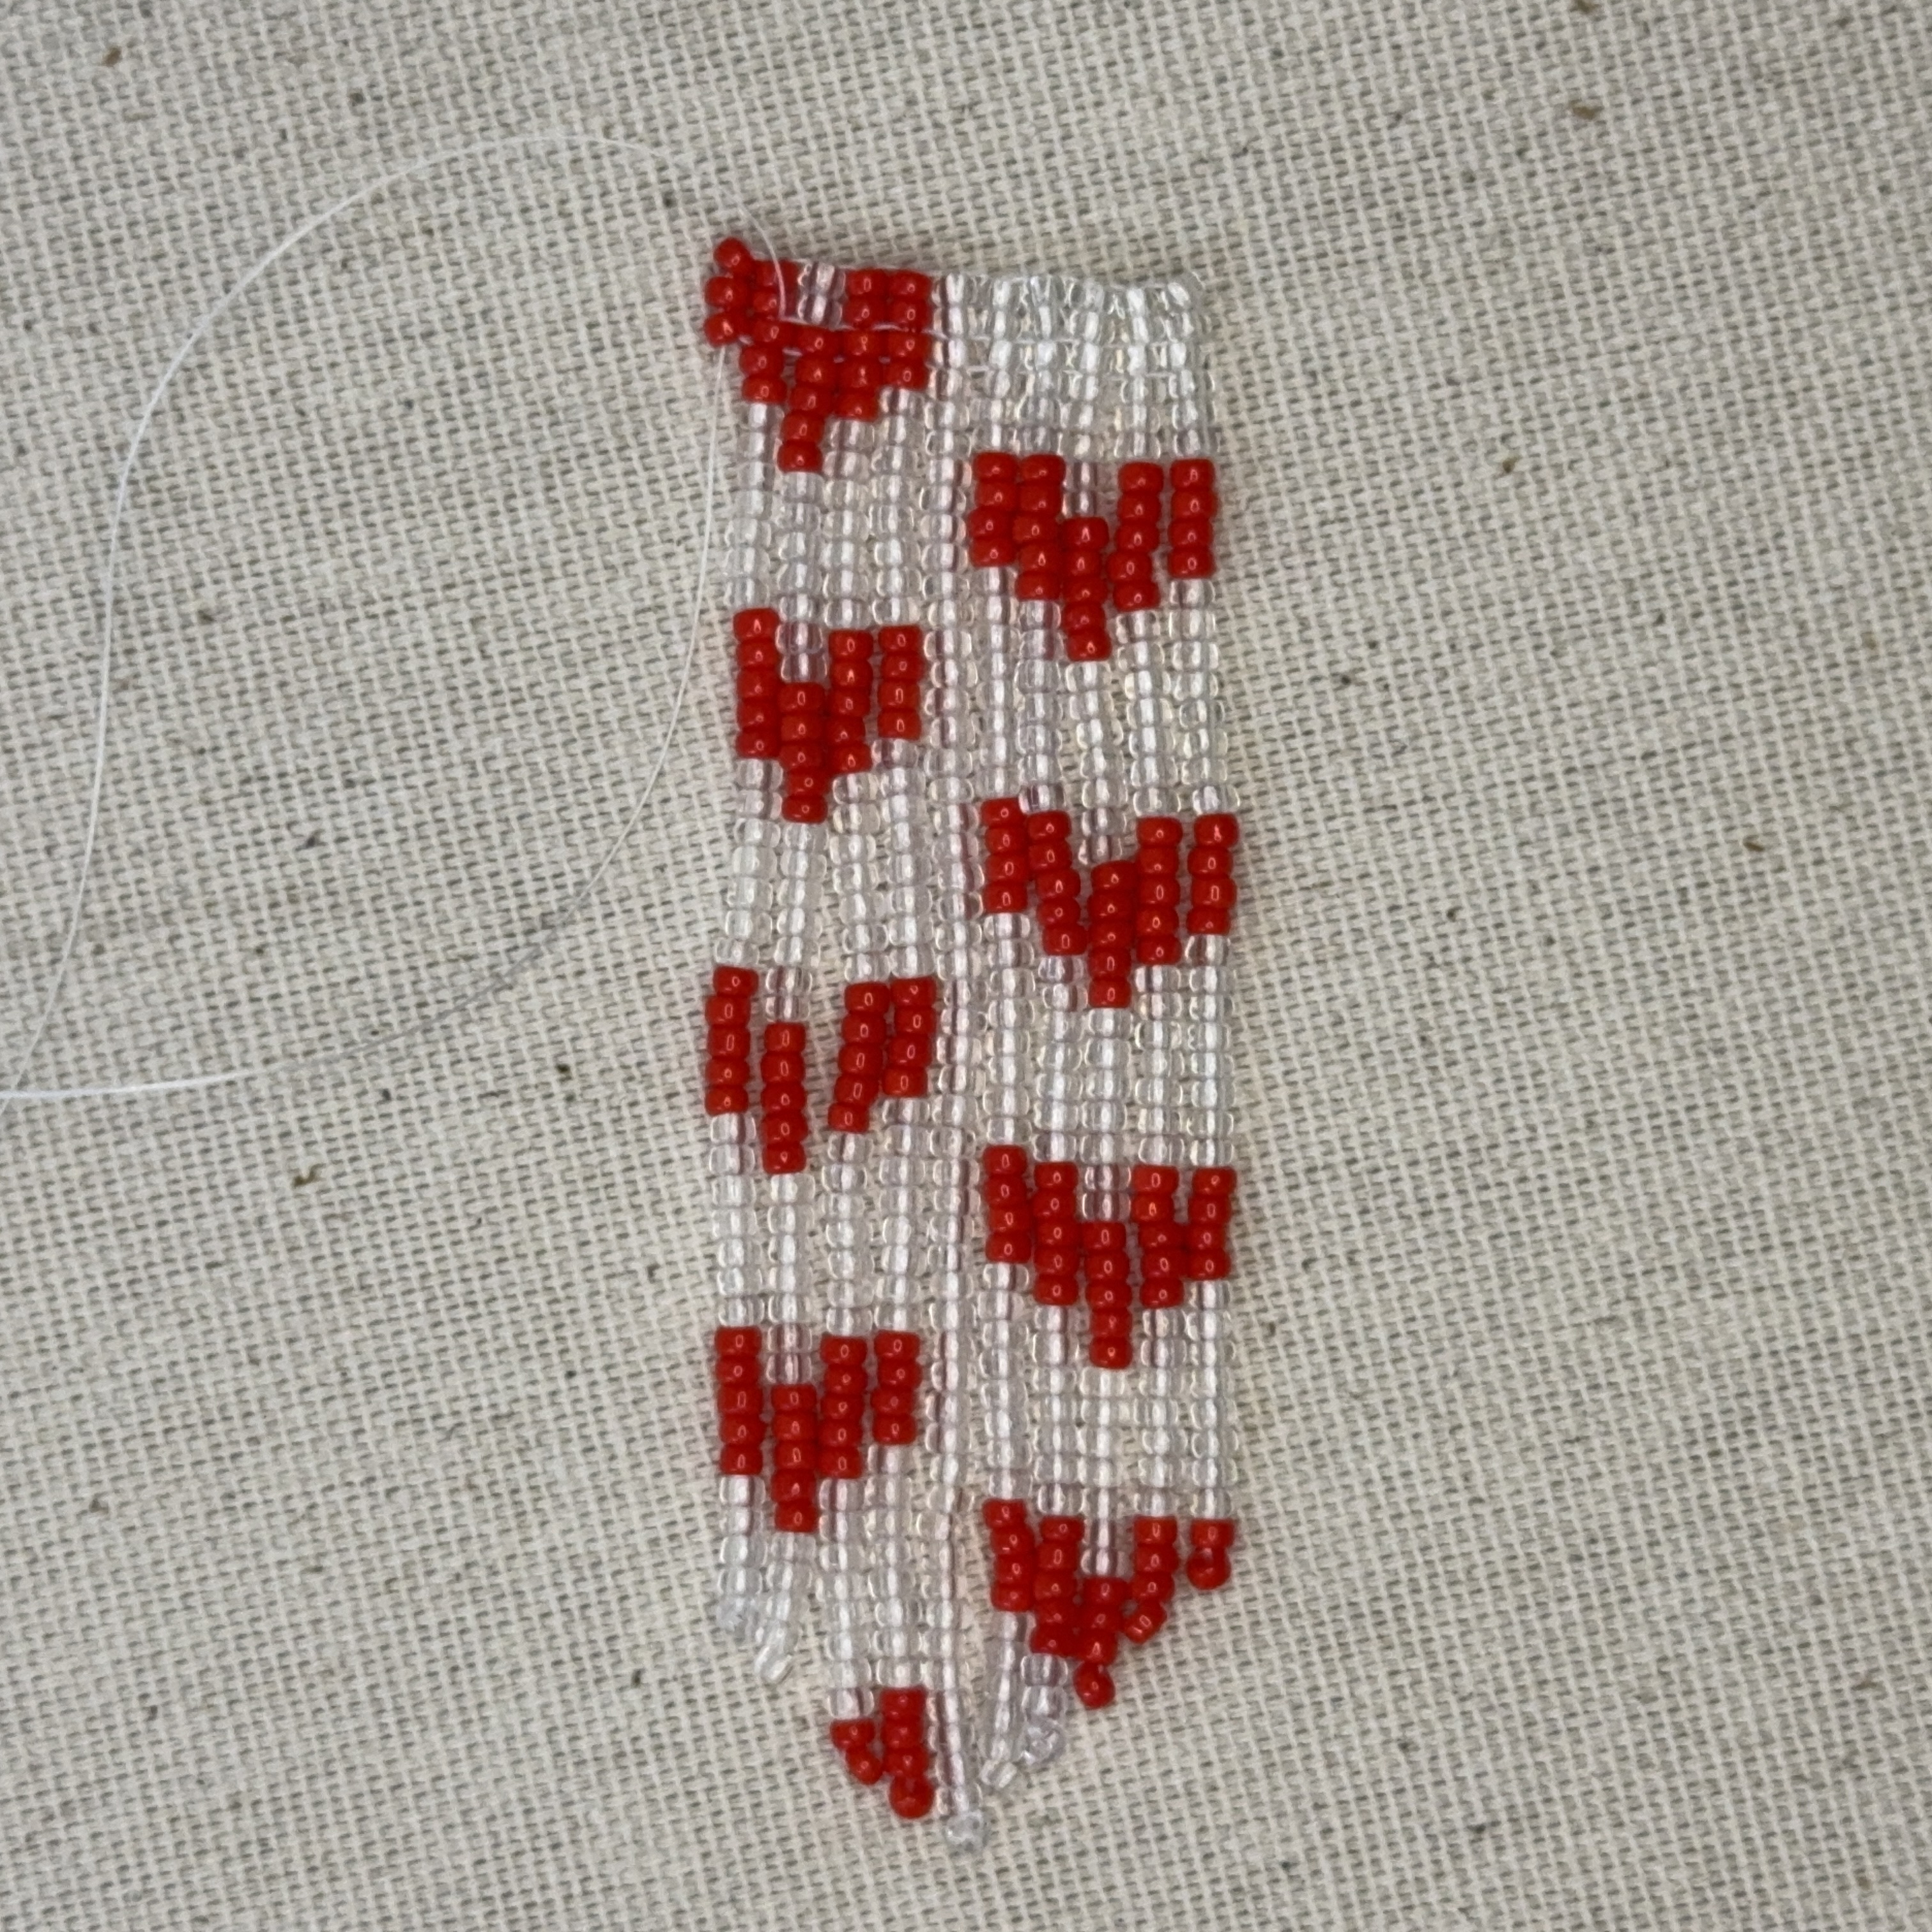
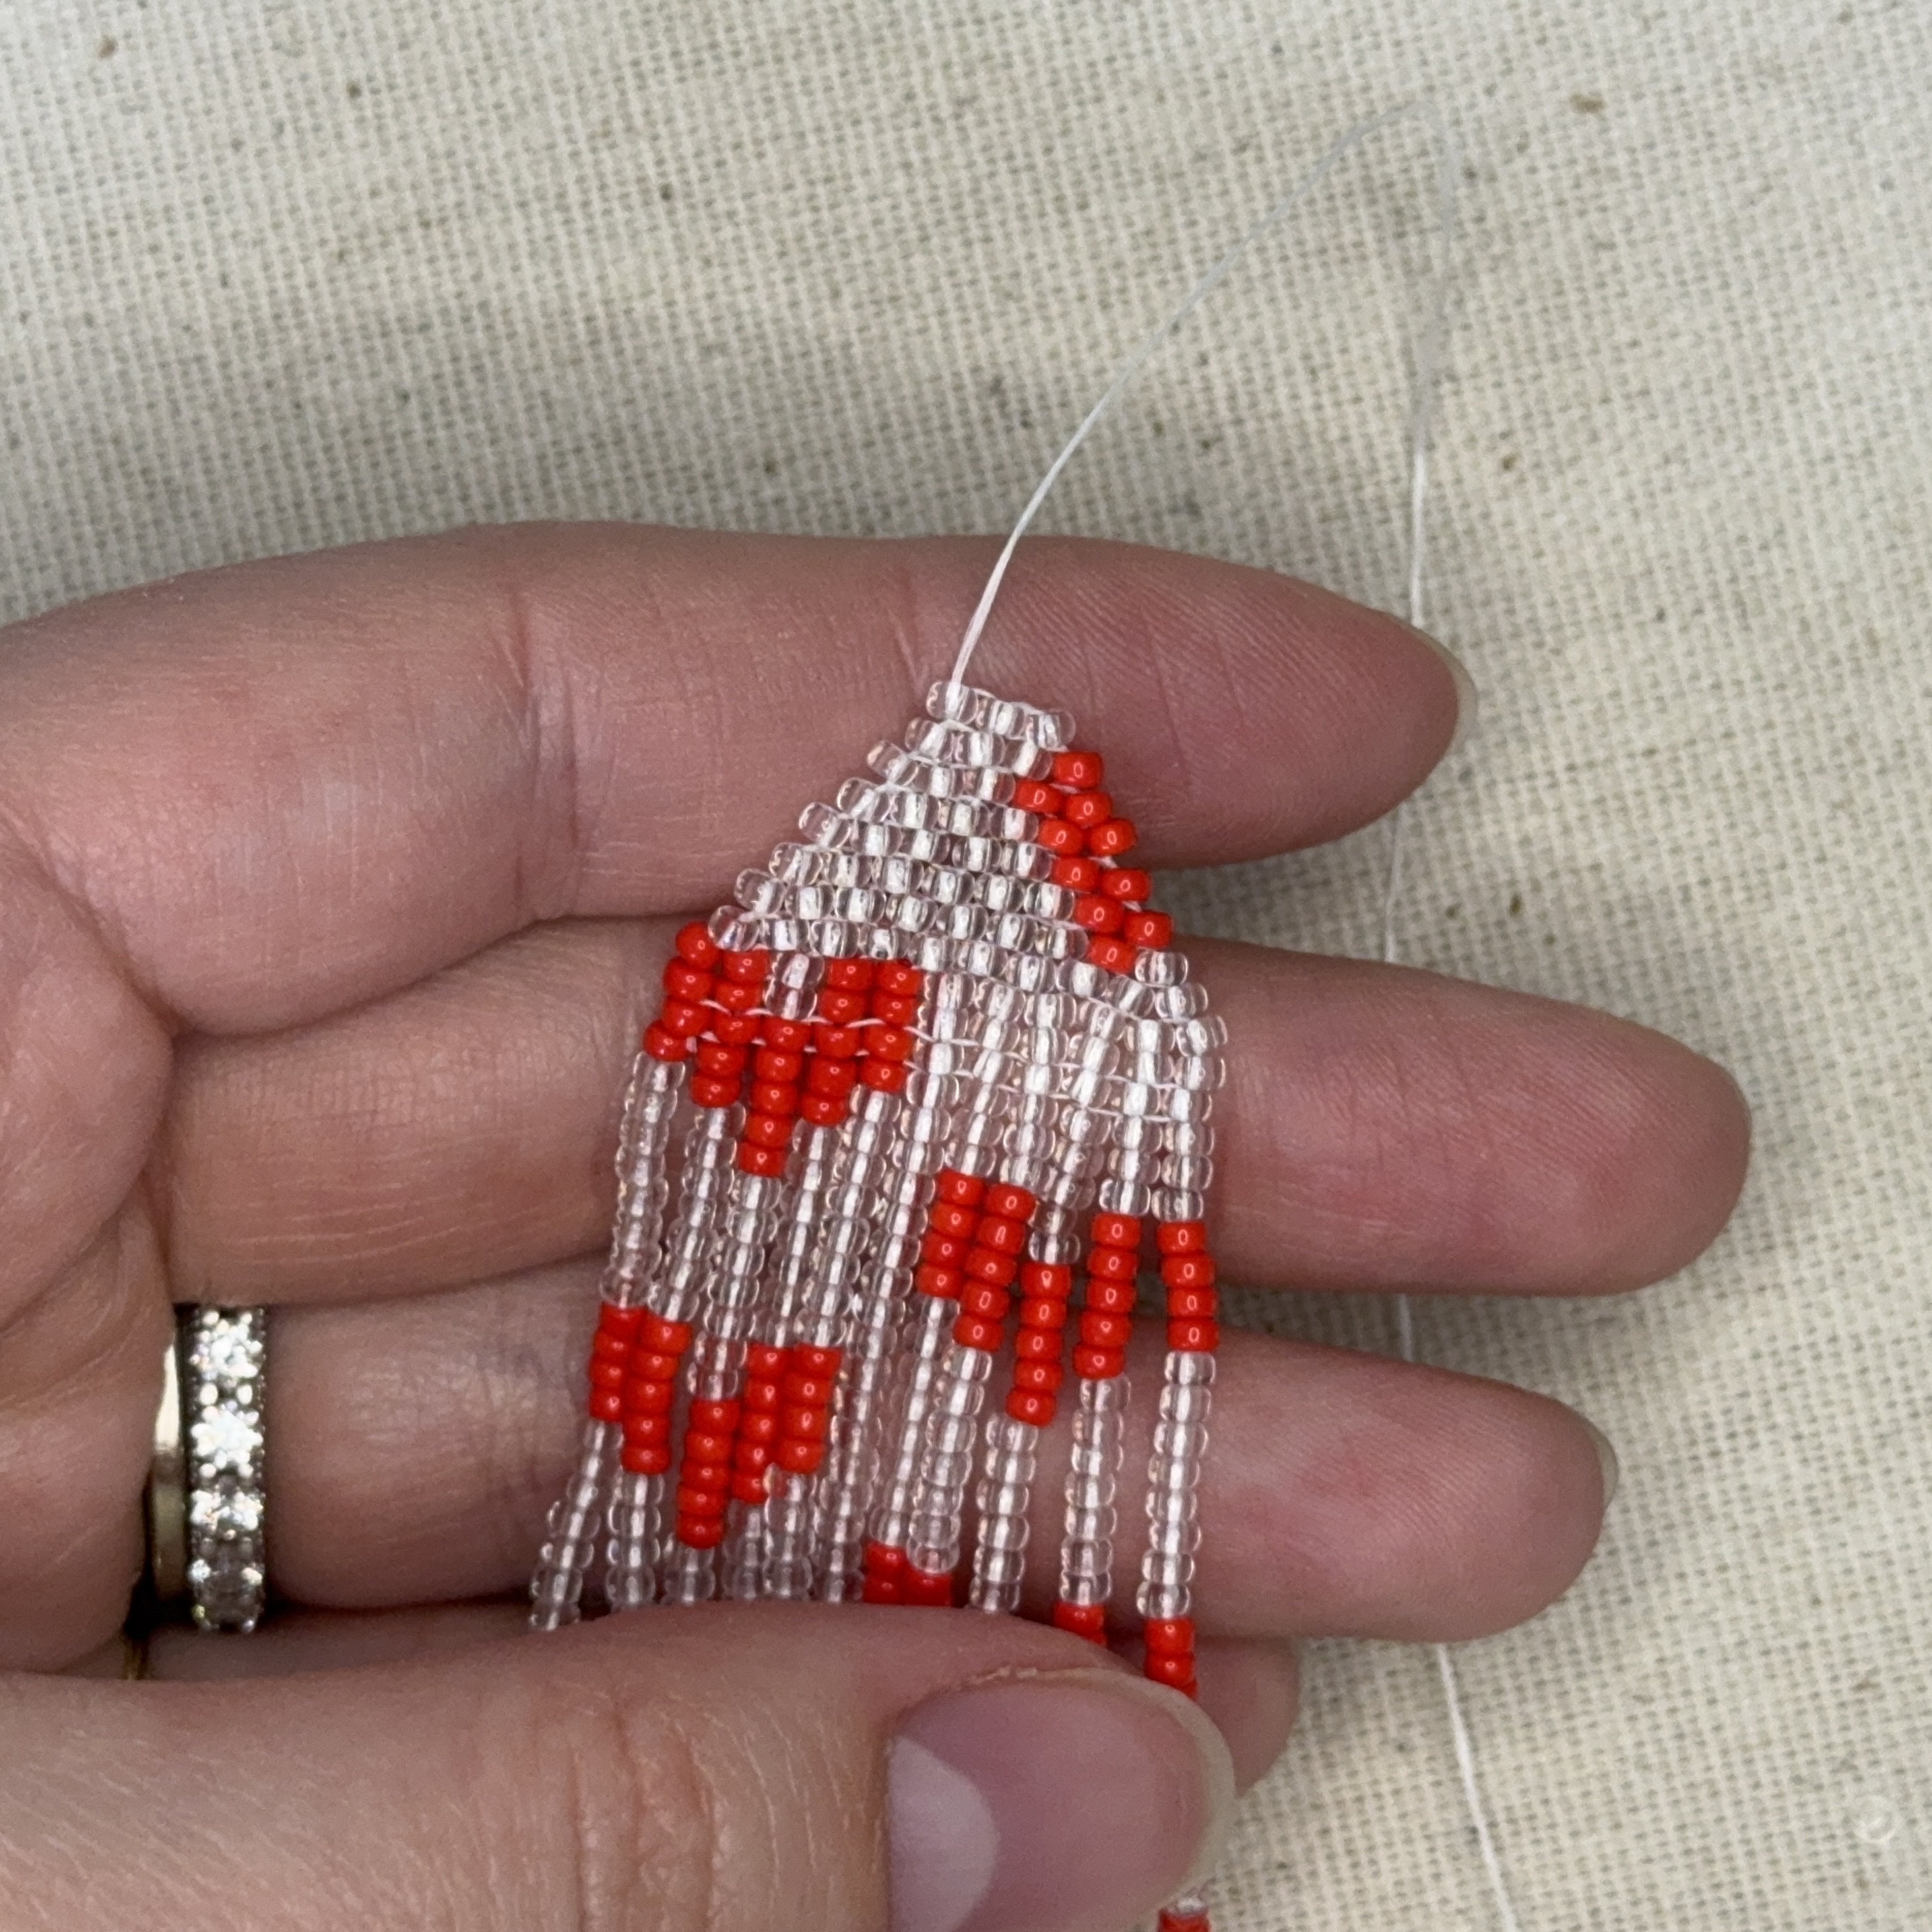
17. String on your beads following the pattern, this strand of fringe will be 3 clear, 5 red, 7 clear, 5 red, 7 clear, 5 red, 7 clear, 4 red - now repeat steps 14-16
18. Third line of fringe will be 5 clear, 5 red, 7 clear, 5 red, 7 clear, 5 red, 7 clear, 4 red
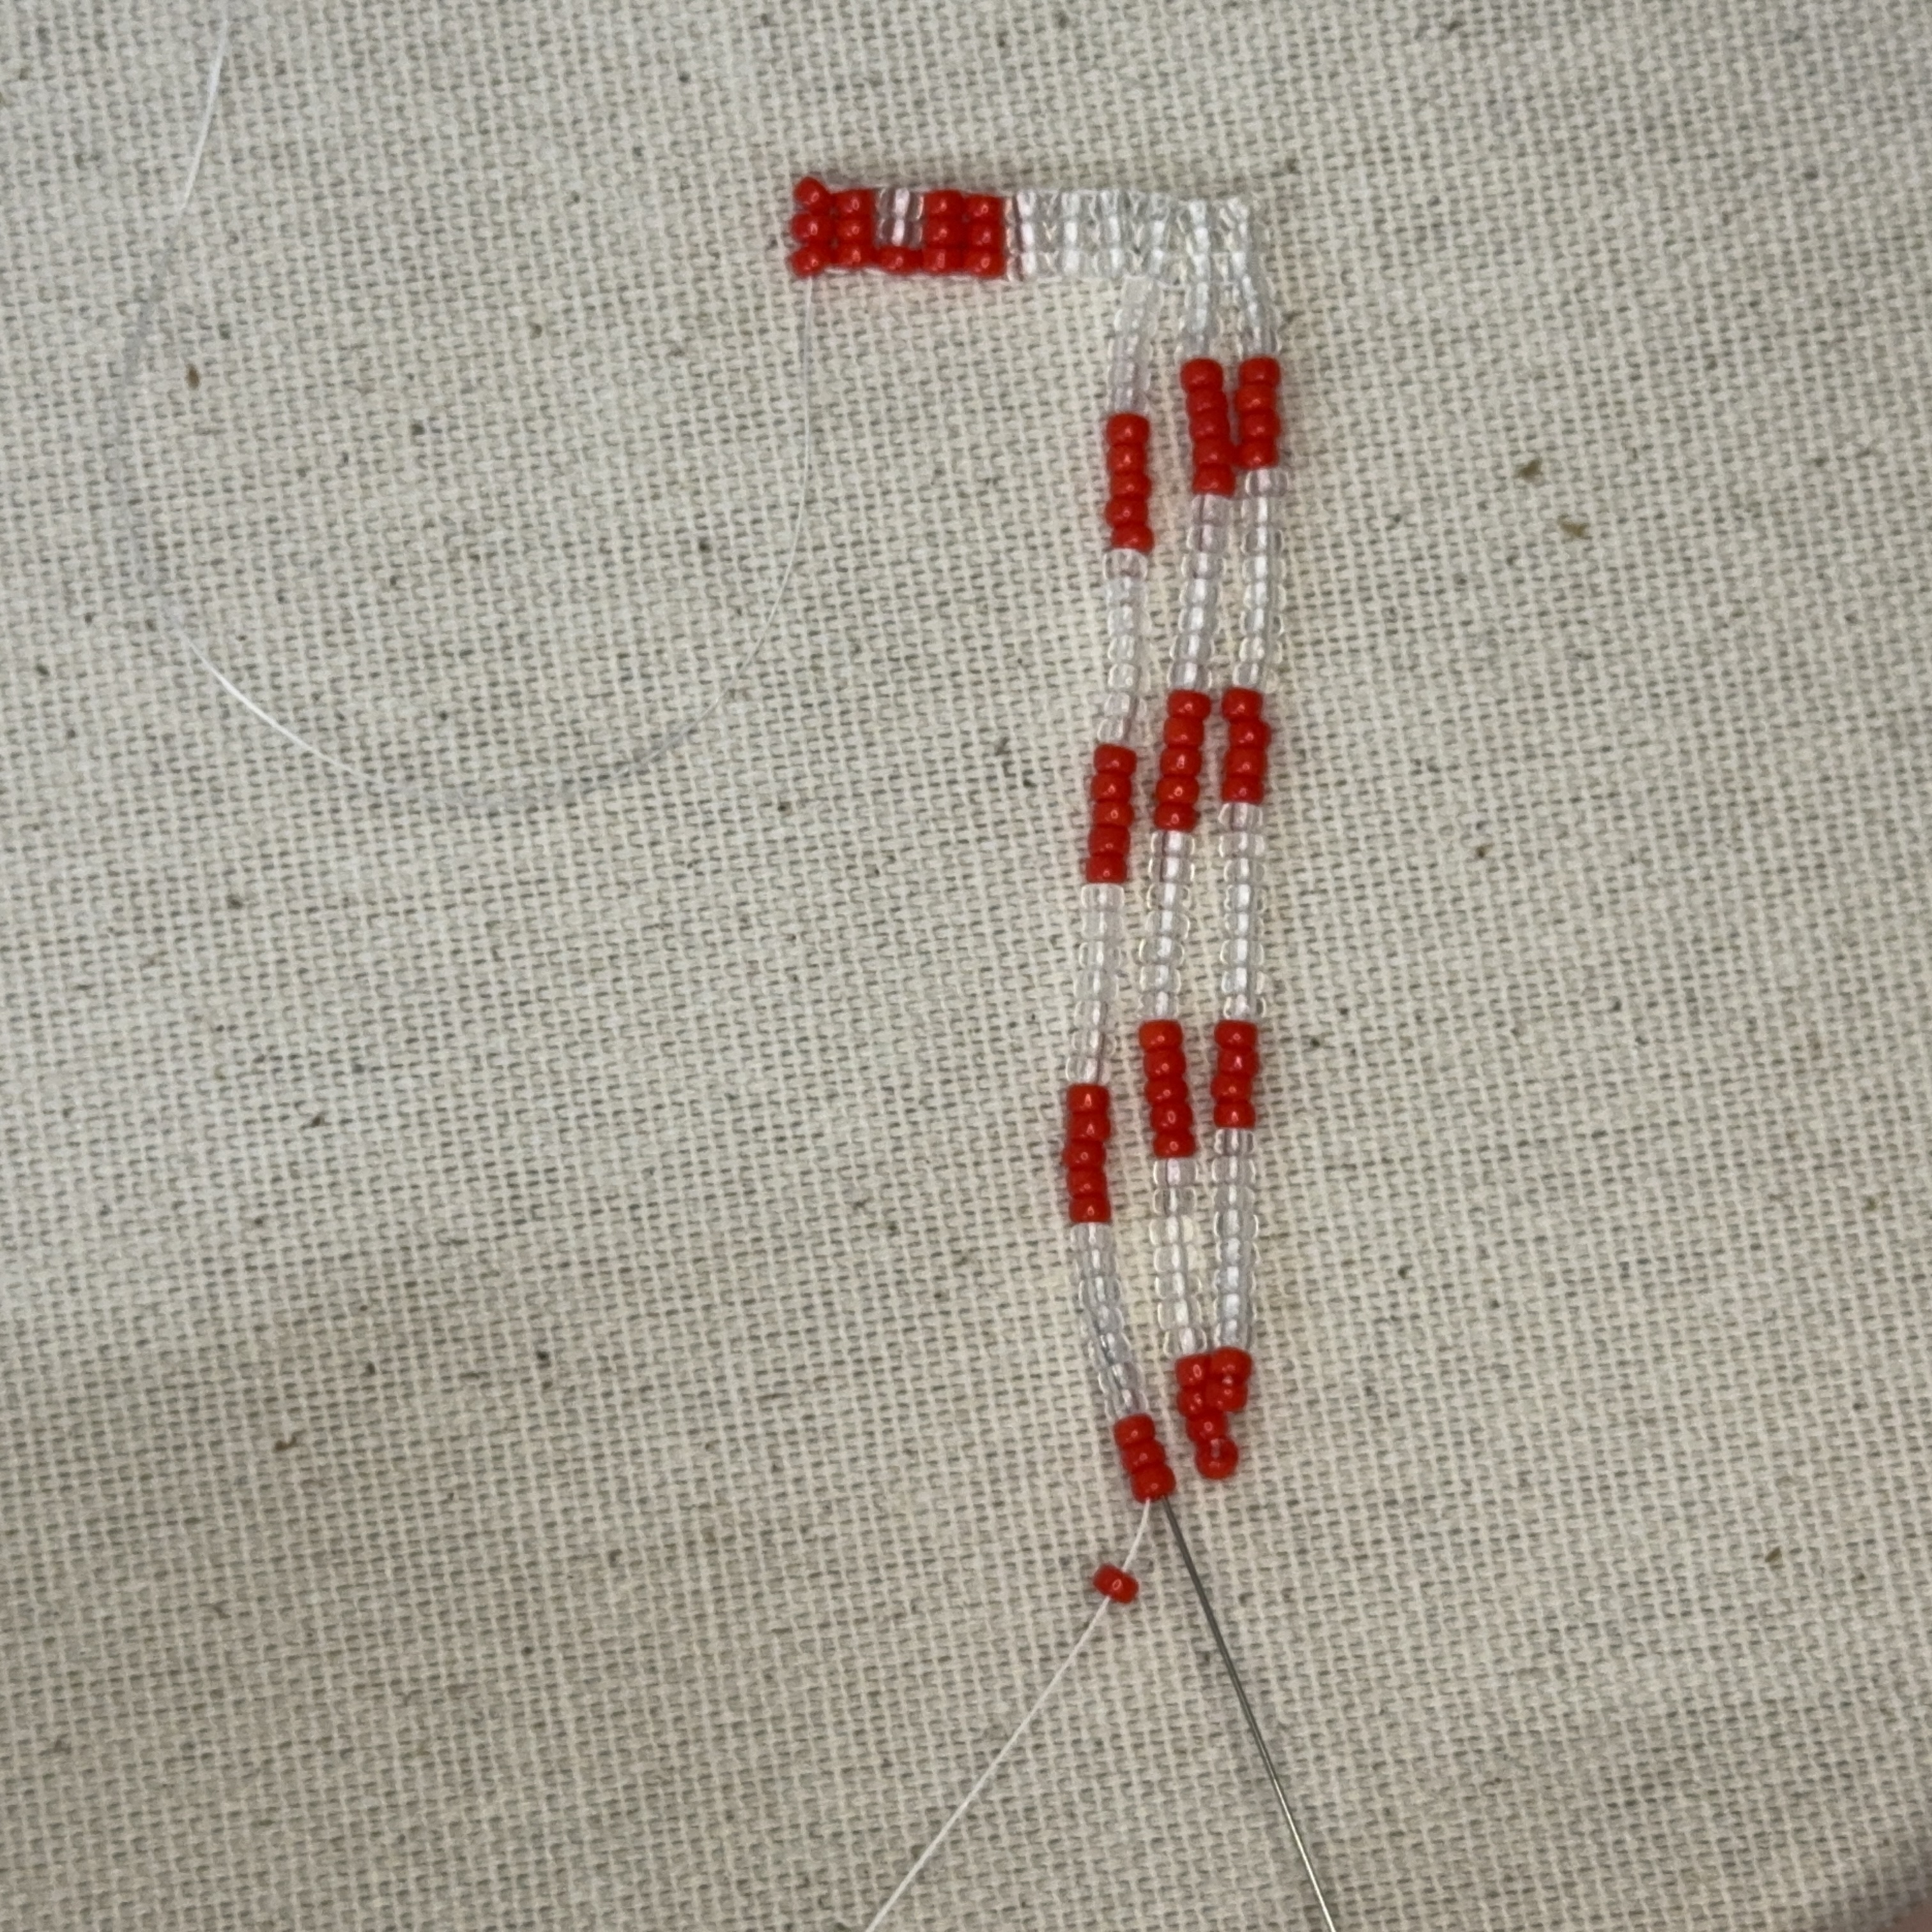
19. Fourth line of fringe will be 3 clear, 5 red, 7 clear, 5 red, 7 clear, 5 red, 7 clear, 5 red, 3 clear
20. Continue with the pattern until you have just one more strand of fringe to complete
21. Thread the needle down the last bead as you would to complete the fringe, but now we will tie the thread we are using with the tail. Tie a surgeon's knot and then cut off the tail as close to the knot as you can, and secure with a dab of gs-hypo glue
22. String on the last strand of fringe and thread the needle all the way up the row of 3 beads to the other end.
Part 3
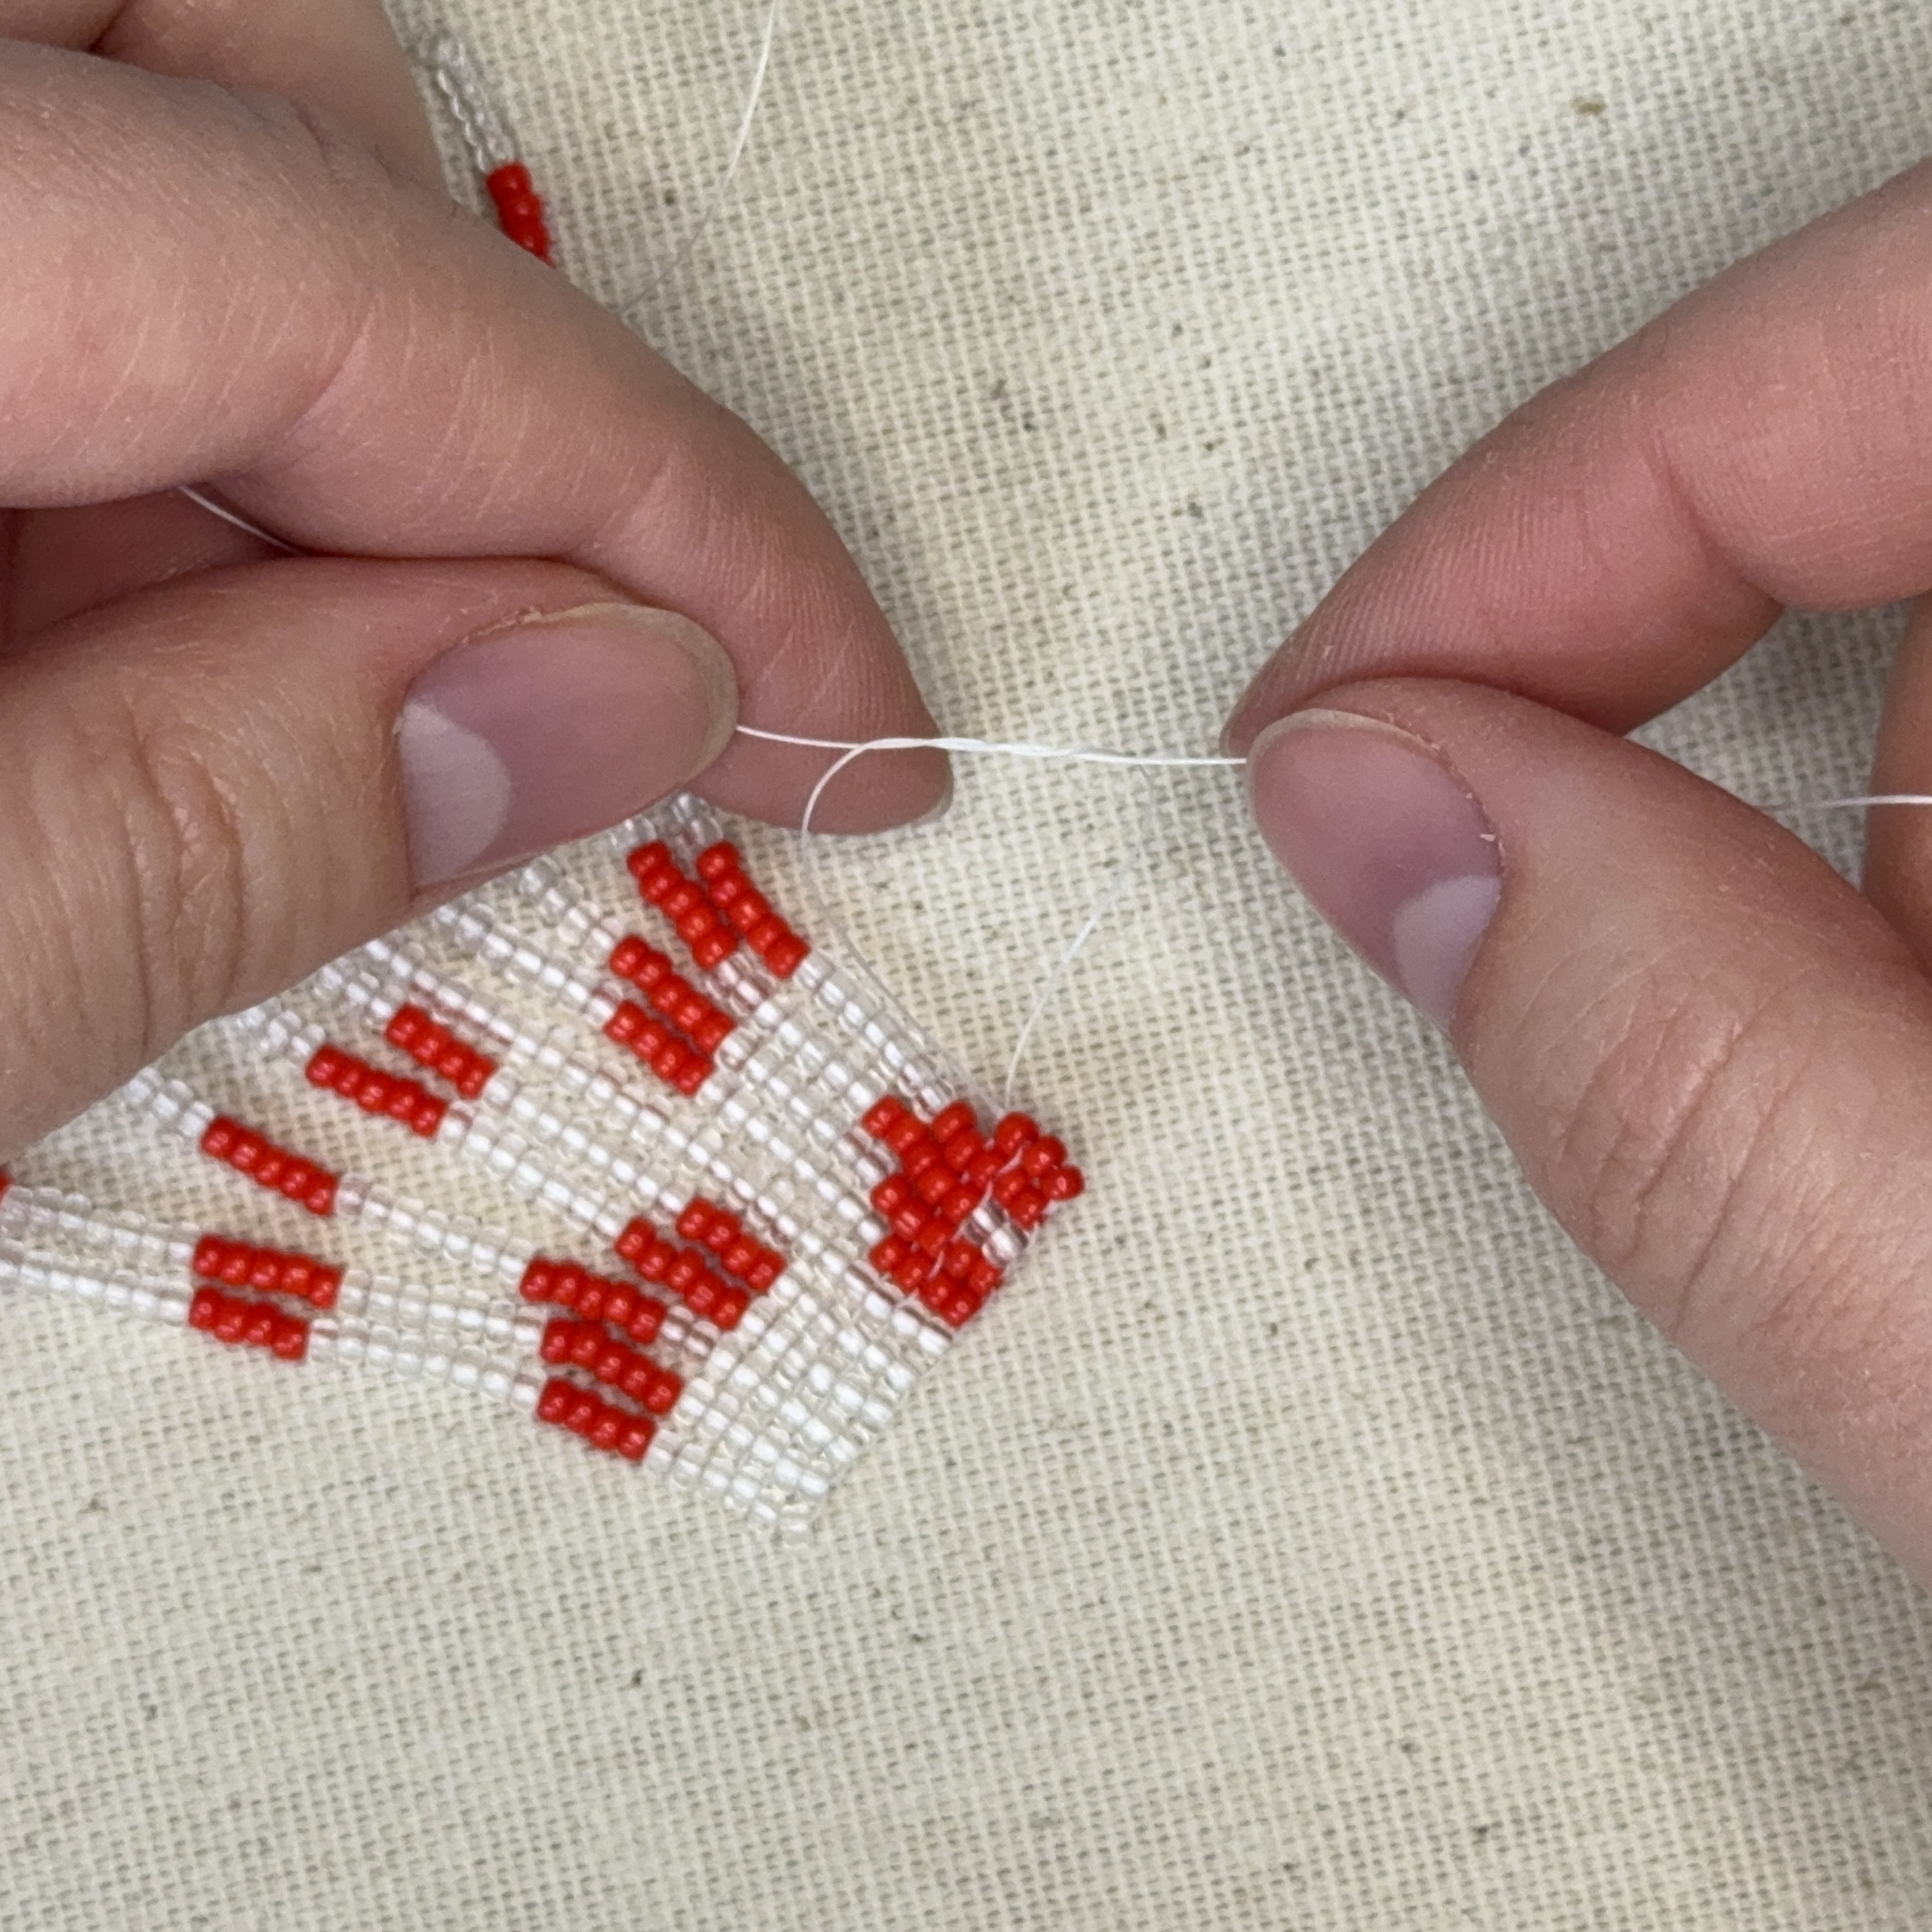
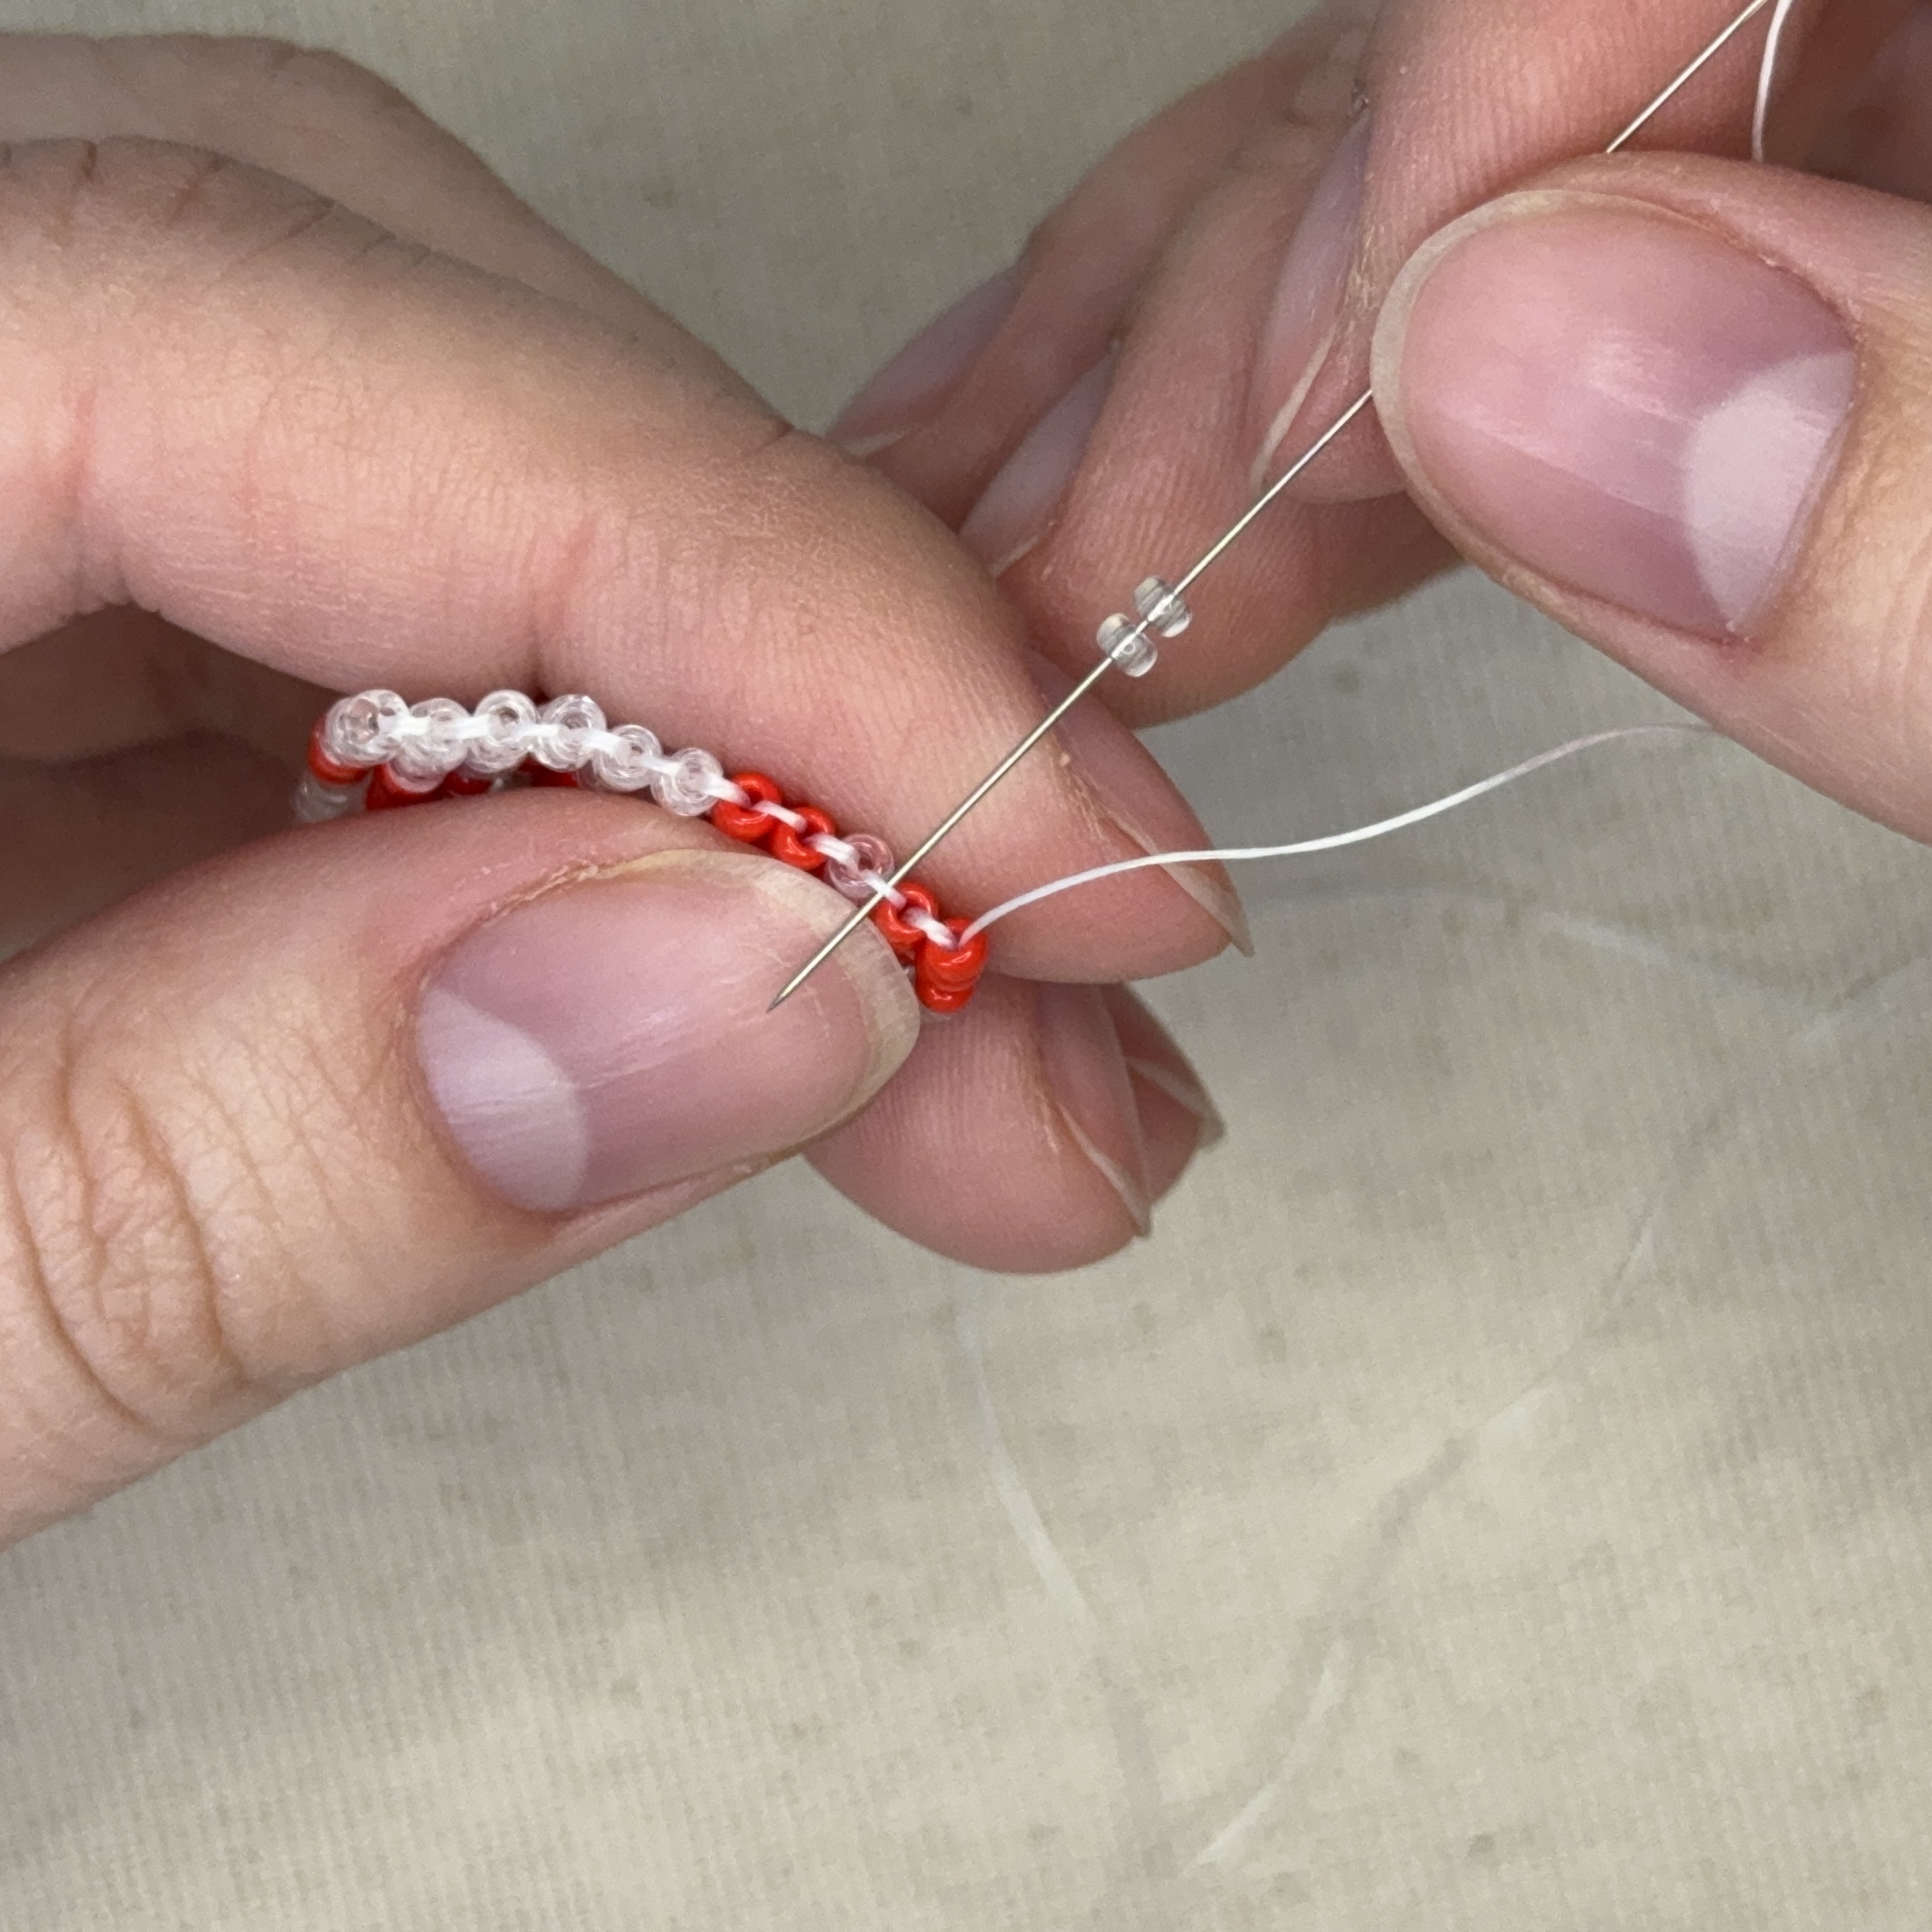
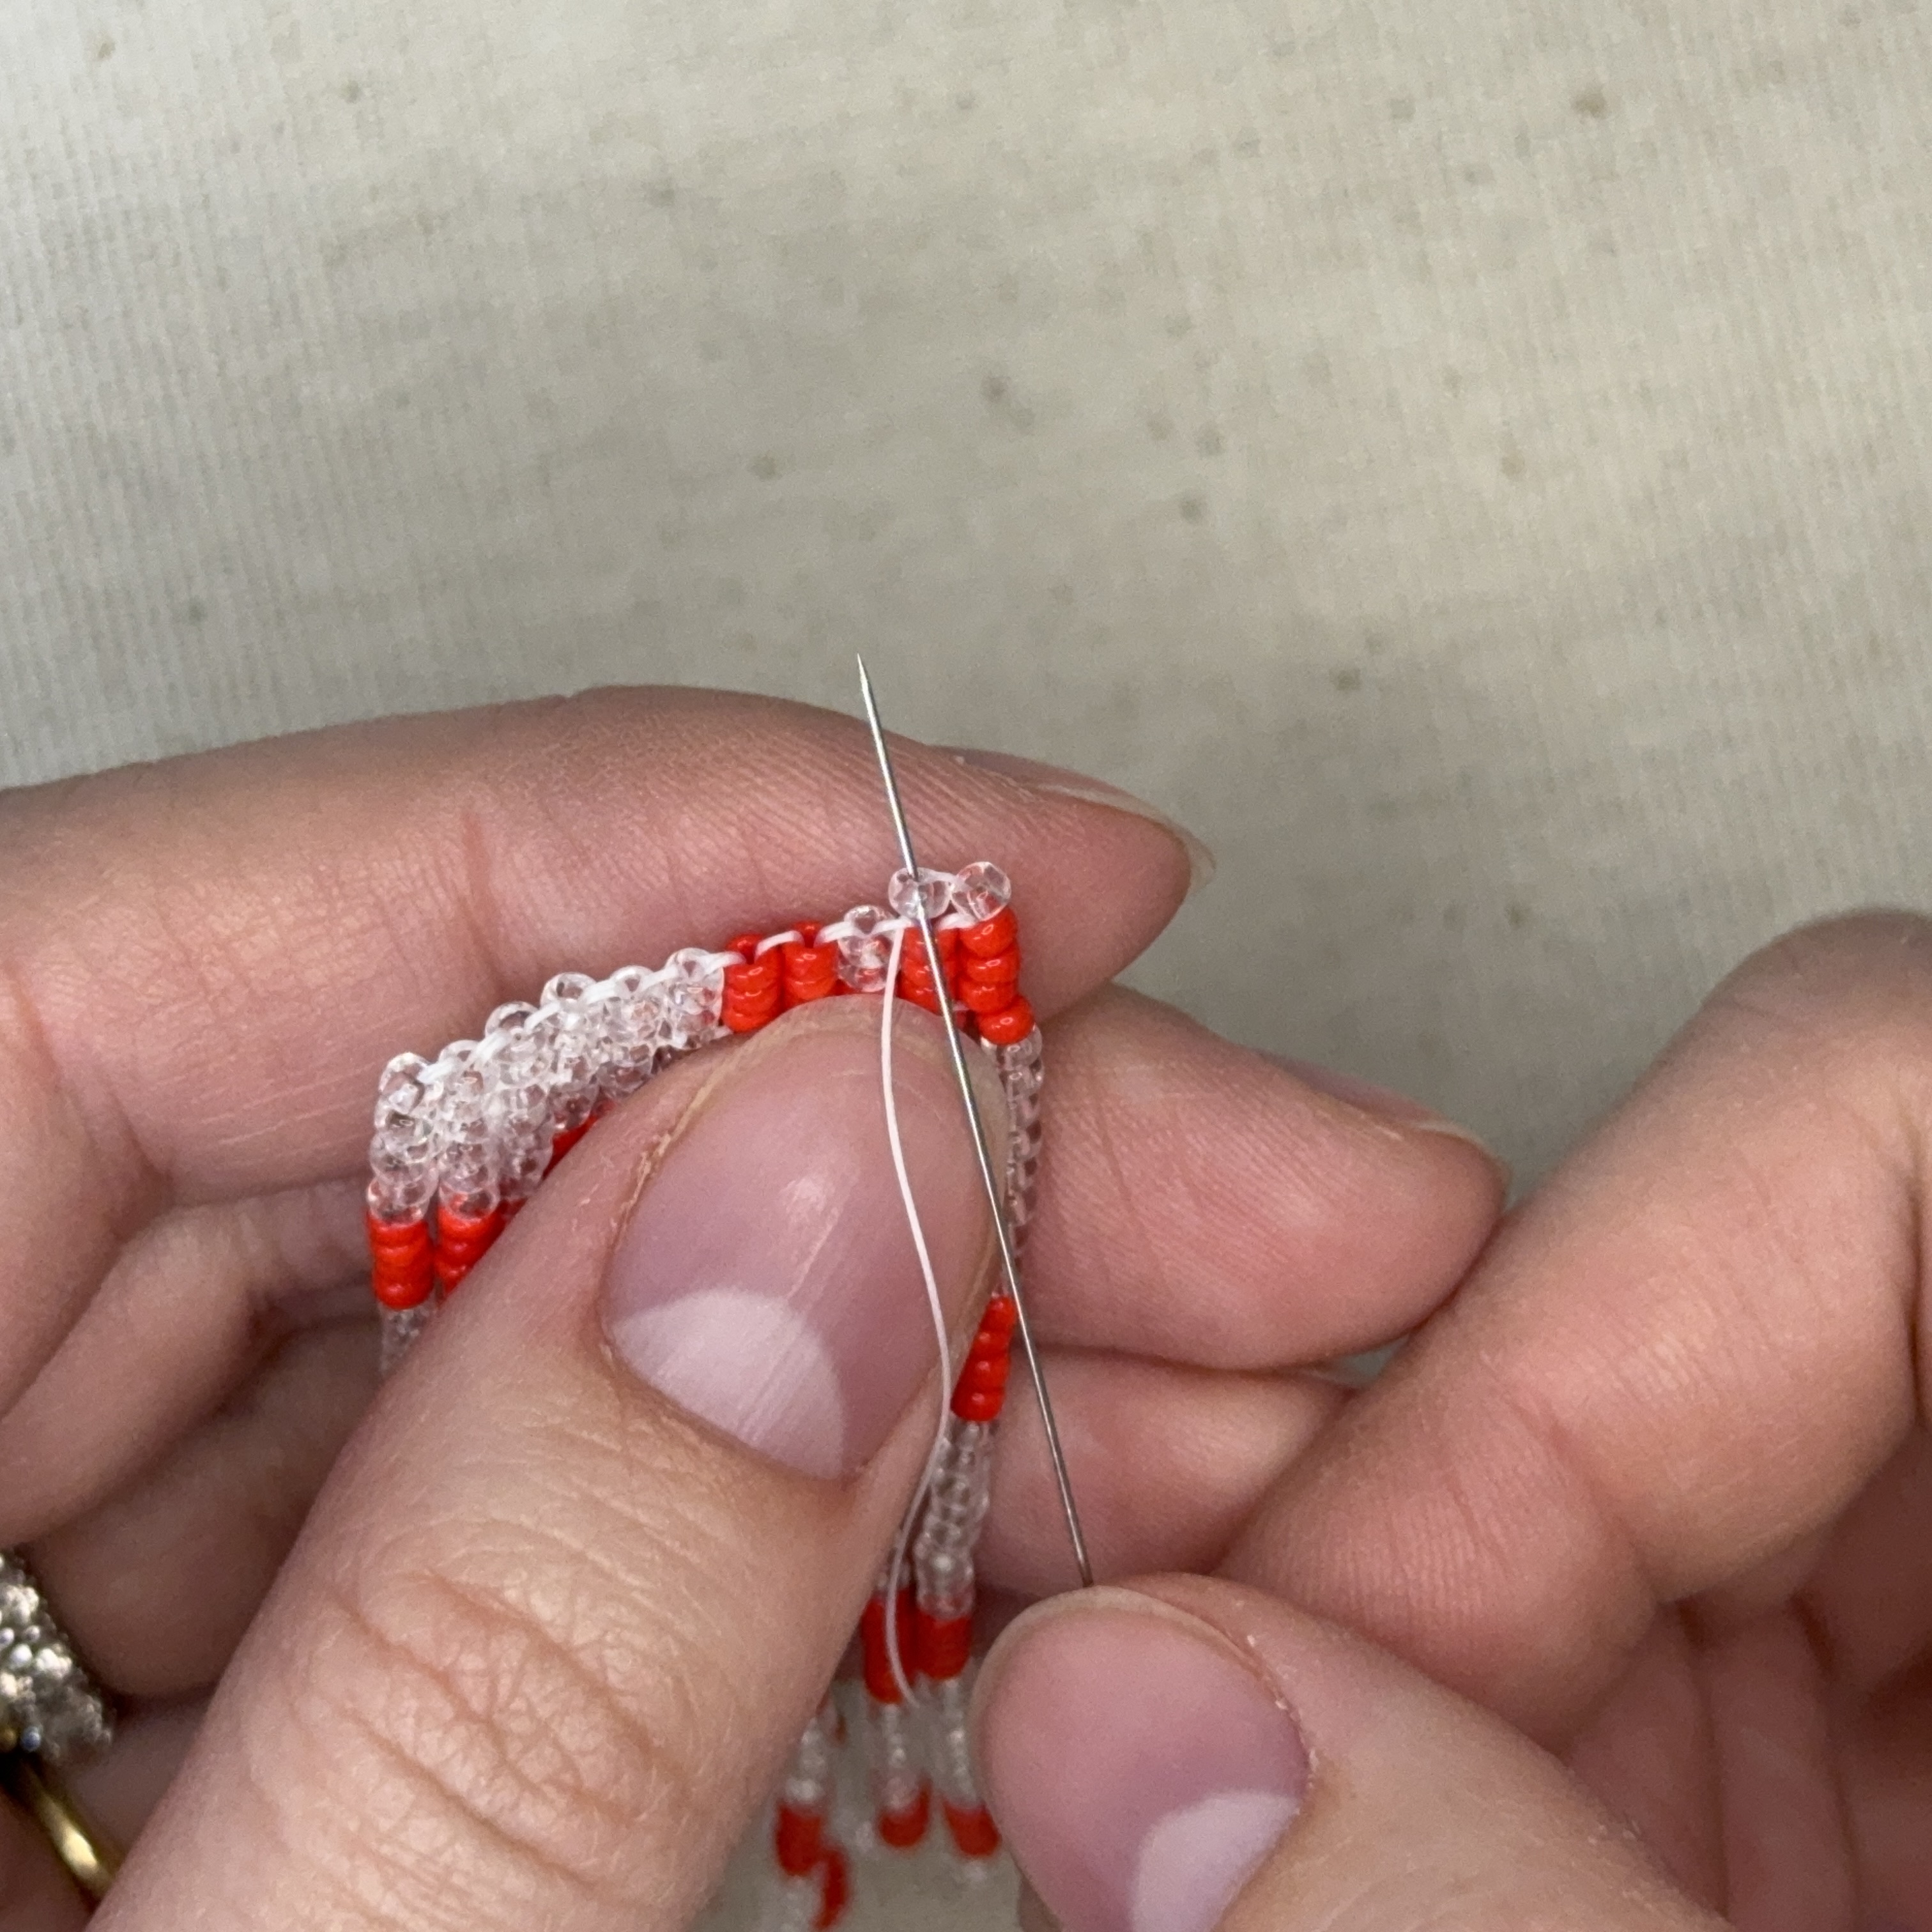
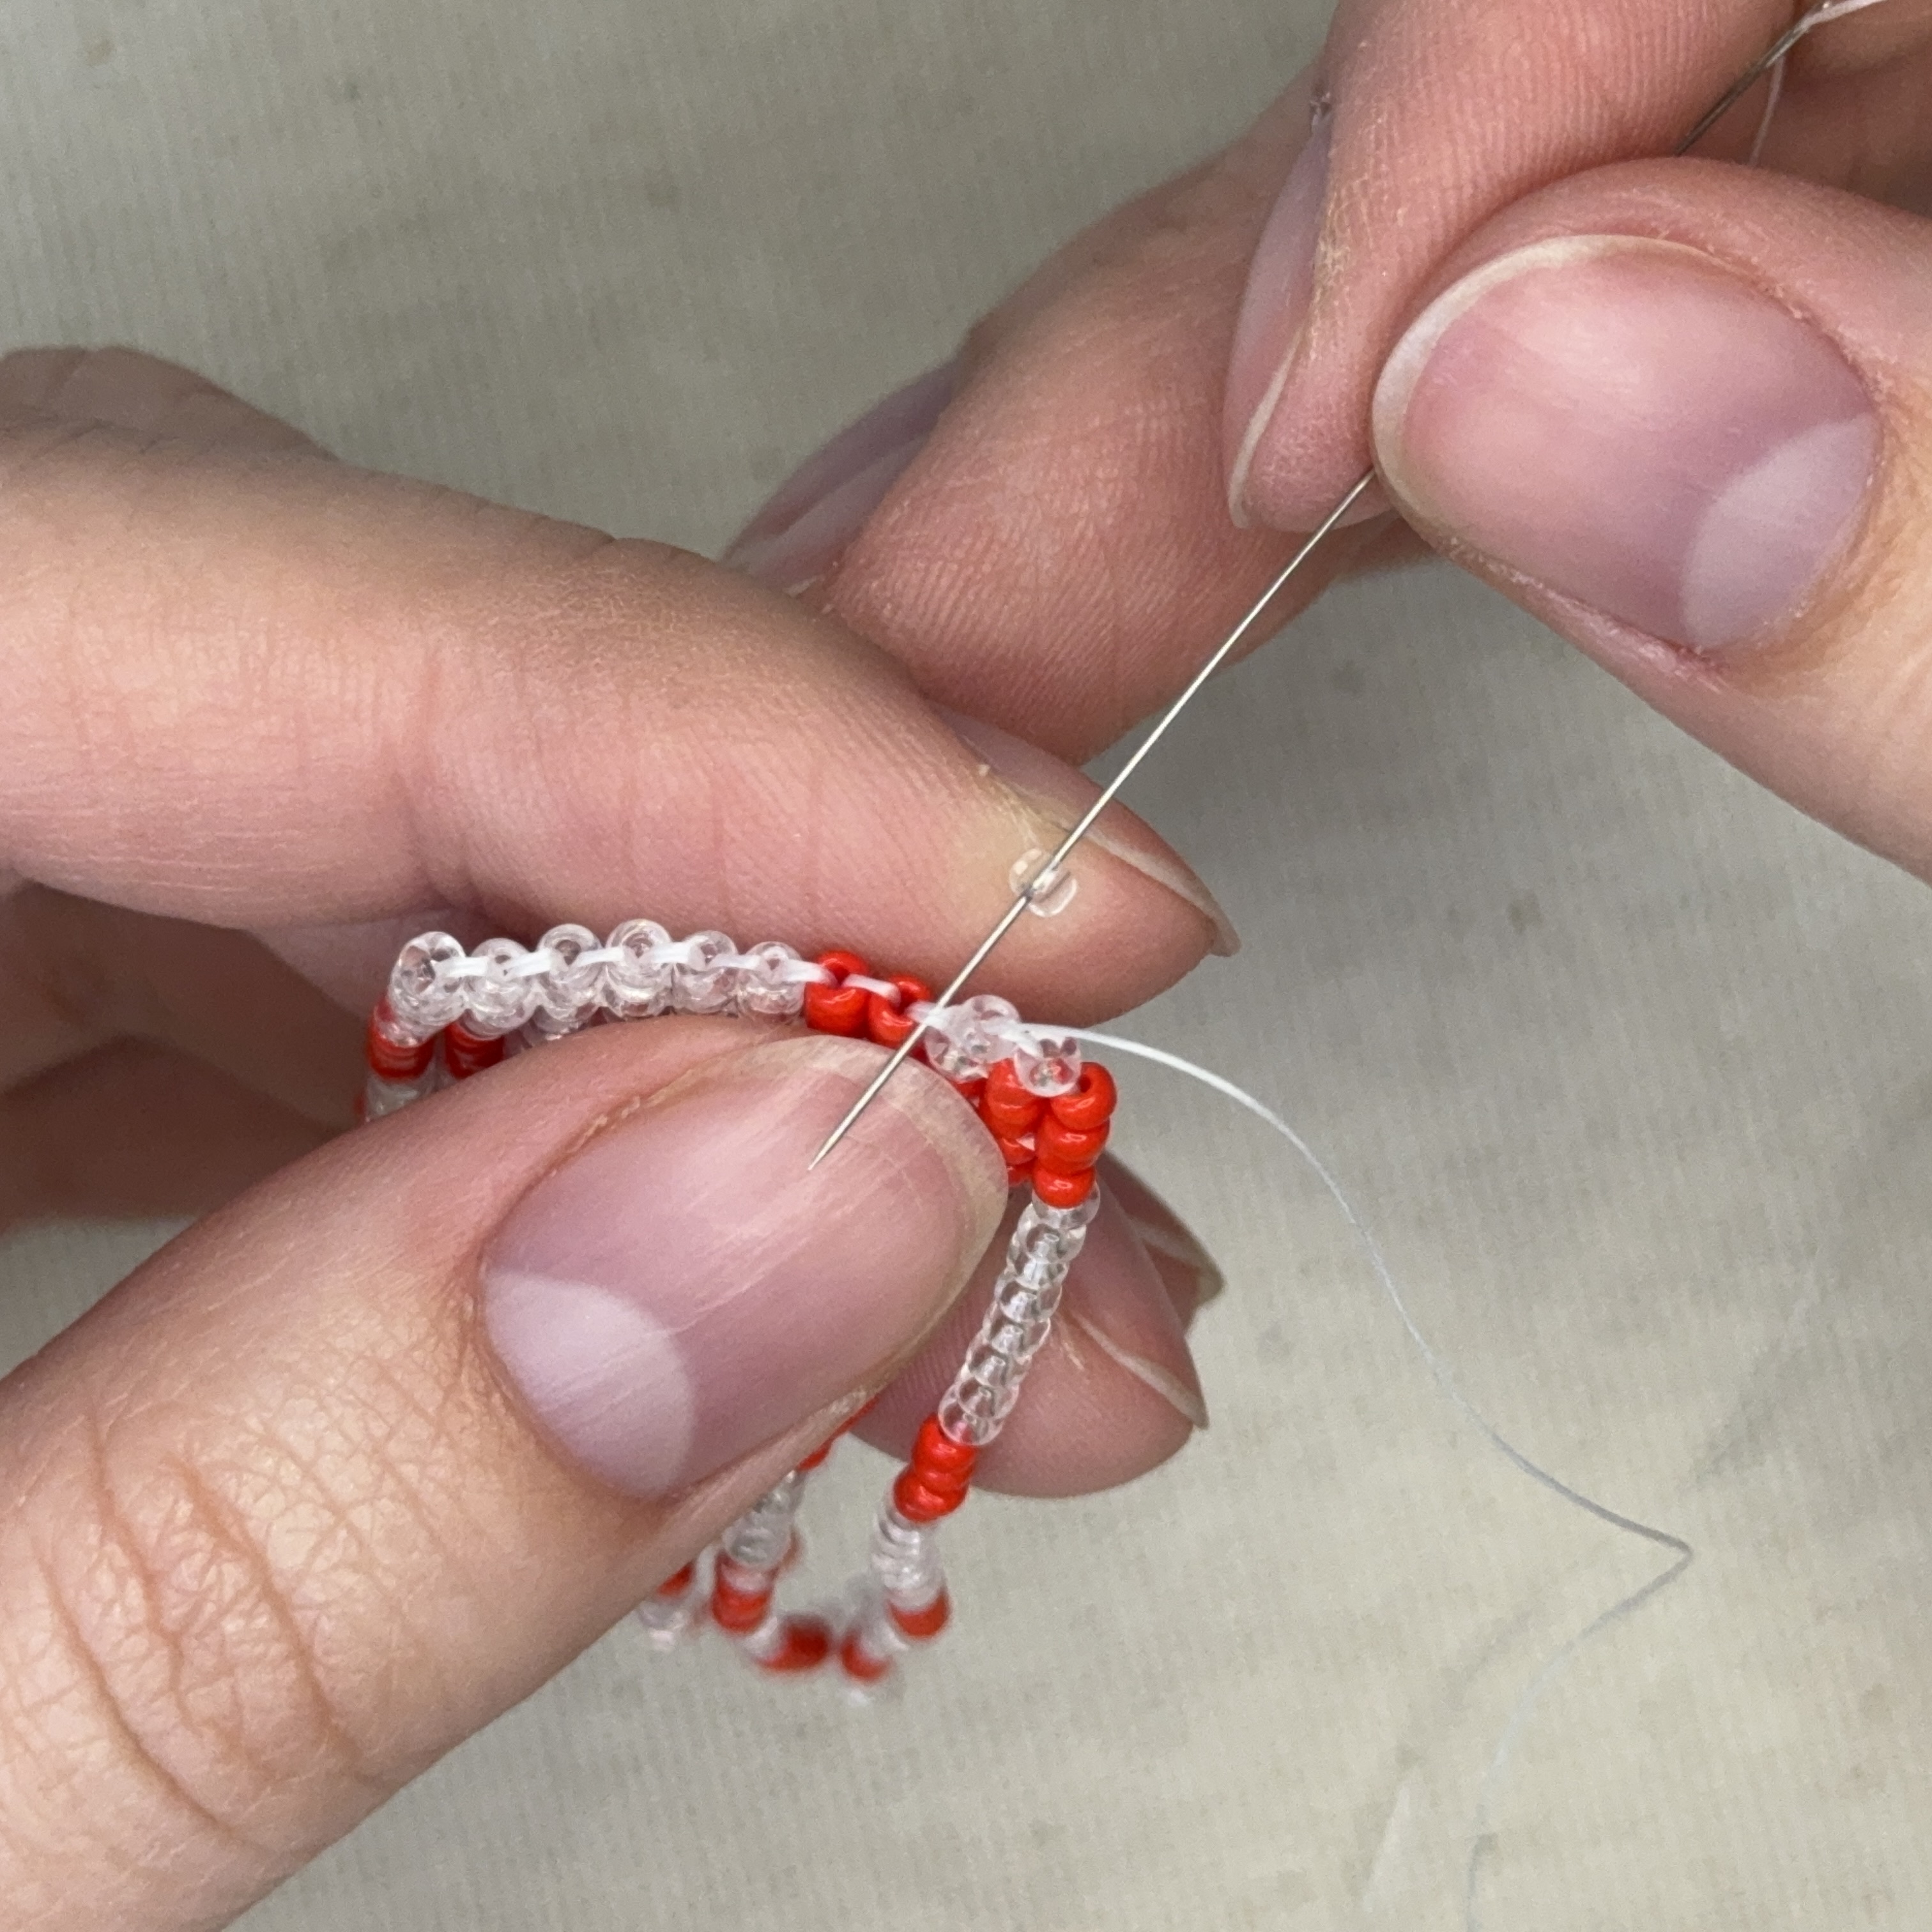
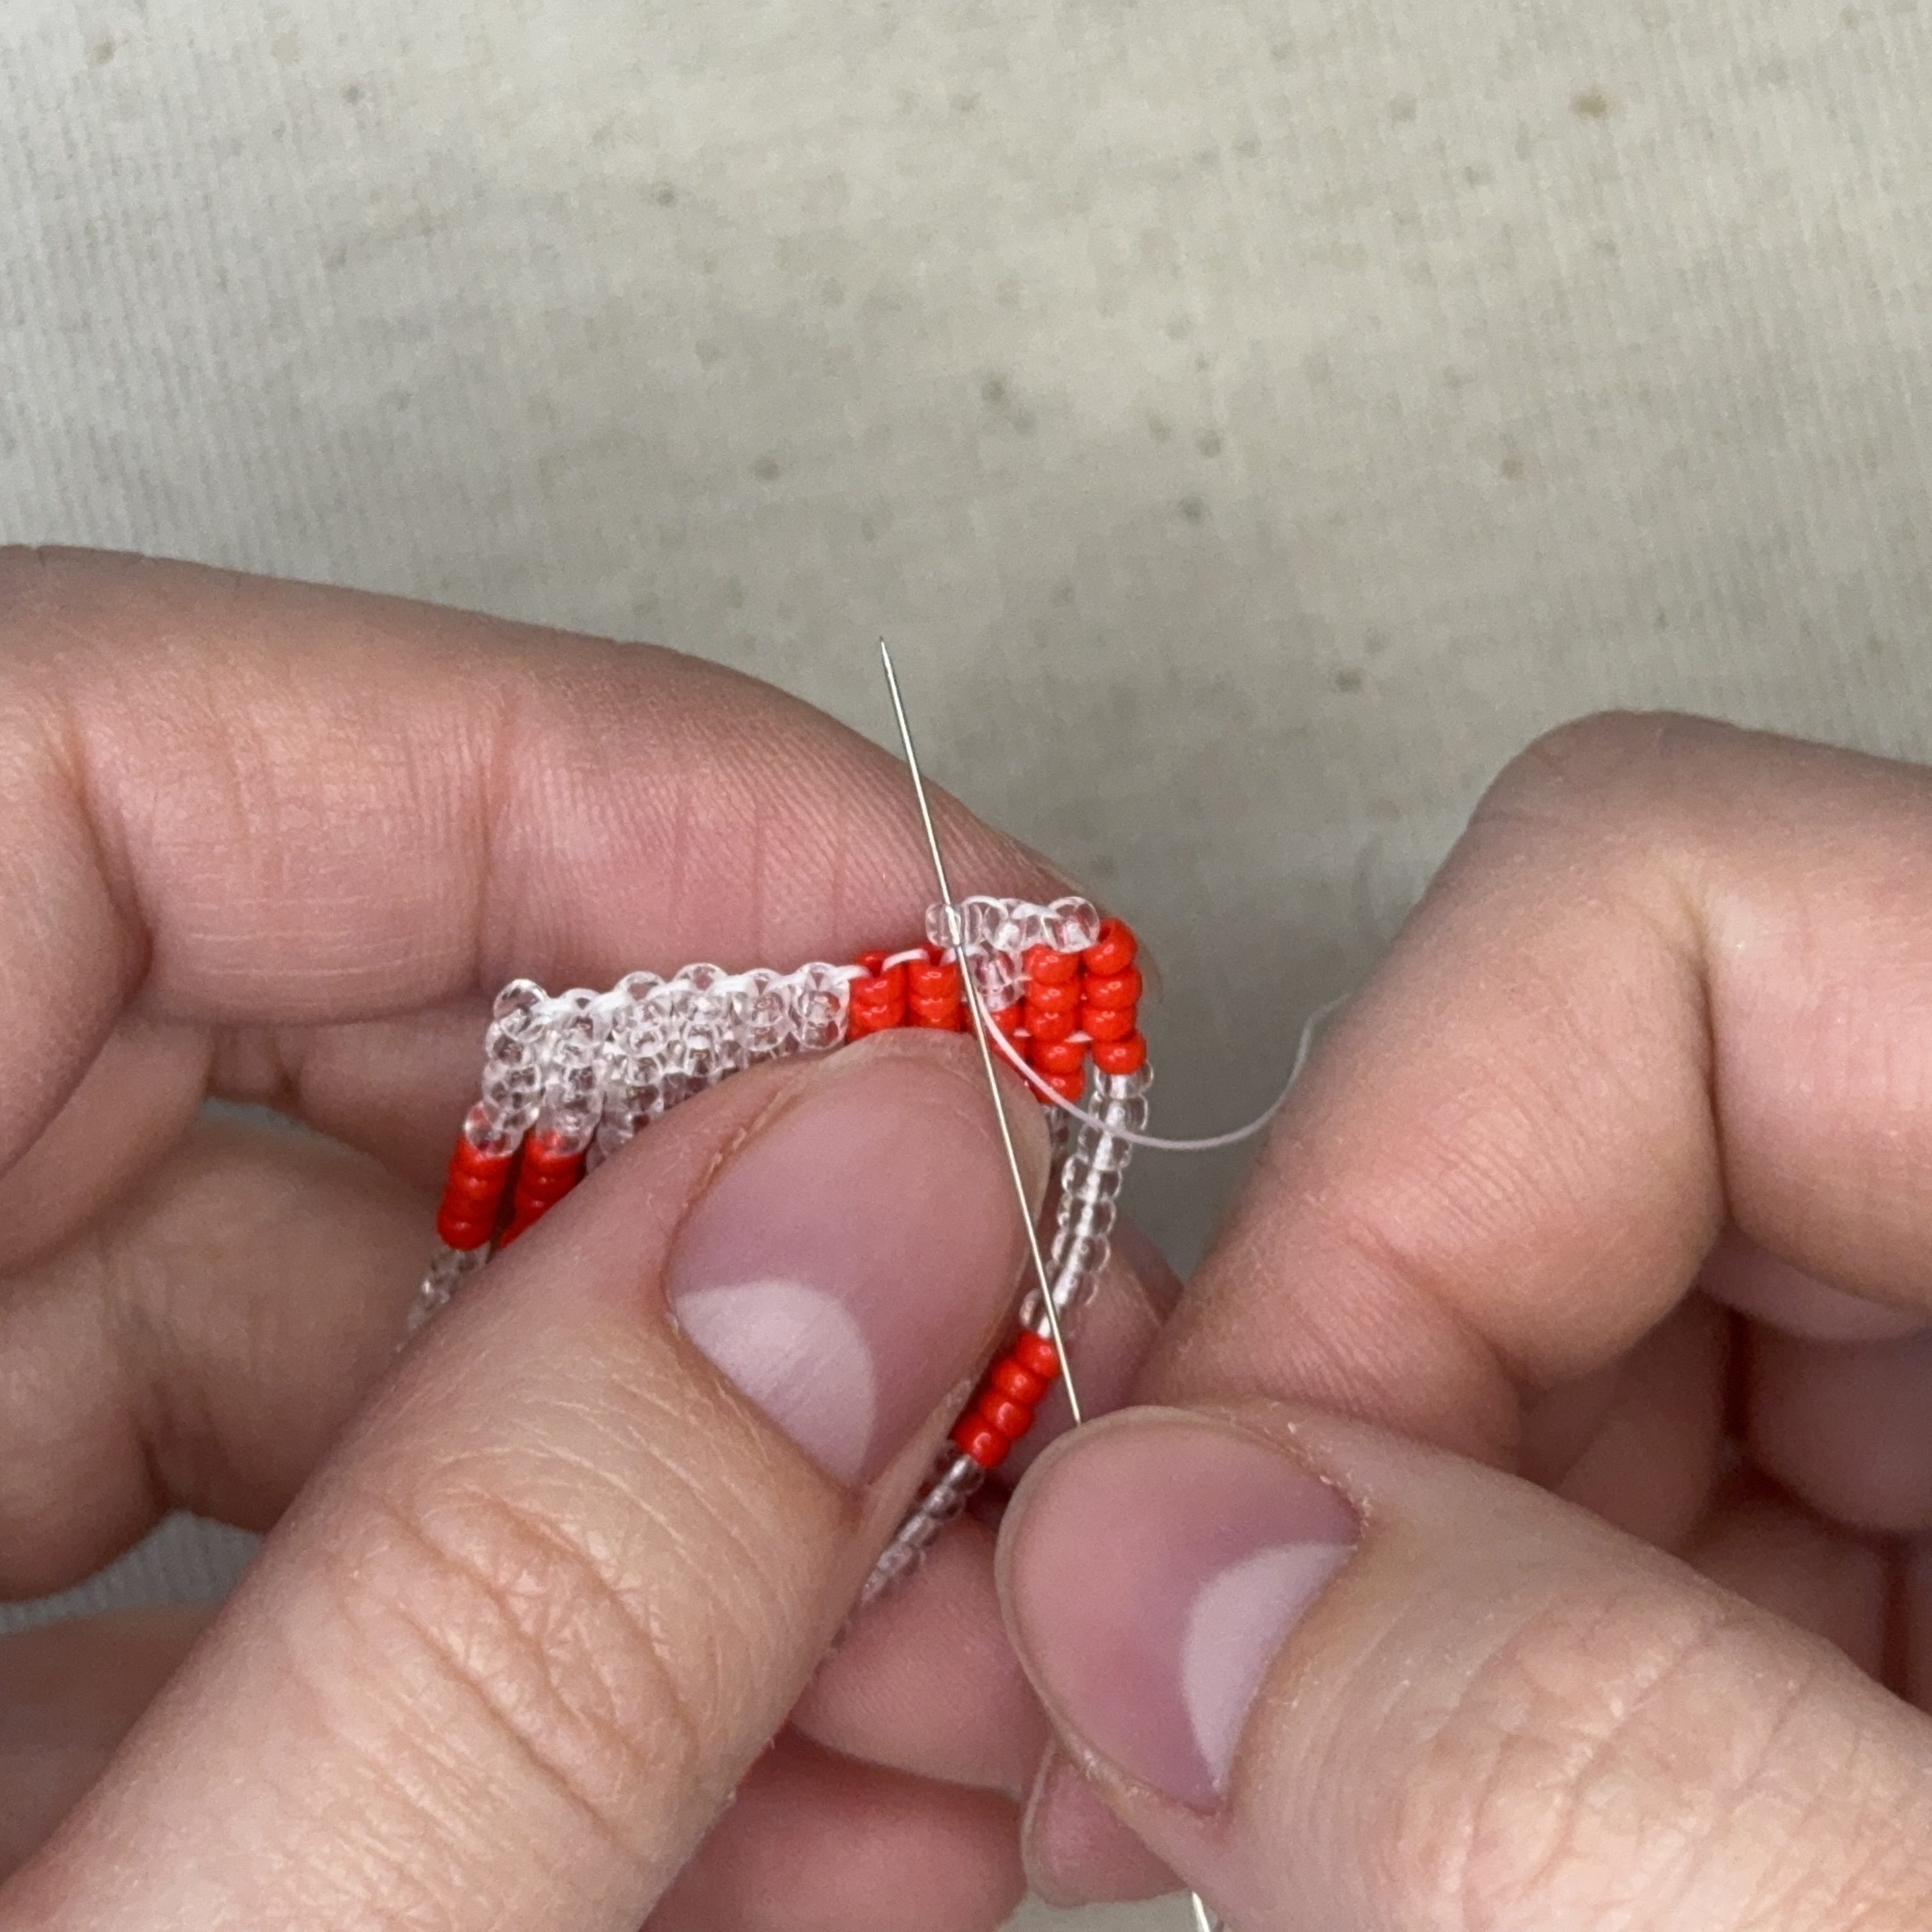
23. Add 2 beads onto your needle and then gently glide the needle through the second connecting thread shown, pull tight but not tight enough to break the thread
24. Thread the needle back up through the seed bead shown on the left and pull tight
25. And then down the seed bead to the right and then the seed bead diagonally left down
26. And then up the seed bead to the left and then directly up through the seed bead shown in step 24
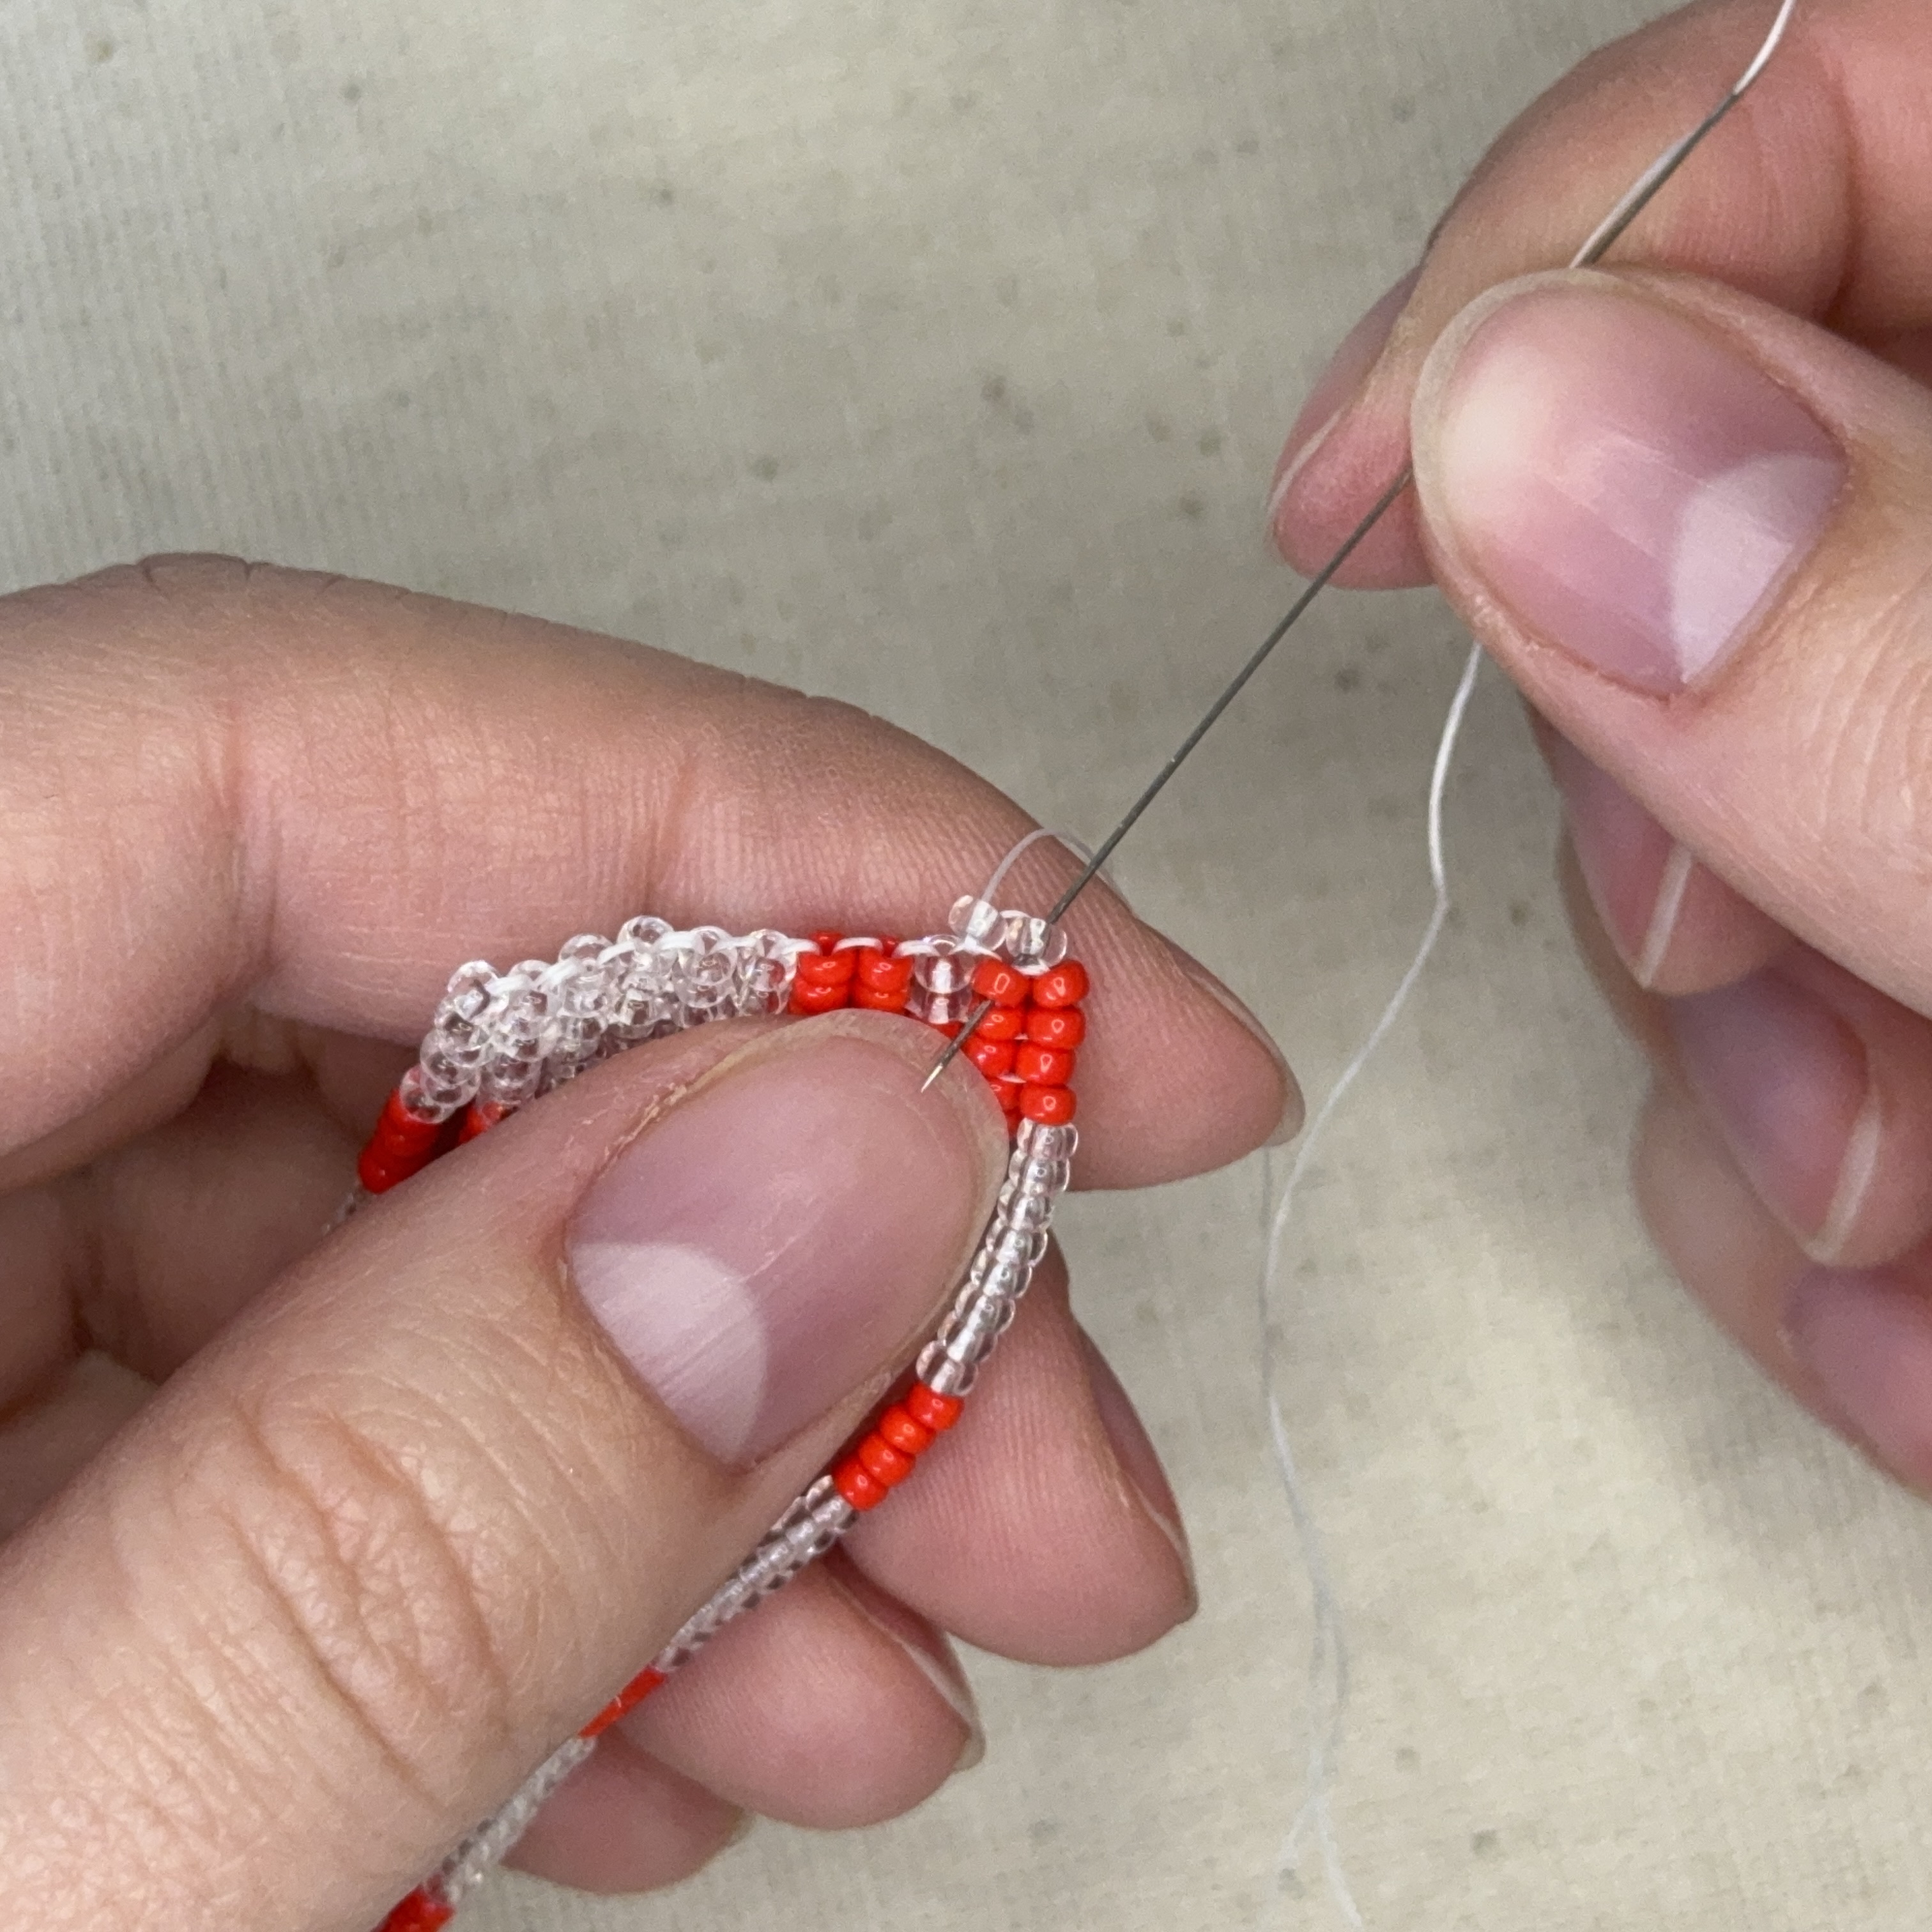
27. Add another clear bead and gently glide your needle through the next stitch along the pattern
28. Then thread your needle back up through the bead you just added and pull tight gently
29. Keep repeating the previous two steps until you have reached the end of the row
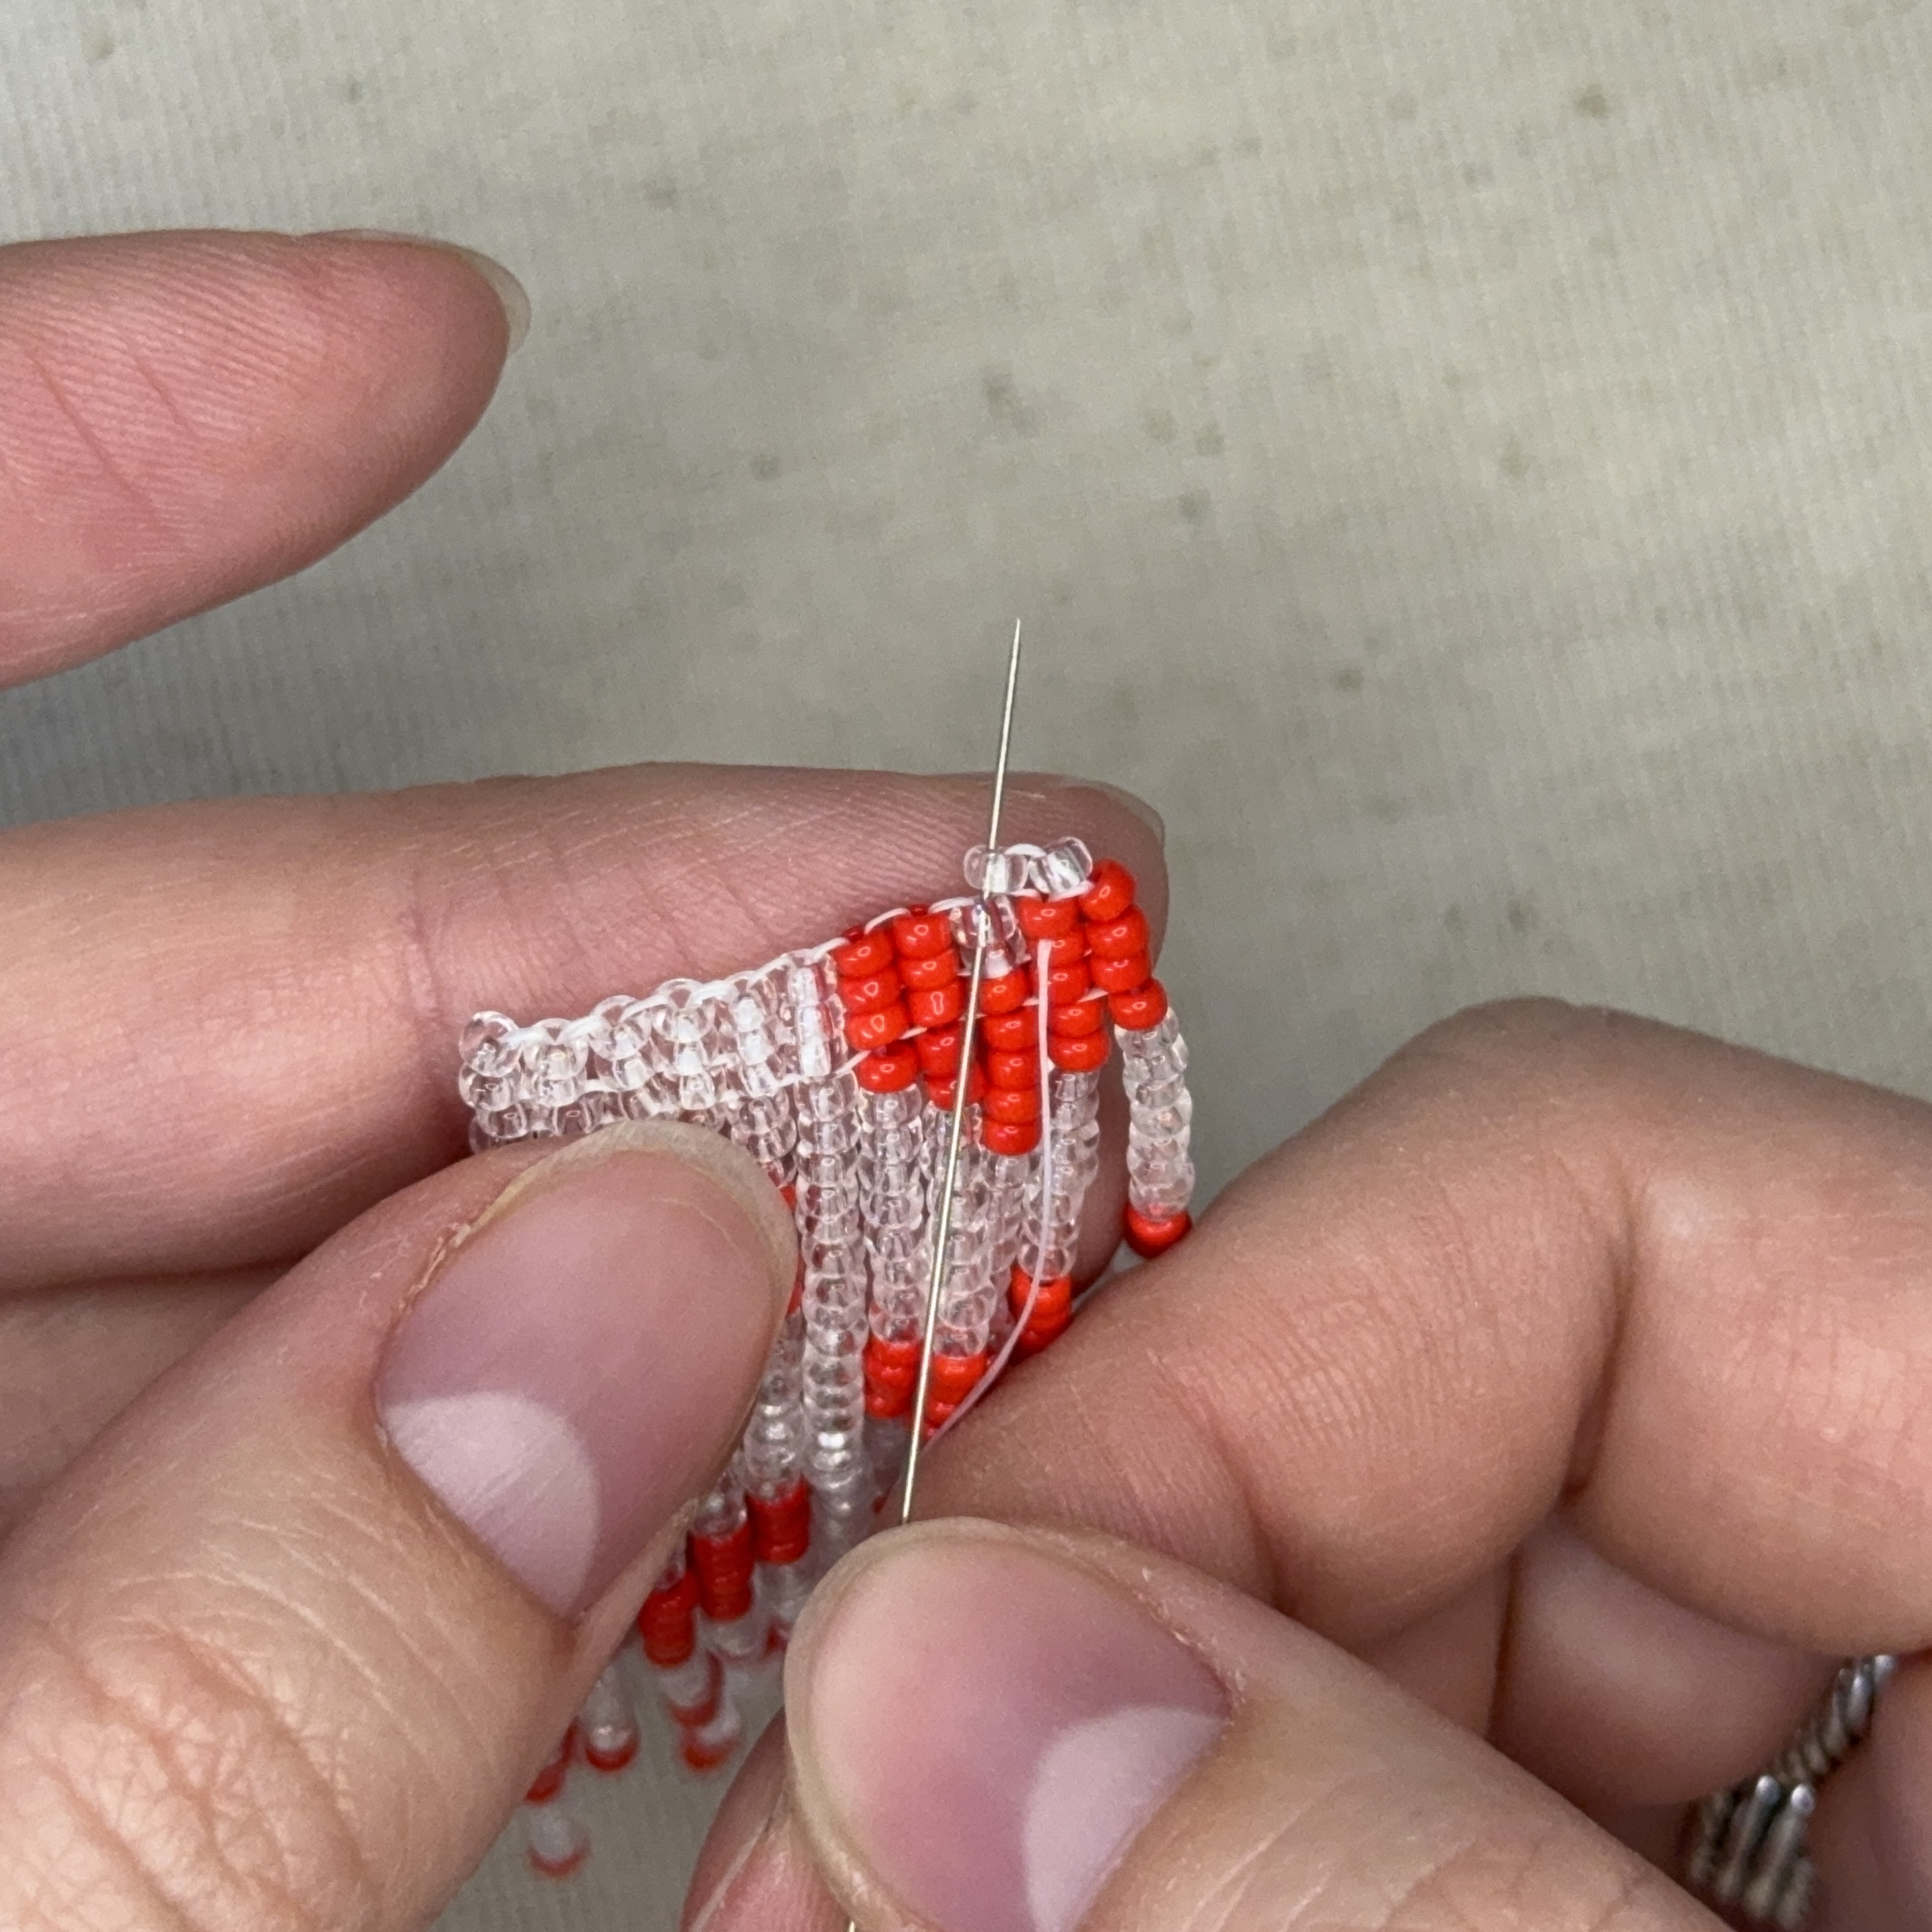
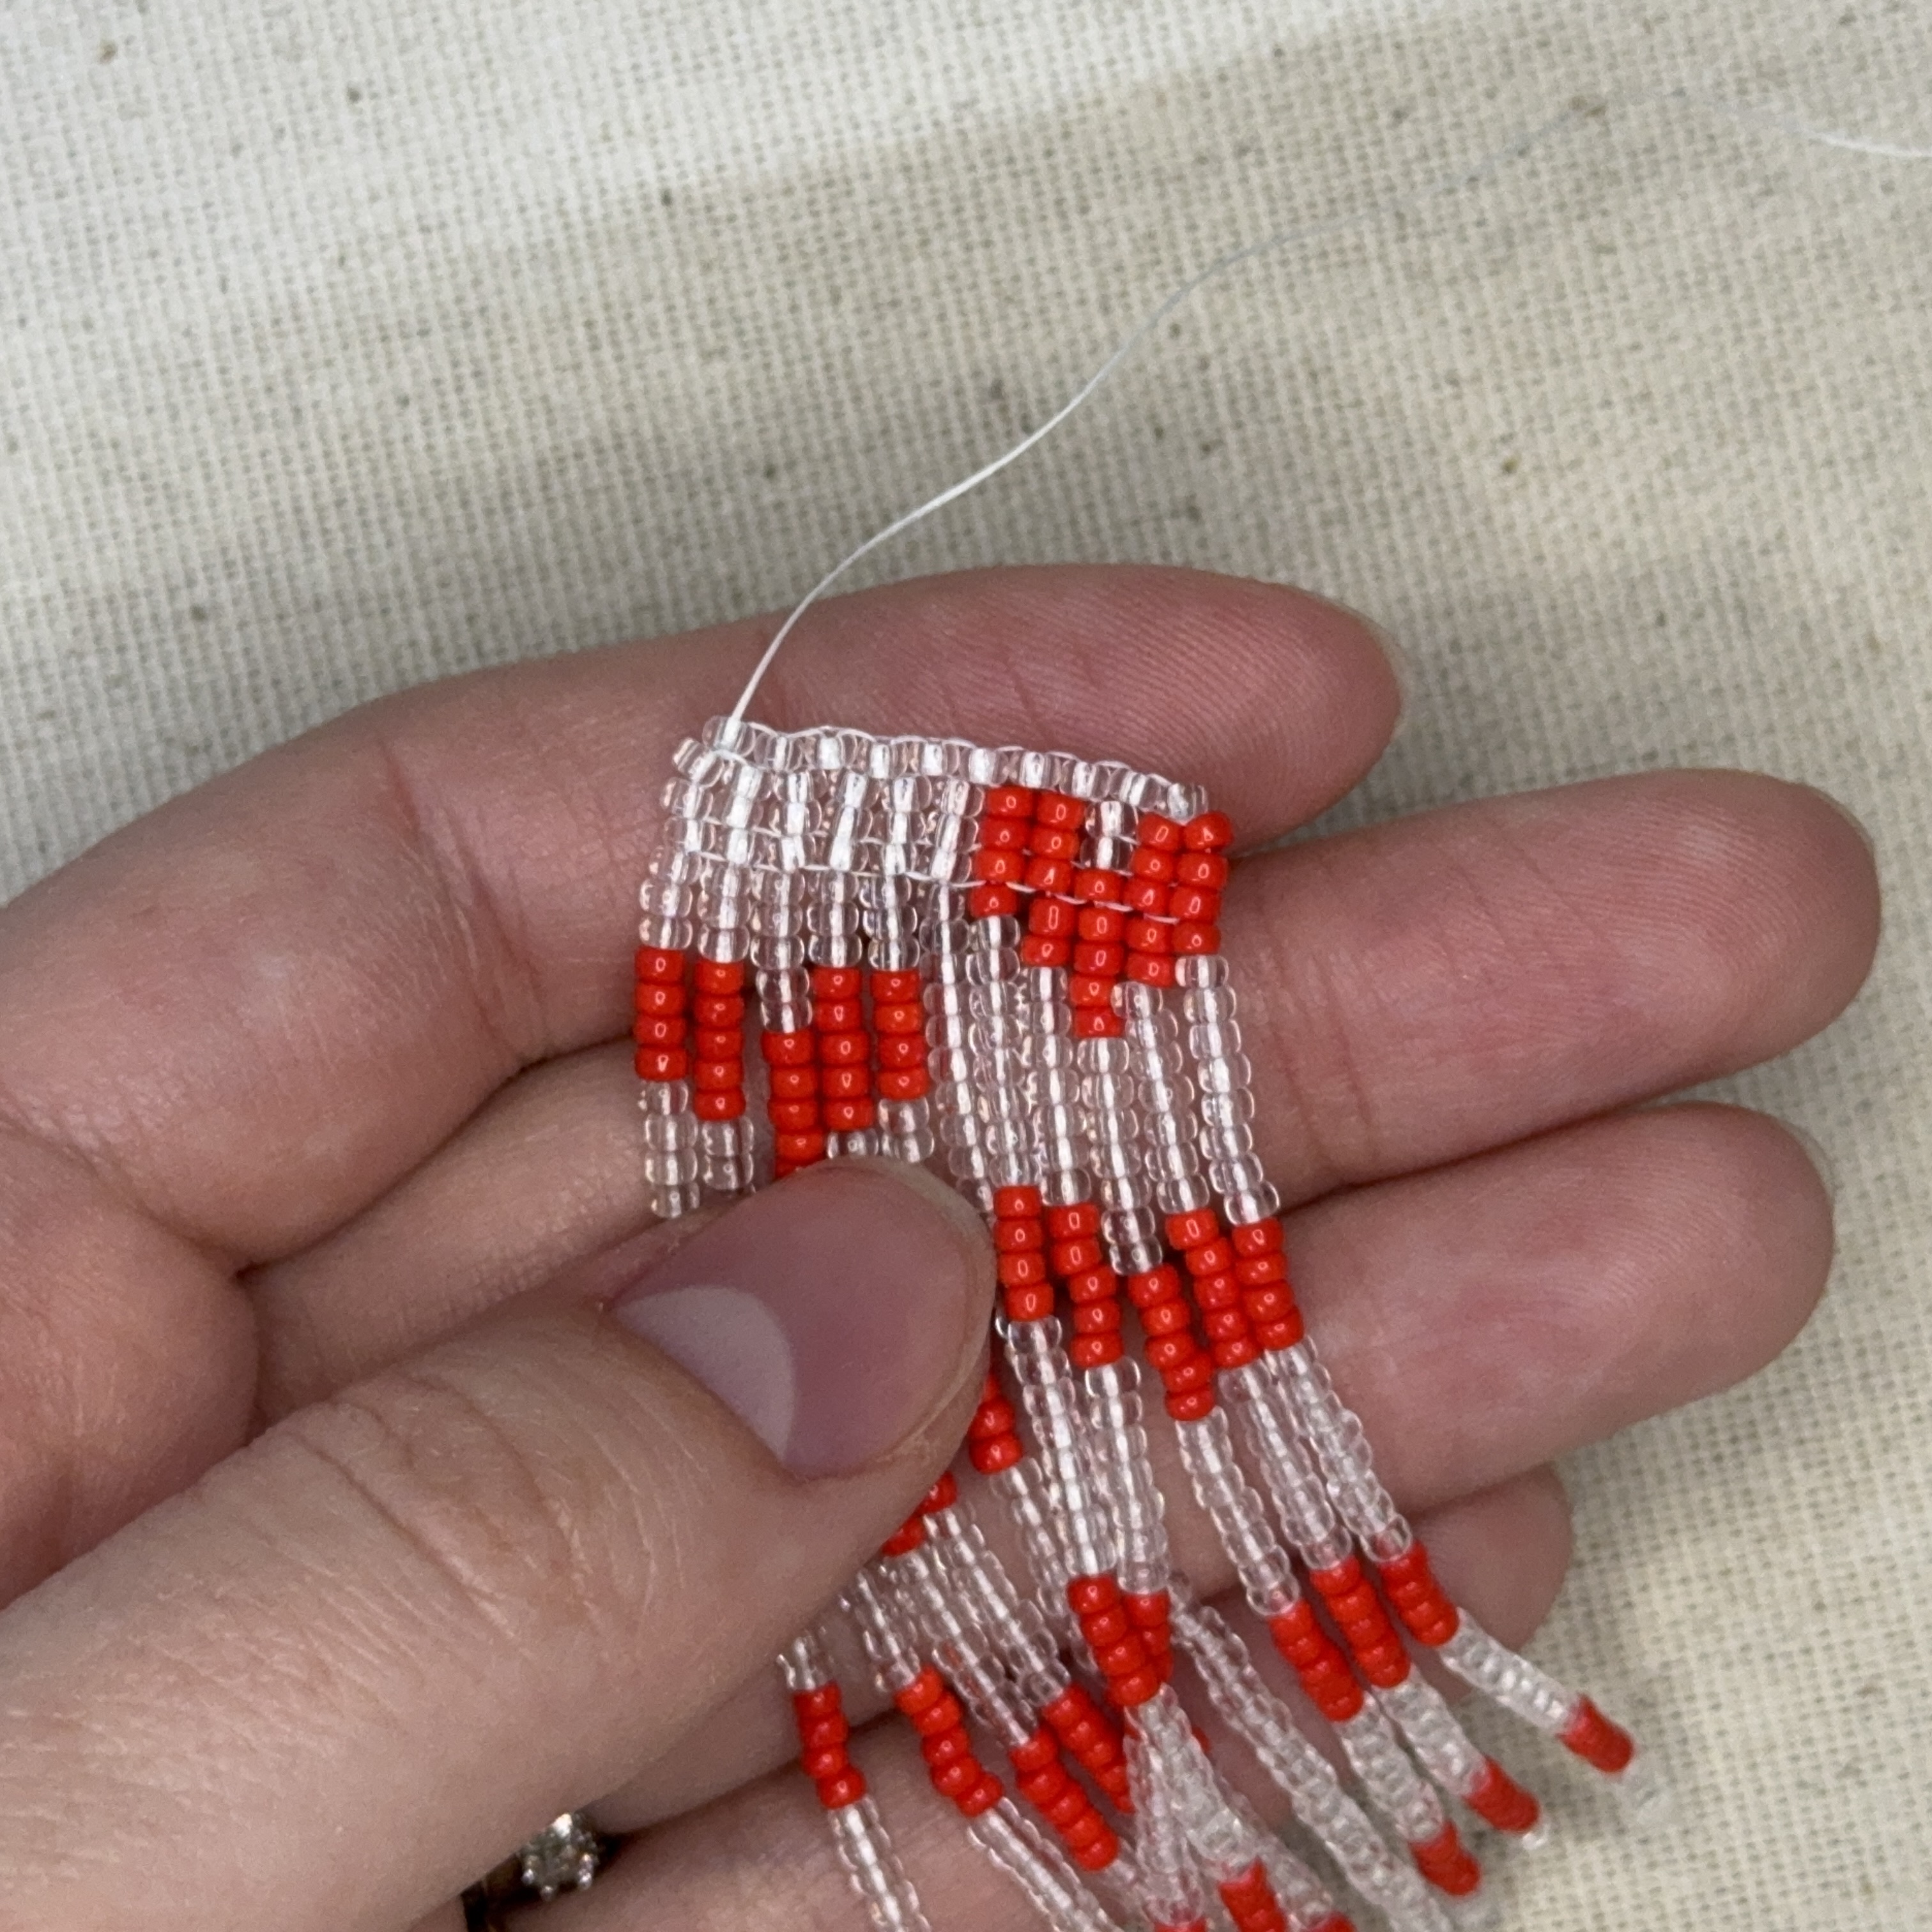
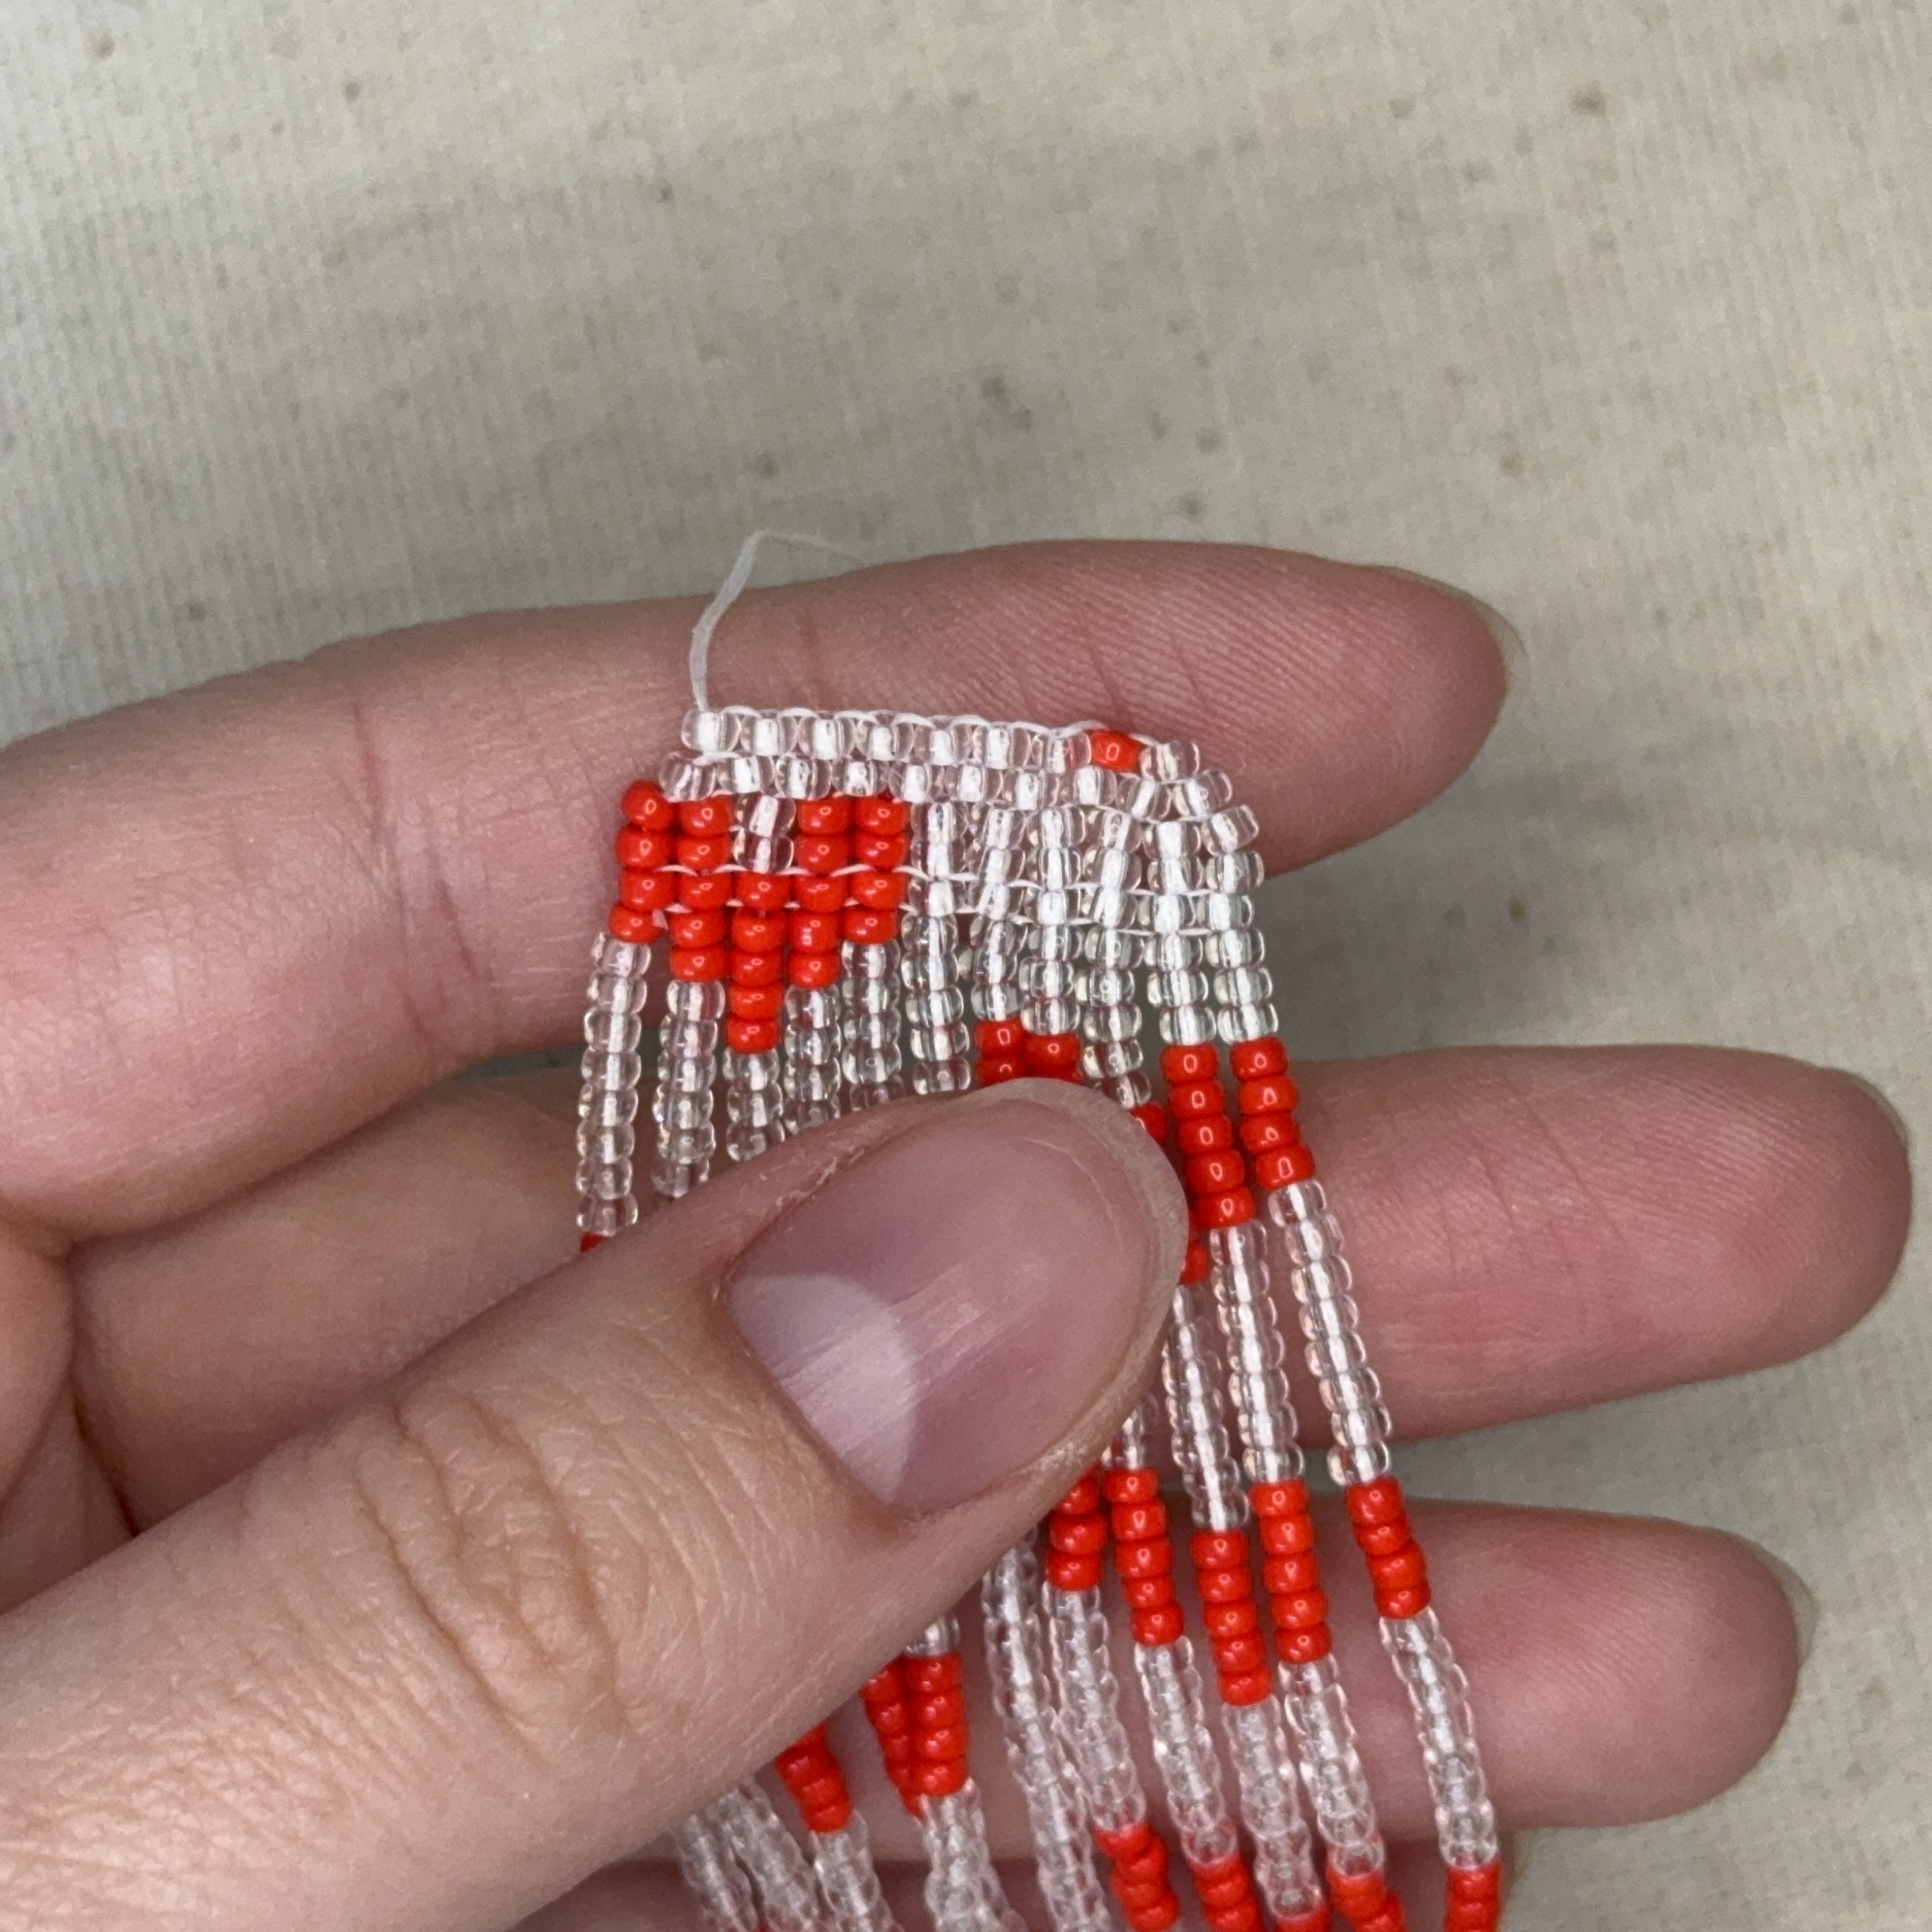
30. Flip your project over and repeat steps 23-29 (be sure to follow the pattern - don't miss the single red bead in this row)
31. And then the next row
32. Keep going, adding rows until you have completed the pattern and now have a row containing only 3 beads
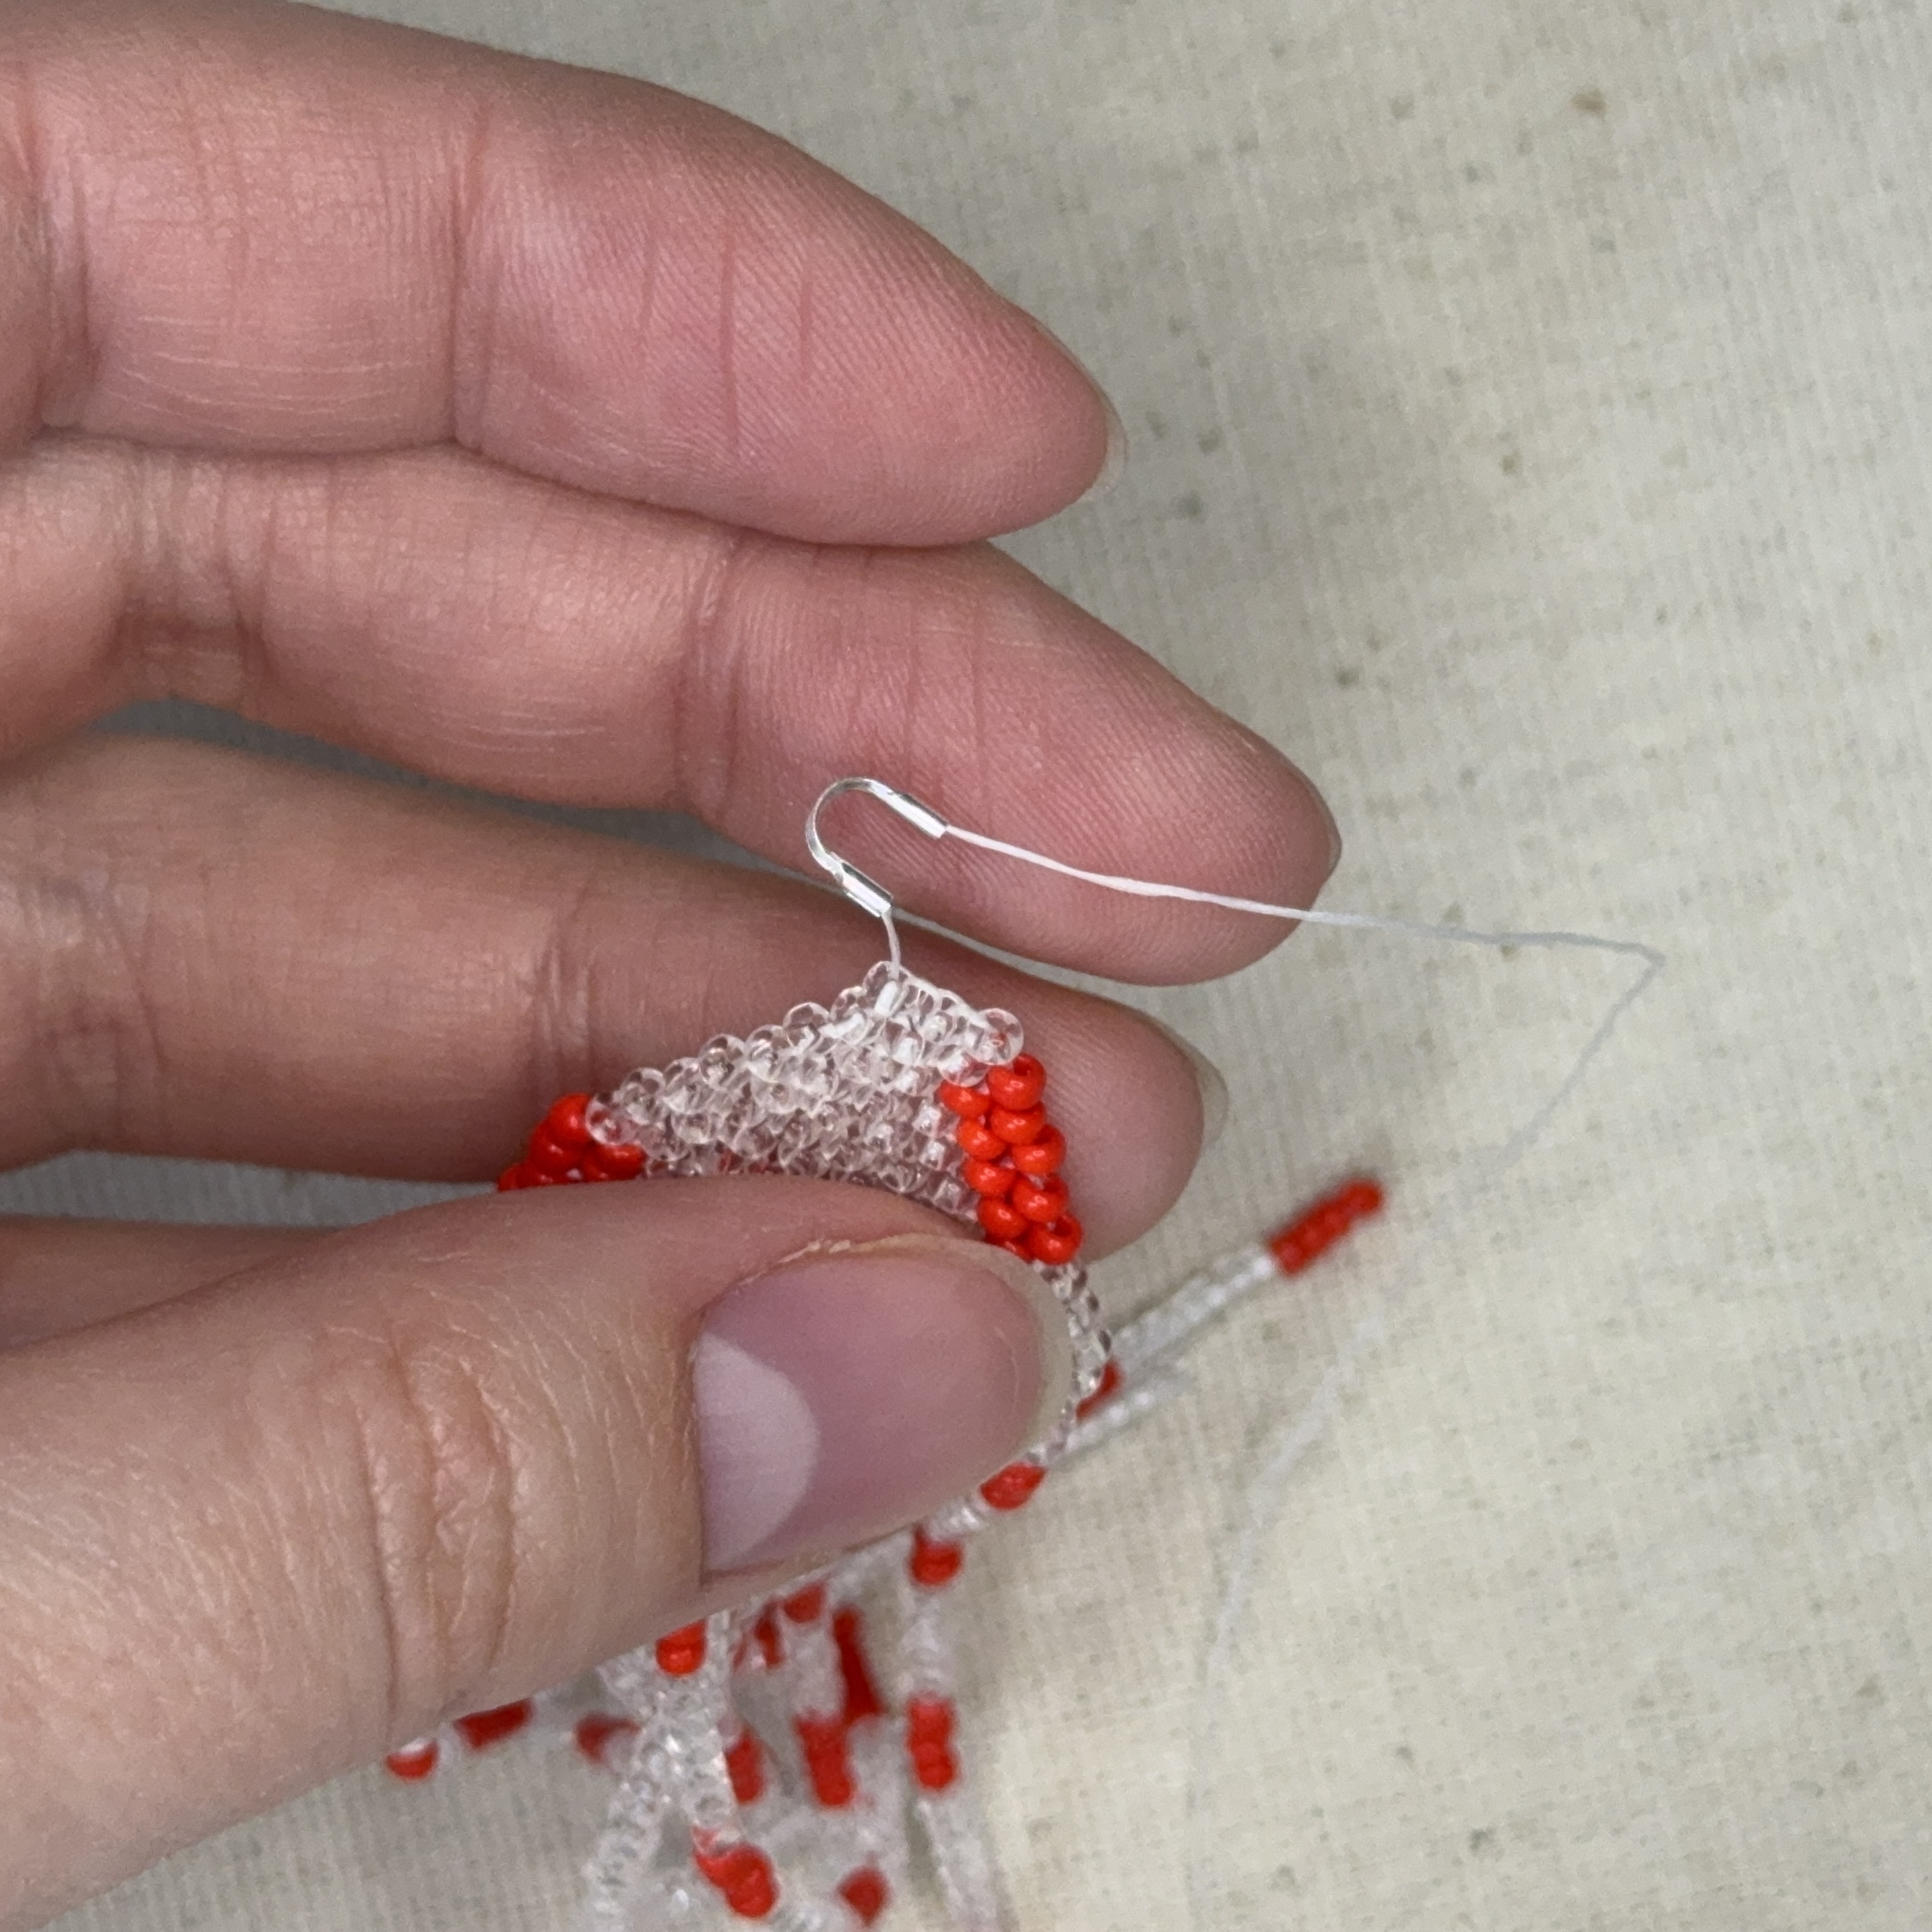
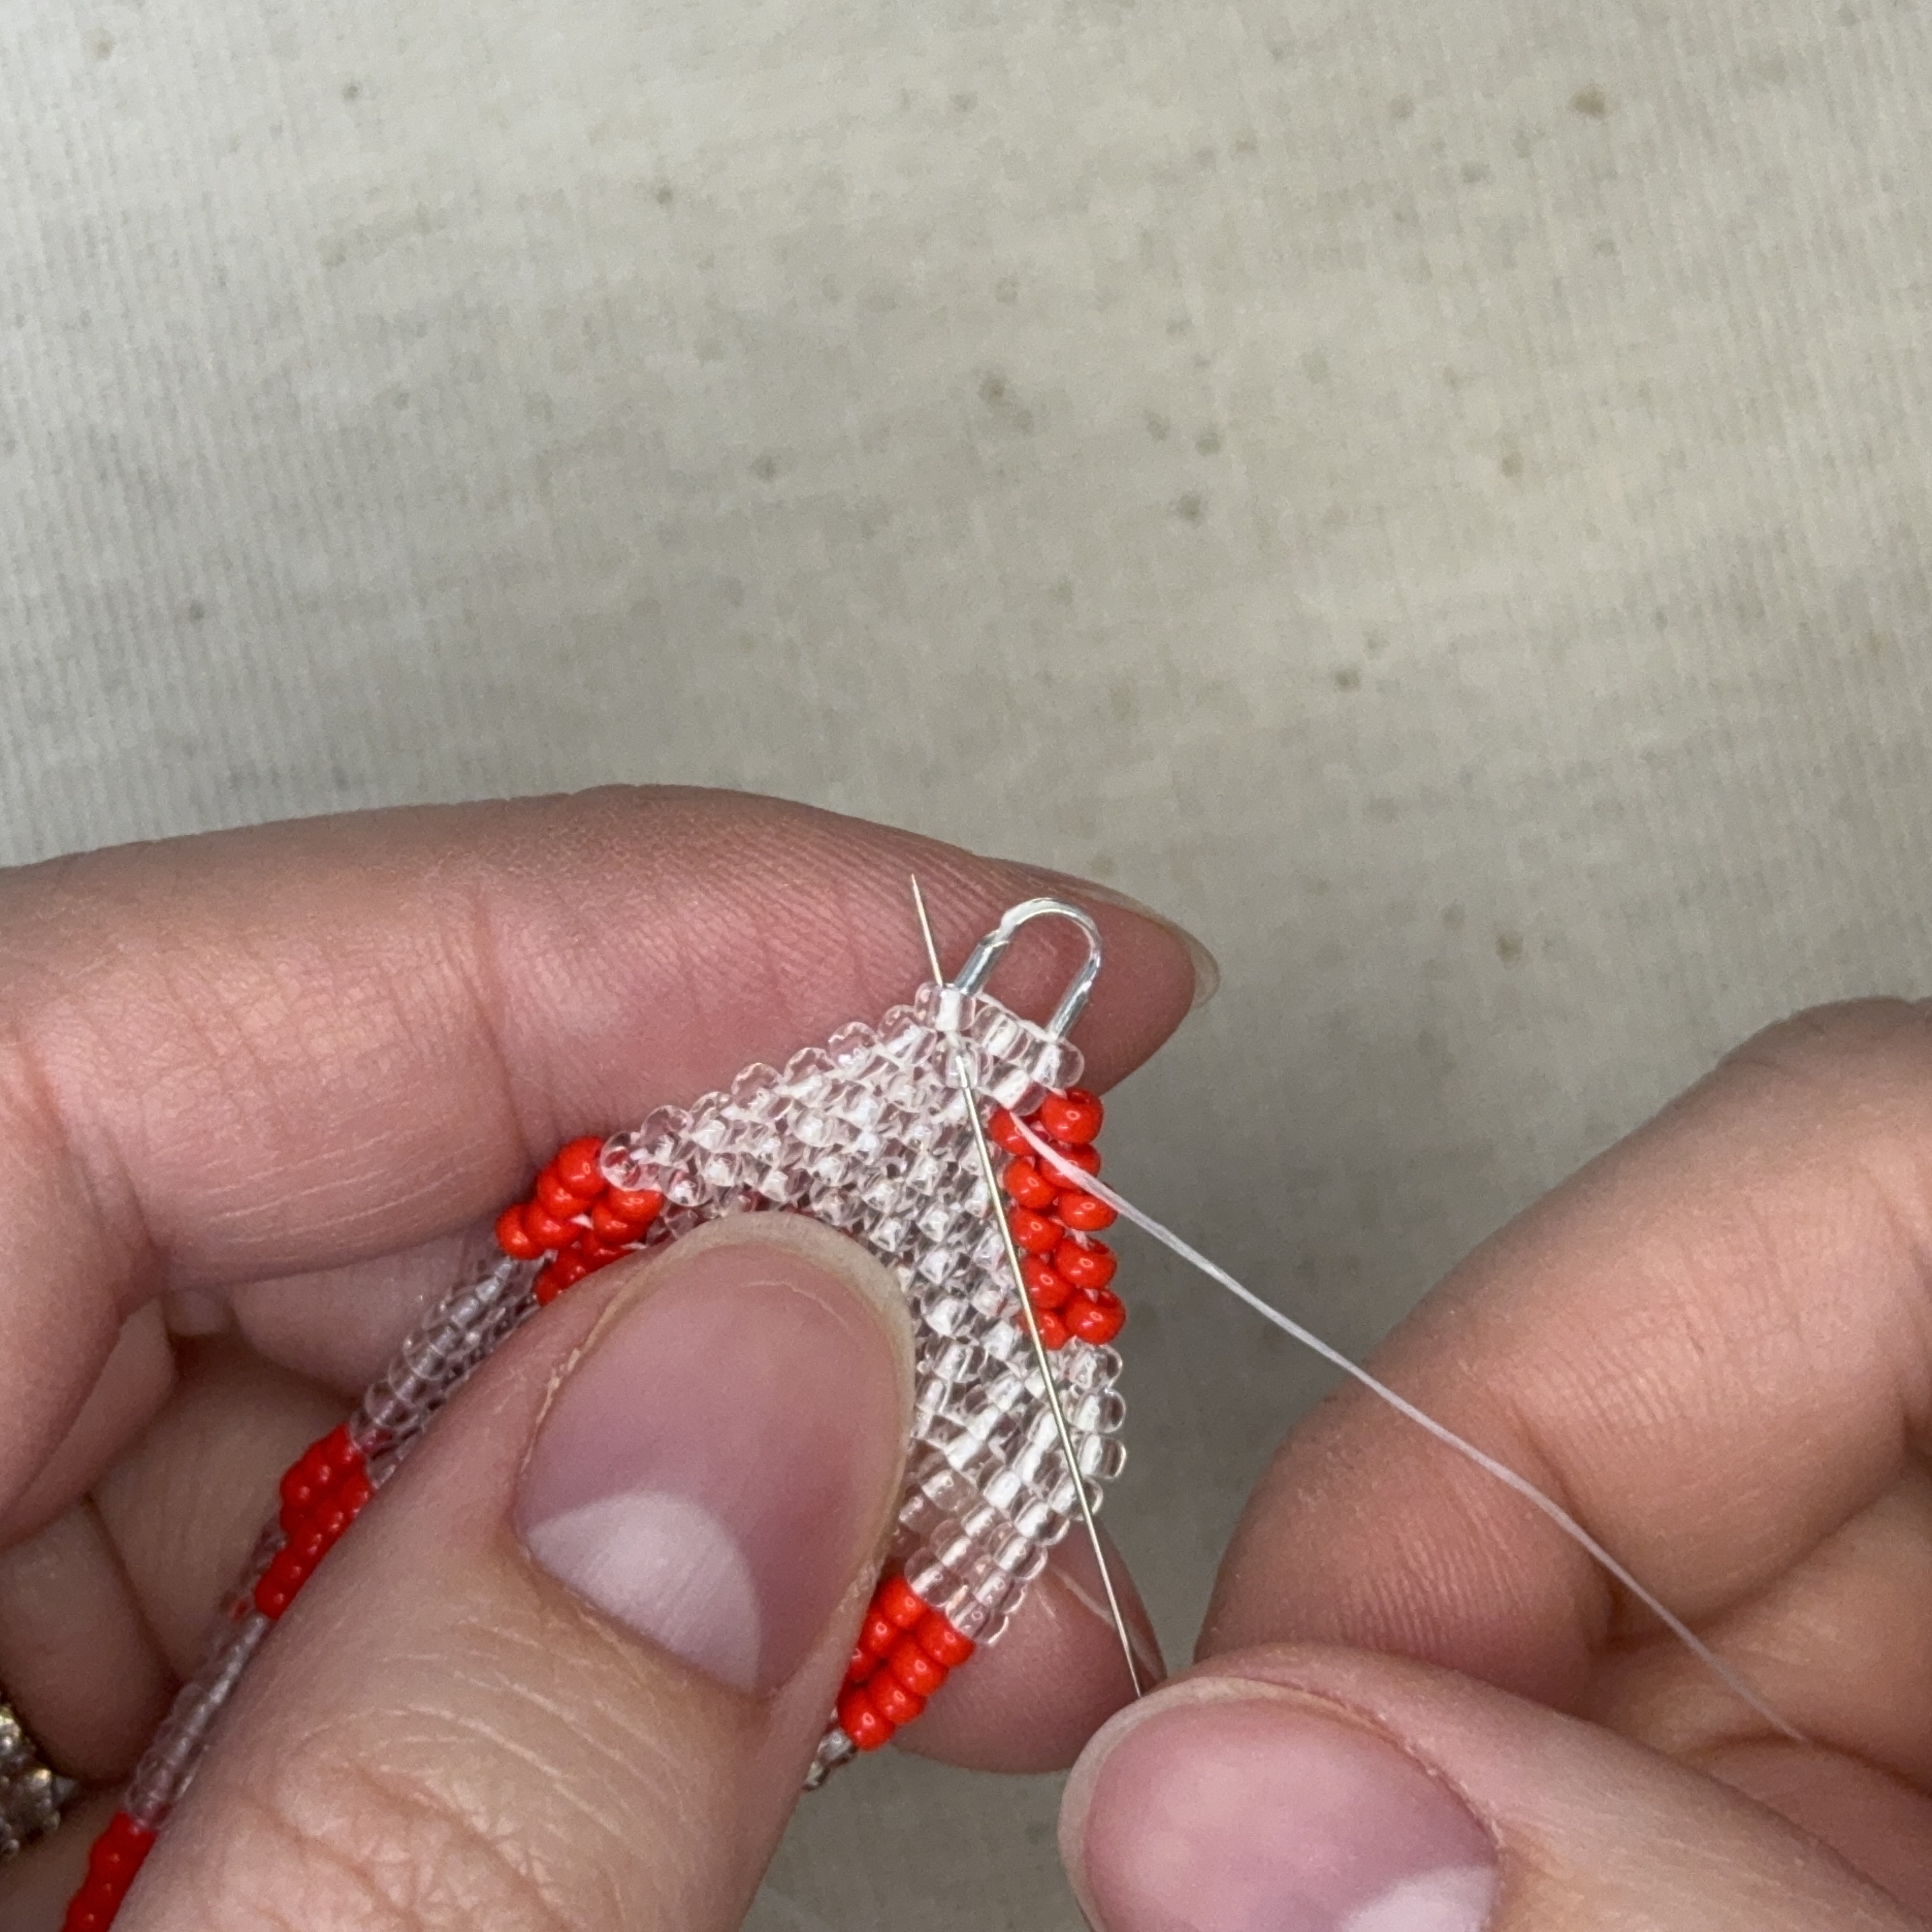
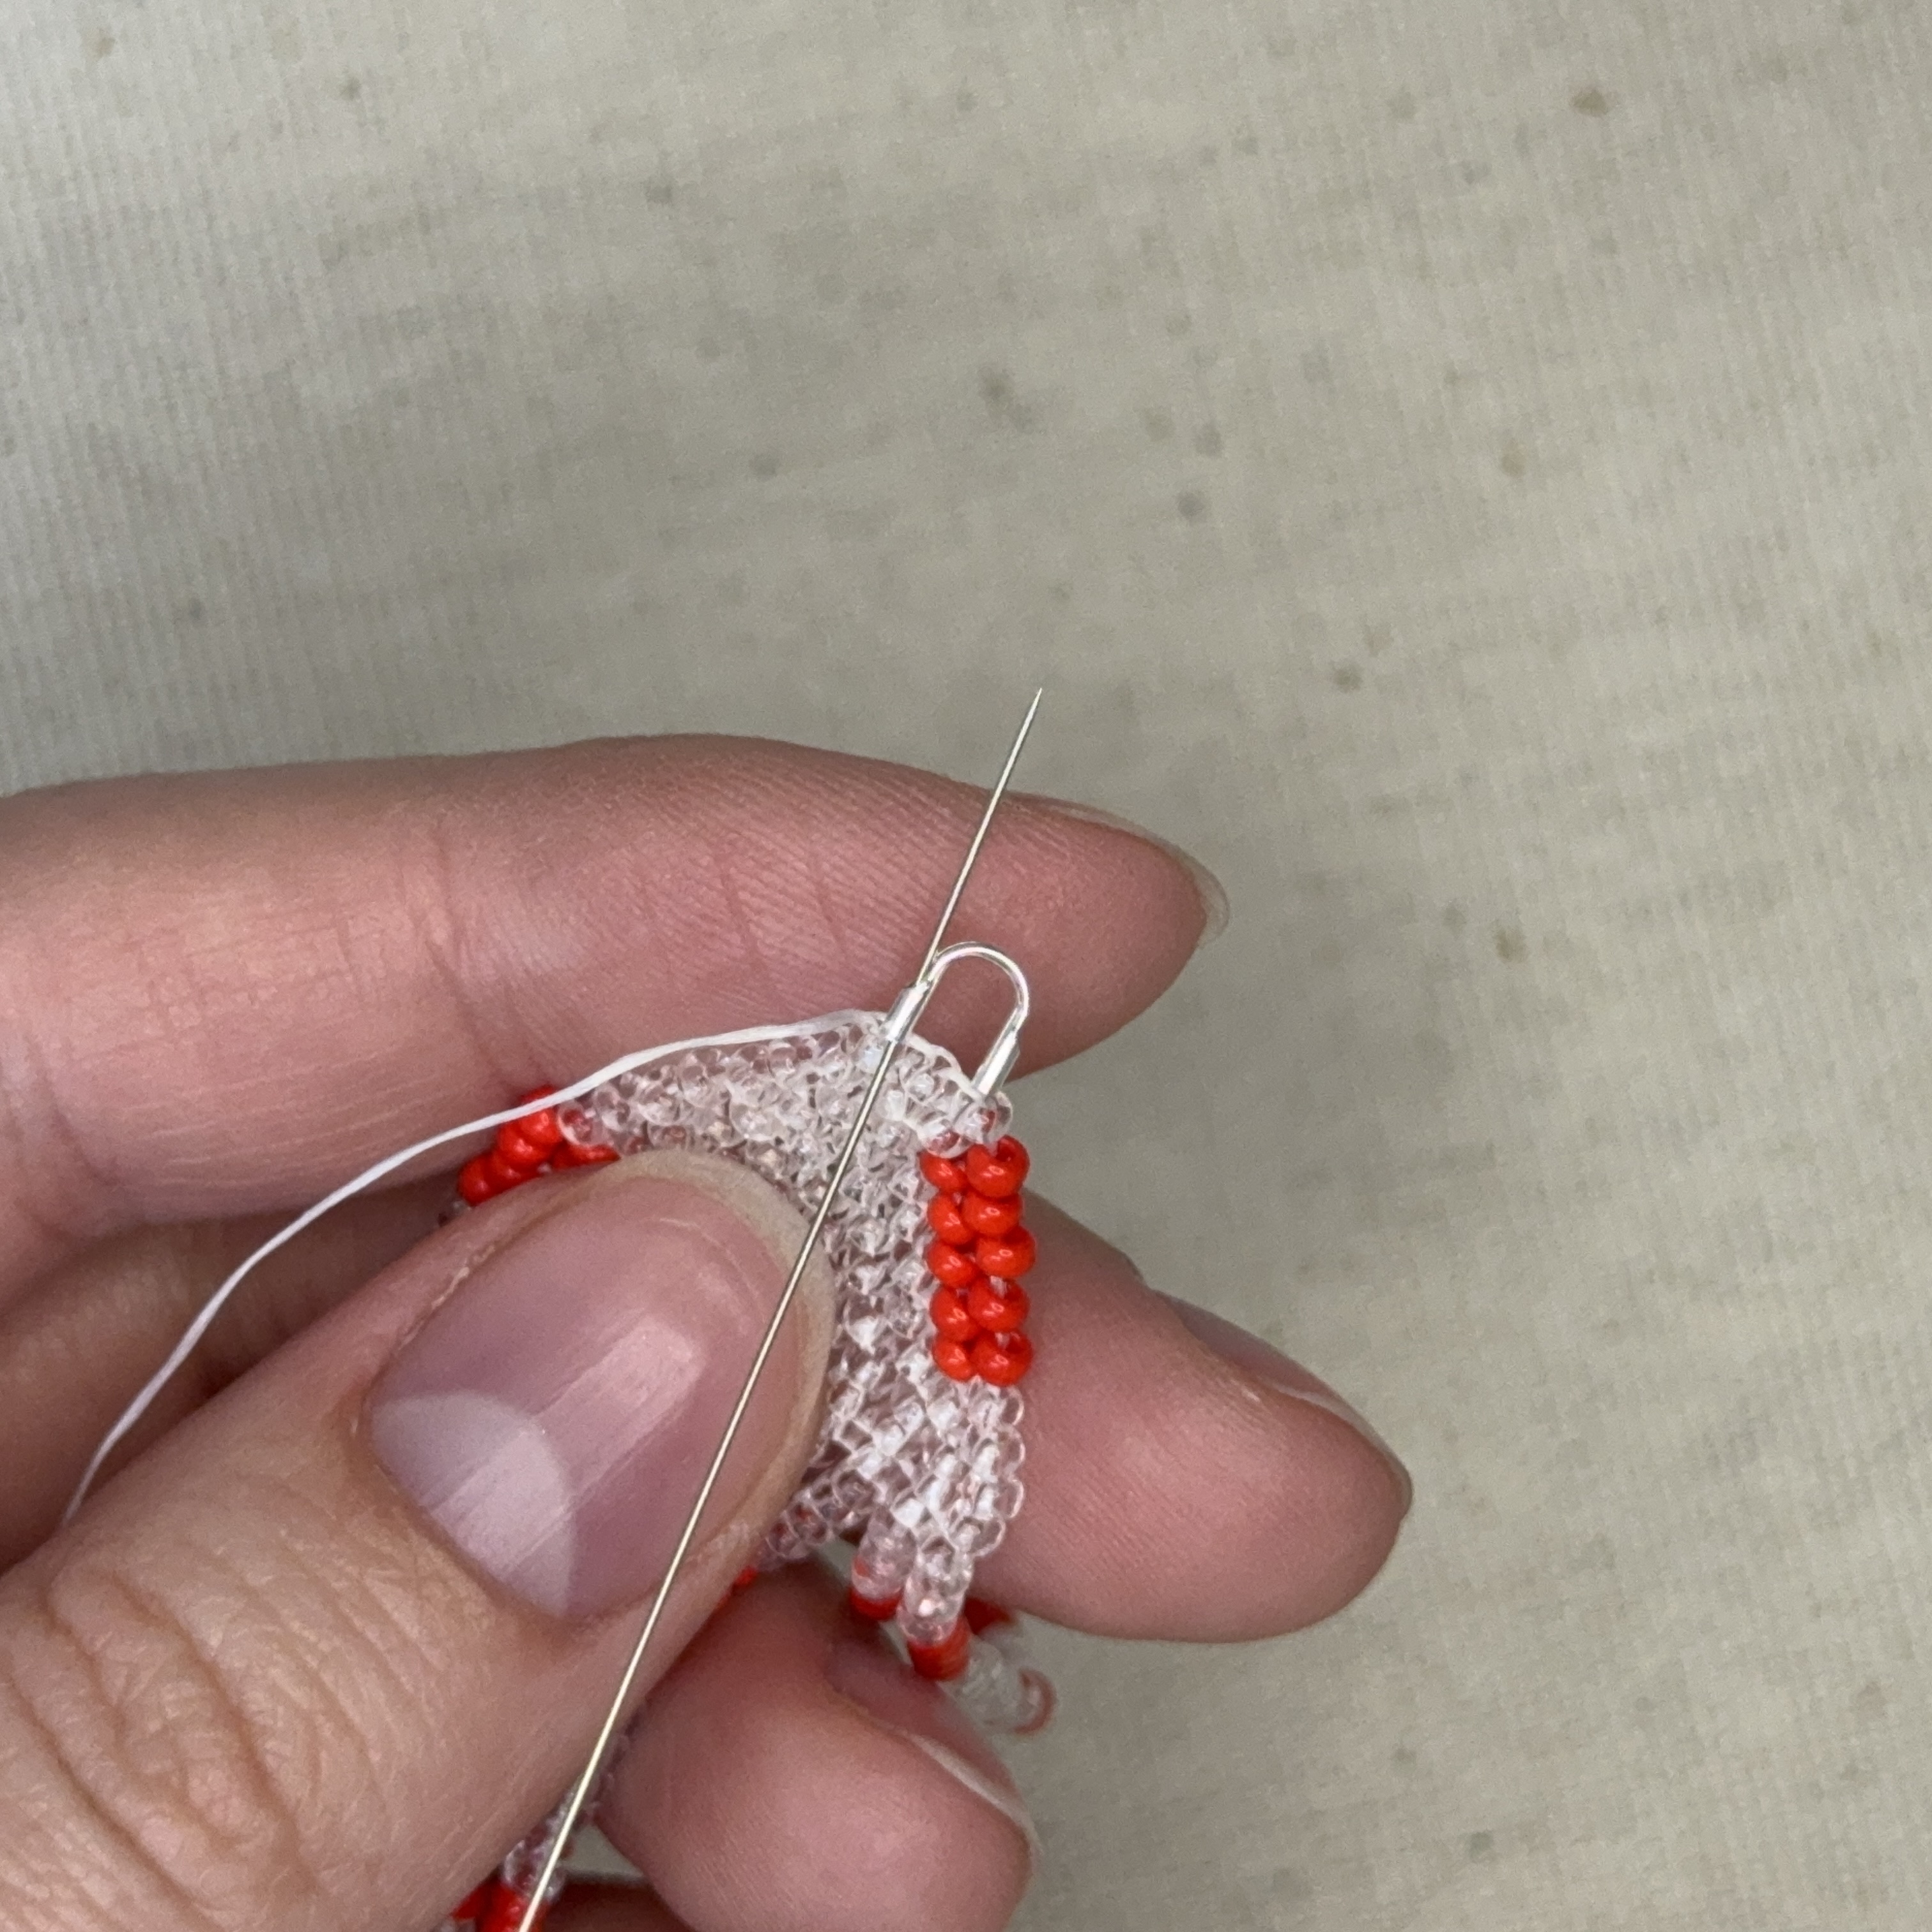
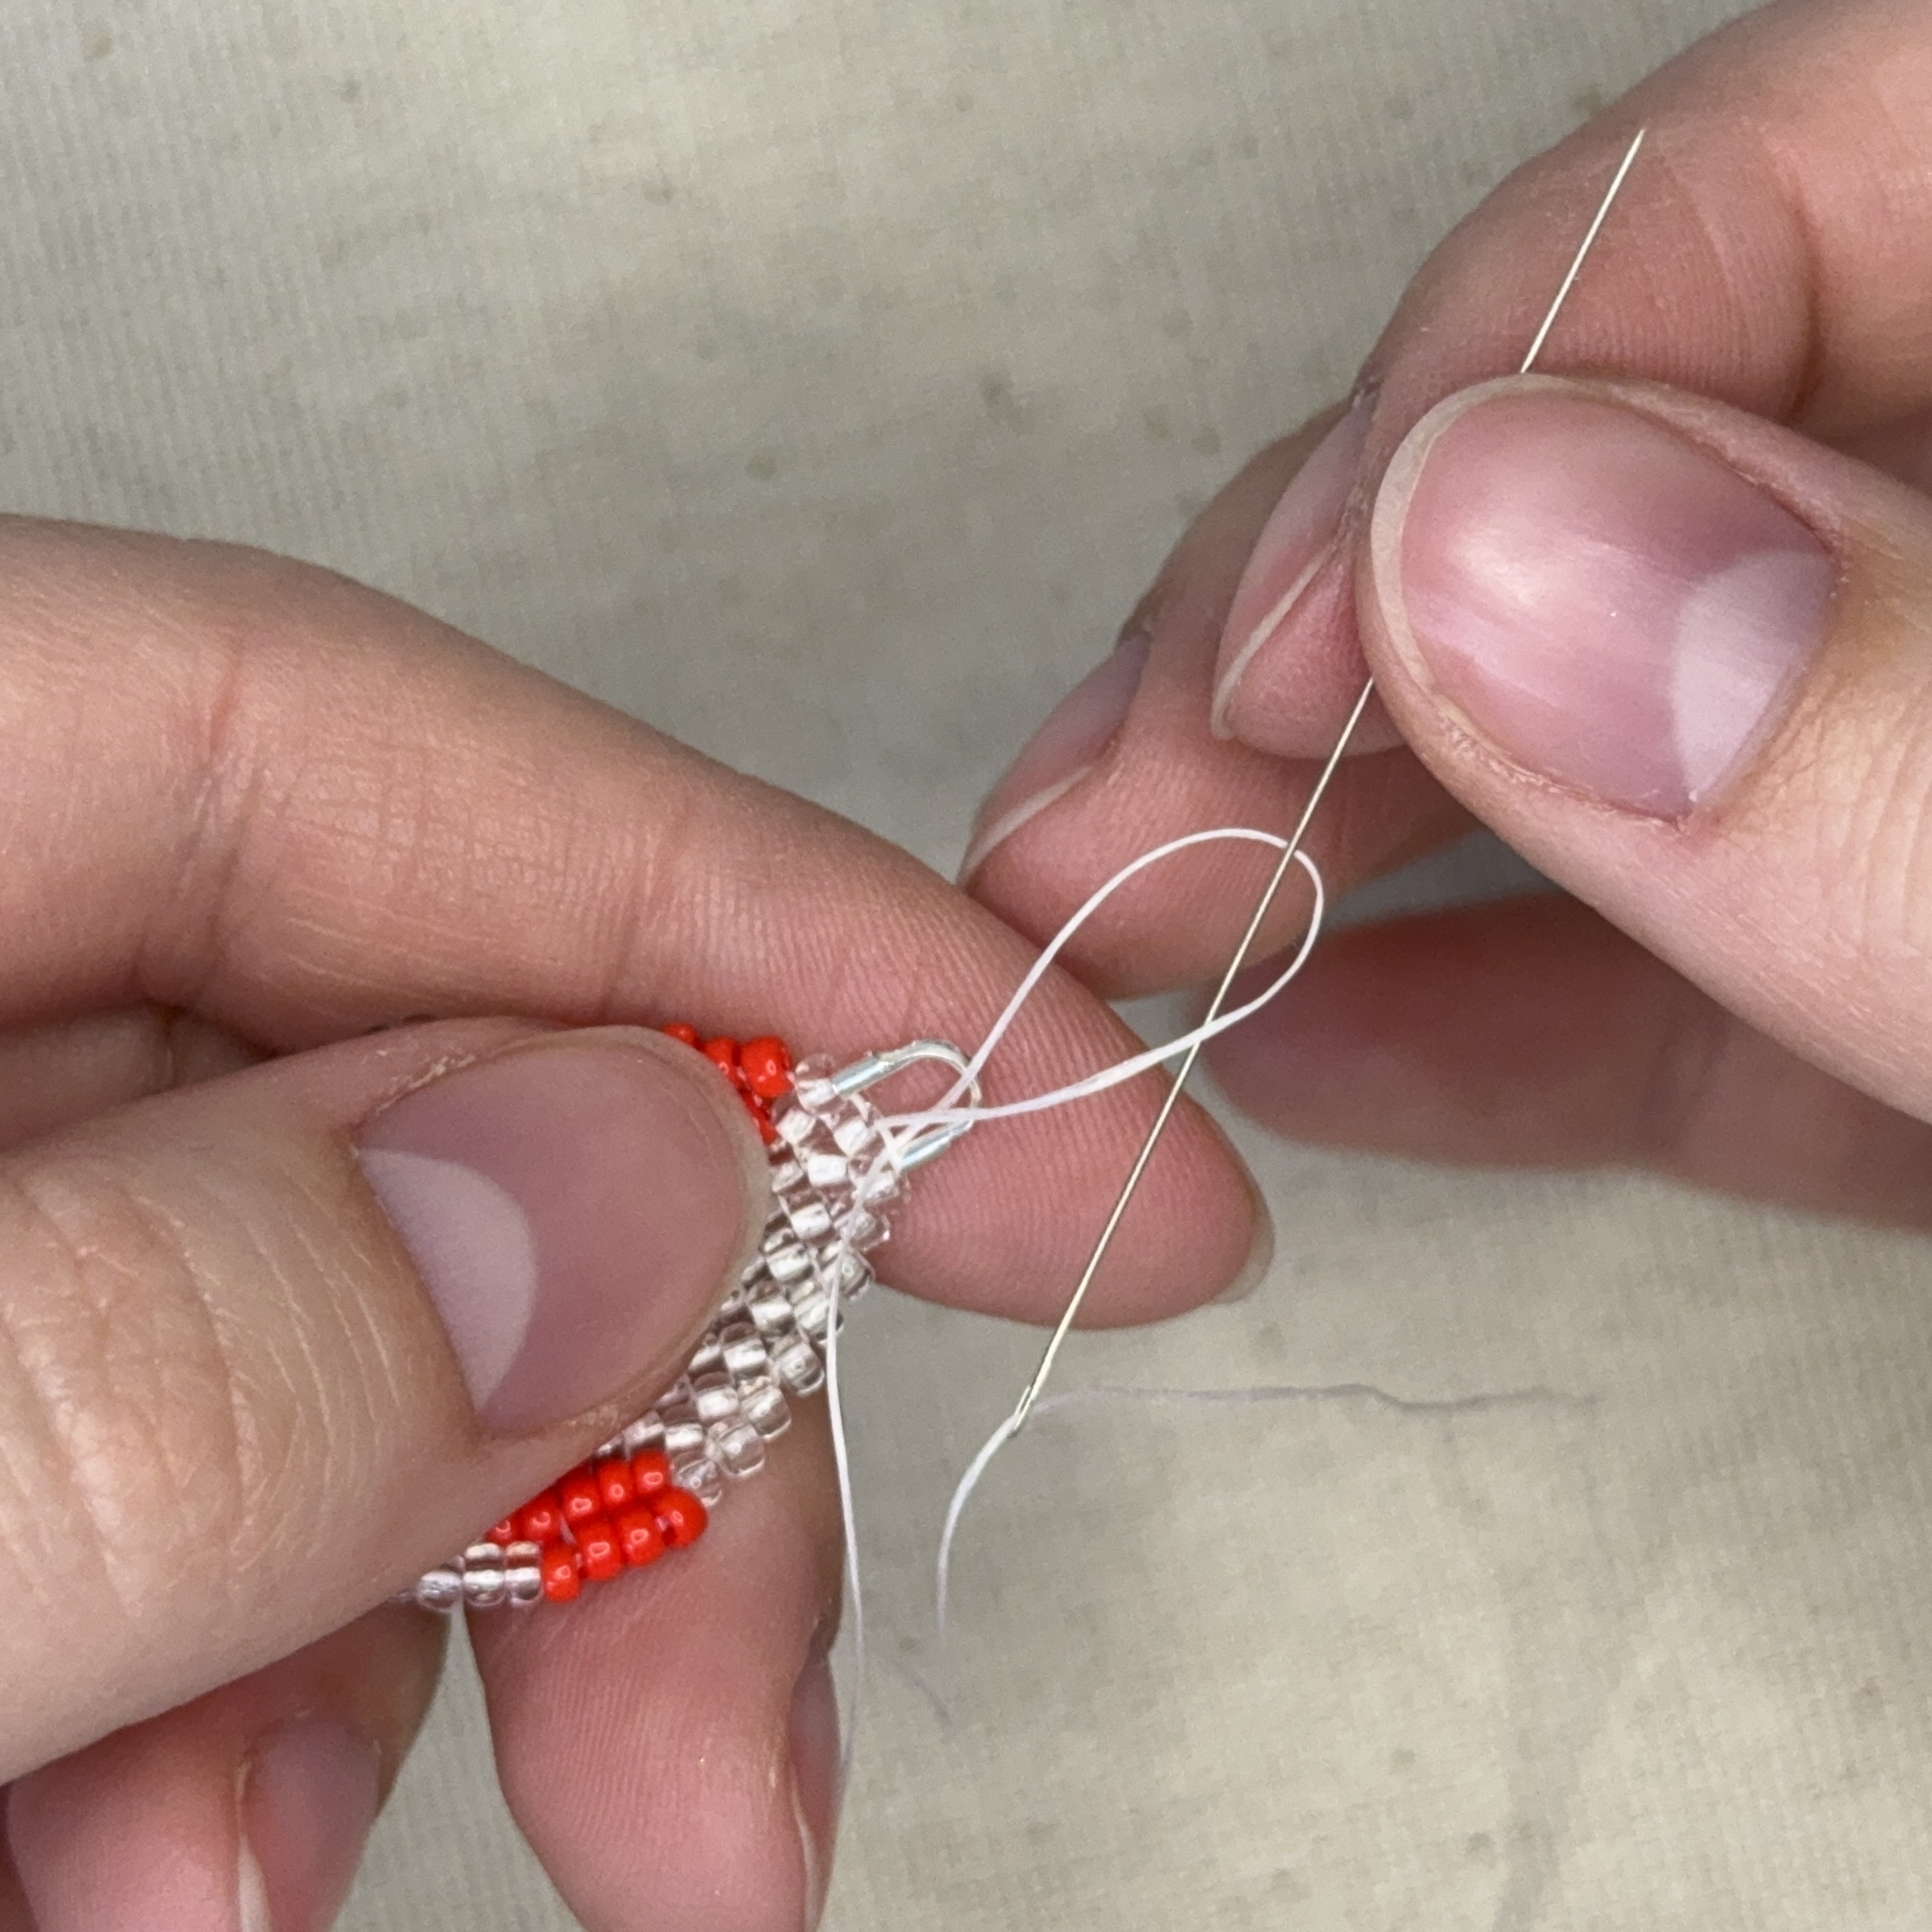
33. Thread your needle up and through the ends of a cable thimble
34. Thread your needle diagonally down to the two beads shown
35. And then diagonally up two beads to the left
36. Then through the cable thimble again
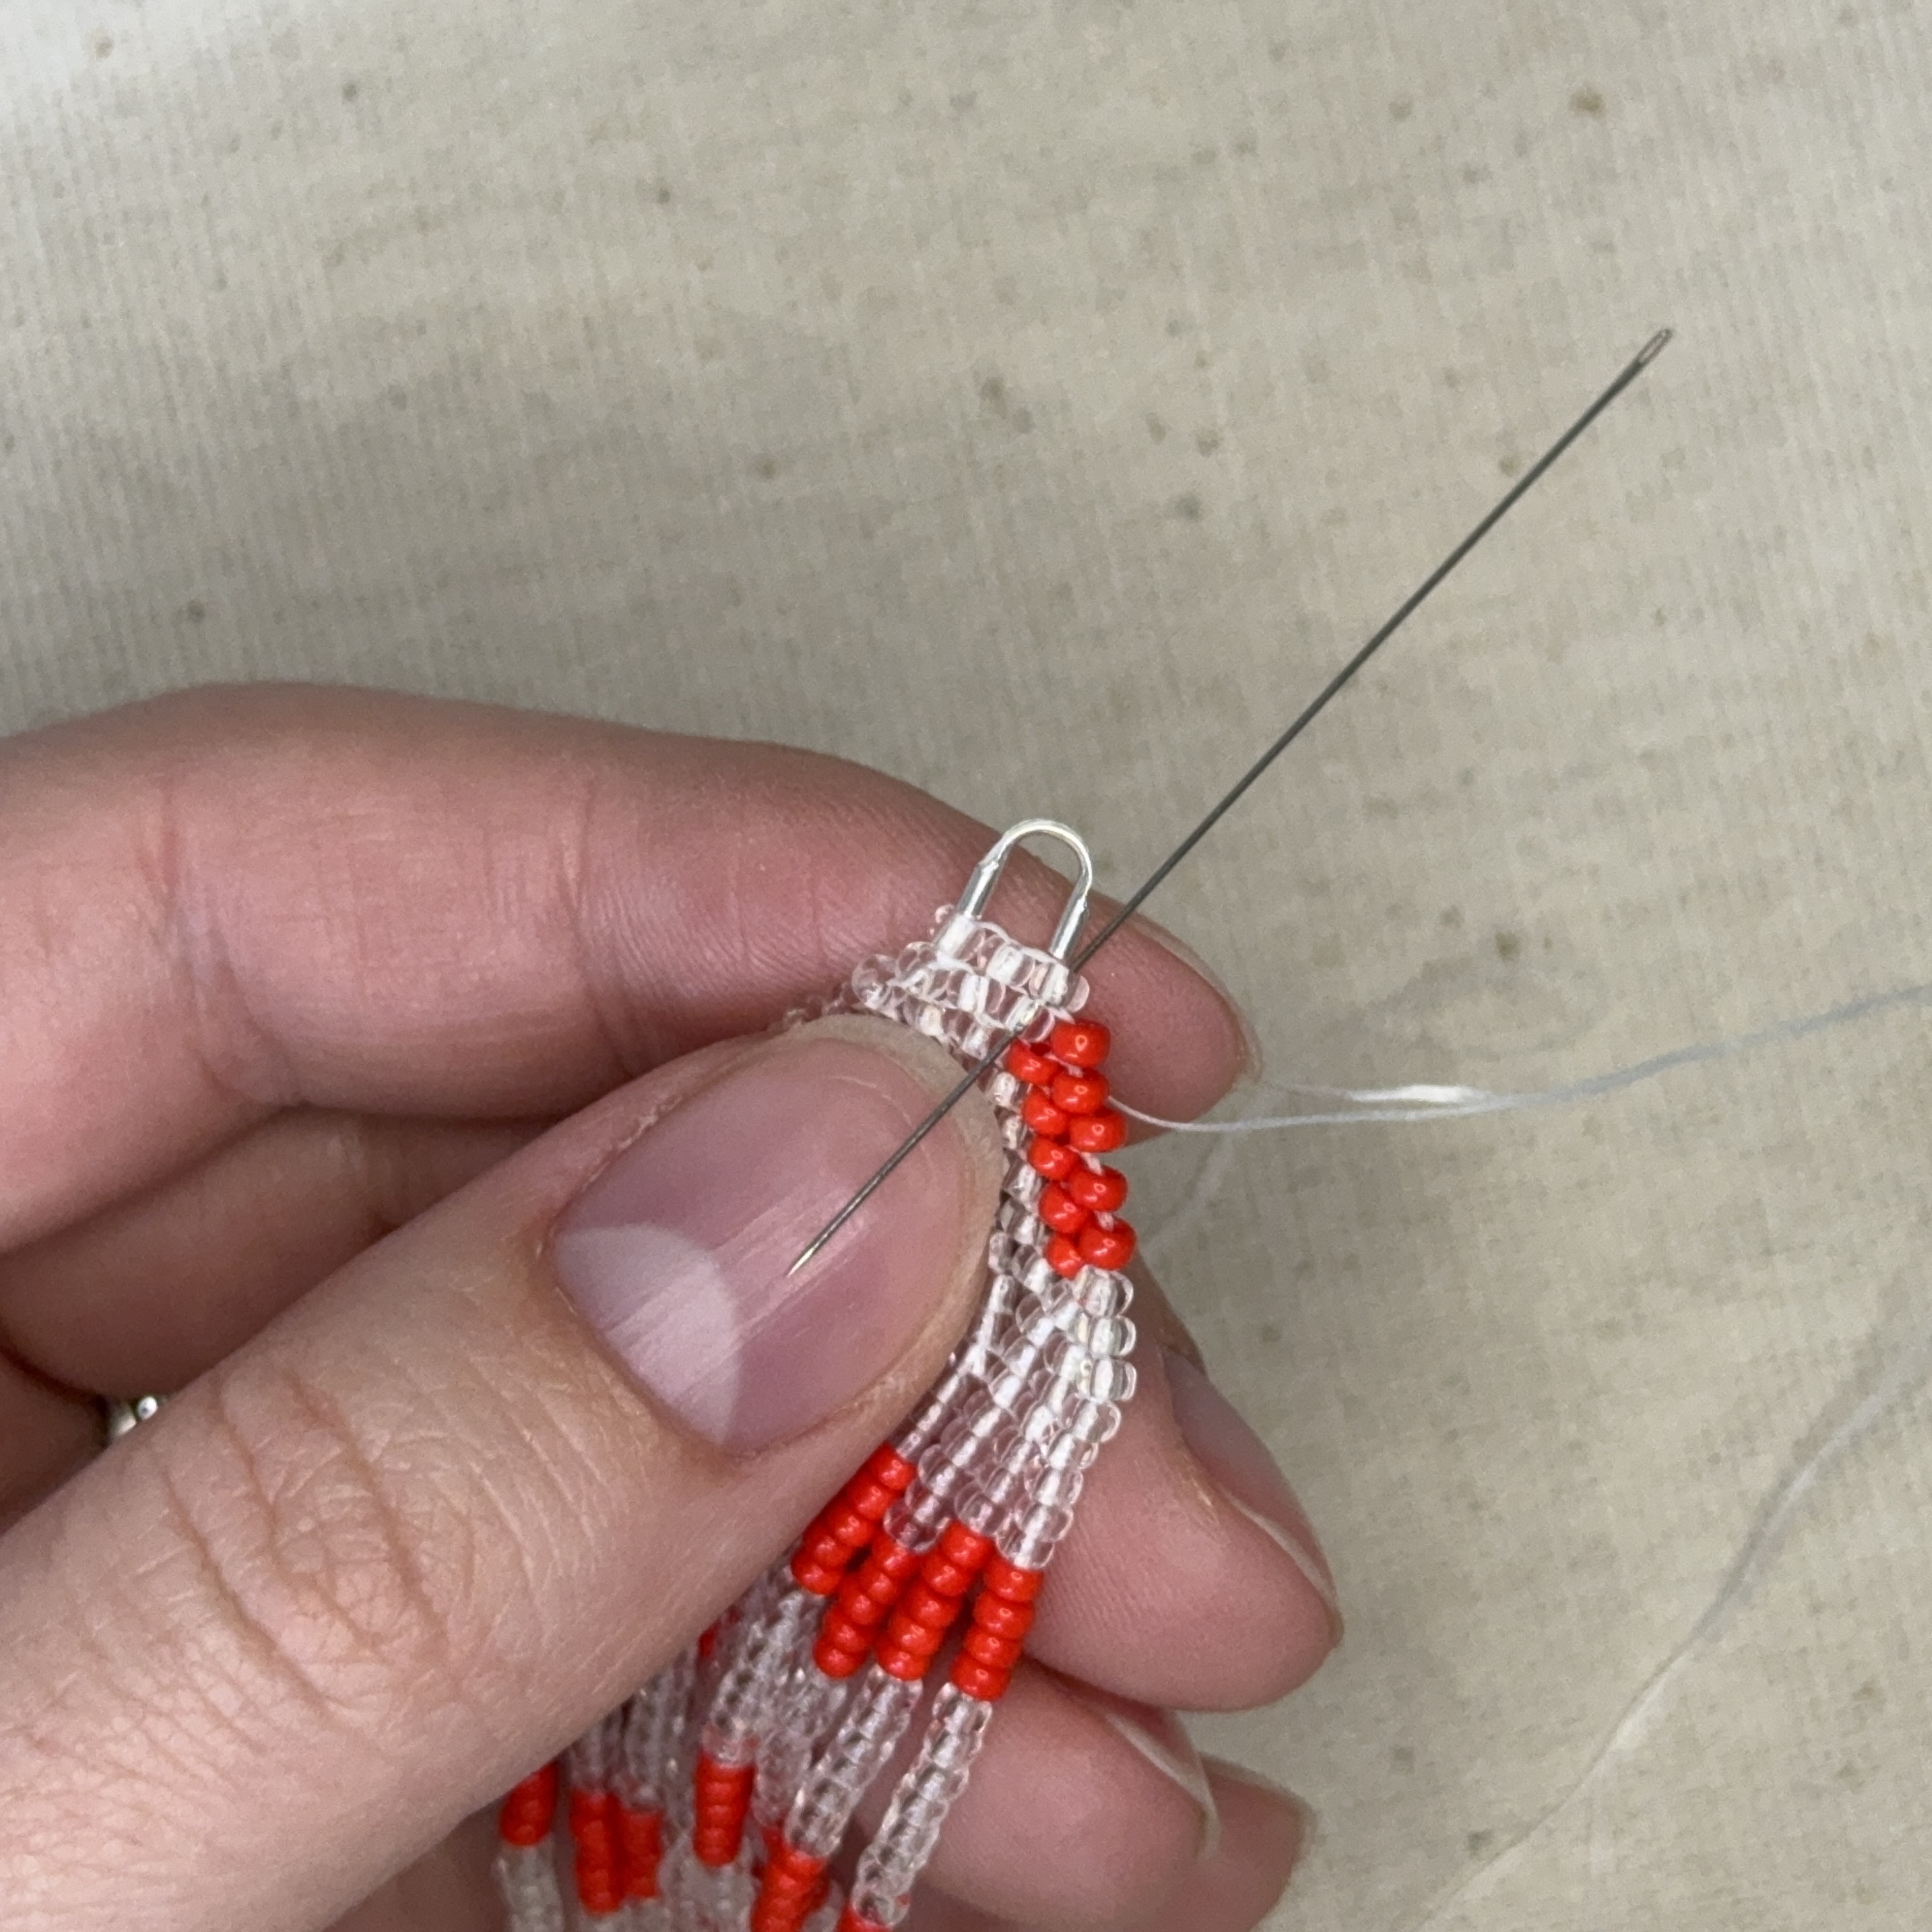
37. Thread the needle through the other end of the cable thimble and back through the two beads you went through in step 34
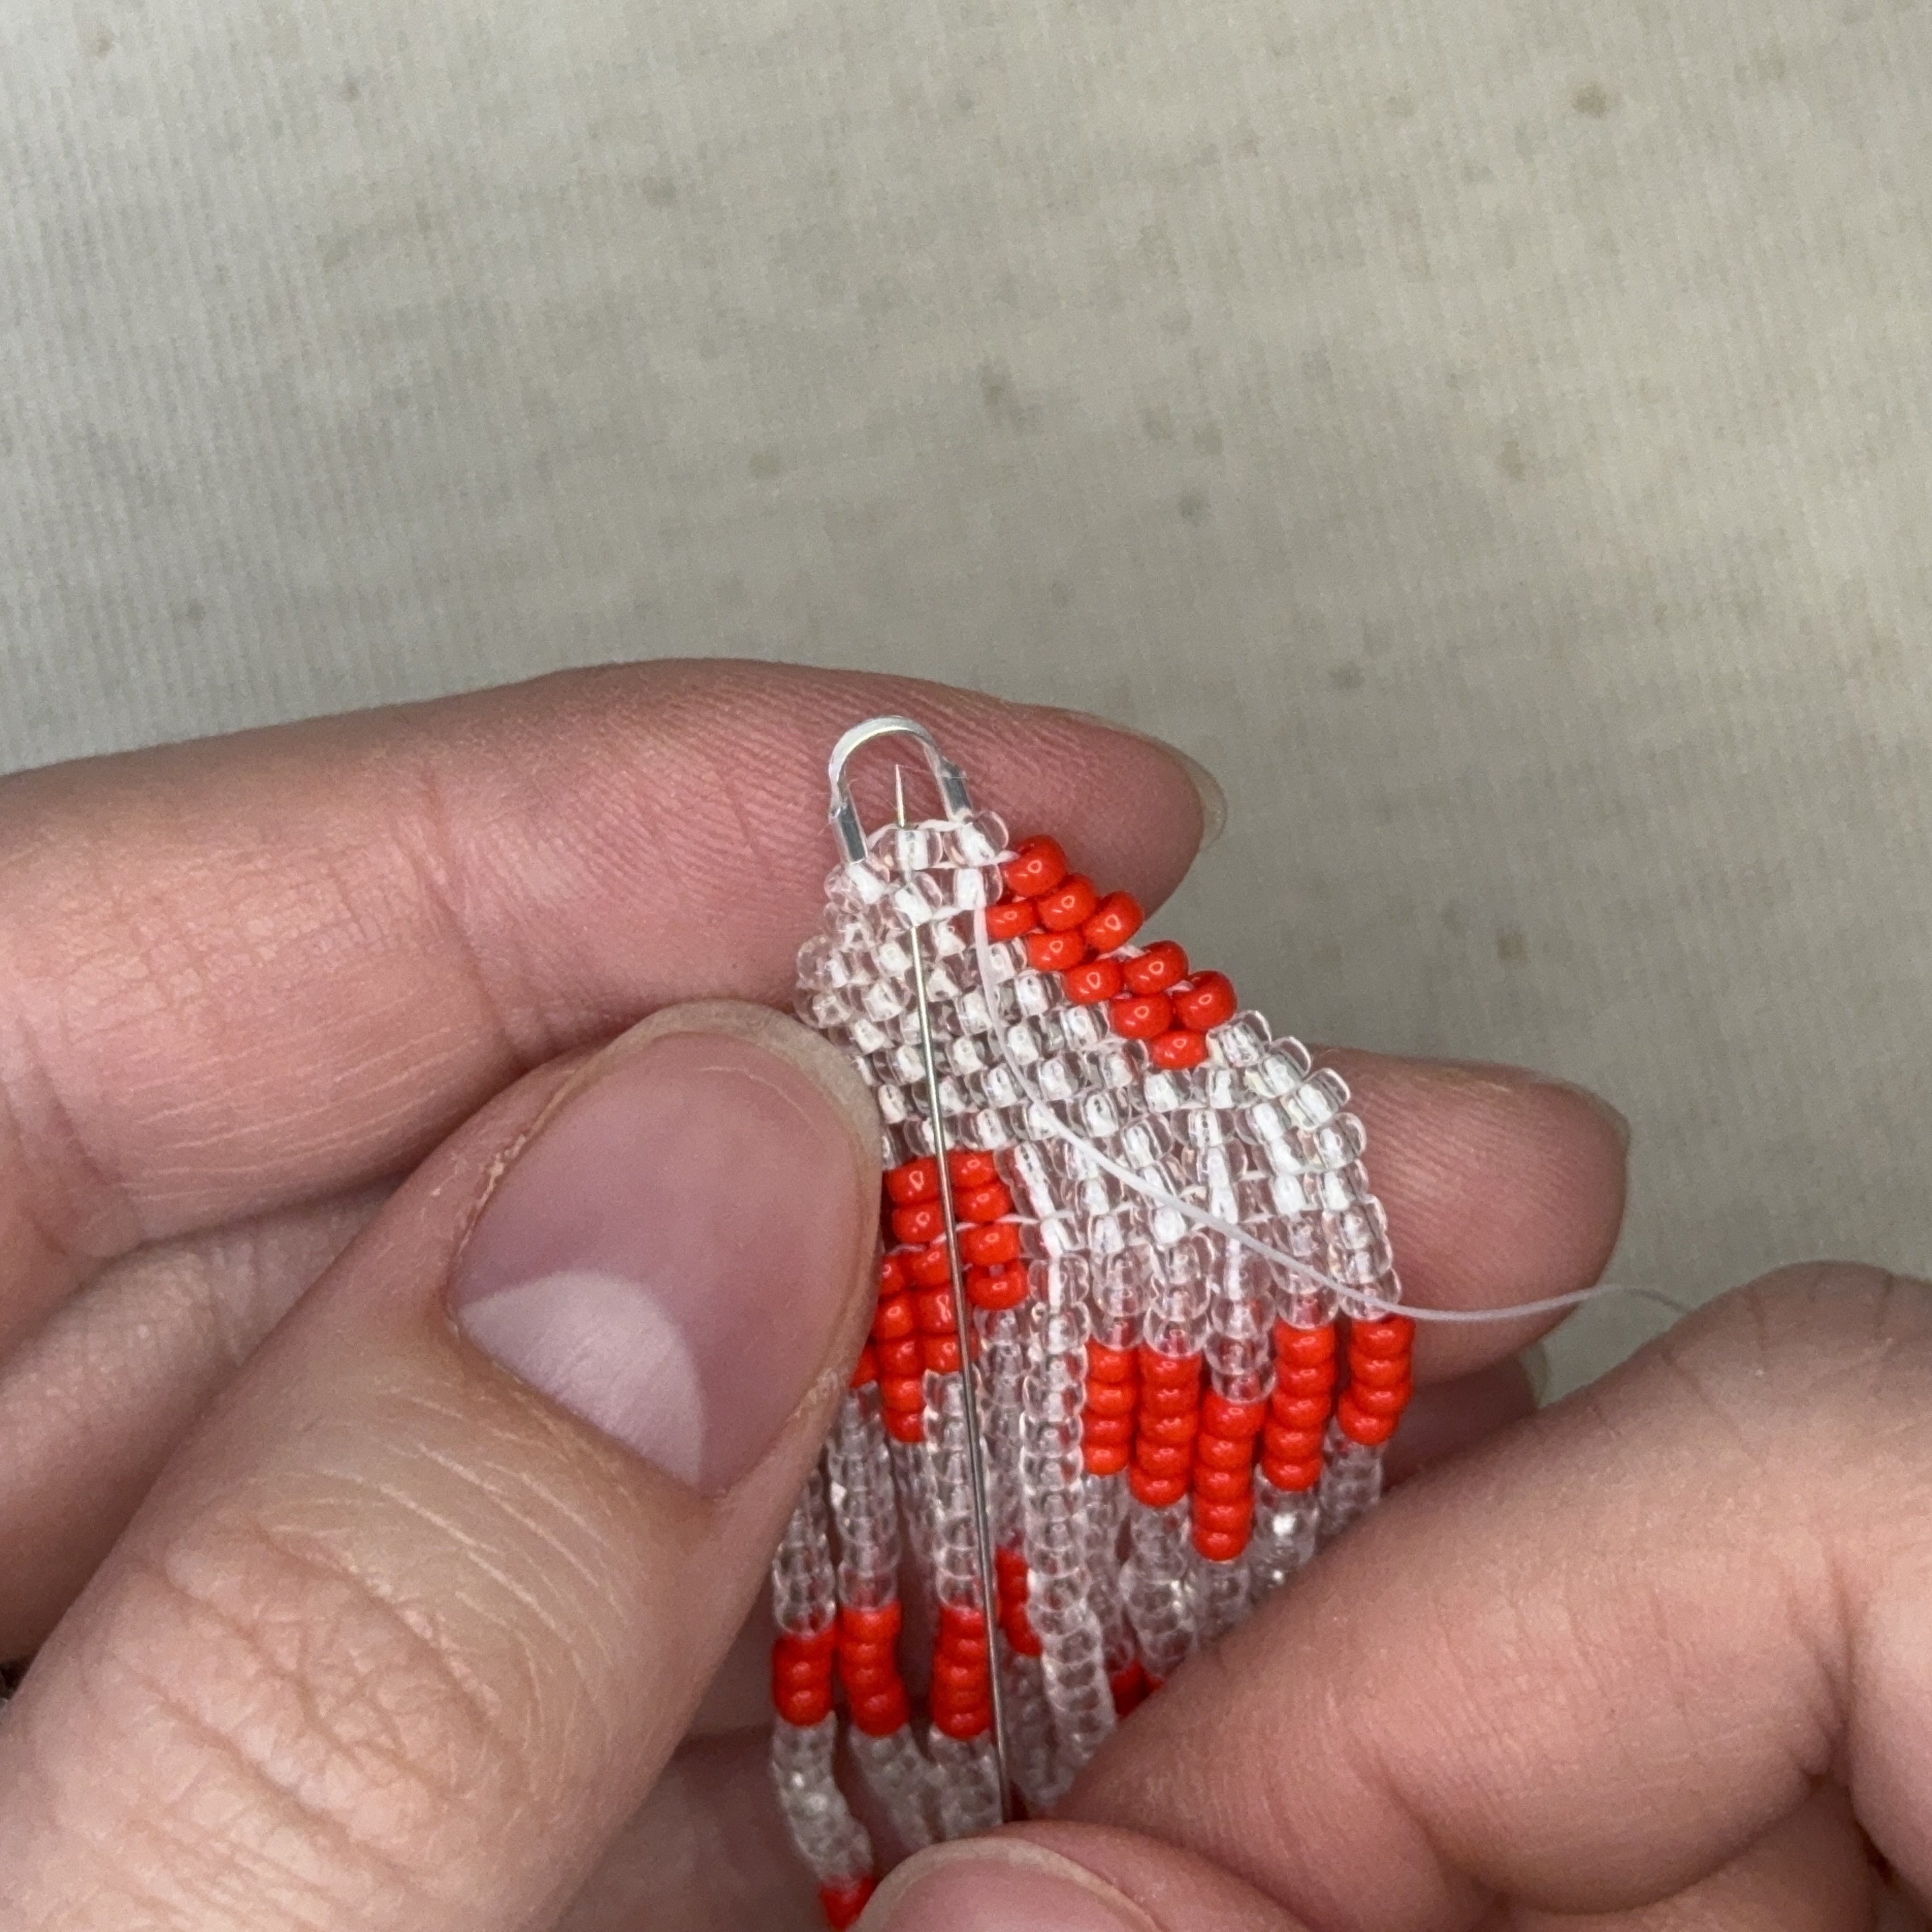
38. Then thread up through to two beads to reach the center bead in between the cable thimble
39. Gently glide your needle through a thread on the side of the center seed bead - this is where we will tie a knot to finish the piece
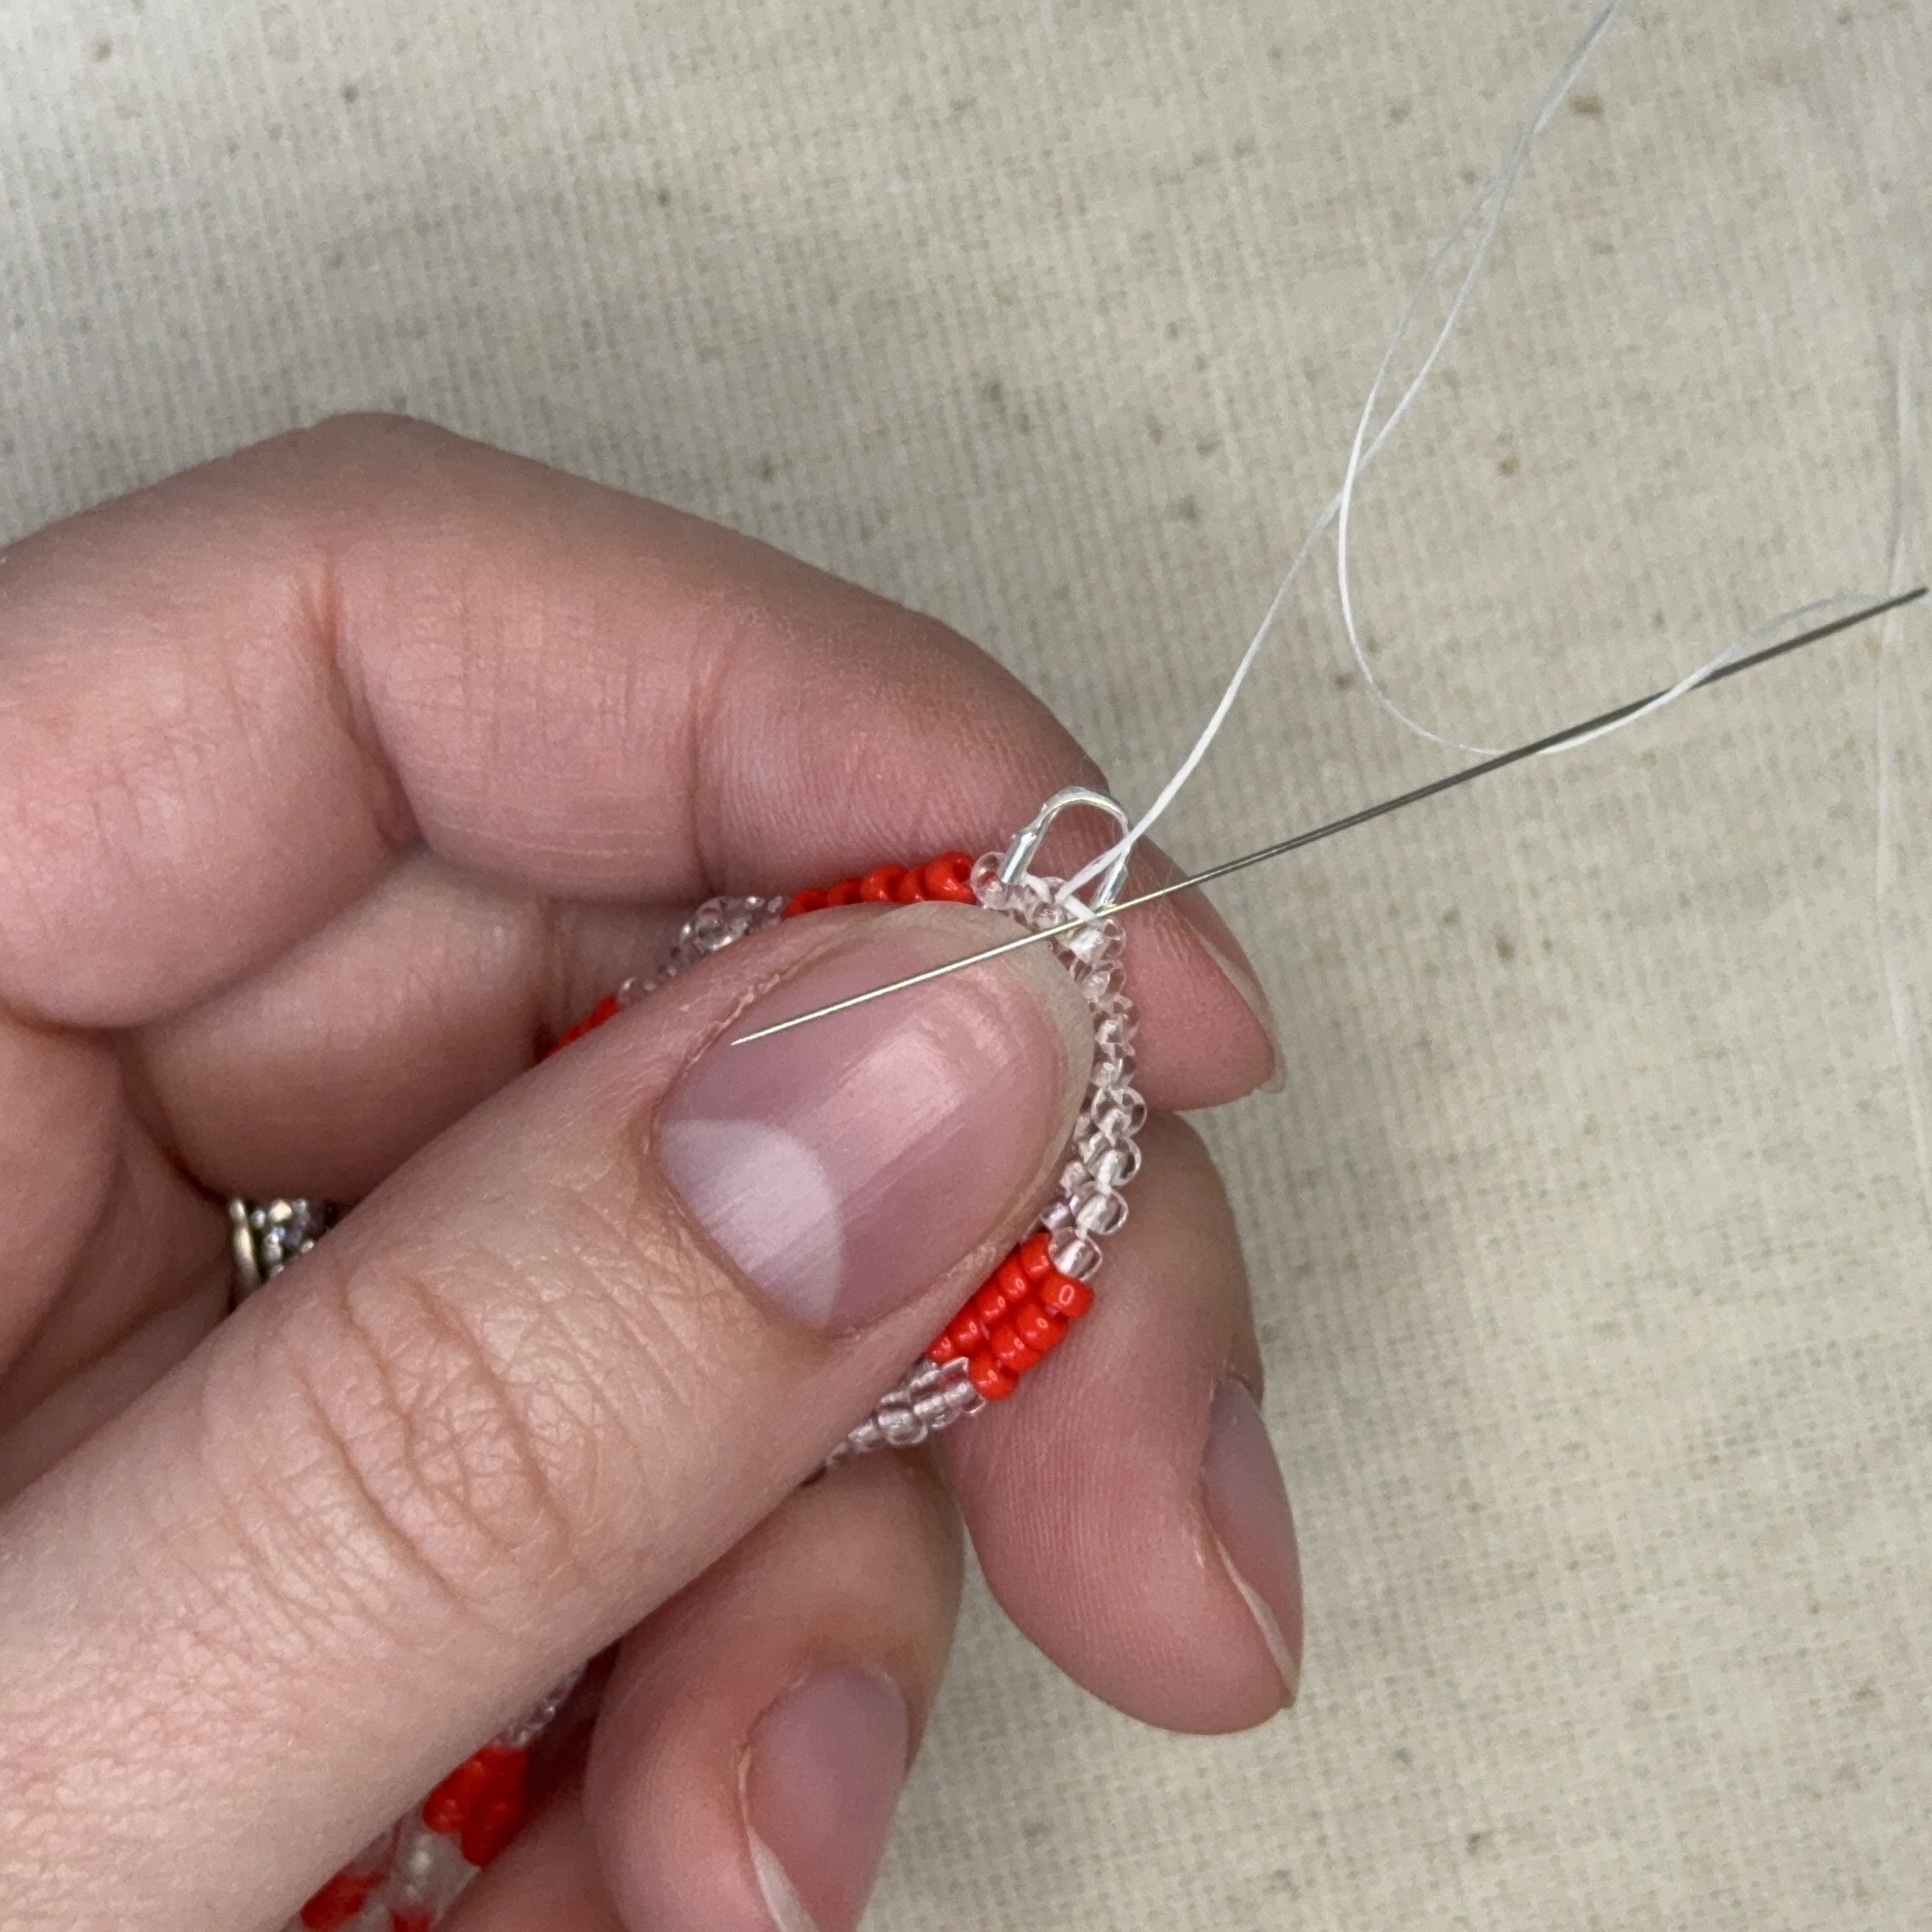
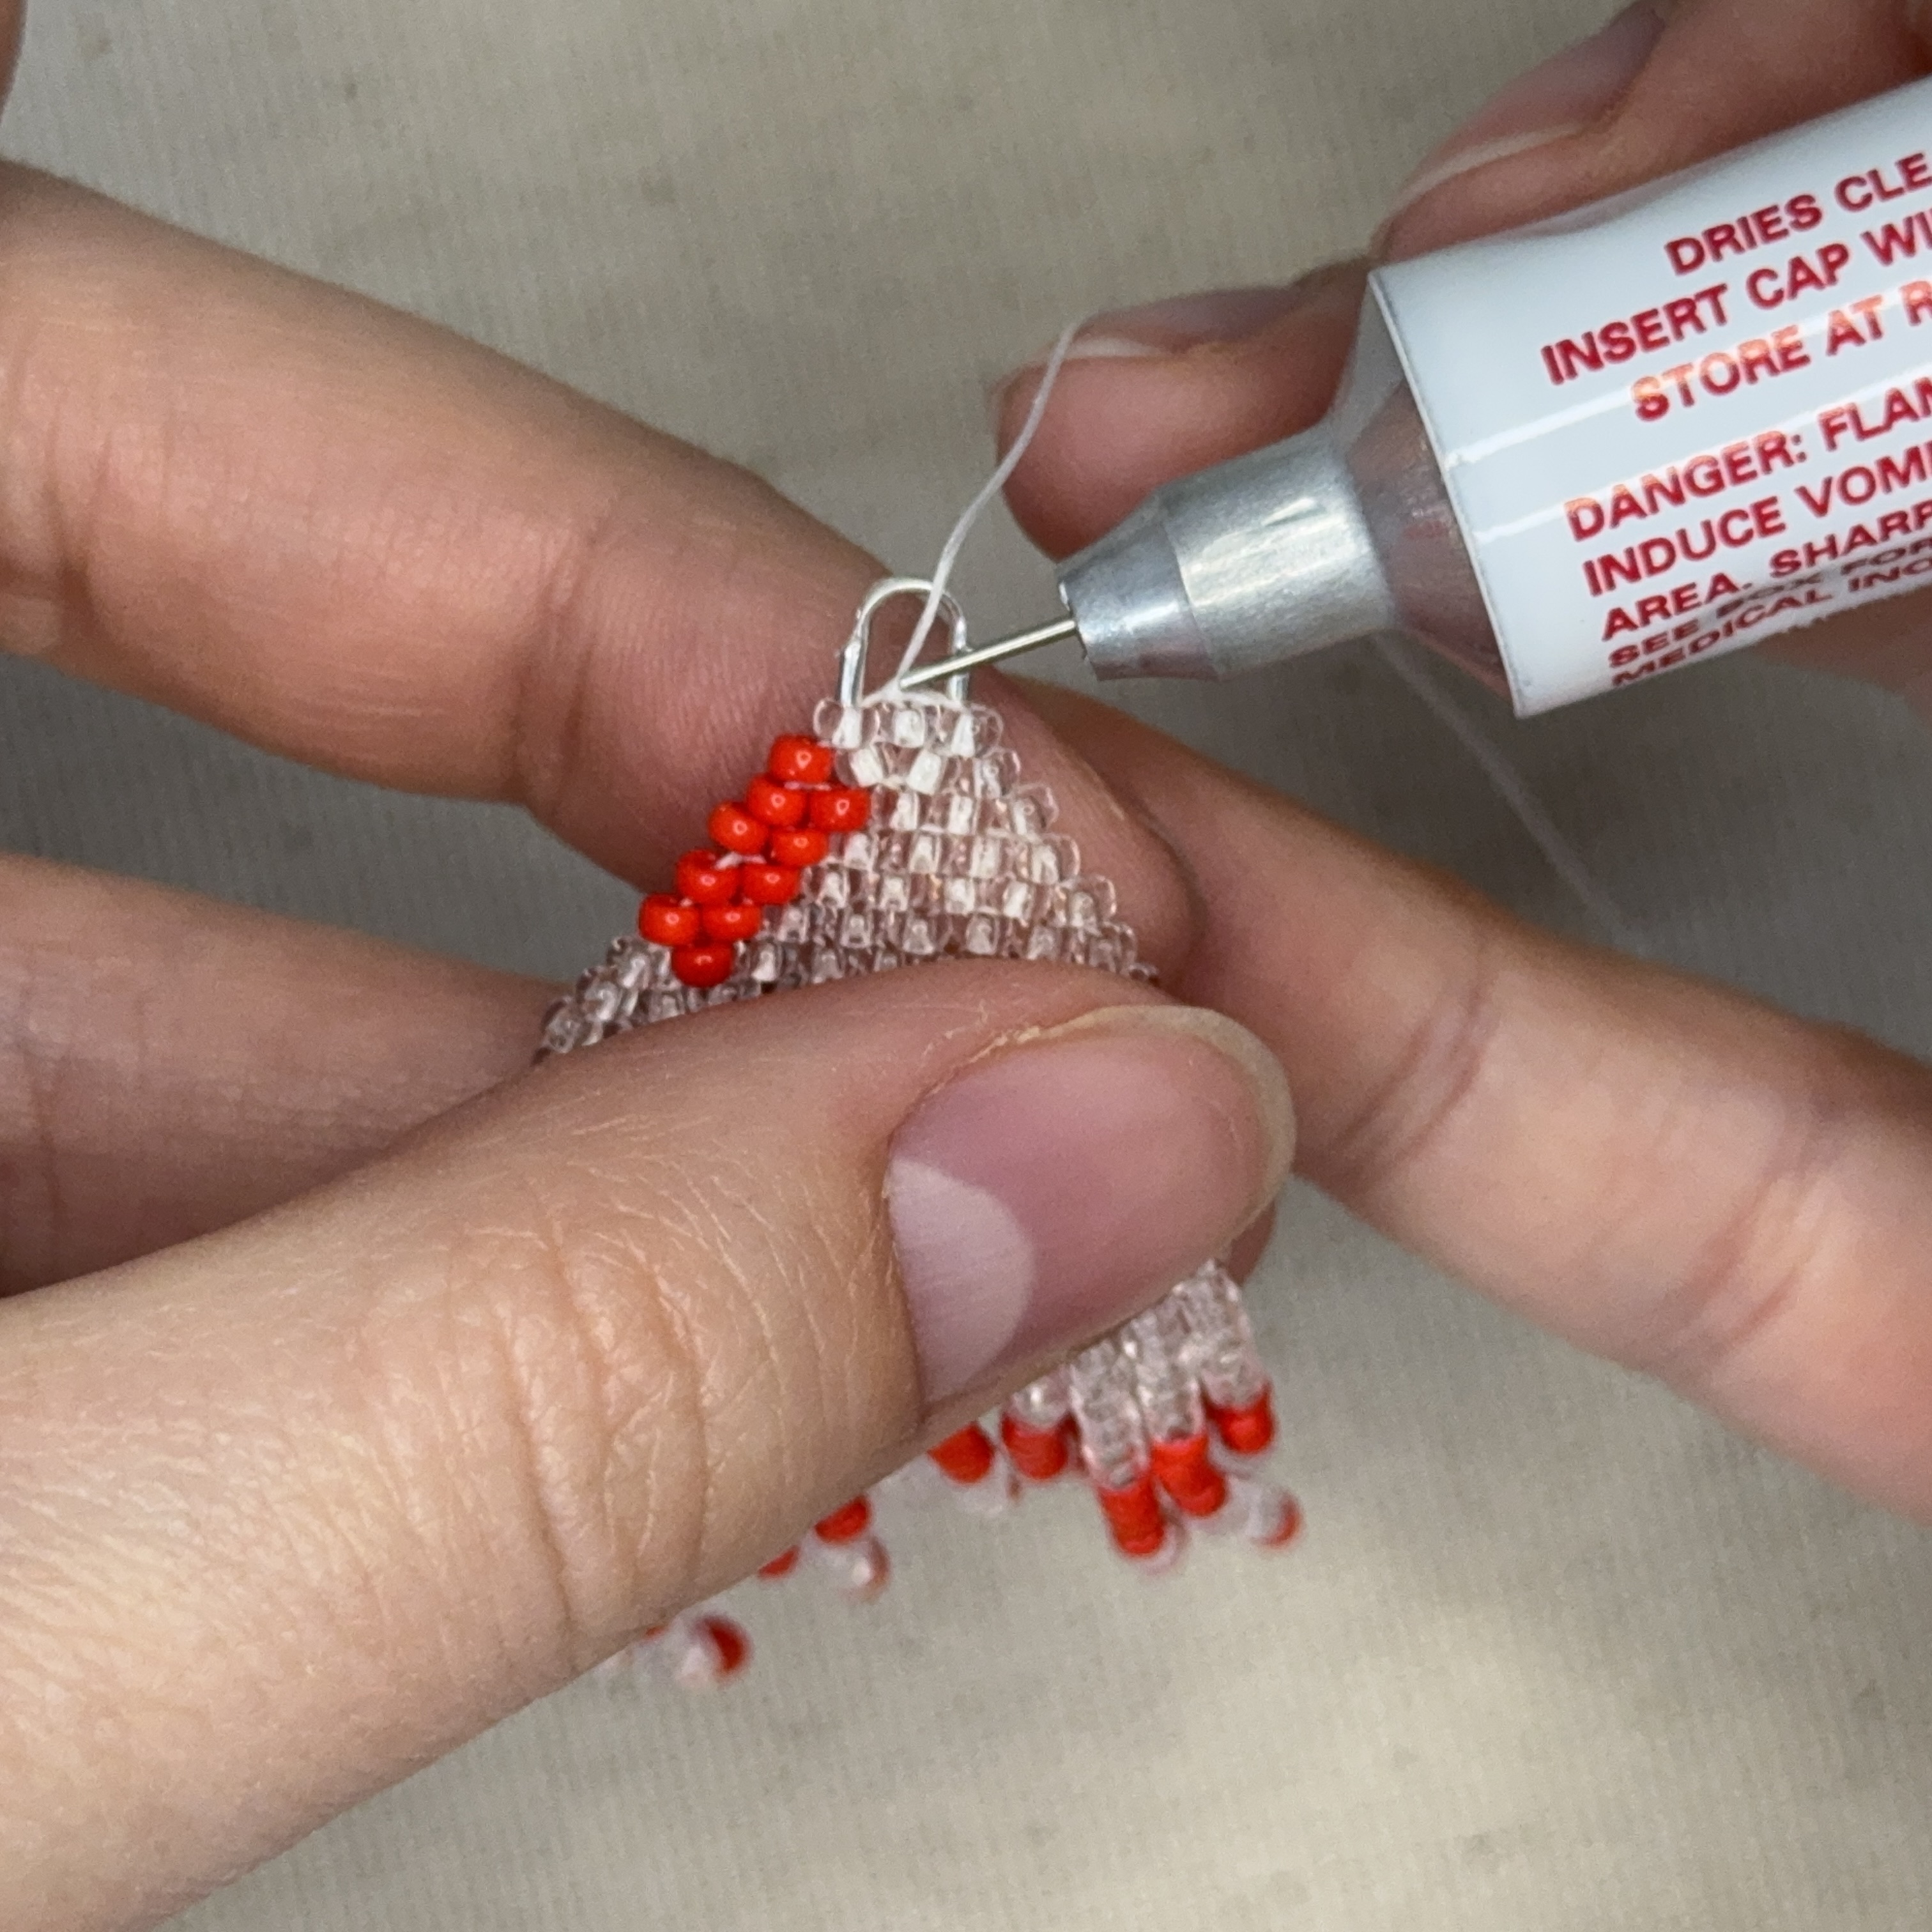
40. Pull the thread into a loop, then tie a knot - do this twice to secure
41. Add a tiny dab of gs-hypo glue and cut the thread as close to the knot as you can
42. Secure your earring wires onto the cable thimbles and you're done! Repeat each step to create a pair.

