

Hope & Sunshine Mala – Pantone 2021 Colors
Hope & Sunshine Mala – Pantone 2021 Colors
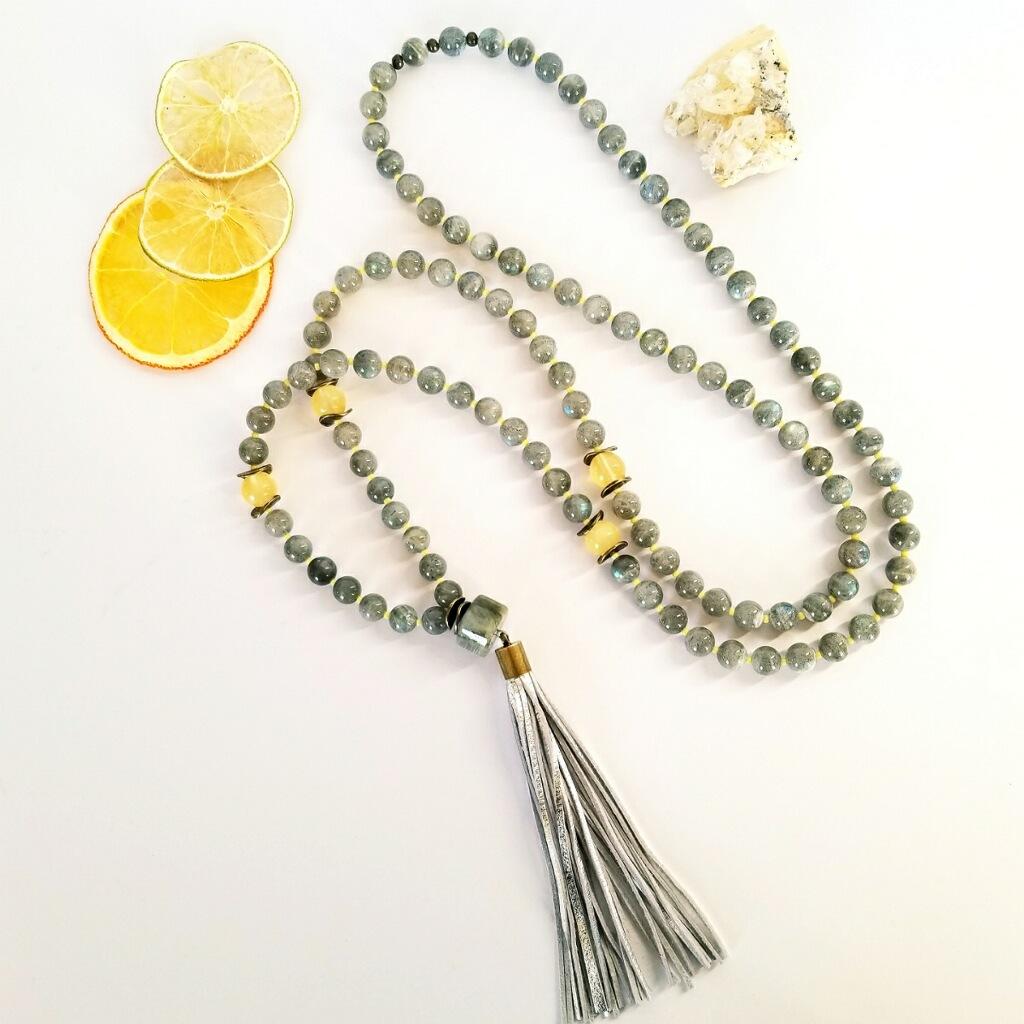
Finished Length: 41” - (Drop from Guru to bottom of tassel approx. 5”). This mala is strung on a beading wire that is finished with three crimps and crimp covers at the center back. The mala has a 7-14-66-14-7 layout. It is strung with iridescent labradorite and sunshine yellow calcite “marker” beads, with yellow seed beads.
This is a good alternative to a knotted mala if you do not have “knotting” in your repertoire, the seed beads are a look great and they bring in another yellow element.
Meanings Associated with the Gemstones in this Mala
Yellow Calcite: Is associated with Hope
Labradorite: Is associated with transformation it energizes your imagination to help create new ideas. The shimmering tones of labradorite refract lights of blue, yellow, silver, green and gray that change color in the light.
Materials Needed:
- 8mm Round AA Grade Labradorite – (2 strands plus 10 beads)
- 10mm Yellow Calcite – (4 beads) * Used as marker beads
- 15x10mm Labradorite Triangle Rondel (1) * Used for Guru Bead
- Size 11 Miyuki Seed Beads 404C – Opaque Light Yellow
- TierraCast 10mm Wavy Disks, Brass Plated – (10)
- 4mm Crimp Covers – Antique Brass (3)
- 2x2mm Crimps Sterling Silver or Antique Brass (3)
- 4” Silver Leather Tassel with Brass Cap (1) or Tassel of your choice – Yellow would also look great
- Soft Flex Beading Wire, Medium - Satin Silver (Approx. 50”) * This is a generous amount, but it will make the mala easier to work on.
Tools Required:
Medium Travelers Bead Board or Bead Mat
Key Code: L = 8mm Labradorite C = 10mm Calcite G = Labradorite Drum (Guru Bead) TC10 = Tierra Cast 10mm Wavy Disks SB = Size 11 Miyuki Seed Beads - Opaque Light Yellow C = 2 x 2 Crimp Tubes
Instructions on Construction:
1. On this mala we will start and finish at the center back
* This will allow you to crimp the mala at the back at completion of project, and then cover the three crimps with crimp covers. Cut a 50” section beading wire and place bead stop approx. 4” from end.
2. Threading sequence is as follows: L (1), C (1), * L (1), SB (1) * (Repeat this section so that you have a total of 33 labradorite beads), TC10 (1), C (1), TC10 (1), * SB (1), L (11) * (Repeat this section so that you have a total of 14 labradorite beads), SB (1), TC10 (1), C (1), TC10 (1), * SB (1), L (1) * (Repeat this section so that you have a total of 7 labradorite beads), SB (1), TC10 (2), G (1),
*You are now at the center point so thread wire through loop at top of tassel, then thread back up through Guru bead and two wavy spacers. The second side is a mirror image of the first side, plus C (1) at the end.
*** Now, carefully count the beads, there should be 108 - 8mm labradorite beads! * I completed a knotted mala recently only to find that one bead had slid off and so I had a 107-bead mala that I had to take apart and redo… it is always better to be check!
3. When you have all your beads threaded onto wire you will carefully remove the bead stop from the beginning section of wire, and then take the end section of wire (where you have just finished stringing), and thread this through the initial L (1), C (1), * This means that this section will have two sets of wire running through it. Now take the beginning section of wire and run back through the last bead section C (1), L (1), C (1), now this section will also have two lots of wire running through it.
* This will now give you a completed circle of beads.
4. The next step before crimping is to lay your mala on a flat surface and to work out how much slack to allow in the wire; you will need to add a little extra to accommodate the crimp covers, plus however much you need to allow the beads to lie easily.
* If you do not allow some slack the beads will look rigid and the wire can break.
5. When you have worked out how much wire is needed you will take your needle nose pliers and crimp the middle crimp tube. Working out from this point you will now crimp the rest of the crimp tubes.
* Make sure that you leave enough space between crimps and beads to allow the placement of crimp covers.
6. Add crimp covers over crimps, close carefully with your needle nose pliers making sure that edges line up nicely.
7. Try on your new mala & admire your handywork!
8. Enjoy!
Jewelry designed by Steph Stirniman at https://magpiecollectives.etsy.com/
Recent Posts
-

Christmas Wine Charms - Mini Tutorial
Christmas Wine Charms - Mini TutorialThese wine charms are sure to be the center talking point at yo …25th Nov 2024 -

Christmas Bow Garland - Mini Tutorial
Christmas Bow Garland - Mini TutorialCreate your own holiday decor with a Christmas-colored bow garl …14th Nov 2024 -

Charm Necklace Tutorial
Charm Necklace TutorialEmbrace individuality with our Personalized Charm Necklace tutorial, a perfec …6th Nov 2024