How to Single and Double Thread Wrap Charms and Pendants - Carnelian Daisy Earrings and More
How to Single and Double Thread Wrap Charms and Pendants - Carnelian Daisy Earrings and More Examples
While this method is typically done using wire, fireline is a great alternative to creating dainty adornments to our stainless steel charms and pendants
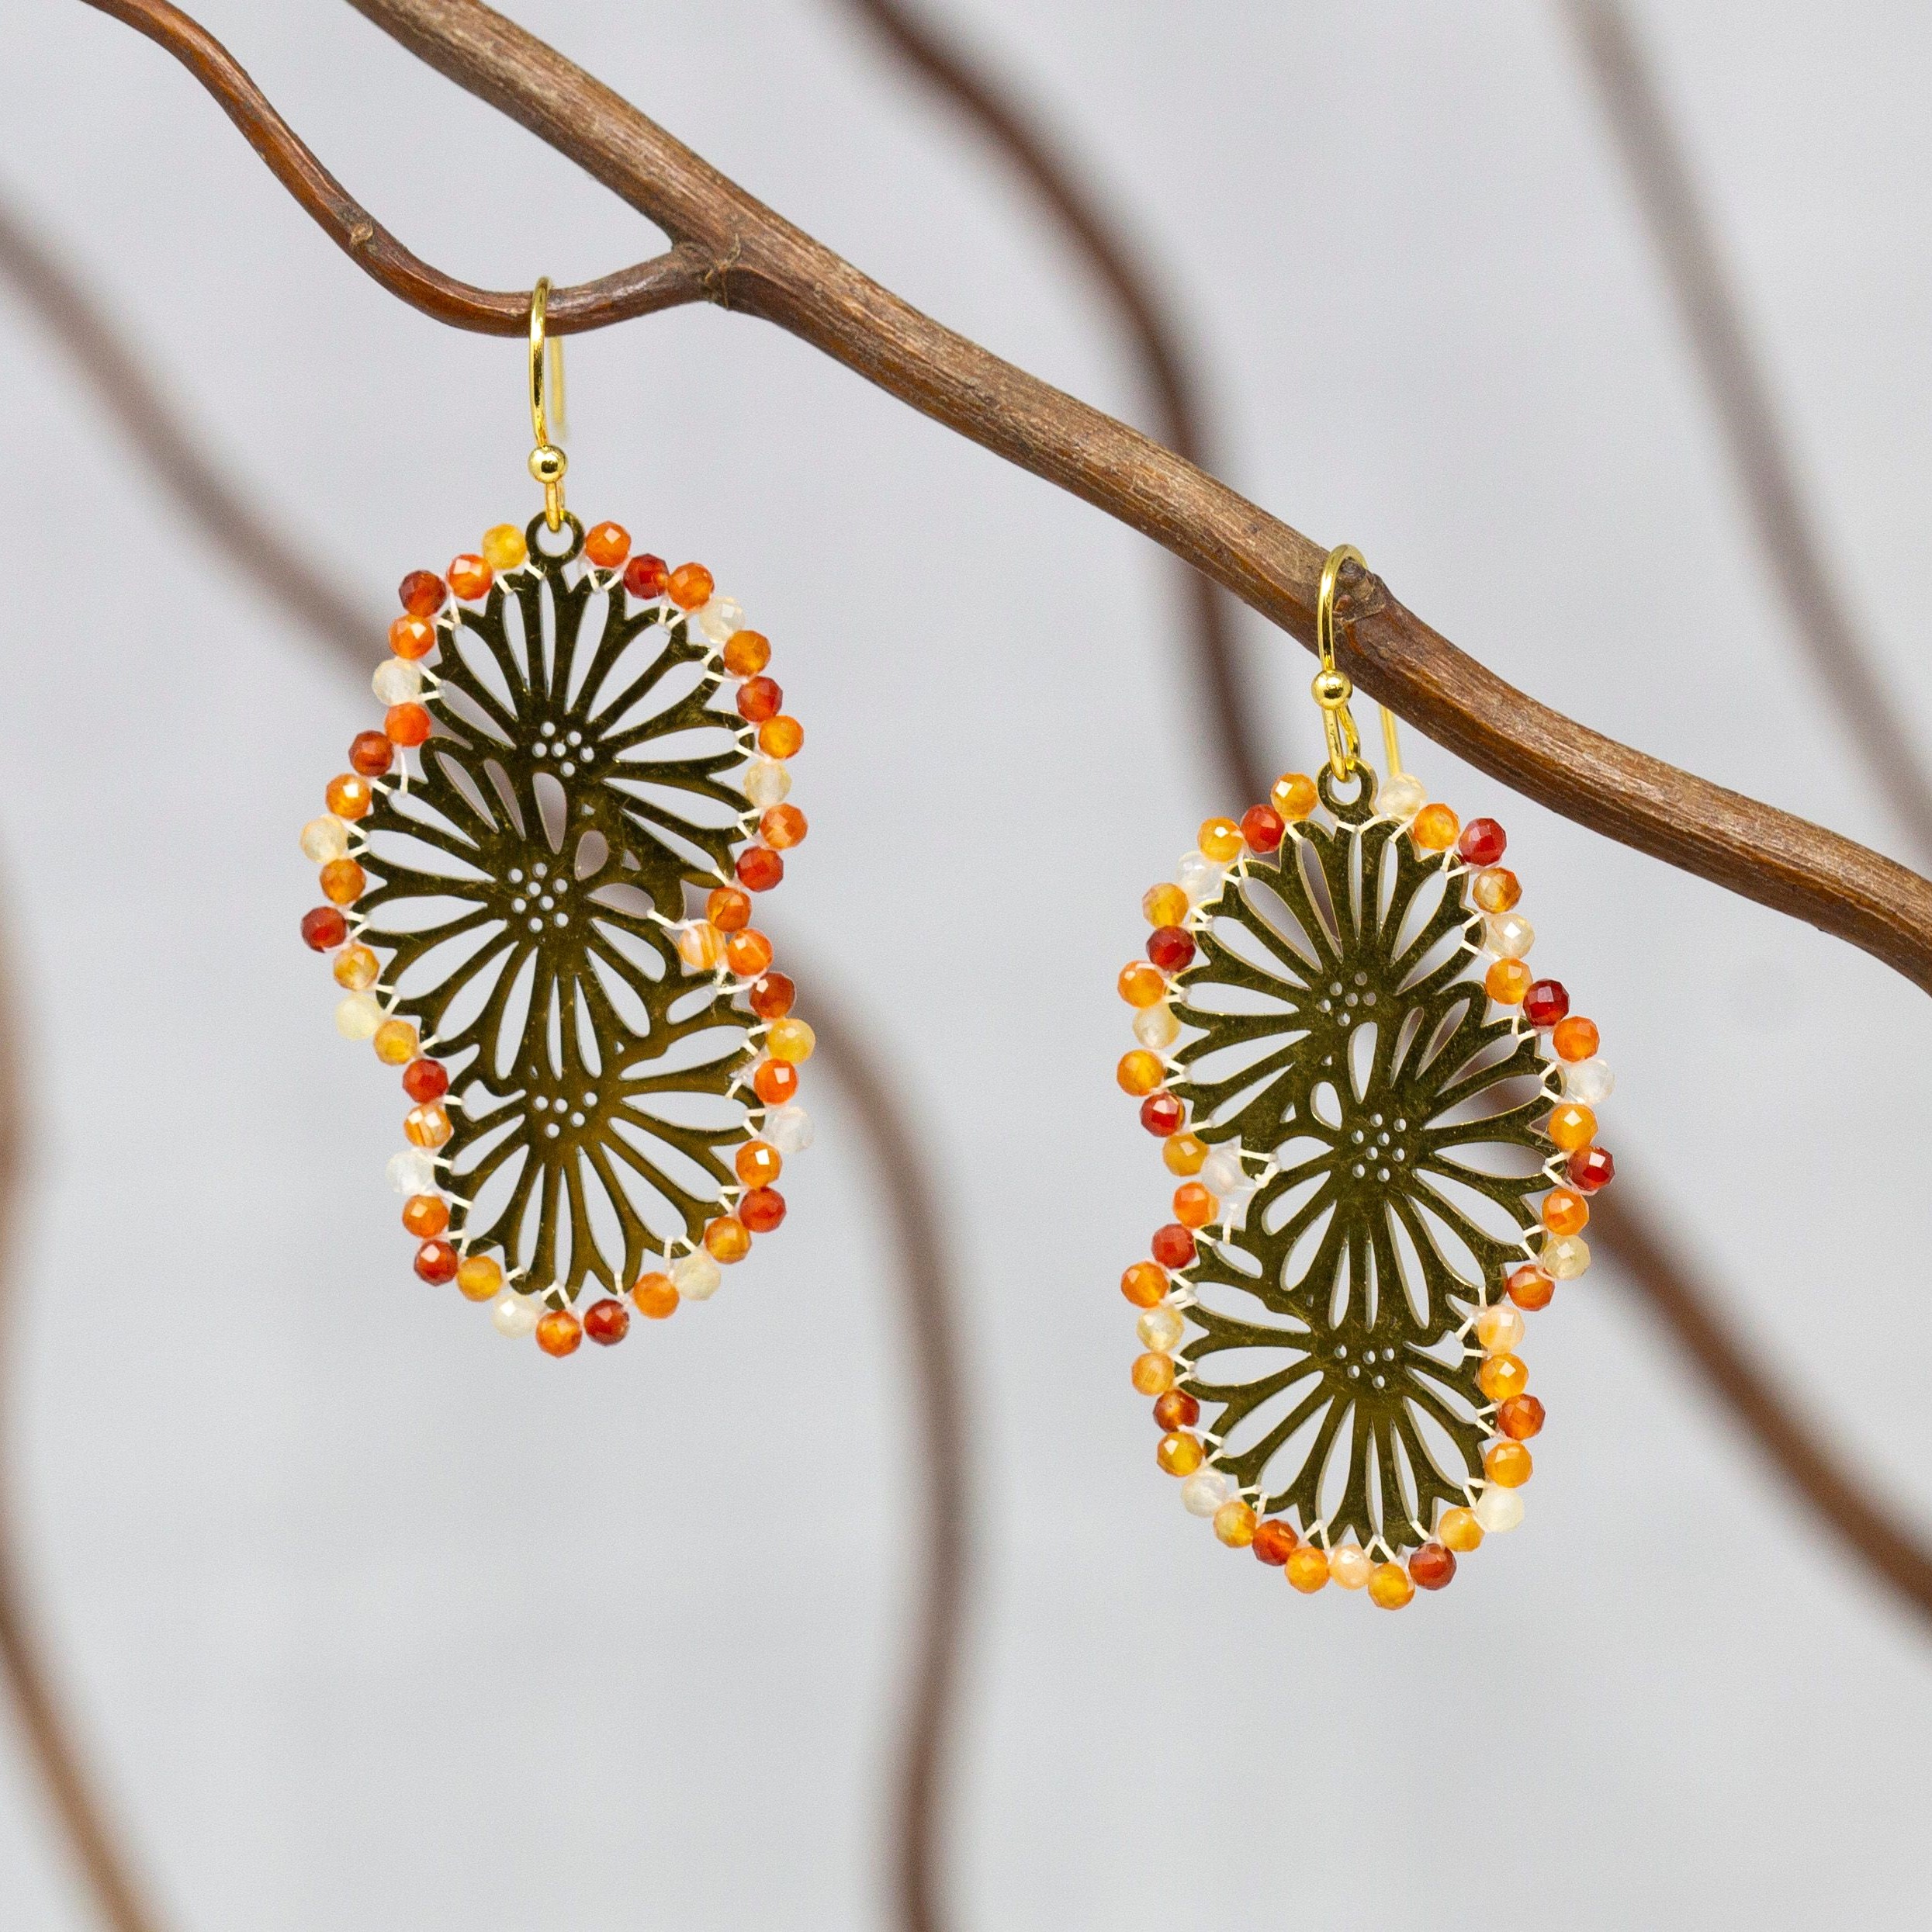
Materials Needed:
For a Pair of the Single Wrap Carnelian Daisies:
- Gold Plated Stainless Steel 37x19.5mm 3 Daisies Pendant (2)
- John James Needle Size 12 (1)
- Fireline Crystal 6lb (2.5 feet each - 5 feet total) I like to use 6lb fireline for strength
- Carnelian Banded 2mm Faceted Round Beads(1 strand - will make 2 pairs of earrings)
- 18K Gold Plated Hypoallergenic French Earring Wires With Ball (1 Pair)
Materials needed for the Blue Stainless Steel Open Lotus Pendant:
- Blue Zircon 2mm Faceted Round (1 strand)
- Stainless Steel 21mm Open Lotus Pendant (1 - use 2 to create earrings)
- Fireline Crystal 6lb (2.5 feet)
Tools Required:
Instructions on Construction:
The pattern: medium color, light color, medium color, dark color, medium color, light color, medium color, dark color, and so on
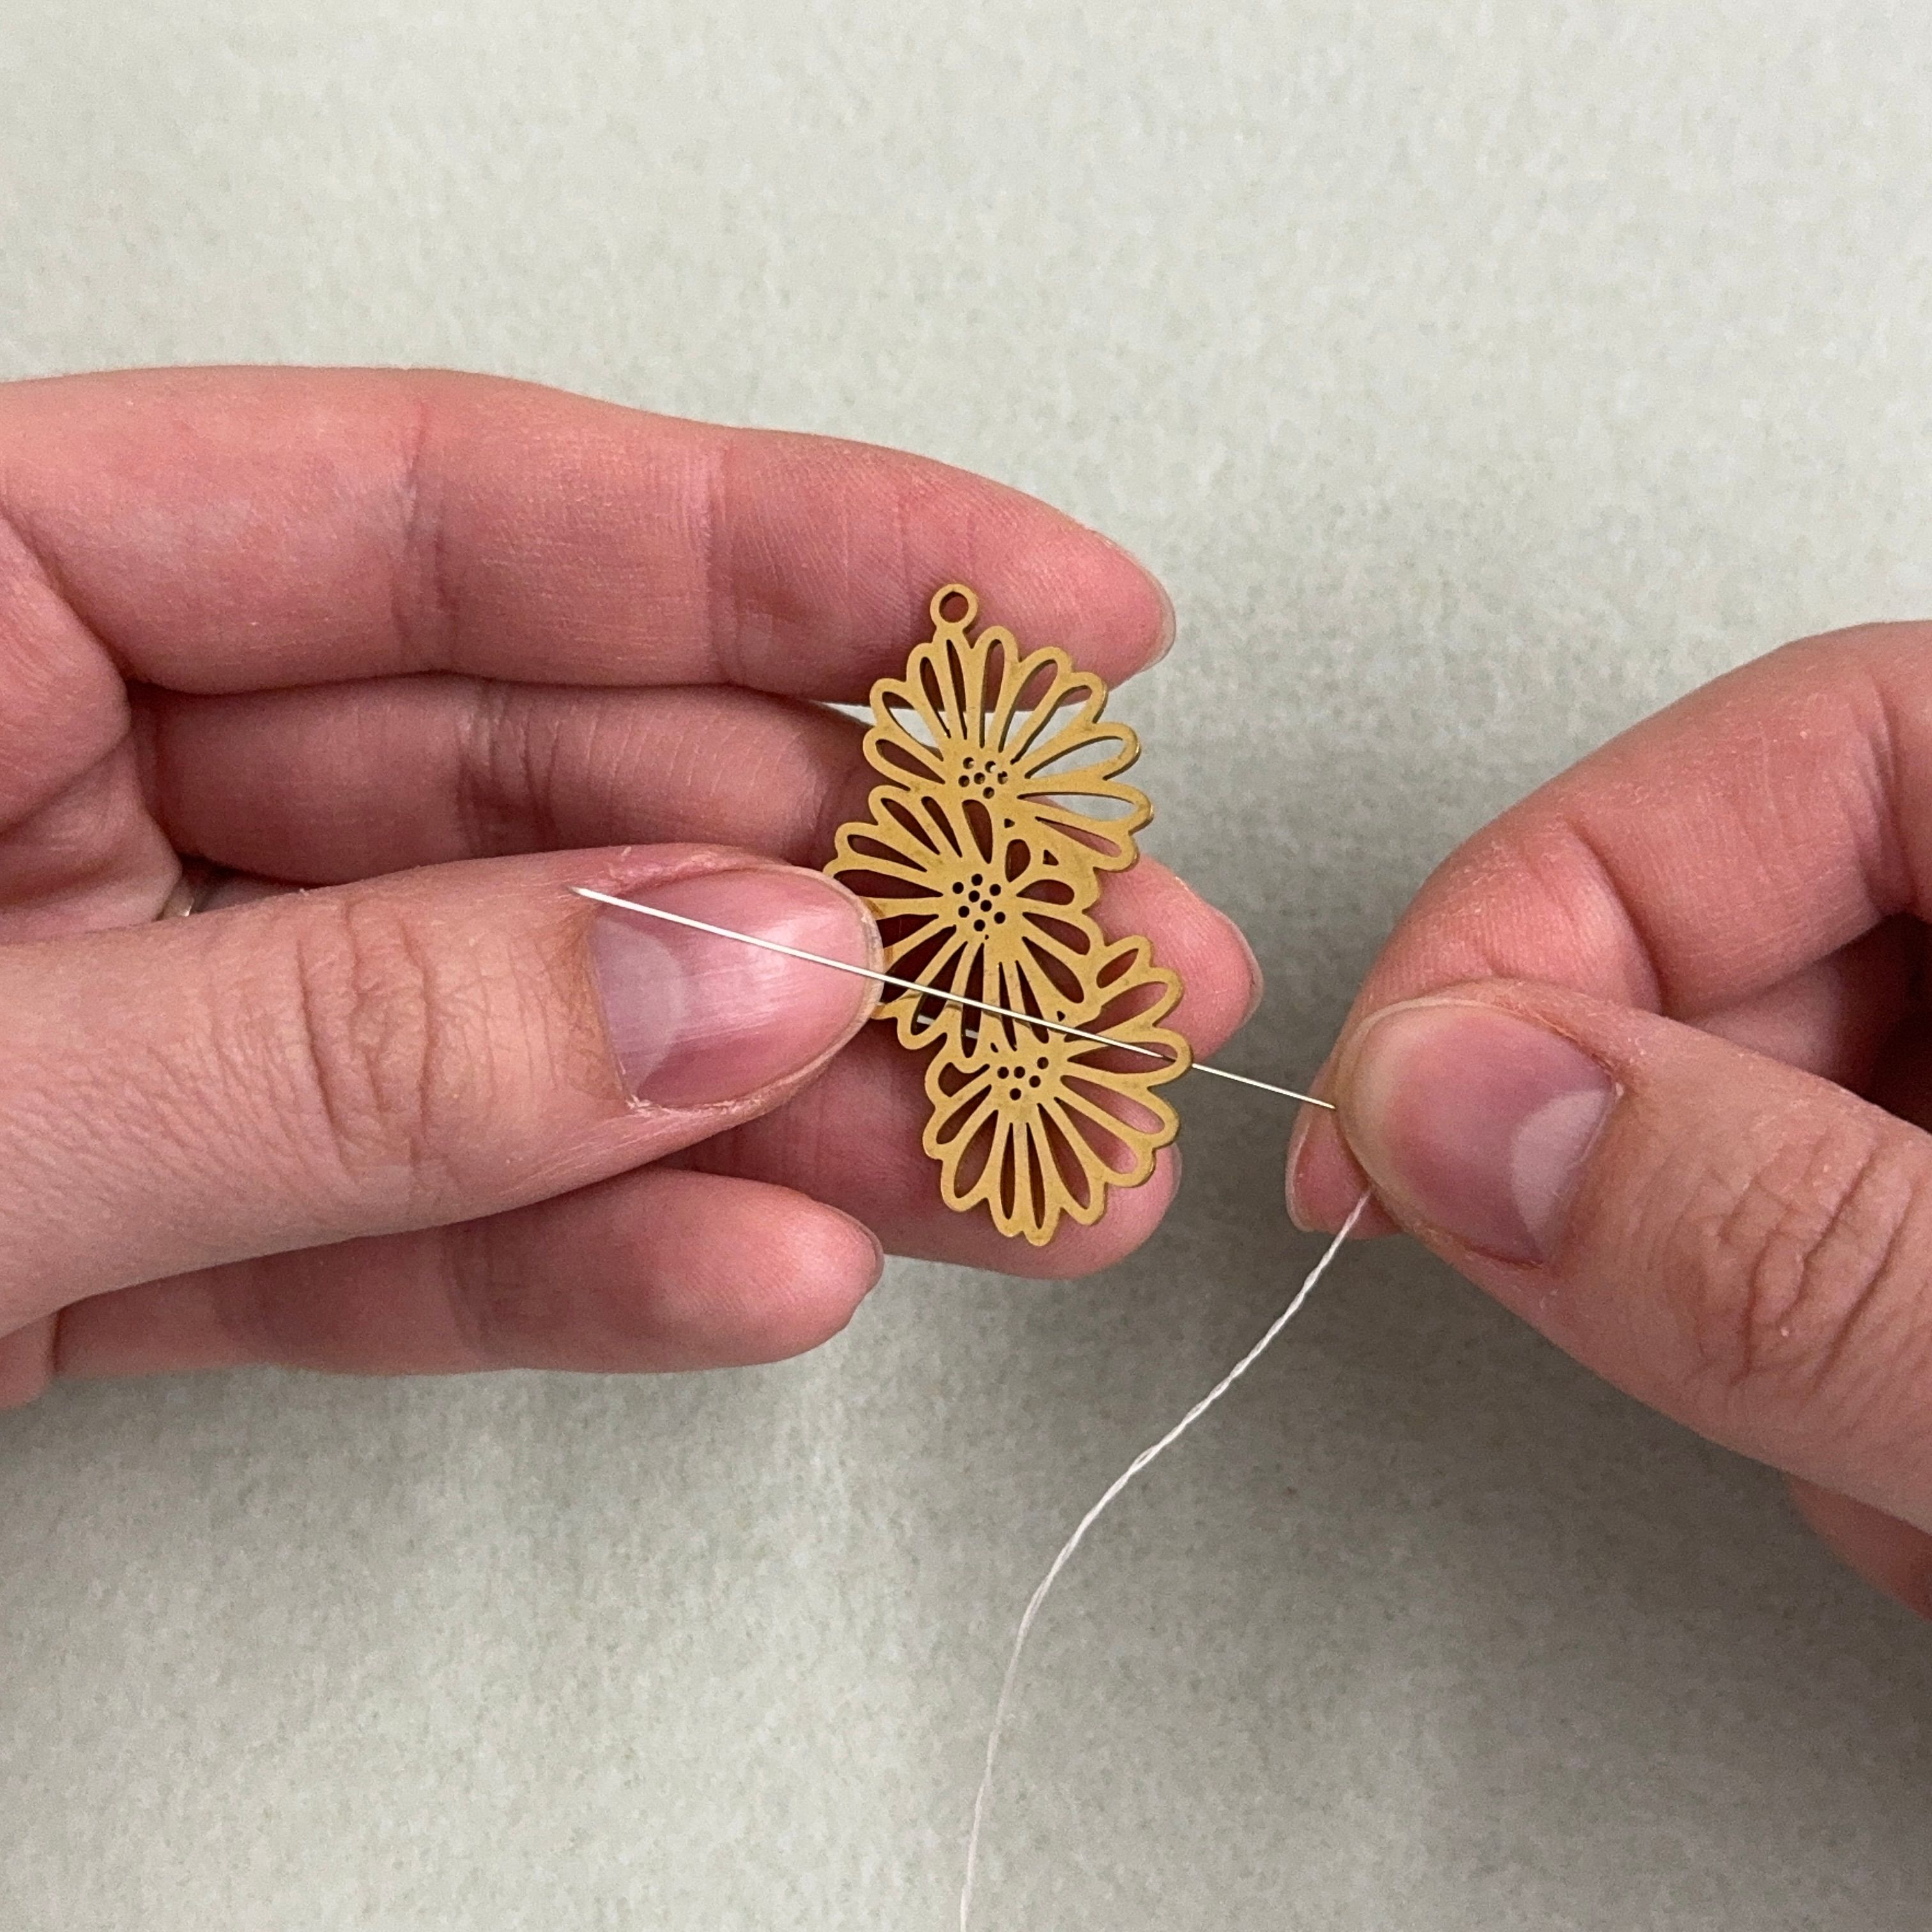
1. Thread your fireline onto the needle and thread it through one of the petals on the daisy. It doesn't really matter which petal - I like to start a single thread wrap in the middle of the pendant rather than the top so I can attach the threads together at the end, it also helps keep the knots from being too bulky by the loop, but this is just personal preference
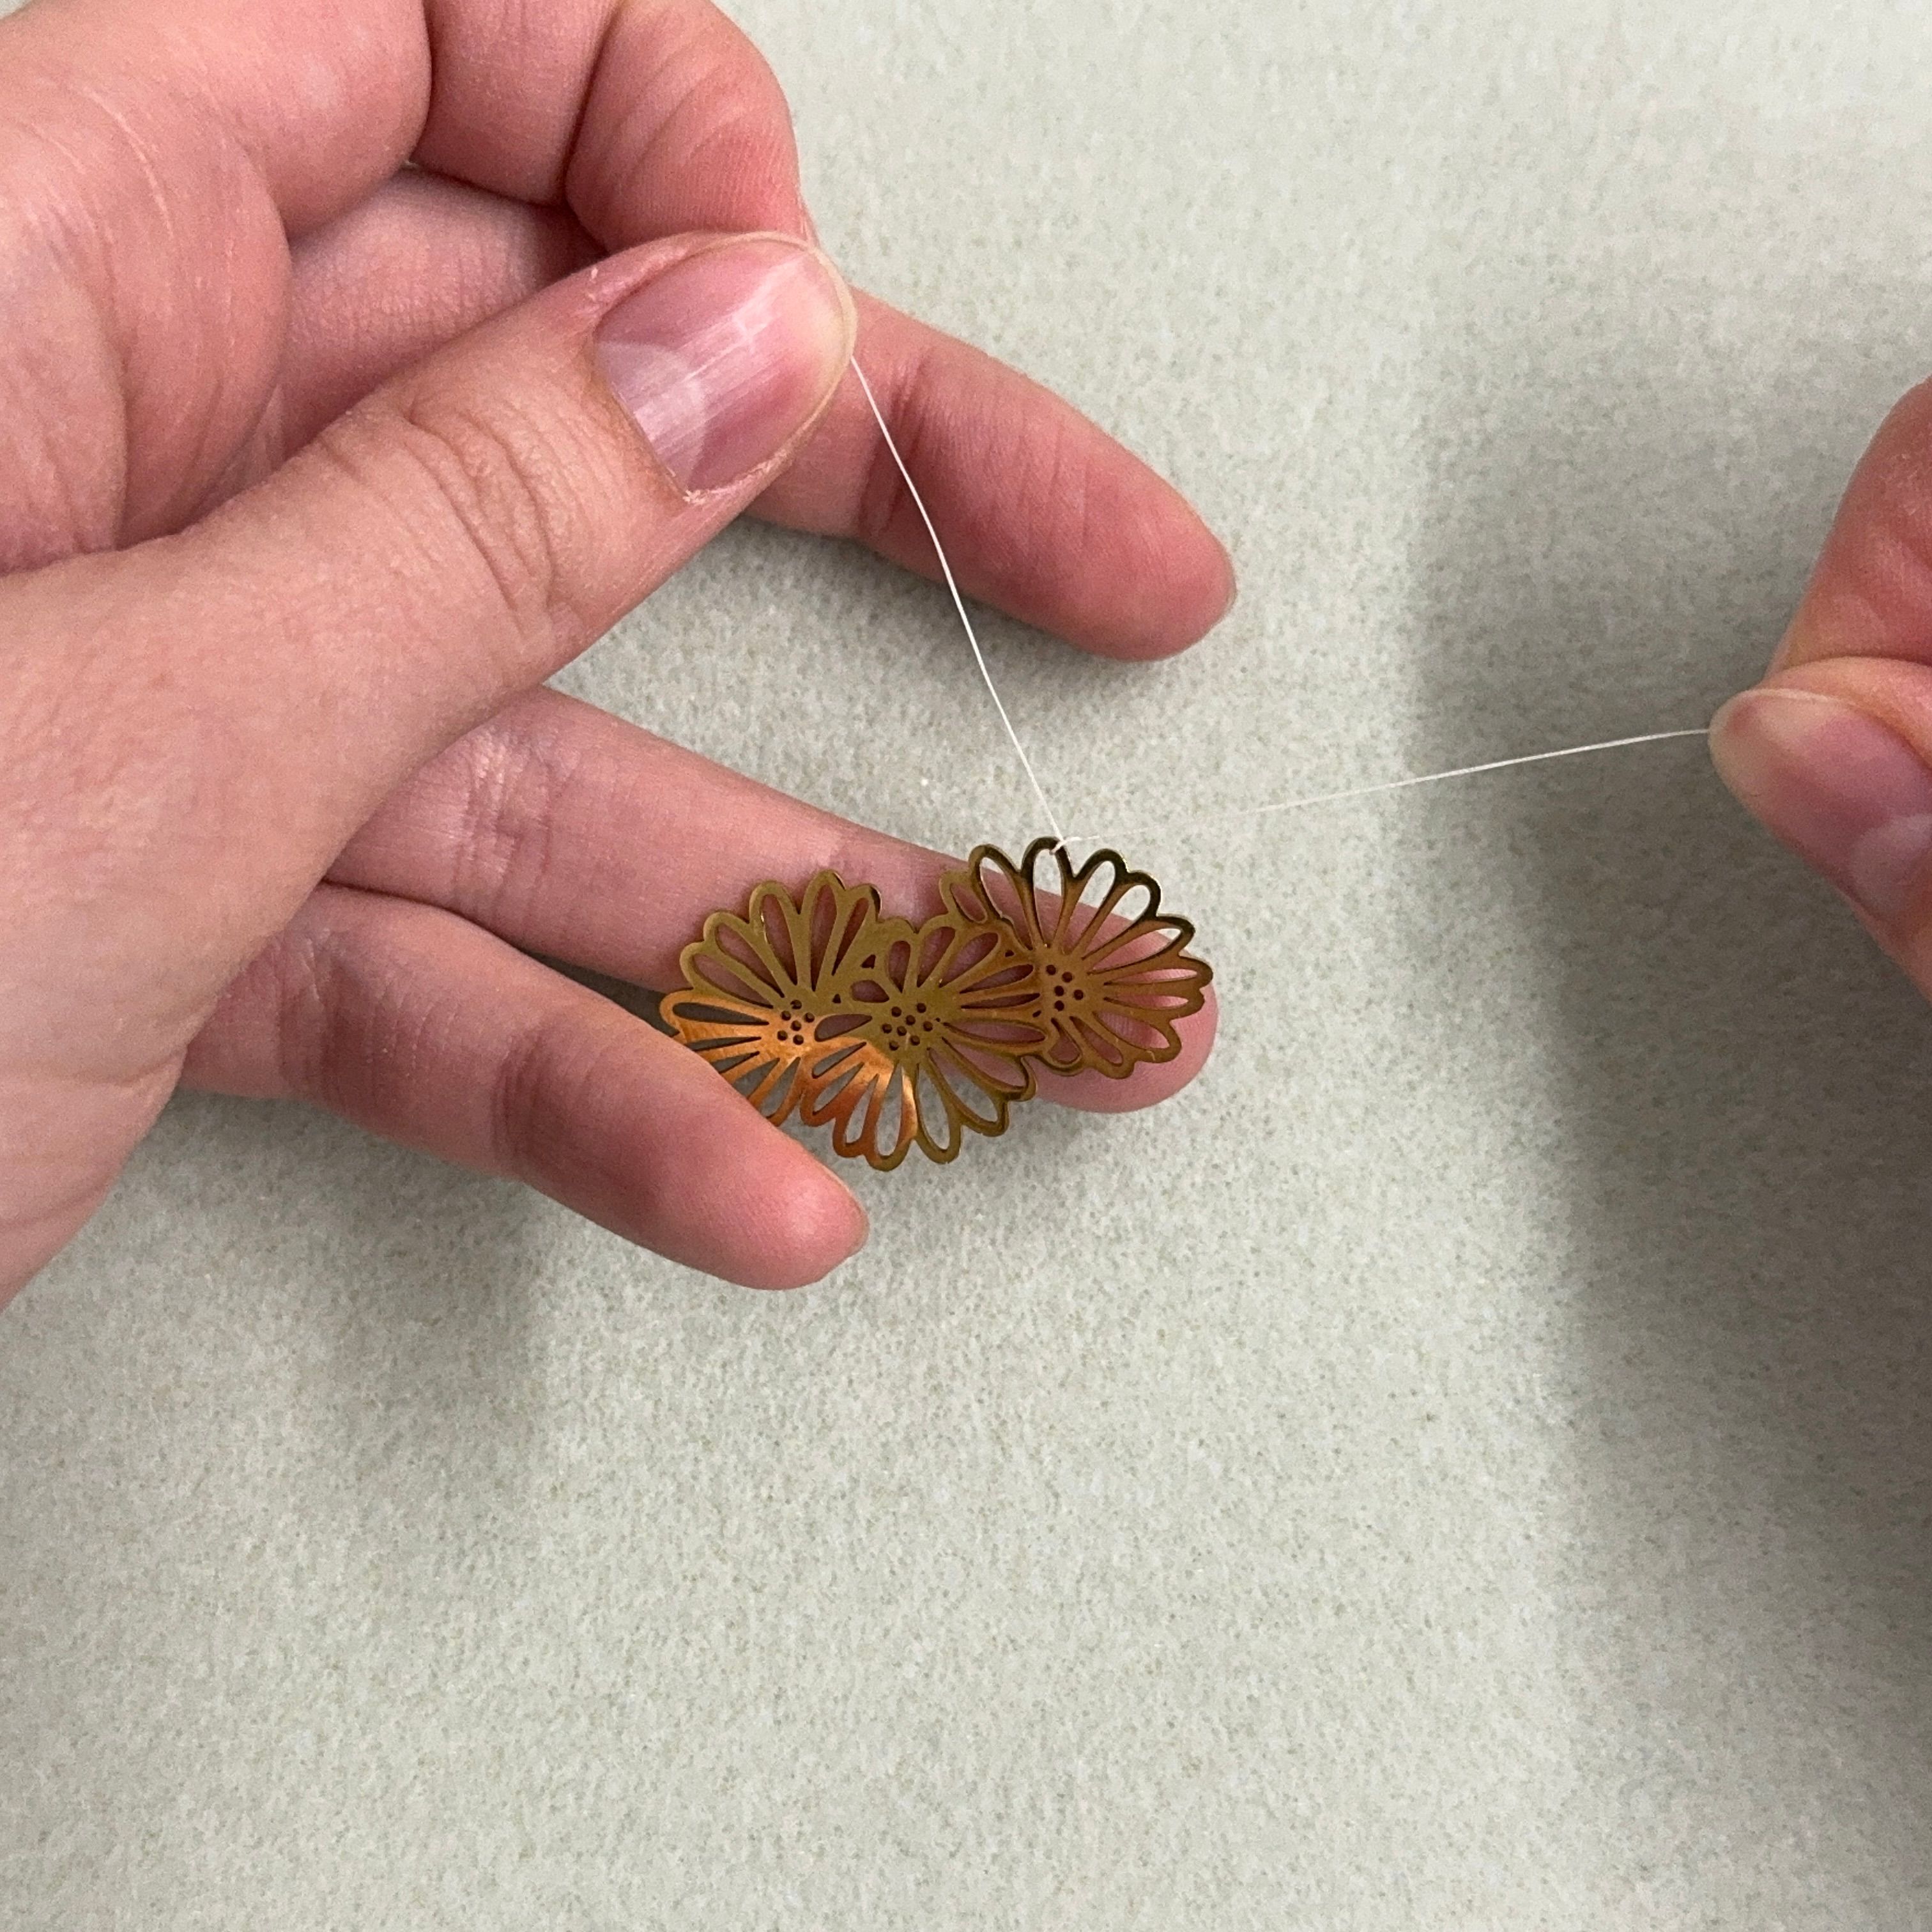
2. Tie 3 knots - leave a 2-3 inch tail of the fireline, we will use it at the very end
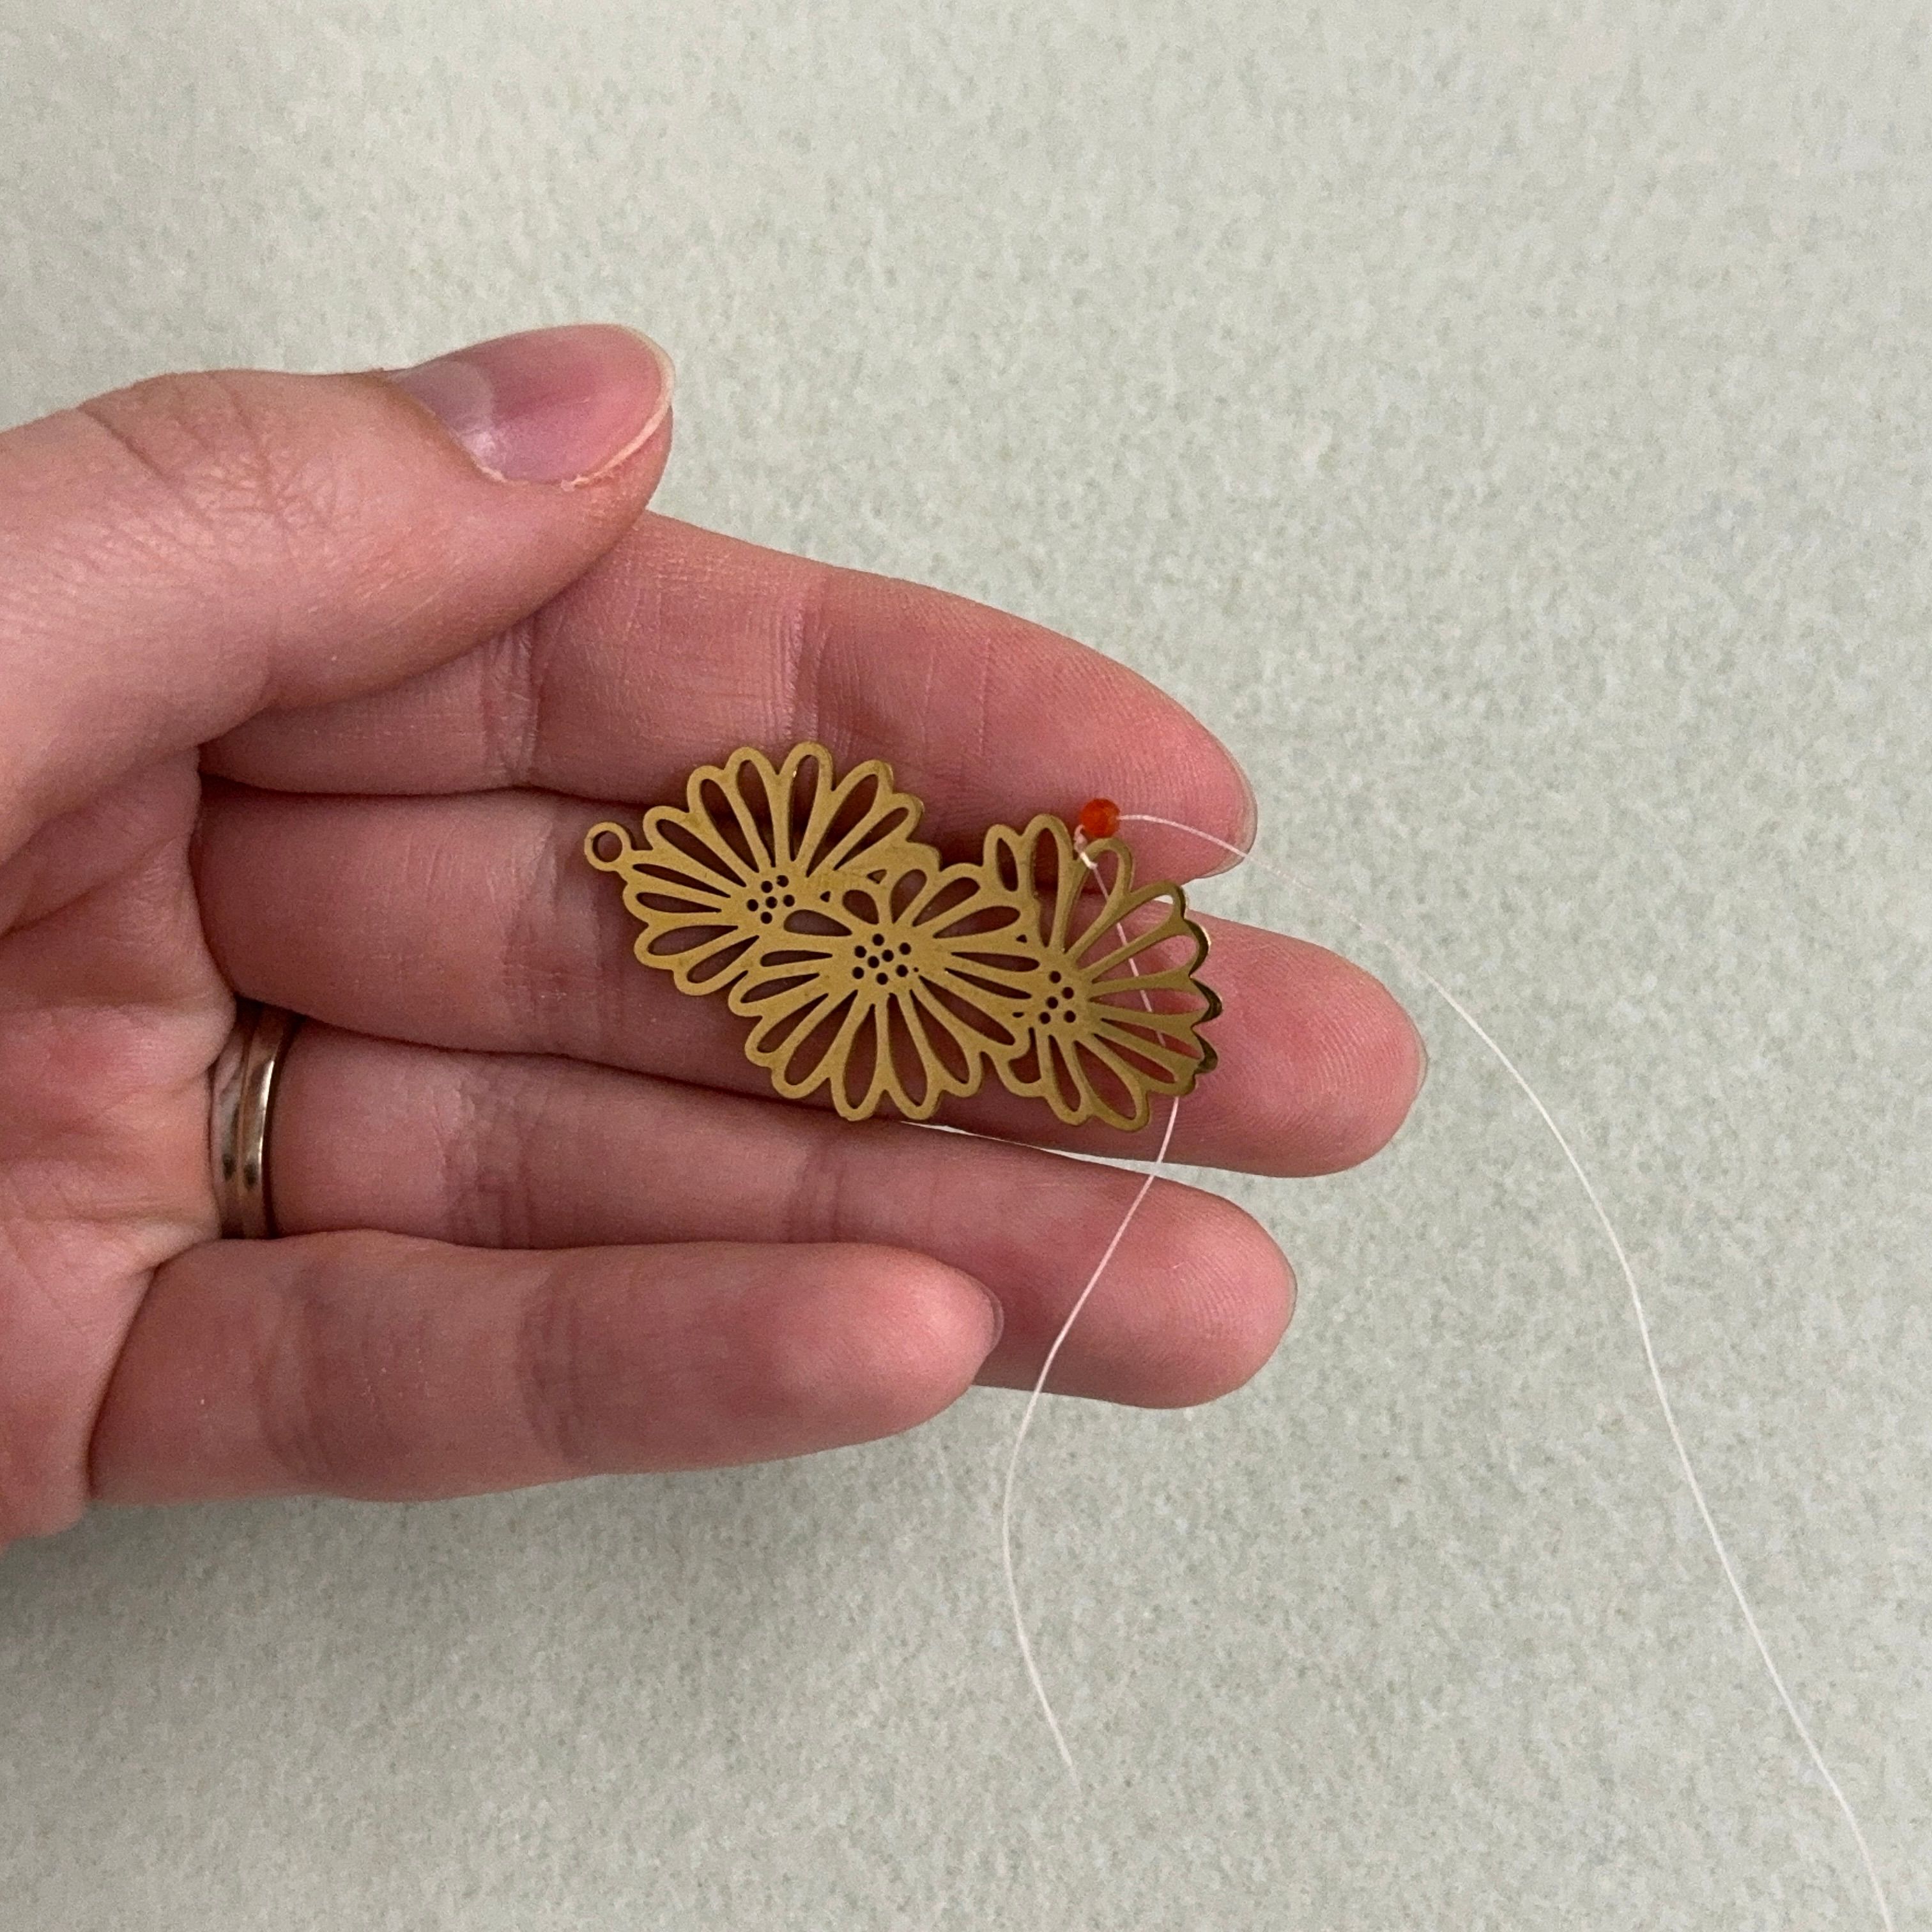
3. Push the thread over to the edge of the petal and add on a medium colored carnelian bead
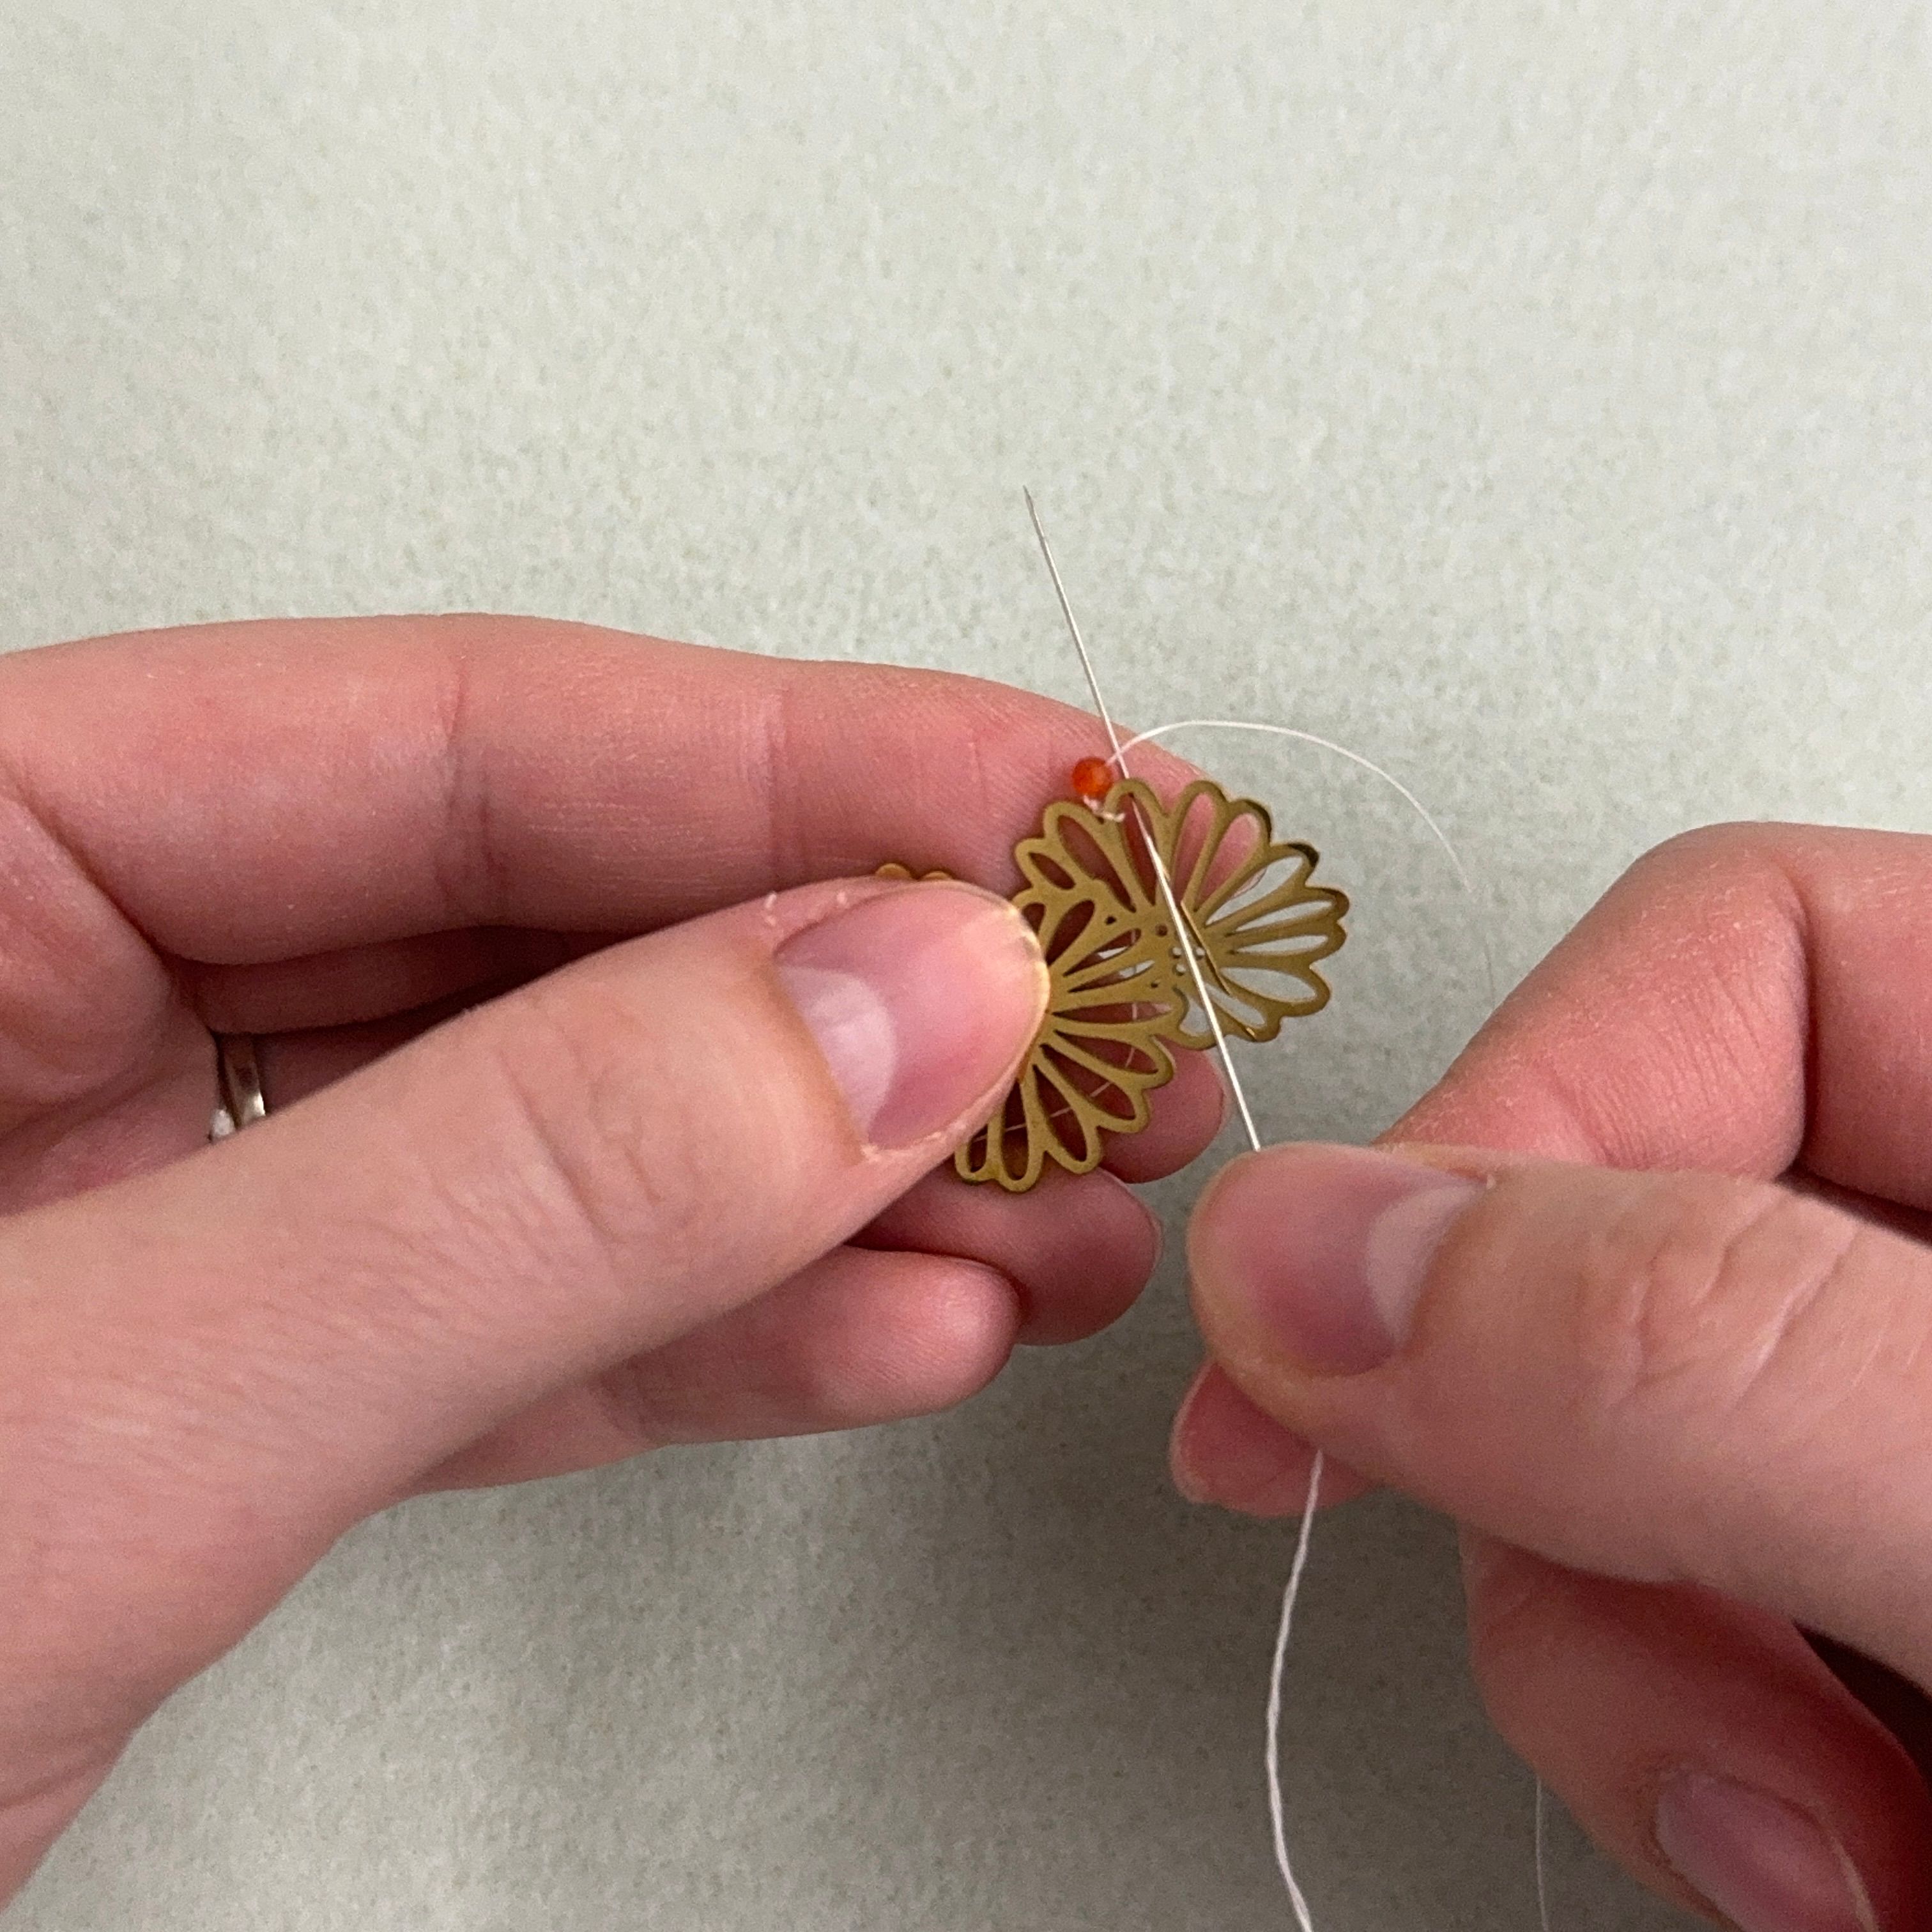
4. Thread the needle through the same petal (needle pointing away from you) (please be careful with the needle as it is easy to poke yourself)
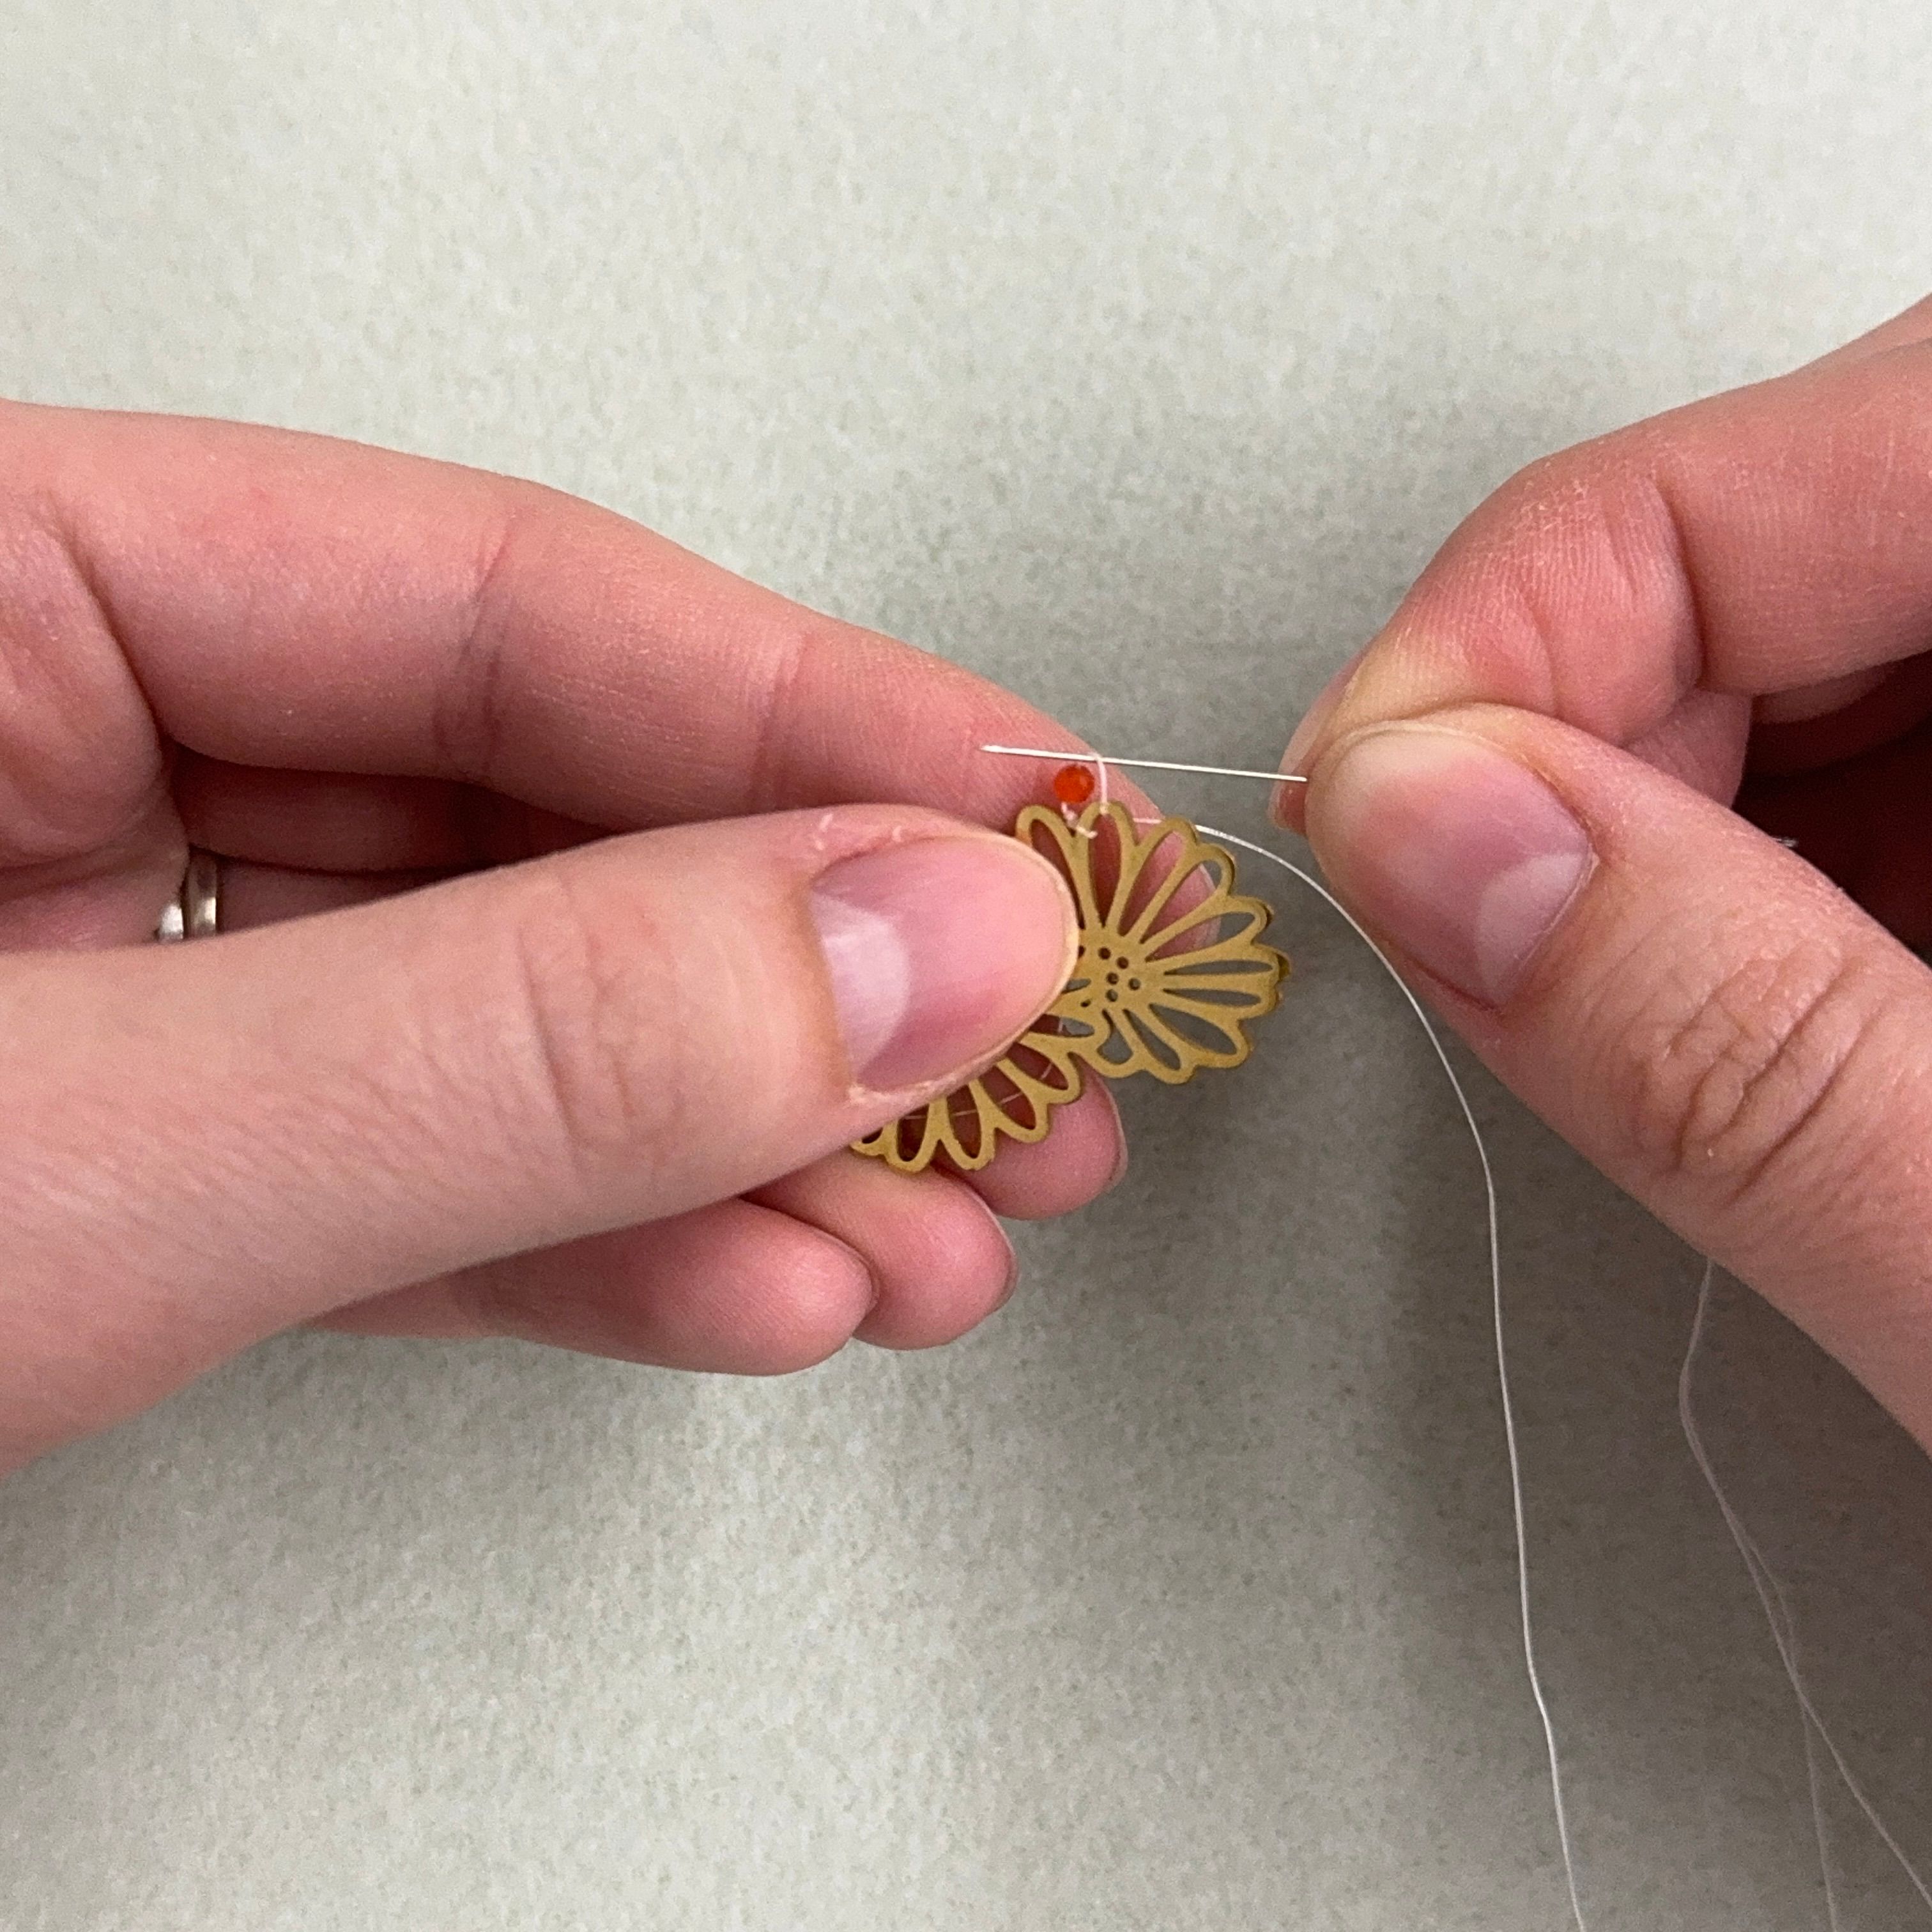
5. Thread the needle through the loop (needle pointing towards you)
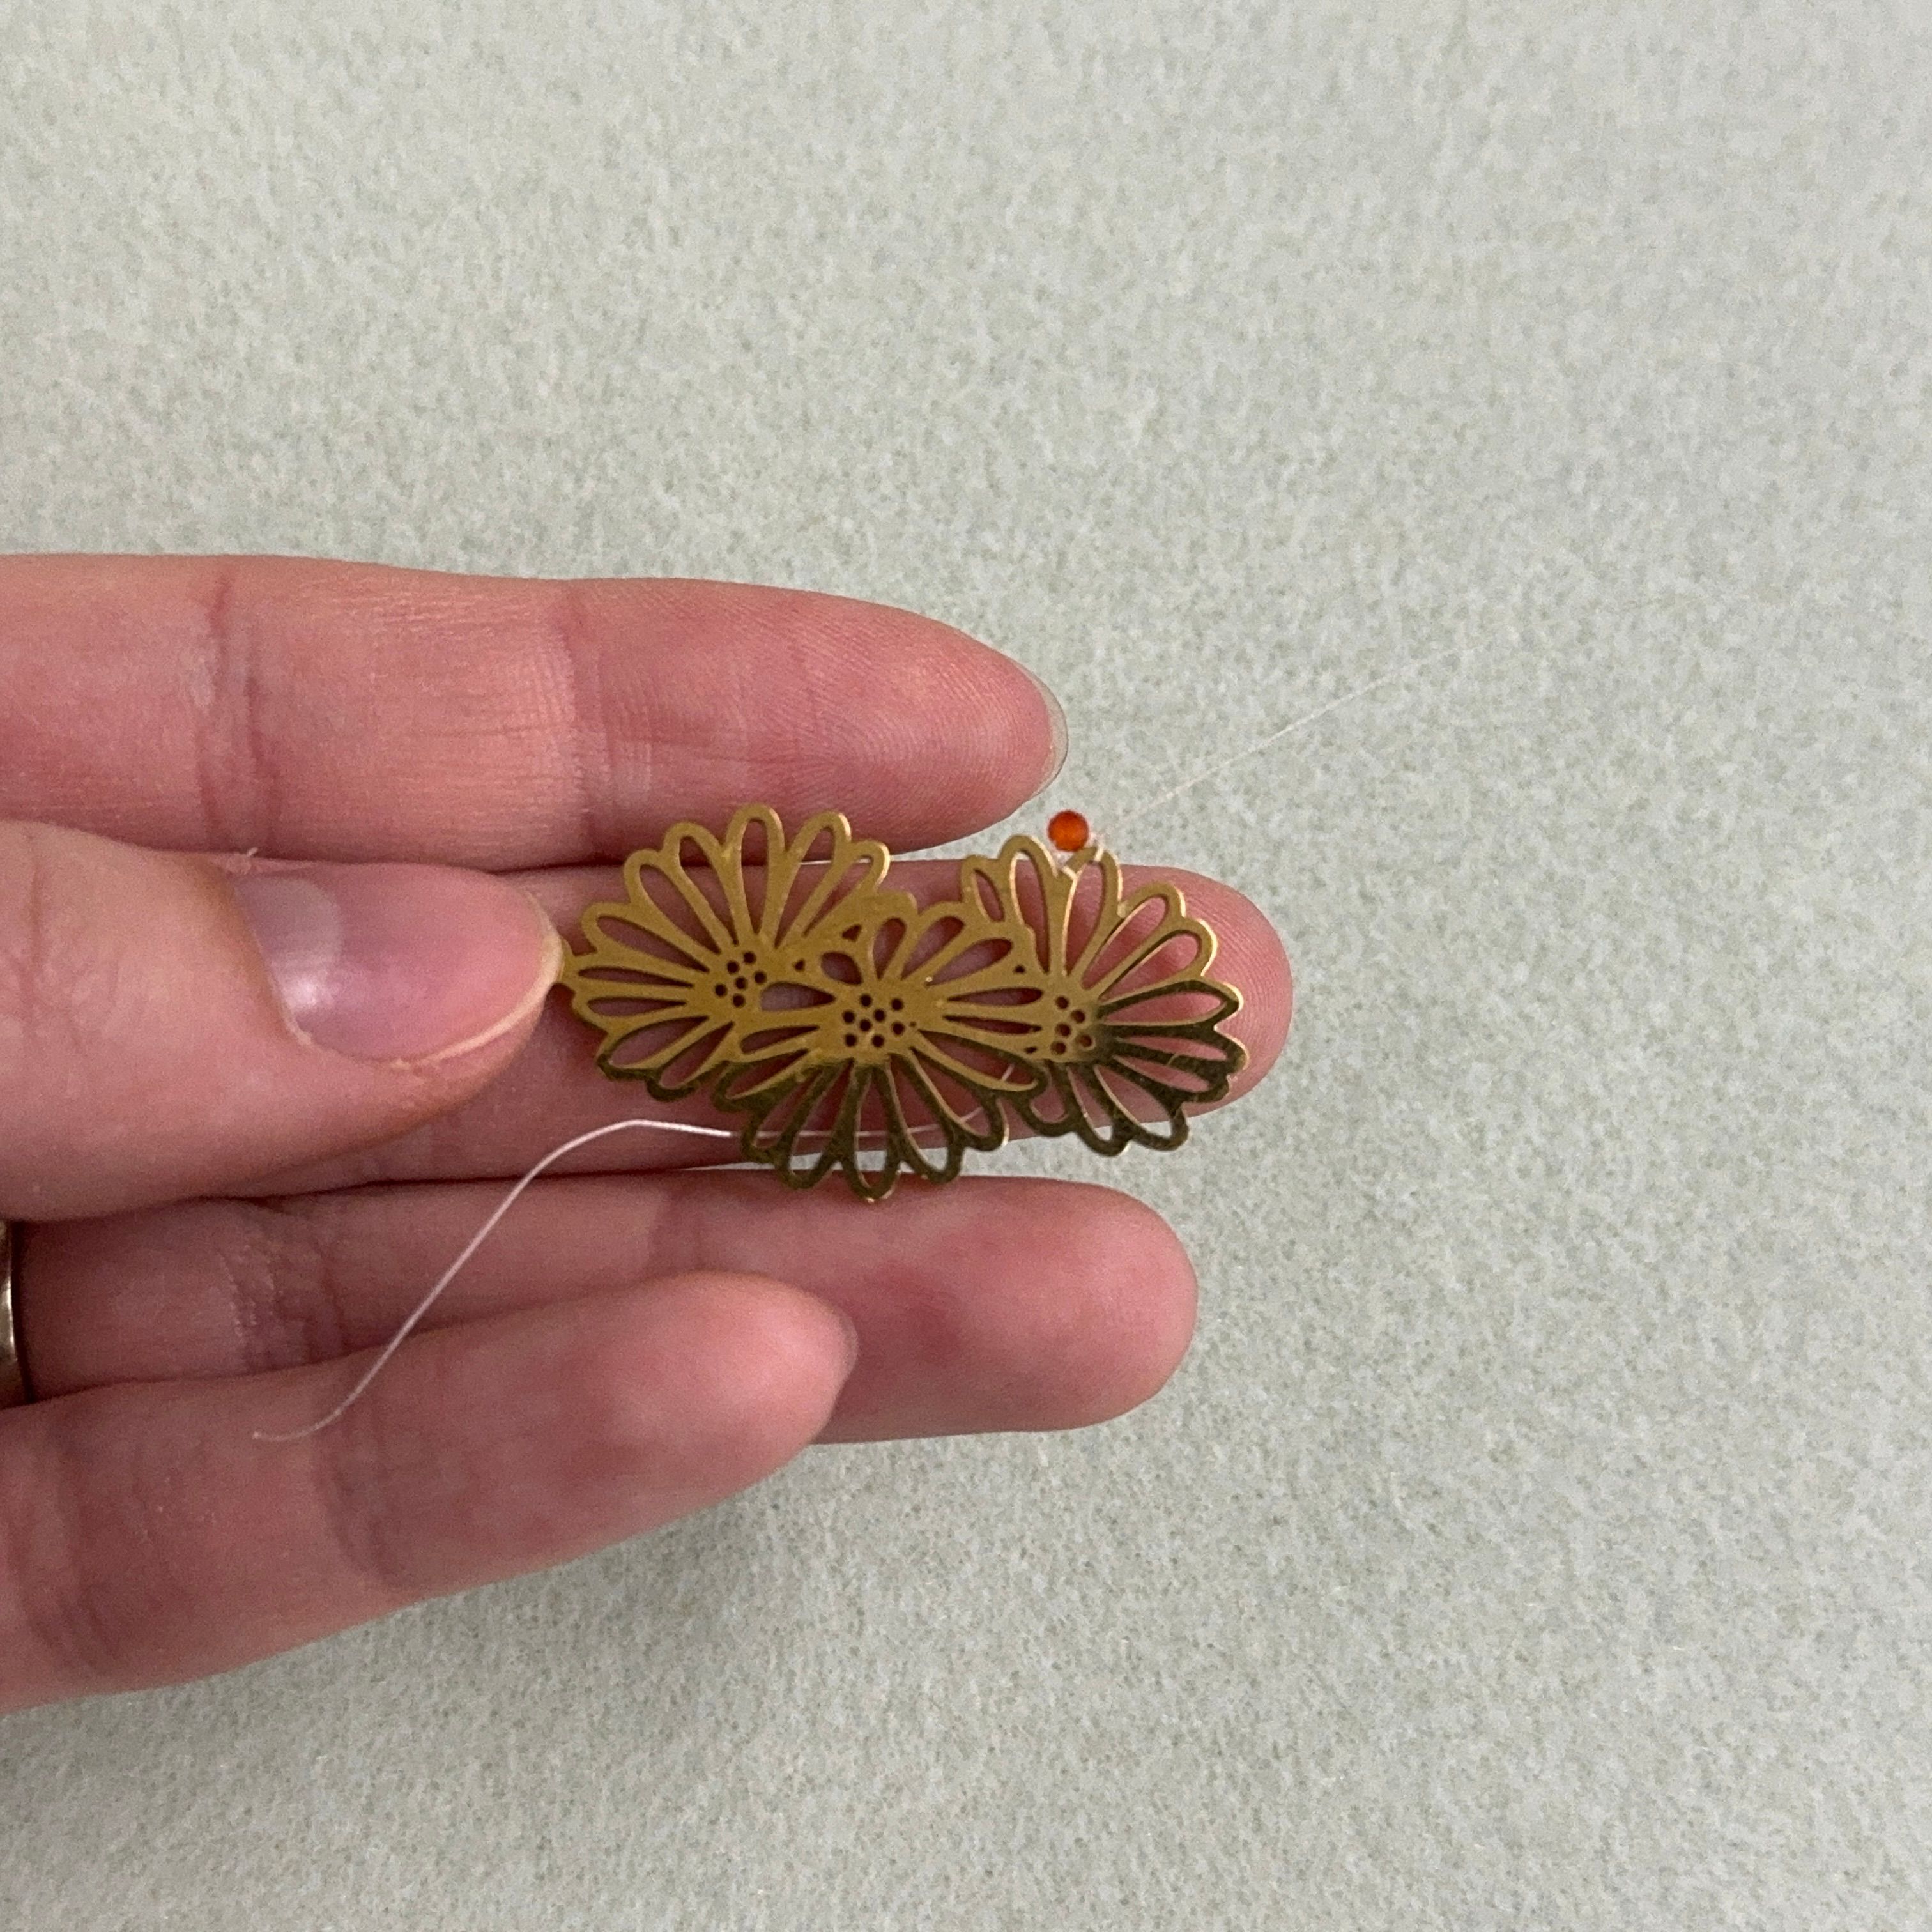
6. Gently pull the thread tight and your project should look like this * keep pulling thread tight after each bead added
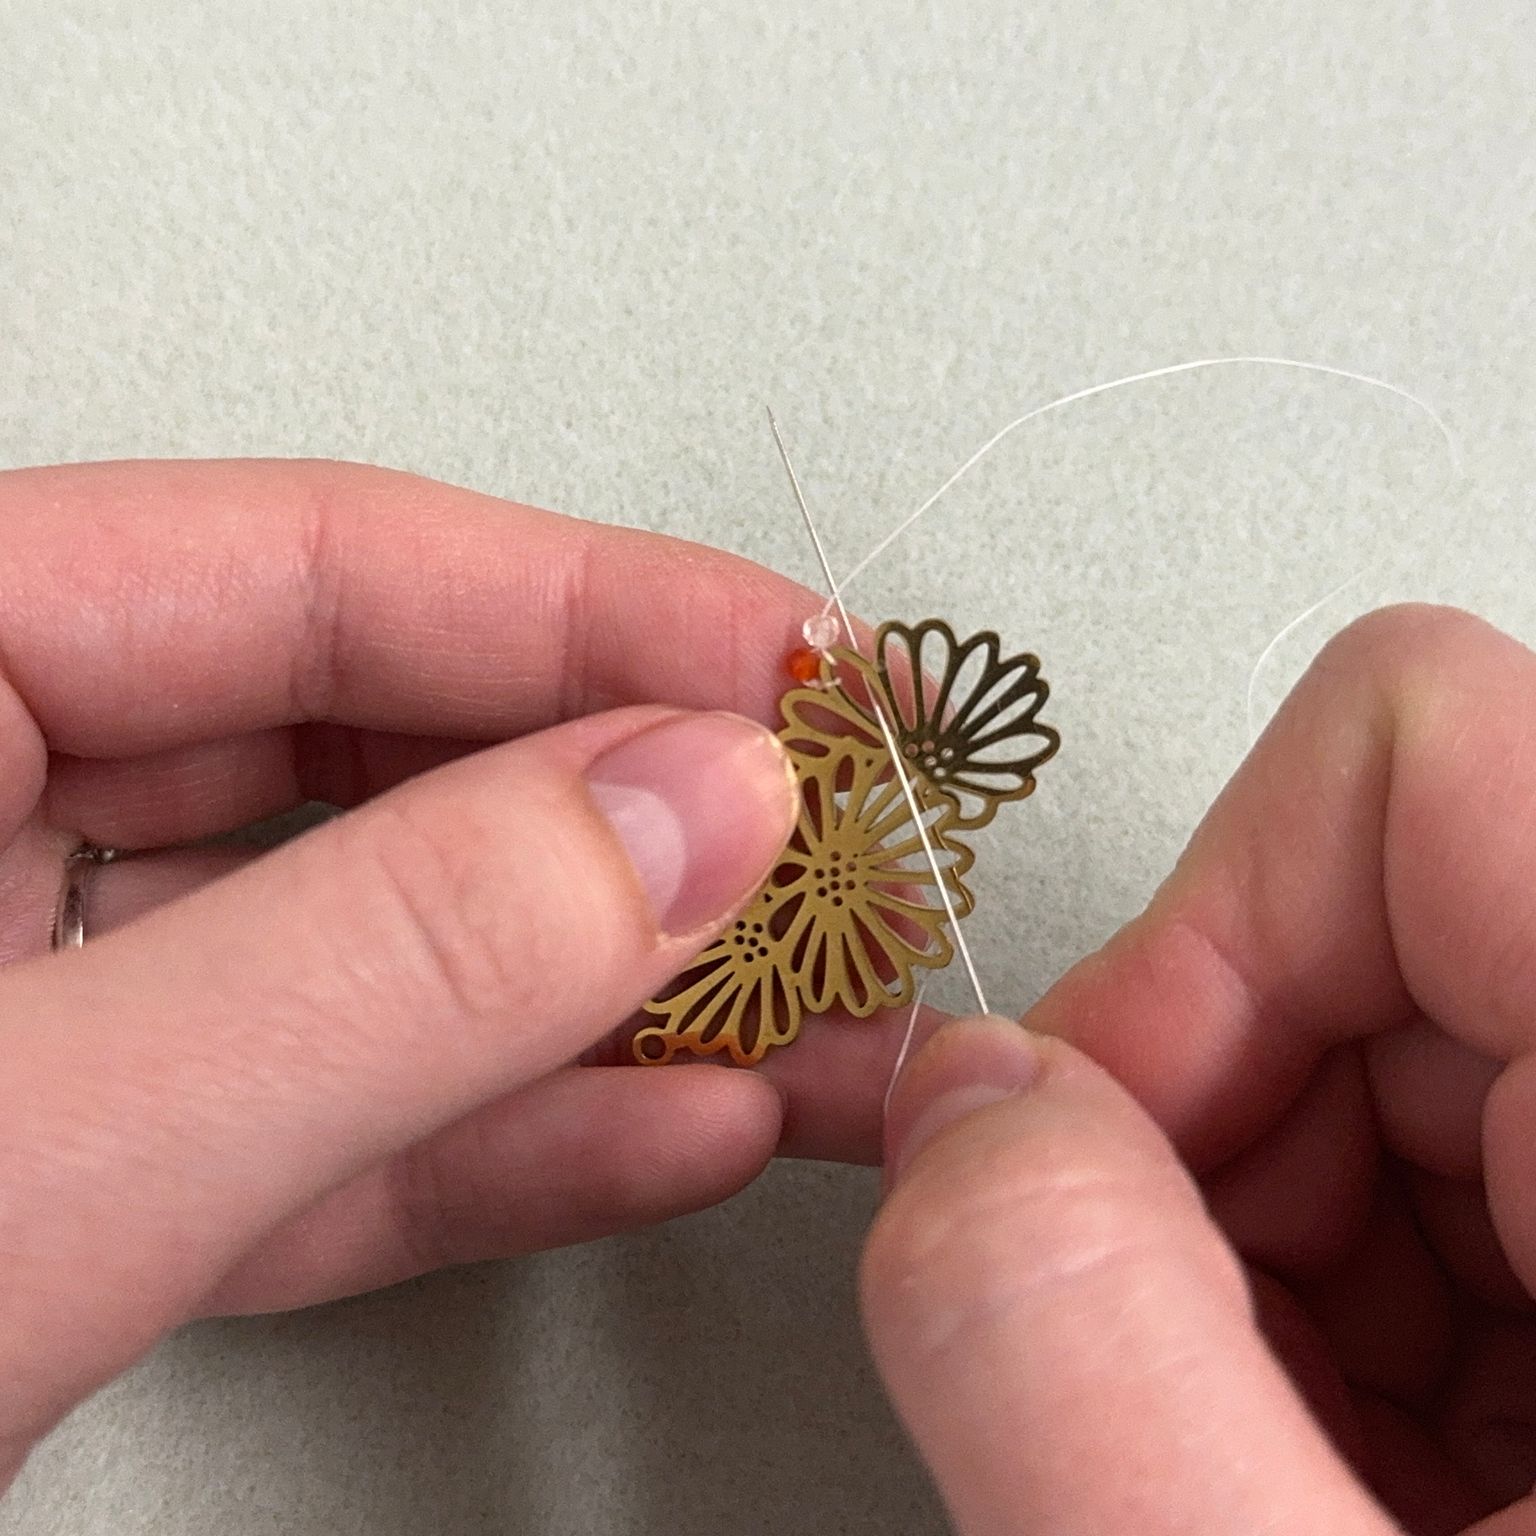
7. Add on a light colored carnelian bead and repeat step 4
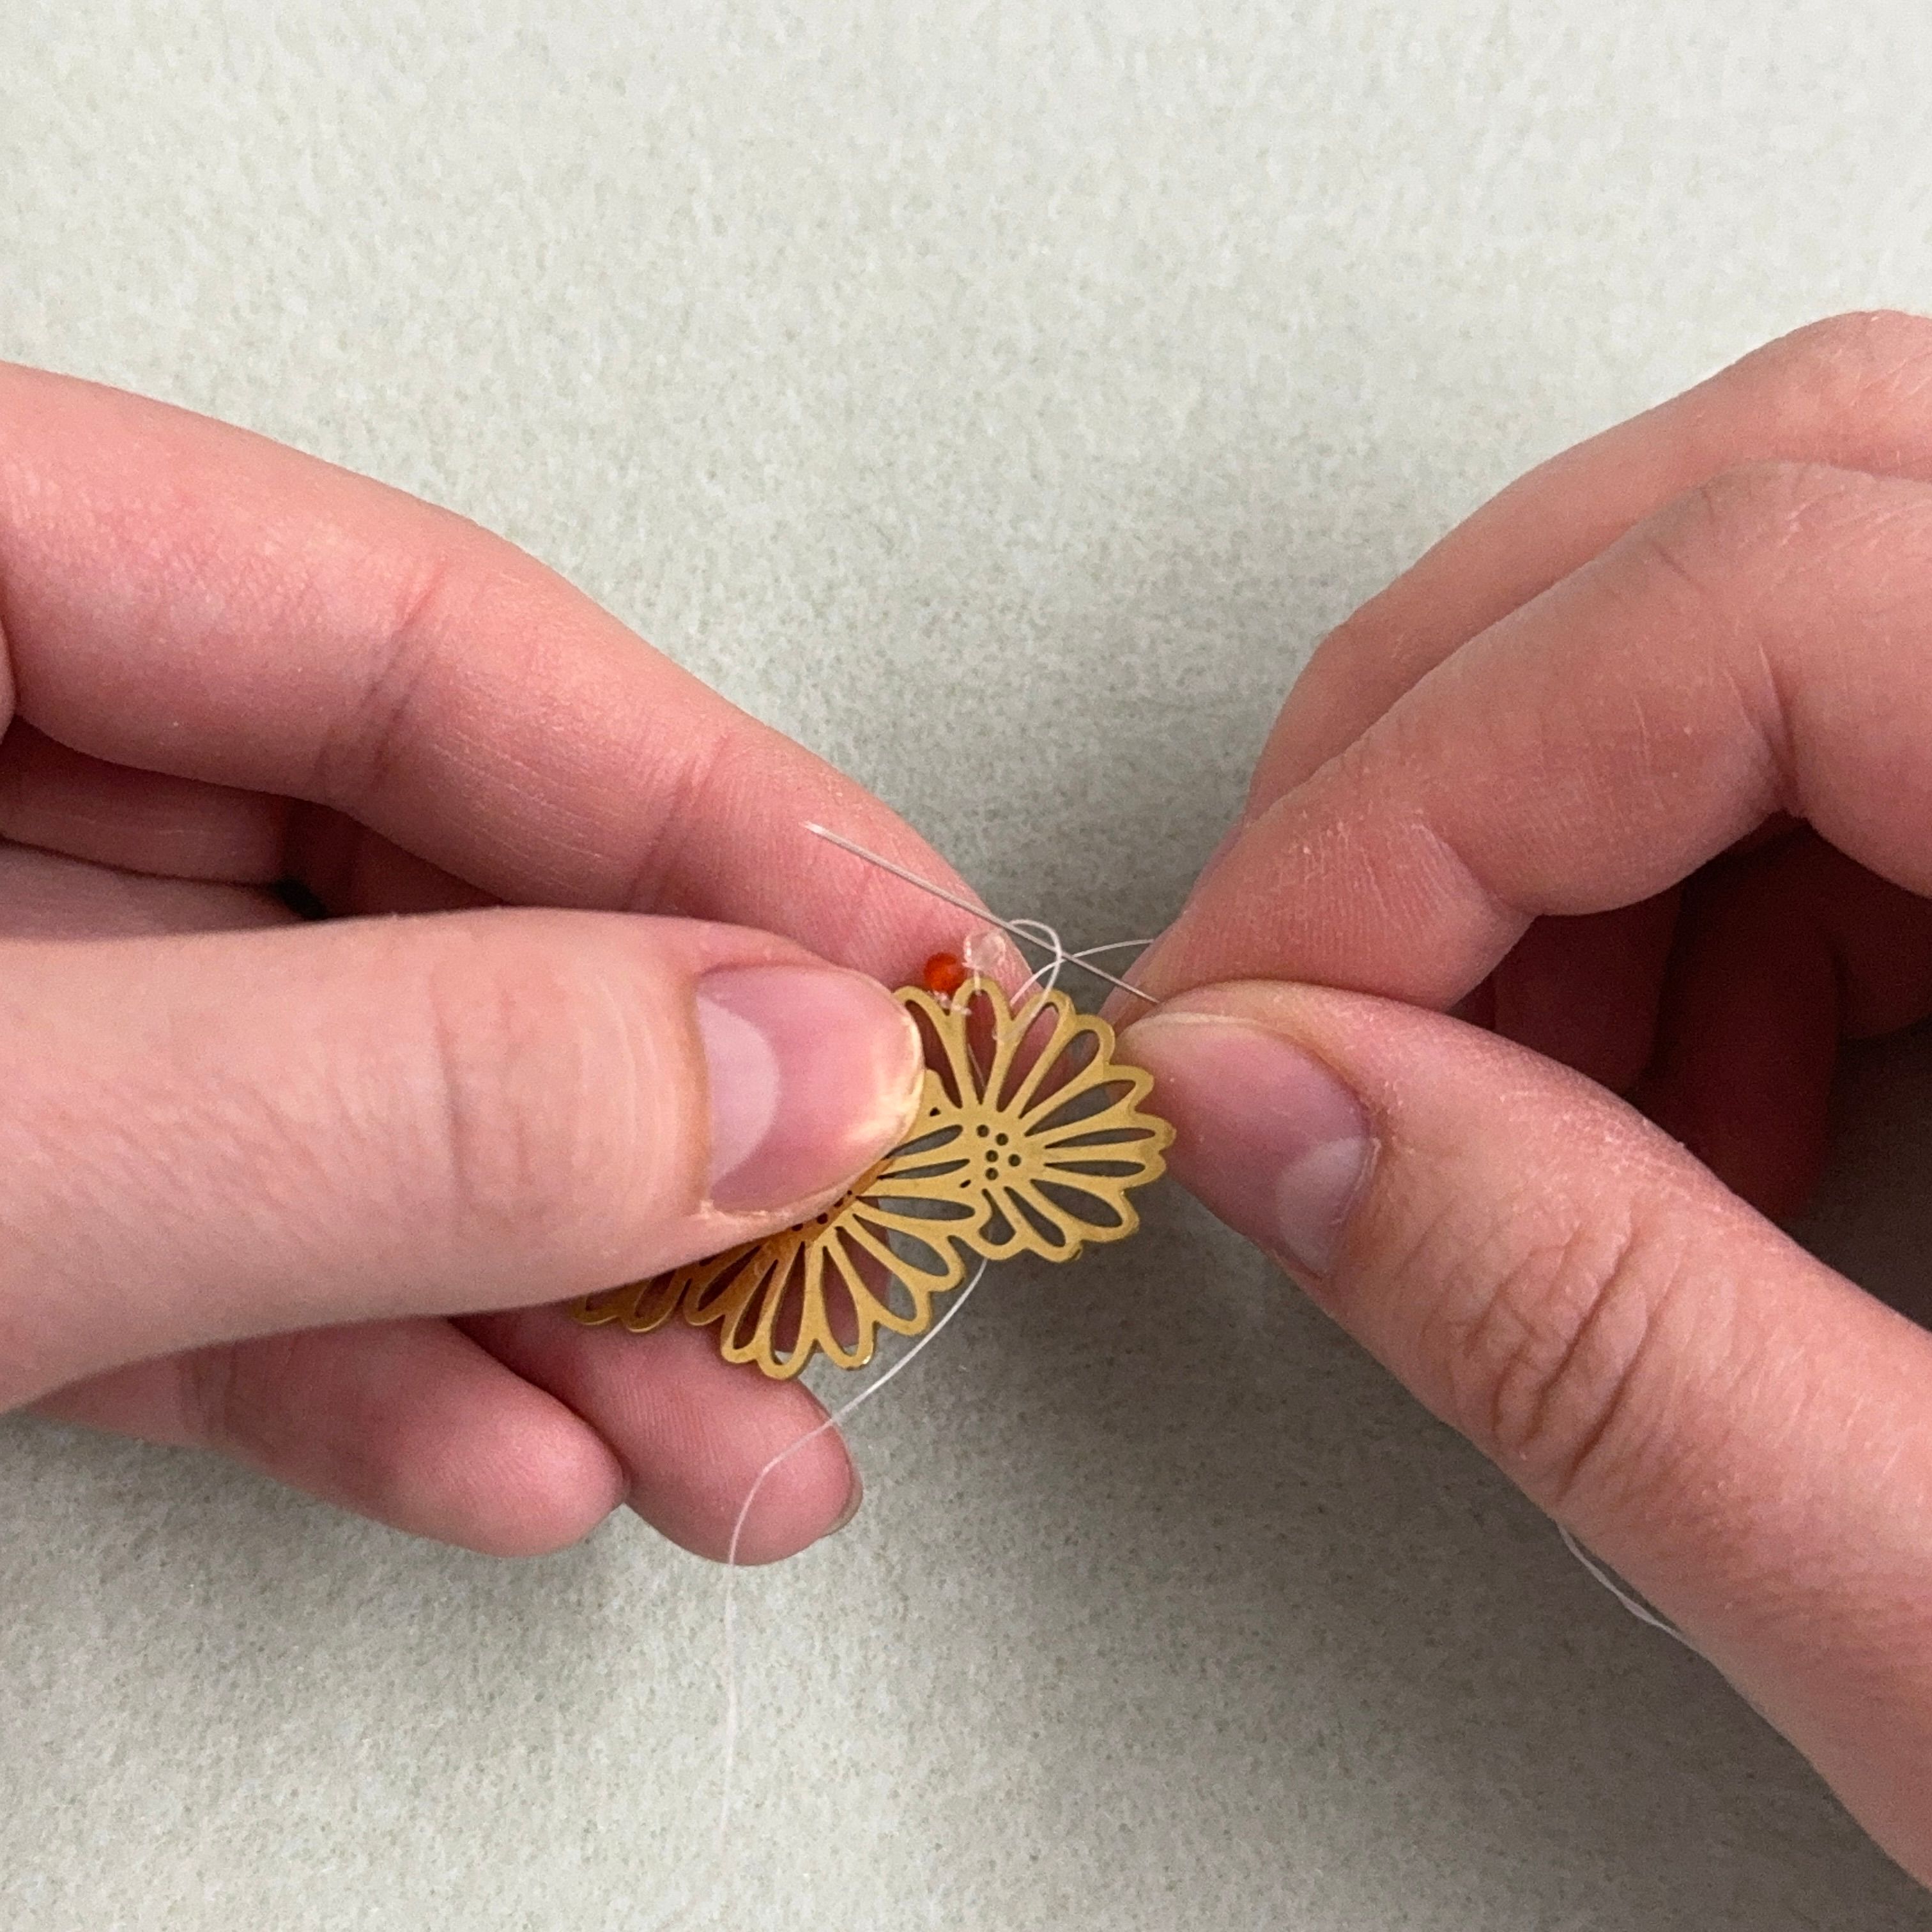
8. Repeat step 5 and 6.
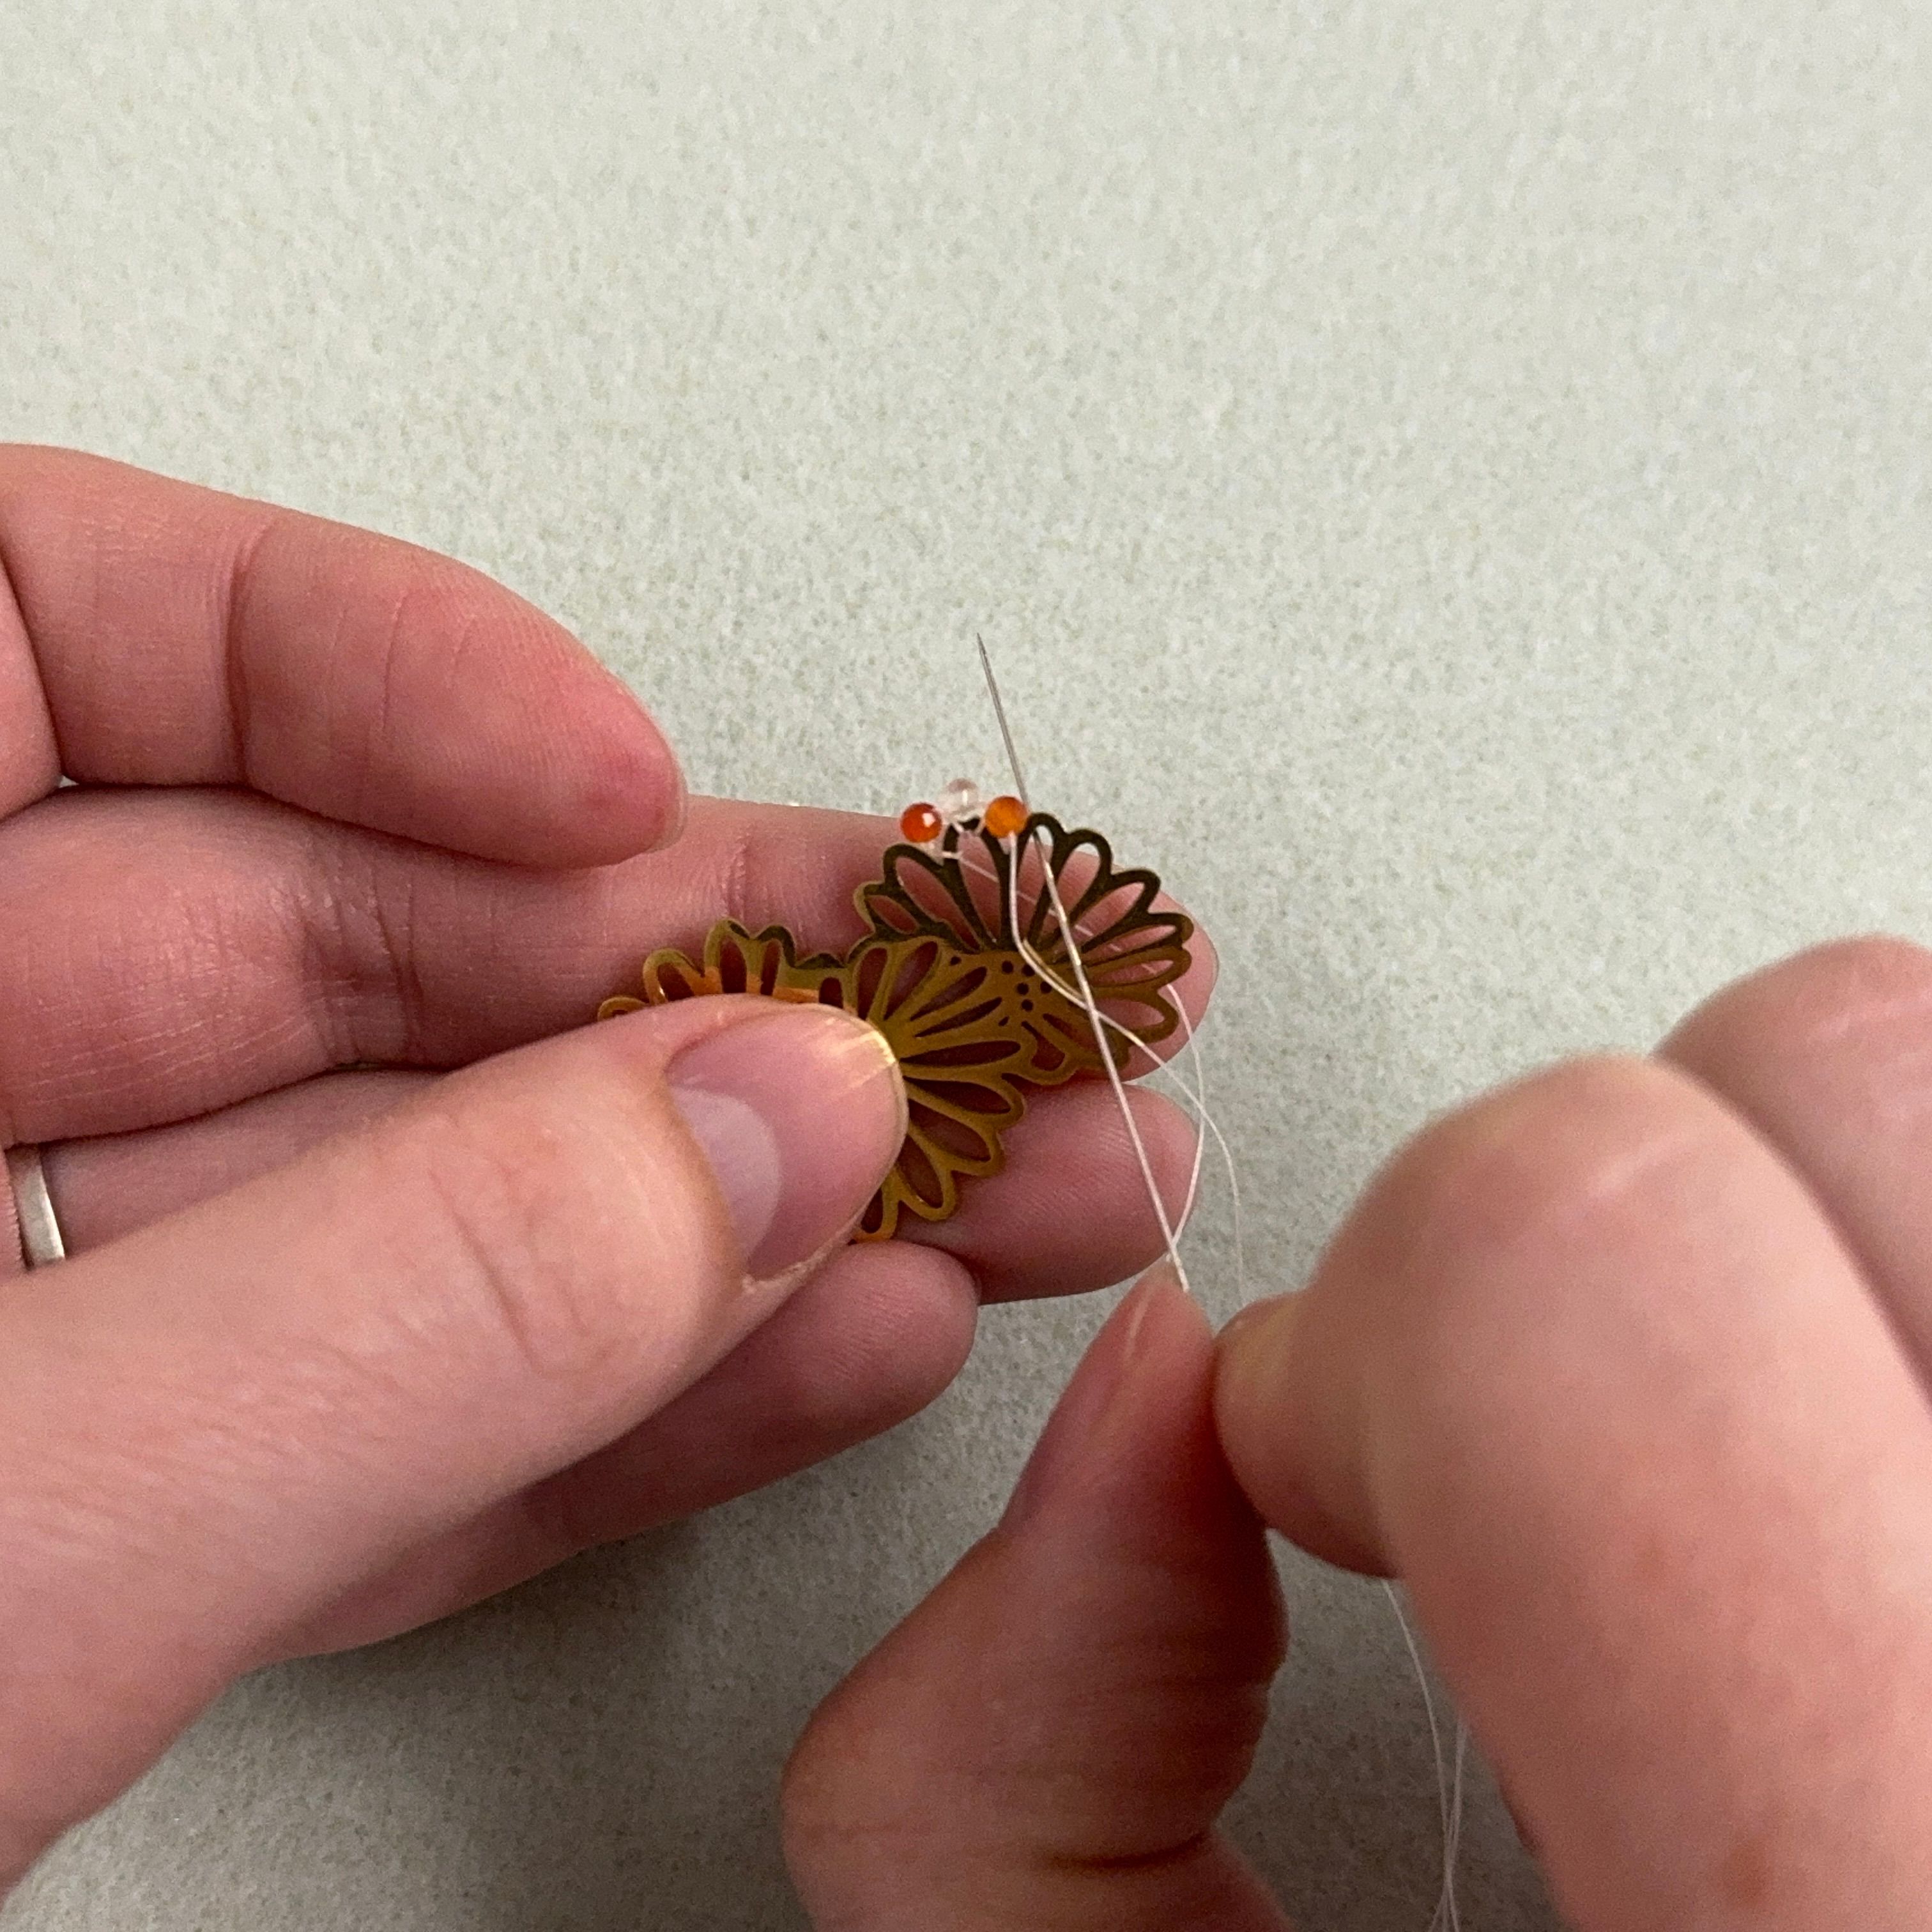
9. Add a medium colored carnelian bead and thread through the next petal
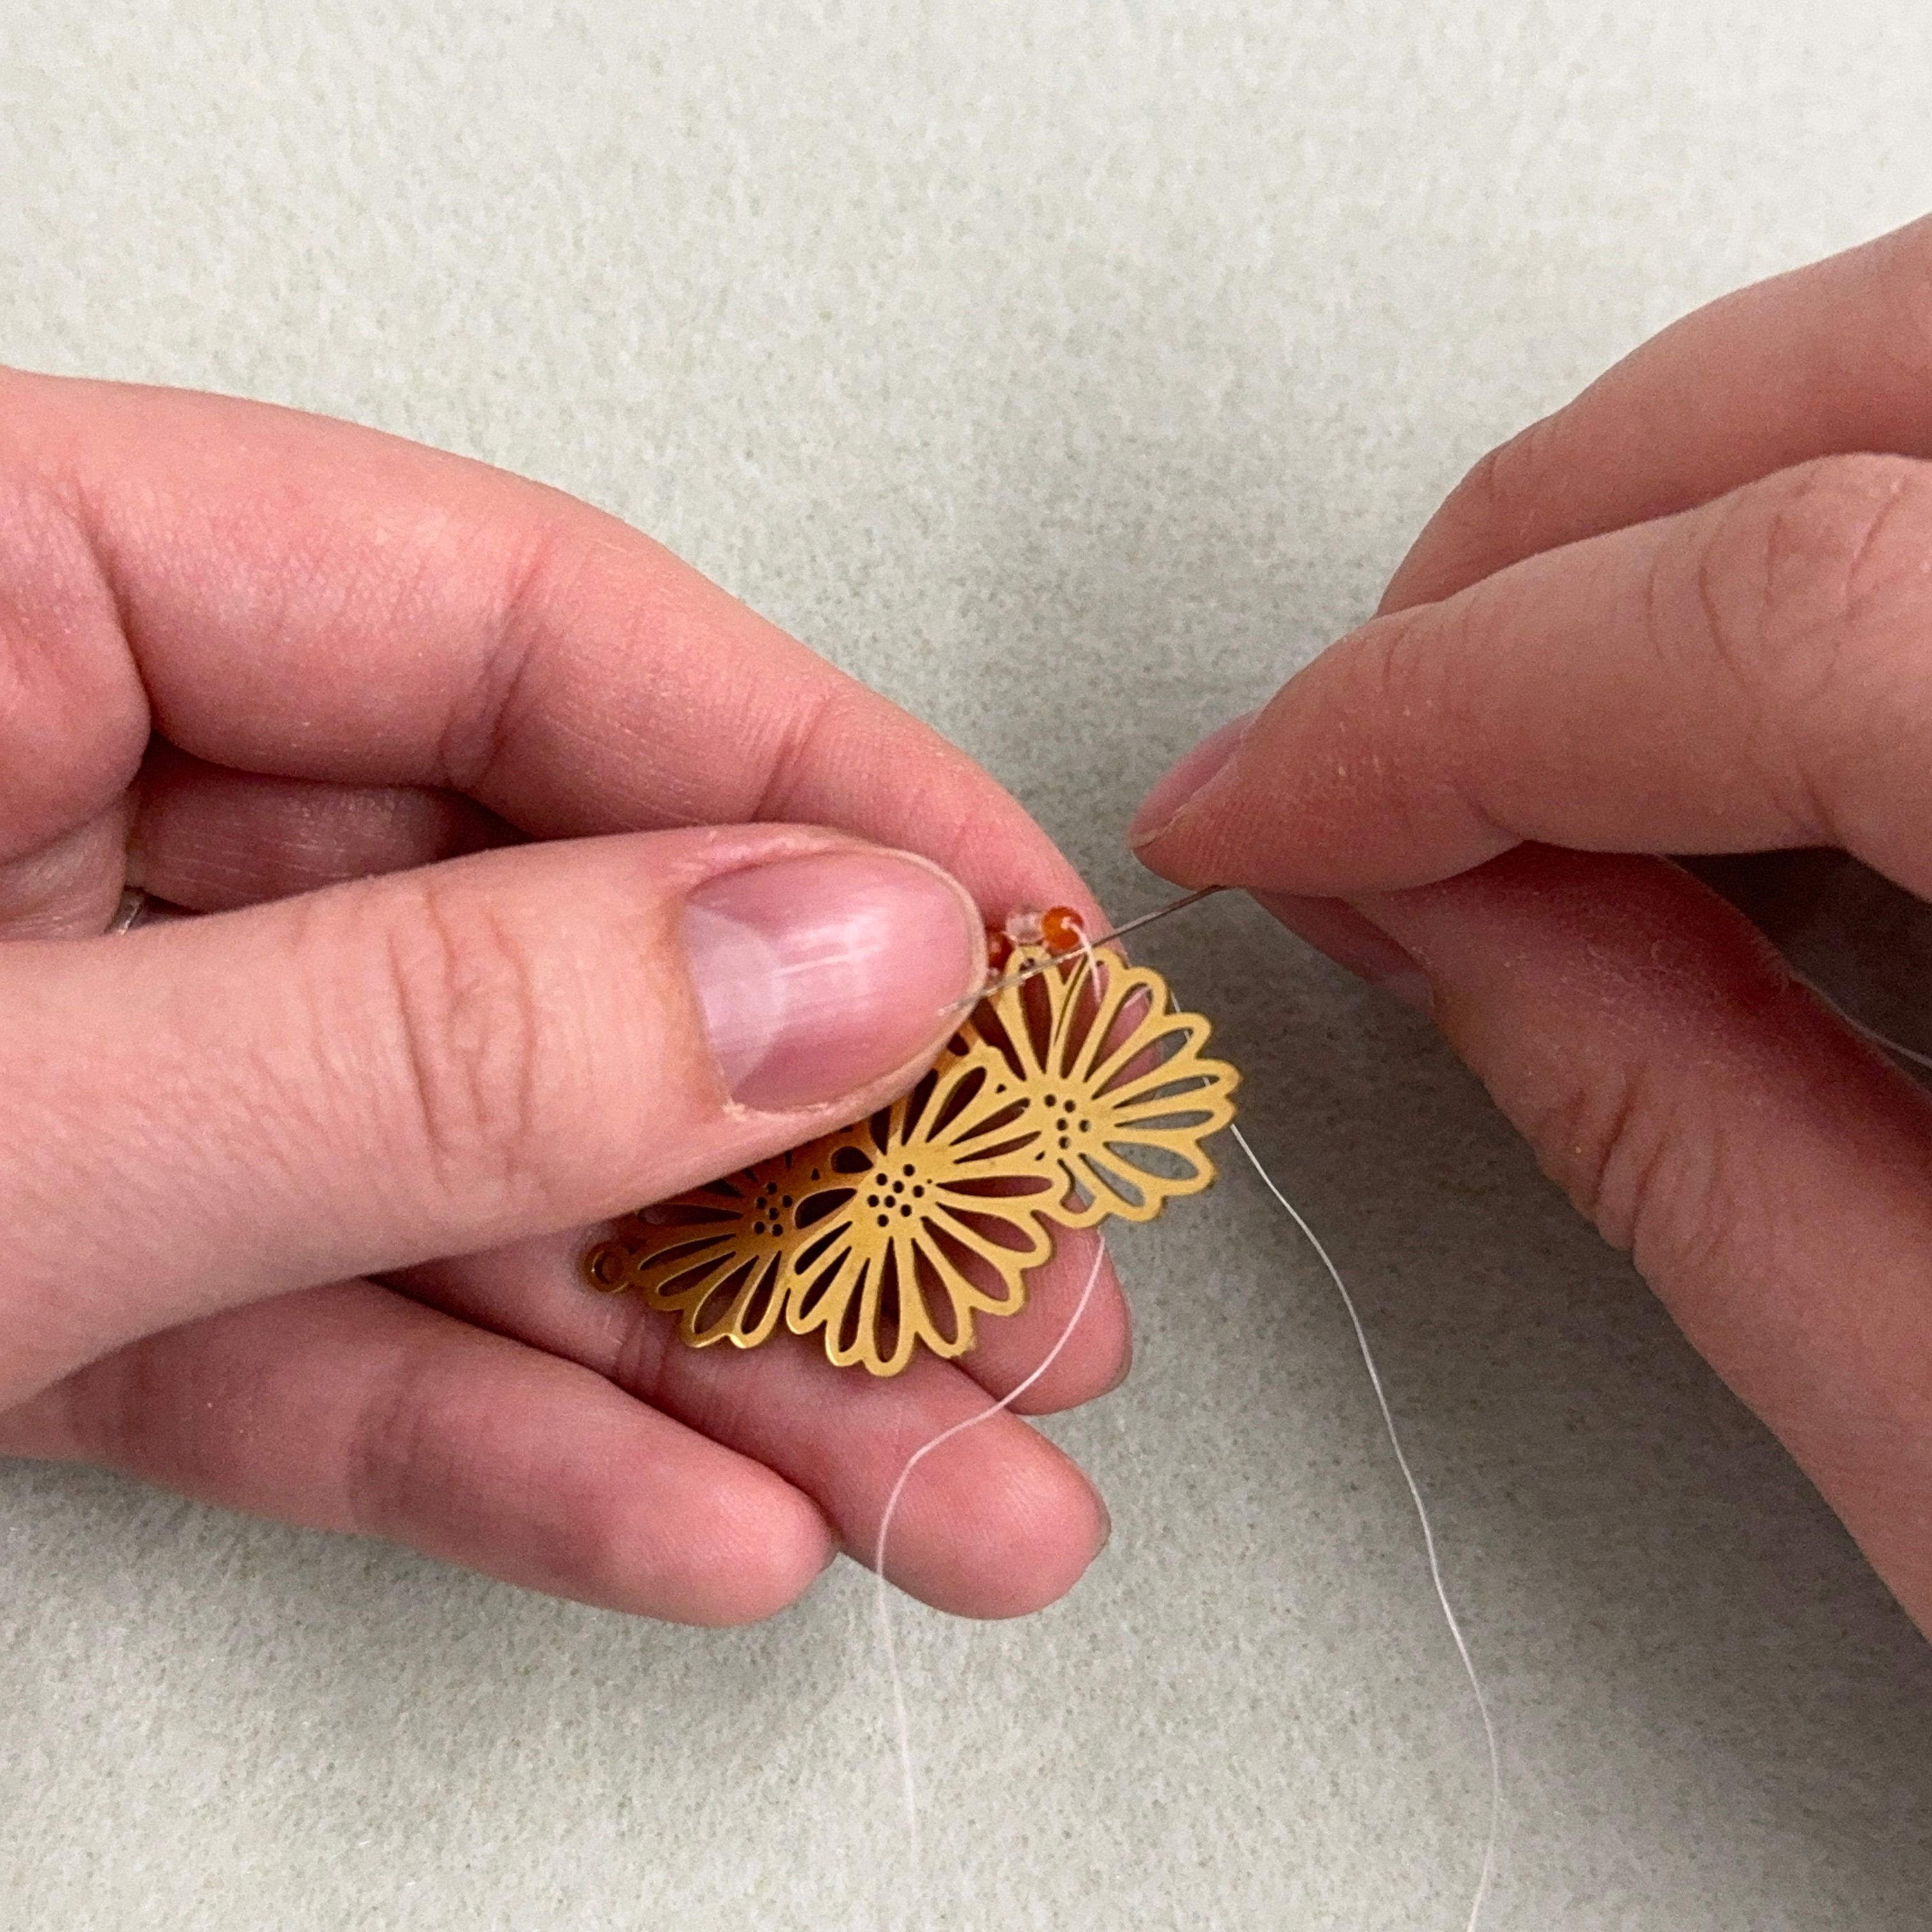
10. Thread the needle through the loop (needle pointing towards you)
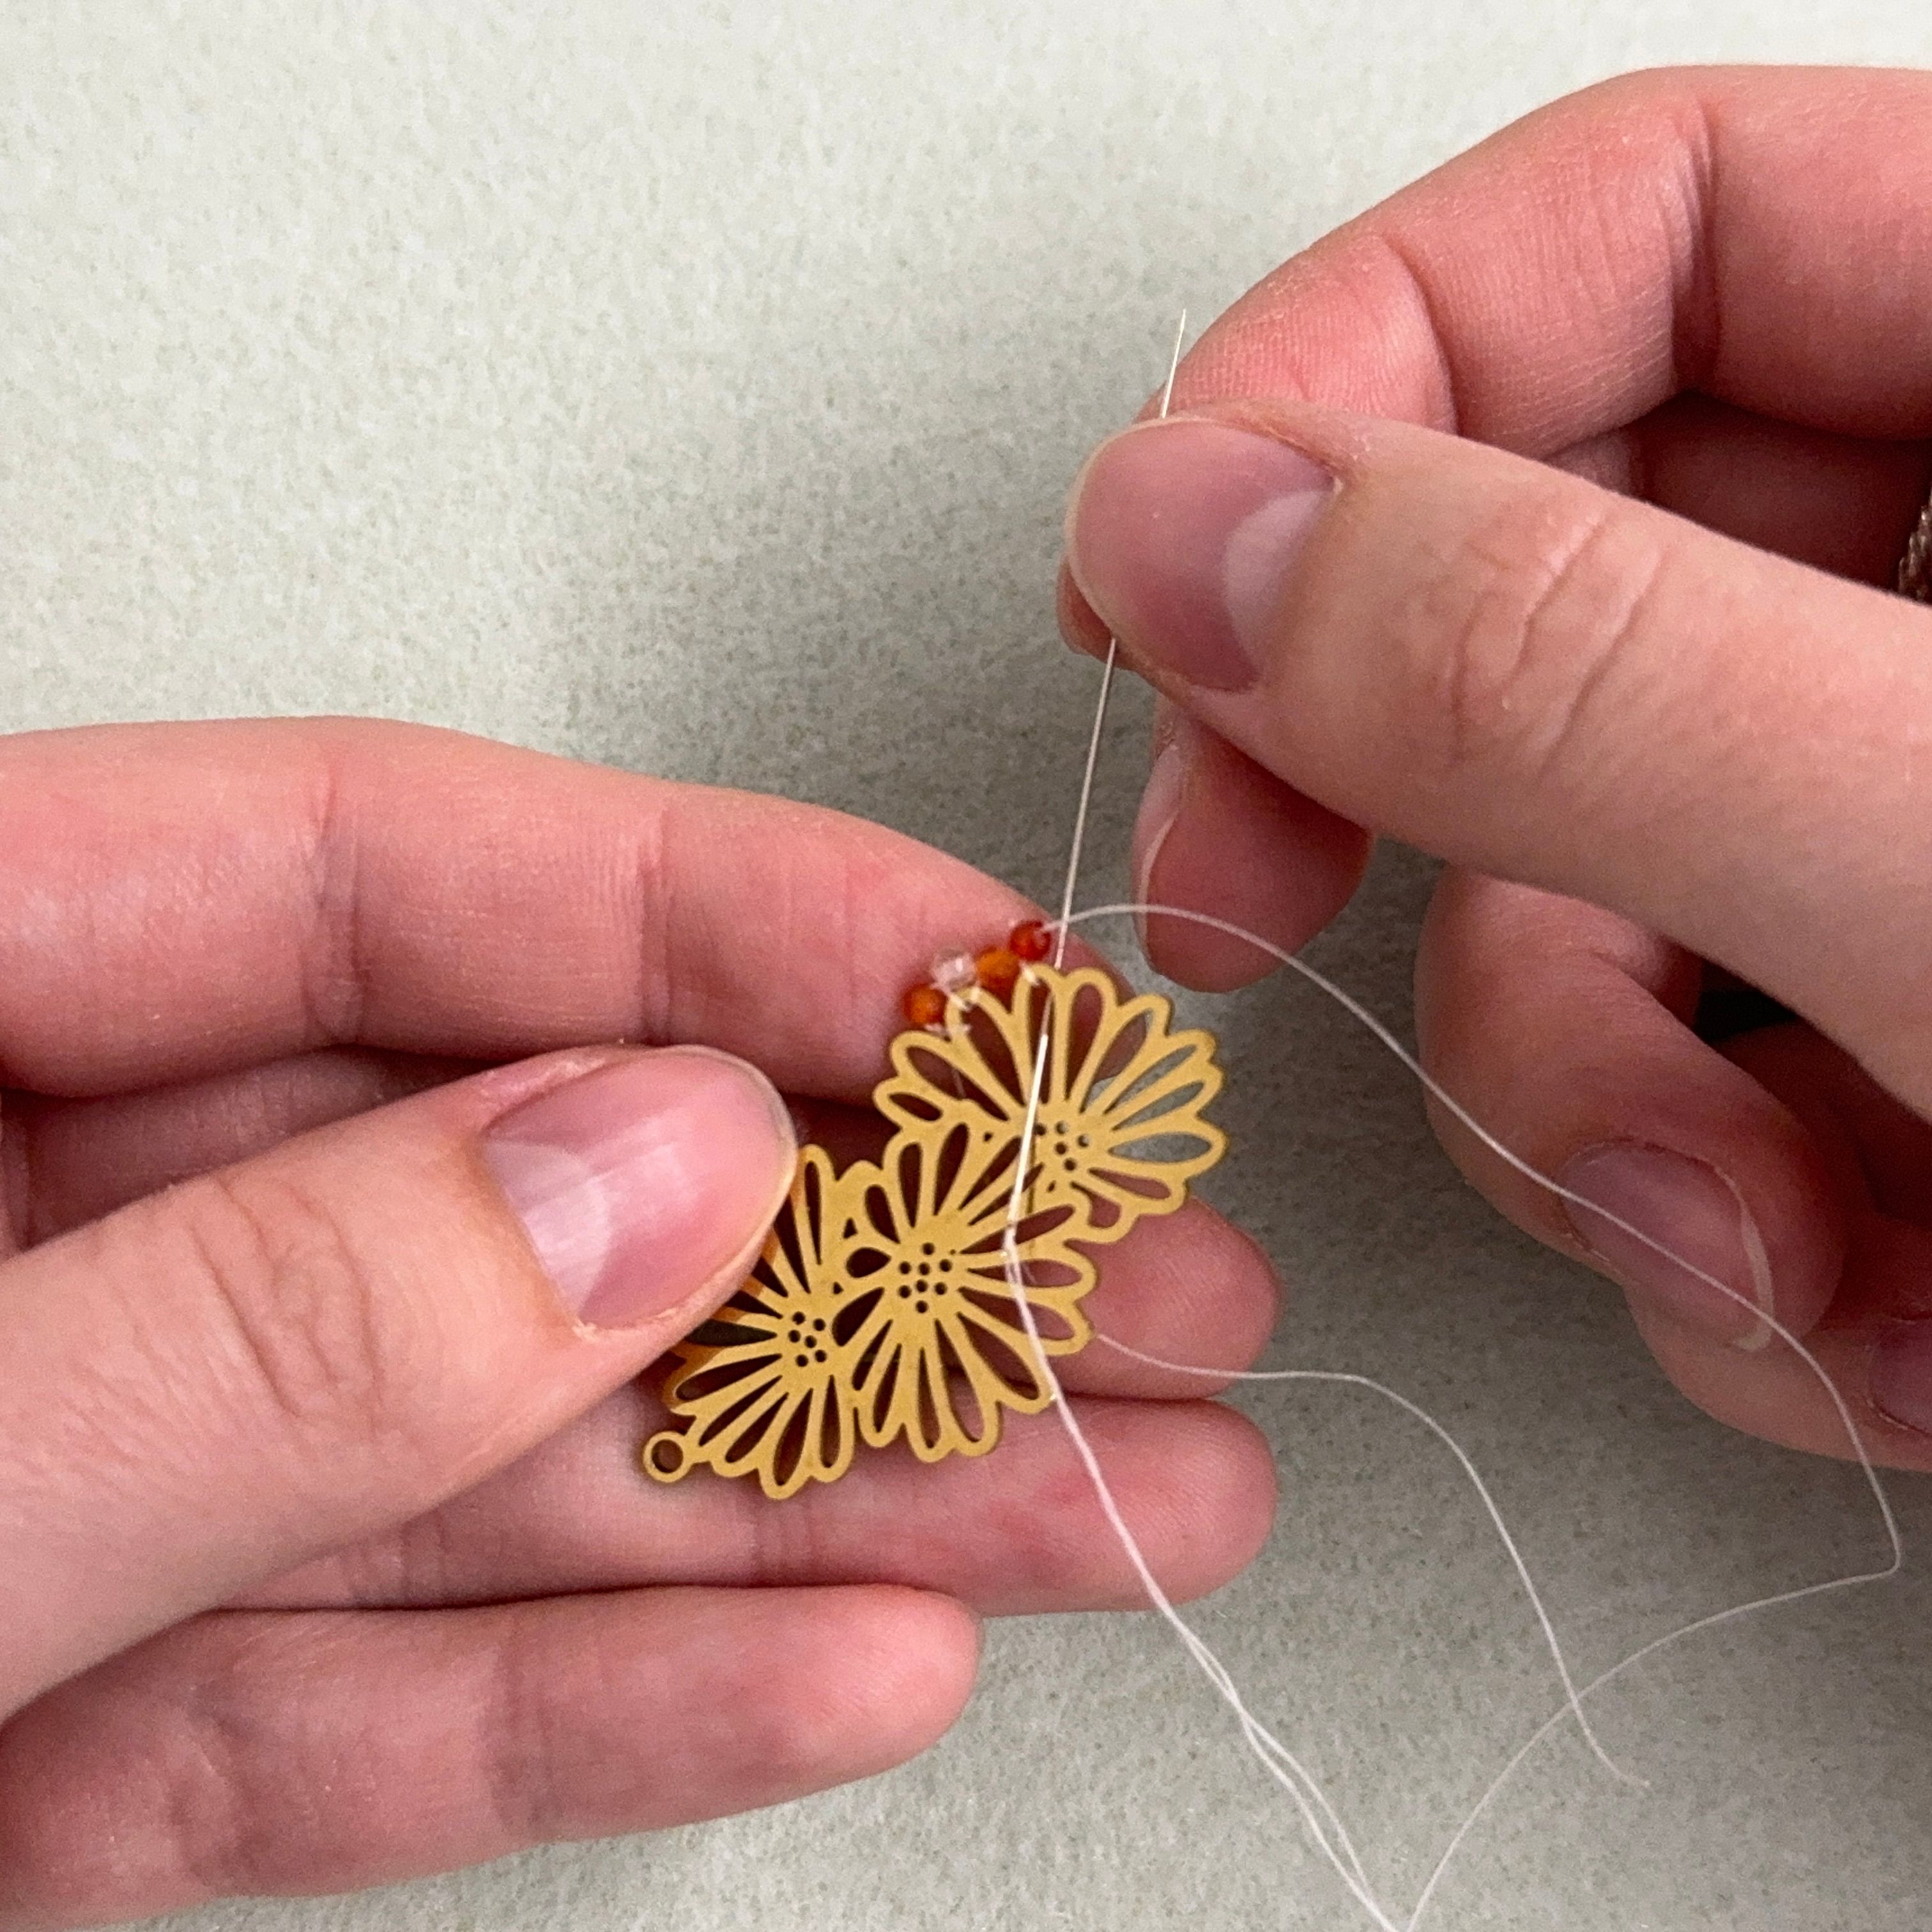
11. Add a dark colored carnelian bead and thread the needle through the petal (away from you)
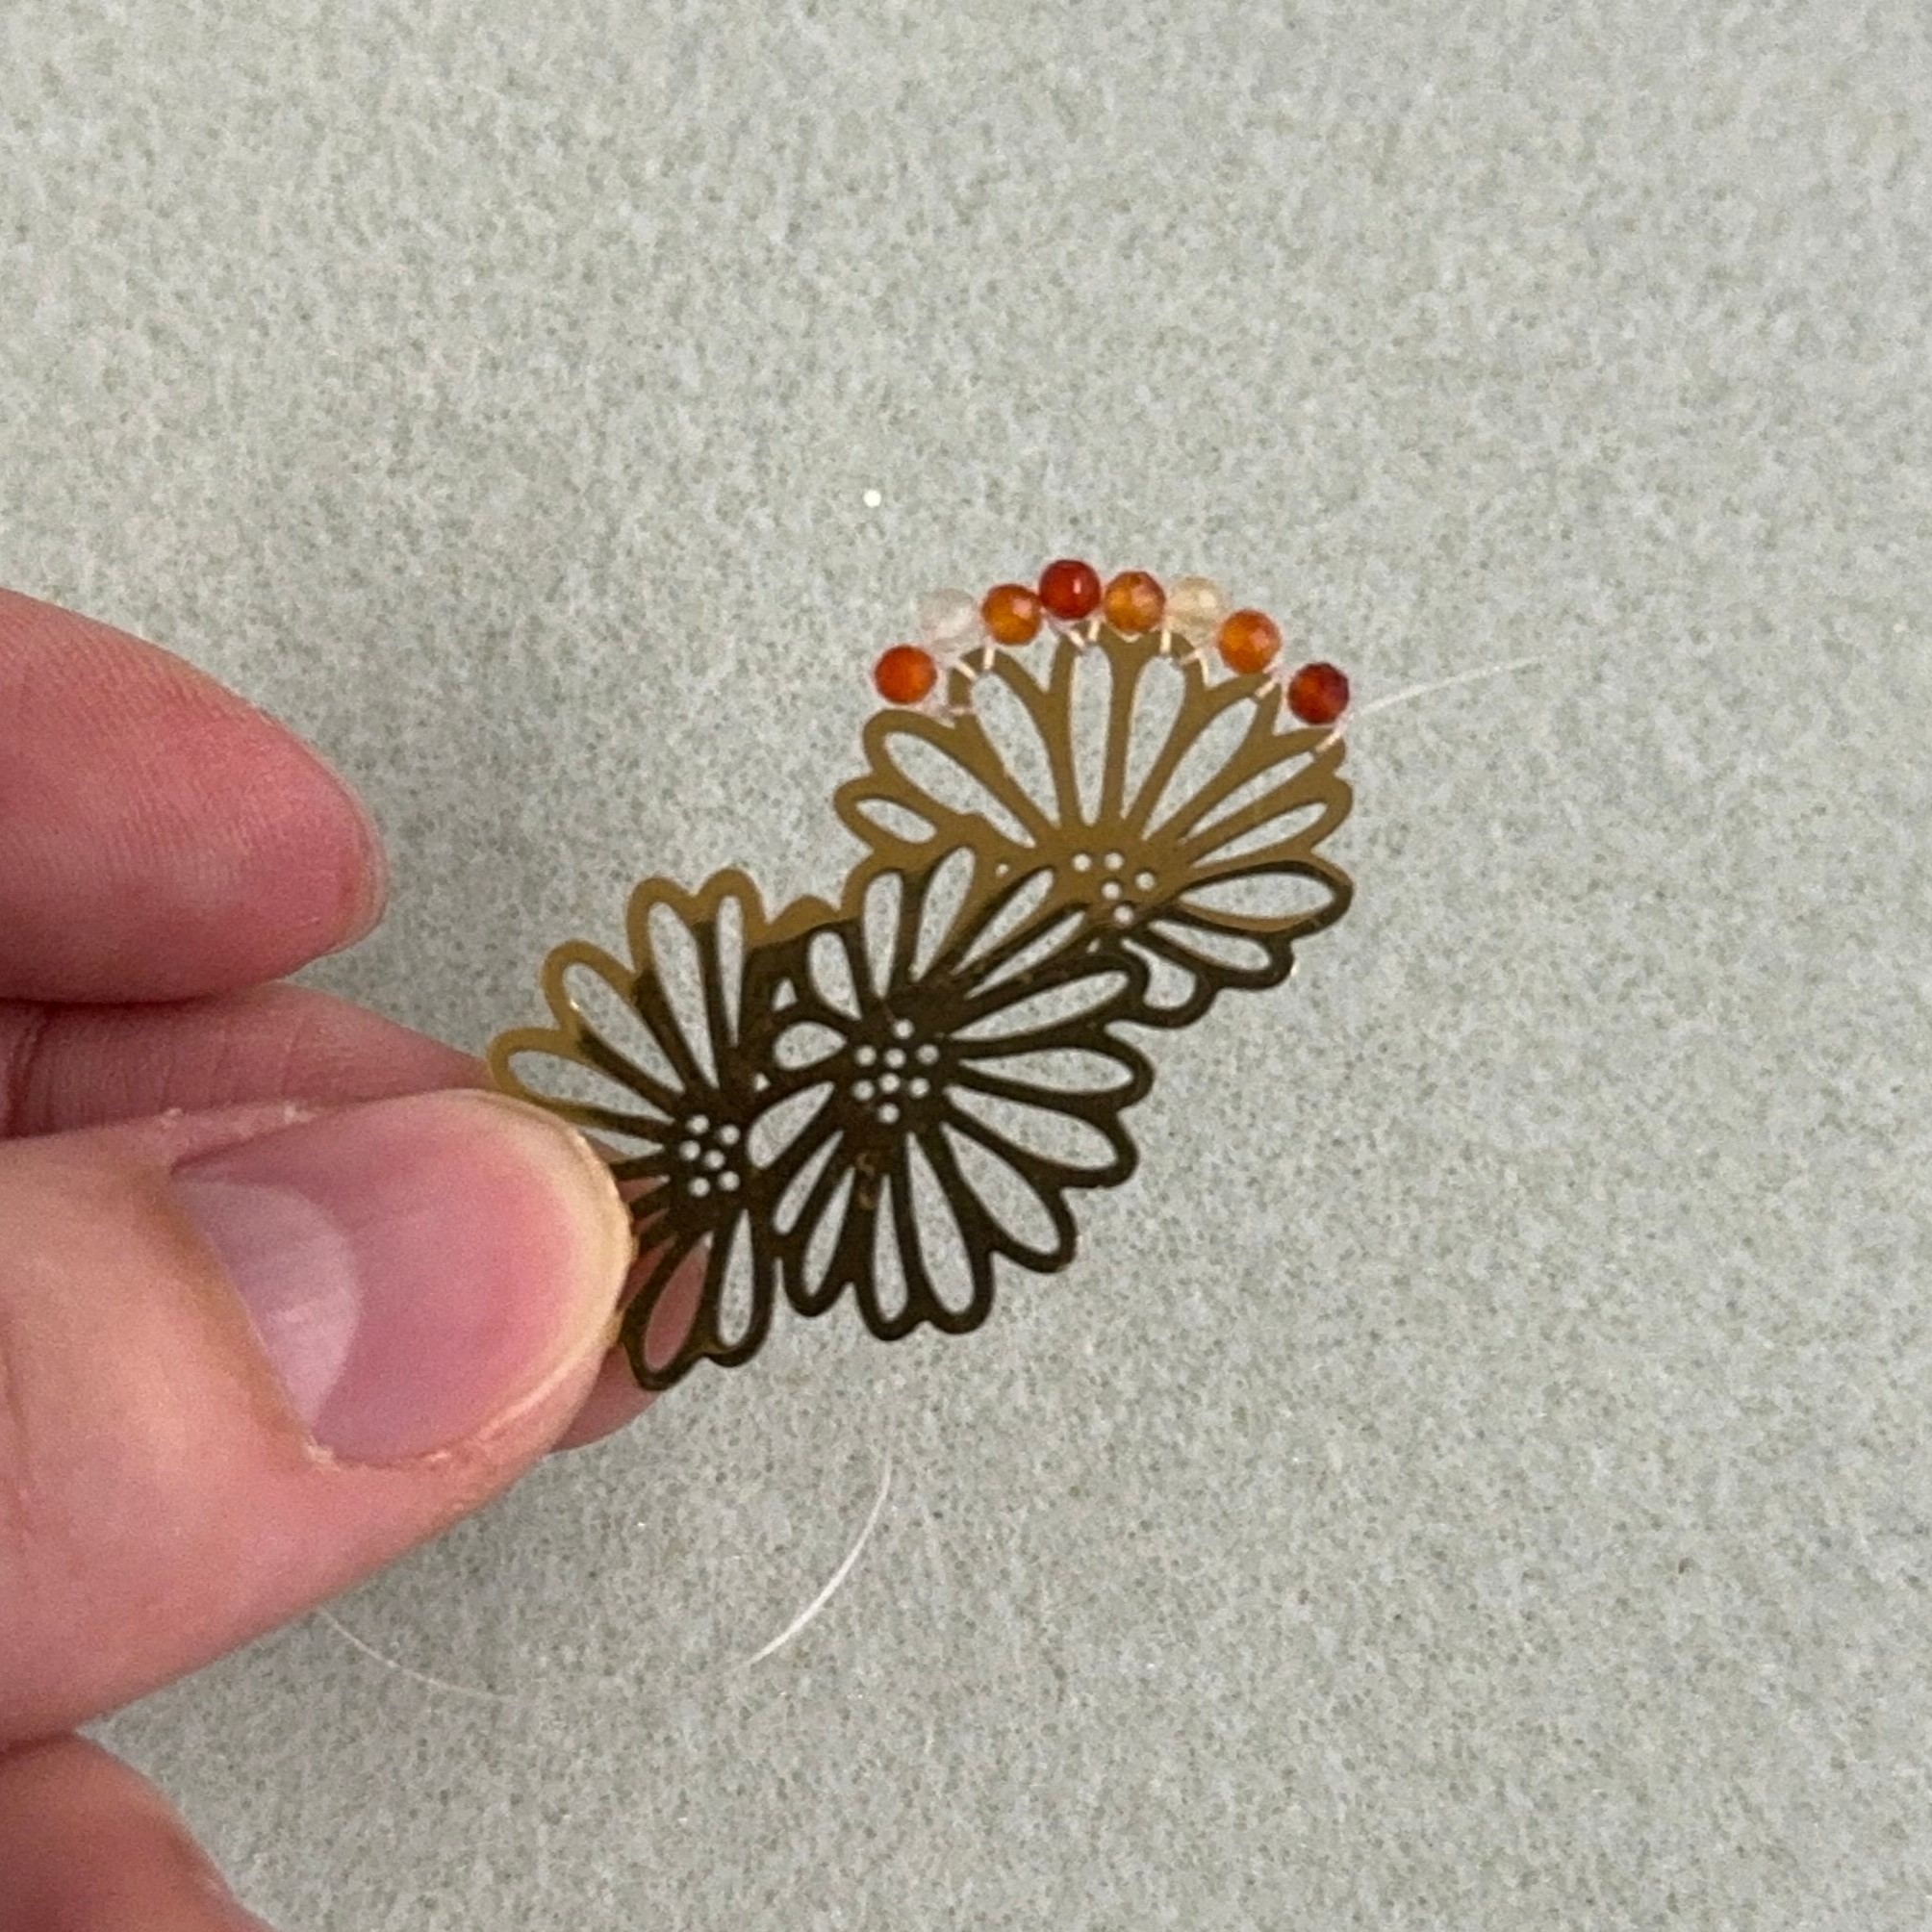
12. Keep the pattern going and your project will look like this so far
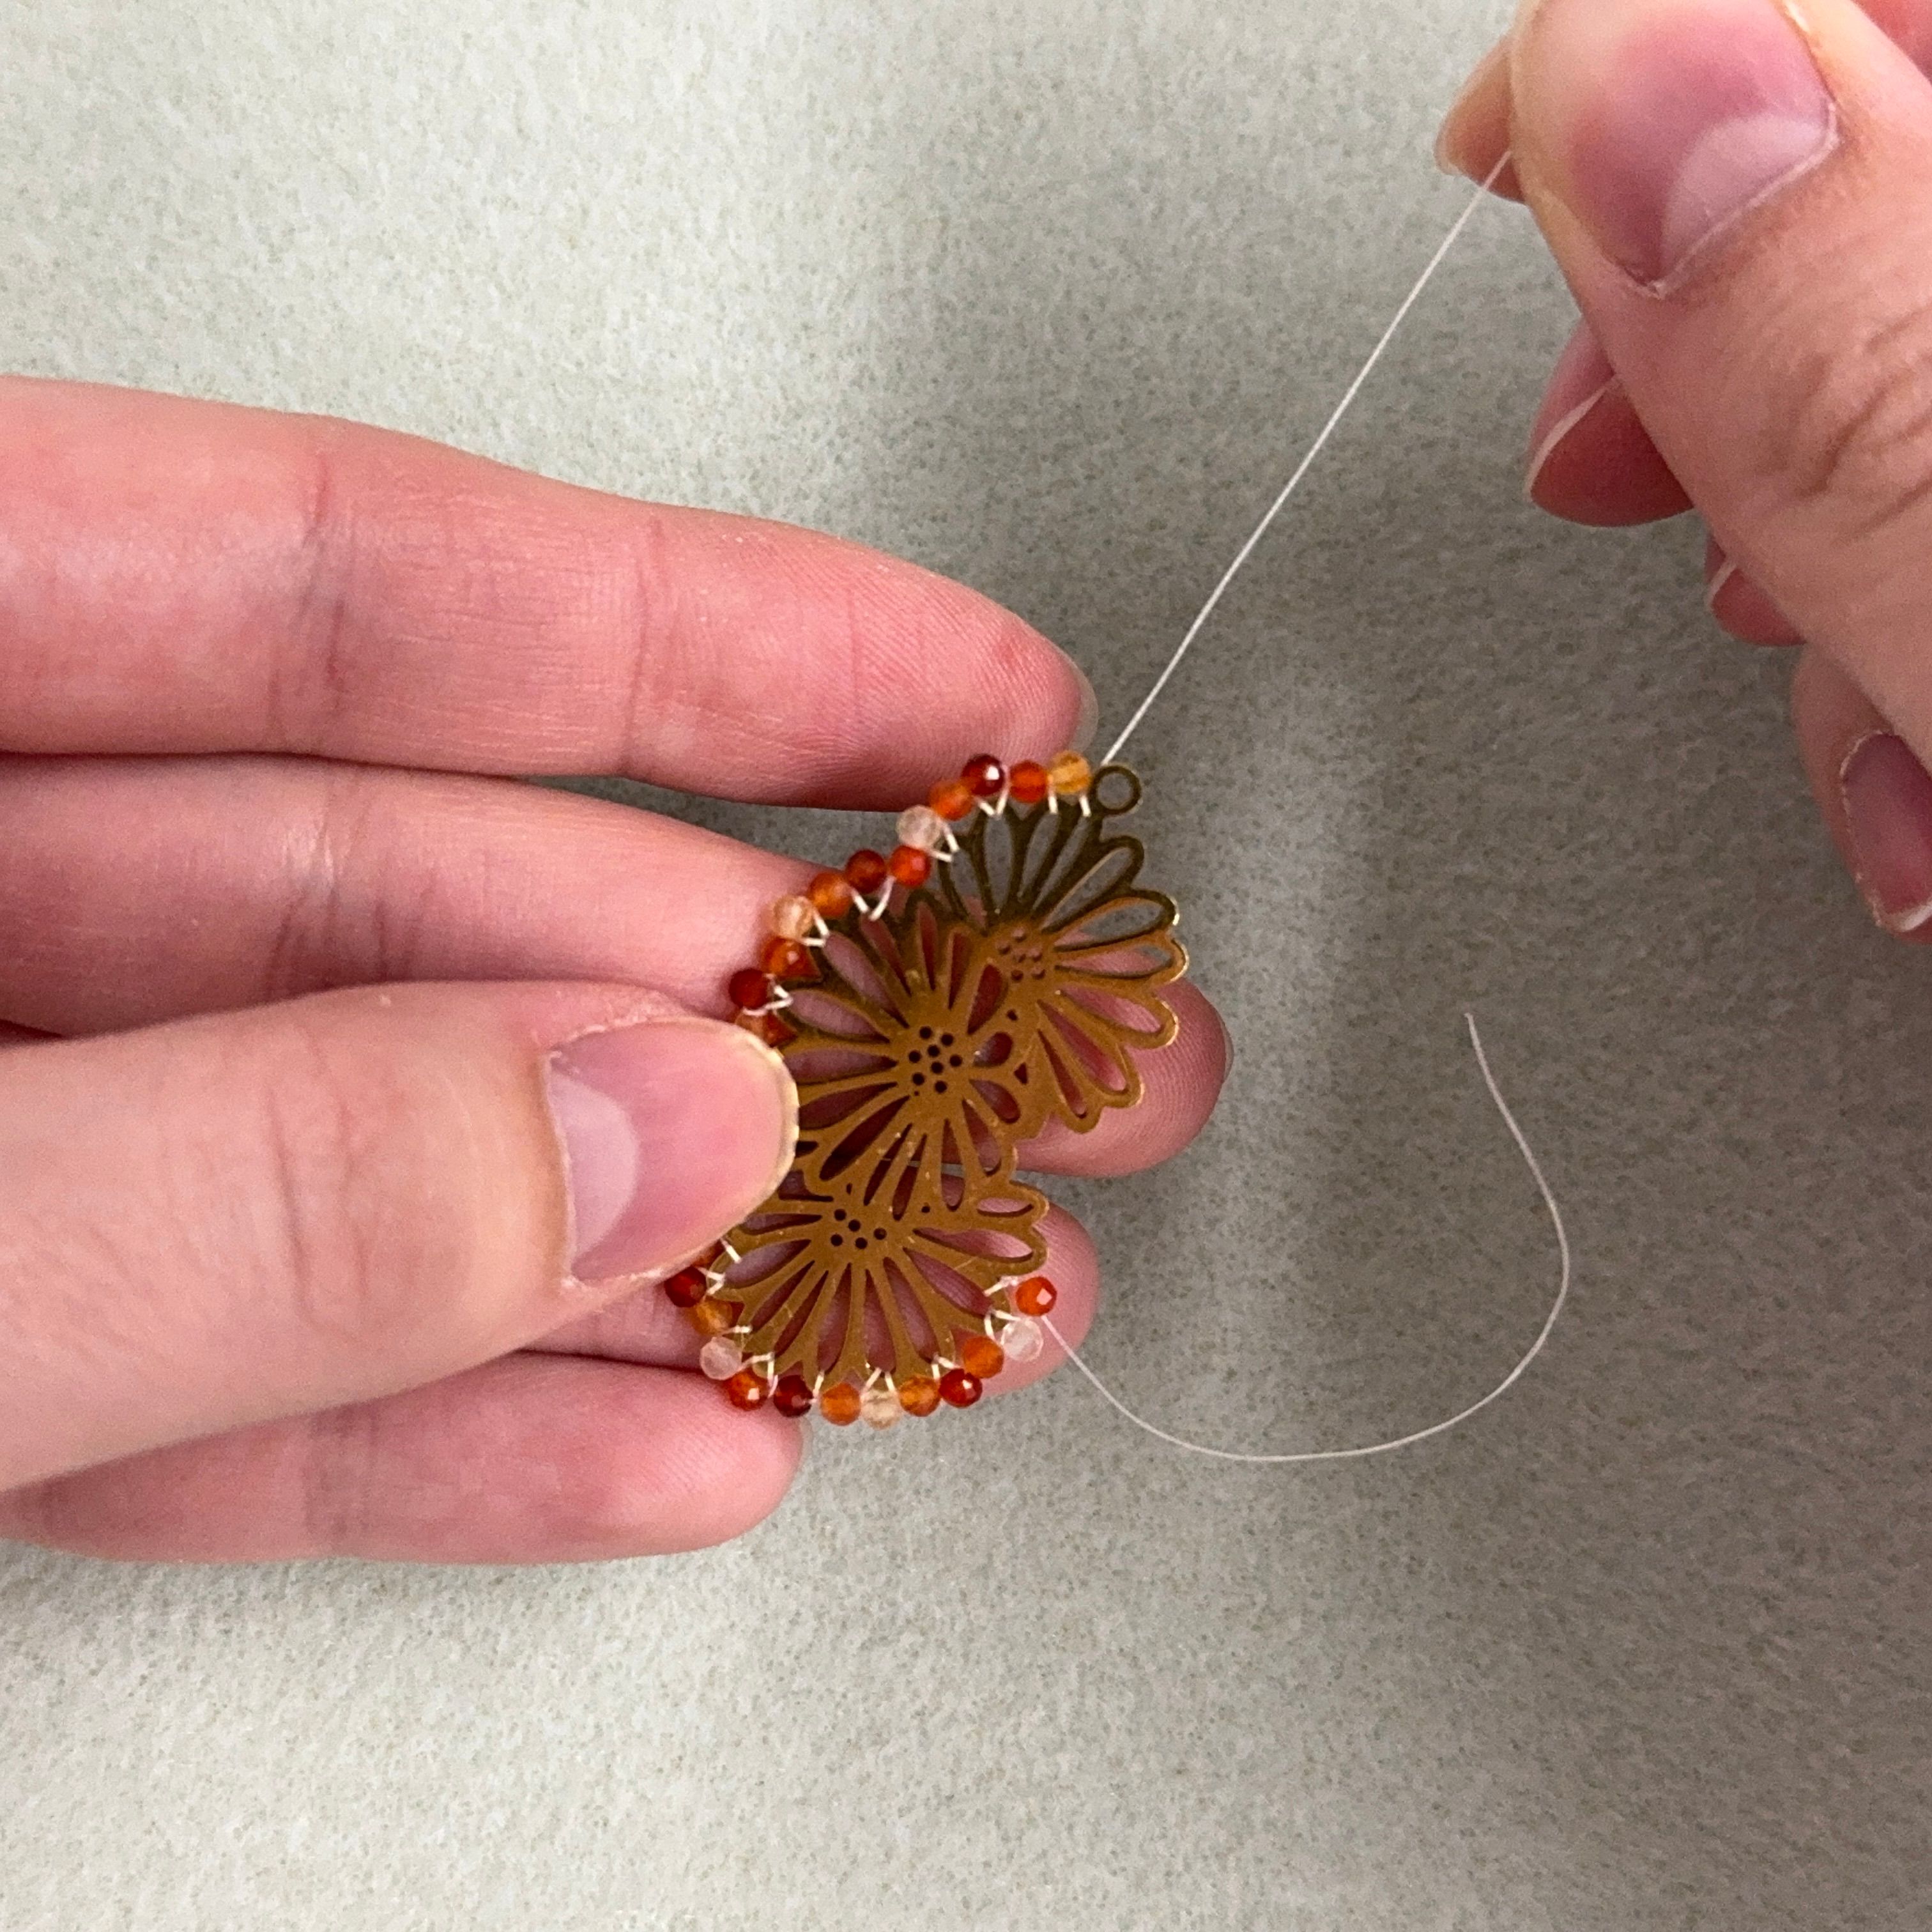
13. Continue the pattern until you reach the top of the loop
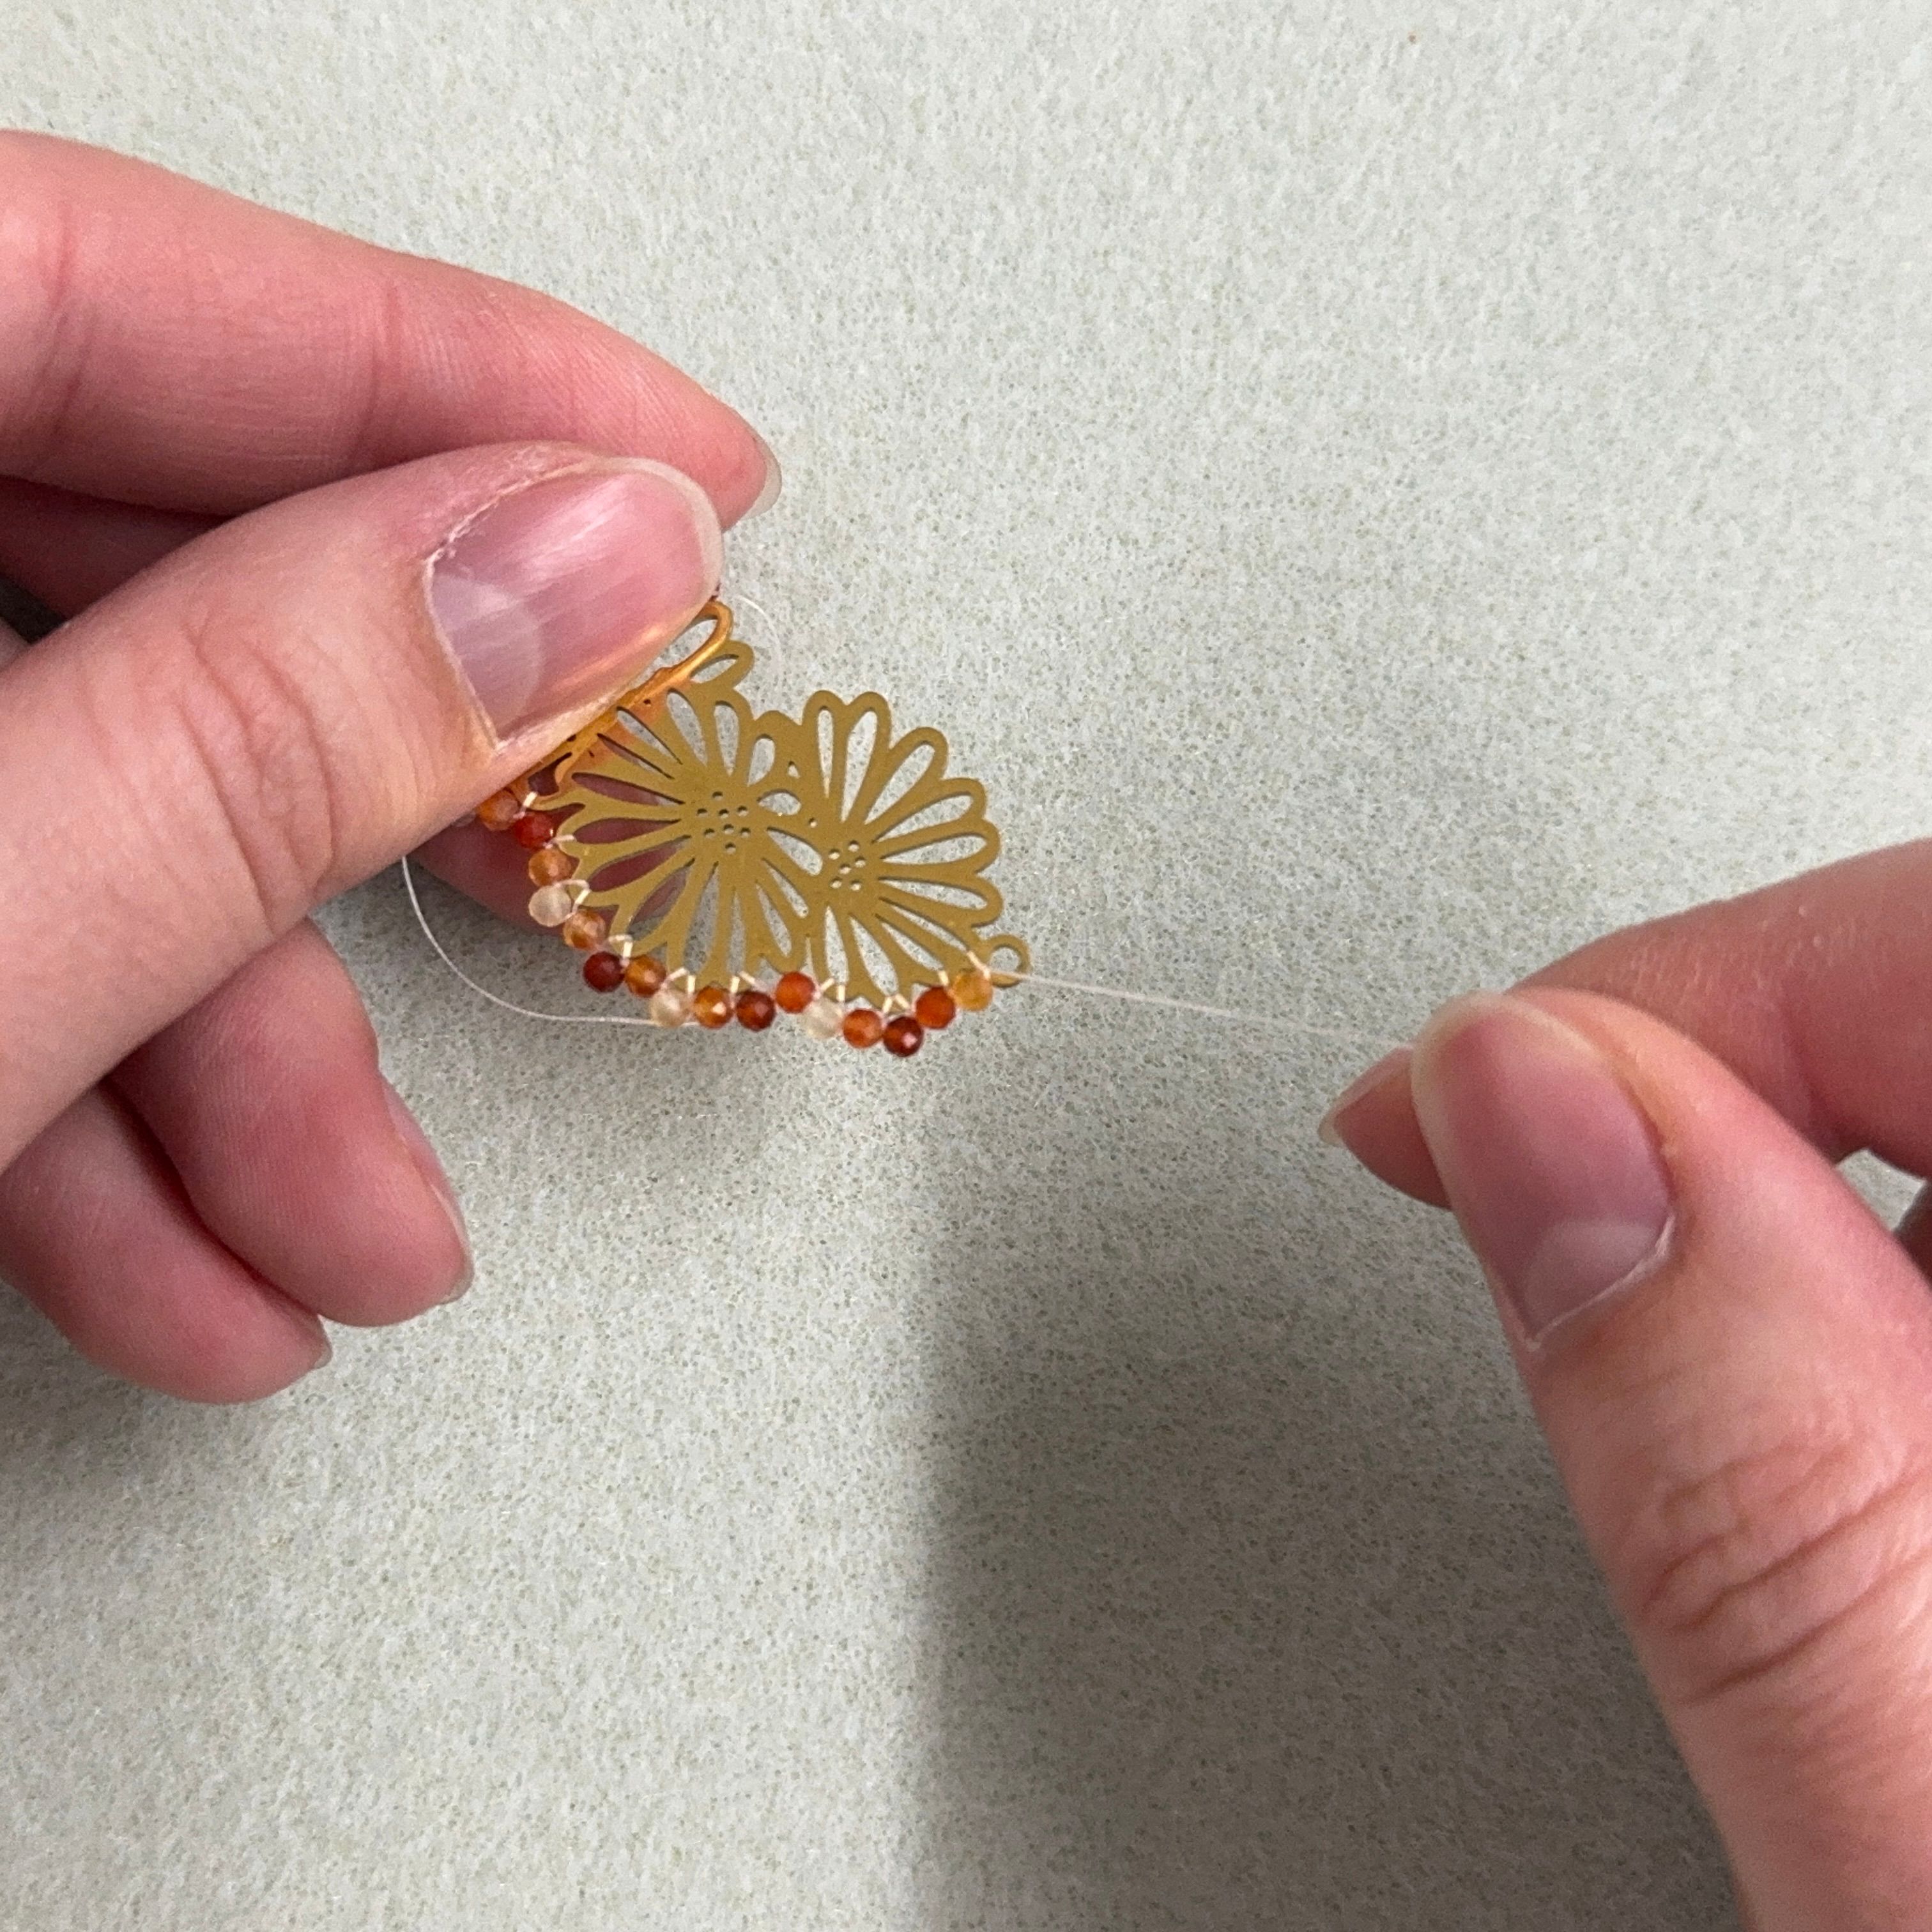
14. Pull the thread tight and behind the loop to the other side (seen below)
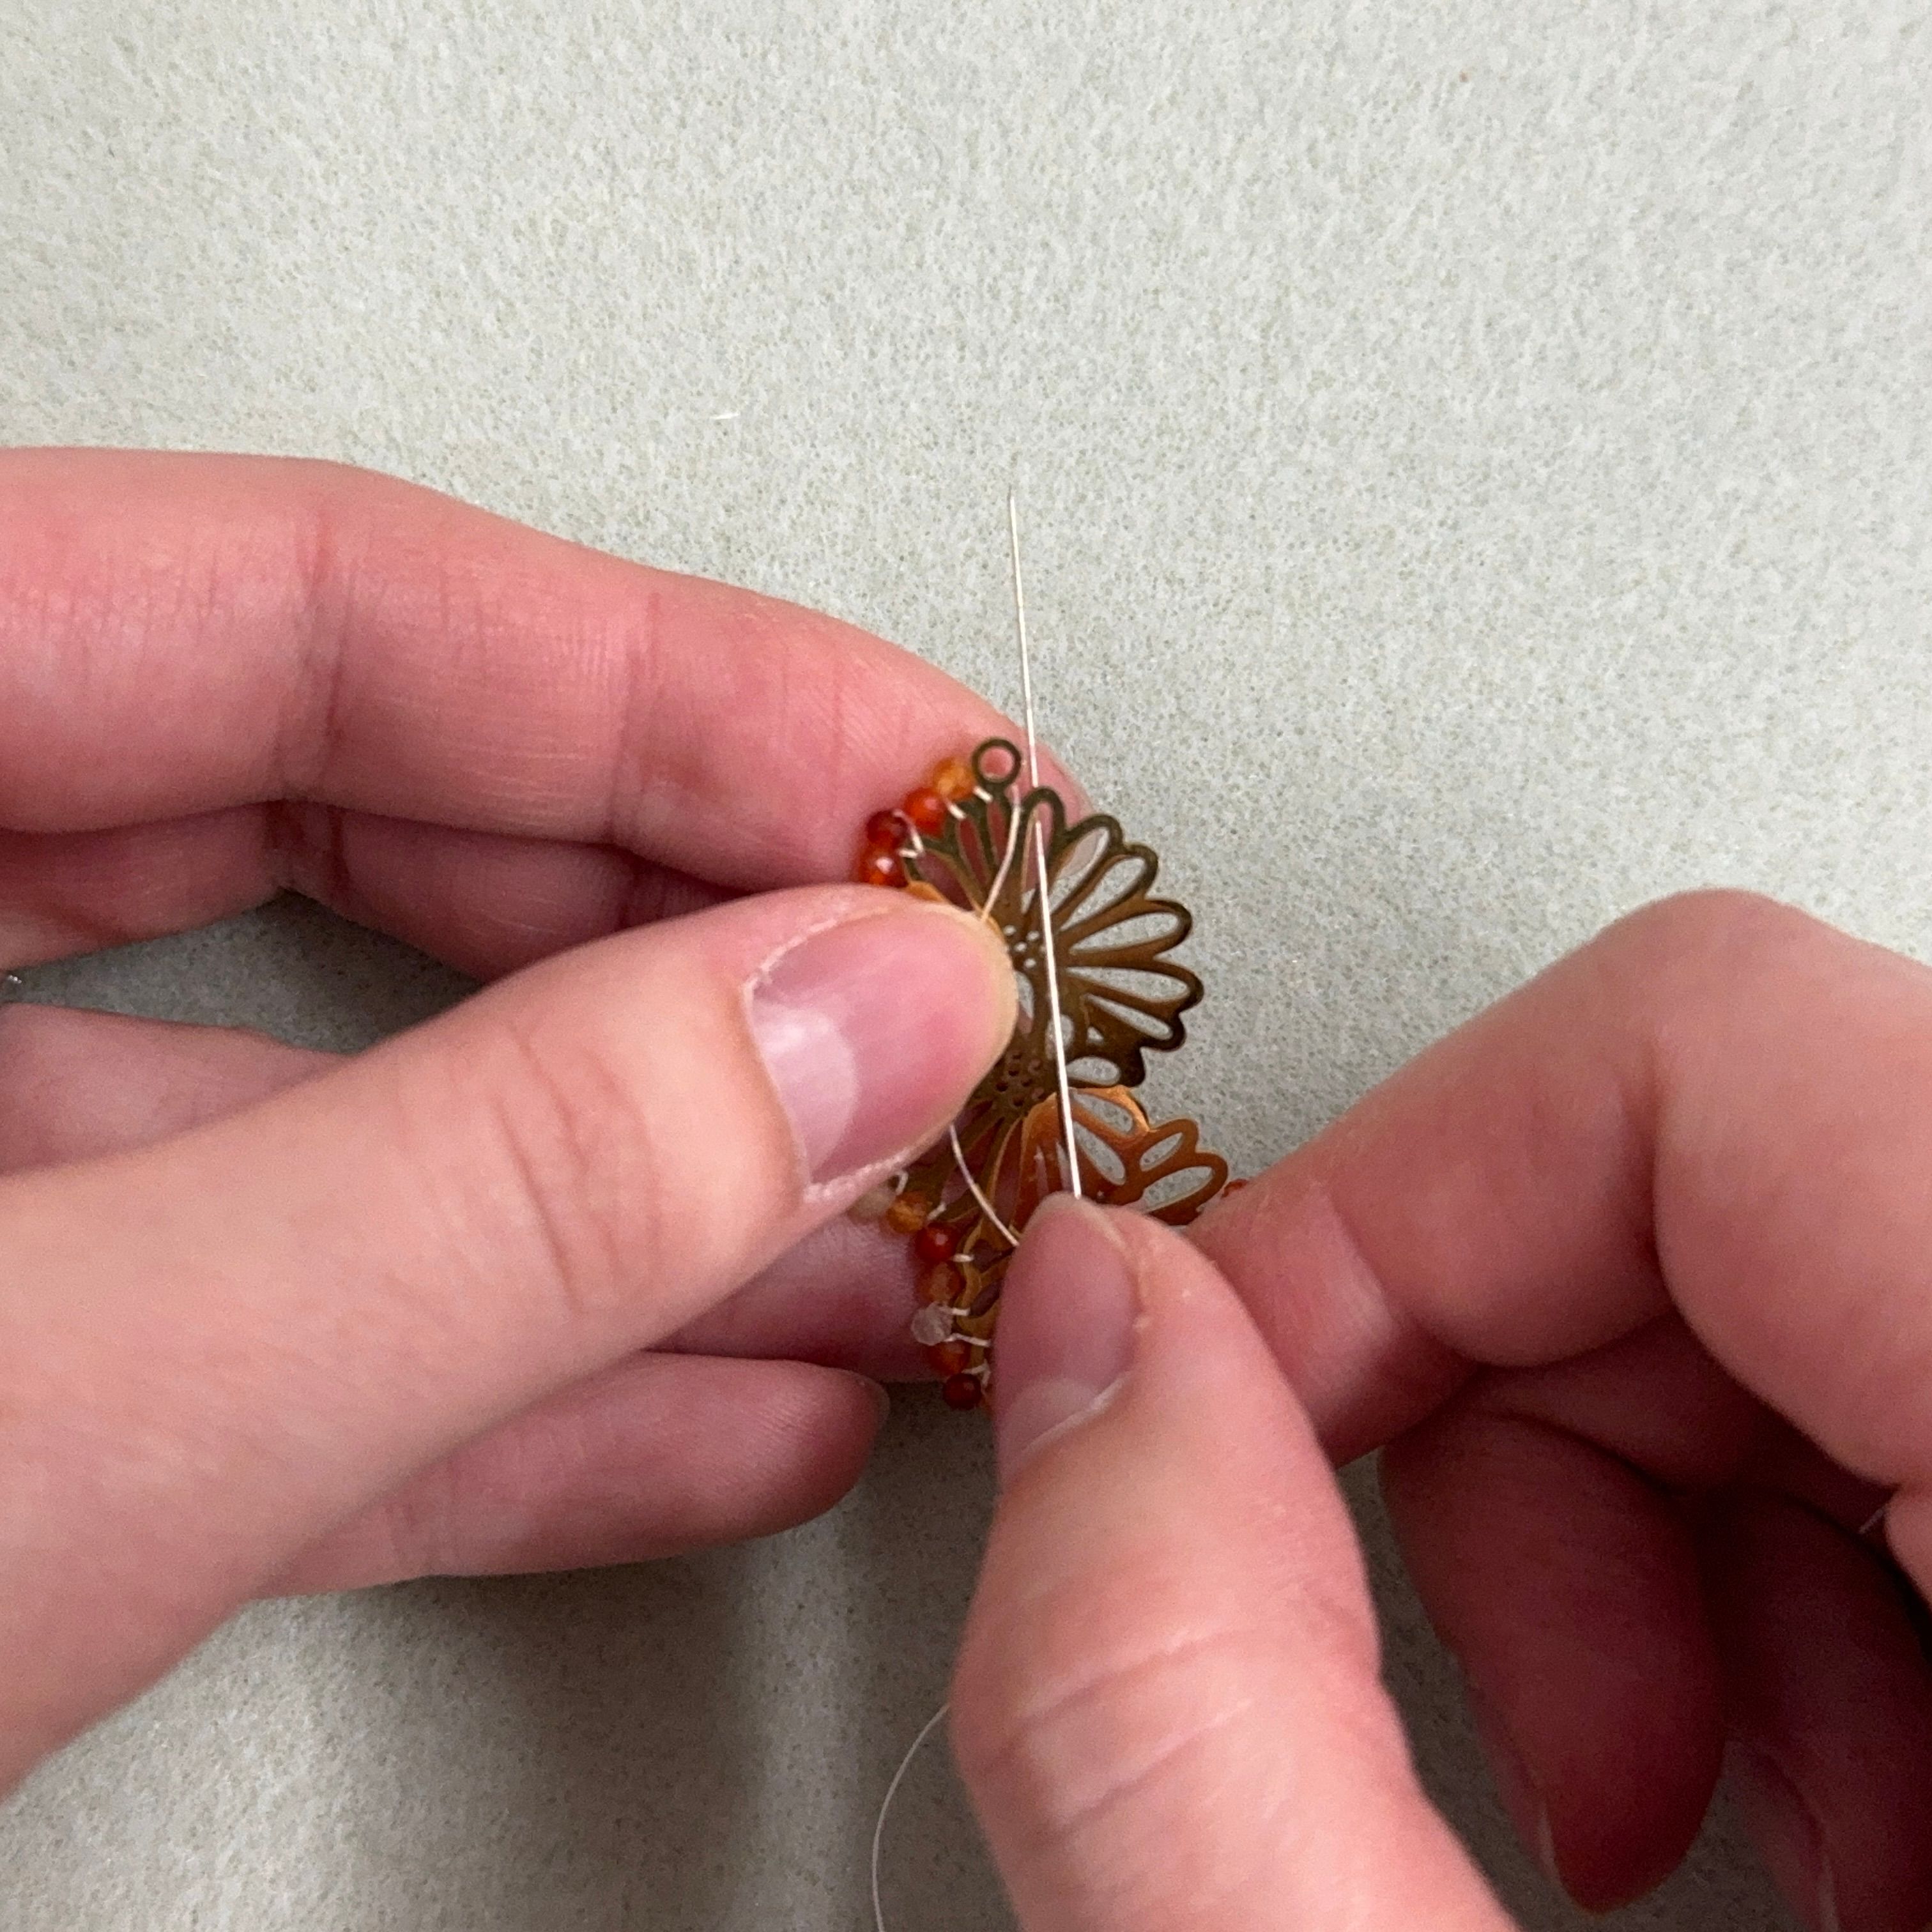
15. Loop the thread around the loop and thread the needle through the next petal
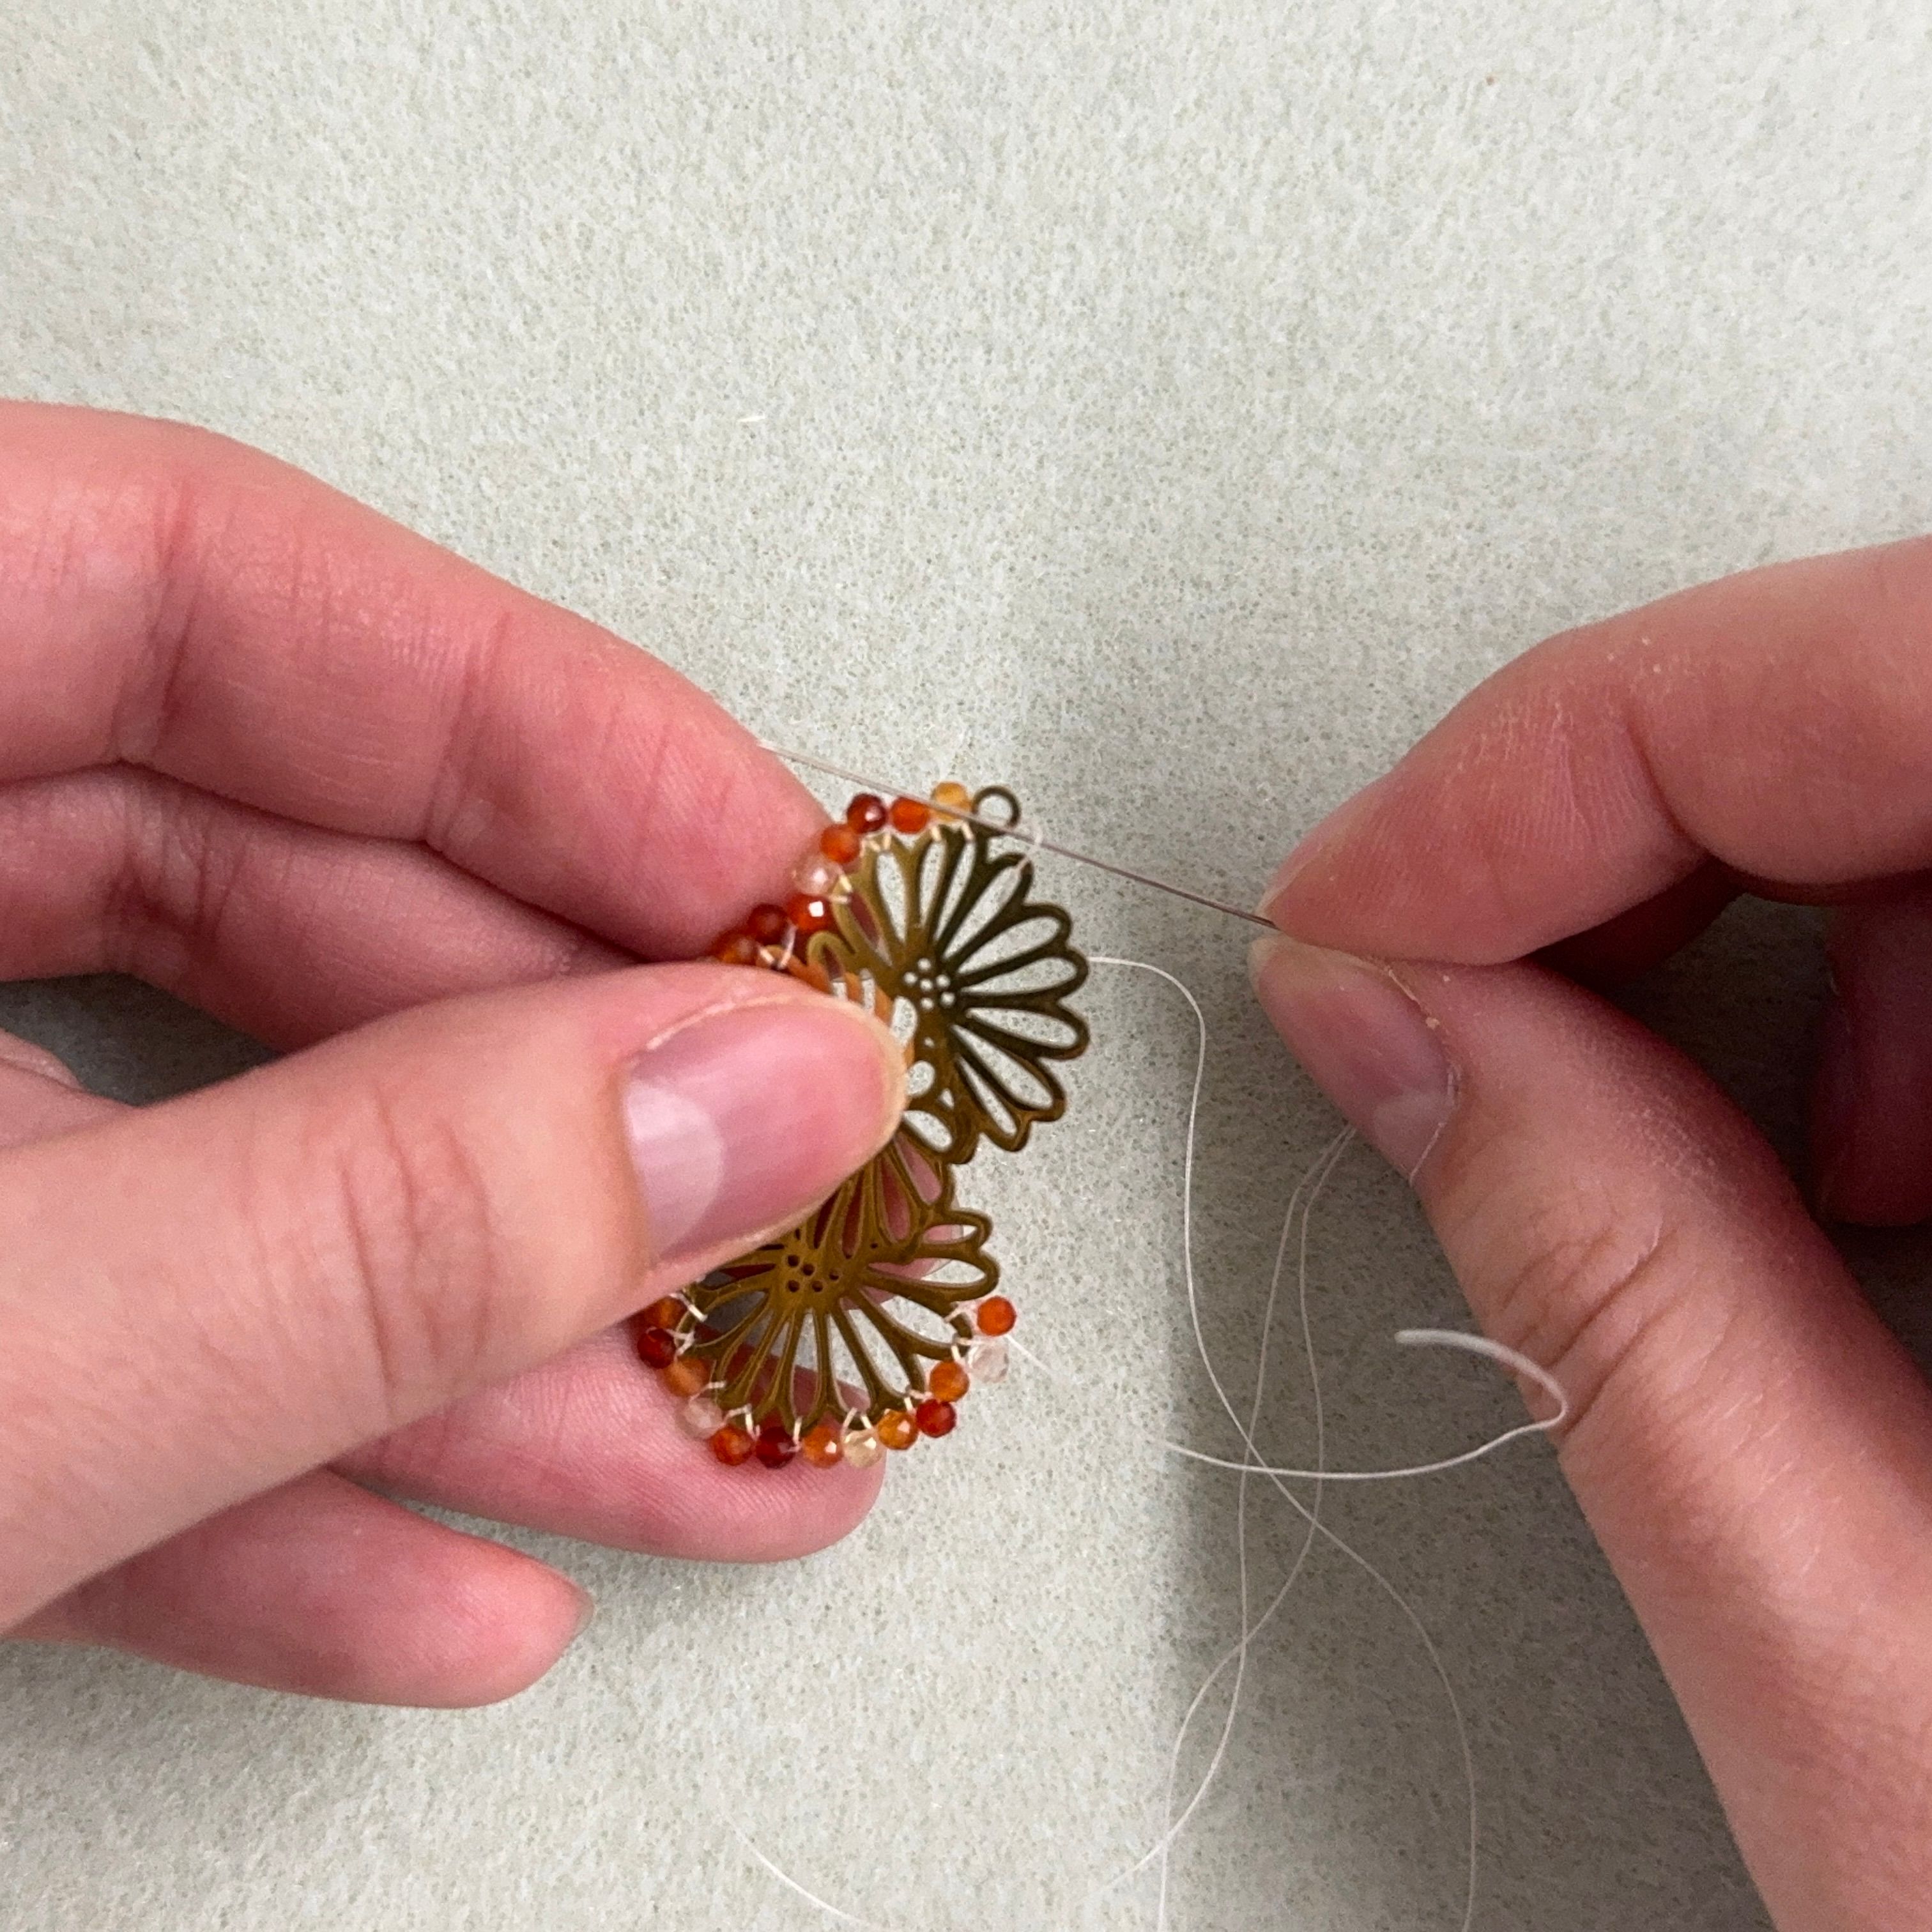
16. Thread the needle through the loop (towards you) and pull tight. * Please be careful not to poke yourself with the needle
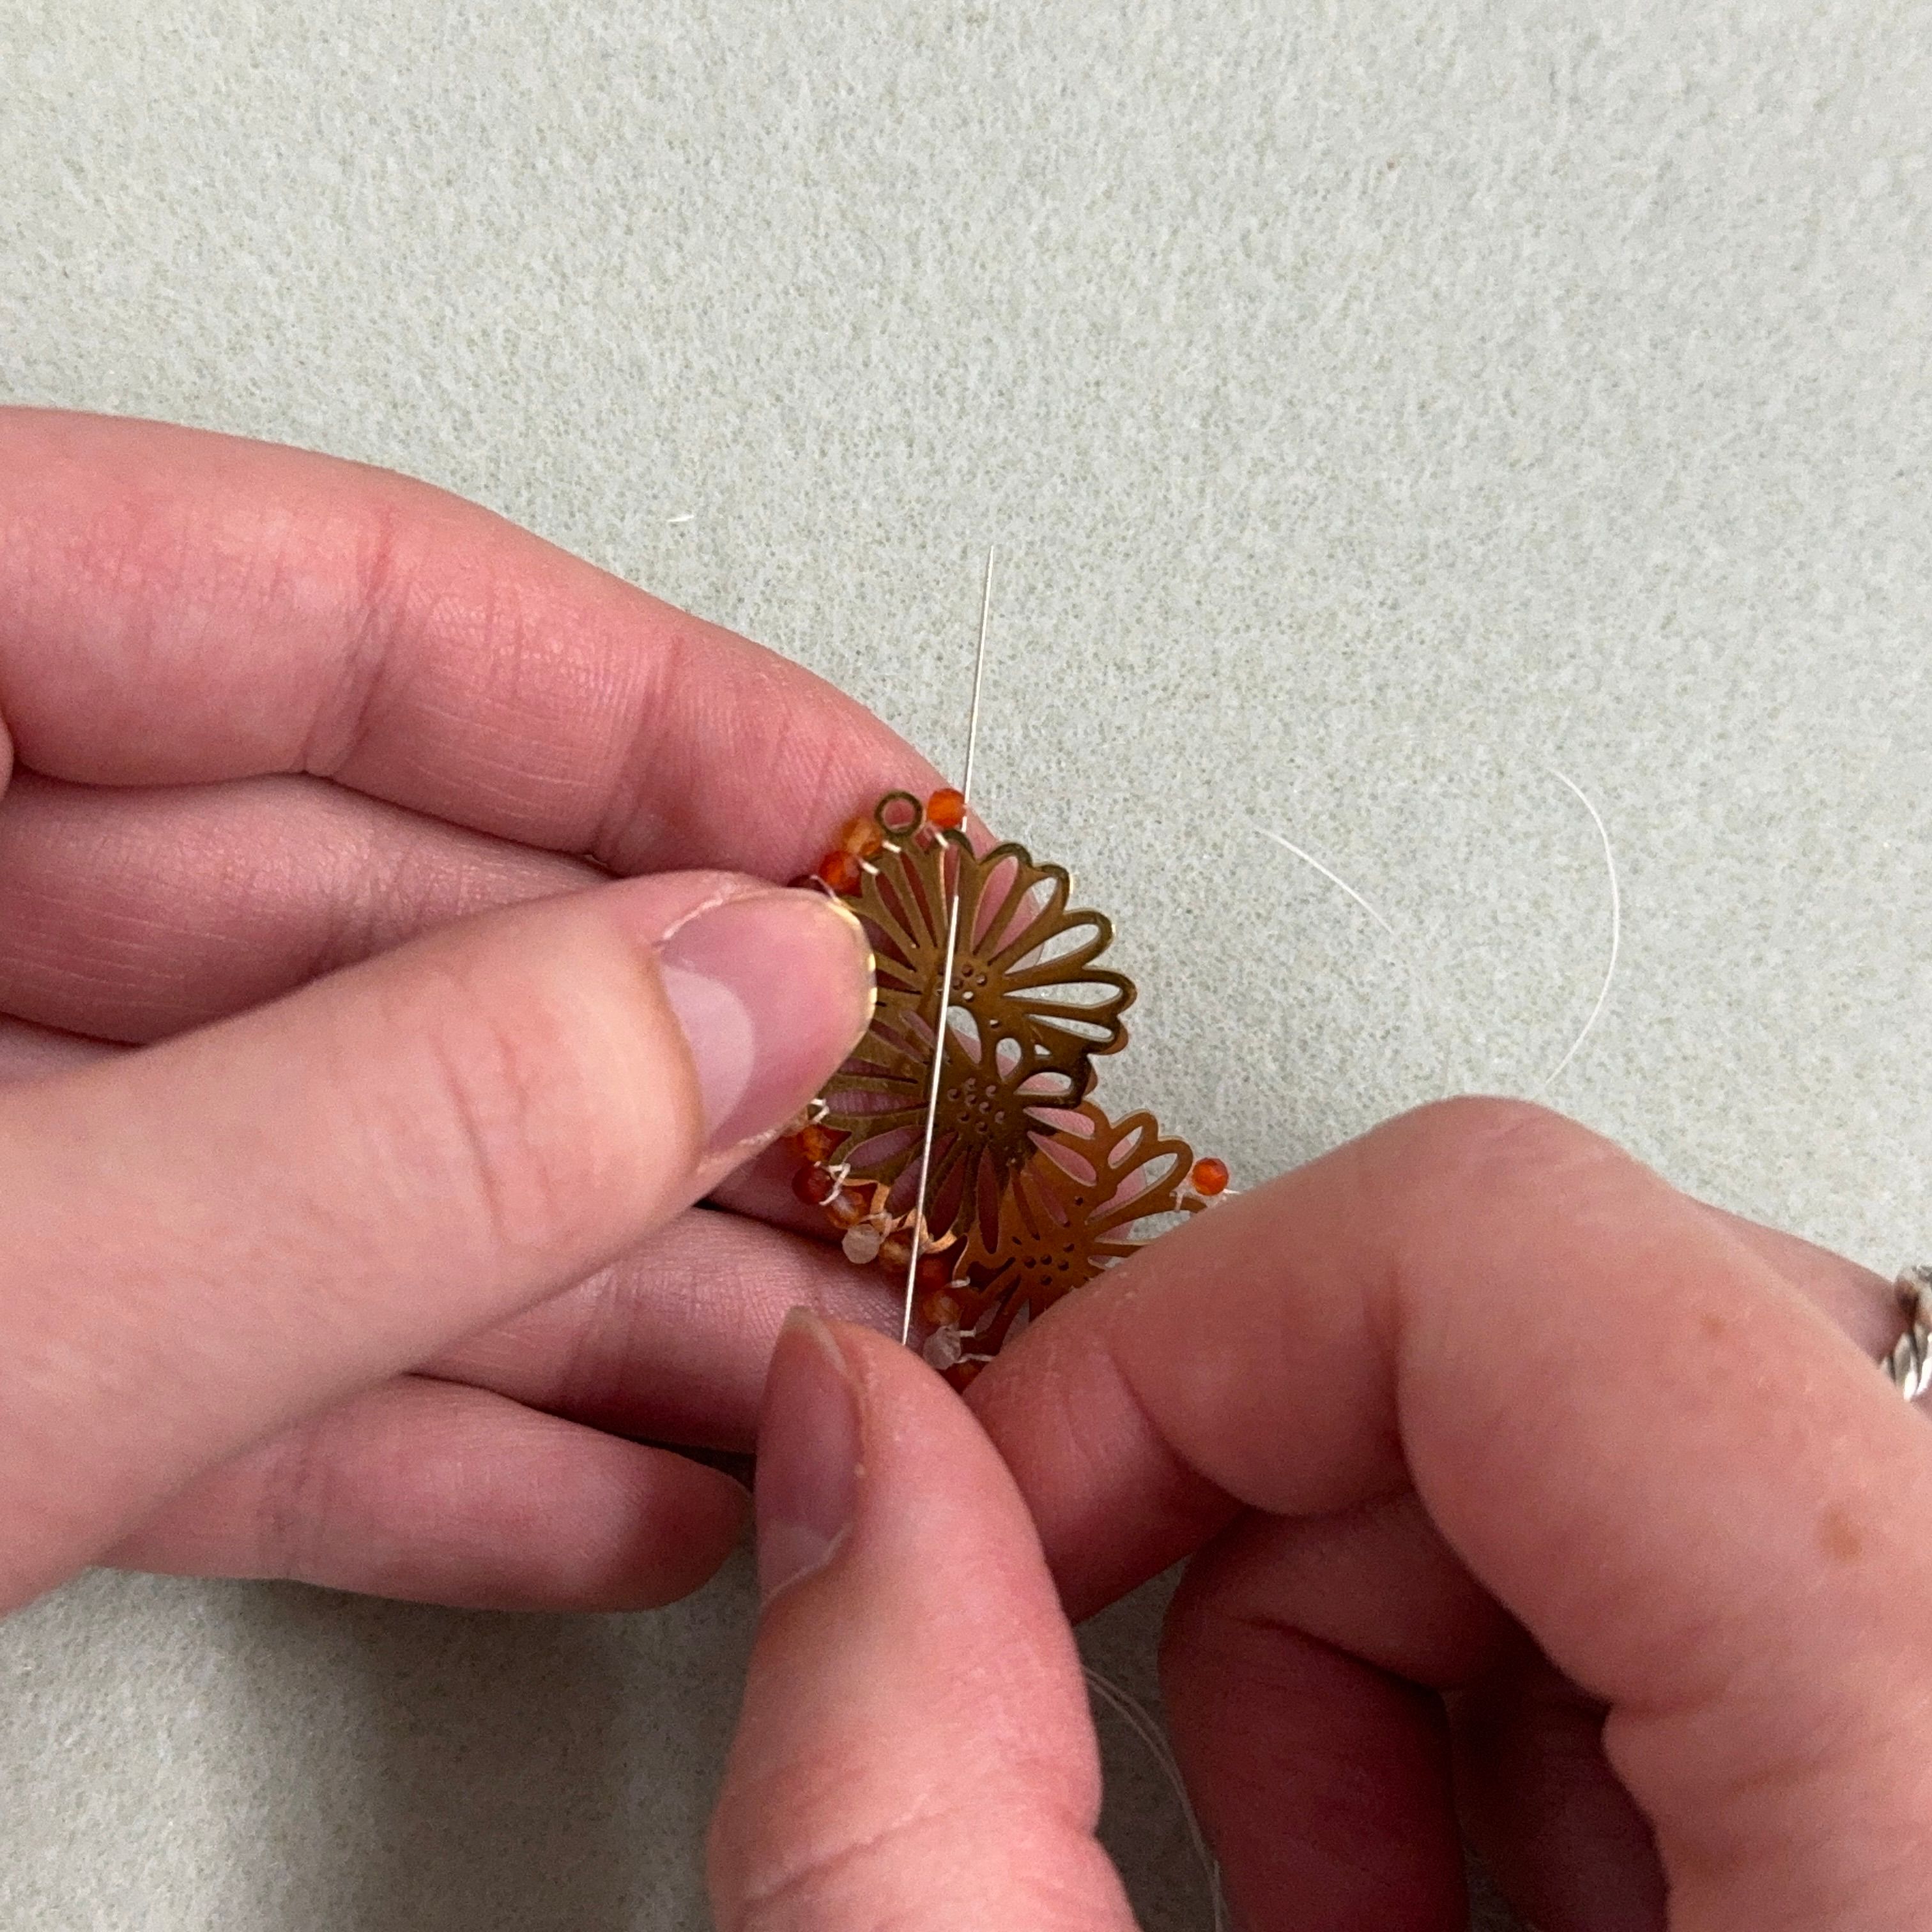
17. Continue the pattern by adding another bead and threading the needle through the petal (away from you)
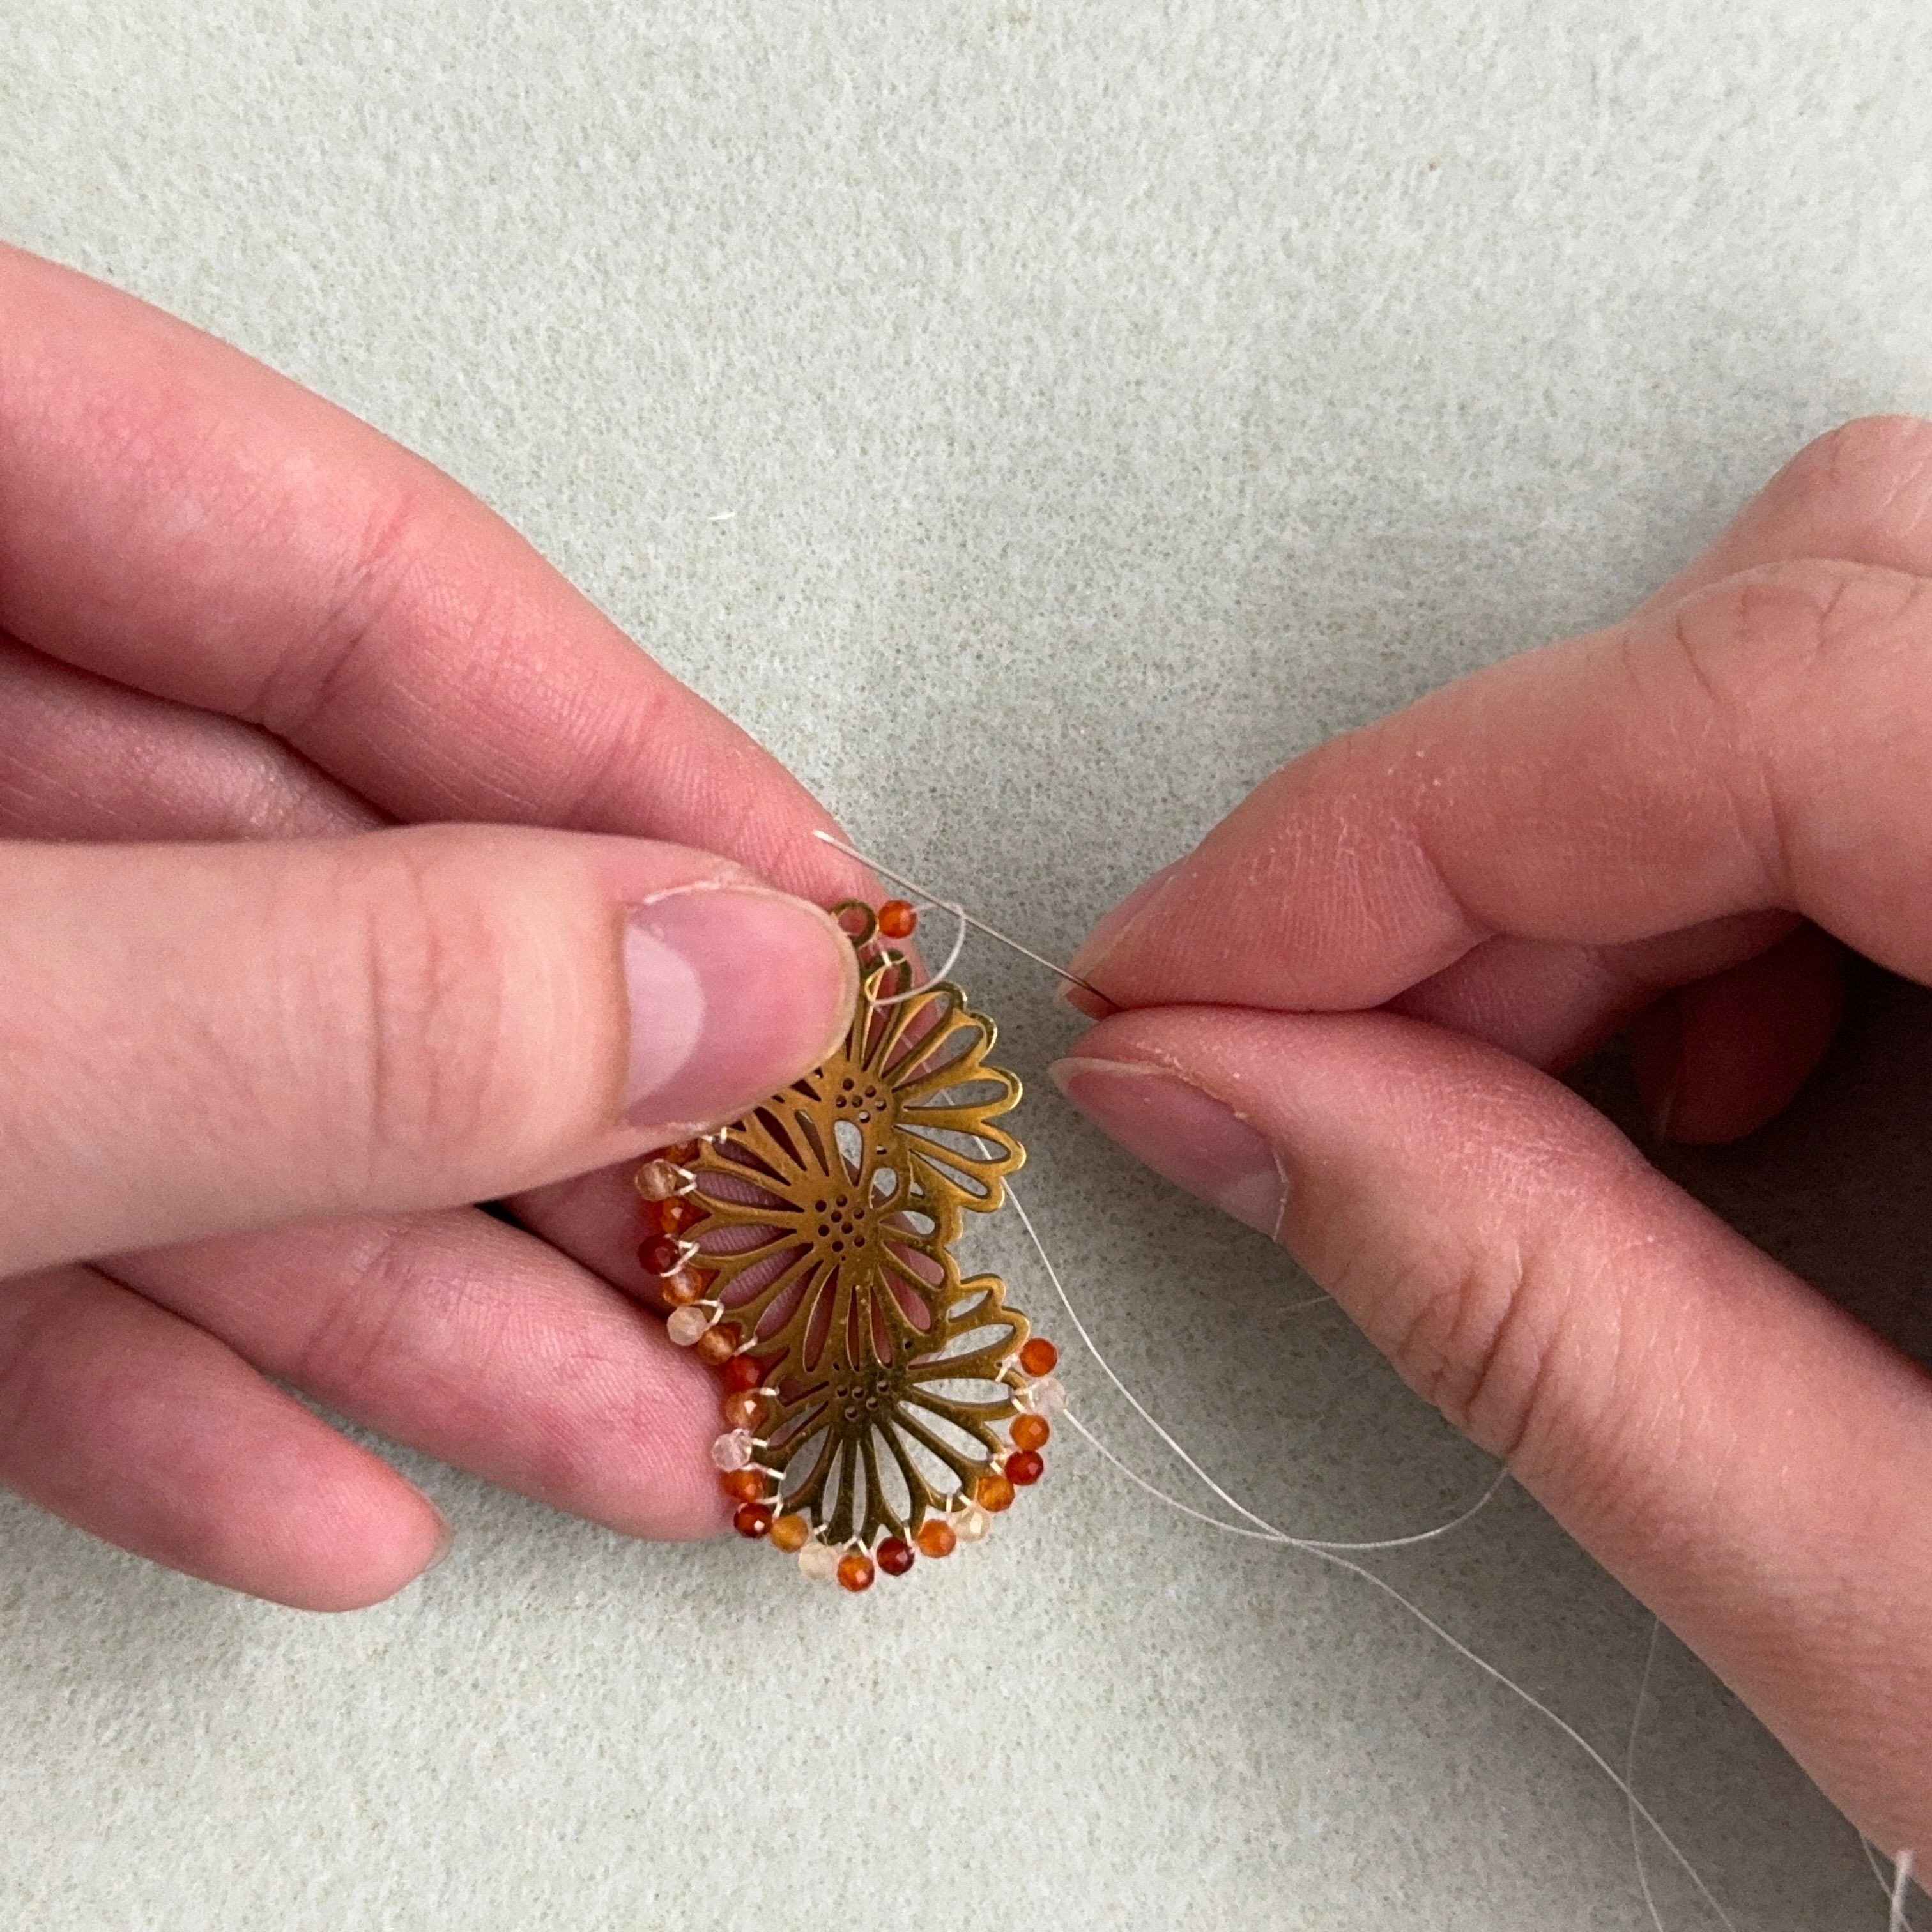
18. Then threading the needle through the loop (towards you) and pulling tight
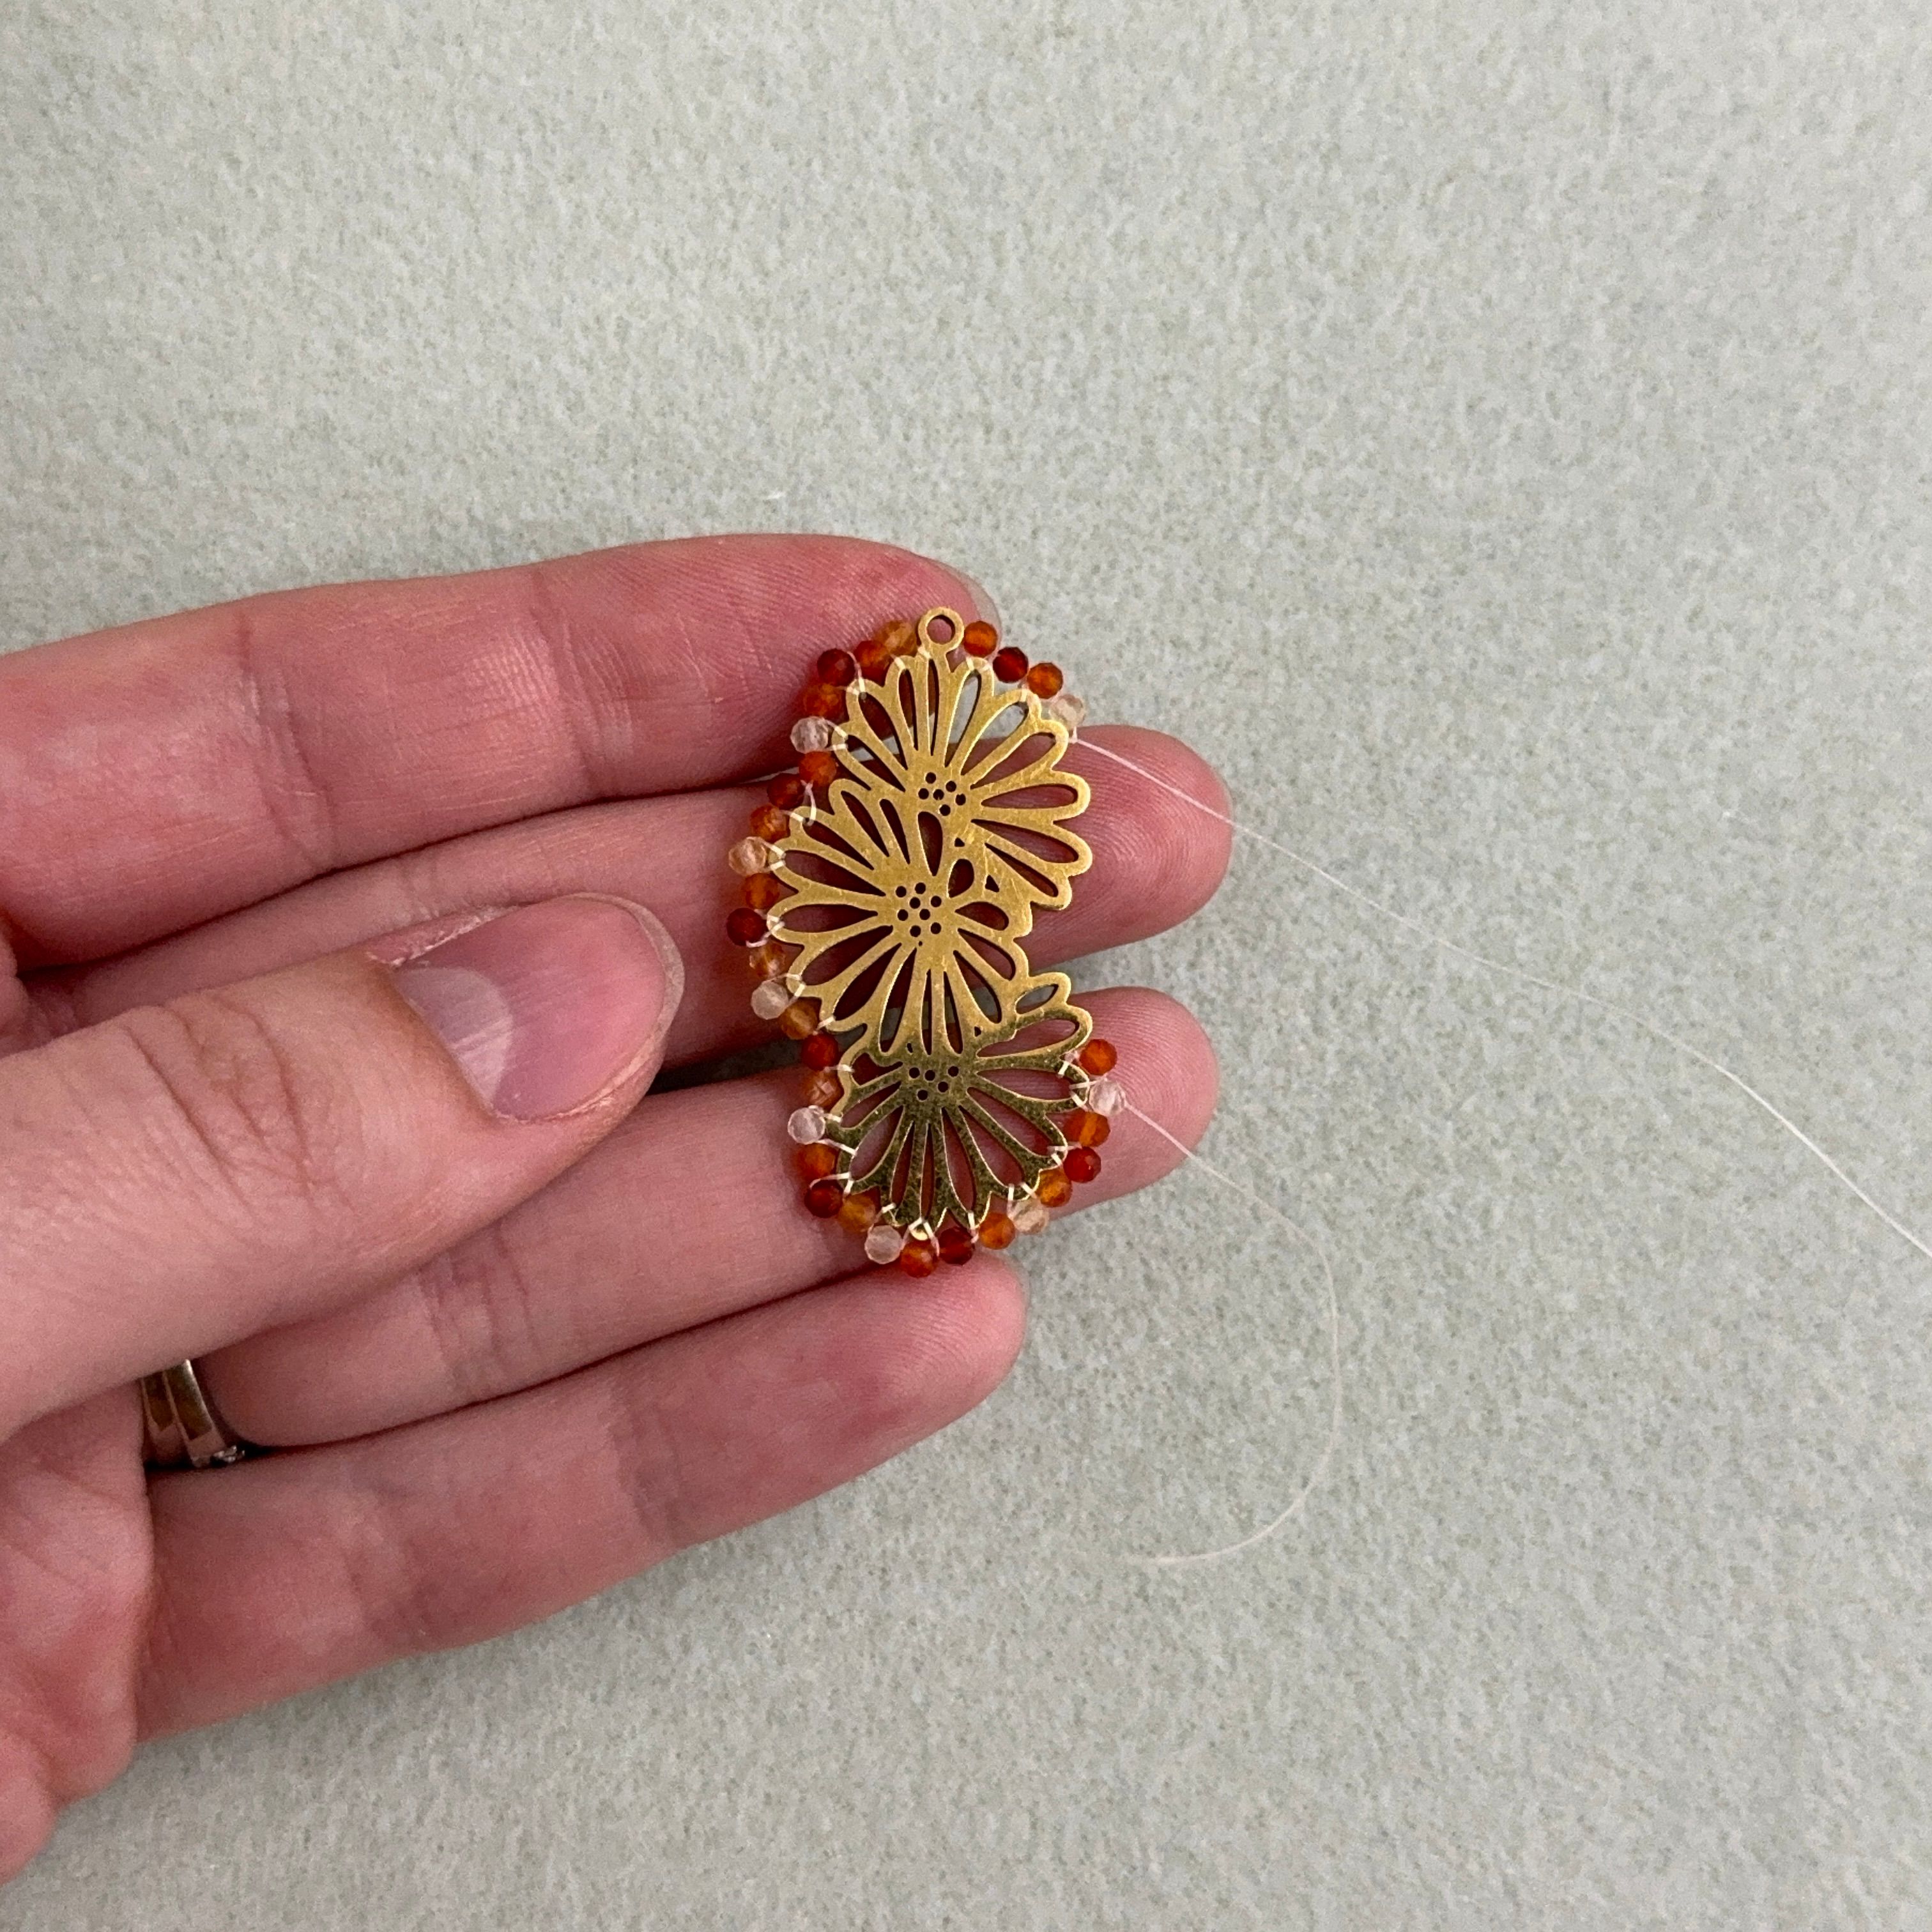
19. Keep going with your pattern
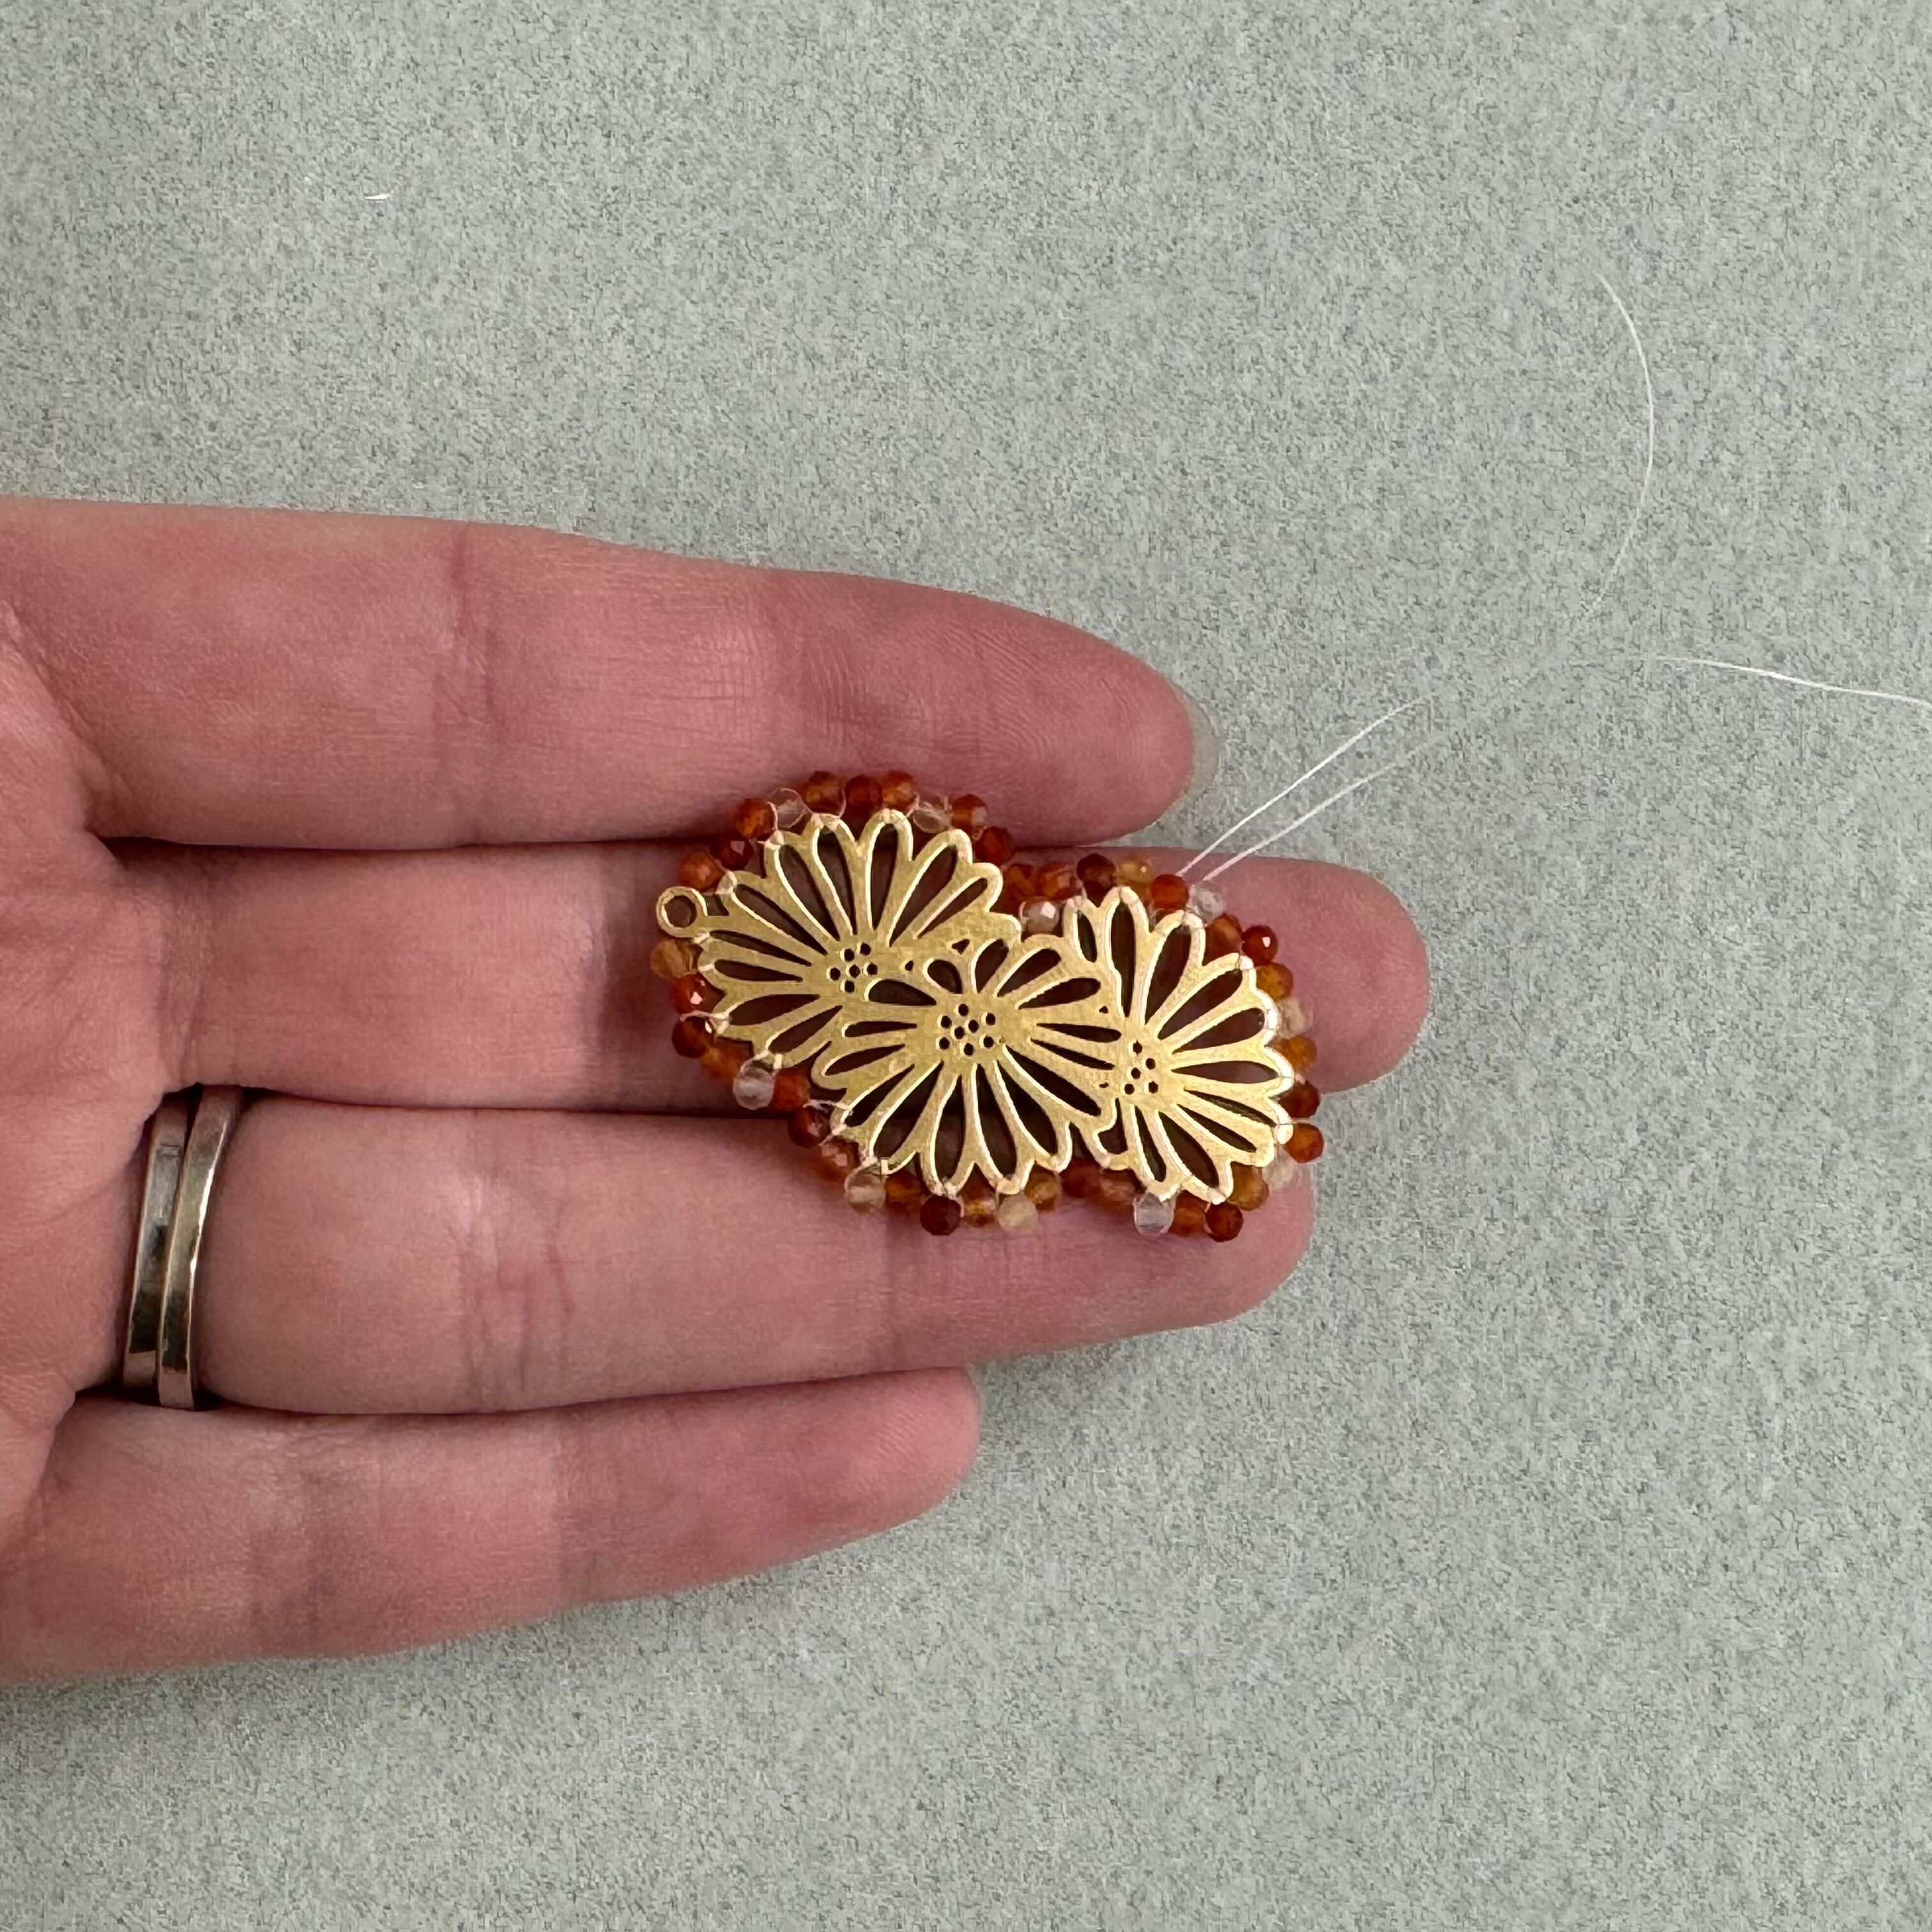
20. Your project will look like this once you are done stitching.
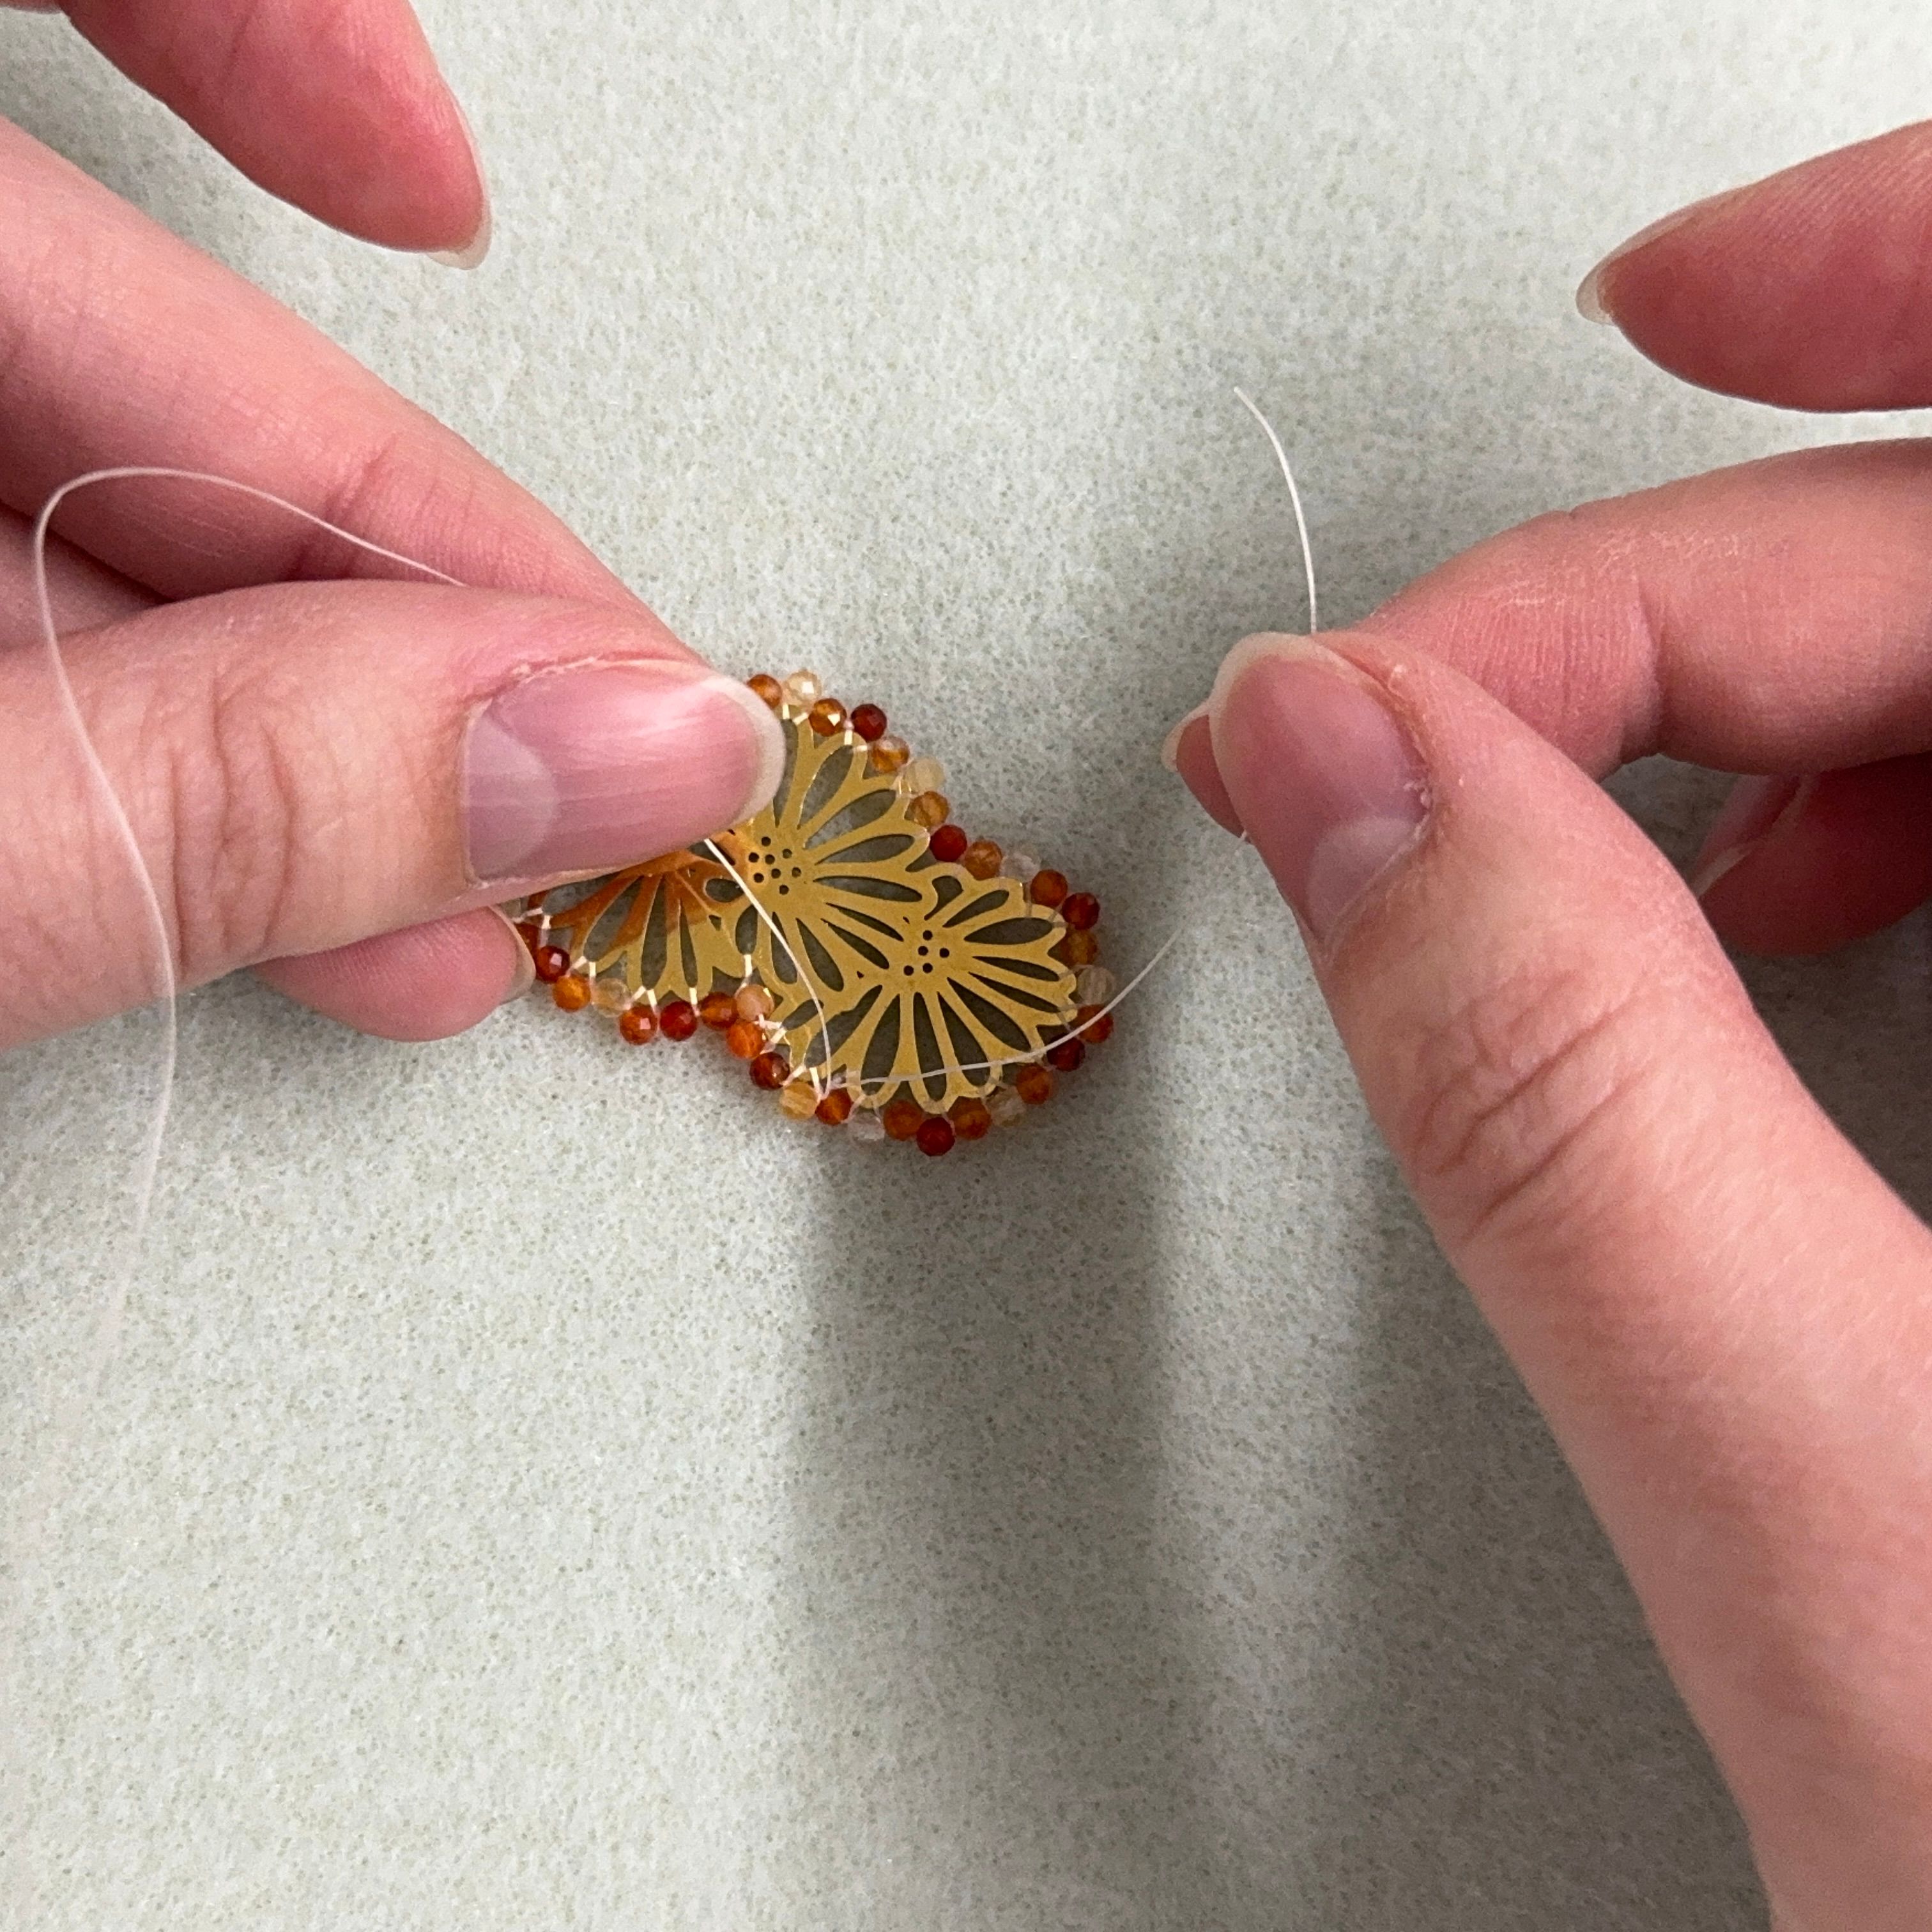
21. Turn your project around and grab the two threads (take the needle off the one end)
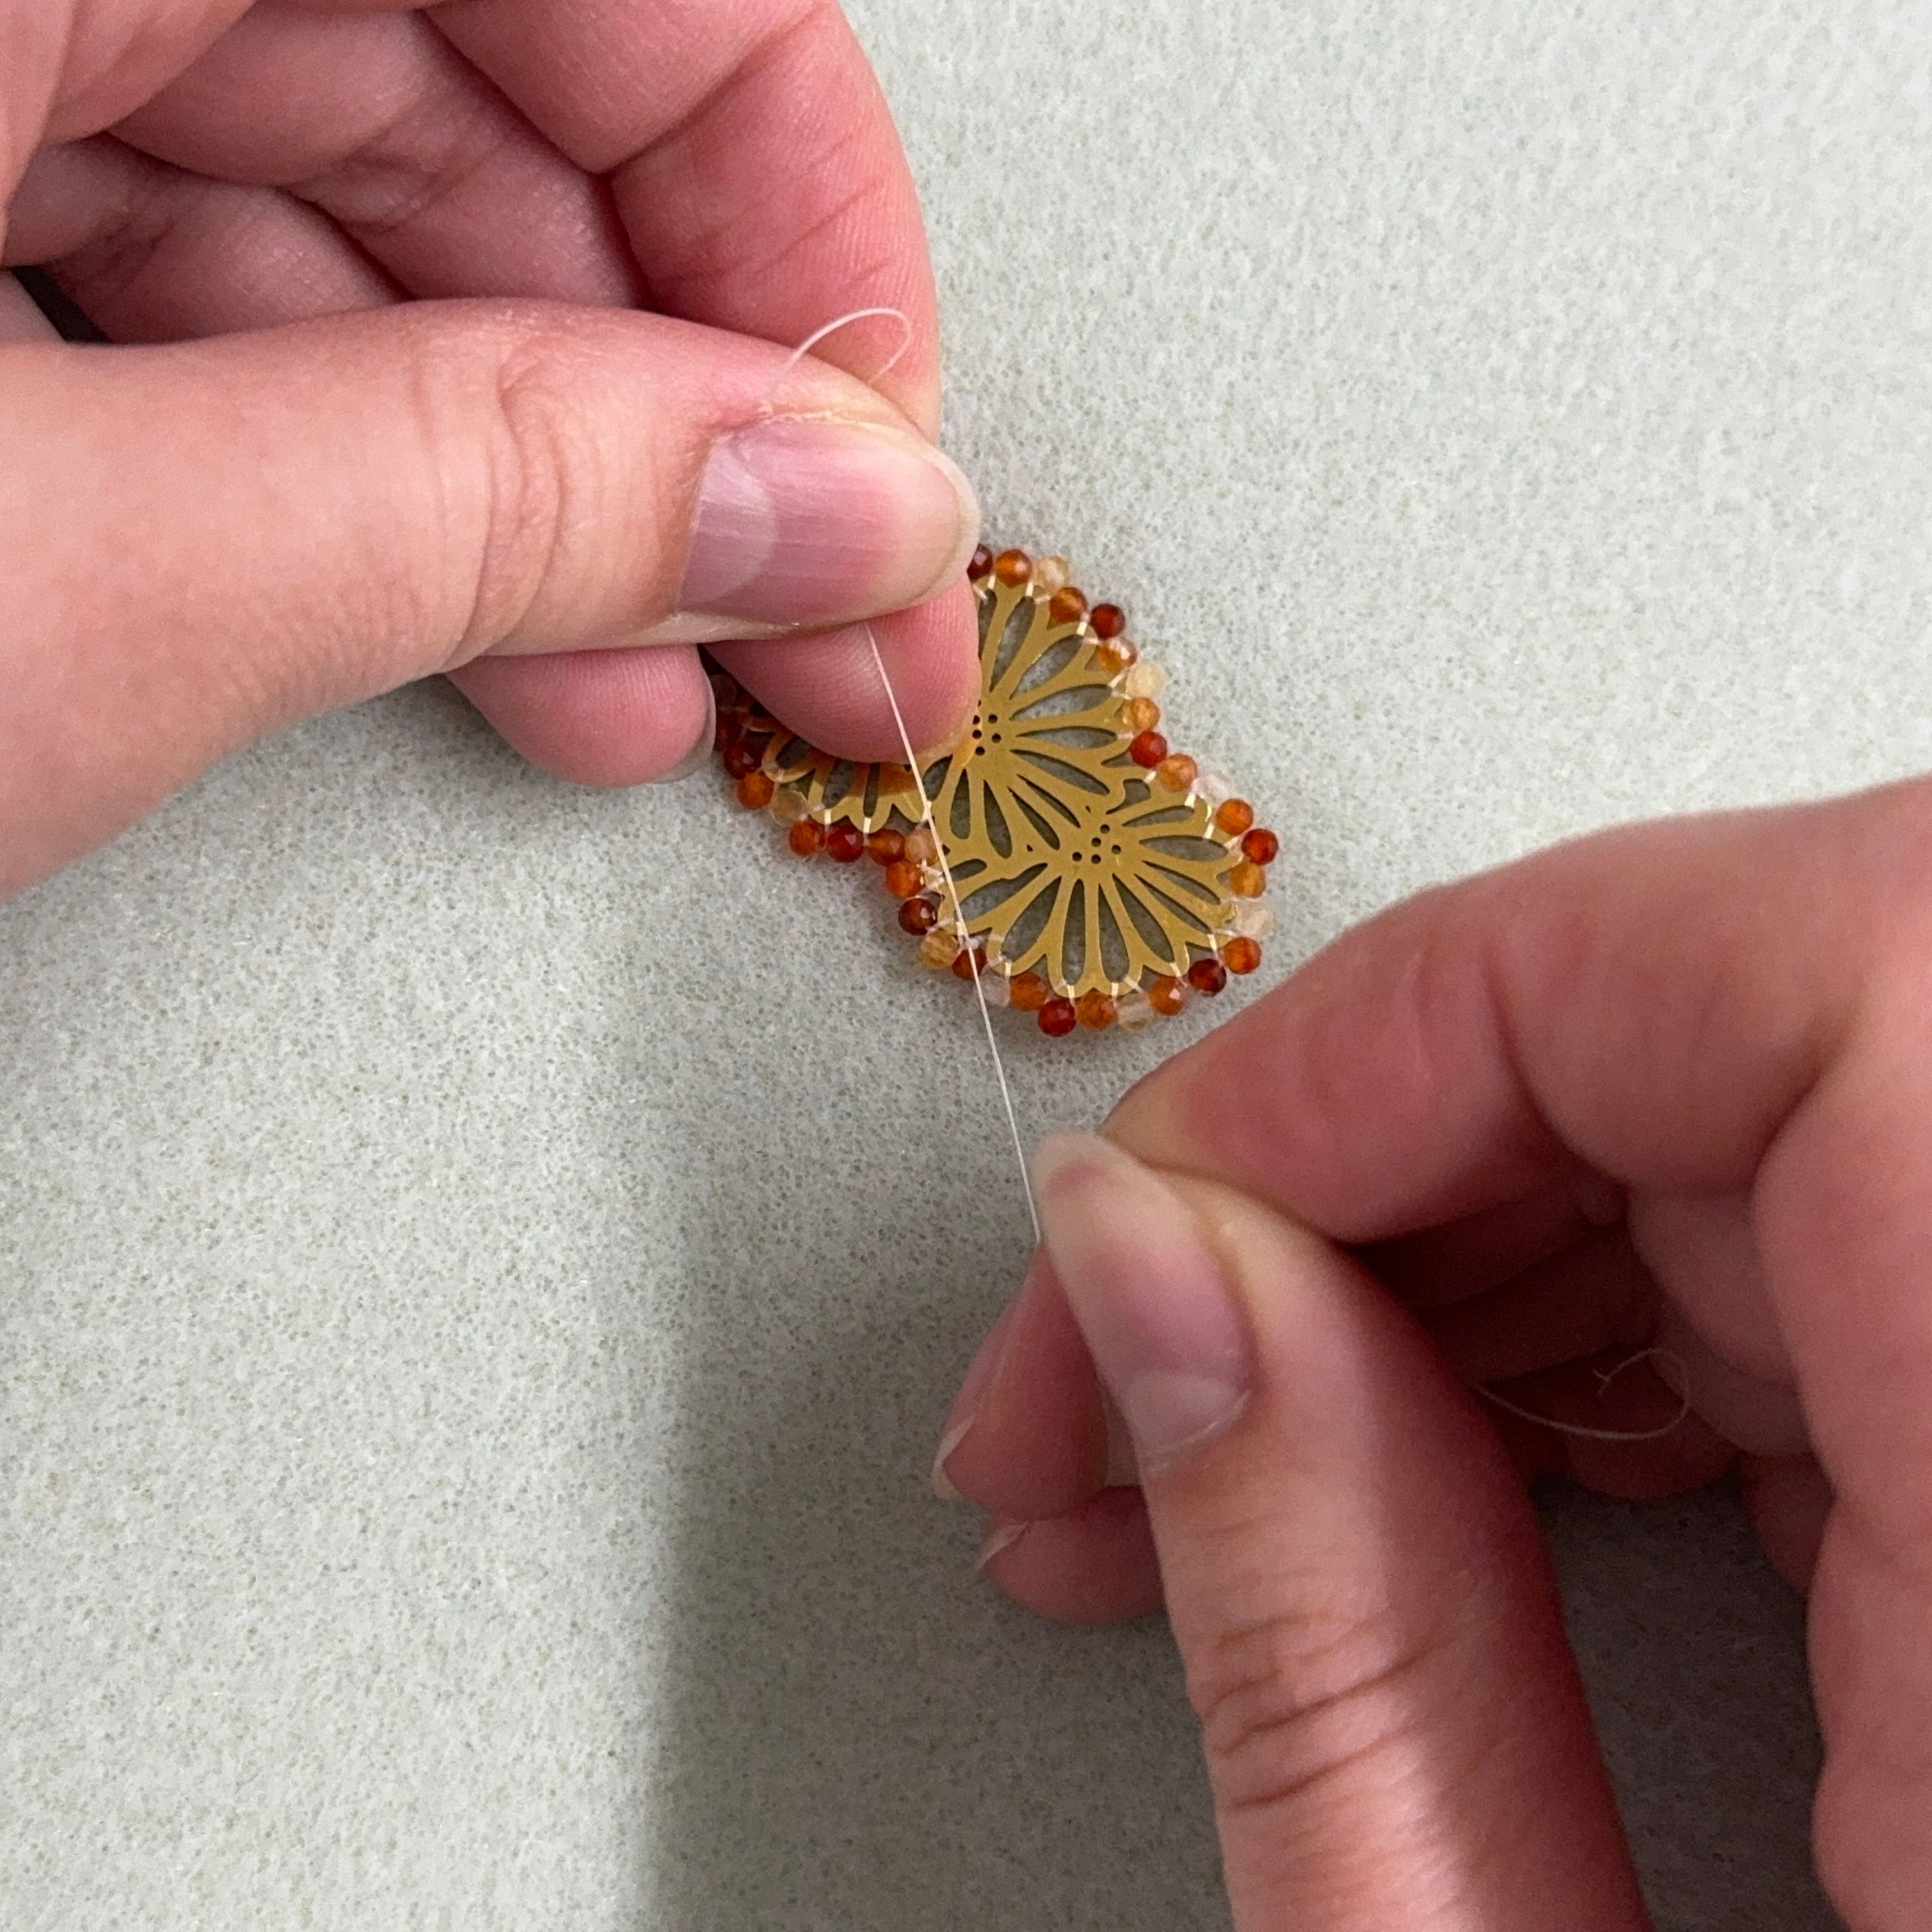
22. Tie 3 knots
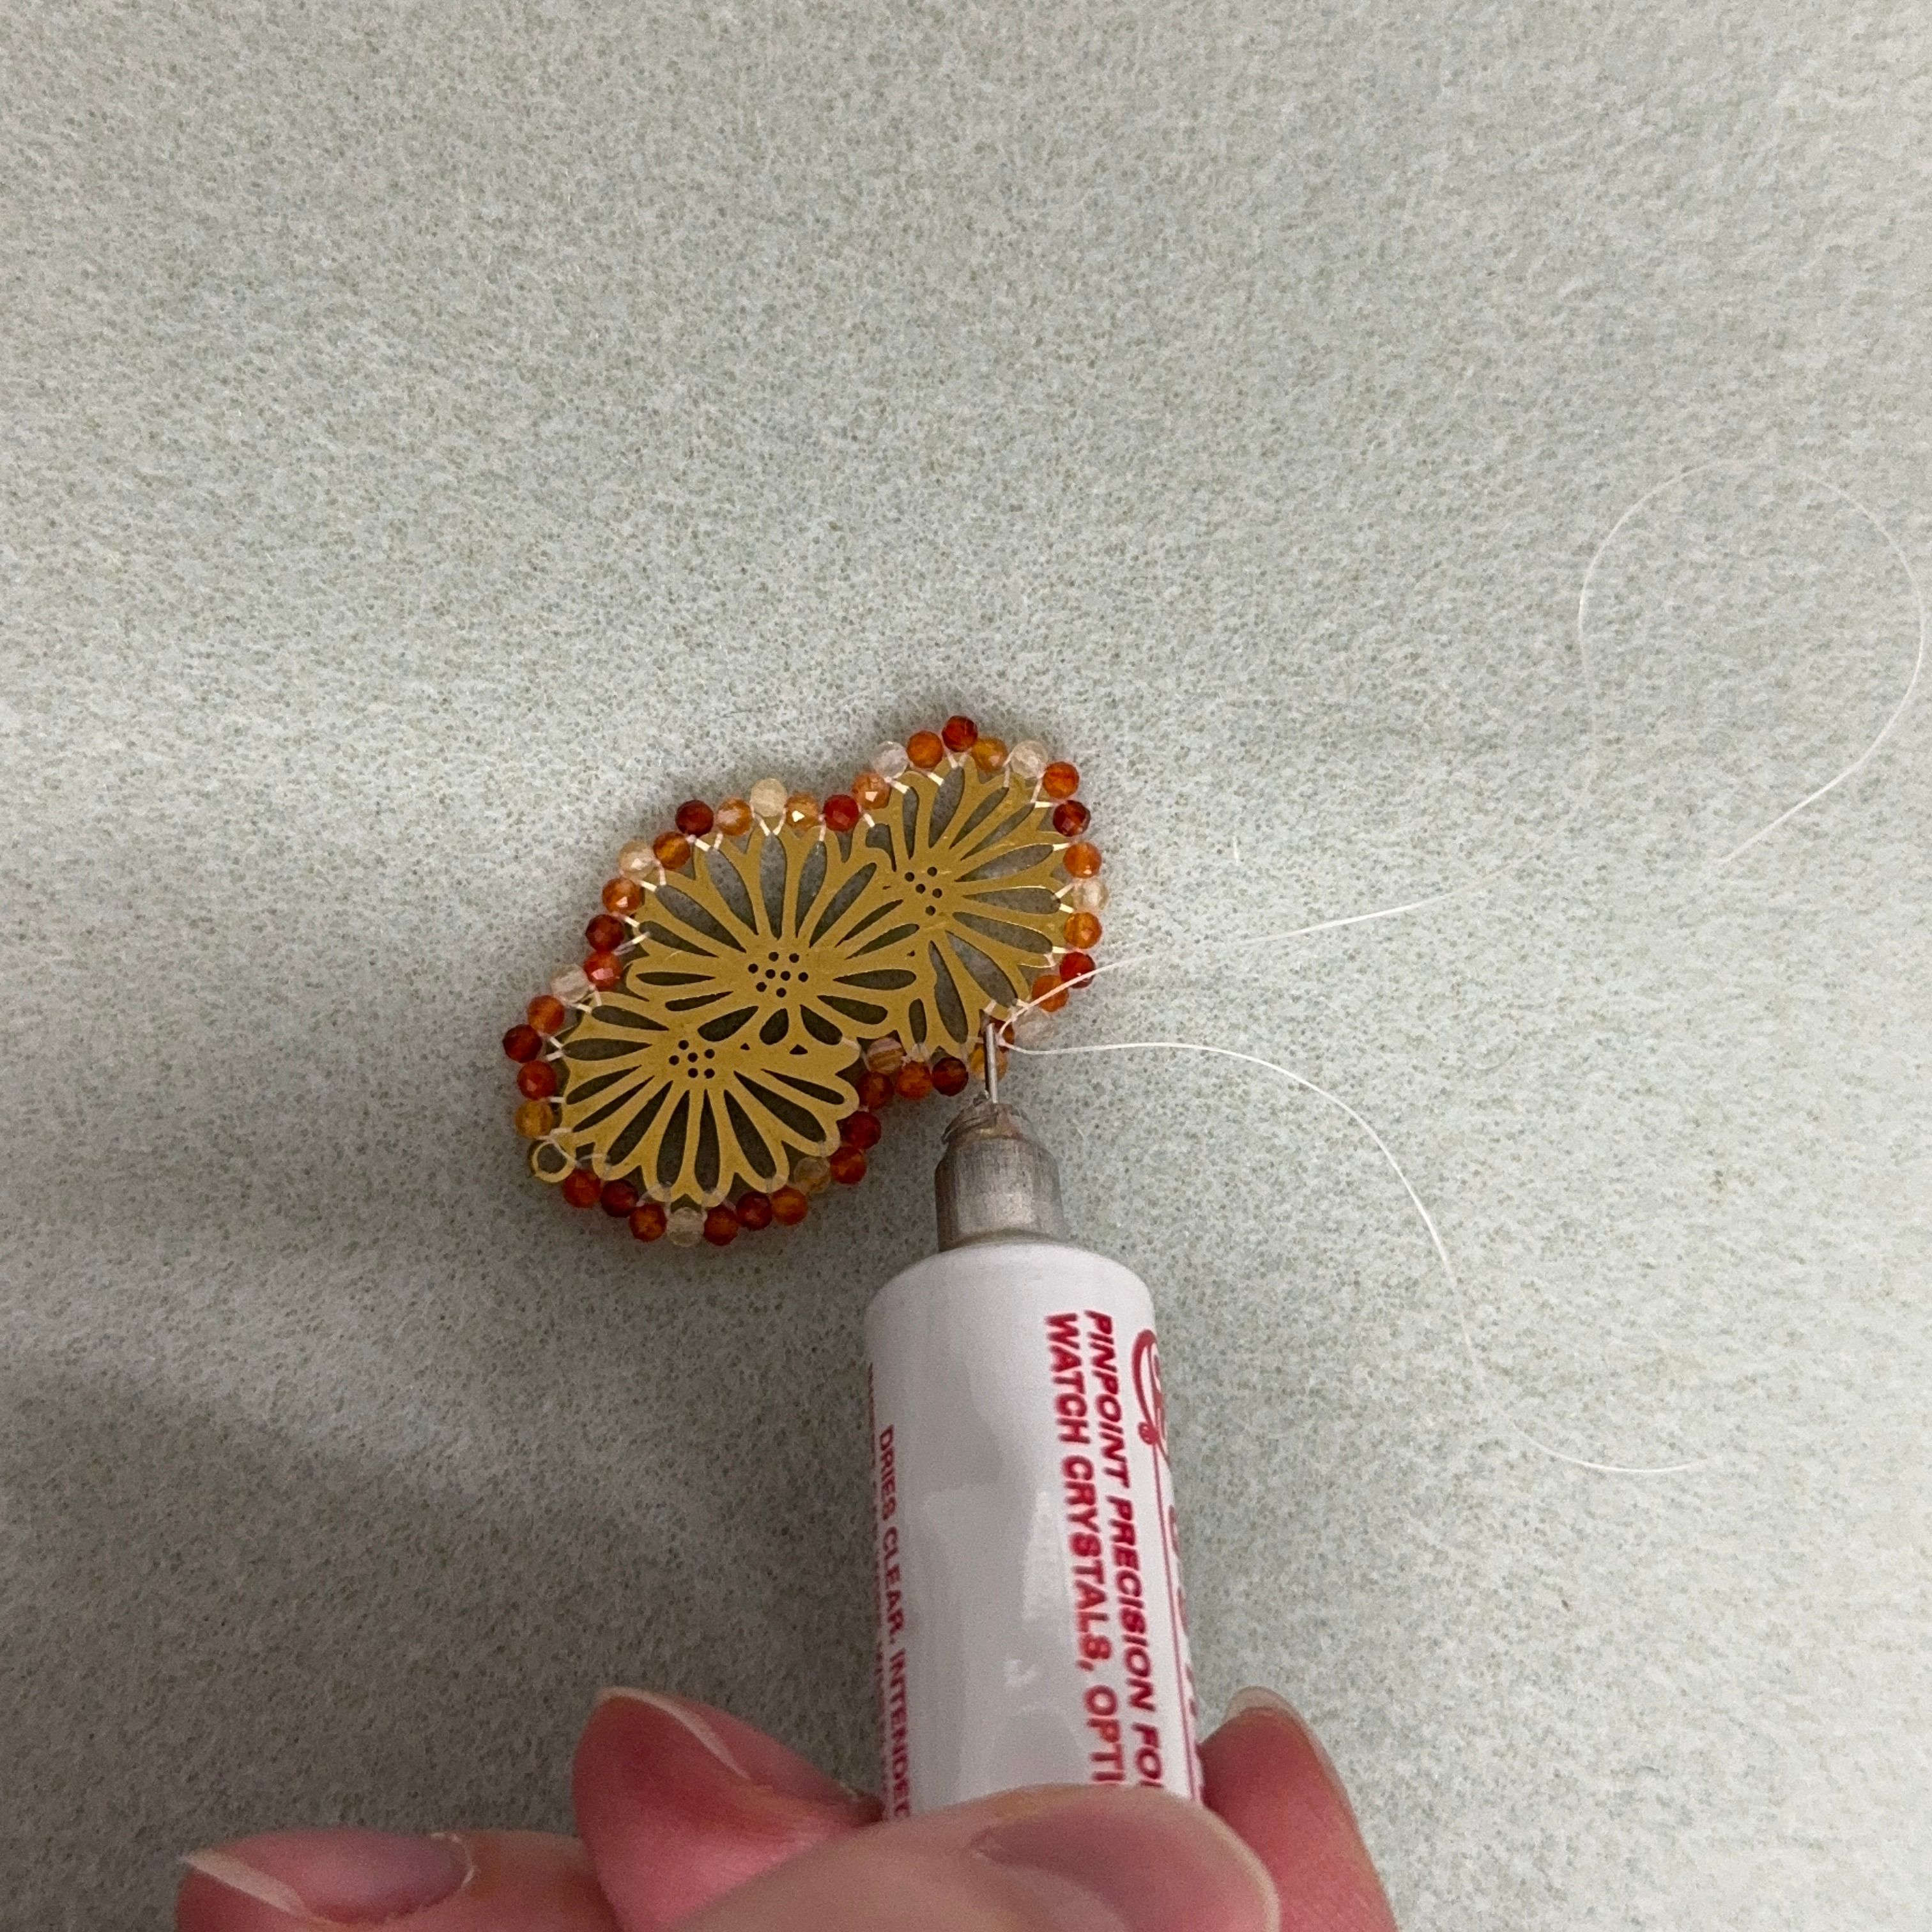
23. Dab a tiny amount of gs hypo cement on the knot and after drying, cut the ends as close to the knot as you can
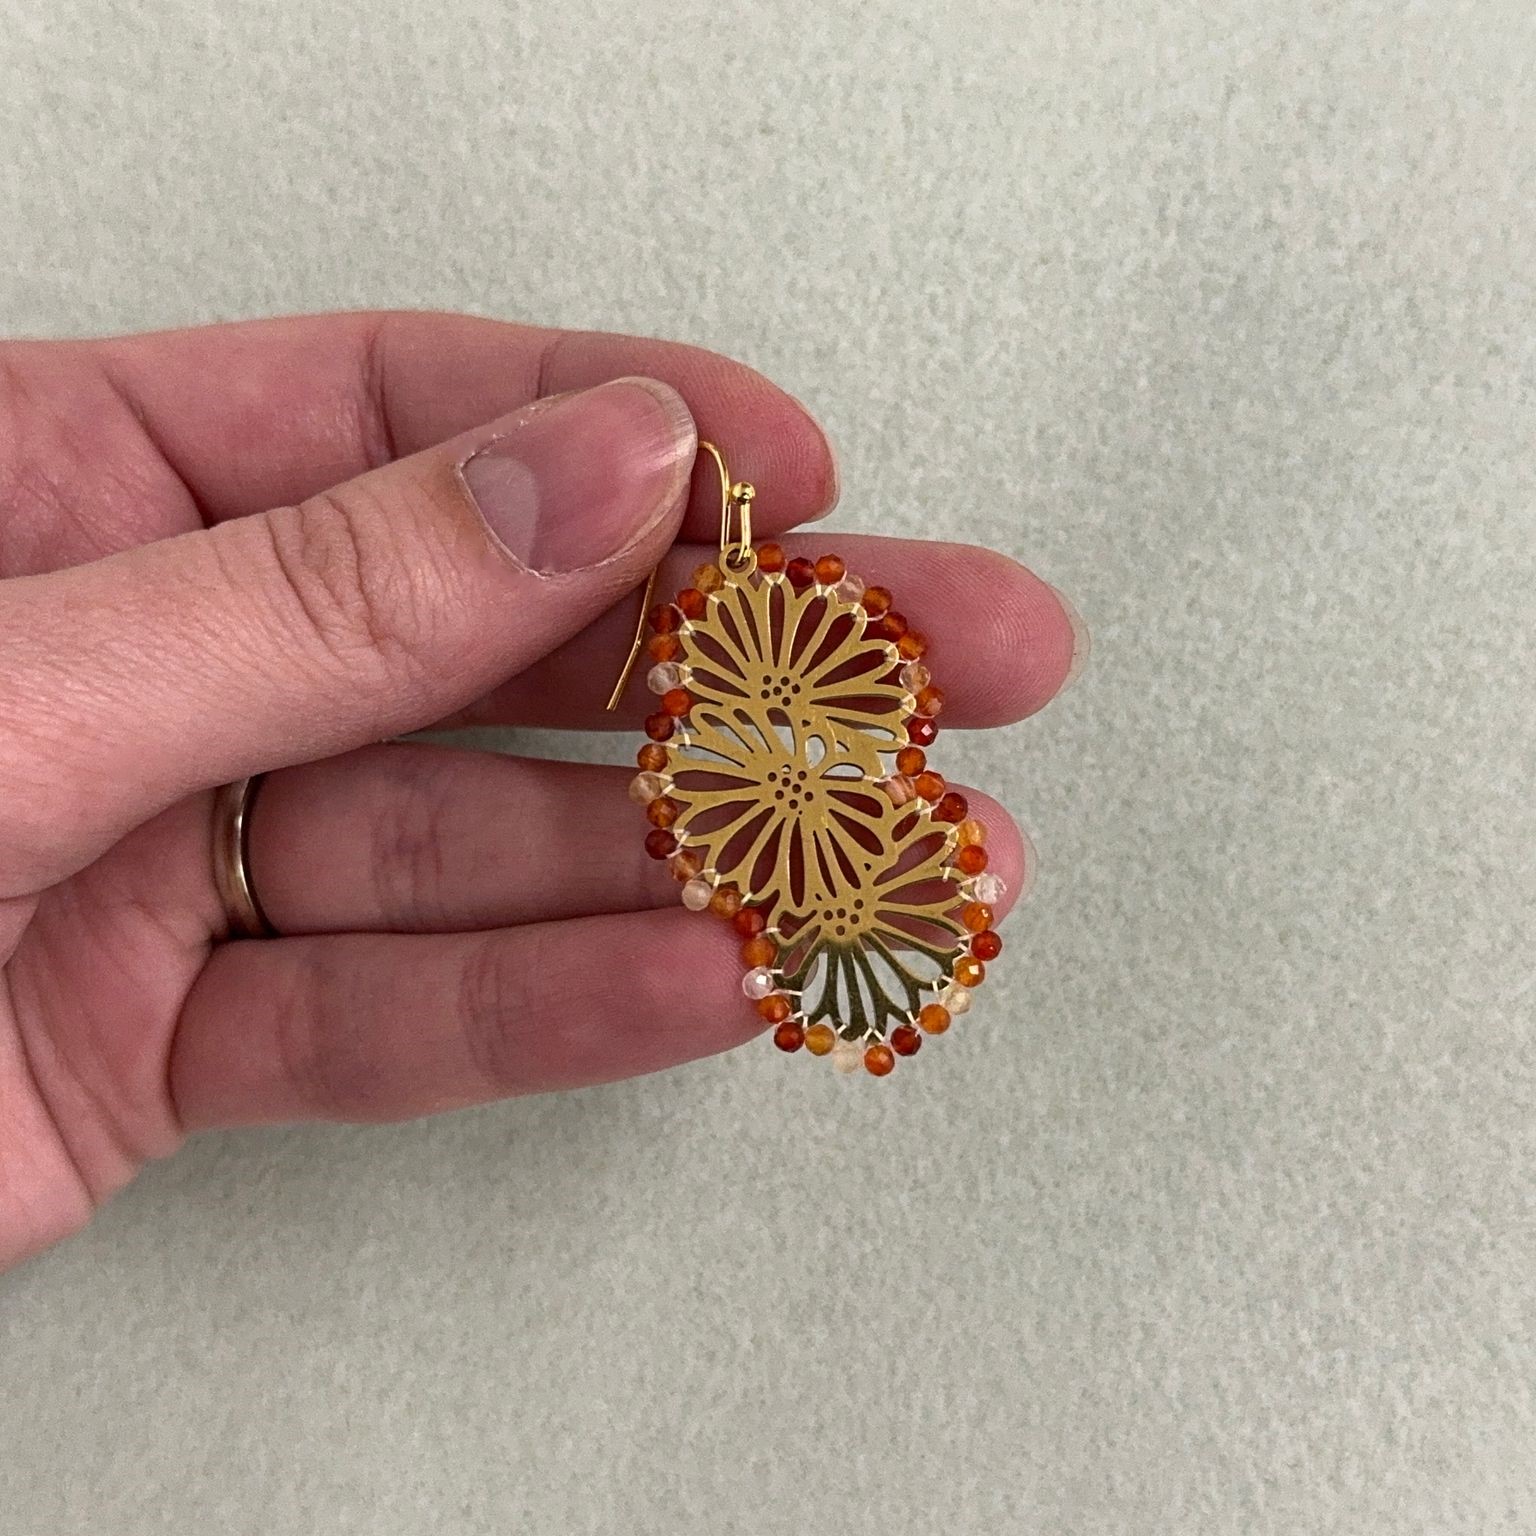
24. Add on your earring wire - you can use a pair of pliers to close the loop. Repeat the steps above to create a pair of earrings - just flip the daisies for a mirror image
*If you would like to double wrap the carnelian daisies, I would recommend starting the knot at the top by the loop as seen below in the following instructions on how to double thread wrap.
How to Double Thread Wrap
Materials Needed:
- Blue Zircon 2mm Faceted Round (1 strand)
- Stainless Steel 21mm Open Lotus Pendant (1 - use 2 to create earrings)
- Fireline Crystal 6lb (2.5 feet)
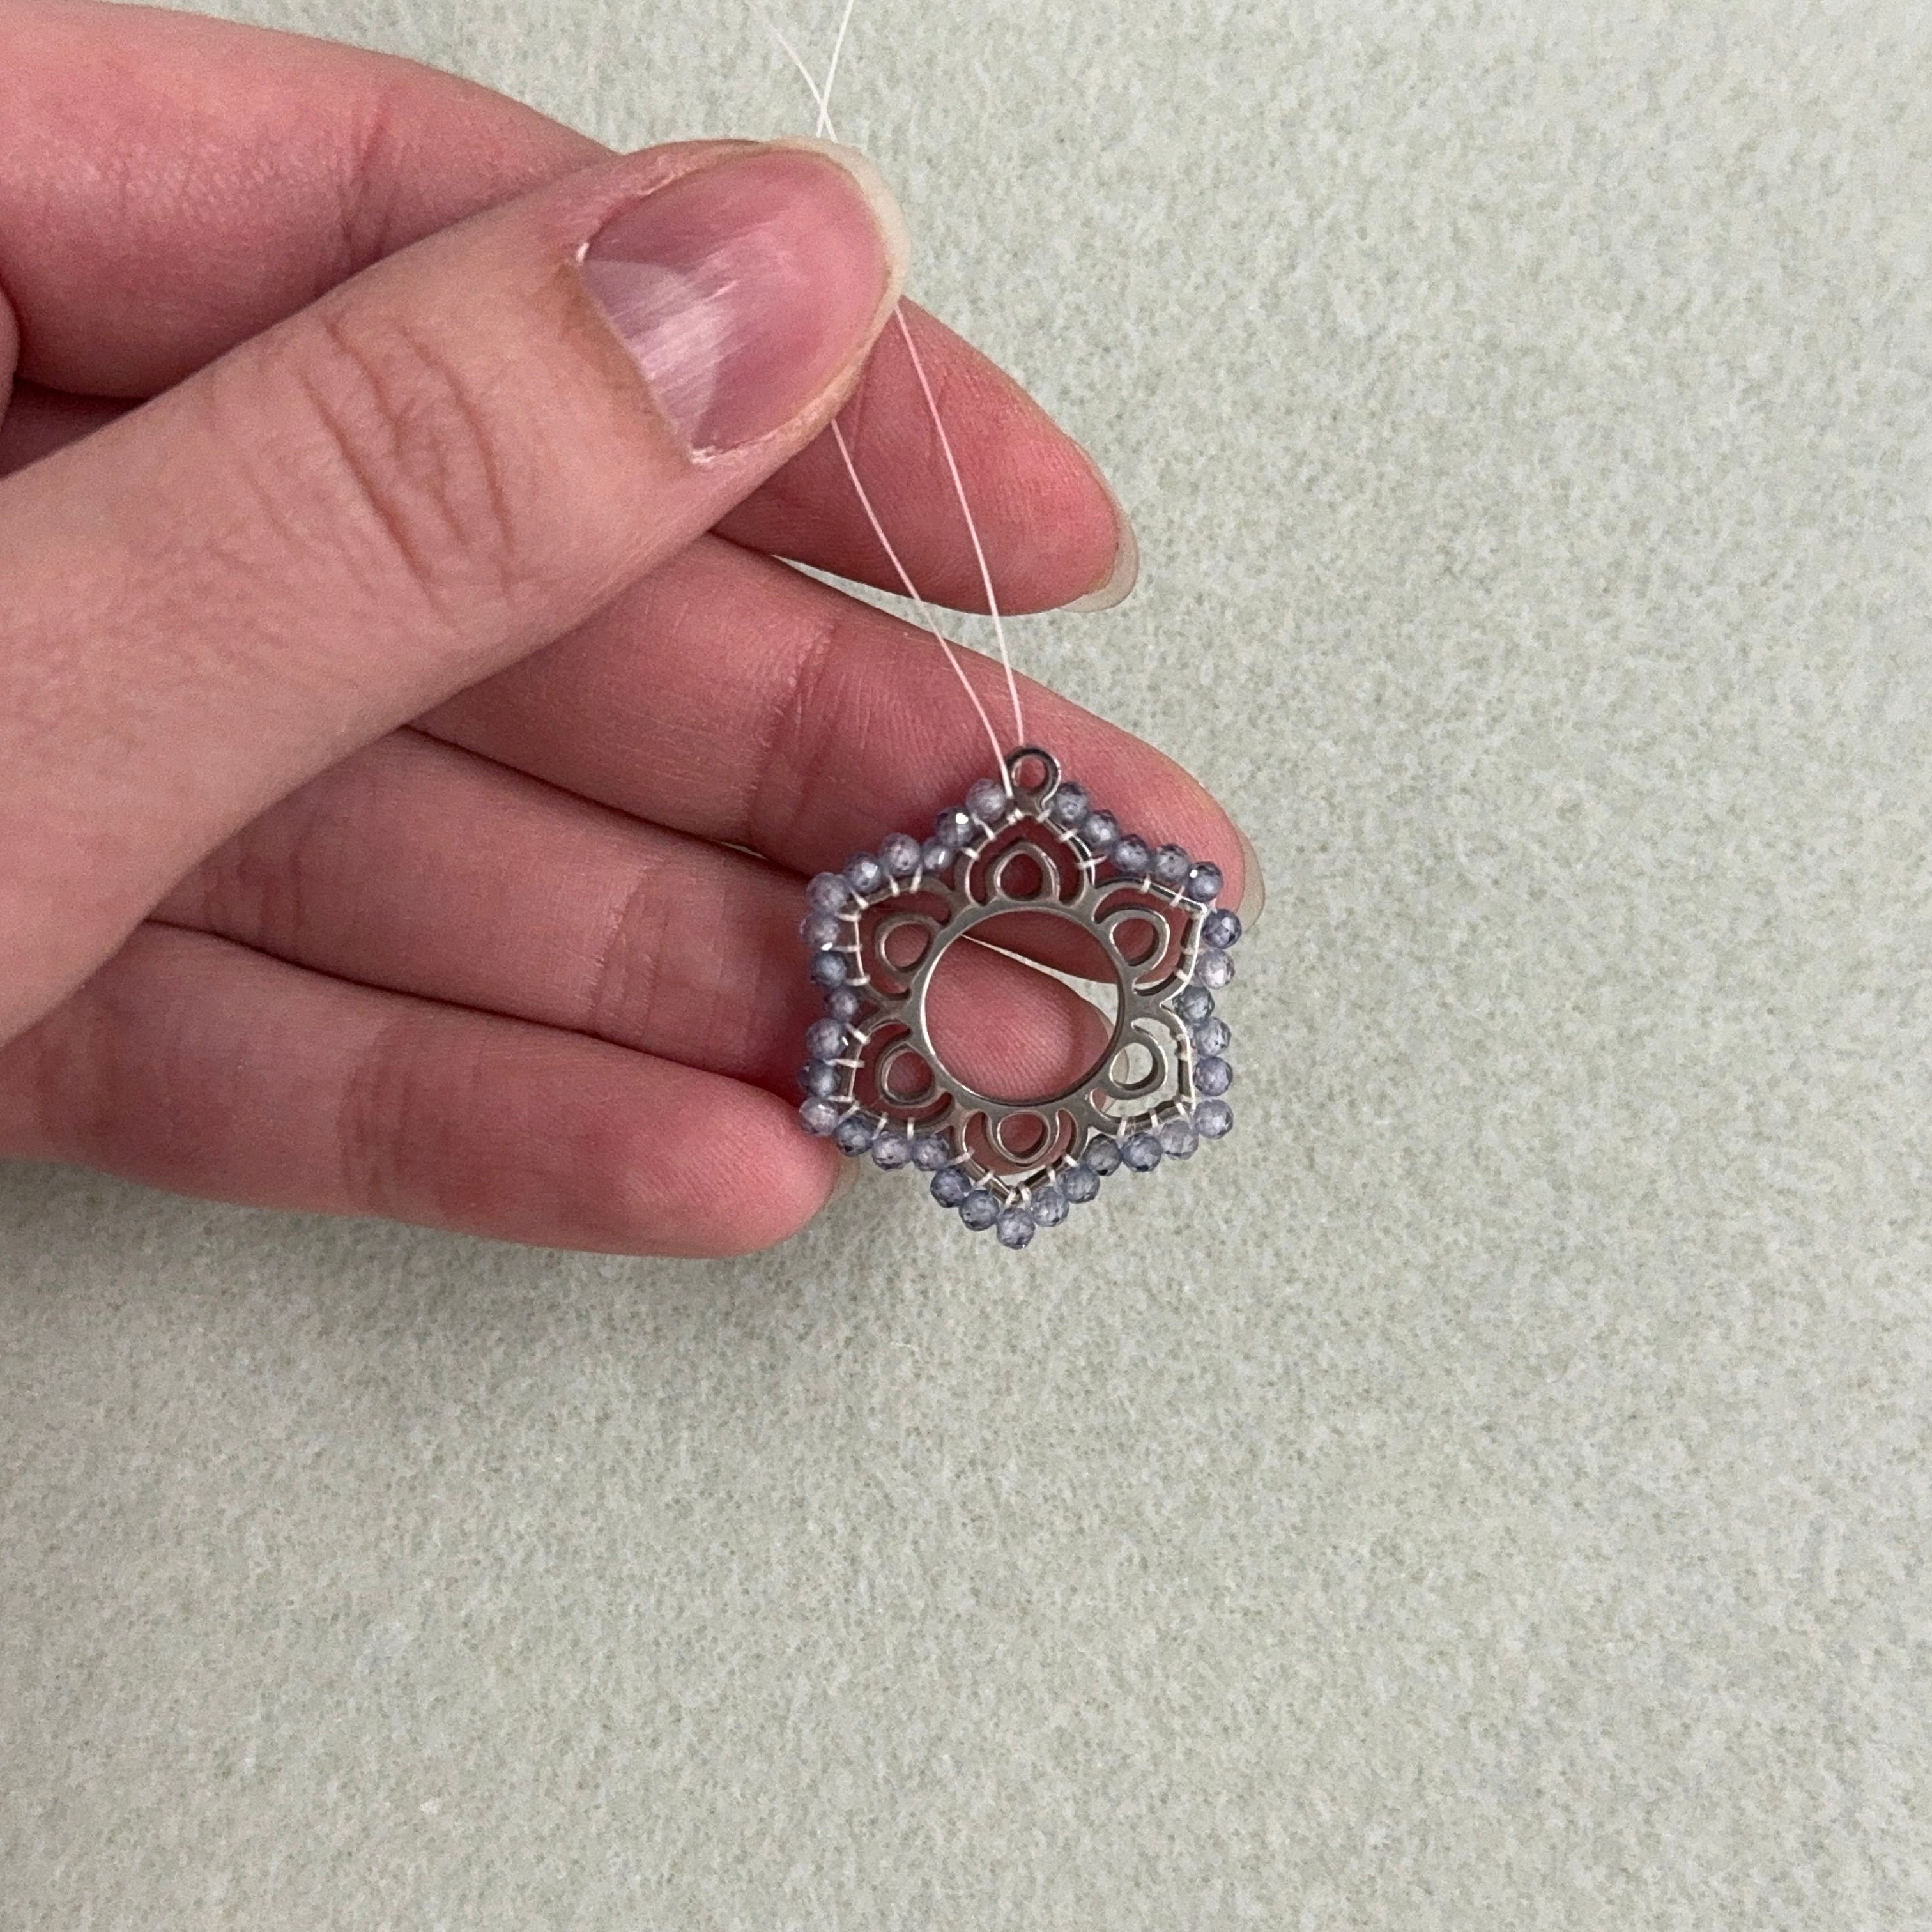
1.Follow the instructions above (except starting at the loop on the right hand side) and wrapping clockwise, make sure to leave about 2-3 inches of fireline to knot at the end
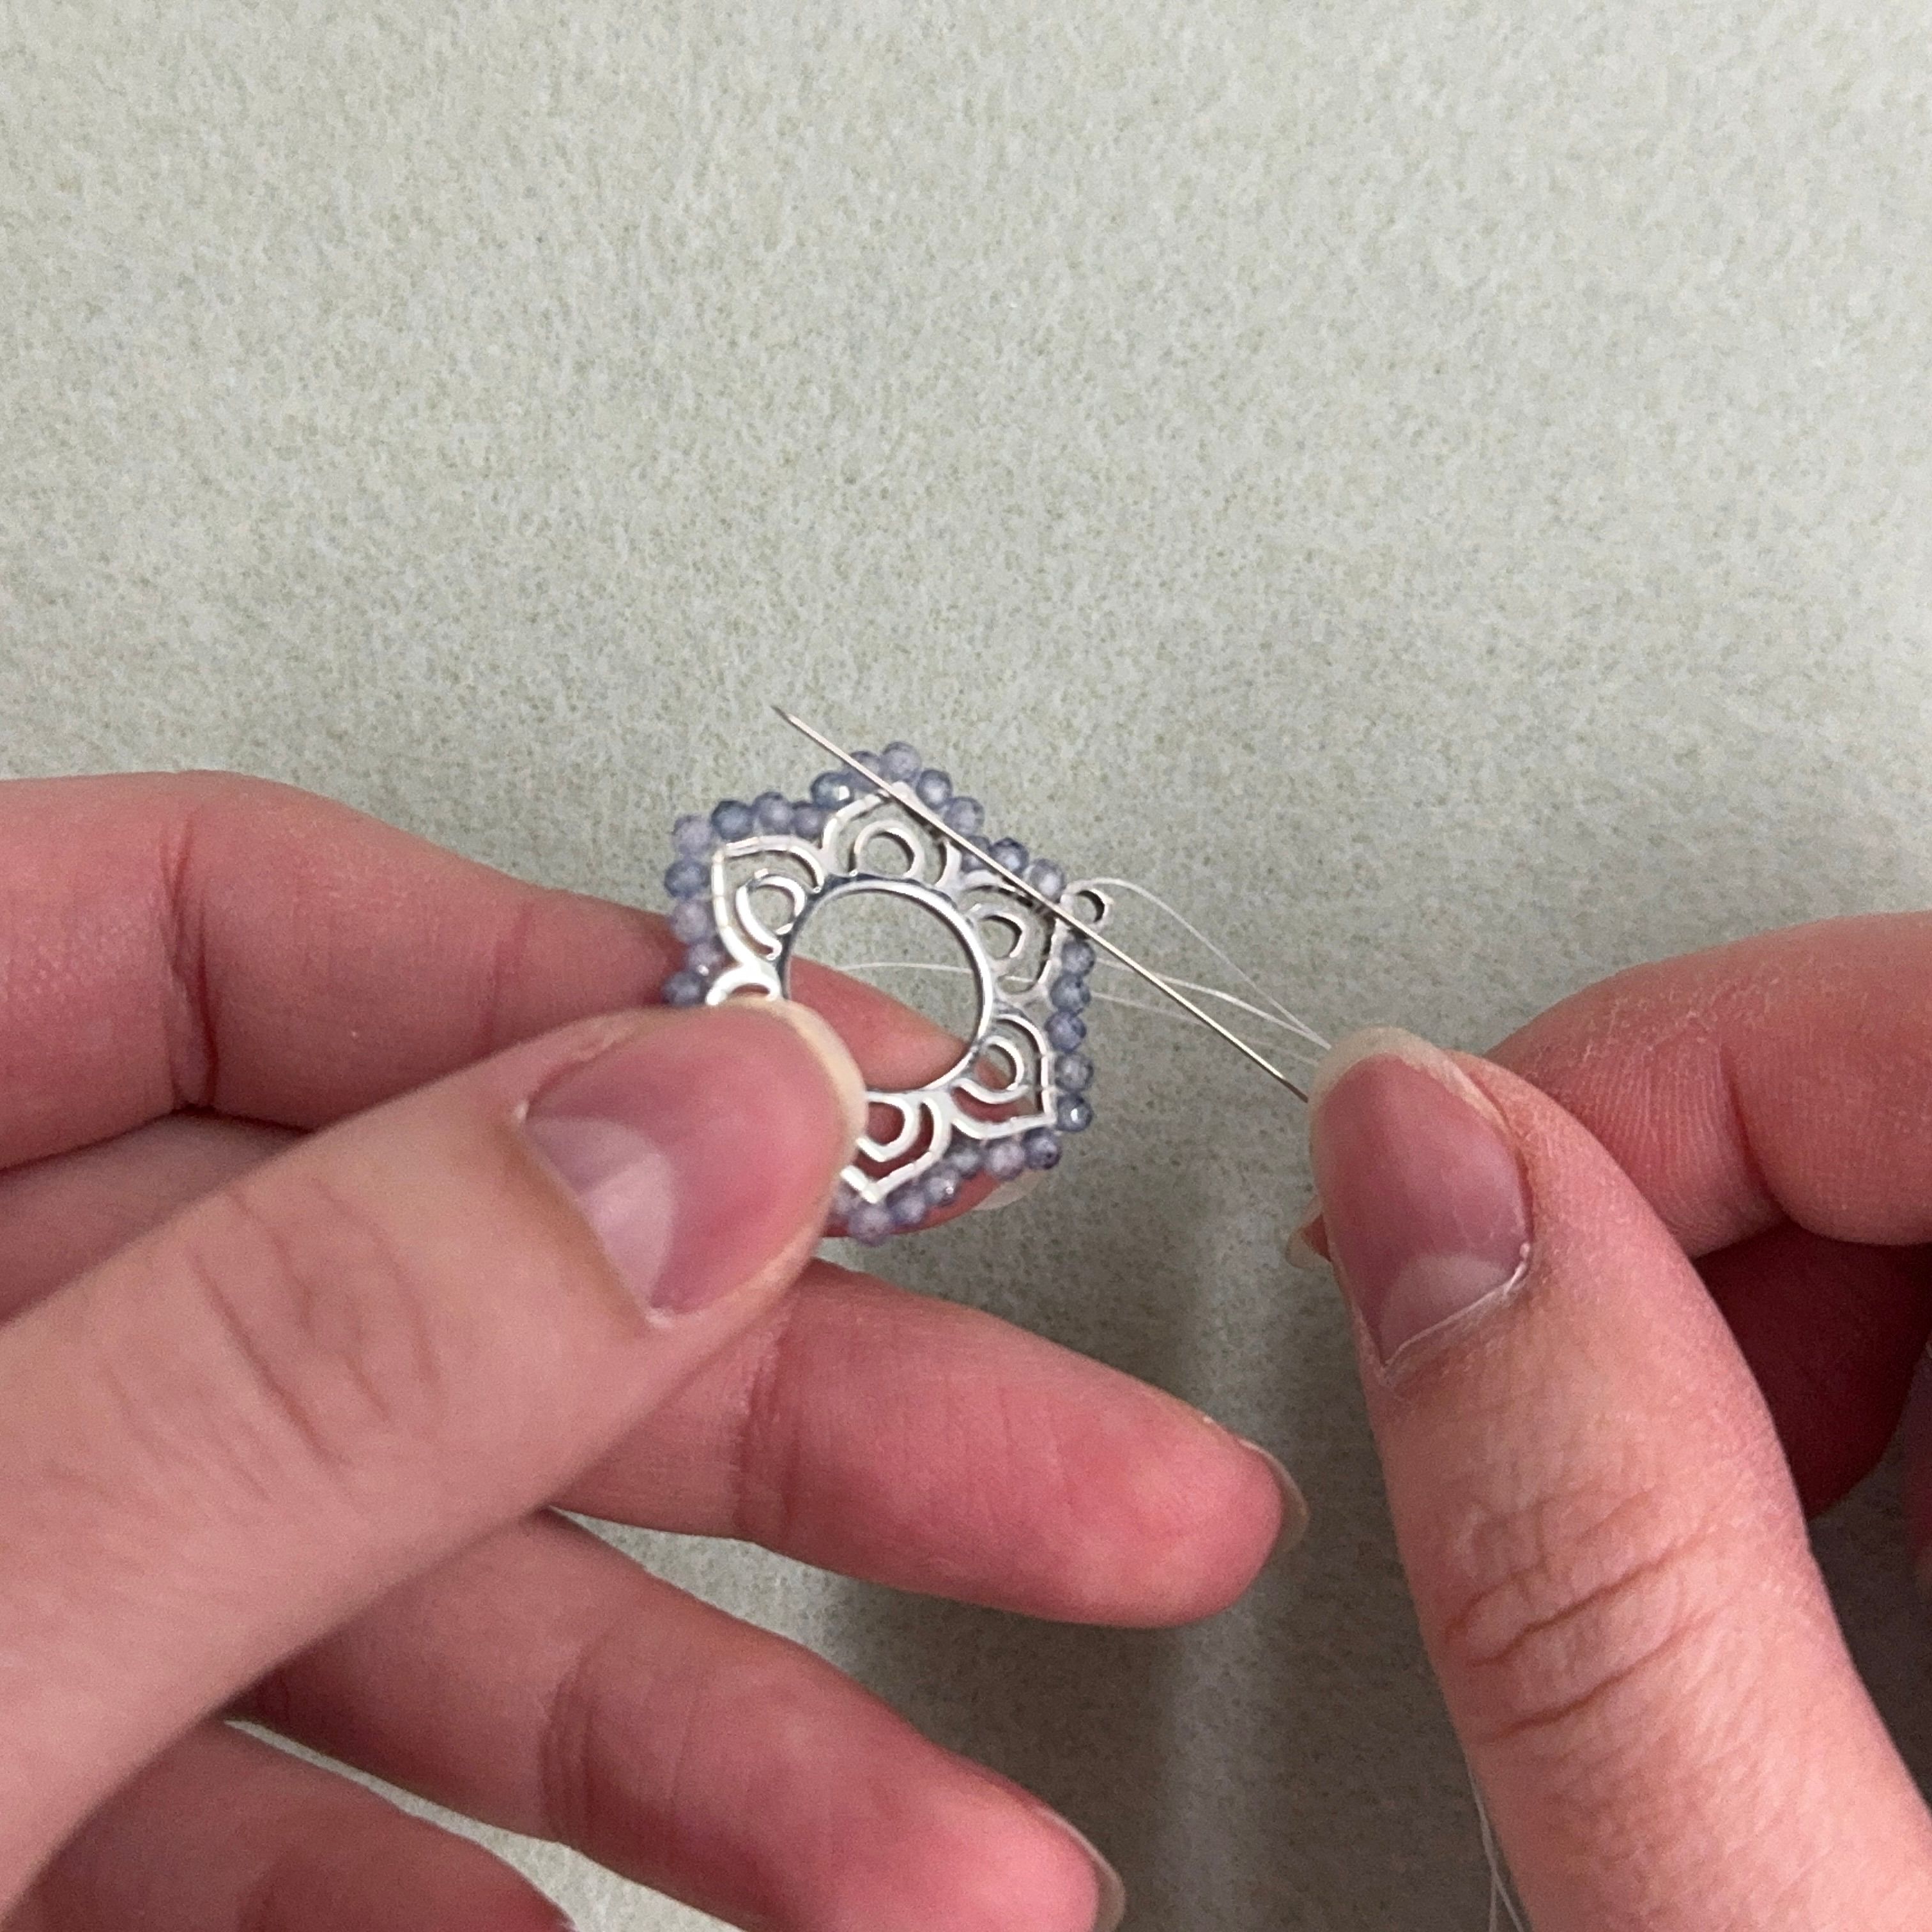
2. Now to start the second layer, making sure the thread is tight, add a bead onto your needle and push the needle through the last wrapped thread you had just added to the project
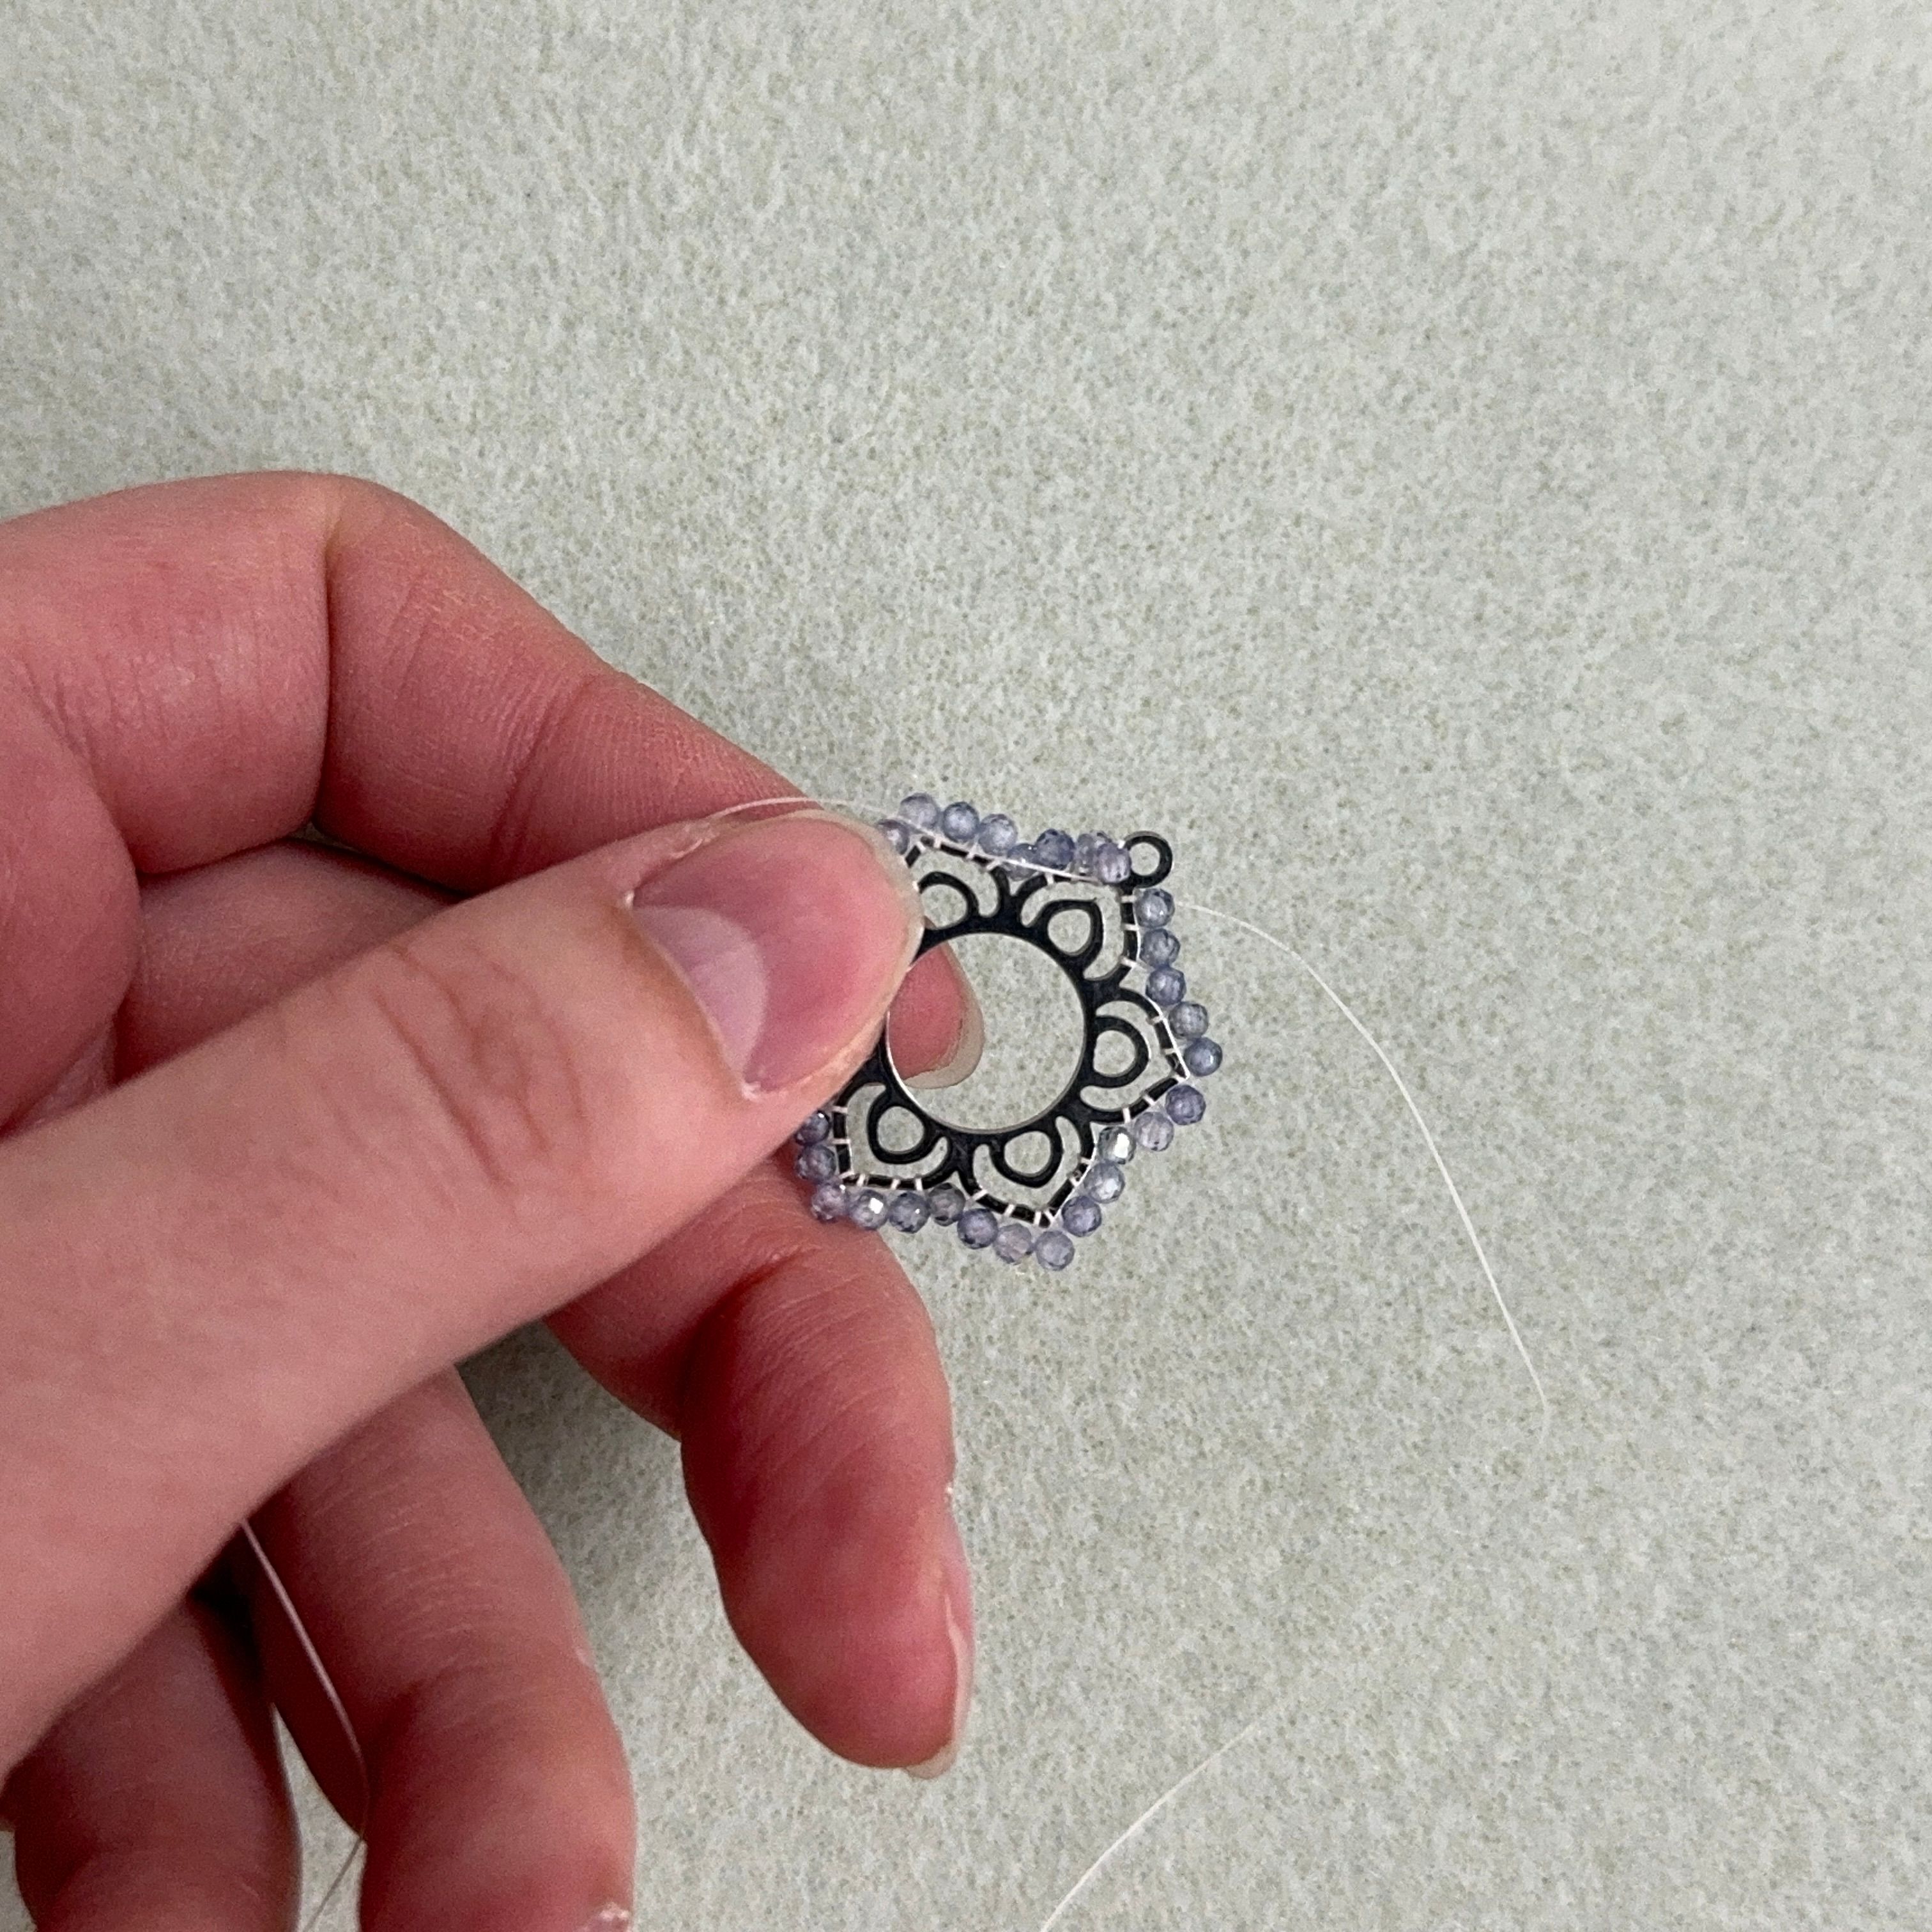
3. Pull tight and it will look like this
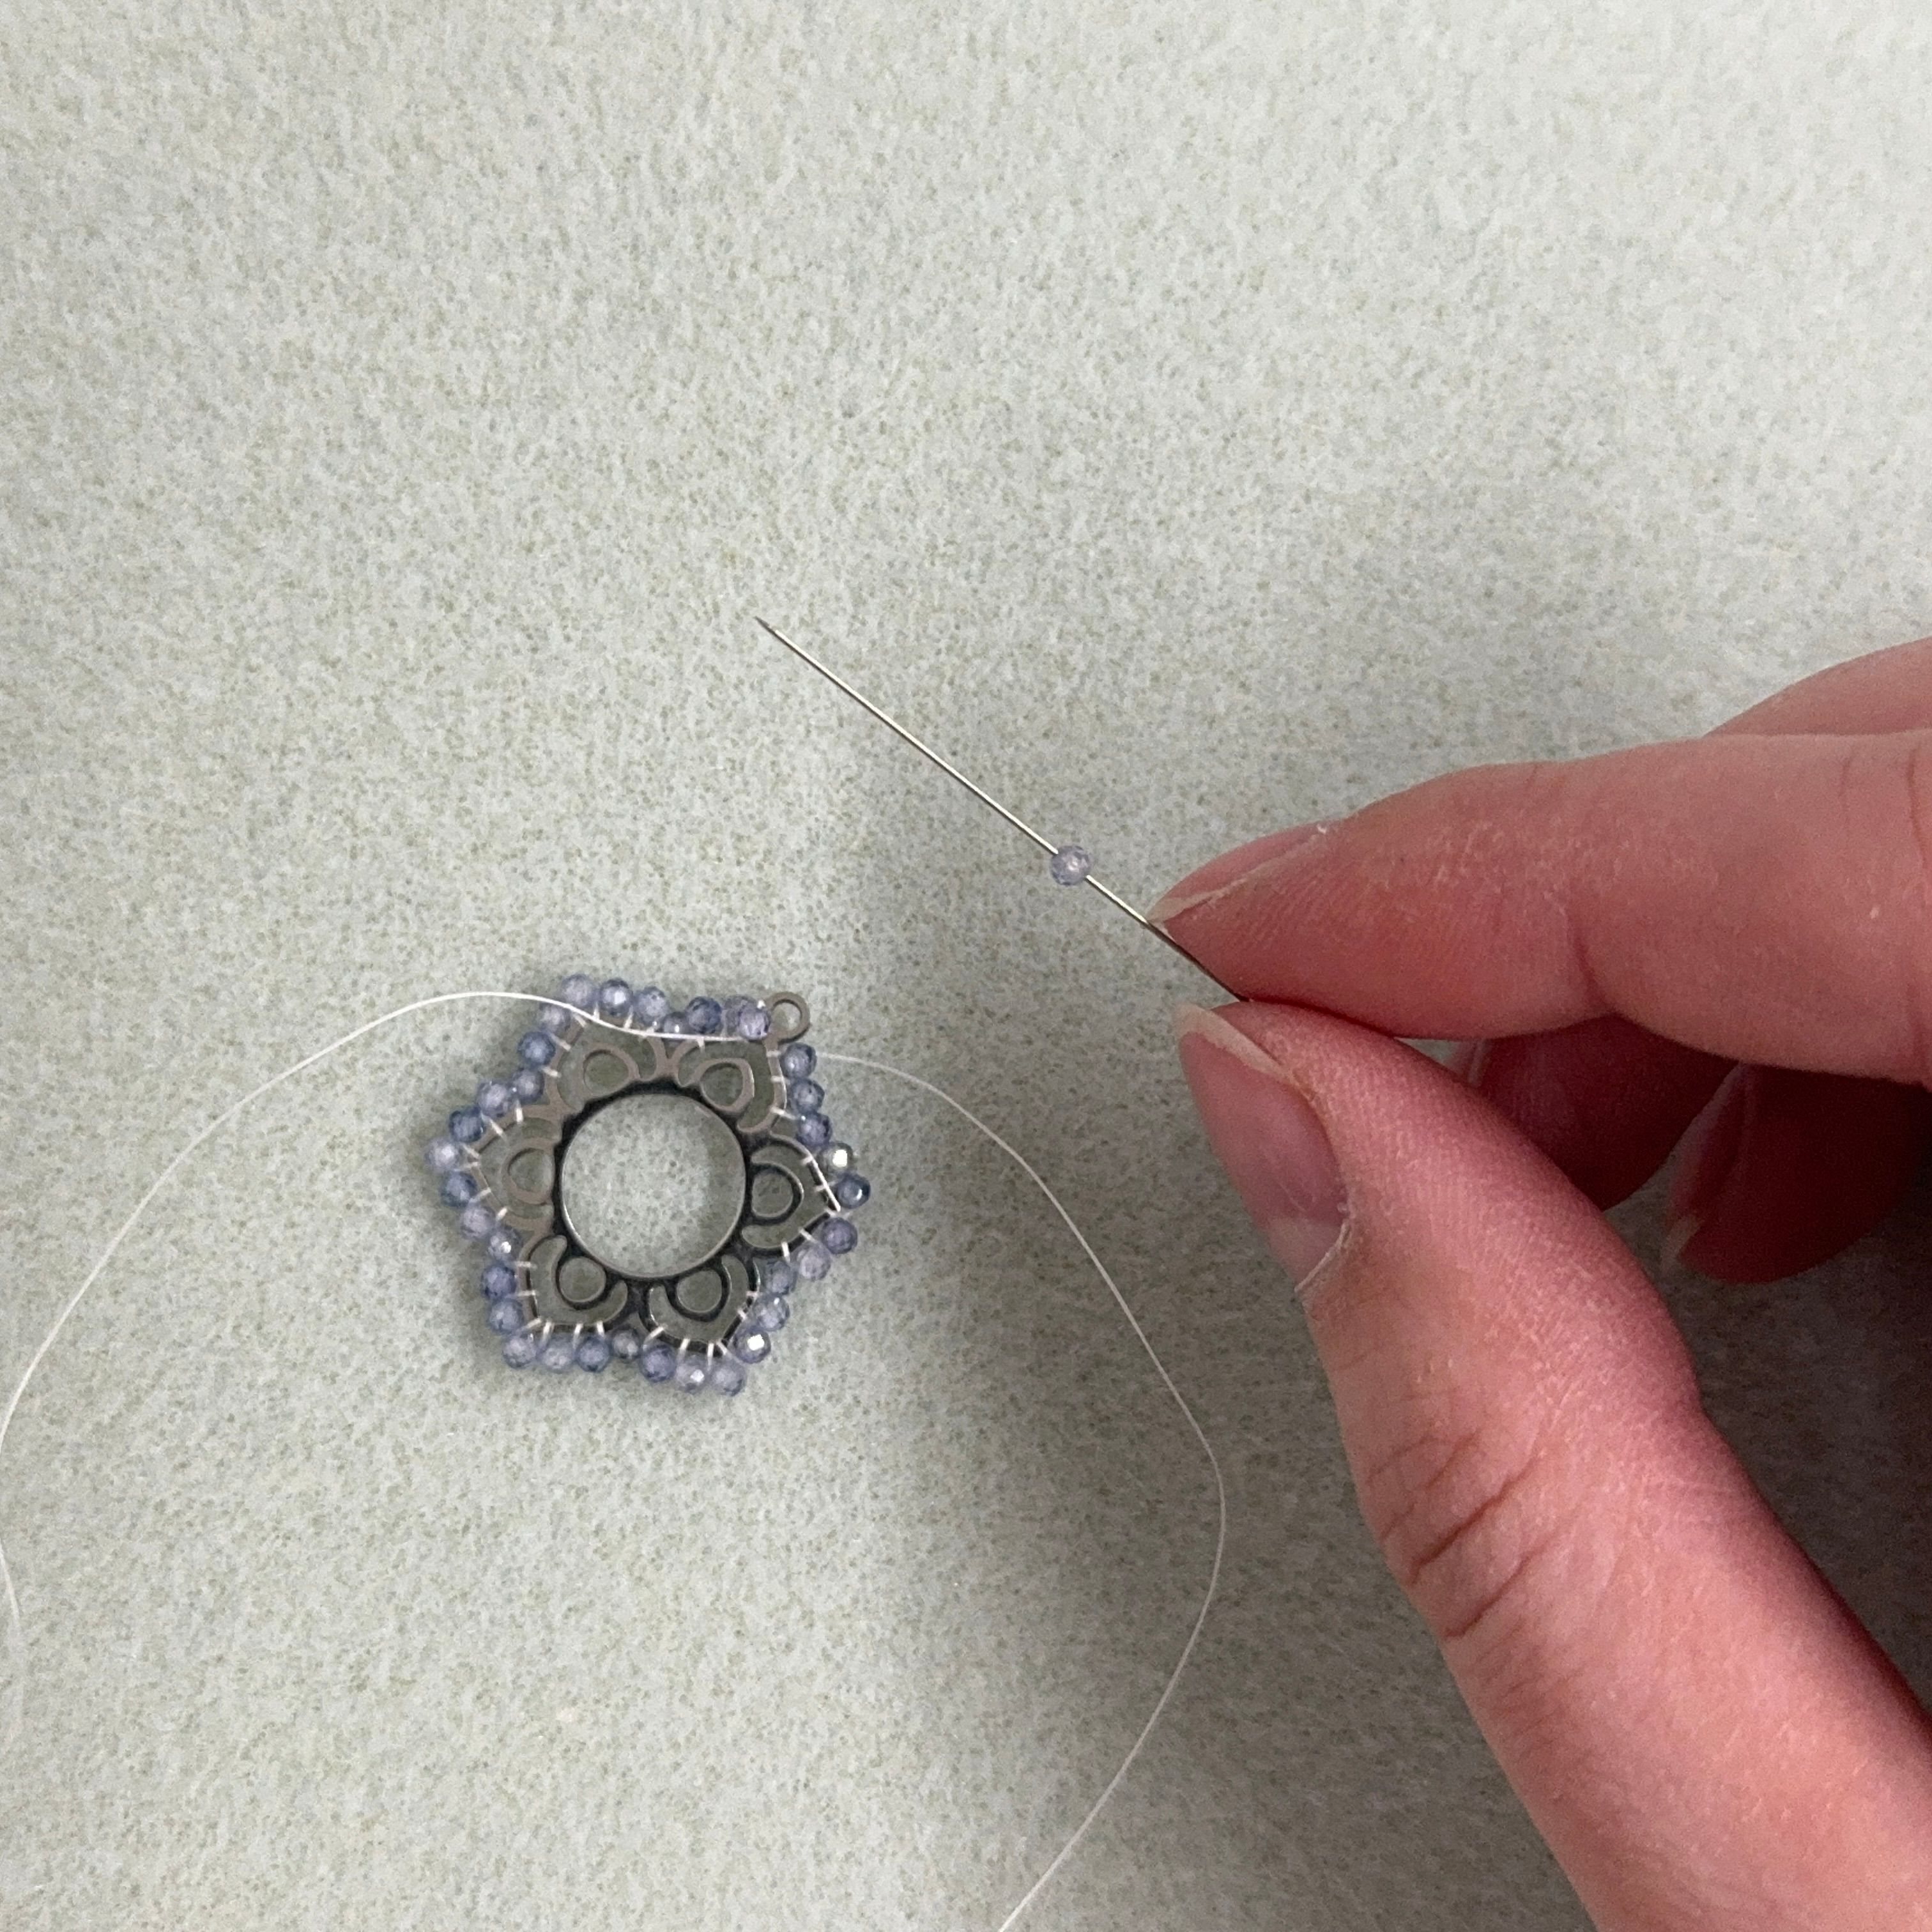
4. Add another bead to your needle
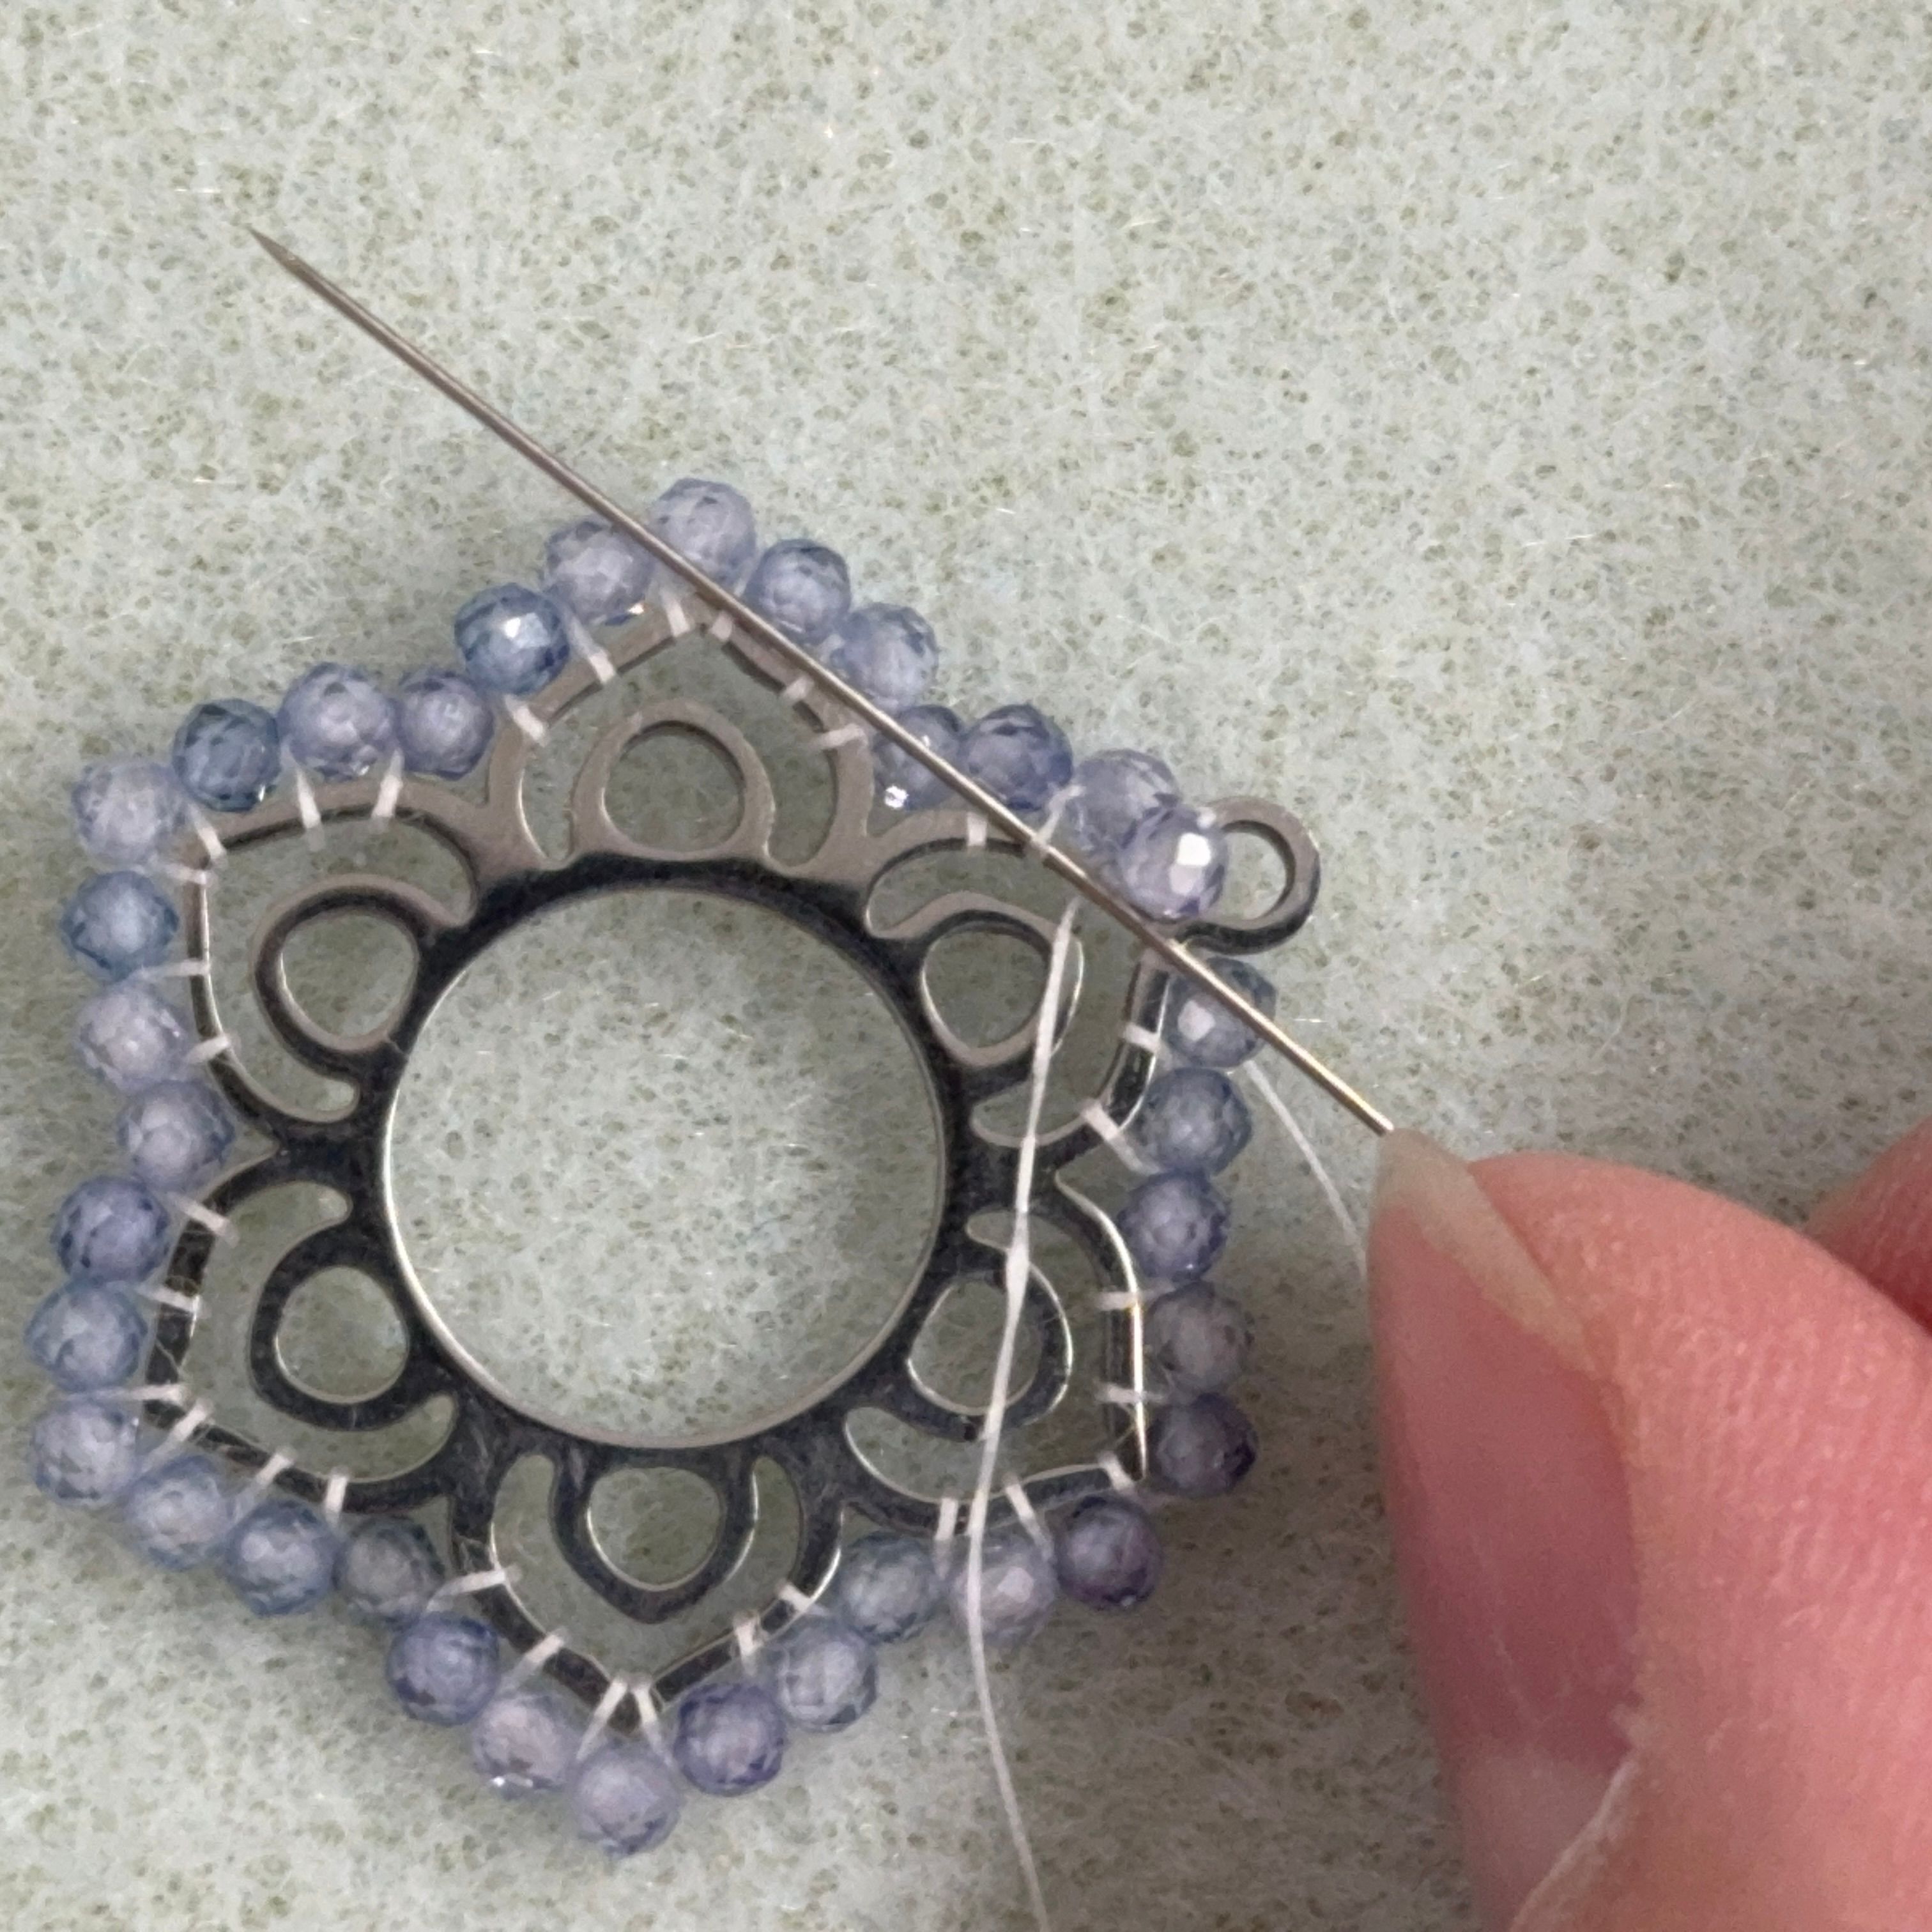
5. And thread the needle through the next loop seen above
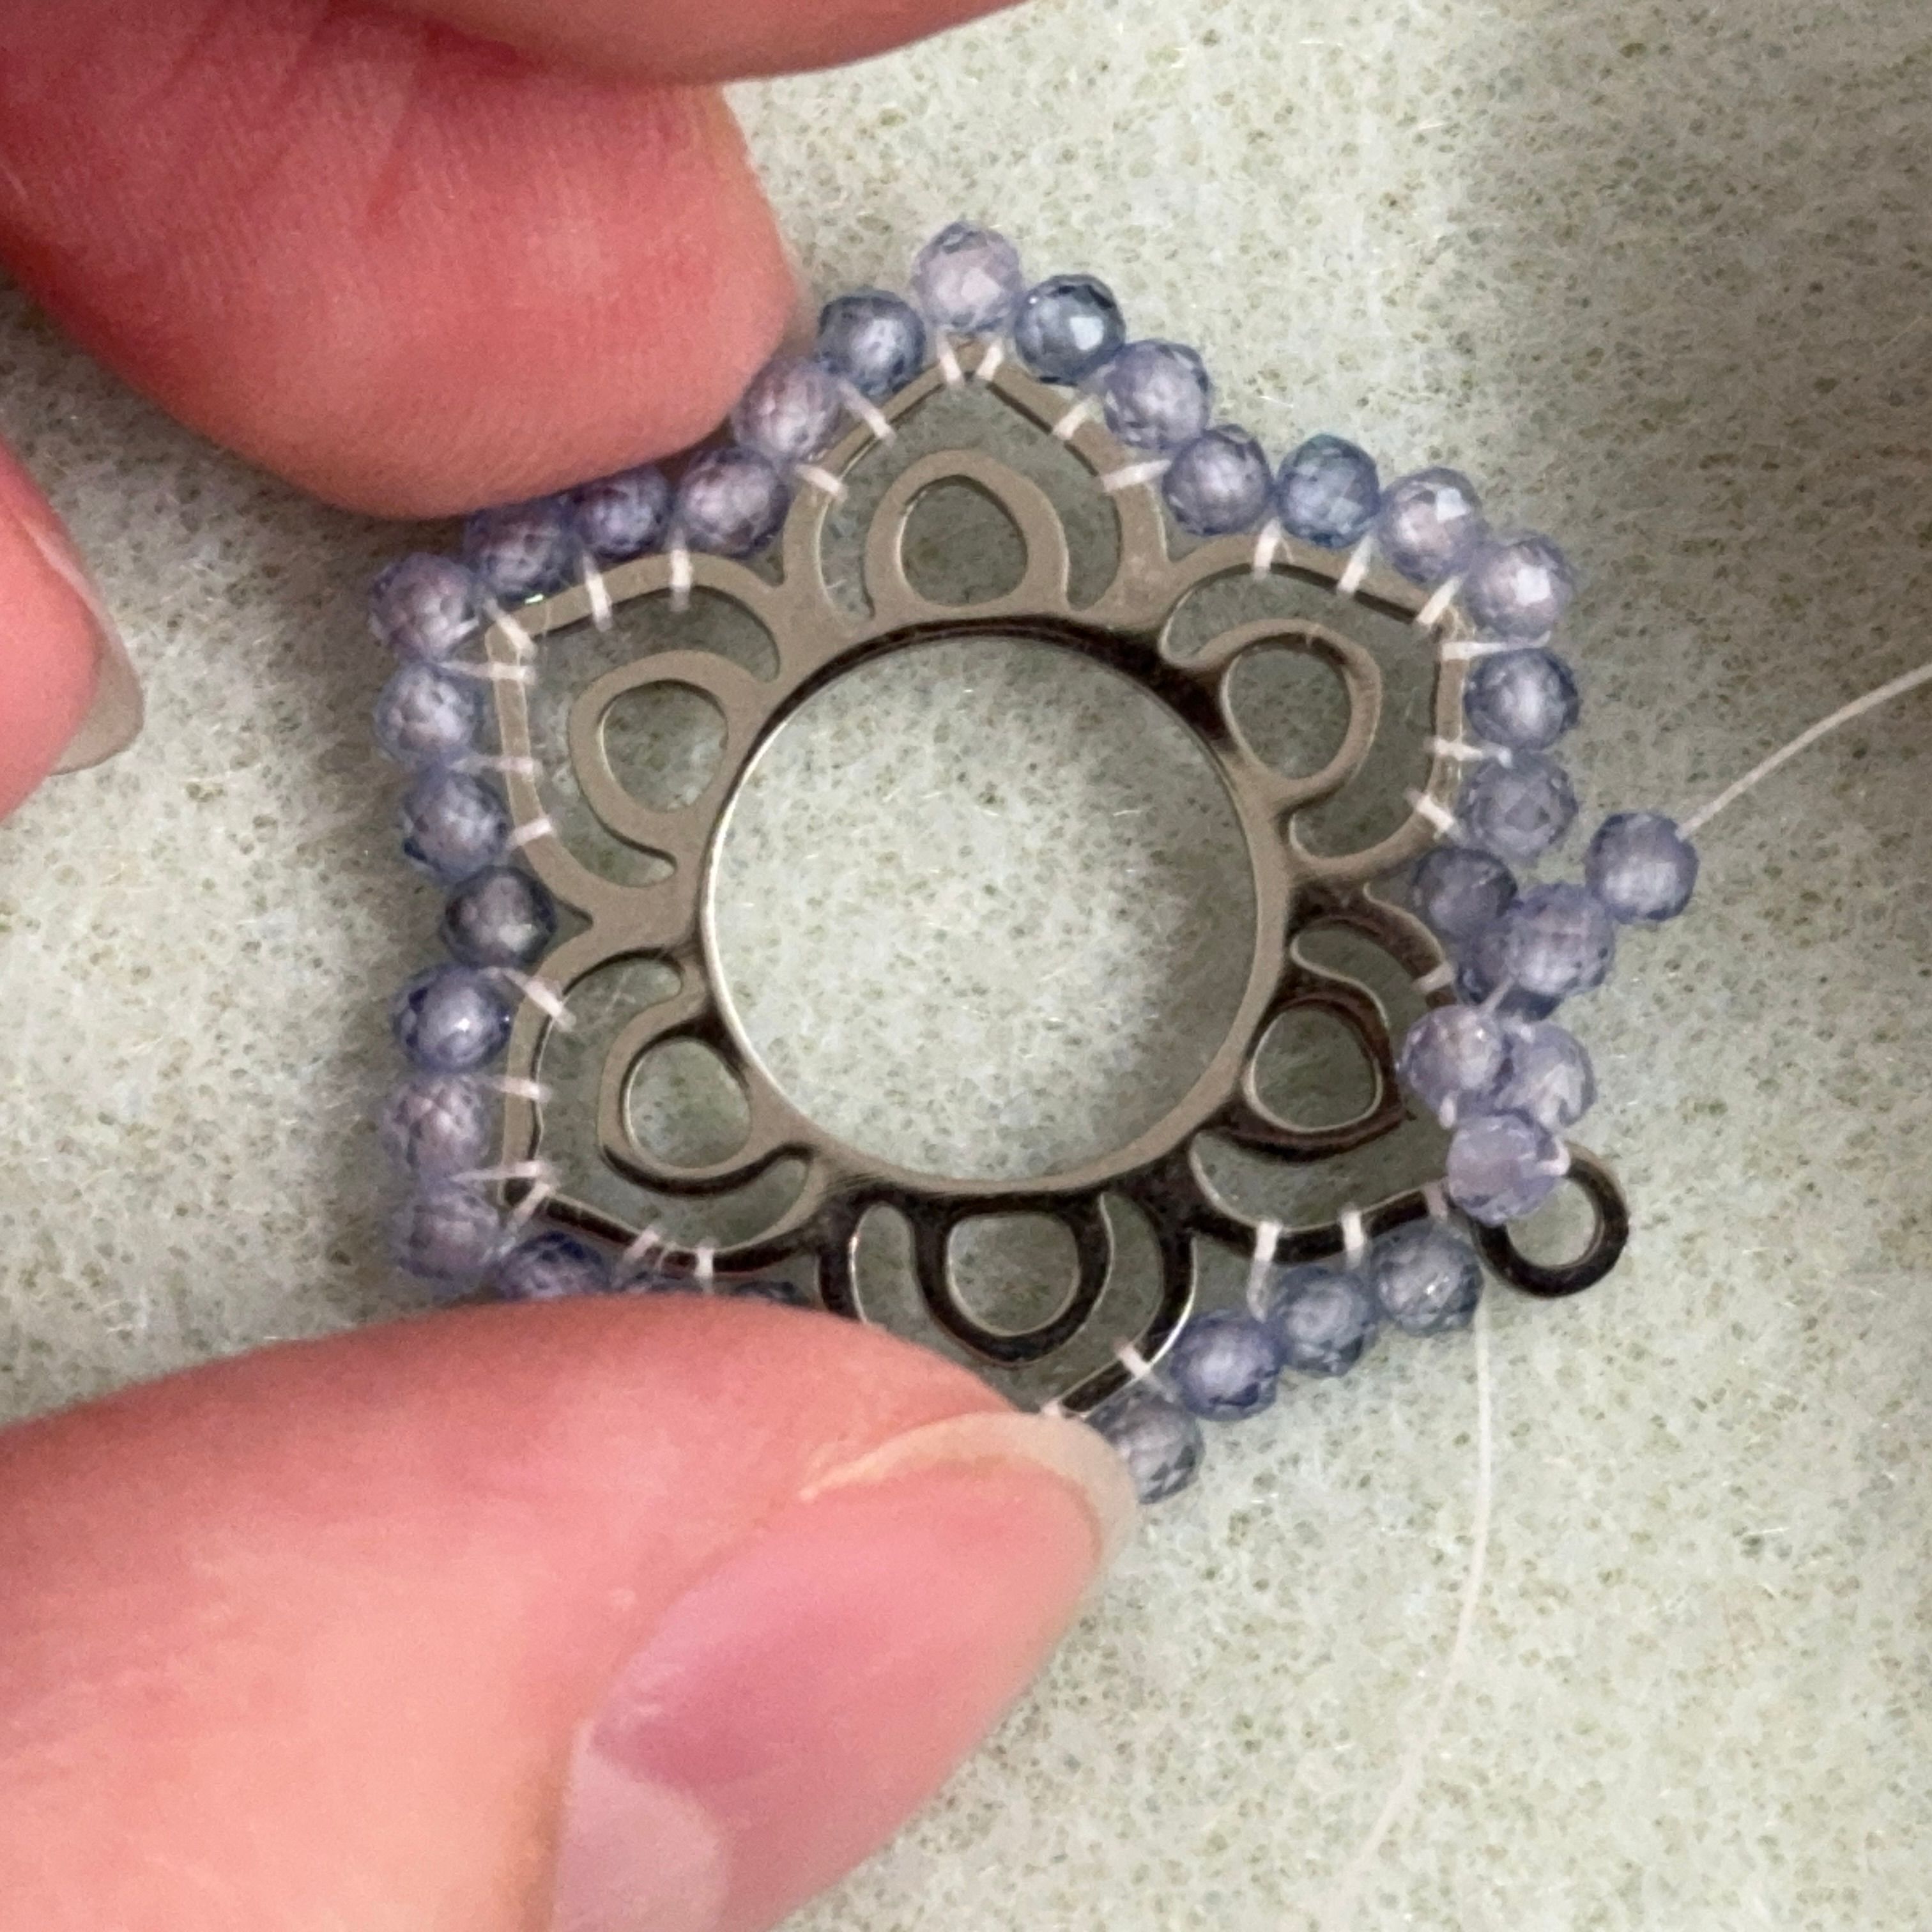
6. Depending on the distance between each loop, you might need to add two beads as seen above
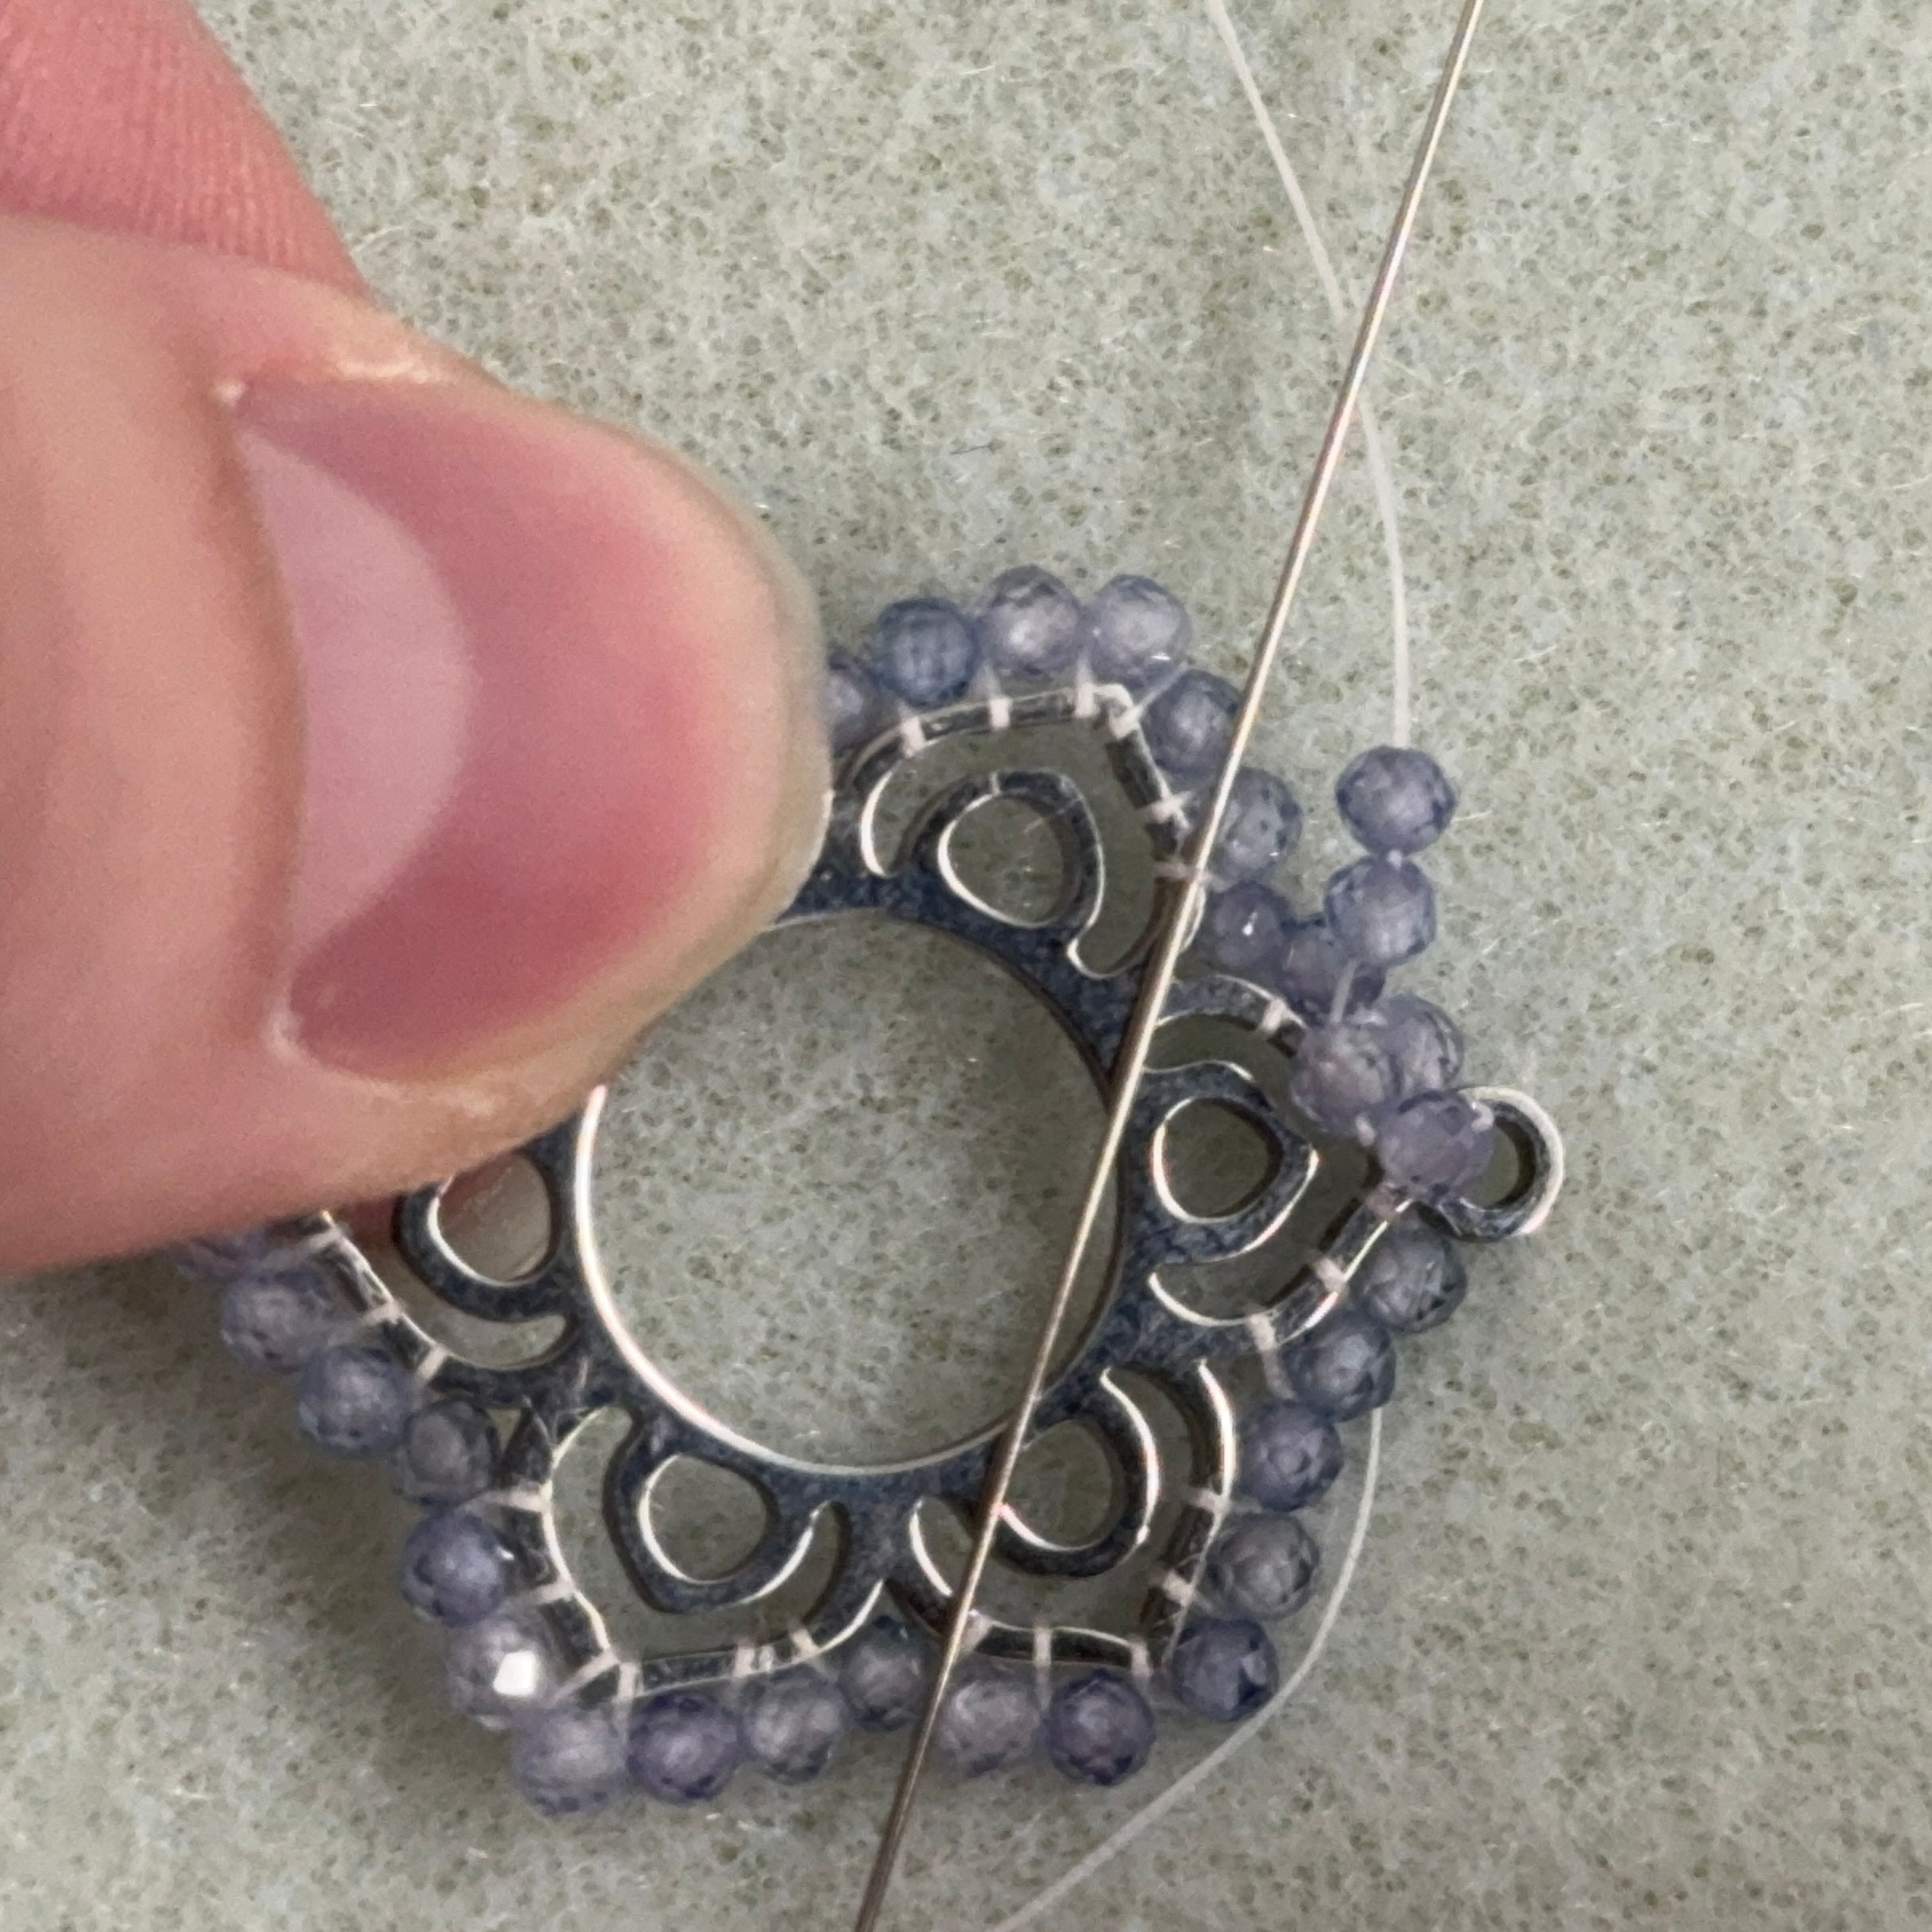
7. Thread the needle through the loop and continue wrapping the beads one by one (and sometimes 2)
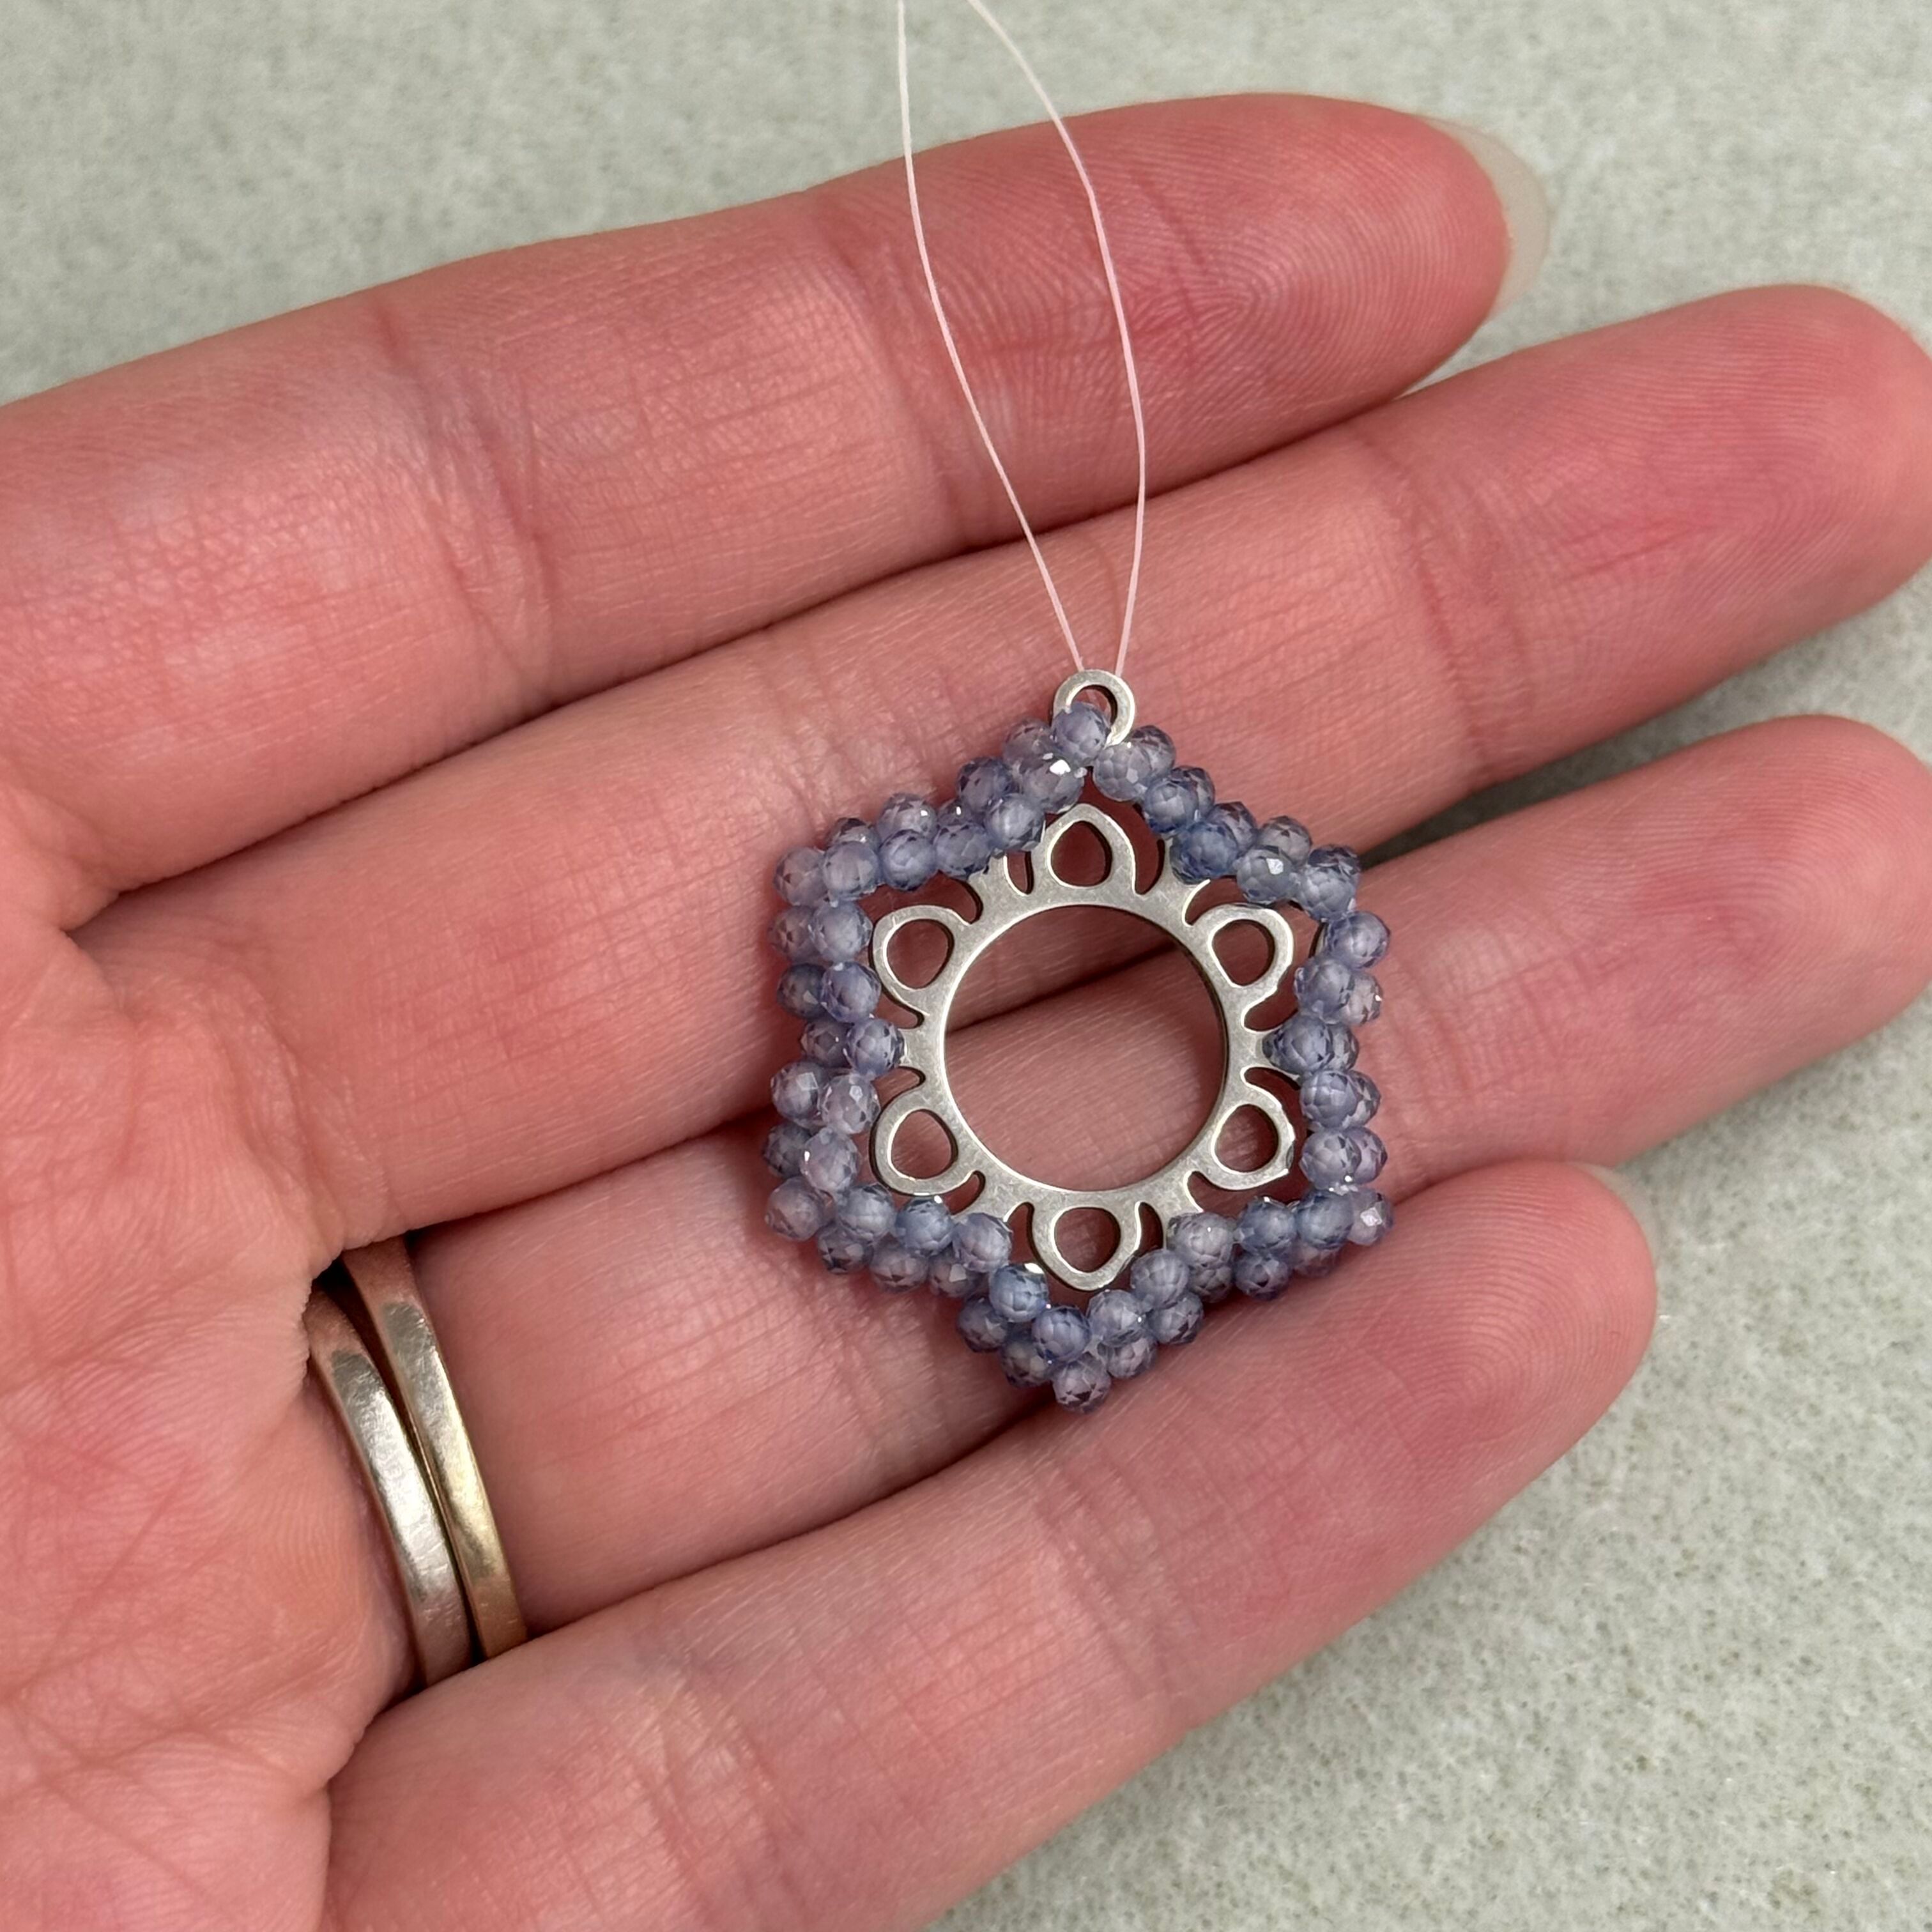
8. Your project should look like this
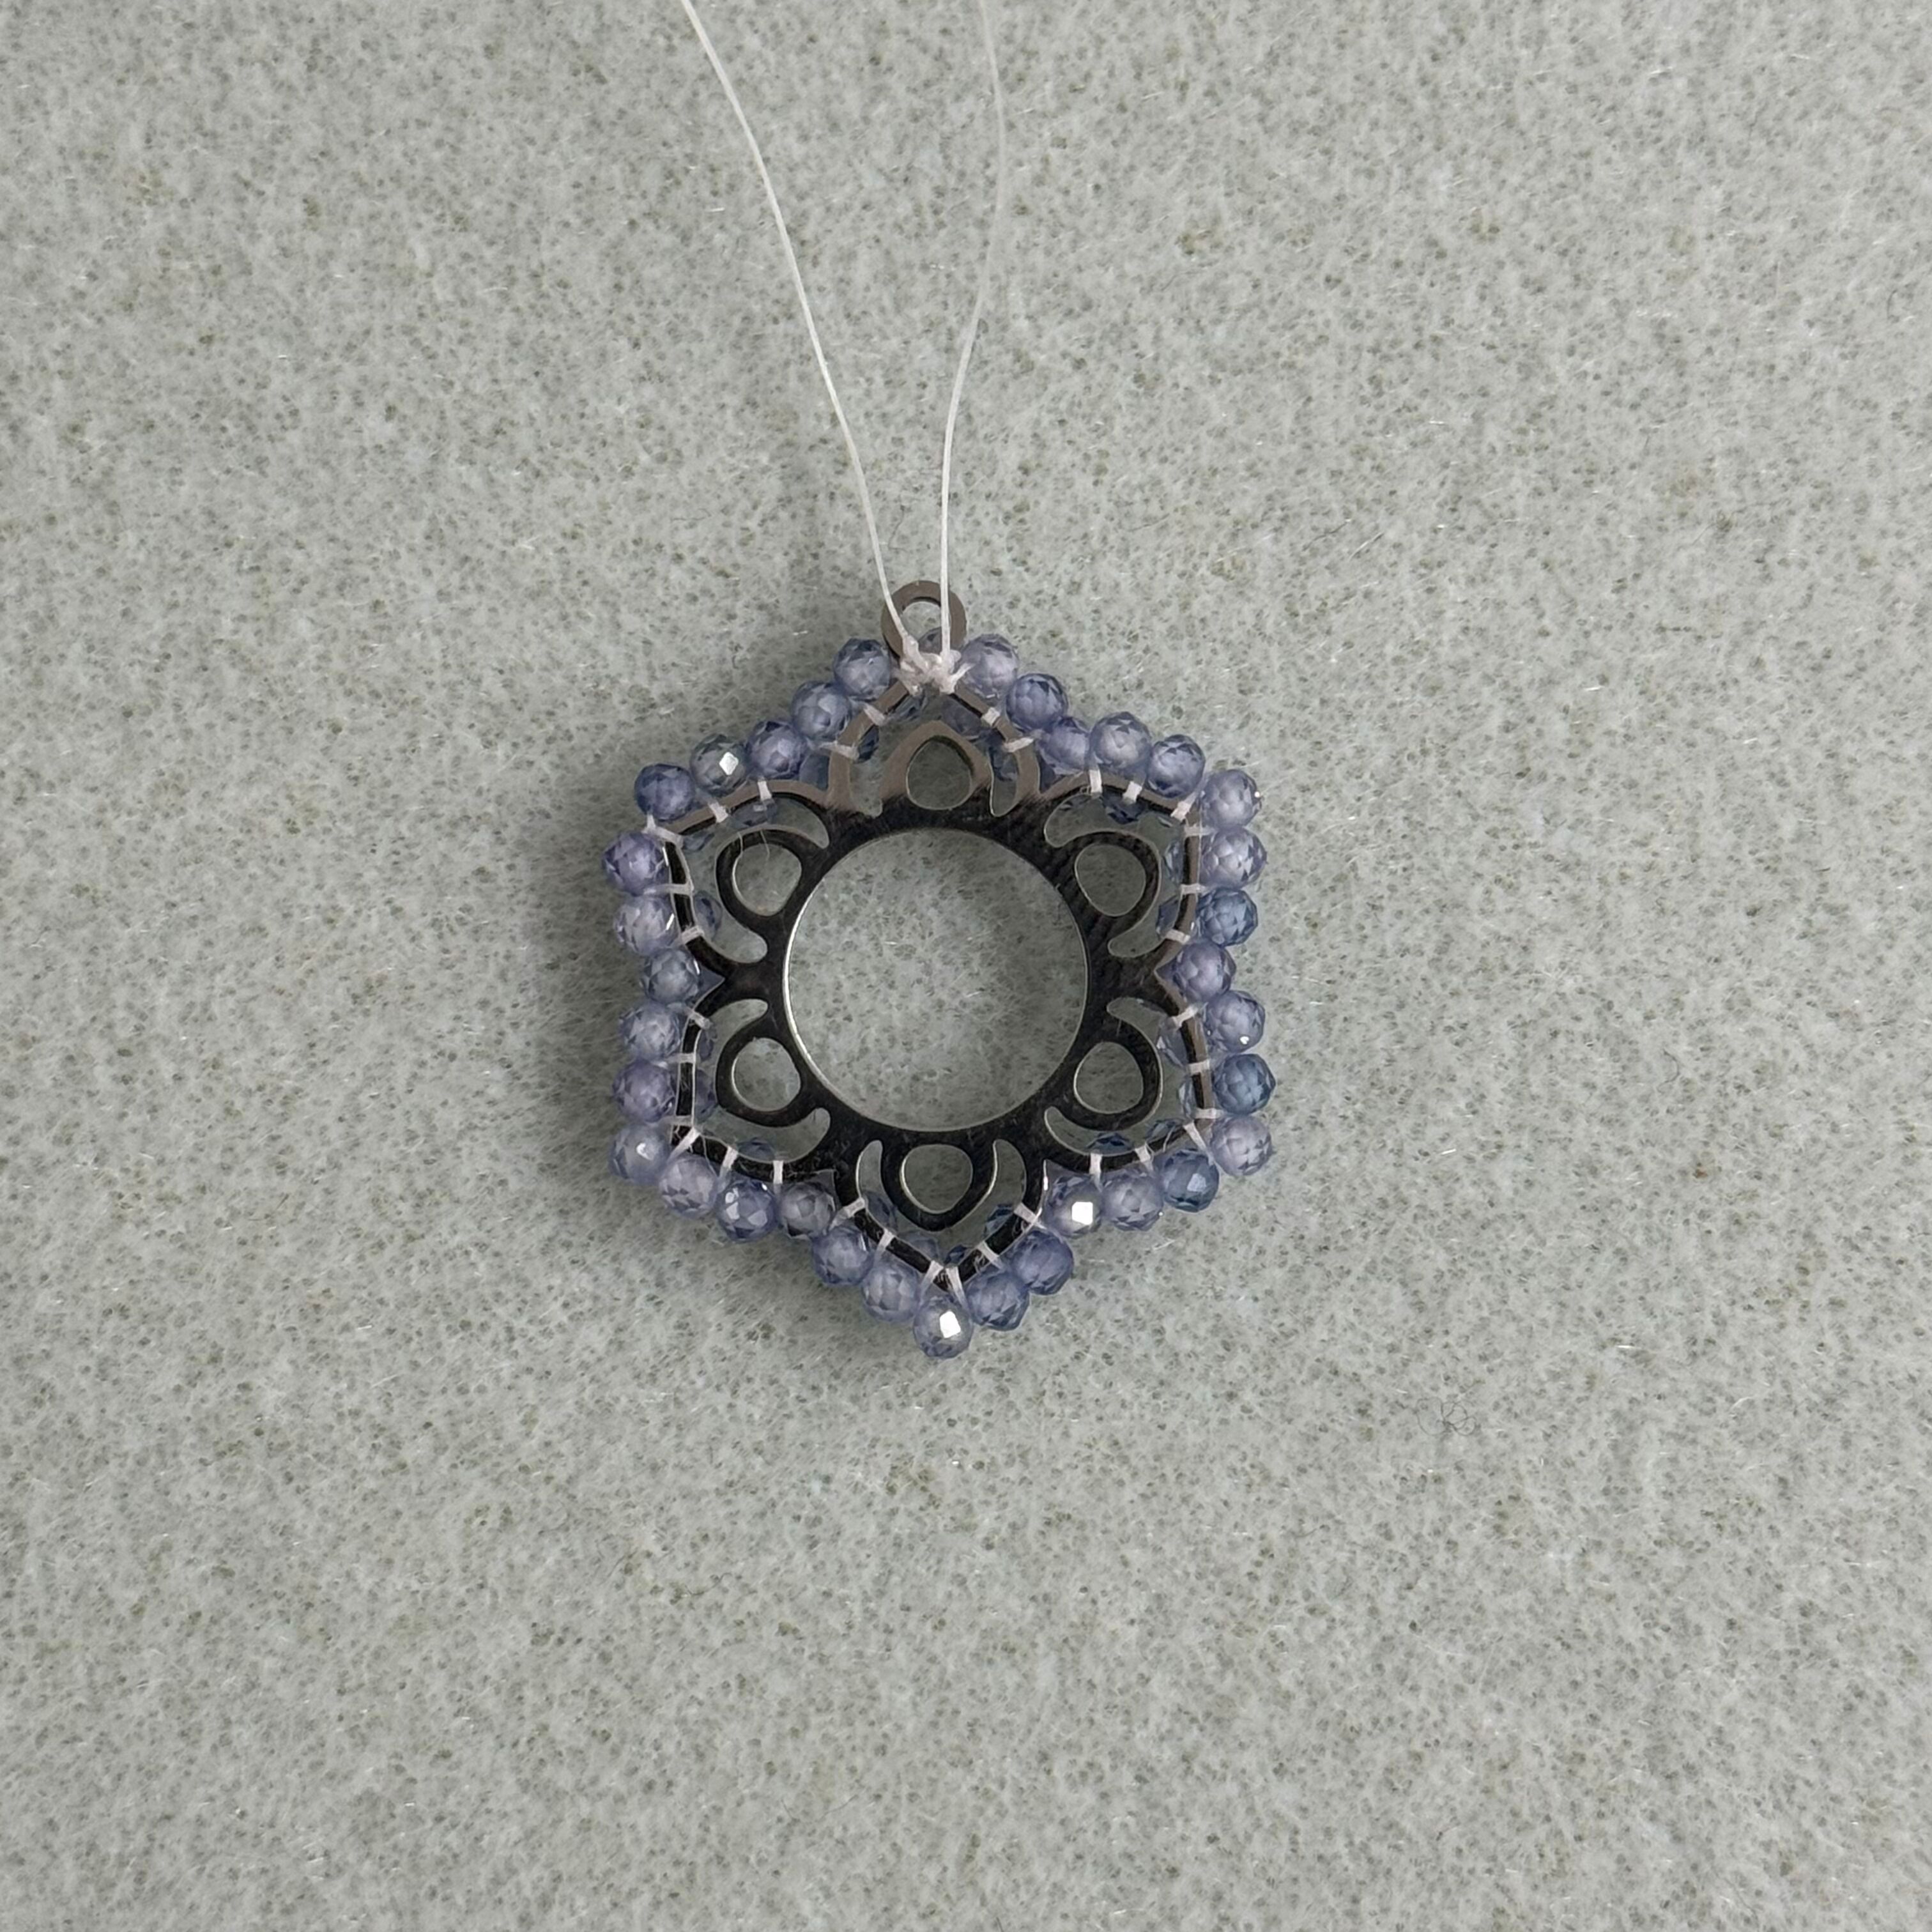
9. Turn charm over and tie the two threads together and knot 3 times. Cut excess thread and dab a bit of glue on the knot
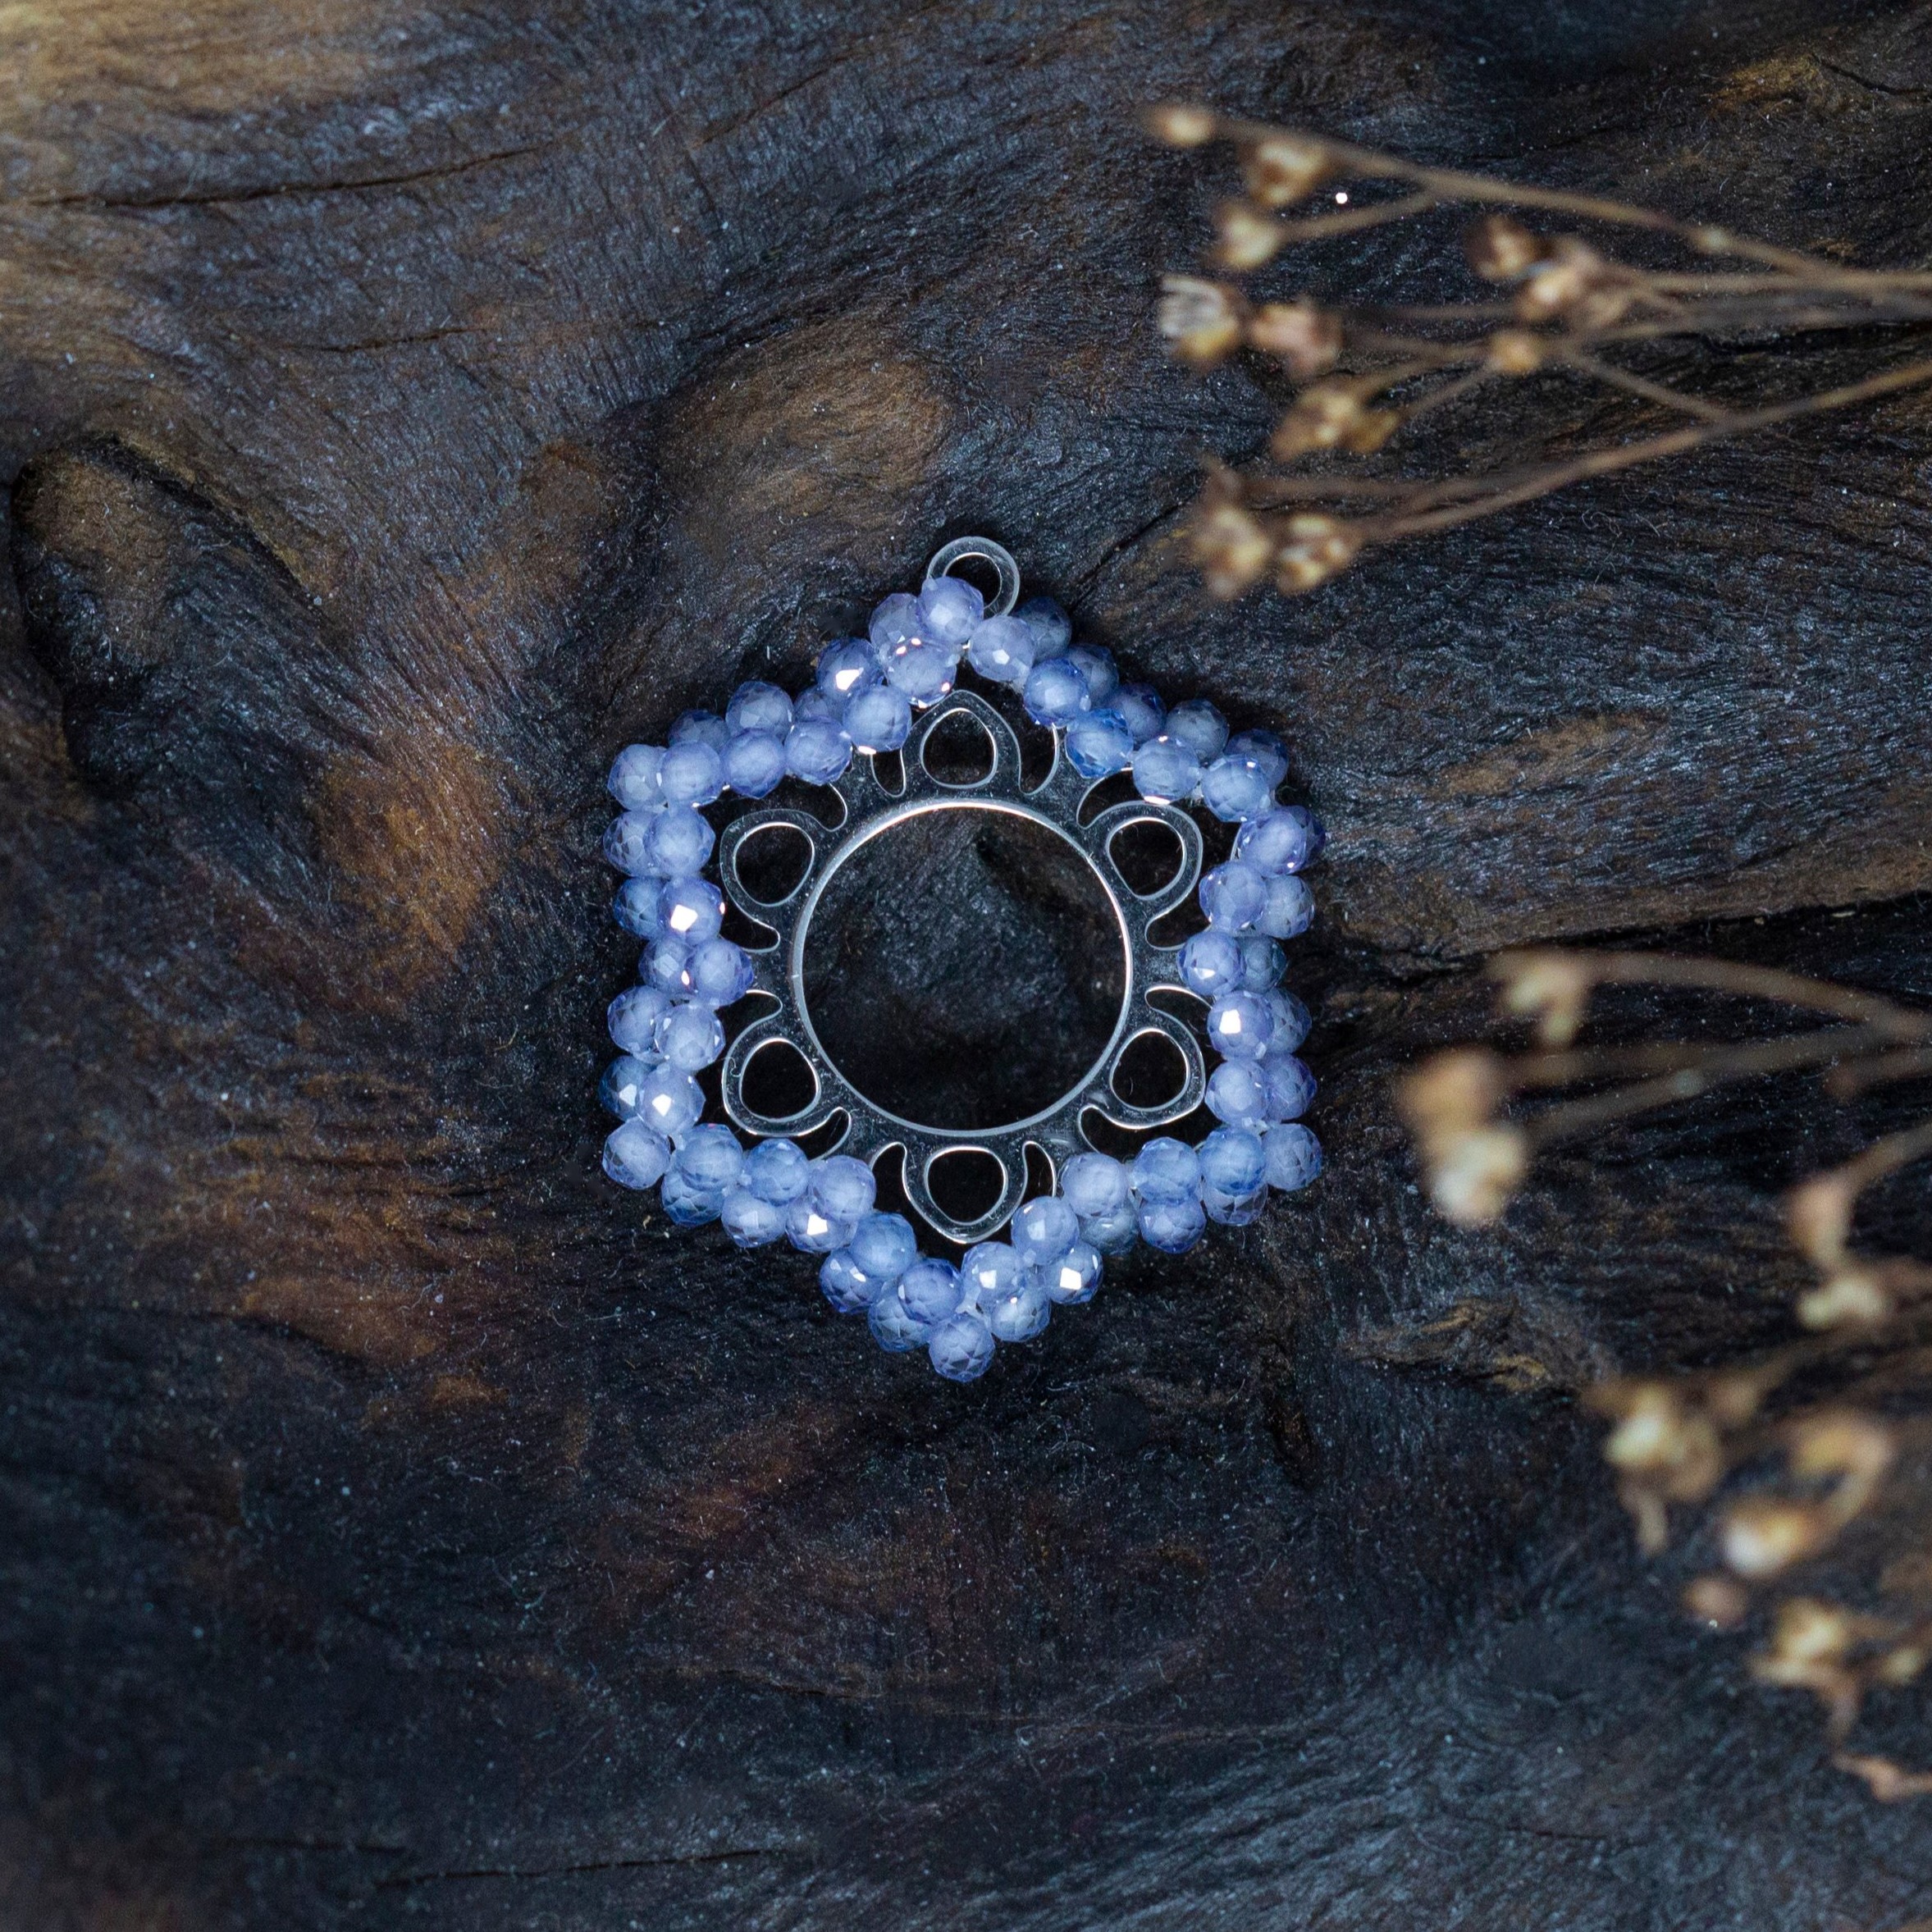
10. Done!
More Examples:
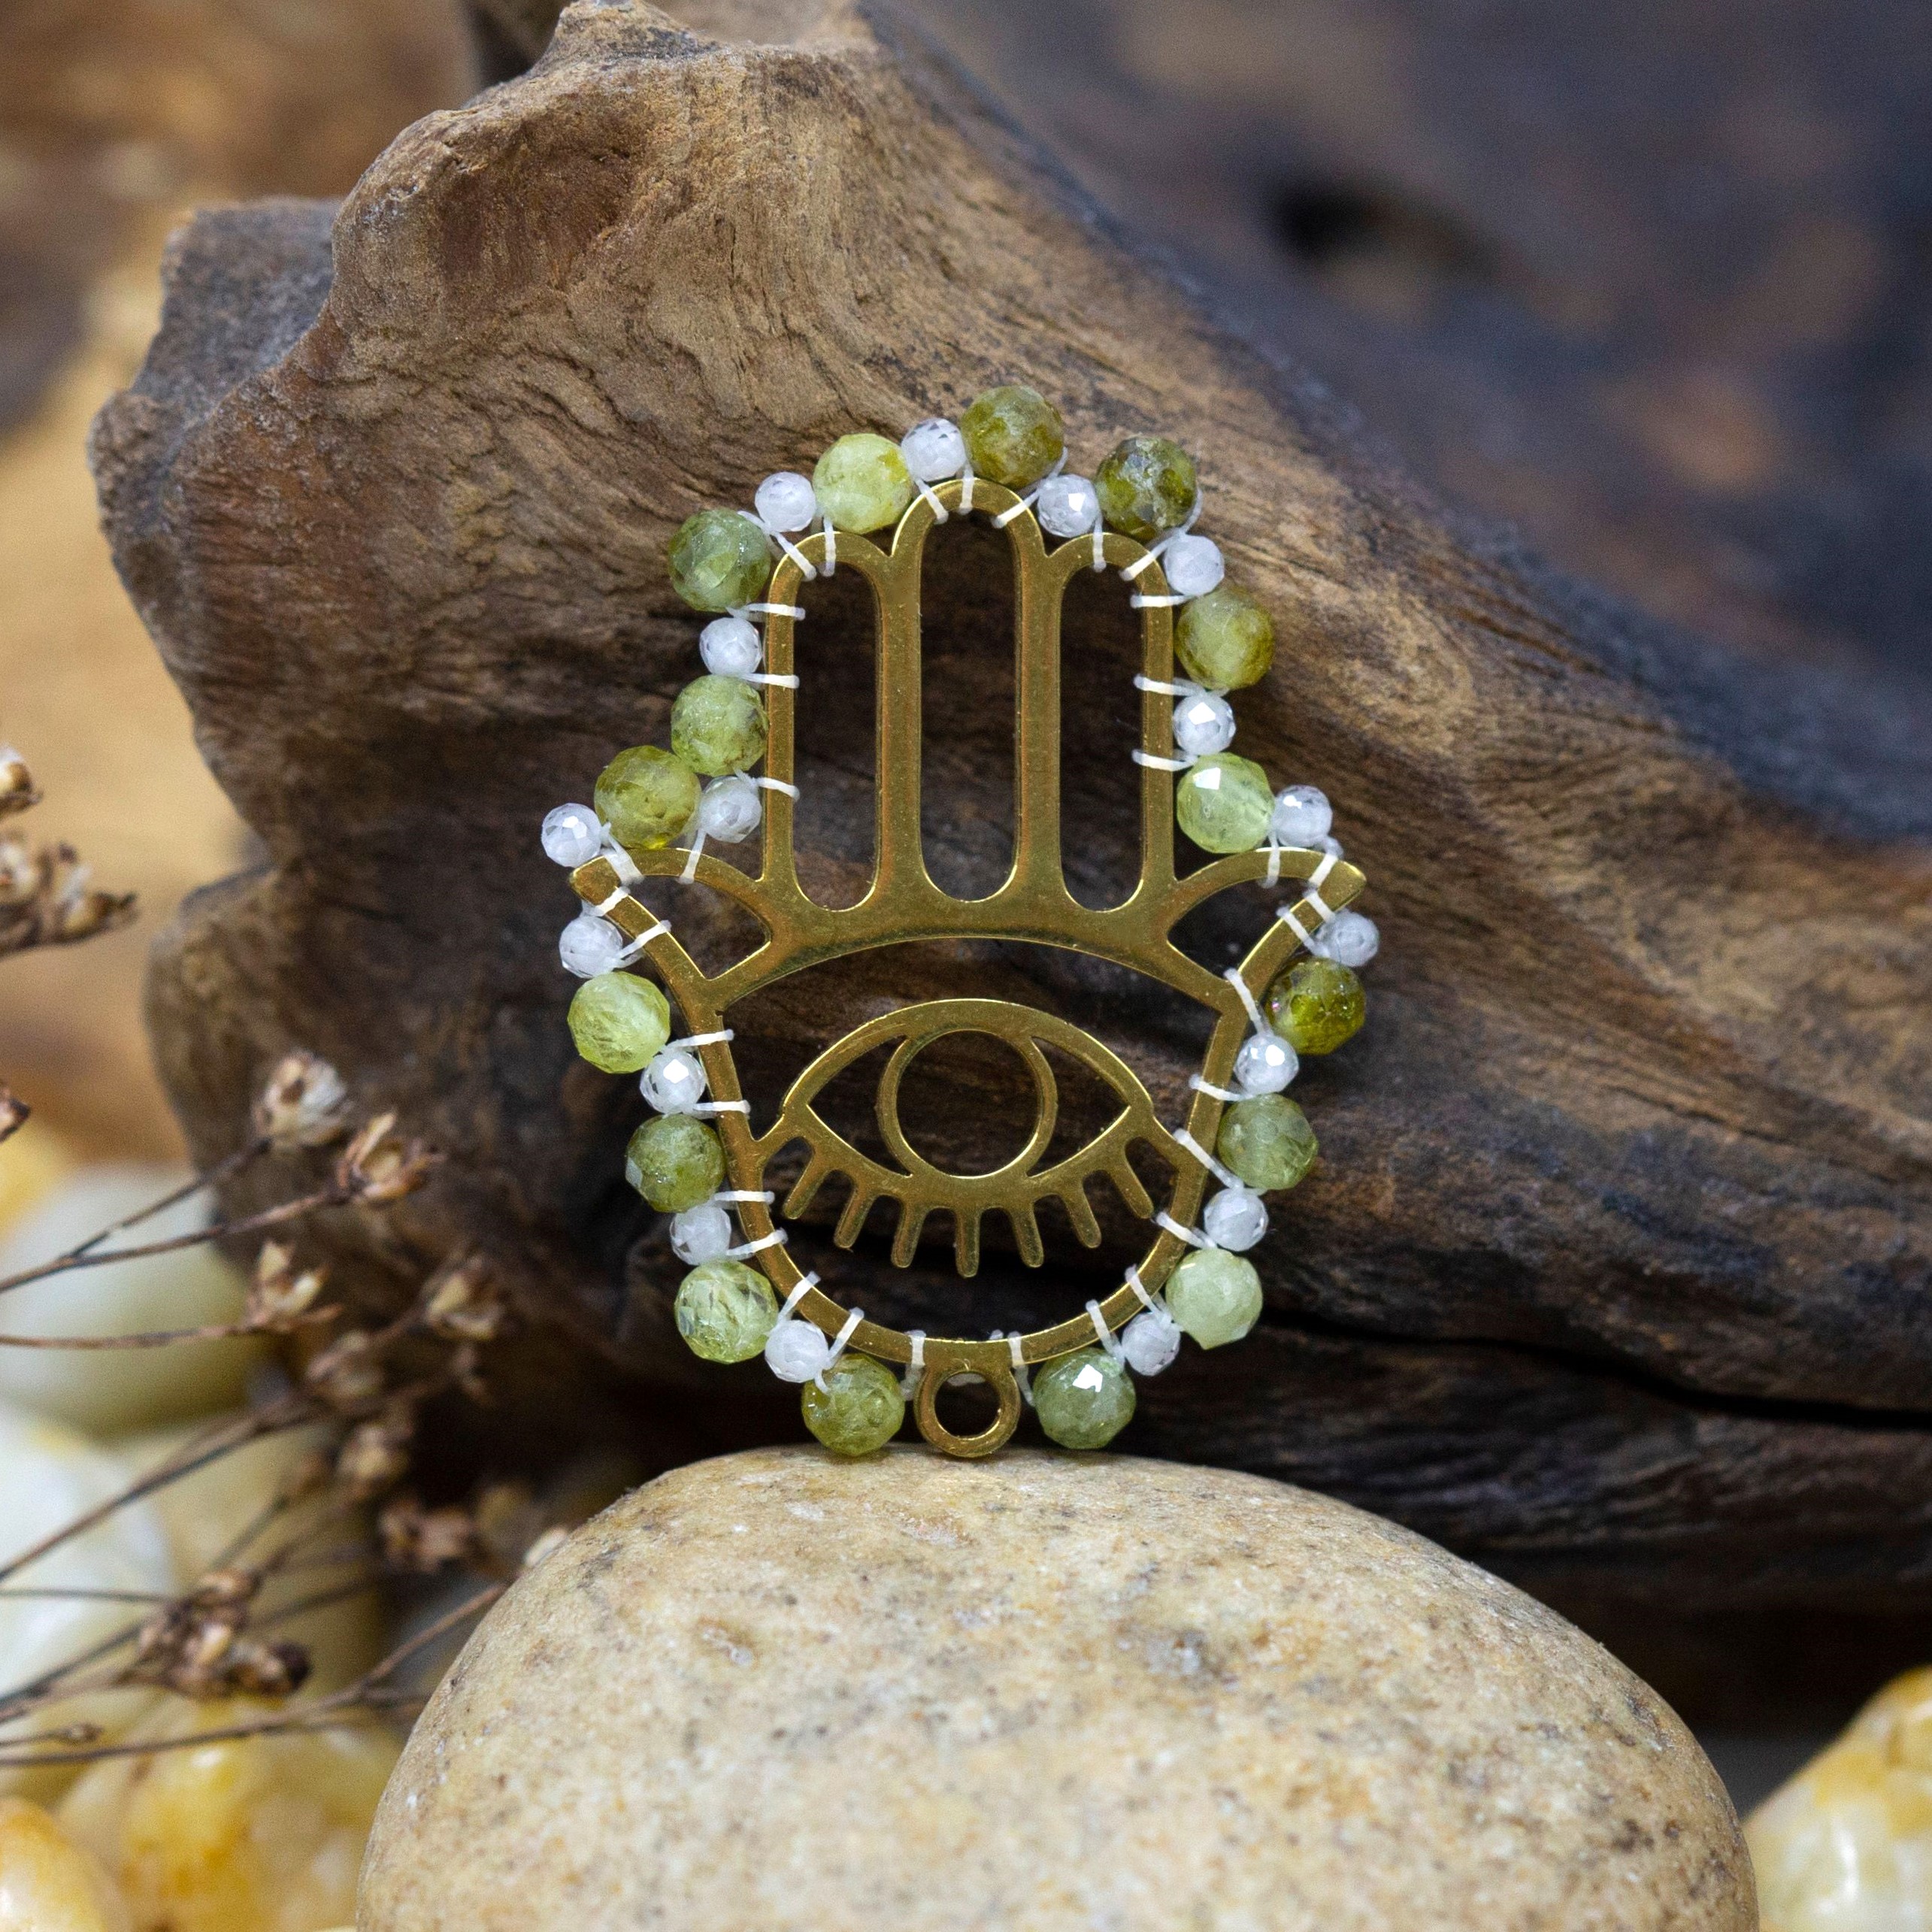
Materials:
18K Gold Plated Stainless Steel 22x28mm Hamsa Eye Palm Pendant
Green Garnet 2.5mm Faceted Round
Fireline Crystal 6lb (2.5 feet)
Materials:
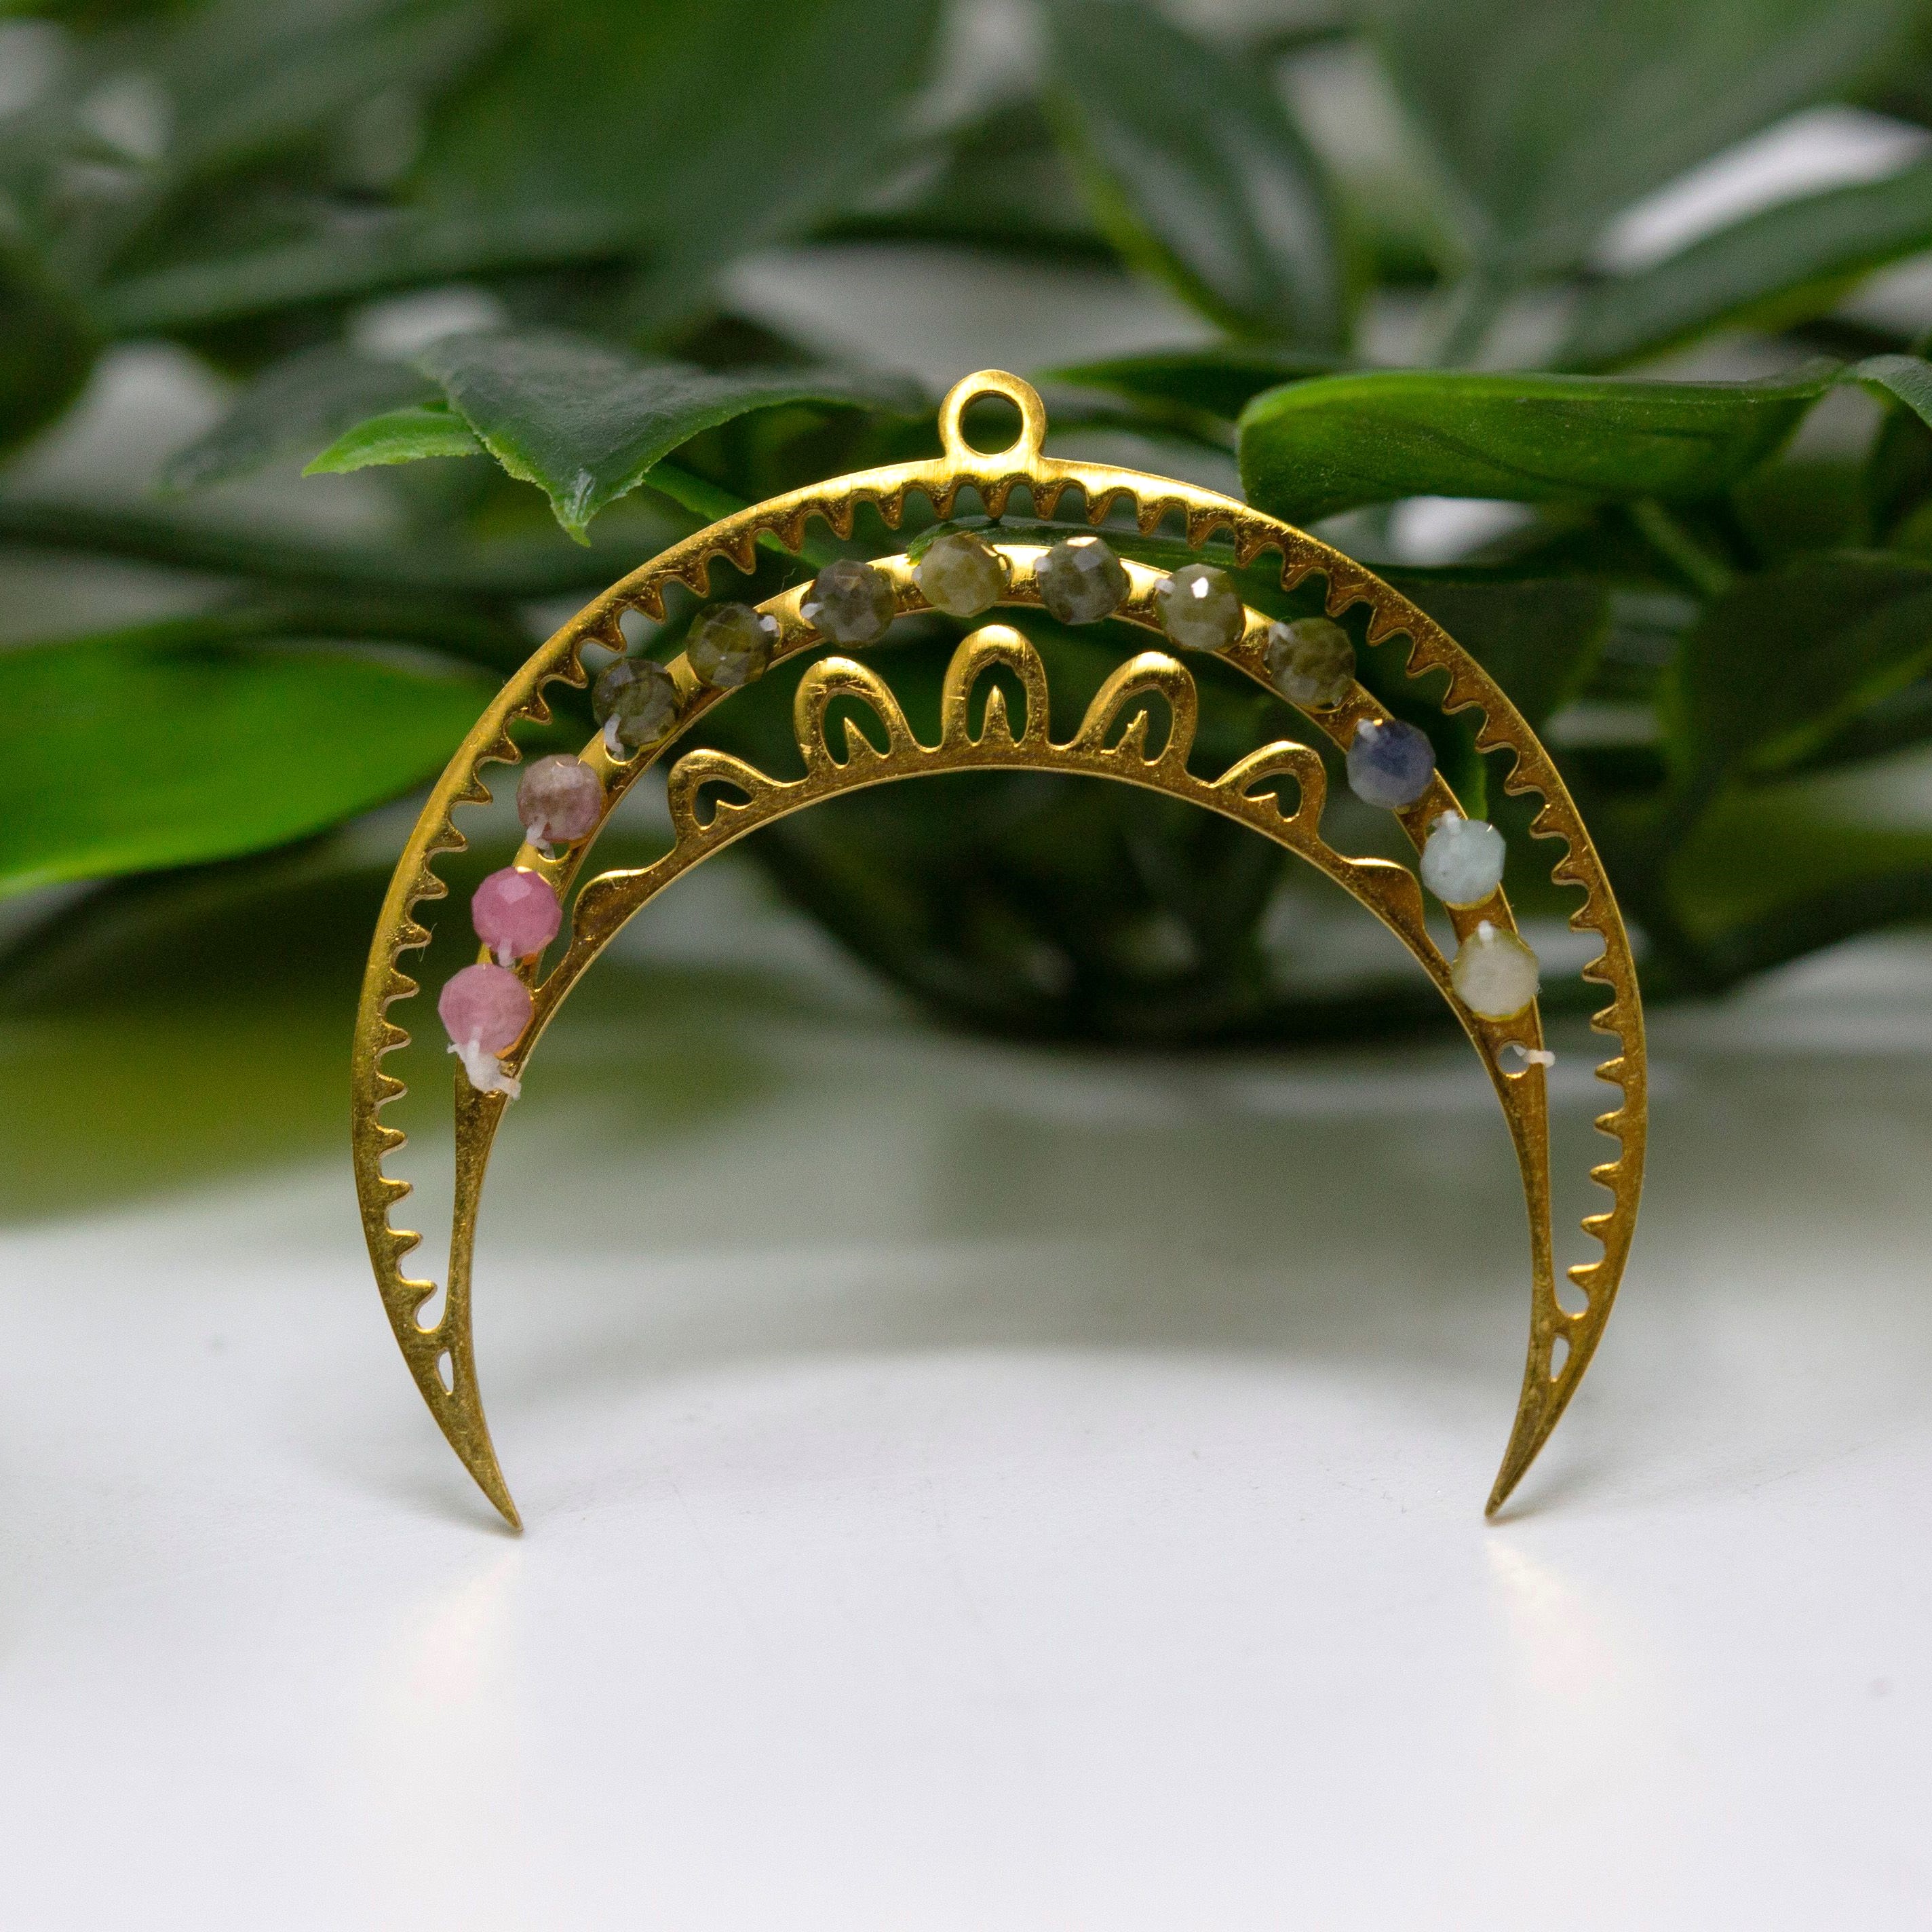
18K Gold Plated Stainless Steel 30x34mm Crescent Moon Horn Pendant
Tourmaline Banded 2mm Faceted Round
Fireline Crystal 6lb (1.5 feet)
You can recreate the above project by looping the fireline in and out of each hole in the pendant and knotting at both ends
Materials:
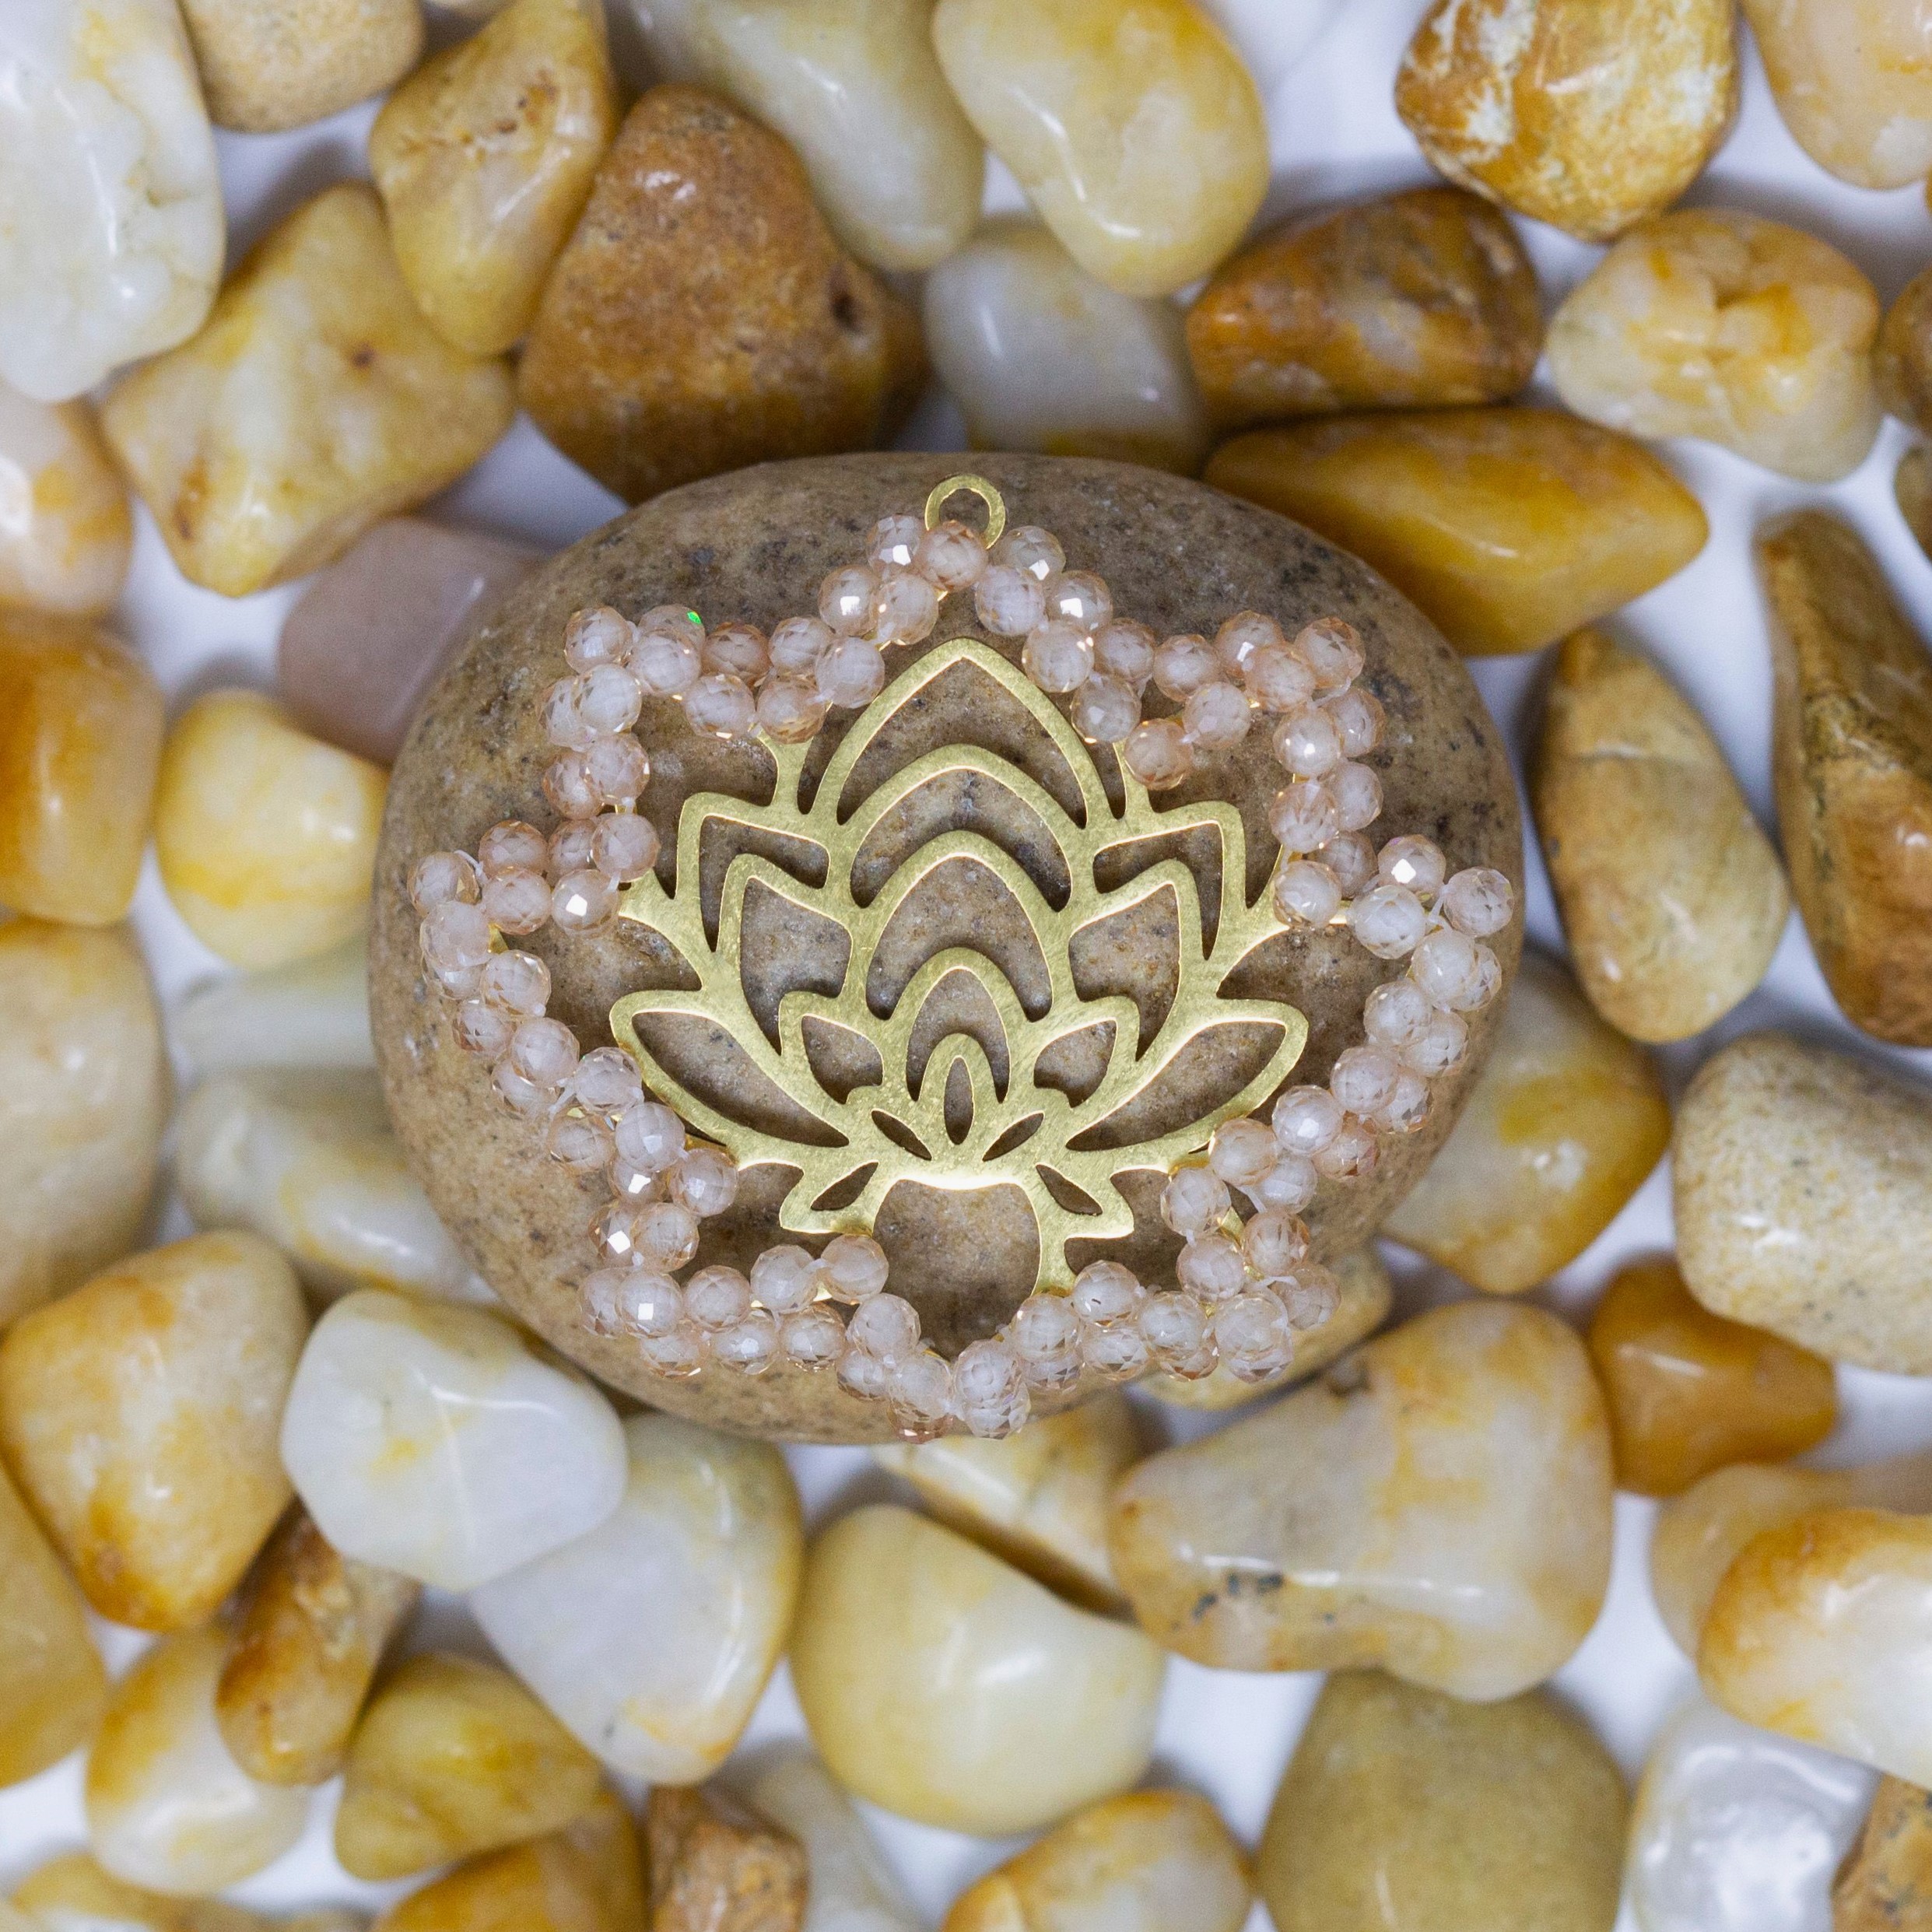
18K Gold Plated Stainless Steel 33x30mm Lotus Flower Pendant
Peach Zircon CZ Grade AA 2mm Faceted Round
Fireline Crystal 6lb (2.5 feet)
Materials:
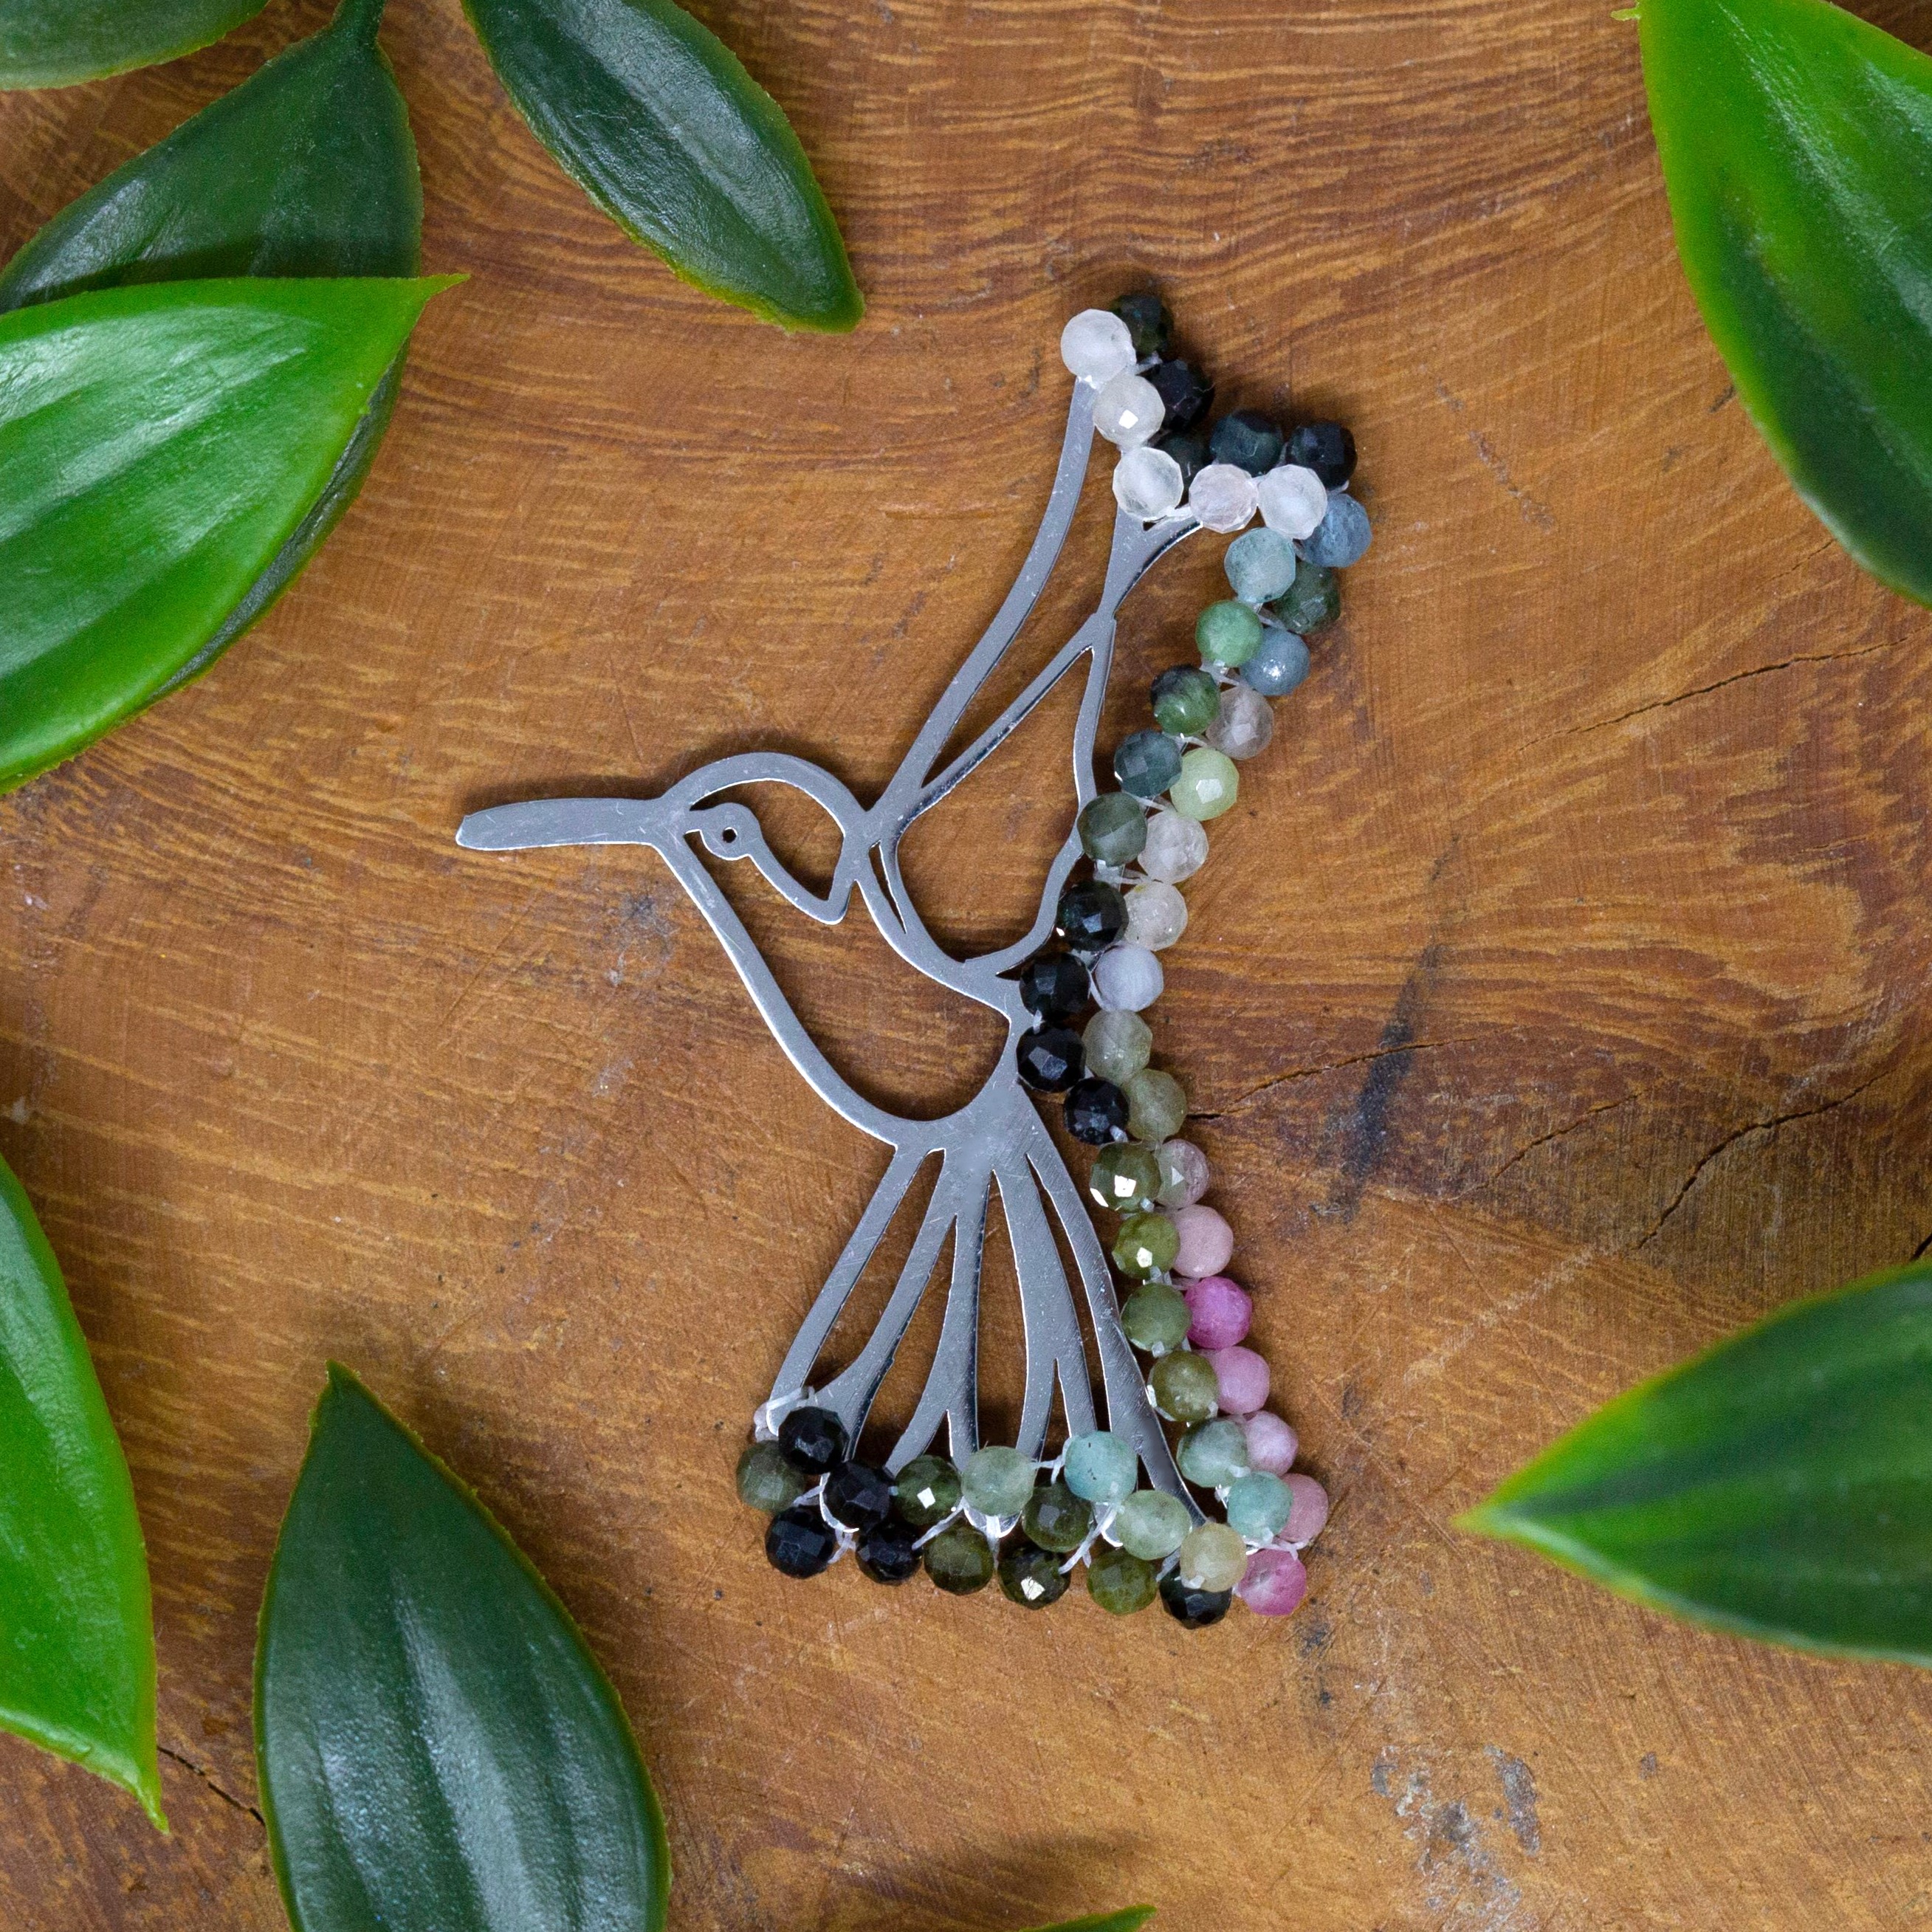
Stainless Steel 40x29mm Hummingbird
Tourmaline Banded 2mm Faceted Round
Fireline Crystal 6lb (1 foot)
Start at the tip of the hummingbird's wings then loop back around at the base of the wings
Materials:
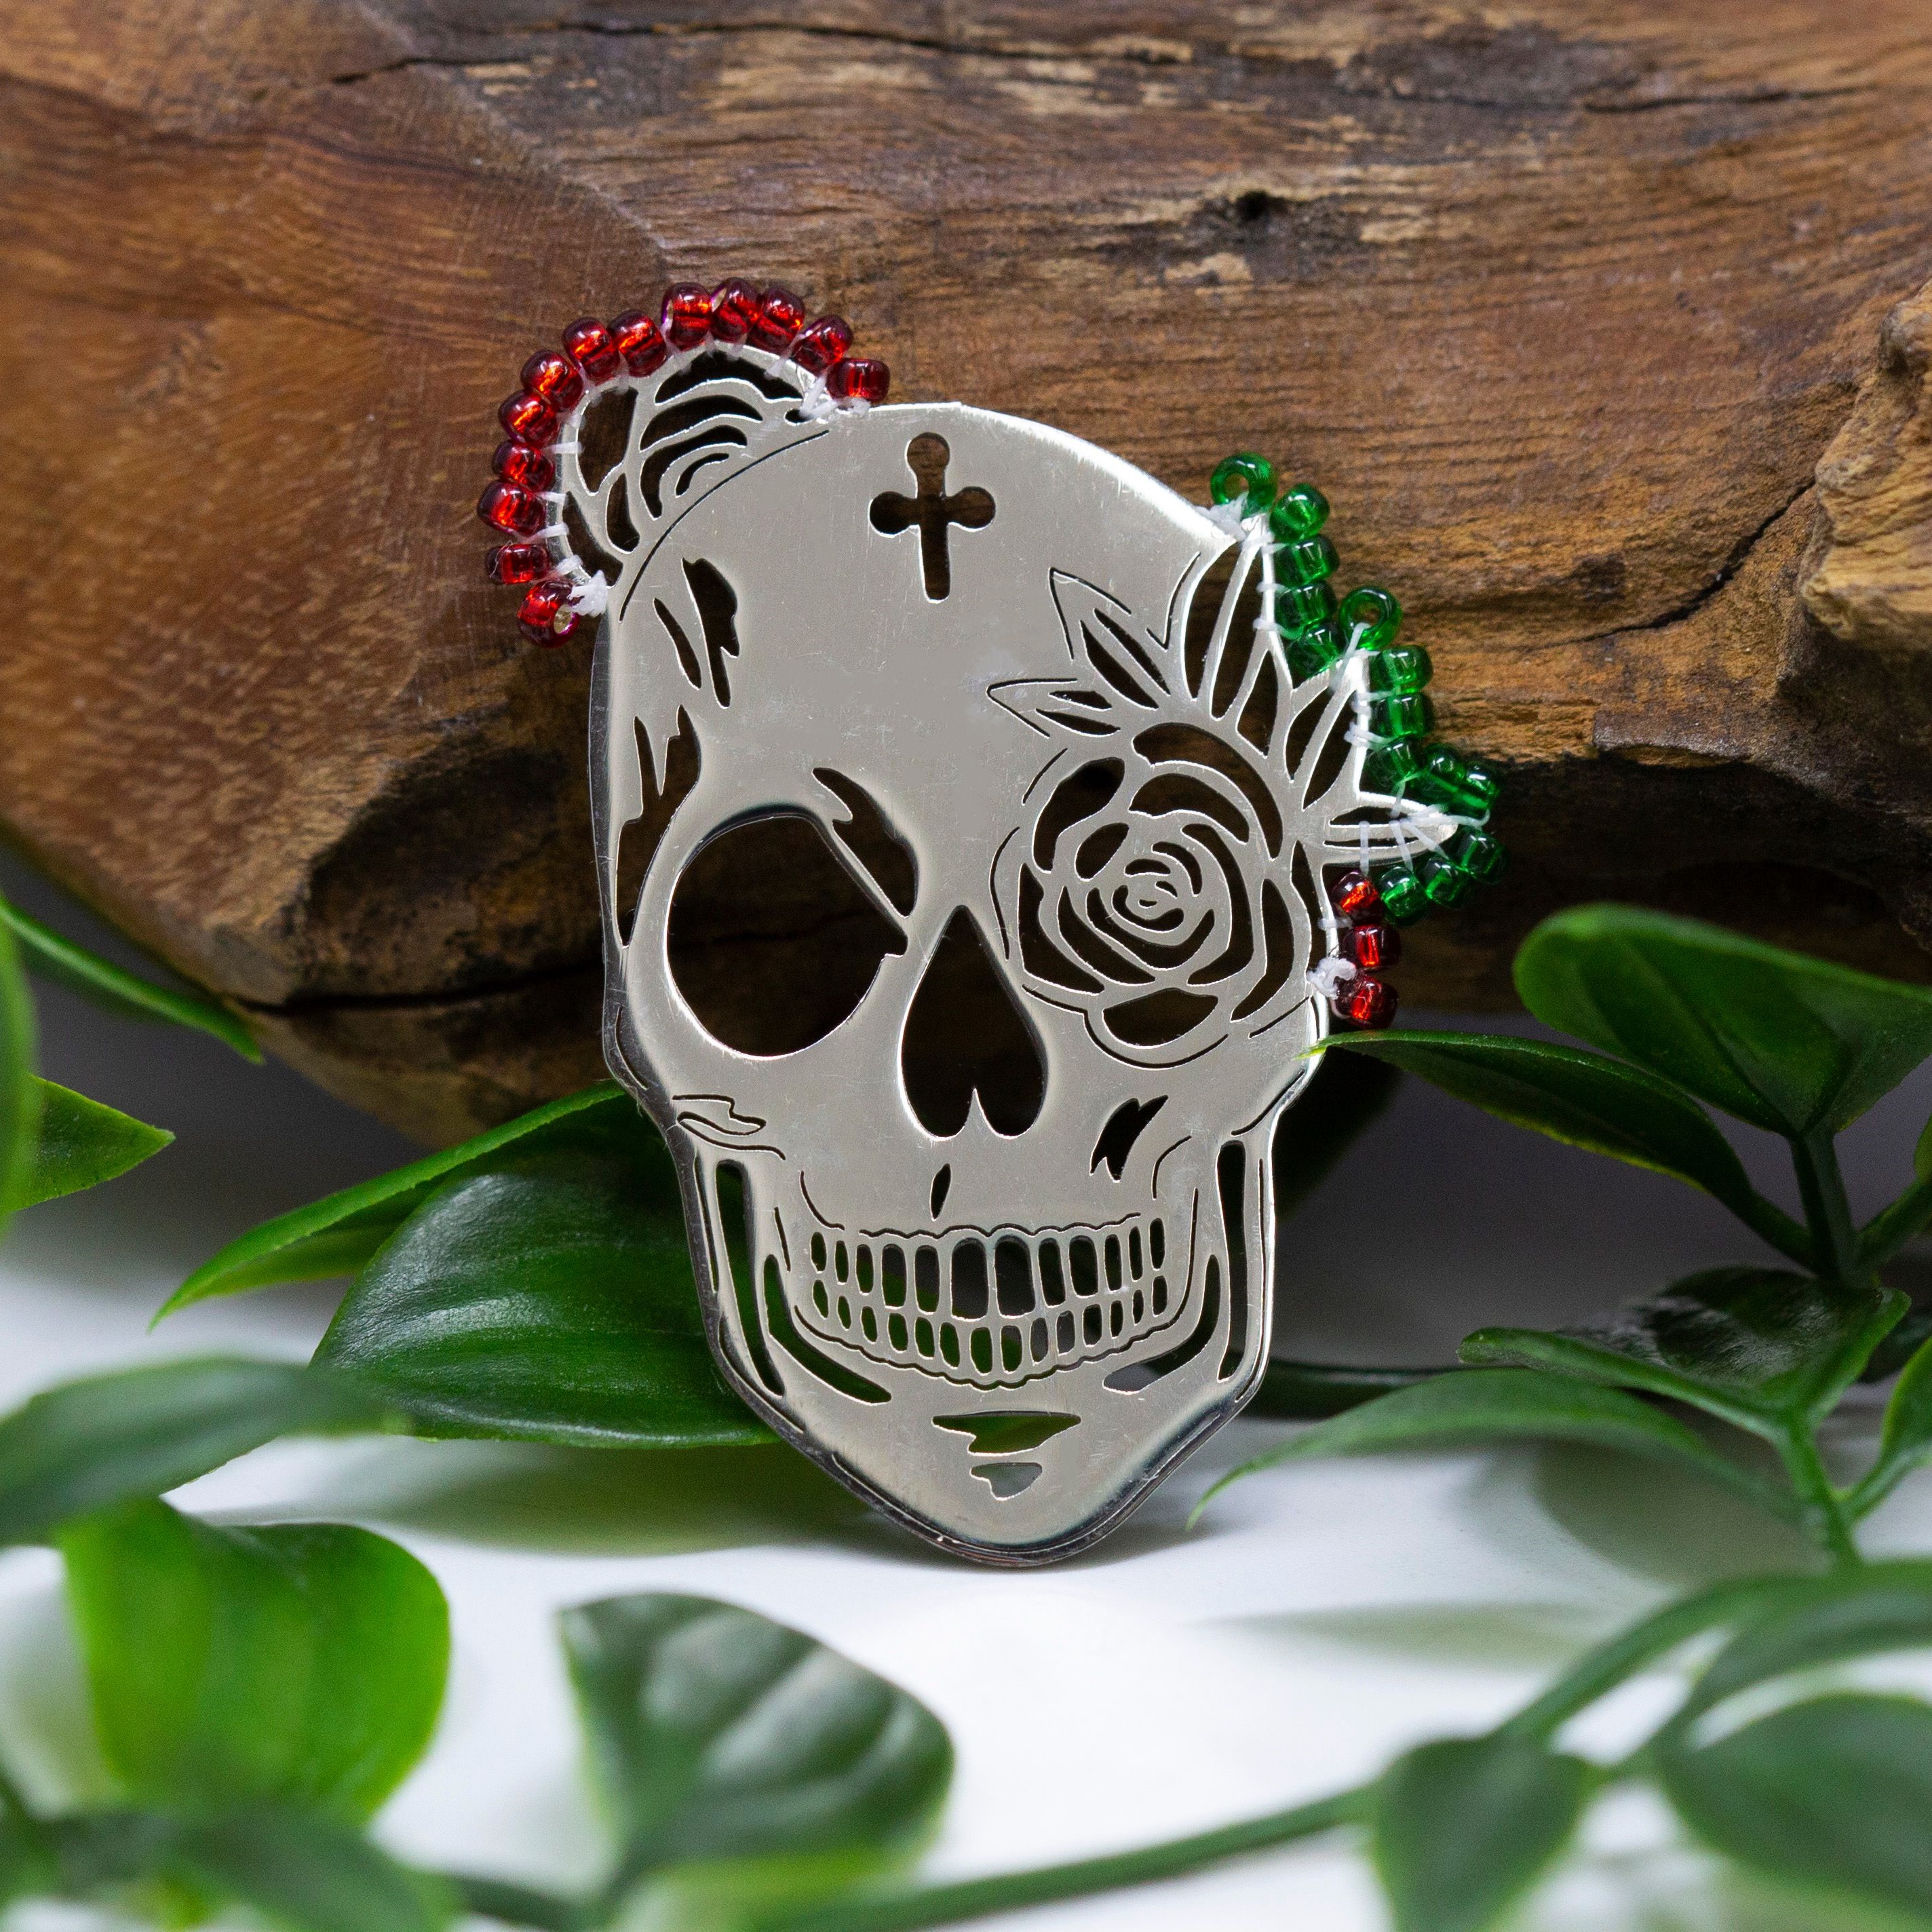
Stainless Steel 29x42mm Skull with Rose Pendant
Size 11 Miyuki Seed Beads Dark Ruby Silver Lined (16)
Size 11 Miyuki Seed Beads Green / Silver Lined (14)
Fireline Crystal 6lb (2 feet)
Leaves with rose and rose are completed and knotted separately
Recent Posts
-
Christmas Wine Charms - Mini Tutorial
Christmas Wine Charms - Mini TutorialThese wine charms are sure to be the center talking point at yo …25th Nov 2024 -
Christmas Bow Garland - Mini Tutorial
Christmas Bow Garland - Mini TutorialCreate your own holiday decor with a Christmas-colored bow garl …14th Nov 2024 -
Charm Necklace Tutorial
Charm Necklace TutorialEmbrace individuality with our Personalized Charm Necklace tutorial, a perfec …6th Nov 2024


