

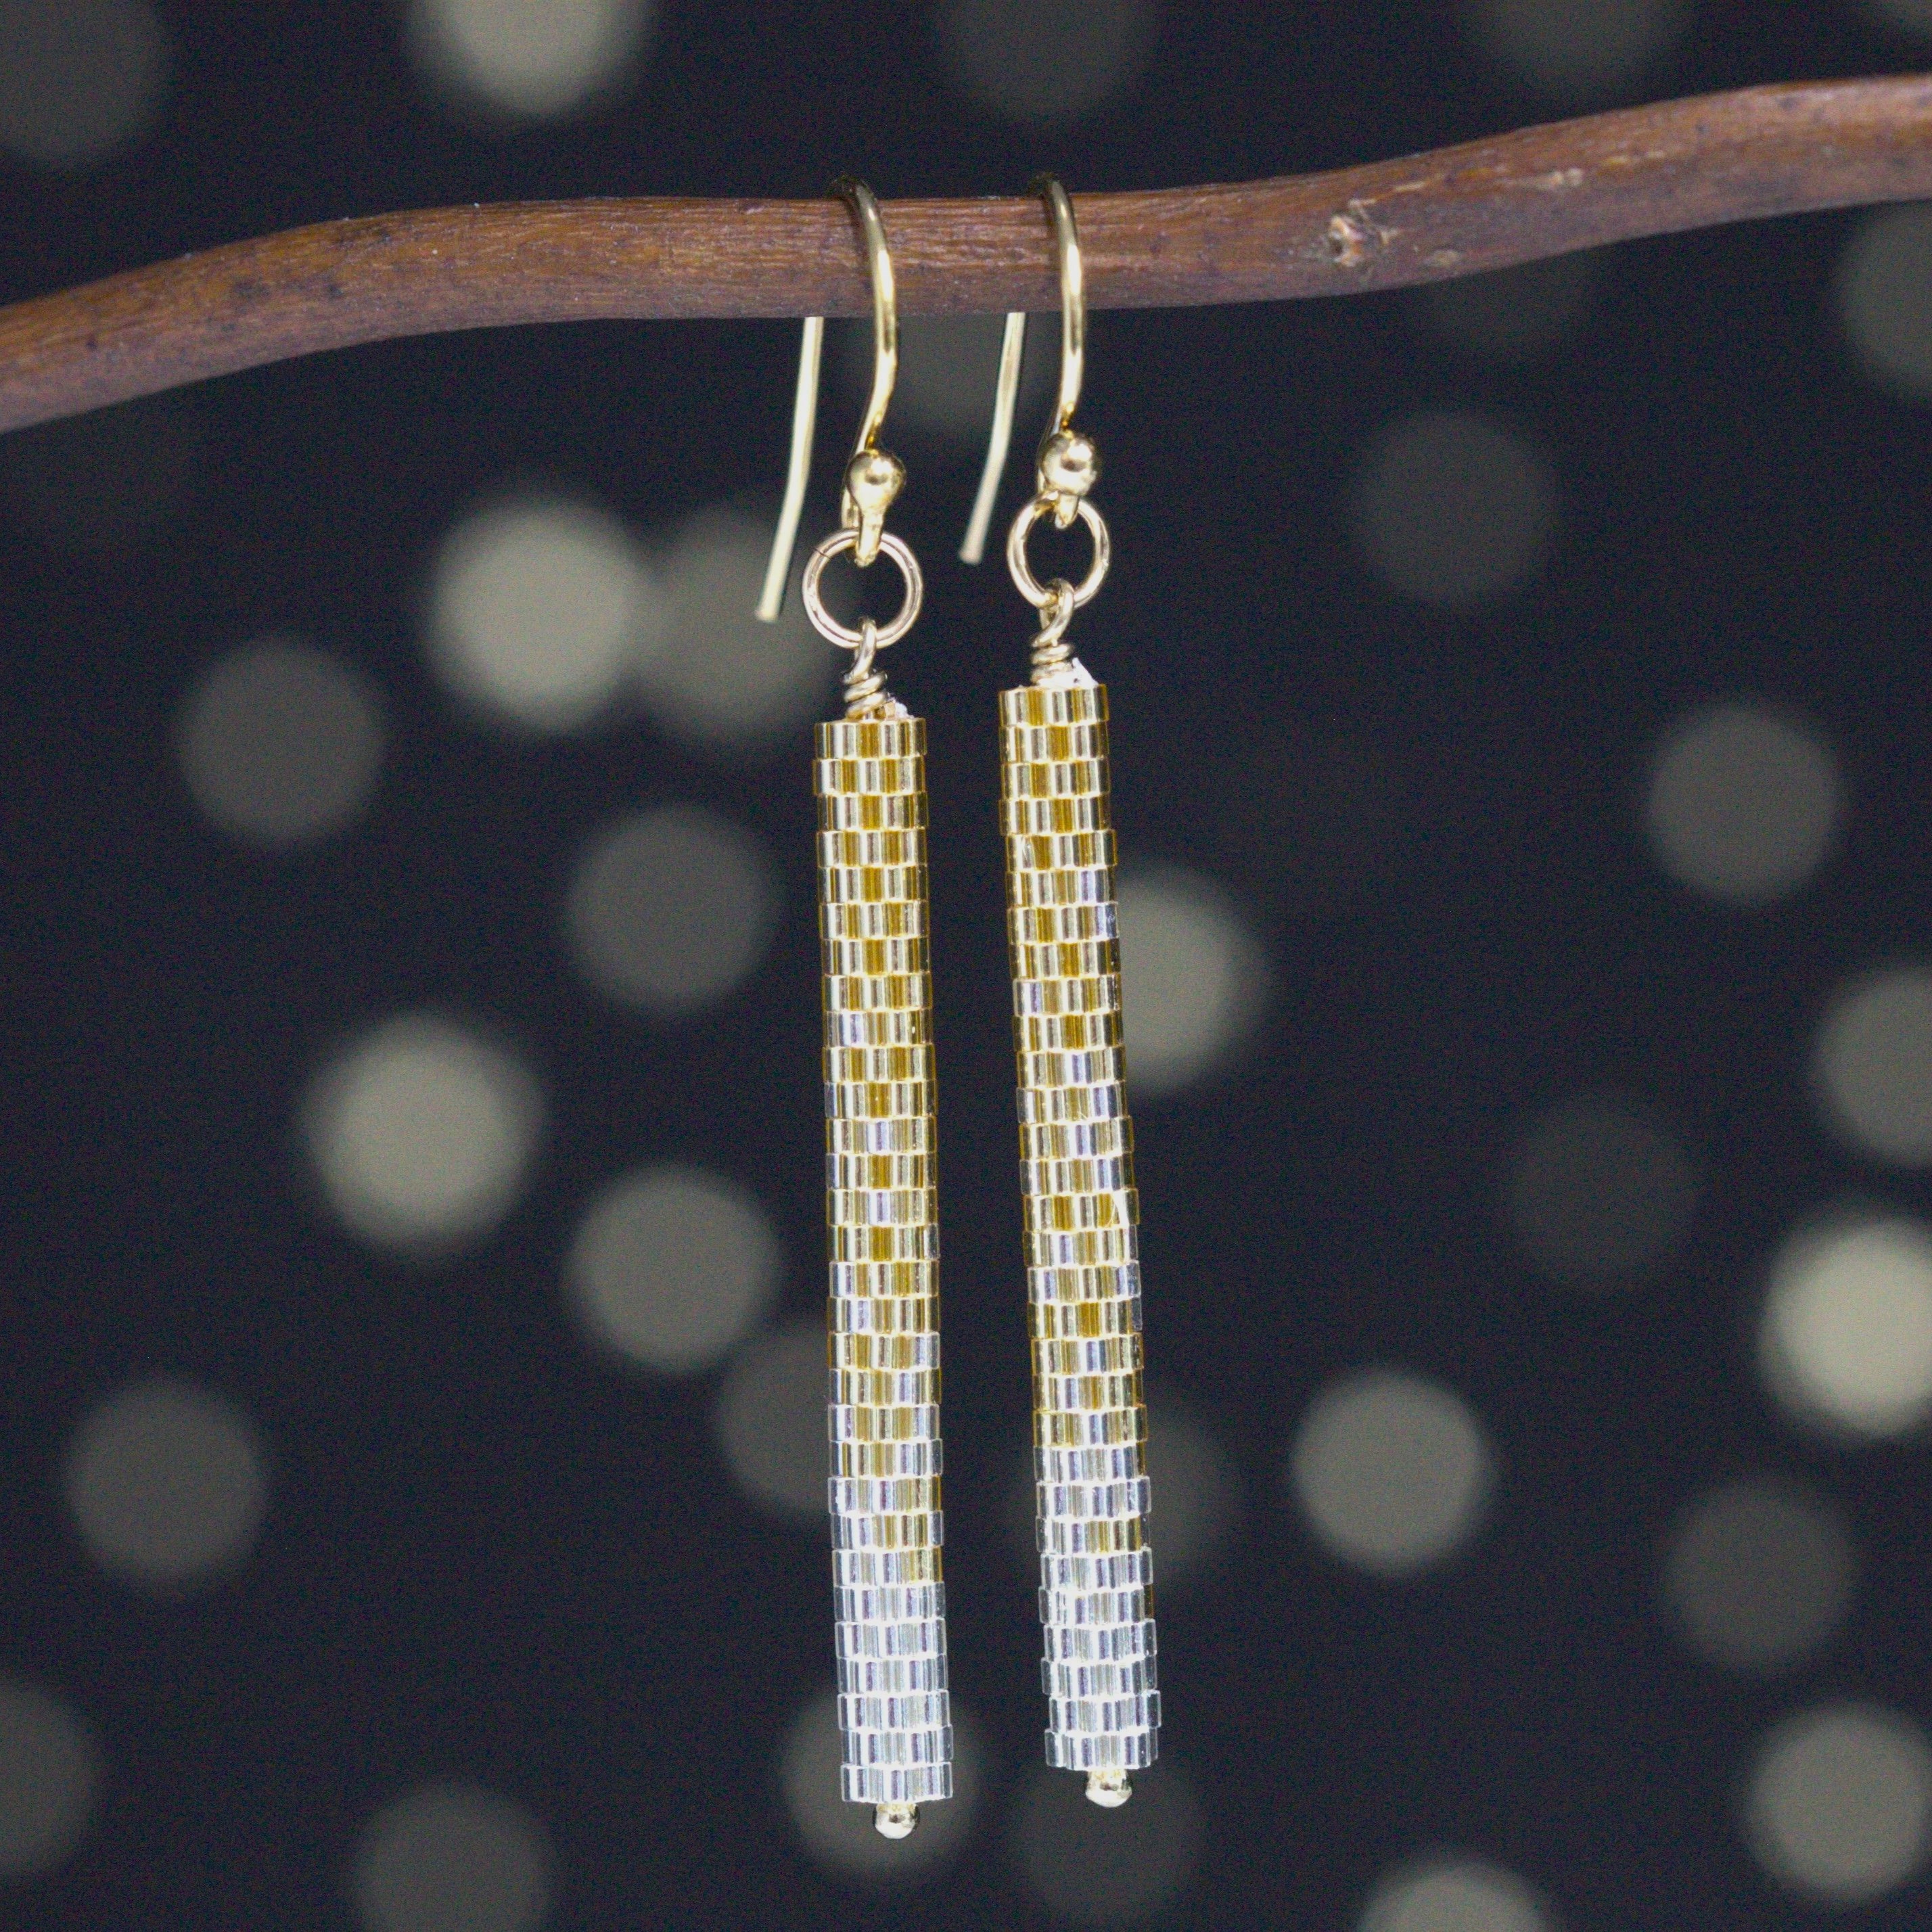
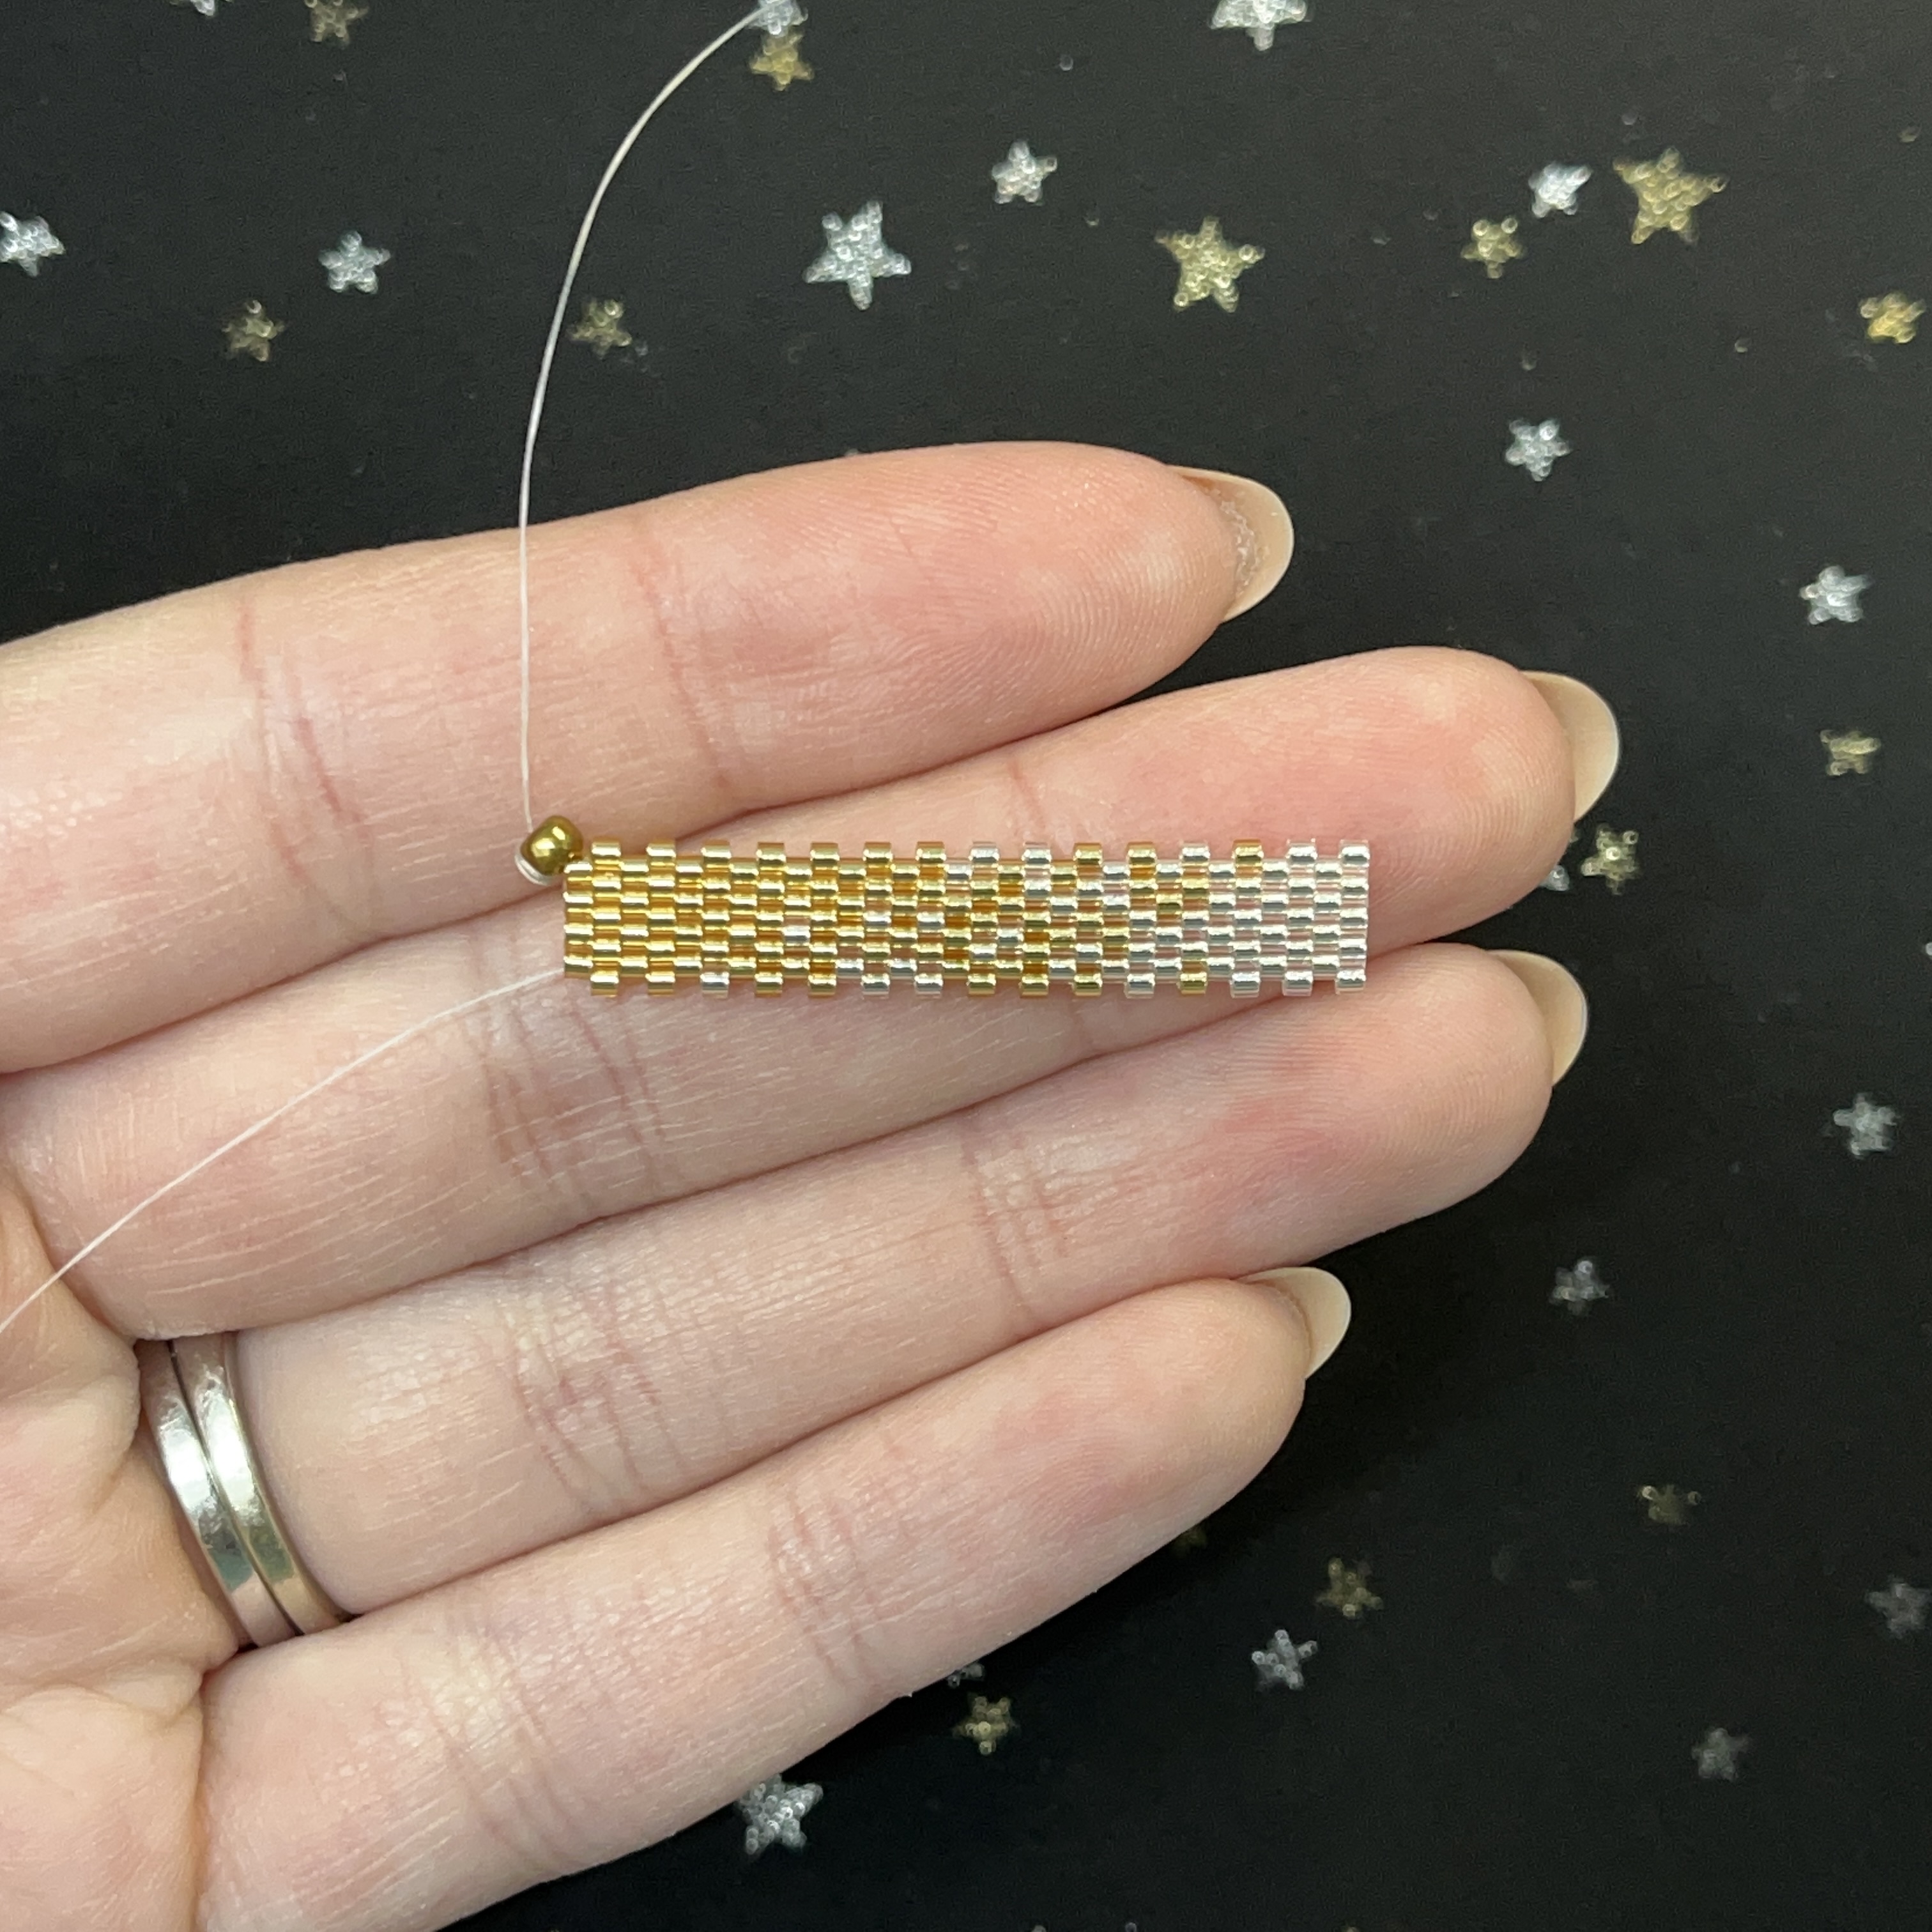
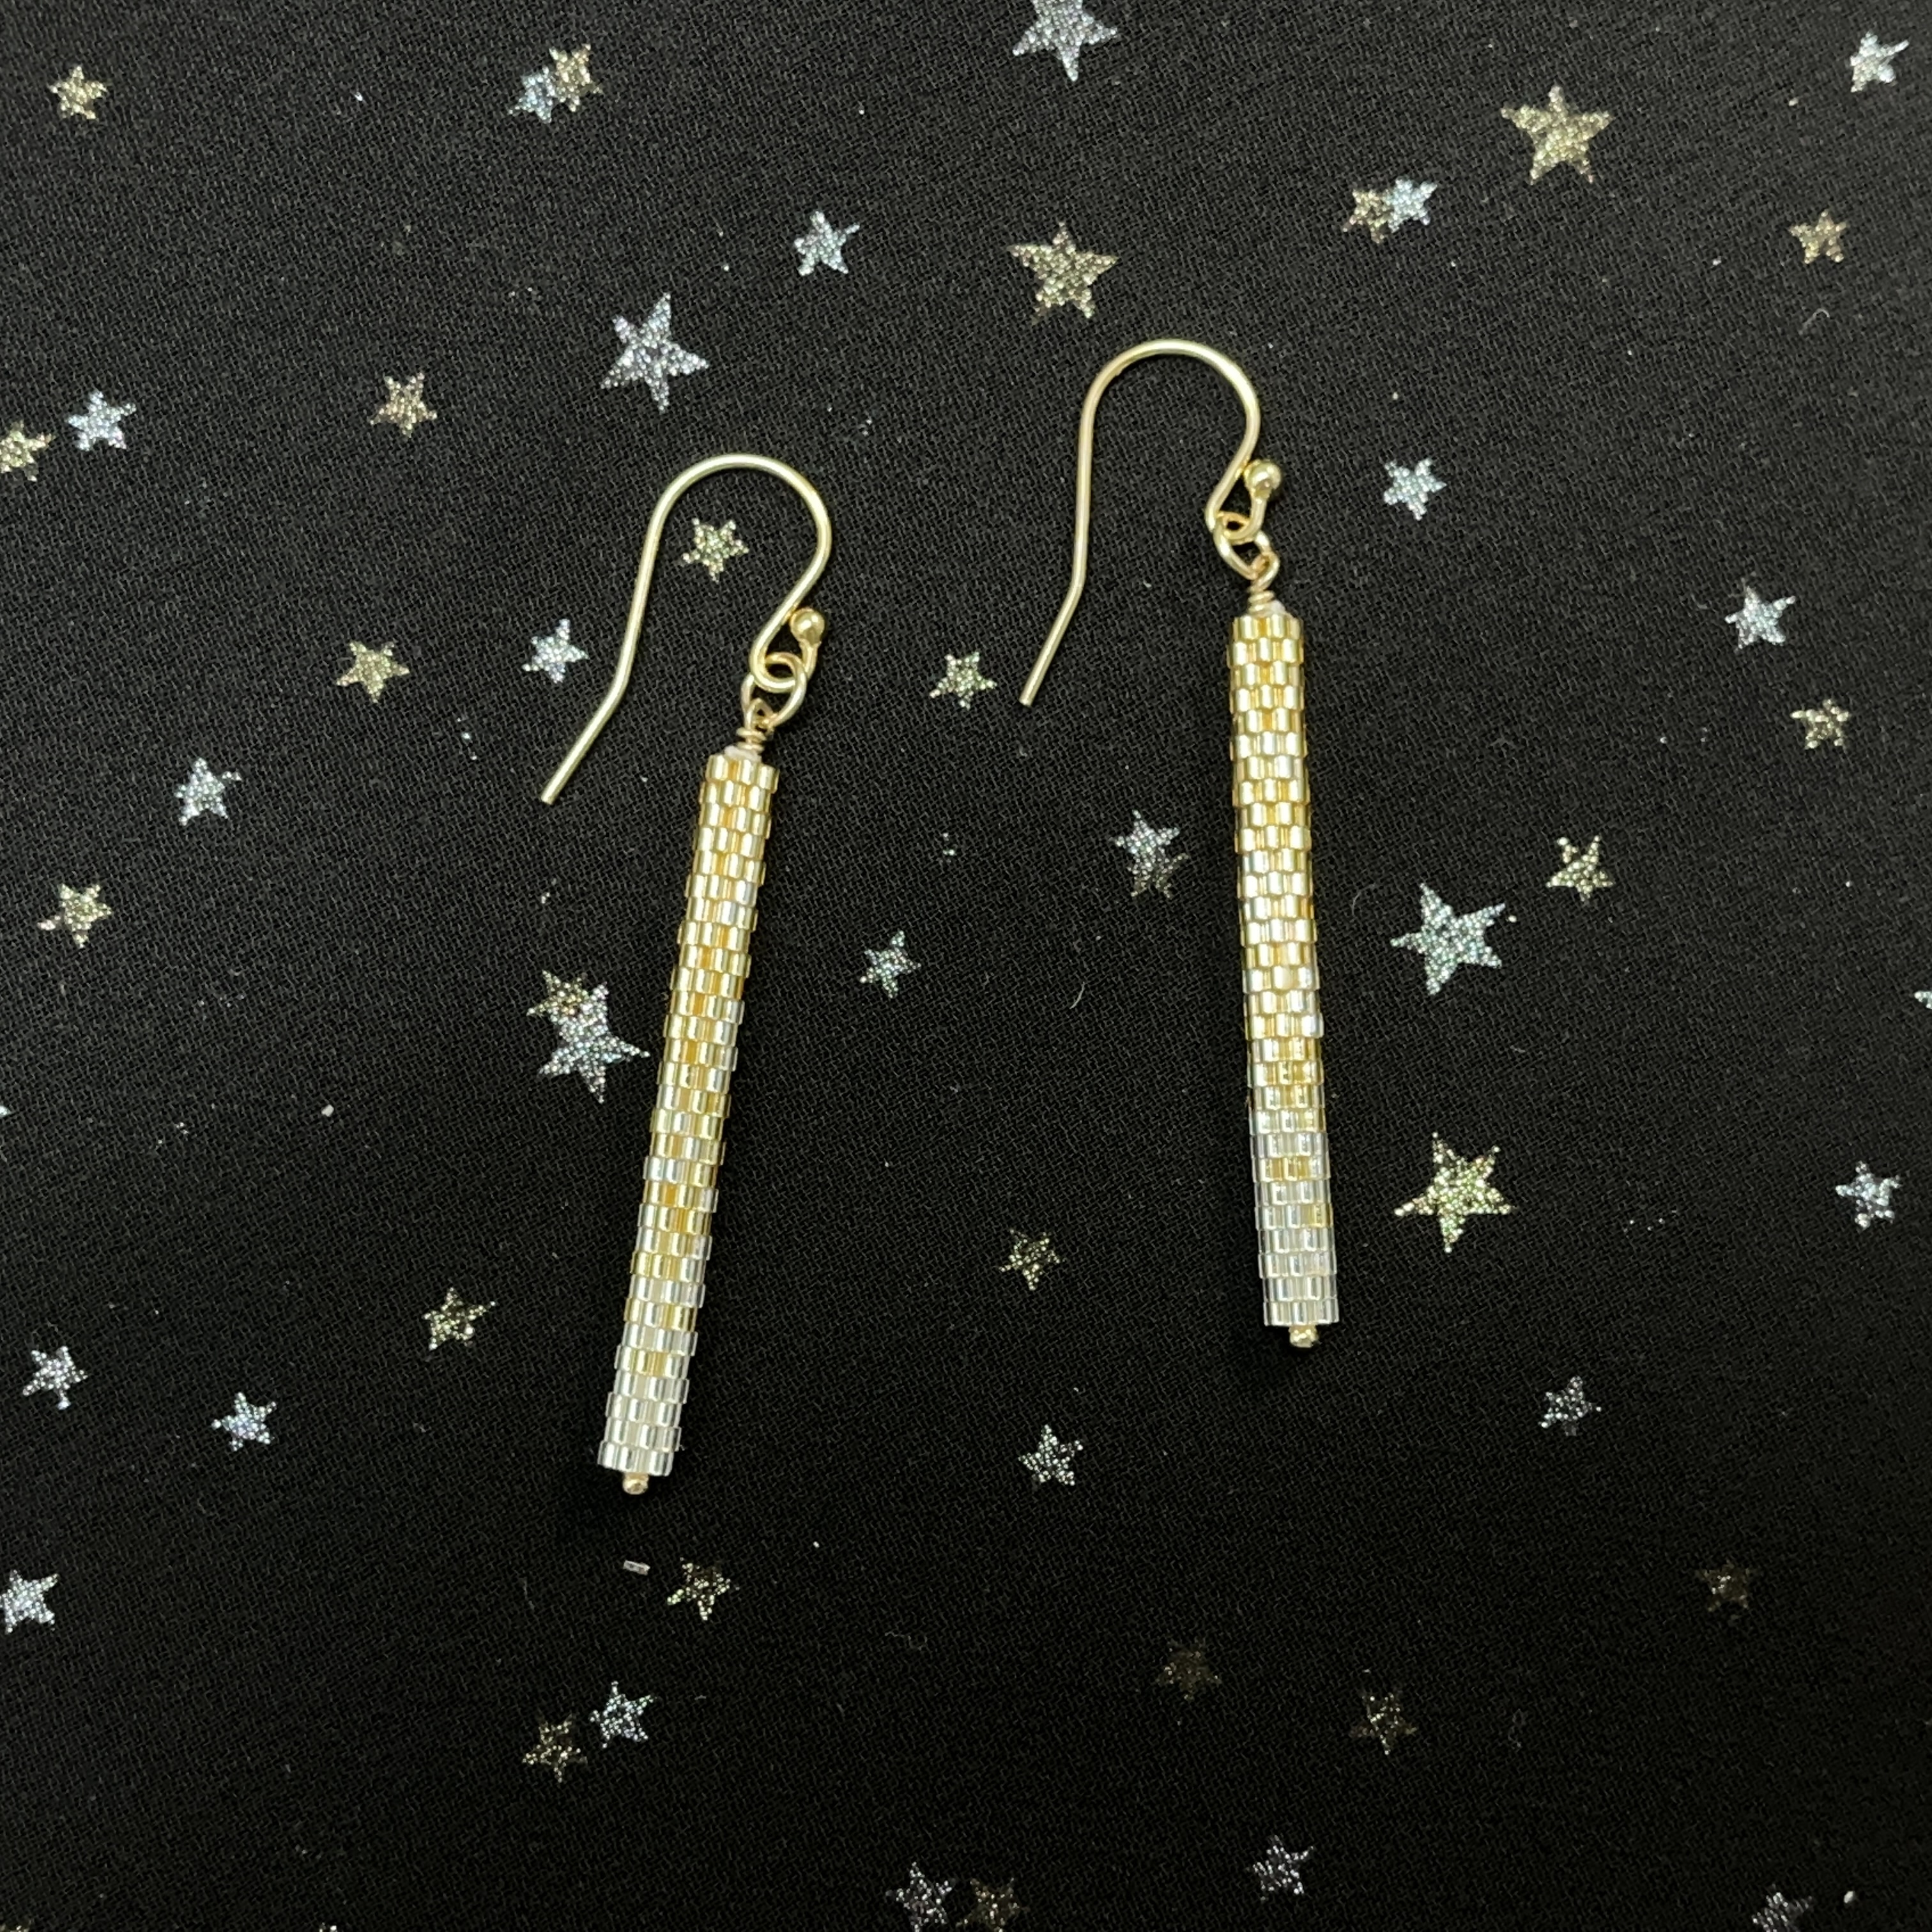
Metallic Ombre - Gold and Silver Peyote Tube Earrings
Metallic Ombre - Gold and Silver Peyote Tube Earrings
This pattern can be a little challenging to a beginner just learning peyote; however, the ombre effect in the pattern can be quite forgiving as long as you keep to the same number of total beads in the pattern.
Peyote Tube Length approx. 1.5 inches
Materials Needed:
- Delica Size 15 - 042 Gold / Silver Lined
- Delica Size 15 - 041 Crystal / Silver Lined
- Fireline Crystal 4lb (about 3 feet but you will end up using less)
- 14K Gold Filled 4mm 22 gauge open jump rings (2)
- 14K Gold Filled Ball End Ear Wires
- John James Needle Size 12 (1)
- GS-Hypo Cement (Red Tube)
- 14K Gold 2" long 24 gauge ball end head pins (2)
Tools Required:
Needle Nose Pliers (also known as chain nose)
Instructions on Construction:
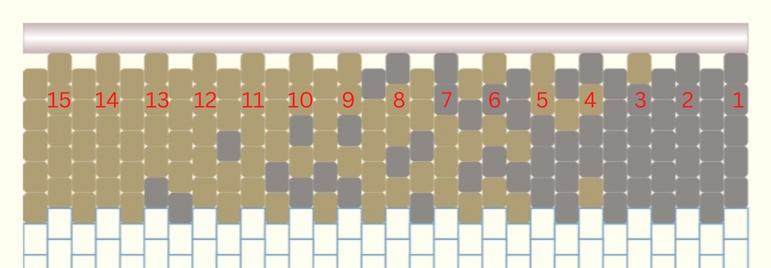
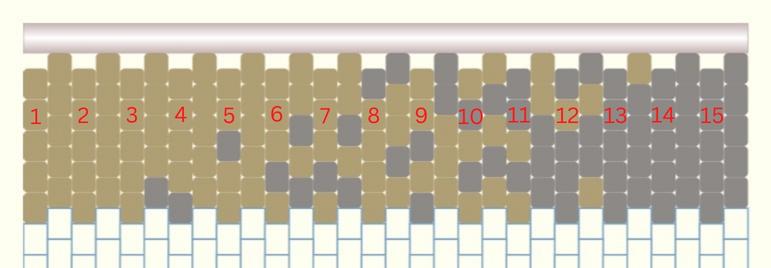
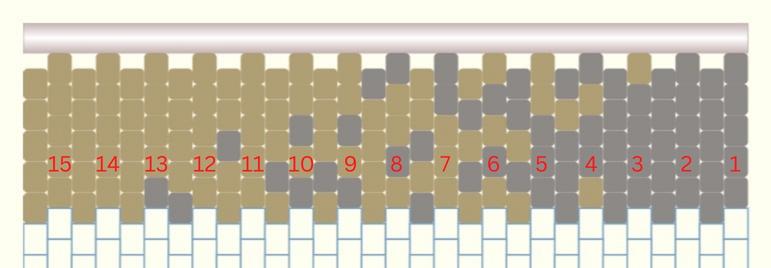
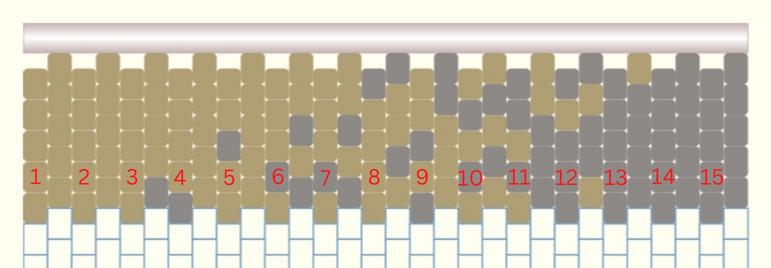
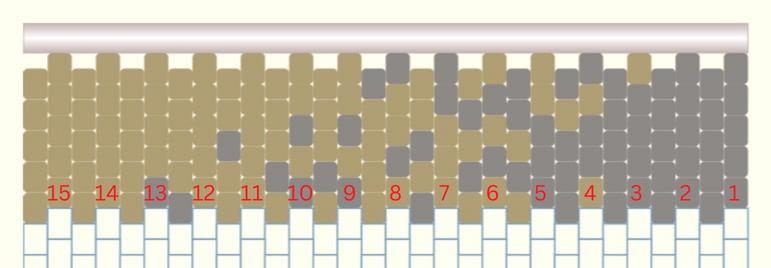
Pattern
Personally, I like to take my cursor and hold it over the bead I am currently stringing. This helps to not loose your place, especially in a more complex pattern like this one where the colors are so similar.

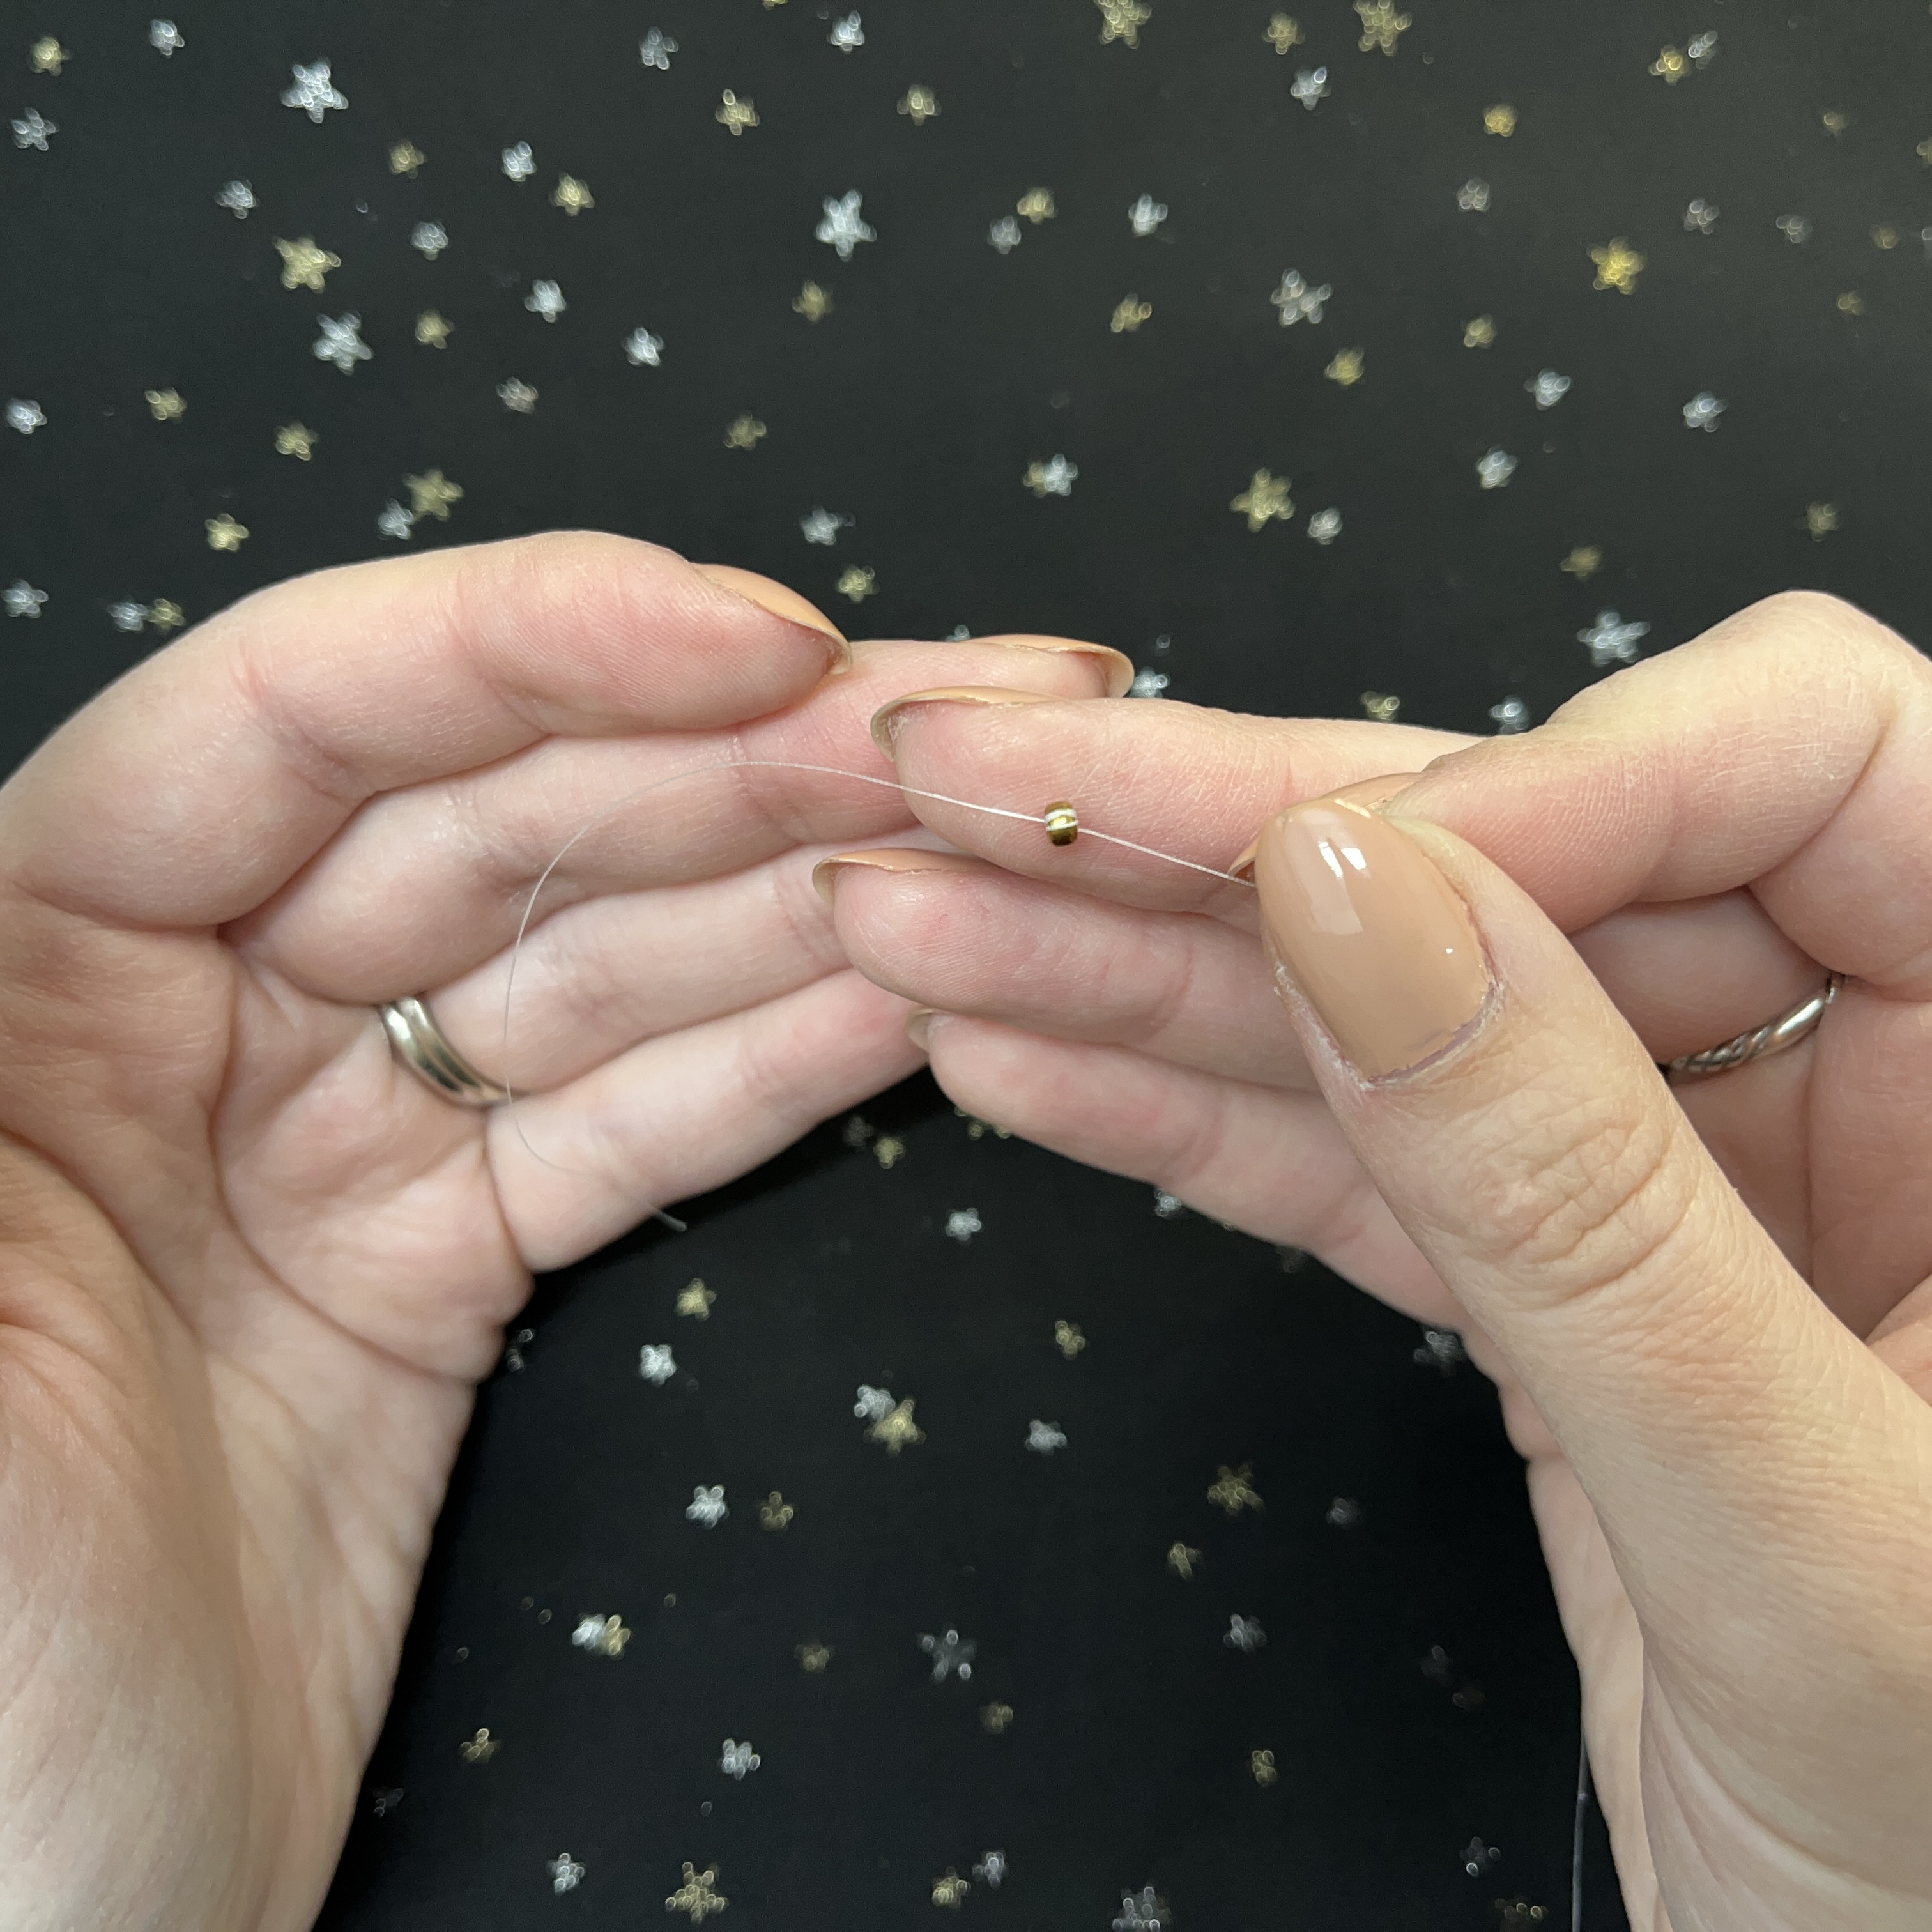
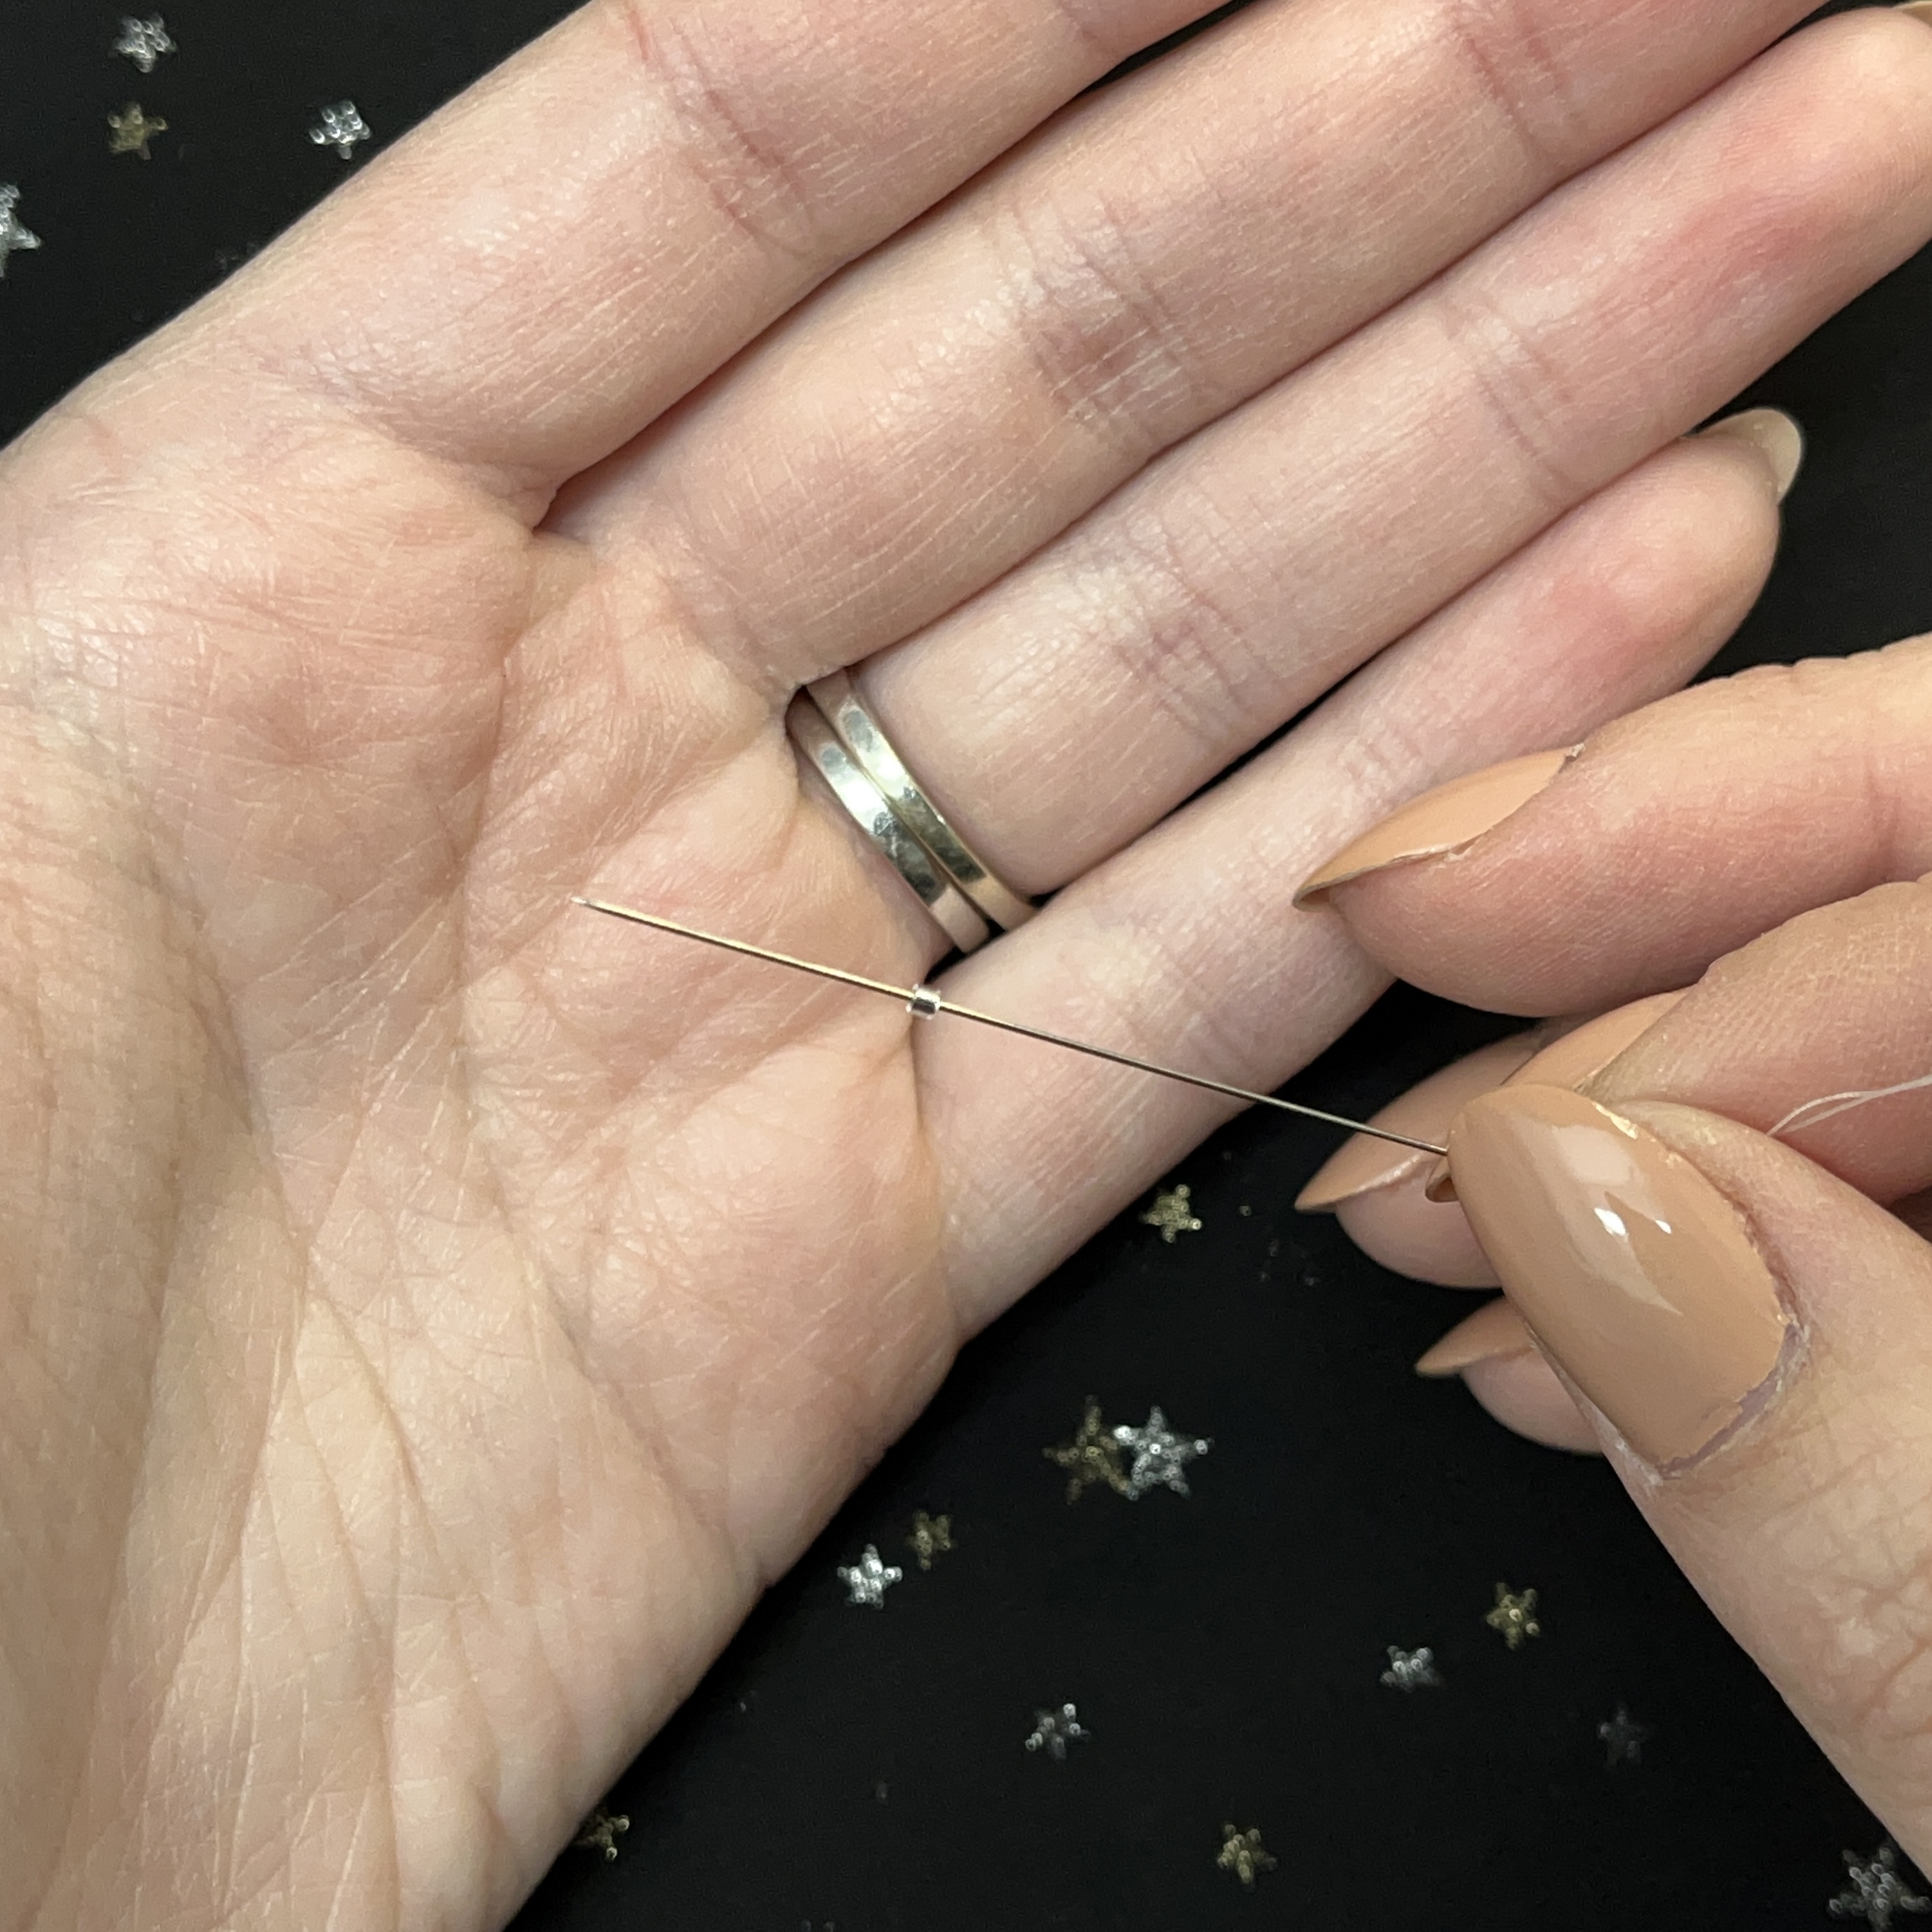
1. Thread on a spare bead you have laying around as your stopper bead. I used a spare size 8 seed bead. Wrap your thread through the bead 3 times to secure it, do not knot it.
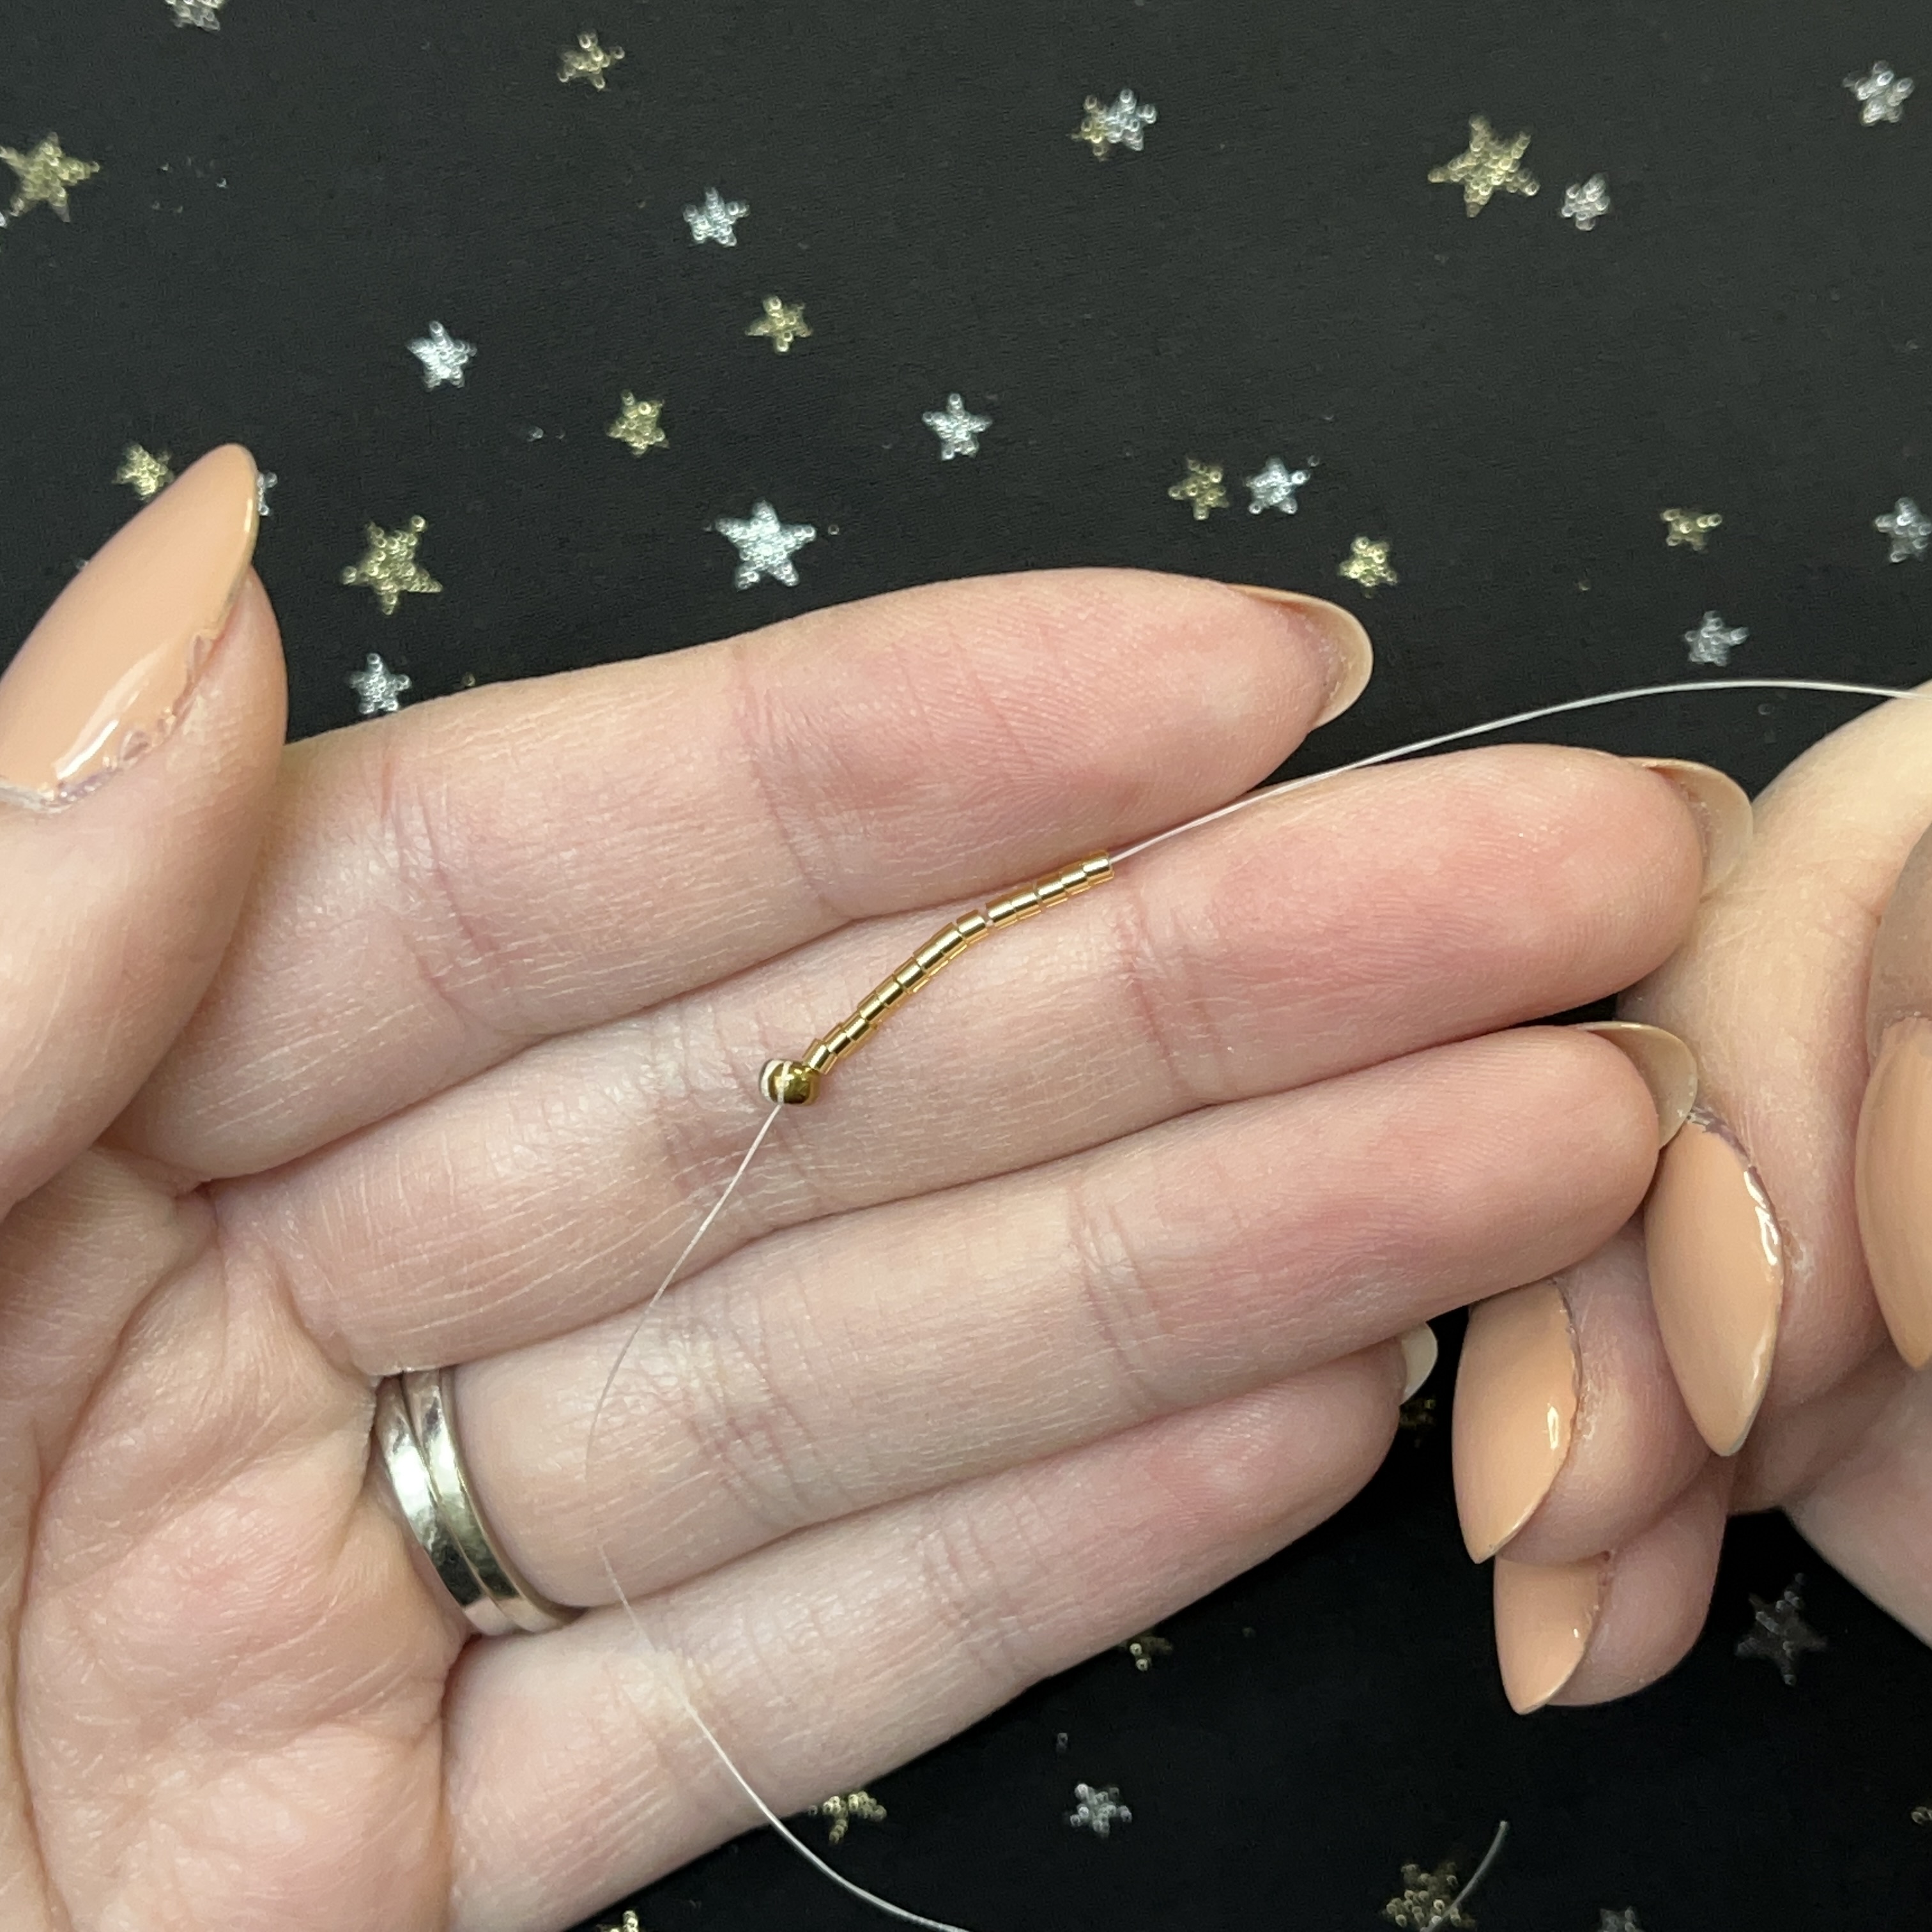
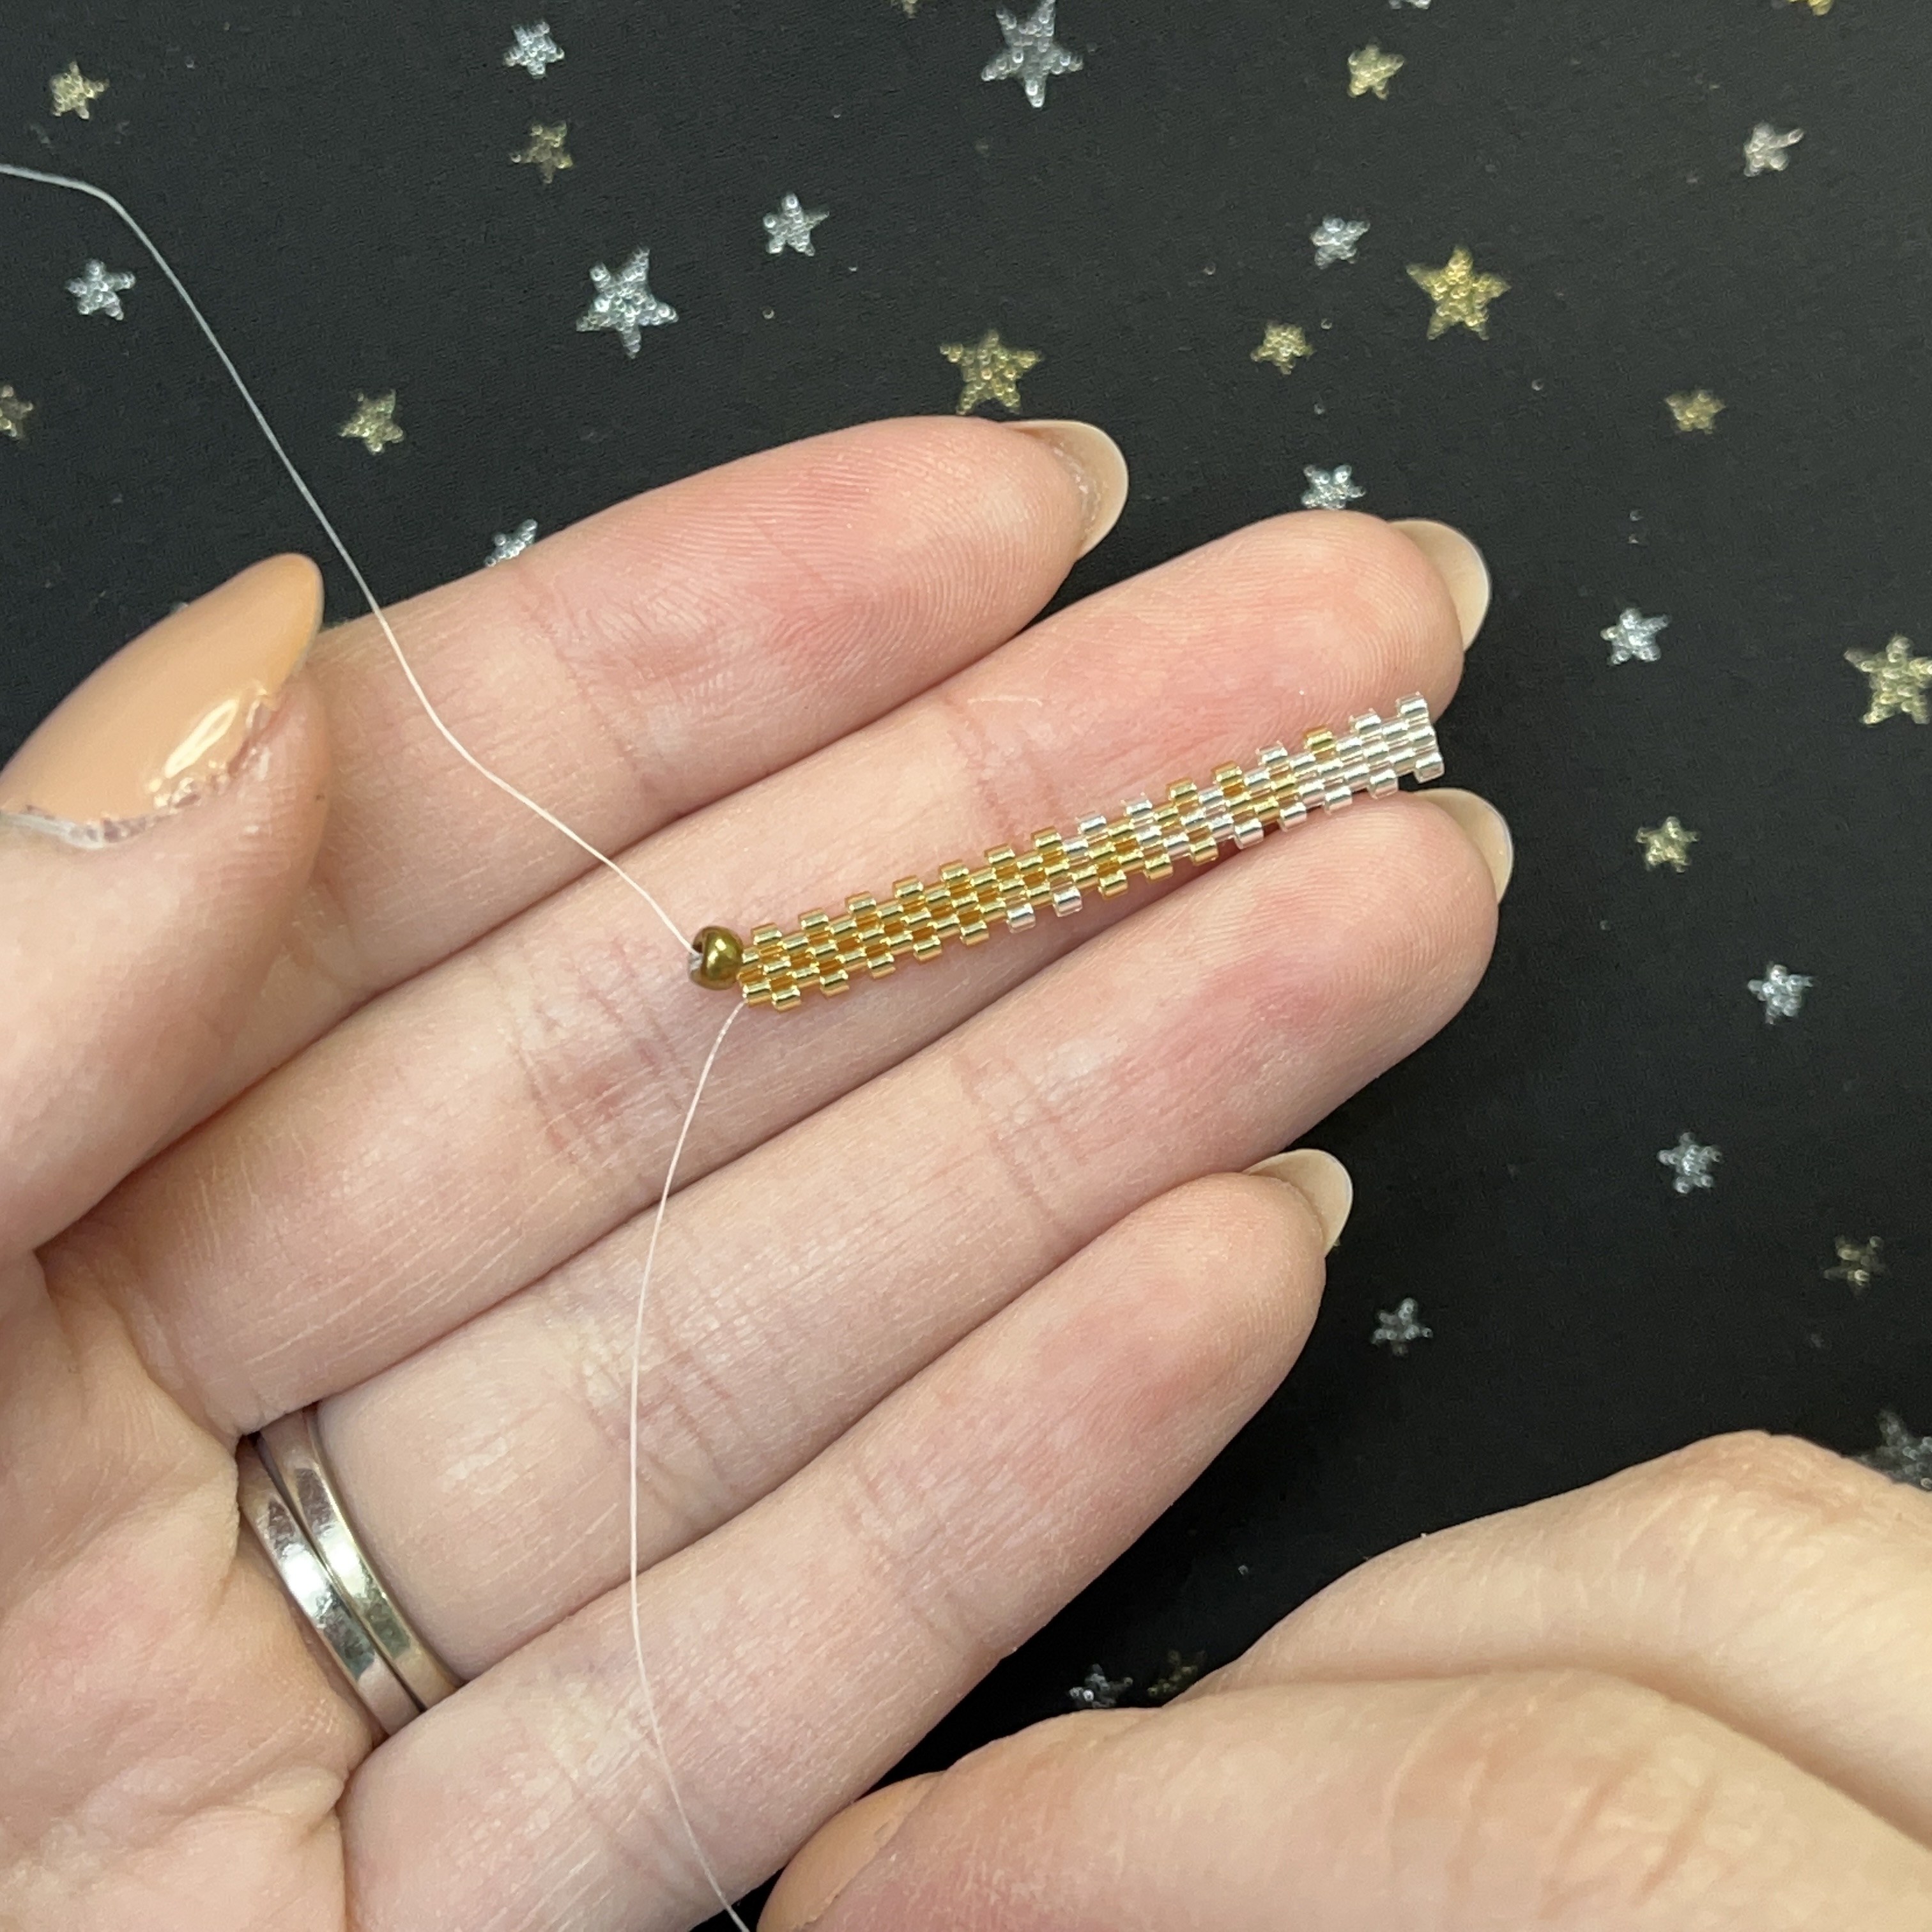
2. The first two rows of your peyote will be the hardest. Thread on 14 gold silver lined beads like shown above.
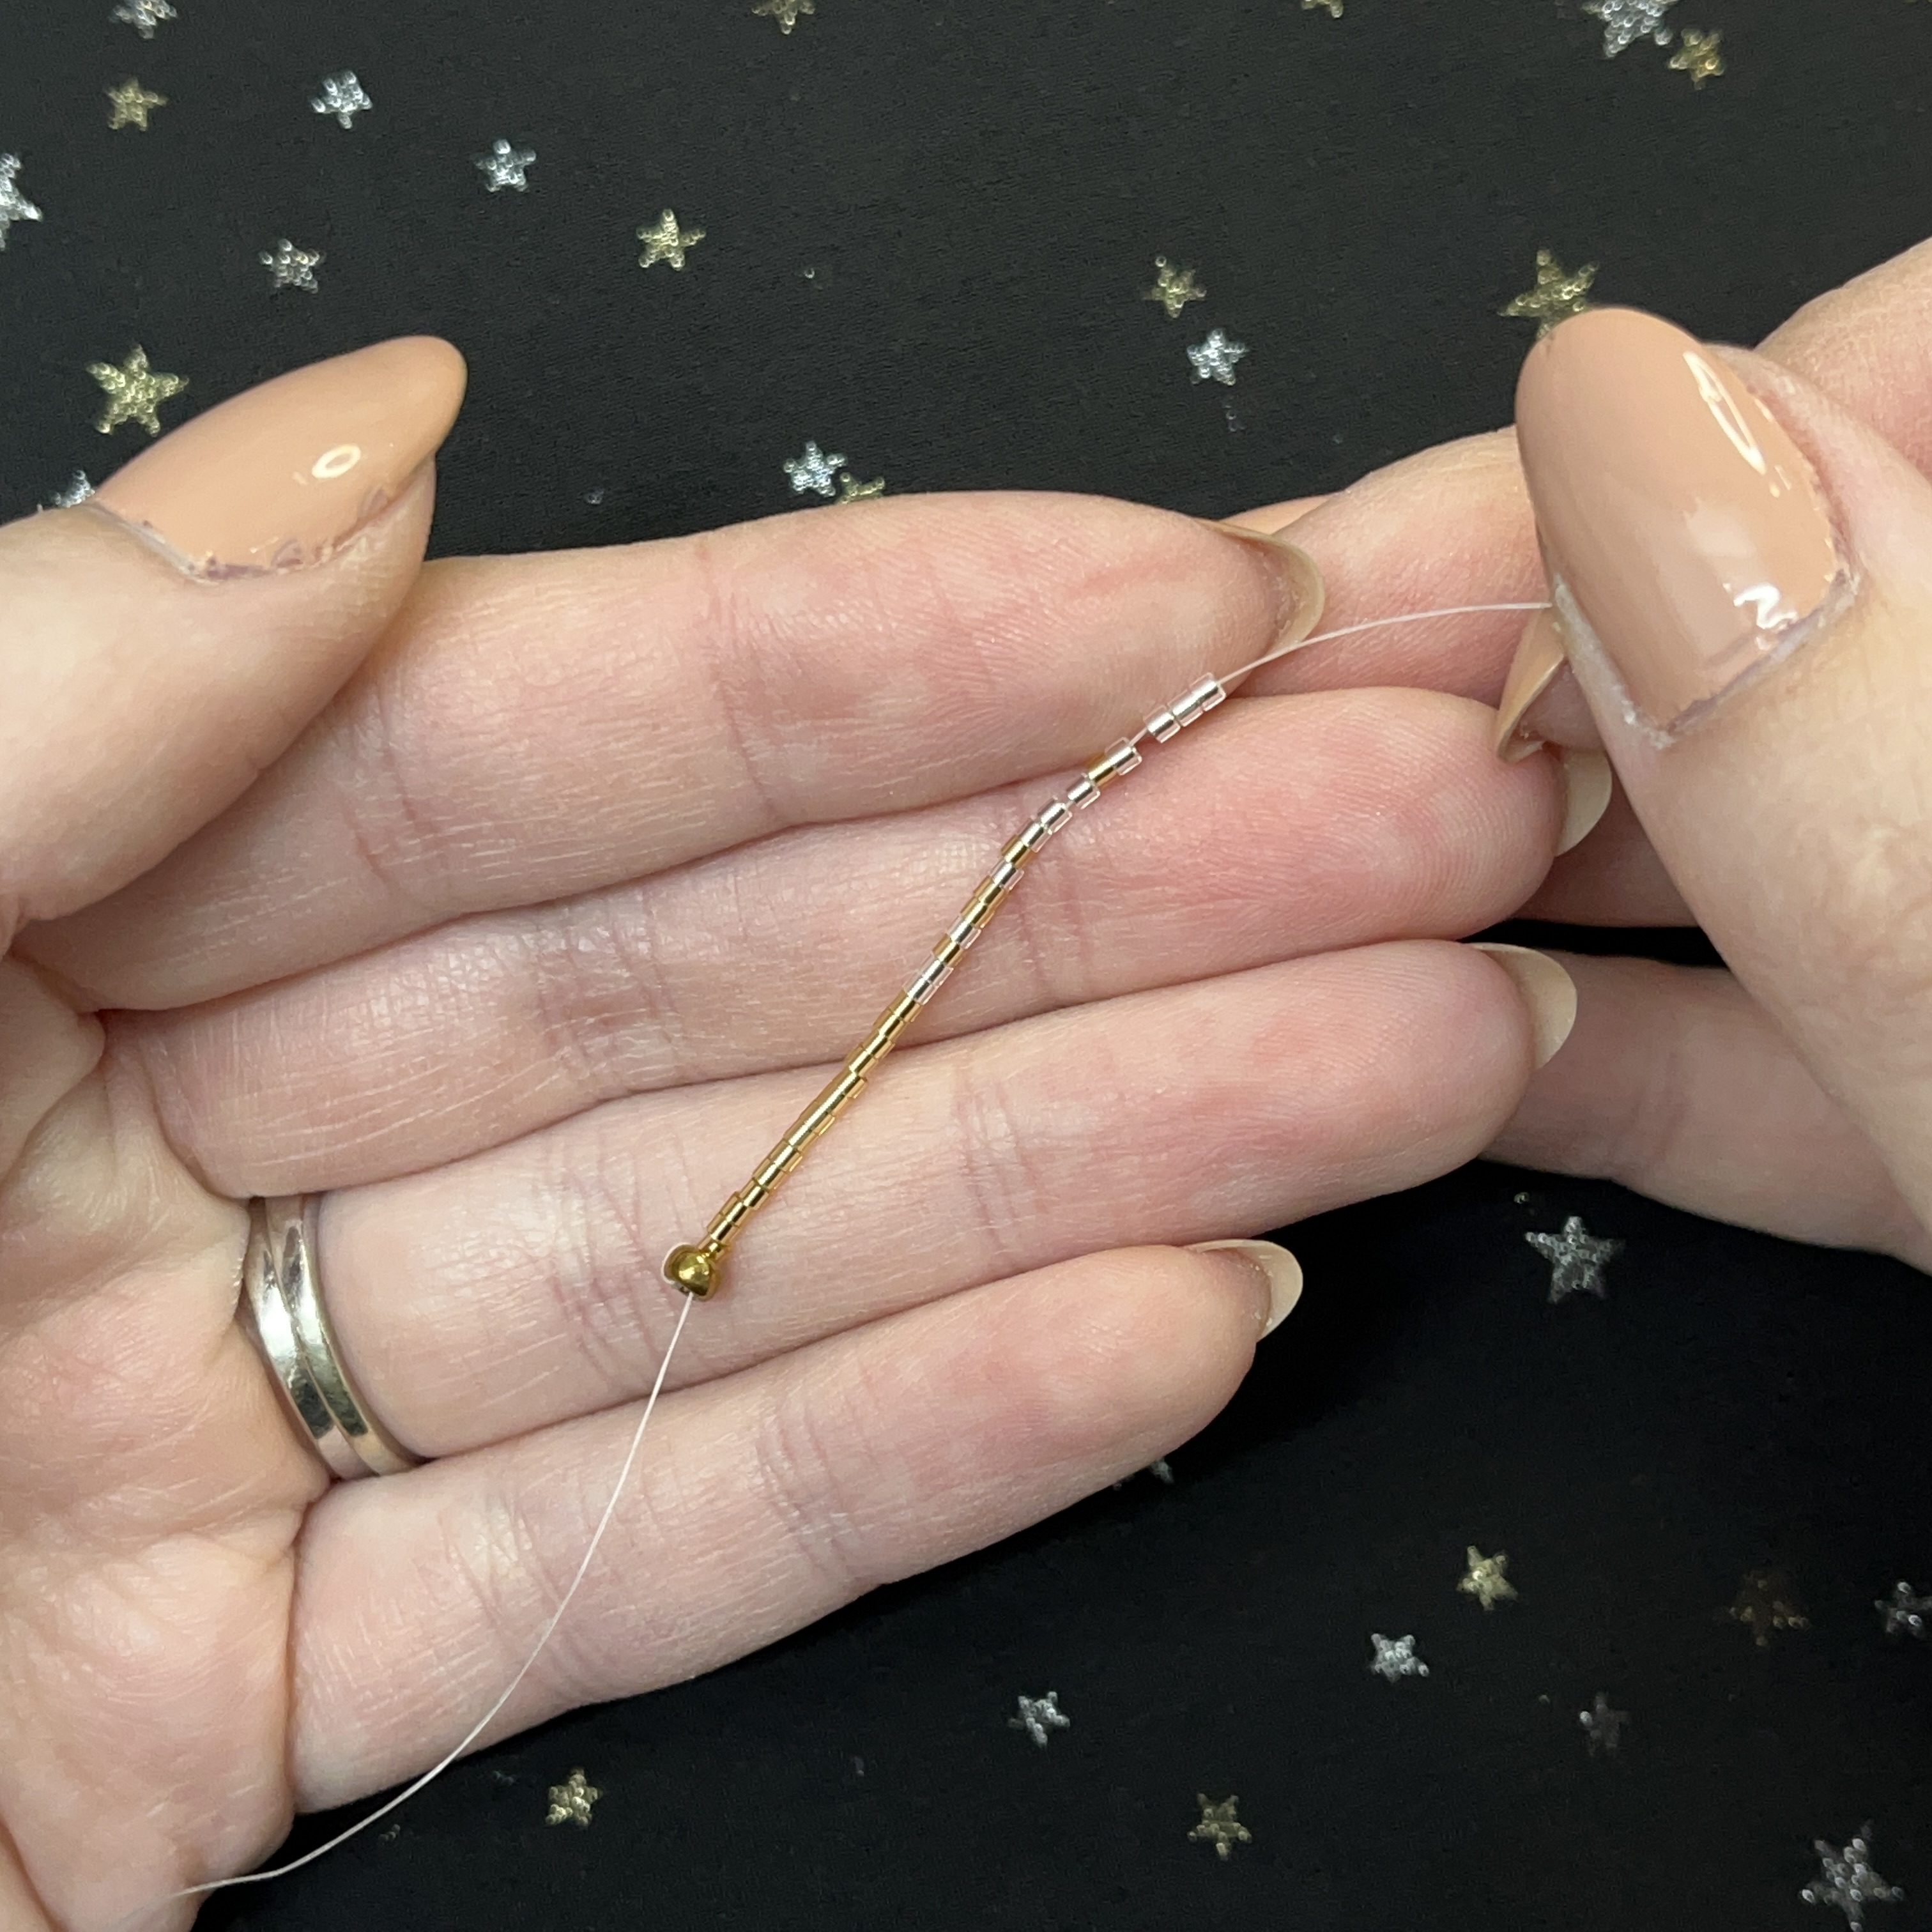
3. Then in this order, thread on 2 silver, 1 gold, 1 silver, 2 gold, 1 silver, 1 gold, 3 silver, 1 gold, 4 silver
4. Thread one silver bead onto your needle, this will be the first bead of the second row.
5. Thread your needle through the 3rd silver bead (second in from the right side, not including the bead you just strung on)
6. Pull tight and after it will look like this (above). You might also need to pull on your stopper bead to get it nice and tight.

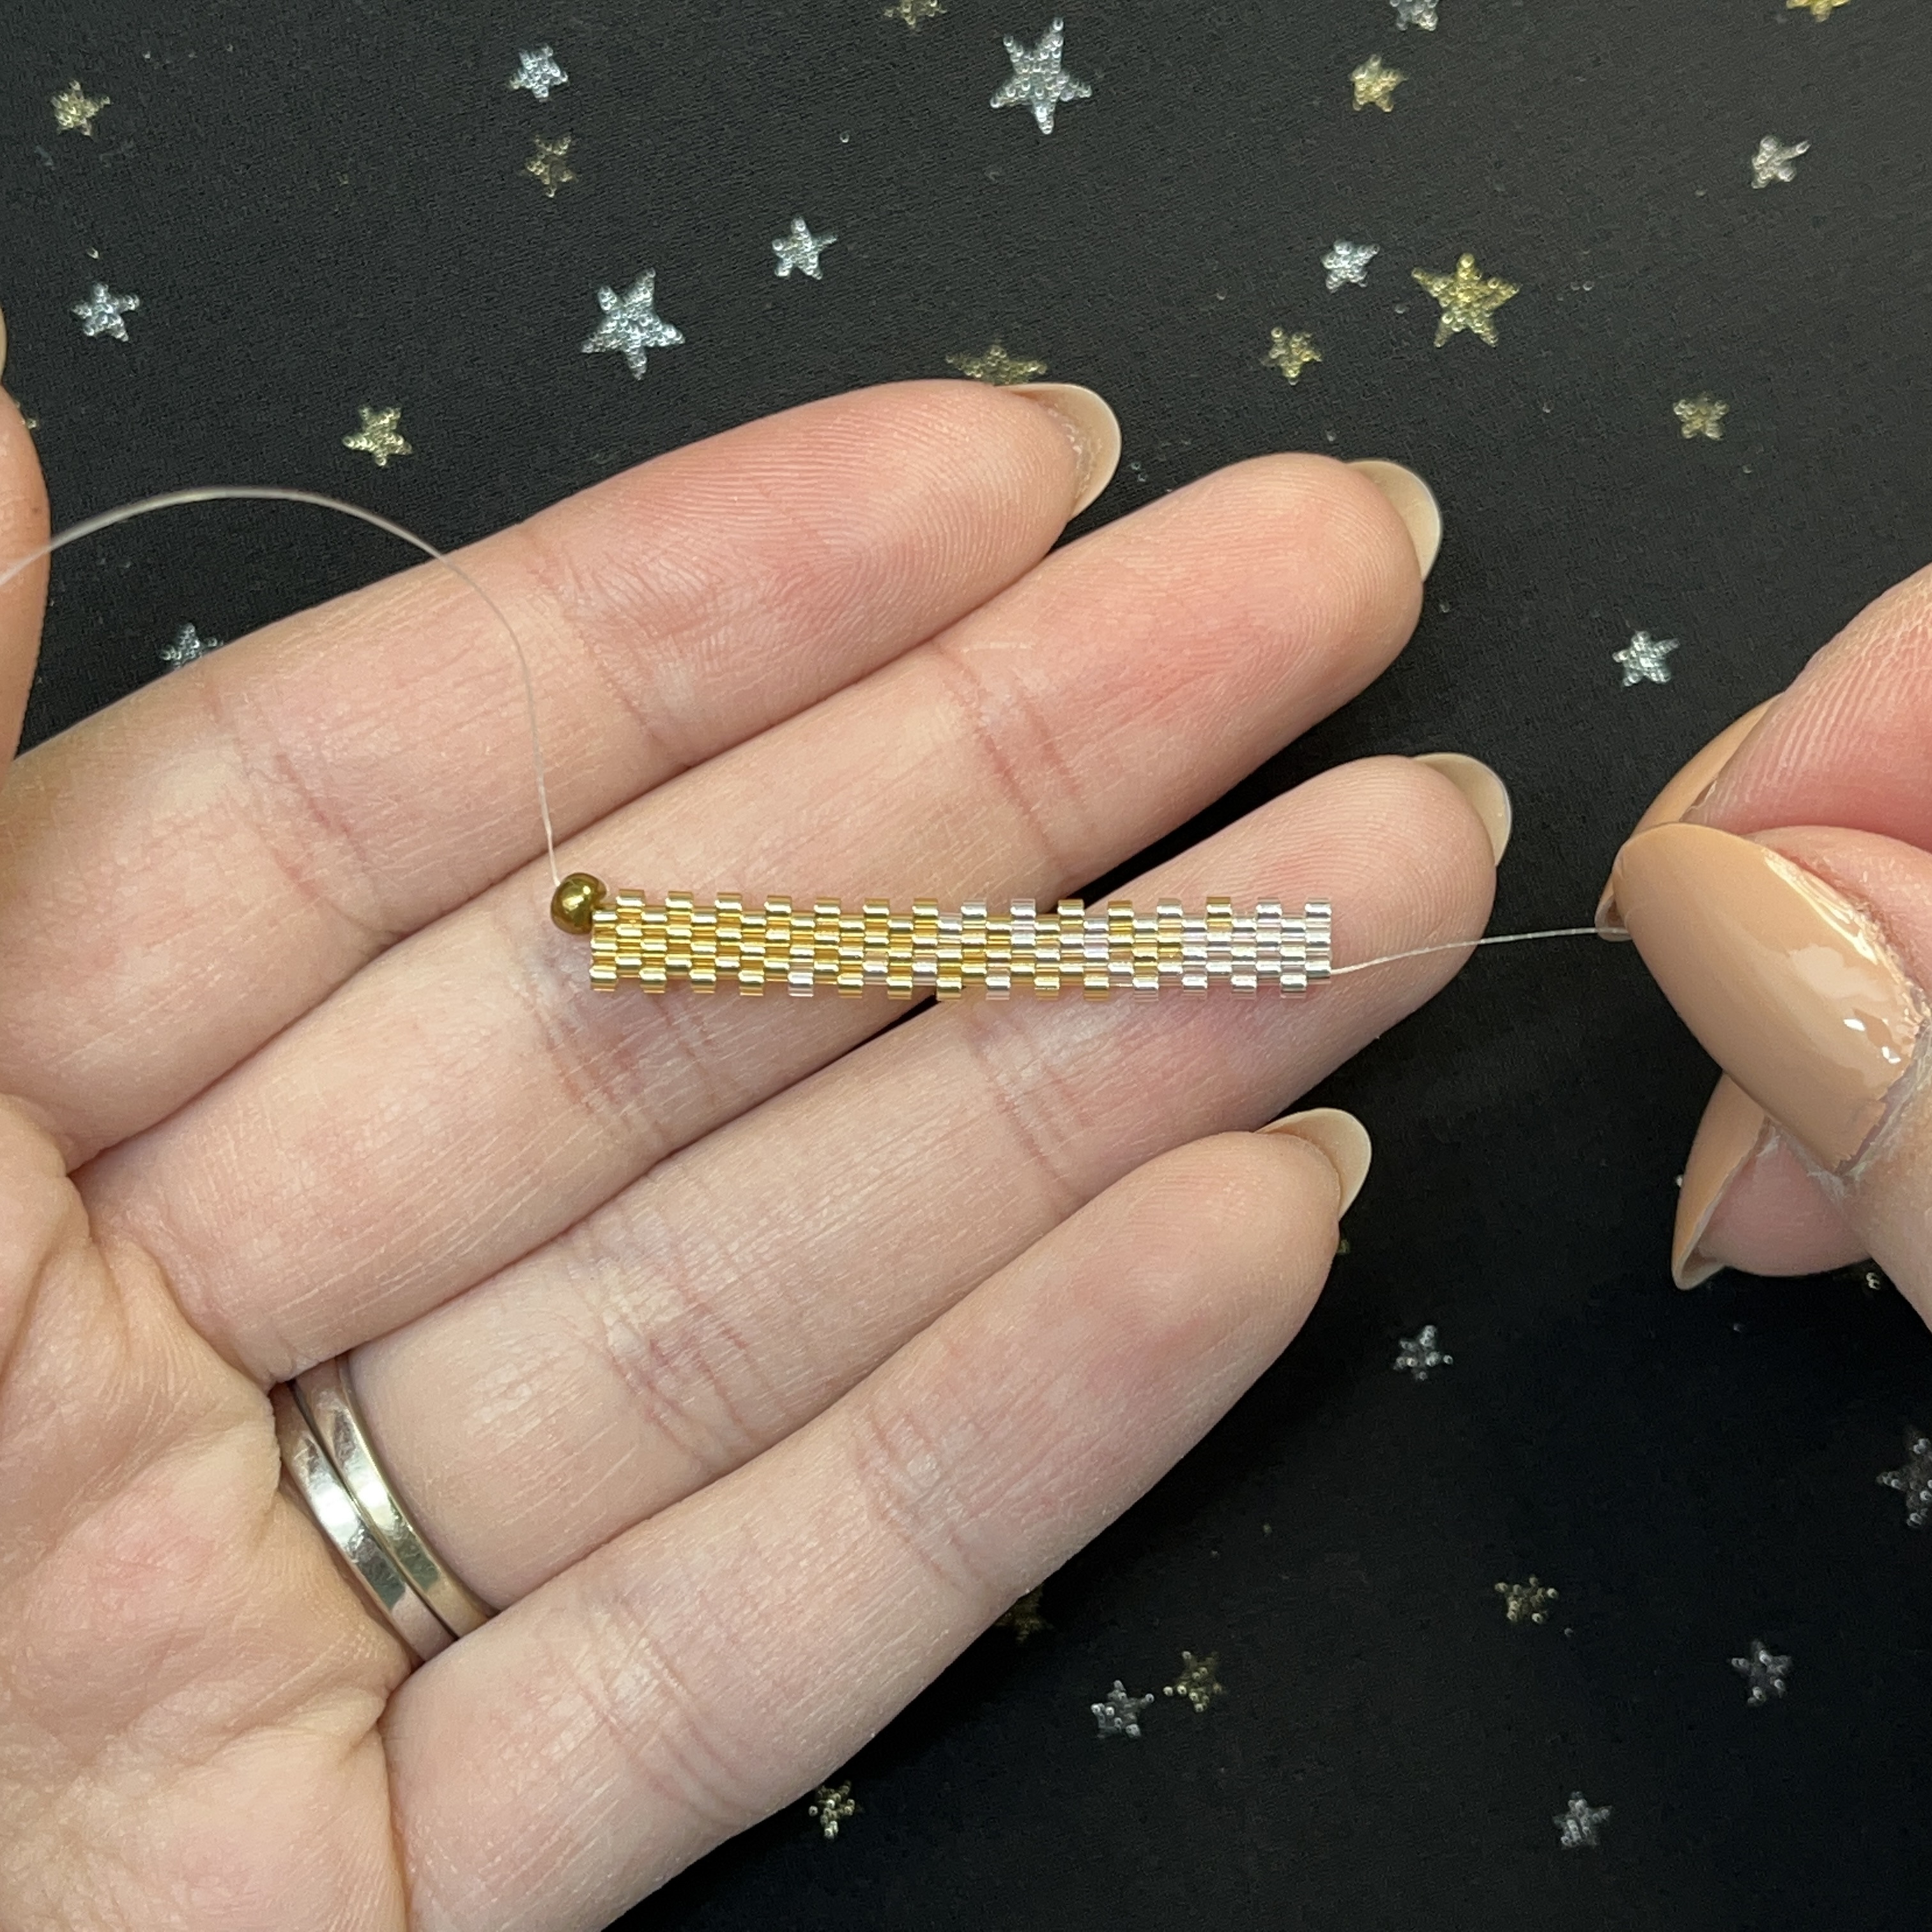
7. Thread on another silver bead onto your needle then through the bead above, the second bead before the gold (see red arrow)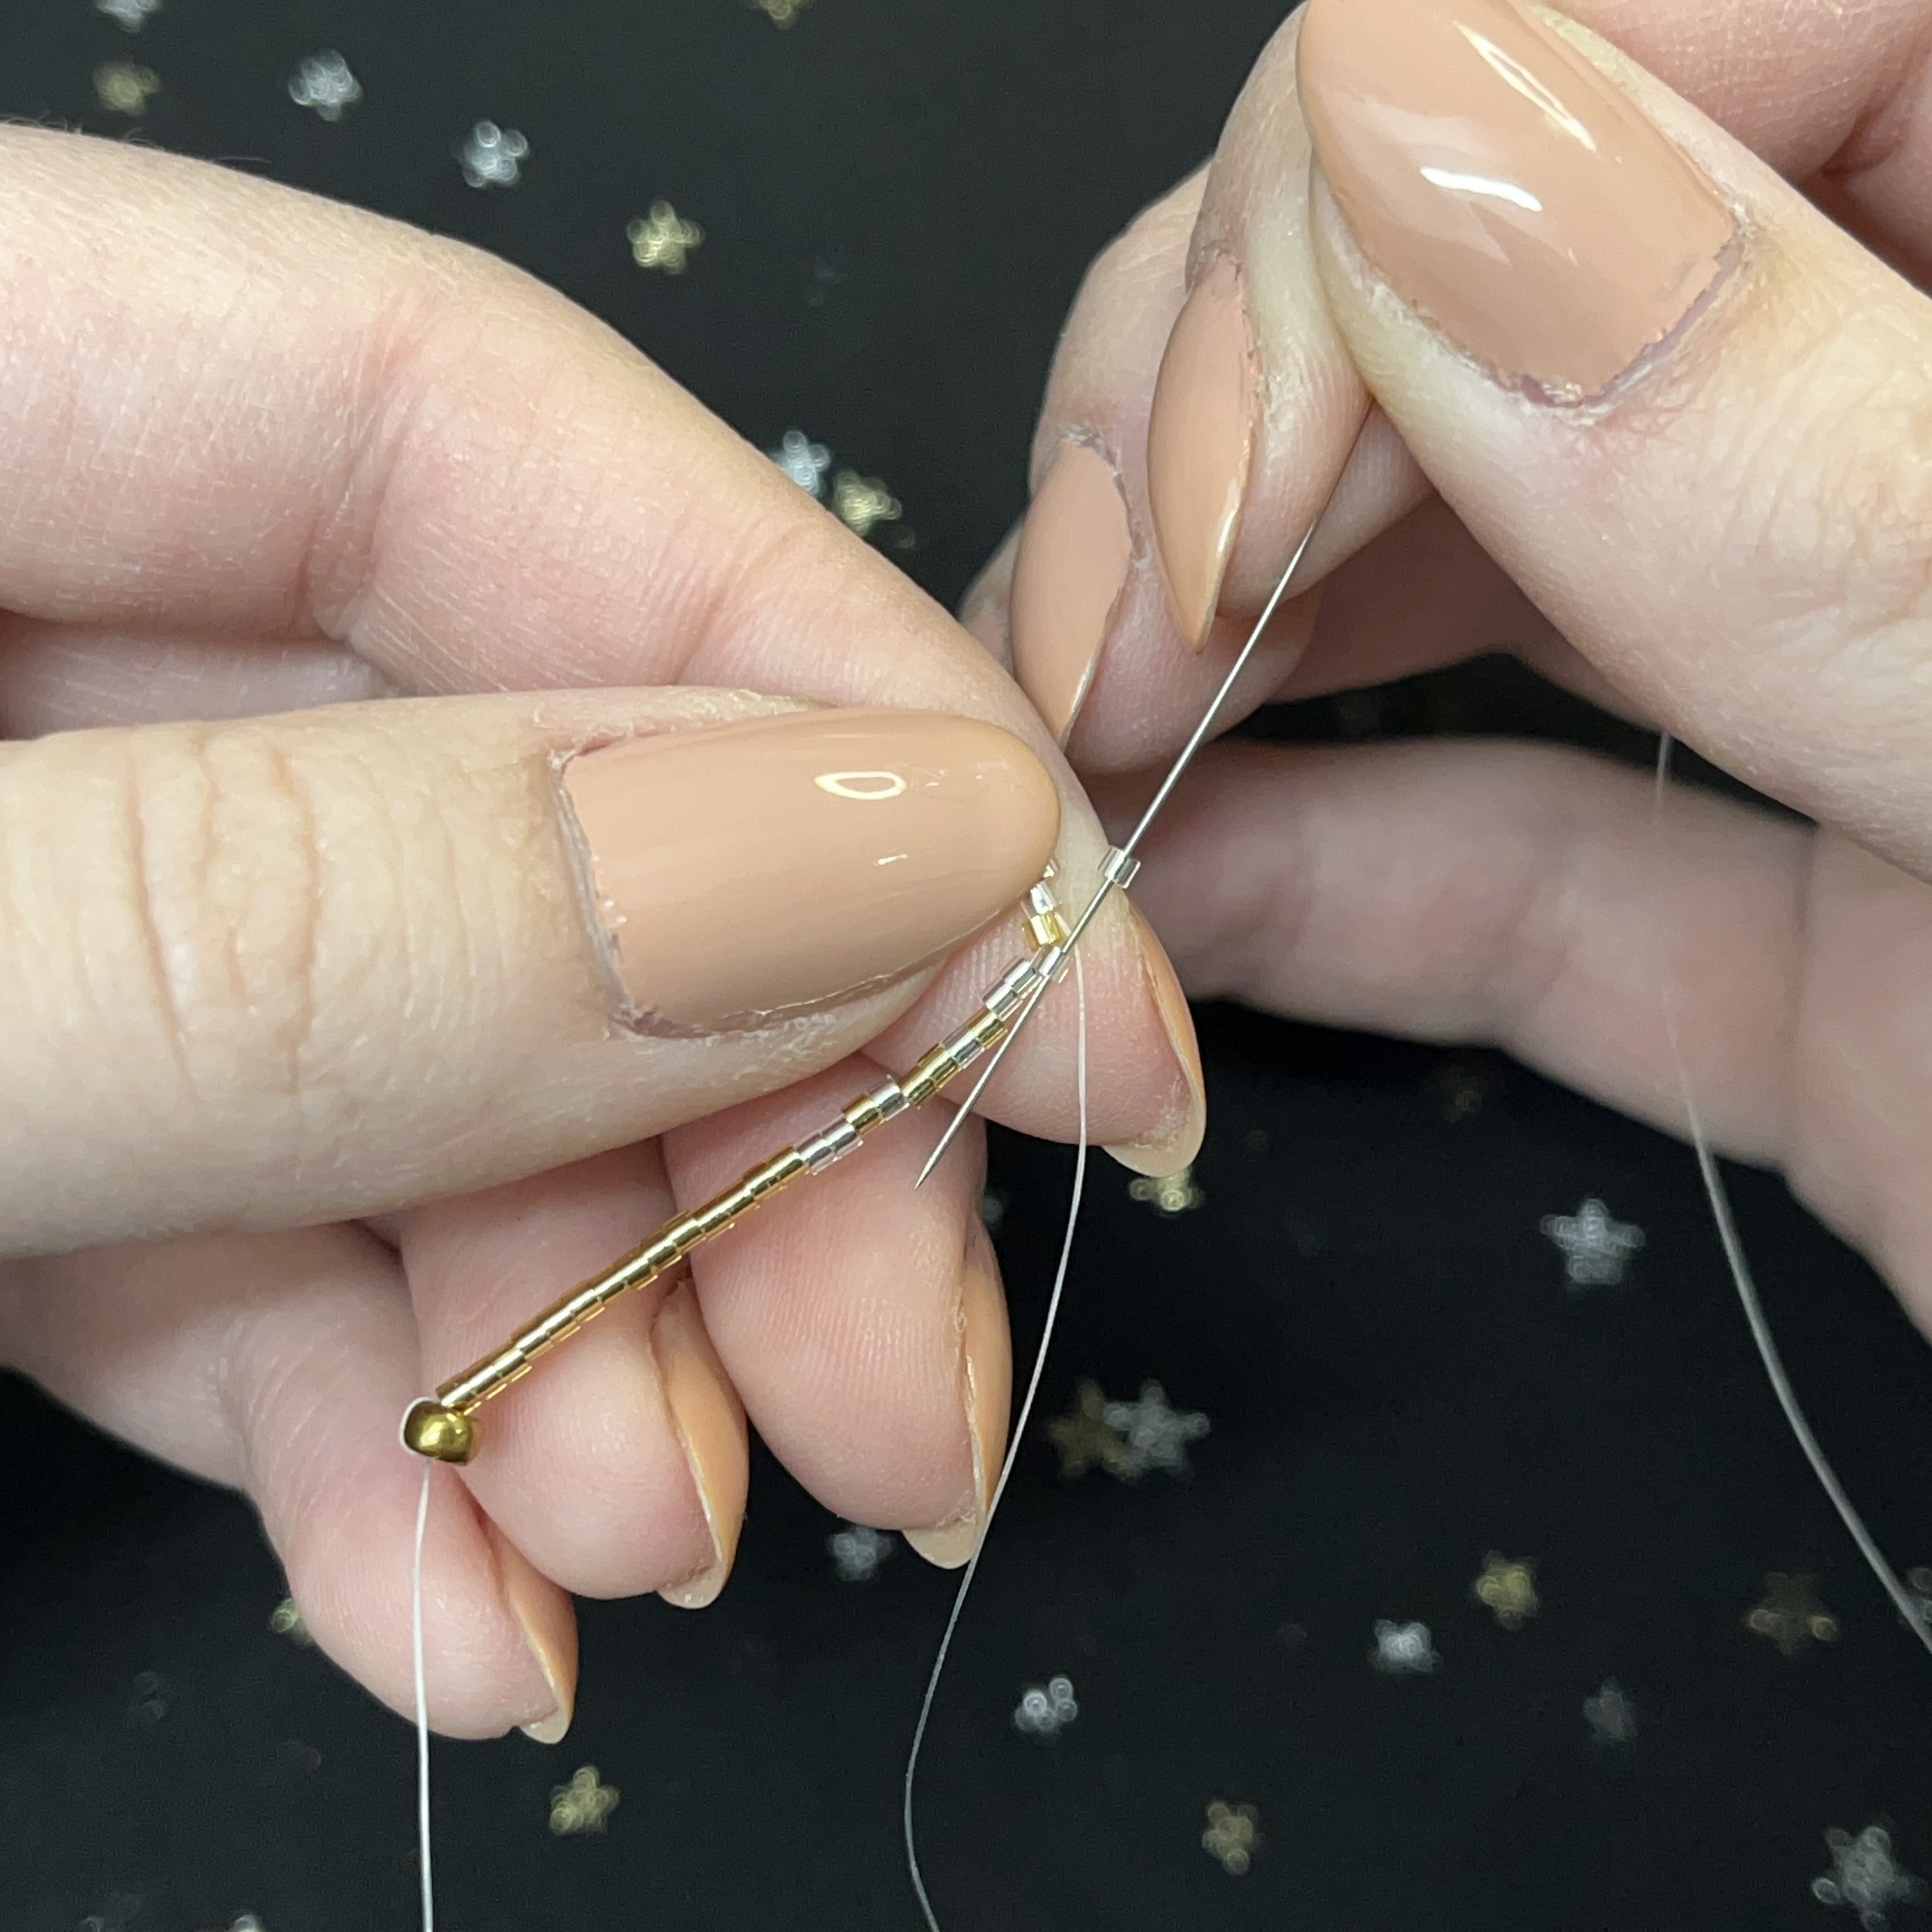
8. Add another silver bead and thread it through the silver bead before the gold bead. I'm sure you've started to notice that we are threading through every other bead.

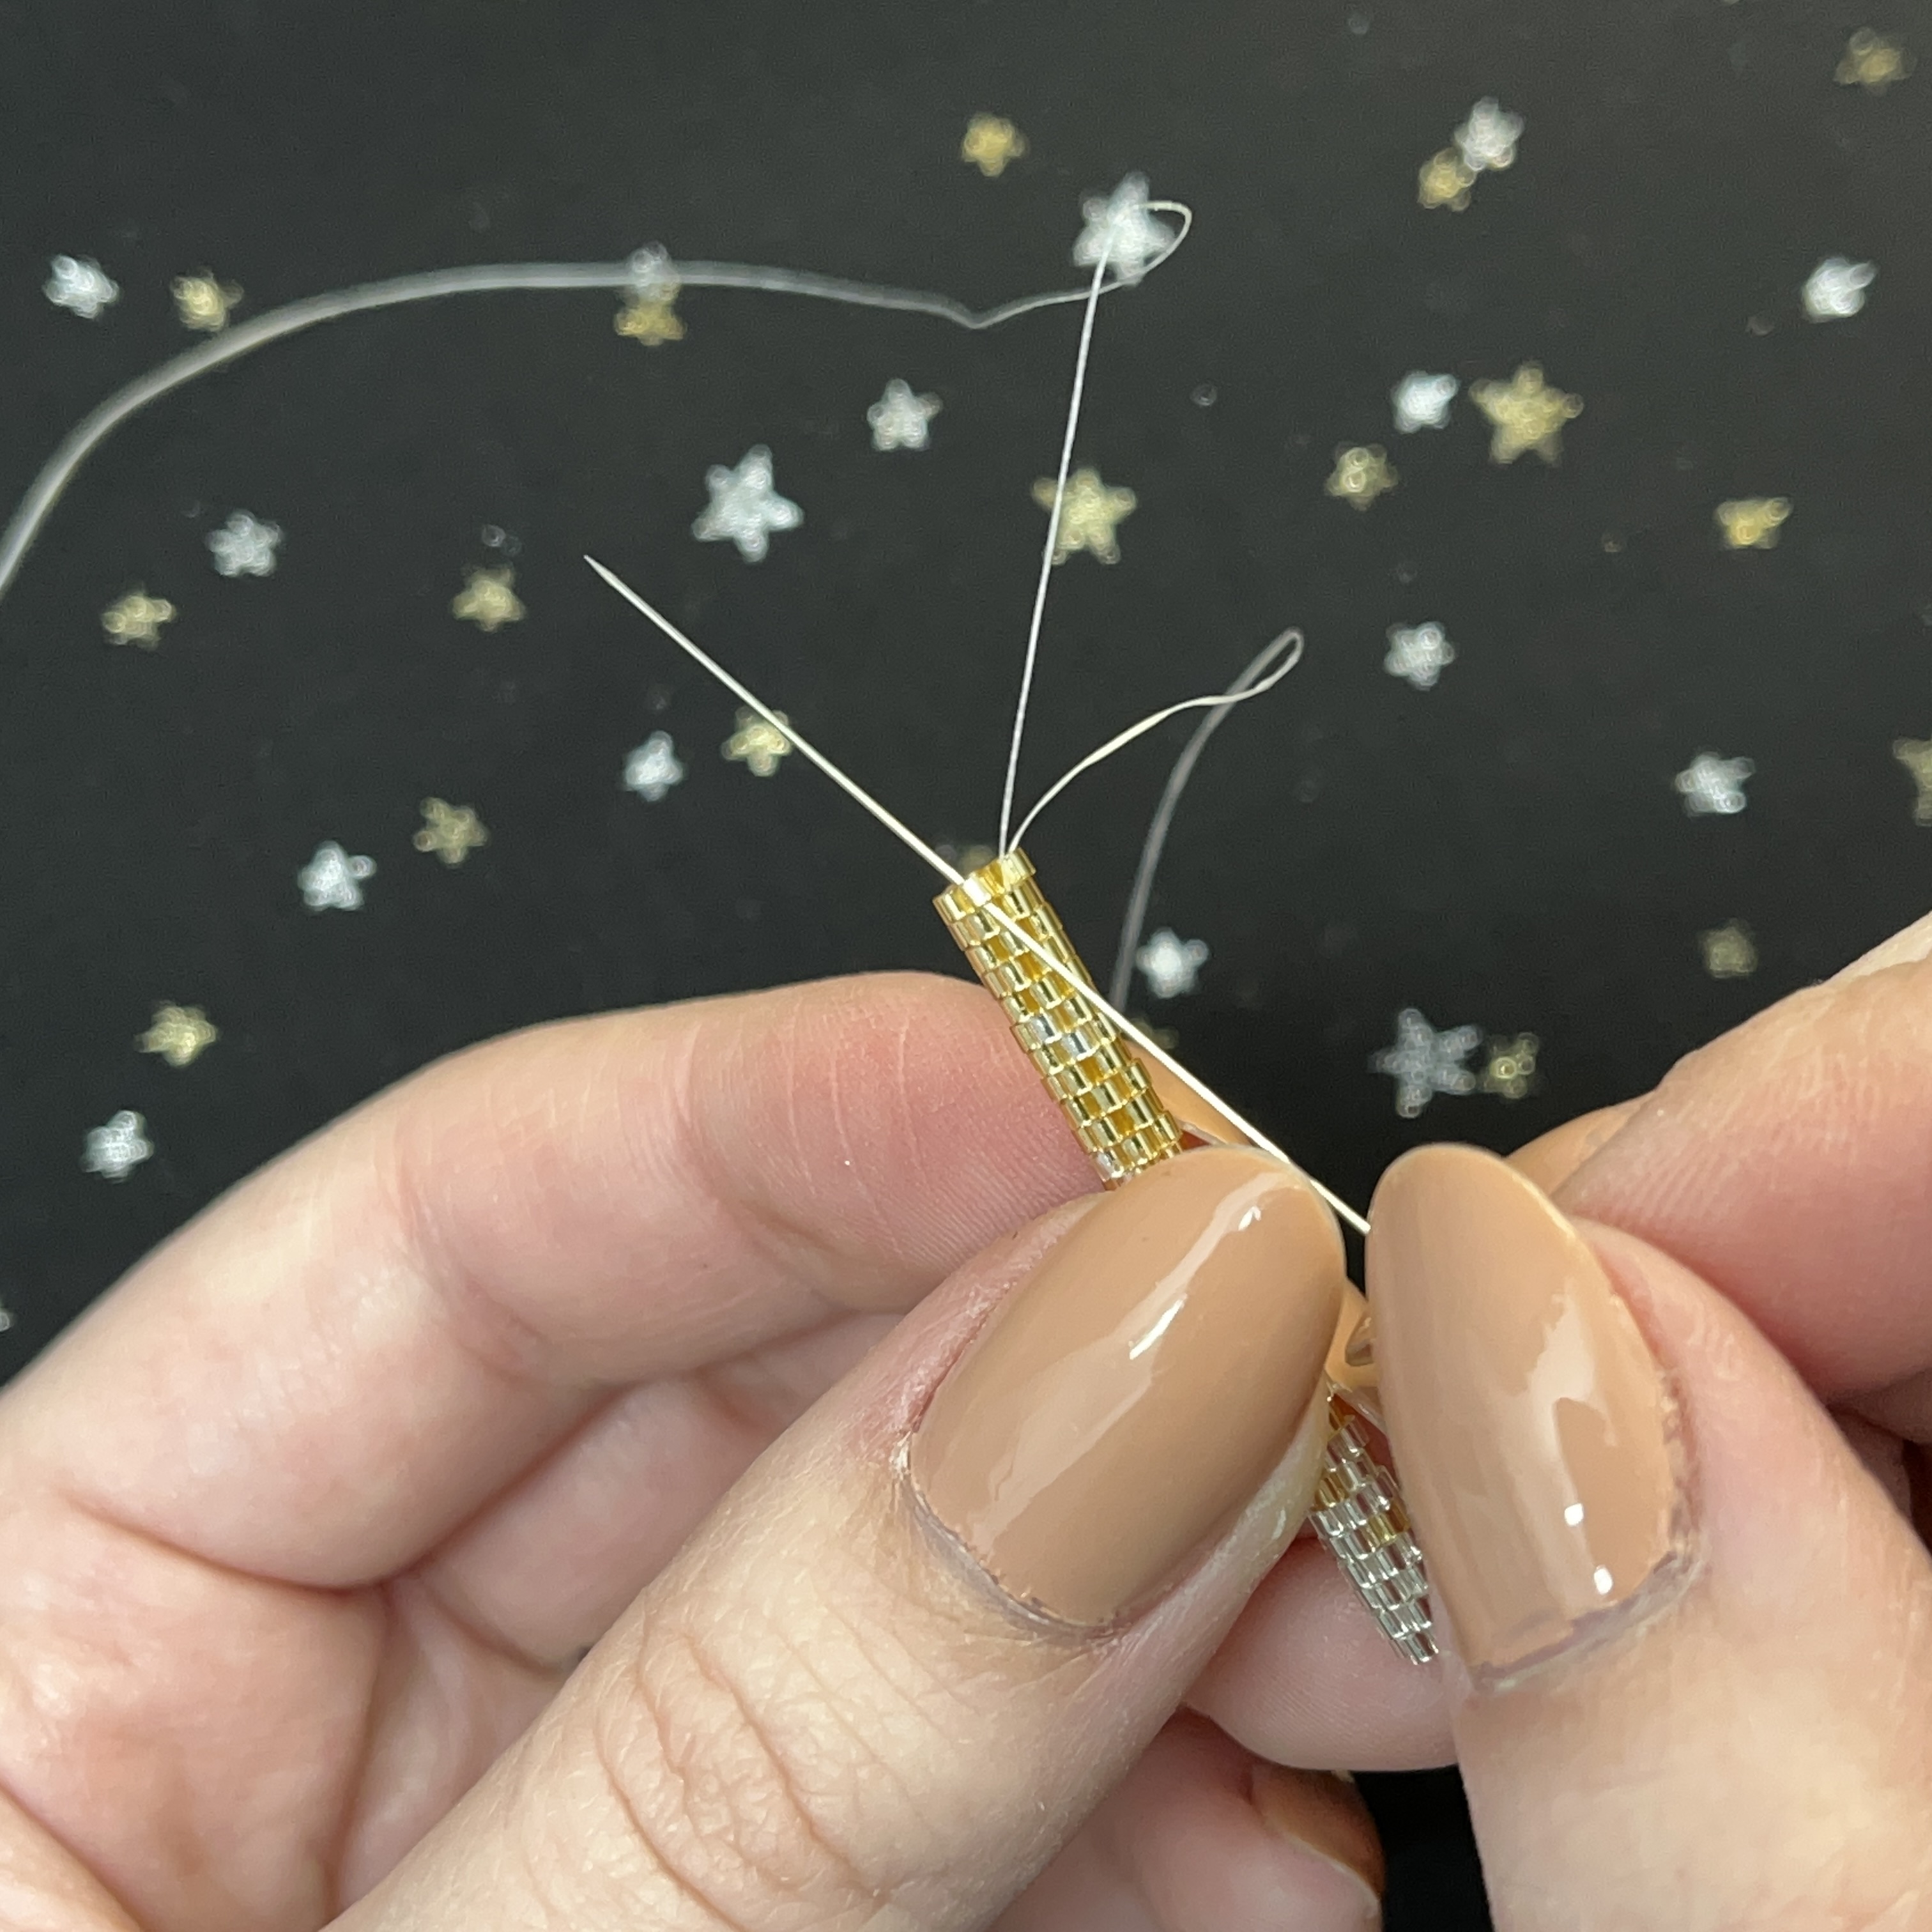
9. Thread a gold bead through the silver bead just to the right of the next gold bead, see above.

10. Continue the pattern and your two rows should look like this (above). Look below to see the pattern again and what beads we just strung on.
11. Now we will start the next row, these next rows will be much easier now. Thread on a gold bead and thread it through the bead above.
12. Thread on another gold bead and thread through the bead shown above. Think of this pattern like you are filling in bricks.
13. Continue the pattern and you will have this above as your newest row. See below pattern for the order of beads we just strung on.
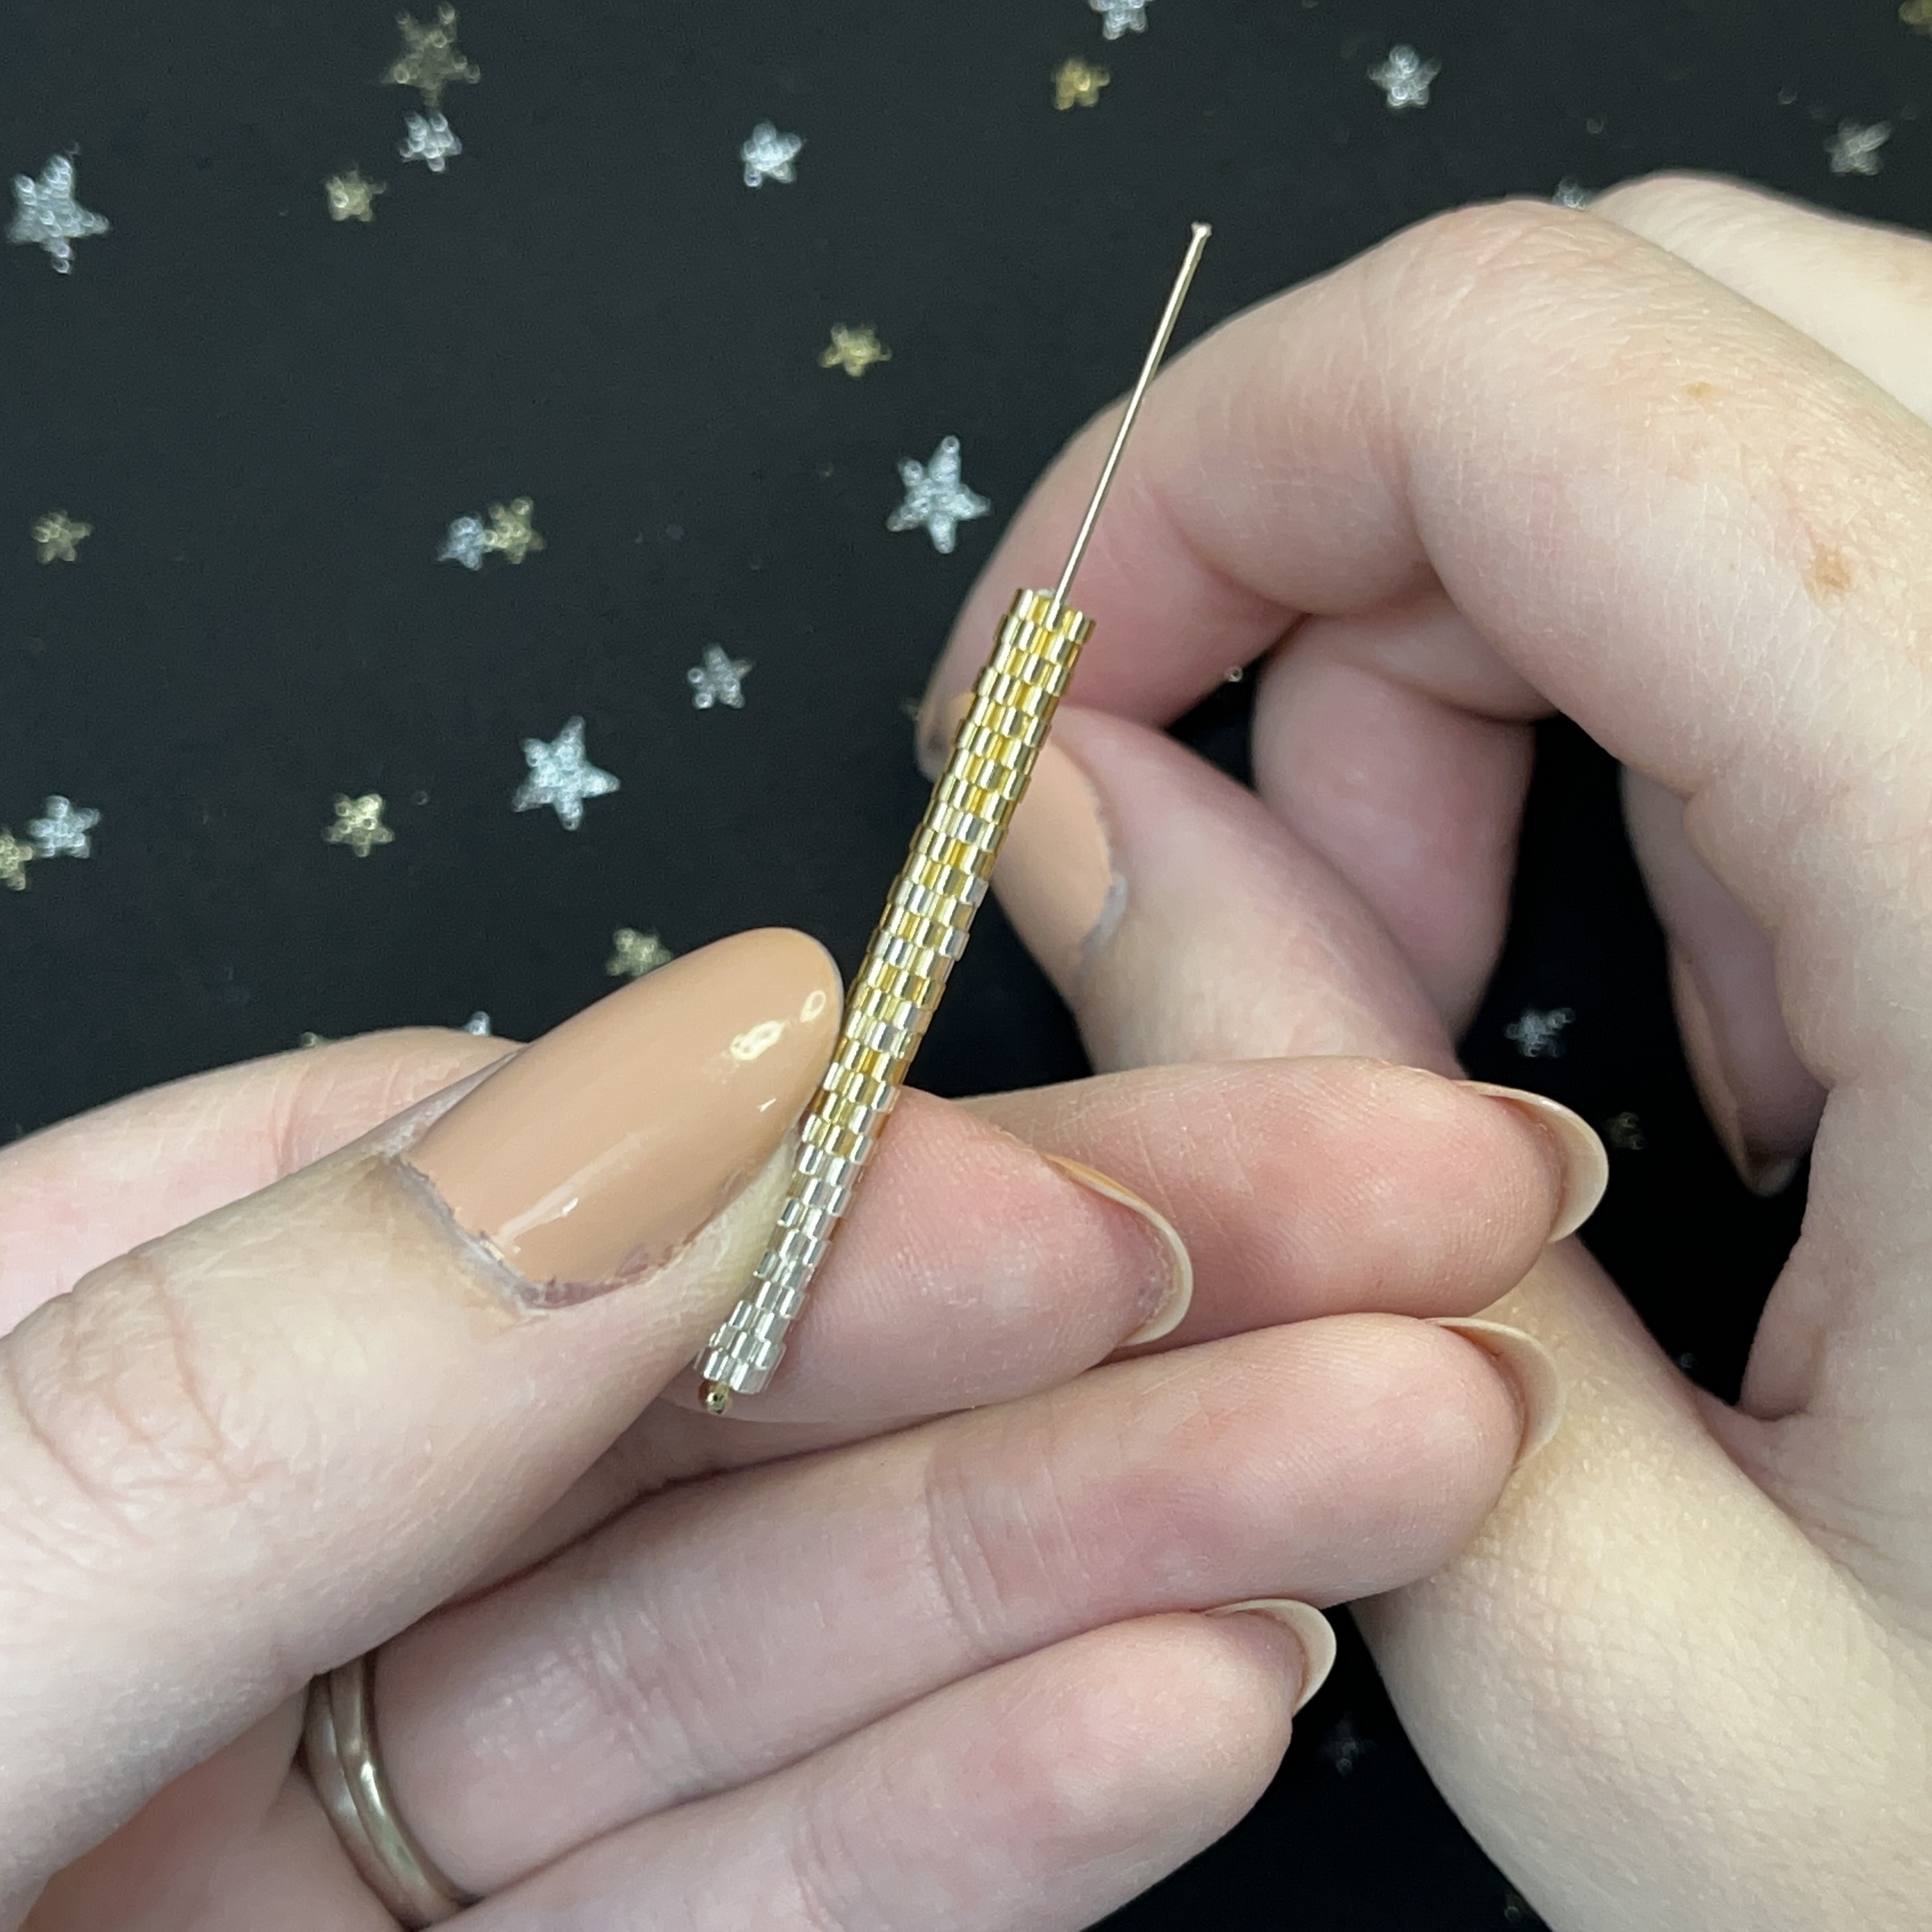
14. Start and finish next row. See below pattern for the order of beads we just strung on.

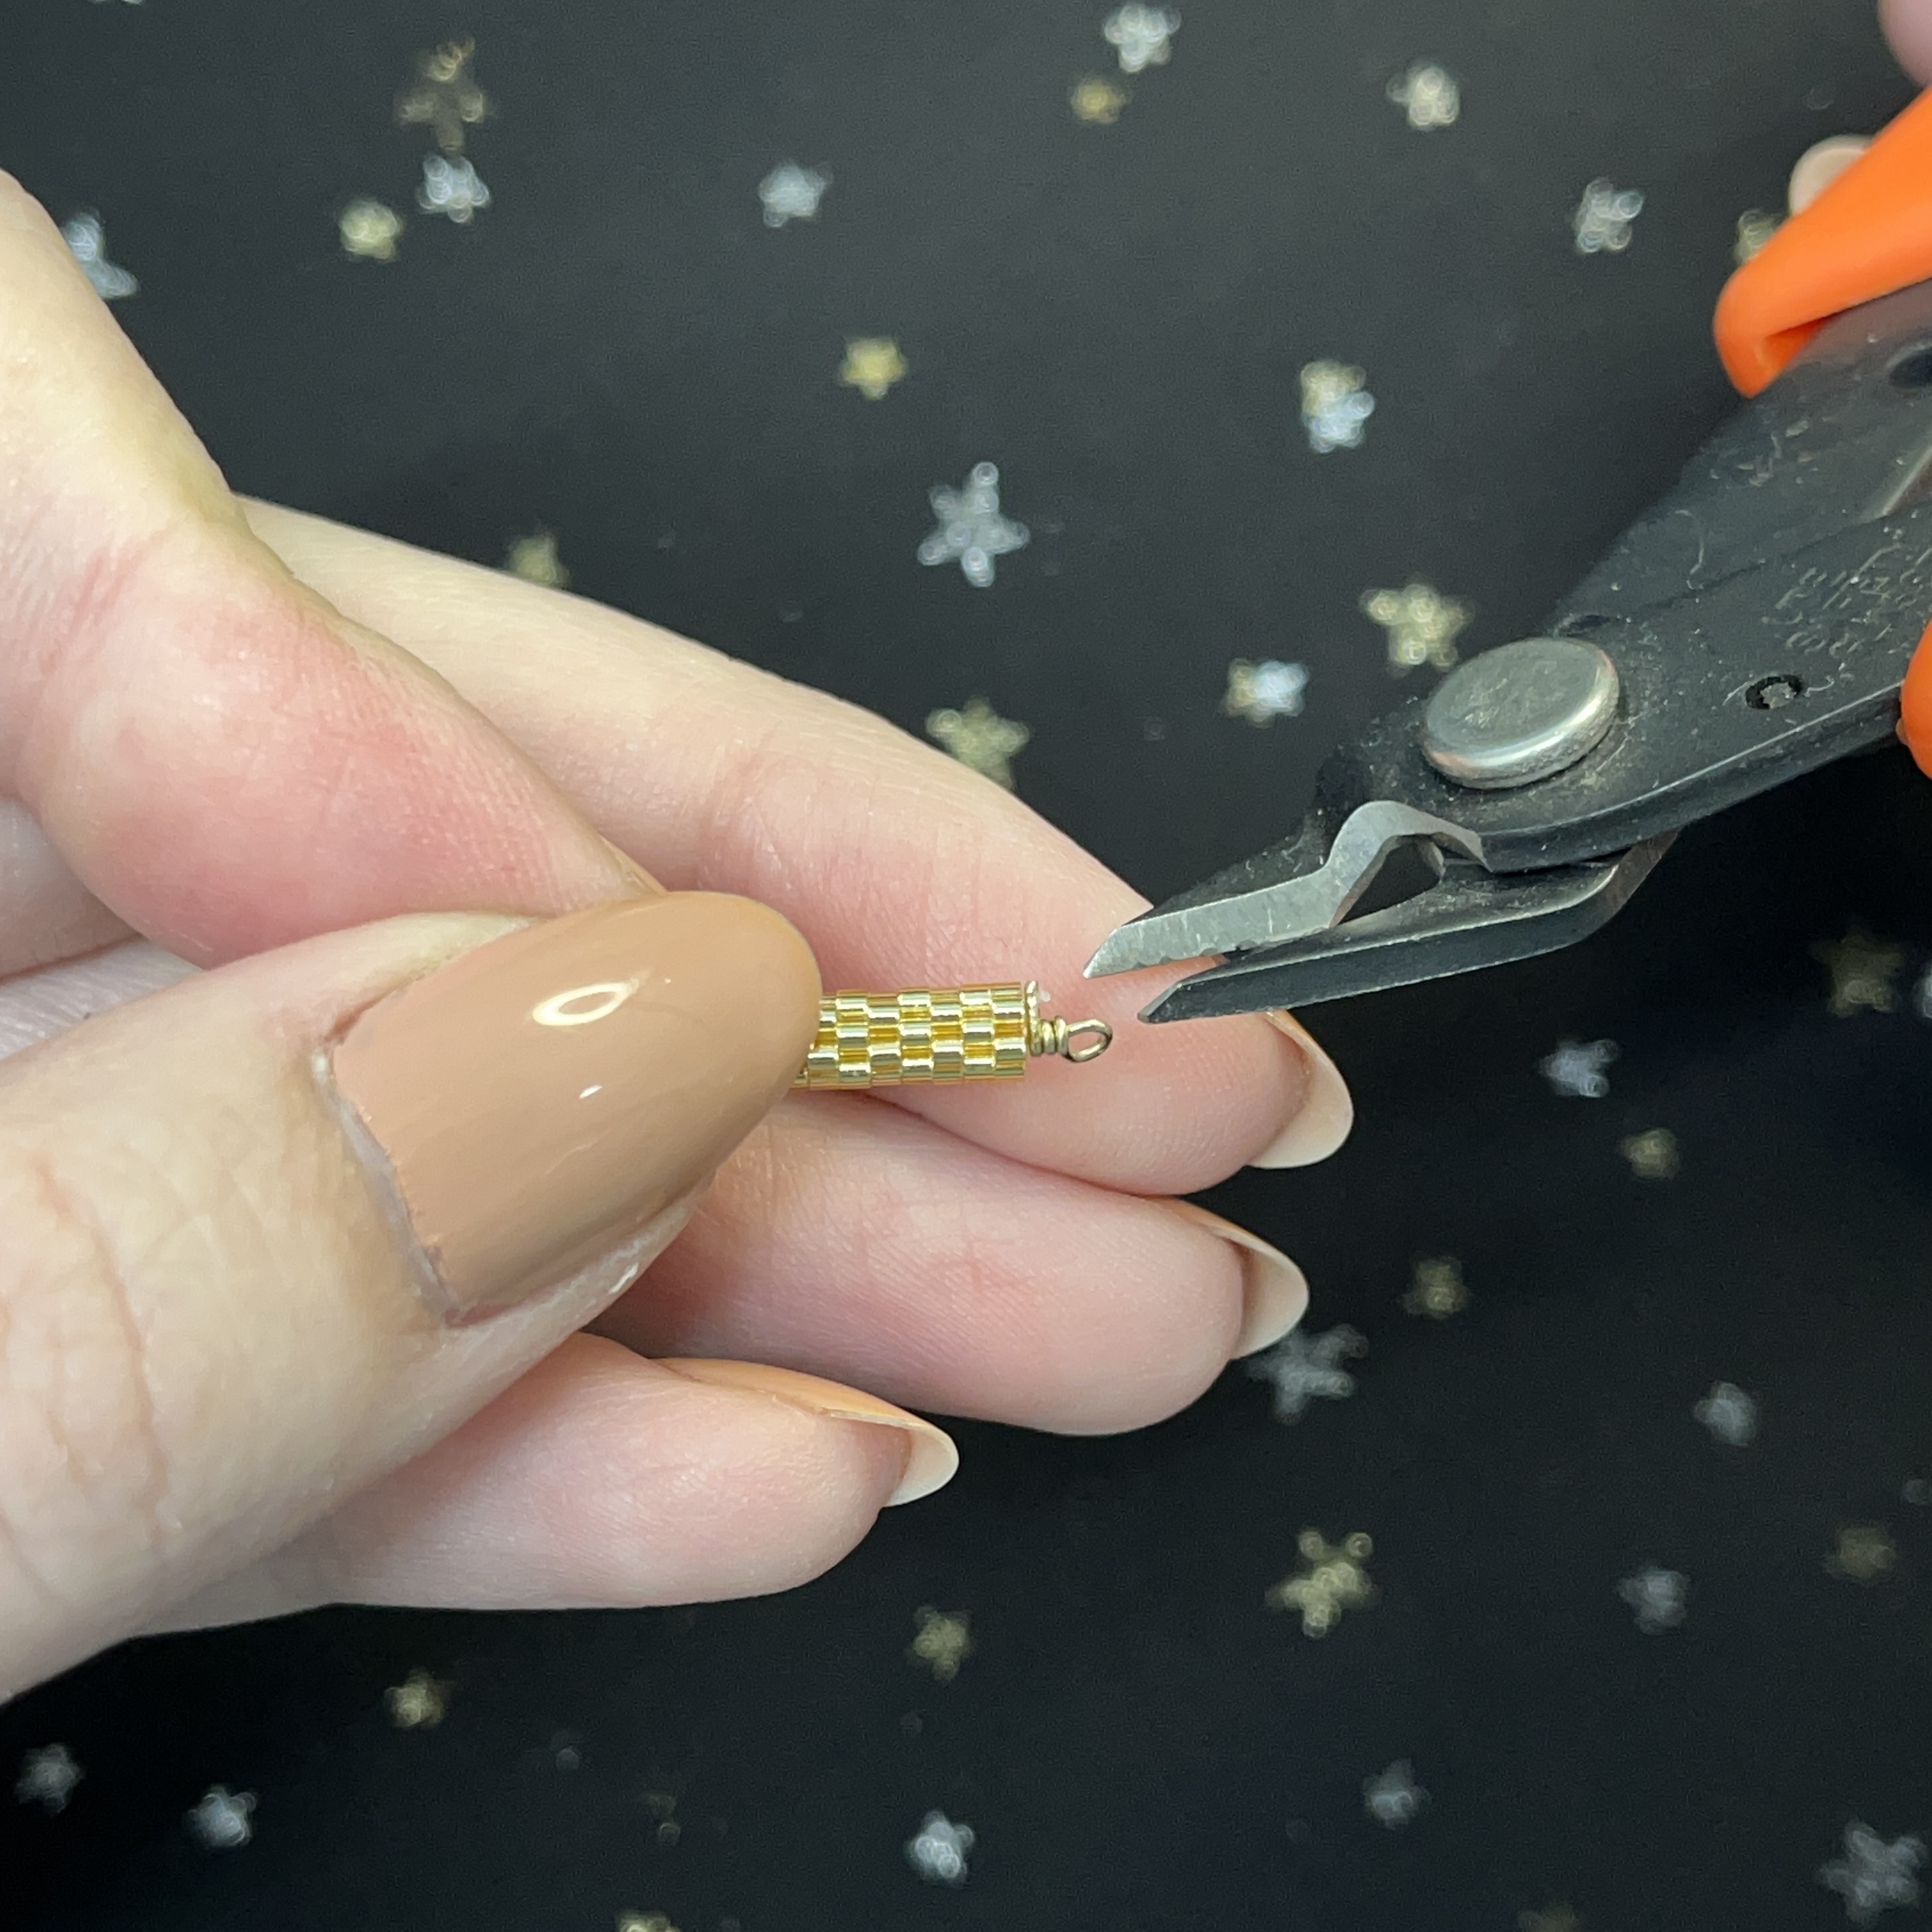
15. Start and finish next row. See below pattern for the order of beads we just strung on.
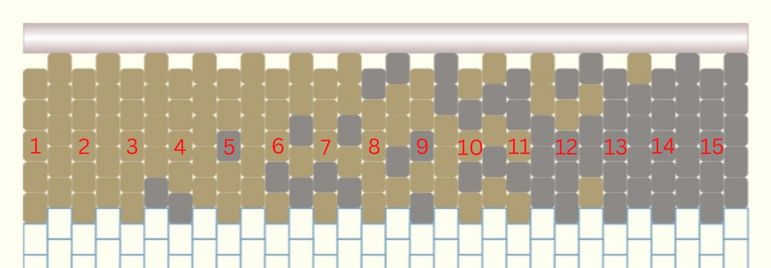

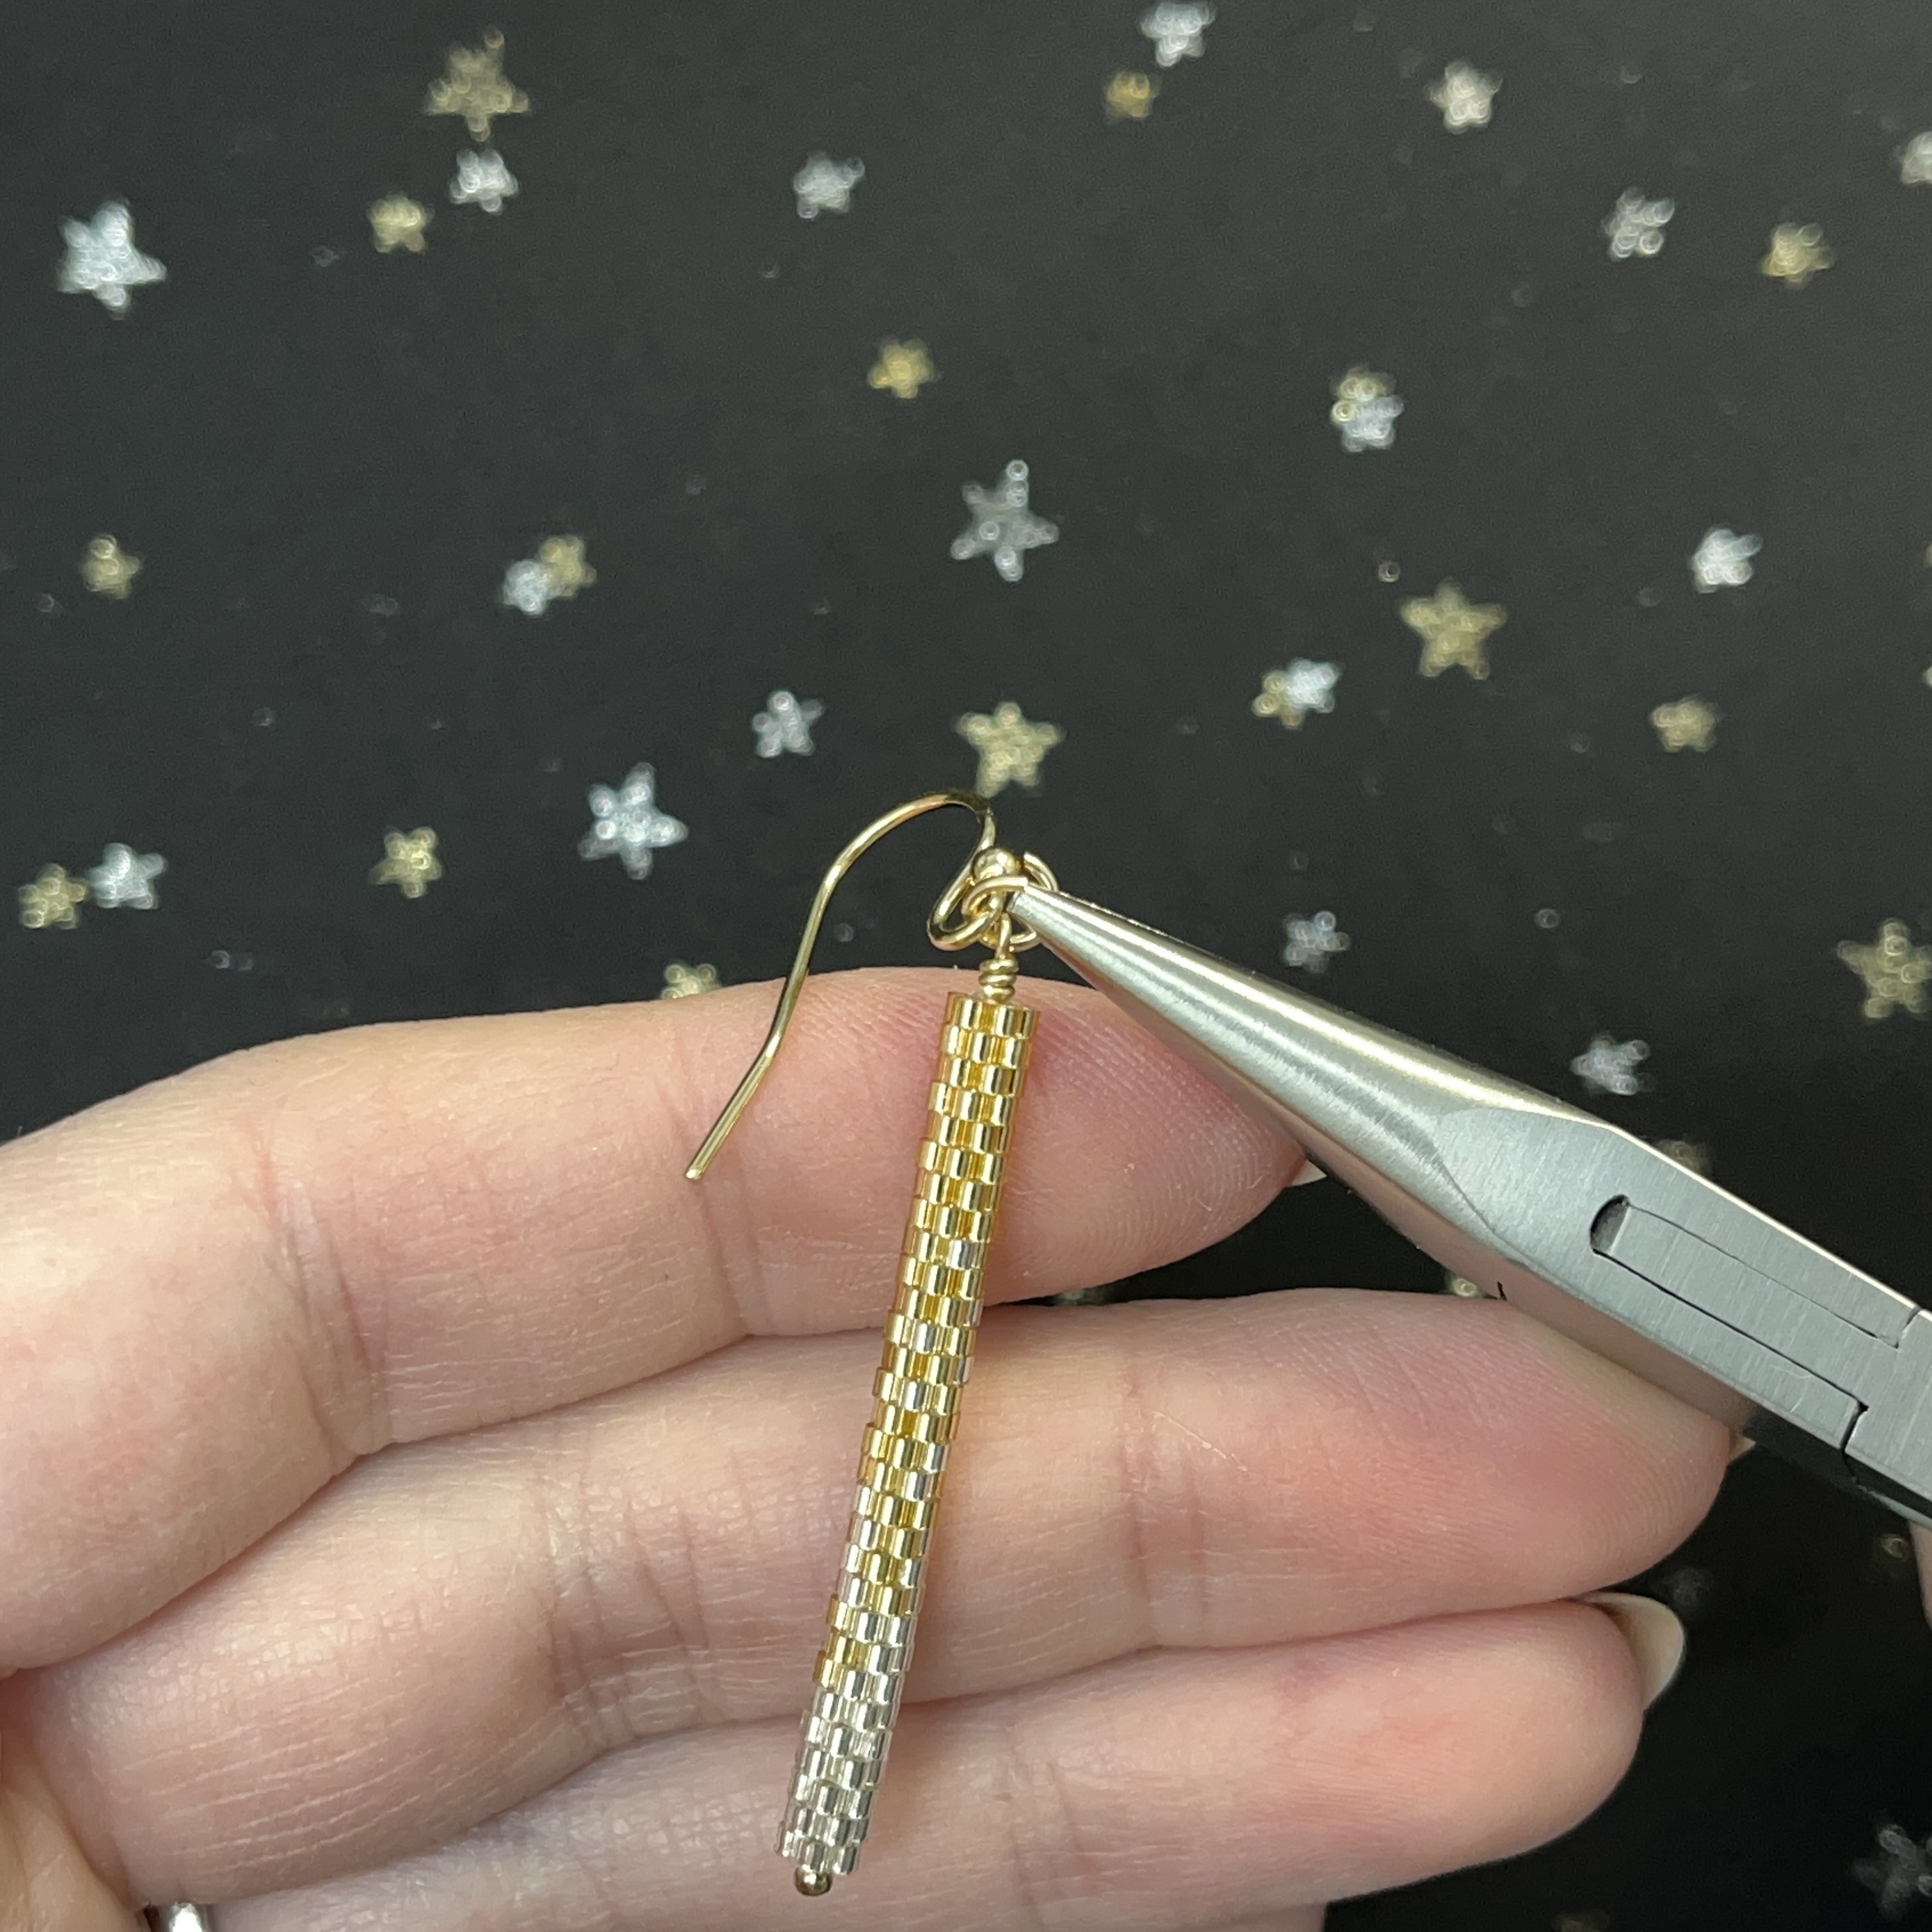
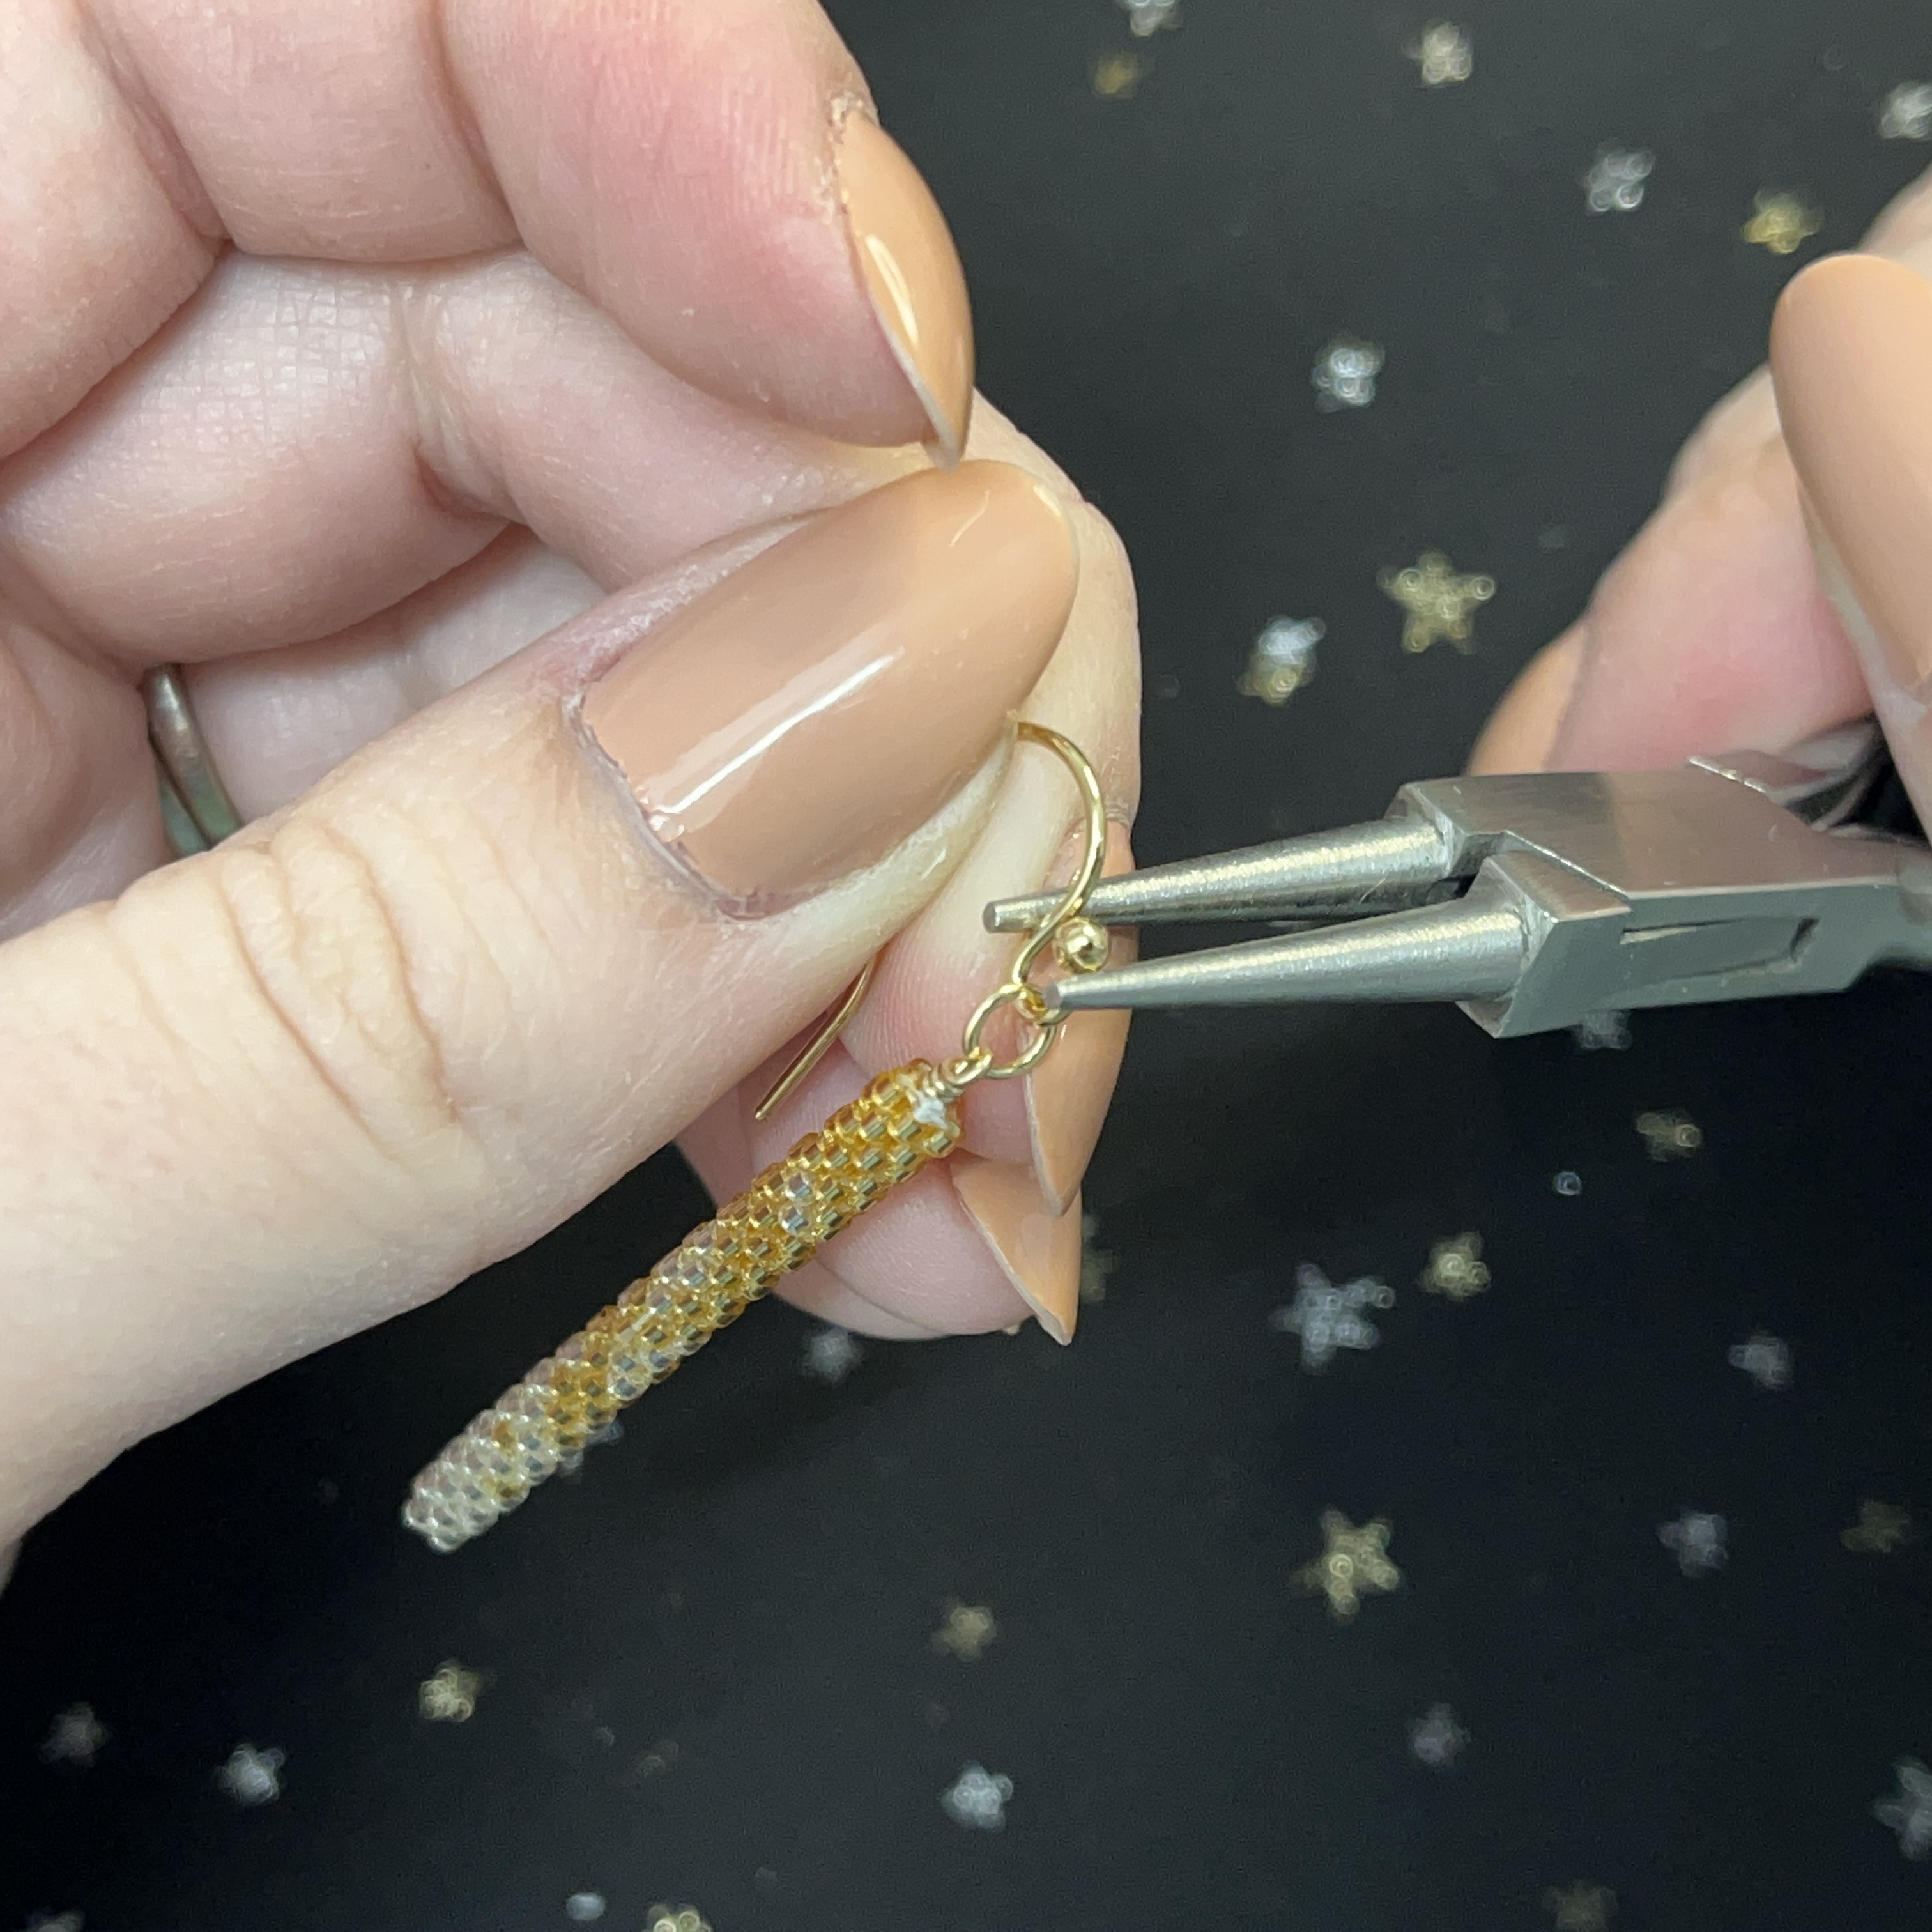
16. Pictured is the next TWO rows. See pattern below.
17. Pictured is the next row. See pattern below.
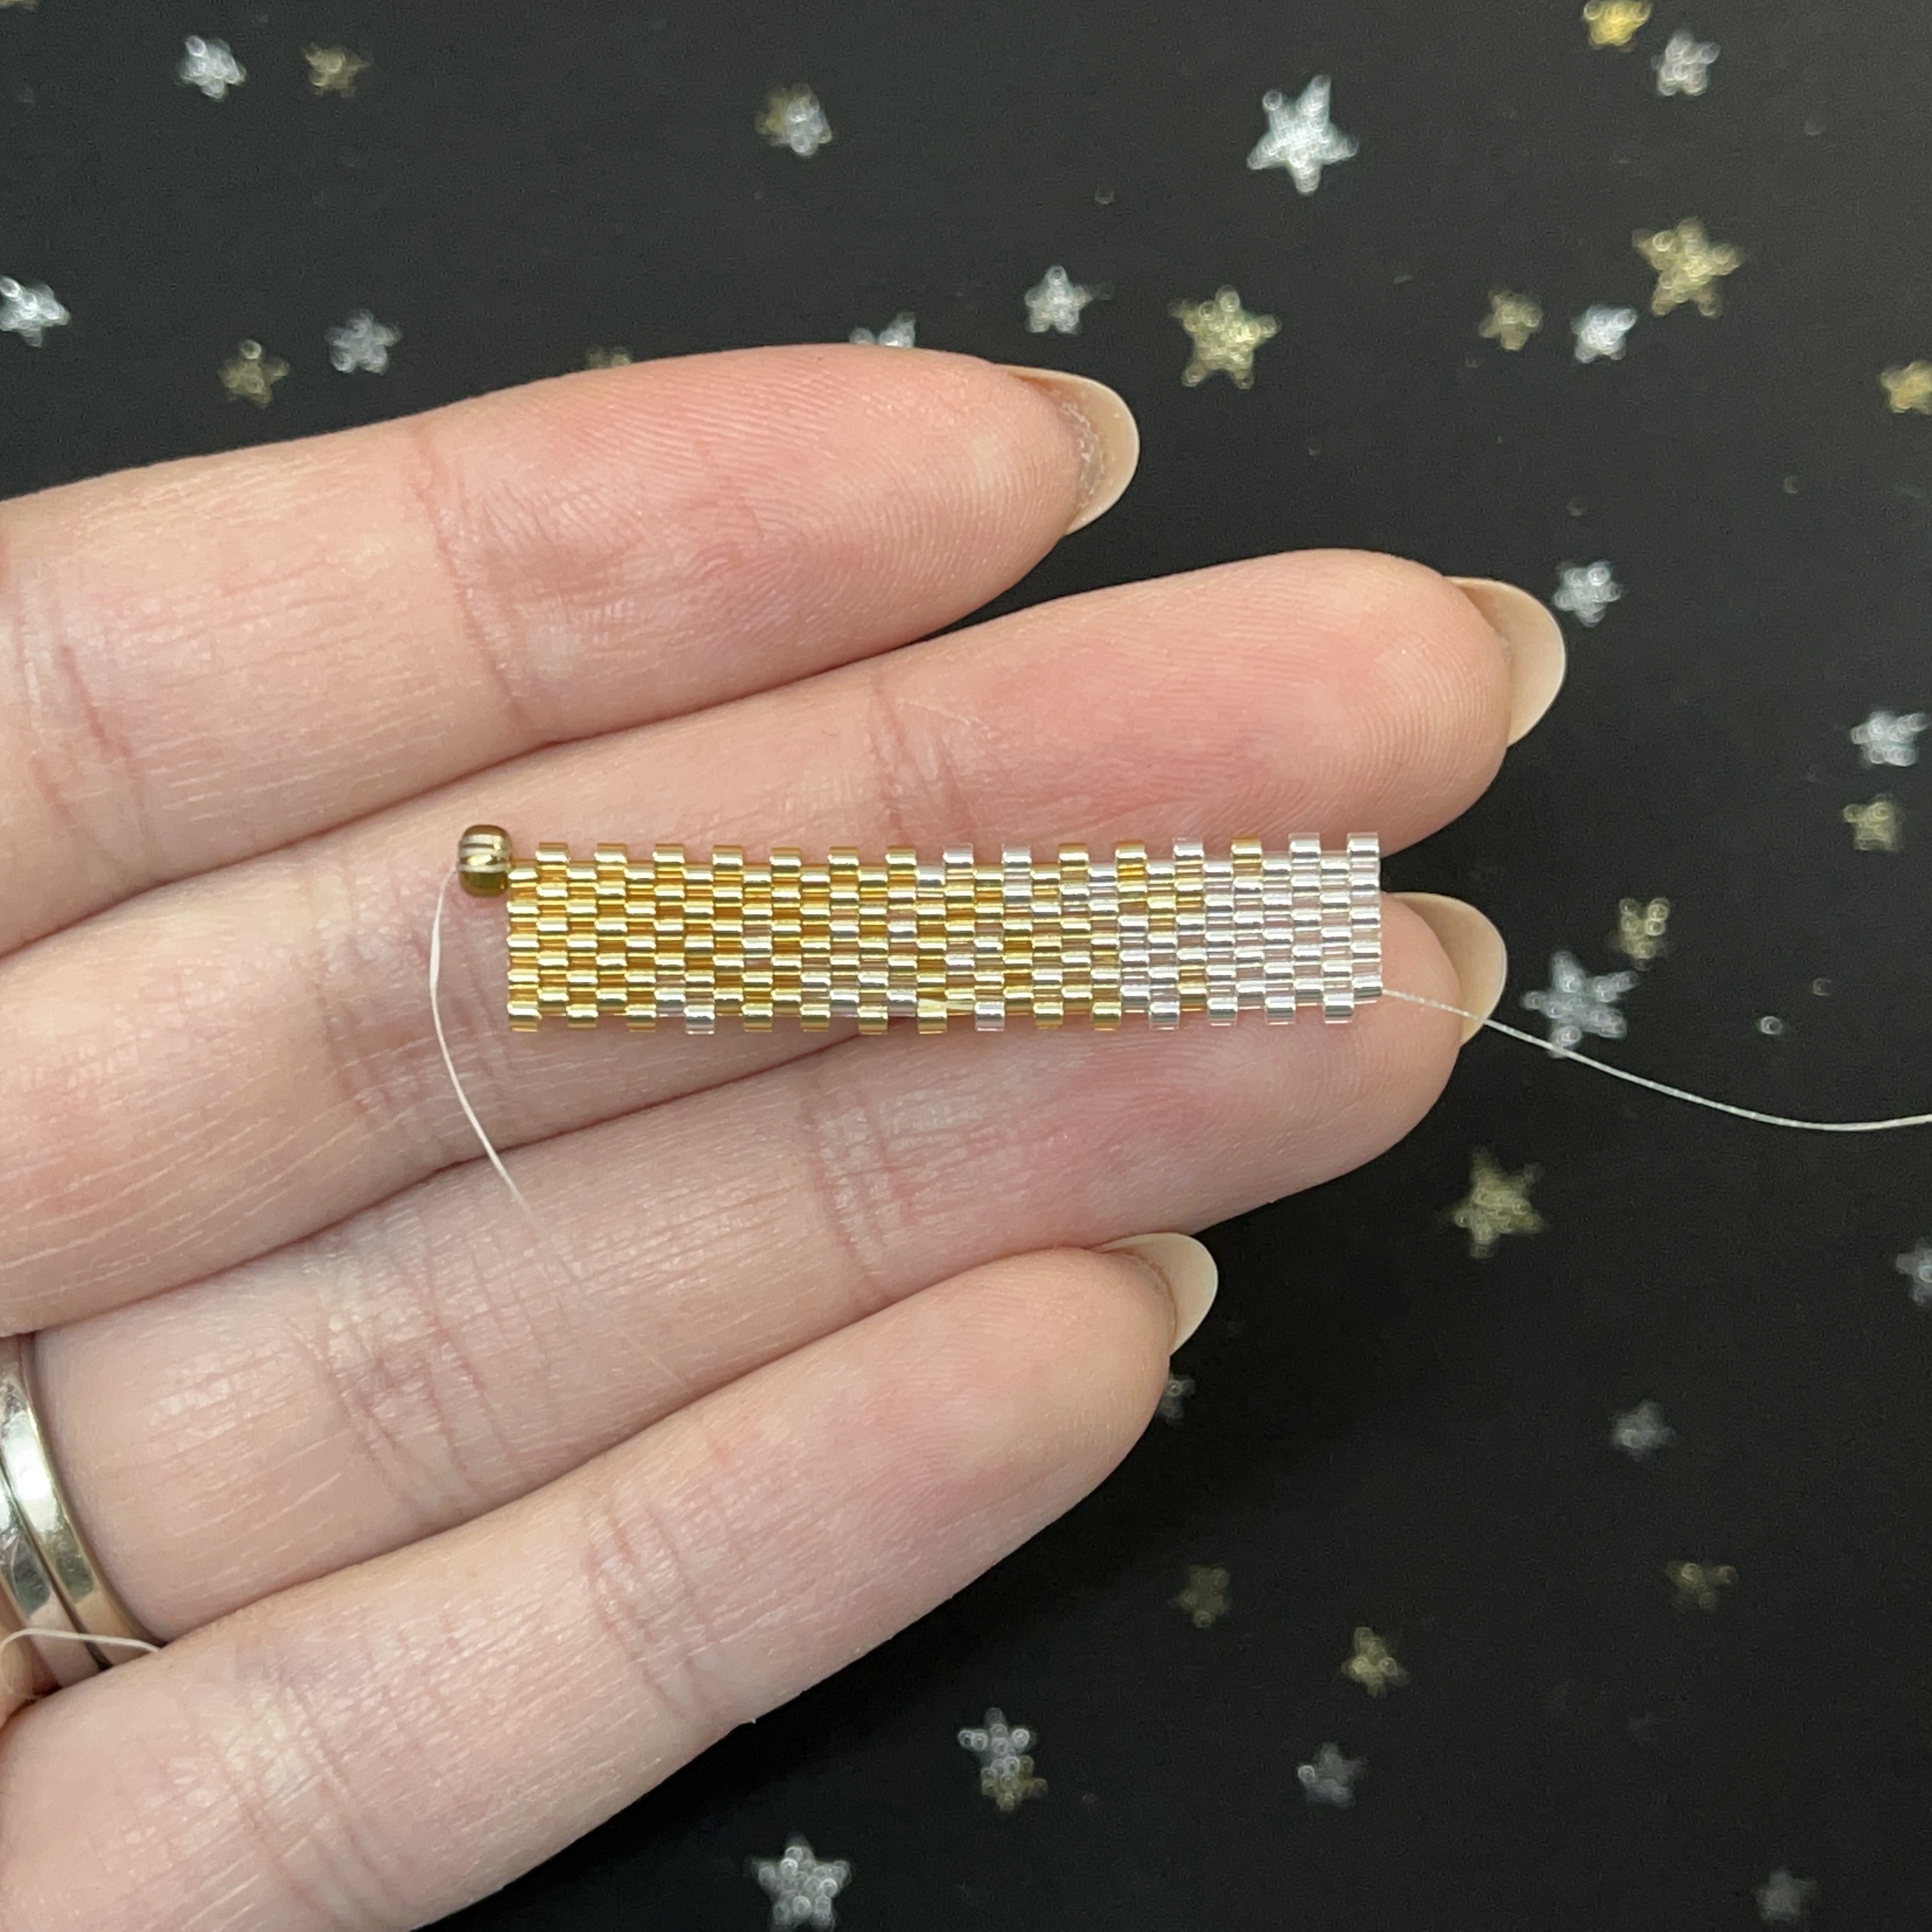
18. Pictured above is the last row. See pattern below to follow.

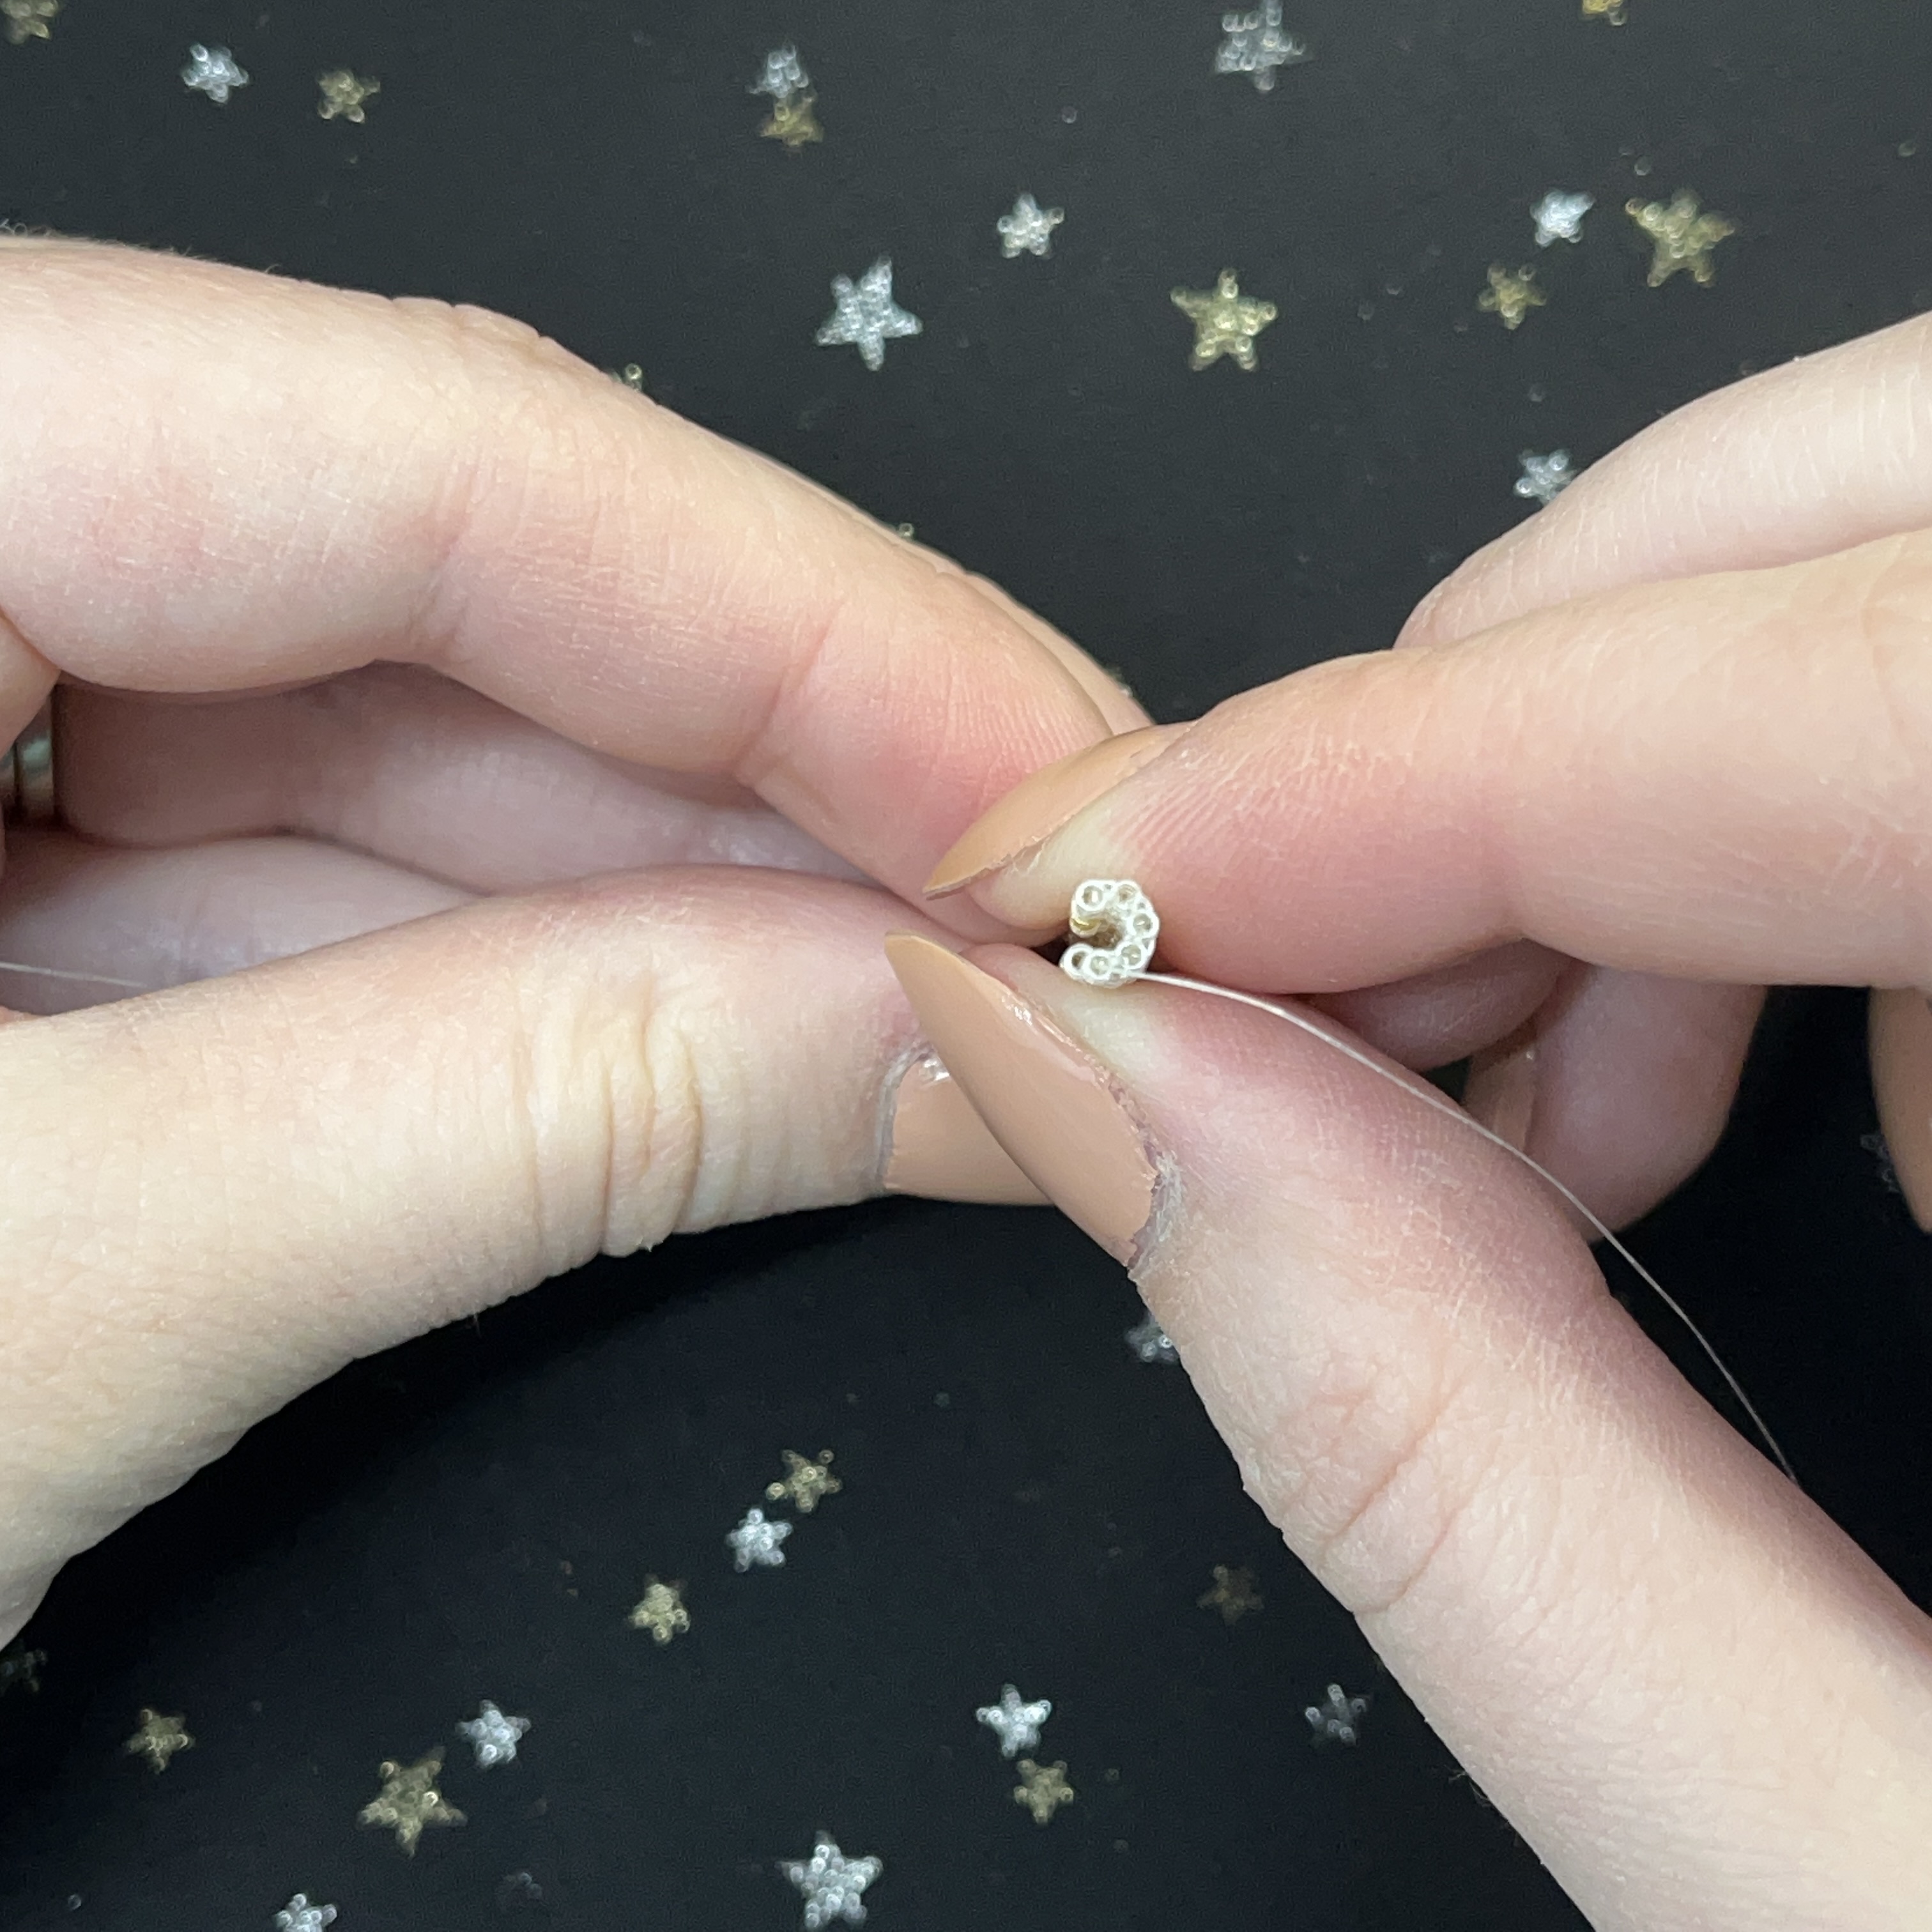
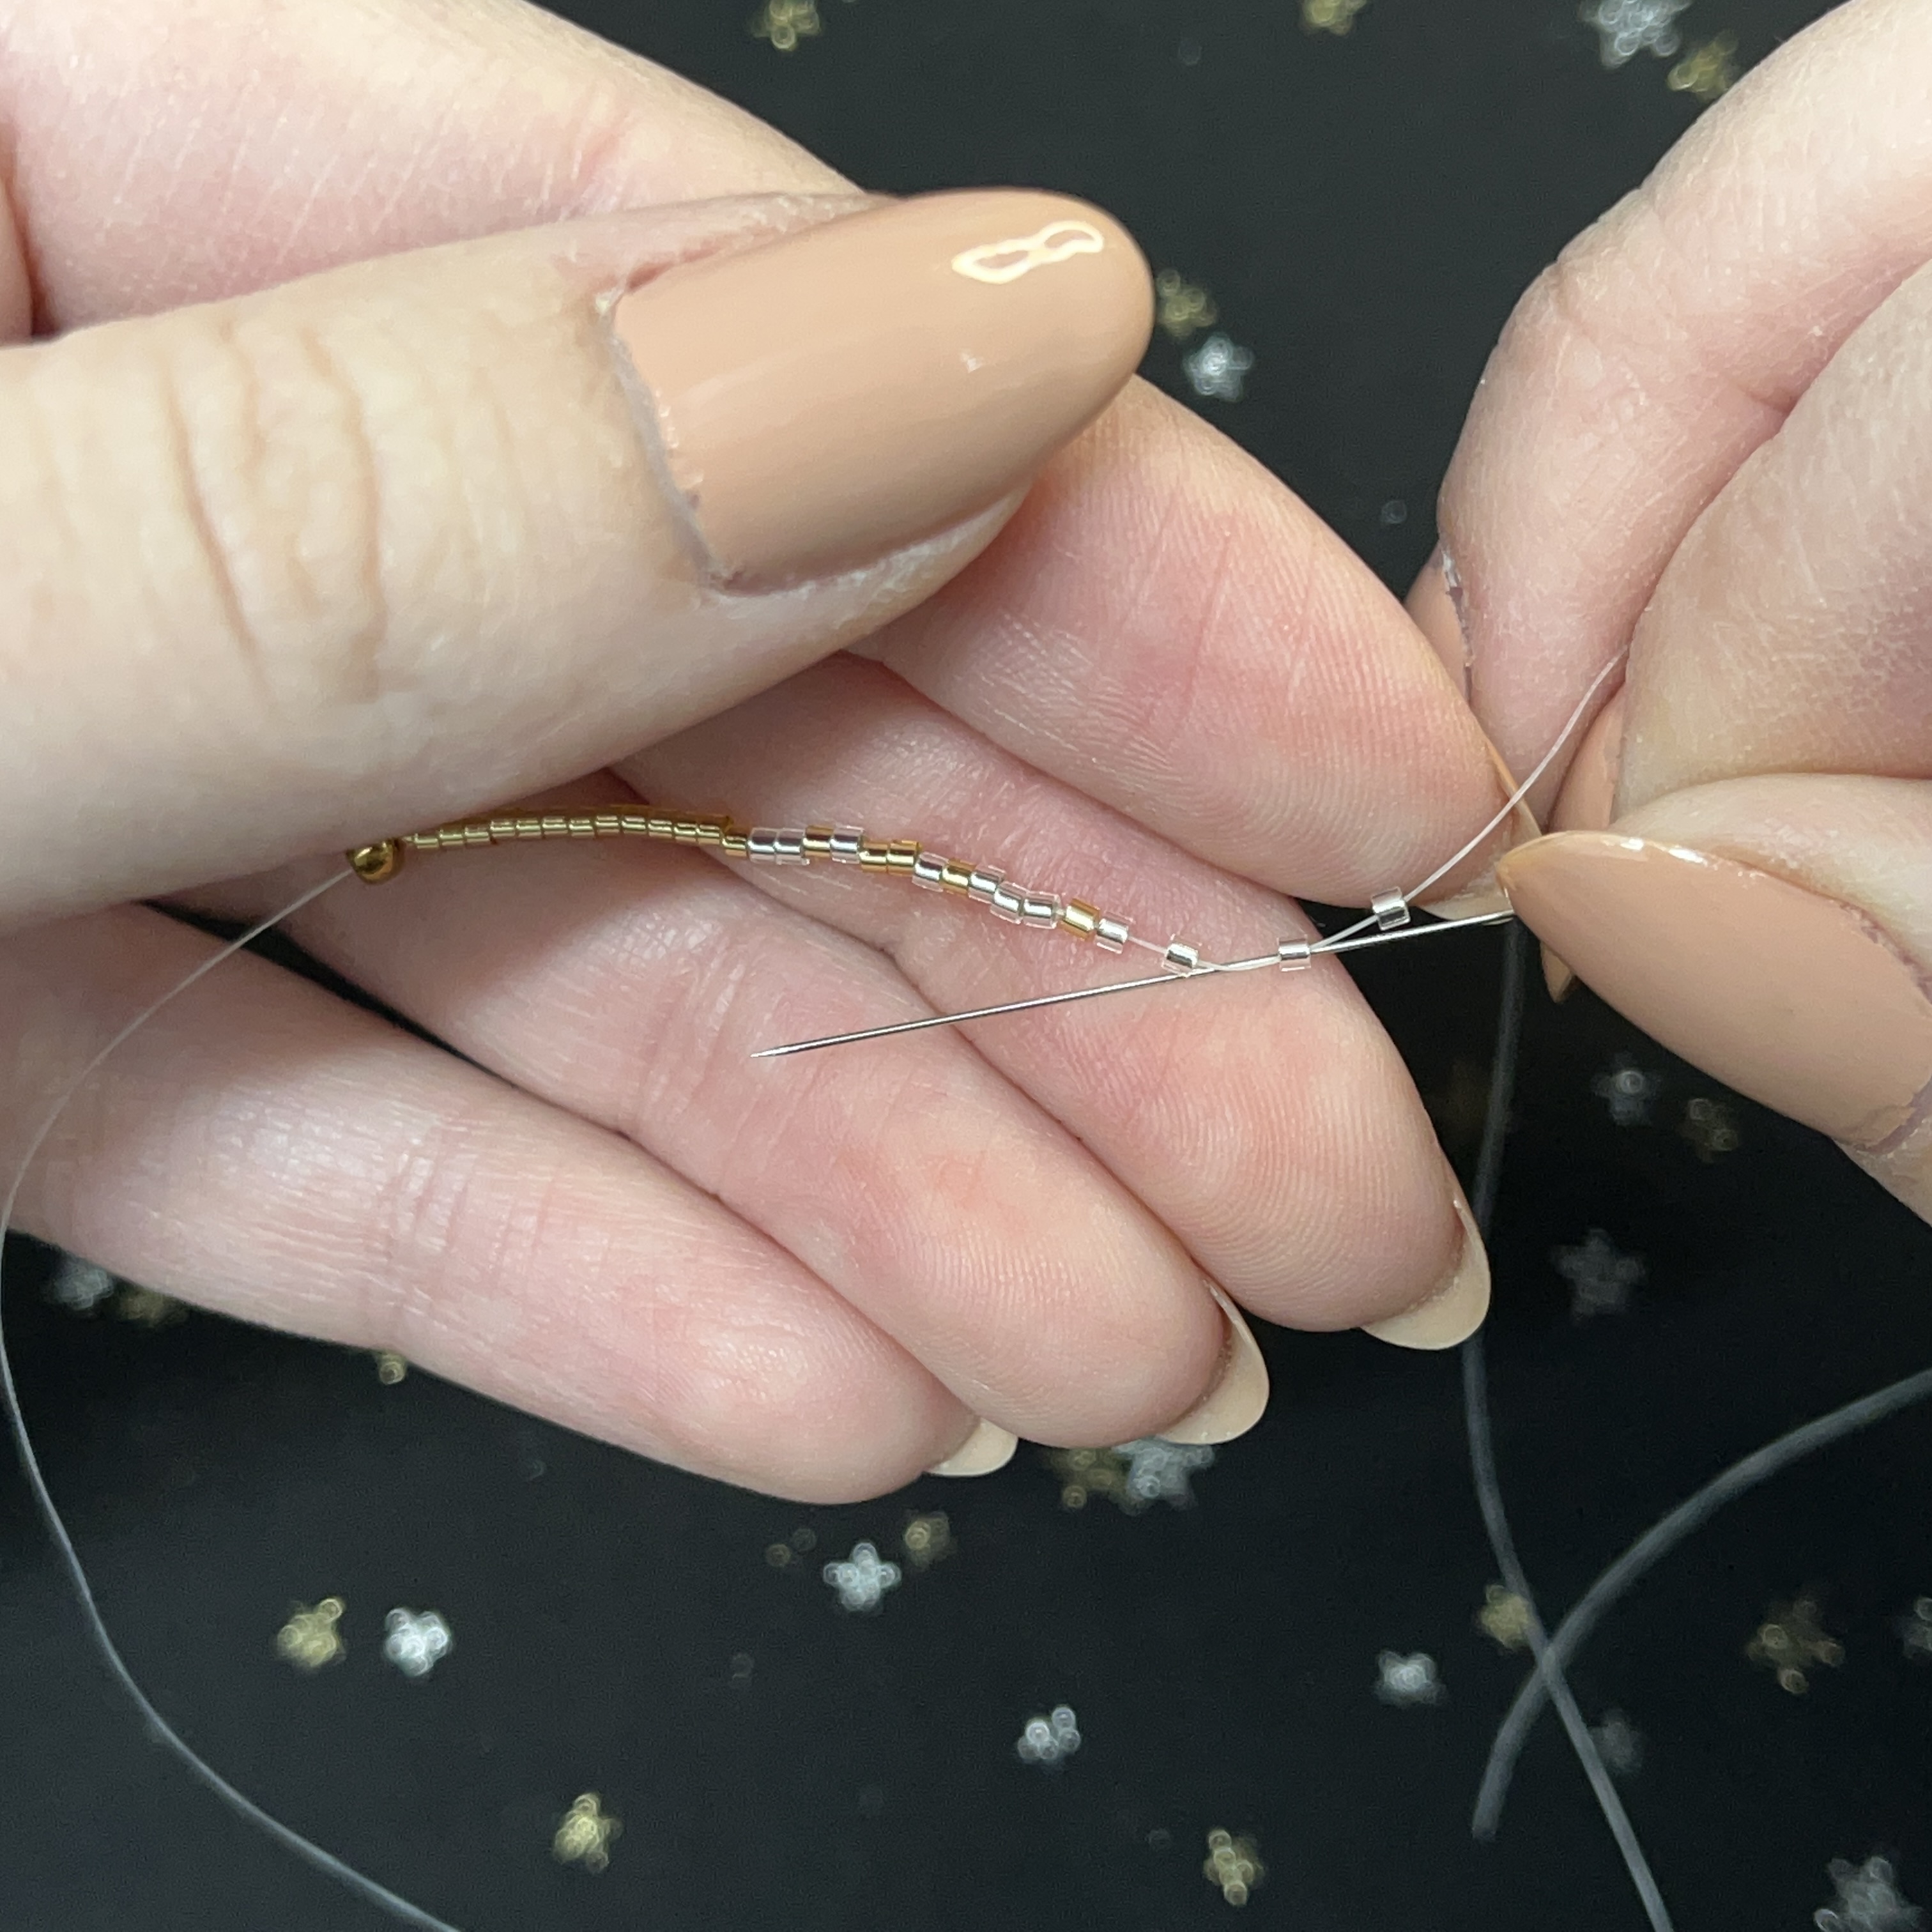
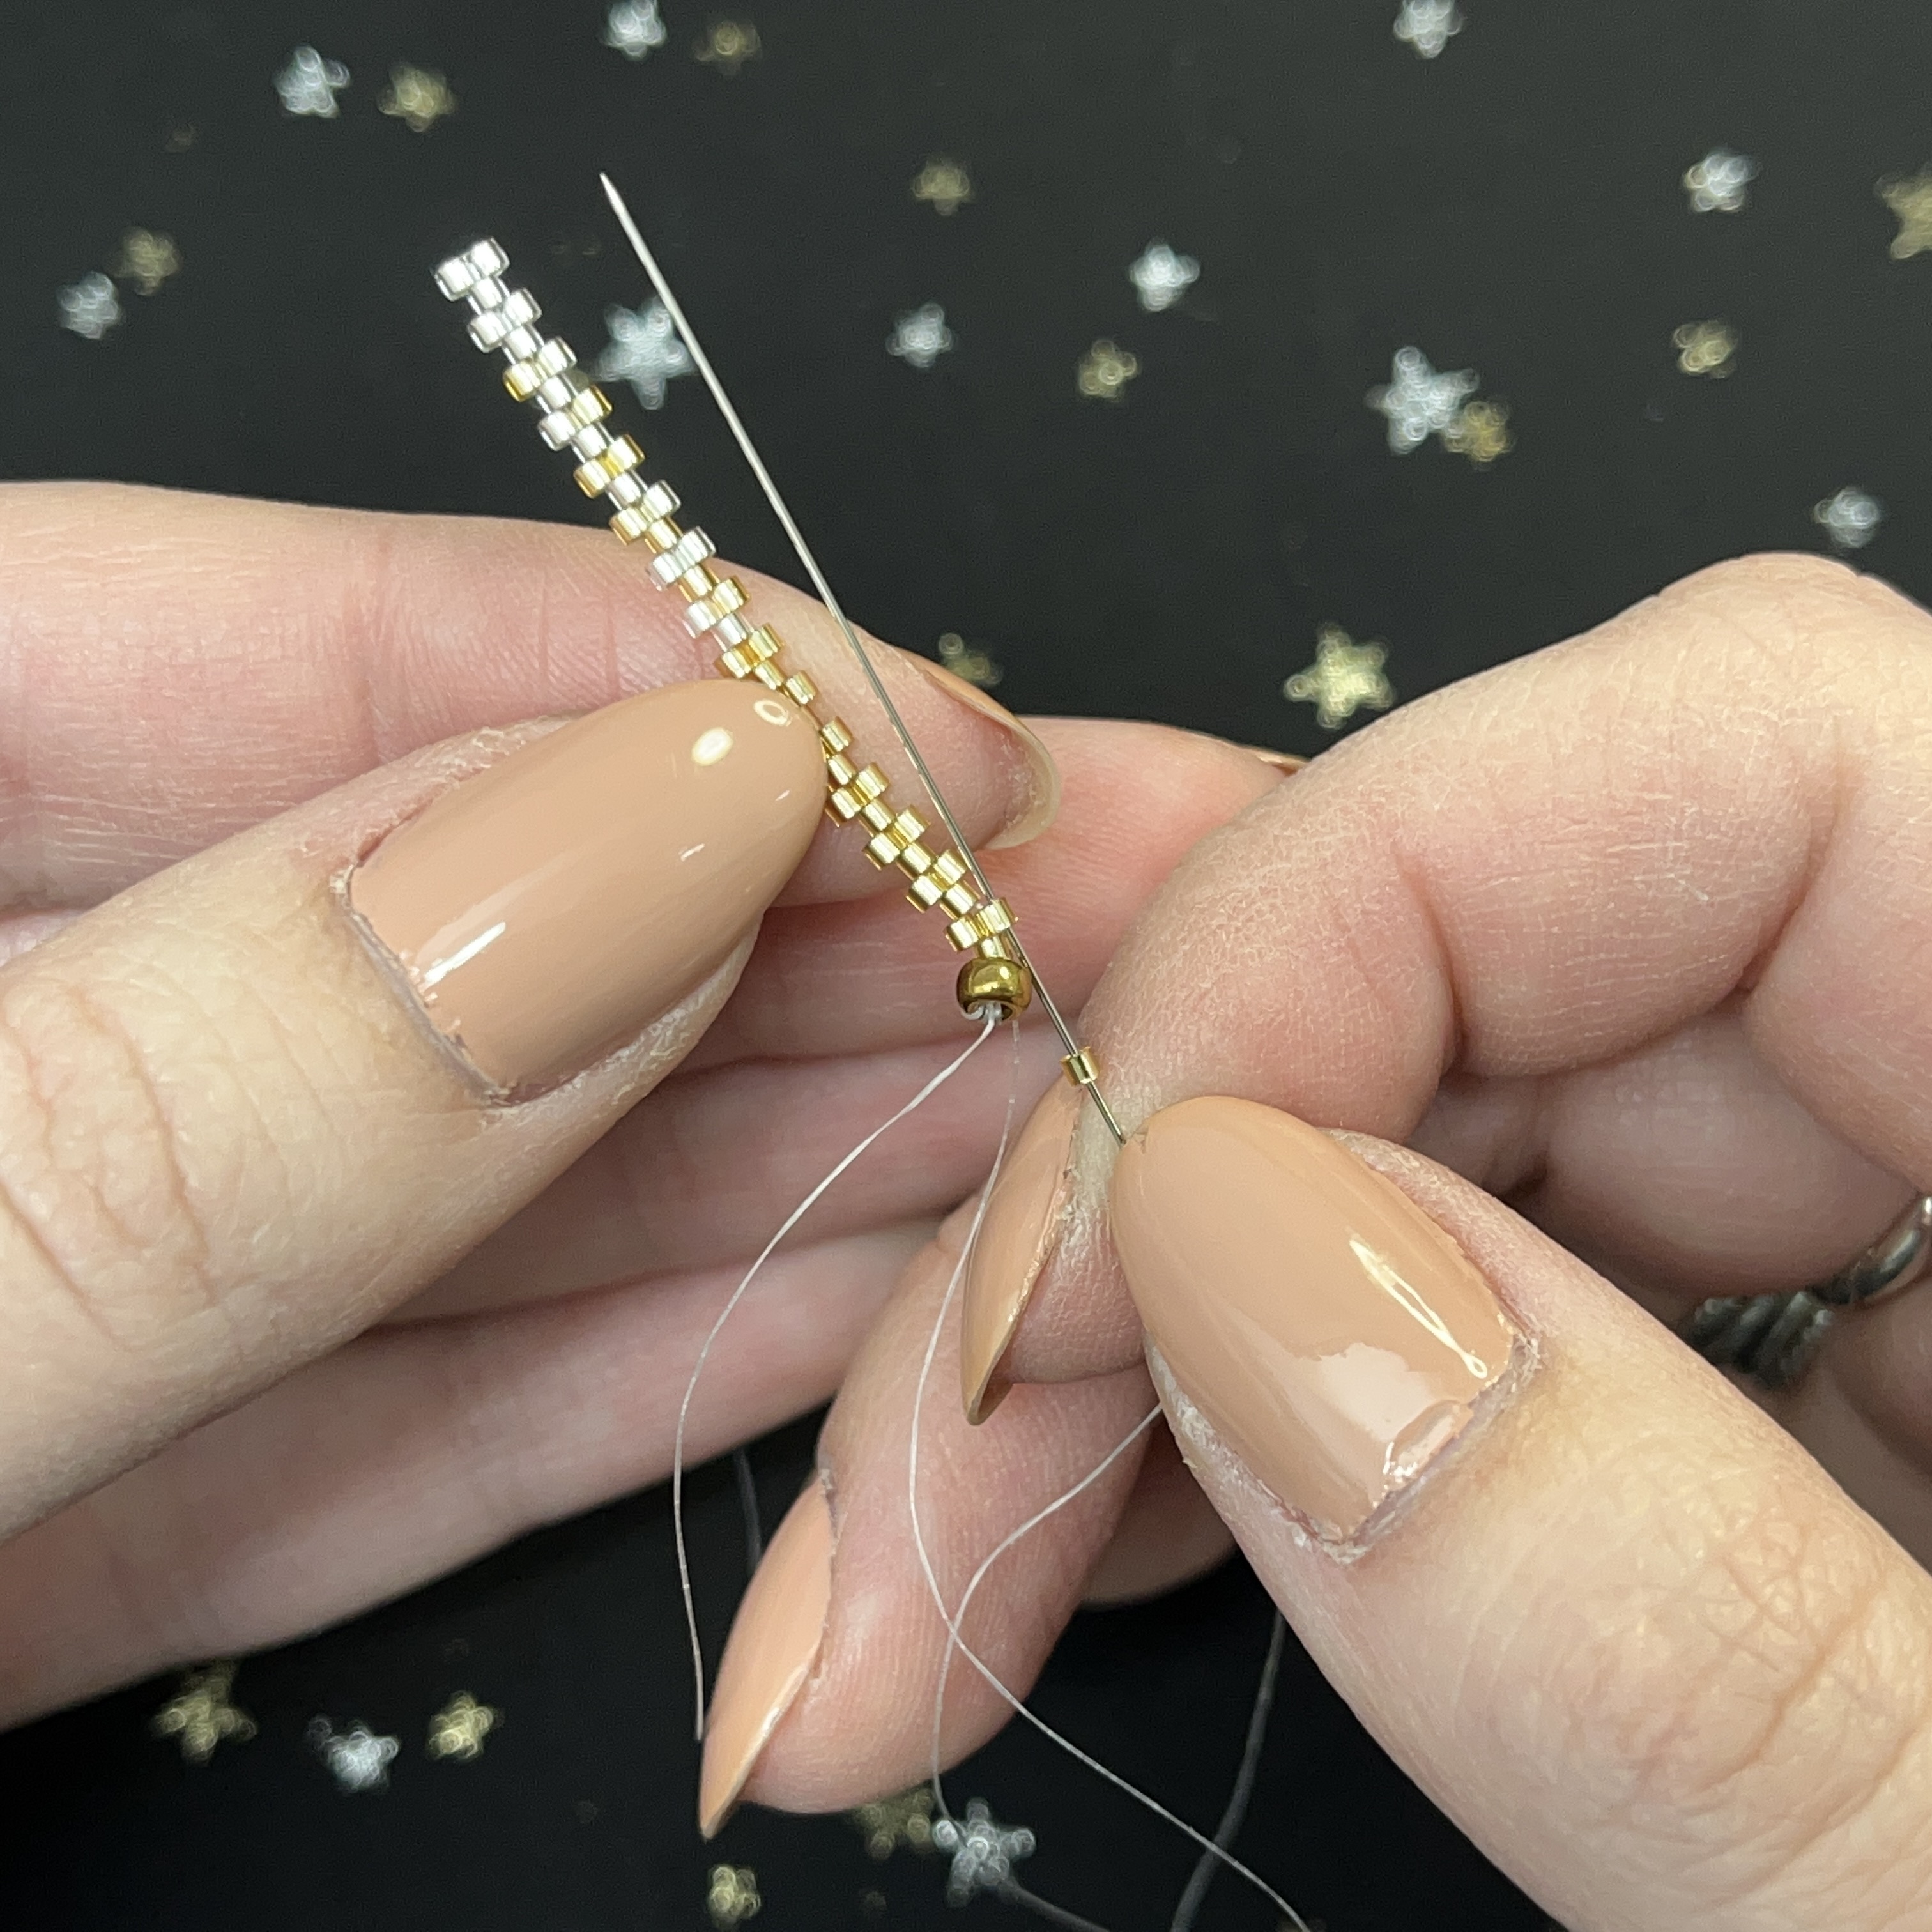
19. Now, curl up your flat peyote pattern into a straw like shape.
20. Thread your needle through the single delica to the right. You are going to zig-zag the beads together with your thread. Similar to a zipper. ** Pull tight after each bead.

21. Thread your needle through the next delica on the left. Like shown above.
22. Repeat with the next delica bead and continue until you have "zipped" all the beads together to make a tube.
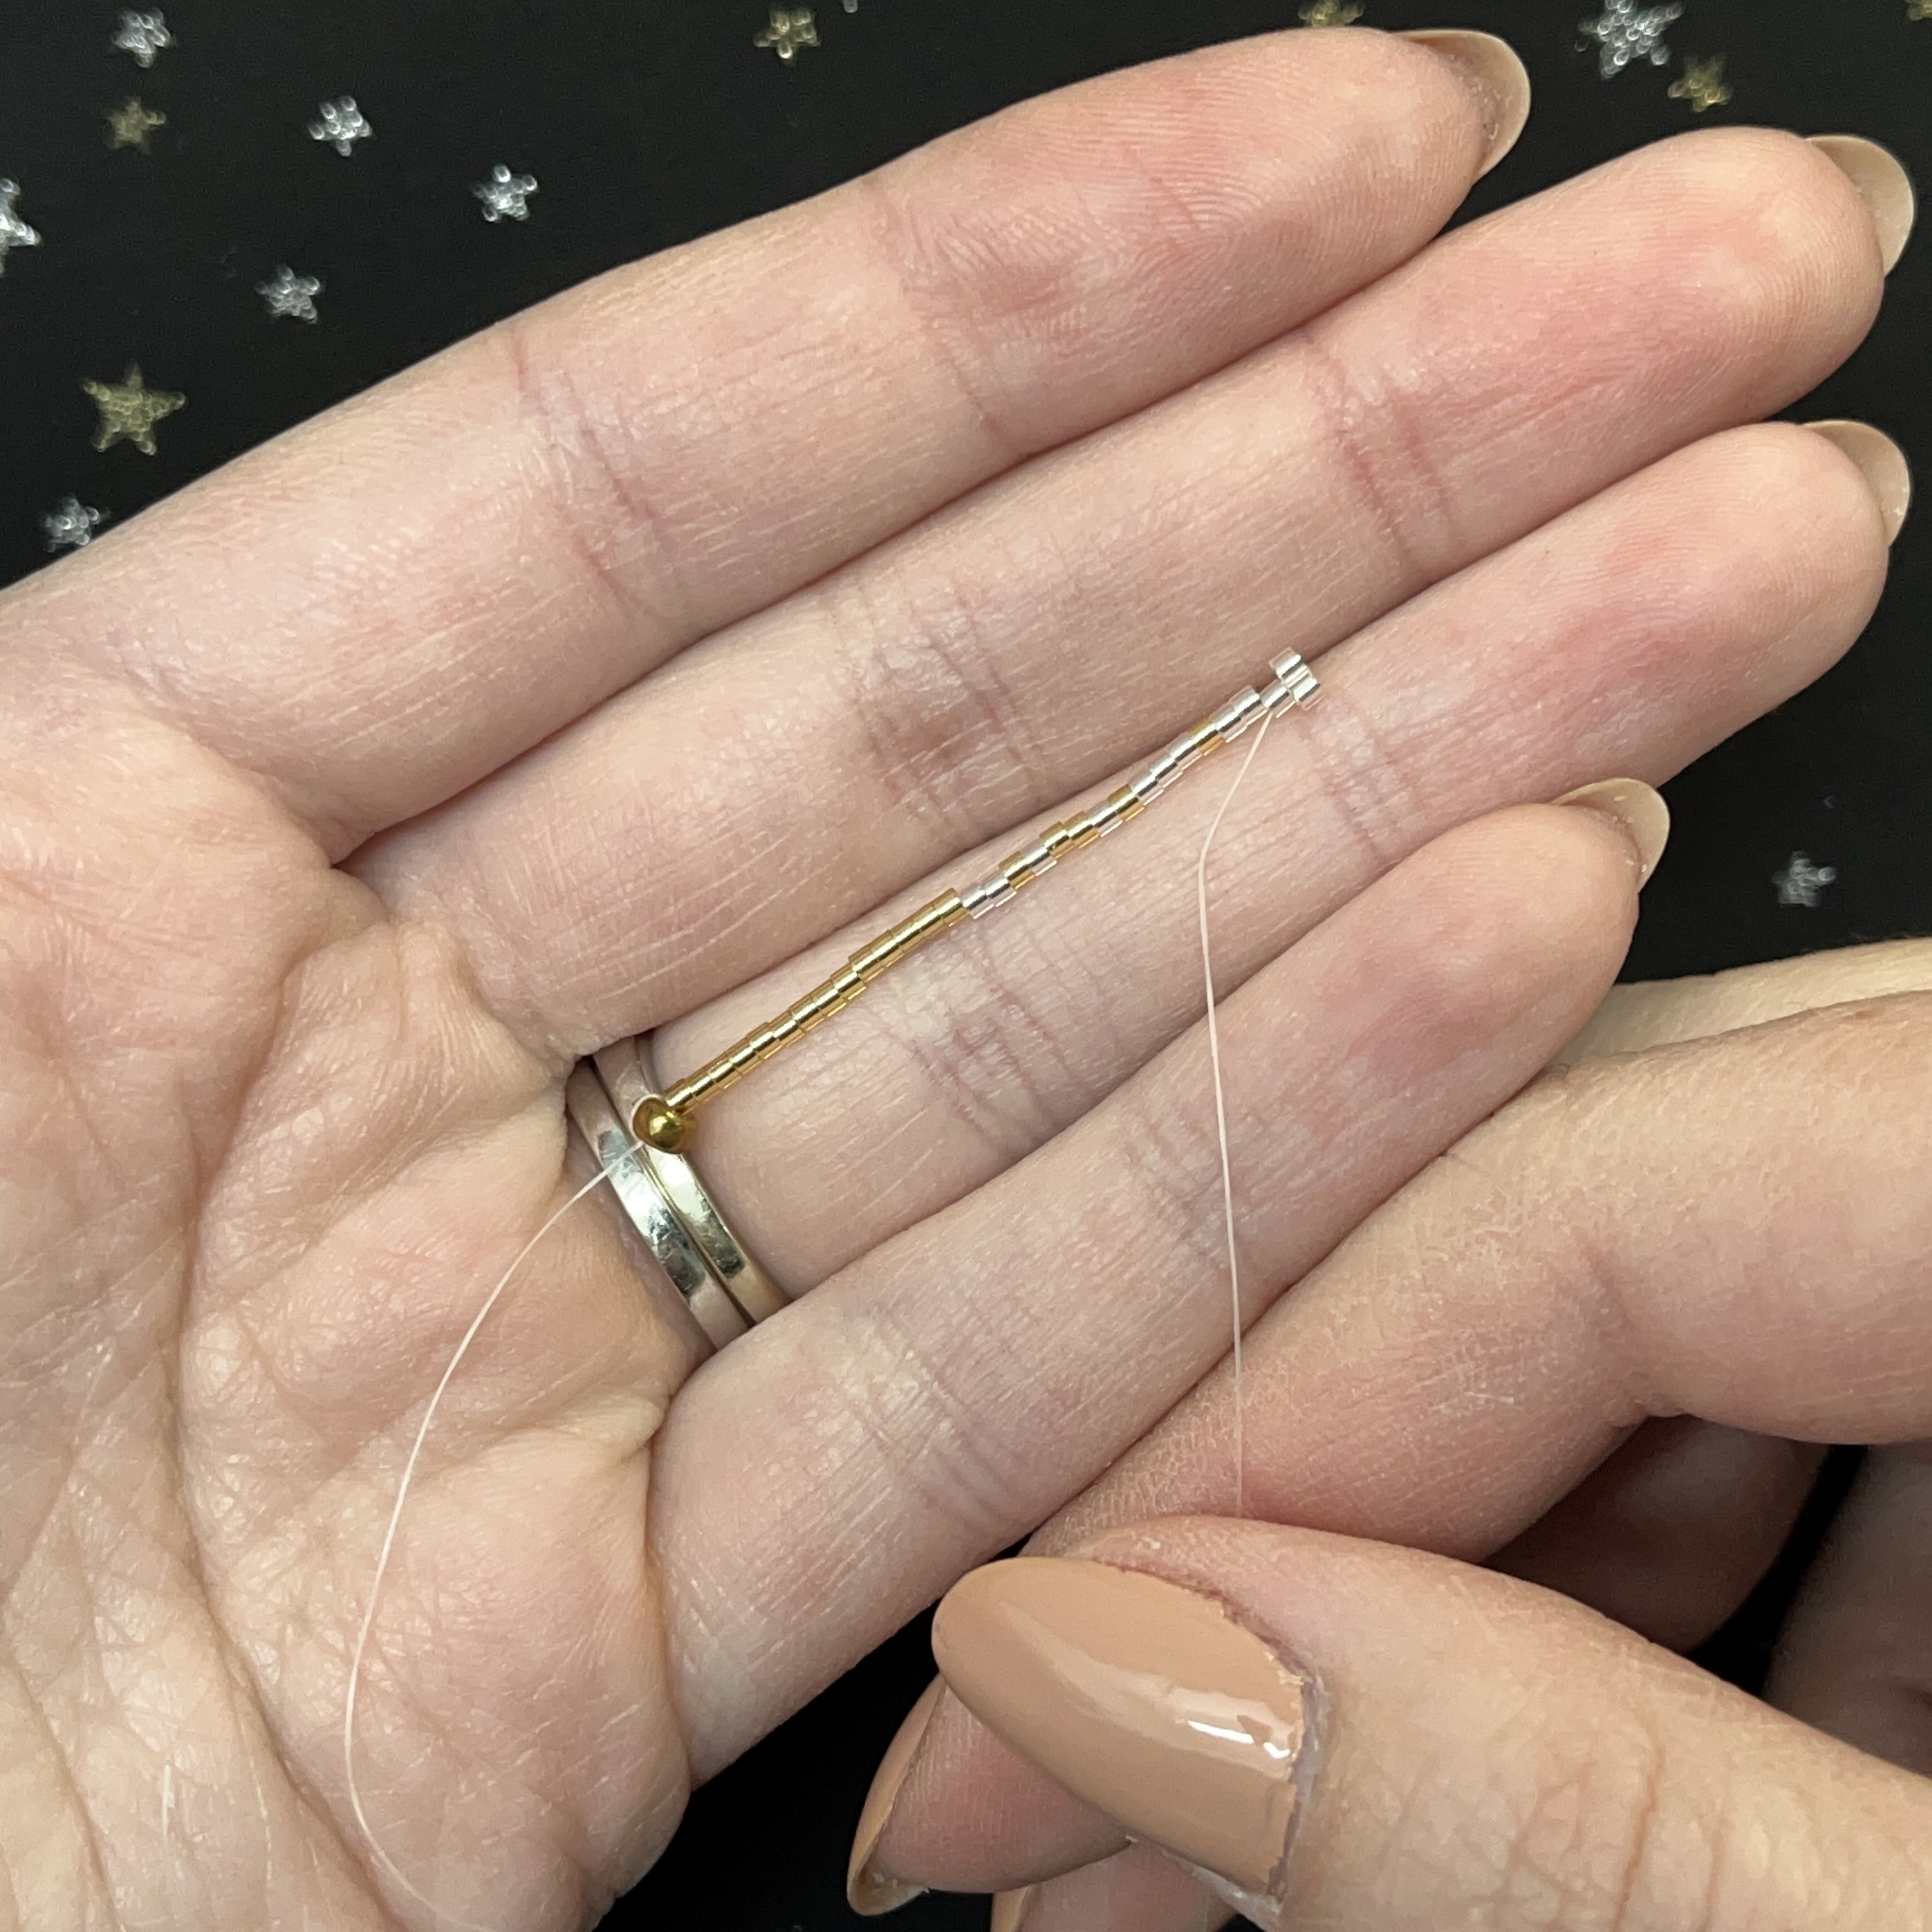
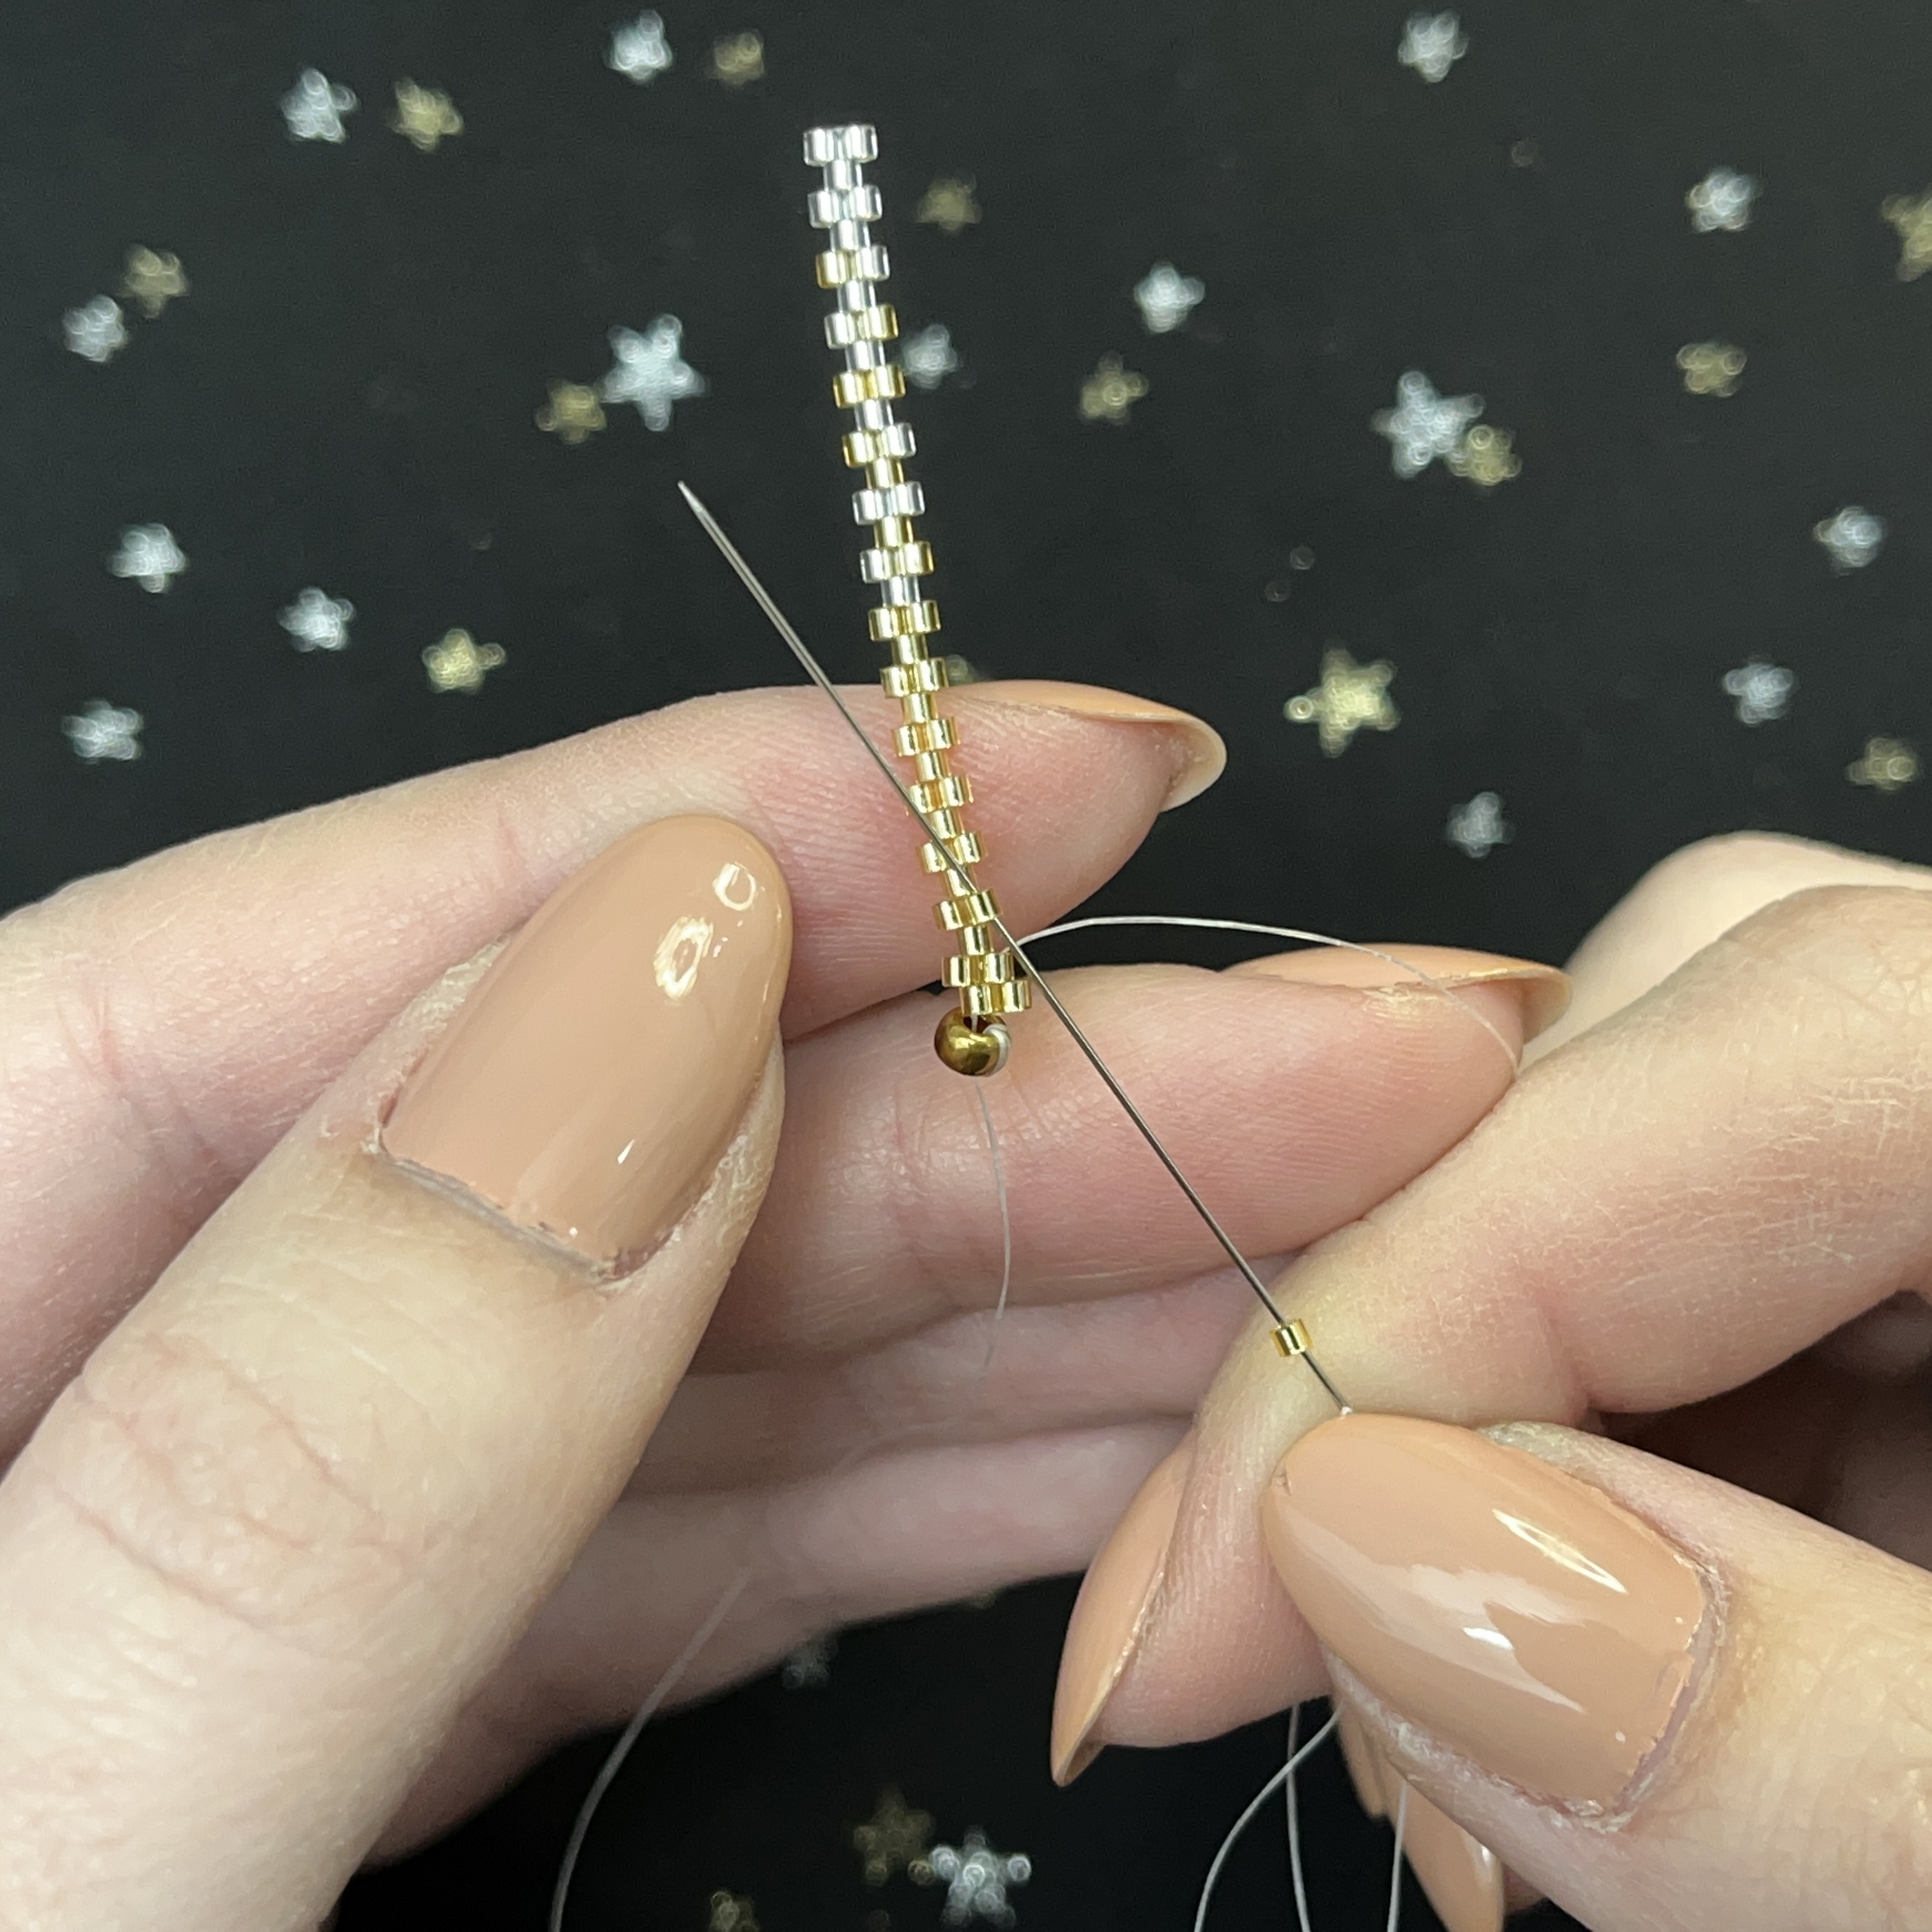
23. Remove stopper bead and pull your thread tight through the last bead in the "zipper"
24. Loop back around through the delica to the right, see above.
25. Thread the needle up through the delica to the right, see above.
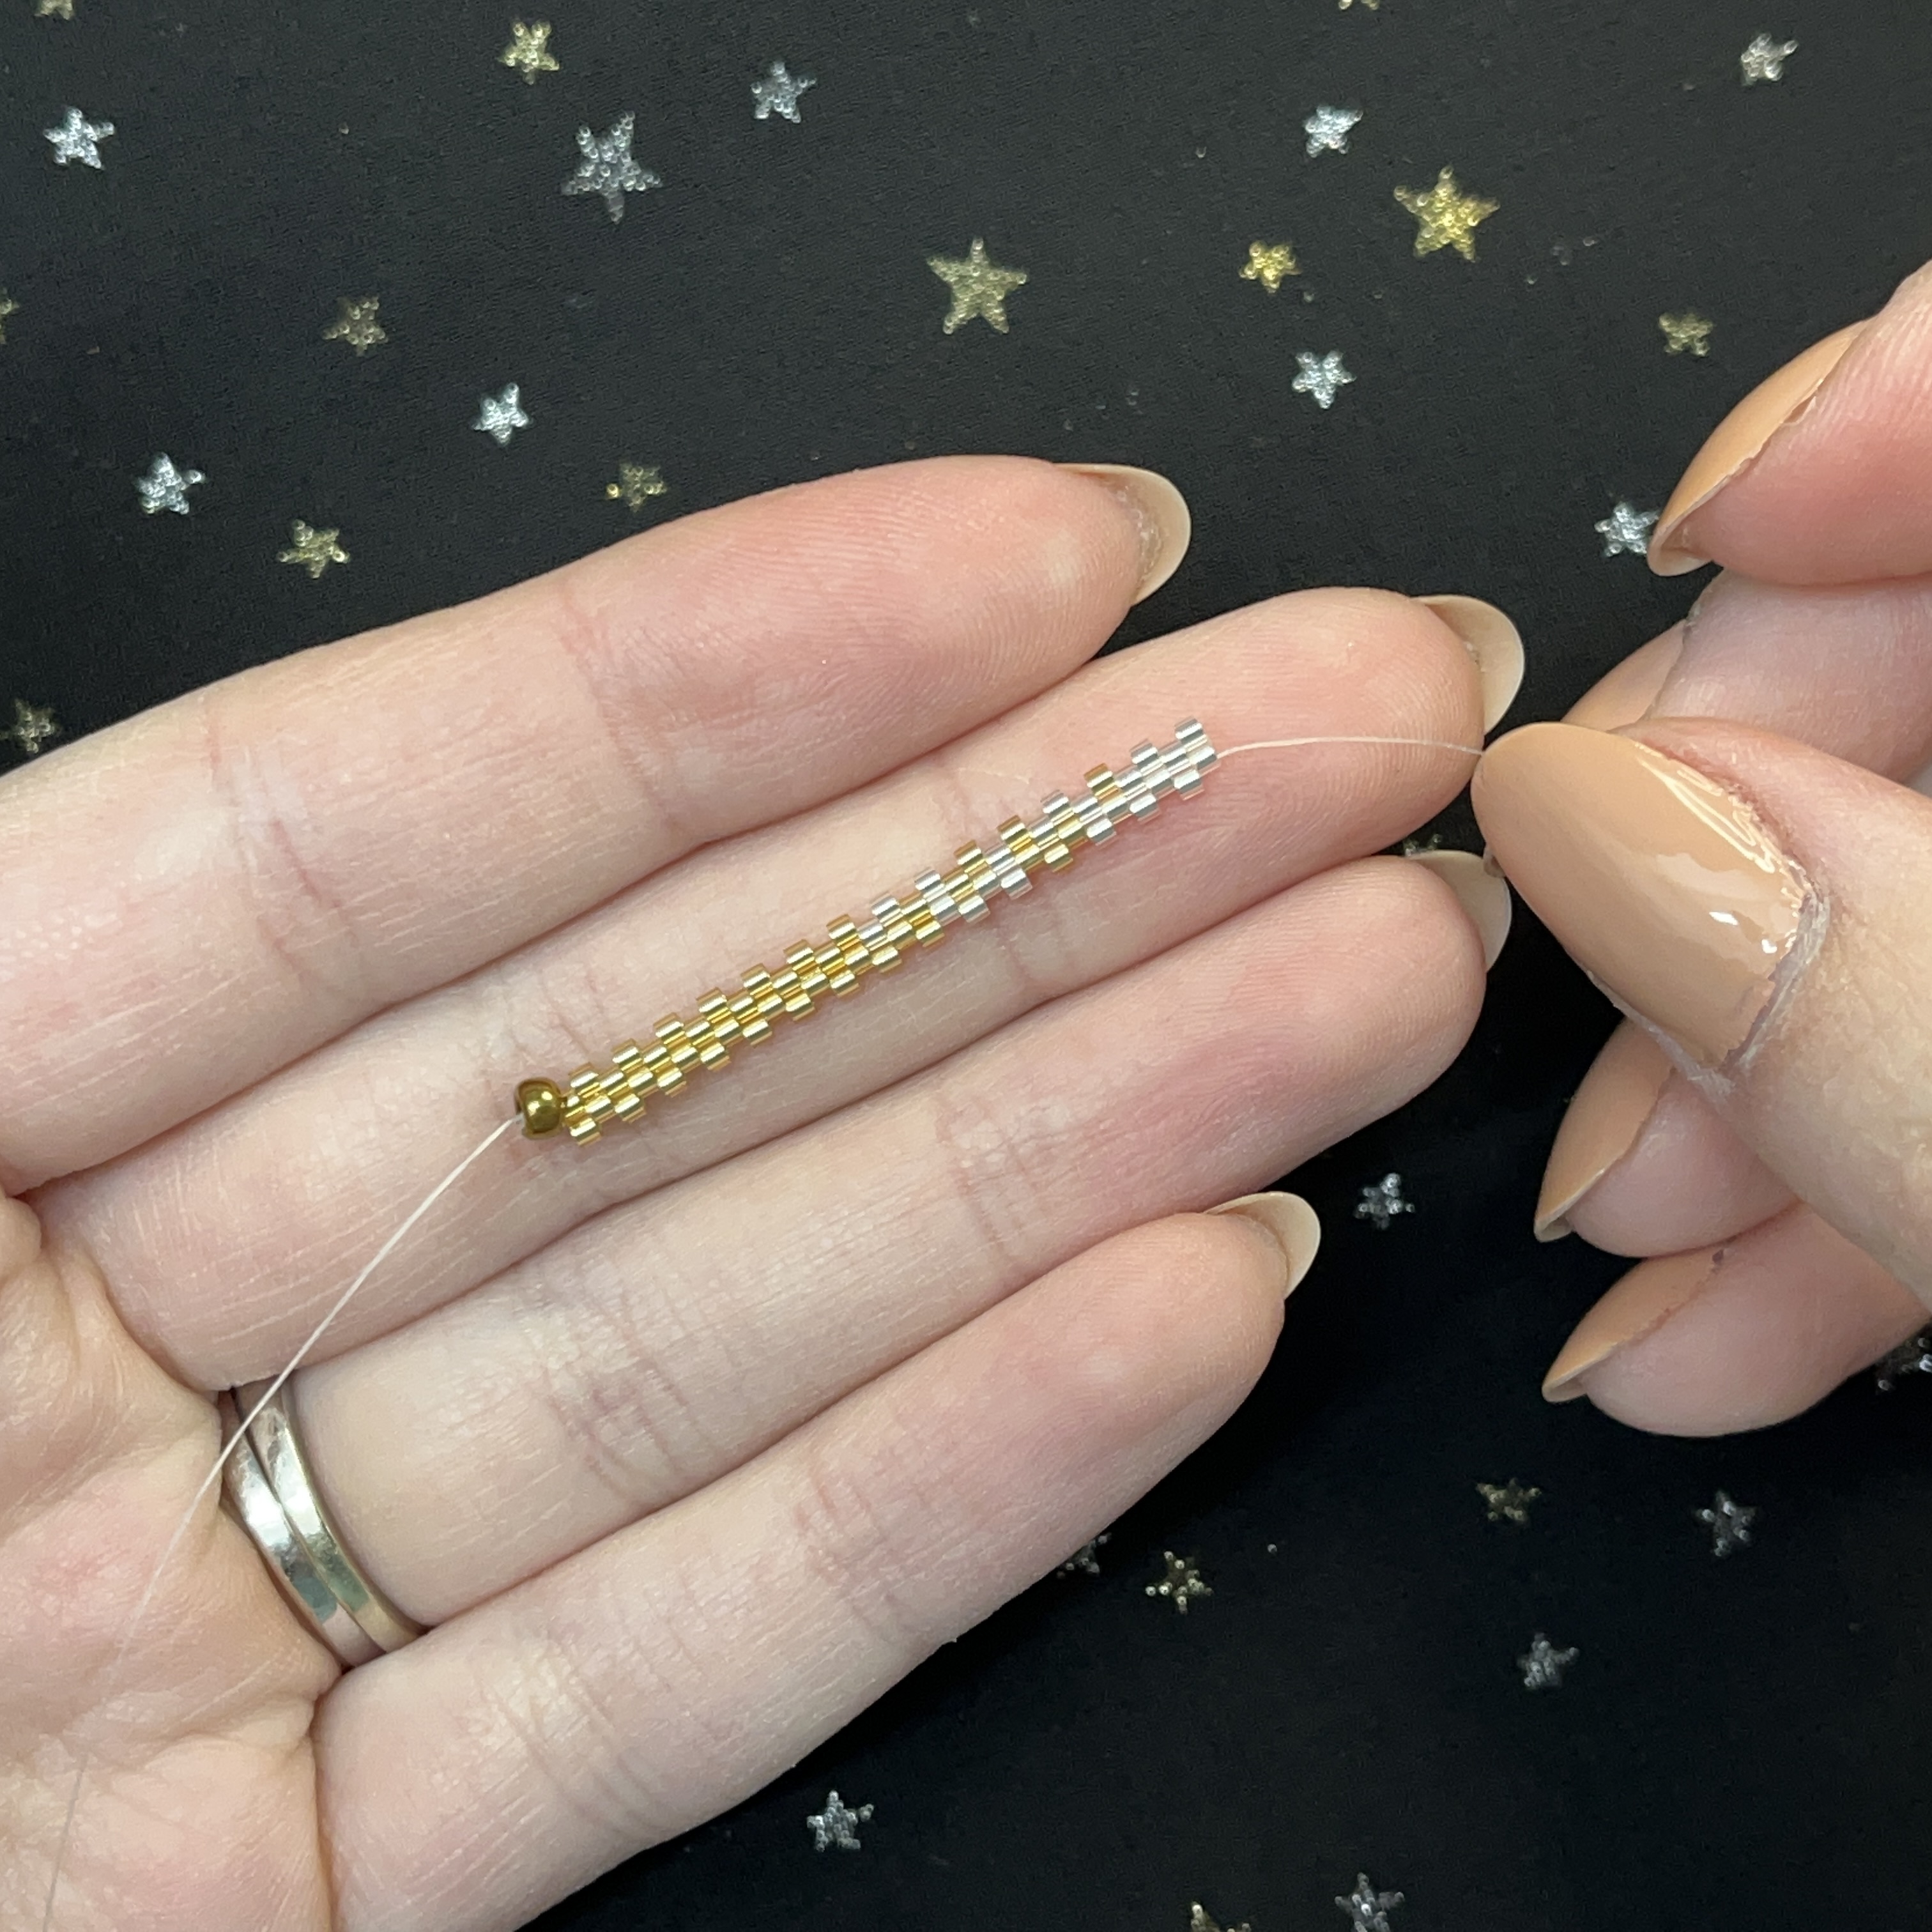
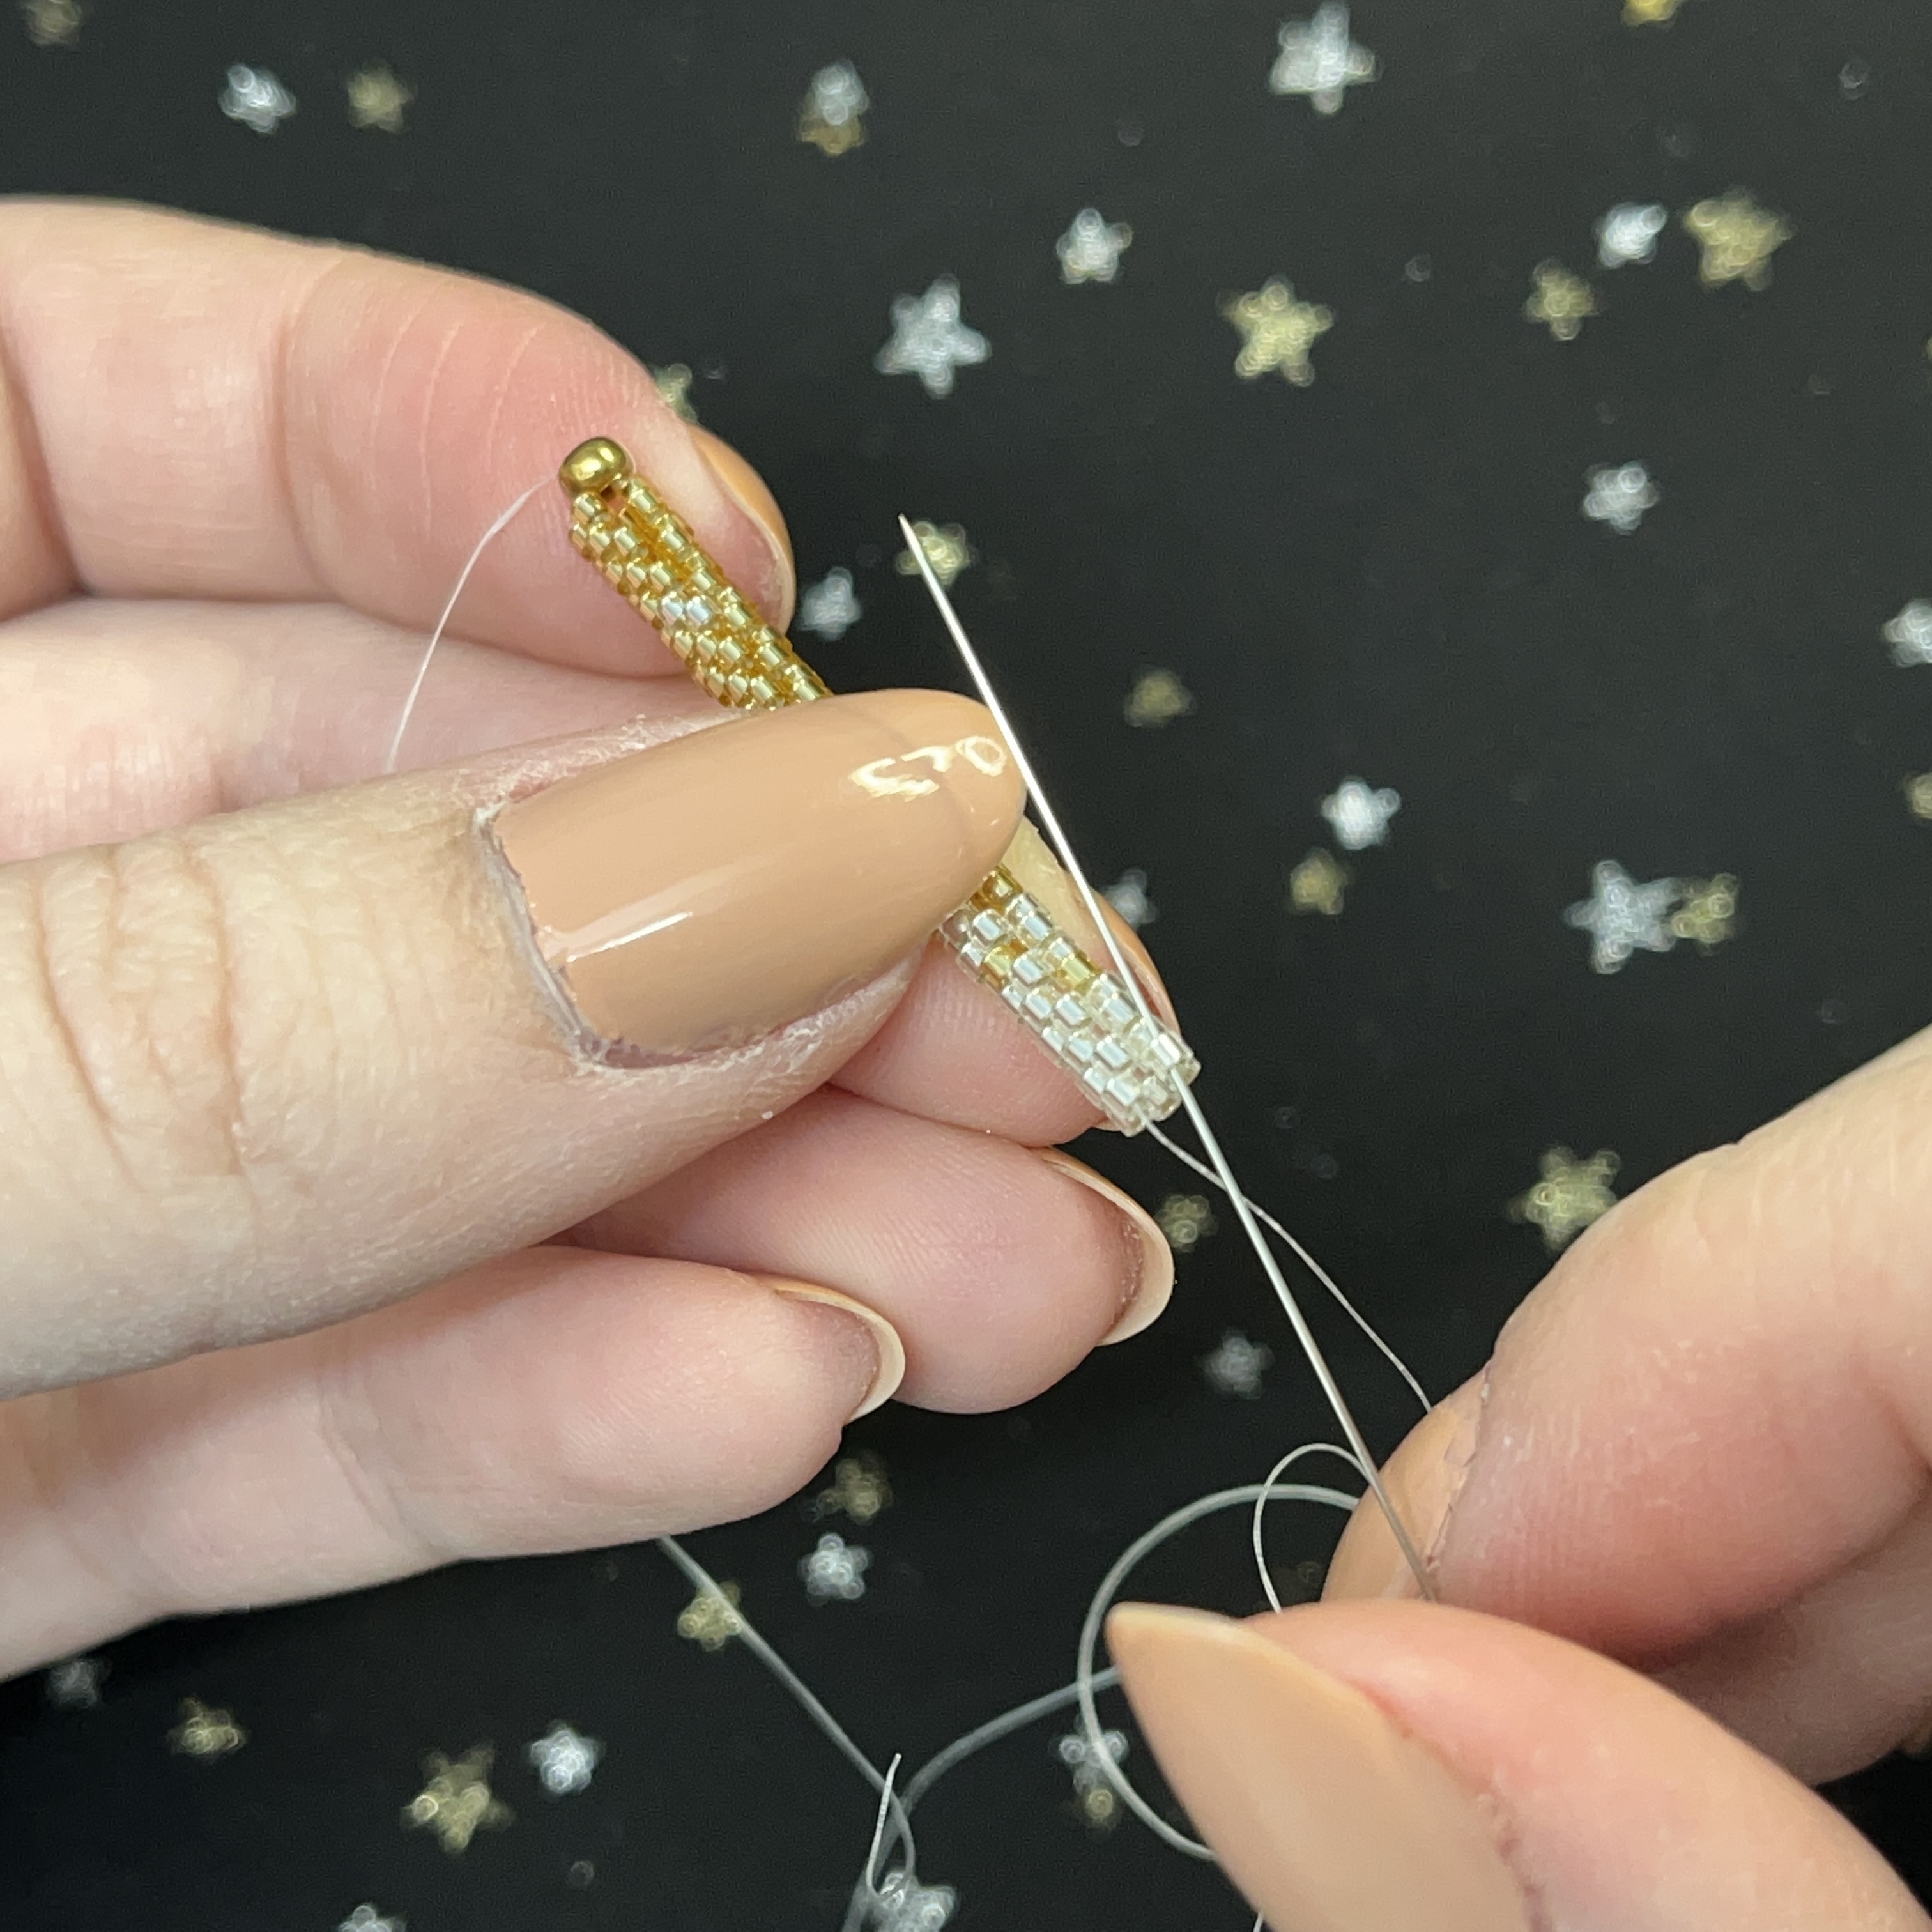
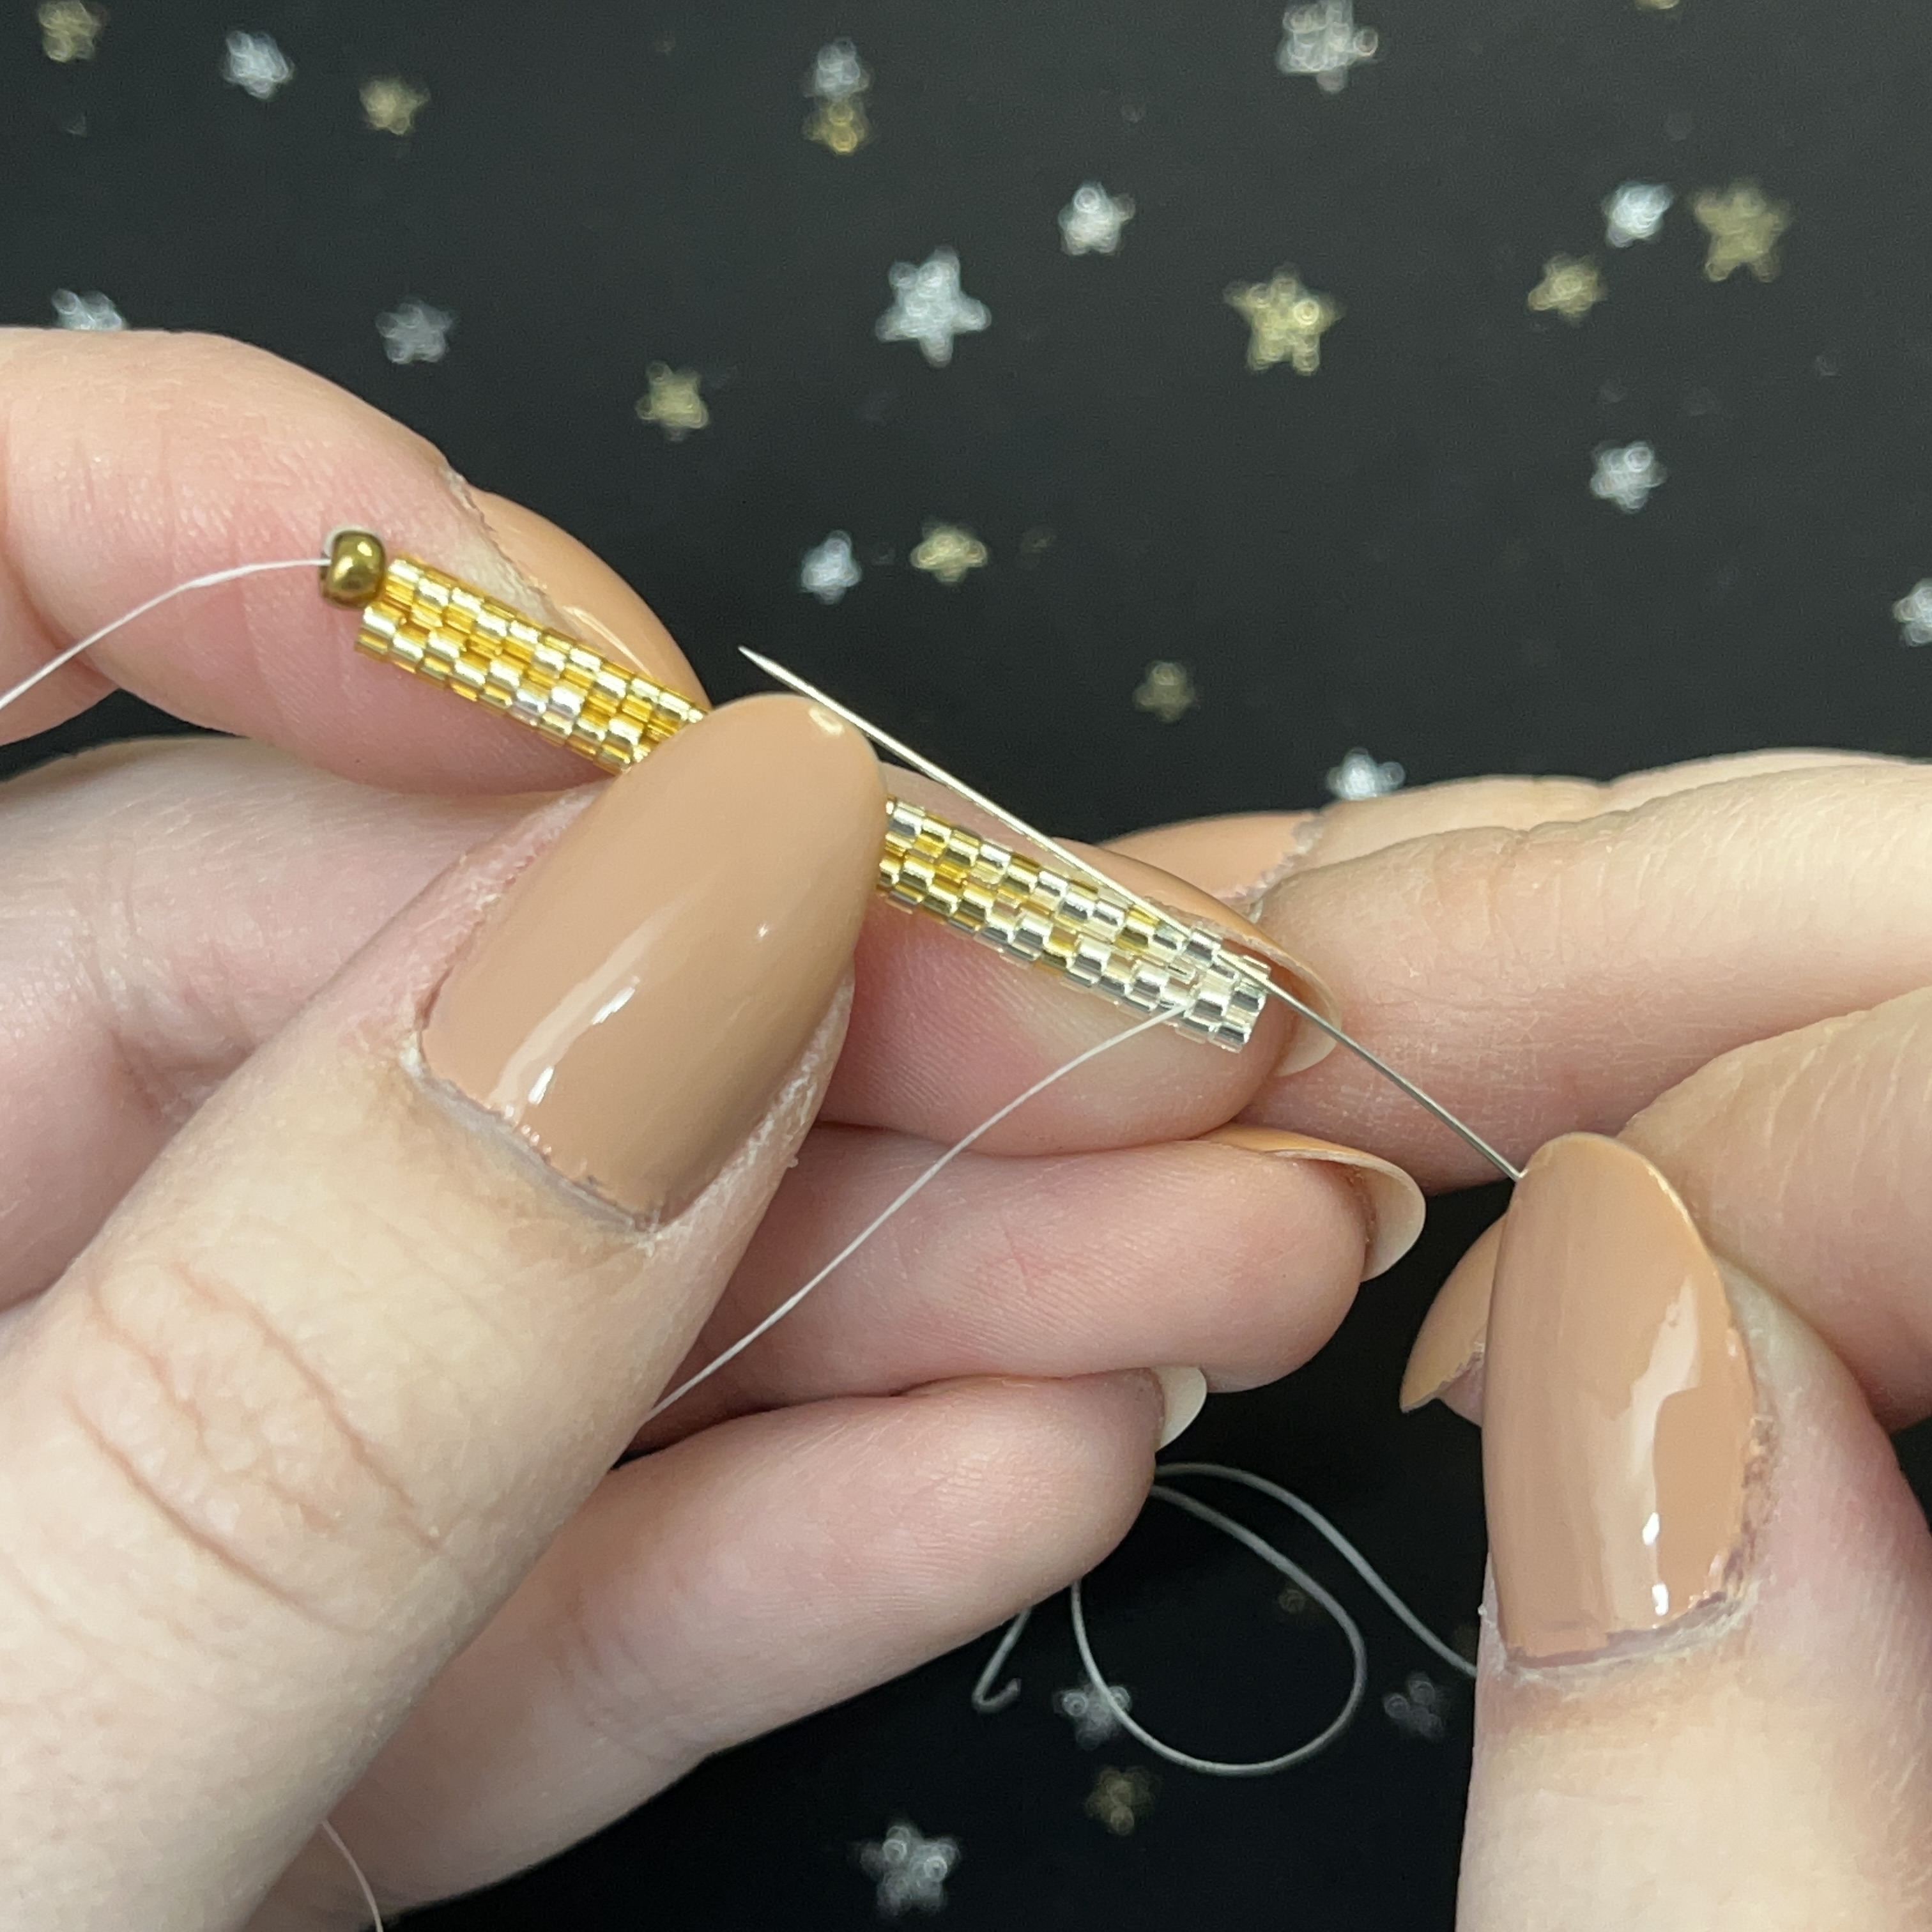
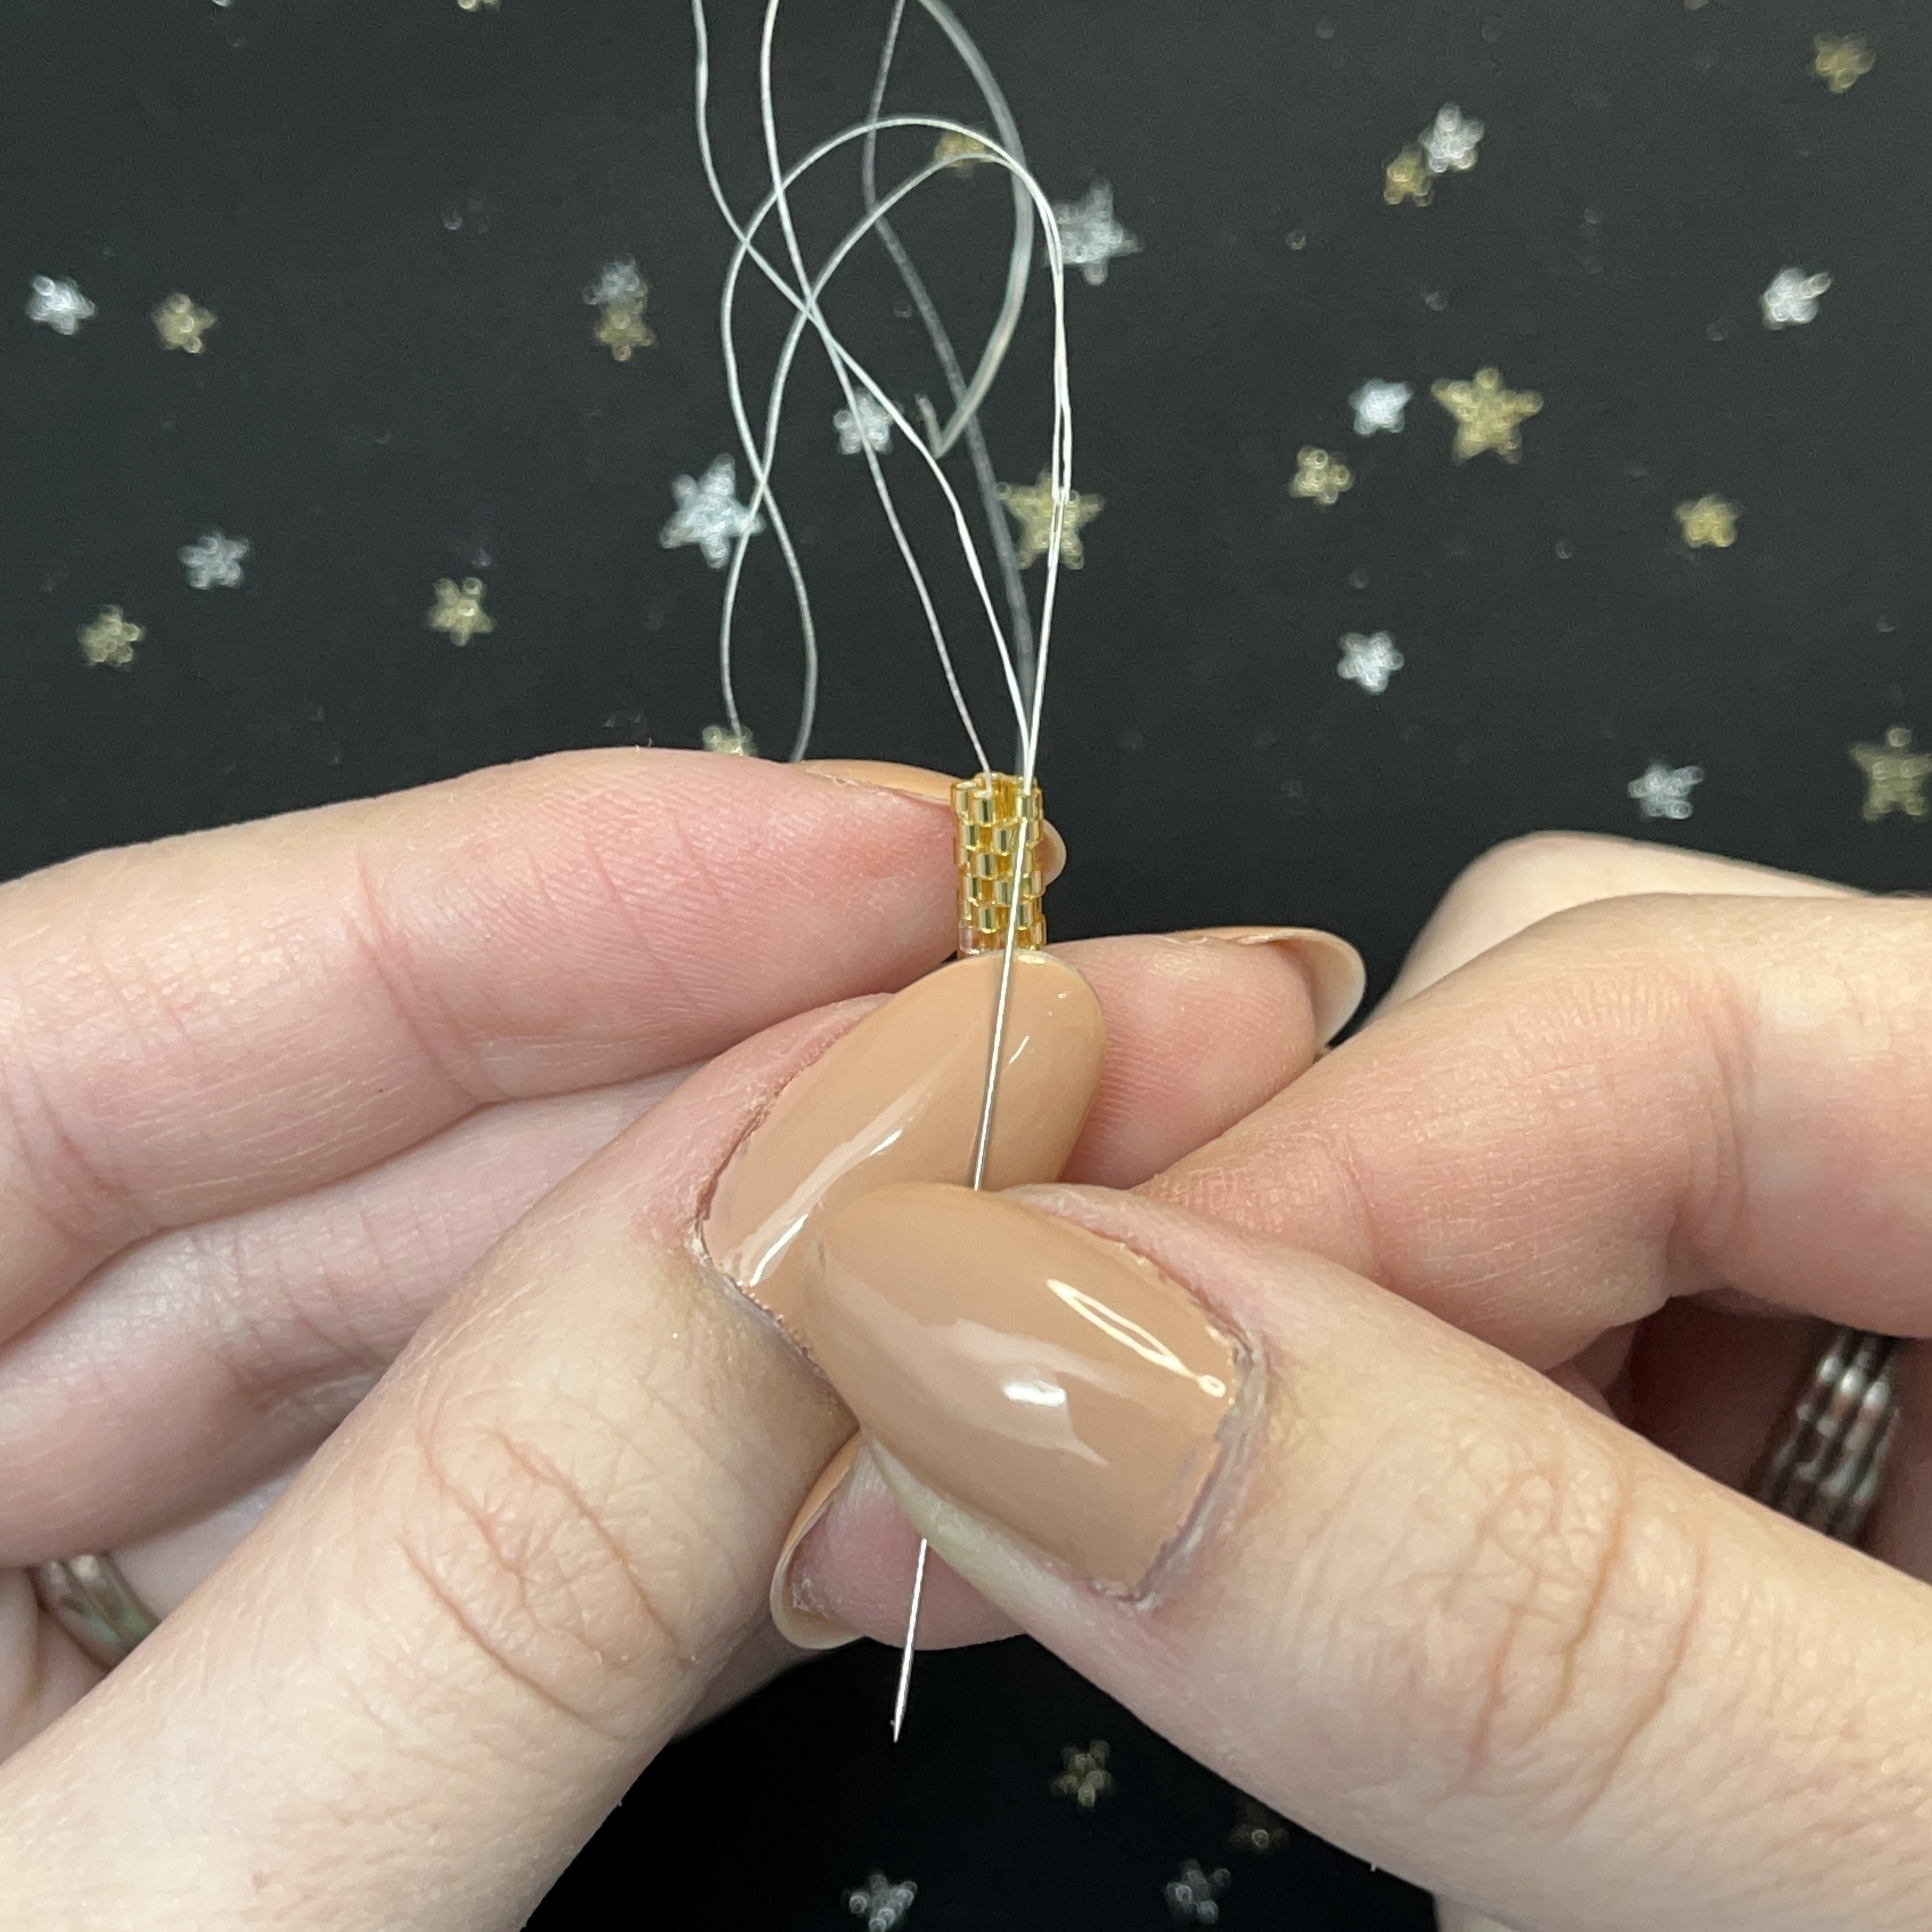
26. Trim ends approximately 6-8 inches to make the thread a little easier to work with.
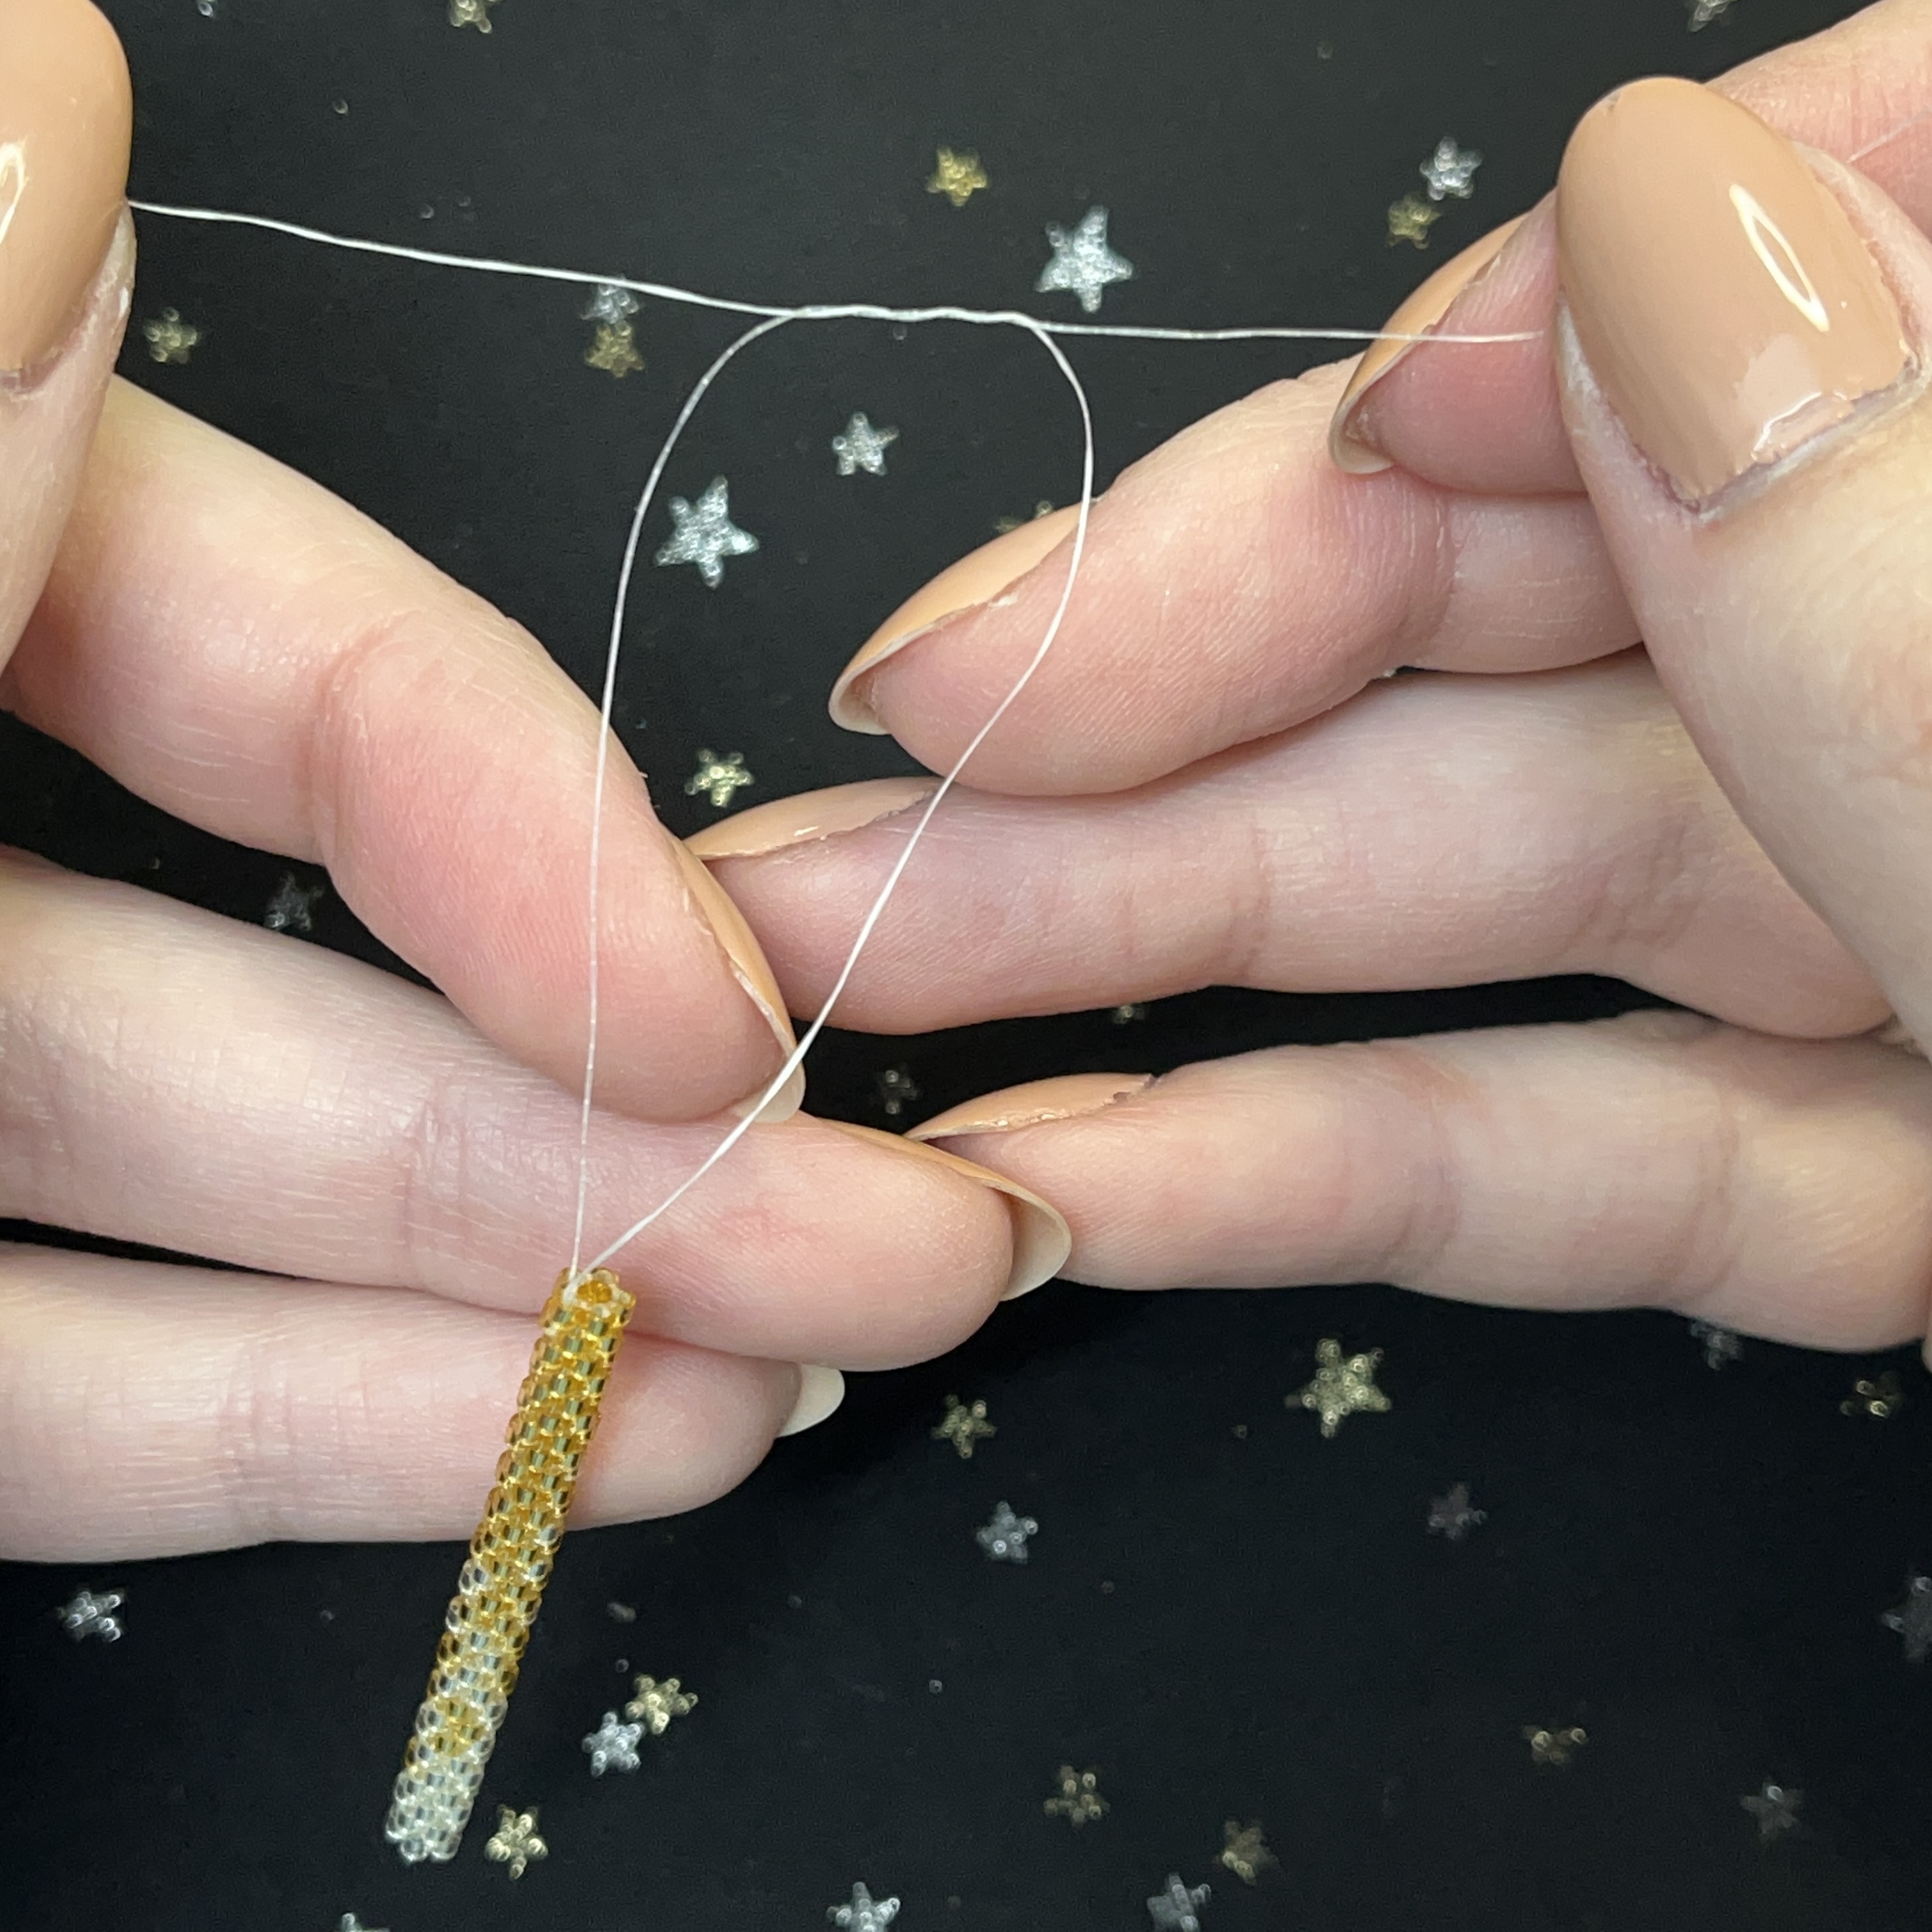
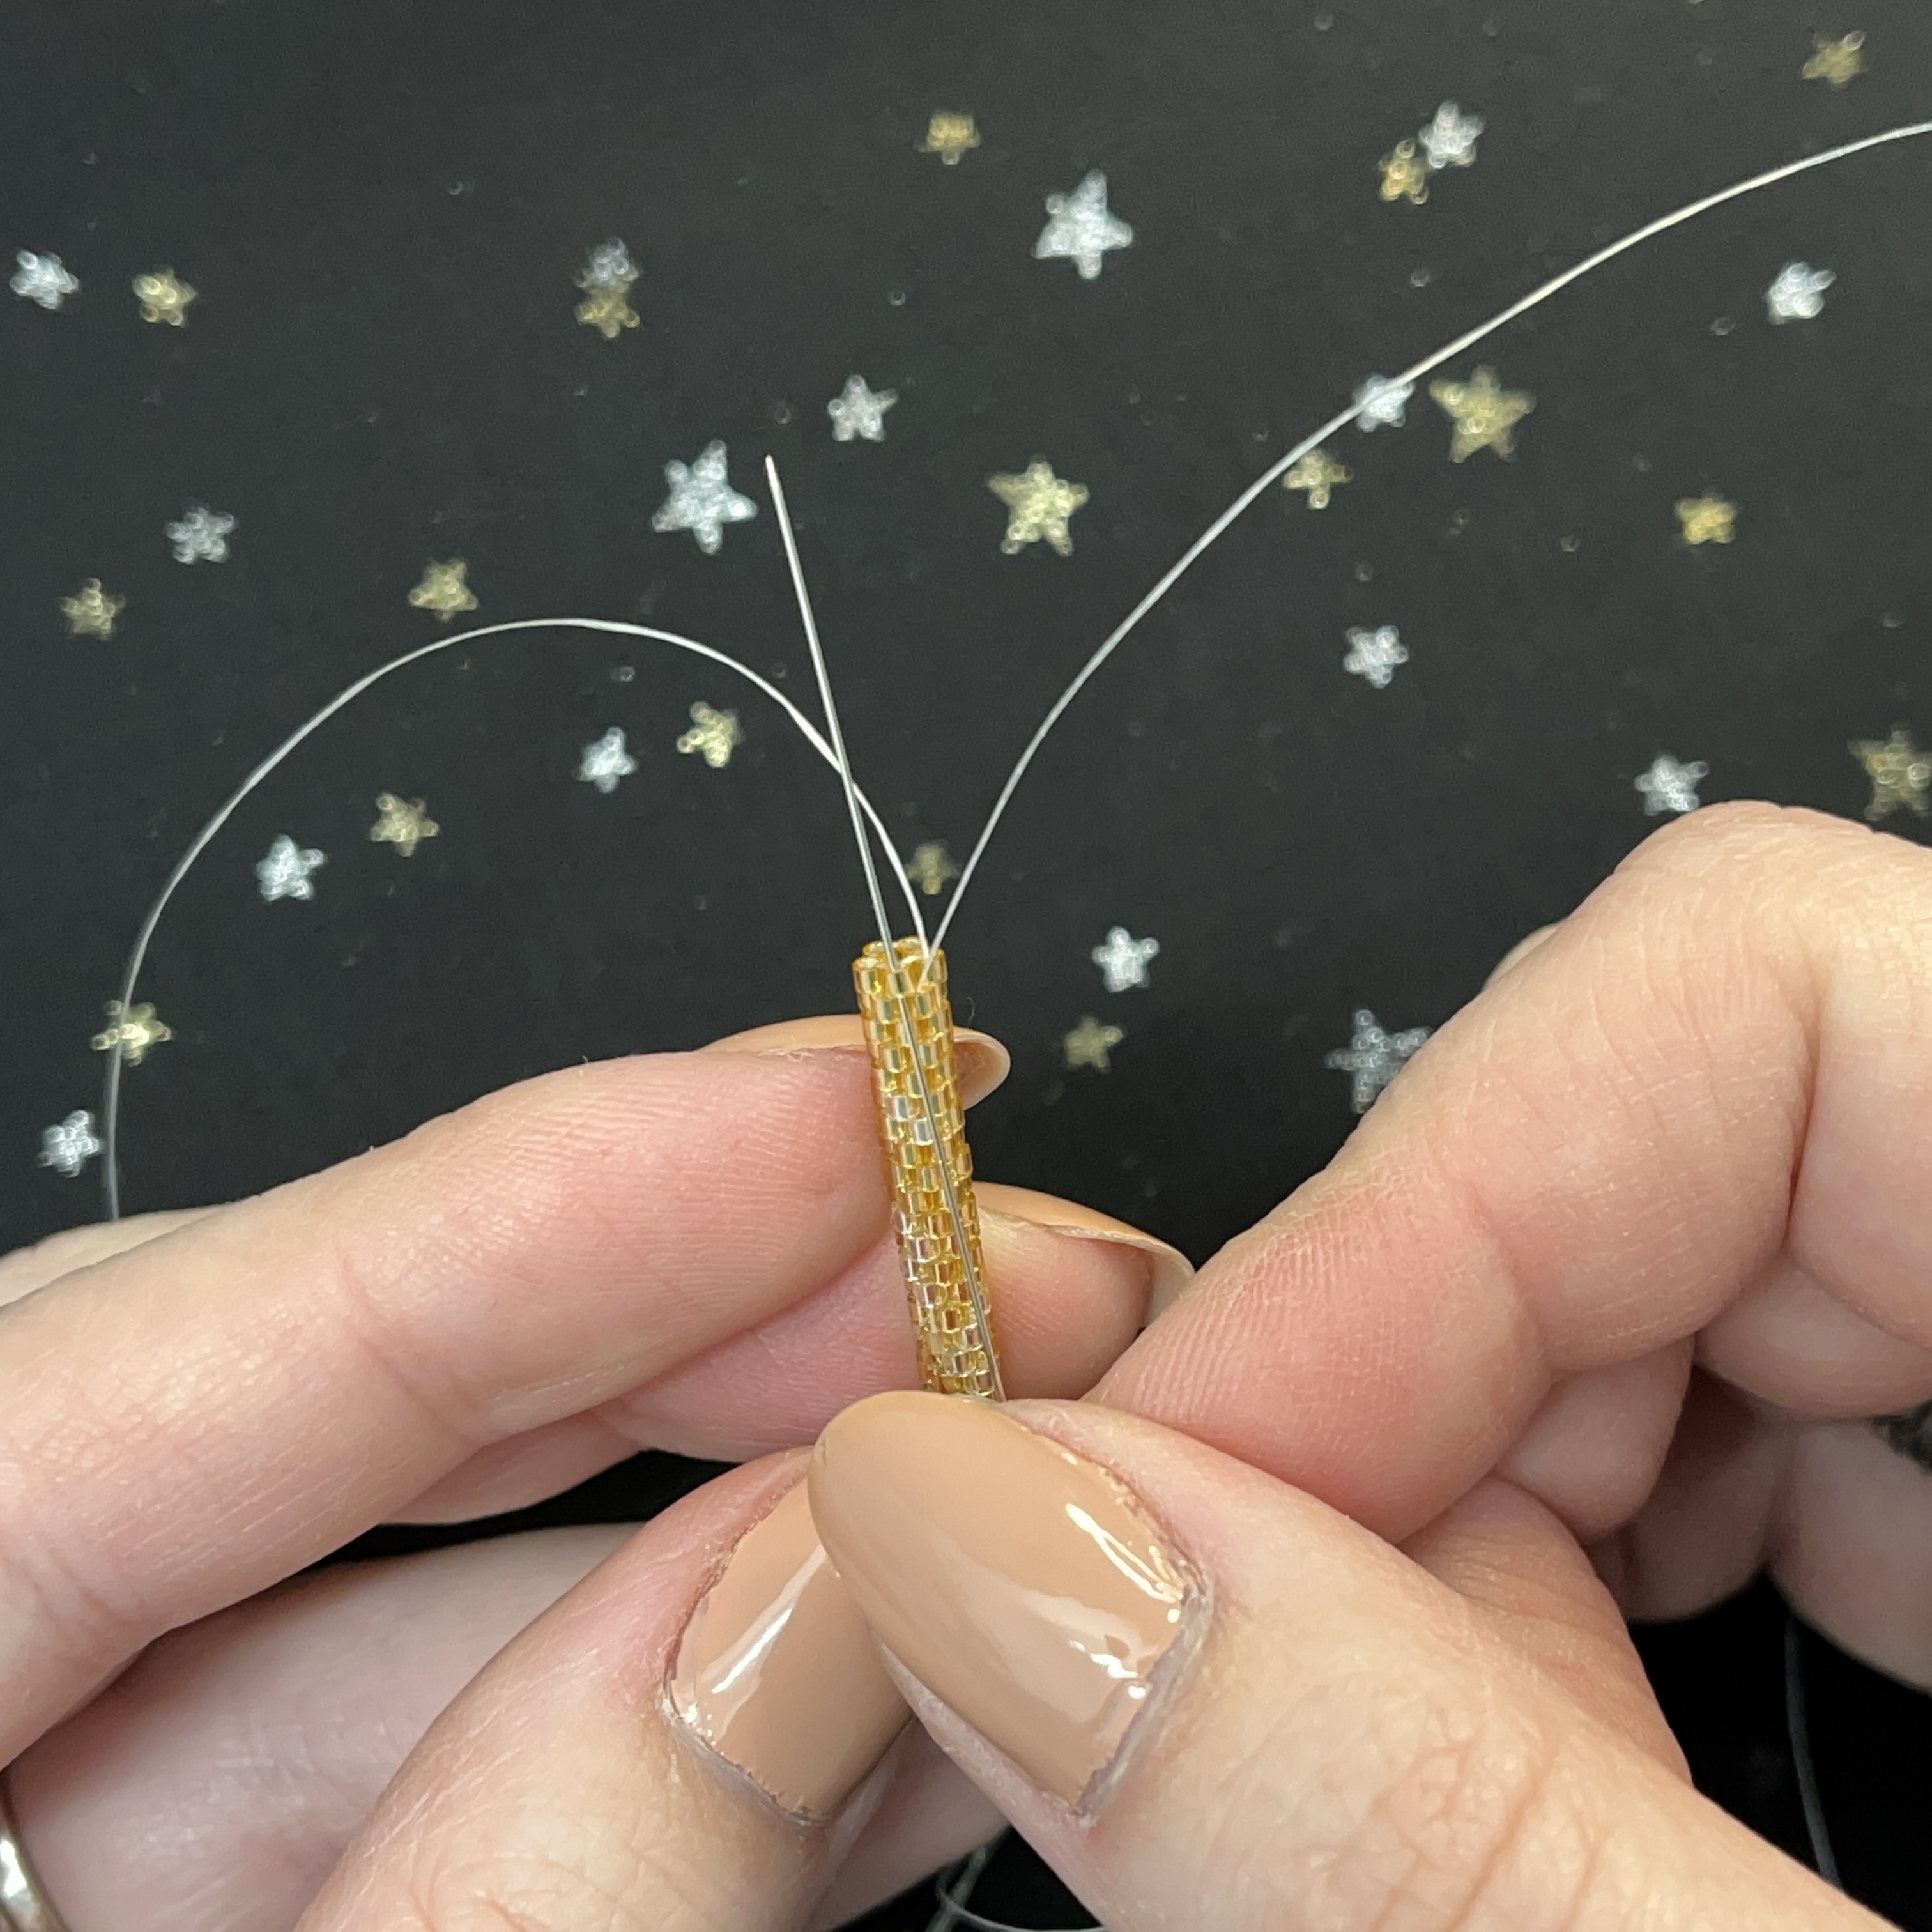
27. Tie a surgeons knot and pull tight
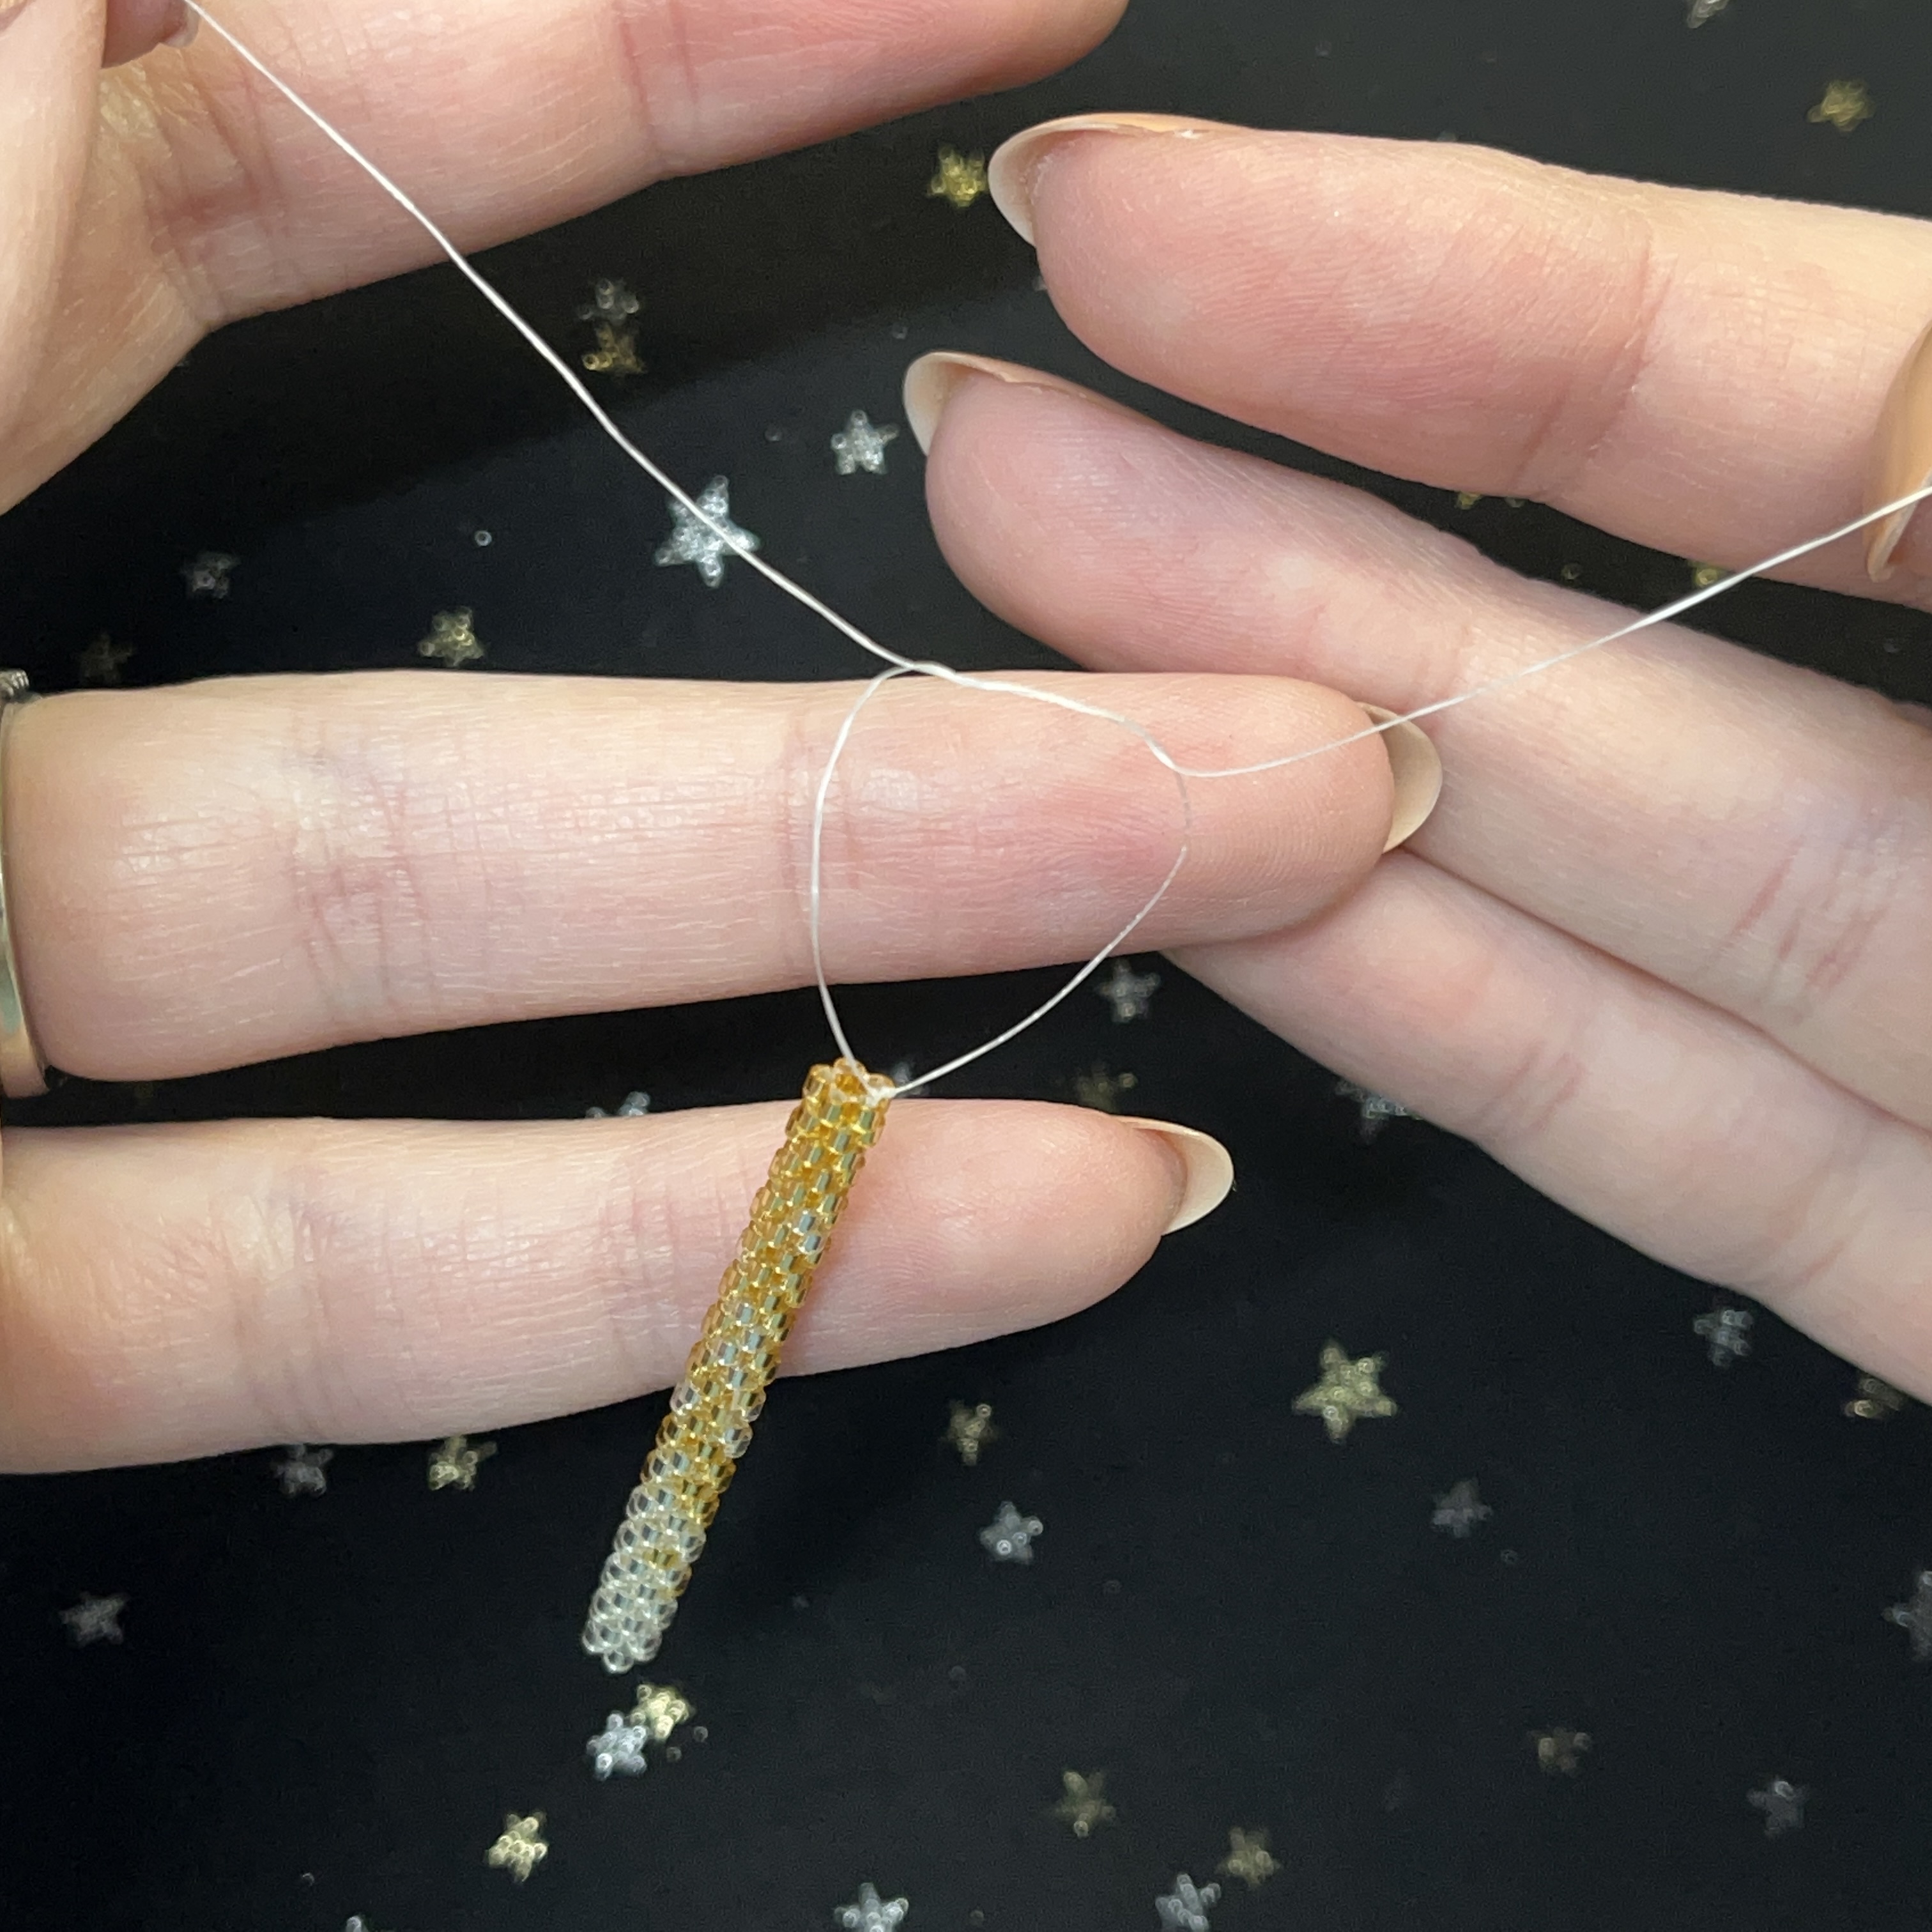
28. Repeat another surgeons knot and pull tight to secure.
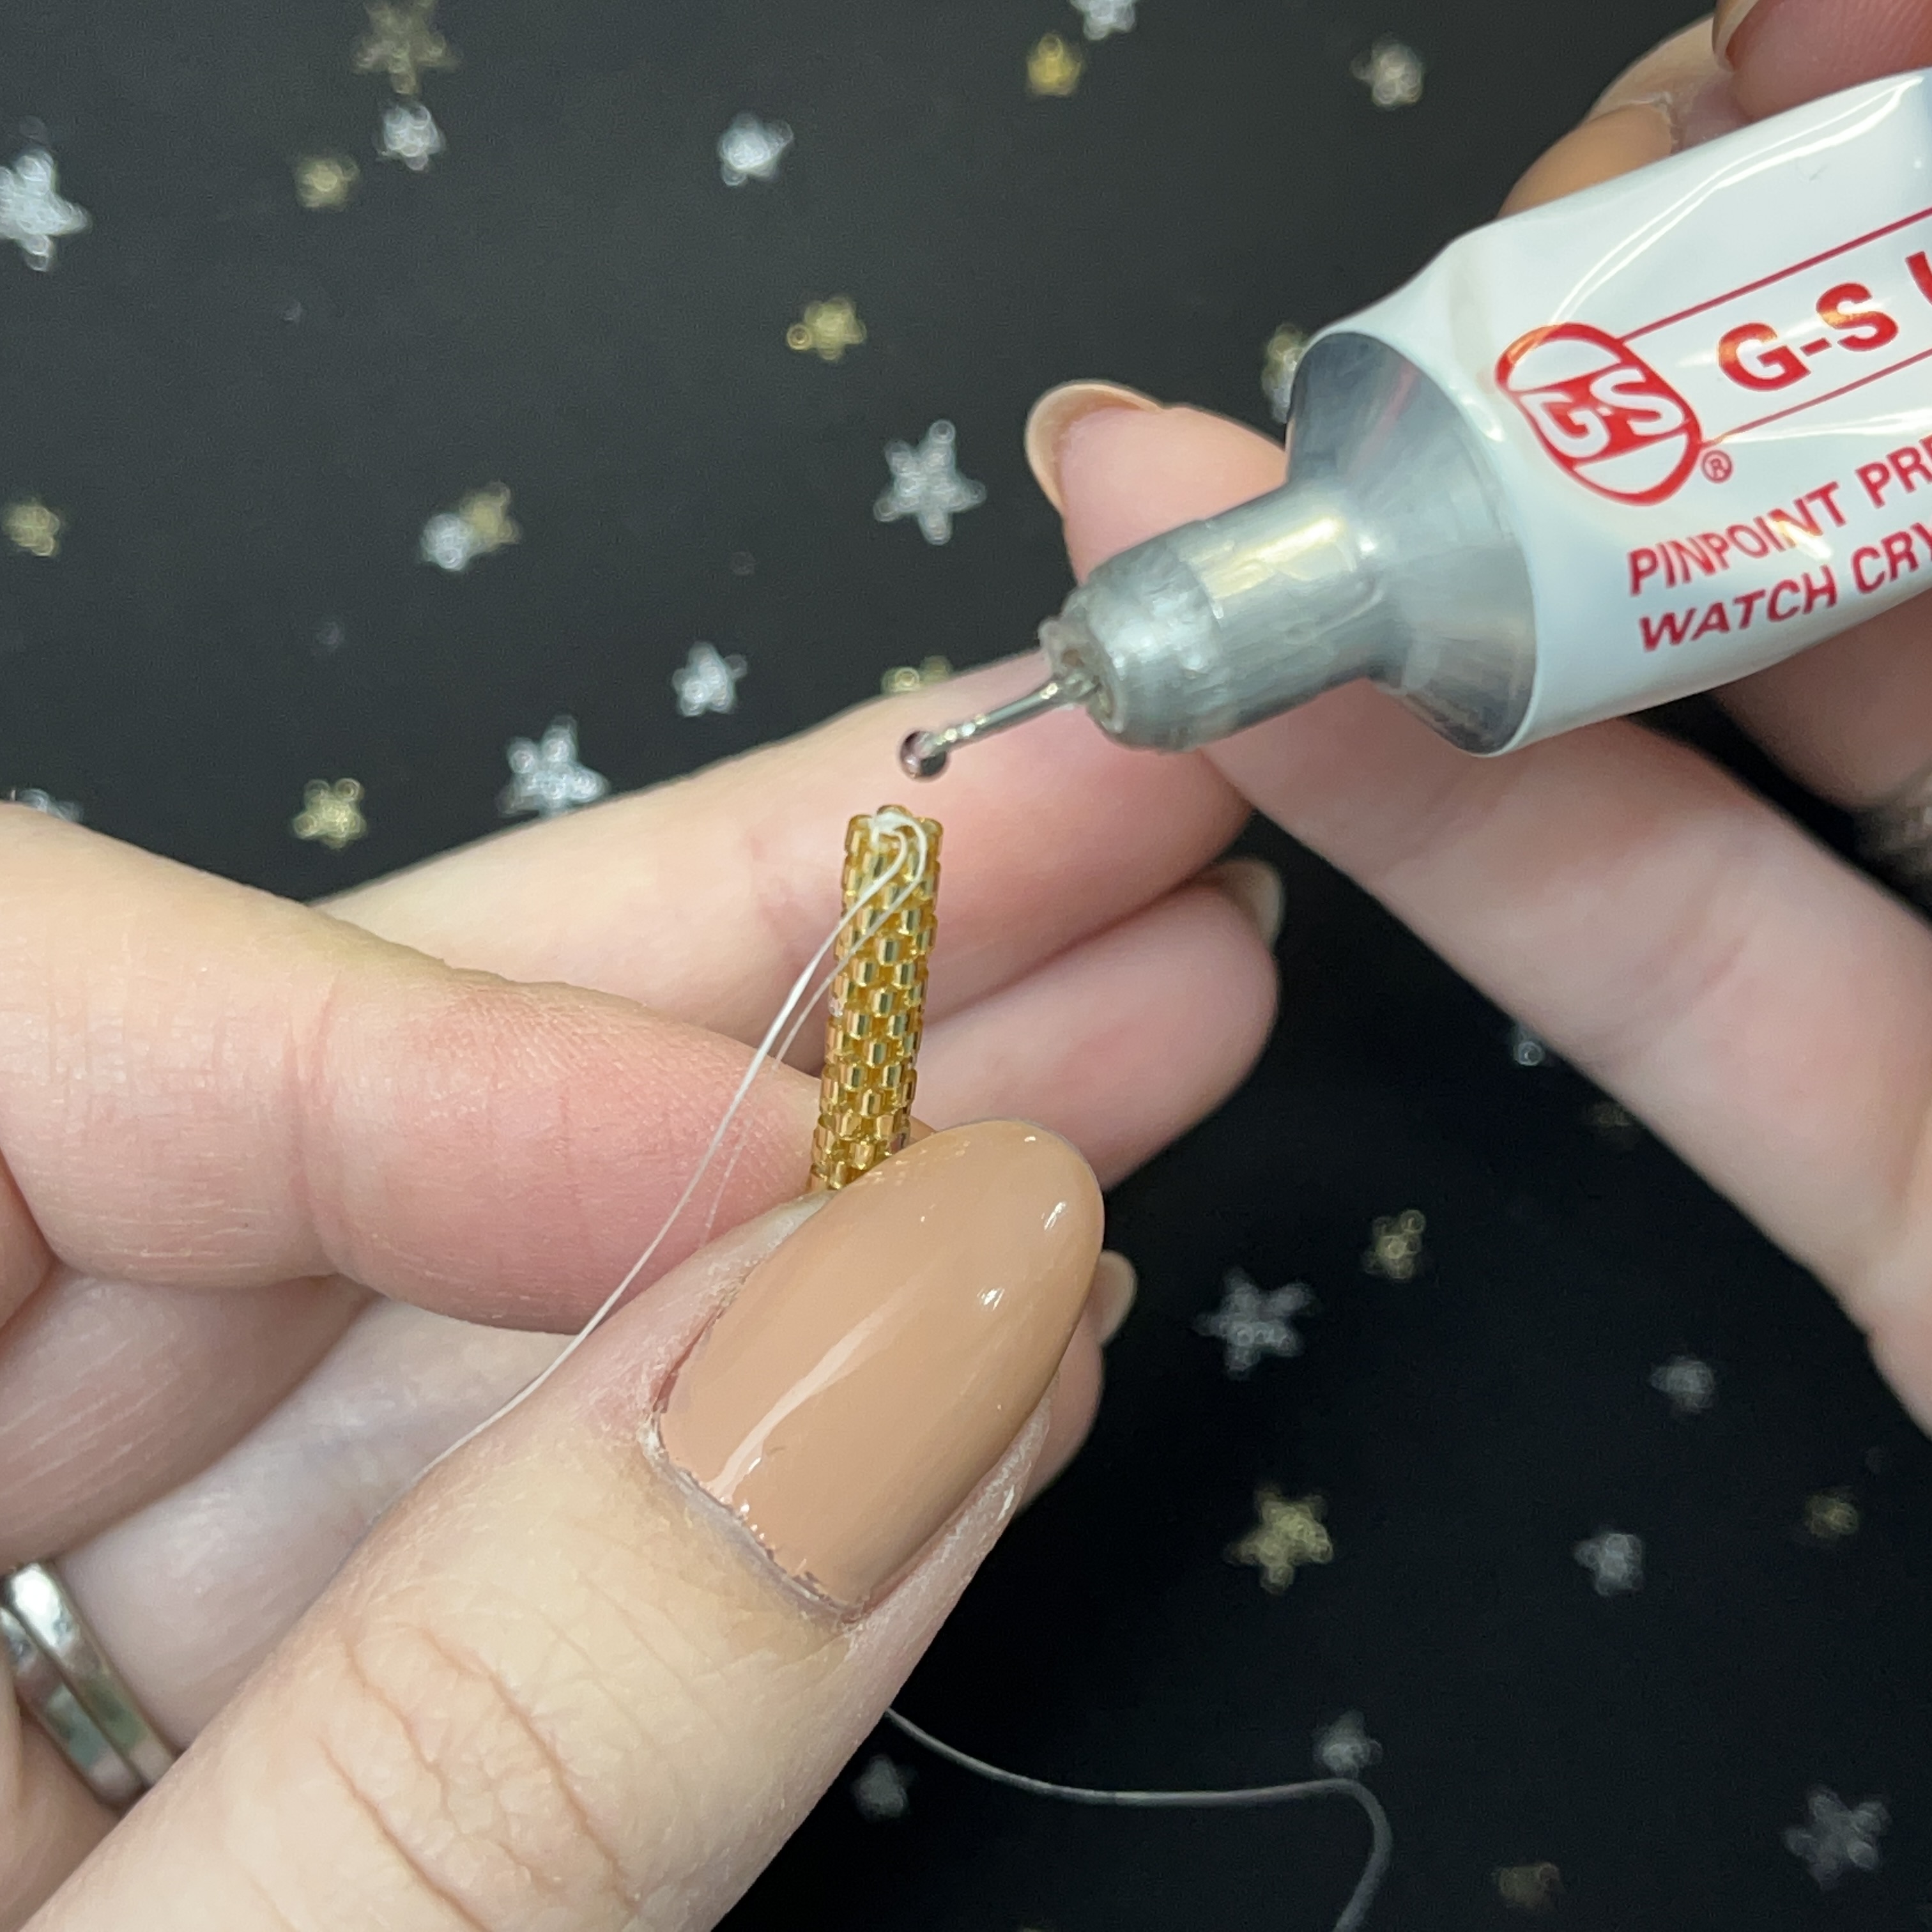
29. Put a bead of GS-Hypo on the knot and wait to dry, at least until tacky.
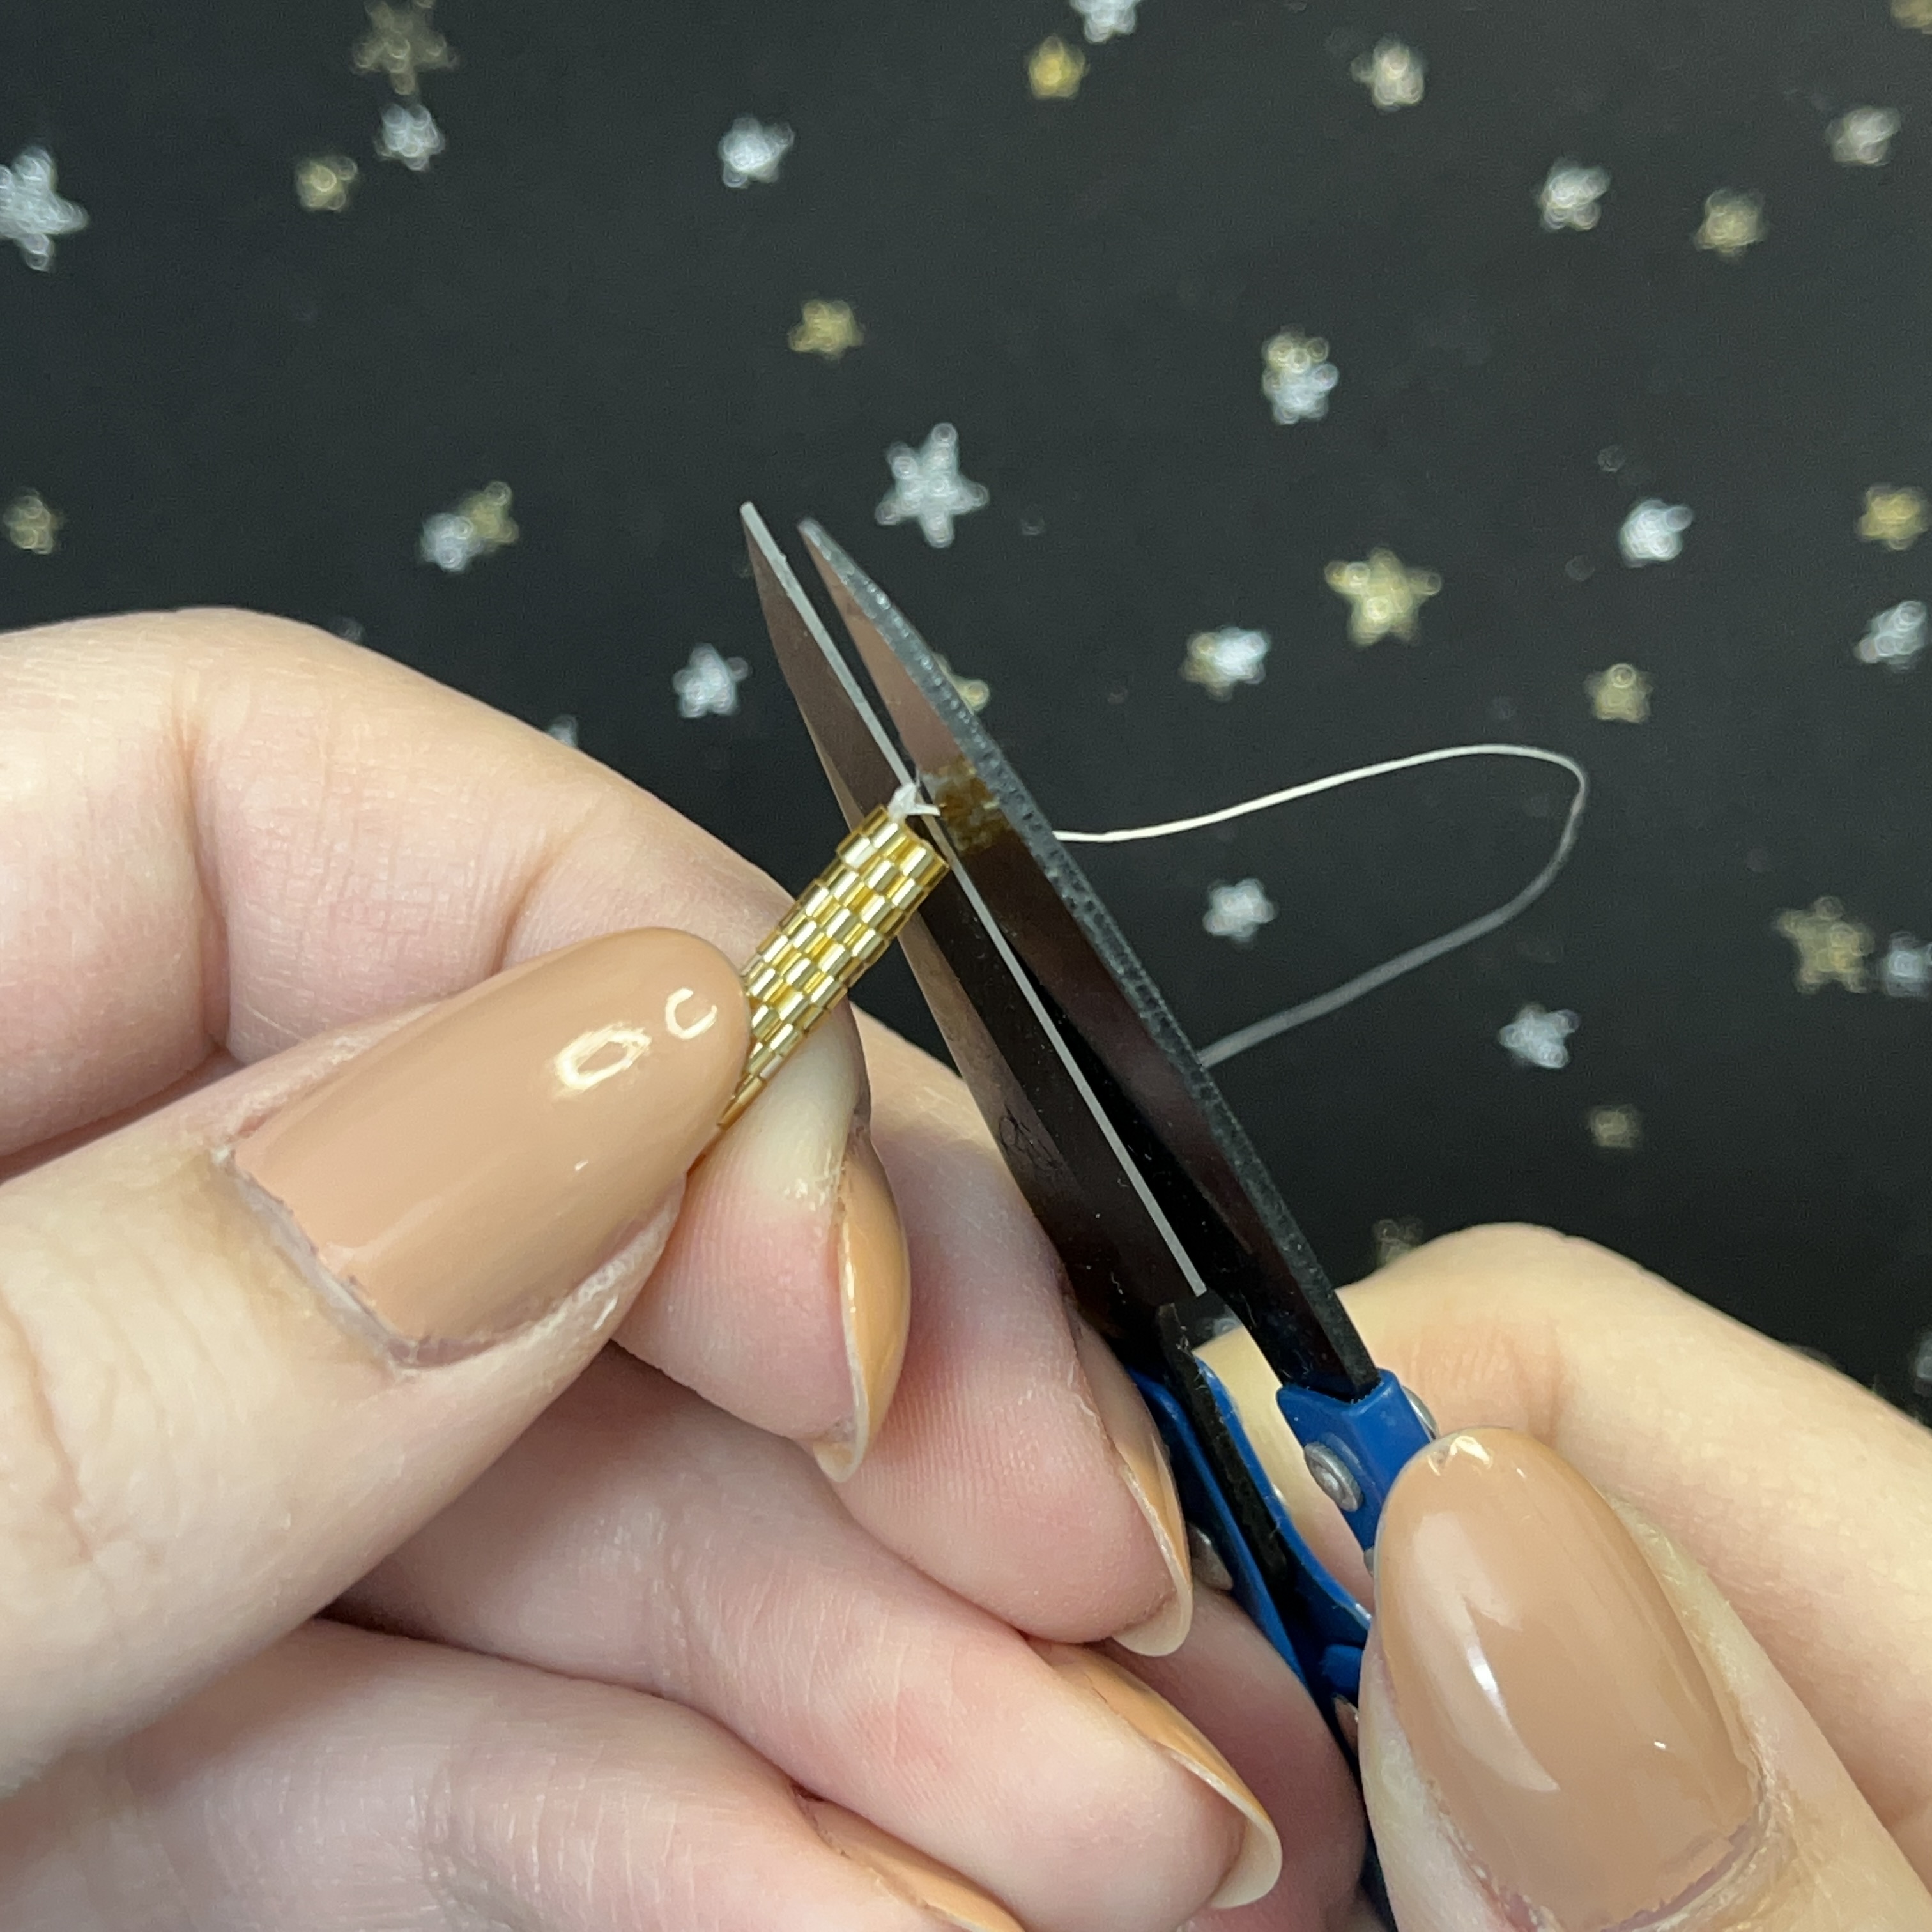
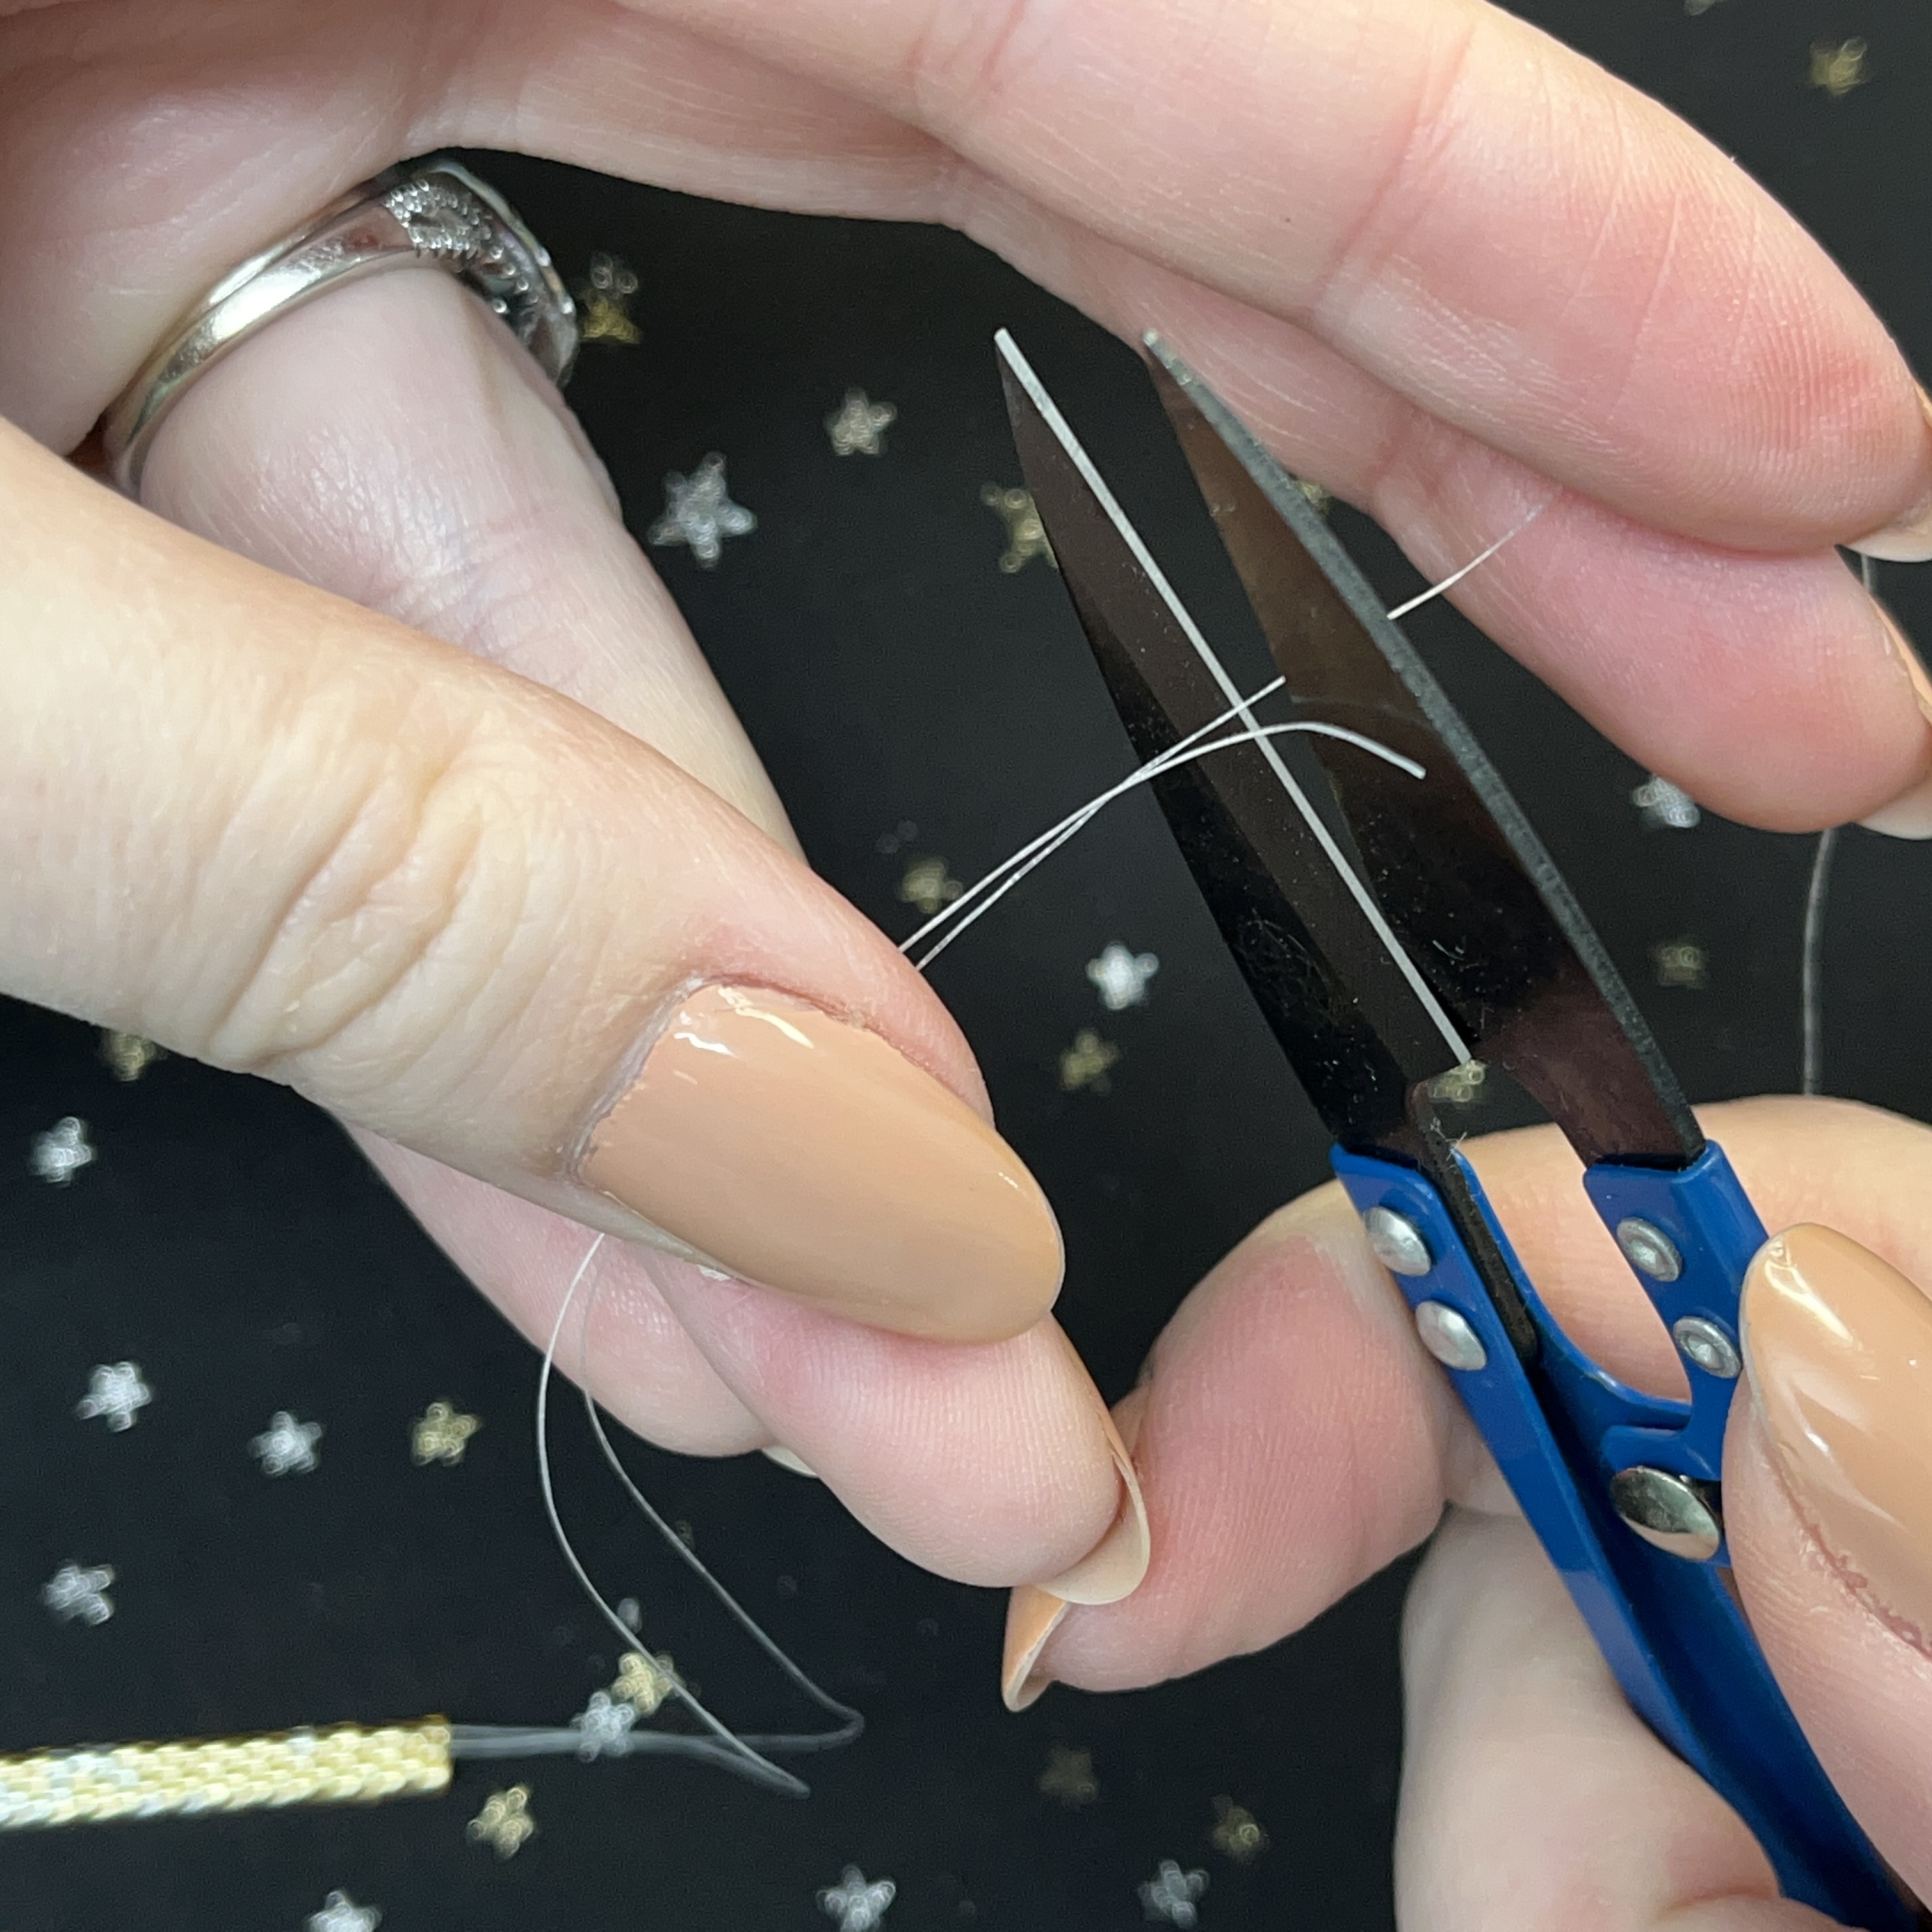
30. Carefully trim ends, you can also pat down the knot so it is a little more flush with the top of the tube.
31. Push the headpin through the peyote tube. Ball end should be on the silver side
32. Create a small wire wrap loop and cut off the excess. Don't forget to push in the cut edge with your needle nose pliers.
33. Add a jump ring through the wire wrap loop and the ear wire.
34. If you like, you can gently press in the ear wire loop to make it extra secure.
35. Repeat for the second earring and done!
Jewelry designed by Kiara Rimsza
Recent Posts
-

Christmas Wine Charms - Mini Tutorial
Christmas Wine Charms - Mini TutorialThese wine charms are sure to be the center talking point at yo …25th Nov 2024 -

Christmas Bow Garland - Mini Tutorial
Christmas Bow Garland - Mini TutorialCreate your own holiday decor with a Christmas-colored bow garl …14th Nov 2024 -

Charm Necklace Tutorial
Charm Necklace TutorialEmbrace individuality with our Personalized Charm Necklace tutorial, a perfec …6th Nov 2024