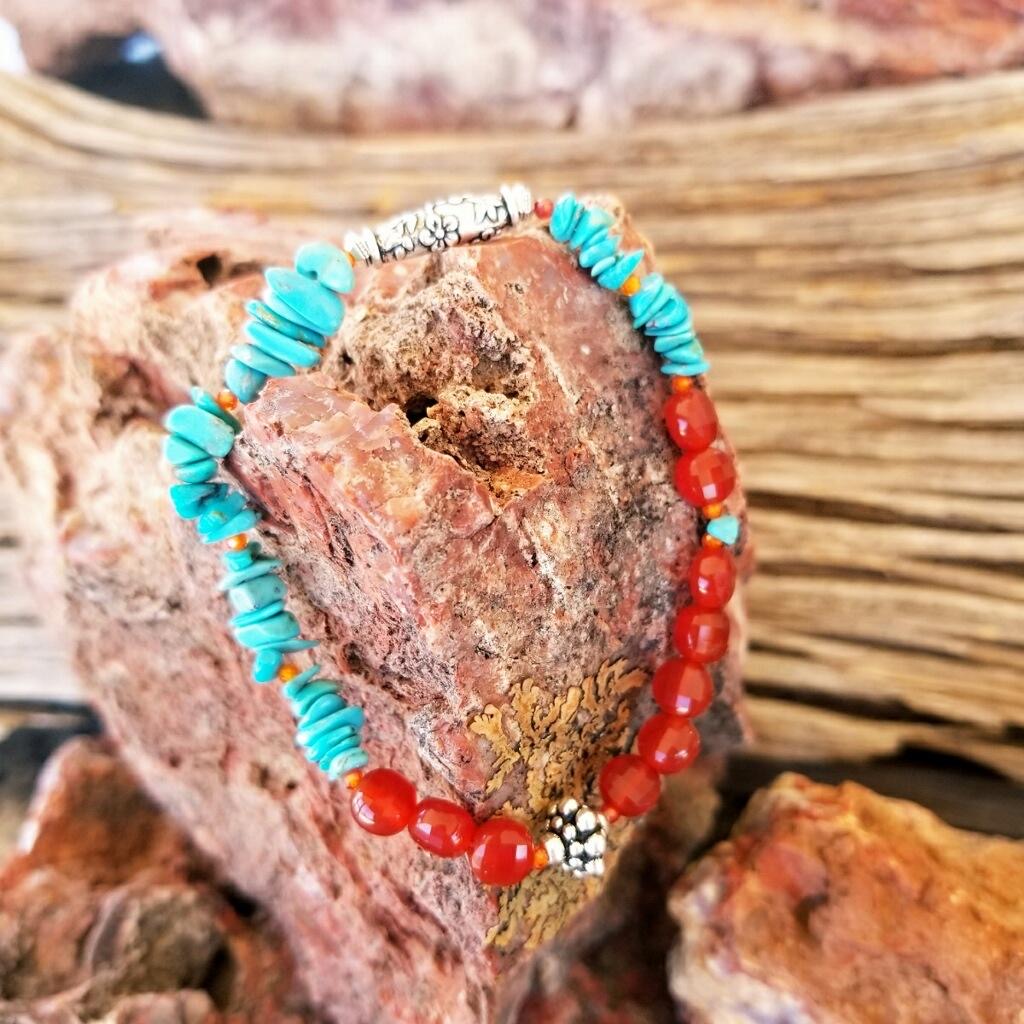
Sunset Sky Stretch Bracelet
Sunset Sky Stretch Bracelet
This bracelet is part of a collection influenced by the Arizona Skies and red rock canyons, which gives it a very South Western feel. This bracelet and the rest of the collection feature TierraCast findings (a cool Californian company that produces quality products).
 Materials Needed:
- TierraCast Wild Rose Barrel Bead, Silver Plated (1)
- TierraCast Pamada Bead, Silver Plated (1)
- TierraCast 3mm Faceted Bead, Silver Plated (2)
- 6mm Carnelian Faceted Coin (10)
- 5-8mm American Turquoise Chips (43)
- 2mm Zircon Crystal (12)
- .5 Stretch Magic, Clear (approx. 12”) * Had to go with the thinnest stretch cord for it to fit through the 2mm Zircon
- G-S Hypo Cement
Finished Length Approx. 6 1/2”
Tools Required:
Key Code for Beads: * If you have a bead board you can lay the beads in correct sequence before stringing A = 3mm TC Fac. Silver Bead C = Turquoise Chips D = TC Wild Rose Barrel Bead E = TC Pamada Bead G = 2mm Zircon I = 6mm Carnelian
Instructions on Construction:
1. Cut 1 (12”) piece of Stretch Magic, pre-stretch cord then trim a small amount from either end (the parts you were holding onto when stretching cord), then attach bead stop to one end of cord about 3” from end.
* Make sure this bracelet does not fit too snugly because this is a delicate stretch cord, the .5 size was needed to fit through the 2mm zircon, so handle with care. If you need a larger size add beads as needed in keeping with the established pattern.
2. Add A (1), (G (1), C (7) – (do this sequence four times), G (1), I (3), G (1), E (1), G (1), I (5), G (1), C (1), G (1), I (2), G (1), C (7), G (1), C (7), G (1), A (1), D (1)
3. Tie three square knots and tighten firmly between each knot.
4. Thread one of the tails back through the barrel bead, add a dab of hypo cement onto the knot (from all sides). Pull tail to center knot in the middle of the barrel bead, you should have one tail sticking out either side of the bead.
5. Leave the bracelet for at least a couple of hours for the hypo cement to set up, then trim tails. You can hold onto one tail, pull the opposite tail & trim close as you can. The other side you just trim as close as you can as you have nothing to hold onto. Ideally the knots will have glued & attached to the center of the barrel bead.
6. You are now ready to try on your new bracelet & to admire your handiwork.
7. Enjoy!
Jewelry designed by Steph Stirniman at magpiecollectives.com
Recent Posts
-
Valentine Fringe Earrings
Valentine Fringe EarringsLearn how to make fringe earrings with a heart pattern that pops! The …13th Jan 2025 -
Dancing Pearl Cowboy Charm Leather Bracelet
Dancing Pearl Cowboy Charm Leather BraceletThis tutorial is a spin of our Dancing Gemstone Brac …17th Dec 2024 -
Christmas Wine Charms - Mini Tutorial
Christmas Wine Charms - Mini TutorialThese wine charms are sure to be the center talking point at yo …25th Nov 2024


