Tutorials

Turquoise Dreaming Necklet
Turquoise Dreaming Necklet
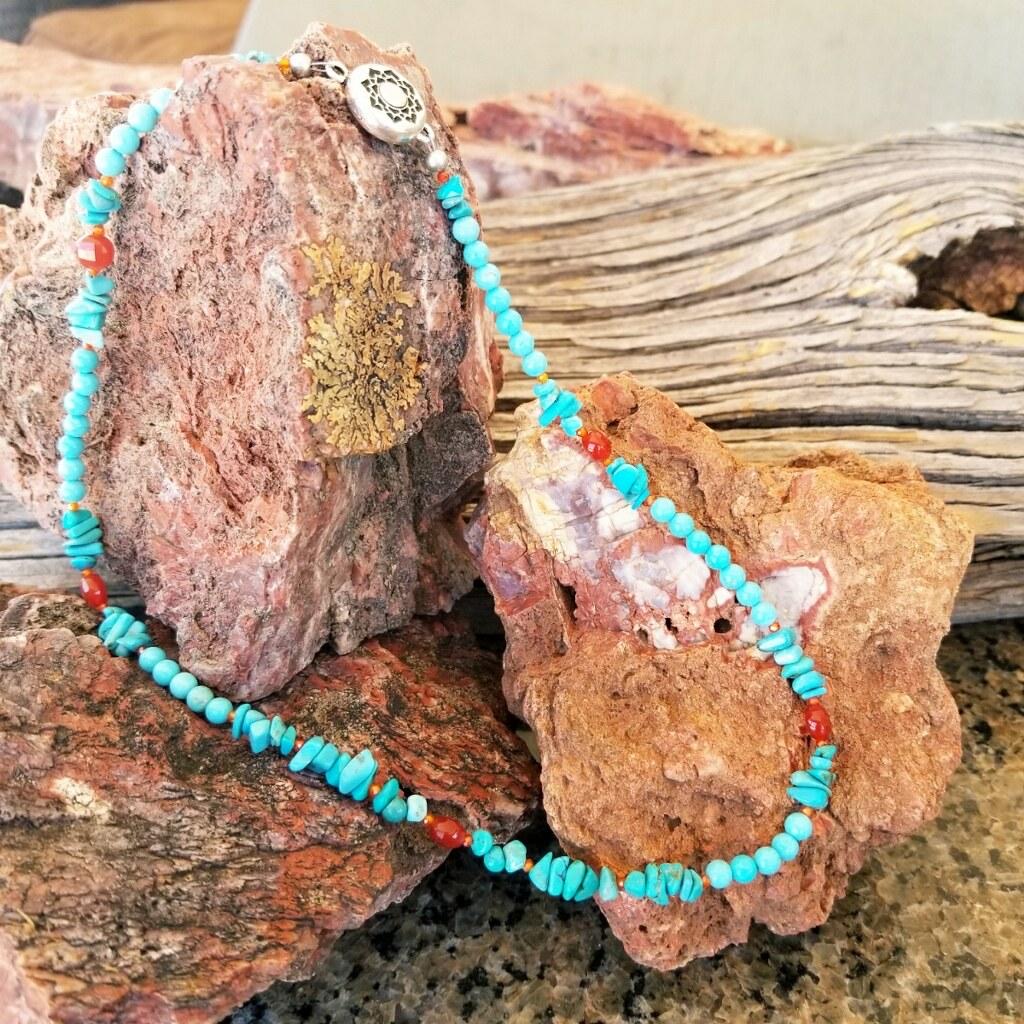
This sweet little necklet is somewhere between a choker and a necklace, but I think it is the perfect length to wear alone or pair with longer chains. It would be easy to adapt the pattern to make a longer or shorter version. This is part of a collection influenced by the Arizona Skies and red rock canyons, which gives it a very South Western feel. This necklace and the rest of the collection feature many TierraCast findings (a cool Californian company that produces quality products).
Materials Needed:
- TierraCast Lotus Magnetic Clasp (1)
- Soft Touch Beading Wire – Fine (Approx. 22”) * Needs to be the fine wire to fit through 2mm Zircon
- 2 x 2mm Sterling Silver Crimps (2)
- 4mm Crimp Covers, Antique Silver (2)
- 6mm Carnelian Faceted Coin (5)
- 5-8mm American Turquoise Chips (72)
- 4mm Round Howlite Turquoise (38)
- 2mm Orange Zircon Crystal Faceted Round (26)
Finished Length Approx. 17”
Tools Required
Optional
Beading Mat or Medium Travelers Bead Board
* These are especially handy when working on bead layouts, they have channels to place your beads in & are marked in inch increments from center front & back.
Key Code for Beads: You can lay your beads out on mat with A – J labels next to them to make it easier for stringing in correct sequence. * If you have a bead board you can lay the beads in correct sequence before stringing, this may be the easiest option. C = Turquoise Chips G = 2mm Zircon H = 4mm Howlite I = 6mm Carnelian
Instructions on Construction:
1. Cut a 22’ piece of bead wire using Soft Flex Cutter. Thread your crimp & attach to one side of the magnetic clasp, then back through the crimp tube. Using your needle nose plier do a flat crimp and then place a crimp cover carefully over the top.
*Keep your wires parallel when crimping, this makes for a more secure attachment, give a test pull on your wire to make sure you have tamped down hard enough on the crimp.
2. String beads as follows: G (1), C (3), H (7), G (1), C (5), G (1), I (1), G (1), C (5), G (1), H (7), G (1), C (5), G (1), I (1), G (1), C (5), G (1), H (5), G (1), C (5), G (1), C (5), G (1), C (3), G (1), I (1) this is the central point of the necklace. The second half is a mirror image of the first side.
3. When all beads are strung add crimp & attach to the second part of the magnetic clasp. Remember to leave enough slack so that you can add a crimp cover and your beads can hang in a fluid manner.
* This is a very cool magnetic clasp, not only is it great looking, but it is extra secure because it locks into place with a cut-out dish shape. I would suggest that you get familiar with how to undo this clasp before wearing it for the first time… it caused me a little angst, especially when my husband was helping me!
4. You are now ready to try on your new necklet & to admire your handiwork.
5. Enjoy!
Jewelry designed by Steph Stirniman at magpiecollectives.com


