

Beaded Pumpkin Earrings: Step by Step Picture Tutorial
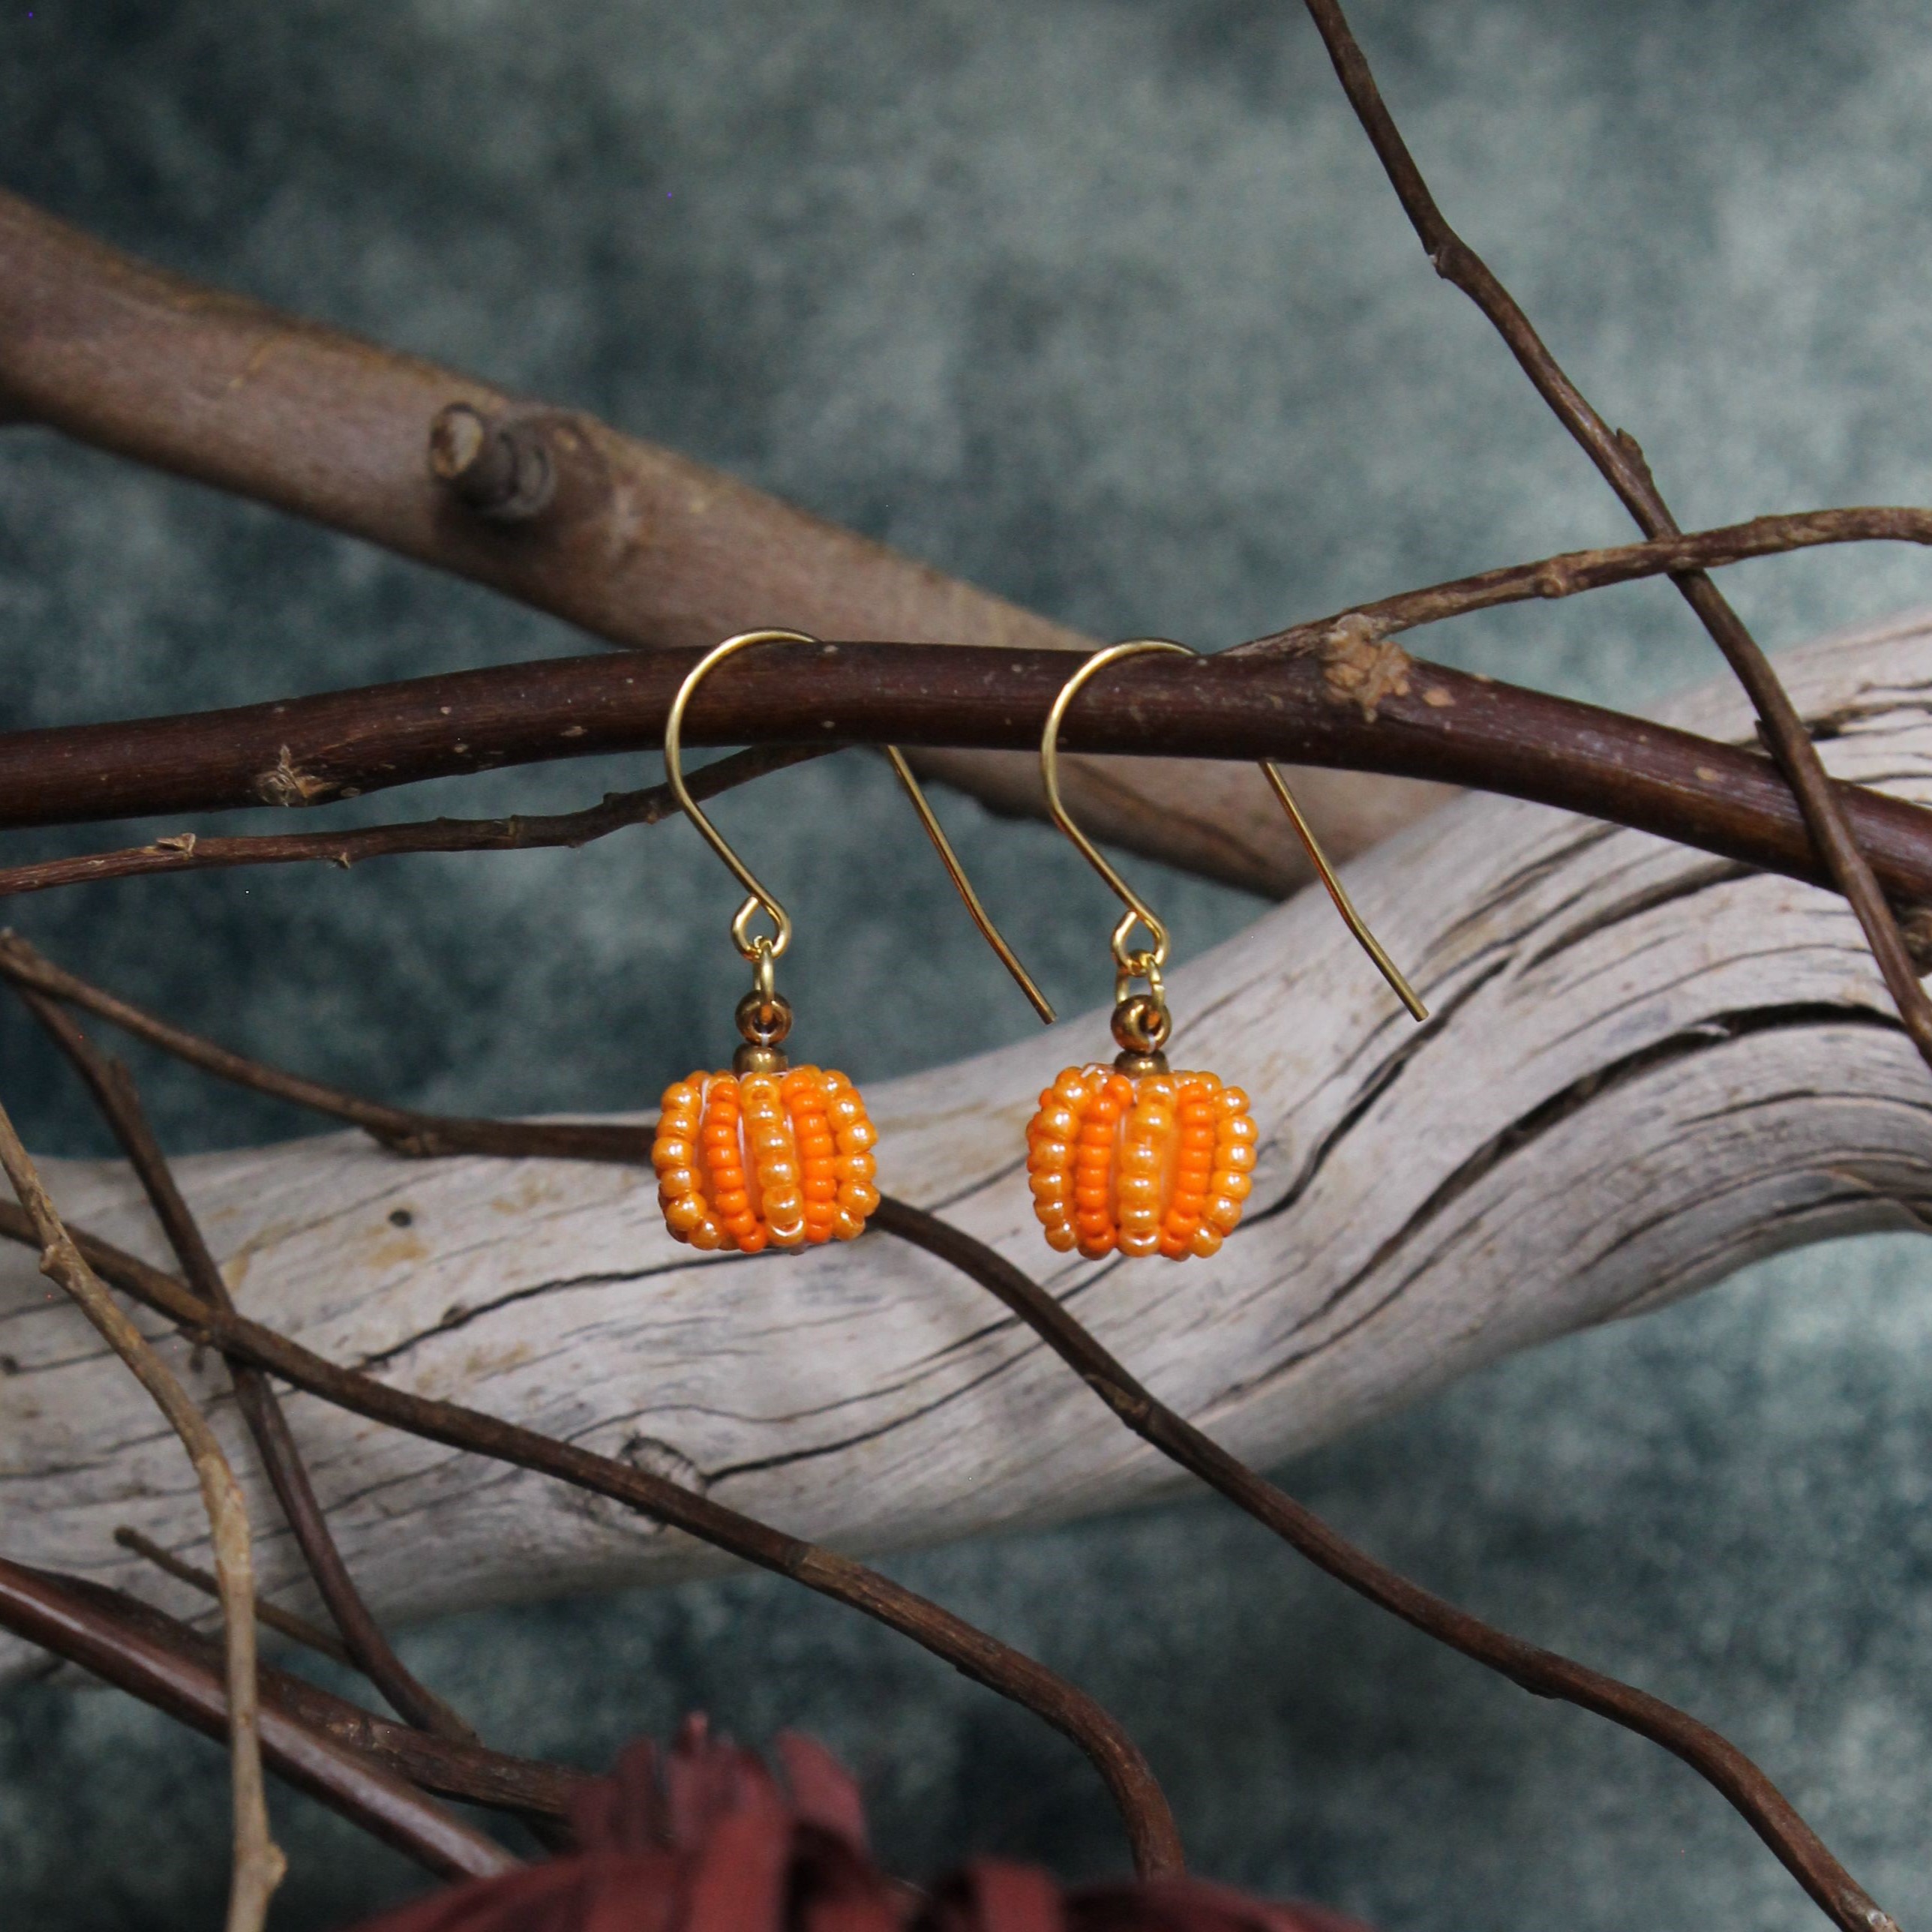
Beaded Pumpkin Earrings
These fun little guys are perfect to make as holiday gifts for family, friends, or yourself! Wear them to that next Halloween party! Personally, I'll wear them all through November as well. We have shown them with two tone orange seed beads but choose any color that appeals to you.
Drop Length approx. 1.25”
Materials Needed:
- Miyuki Size 11 #423 Opaque Light Orange Luster
- Miyuki Size 15 #406 Opaque Orange
- Size 8 #457L Metallic Light Bronze
- Fireline Crystal 4lb (about 3 feet but you will end up using less)
- Forte Bead - Orange Glass (2)
- Gold Plated 4mm 21 Gauge Jump Rings (2)
- 18K Gold Plated Stainless Steel Ear Wires (1 Pair) or gold plated ear wires of your choice
- John James Needle Size 12 (1)
Tools Required:
Needle Nose Pliers (also known as chain nose)
Instructions on Construction:

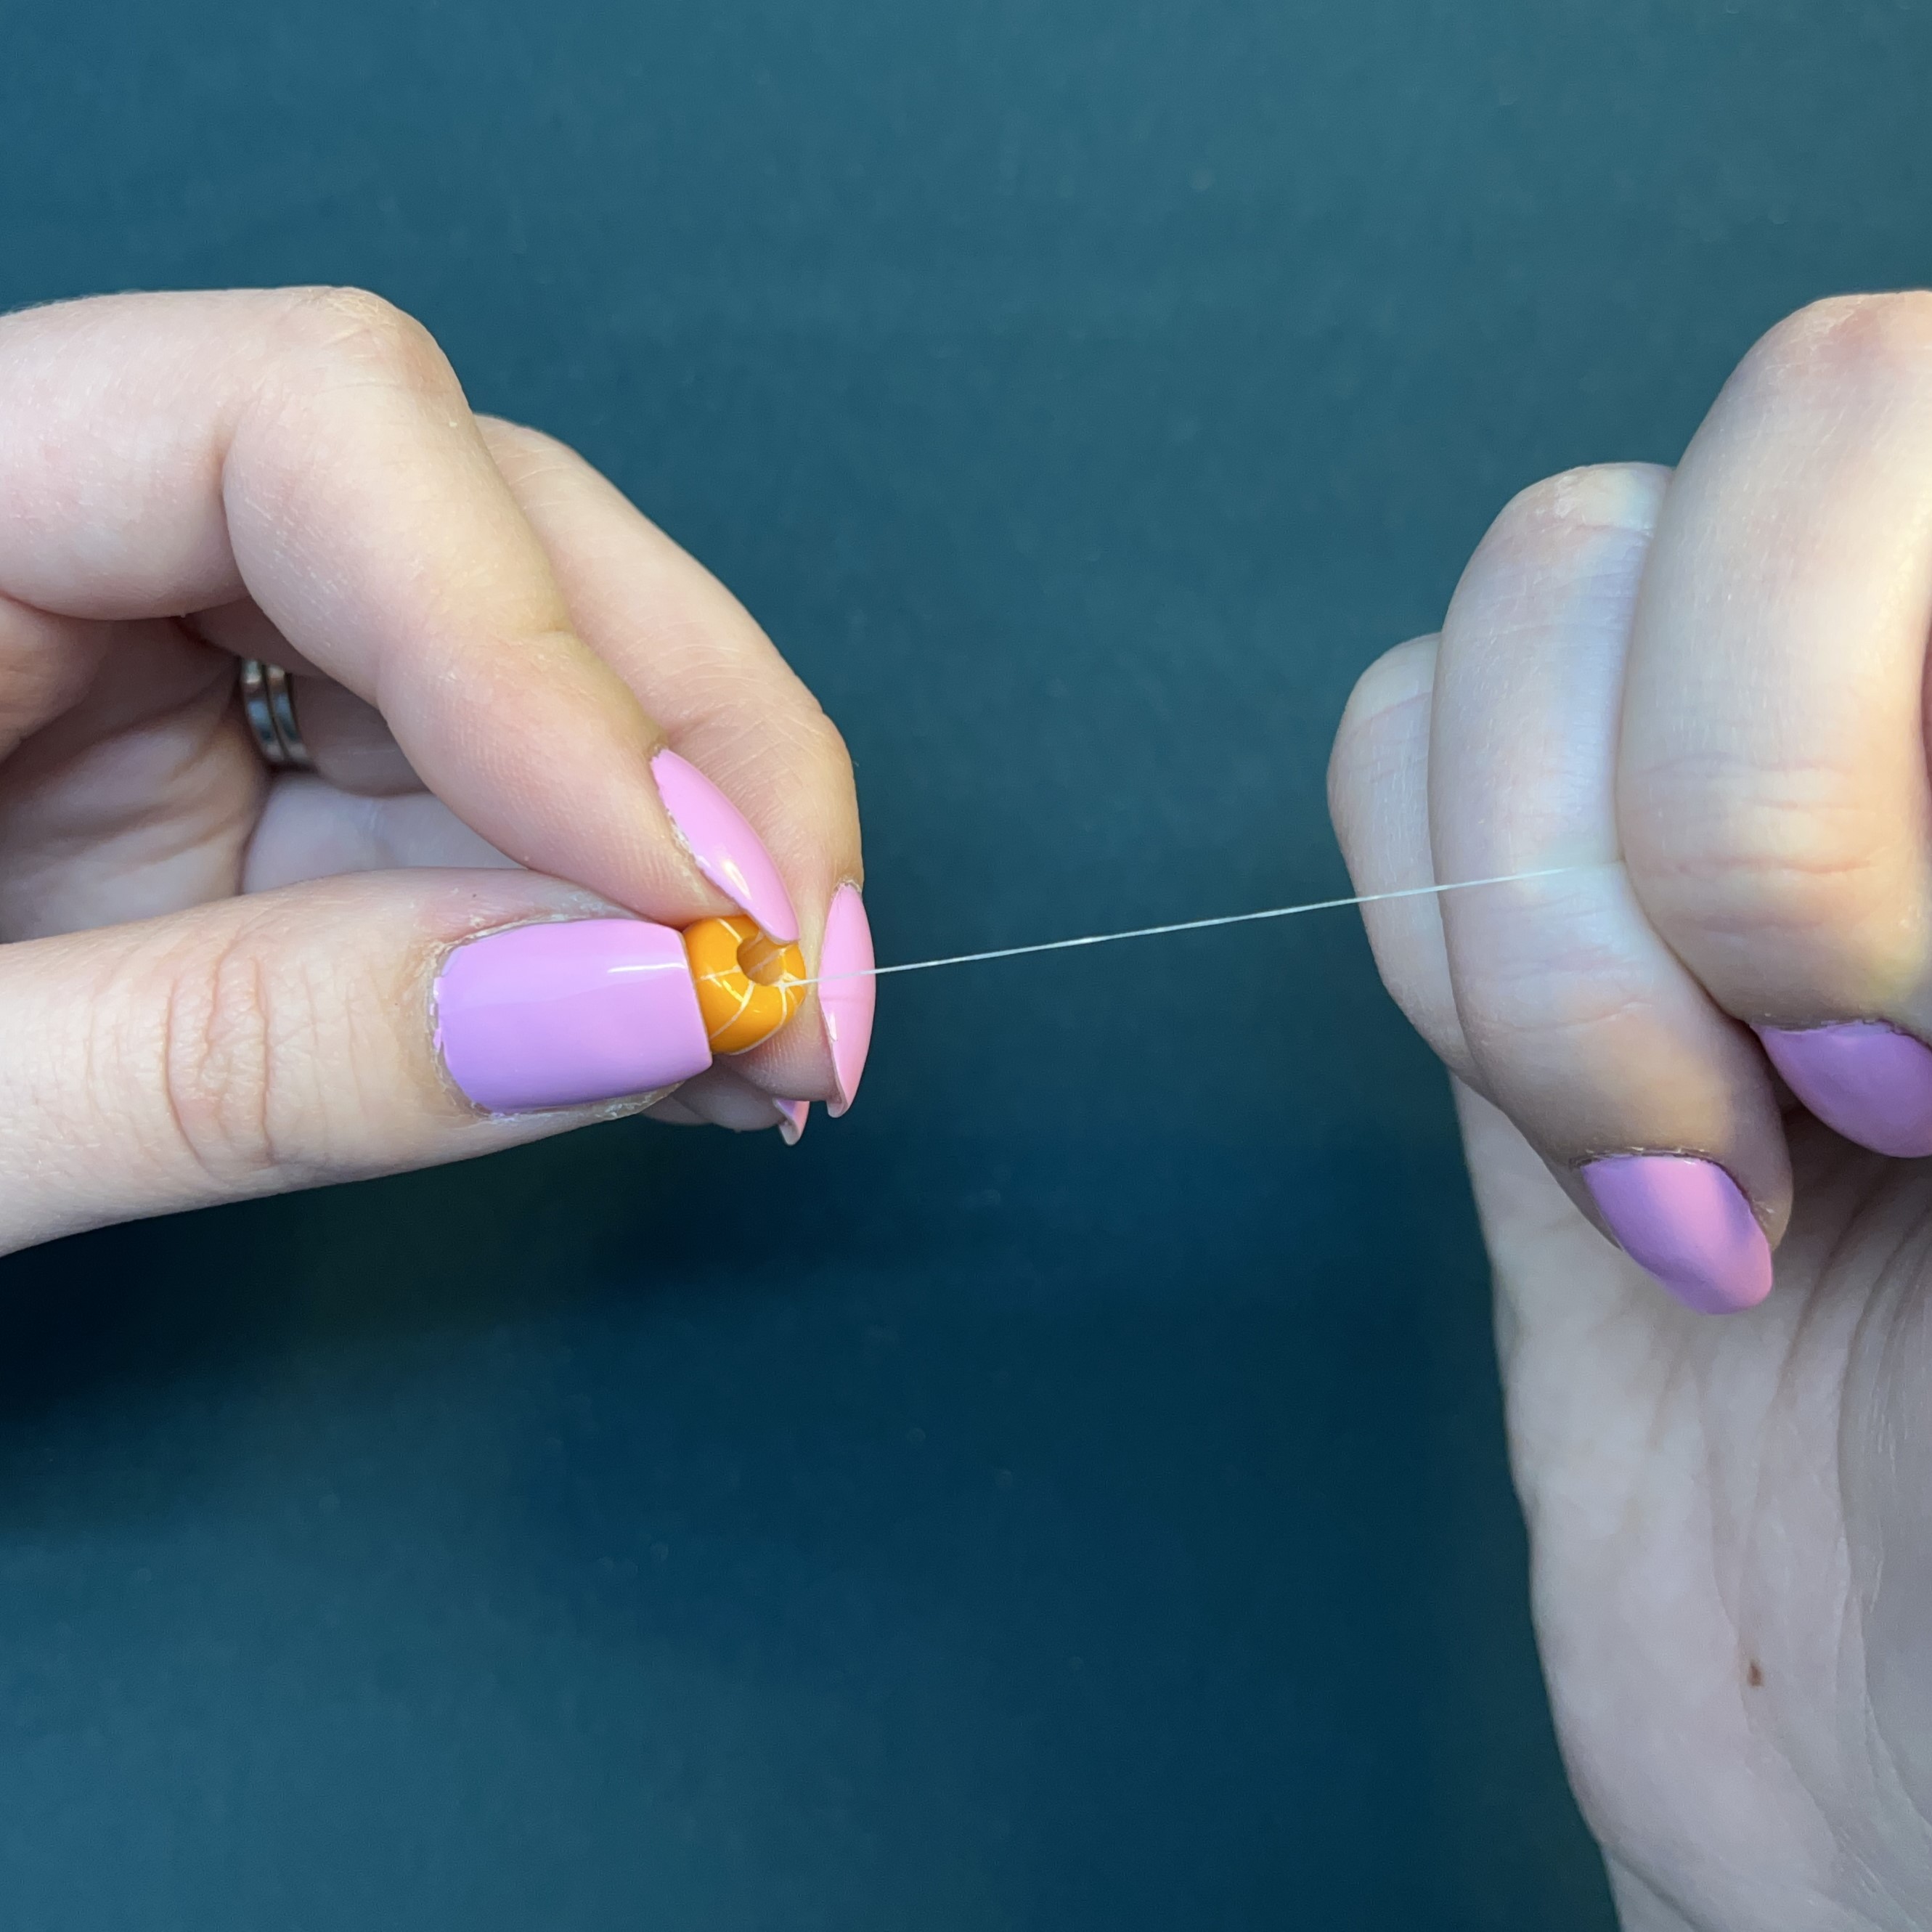
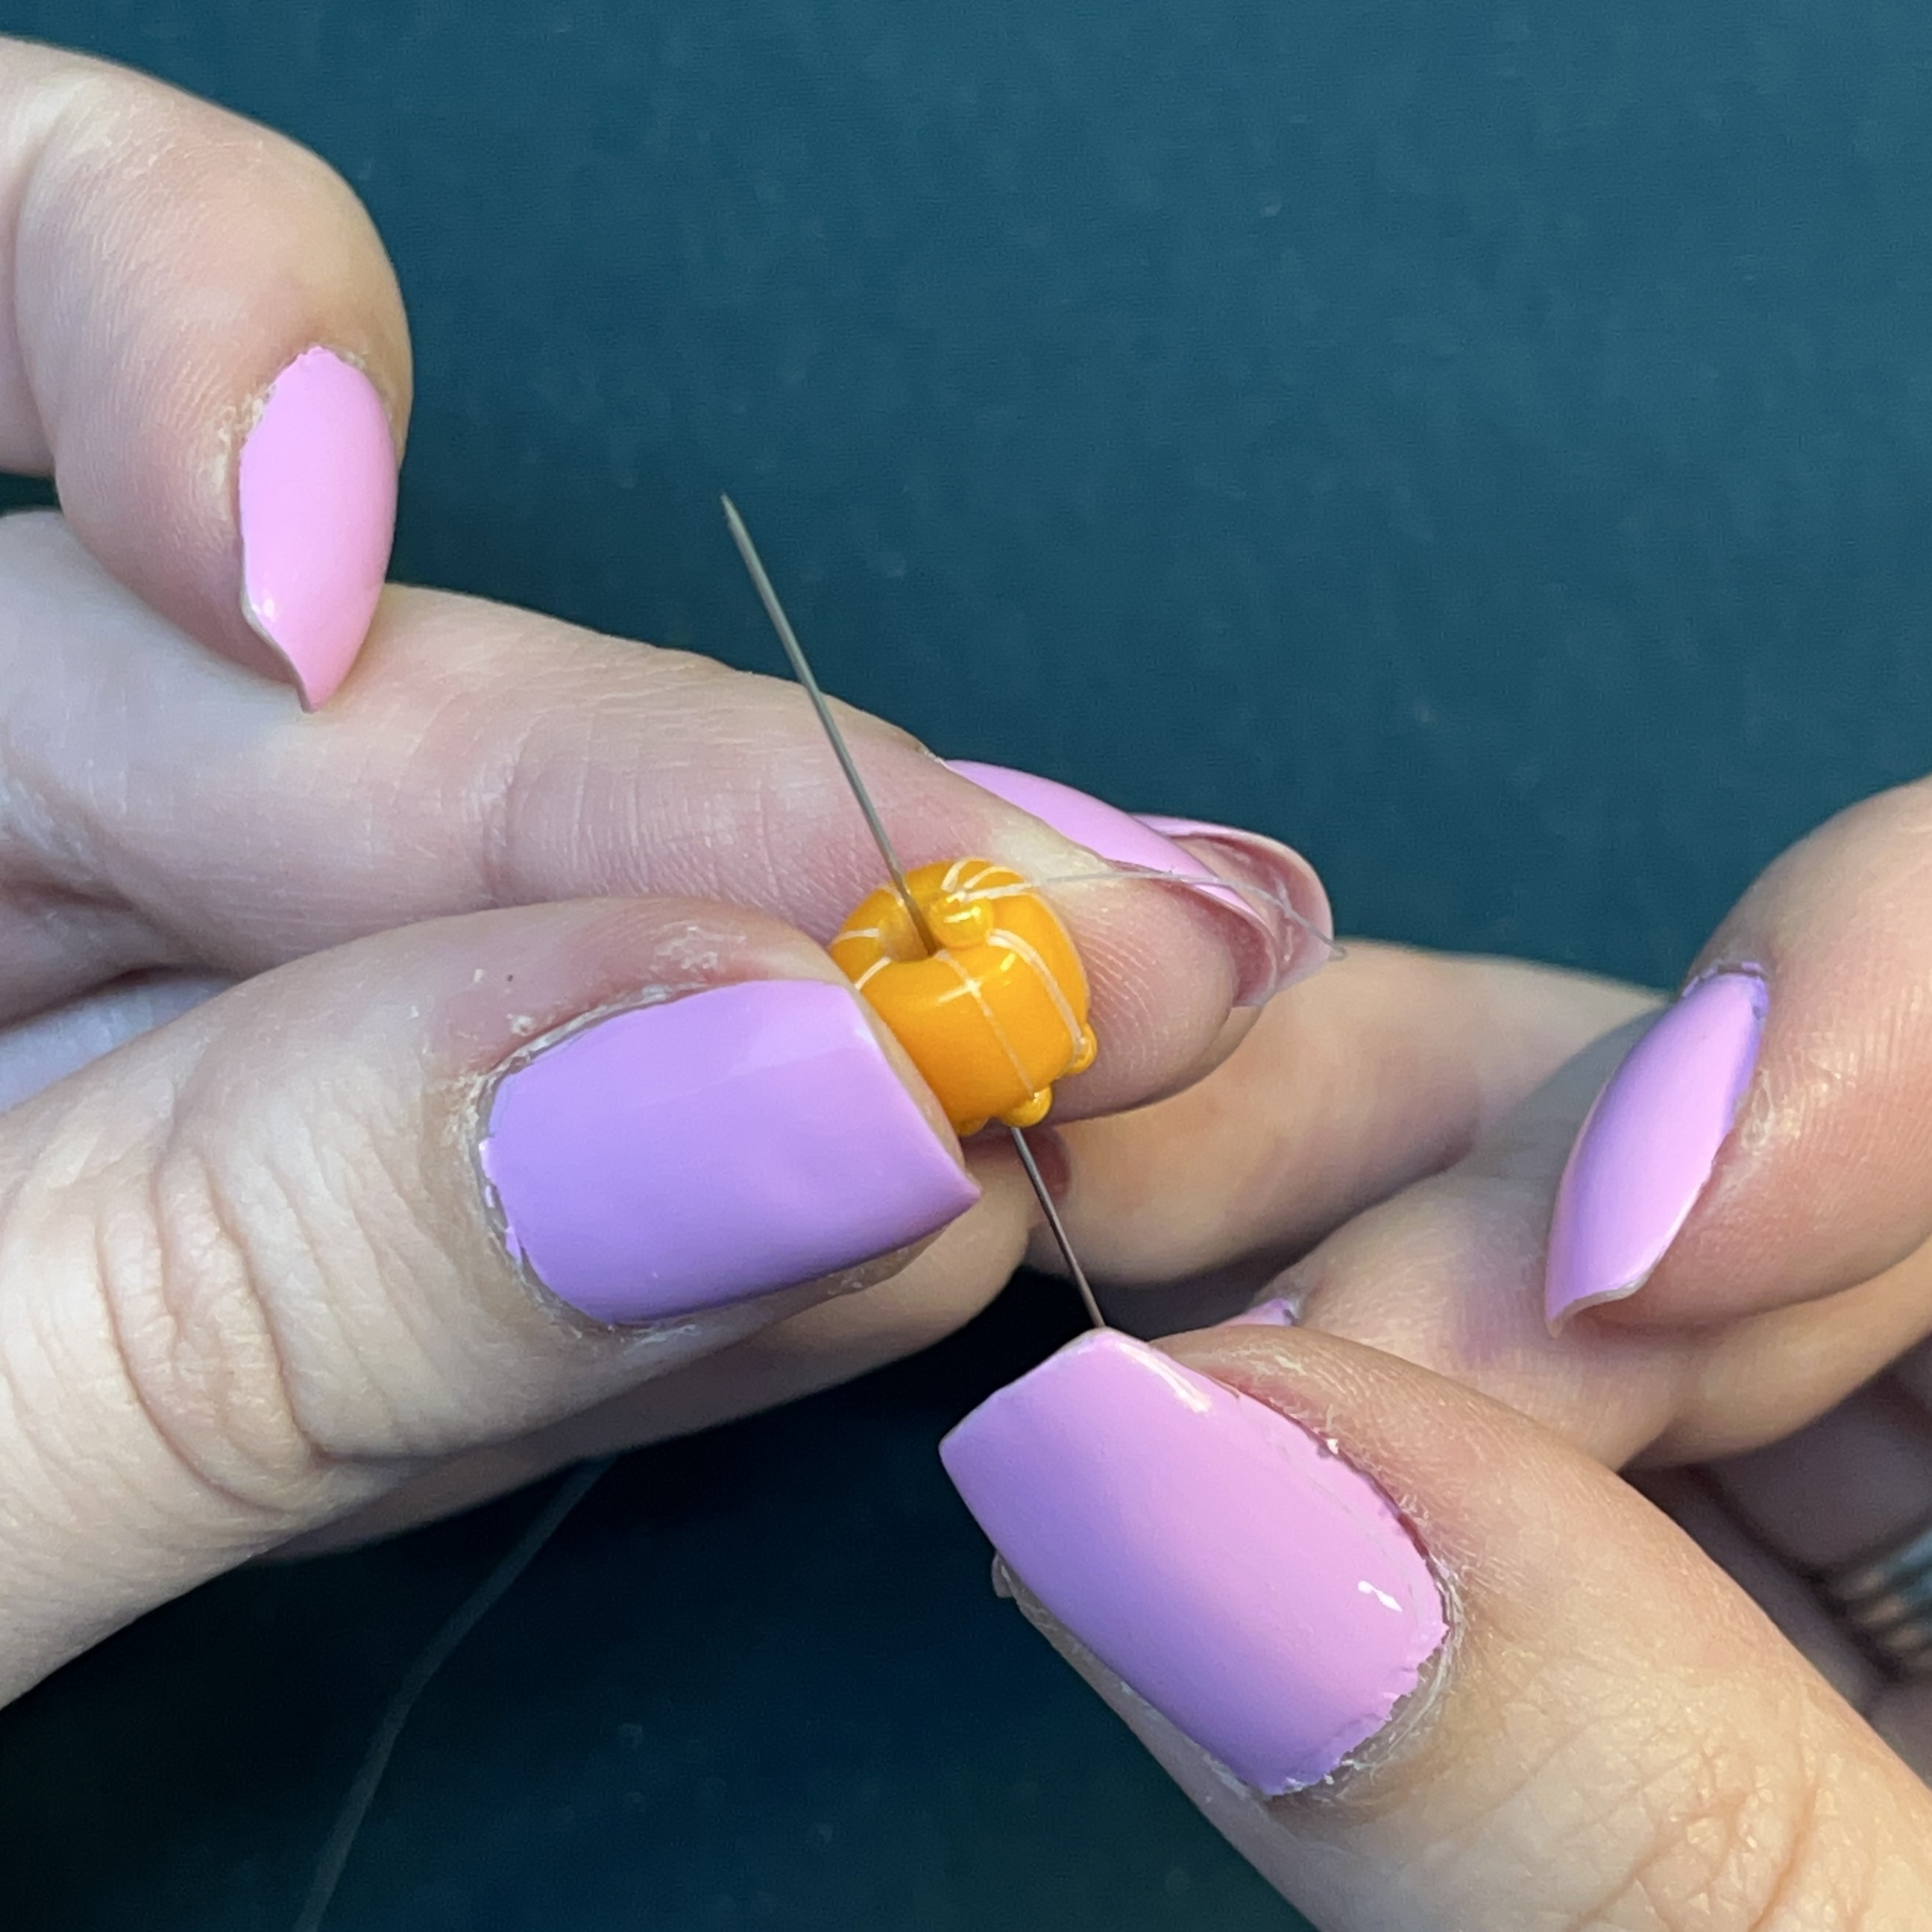
1. Thread fireline through needle.
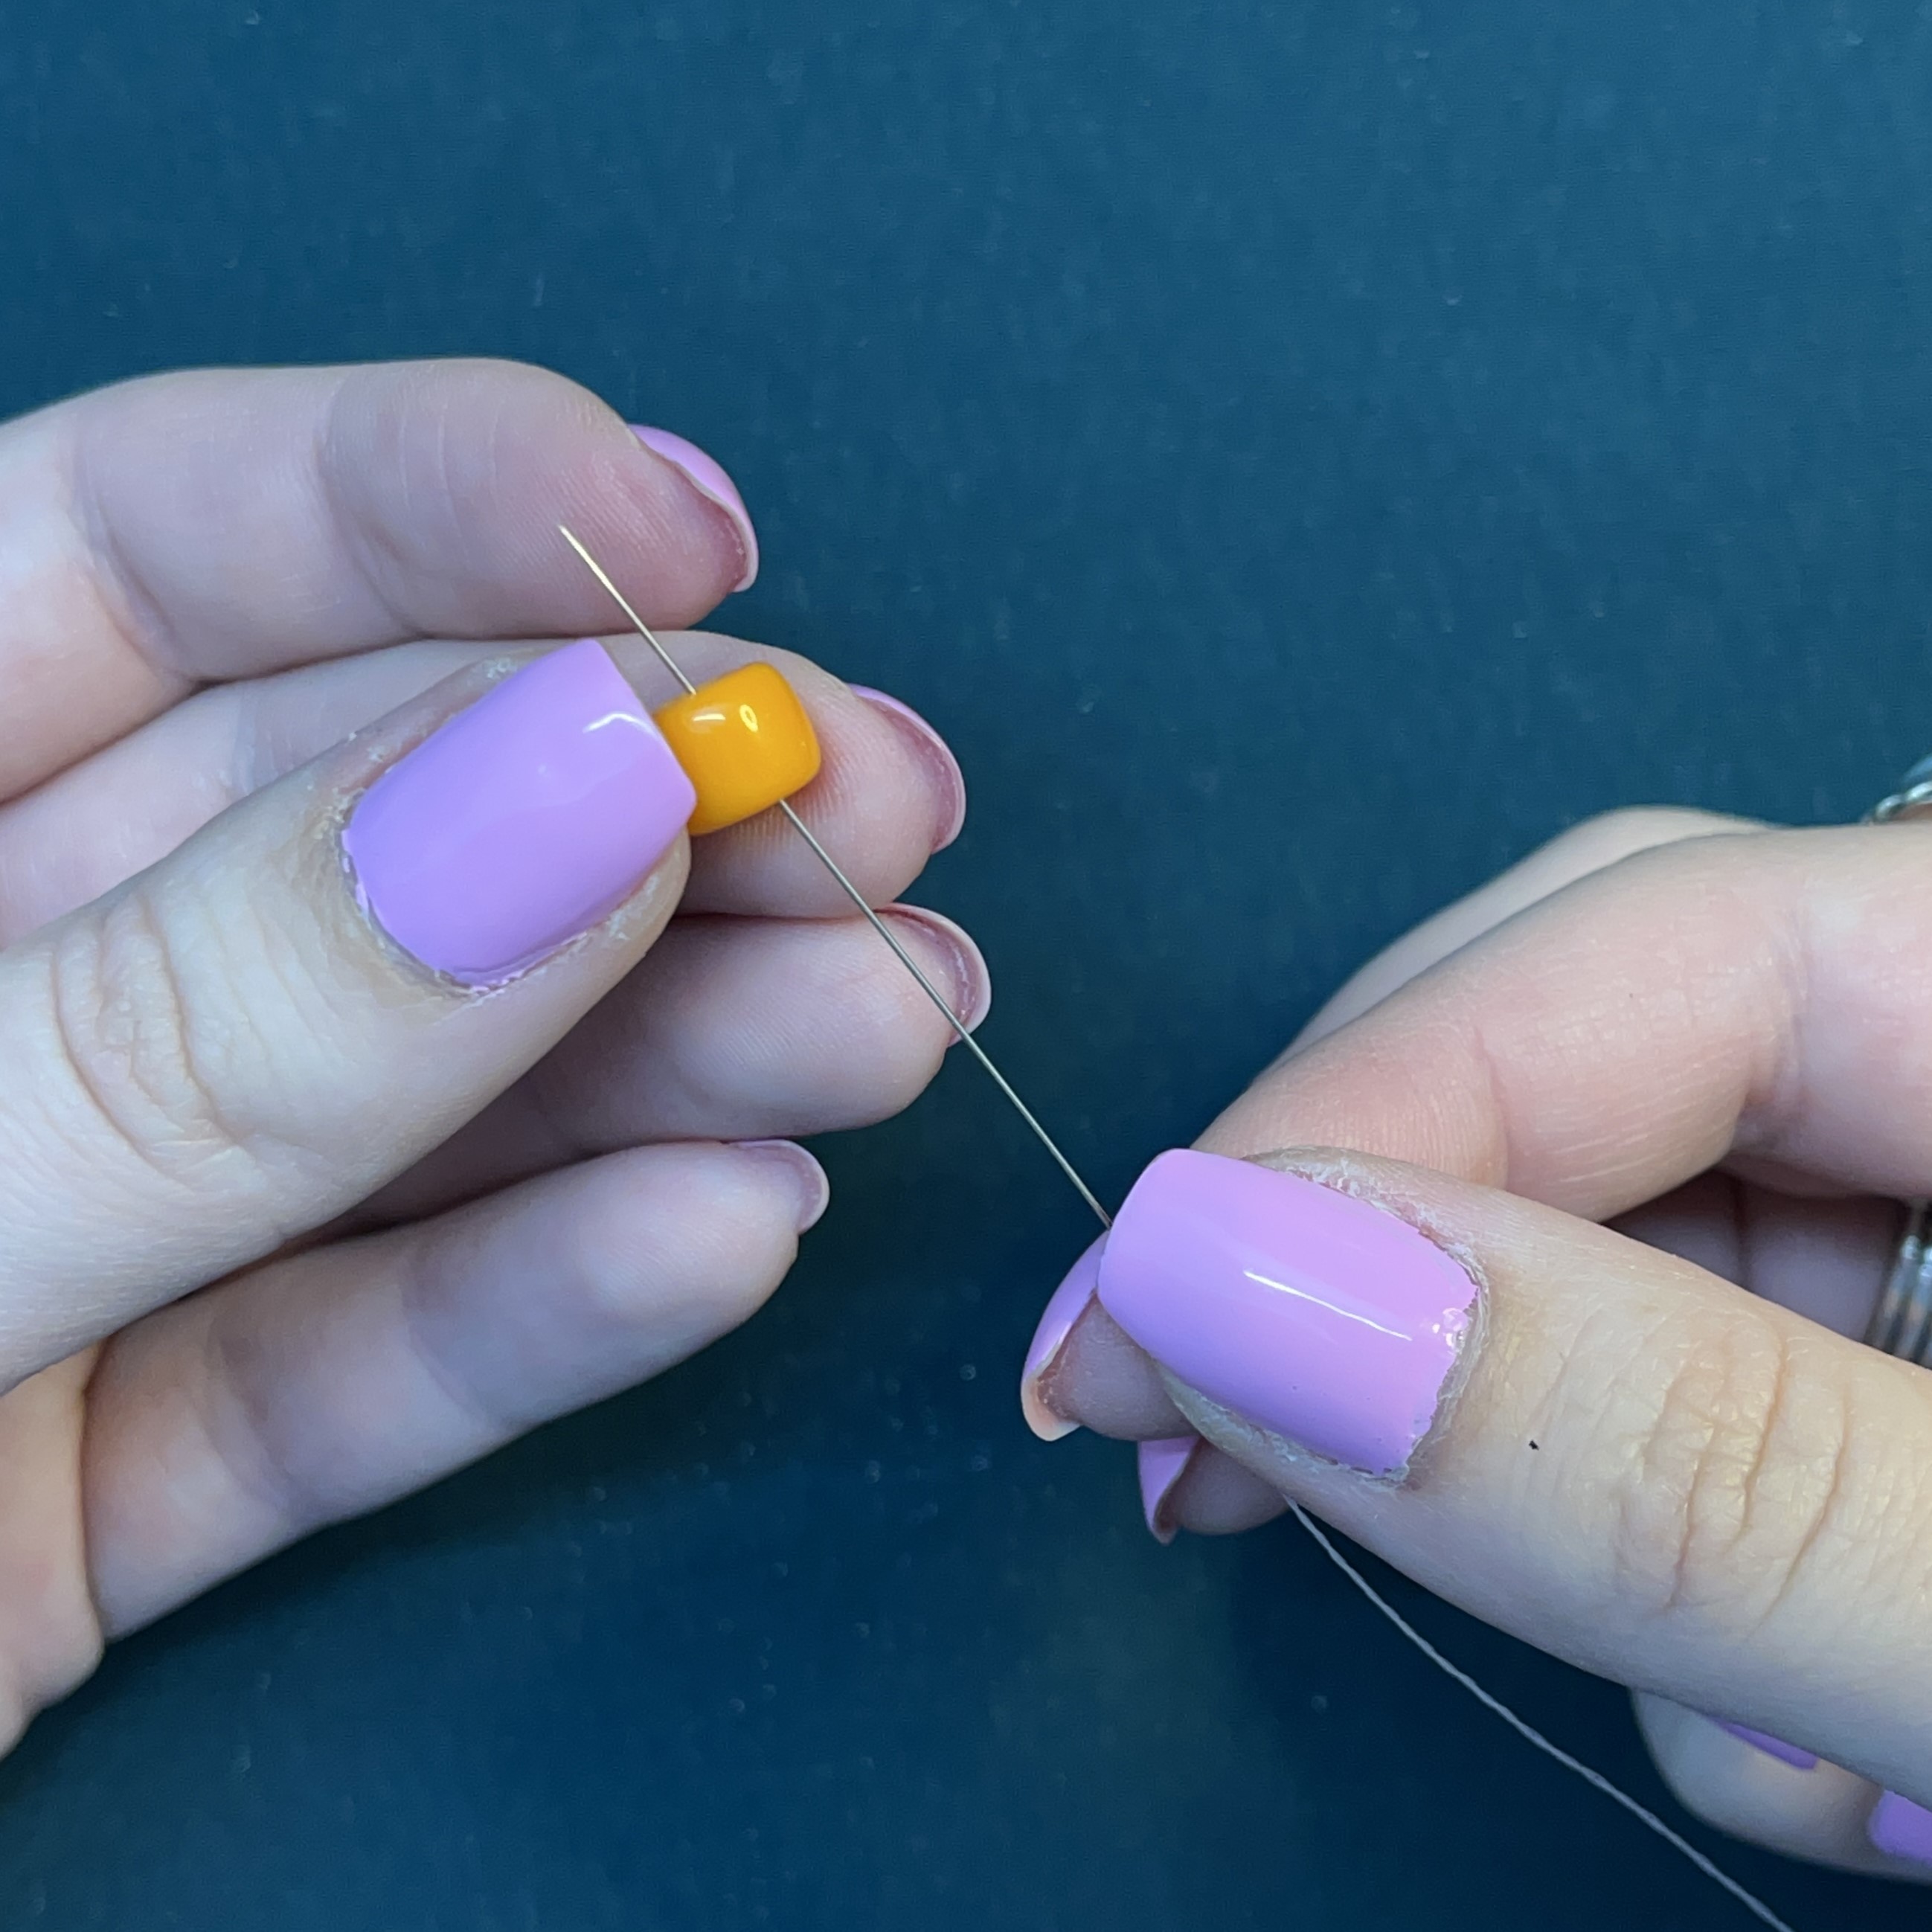
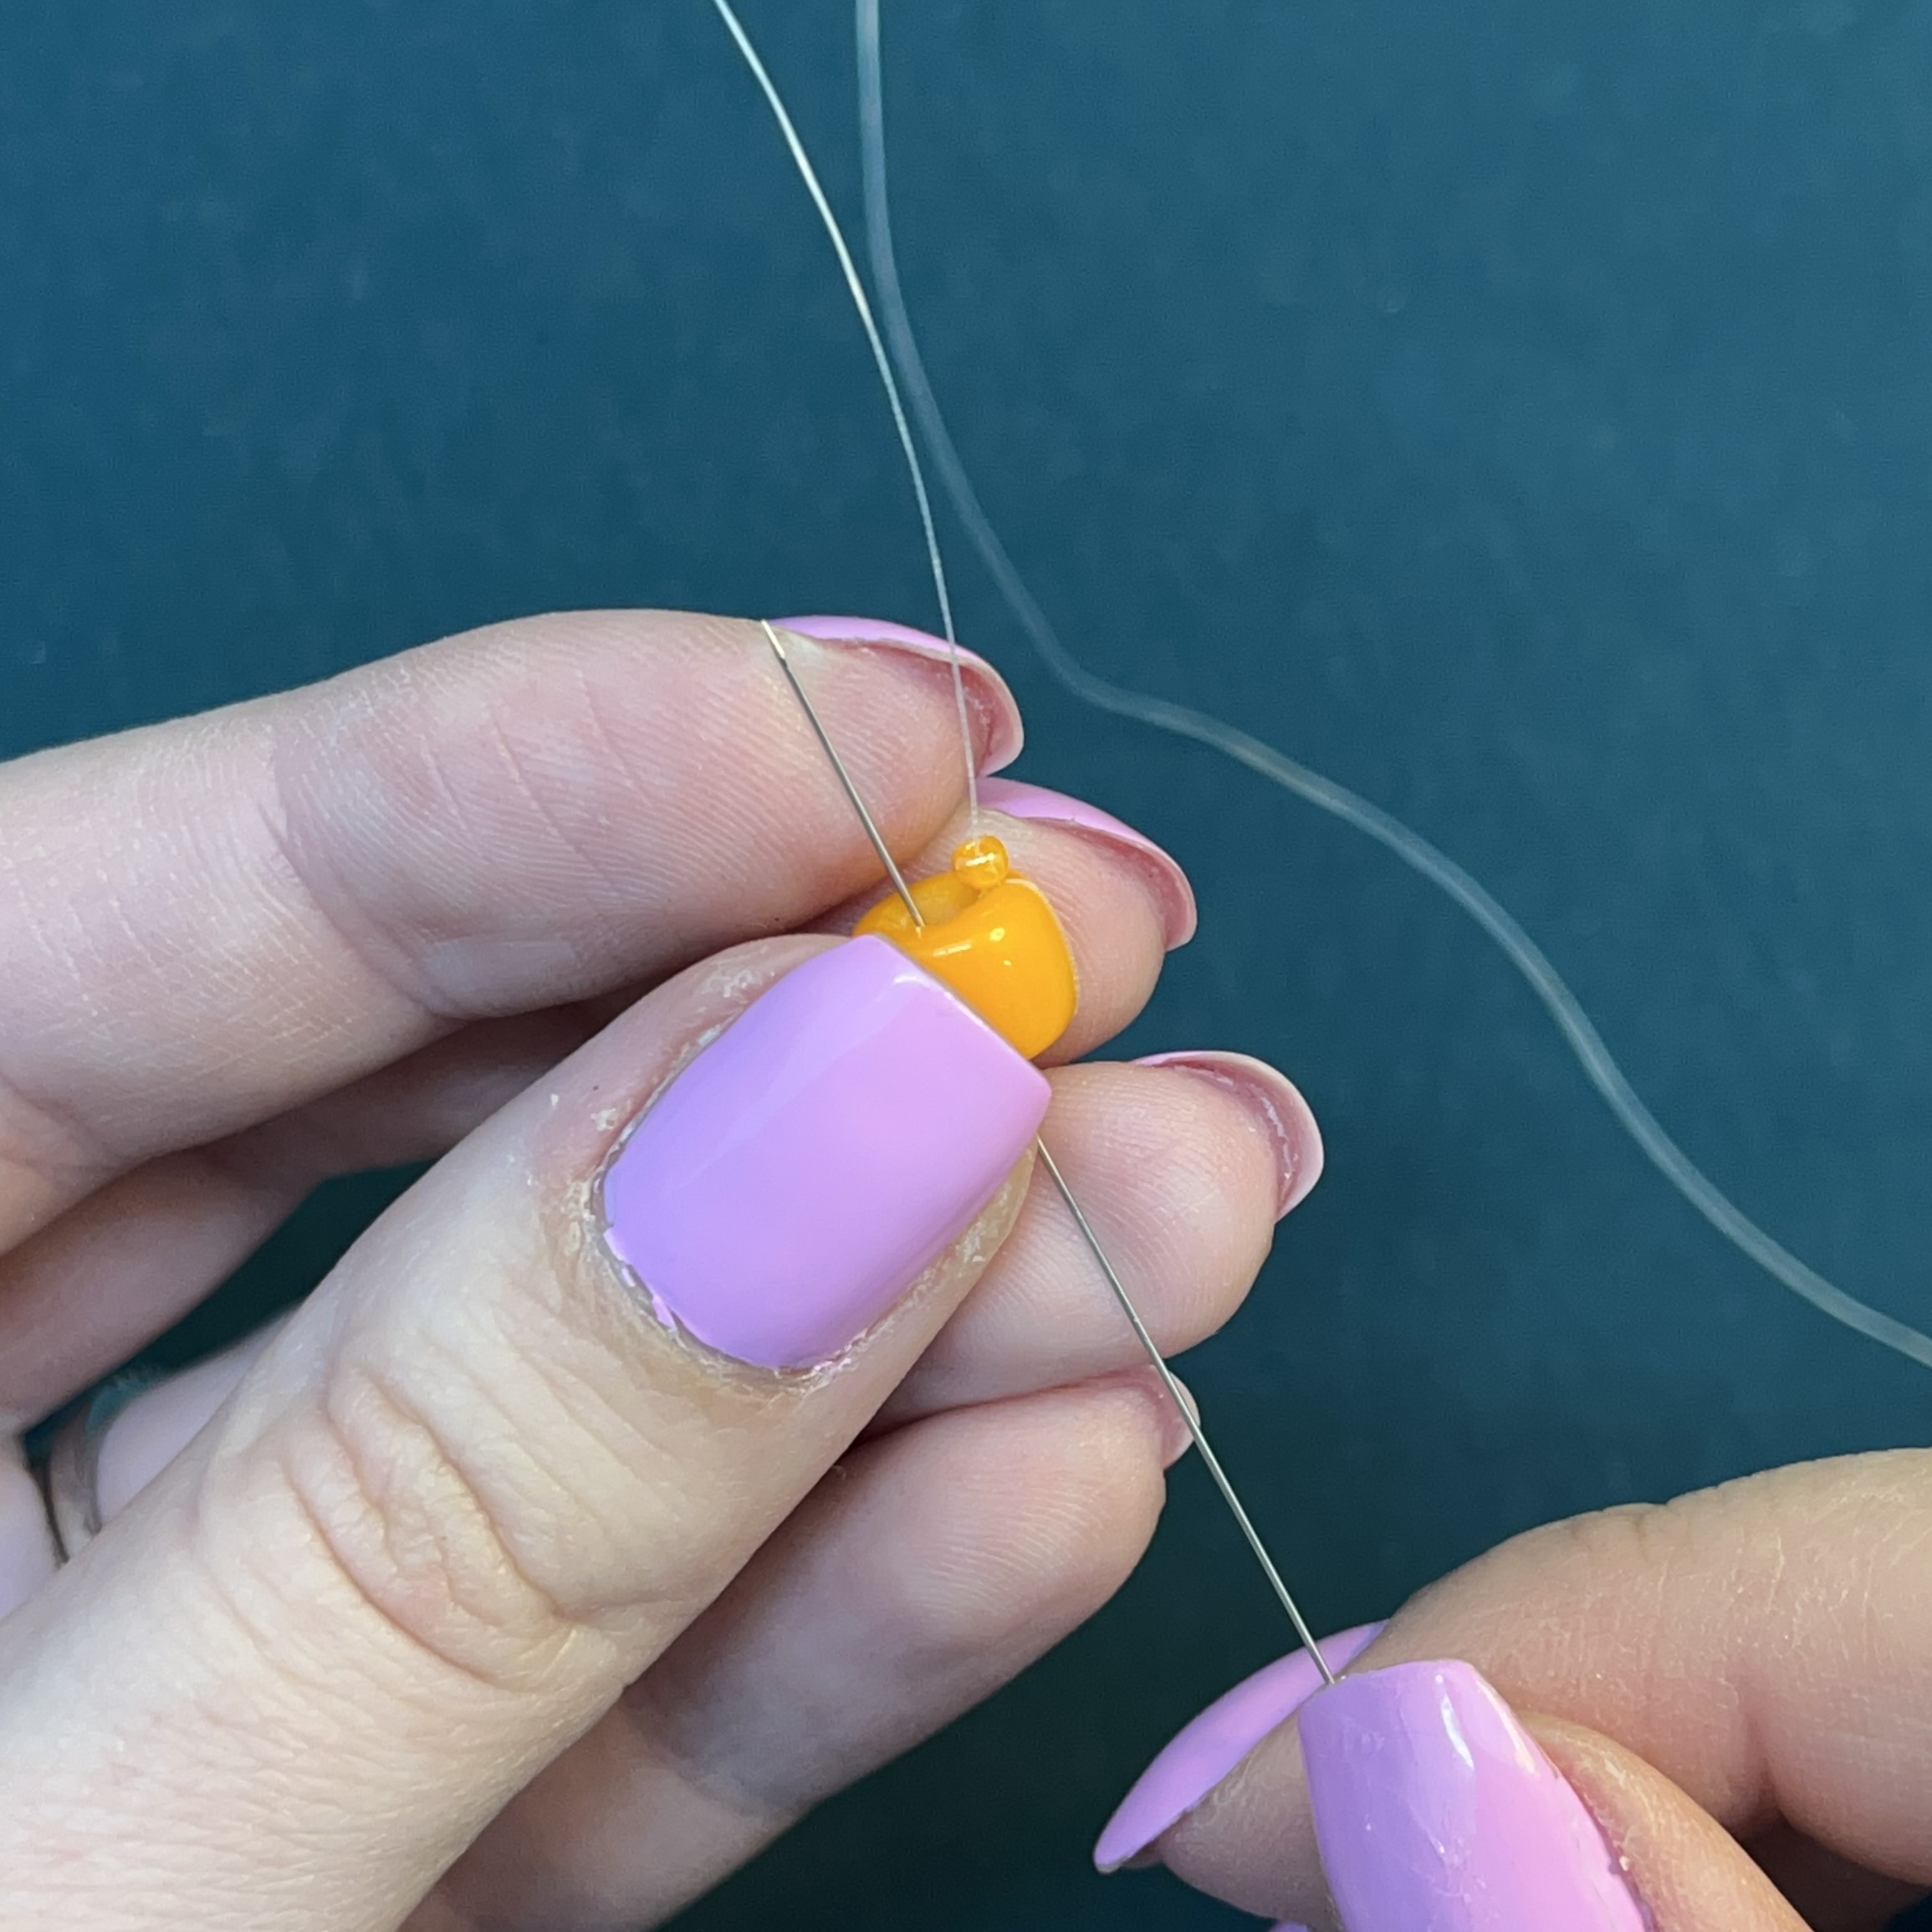
2. Thread needle through forte bead.
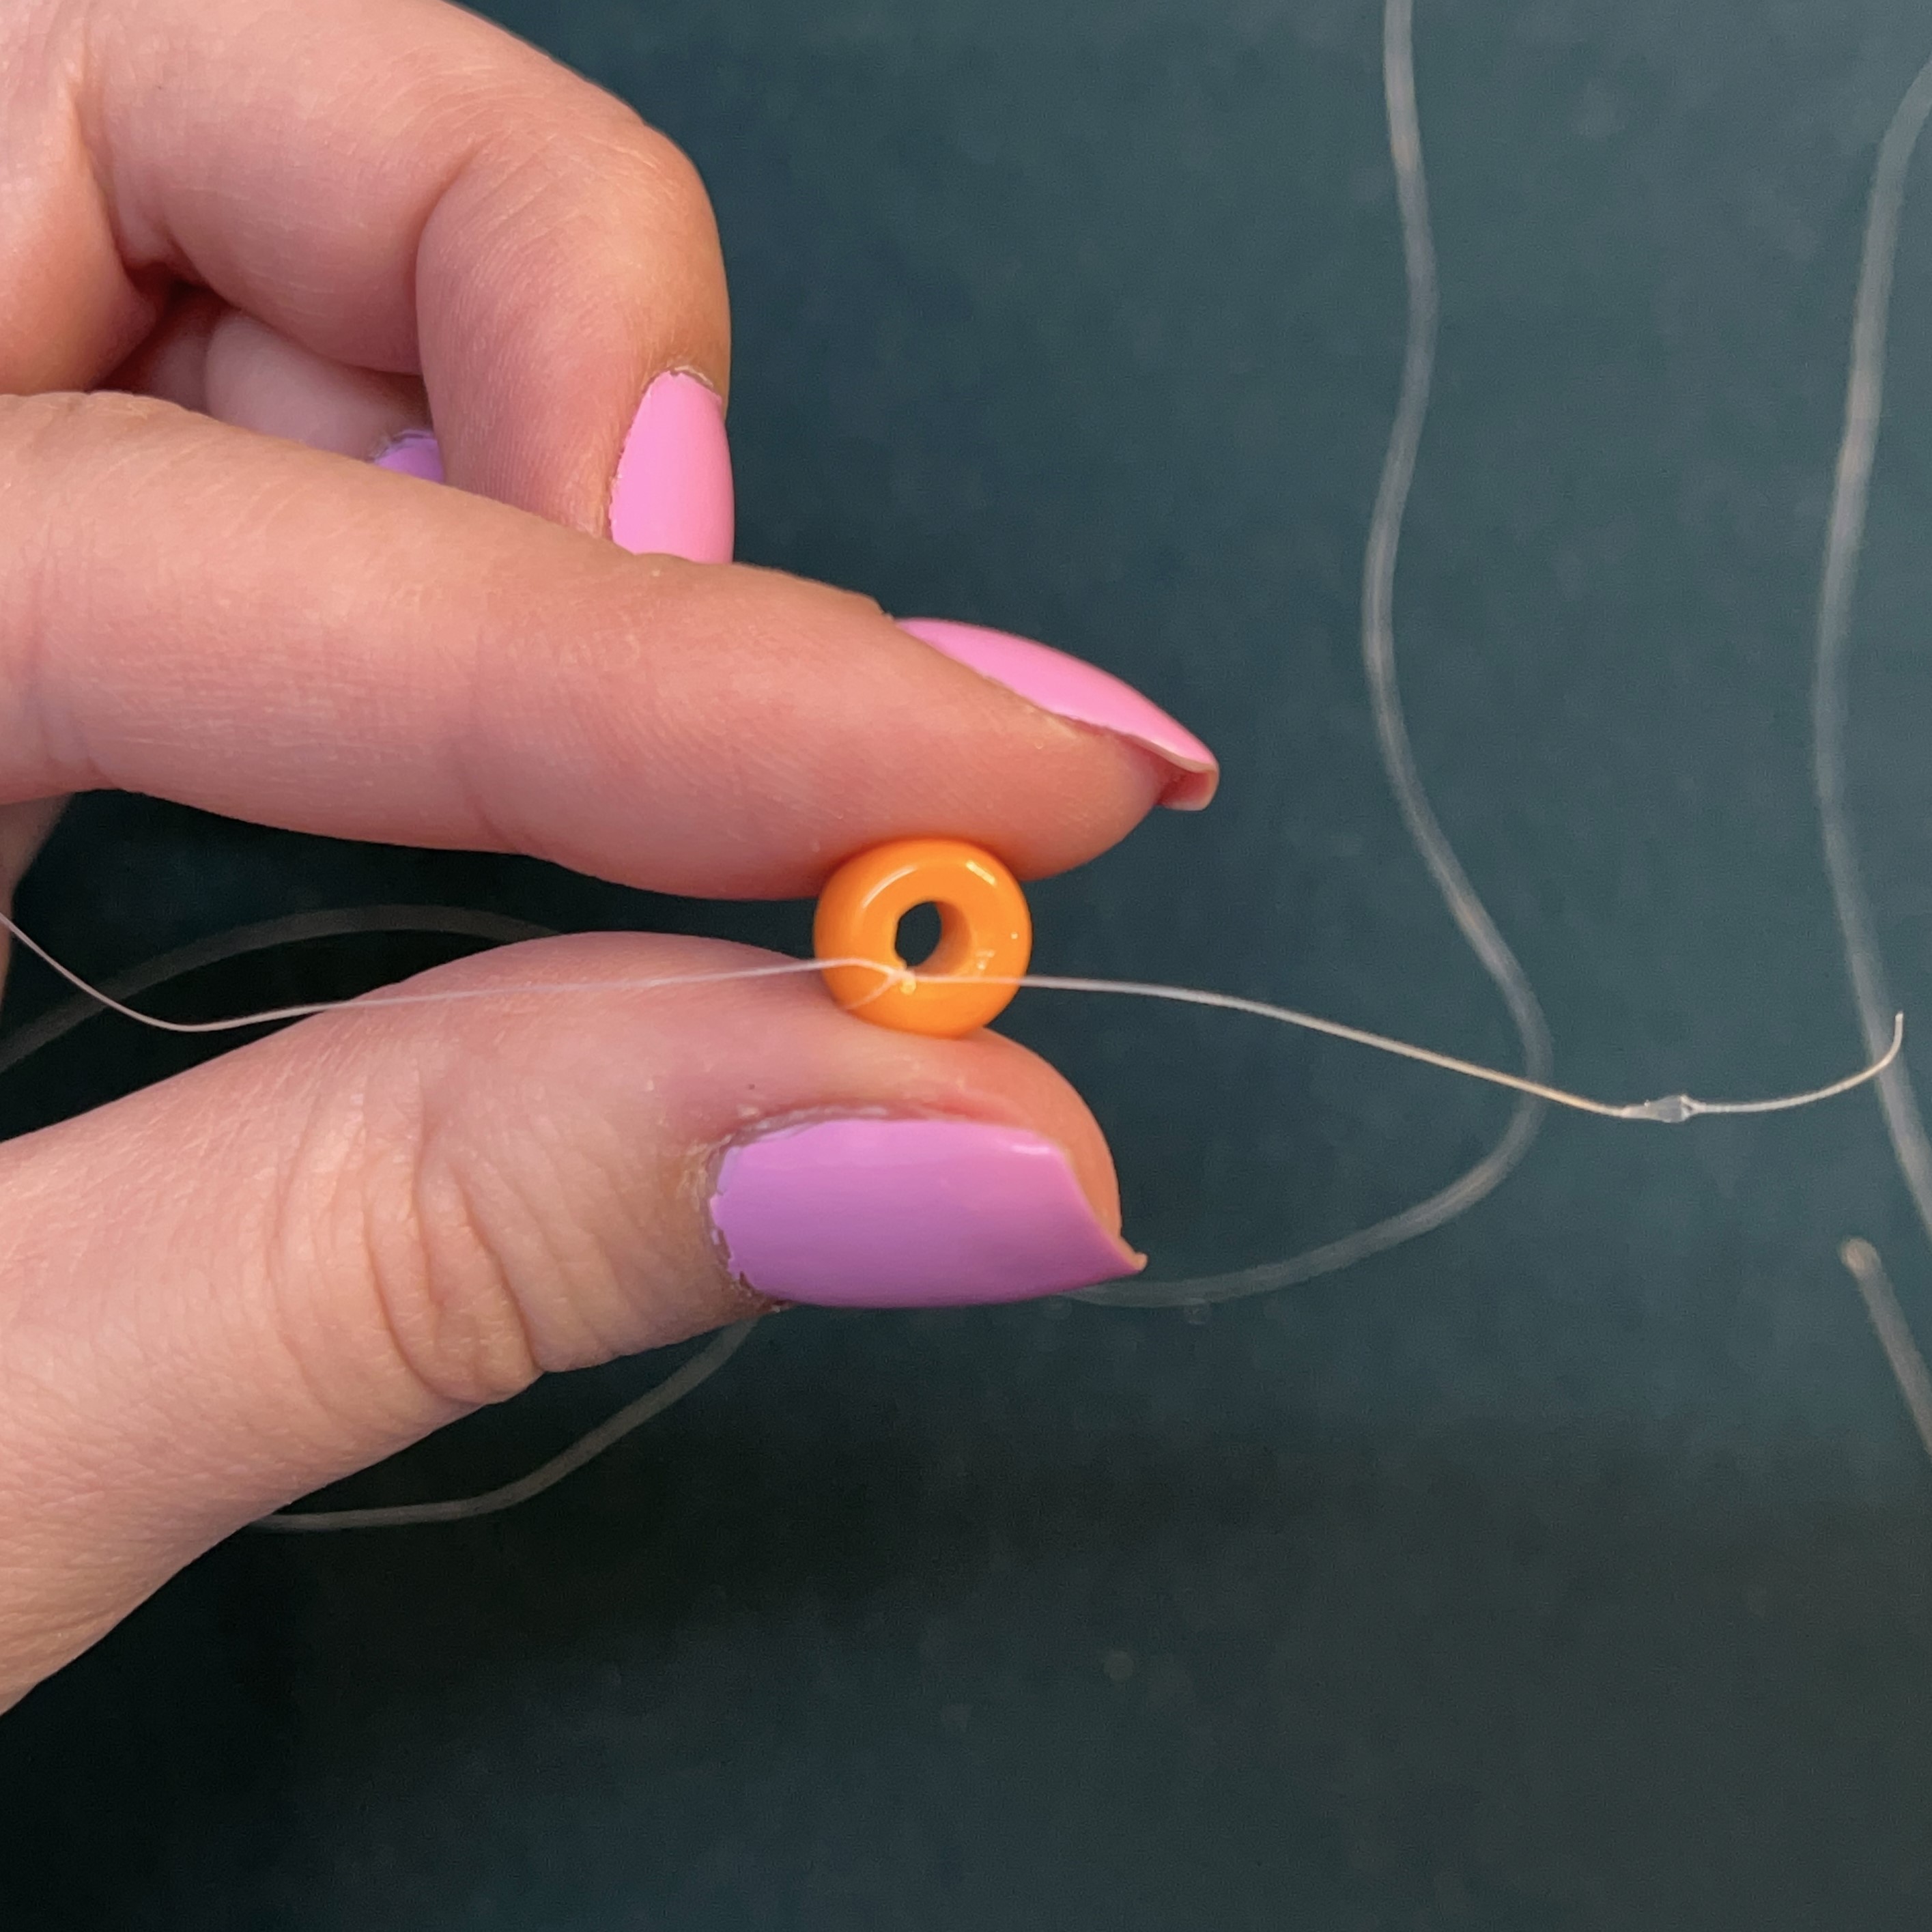
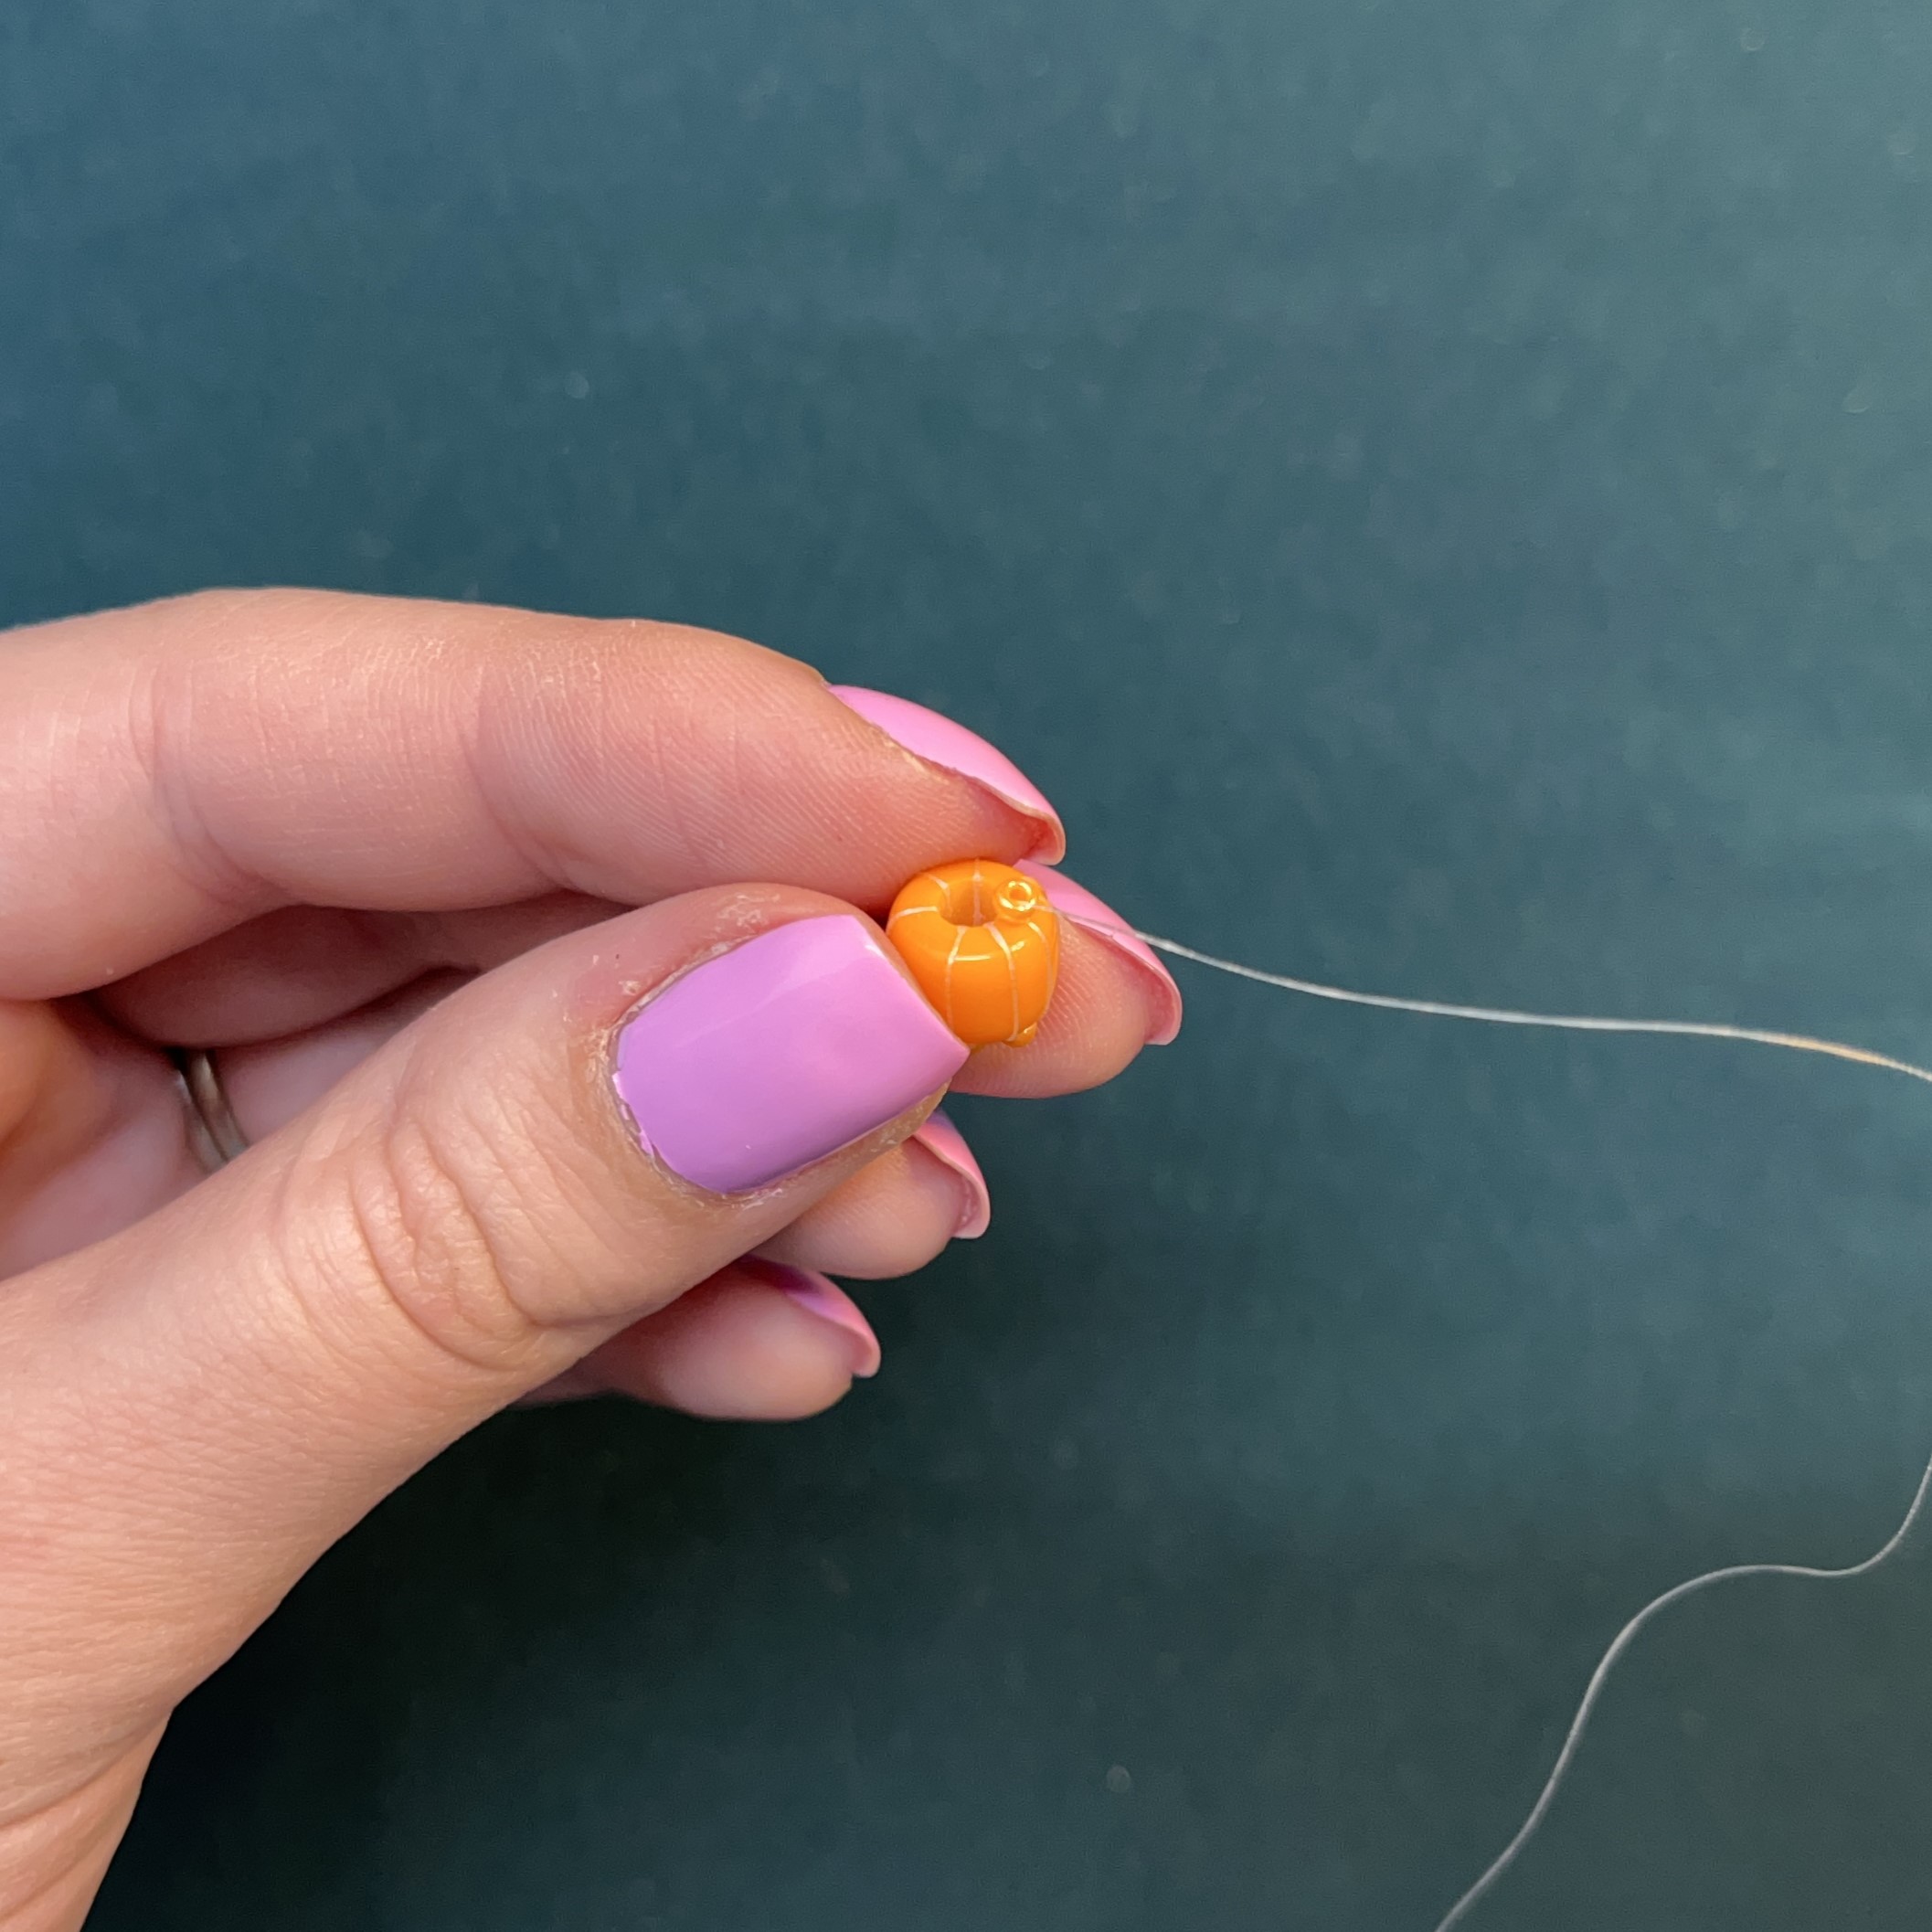
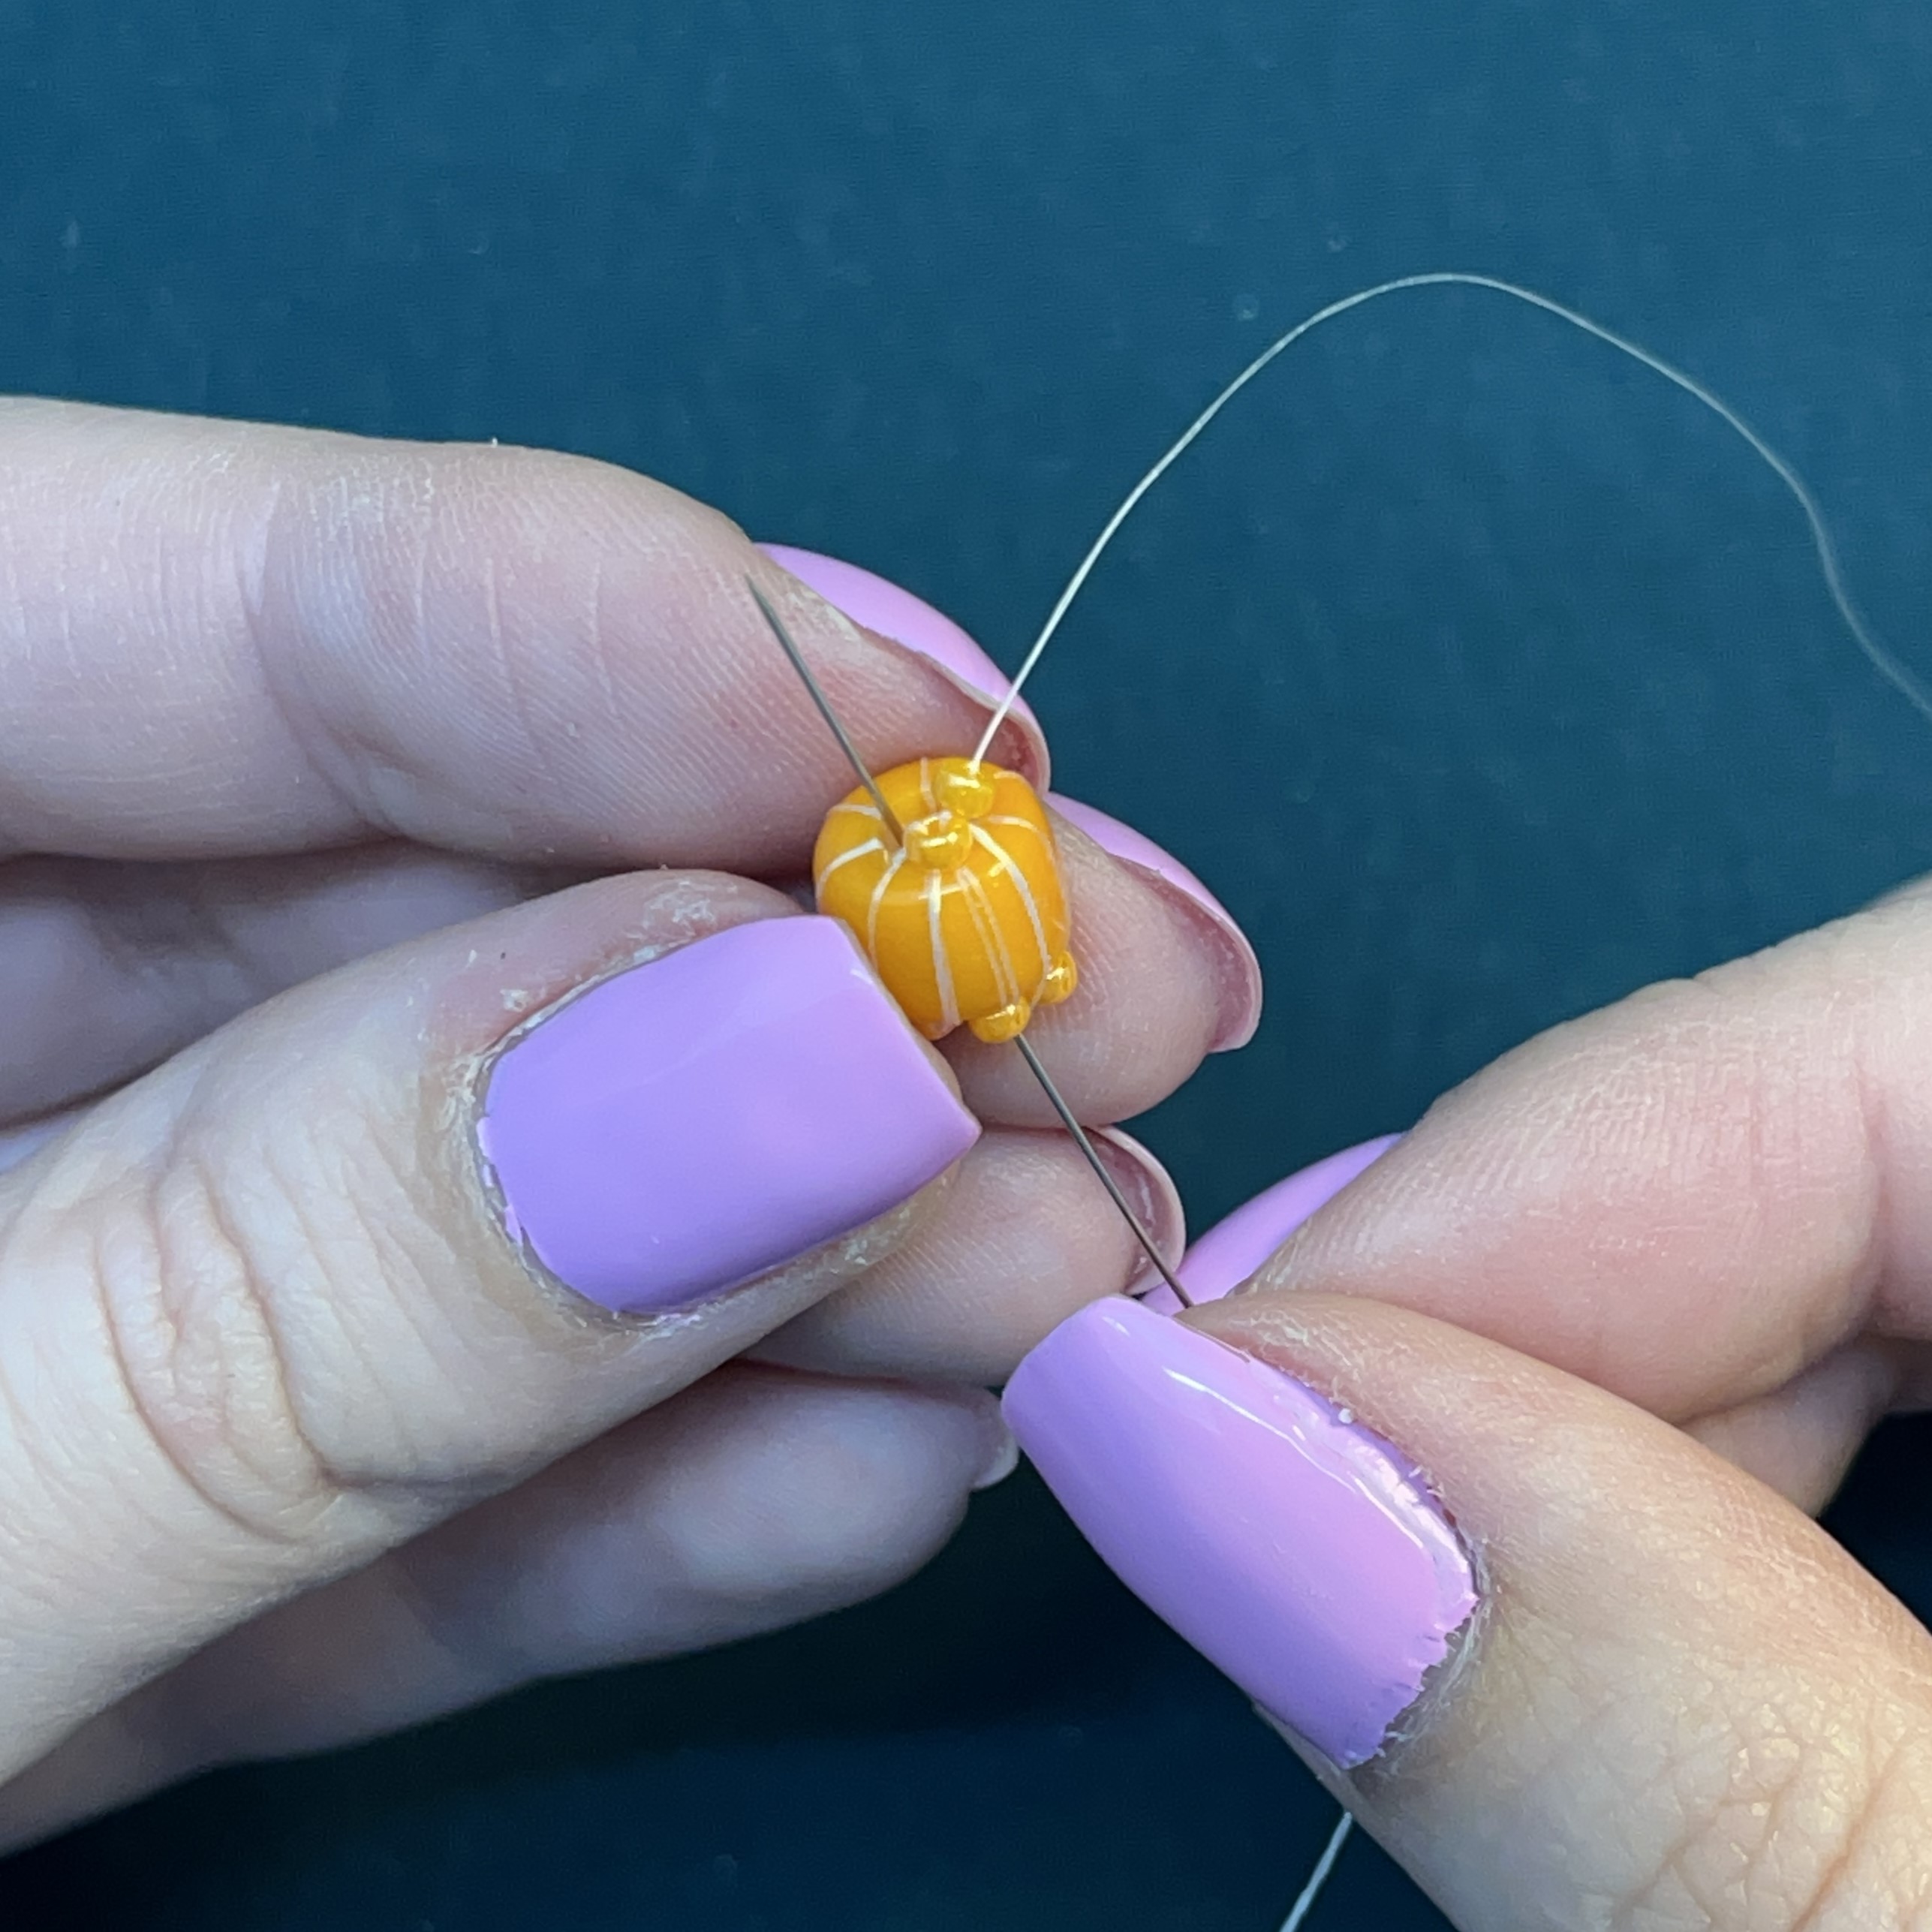
3. Tie a couple knots to secure the thread onto the bead. Keep the knot at the top of the bead like shown in the picture above.
*Glue knot and trim excess thread.
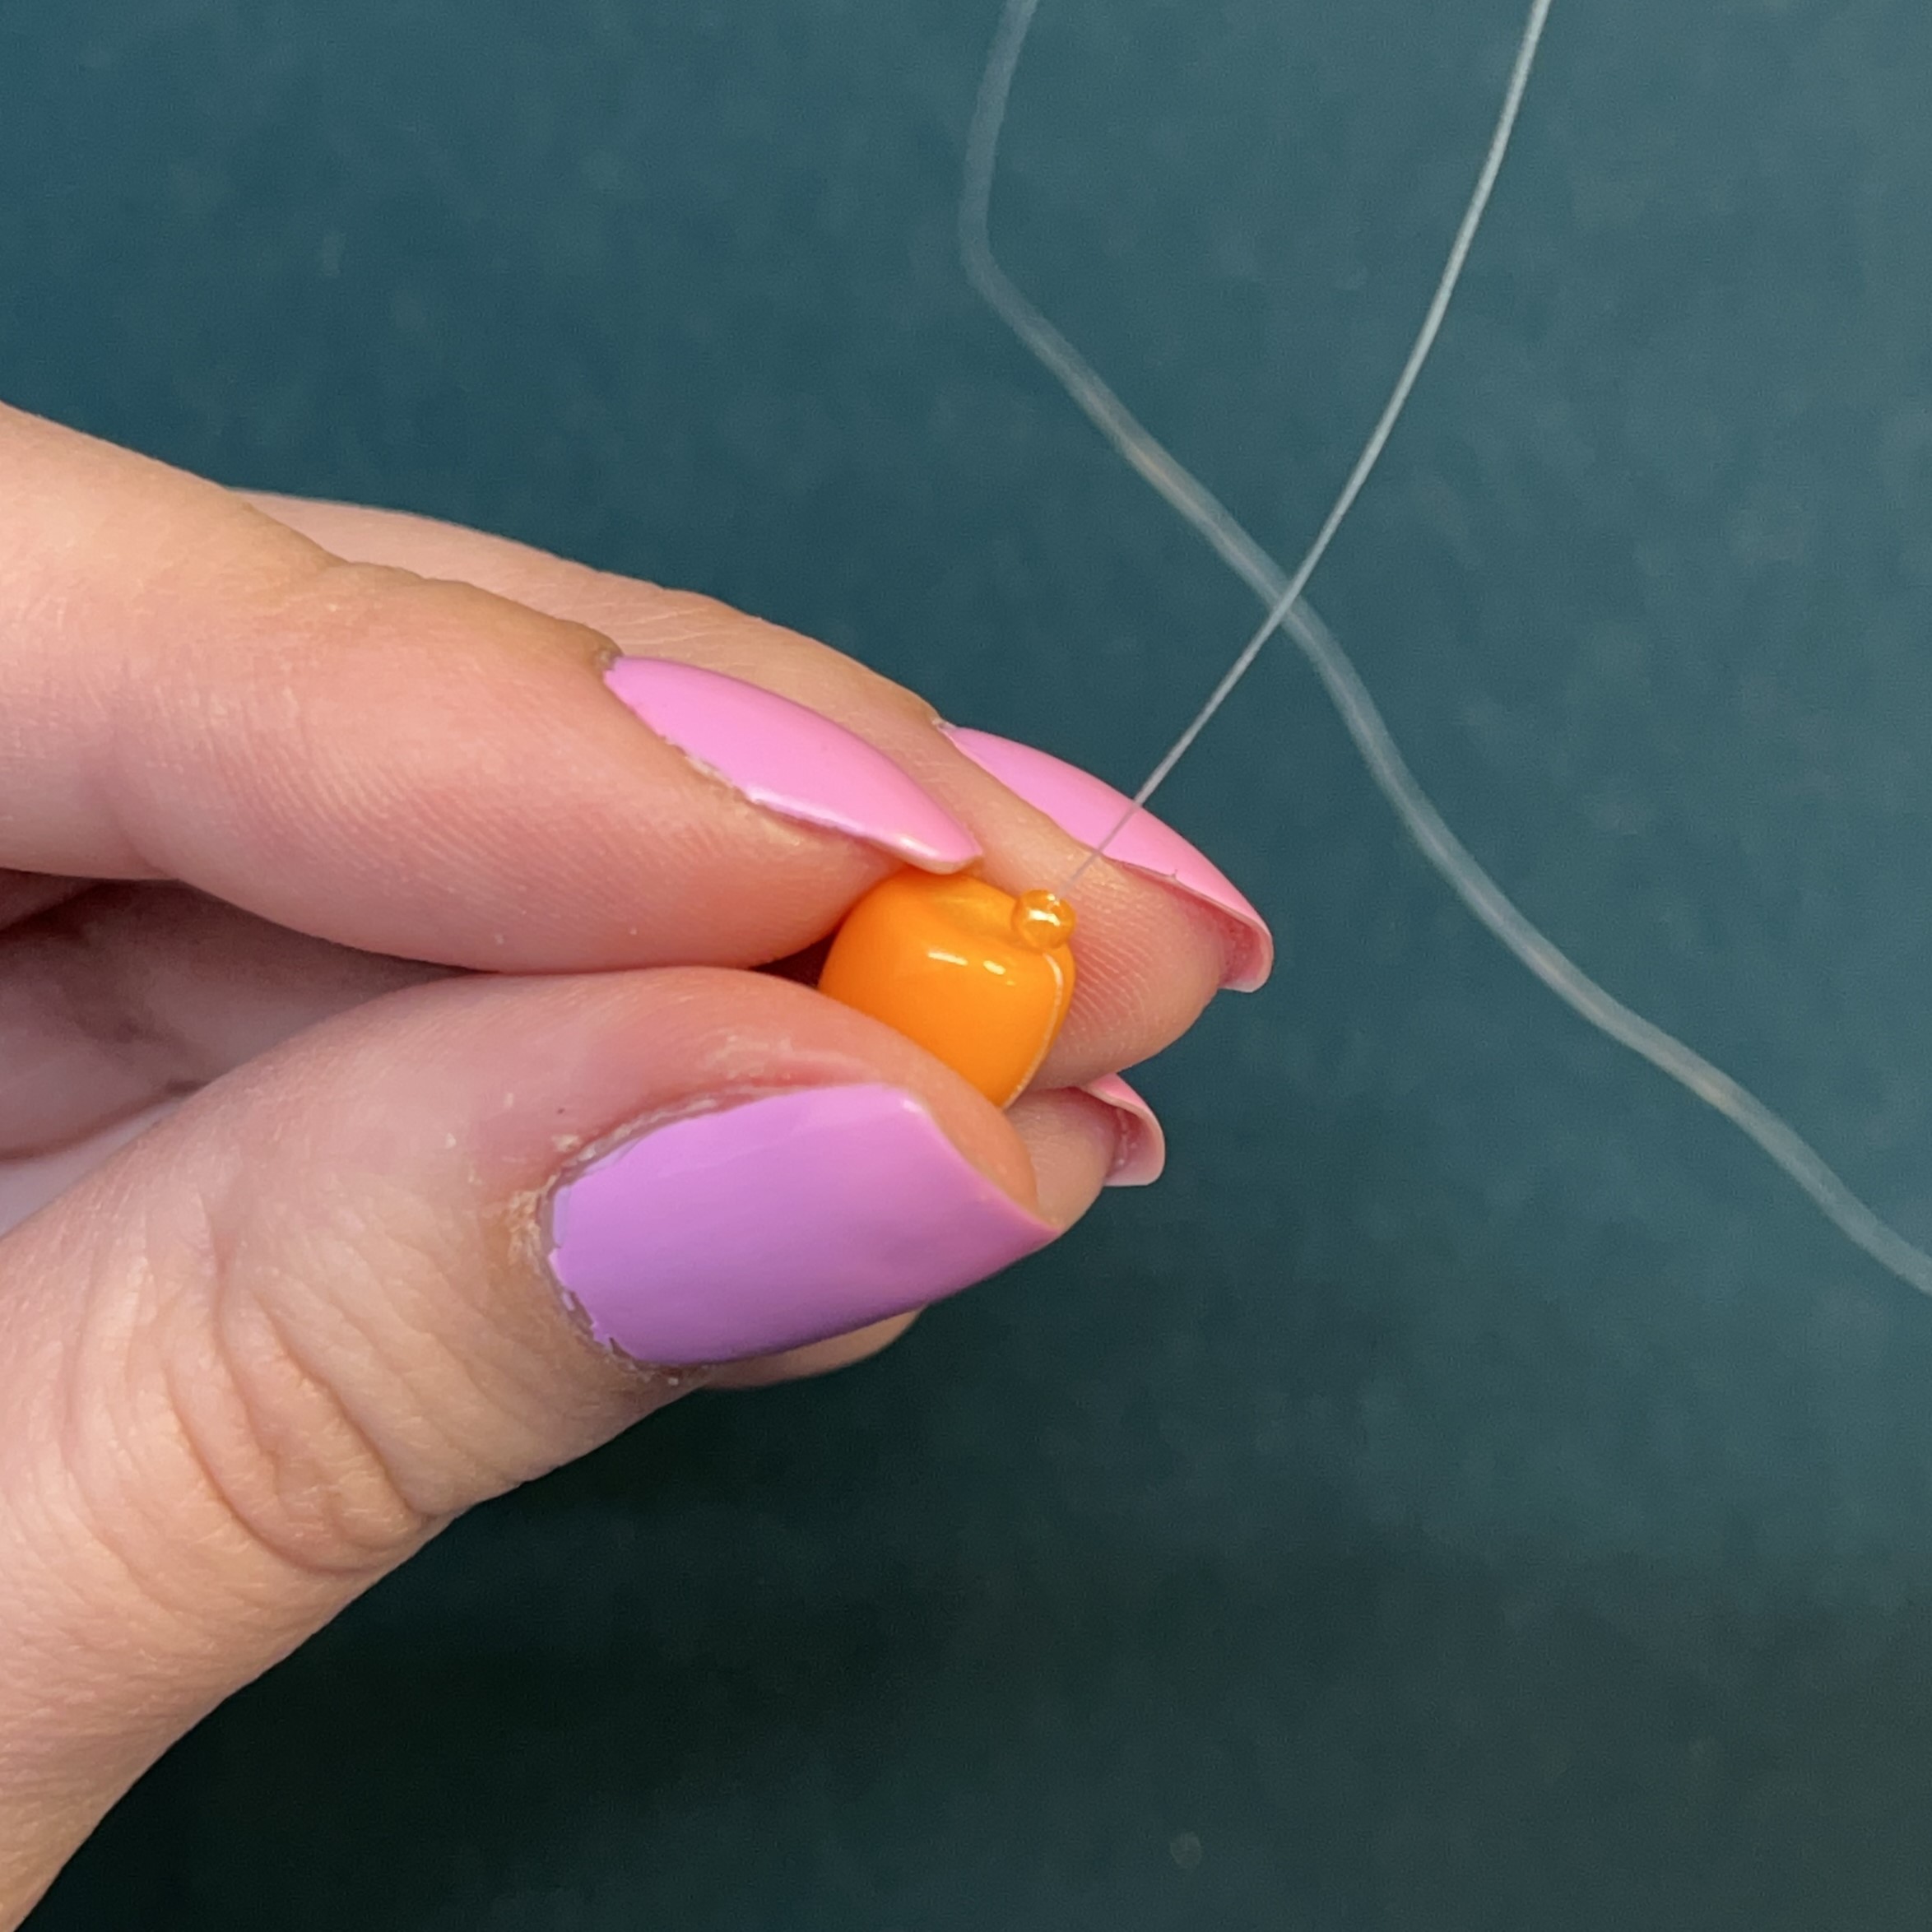
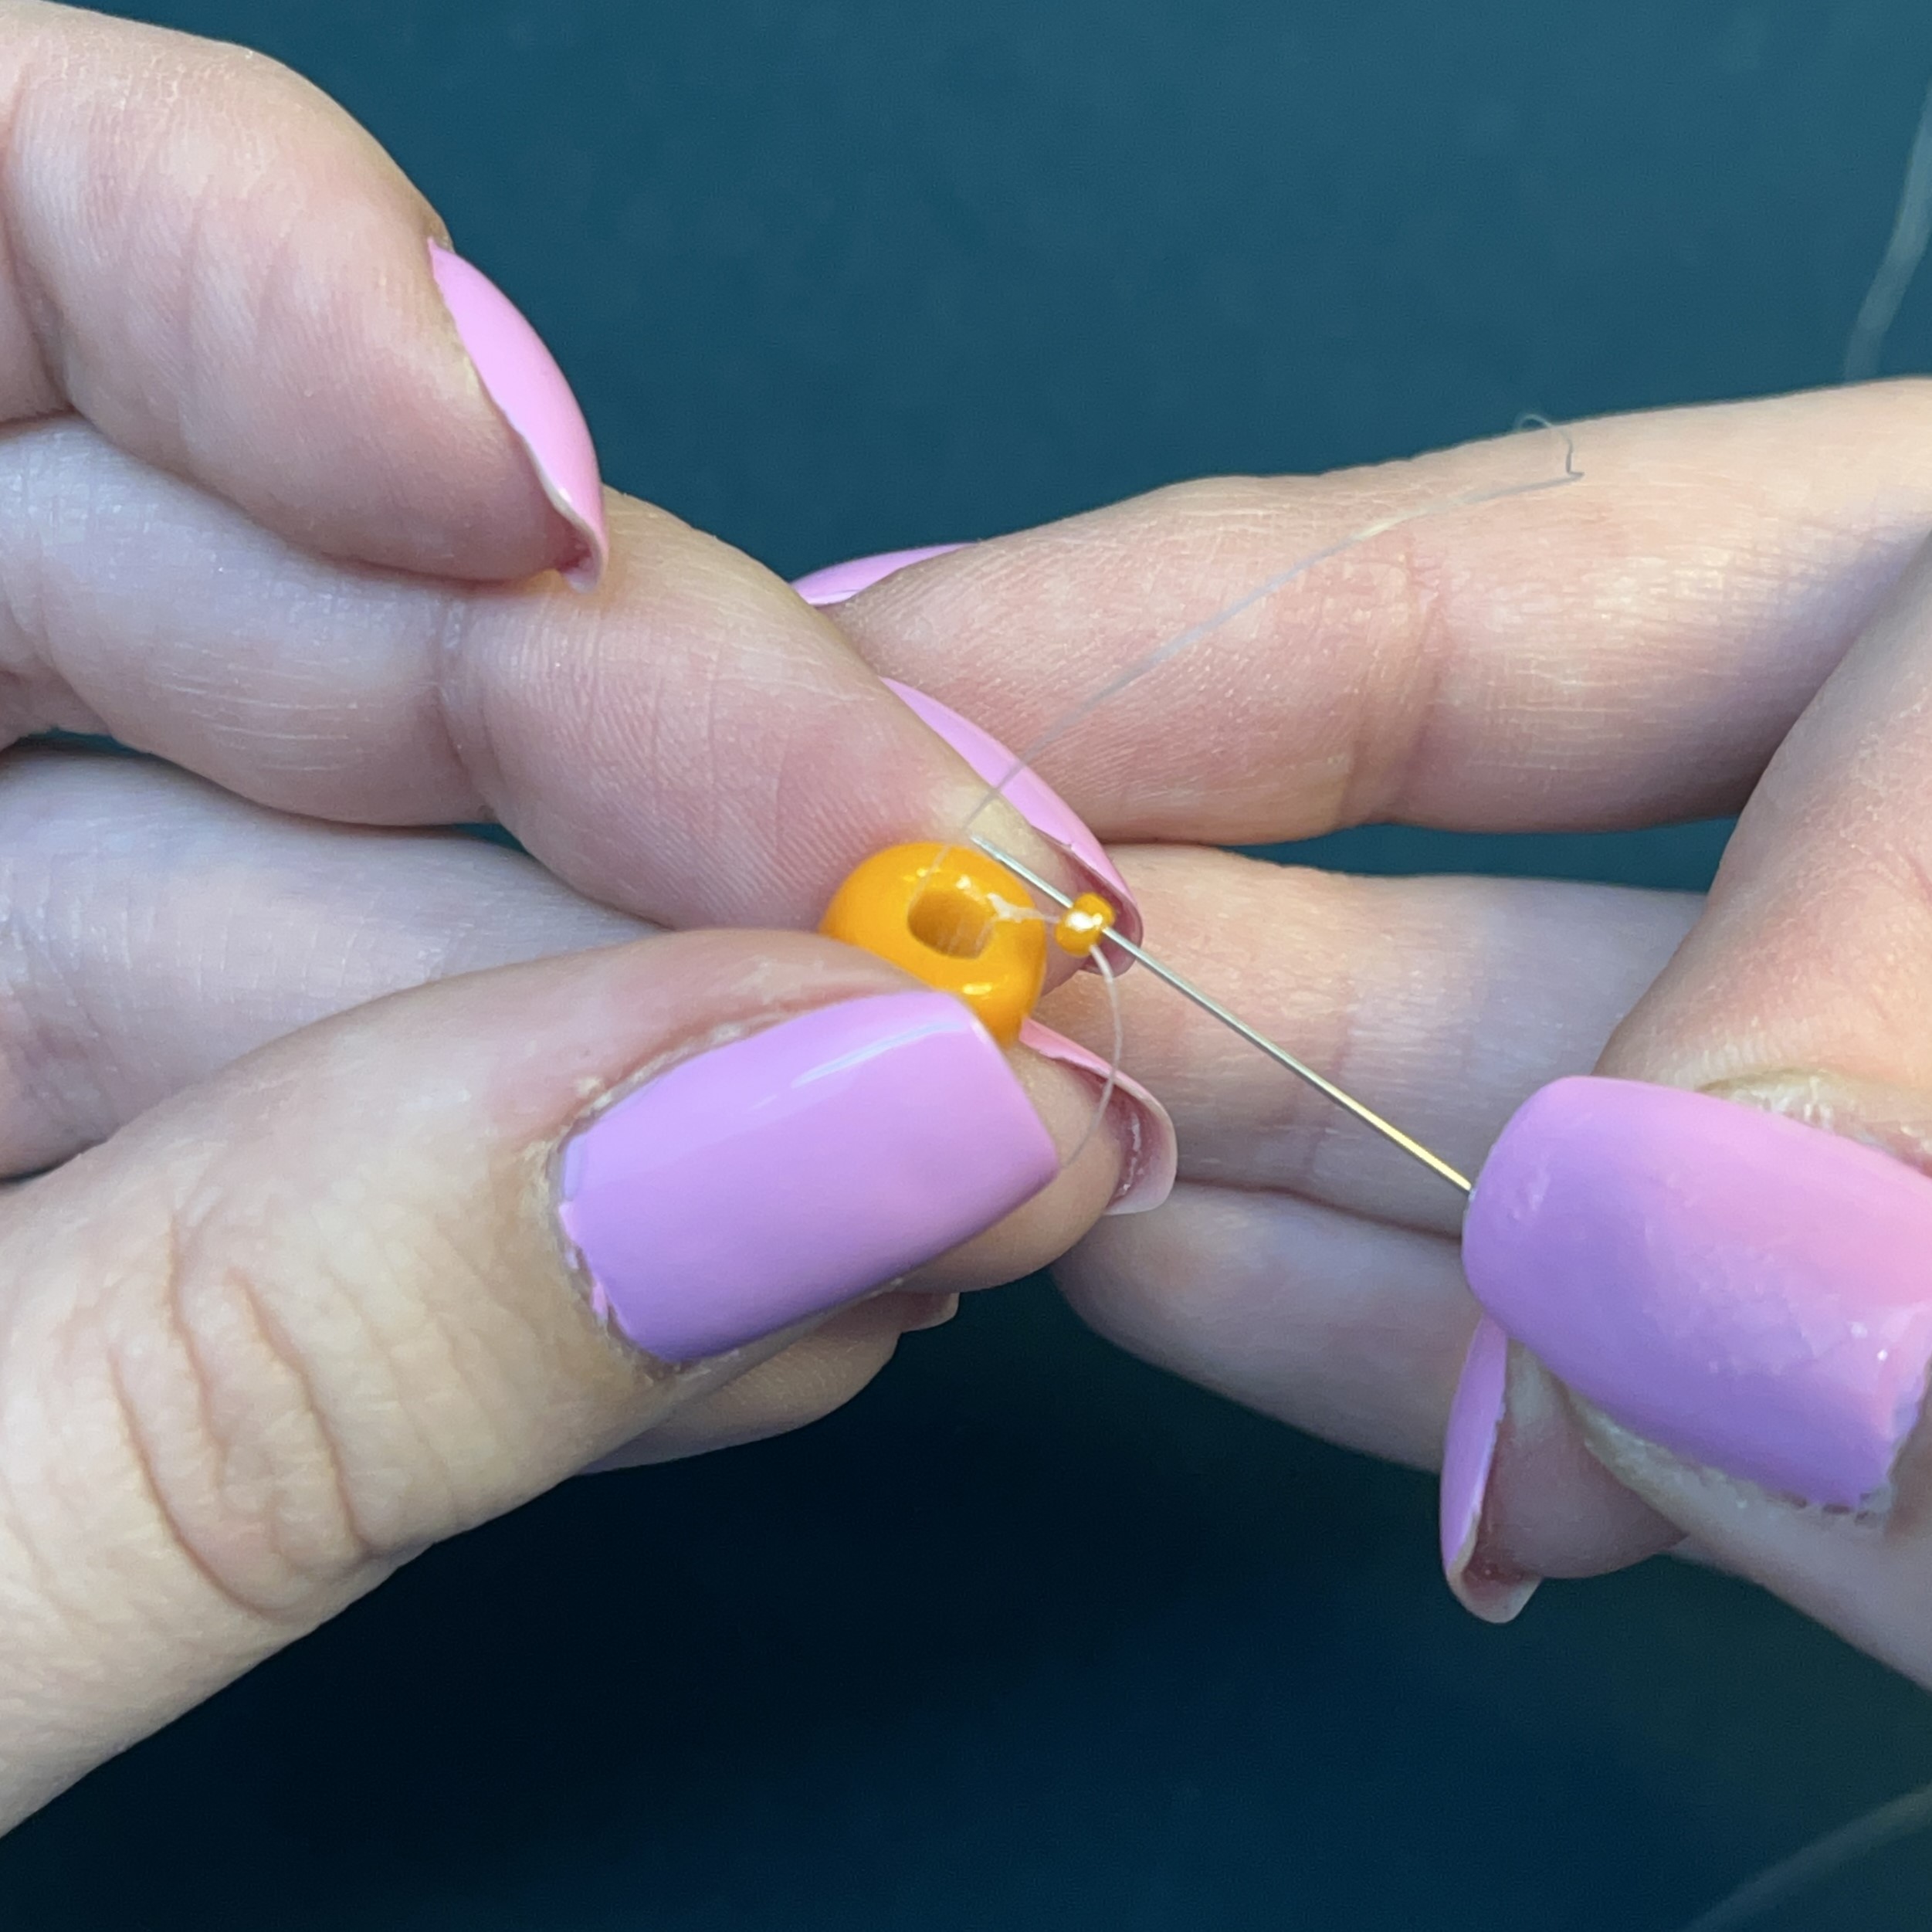
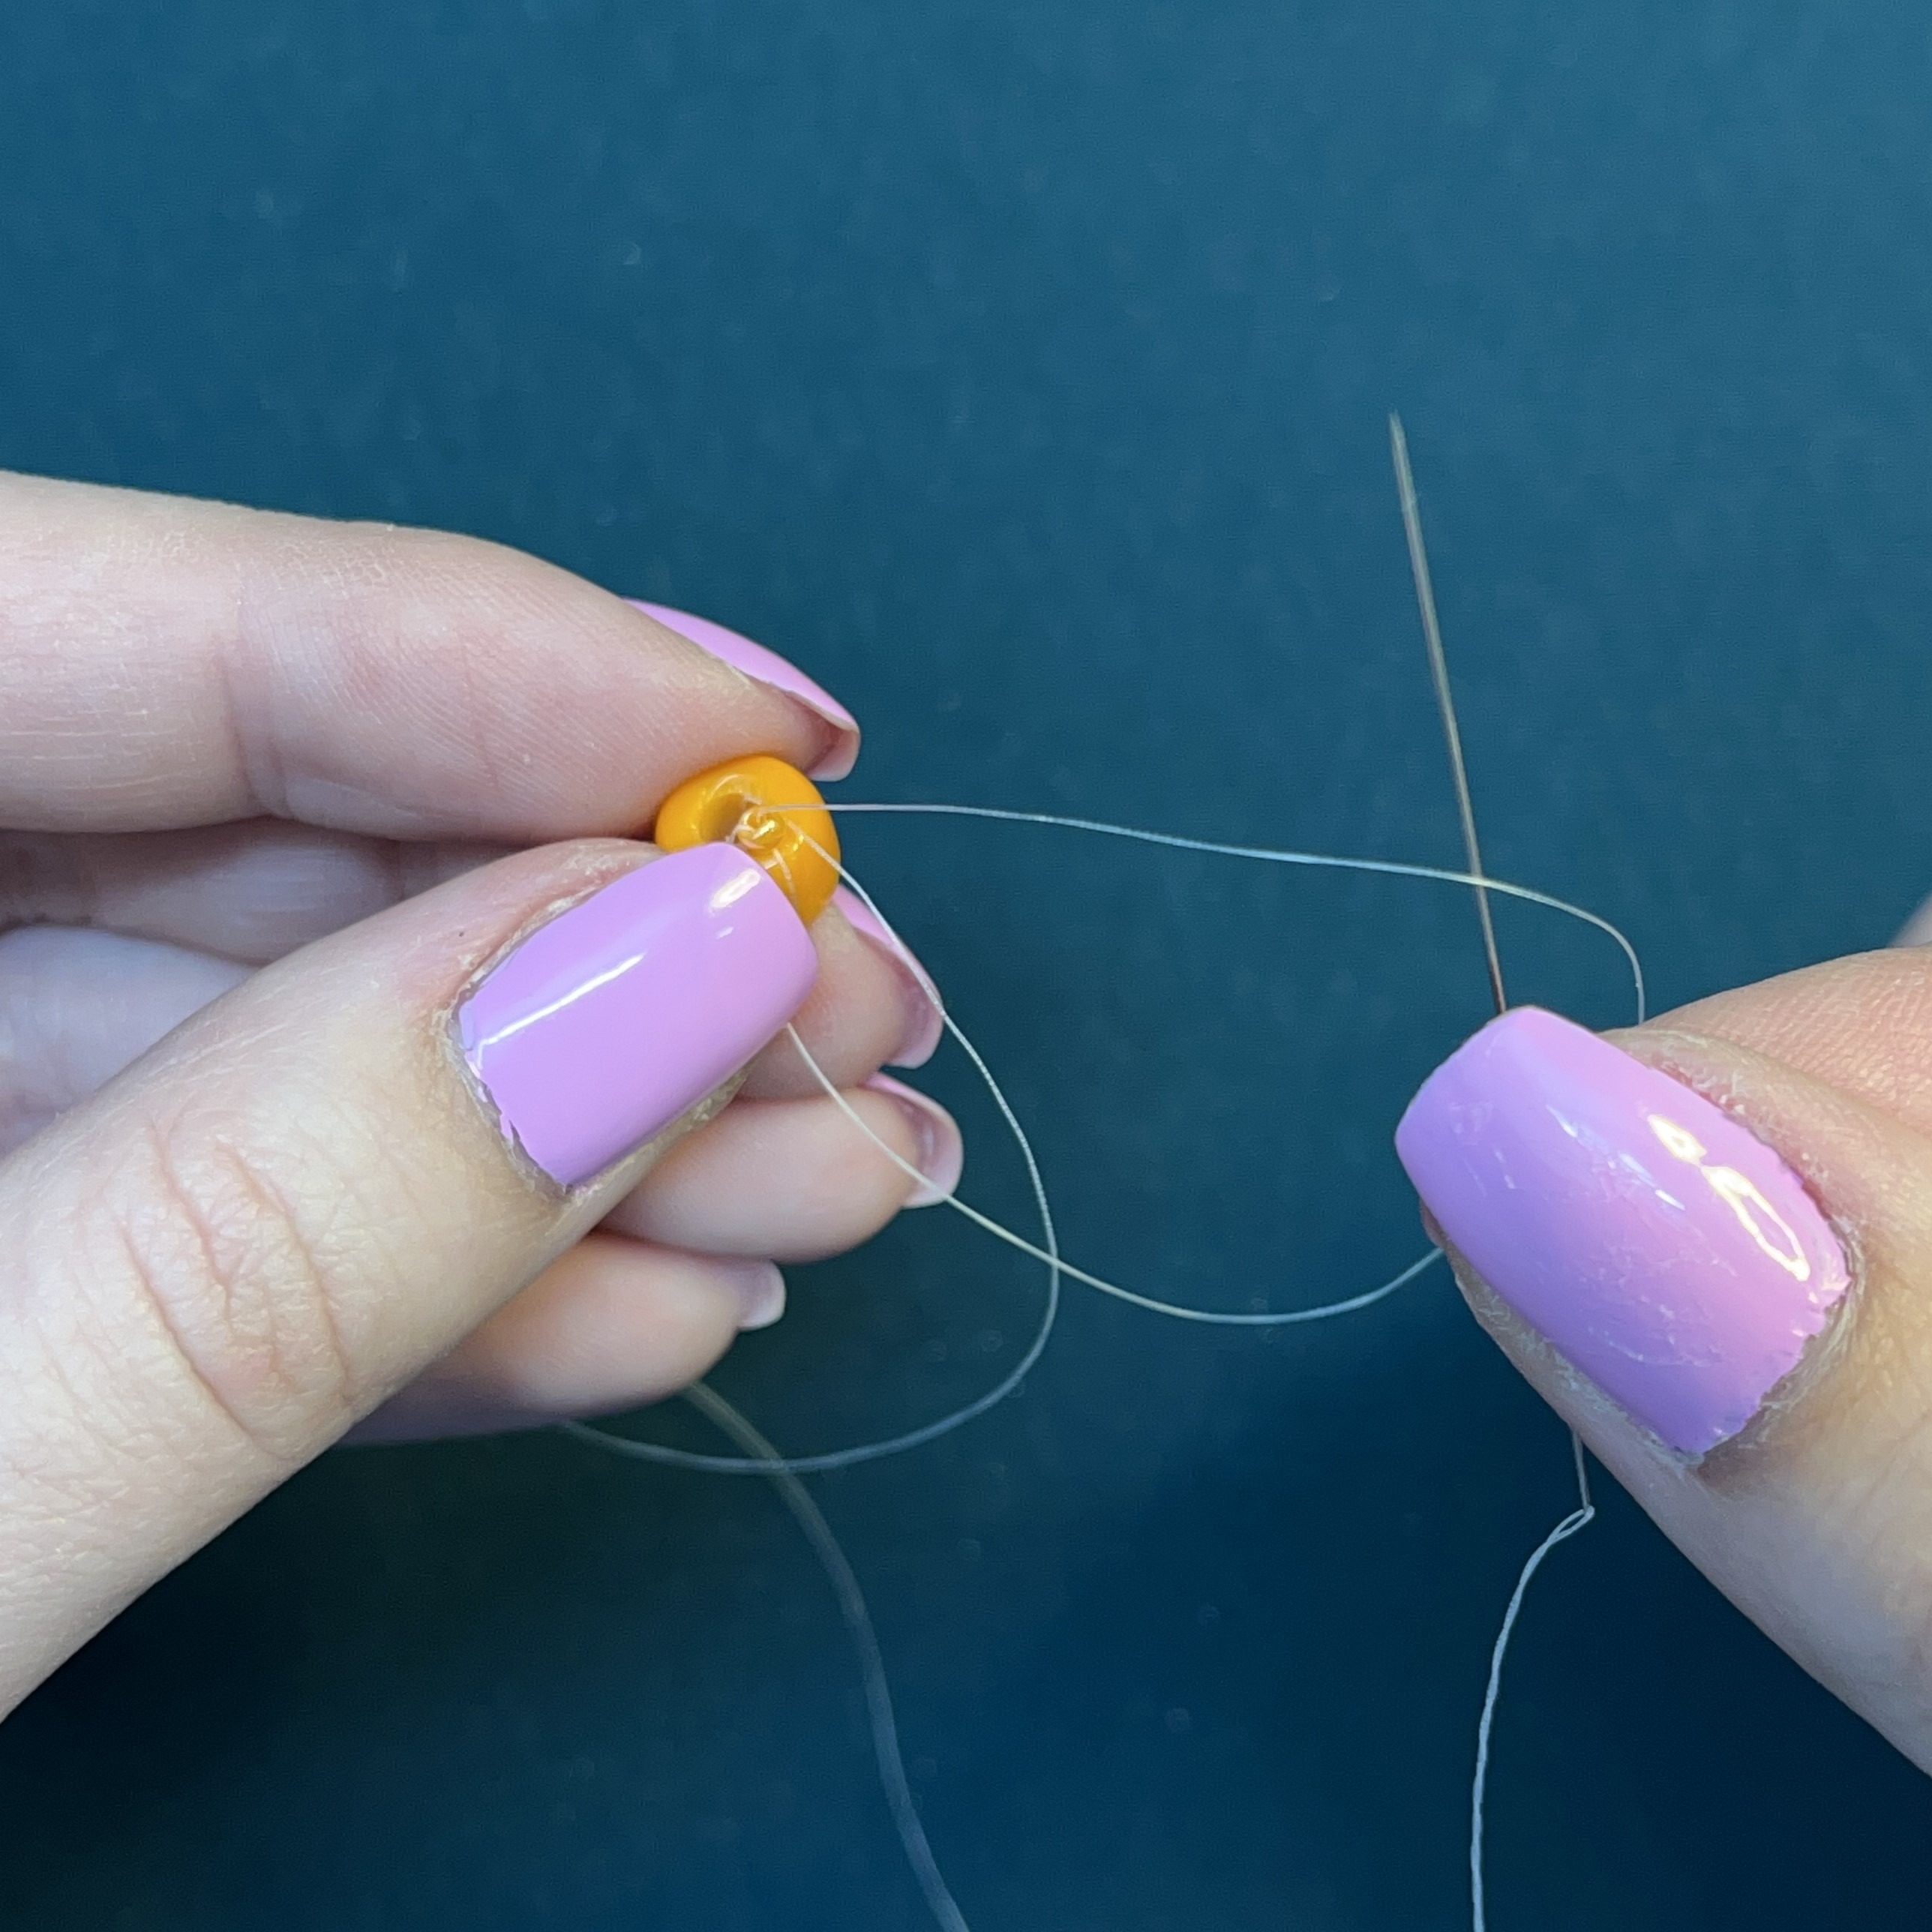
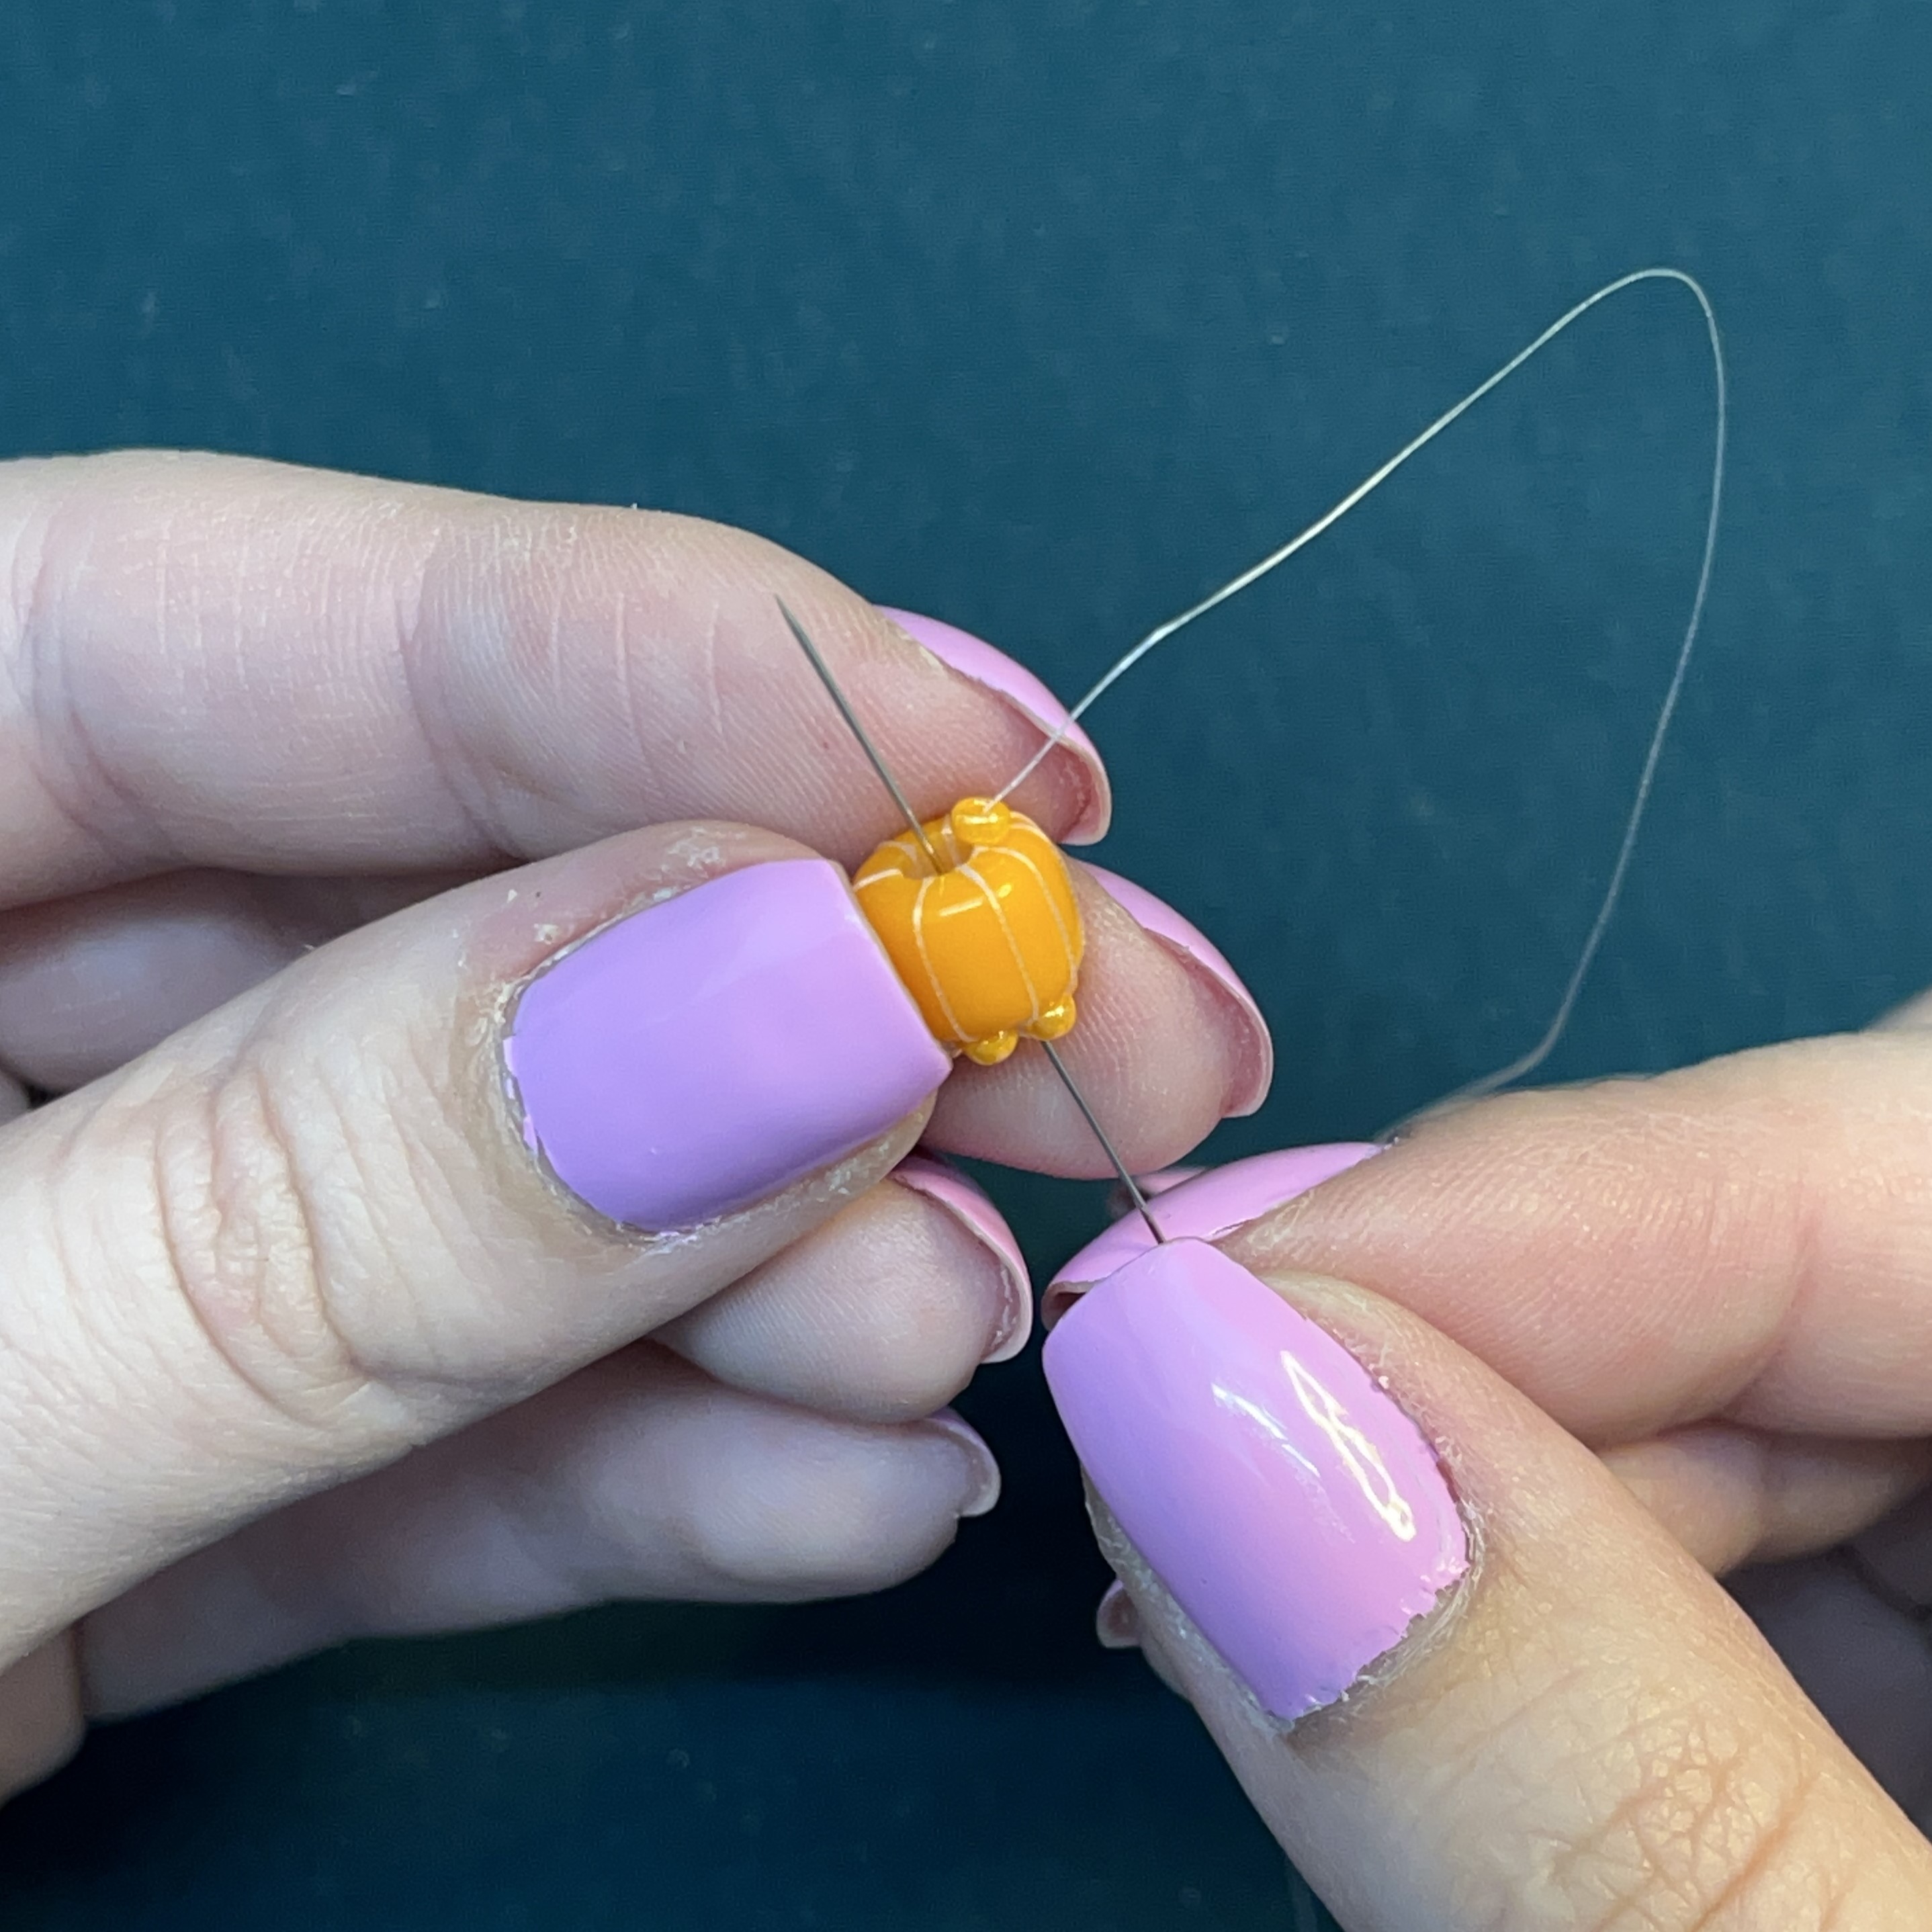
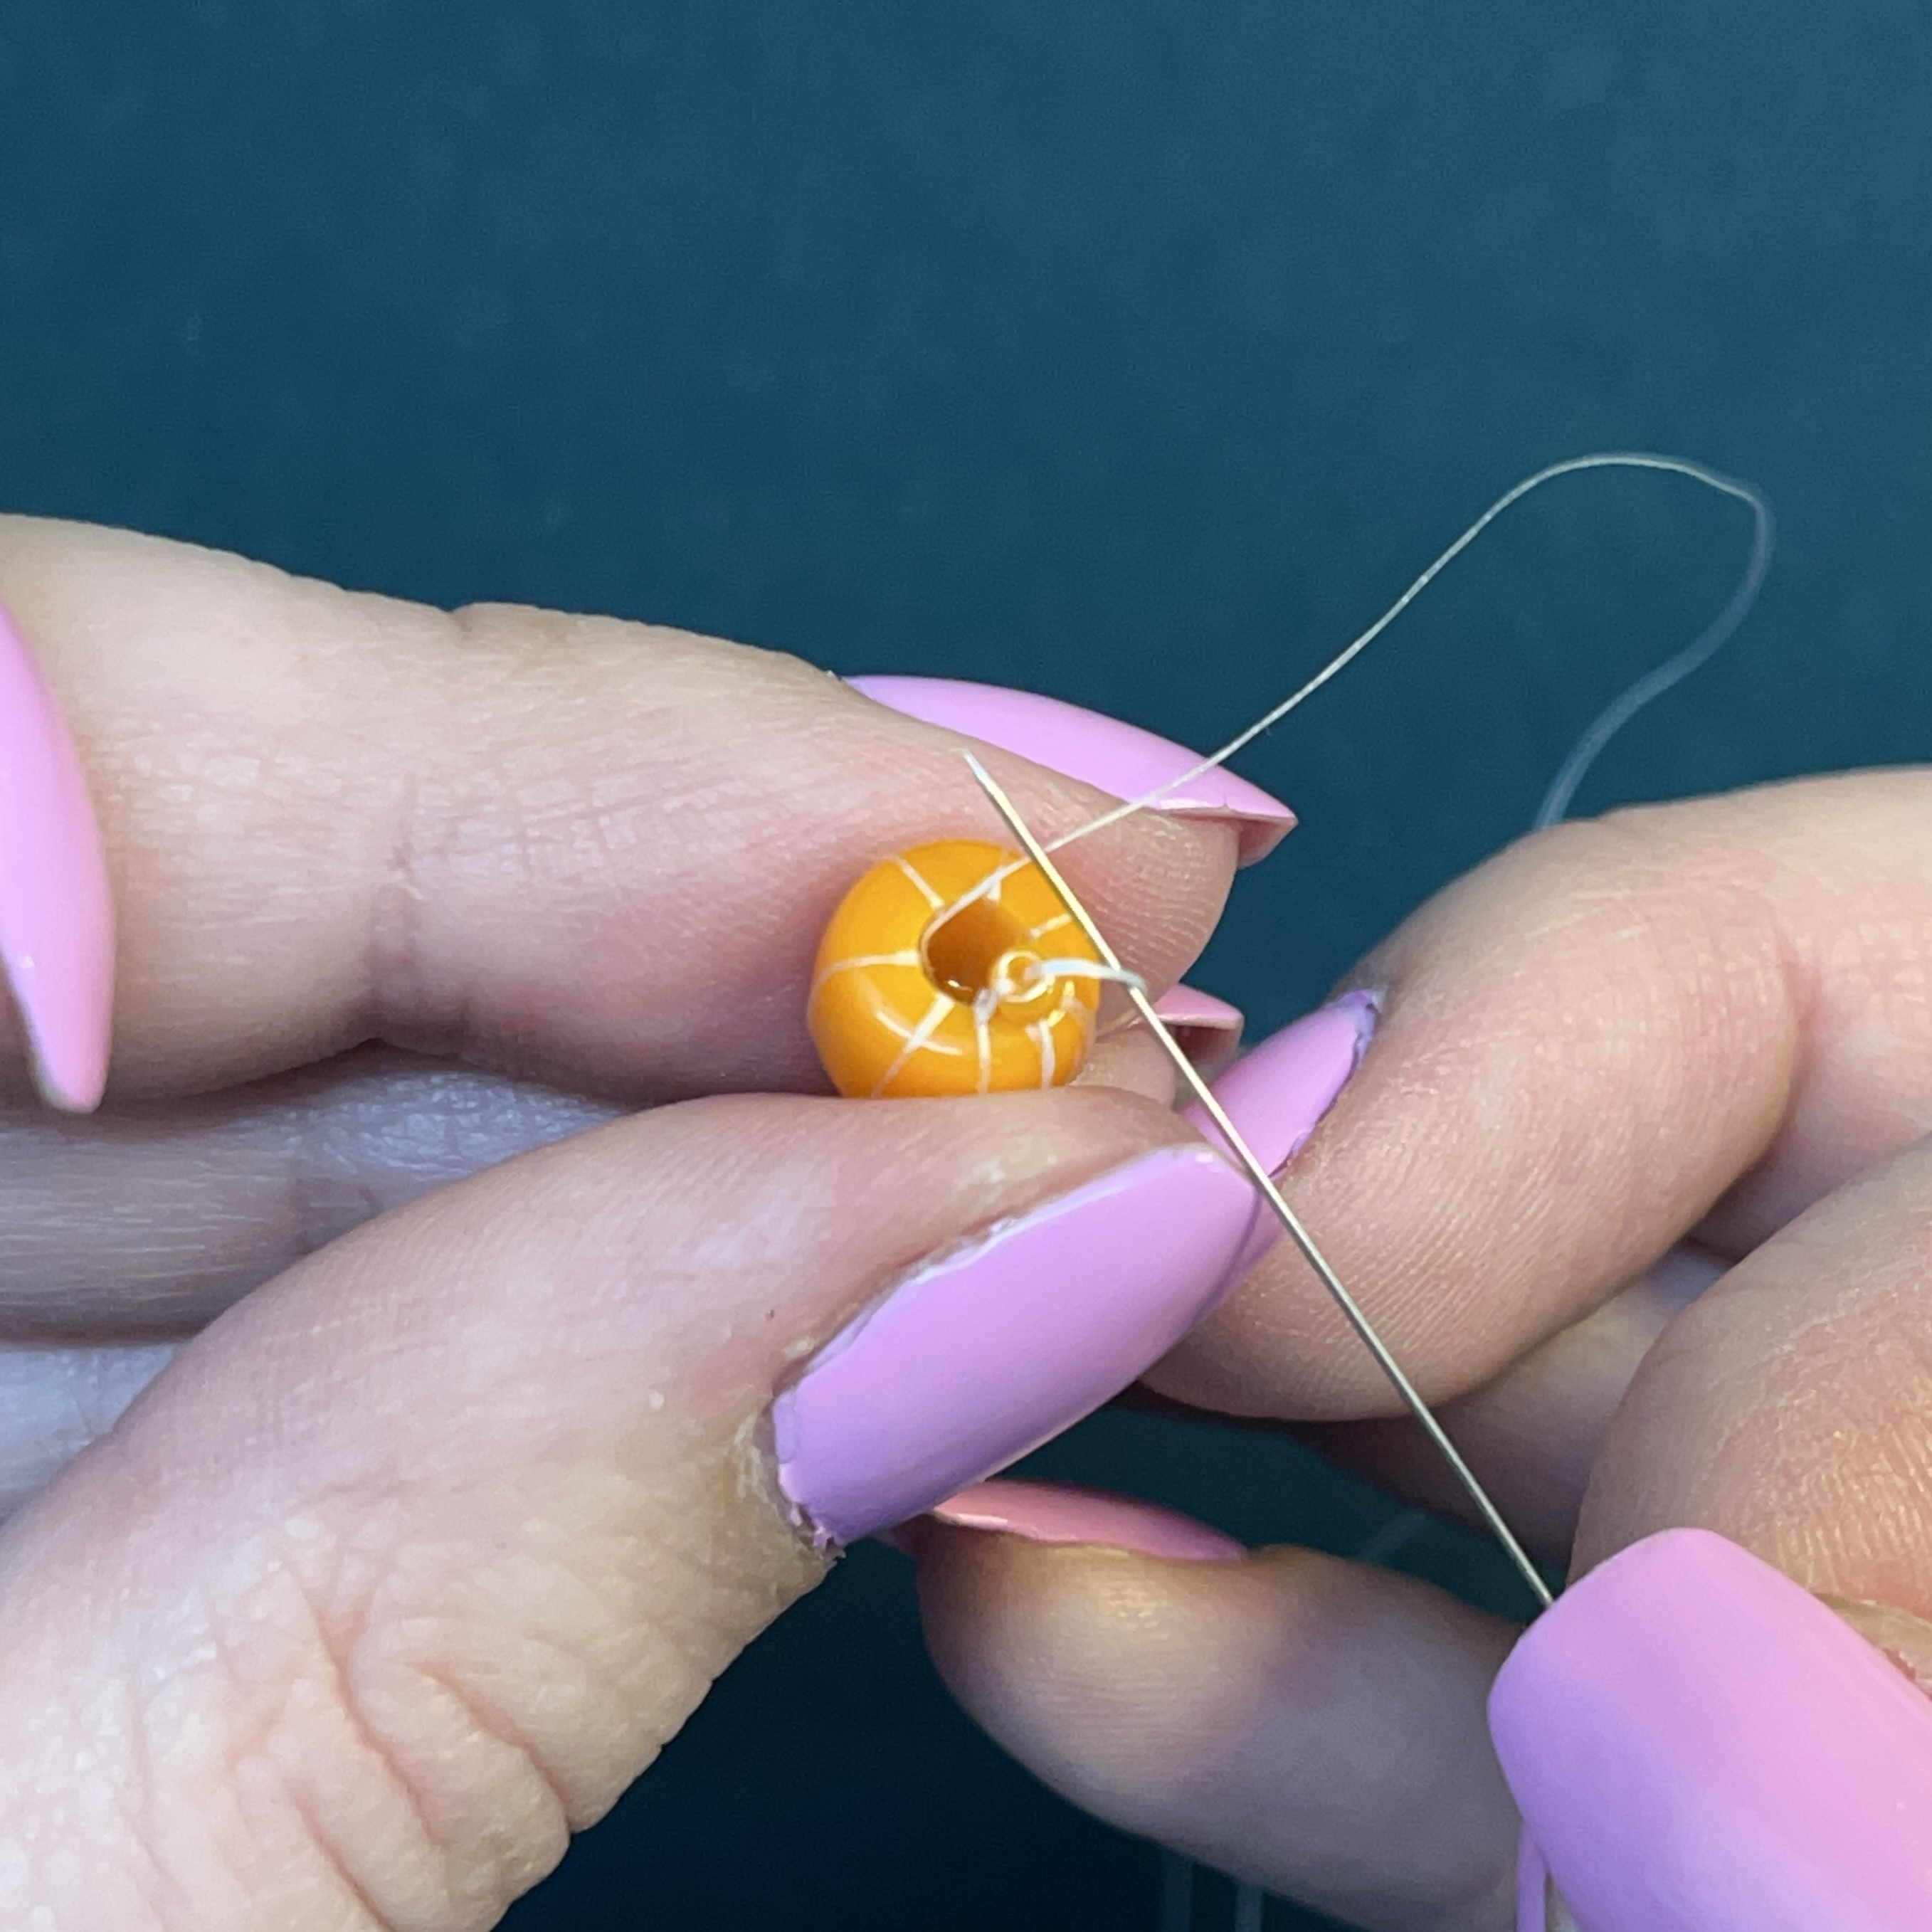
4. Thread one #423 size 11 seed bead and hold at the base of the knot.
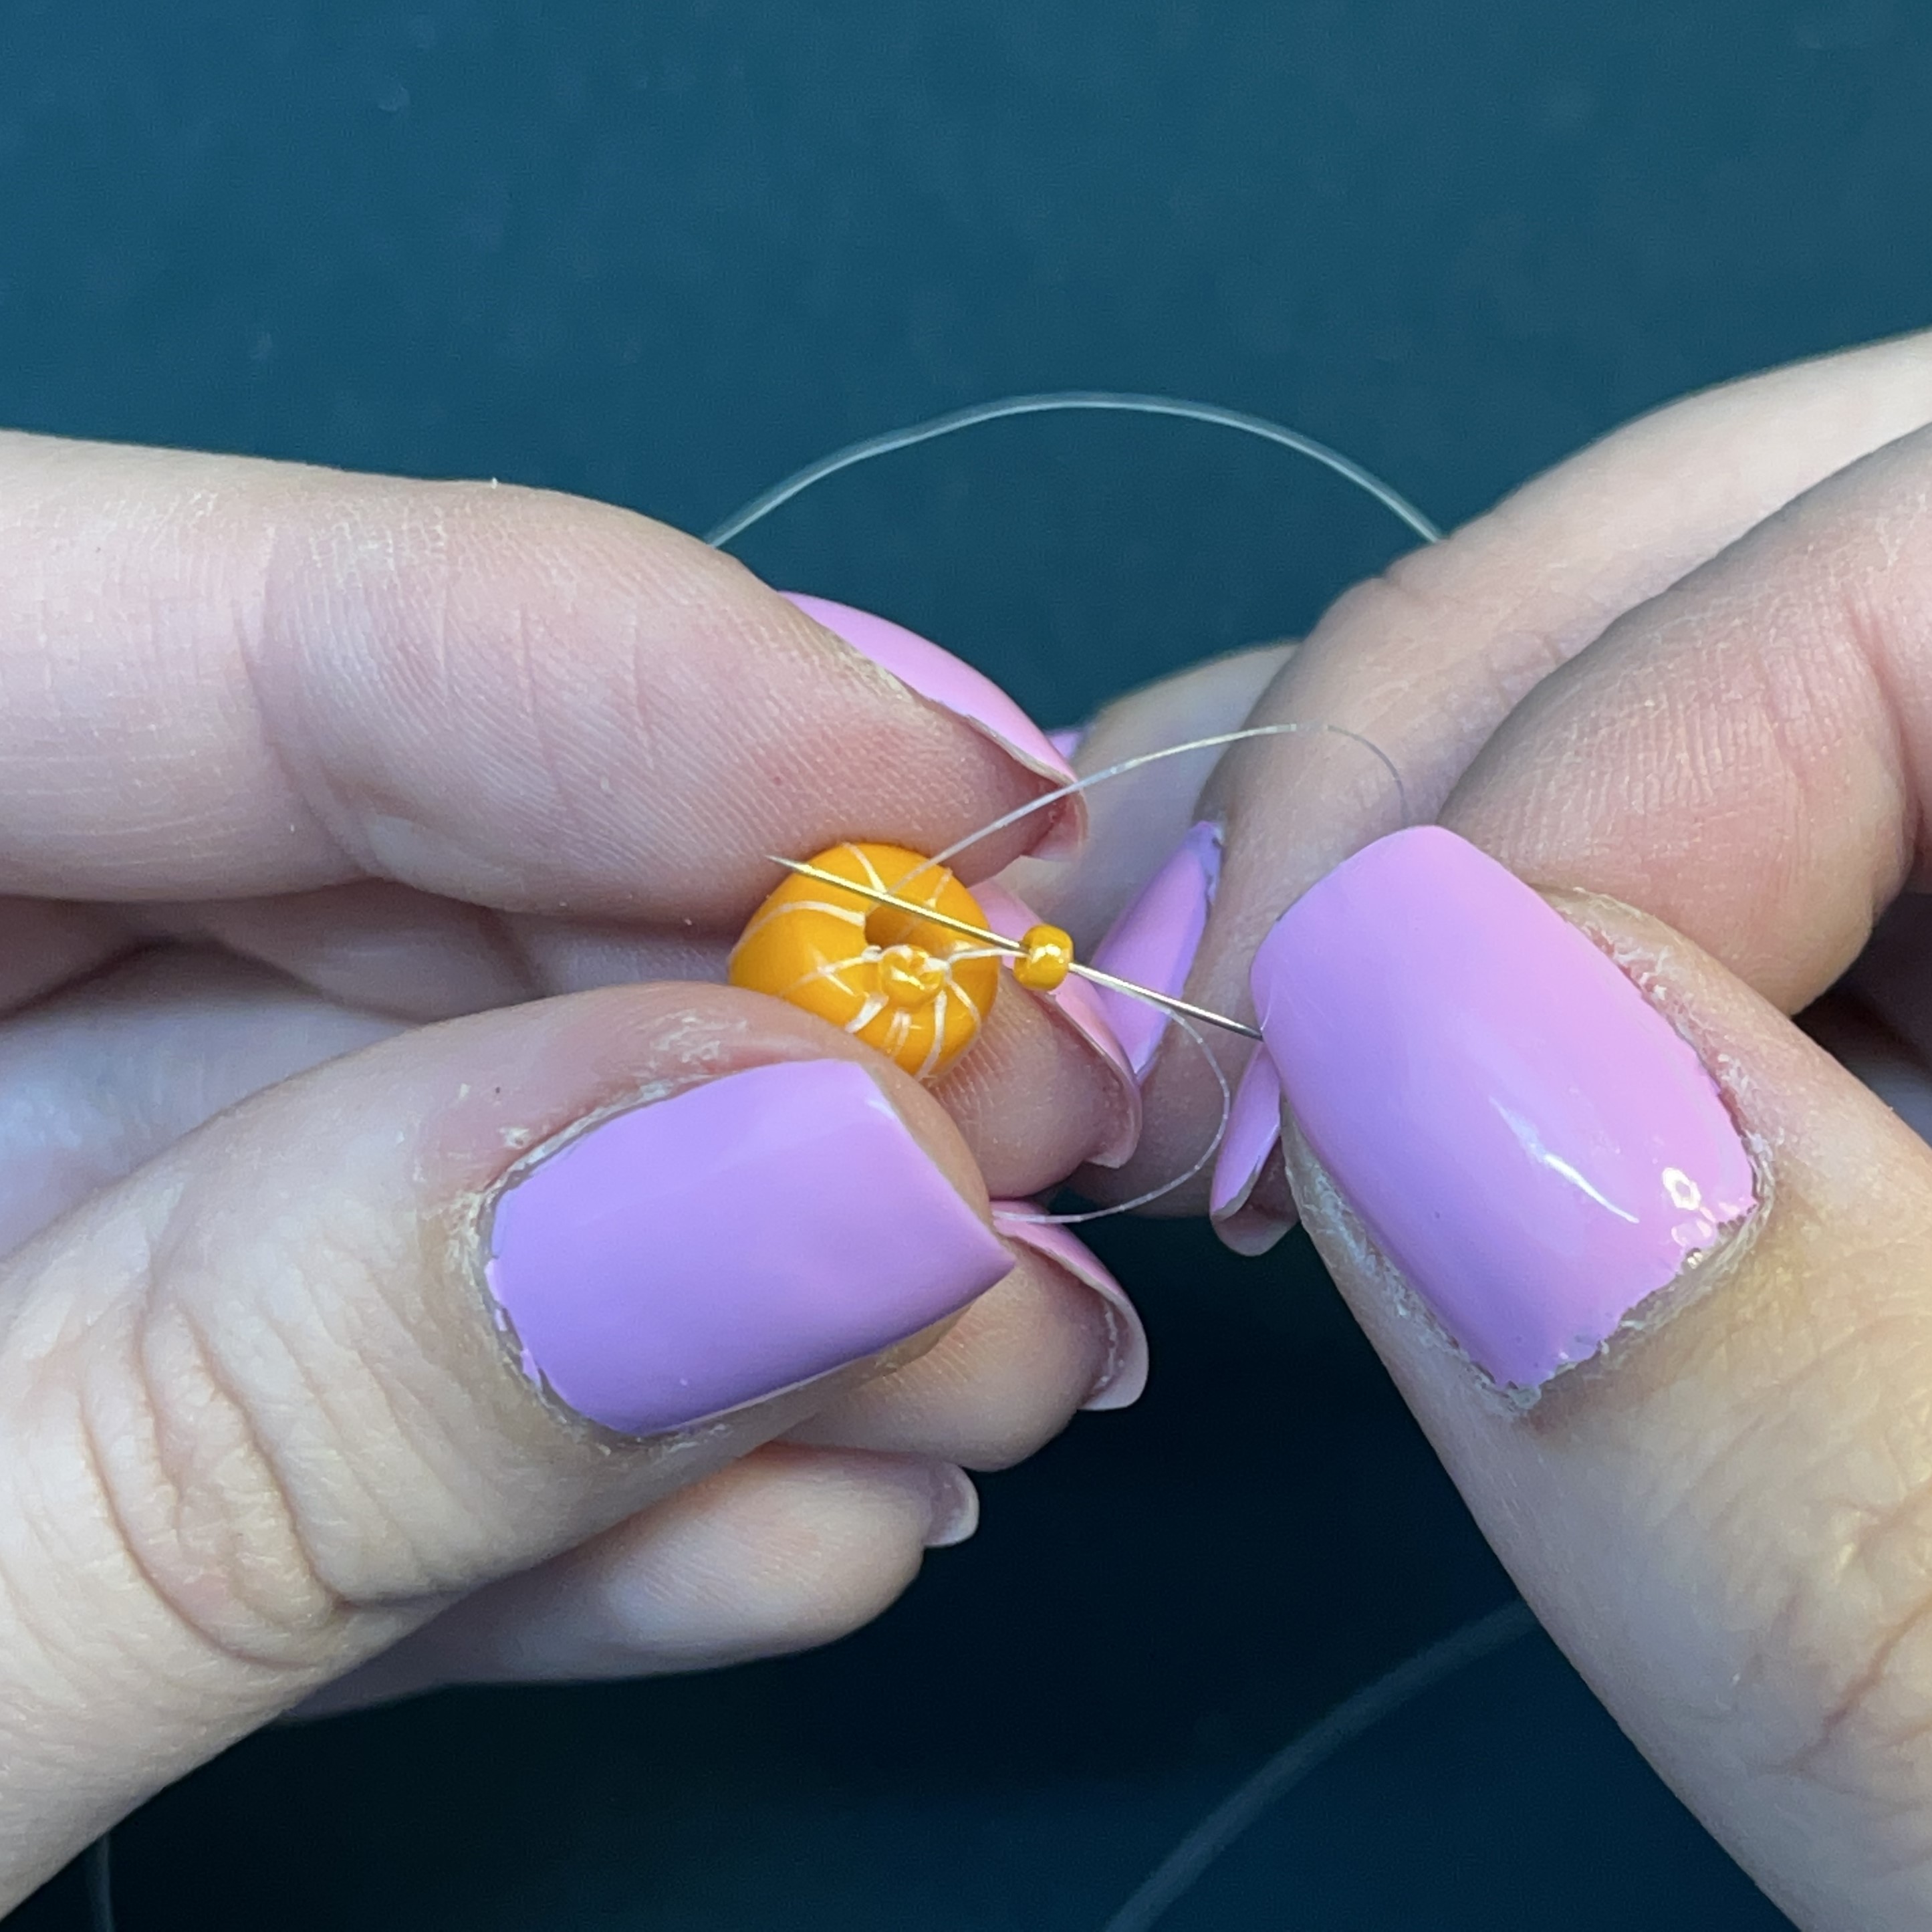
5. Thread the needle back through the forte bead like the picture. Keep the seed bead at the top of the forte bead.
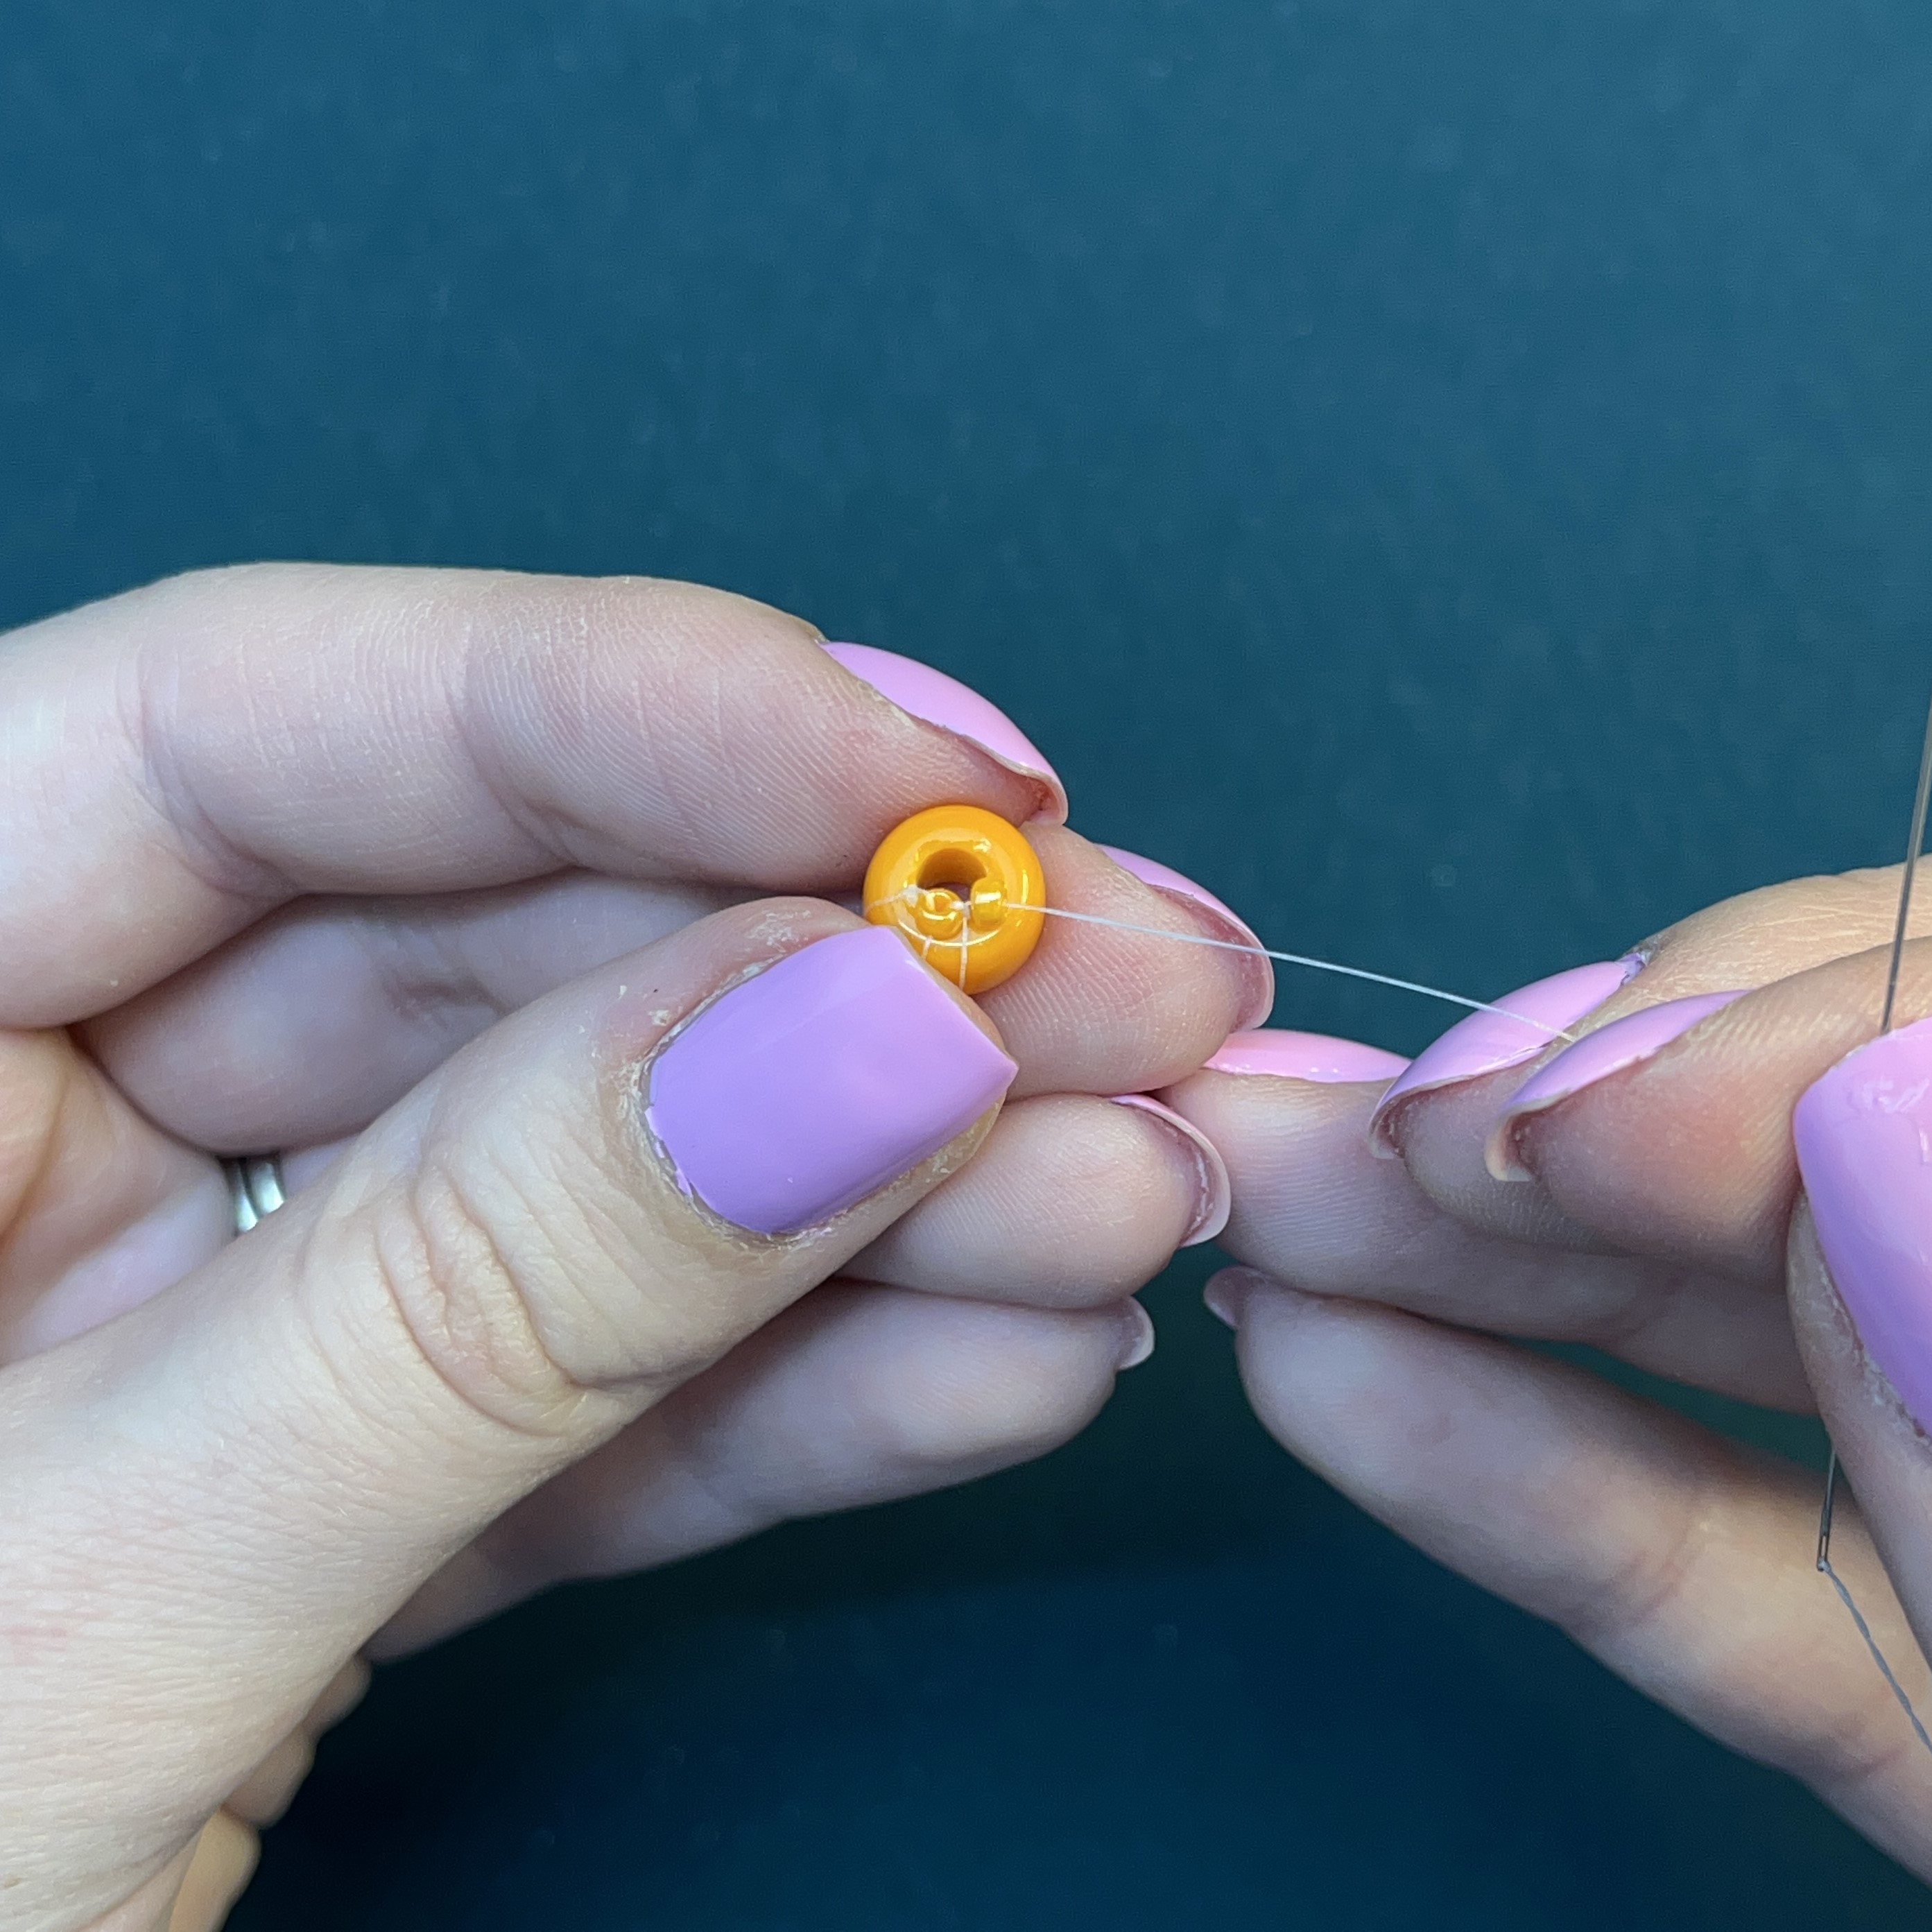
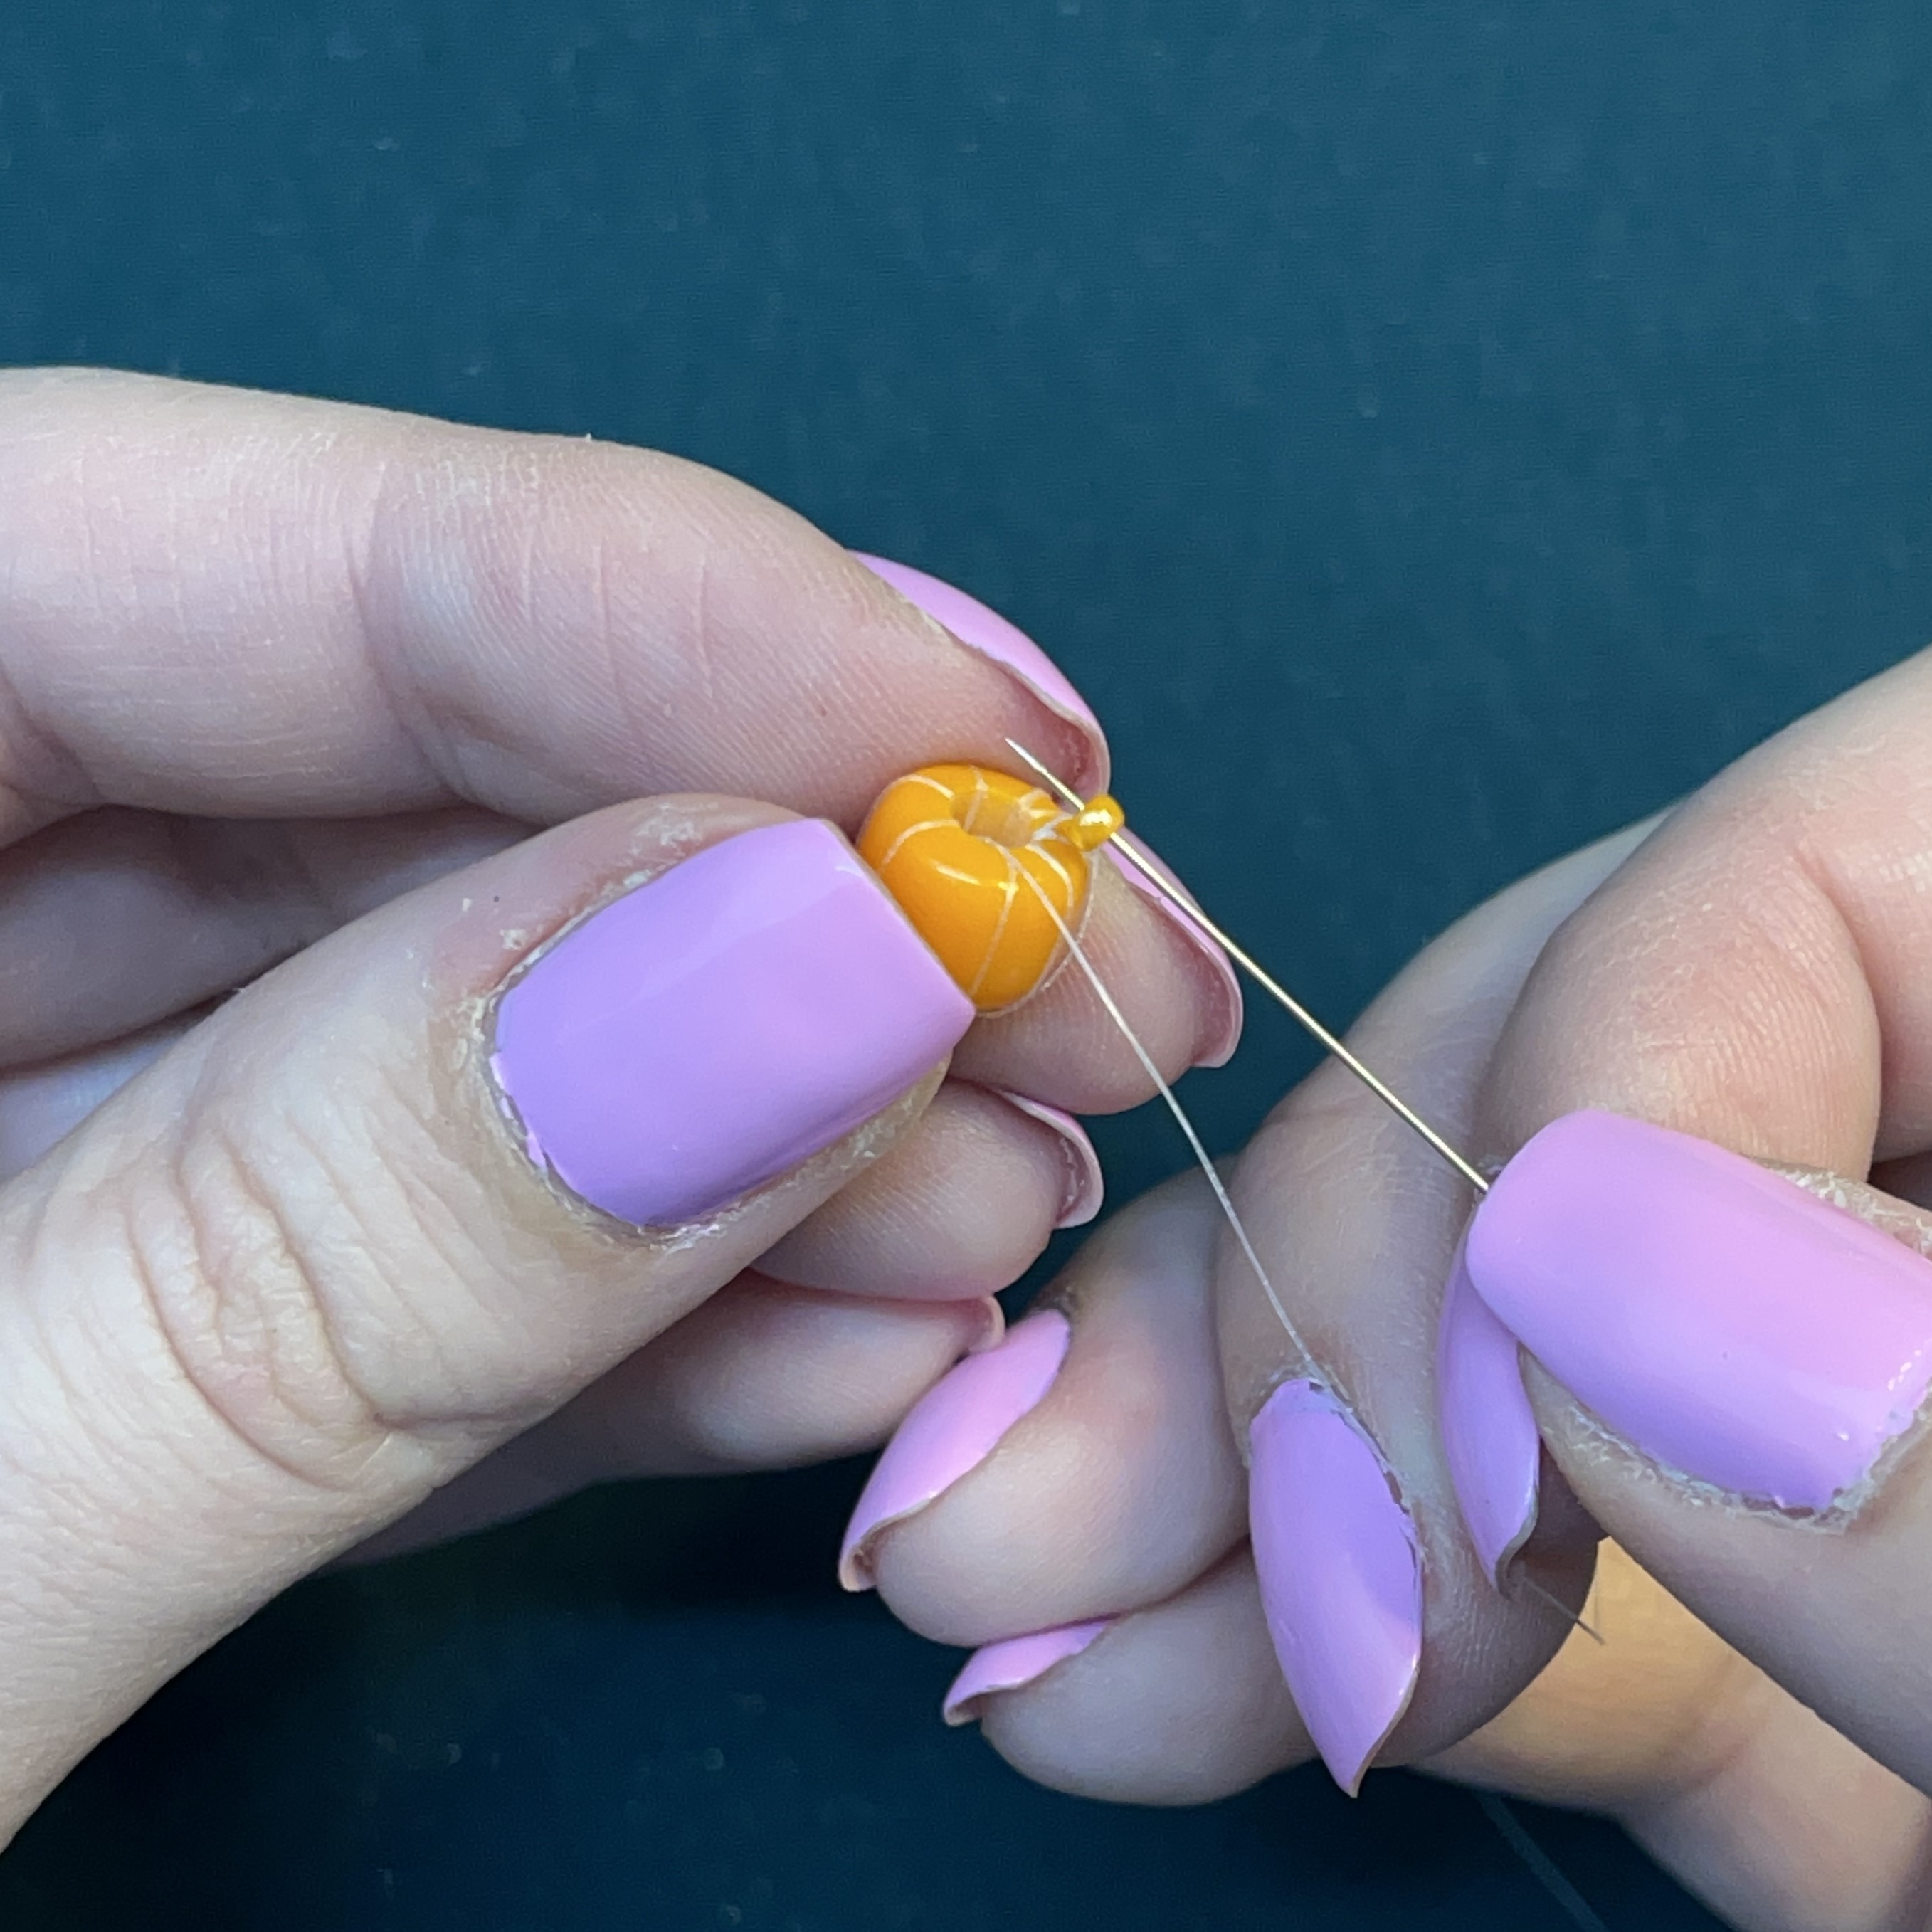
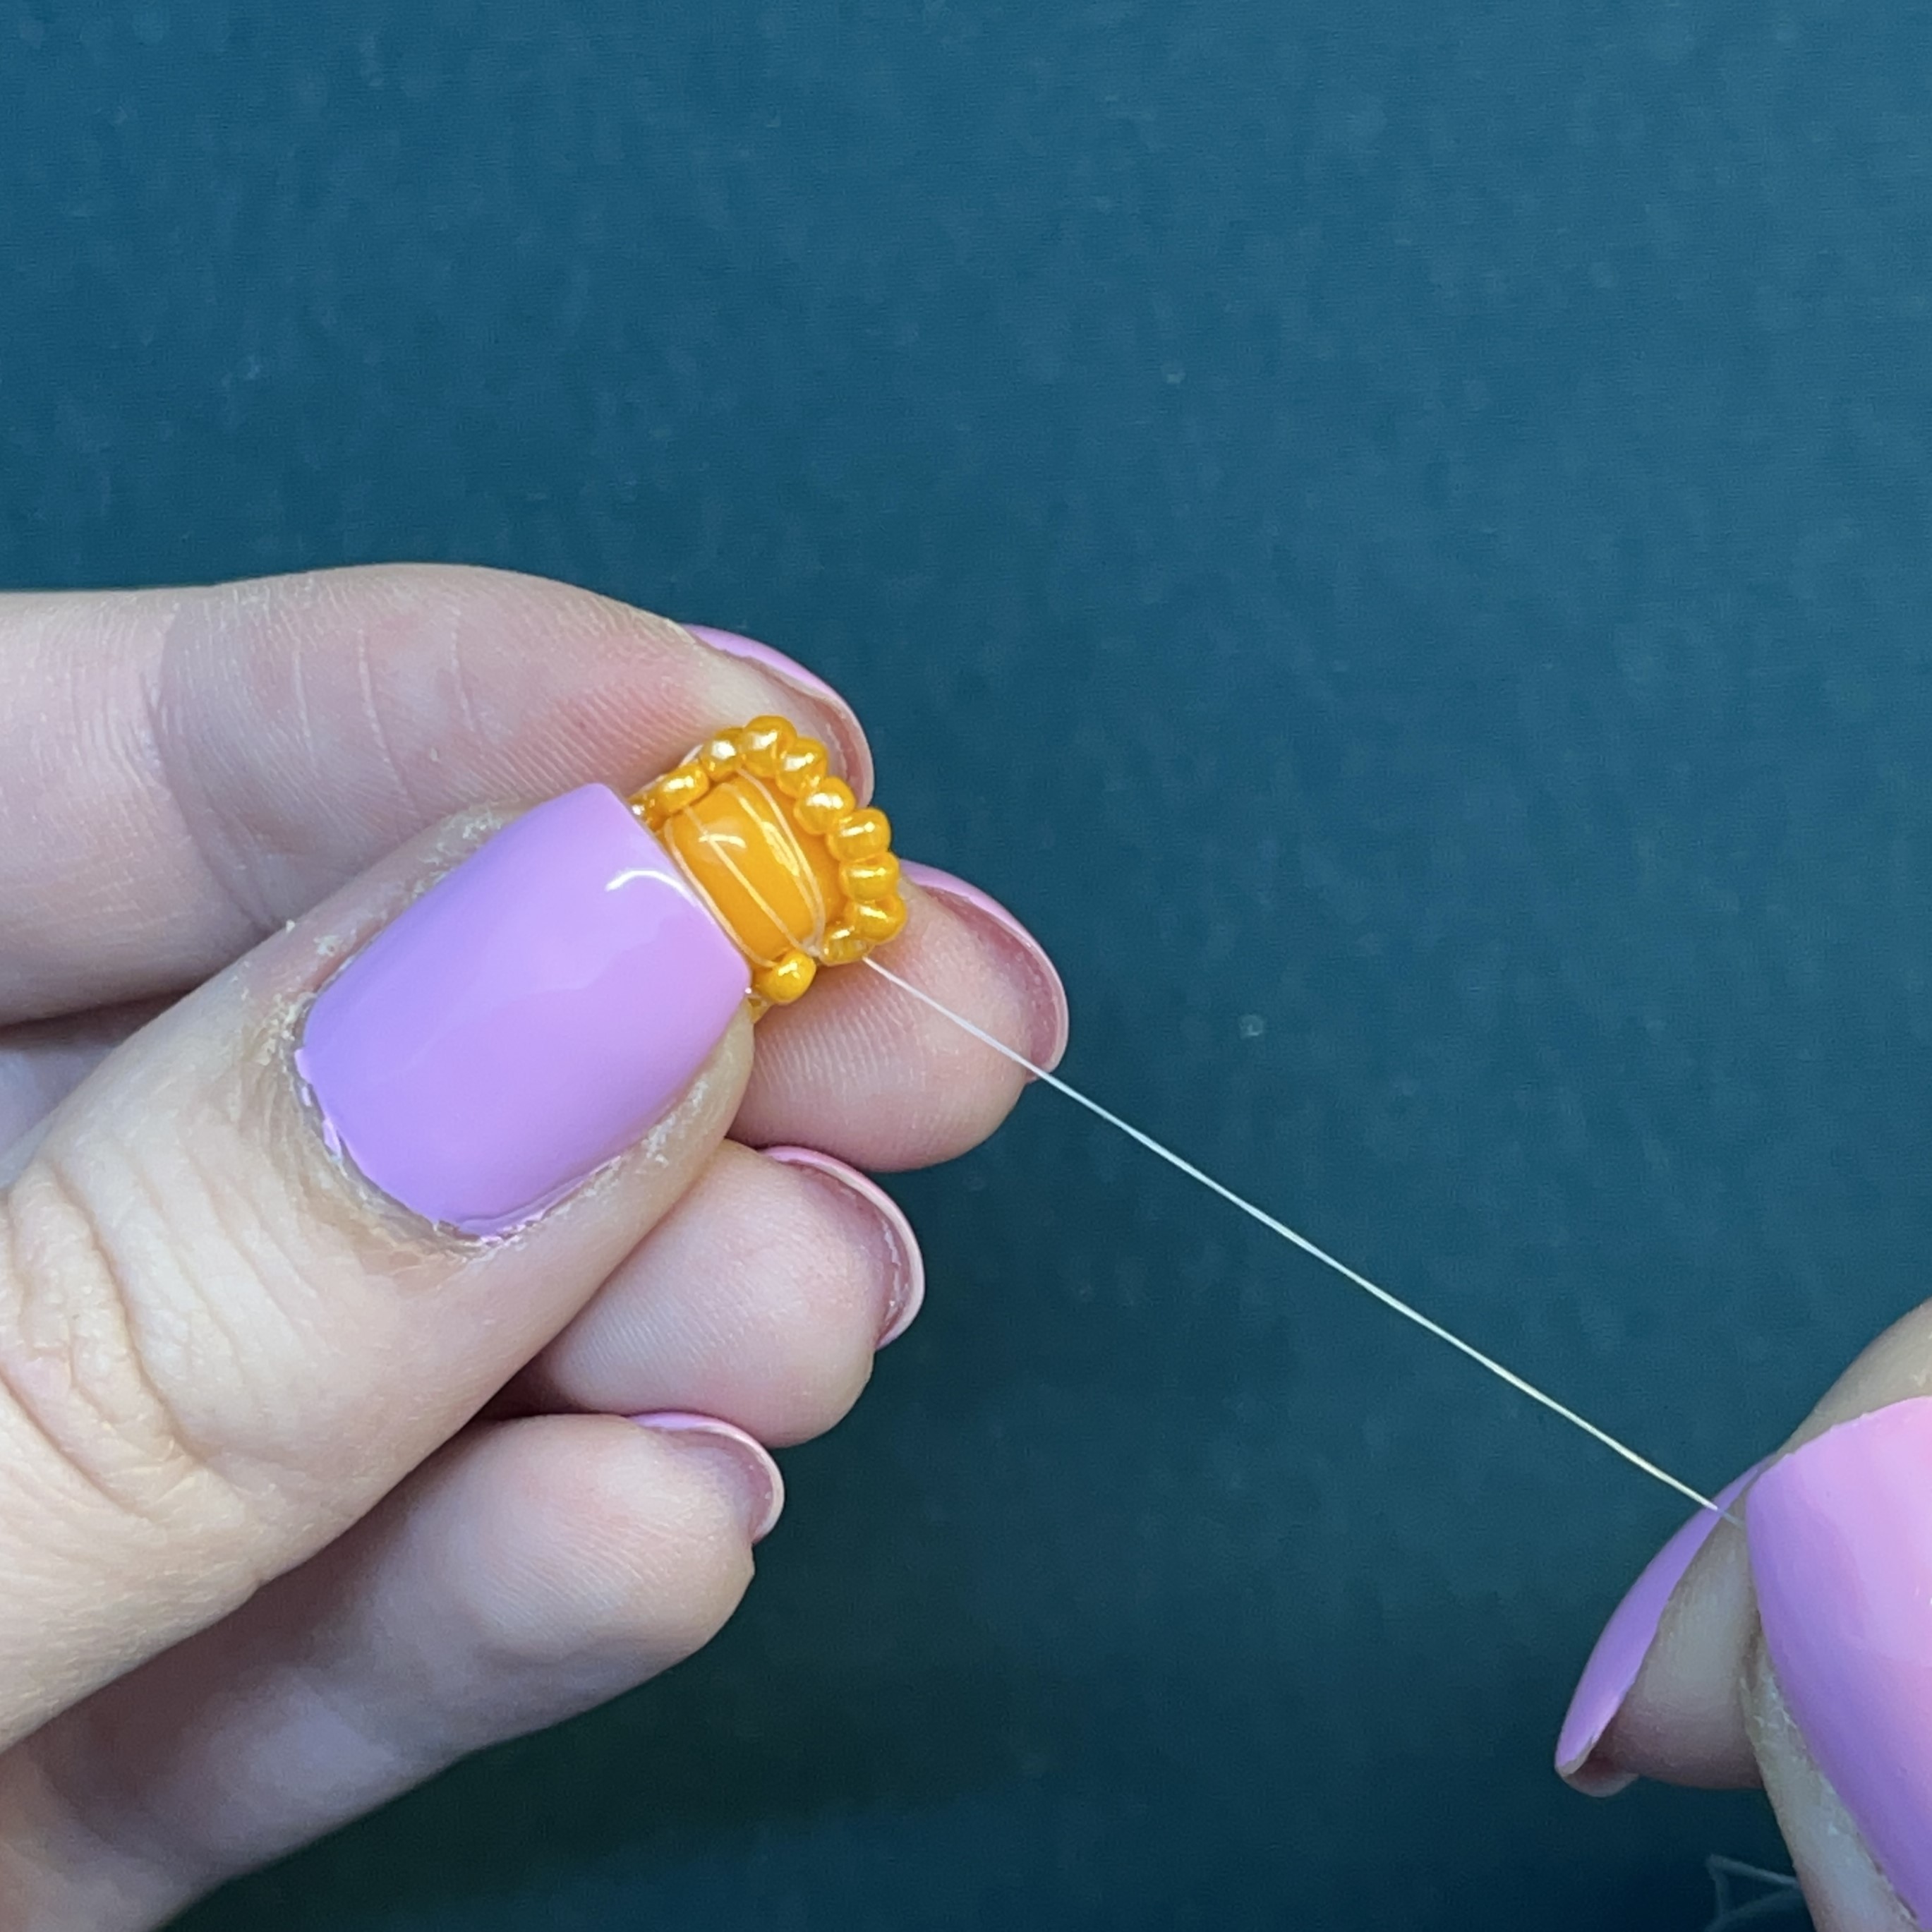
6. Pull the thread mostly through and then thread the needle through the seed bead going from the right to the left.
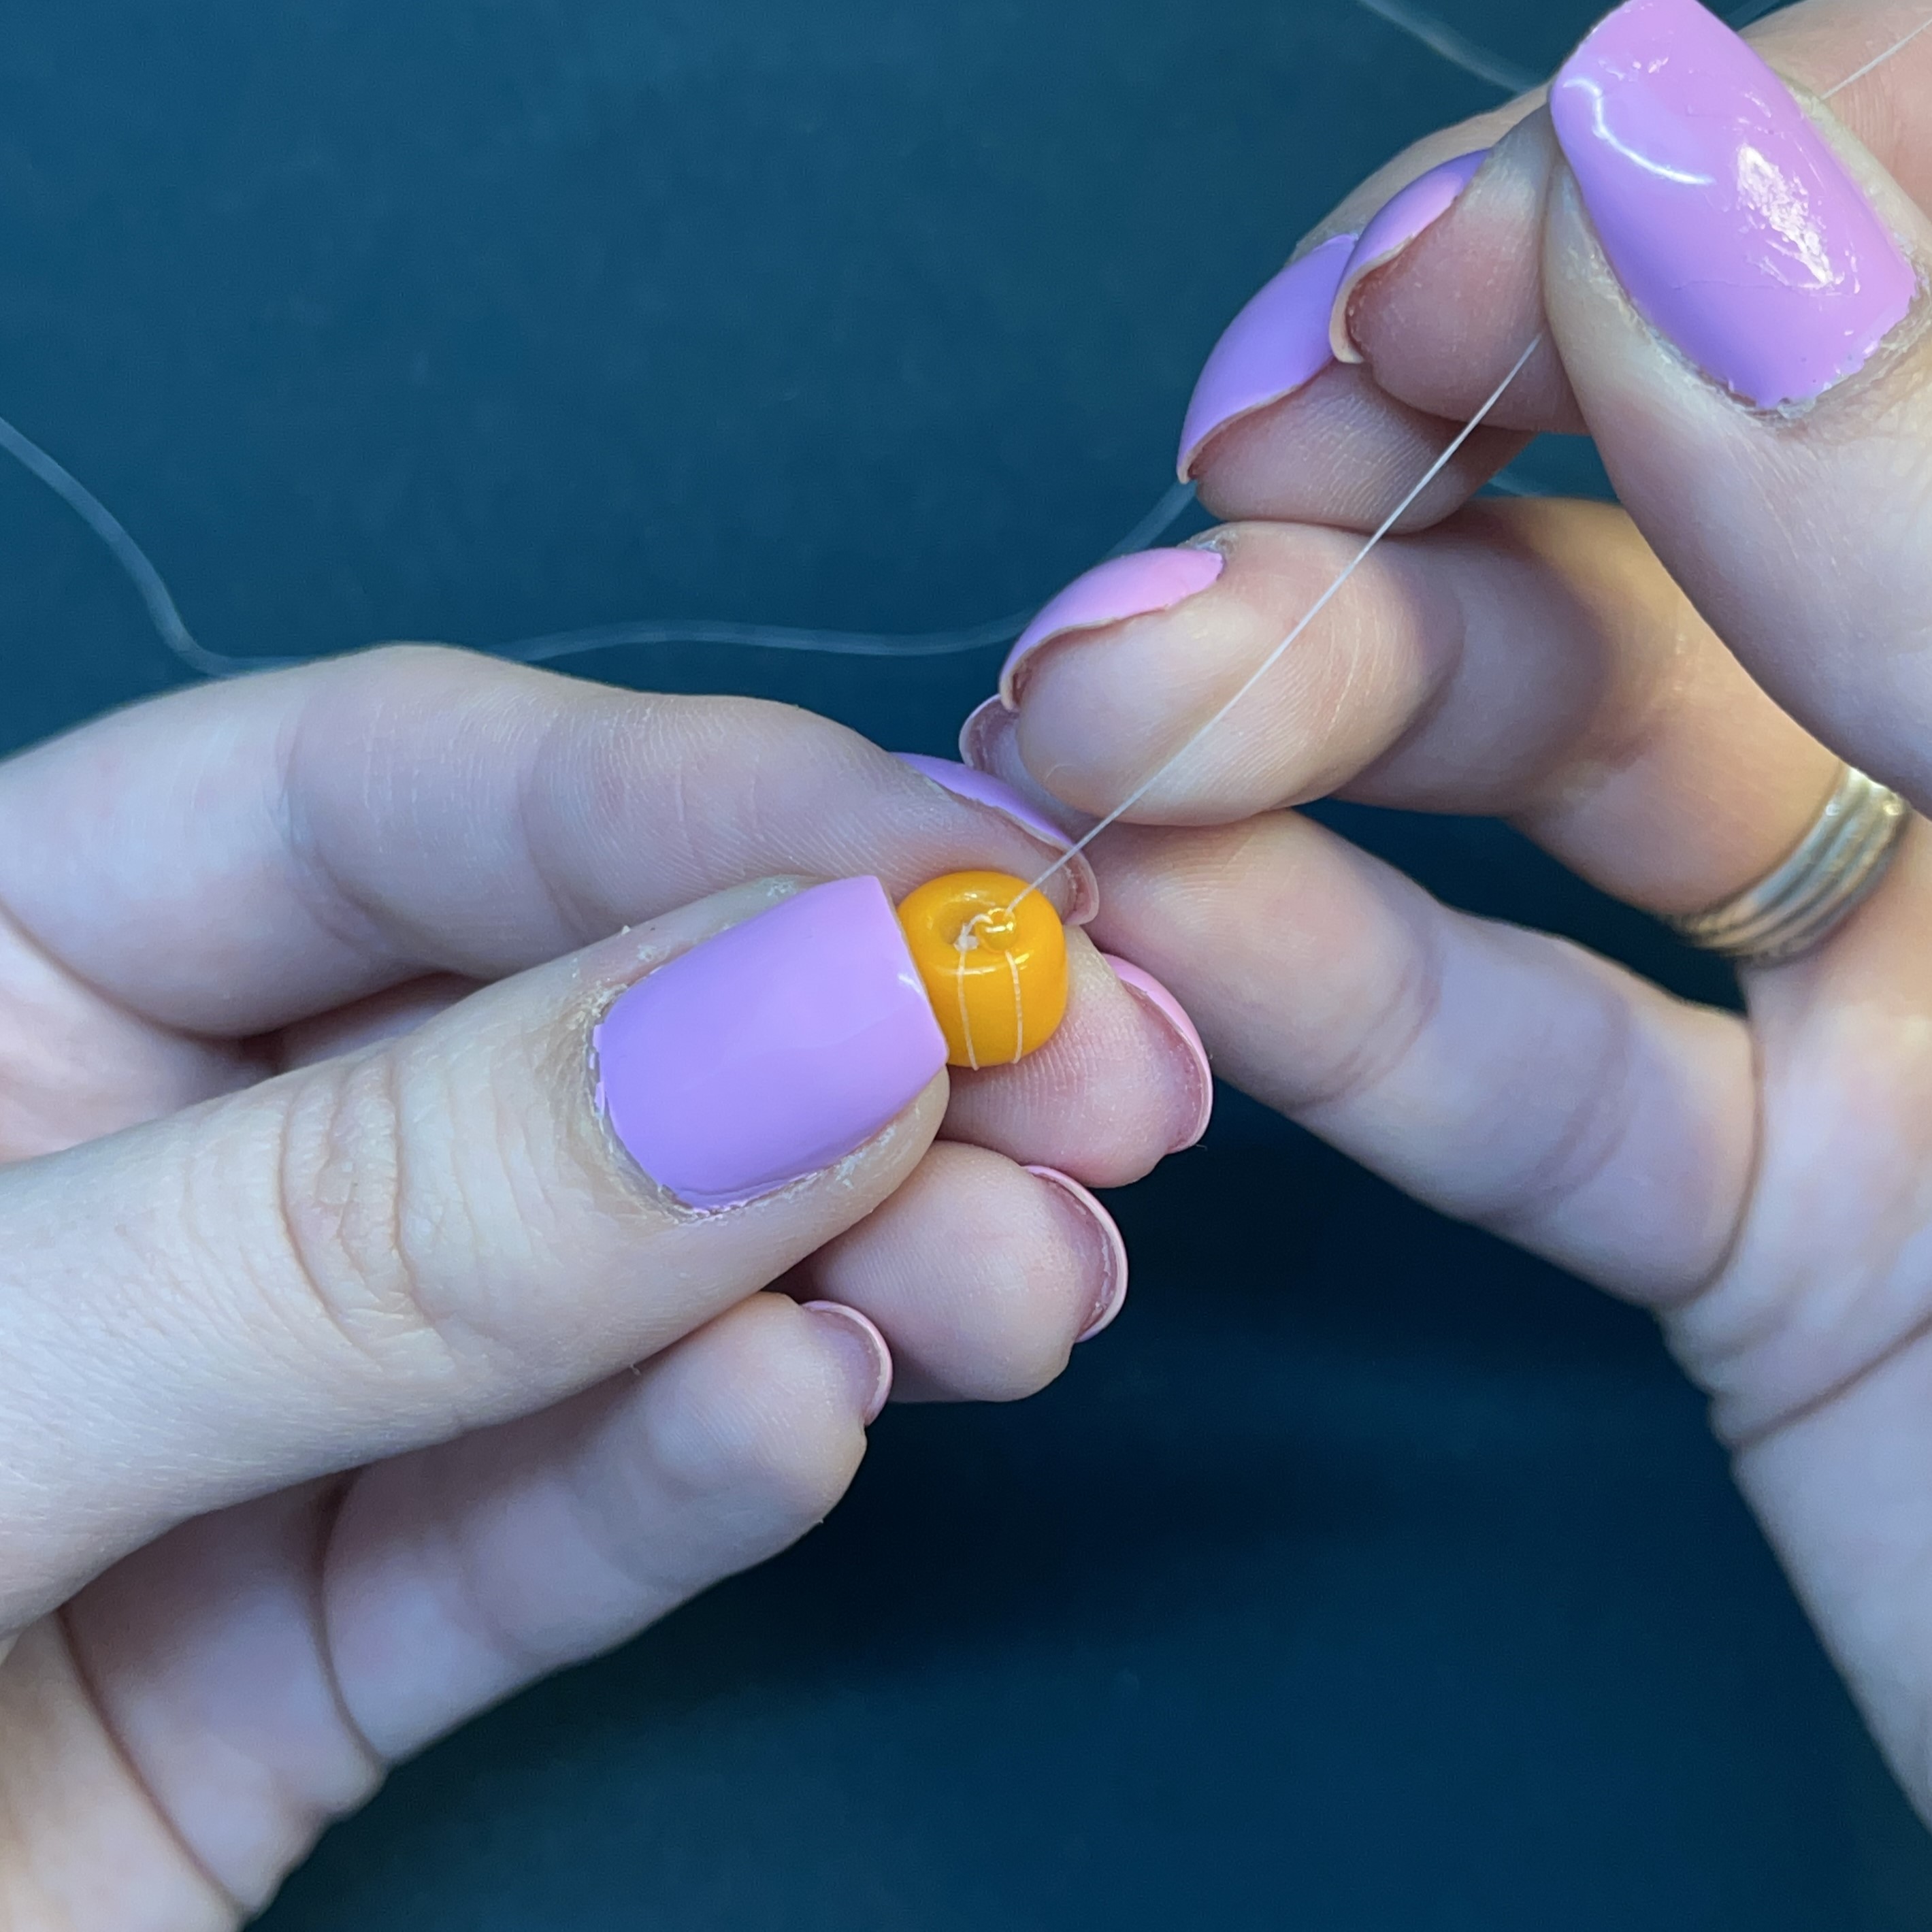
7. It should look like this. Pull it tight while making sure the seed bead stays snug at the top of the forte bead.
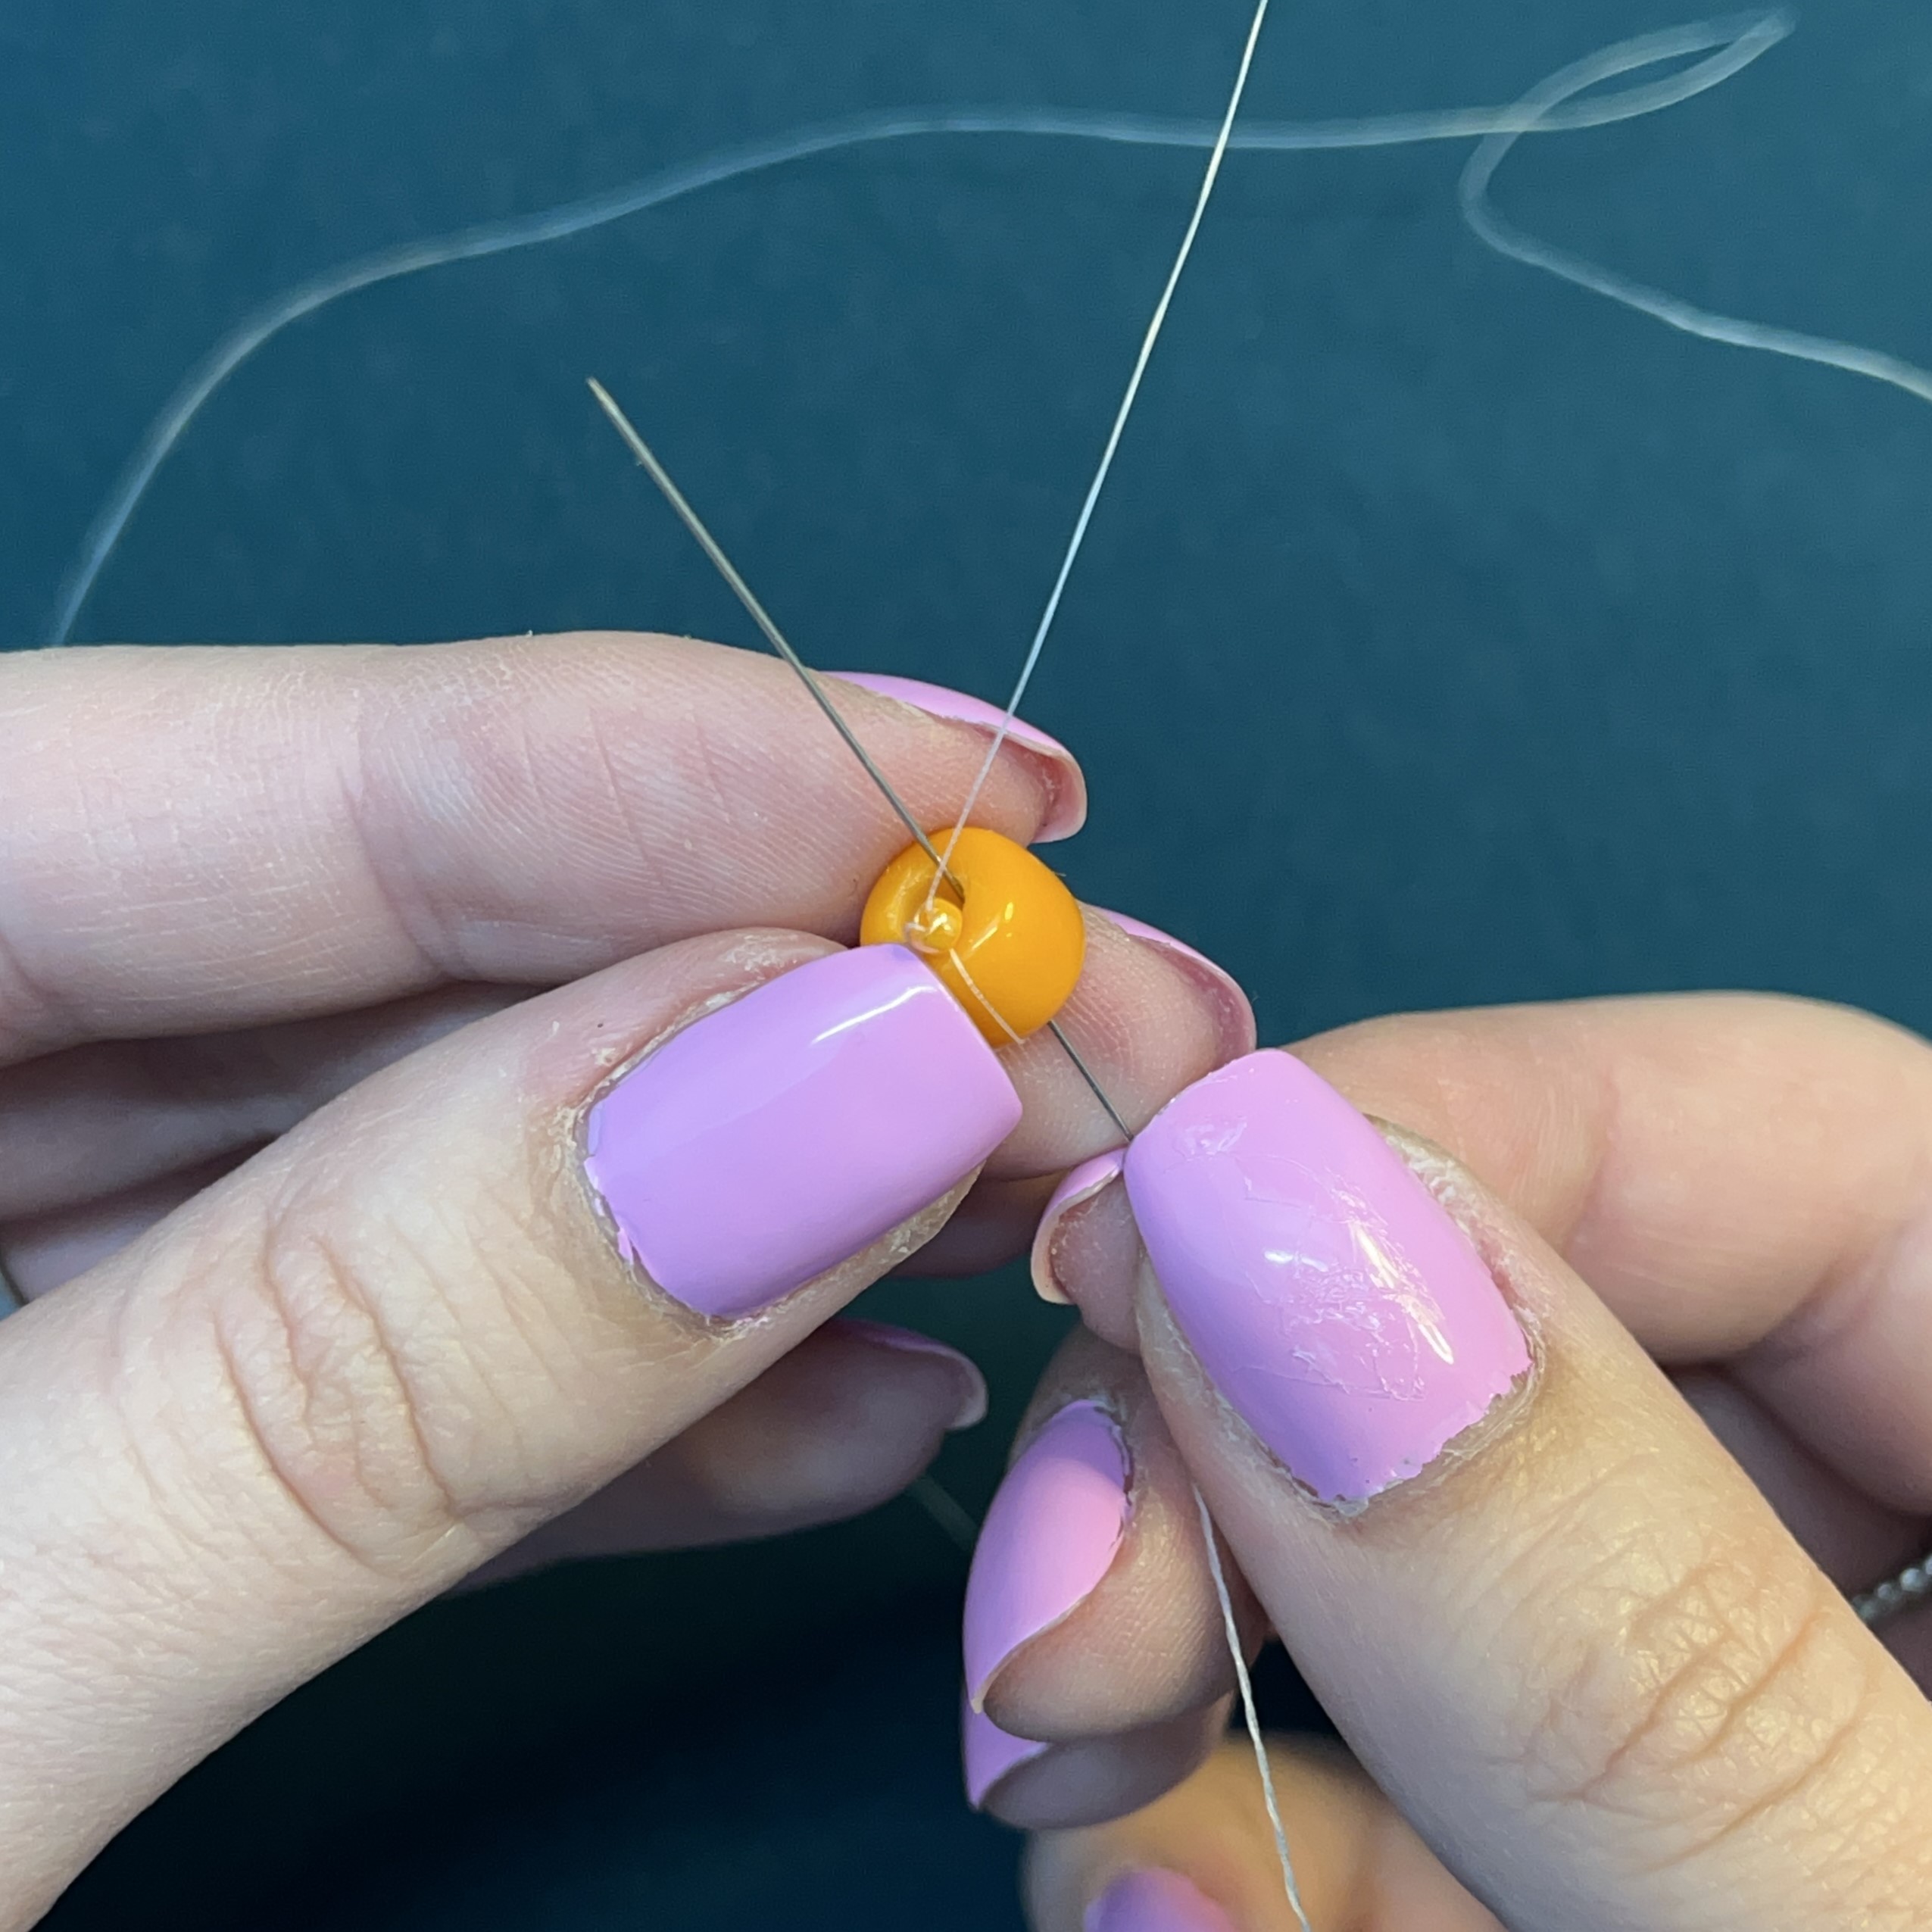
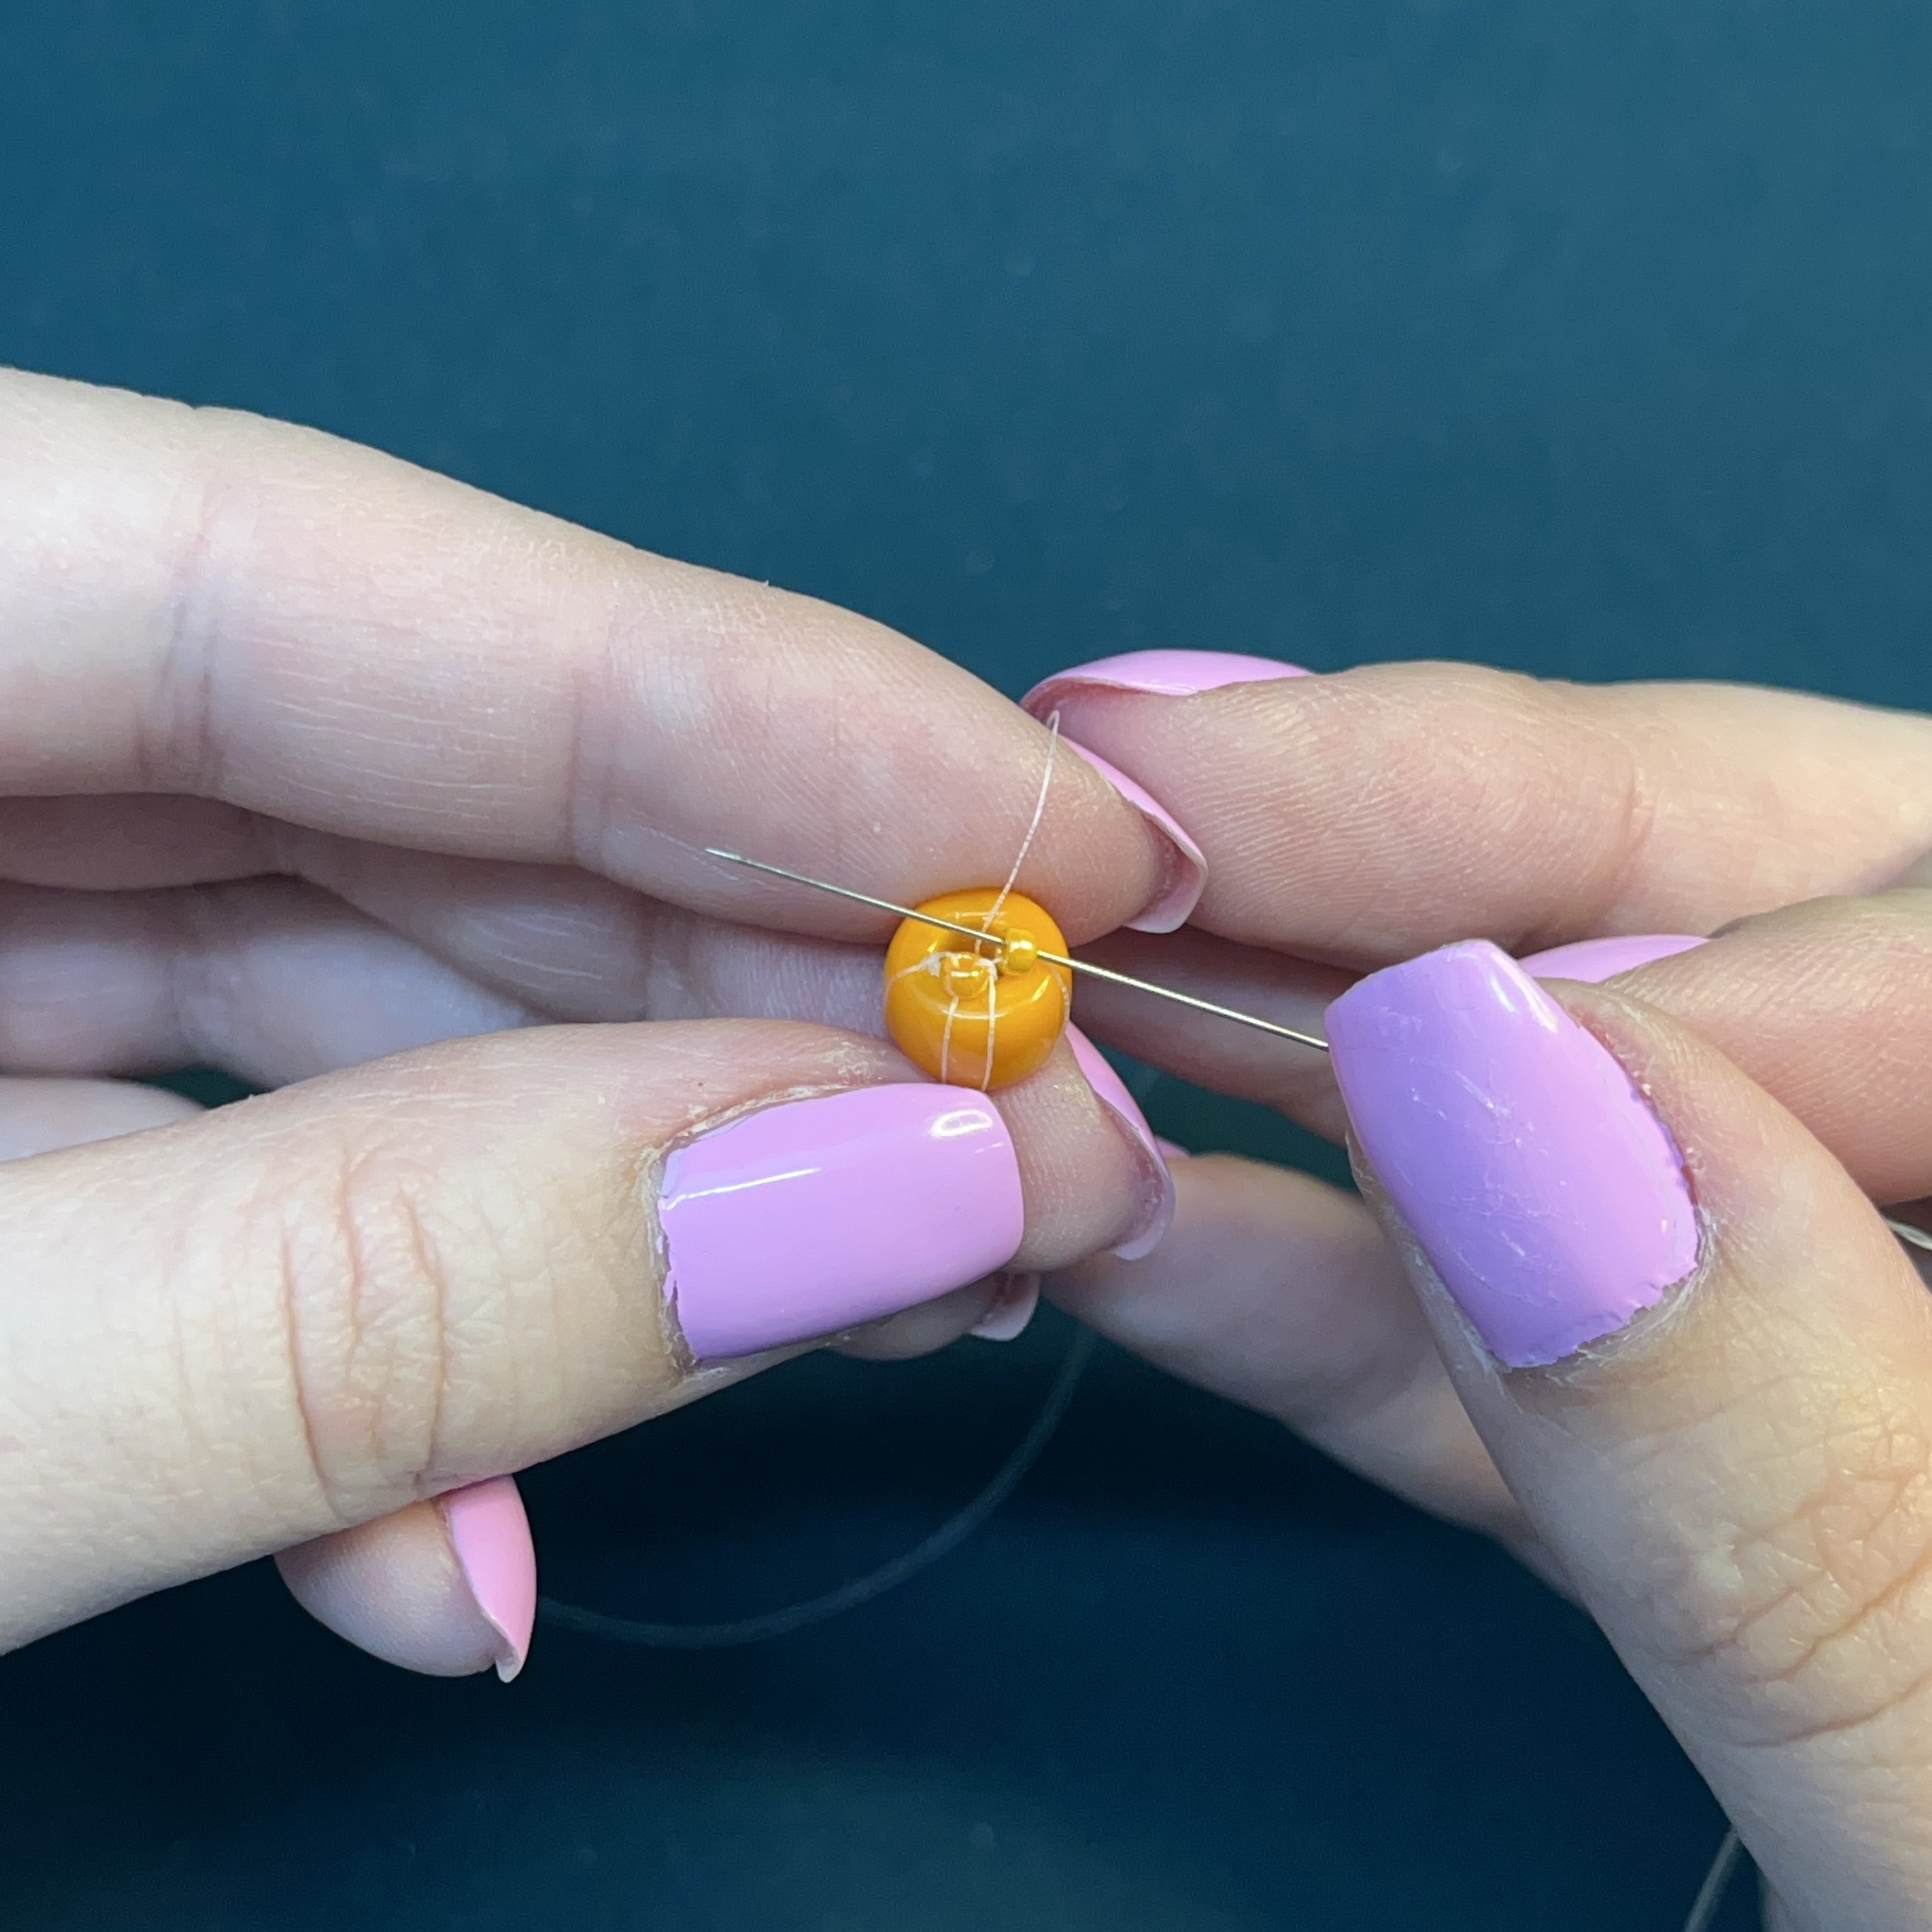
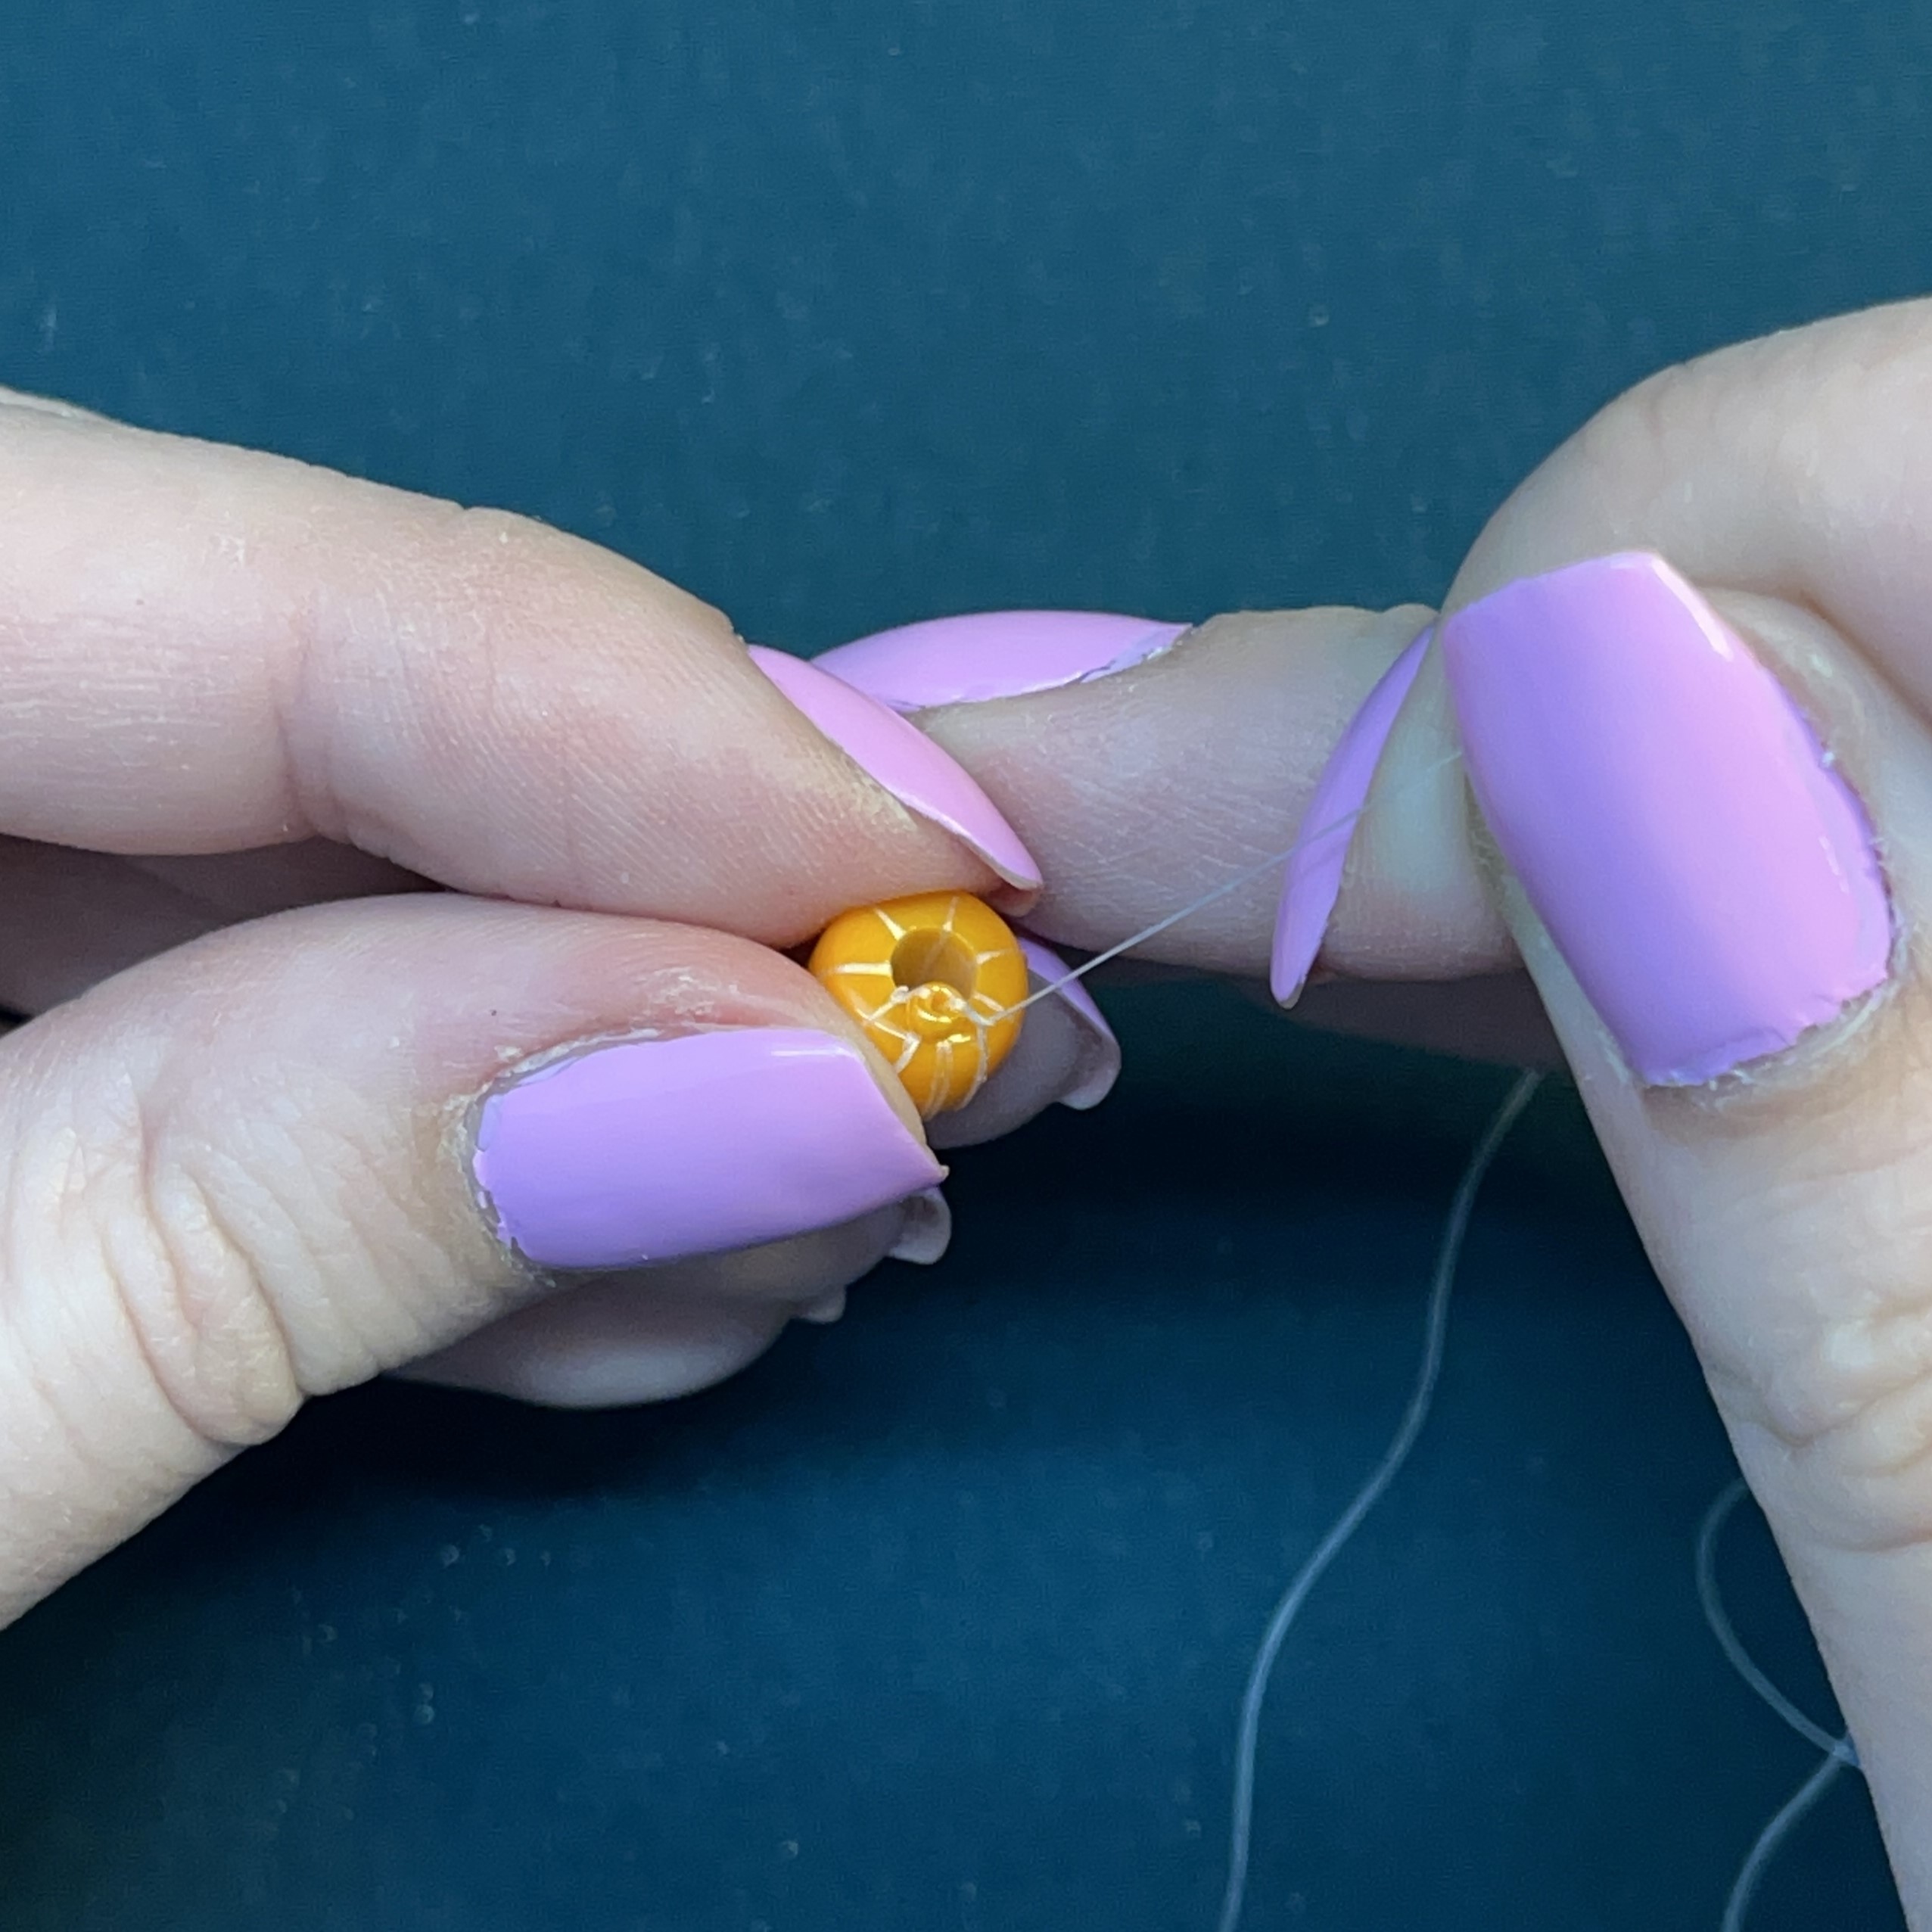
8. Now we are going to secure that starter bead. Thread the needle and thread from bottom to top.
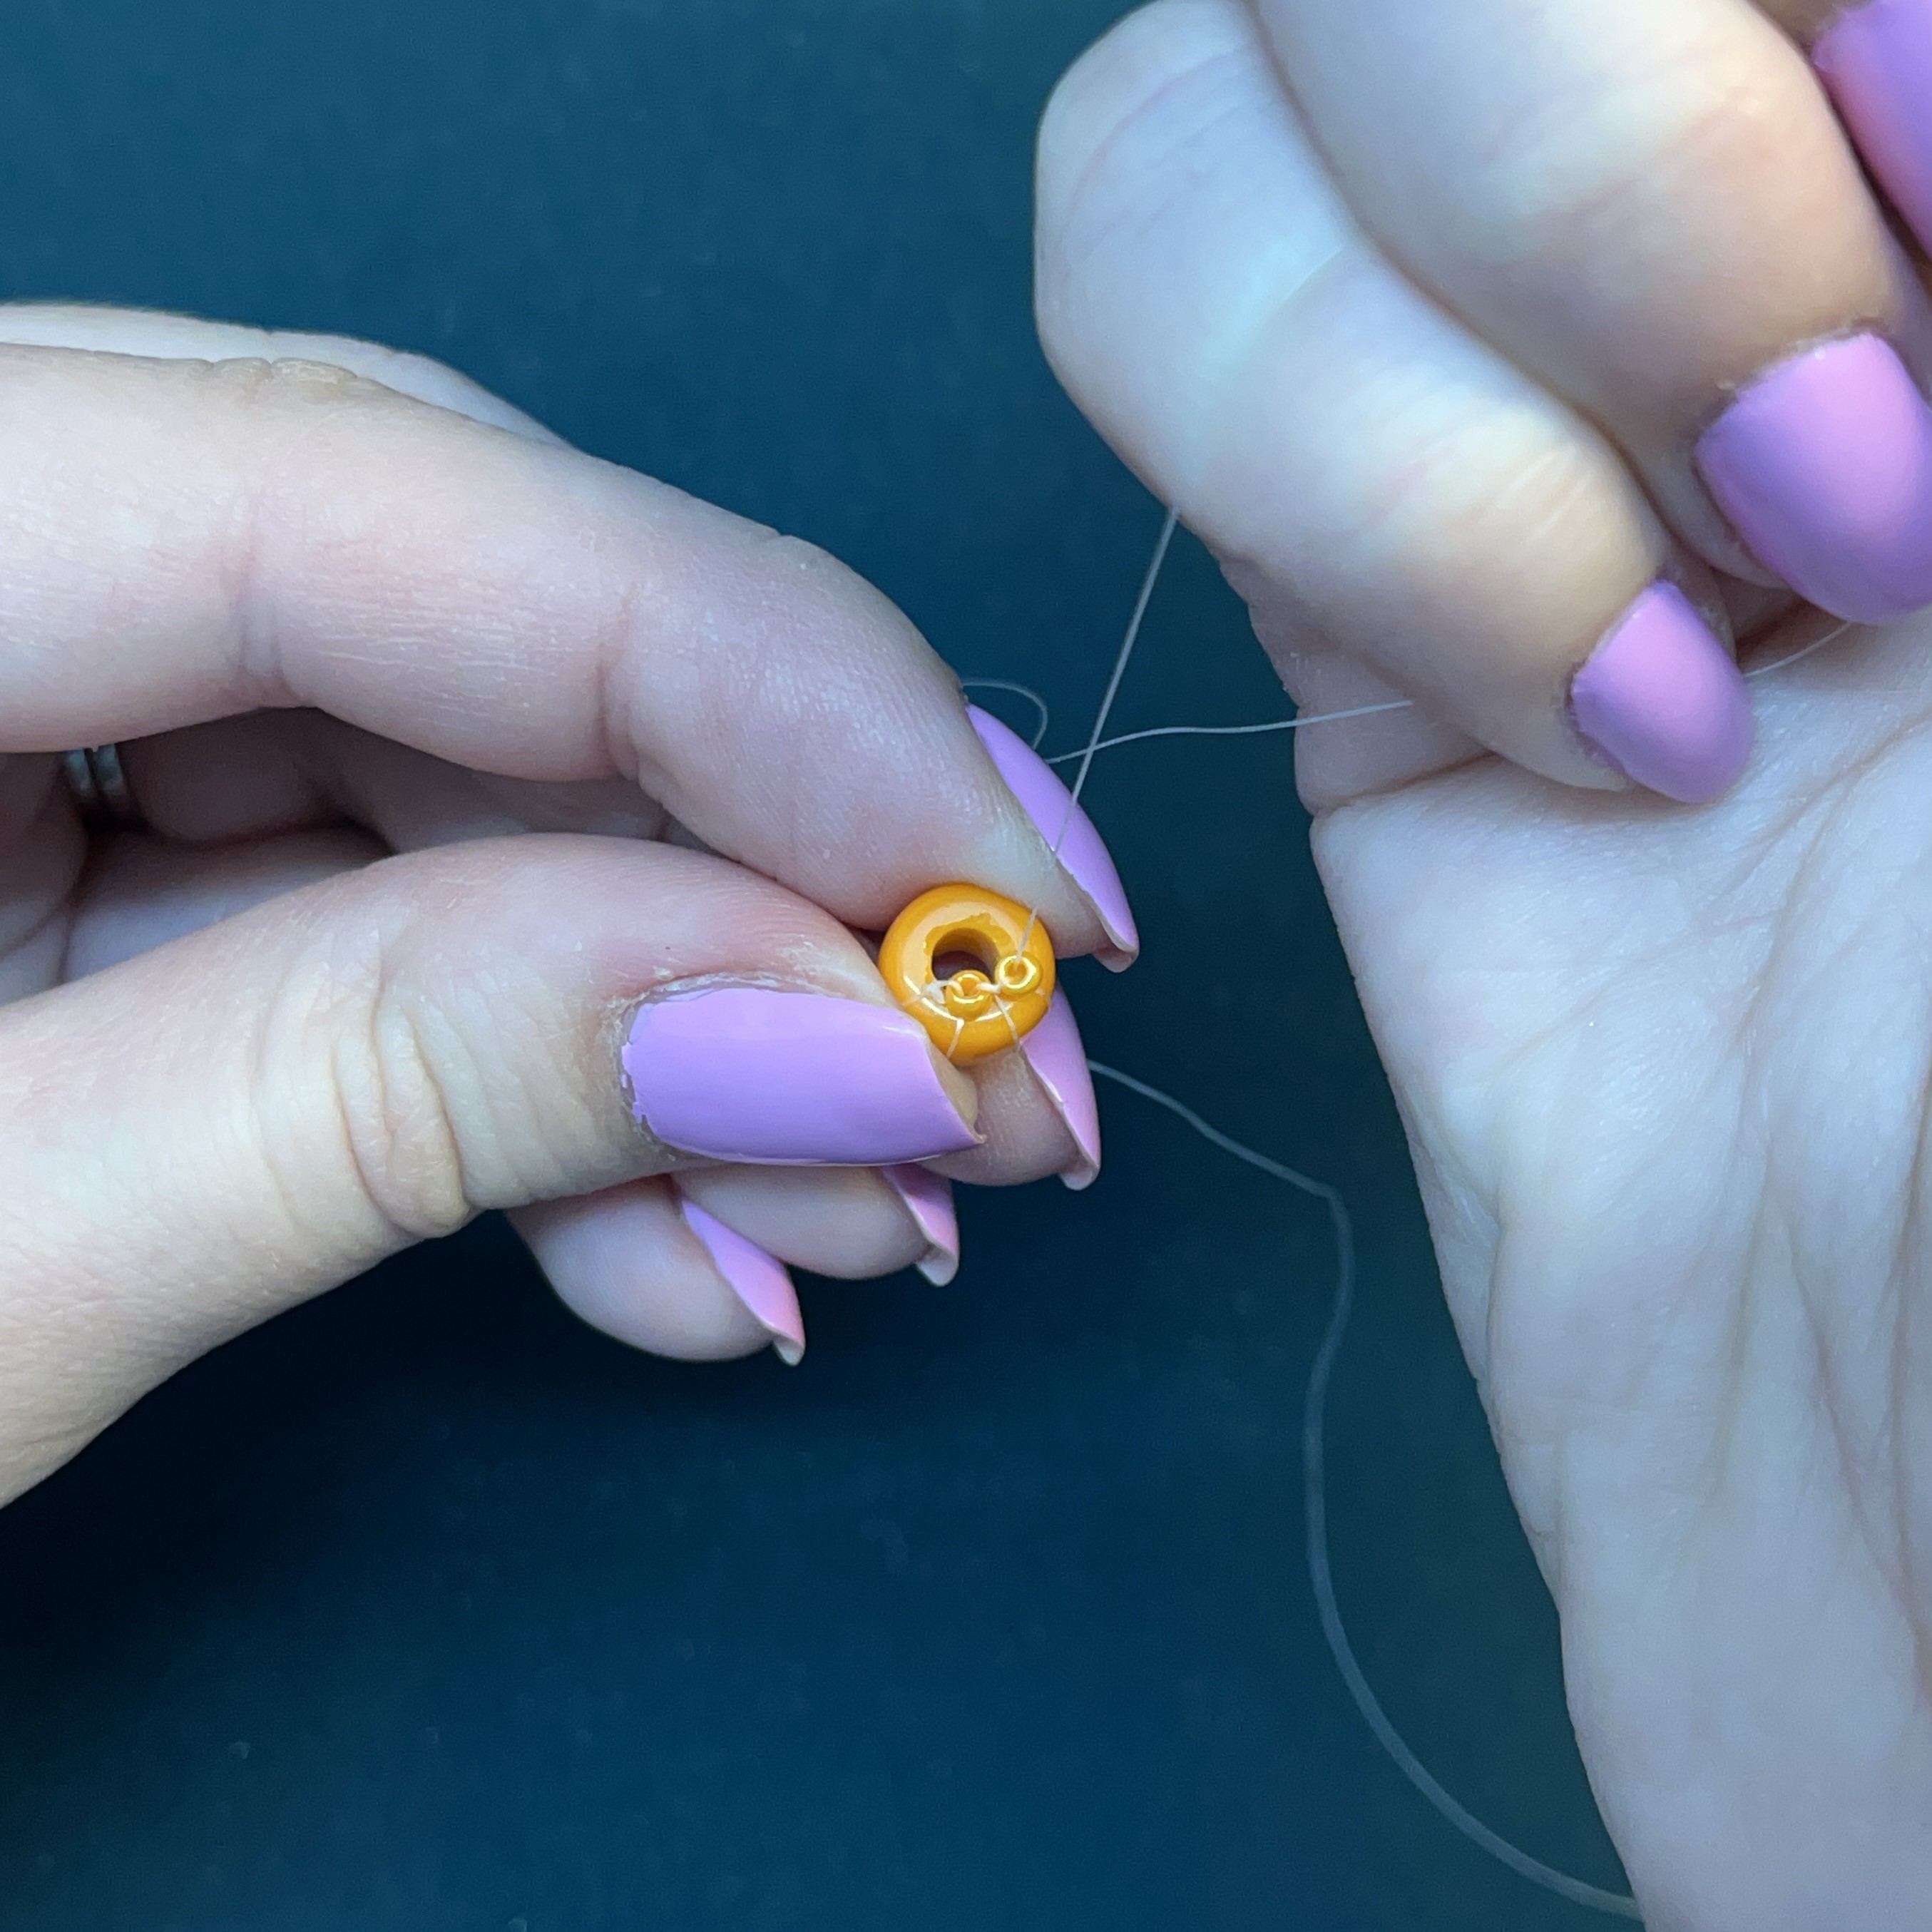
9. Pull your needle through the thread to create a knot for when you tighten the thread in the next step.

10. Pull the thread tight. Make sure your bead is secure and the knot is on the right side (as shown above), we will be going in a counter-clockwise circle to make the pumpkin's base.
11. Thread another size 11 seed bead on and hold at the top of the forte bead.
12. Loop from bottom to top through the forte bead like in step 5 then thread the needle through the seed bead as shown from right to left.
13. Pull tight so the seed bead is laying snug and flat on the forte bead. After, just add another seed bead You do not need to secure the 2nd, 3rd, 4th, or 5th bead. Just continue the pattern.
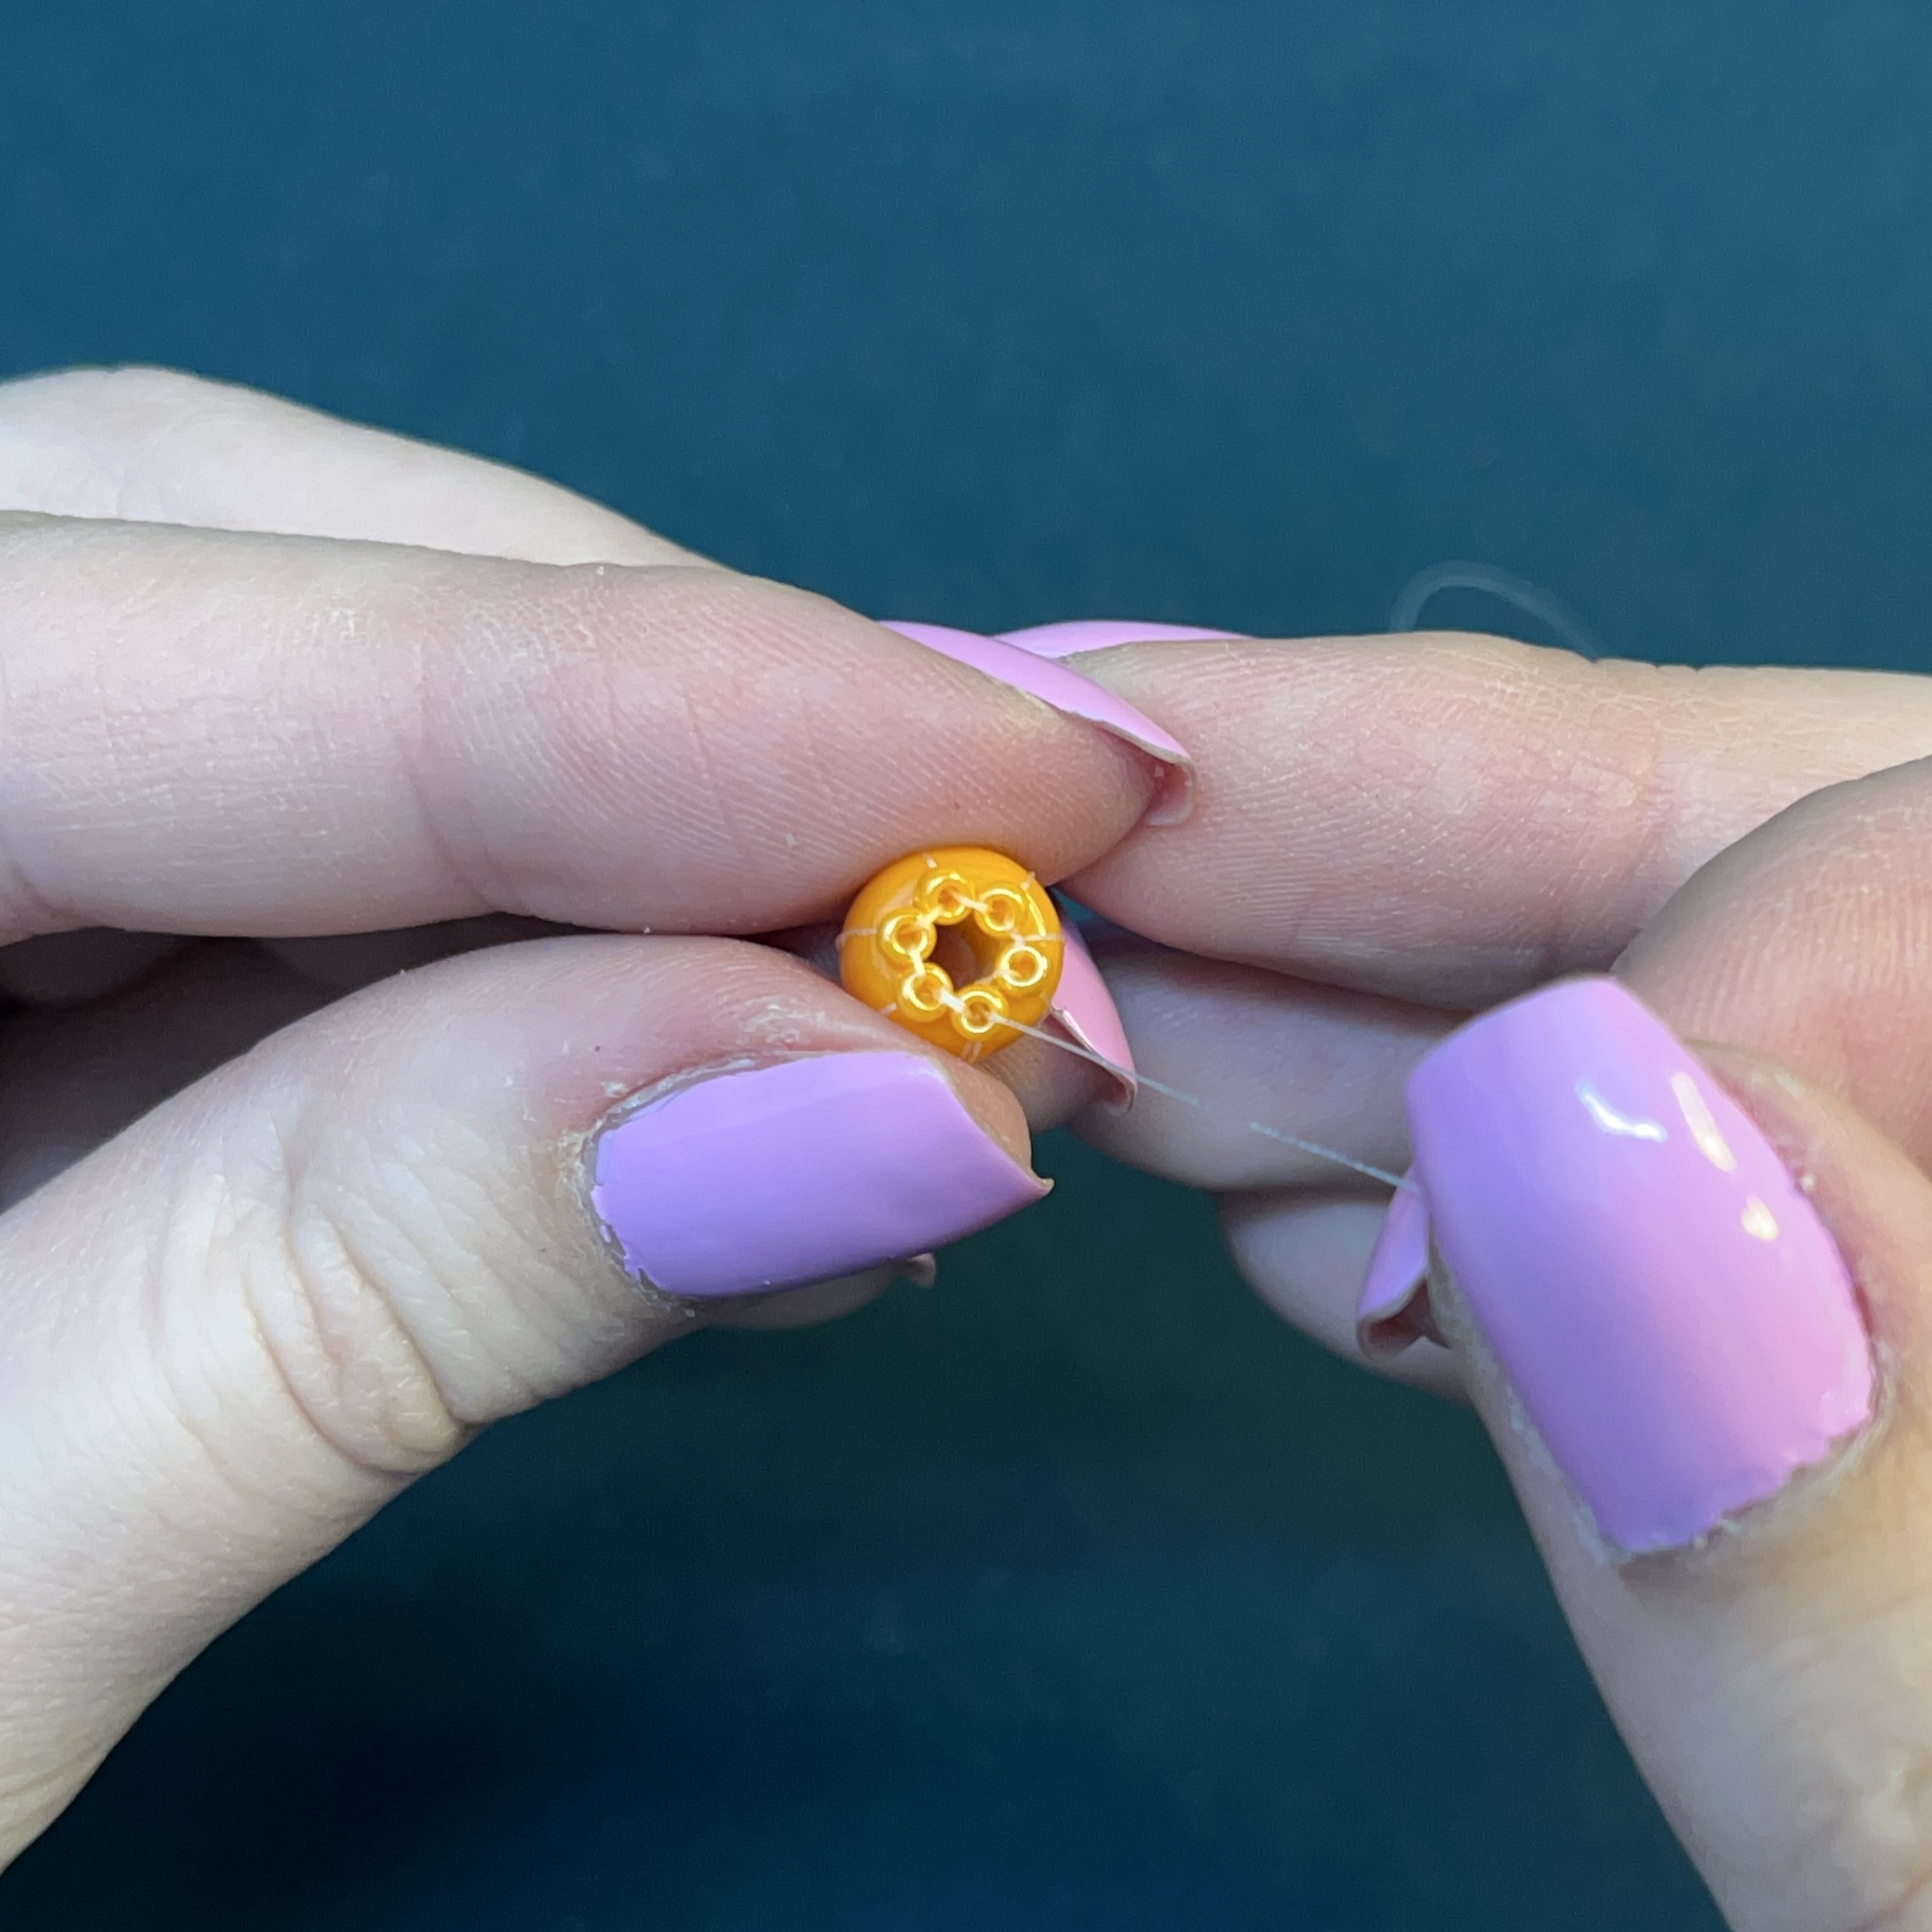
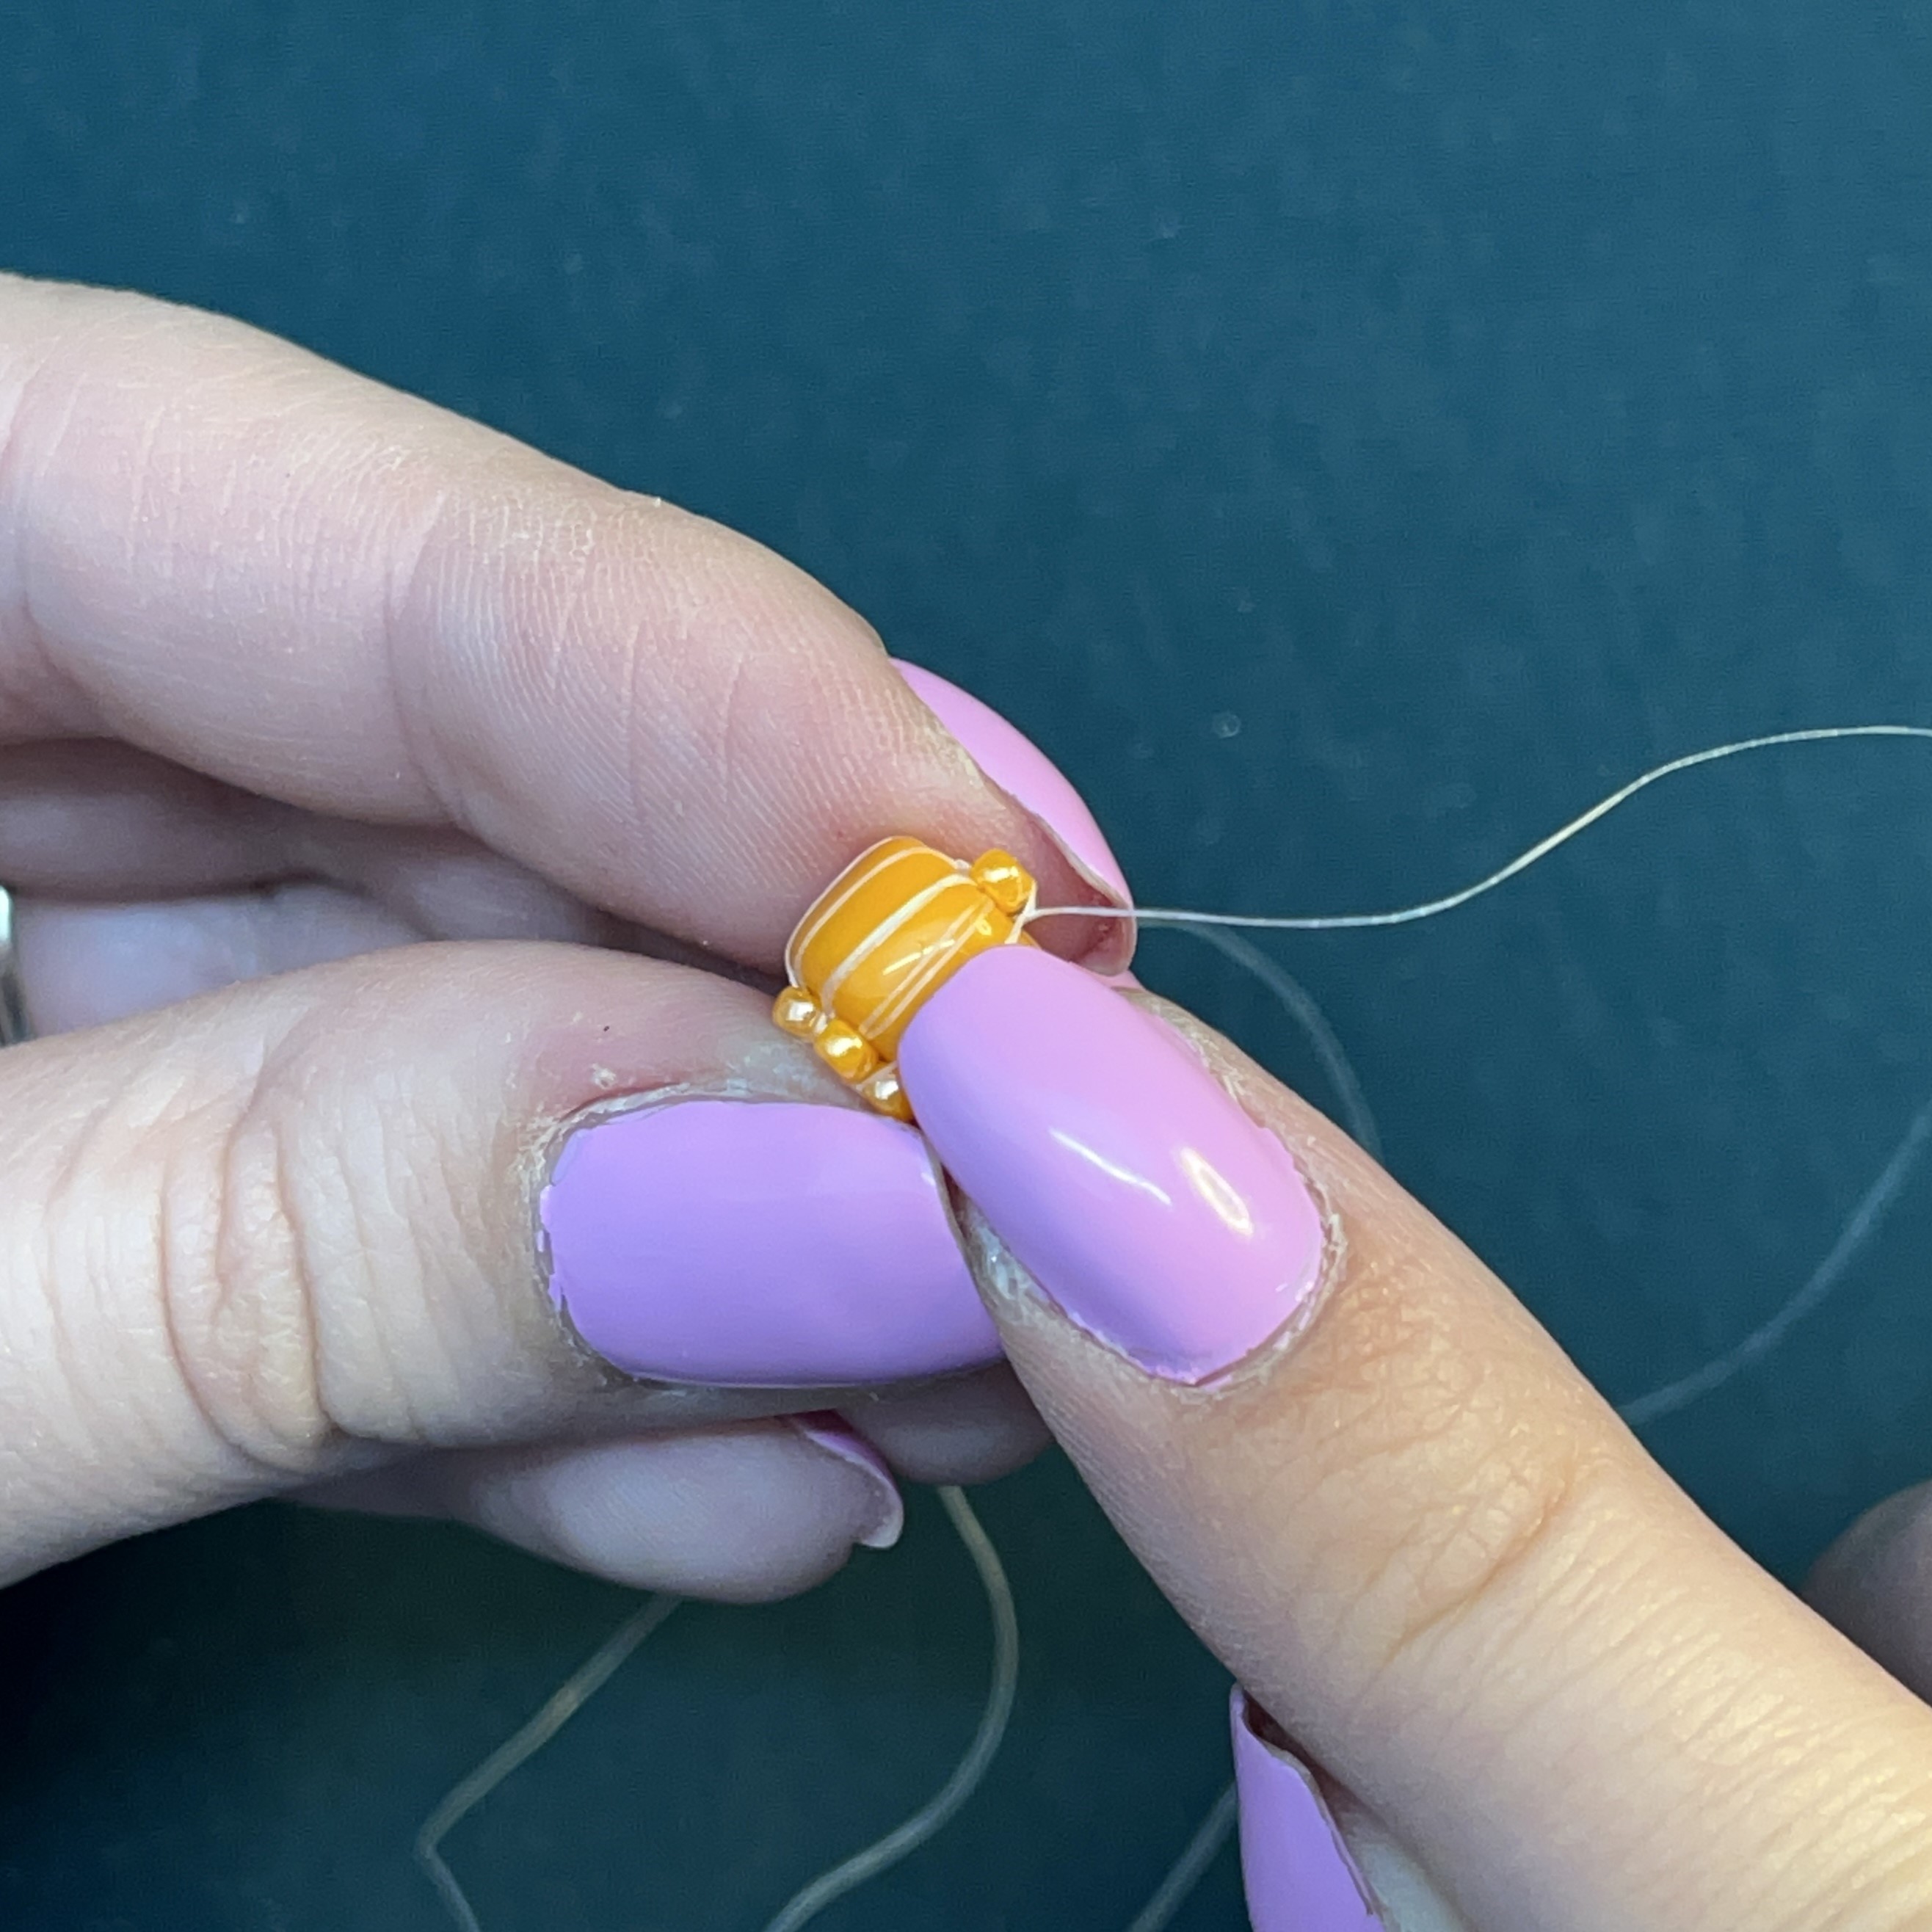
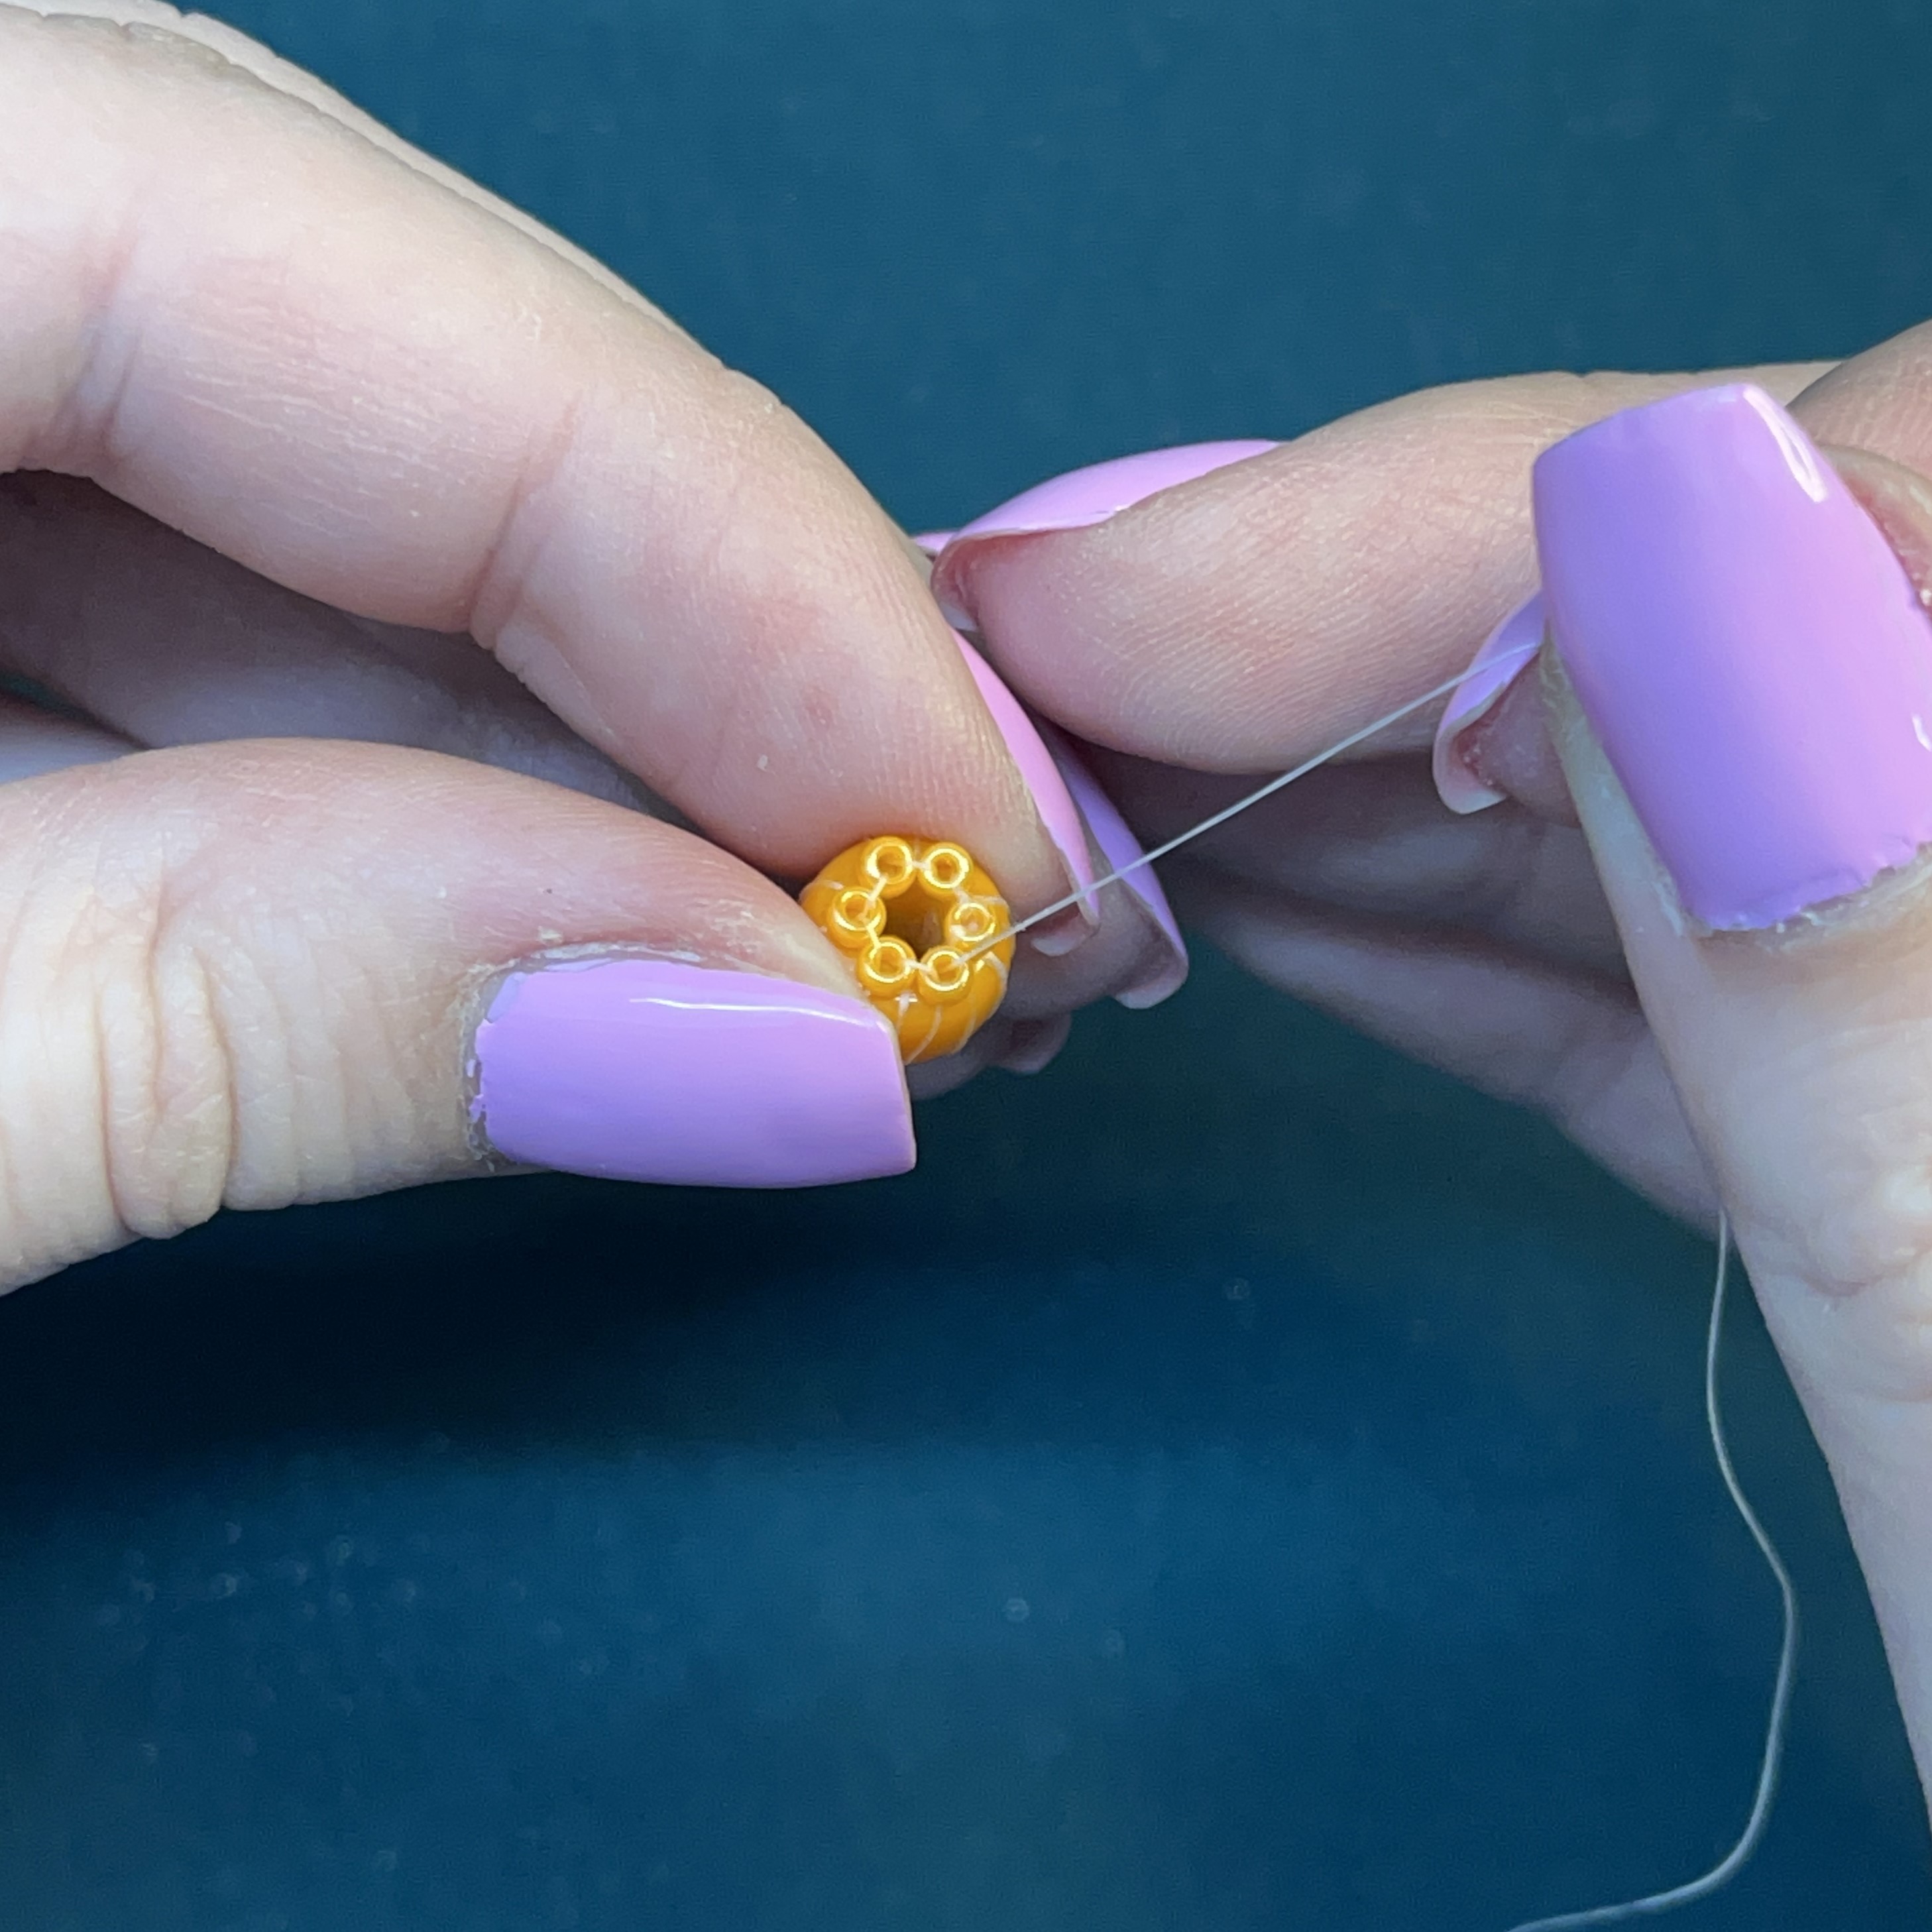
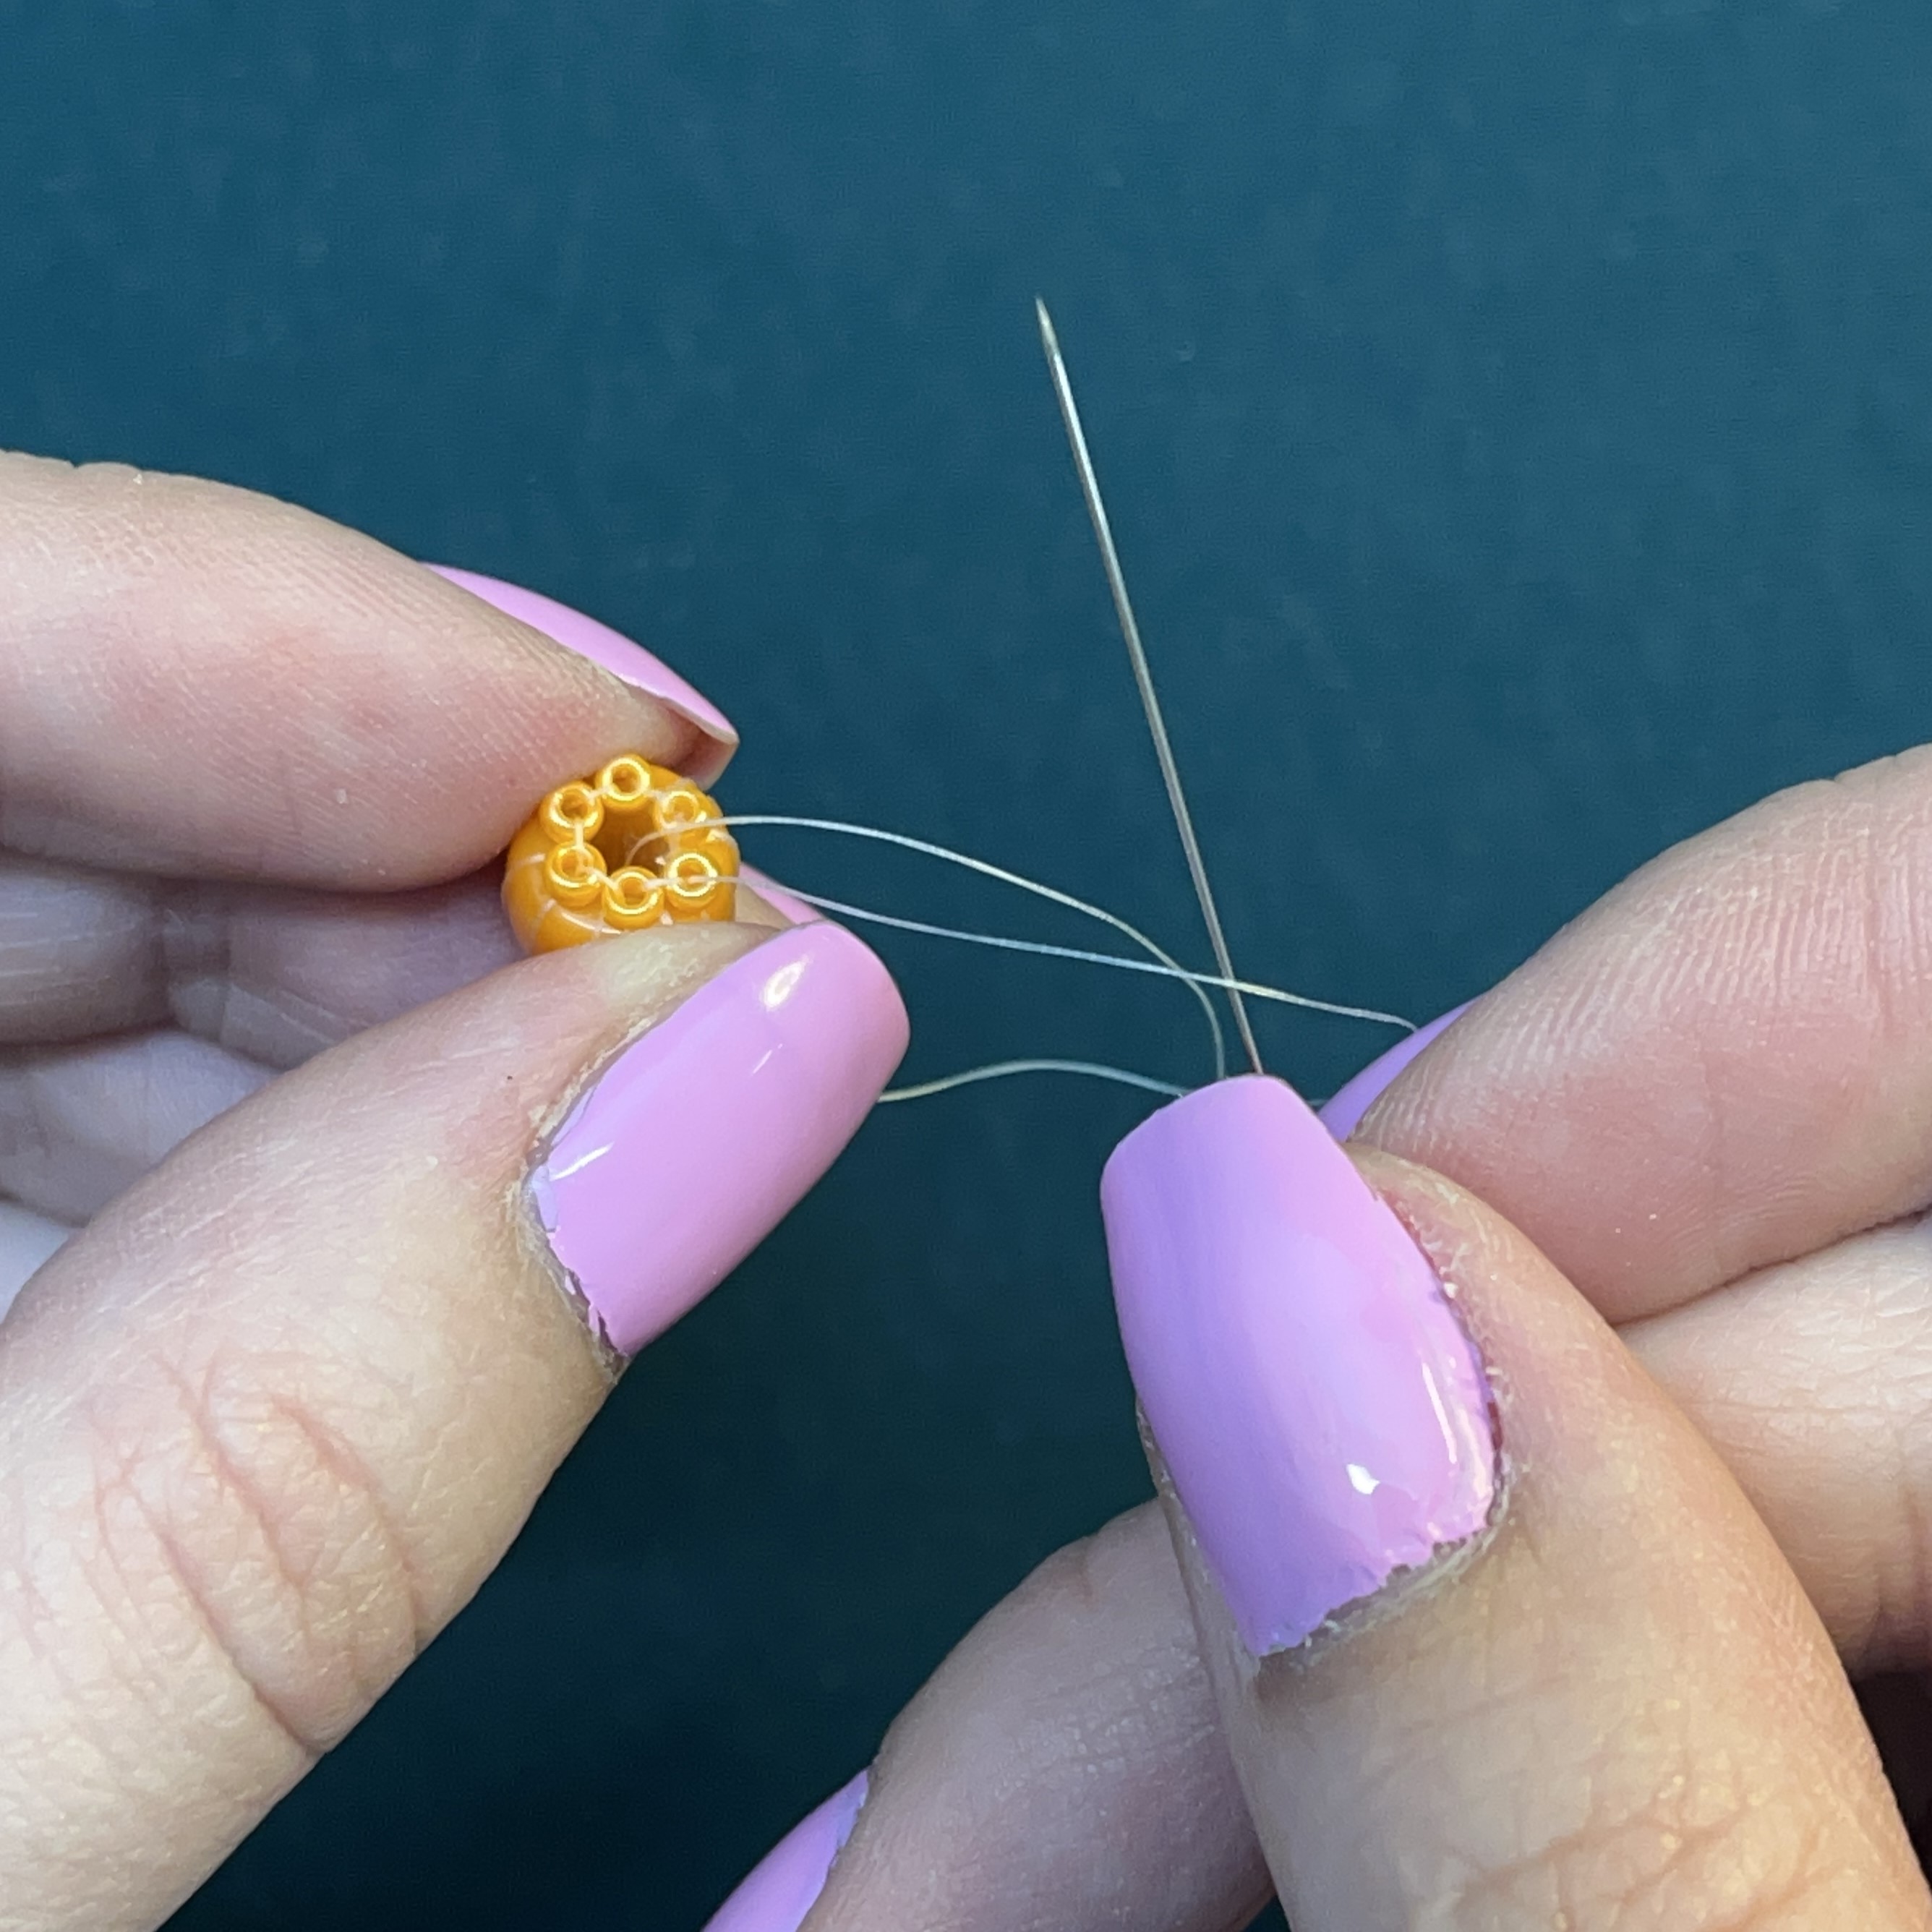
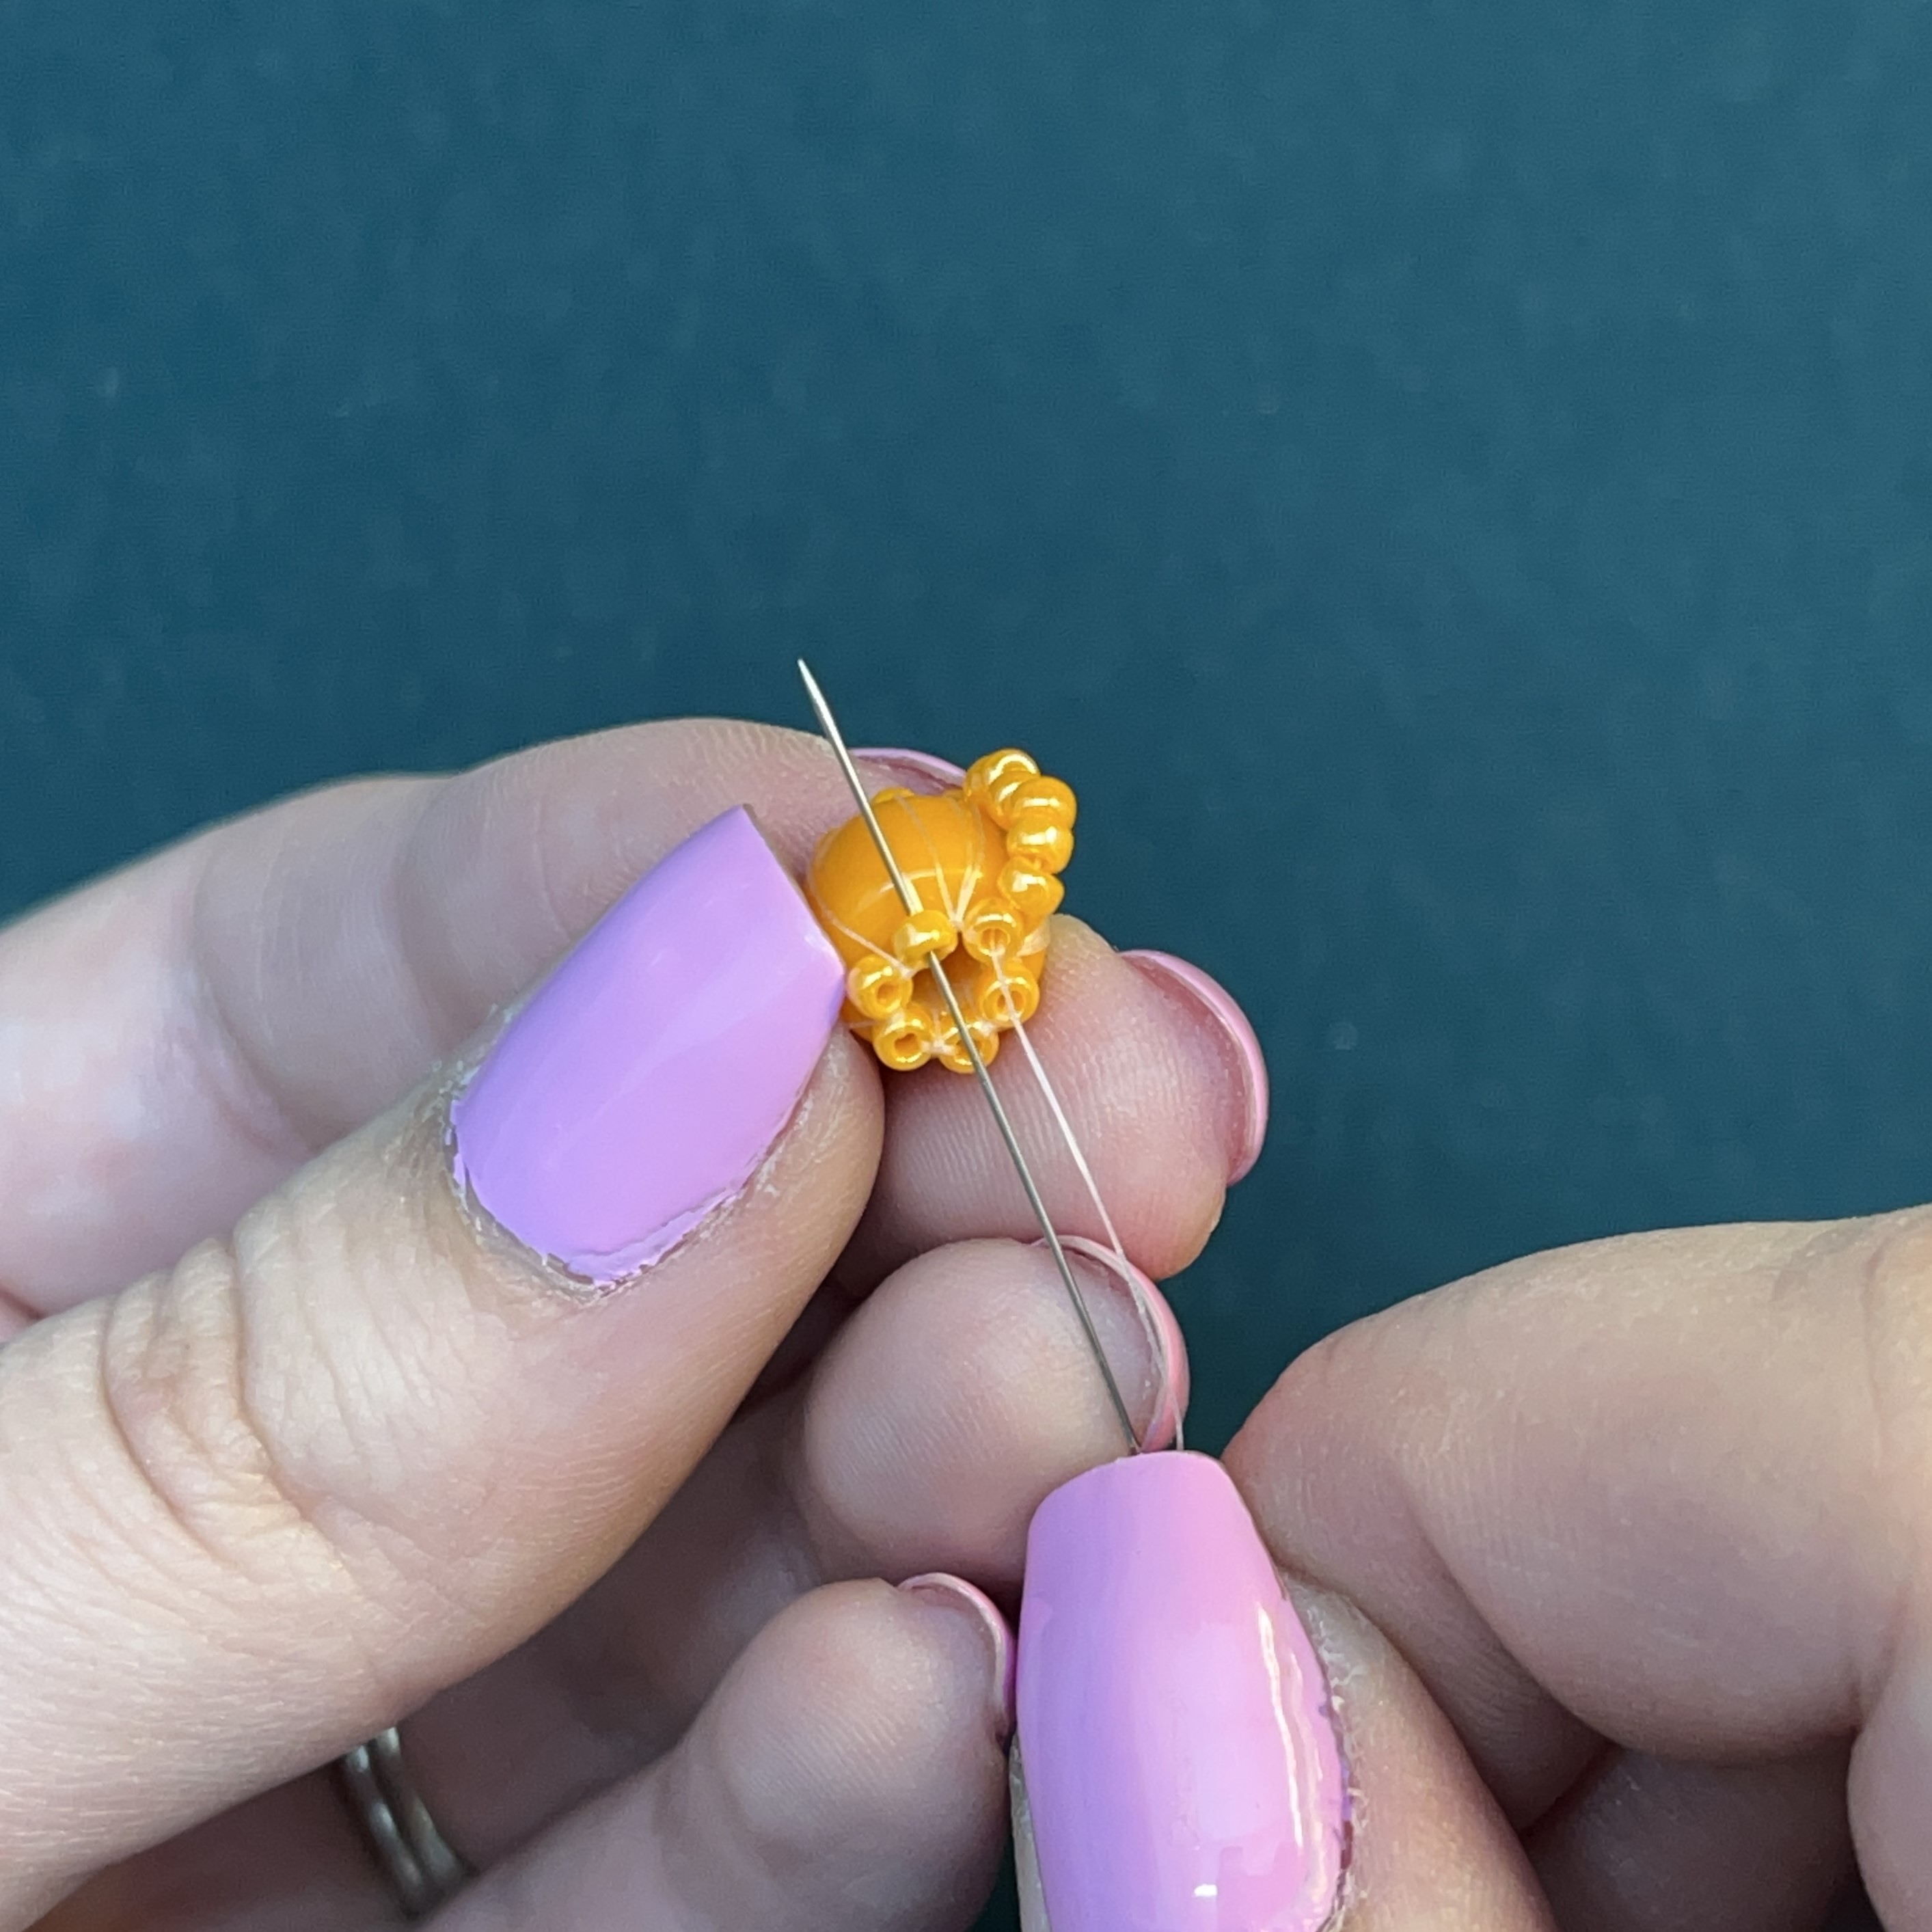
14. Continue pattern until you have 6 seed beads creating a circle around the hole of the forte bead.
15. Now we will secure the last bead in the circle that we just added. Loop the thread from bottom to top of the forte bead.
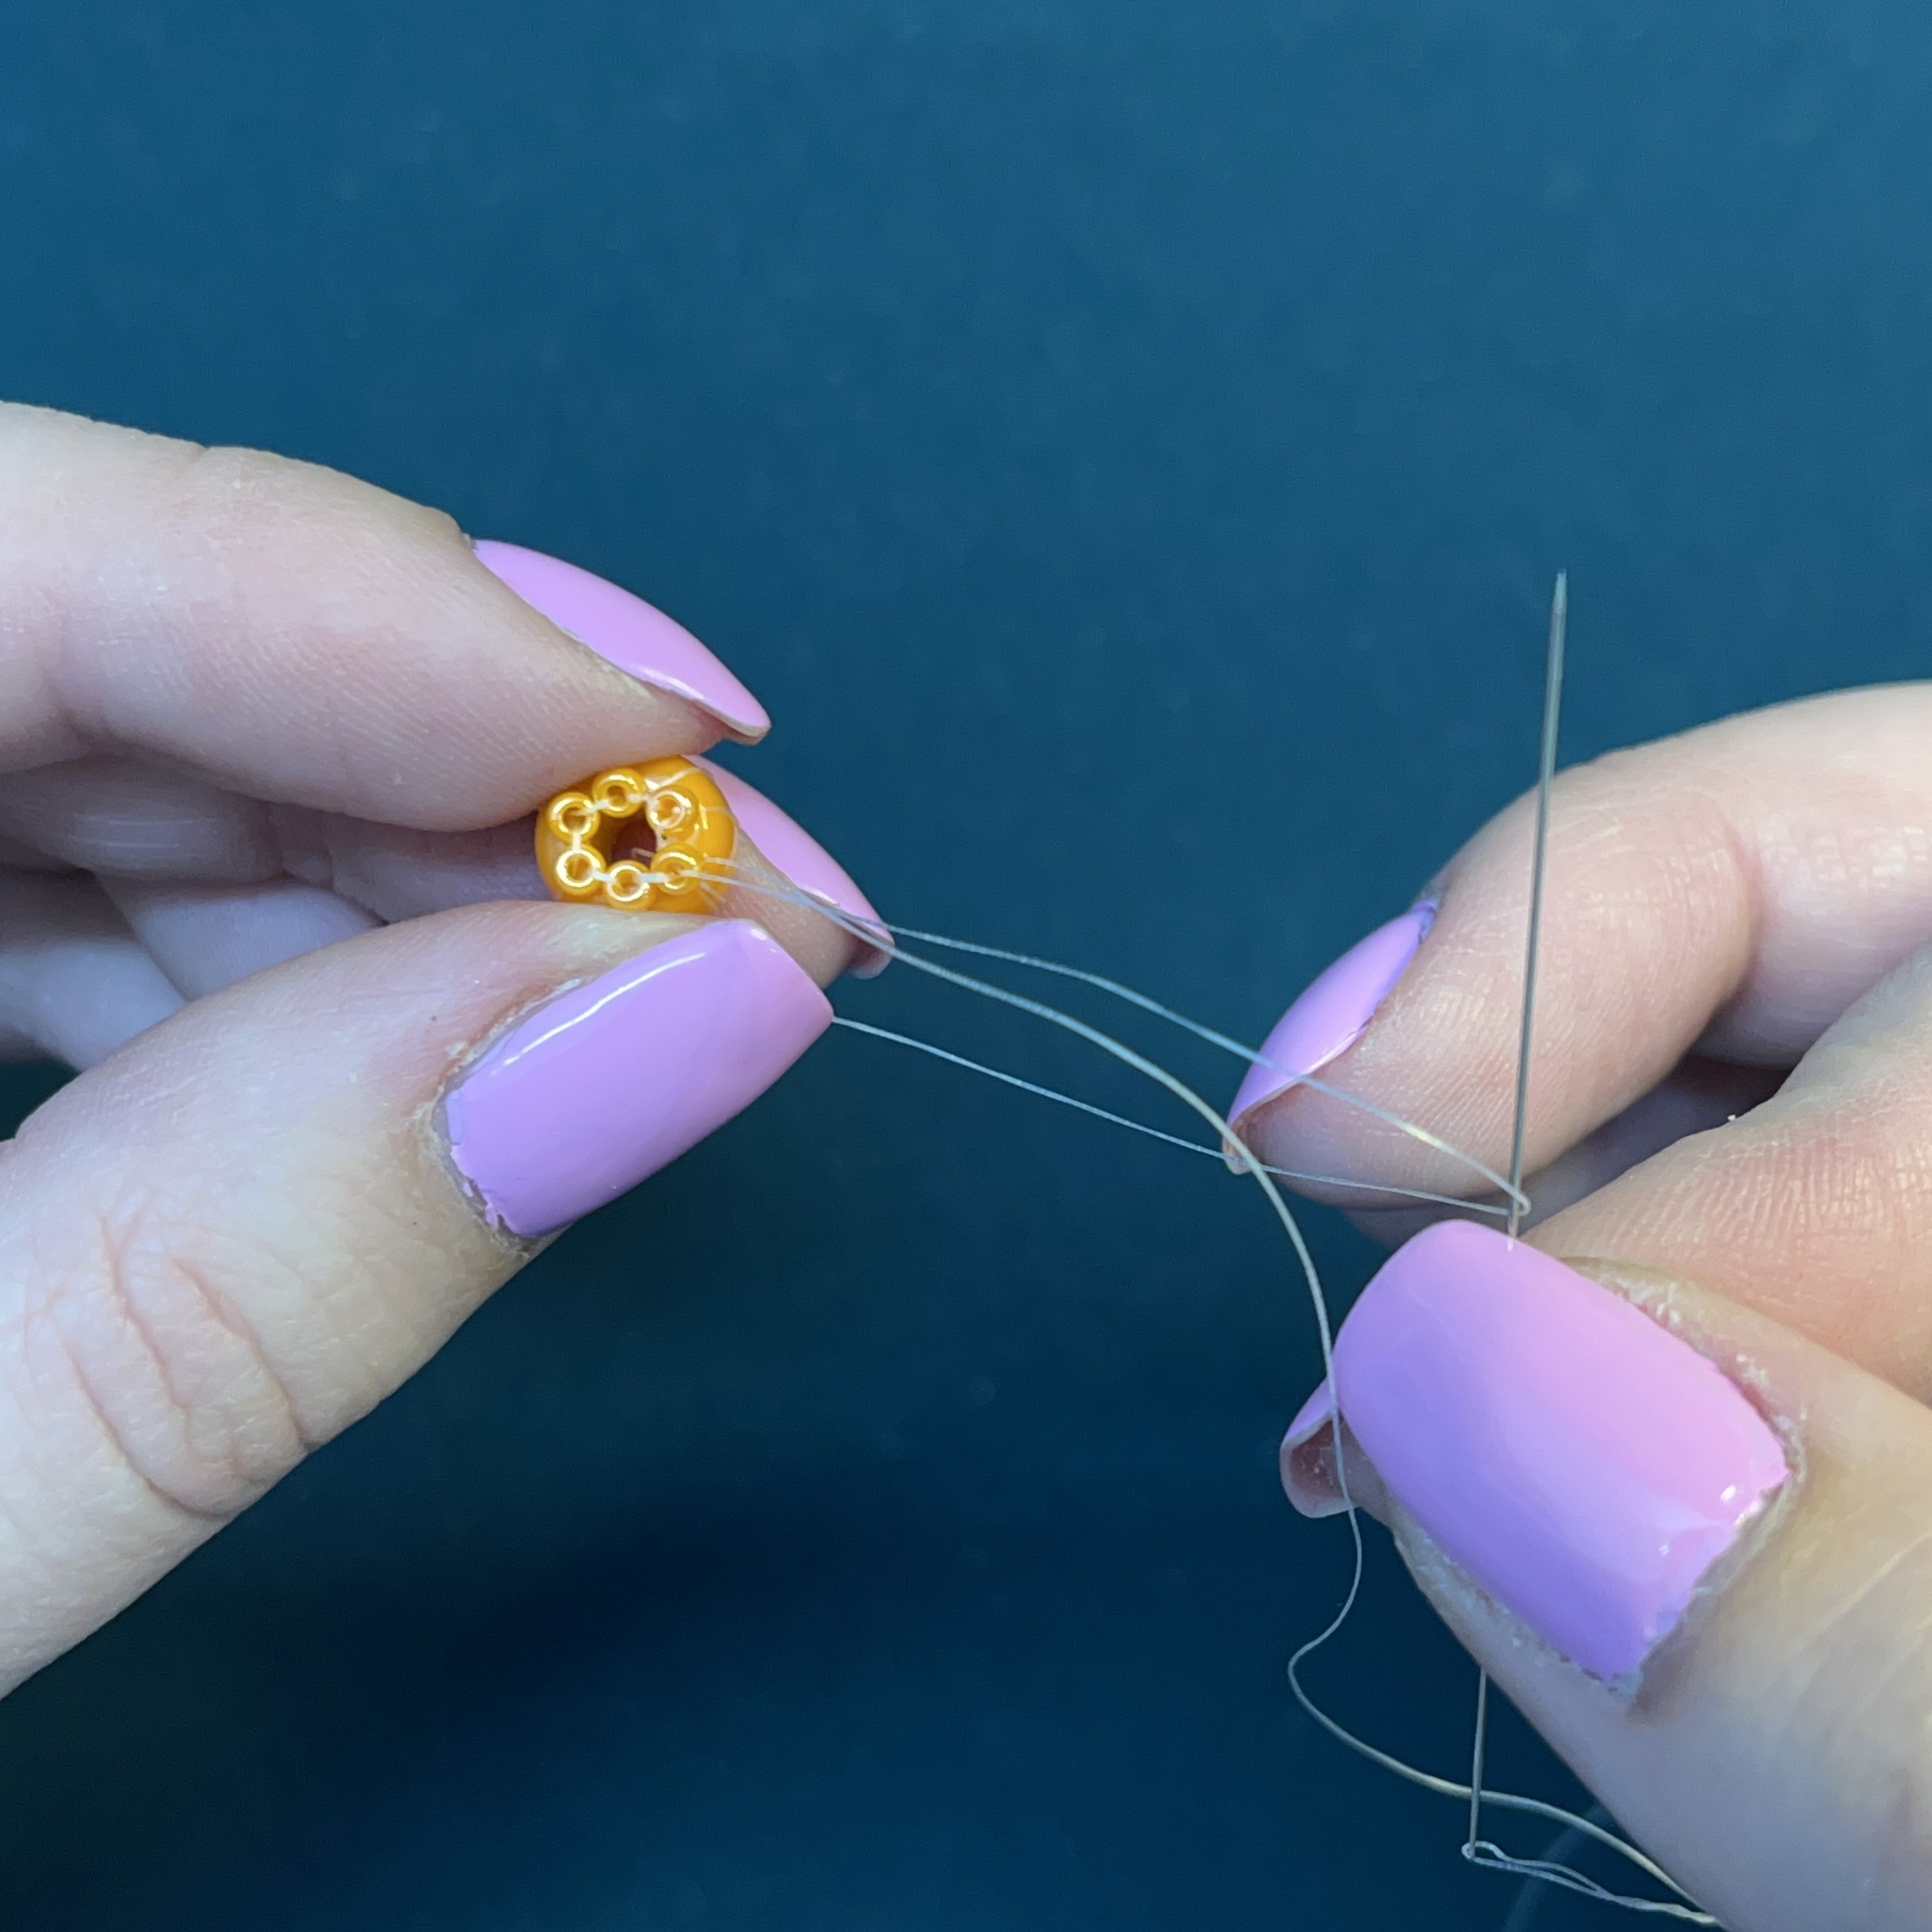
16. Pull your needle through the thread to create a knot for when you tighten the thread in the next step.
17. Tighten the knot so the bead is nice and snug. Keep the knot near that last seed bead.

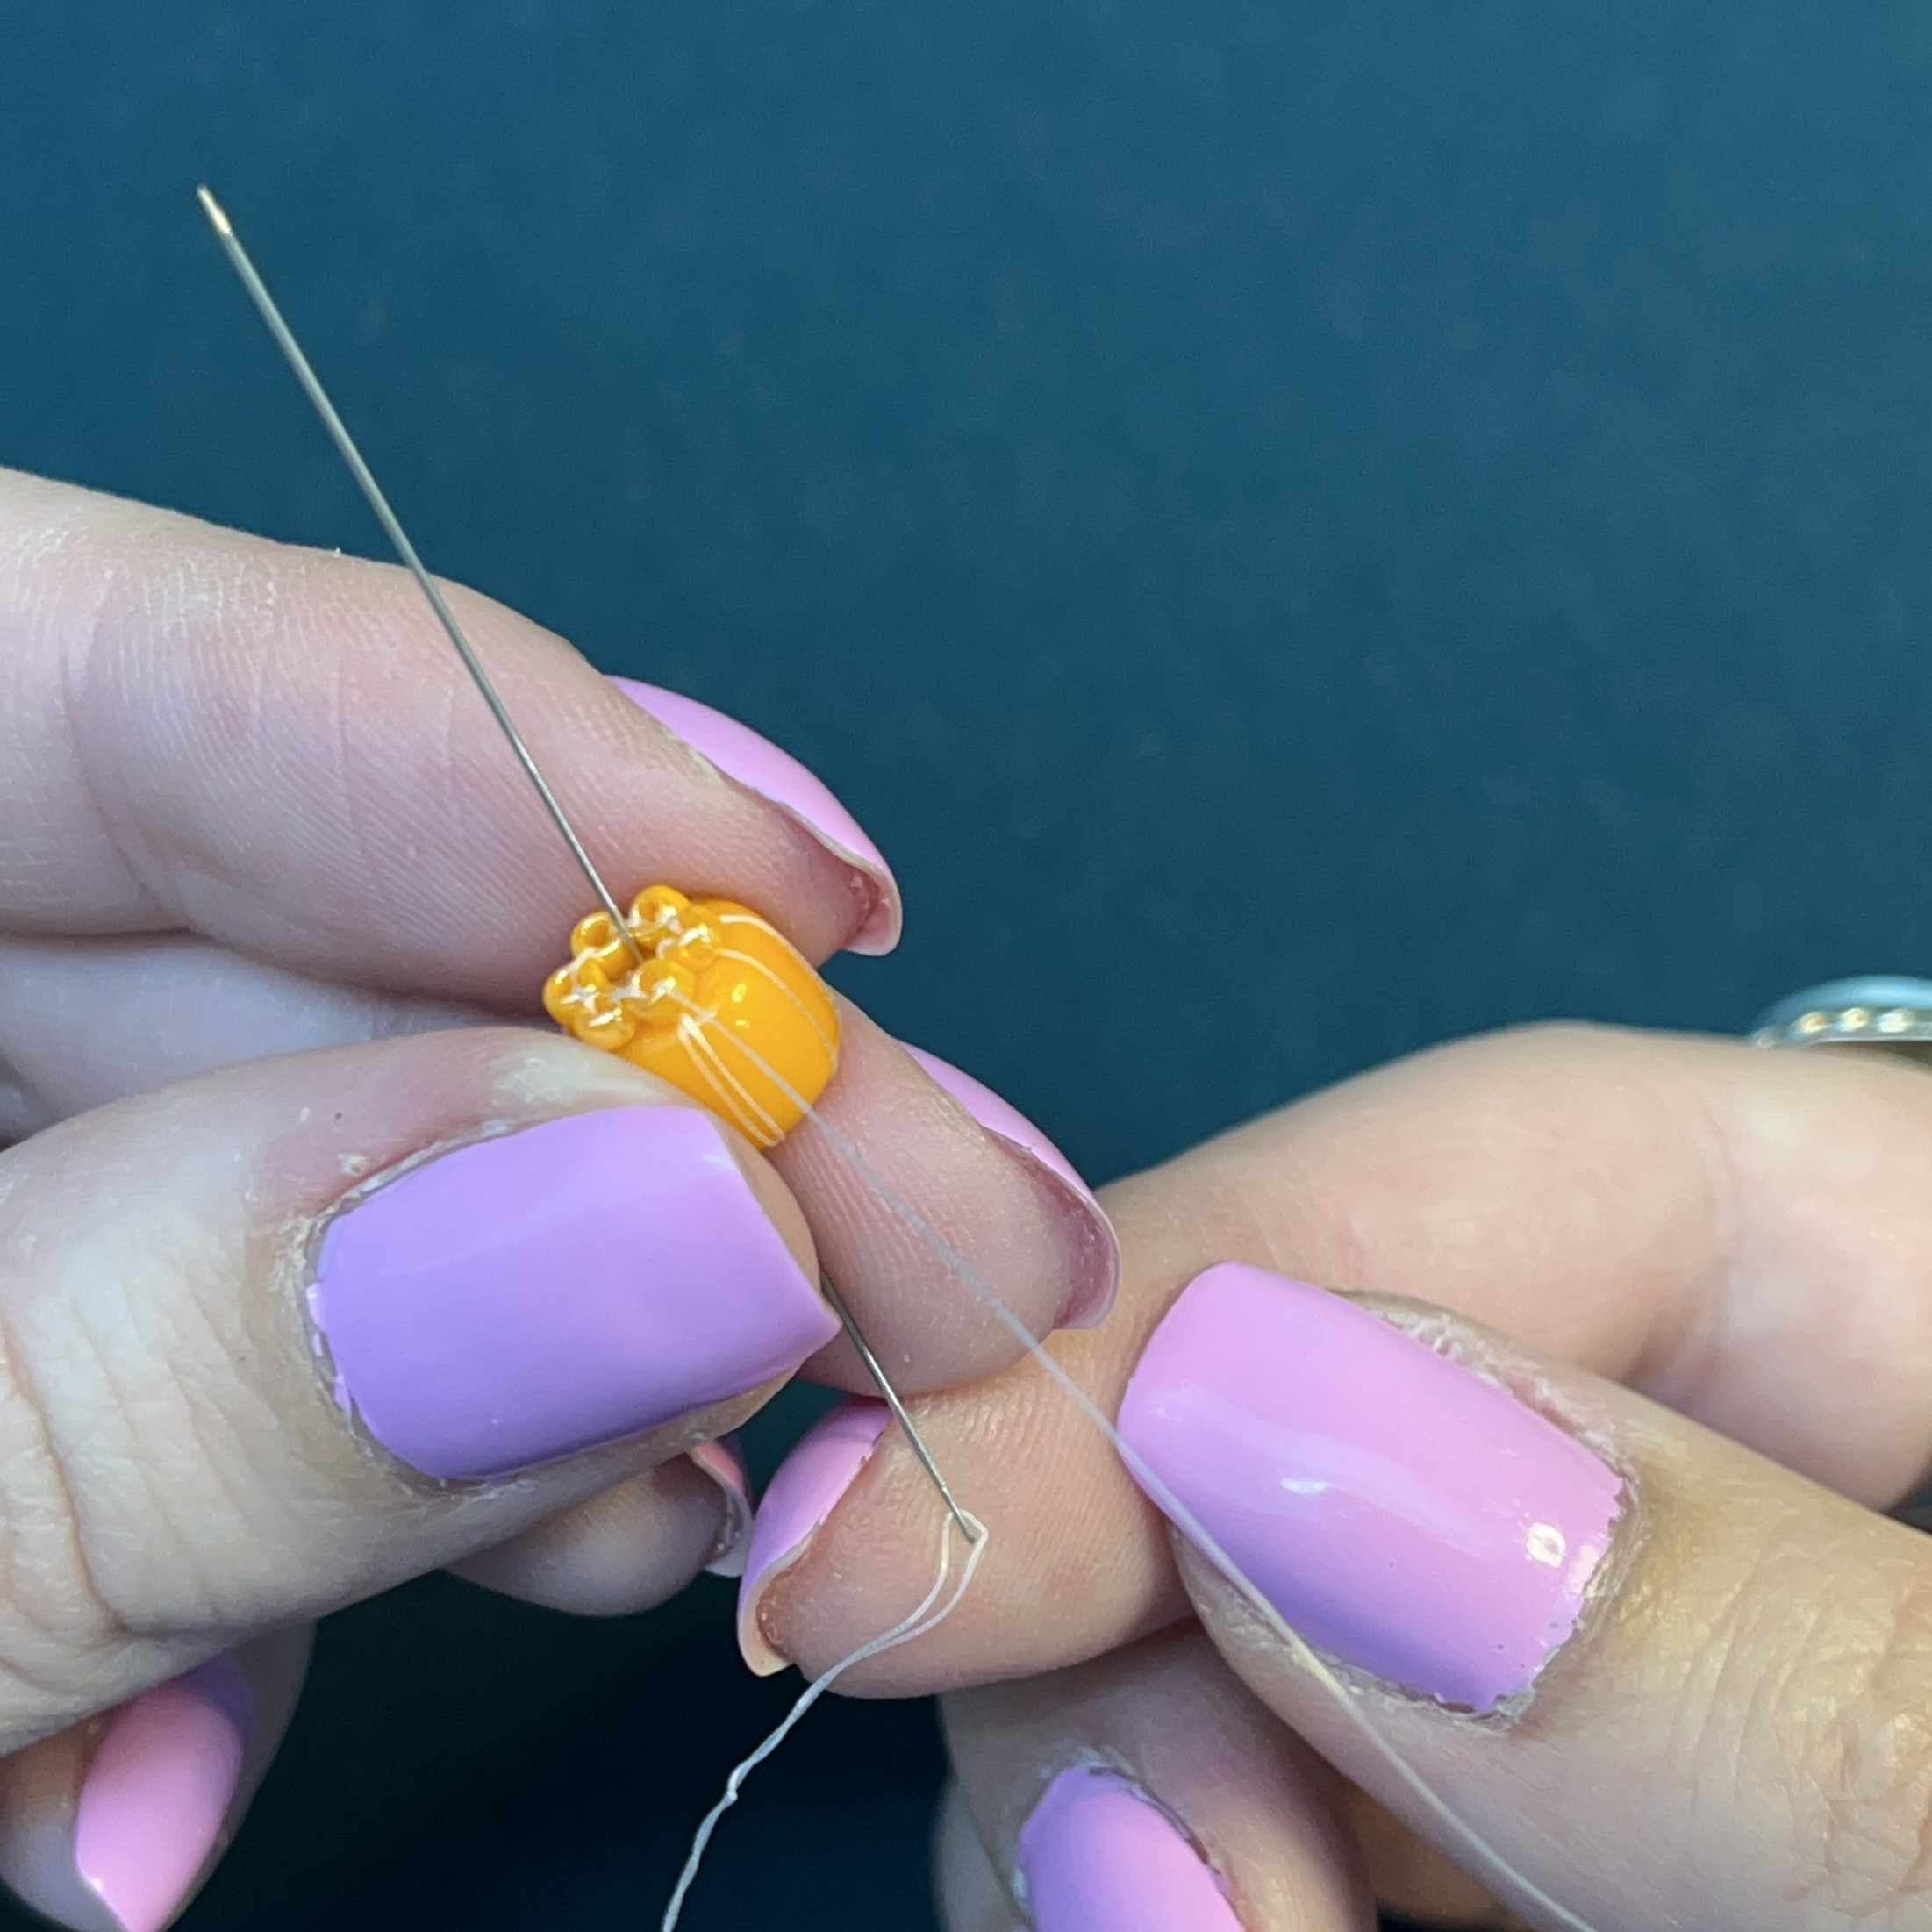
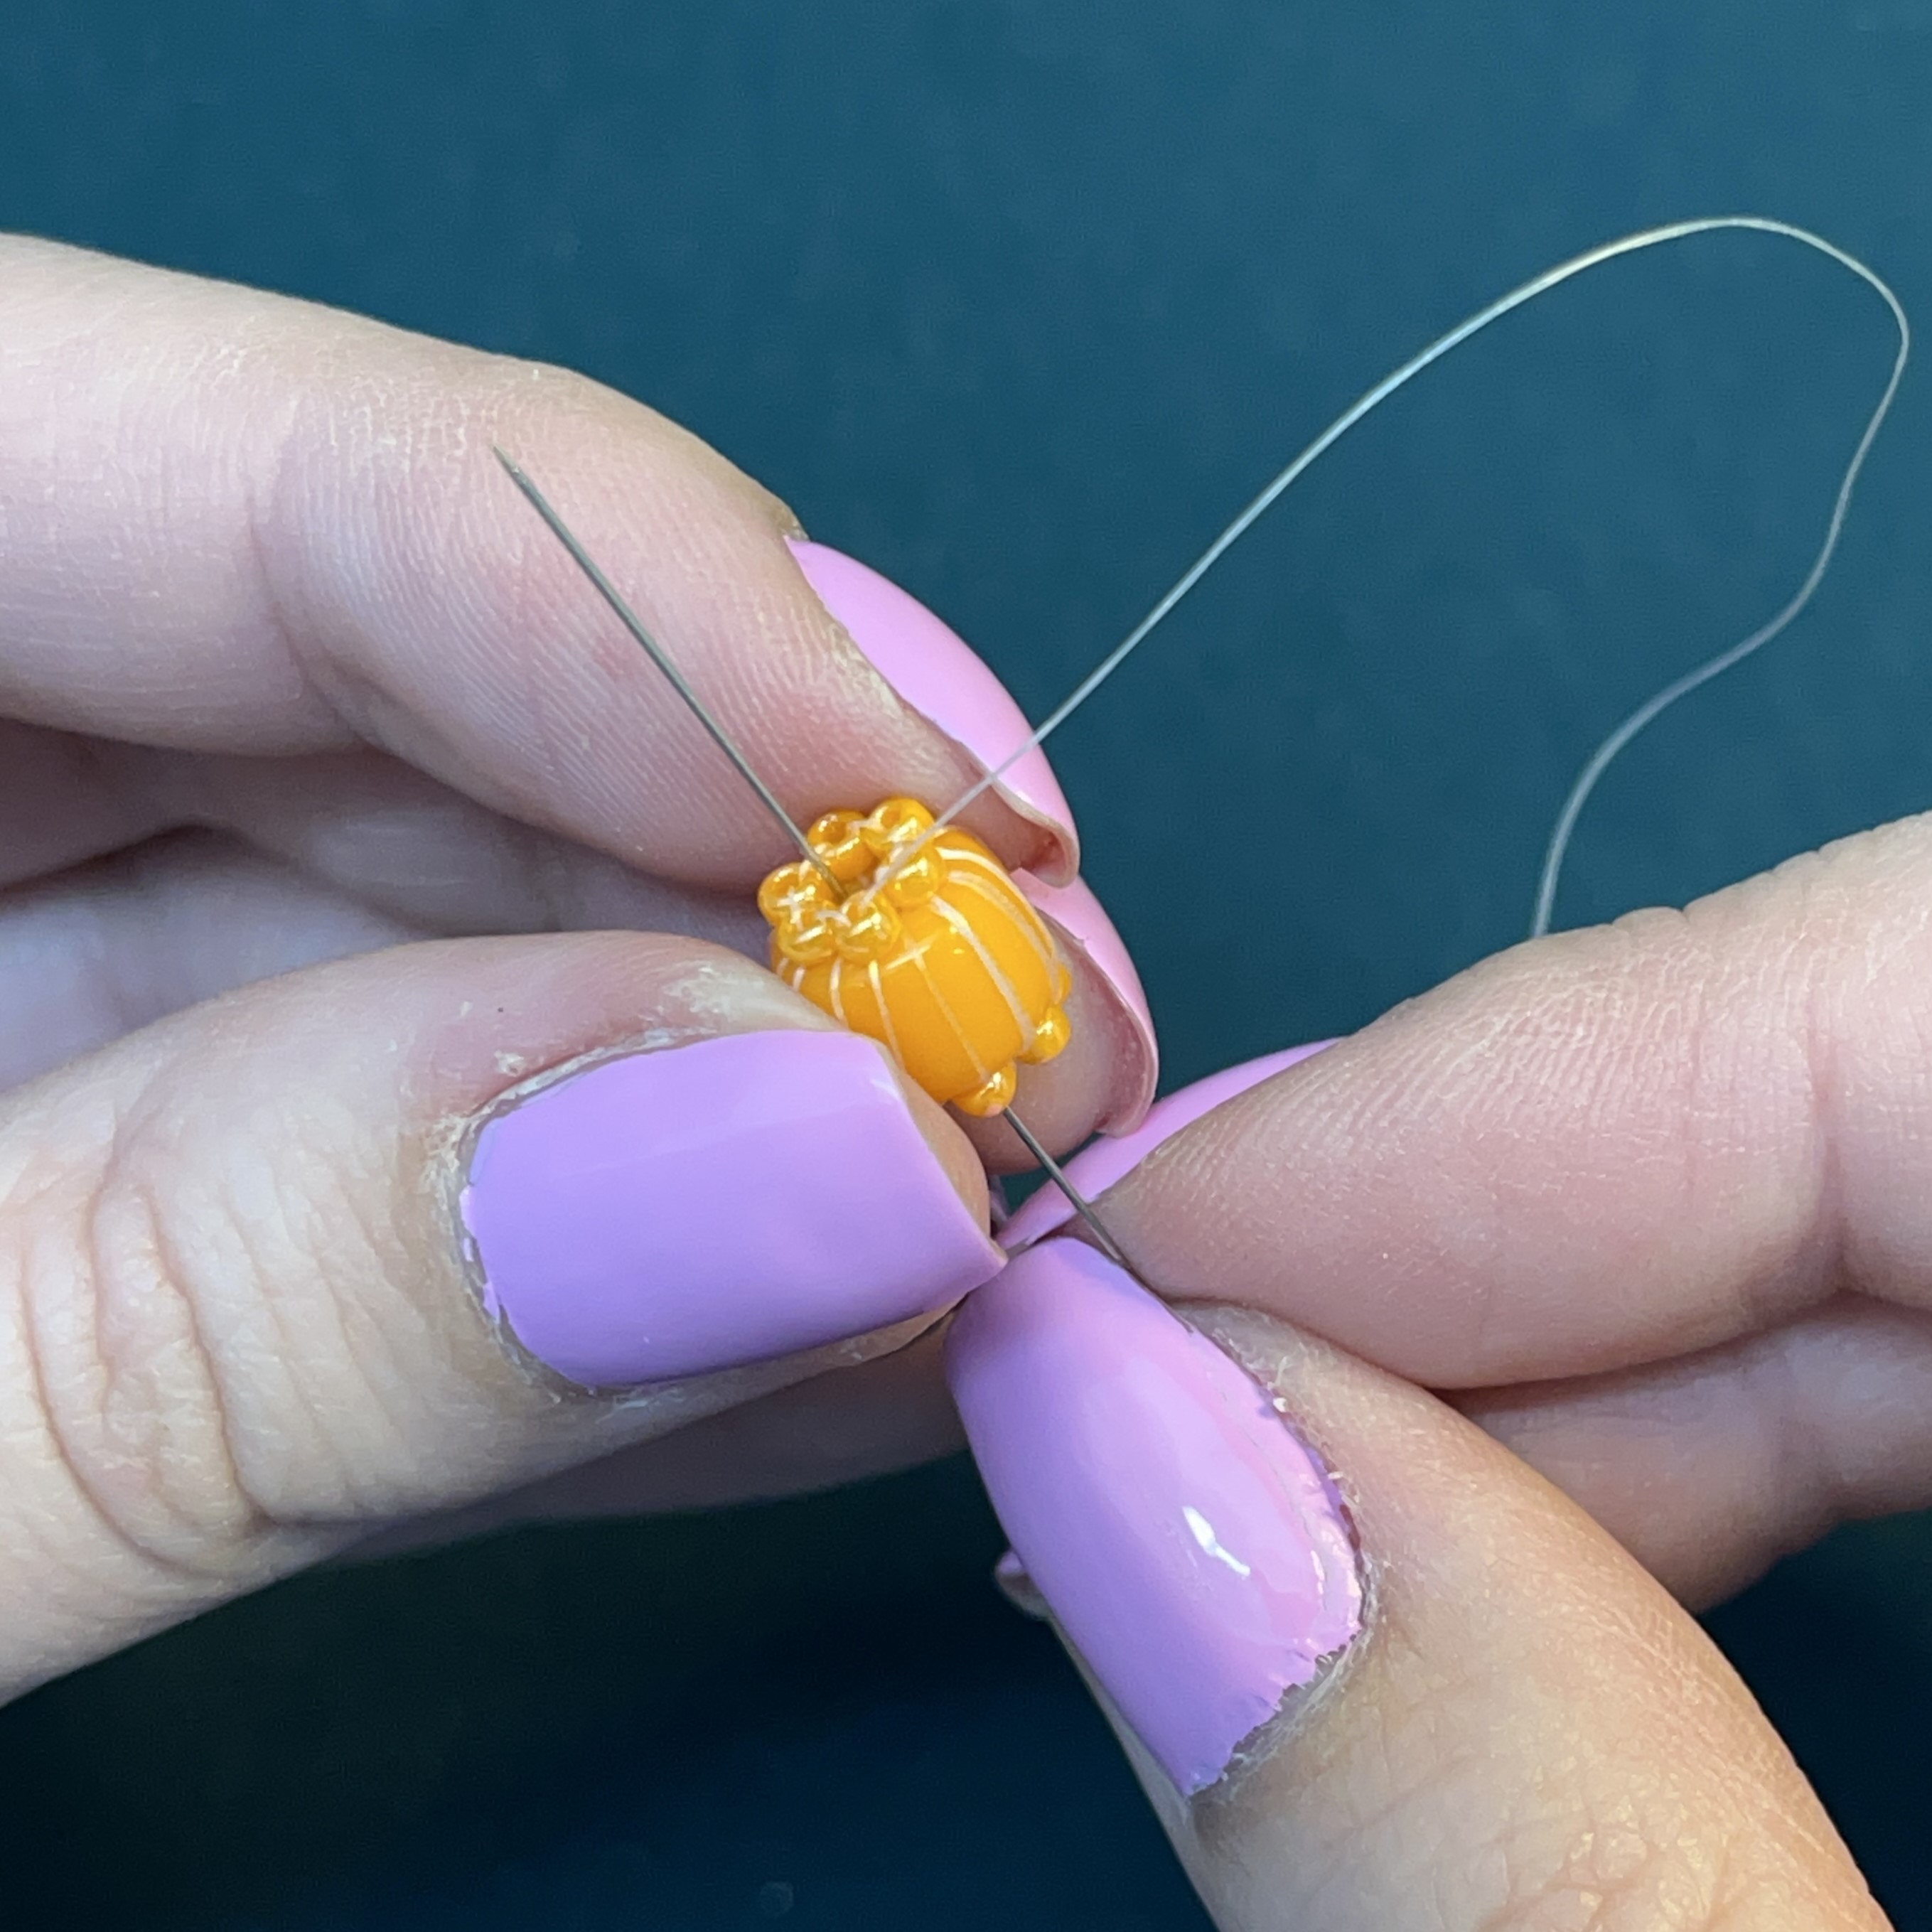
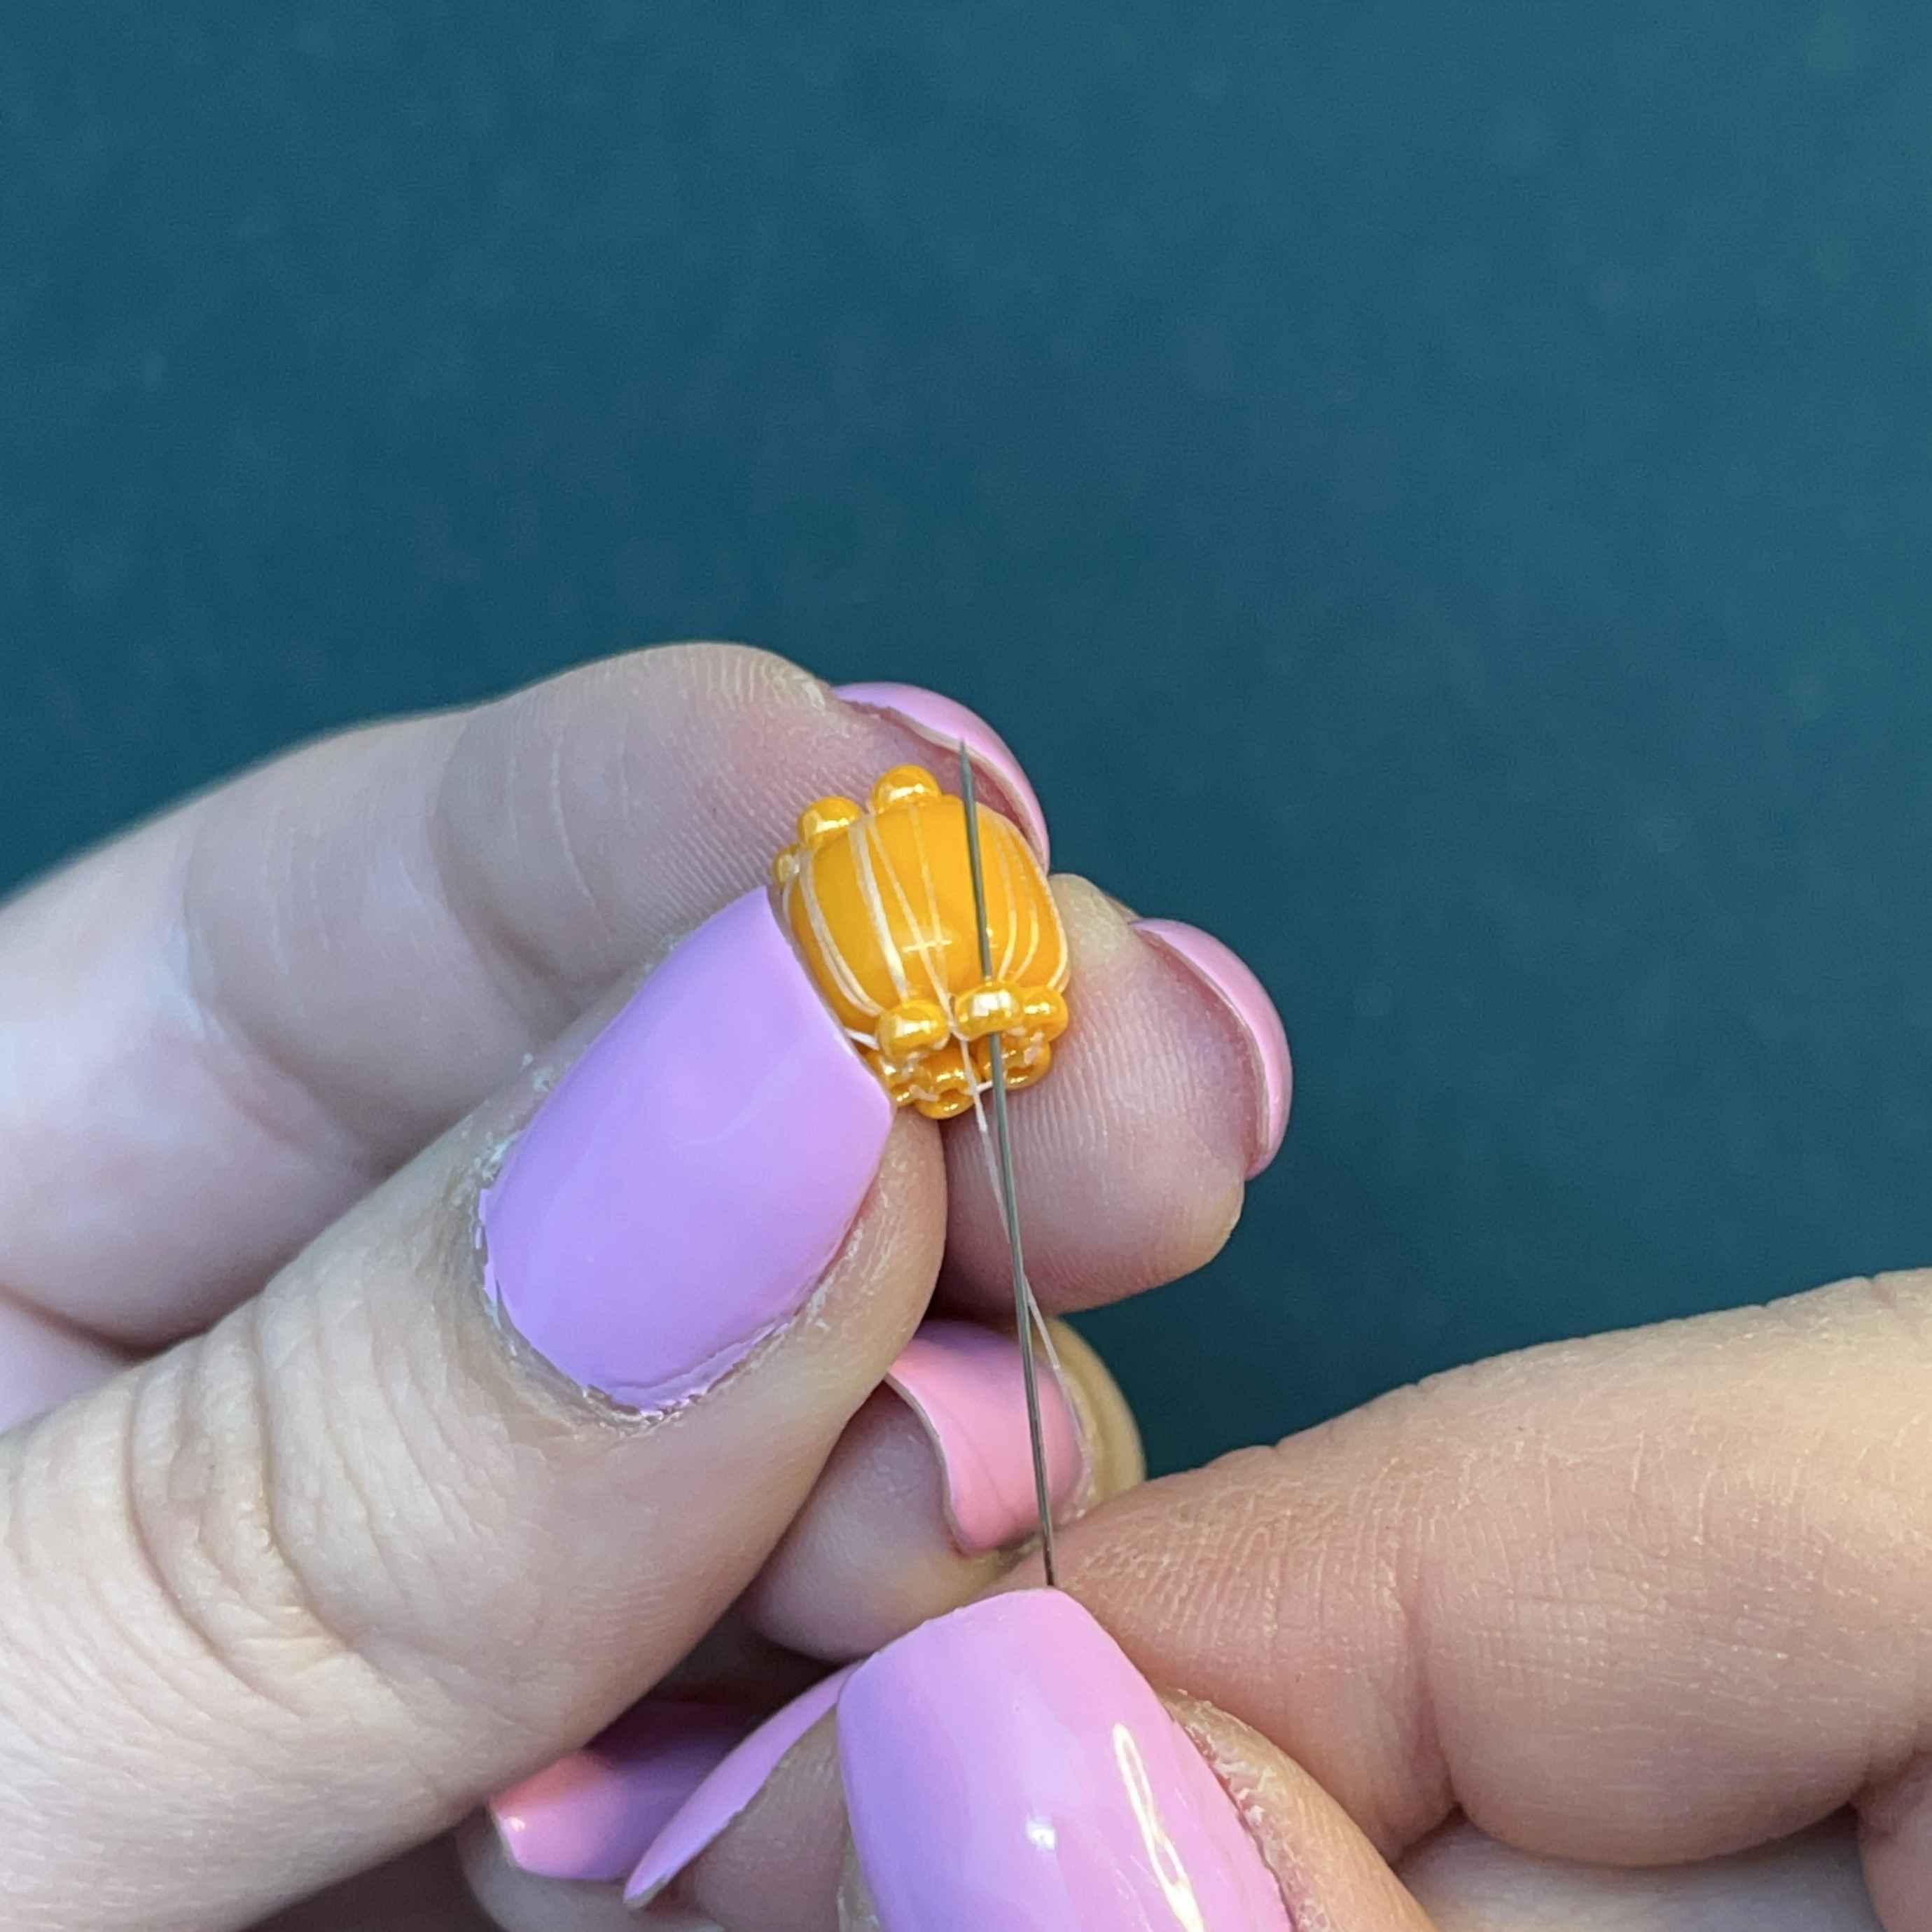
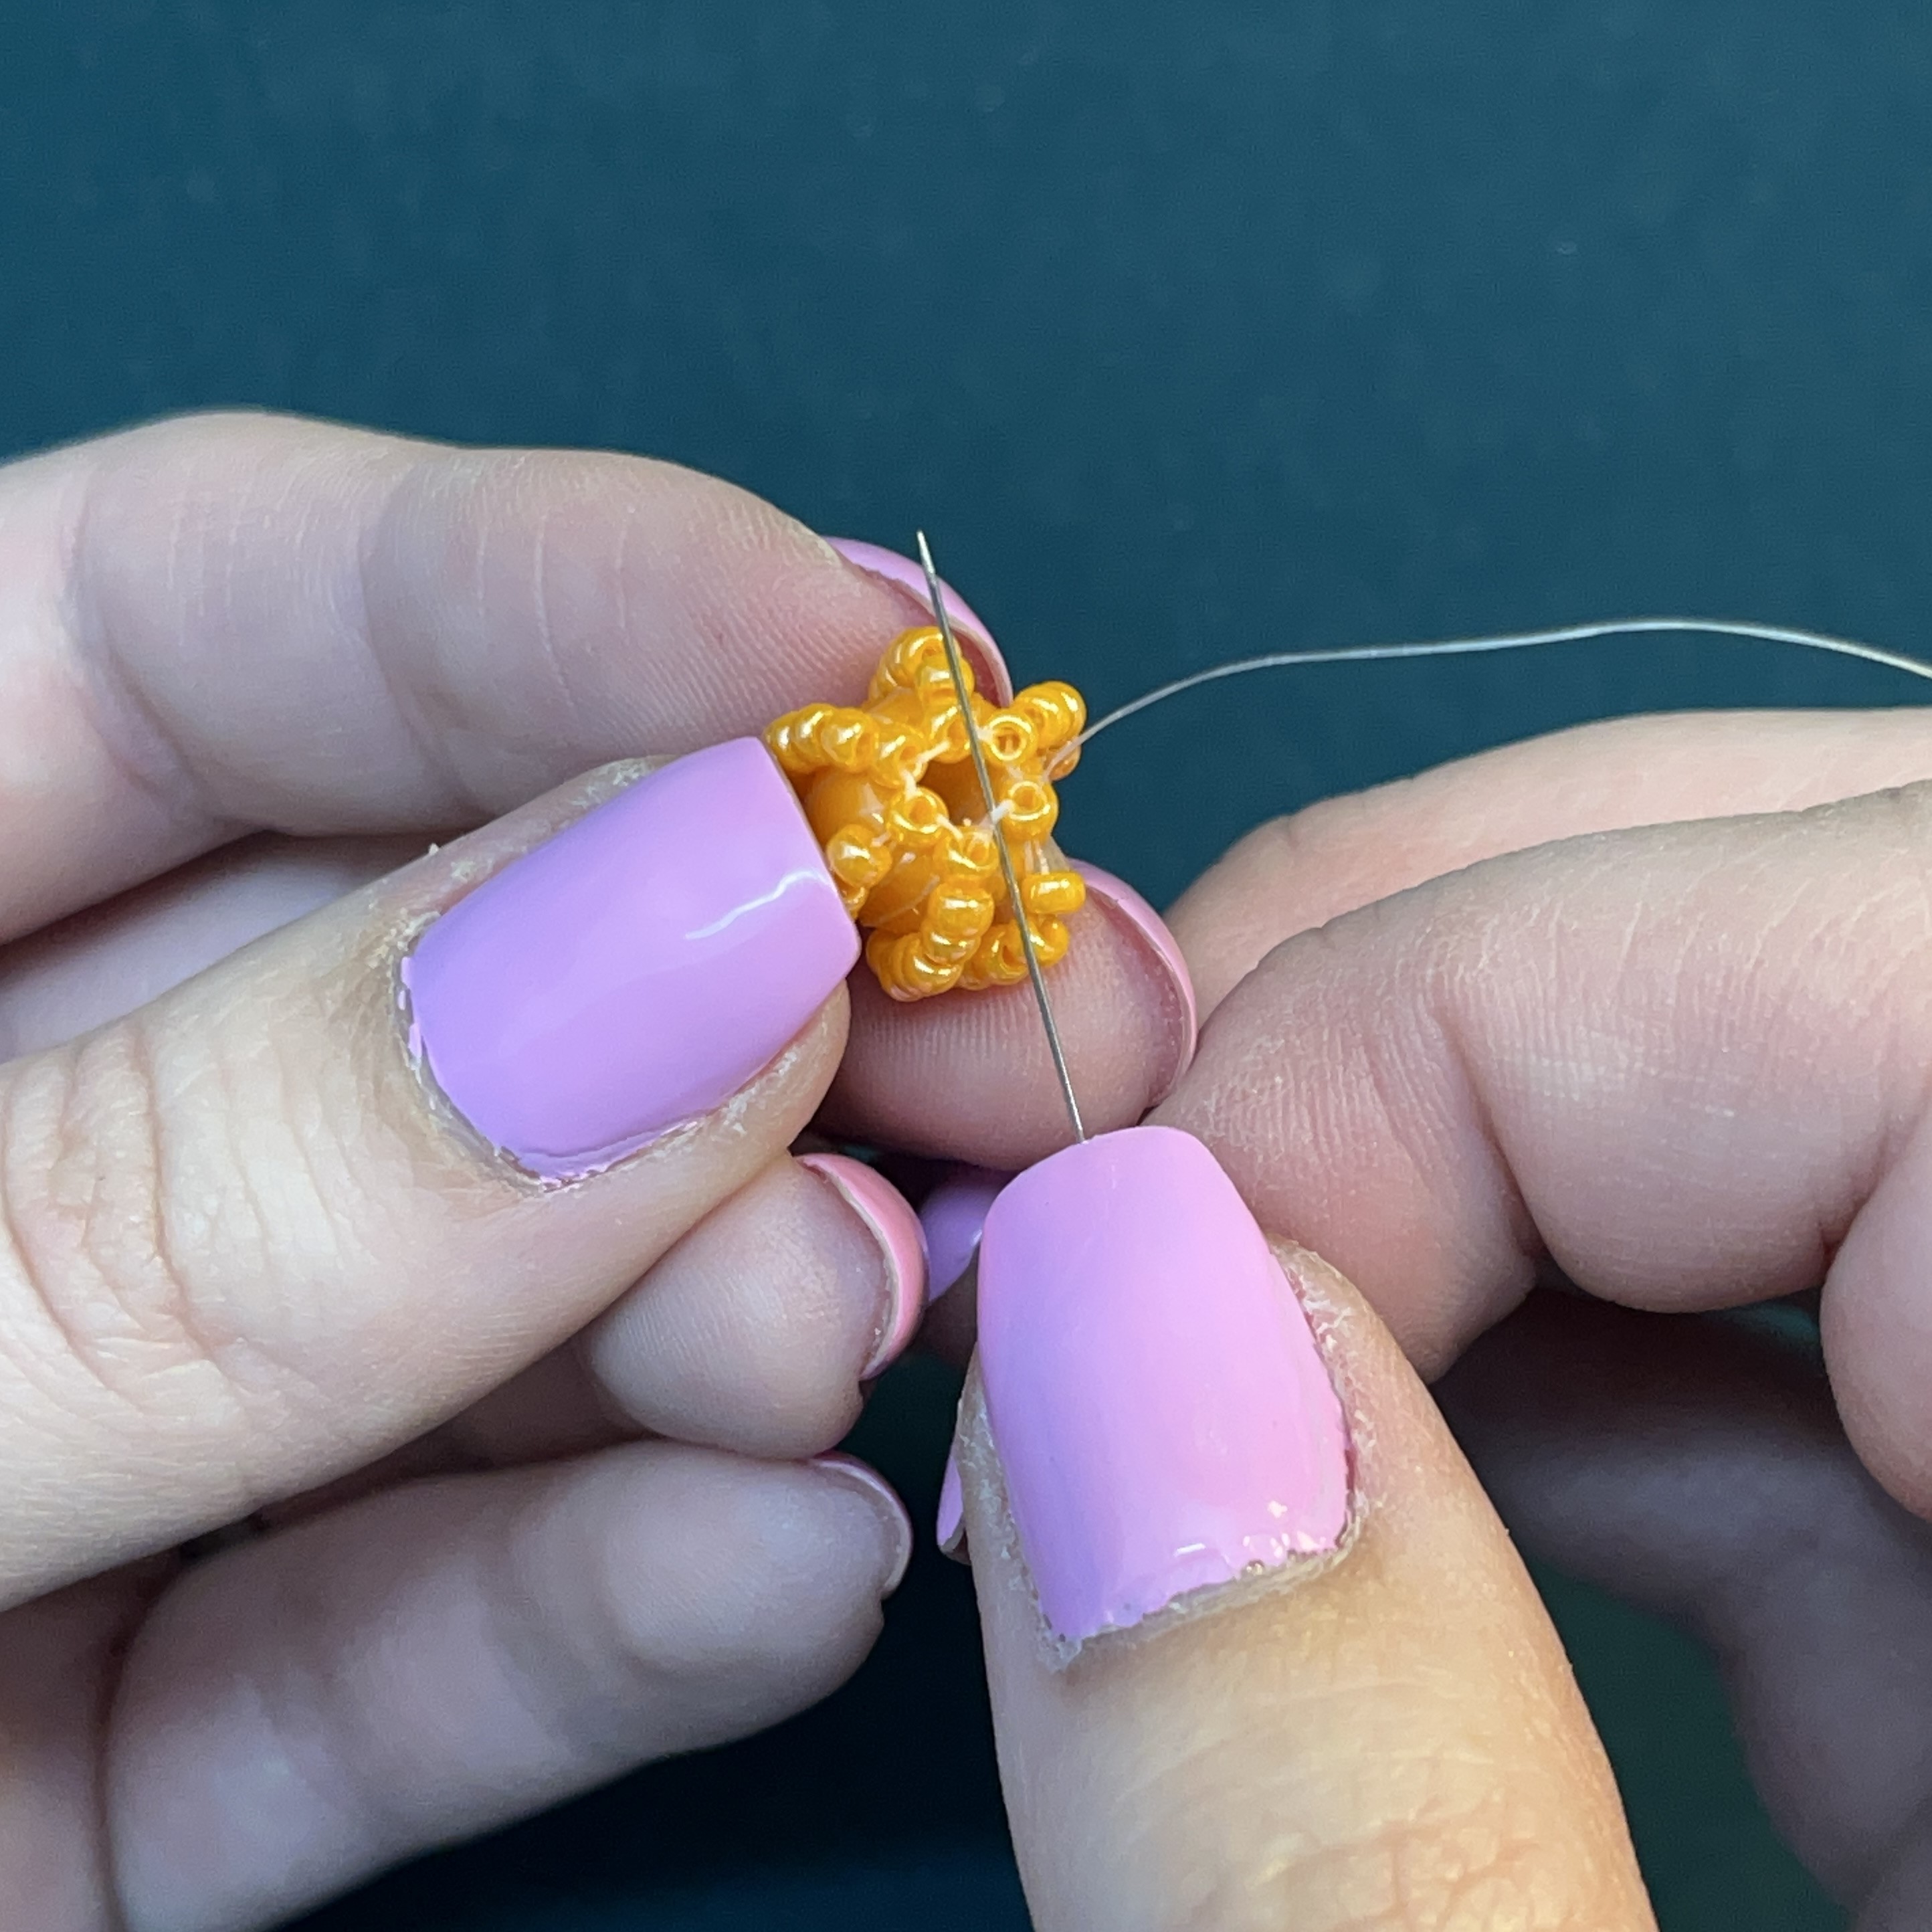
18. Turn the forte bead around and thread the needle through the forte bead - bottom to top. We will now make the top of the pumpkin.
19. Create a knot at the top of the forte bead by connecting it to one of the threads already wrapped around the bead. Make sure to keep this knot at the top of the forte bead.
20. Thread a size 11 seed bead onto the knot.
21. Thread the needle through the forte bead from bottom to top.
22. Pull the thread mostly through and then thread the needle through the seed bead going from the right to the left. It should look like this. Pull it tight while making sure the seed bead stays snug at the top of the forte bead.
23. Now we are going to secure the seed bead. Thread the needle from bottom to top of the forte bead.
24. Create a knot with that loop you just made.
25. Tighten the knot for a snug fit.
26. Now I want you to check the placement of this seed bead with the one below it. You want each bead to be parallel to the bead below it so you can properly make the ridges of the pumpkin. If these are off, you'll have a swirly pumpkin! (still a cute pumpkin though)
27. Thread the needle back through the forte bead like the picture. Keep the seed bead at the top of the forte bead.
28. Pull the thread mostly through and then thread the needle through the seed bead going from the right to the left. After, just add another seed bead You do not need to secure the 2nd, 3rd, 4th, or 5th bead. Just continue the pattern.
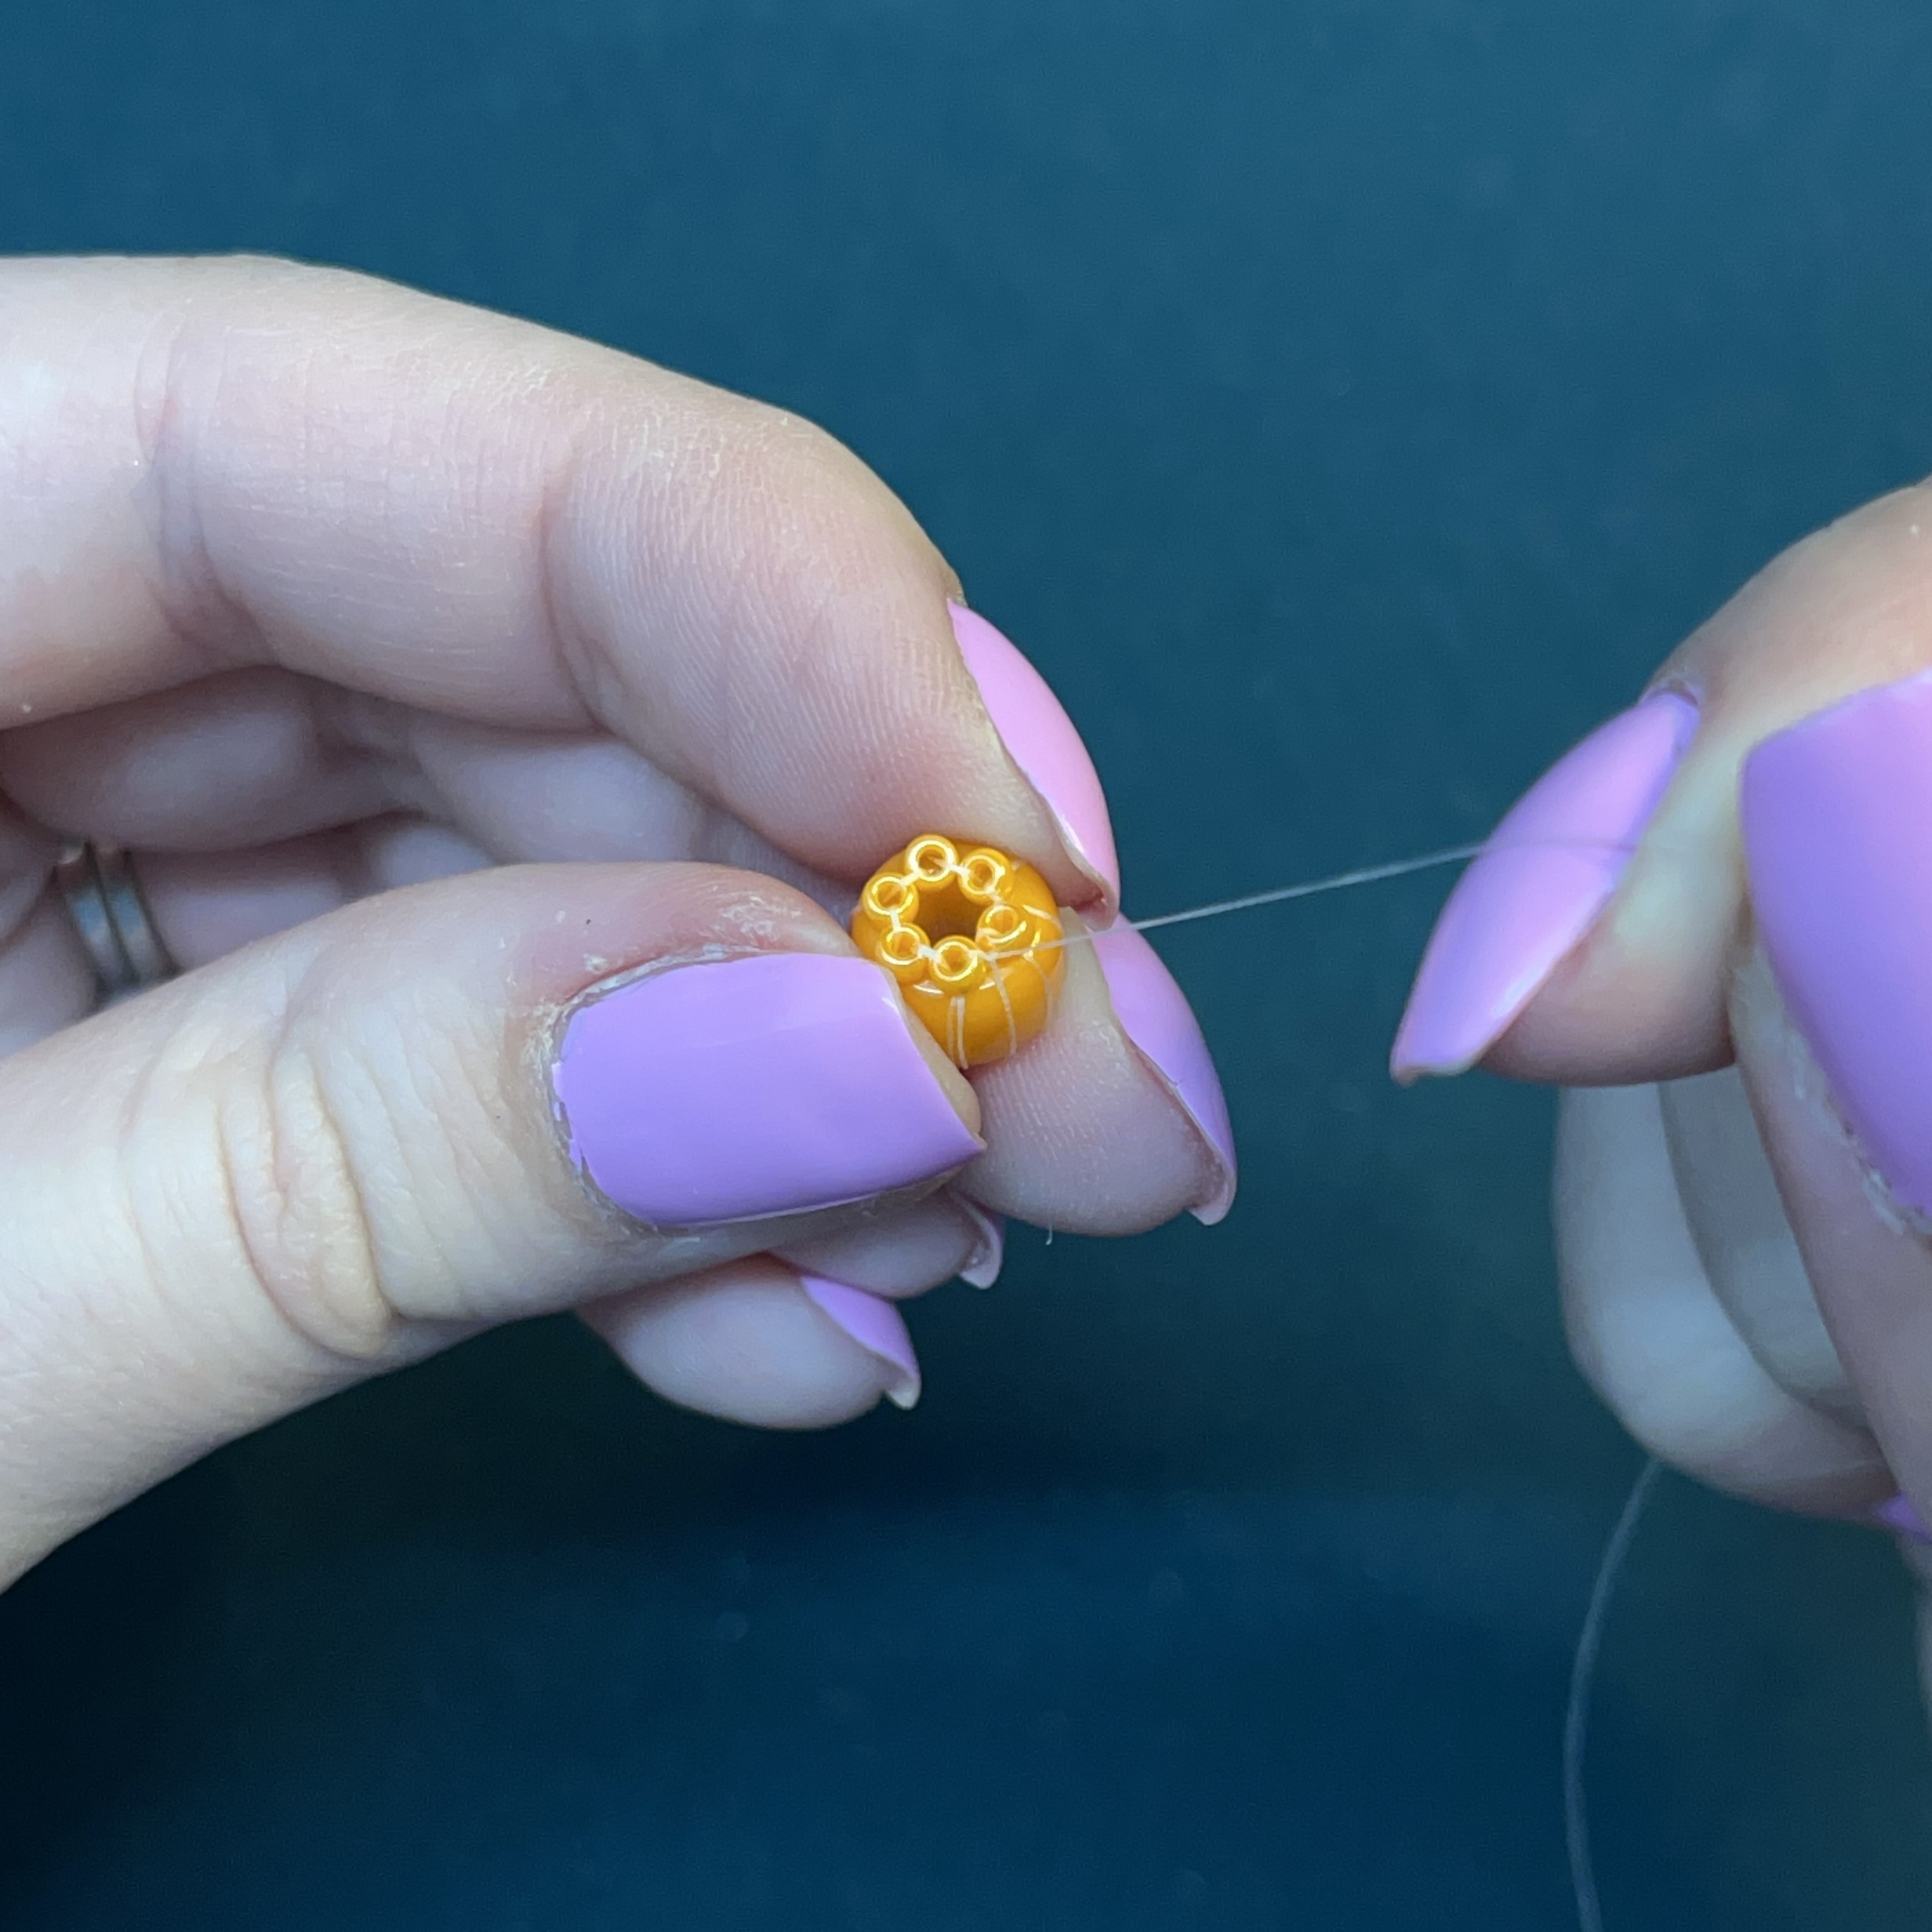
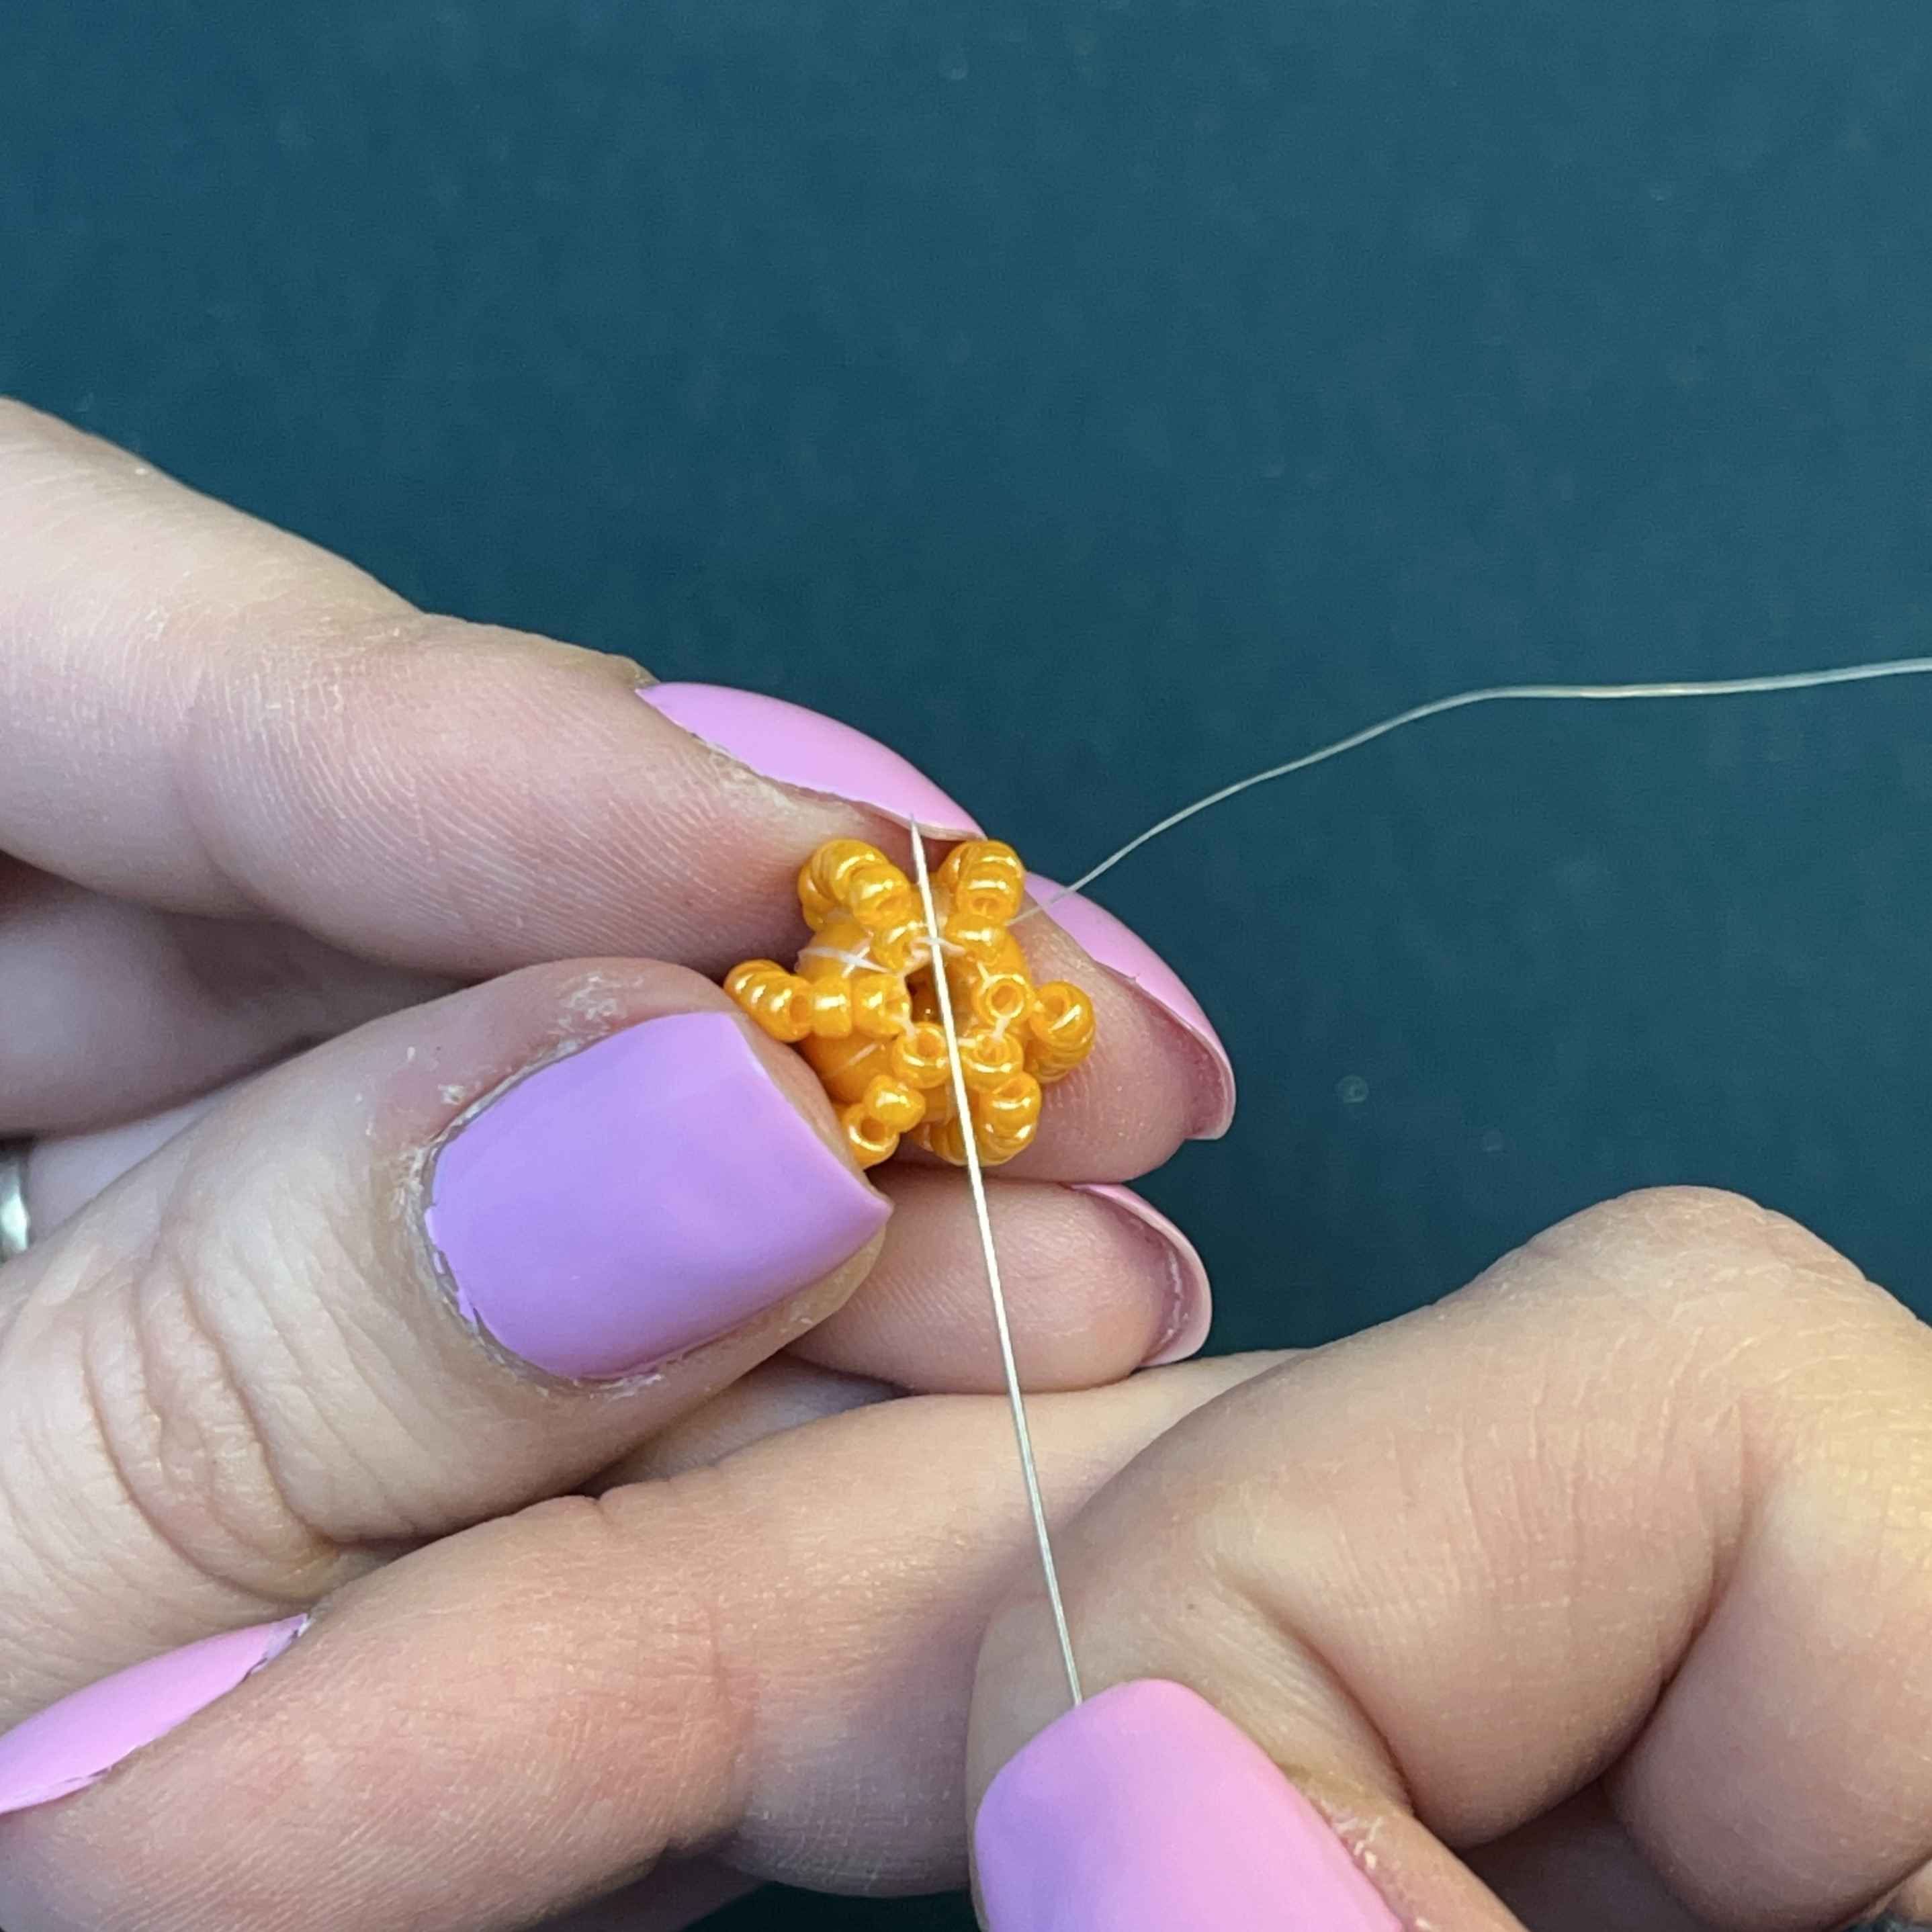
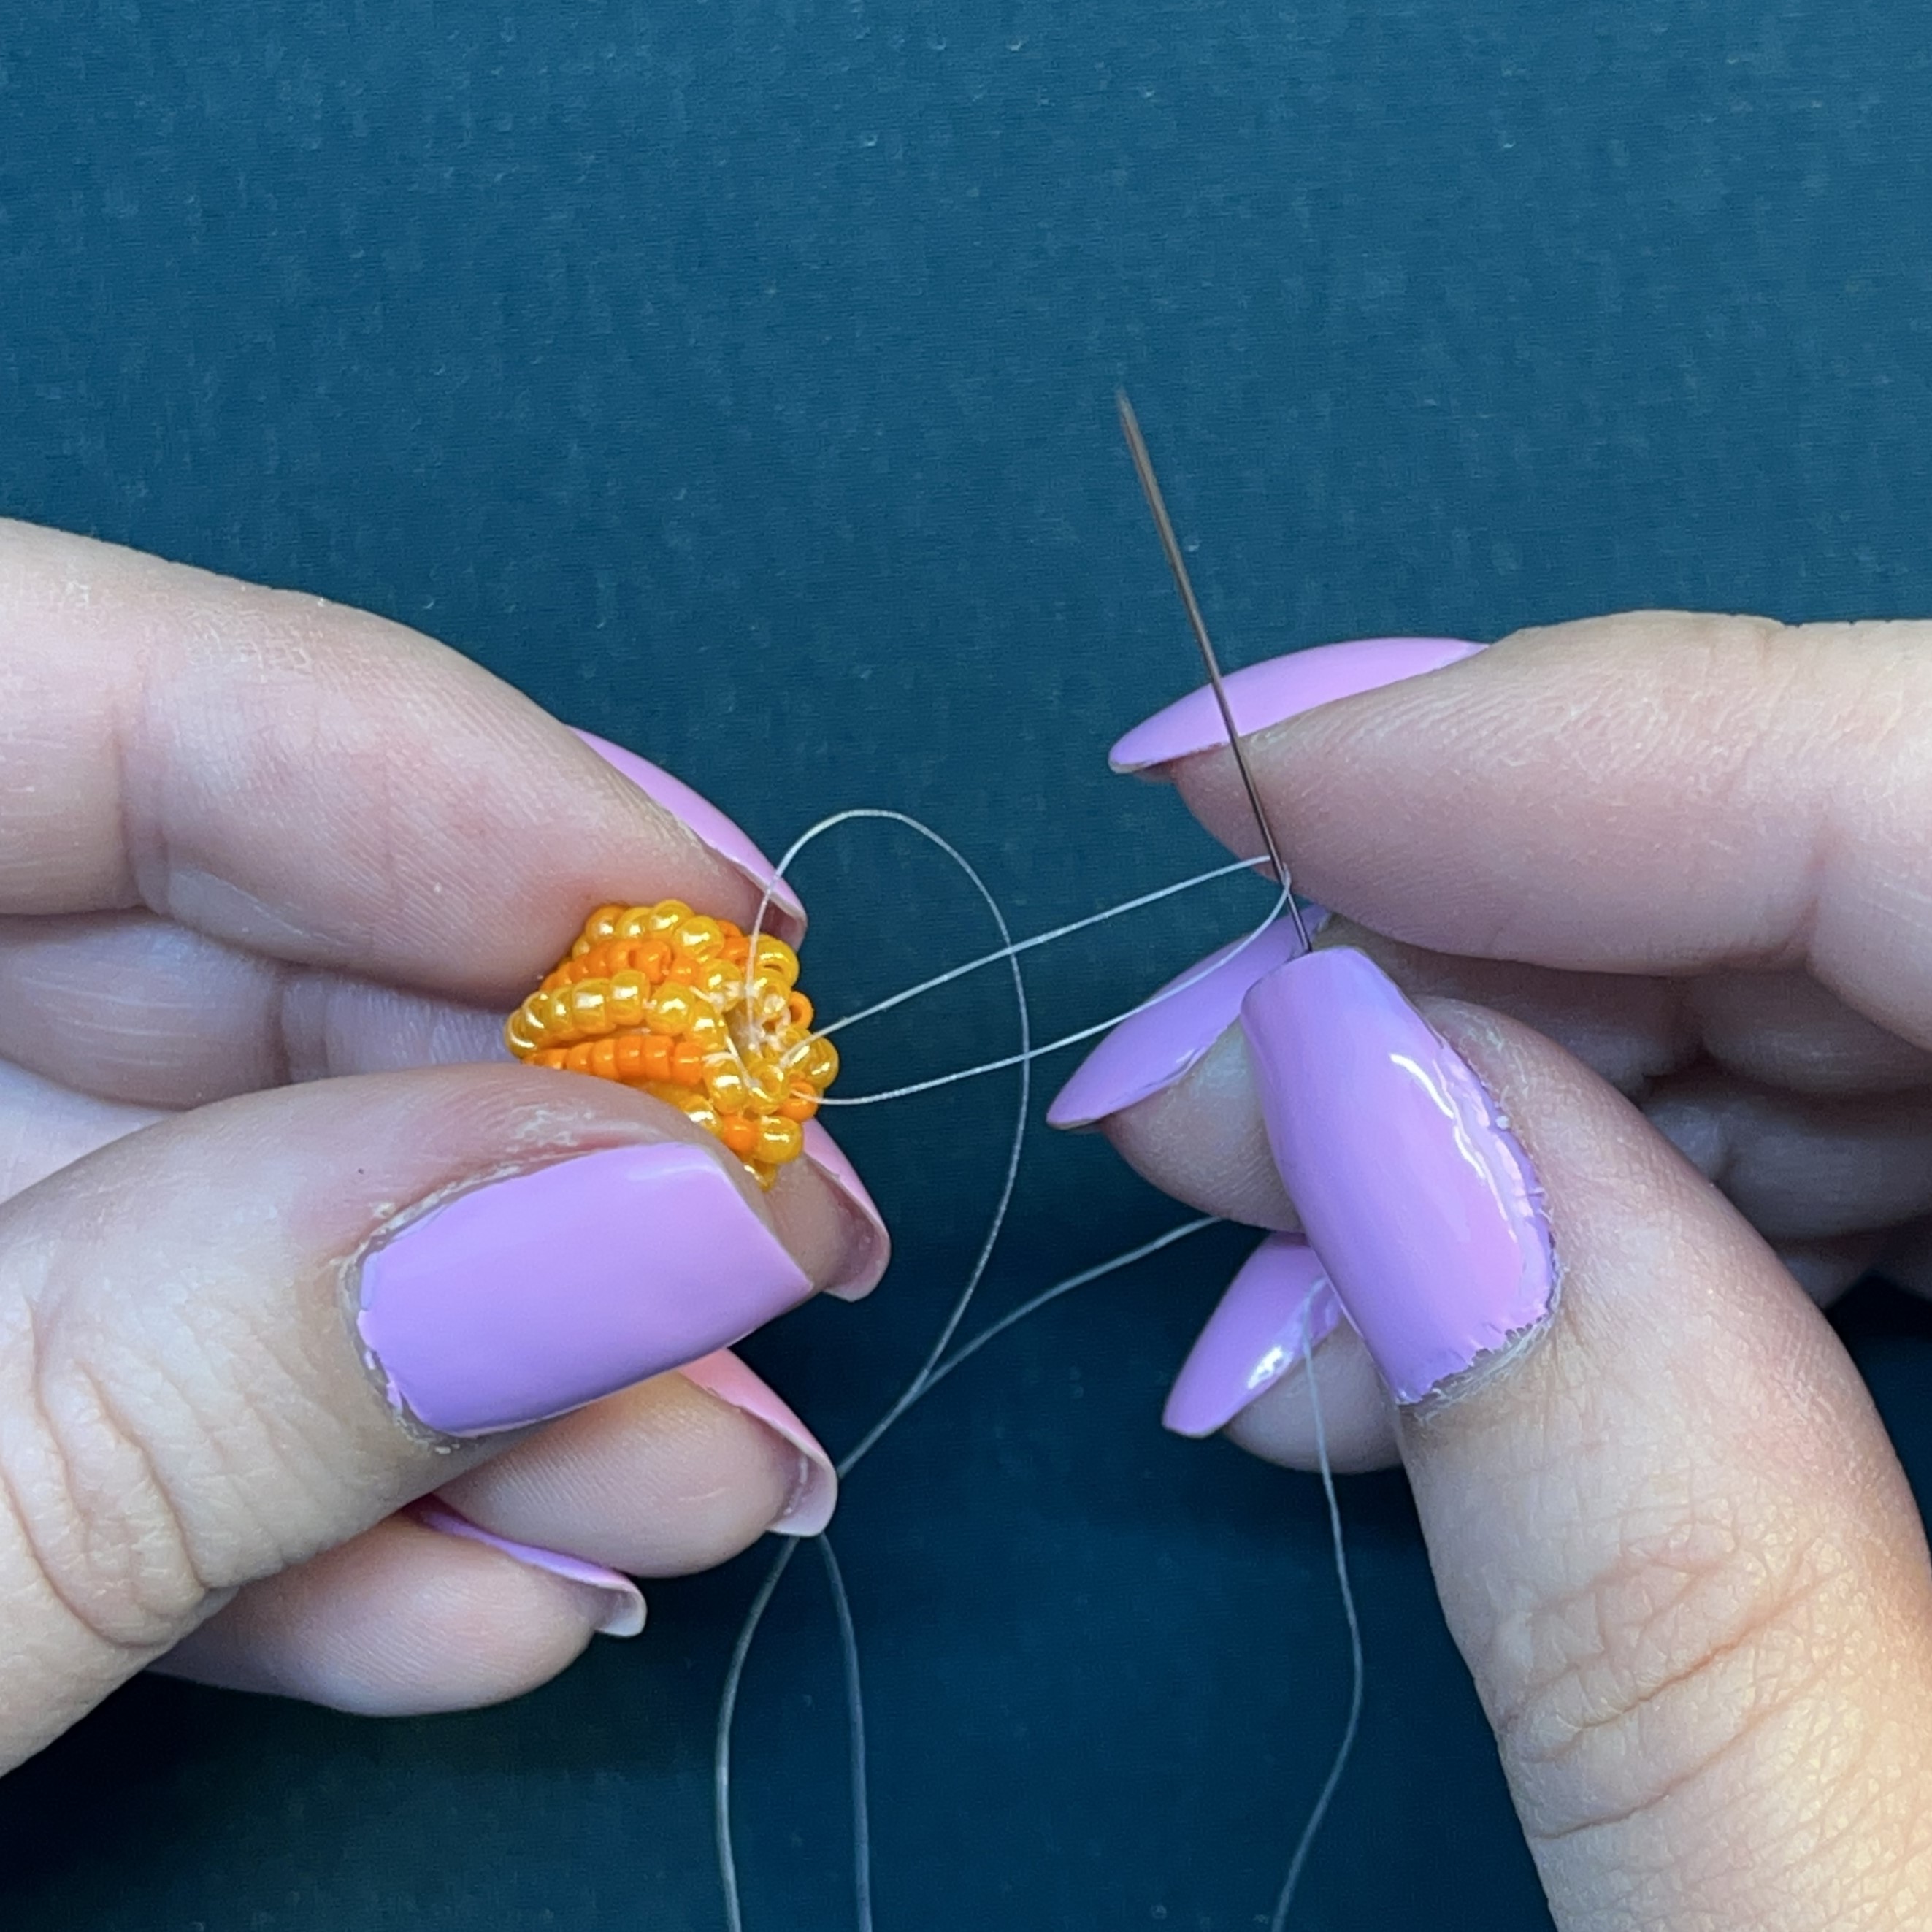
29. Continue until you have 6 seed beads in a circle around the forte bead hole.
30. We will now secure the last bead. Thread the needle from the bottom through the top.
31. Create a loop to create a knot, pulling the needle under. Tighten the knot to the right side of the seed bead.
32. Turn the bead around so the knot you just made is facing the ground. Thread the needle through the seed bead you just secured.
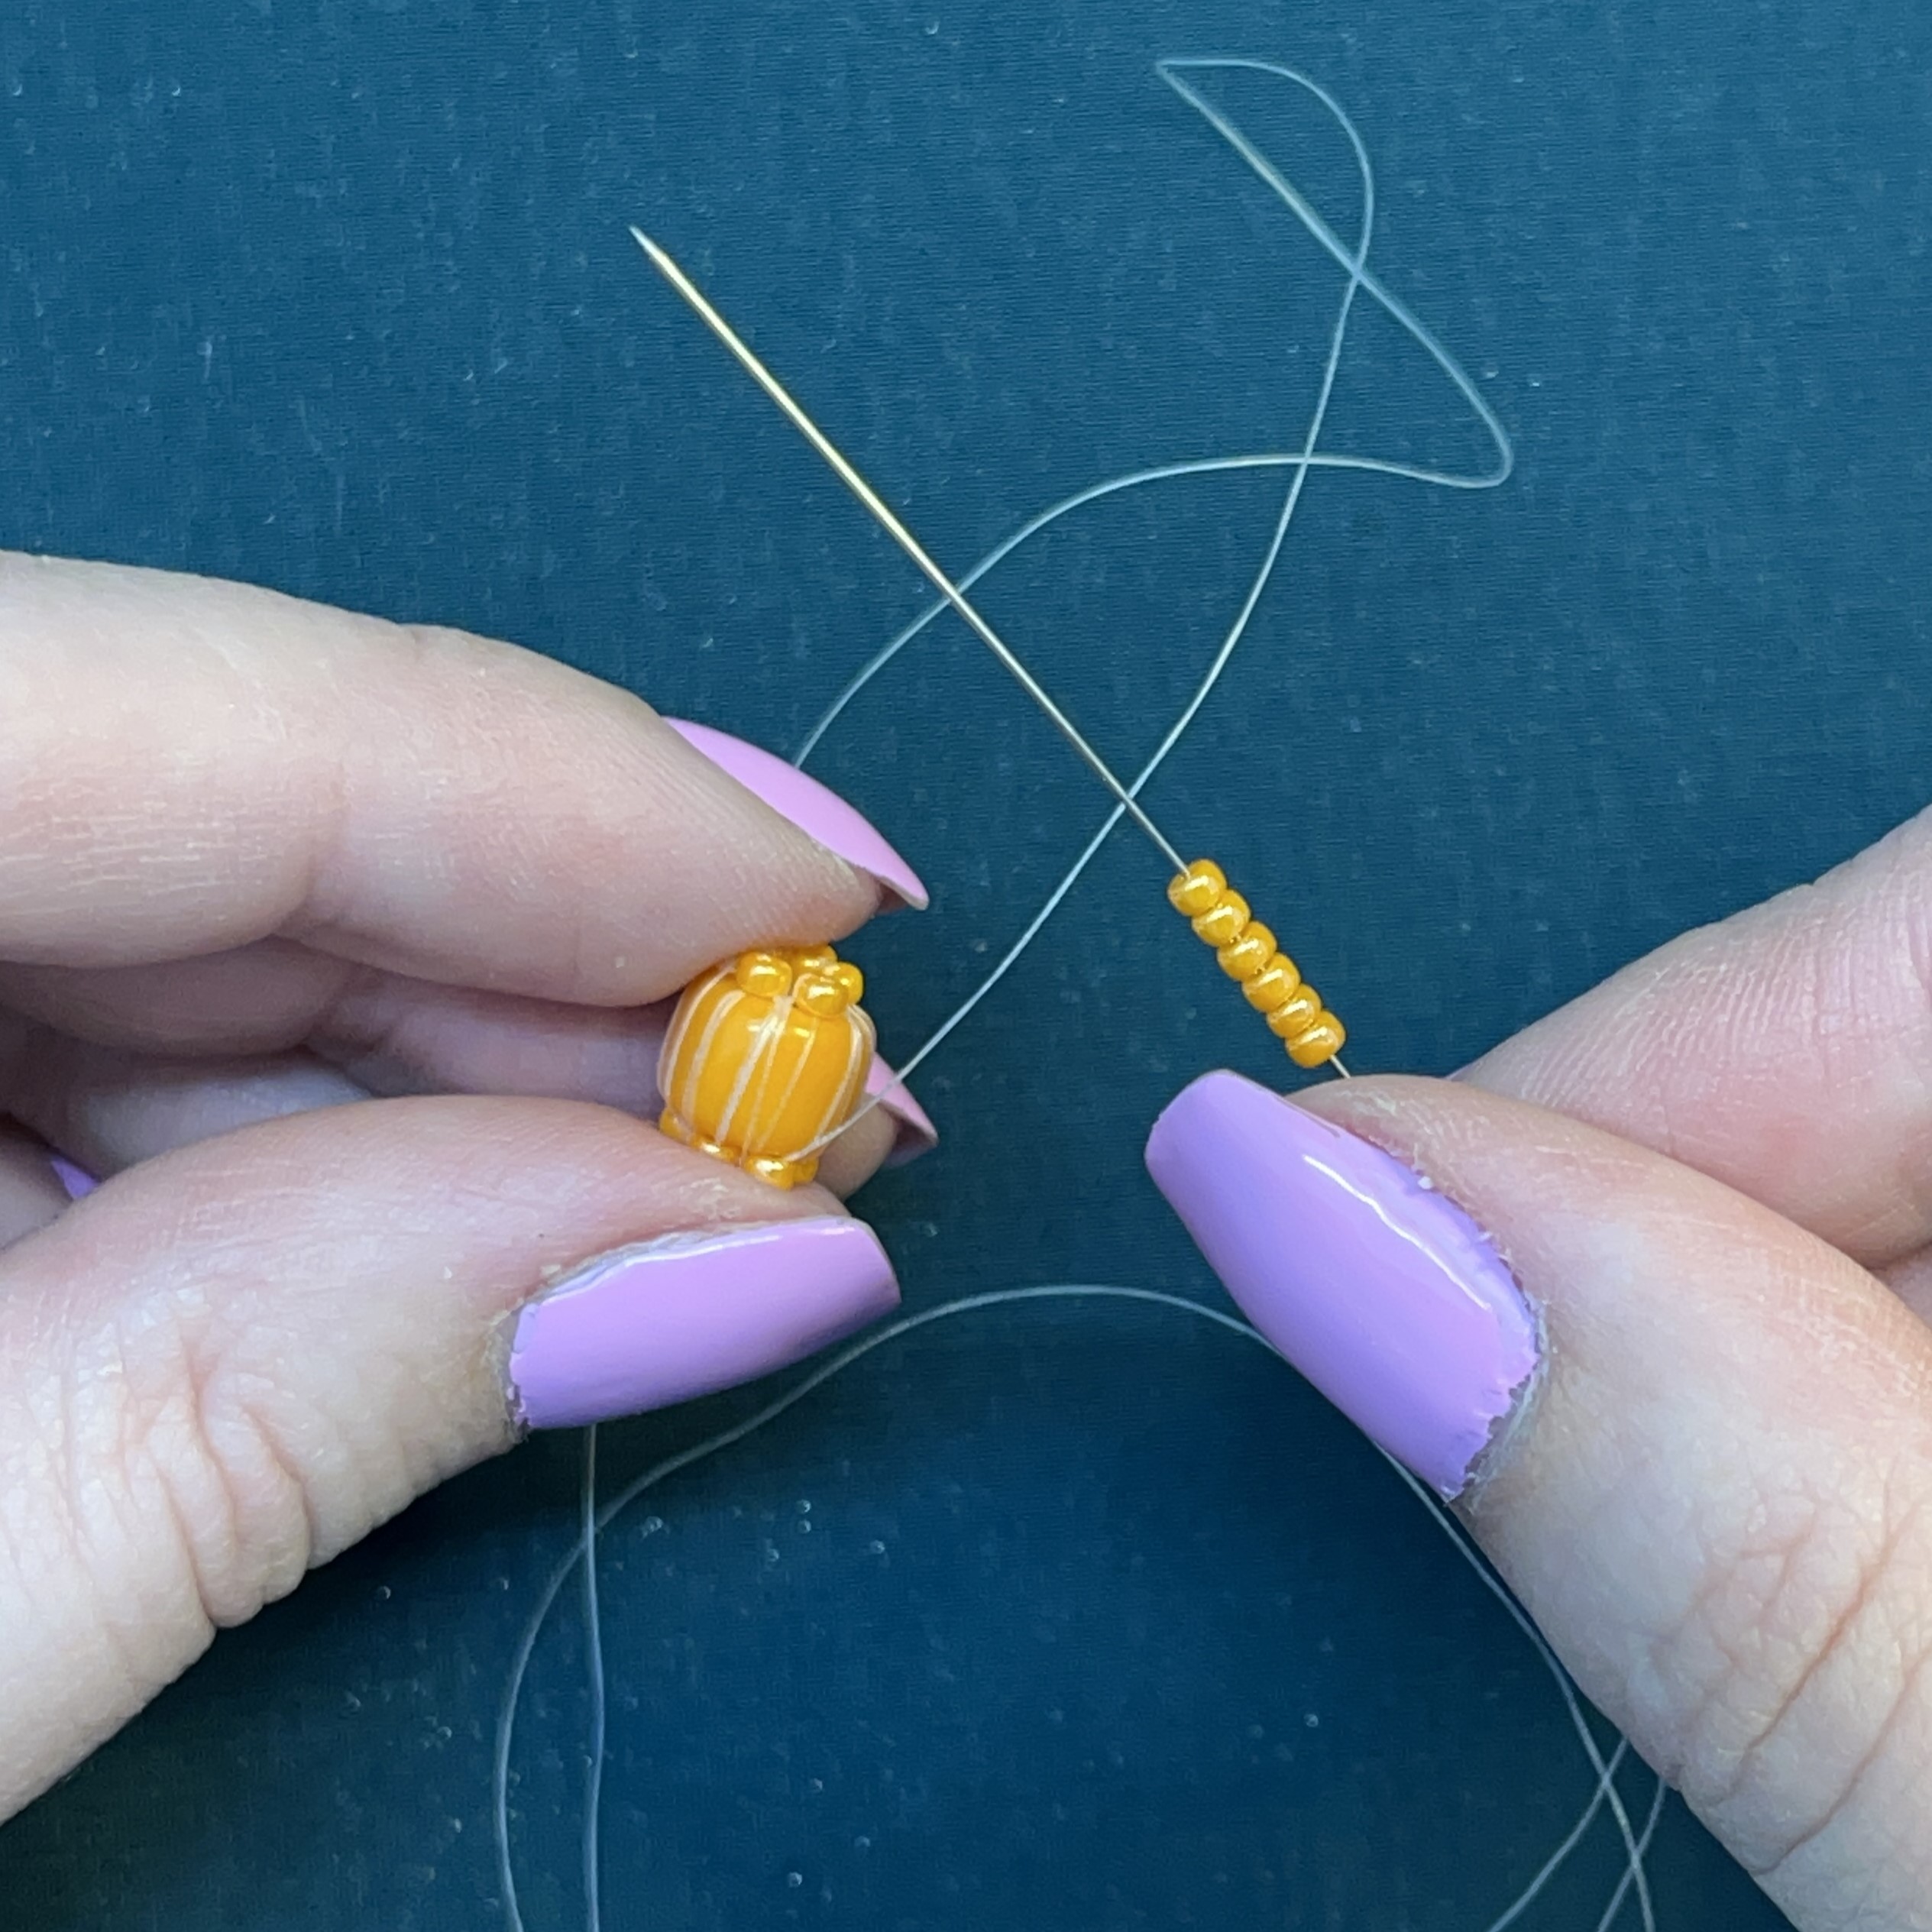
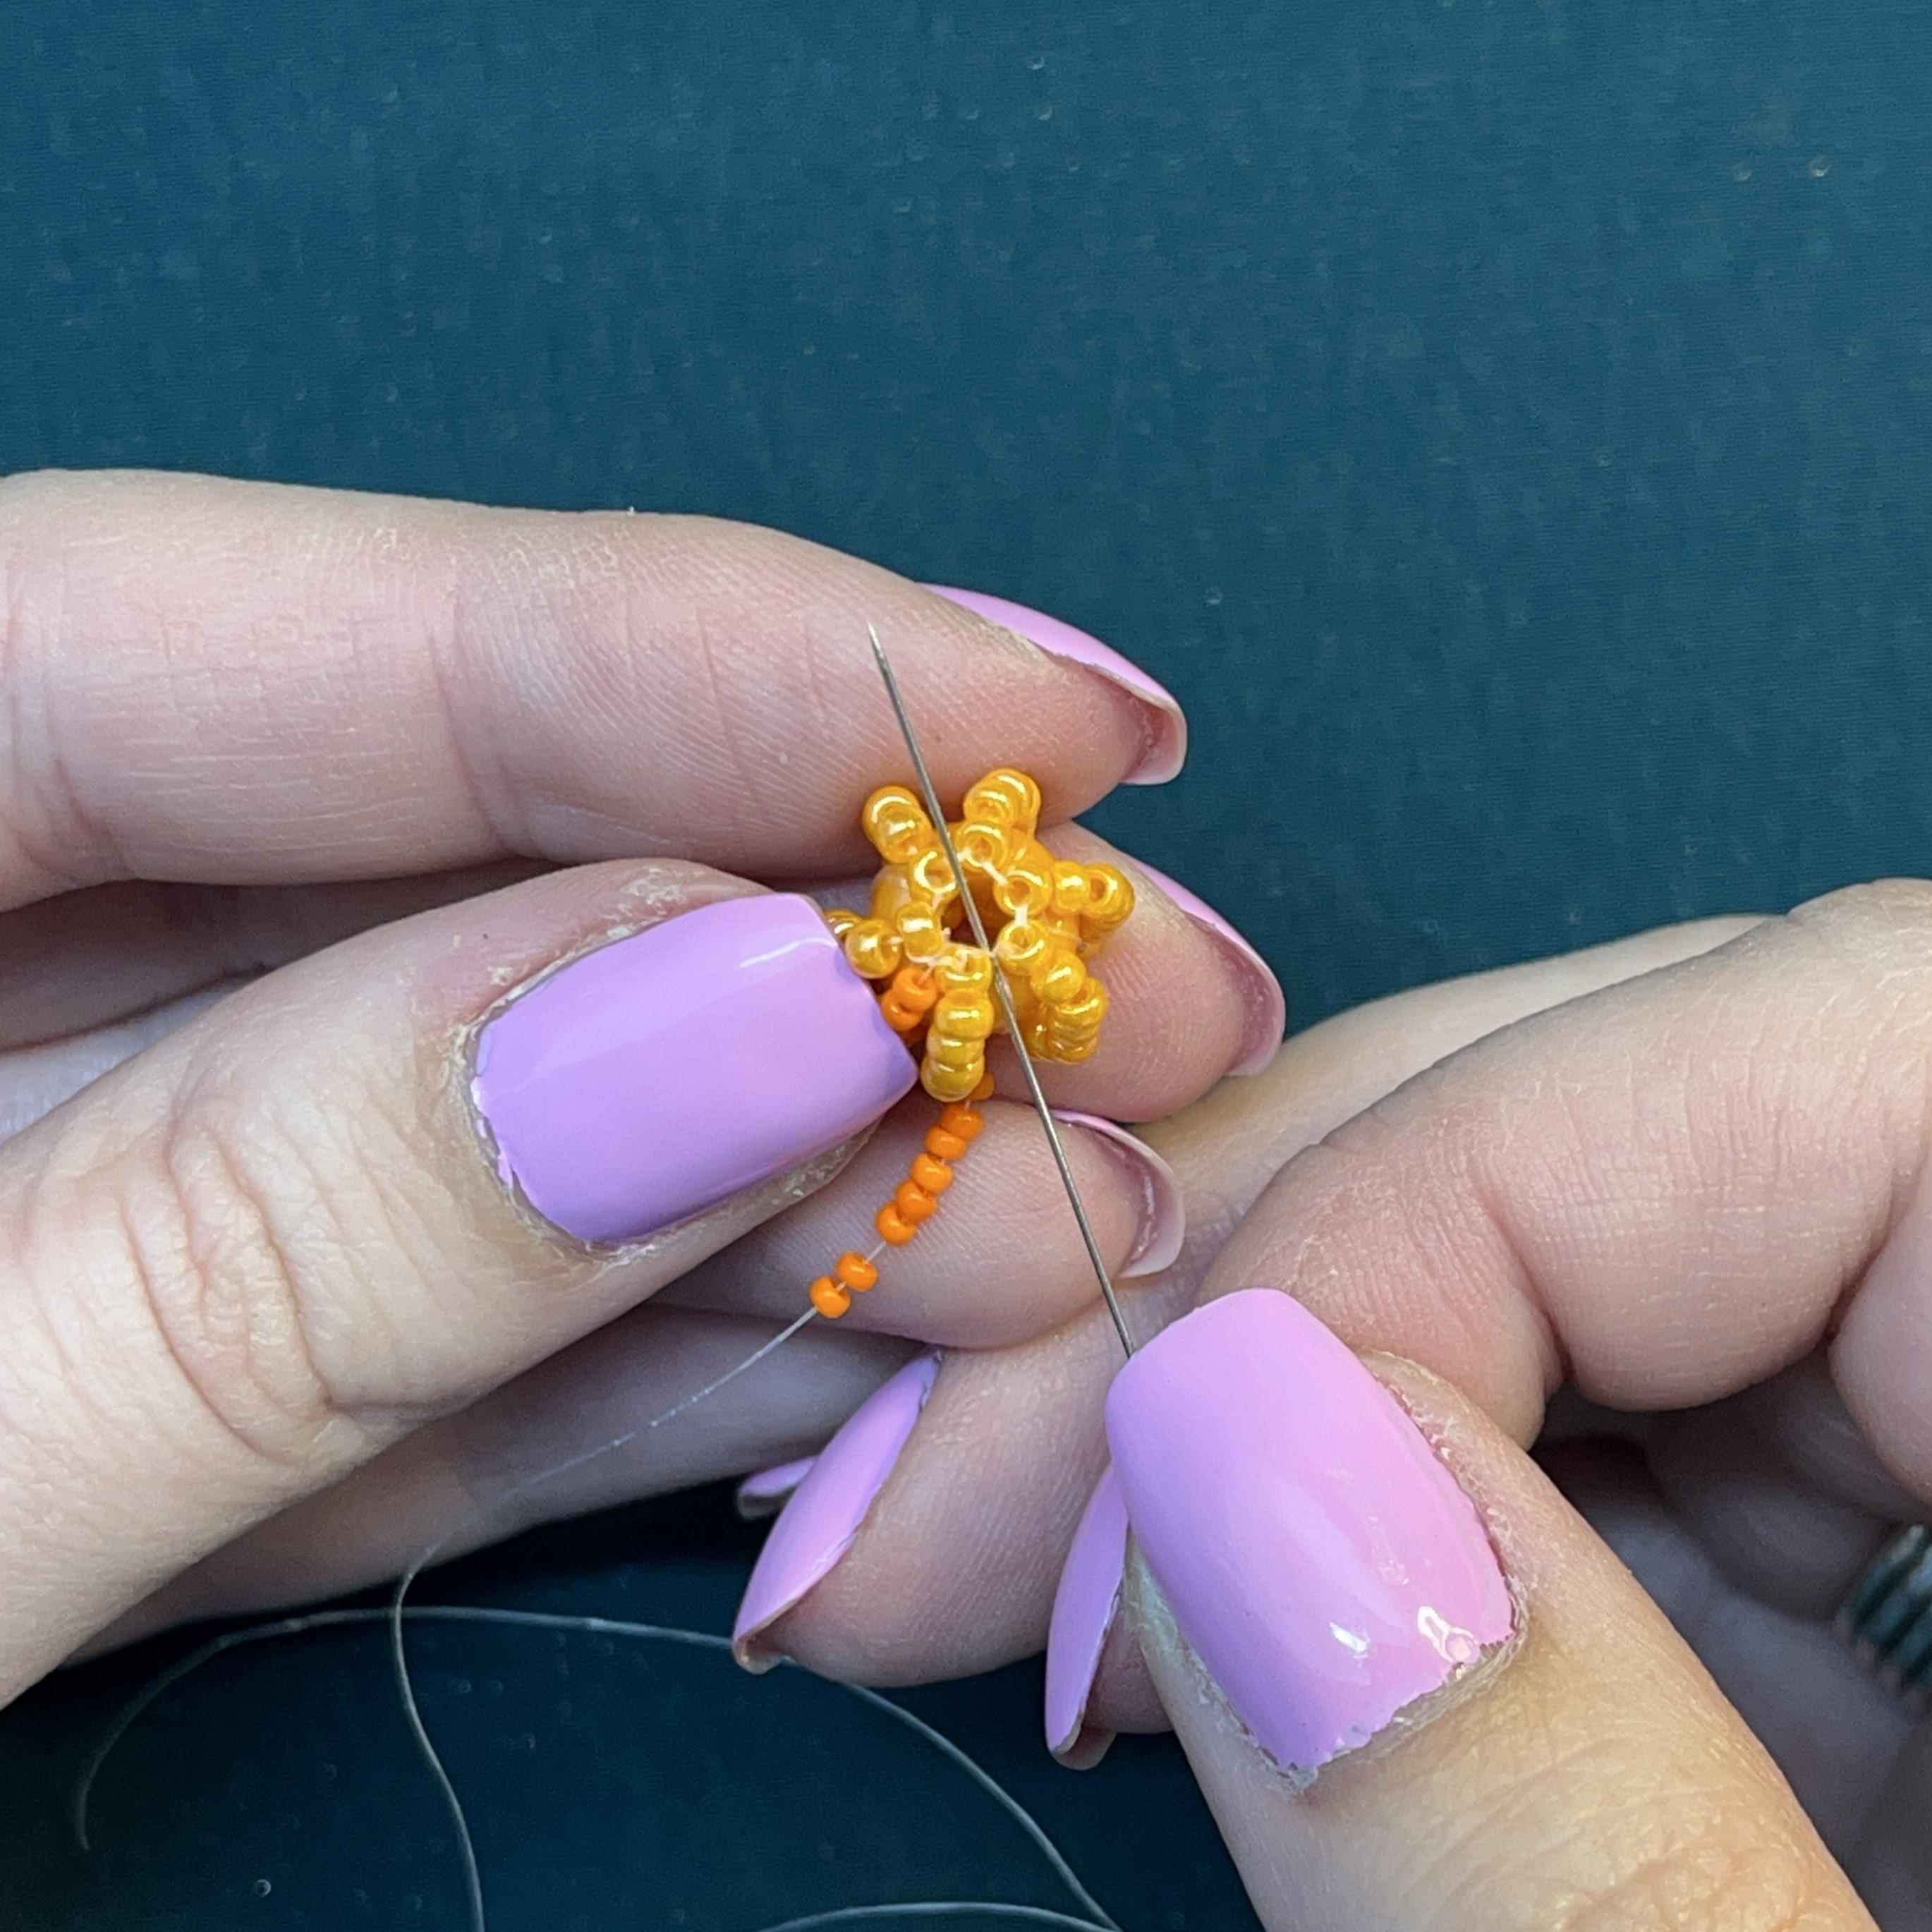
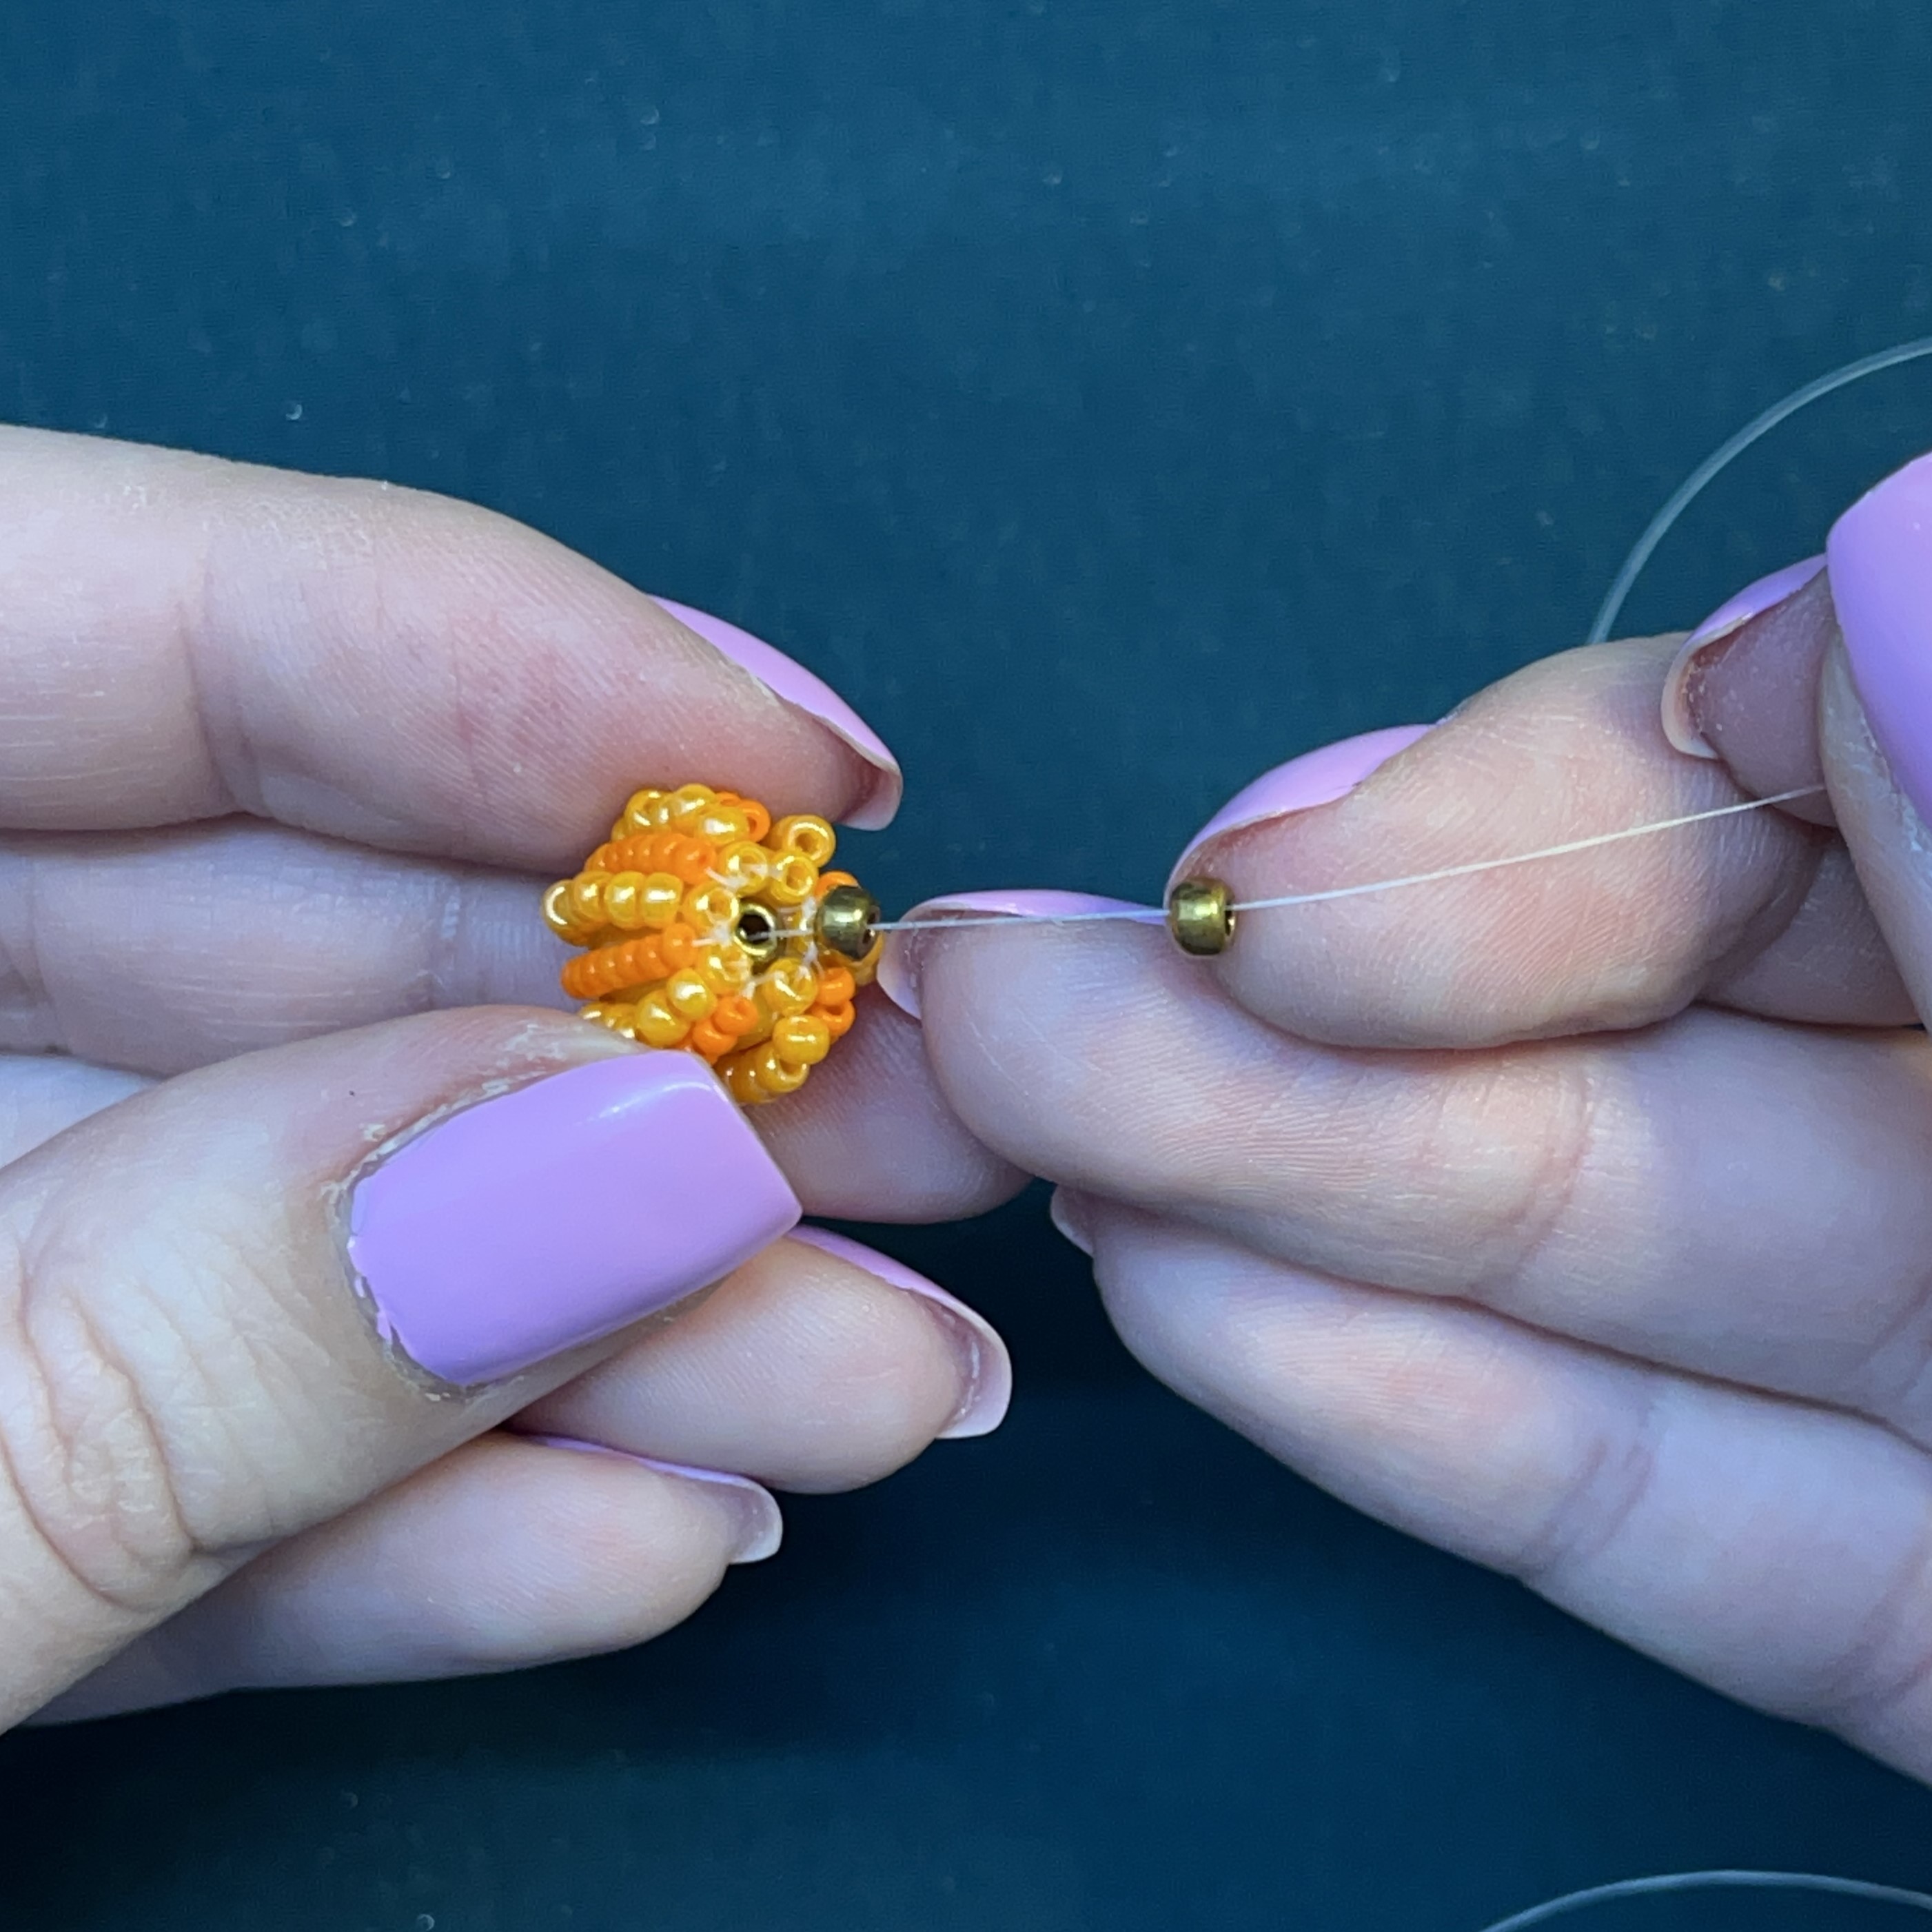
33. Thread 6 size 11 seed beads on your needle and thread.
34. Thread the needle through the parallel seed bead on the other side of the forte bead.
35. Pull the thread though the seed bead and hold tight while you do the next step.
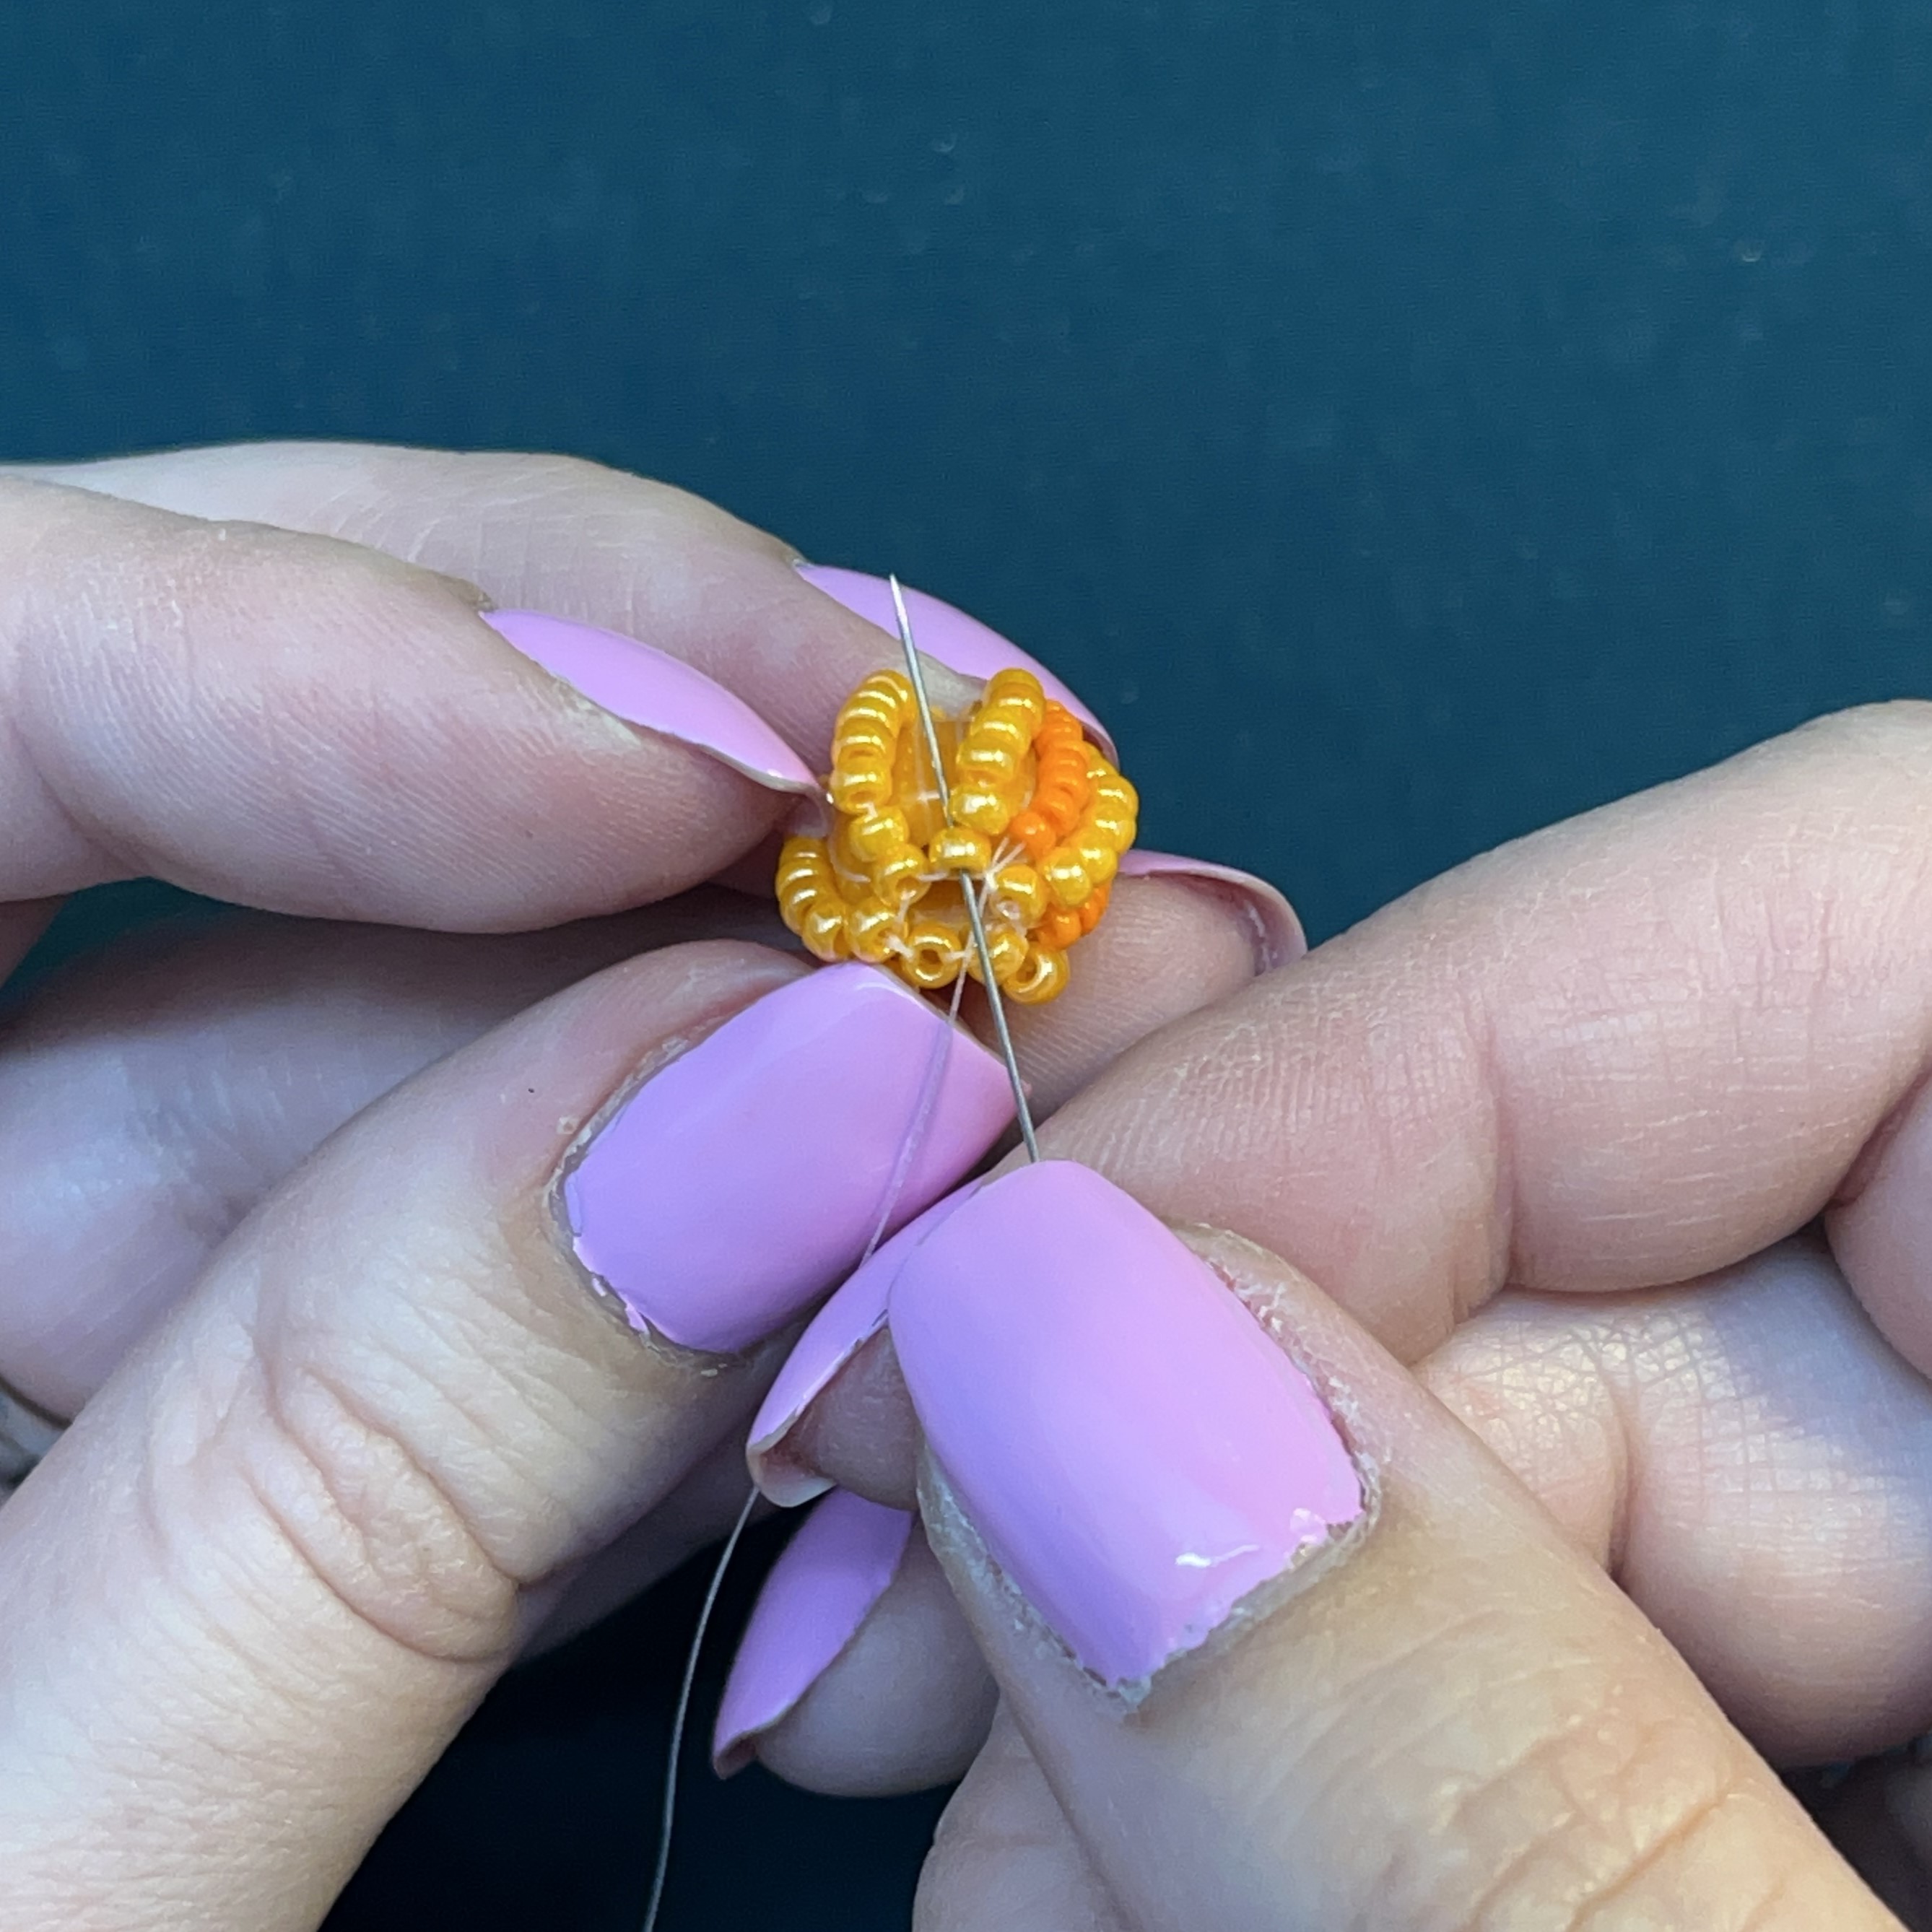
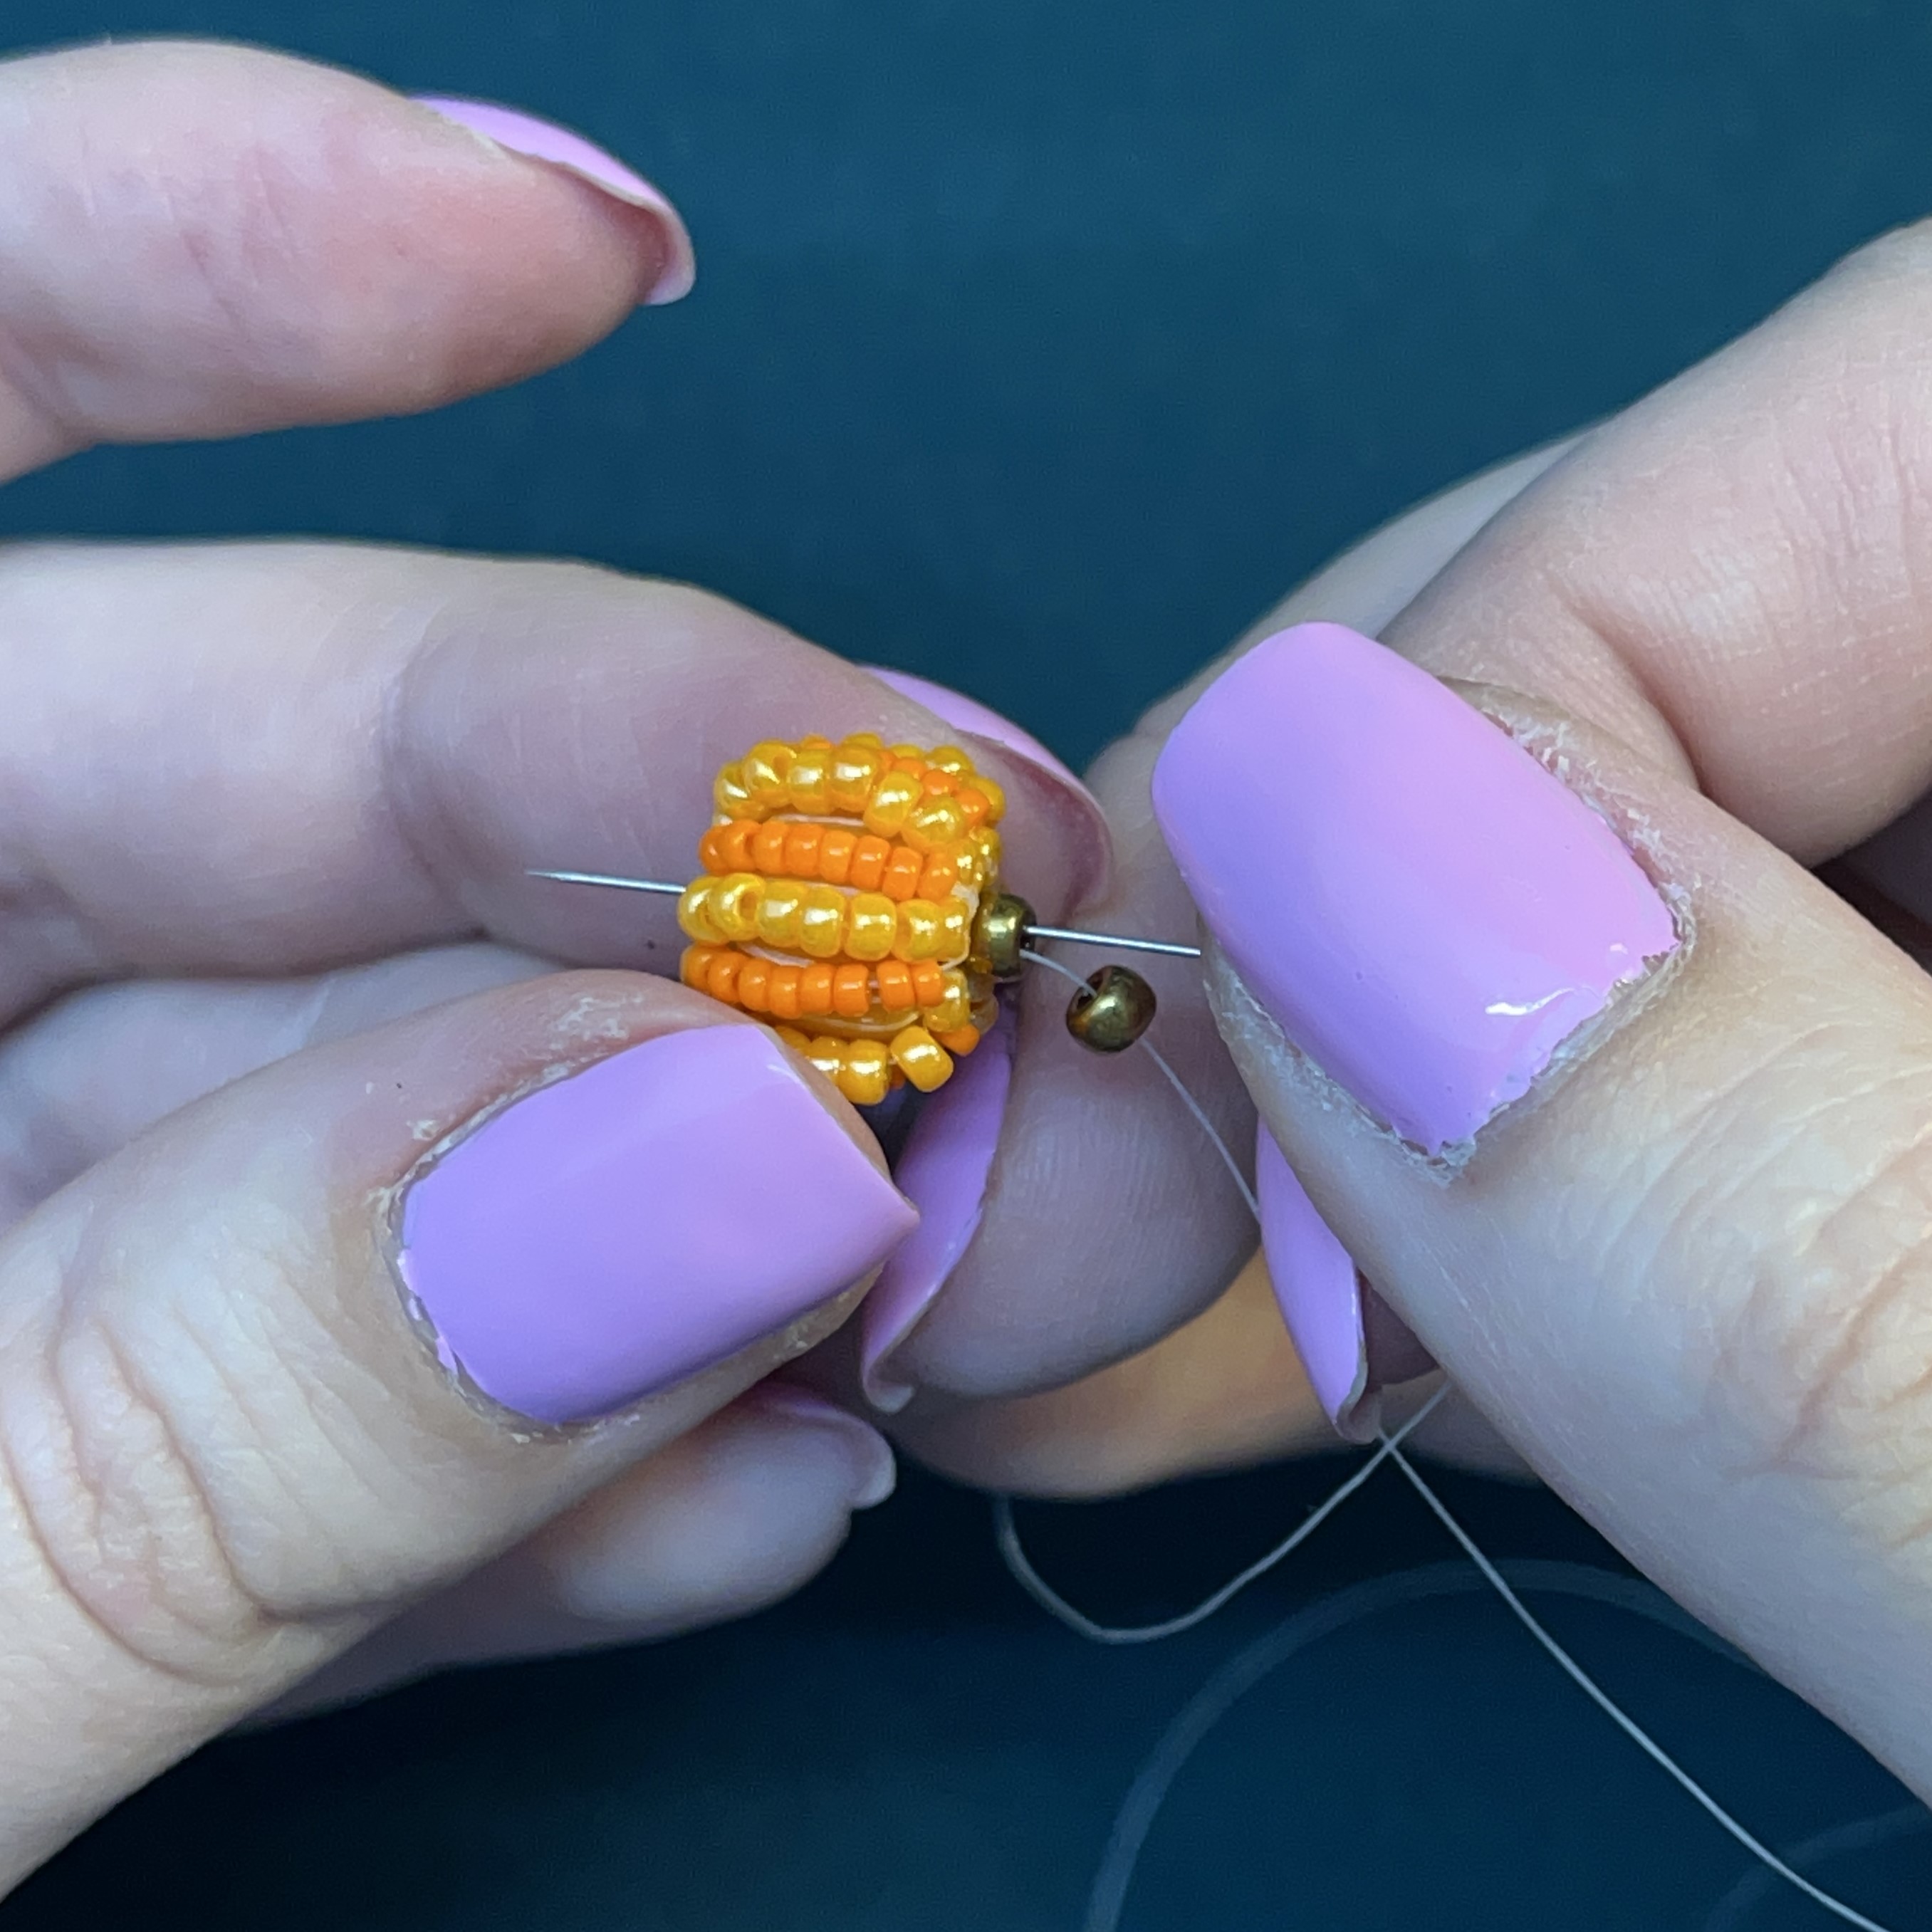
36. While holding the thread tight, thread through the seed bead to the left from bottom to top, add 6 more seed beads and loop through the parallel seed bead on the other side of the forte bead. Turn the forte bead around and thread through from bottom to top on the seed bead to the right. Continue steps until you have 6 lines around your forte bead.
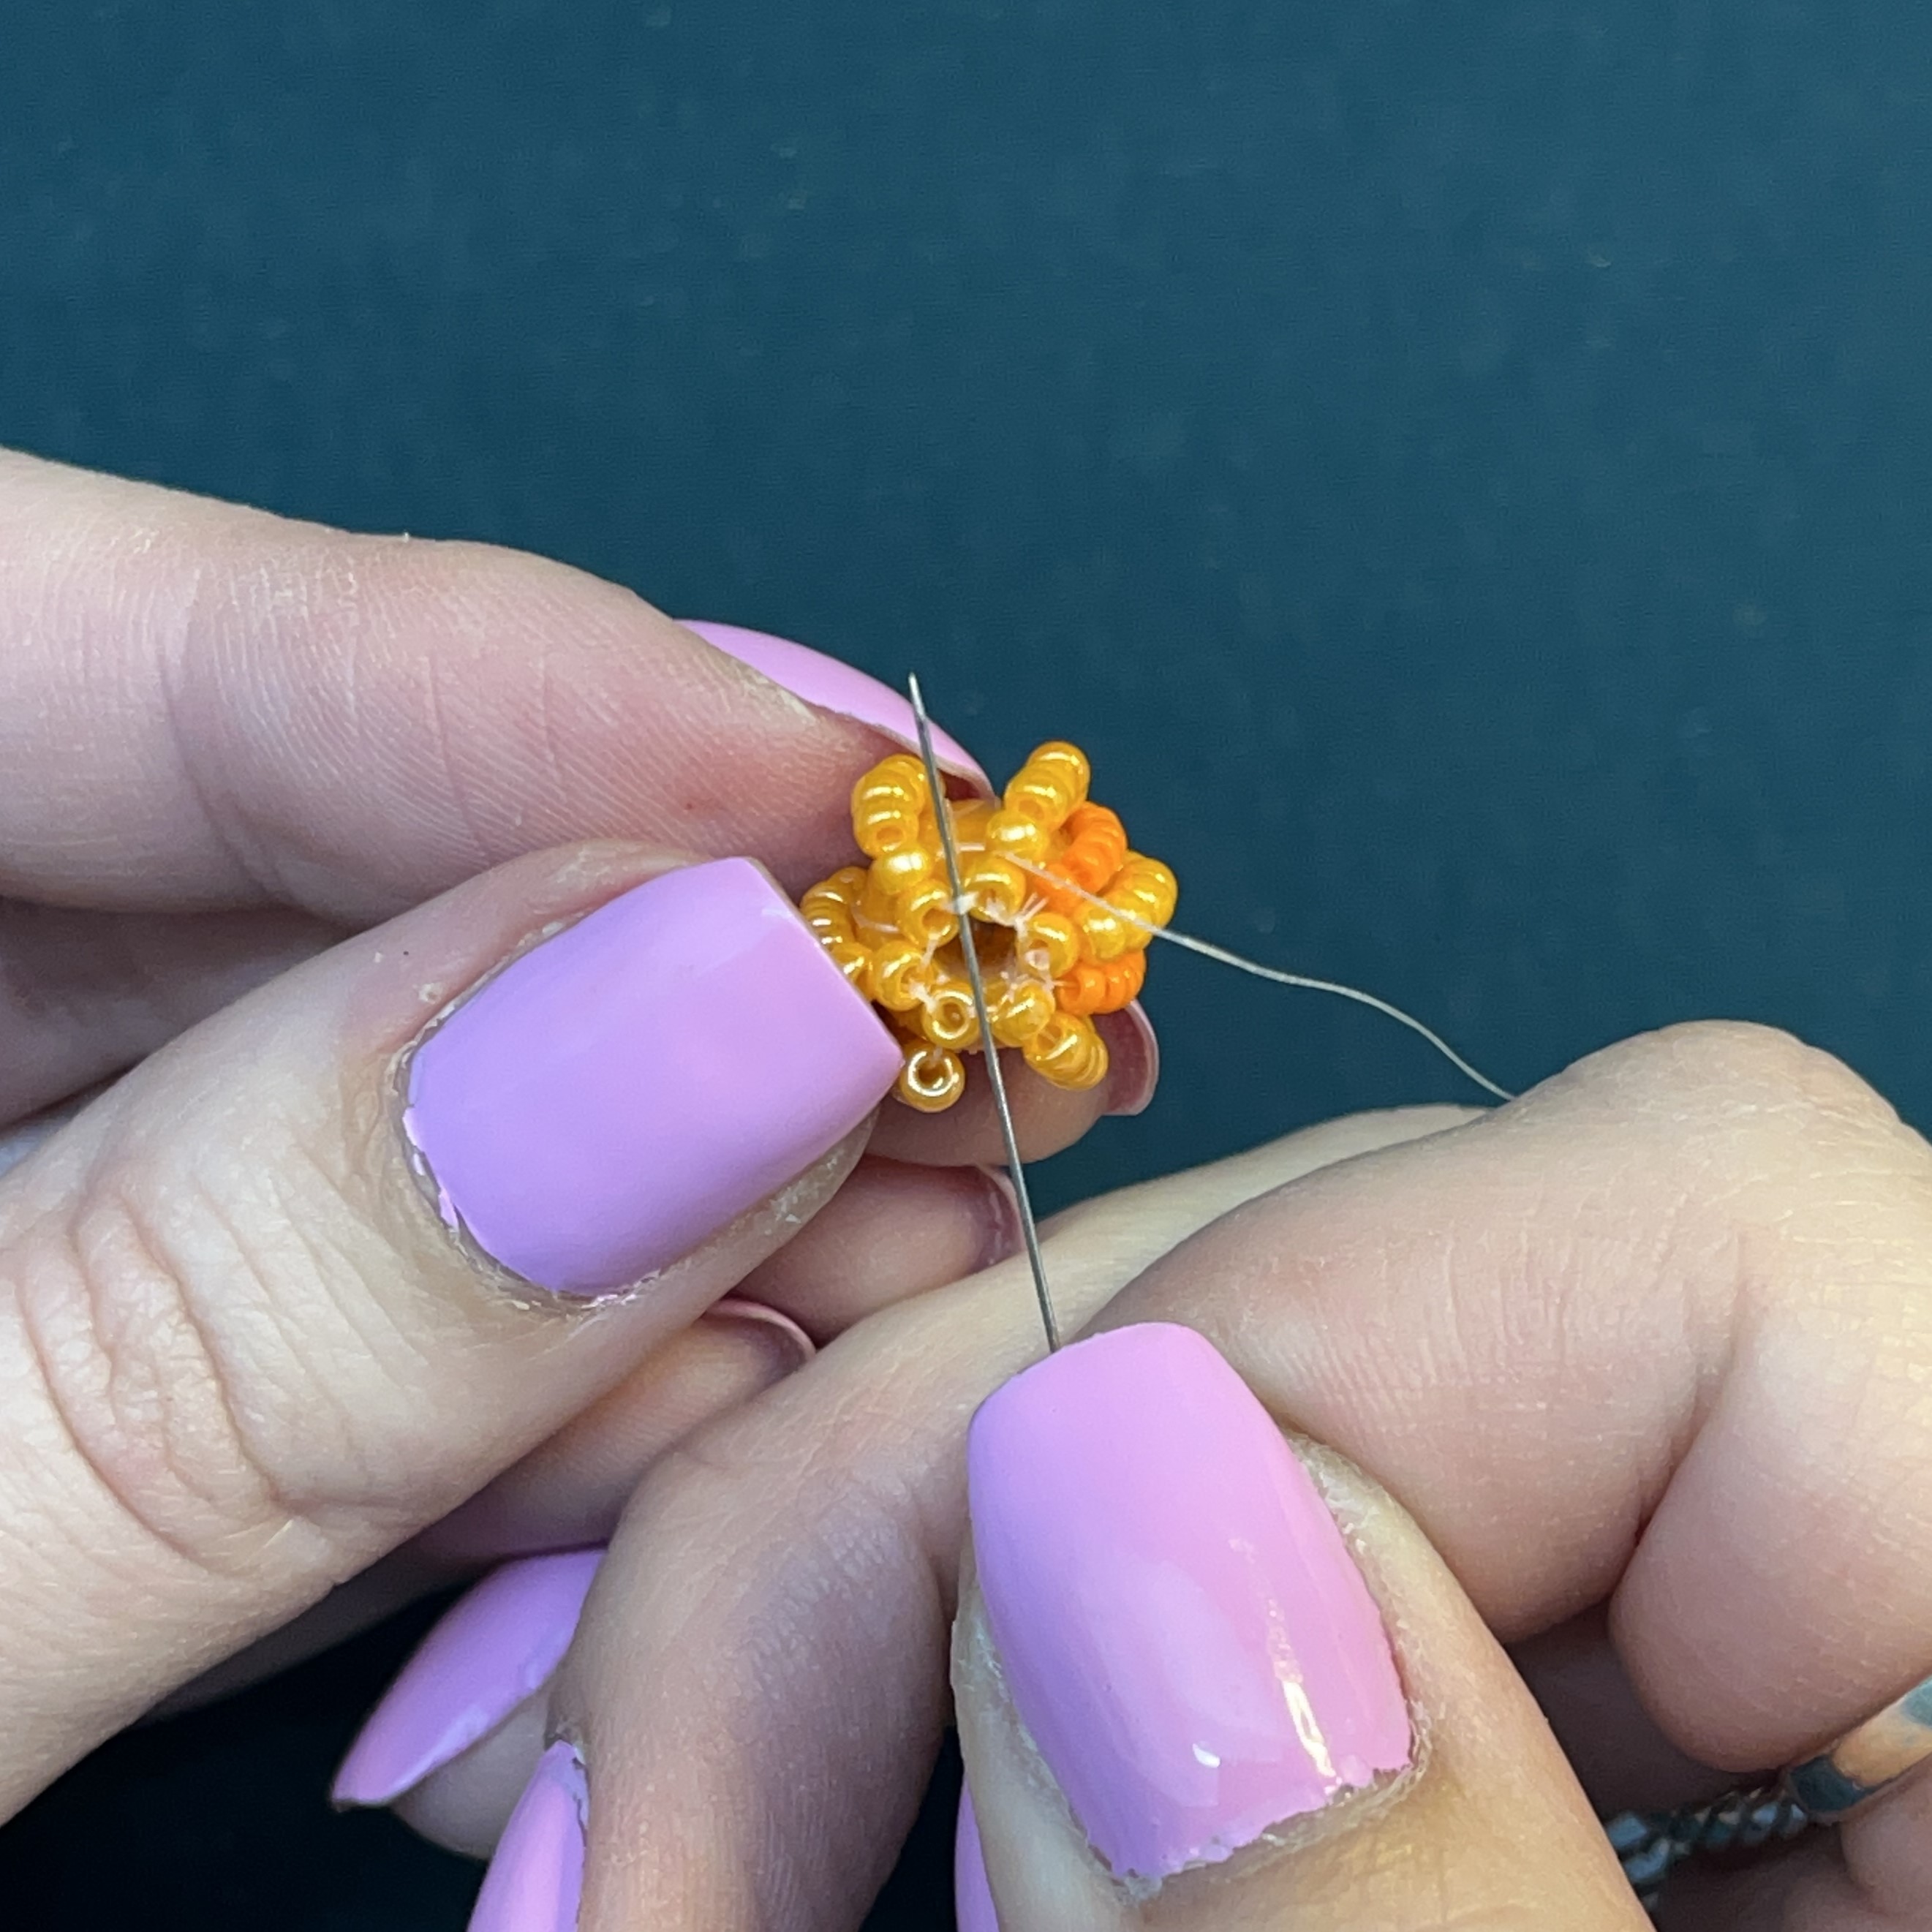
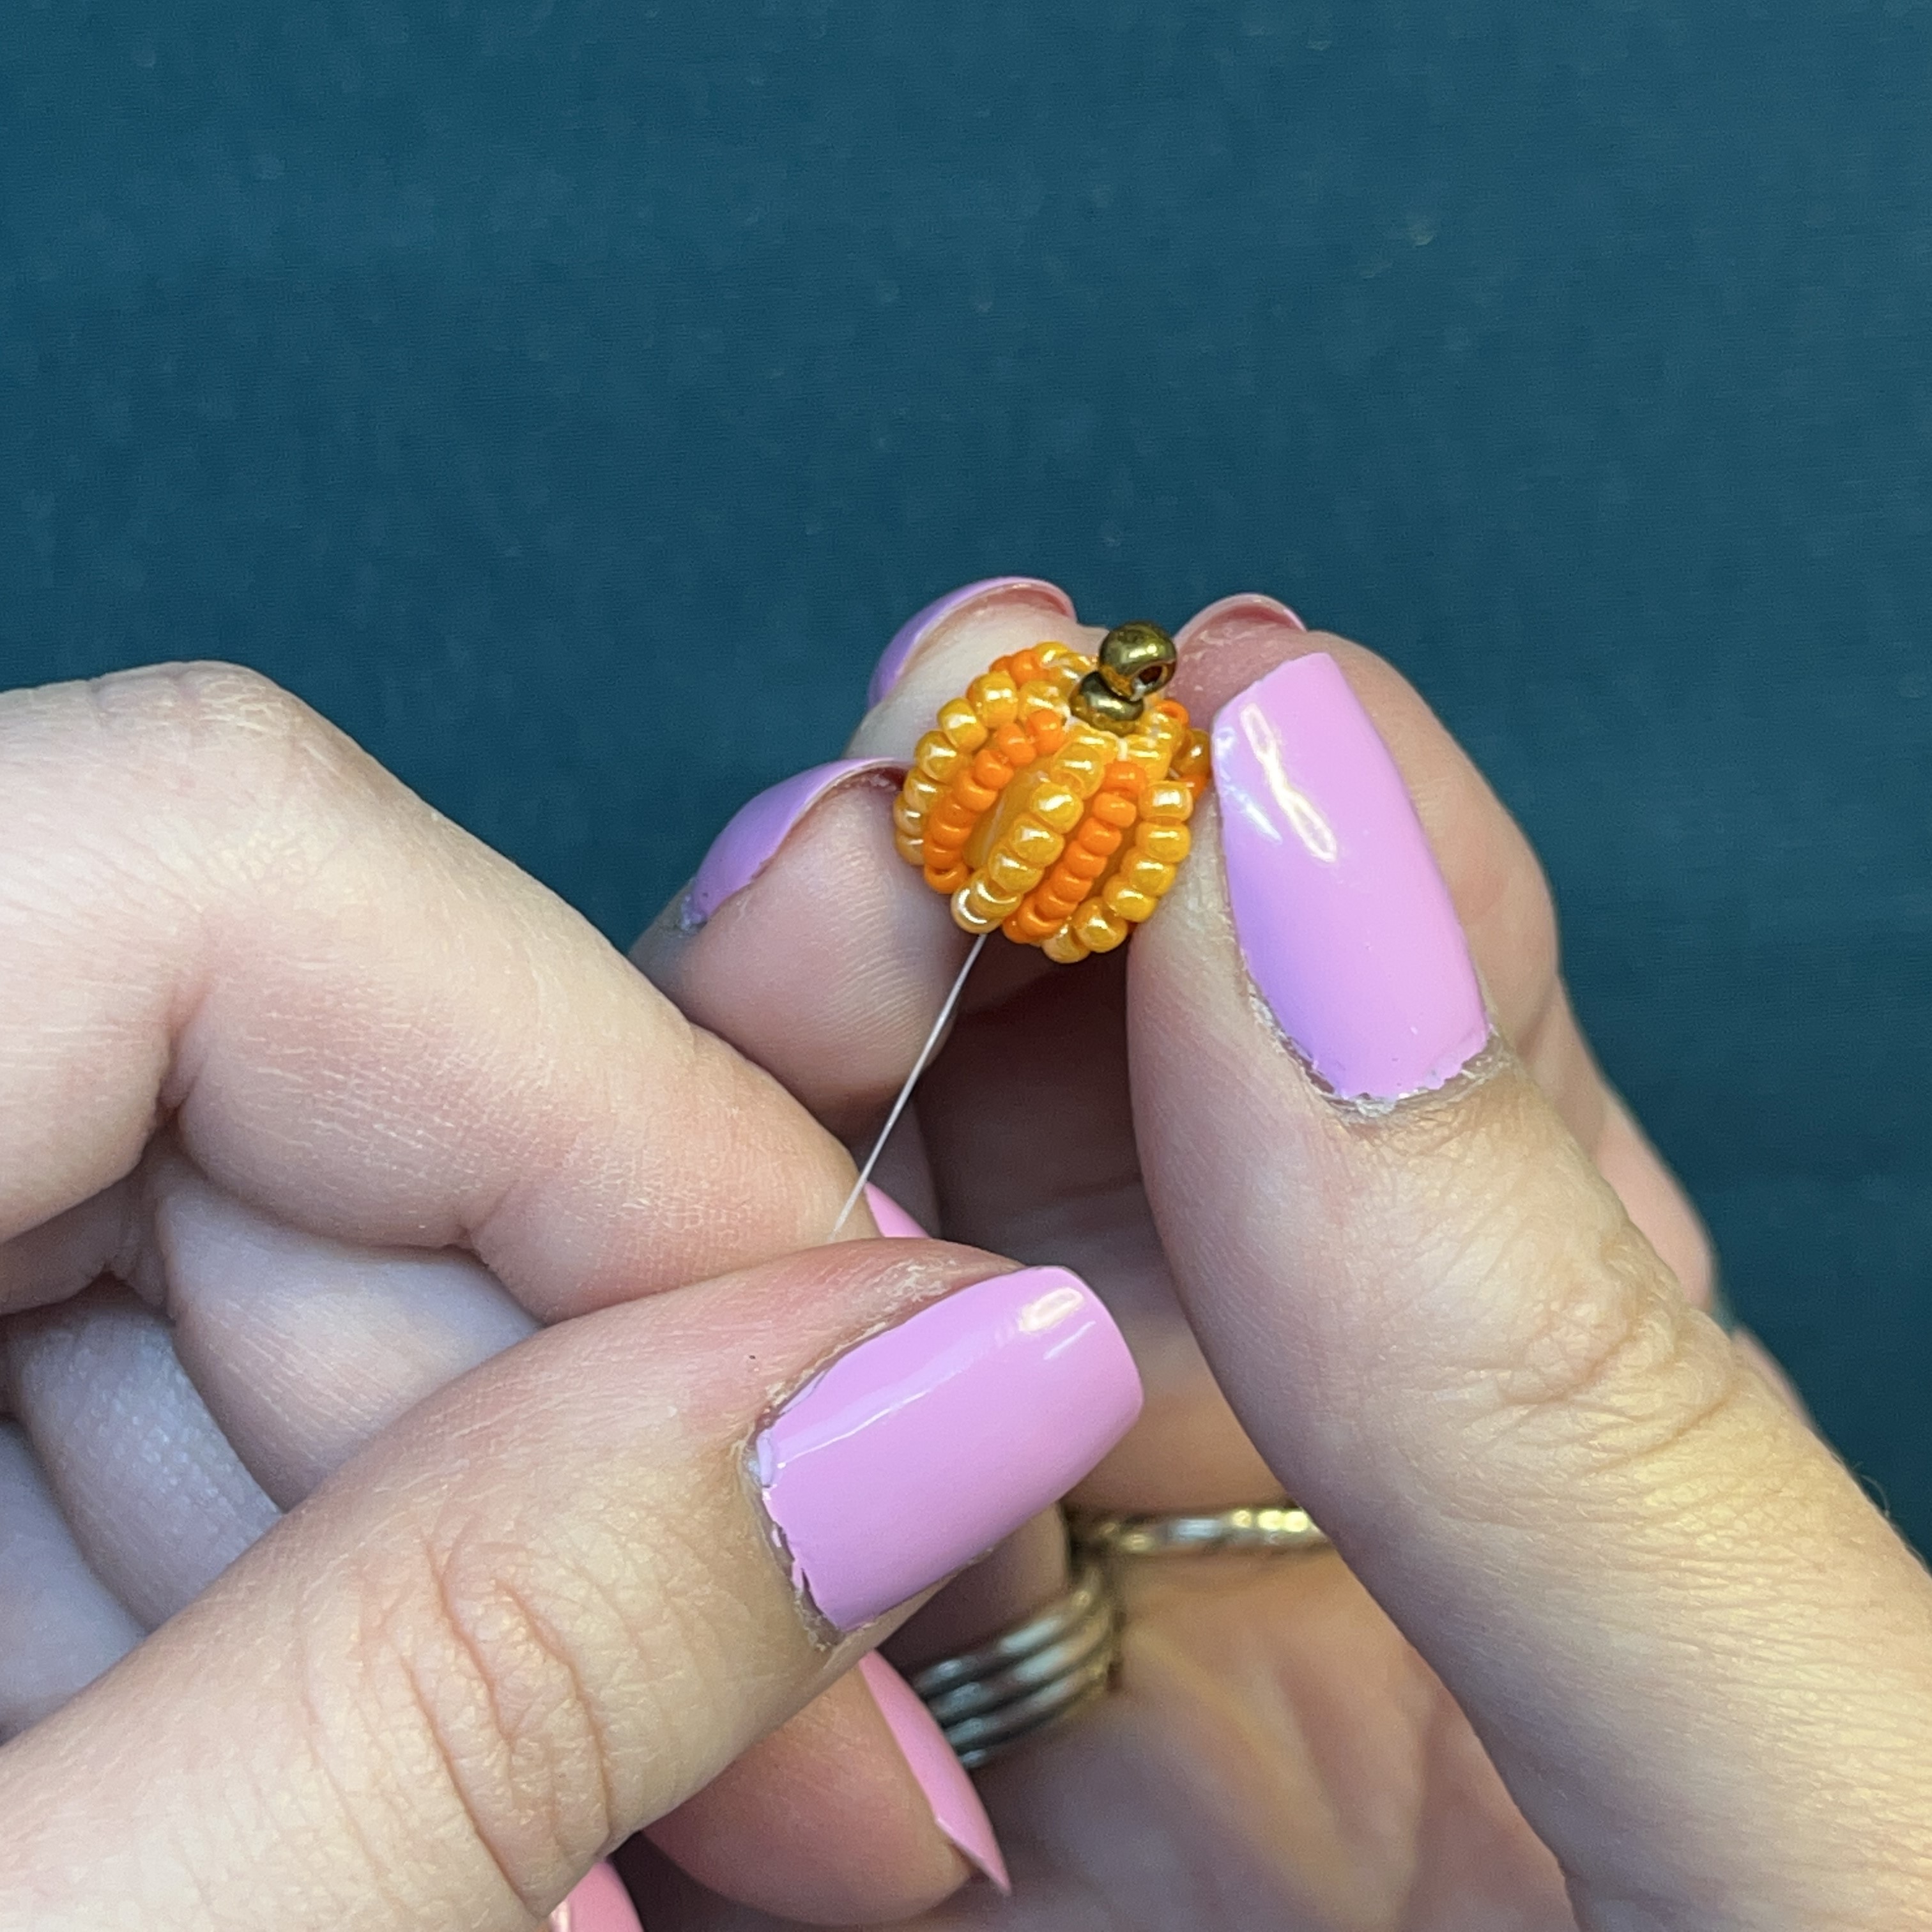
37. Continue until you have 6 lines around your forte bead. We will now secure the last line to the circle at the top of the forte bead. Loop around one of the threads and create a knot.
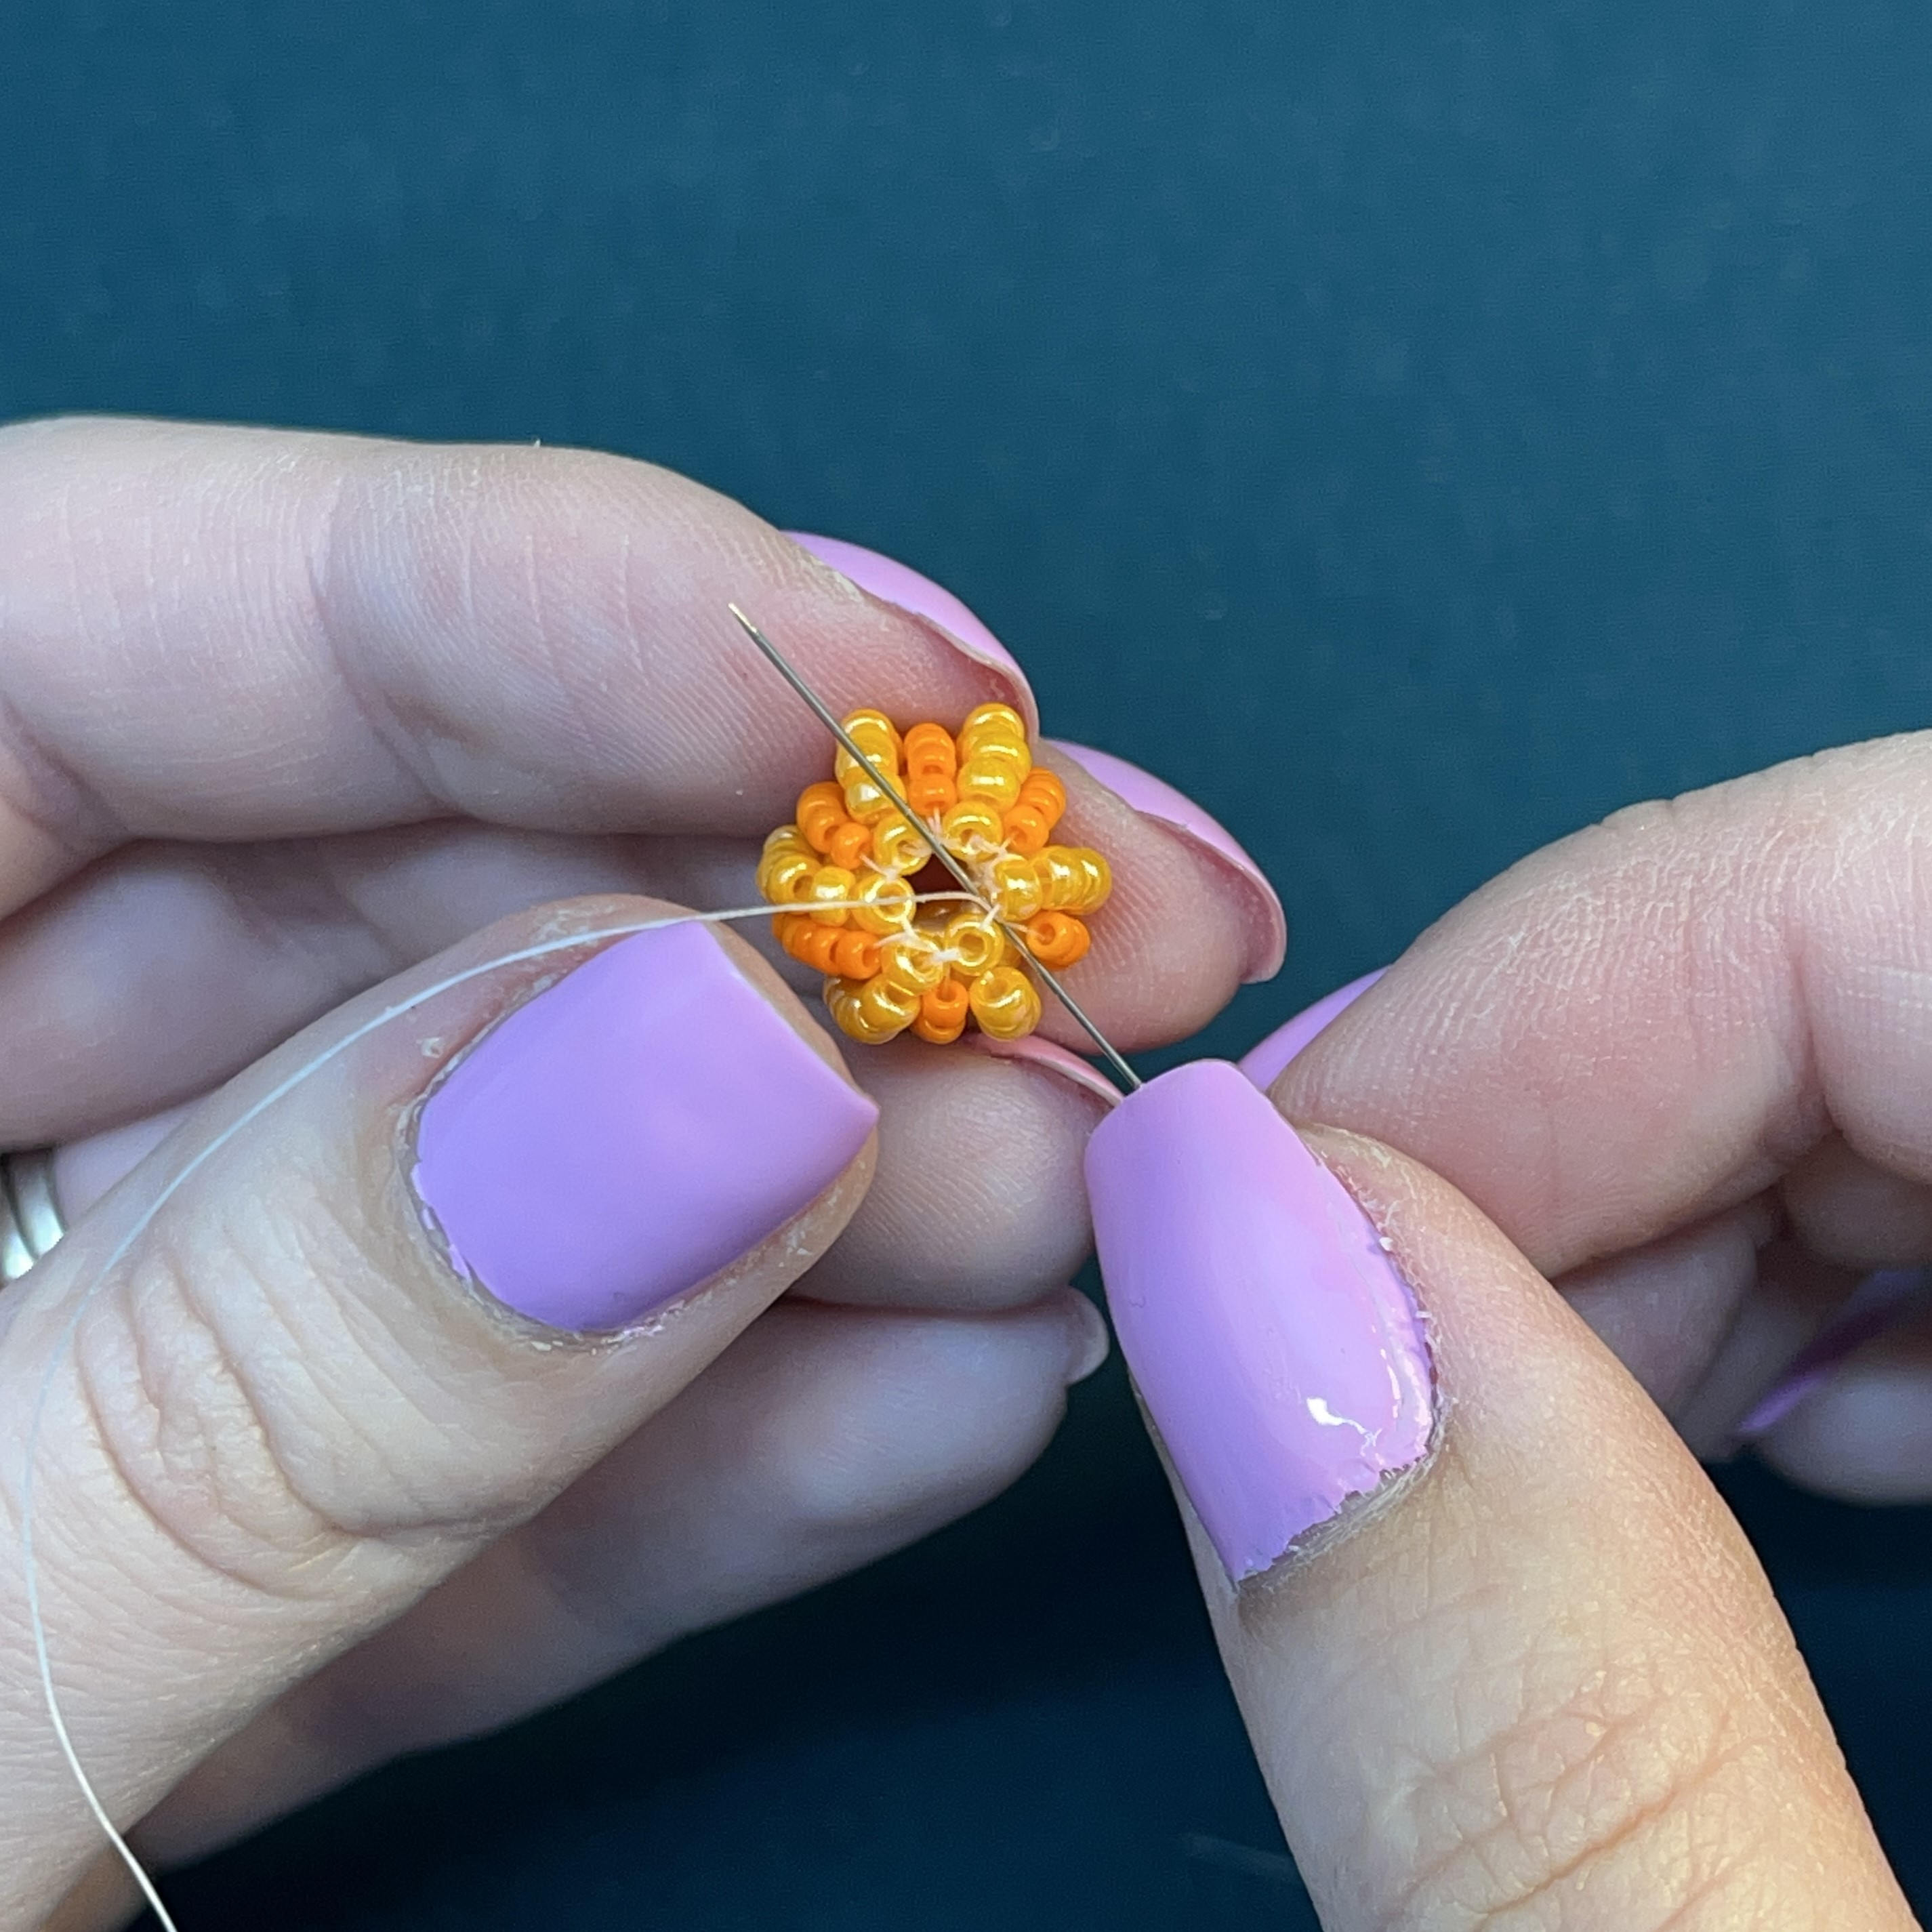
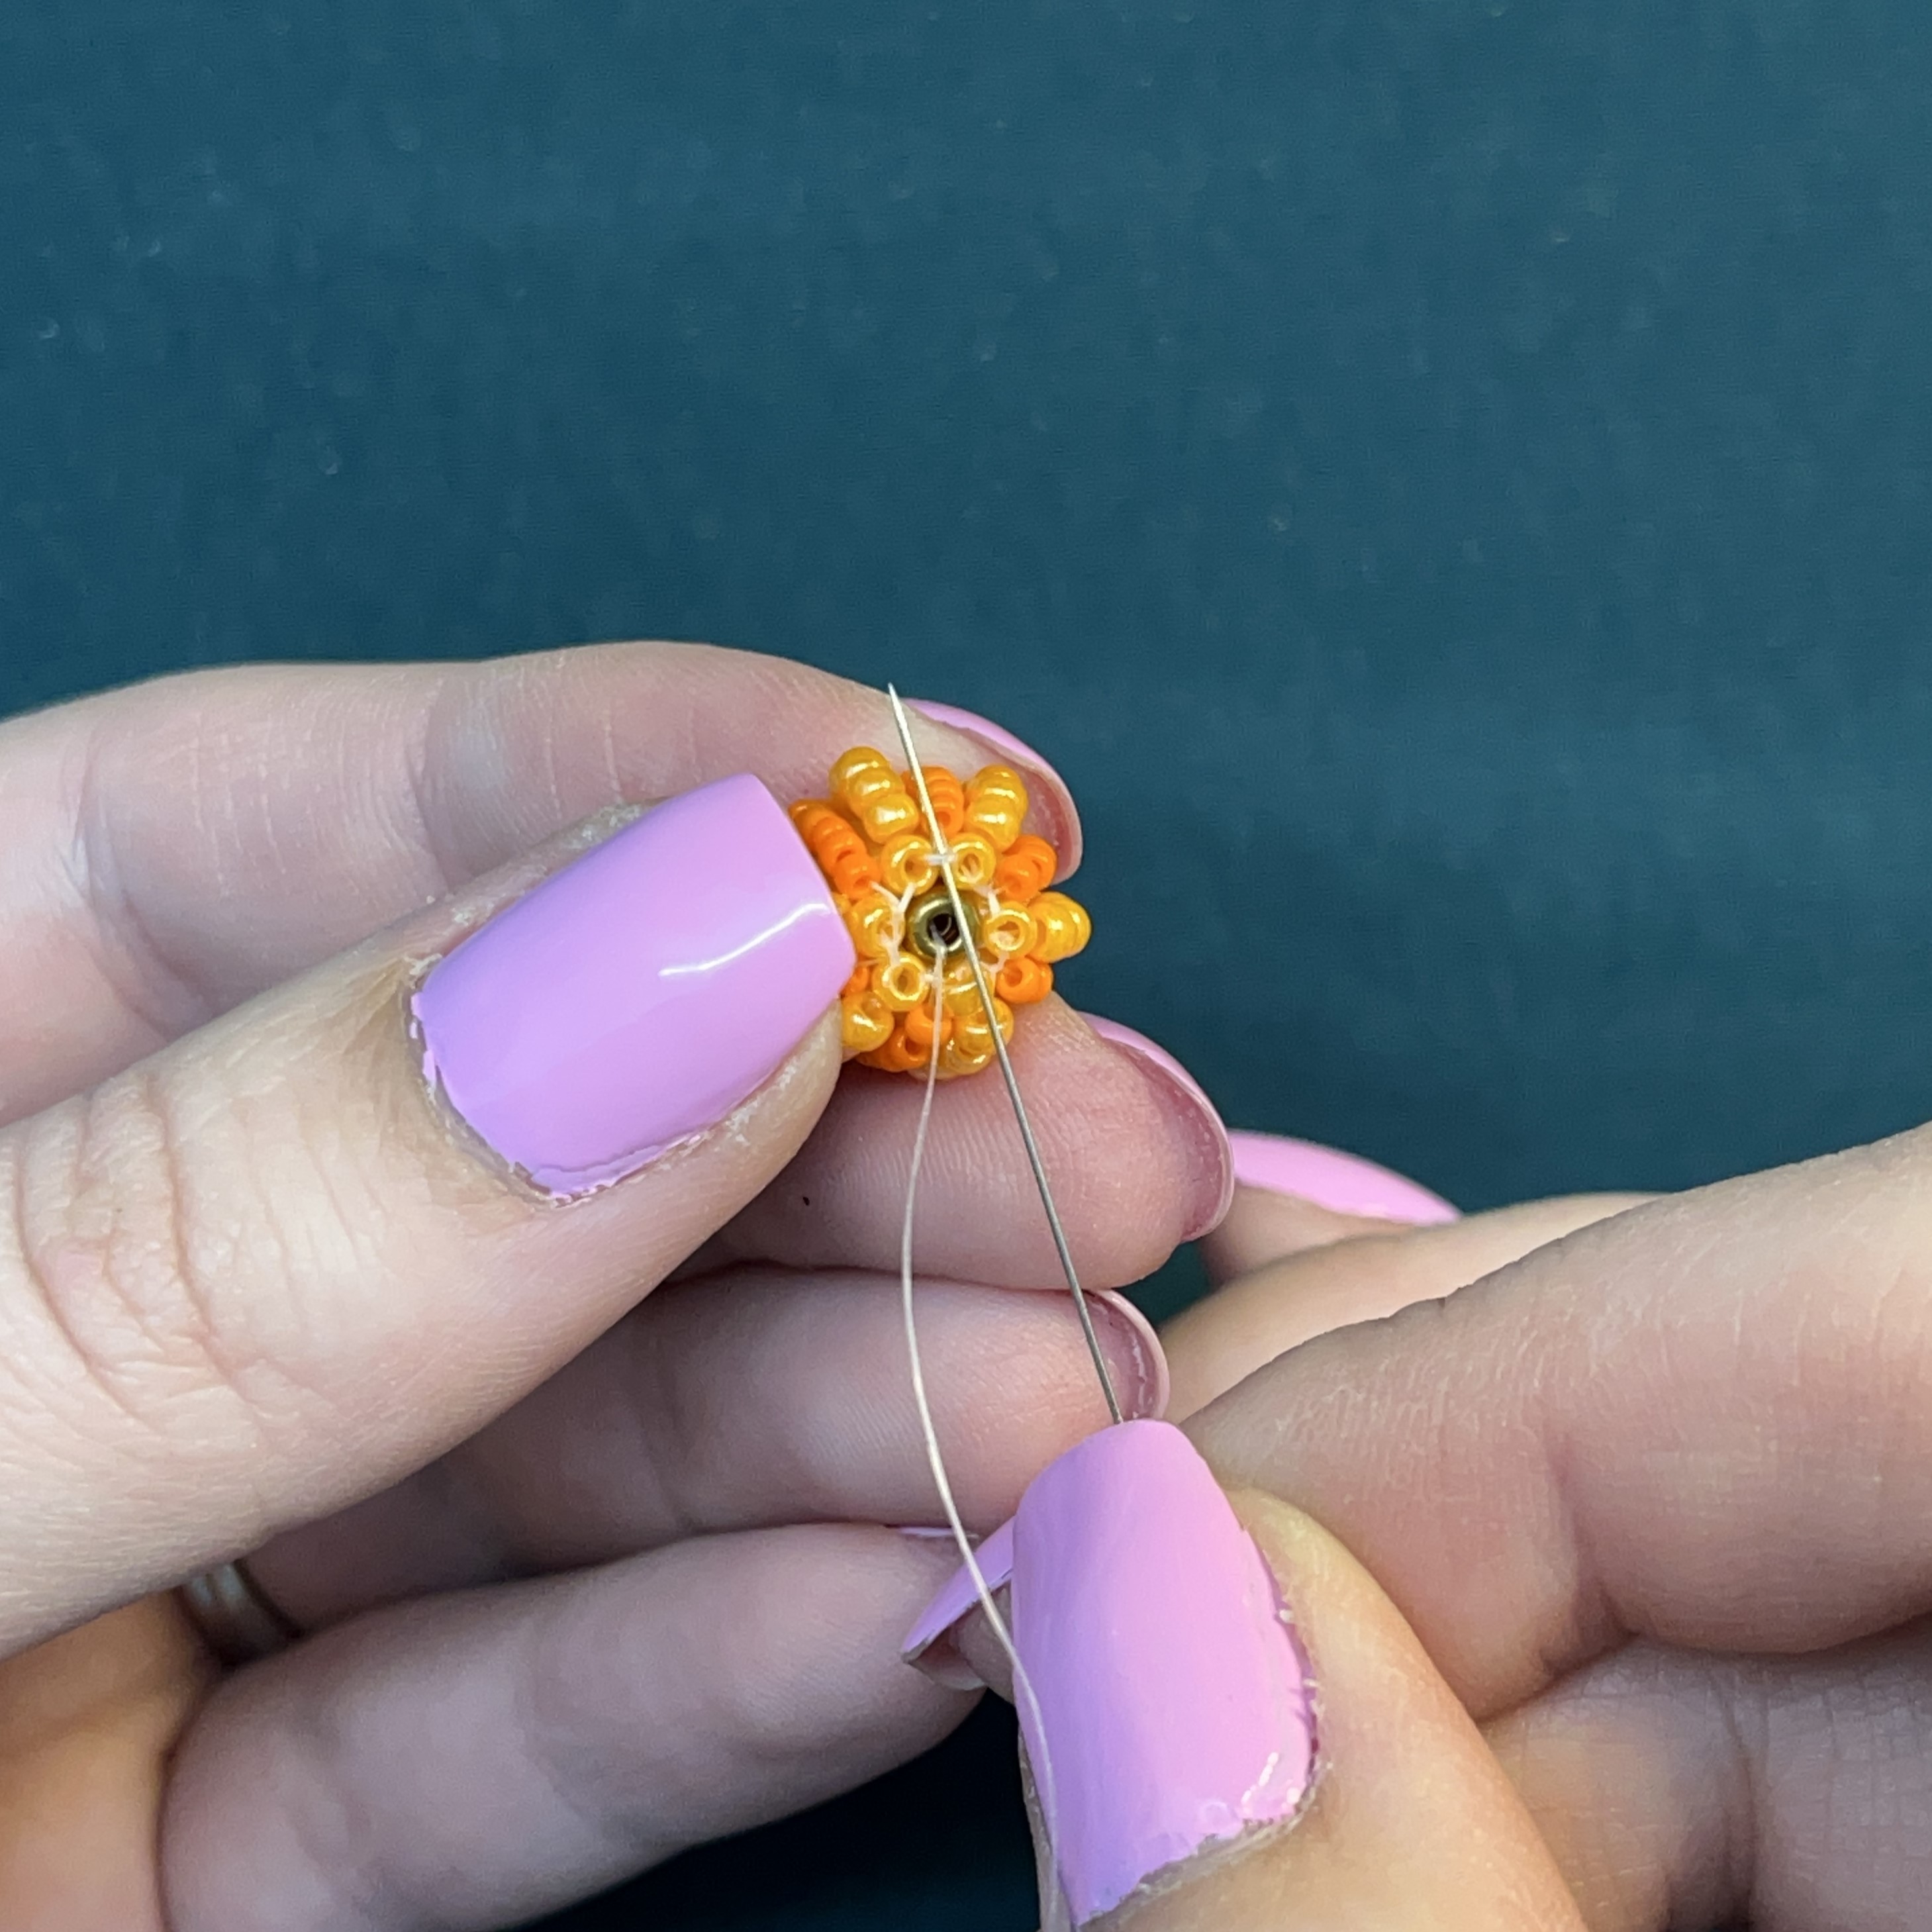
38. Now where you just attached your knot, thread through the piece of thread in between the two size 11 seed beads away from the hole. We will now be adding the size 15 seed beads.
39. String 8, size 15 seed beads onto the thread.
40. Take the needle and thread it through the thread in between the two seed beads on the other side of the forte bead to create a straight line.
41. Holding the thread tight, thread the needle through the seed bead to the right from bottom to top. This will help secure the size 15 seed bead lines and prevent the thread from pulling your pattern in wonky ways.
42. Now, loop around and go up through the thread that is in between the two size 11 seed beads like the picture above. Pull tight to secure.
43. String on 8, size 15 seed beads. Pull the needle through the thread in between the two seed beads parallel to create a straight line with the size 15 seed beads.
44. Repeat step 41.
45. Repeat step 42.
46. Continue the steps 39 - 45 until you make it all the way around the forte bead. Loop the thread around the end of the last line of size 15 seed beads.
47. Create a knot and pull tight to secure the size 15 seed beads.
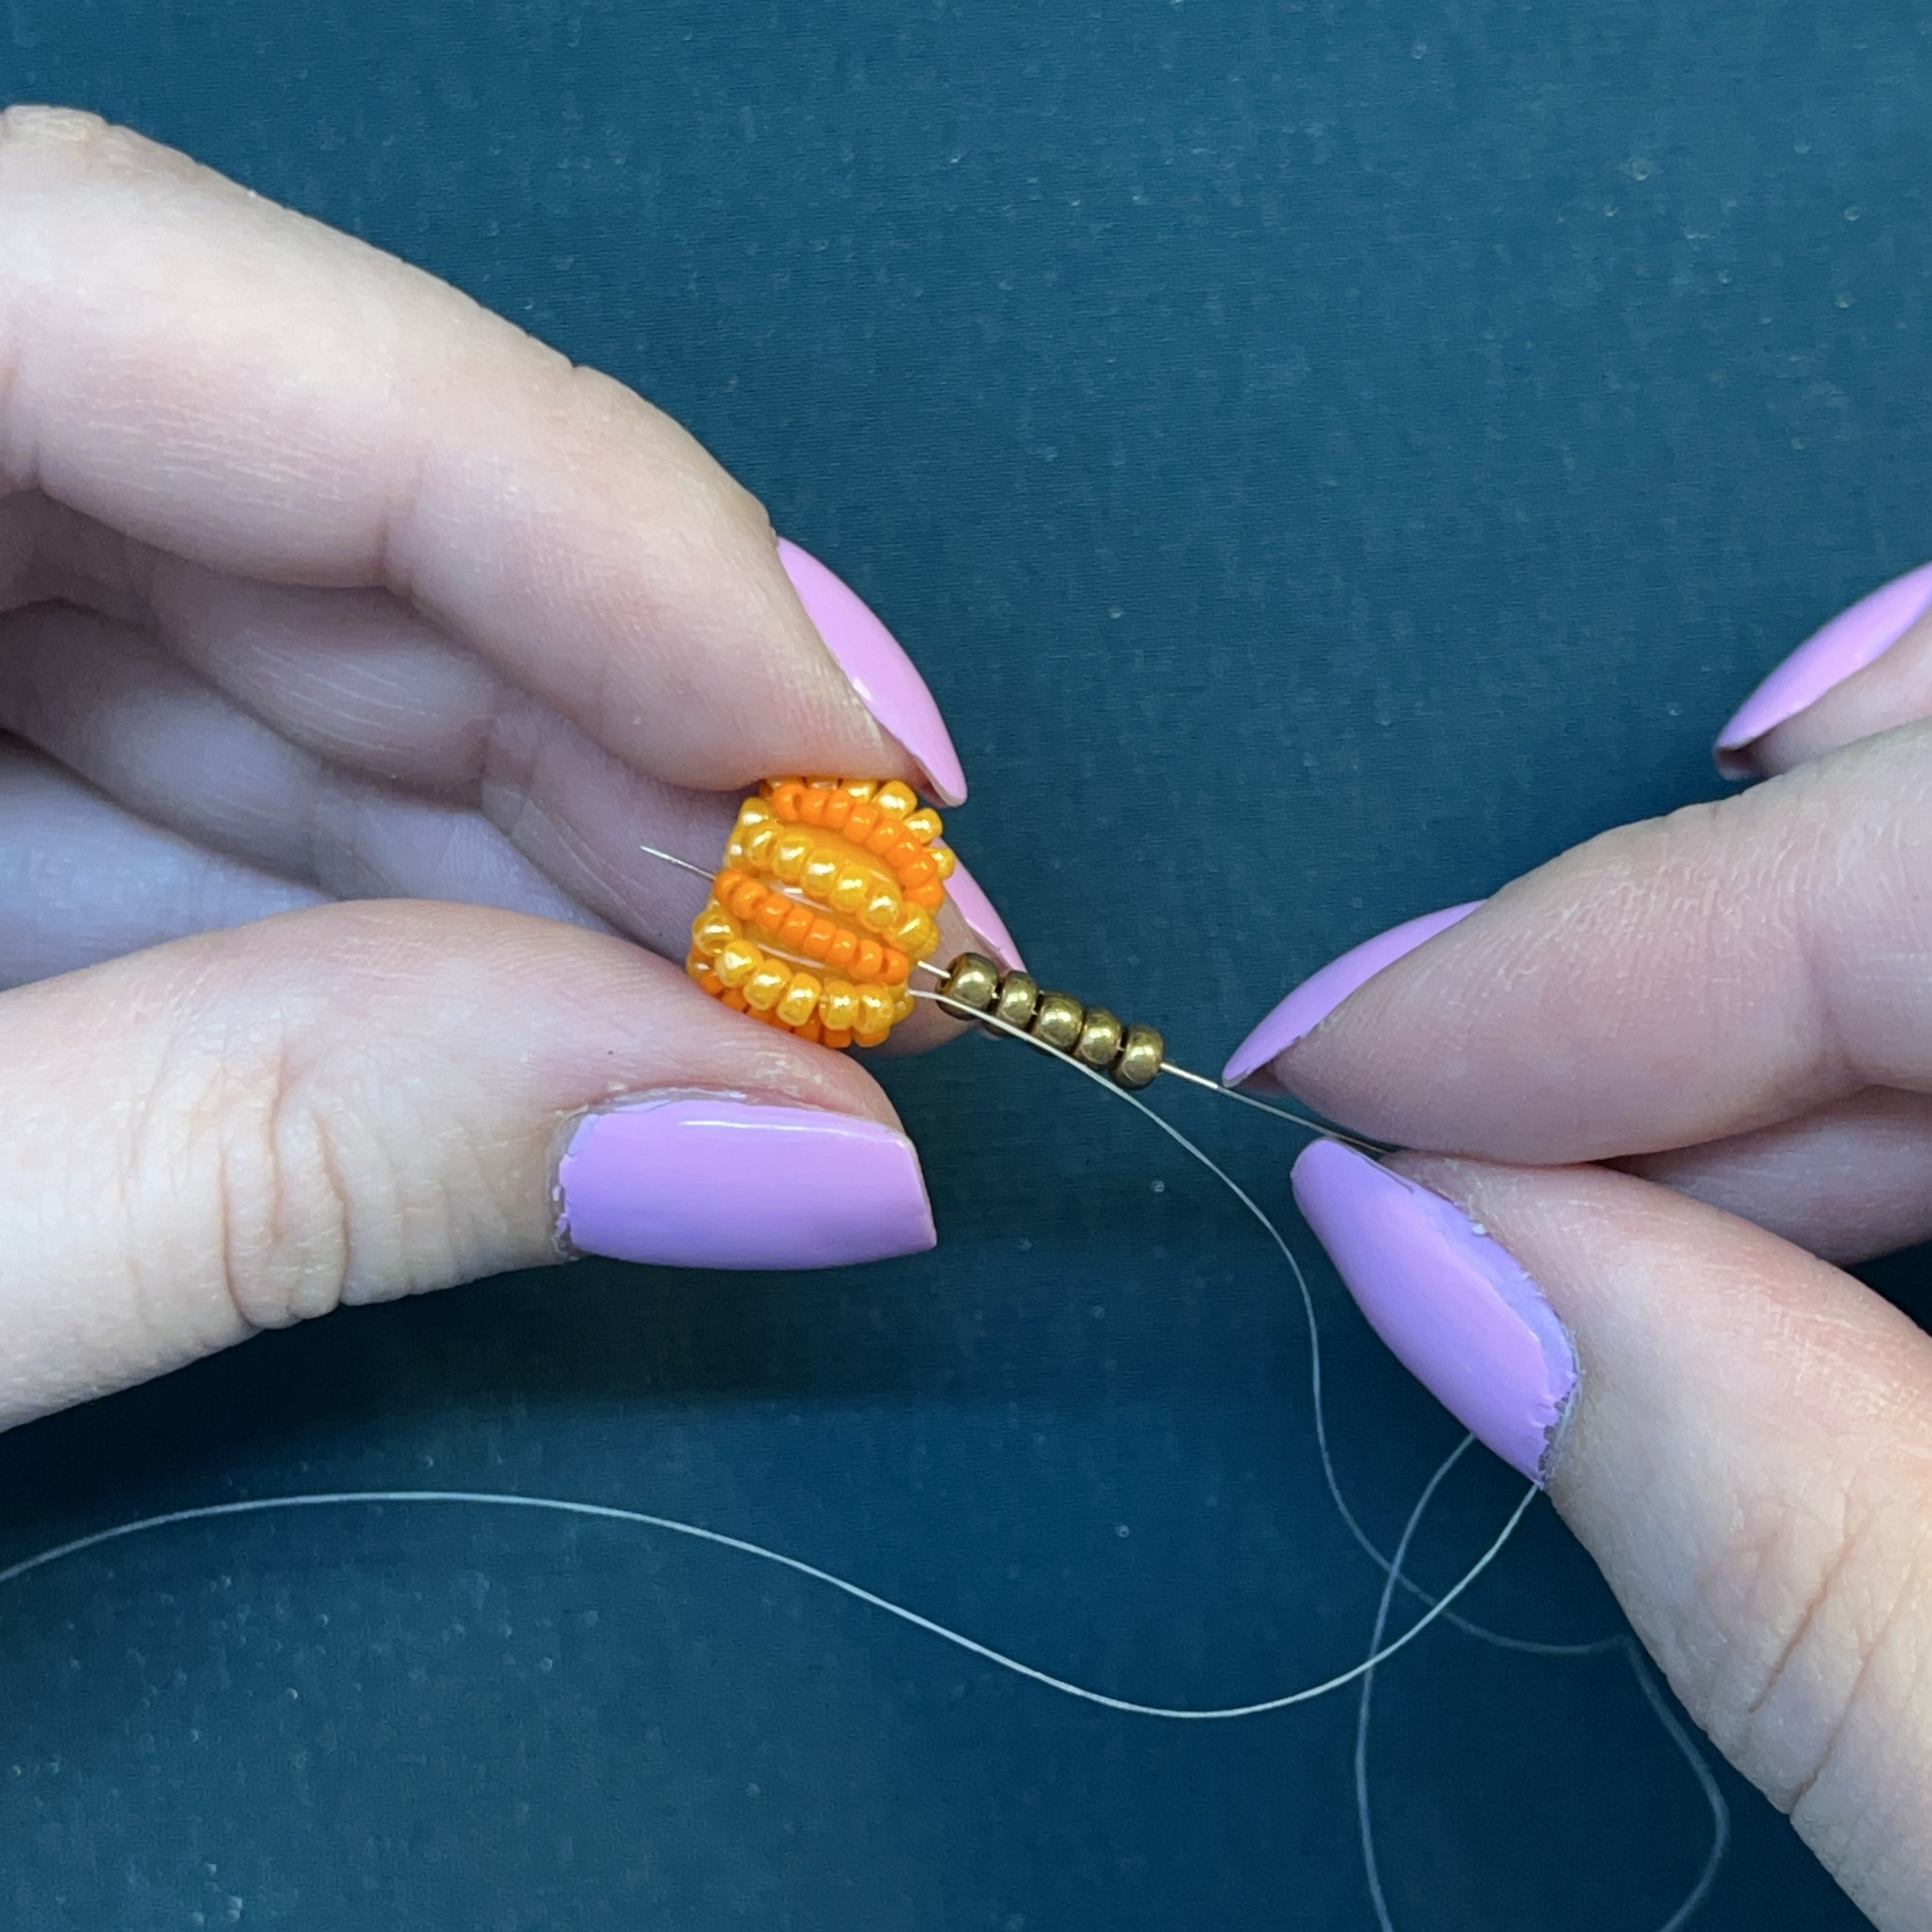
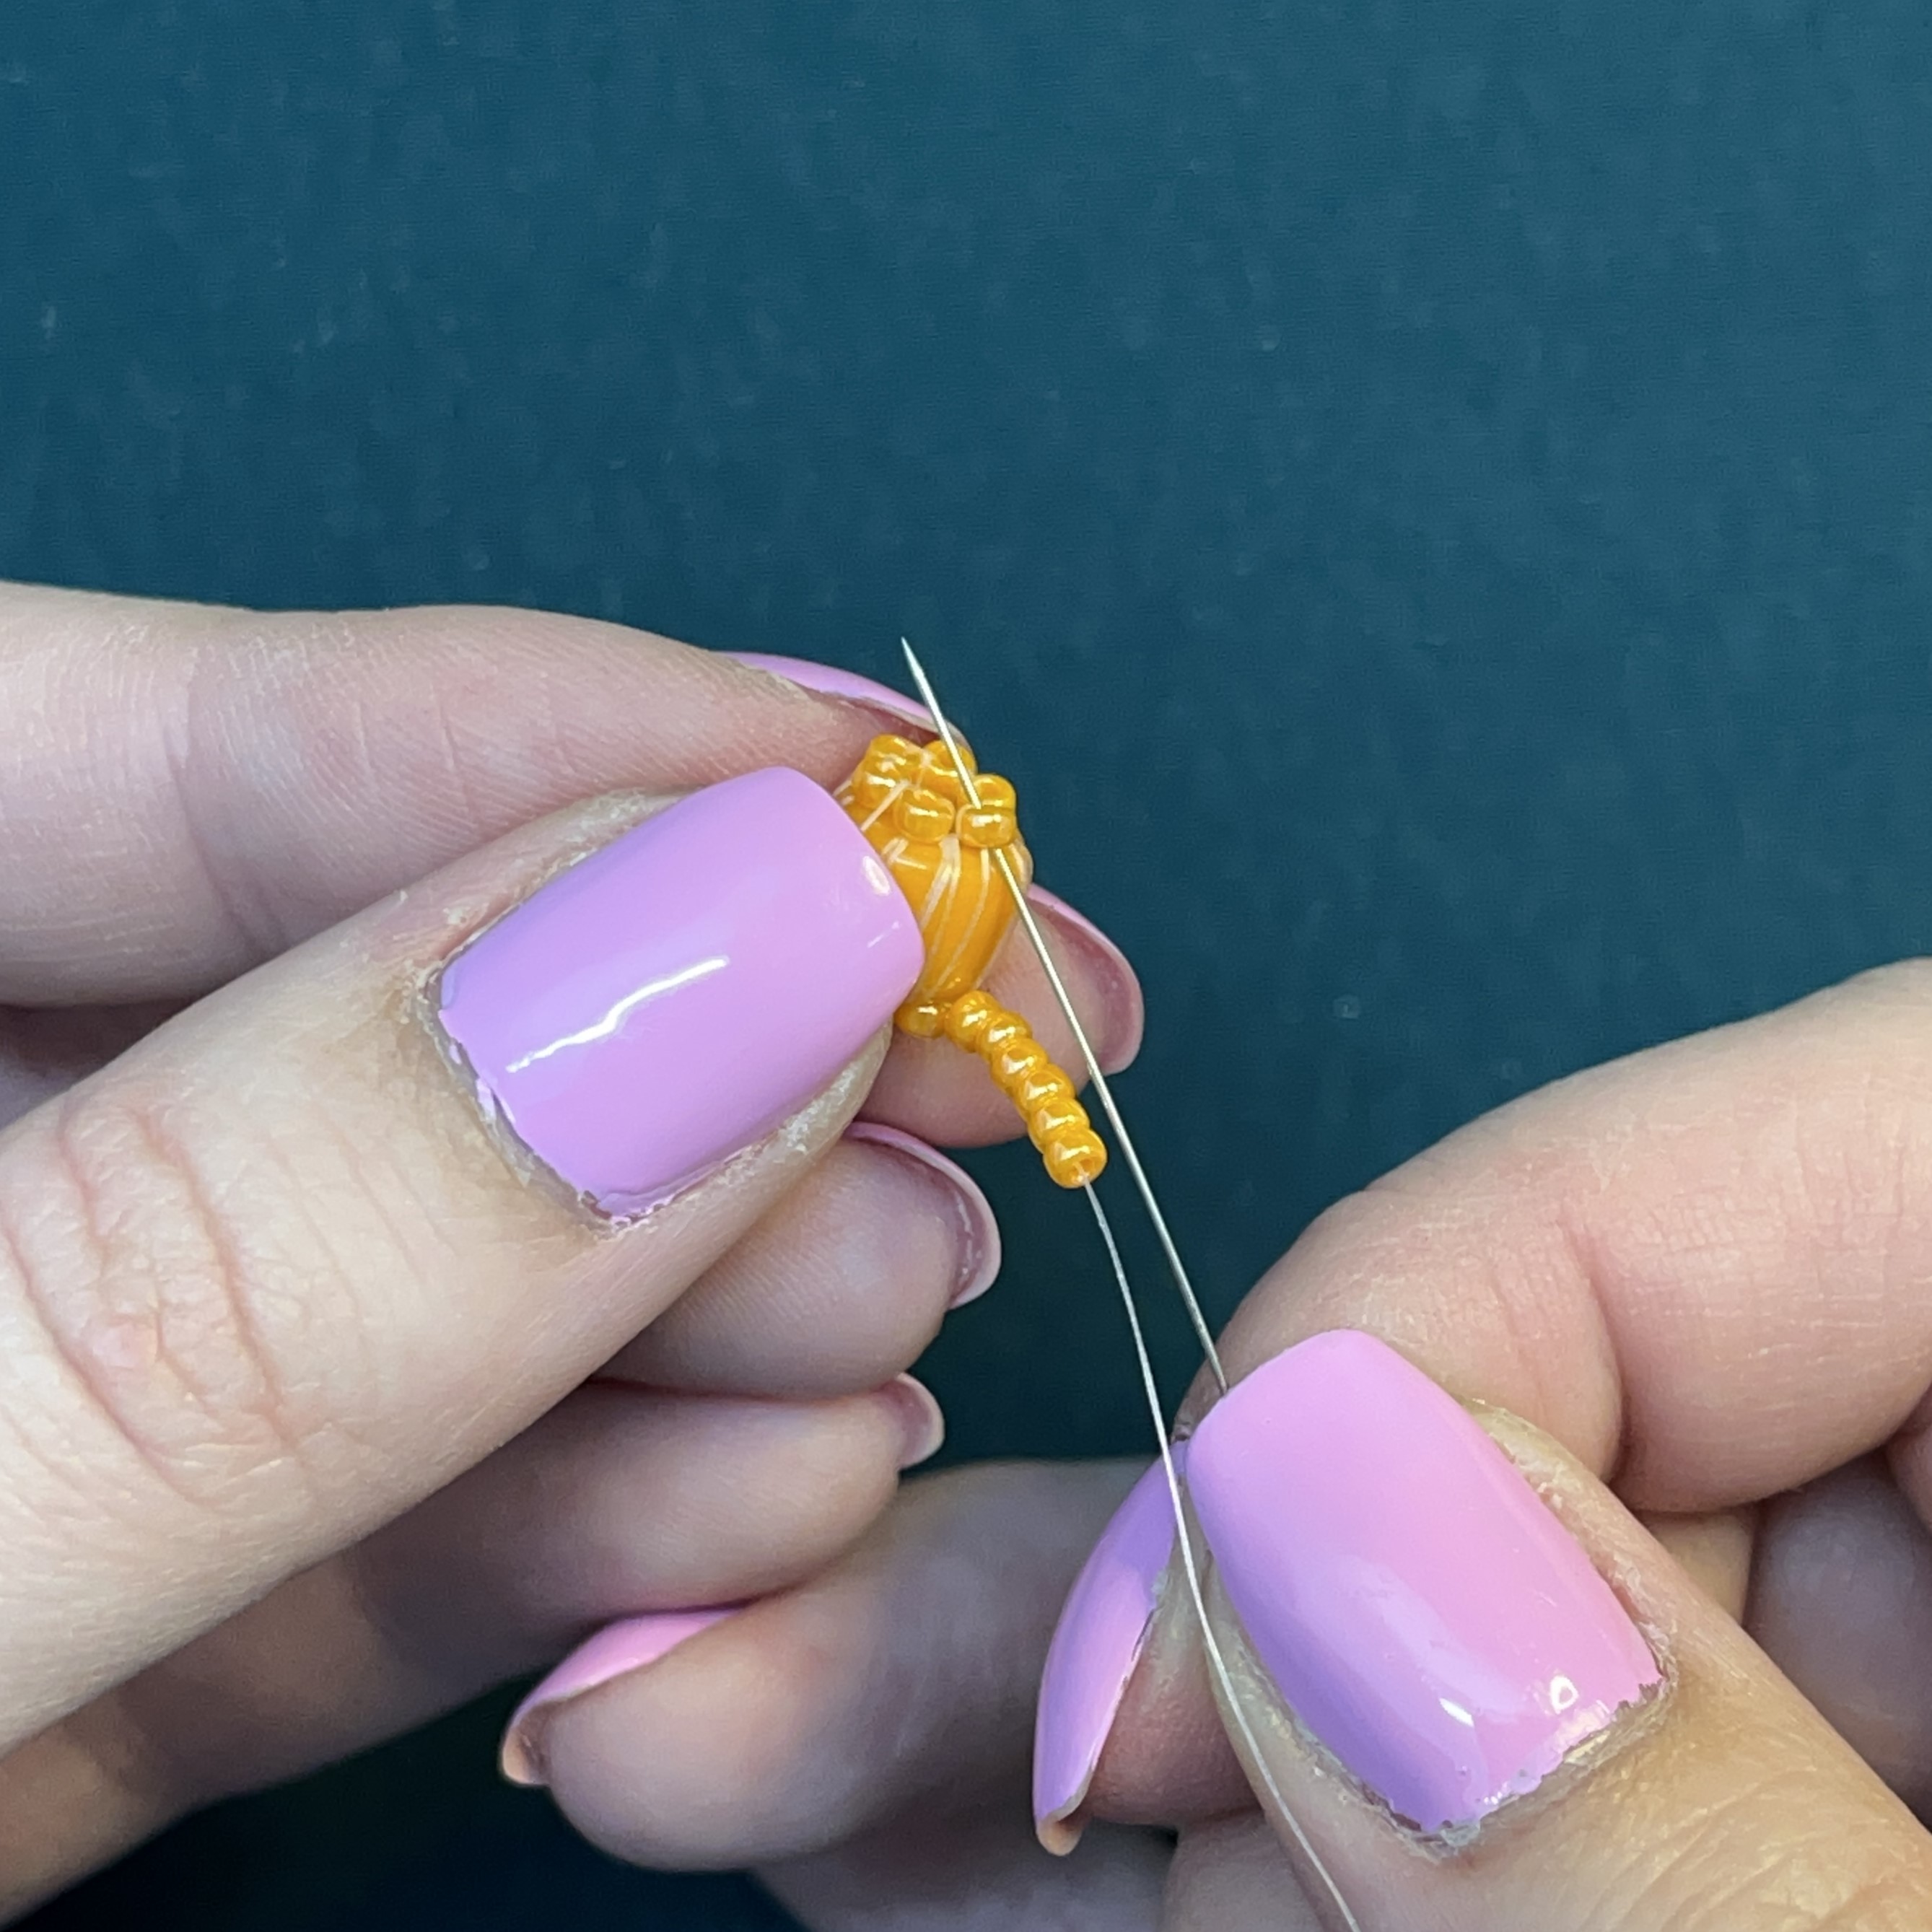
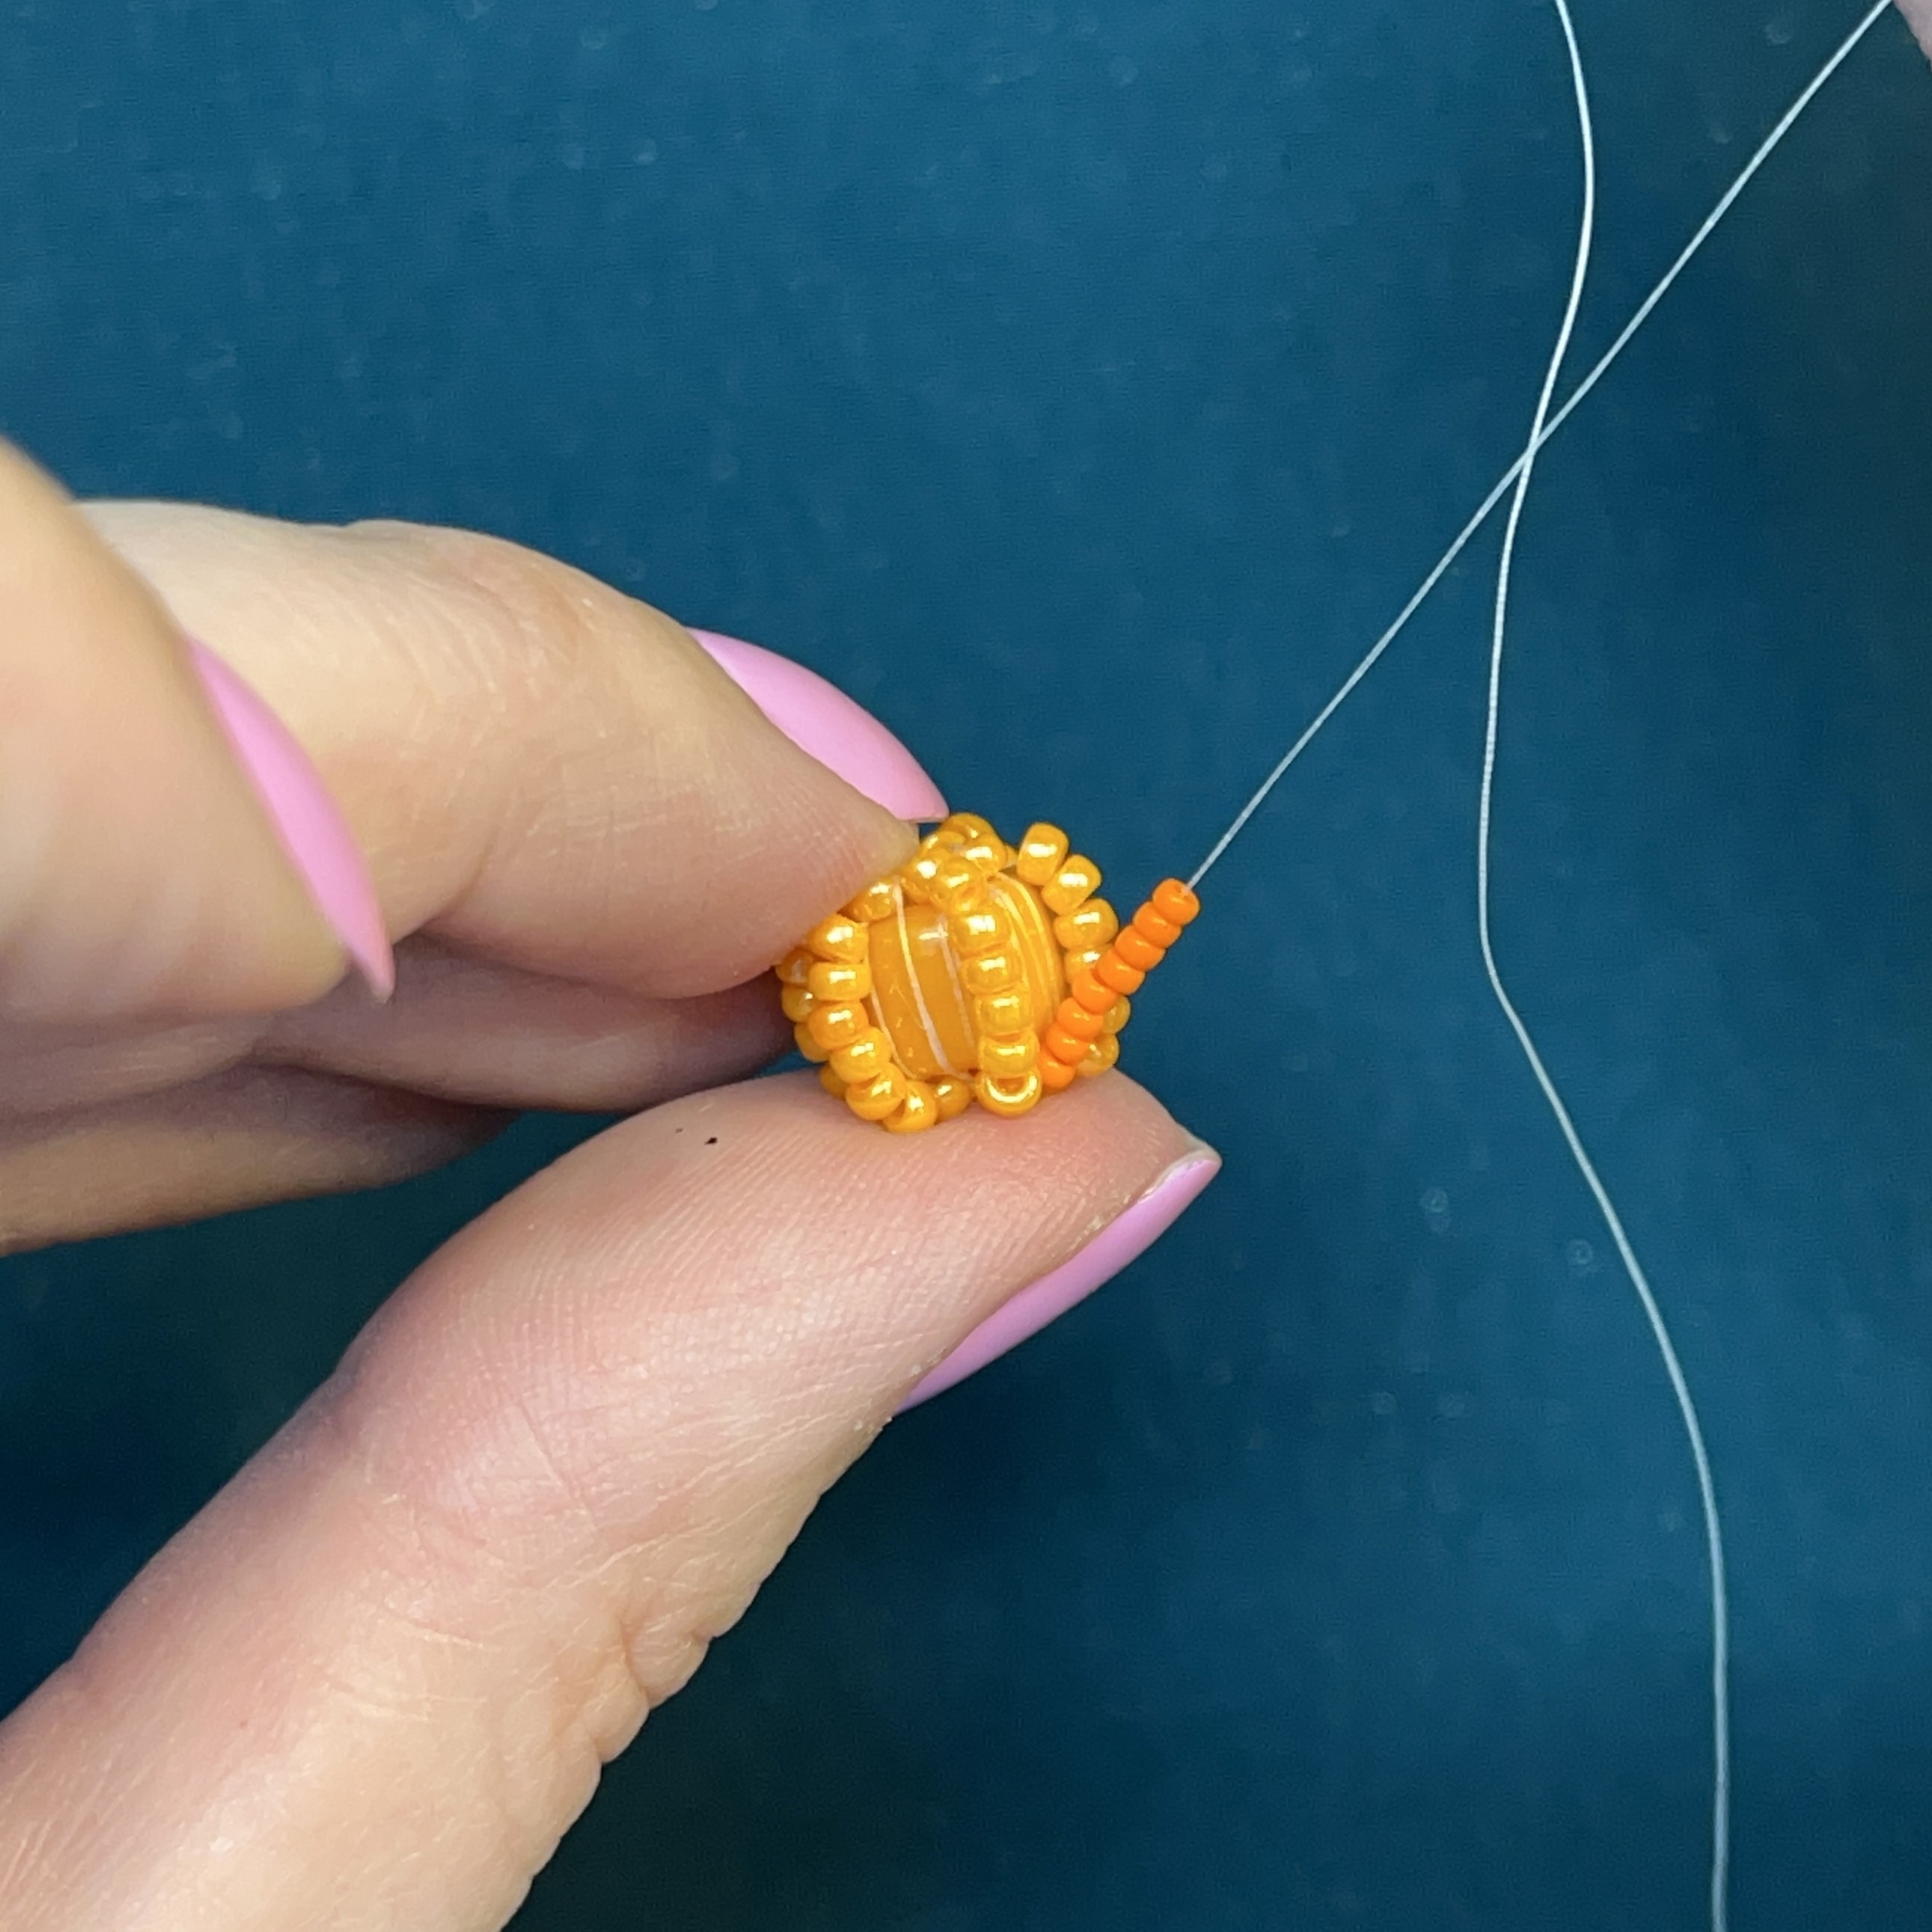
48. String on 5, size 8 seed beads and thread through the forte bead.
49. Now you can use your fingers, needle (be careful), or the end of your needle nose pliers to do this next bit. Push all 5 seed beads through the hole of the forte bead one by one.
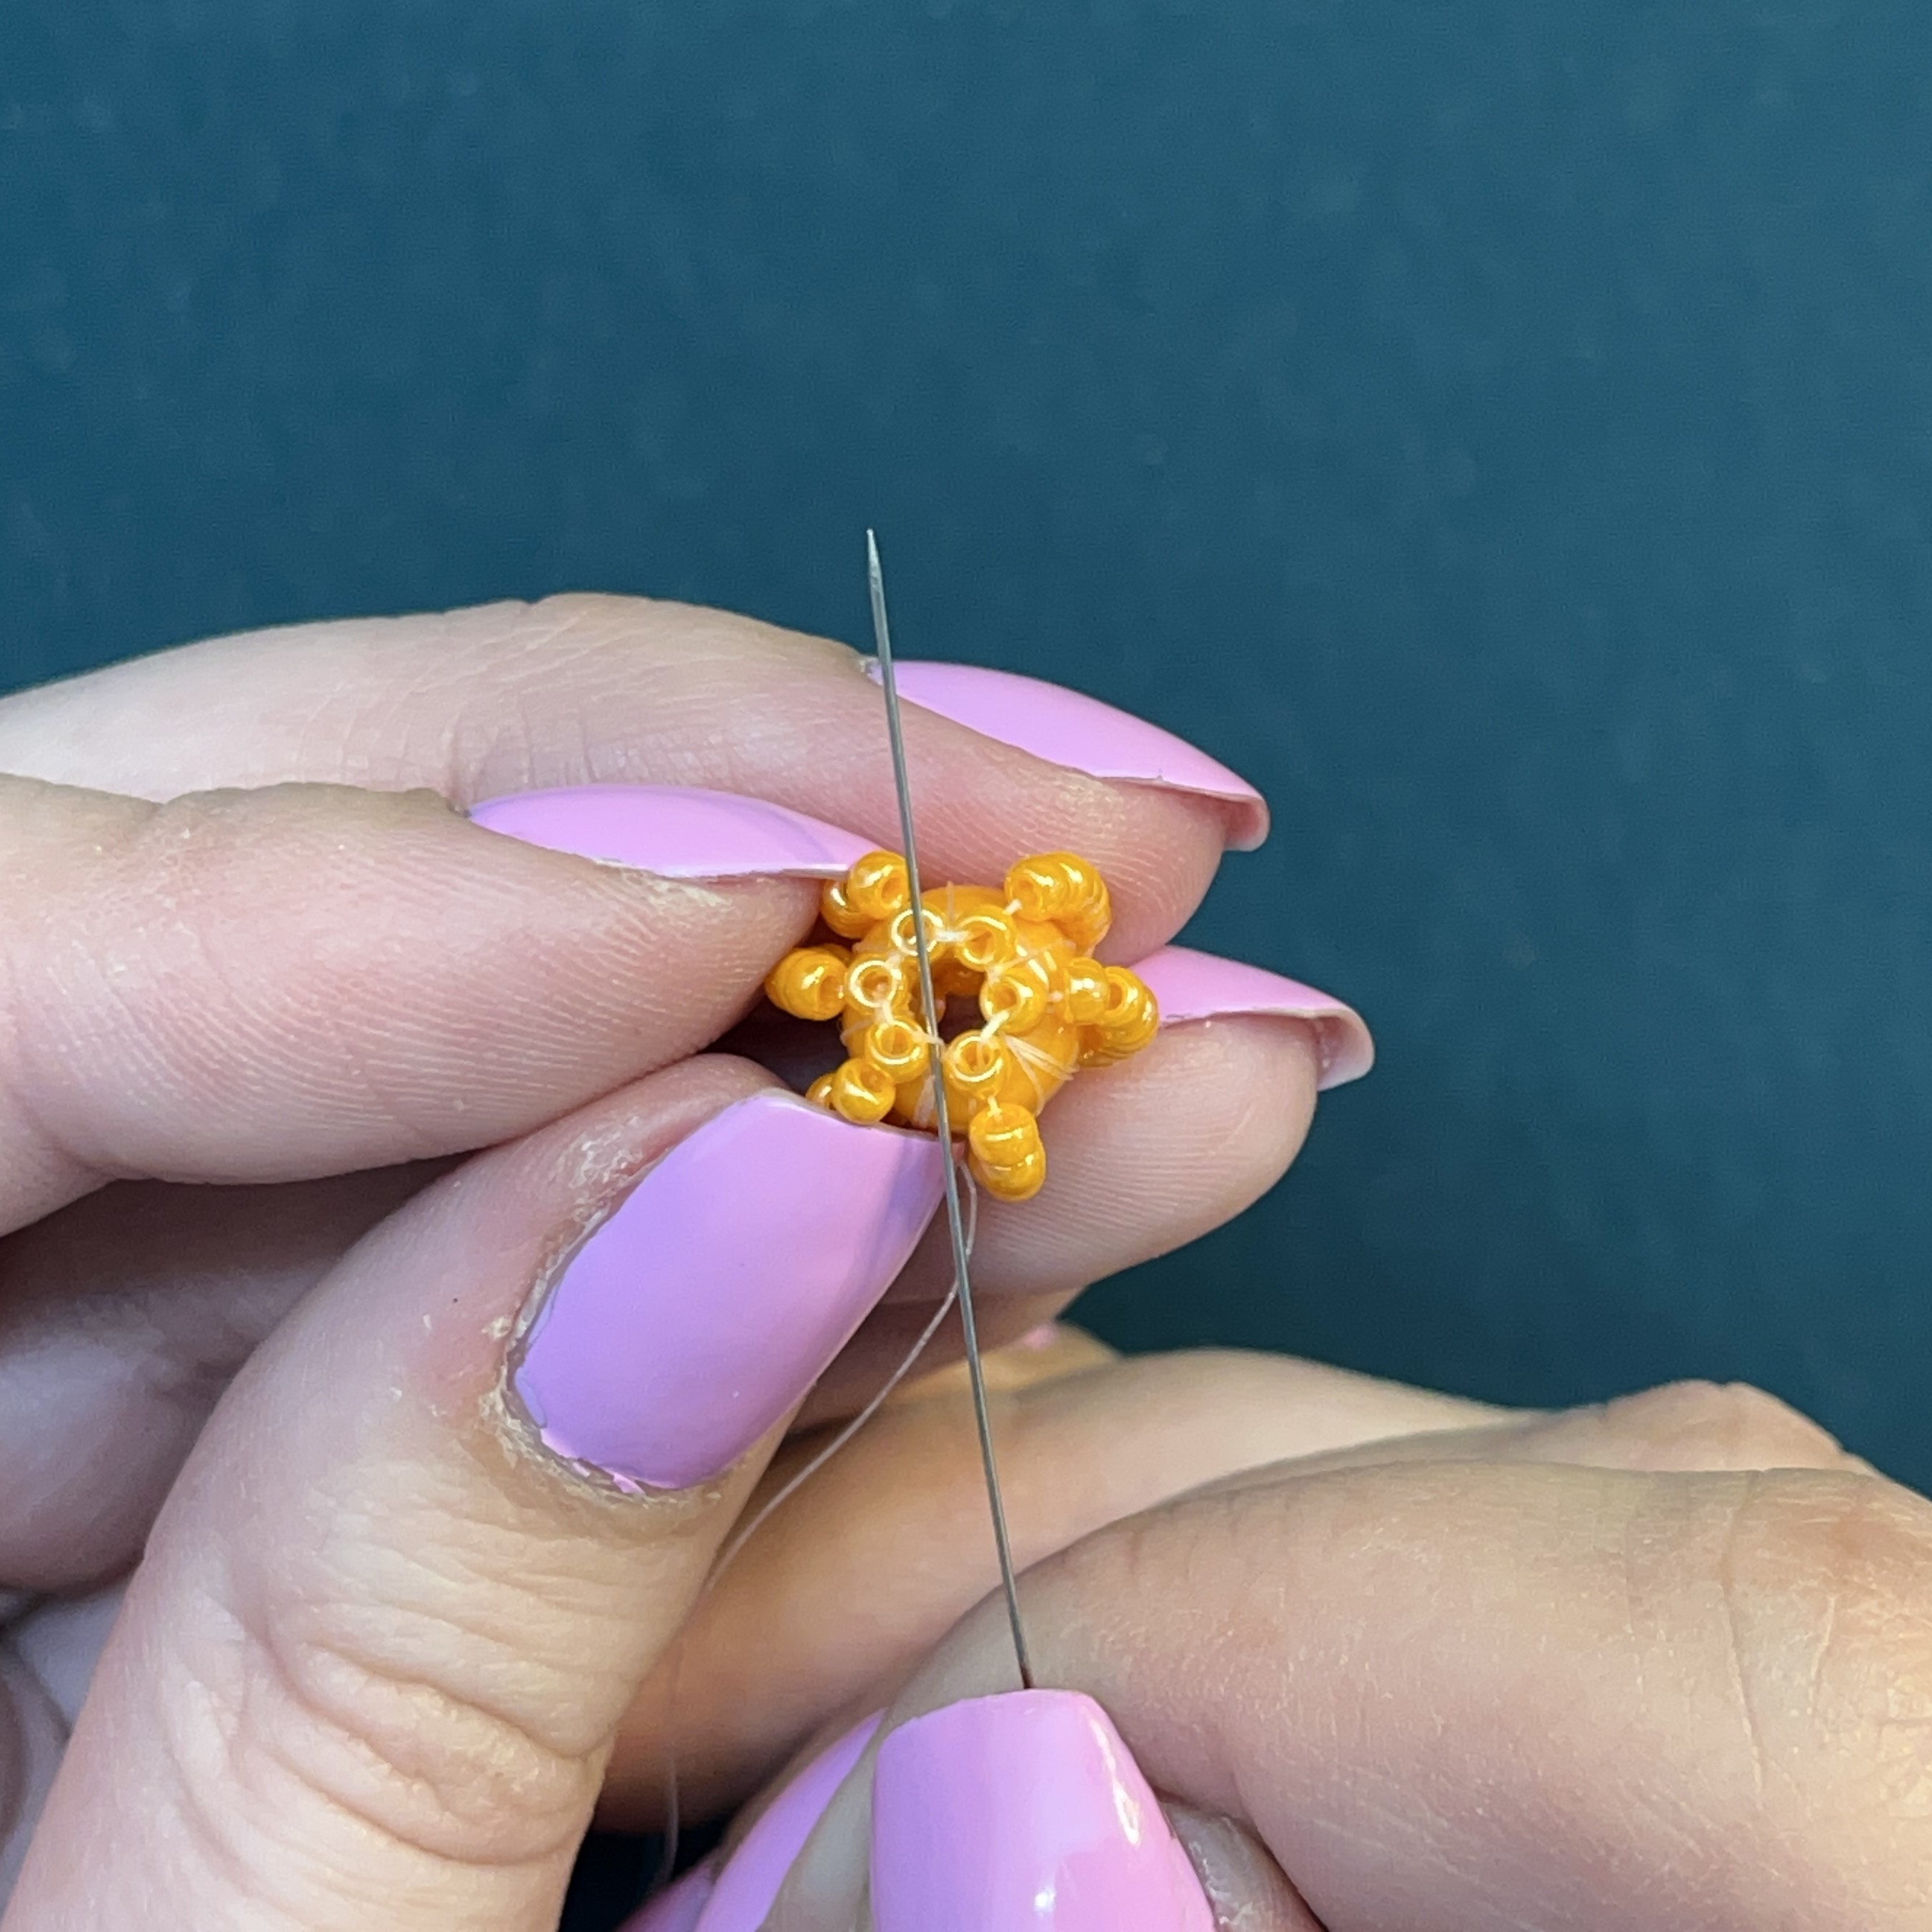
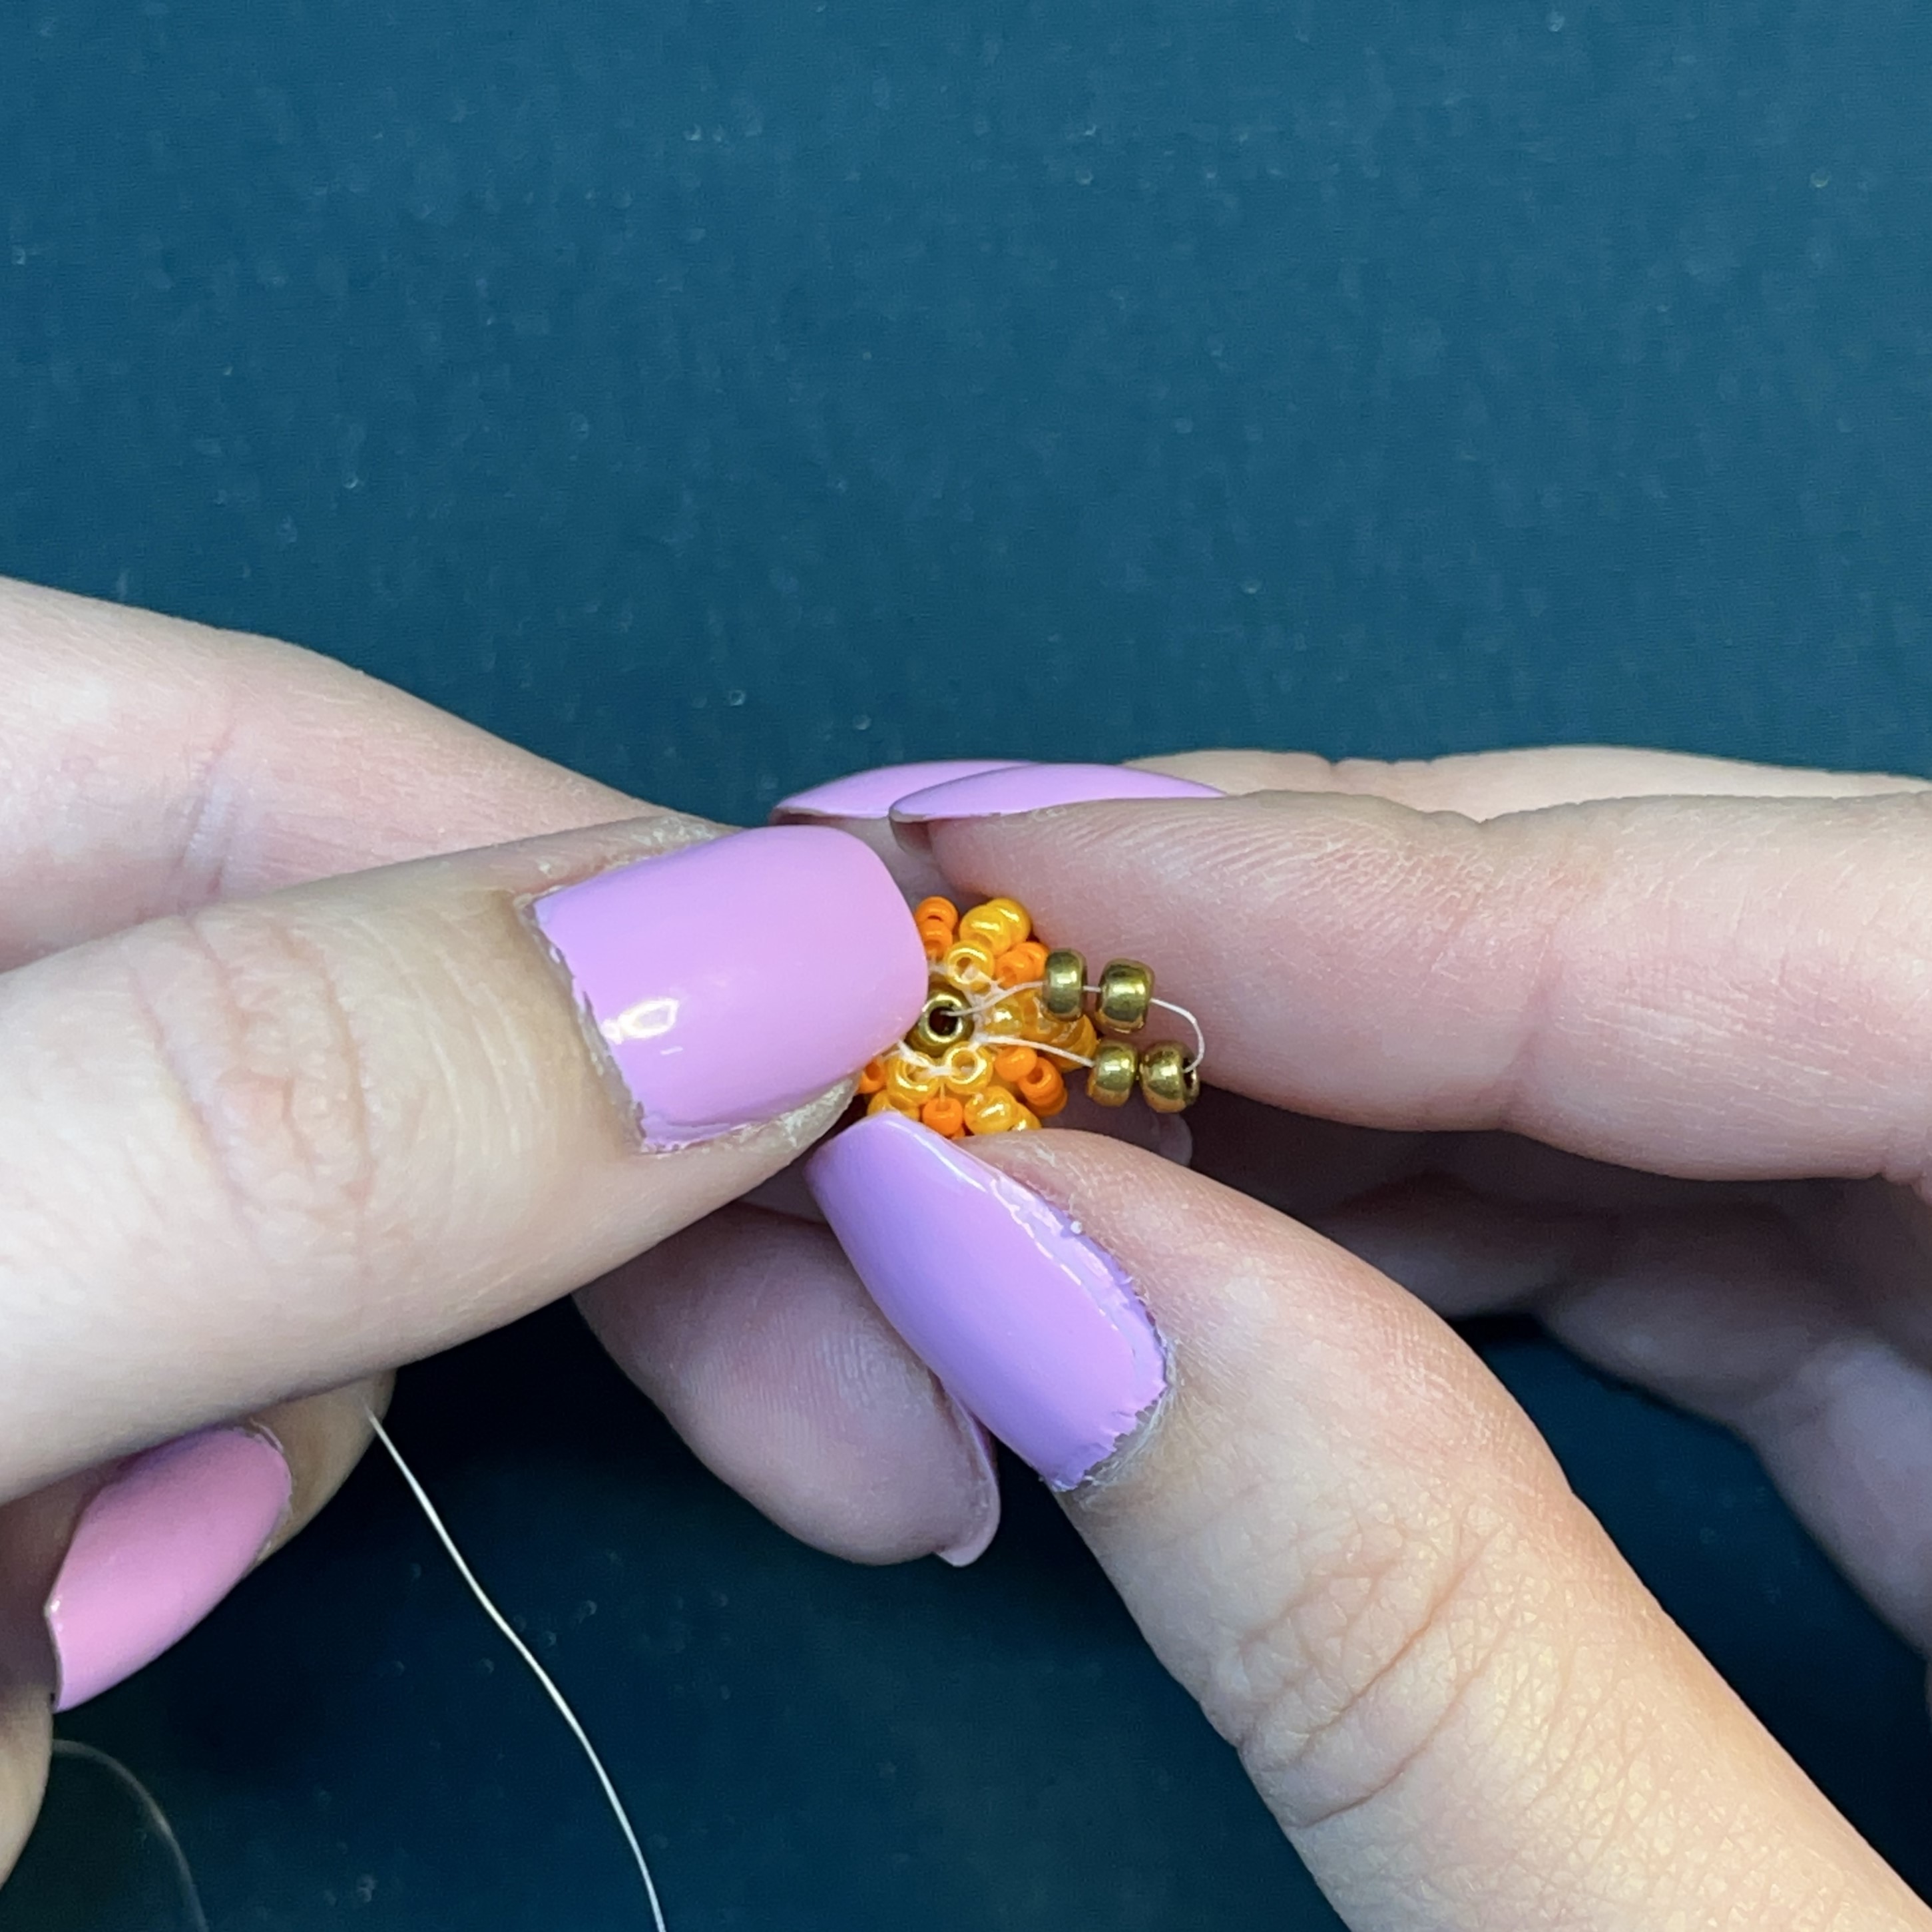
50. When you have pulled all the size 8 seed beads through, it should look like this at the bottom.
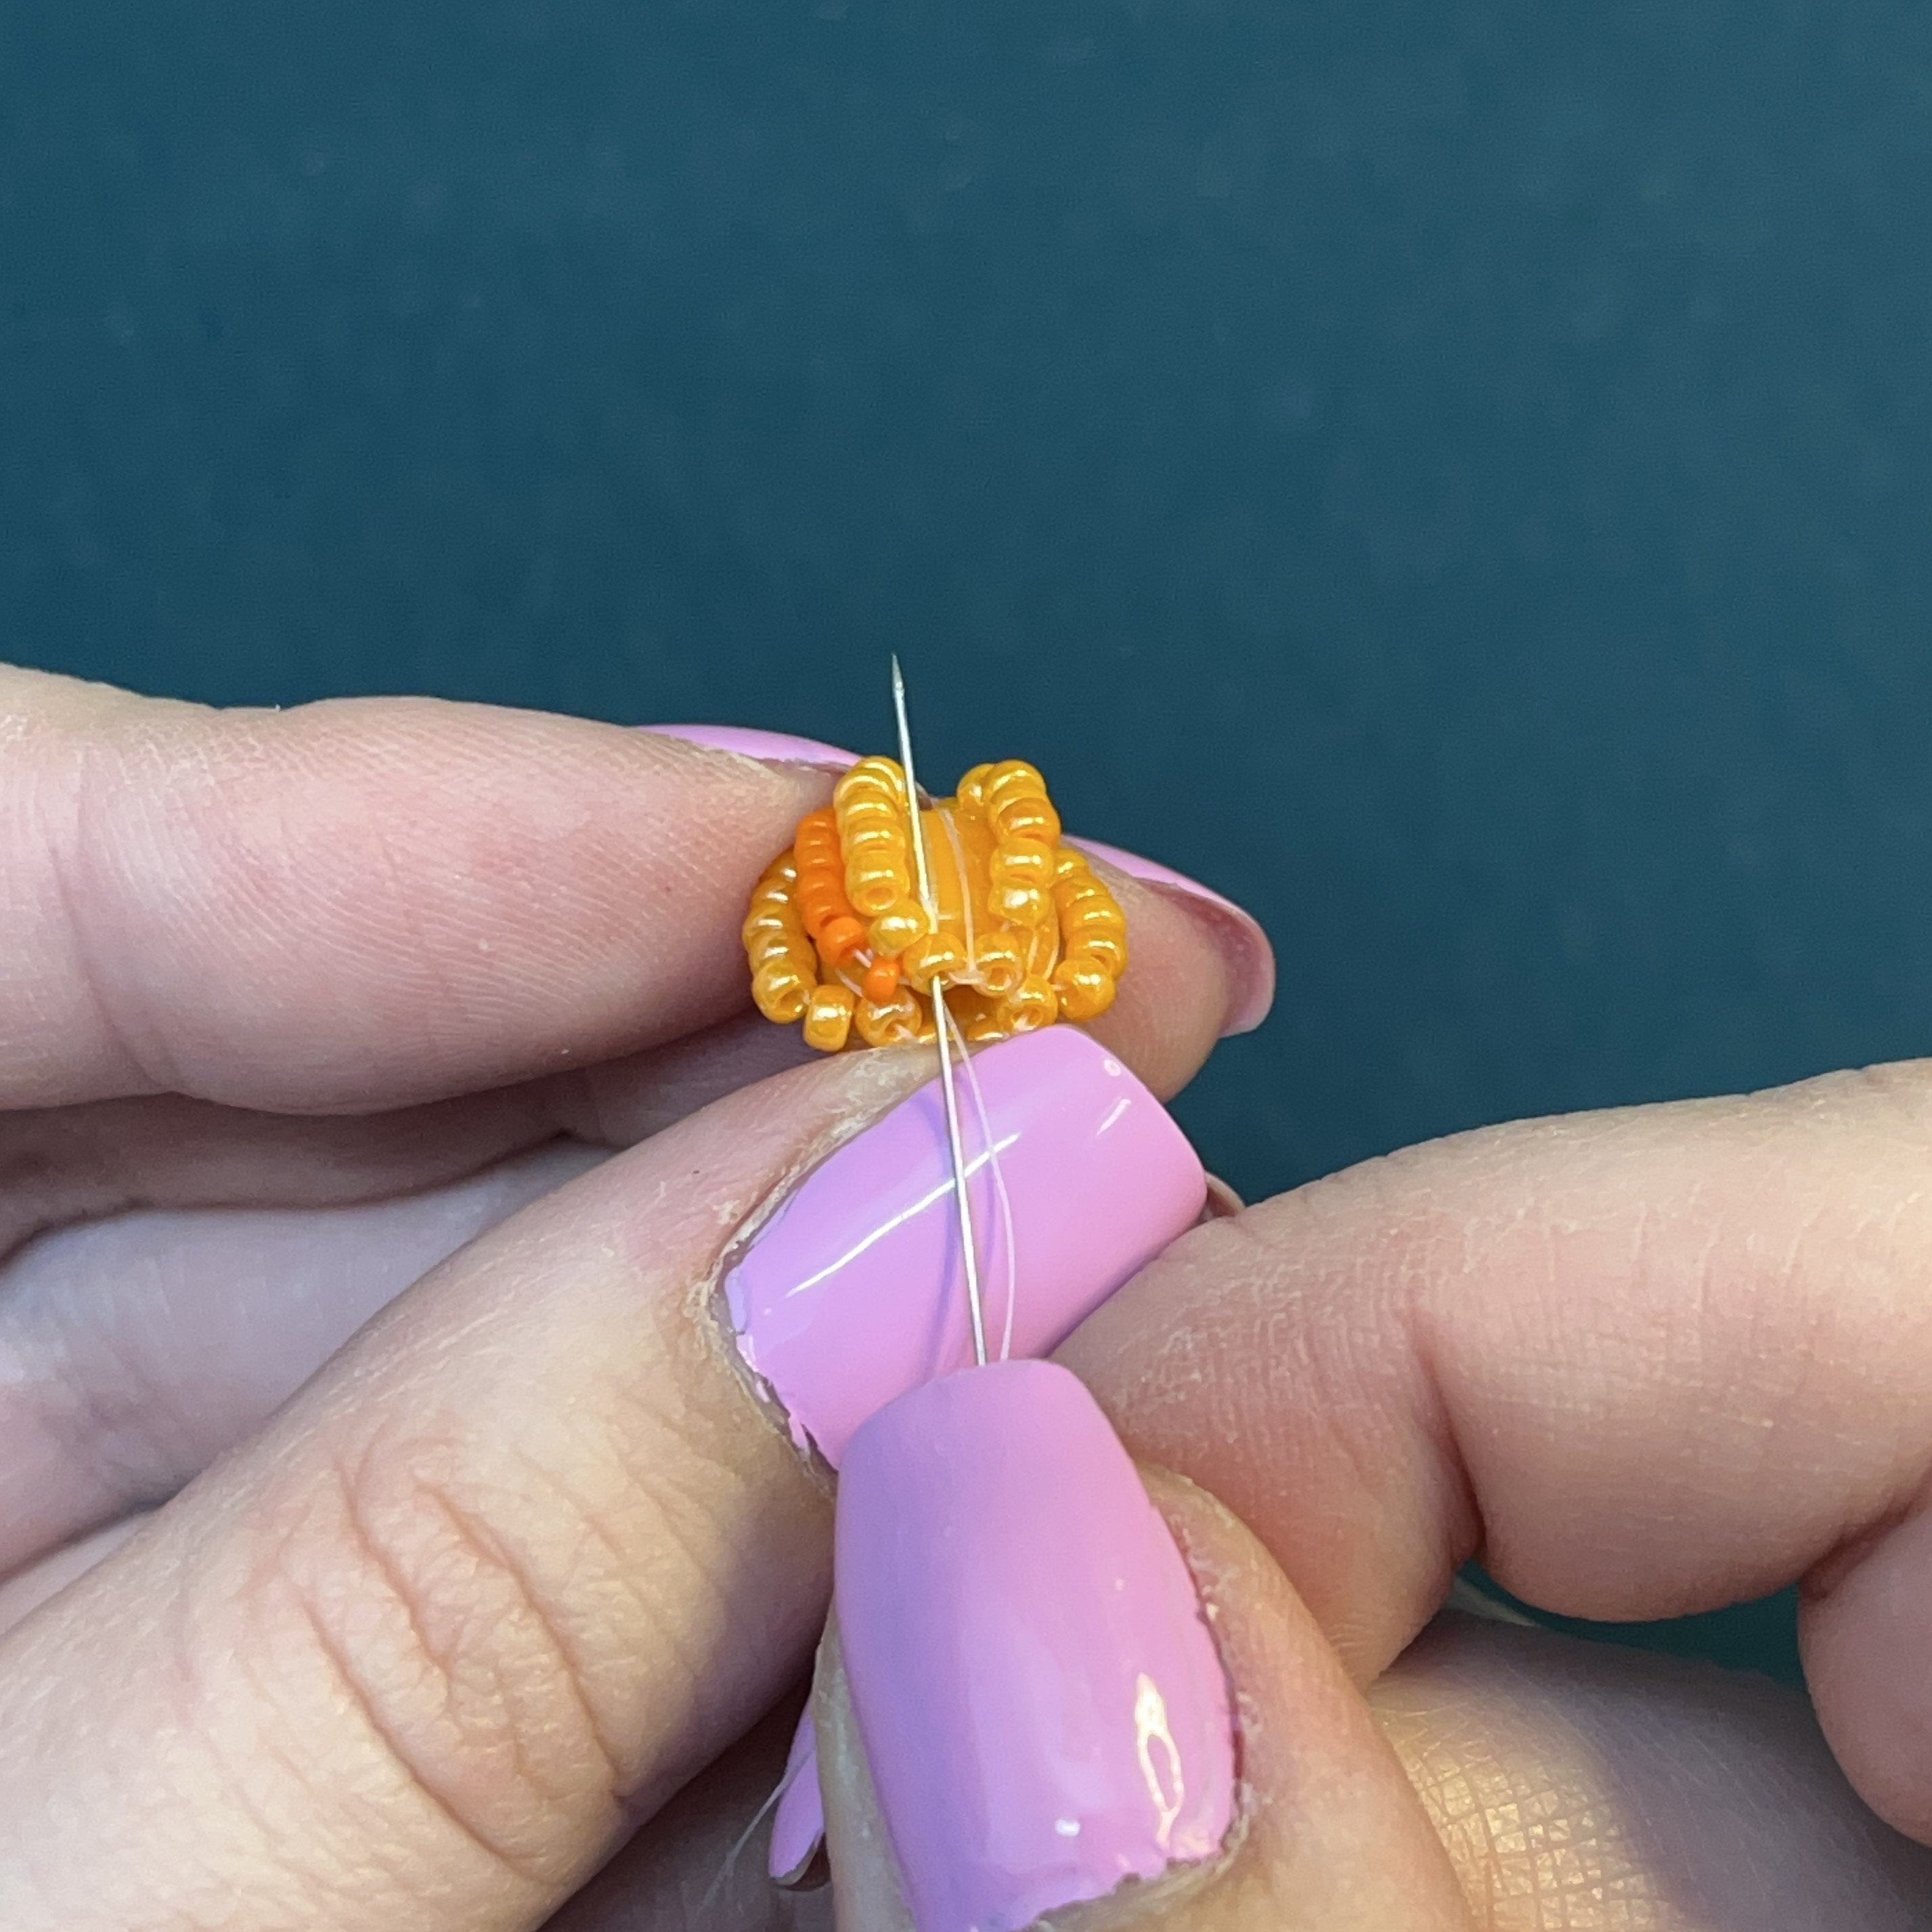
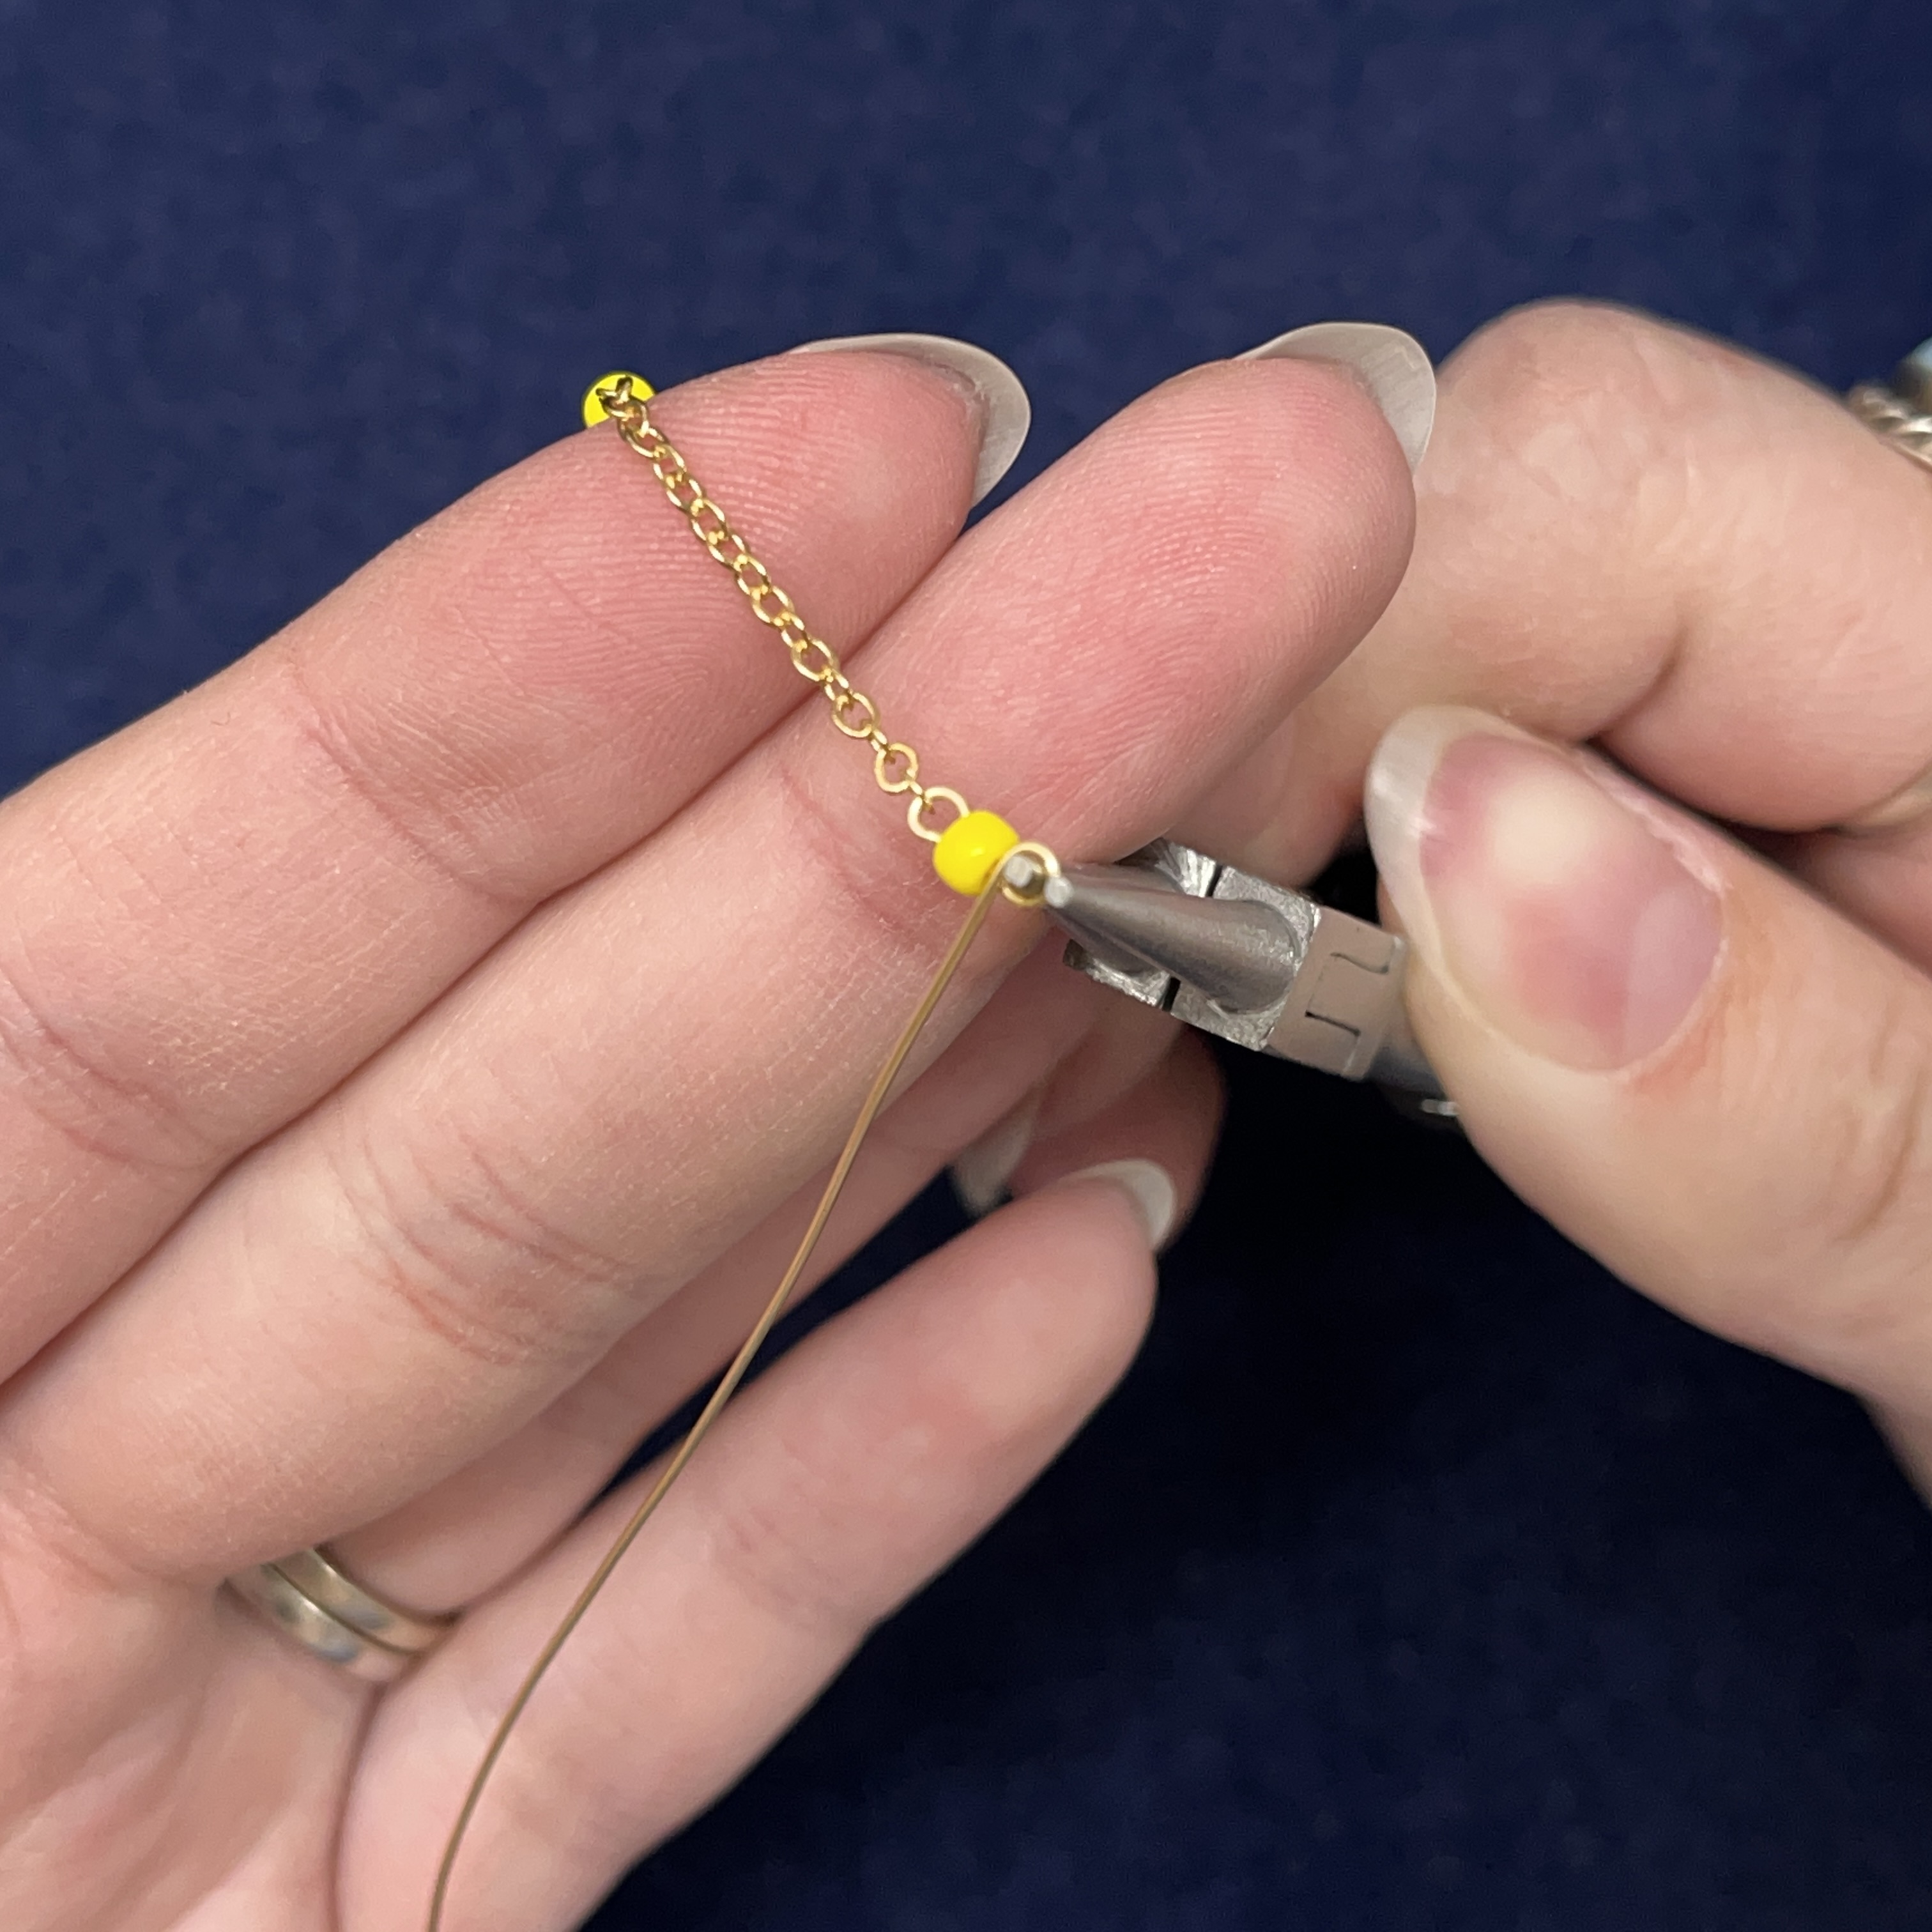
51. You will have one extra seed bead that is not lodged in the forte bead, that is fine. Thread one more size 8 seed bead on. There will now be a total of 6 size 8 seed beads. ** If you would like your pumpkin vine to be longer, just add an extra seed bead or two to achieve your desired length.
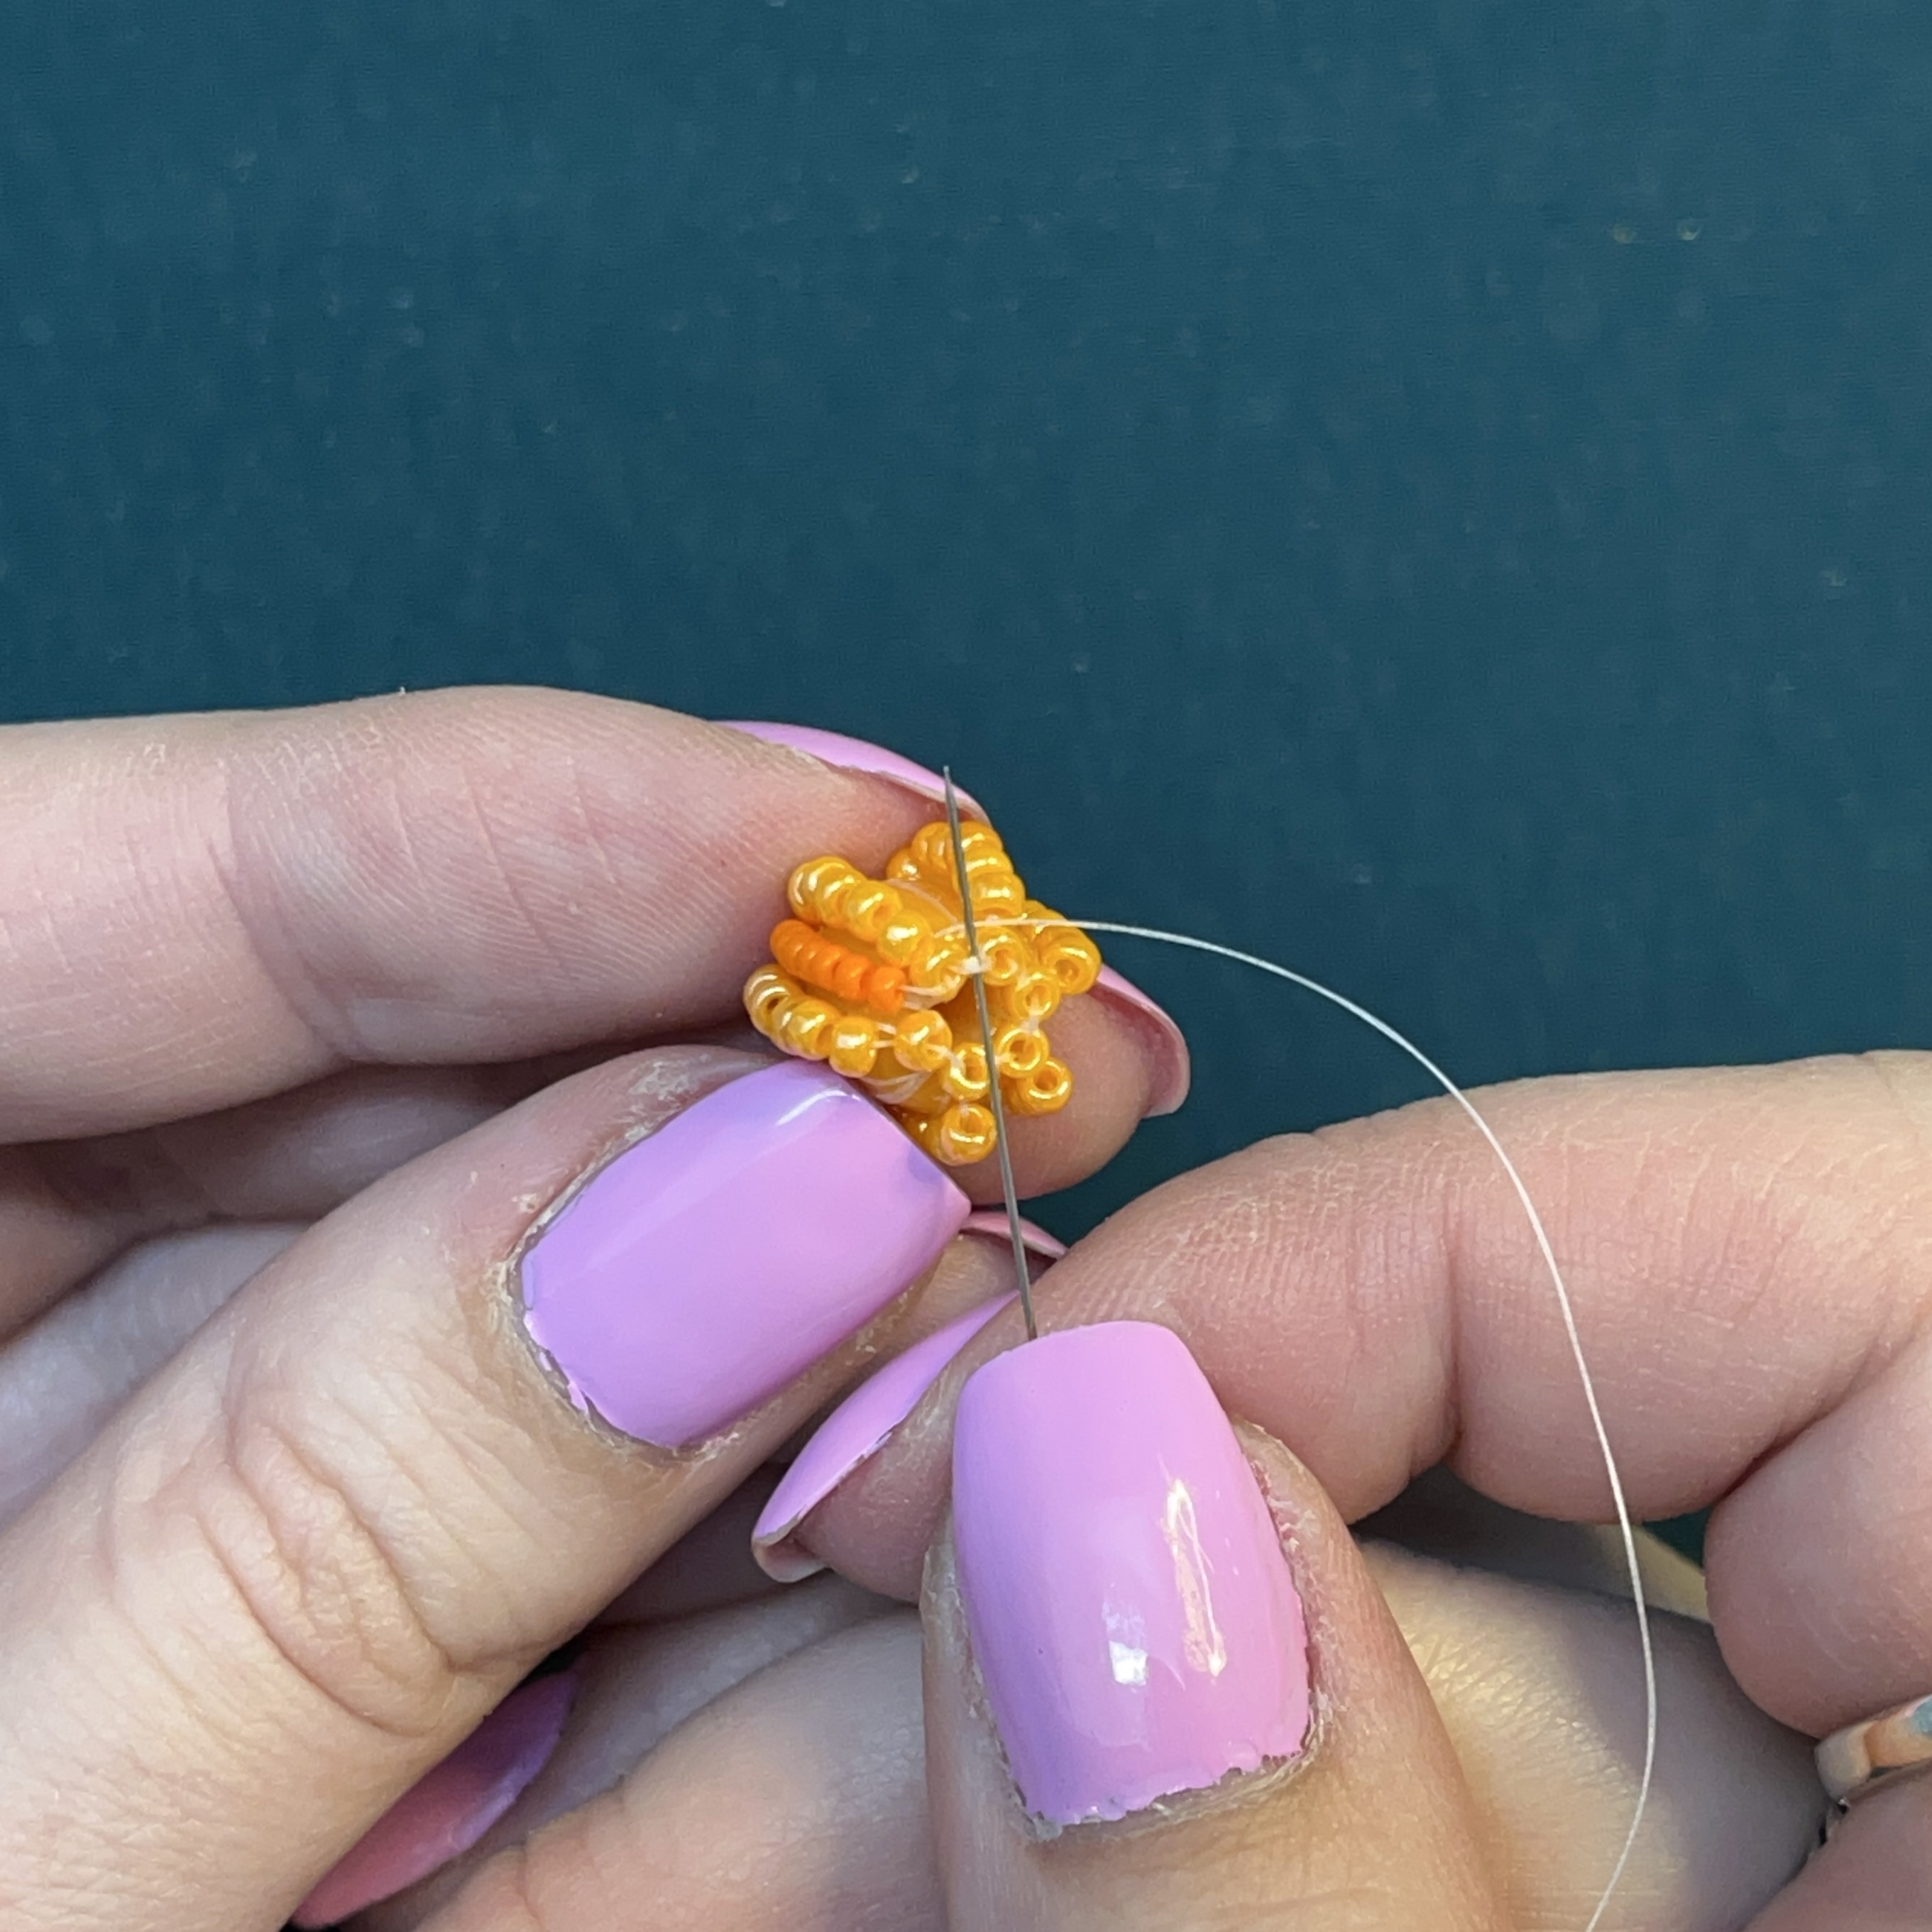
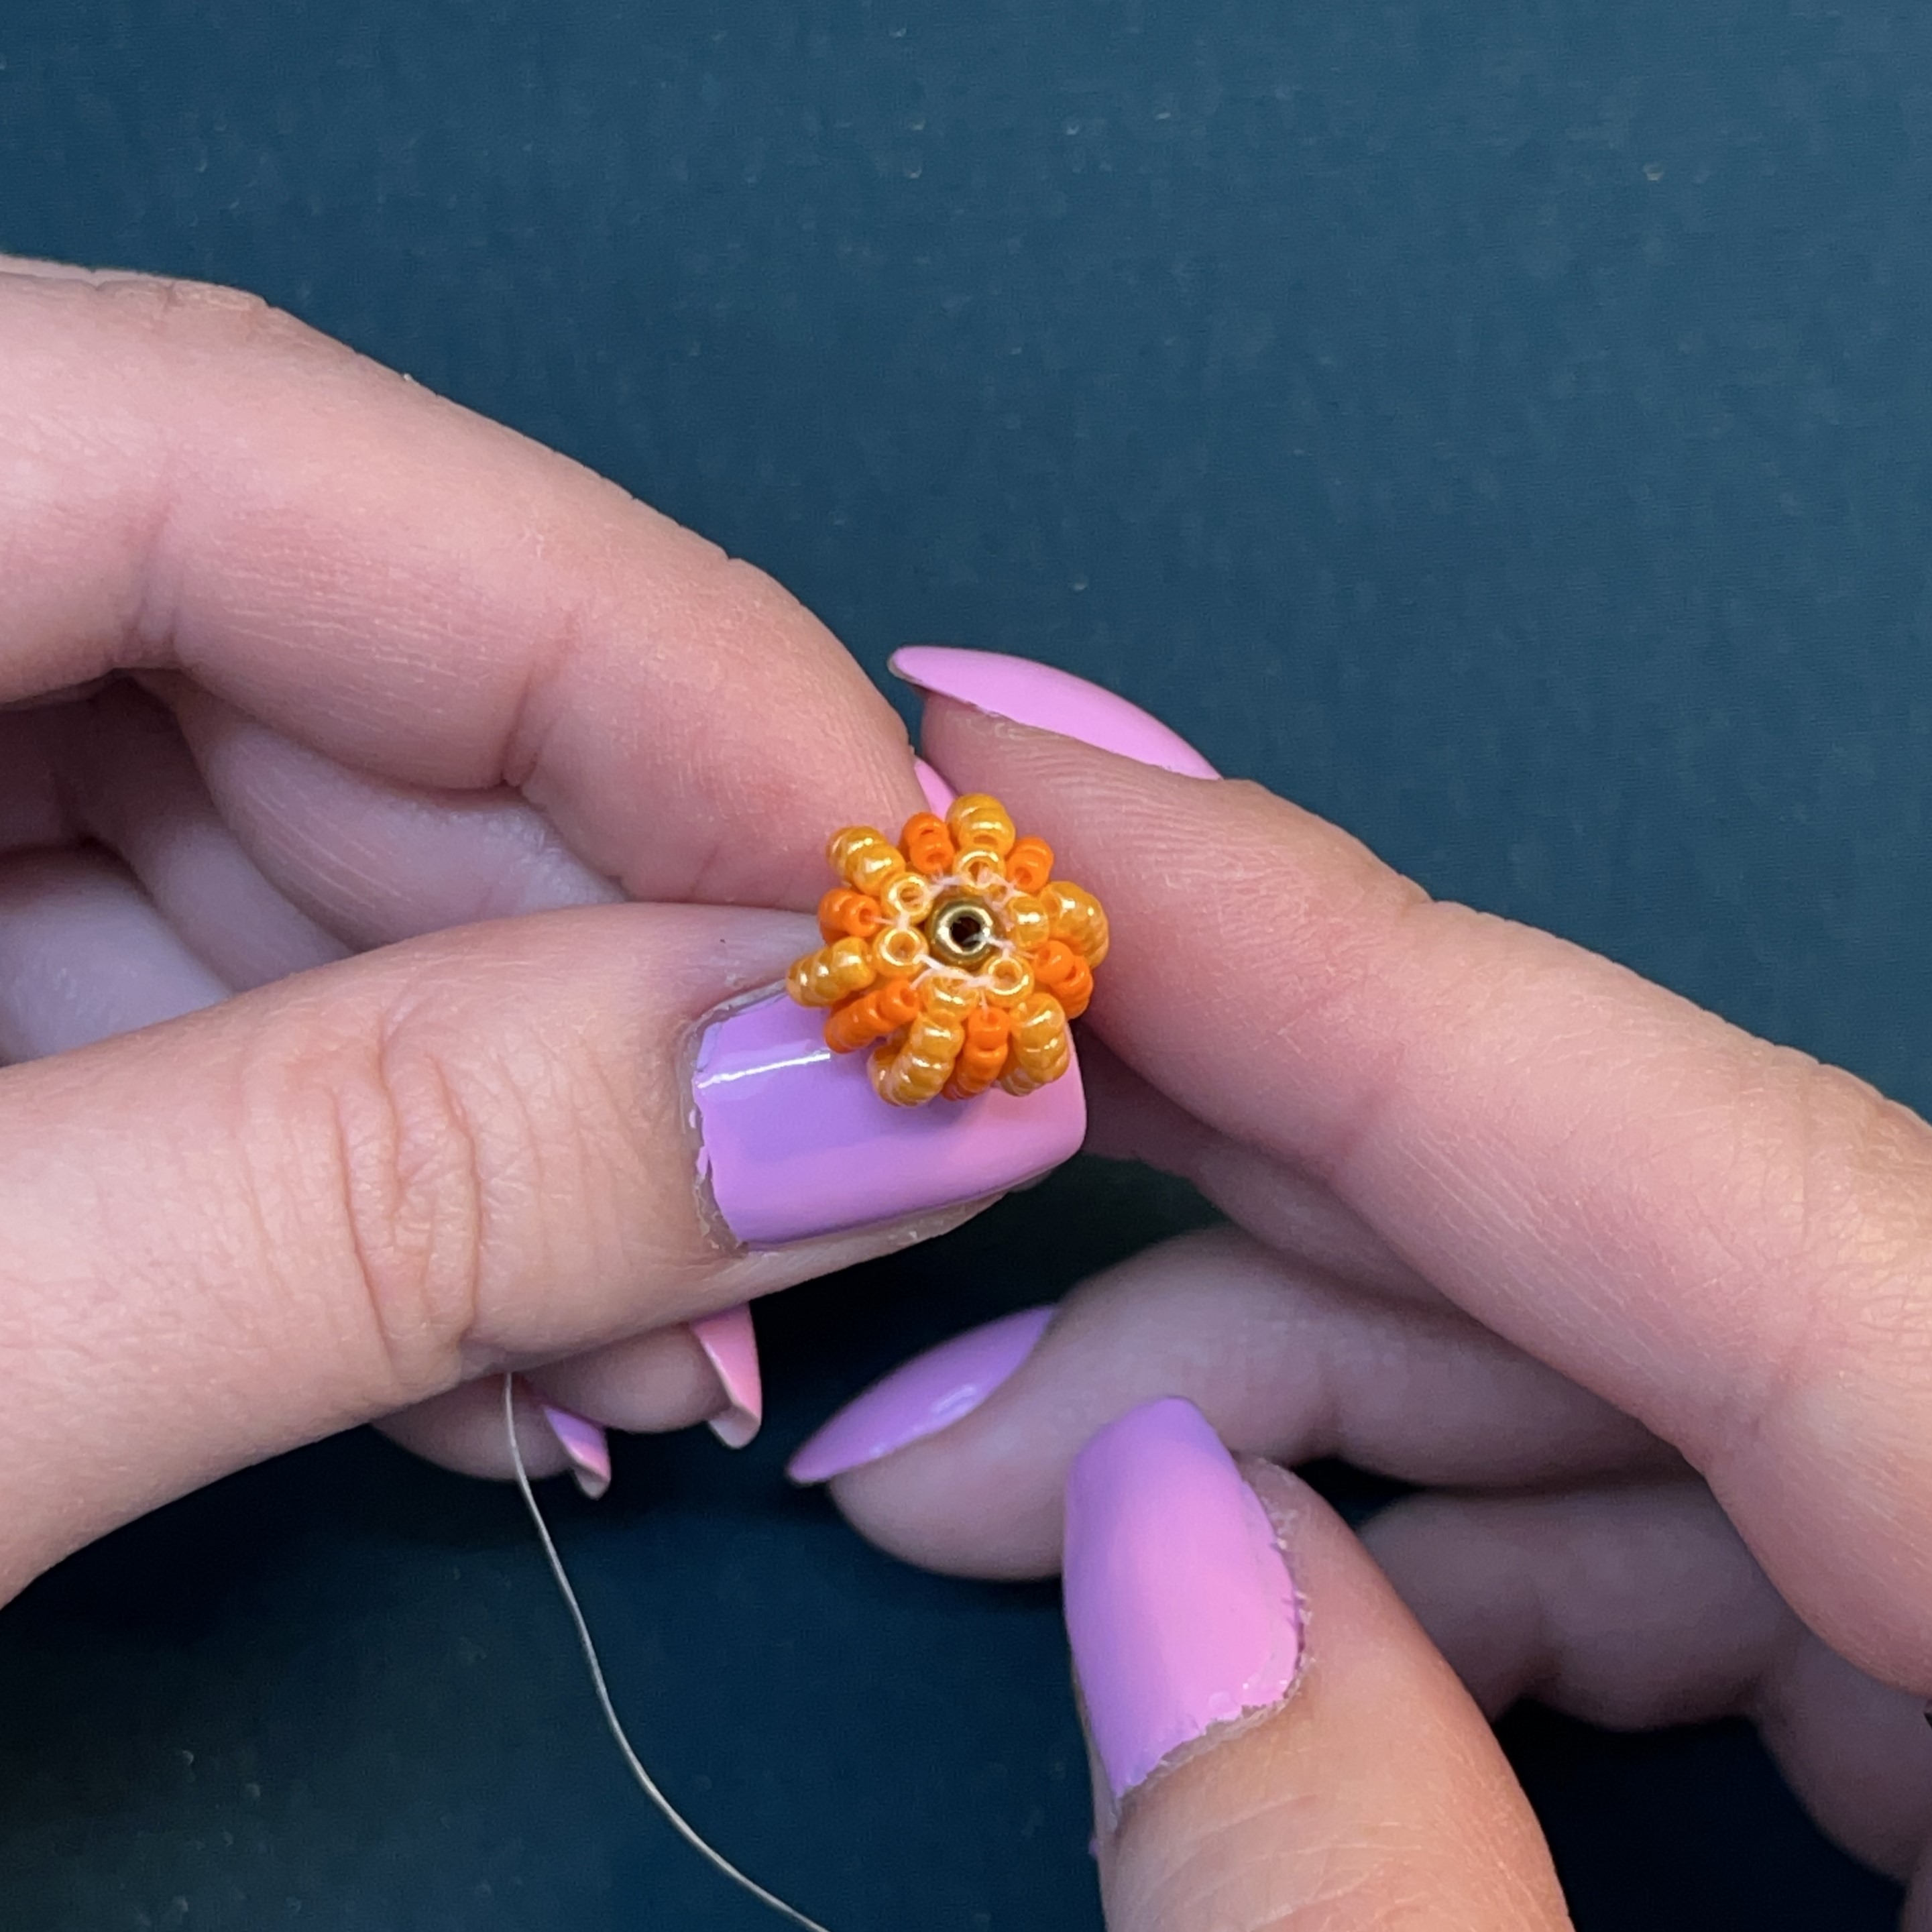
52. Skipping the last seed bead you strung on, thread all the way through the 5 seed beads you initially pulled through the forte bead.
53. When you pull the thread tight, it should look like this.
54. Holding the pumpkin vine in place on the other end. Find the line of thread opposite to where the size 8 seed bead is attached like in the picture. Thread the needle through this.
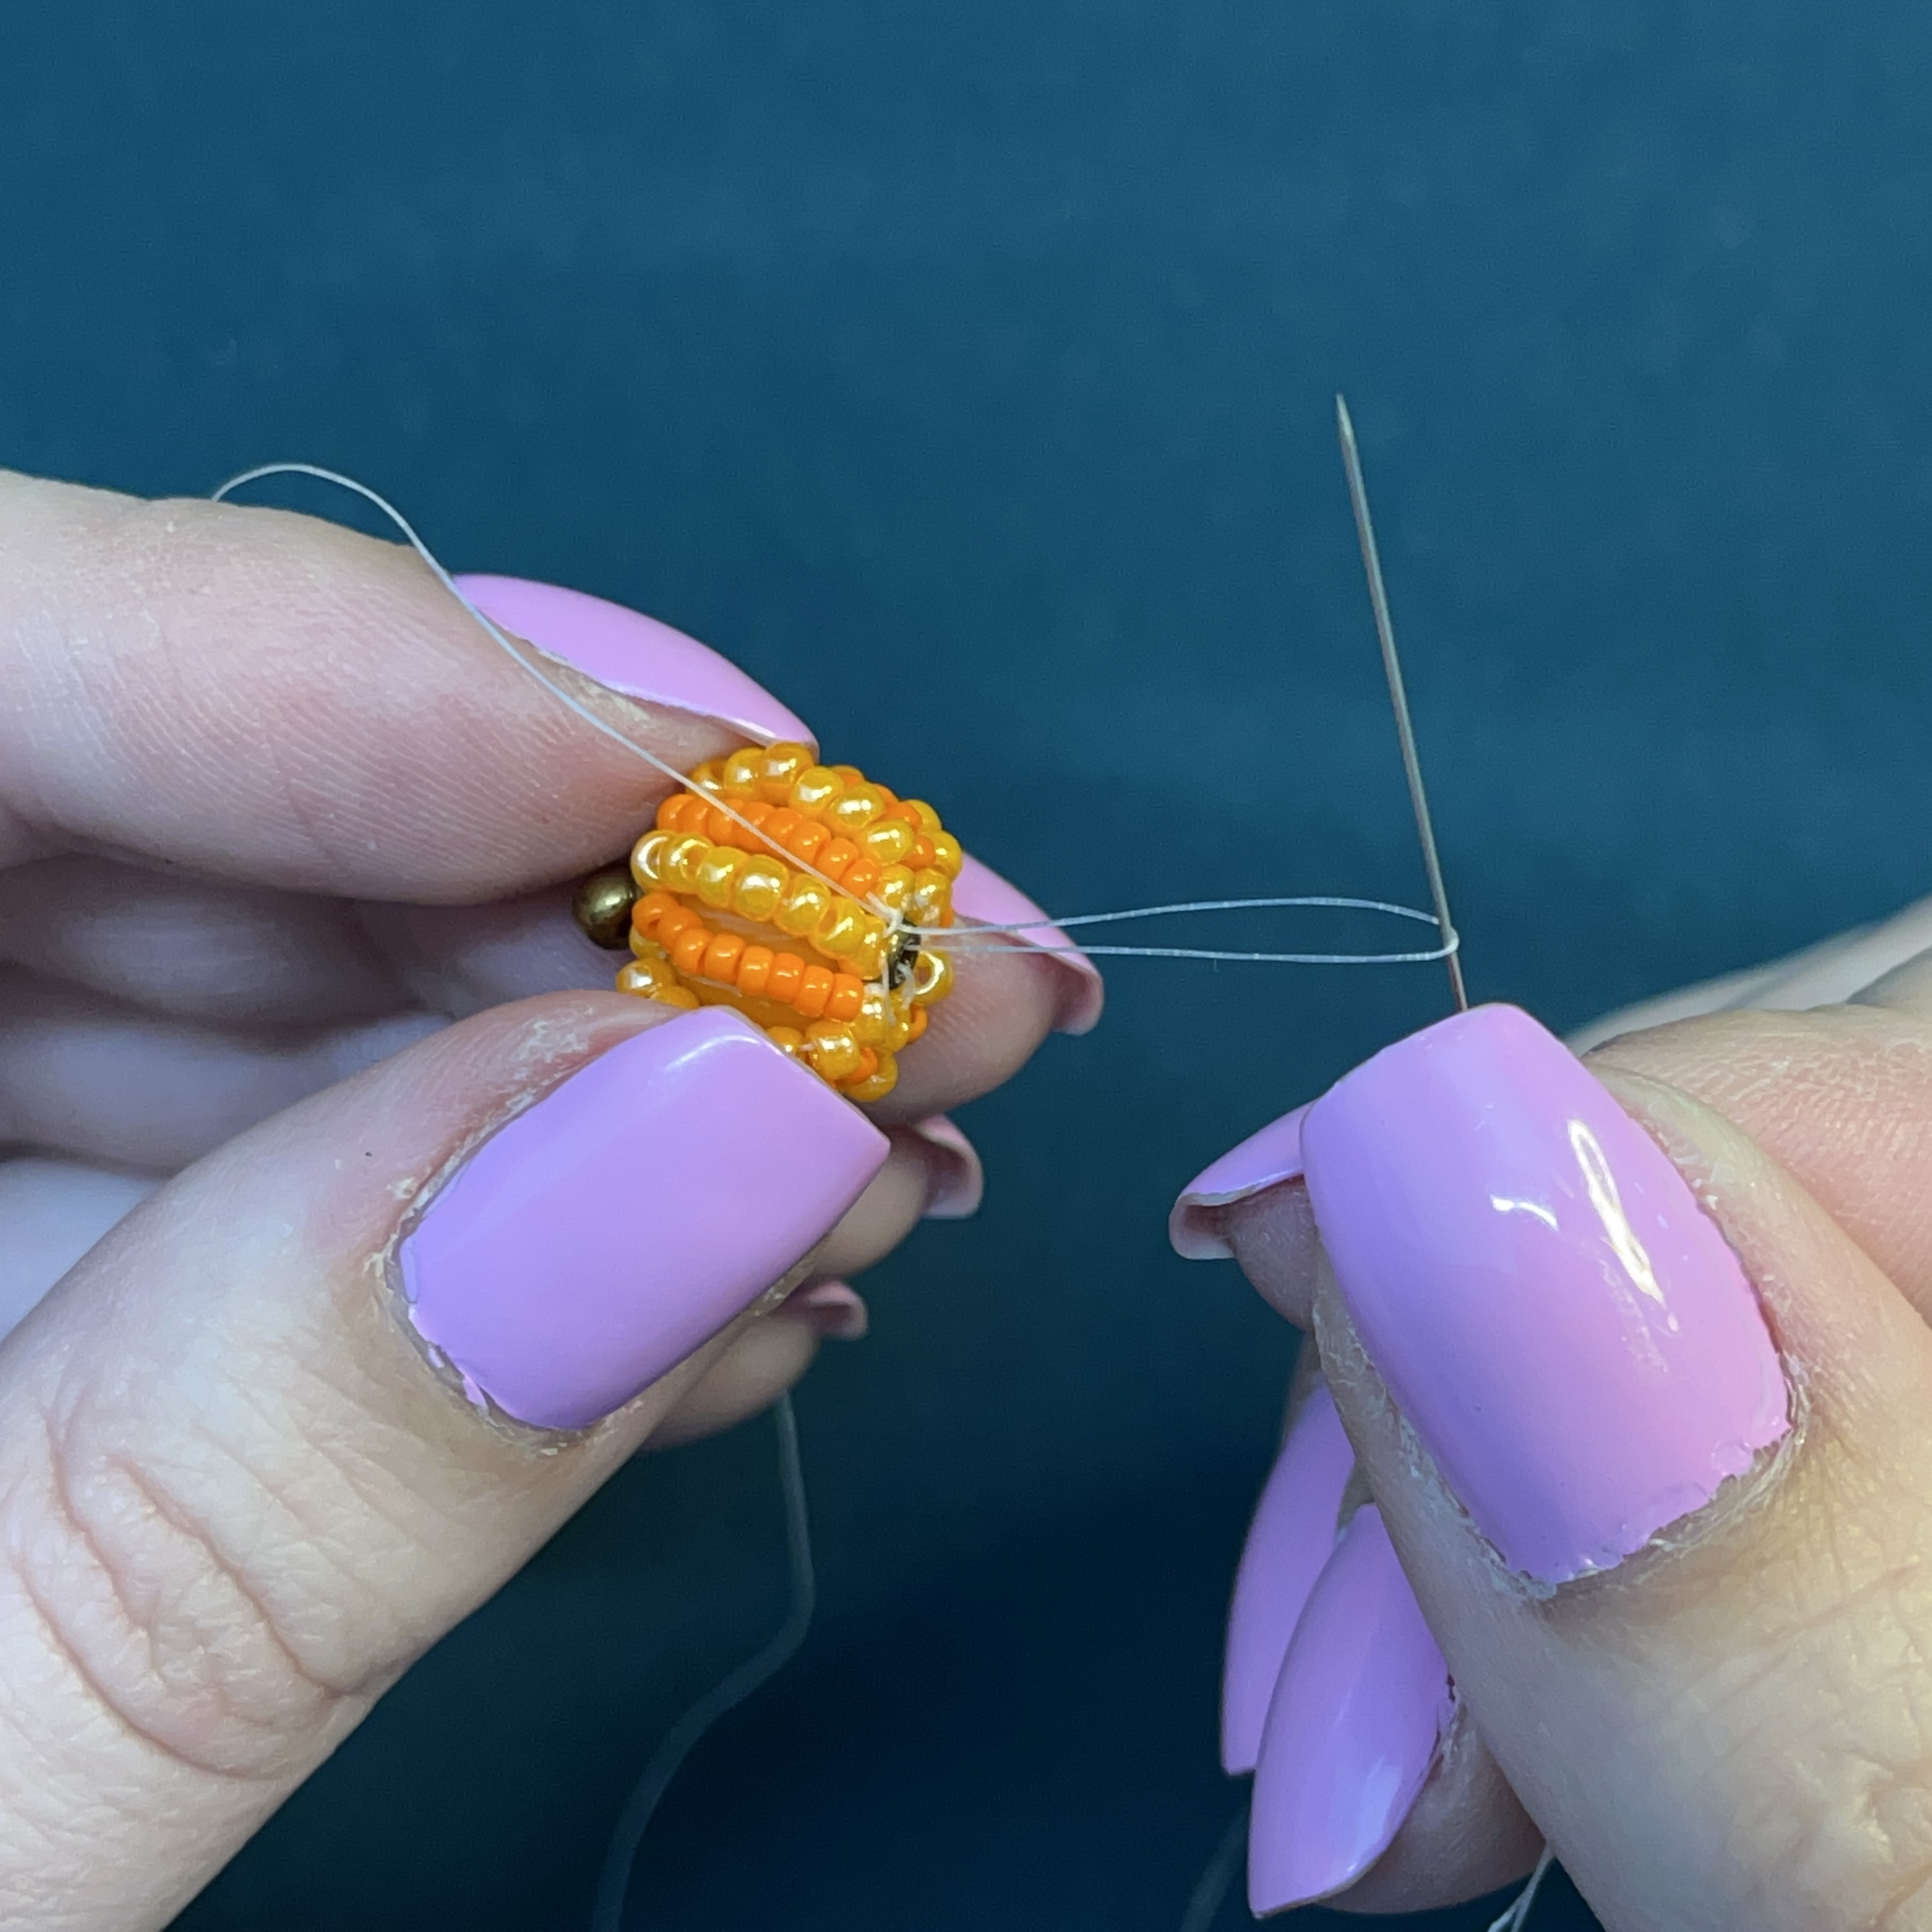
55. Create a loop and knot this spot a couple times. I will usually do about 3 sturdy knots.
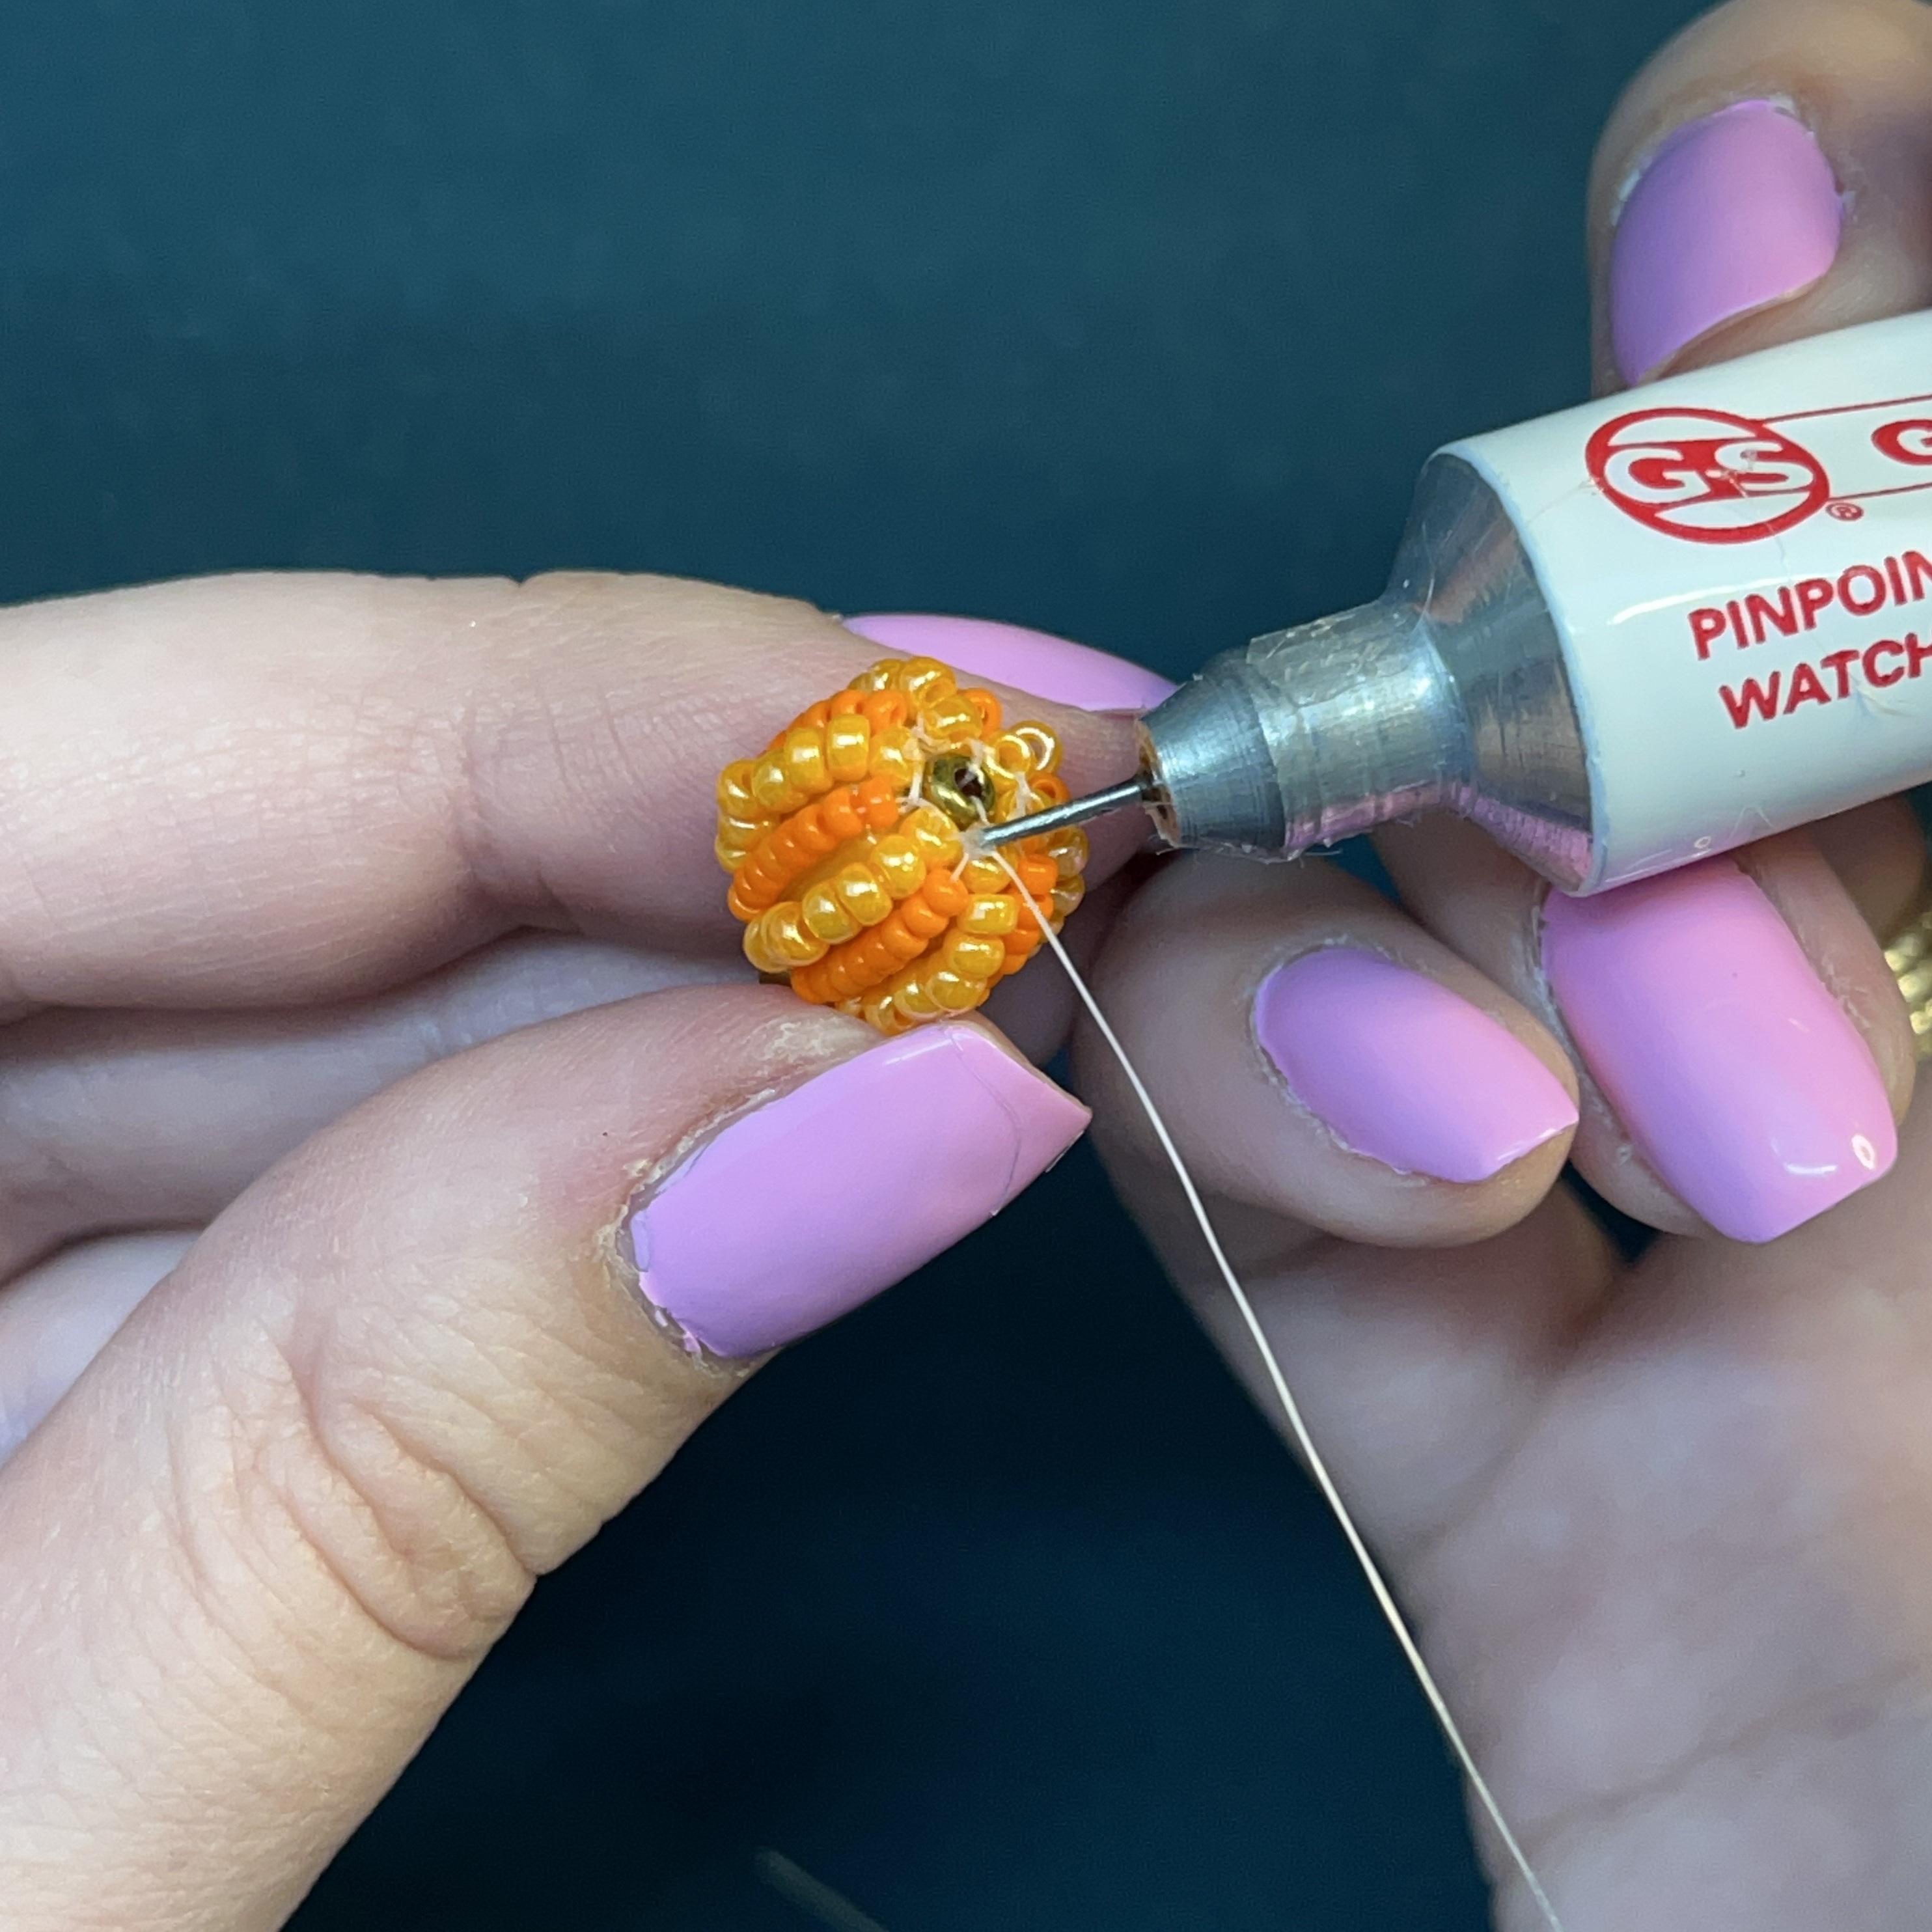
56. Glue the knot and wait for the glue to dry.
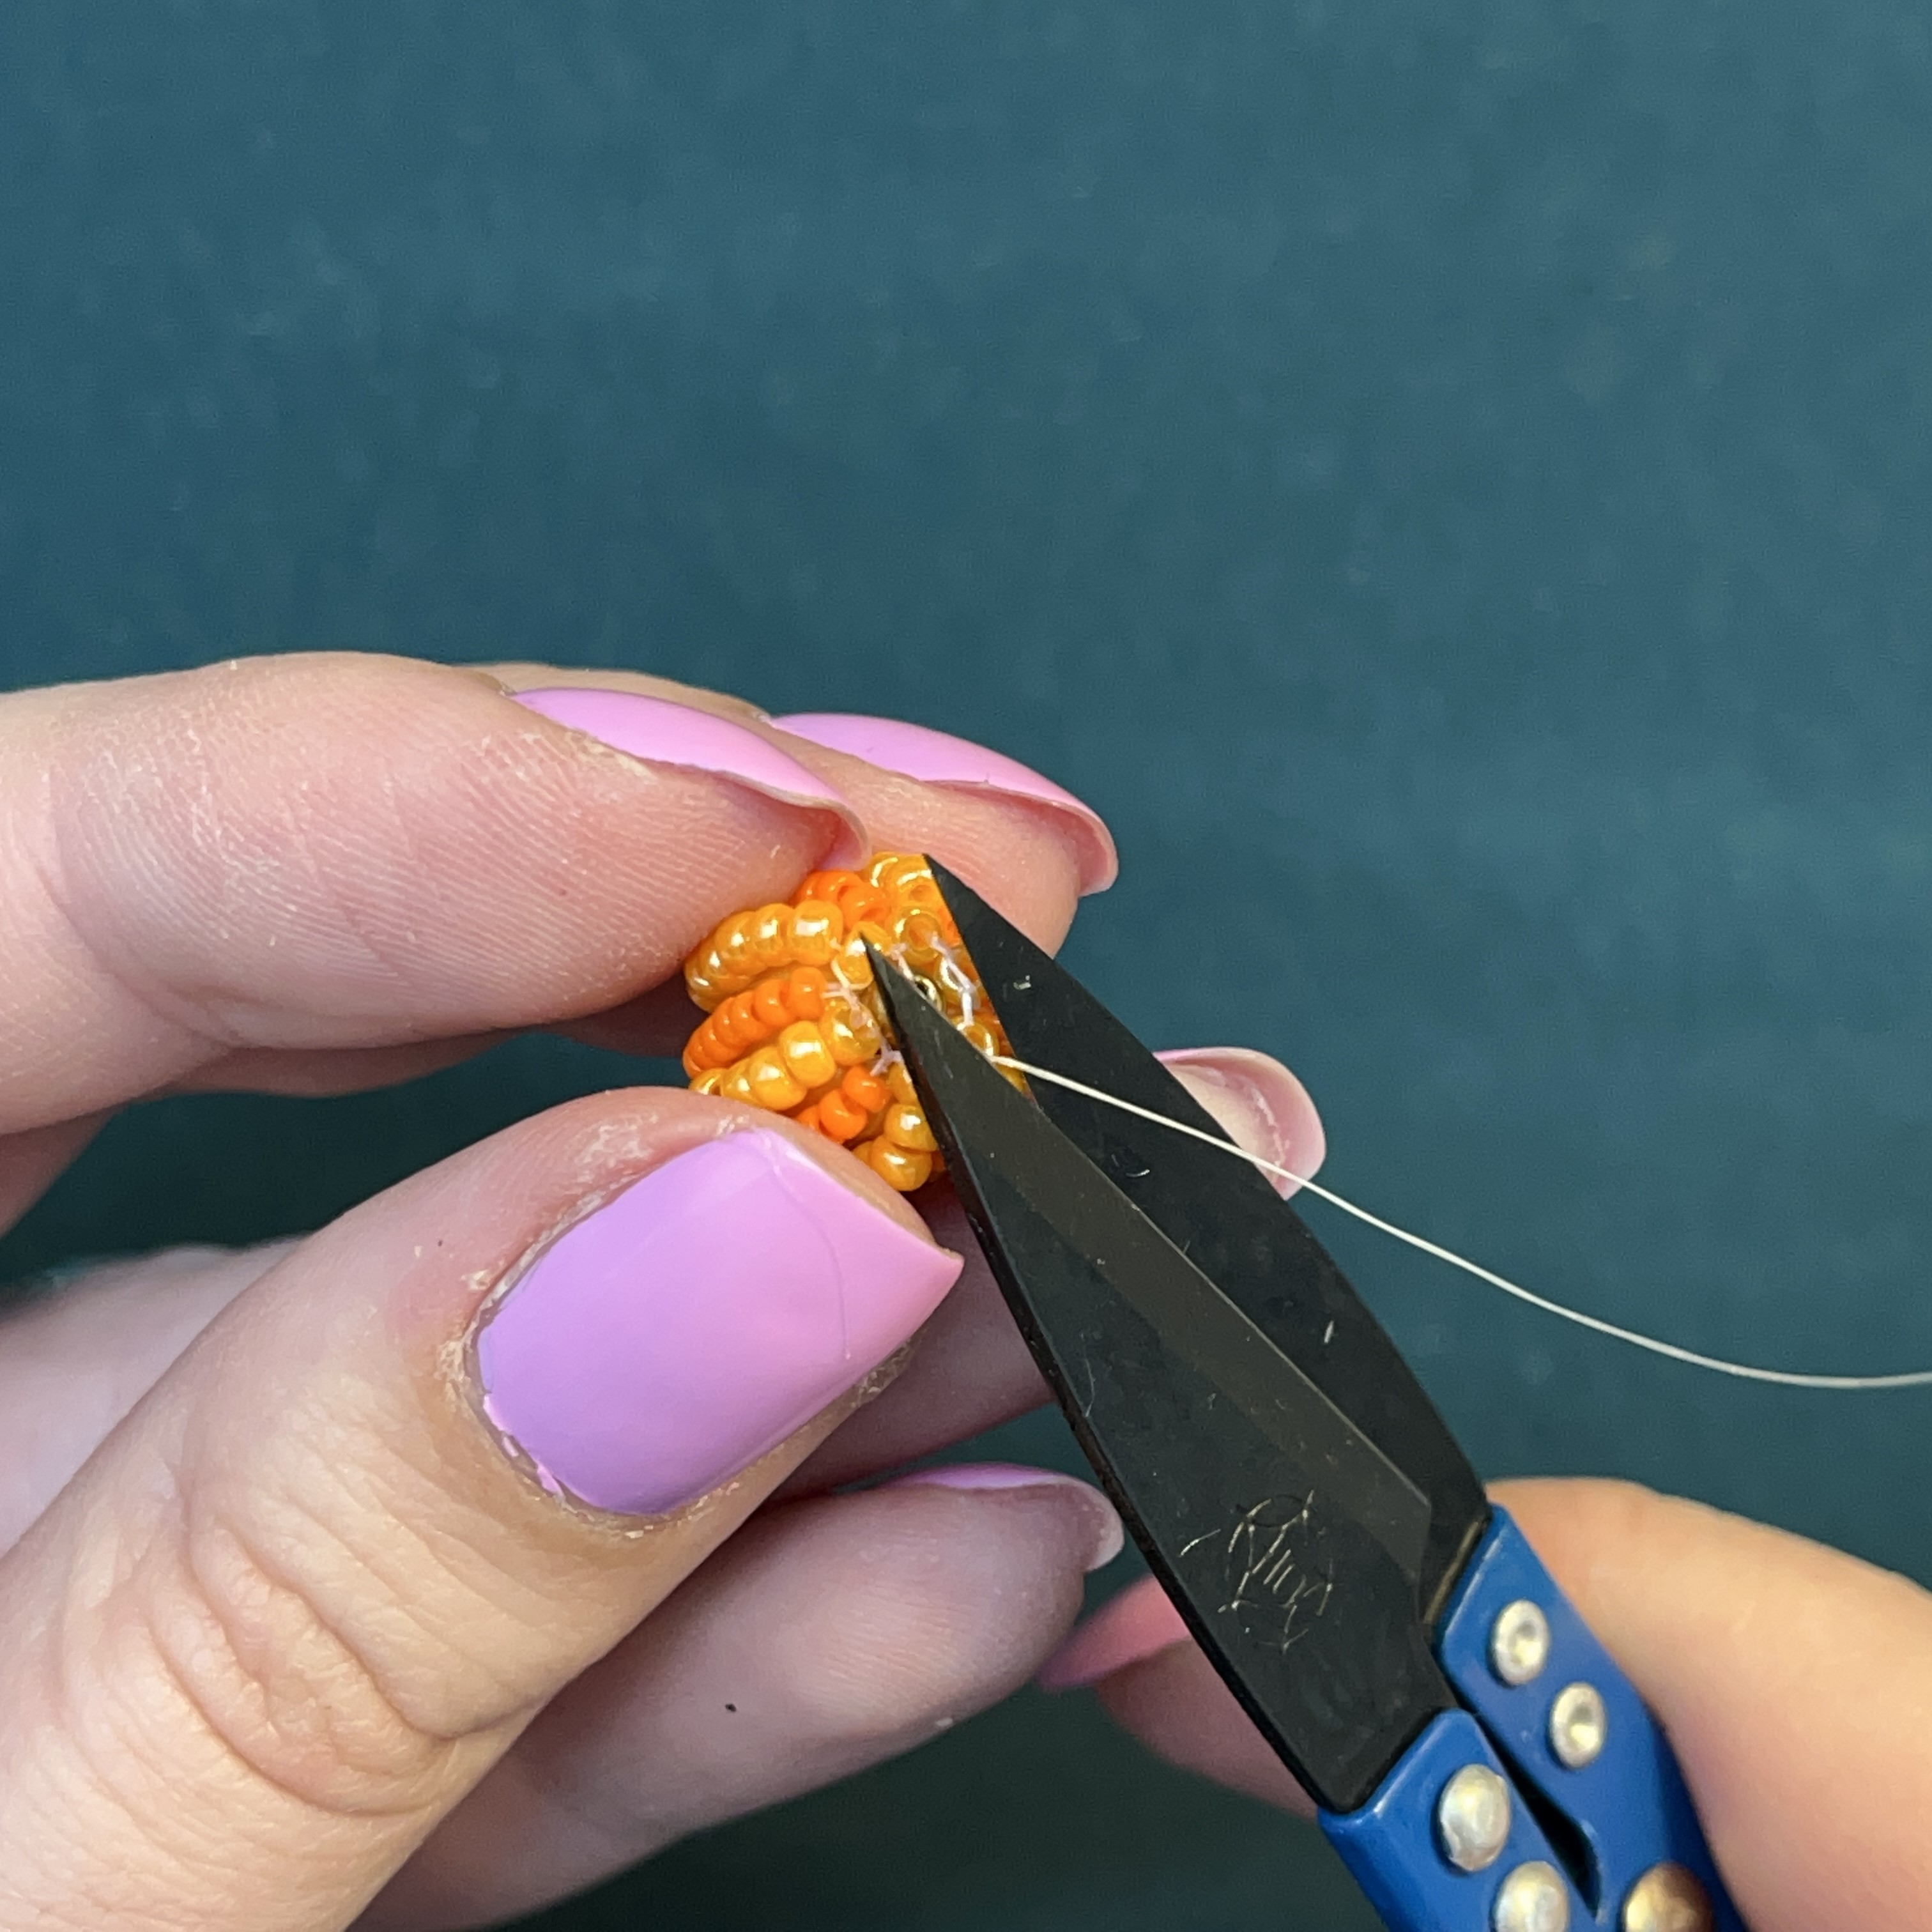
57. Carefully trim off the extra fireline as close as you can get to the knot without cutting the knot.
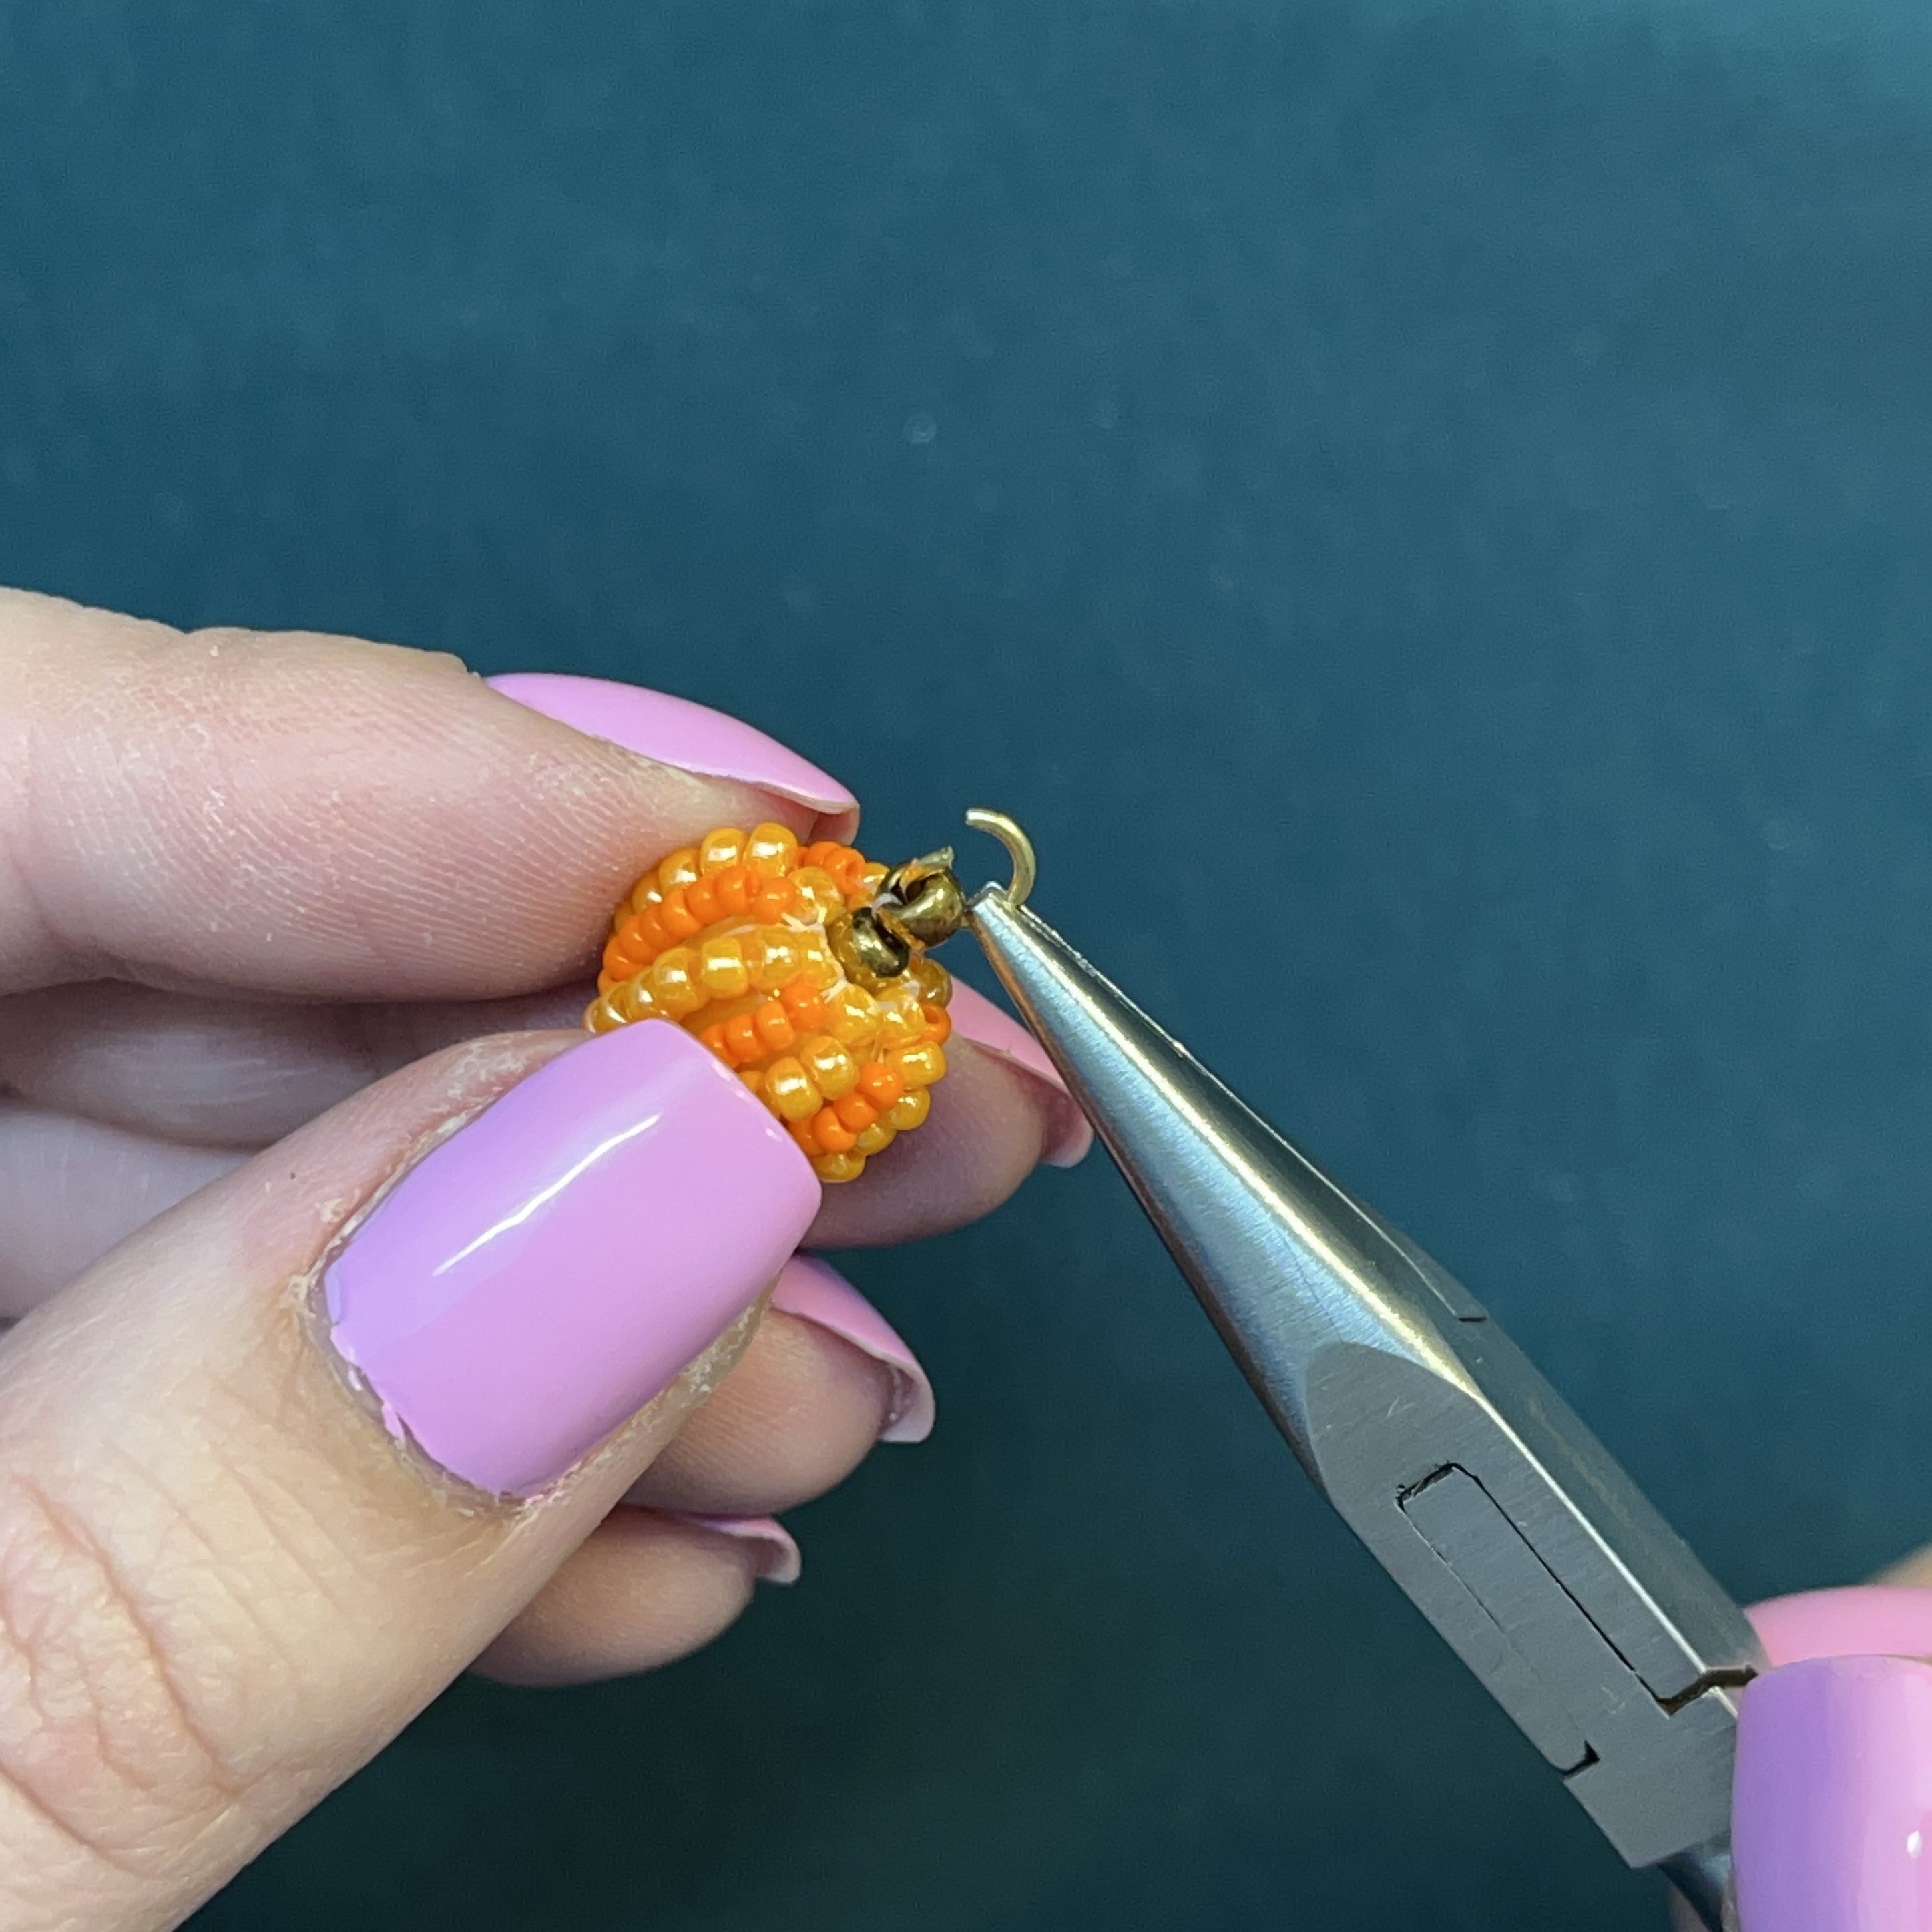
58. Take the jump ring, open it, and thread it onto the size 8 seed bead at the top of the pumpkin vine.
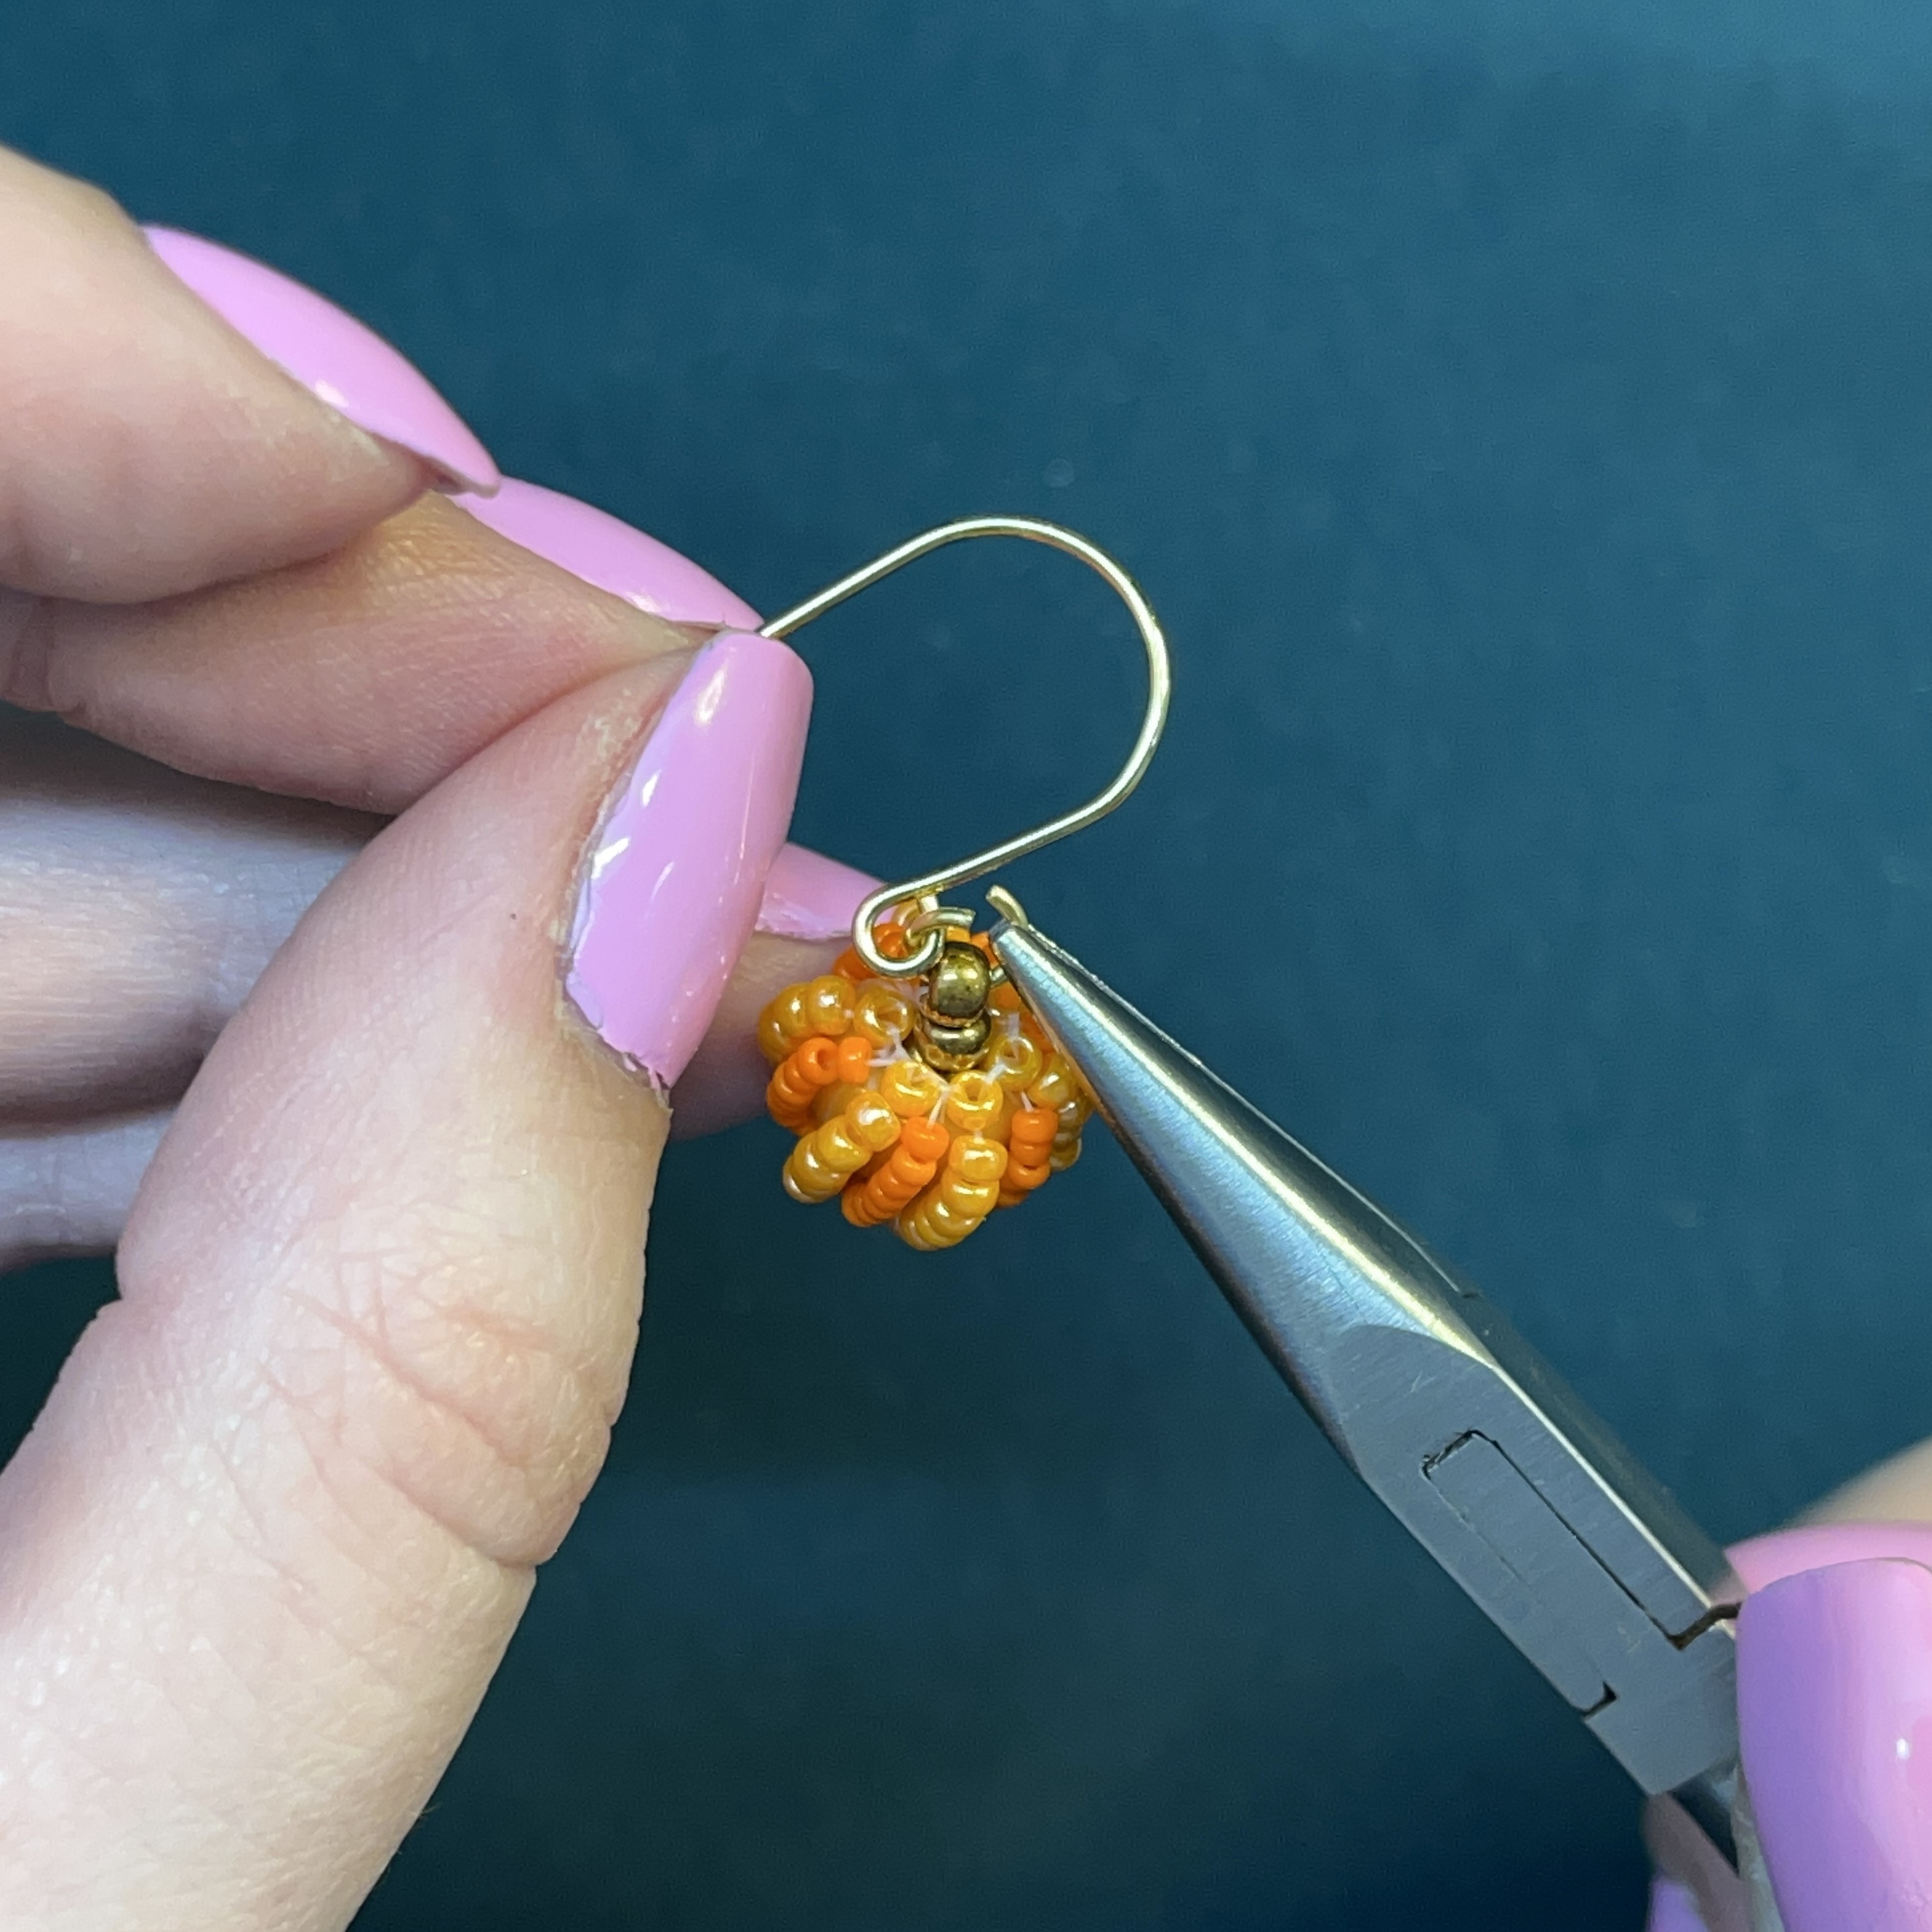
59. Place the earring wire on the open jump ring.
60. Close the jump ring. Repeat steps 1 - 60 to create the second earring. Now enjoy your cute little pumpkin earrings!
Jewelry designed by Kiara Rimsza
Recent Posts
-

Back to Basics: Stack of Stretch Bracelets Including How to Make a Daisy Chain Stretch Bracelet
Back to Basics: Stack of Stretch Bracelets Including a Daisy Chain Stretch BraceletFollow our "Back …24th Jul 2024 -

Seed Bead Starfish Bracelet
Seed Bead Starfish BraceletThis project is perfect for both beginners and seasoned crafters looking …19th Jun 2024 -

DIY Personalized Layered Charm Necklace
DIY Personalized Layered Charm NecklaceEmbrace individuality with our Personalized Charm Necklace tu …29th May 2024