
Tutorials
Chain Tassel Tutorial
Chain Tassel Tutorial

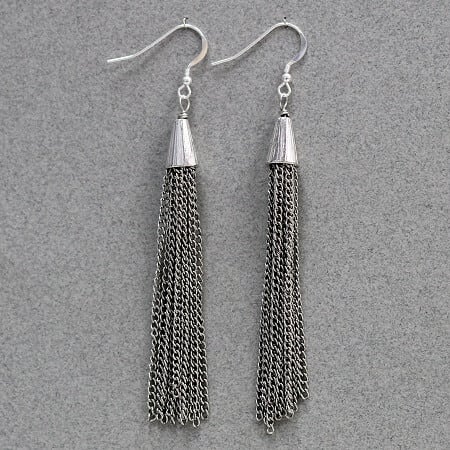
Whether you’re looking to make an awesome pair of earrings like the one shown above, or to add a cool tassel to a necklace or mala, chain tassels are a MUST right now. Unfortunately, they can be a little hard to find and a bit spendy when you do find them. No worries! You can easily make your own!!
For each tassel, you will need:
3 feet of fine open link chain (we used silver plated chain)
1 cone (we used TierraCast silver plated cones)
4 inches of 24 gauge craft wire (we used silver tone)
Round nose pliers
Needle nose pliers
Wire cutters
.

About 1 1/2 inches from one end of the 24 gauge wire, form a loop with your round nose pliers. Make sure the loop will easily fit inside the cone you are using.
.
.

Cut your chain into 2 1/2 inch pieces (or the length of your choice). You should have about 14 pieces.
.
.

String the last loop of one piece of chain onto the looped wire, making sure the chain is INSIDE the loop and can swing freely.
.
.

String the remaining pieces of chain onto the looped wire in the same manner. The loop will be very full of chain.
.
.

Wrap the short end of the looped wire around the long wire at least 2 times. This secures the loop.
.
.

Carefully trim away any excess wire. Make sure you ONLY cut the SHORT wire. You’re going to need the long end of the wire!
.
.

Slide the cone onto the remaining wire.
.
.

The cone should cover the loop completely. Ideally, the chains should fill the cone.
.
.

Using your round nose pliers, form a loop. Make sure you create a loop size that will work for your project. For example, if you are going to use your tassel on a necklace, make sure it will fit over the chain or leather you’ll be using.
.
.

Wrap the loop closed to secure the tassel. Then cut off any excess wire.
.
.

Your finished tassel will look like this! Now, you can add it to the project of your choice! Have fun!!
Happy Beading!
Related Articles

Russian Ornament Tutorial
Russian Ornament TutorialThe holiday season is upon us!! It seems too early to start thinking about...

Gemstone of the Month: Turquoise
Gemstone of the Month: Turquoise.Here in Arizona, no gemstone is a greater part of the collective culture...

Gemstones for Stress Management During the Holiday Season
Gemstones for Stress Management During the Holiday SeasonHalloween is over and the holiday season is...