
Tutorials
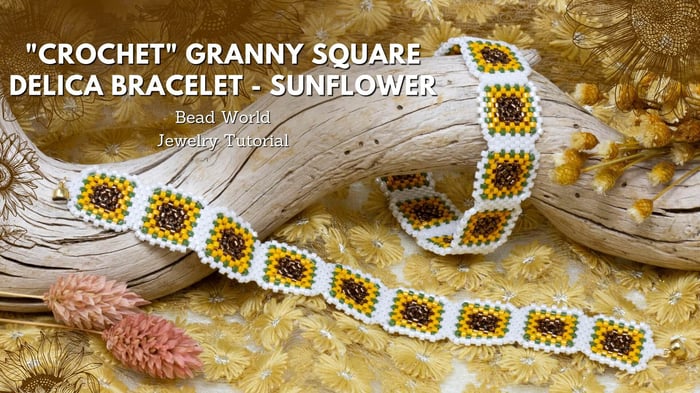
"Crochet" Granny Square Delica Bracelet - Sunflower
"Crochet" Granny Square Delica Bracelet - Sunflower
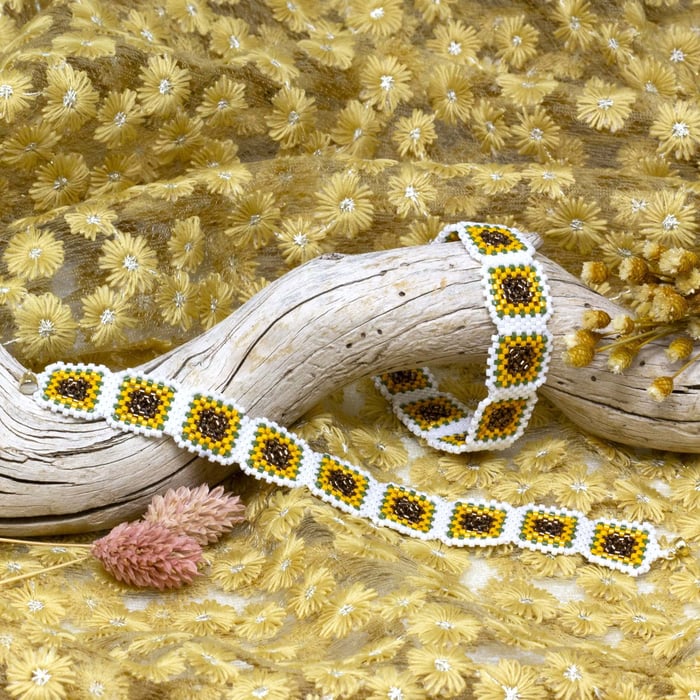
The "Crochet" Granny Square Delica Bracelet – Sunflower blends vintage crochet style with the precision of bead weaving. Inspired by classic granny squares and summer sunflowers, this design uses Delica beads to create a bold, floral pattern that mimics the look of crocheted yarn. This step-by-step tutorial guides crafters through a peyote style stitch to bring the bracelet to life.
*Please use caution while creating this bracelet, it is very easy to poke yourself with the needle*
Bracelet measures Approx.: 6.75" - Each granny square measures 17 millimeters
Materials Needed:
- Delicas Size 11 Miyuki Seed Beads -- 150 Brown / Silver Lined
- Delicas Size 11 Miyuki Seed Beads -- 651 Dyed Opaque Squash
- Delicas Size 11 Miyuki Seed Beads -- 1135 Avocado Opaque
- Delicas Size 11 Miyuki Seed Beads -- 203 Ceylon Light Yellow
- Size 10 John James Needles
Fireline® - Crystal - 50 Yards - 6lb (18 inches per granny square - 13.5 feet total)
4.5mm 14K Gold Filled Magnetic Clasp (1) Or any clasp of your choosing
Tools Needed:
Instructions on Construction:
For illustrated diagram instructions, please scroll down to the very bottom of the page
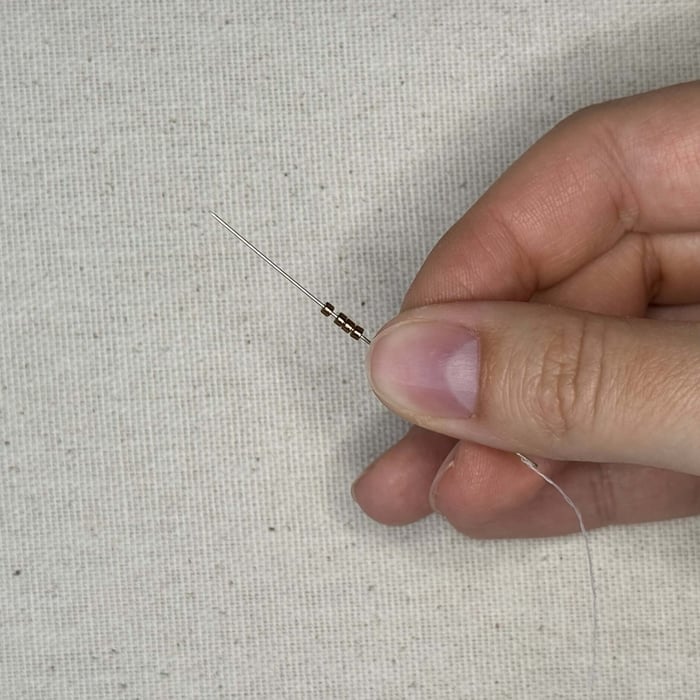
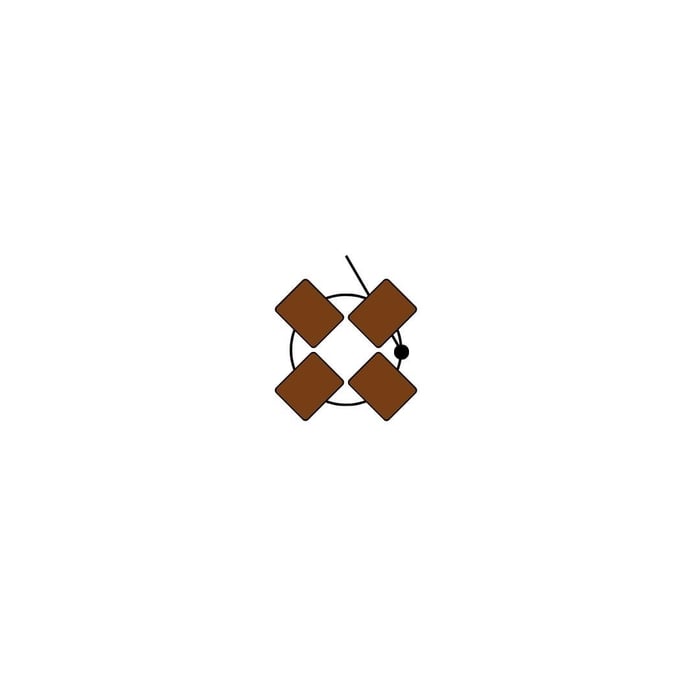
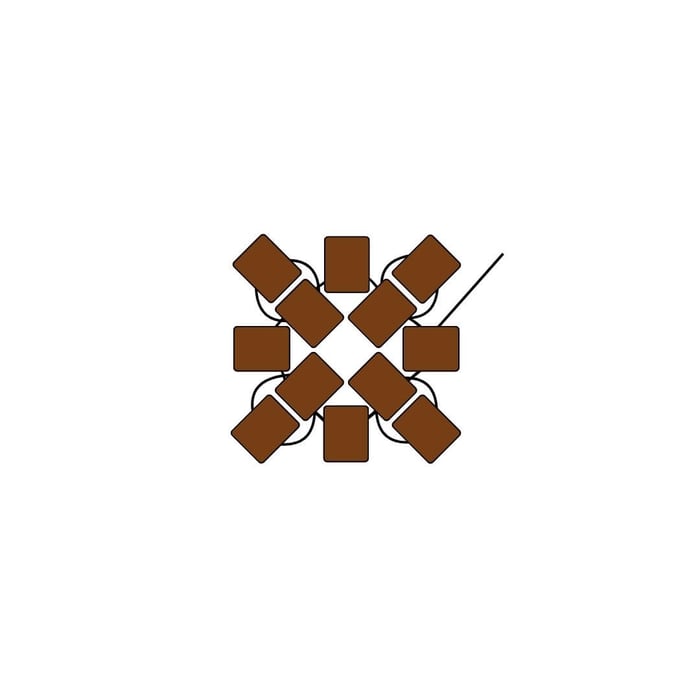
1. Cut 18 inches of fireline and thread it through the eye and onto your needle, then string on 4 150 Brown Silver Lined Delica Beads
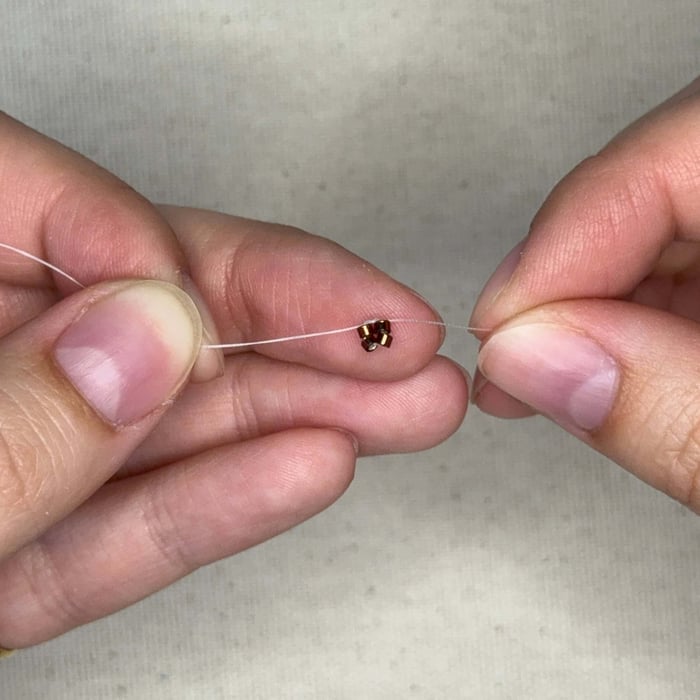
2. Bring those 4 delicas almost all the way down to the end of the fireline, leaving about a 2-3 inch tail, then tie a simple overhand knot, then a surgeon's knot, and then a second surgeon's knot
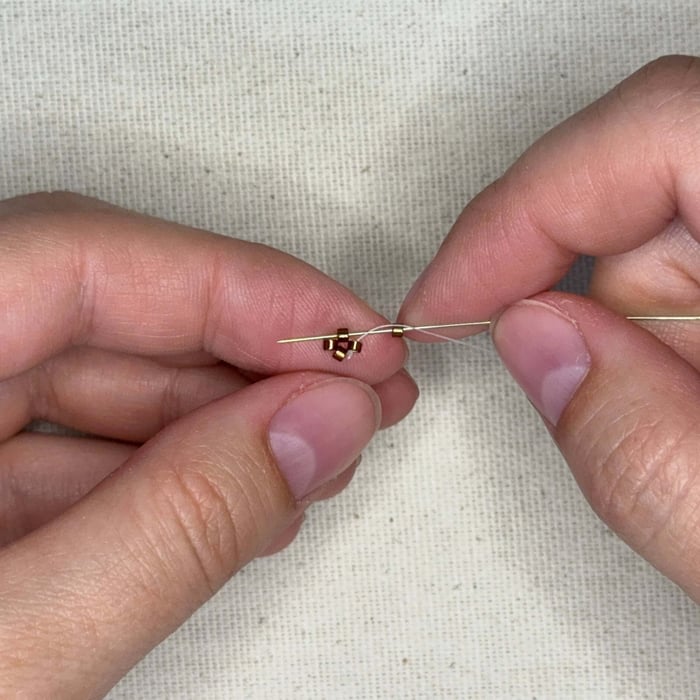
3. Thread your needle up through the bead to the left of the knot, going counter clockwise, add another brown delica to your needle then thread it through the following delica (shown)
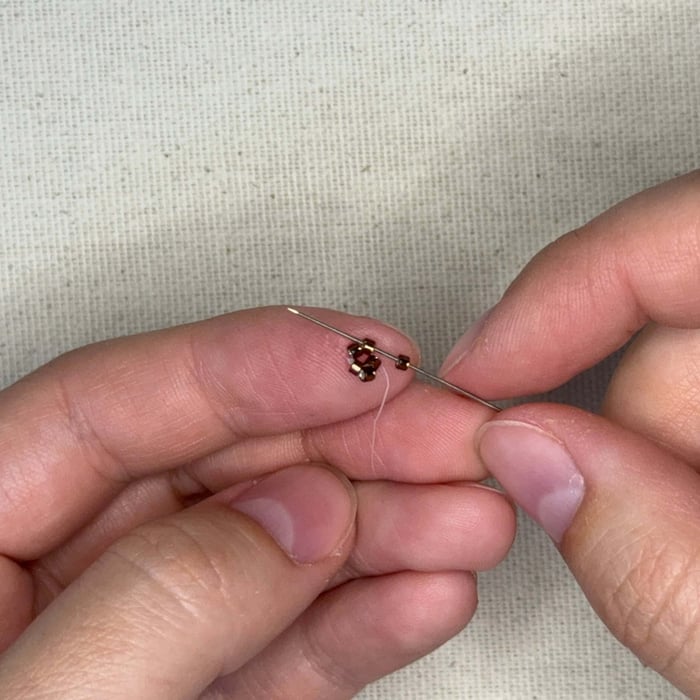
4. Add another brown delica to your needle and thread it through the following delica bead of the initial 4 delicas, remember you're following counter clockwise, pull tight but not too tight between each stitch. Just enough to keep the shape but not enough that you are unable to pass through the beads with ease.
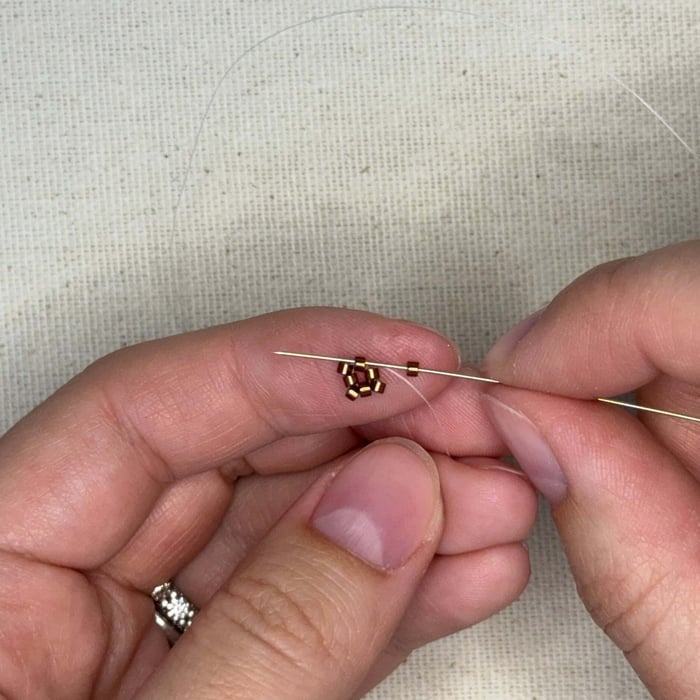
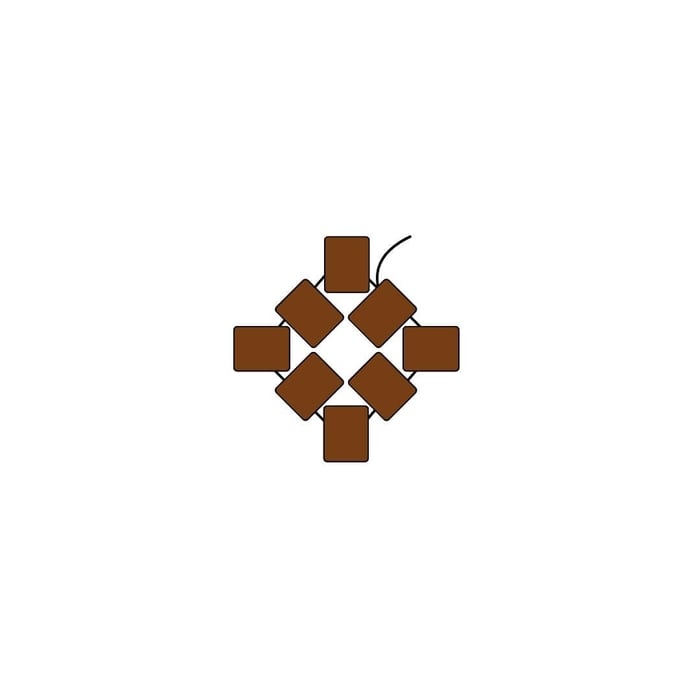
5. Complete the circle with a 4th delica bead (8 in total)
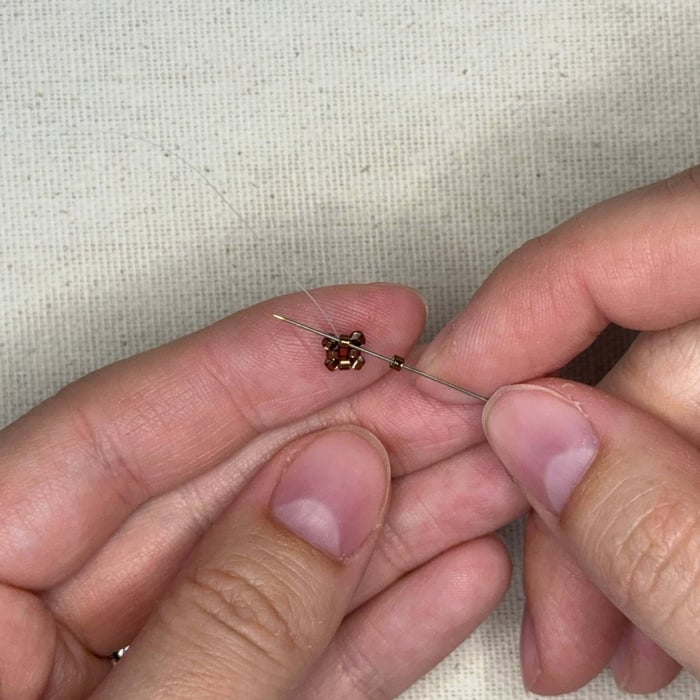
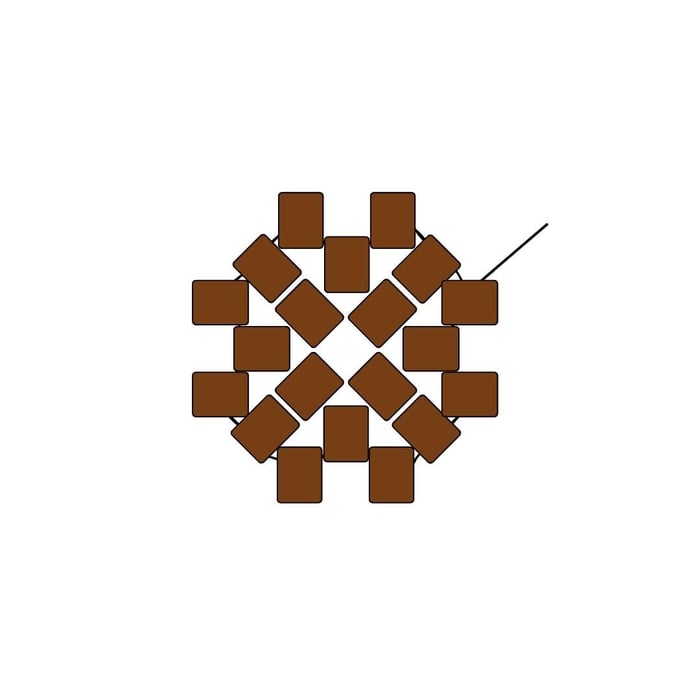
6. Alright, now for the hardest part of the granny square, I promise it gets much easier after these next steps! What you'll be doing now is looping around the initial 4 beads one by one adding another 4 brown beads as you complete another counter clockwise circle.
Add a bead to your needle and go back through the bead where your fireline is coming out of, but through the opposite end
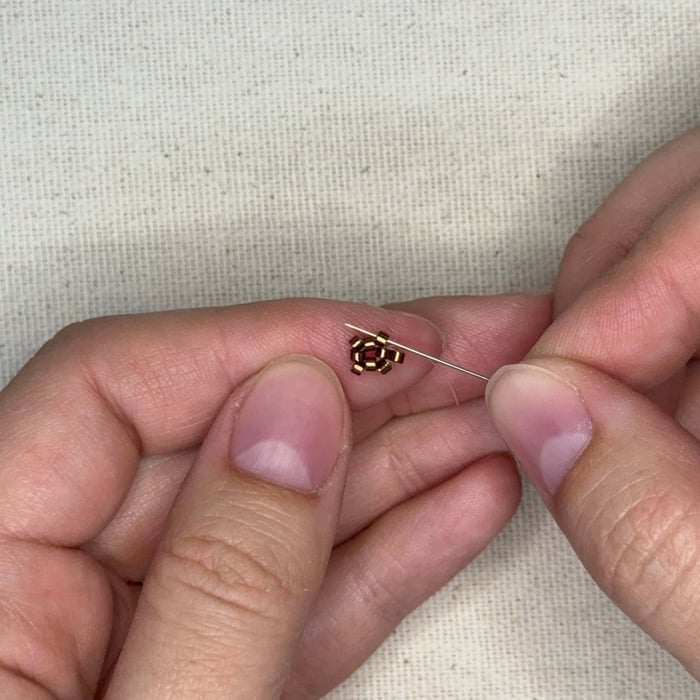
7. Pull the fireline tight and then thread your needle through the following bead to the left (counter clockwise and no bead added)
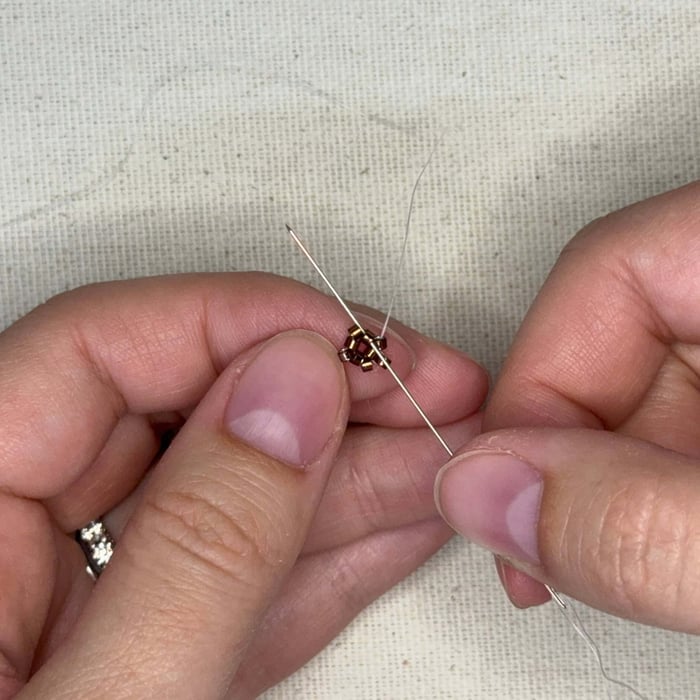
8. Thread your needle through the next bead to the left (no bead yet)
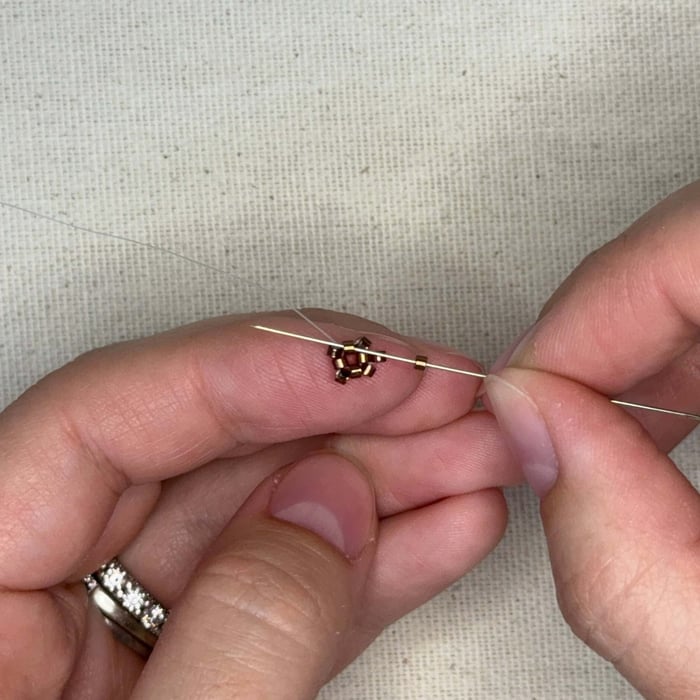
9. Now you add a bead to your needle and thread it through the bead you went through in the previous step. Pull tight.
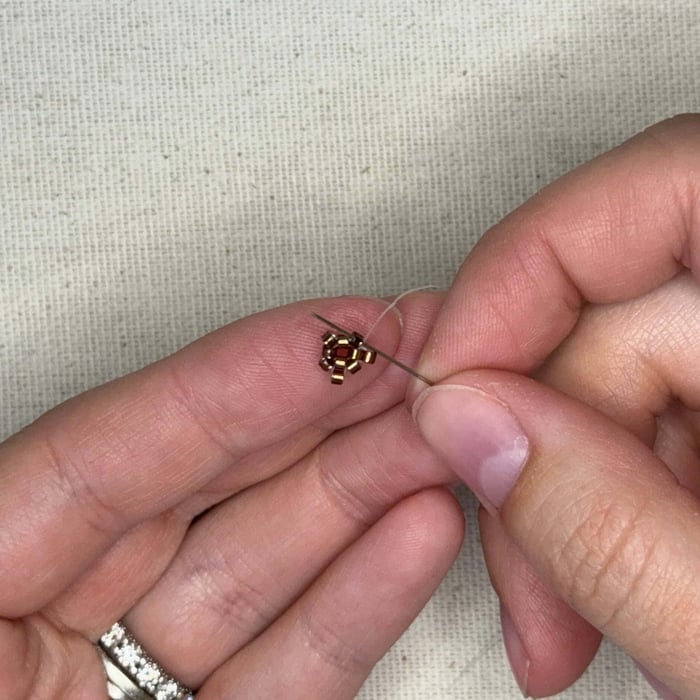
10. Now thread the needle through the next bead
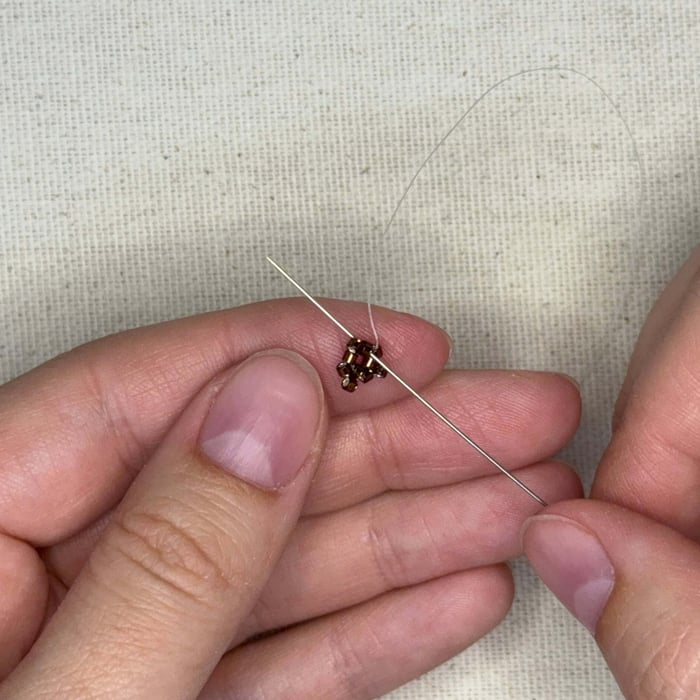
11. And the next
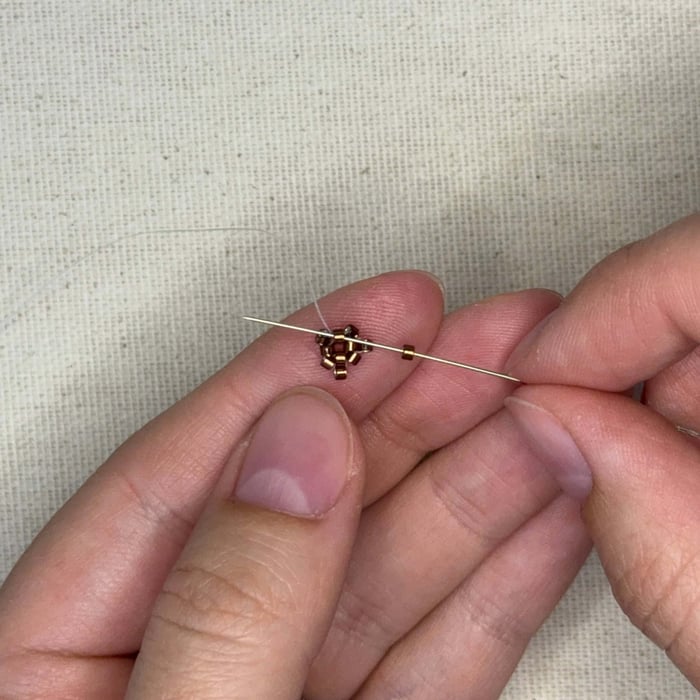
12. Now add a bead and thread the needle through the bead you went through in the previous step. Pull tight.
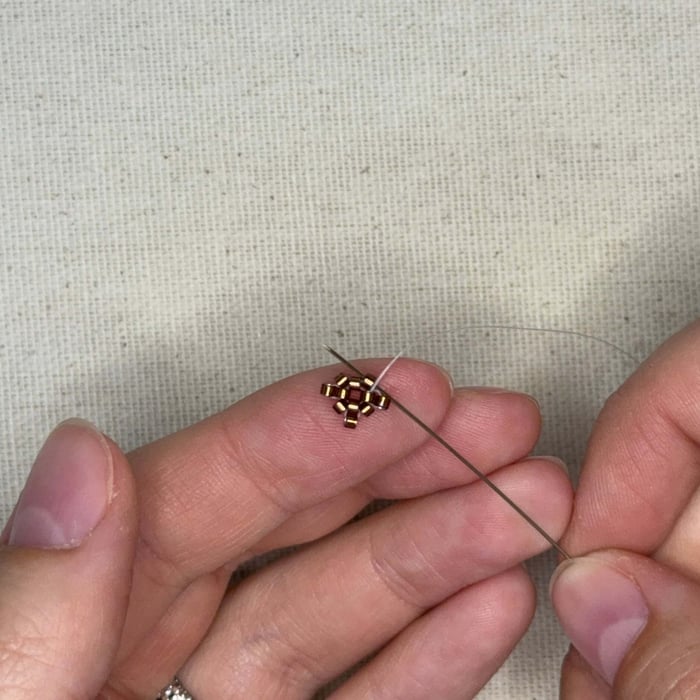
13. Thread through the next bead
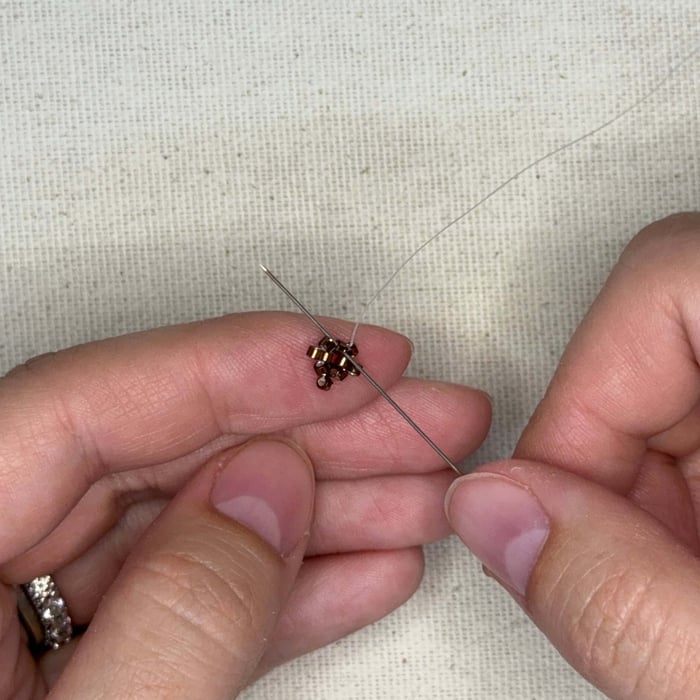
14. And the next
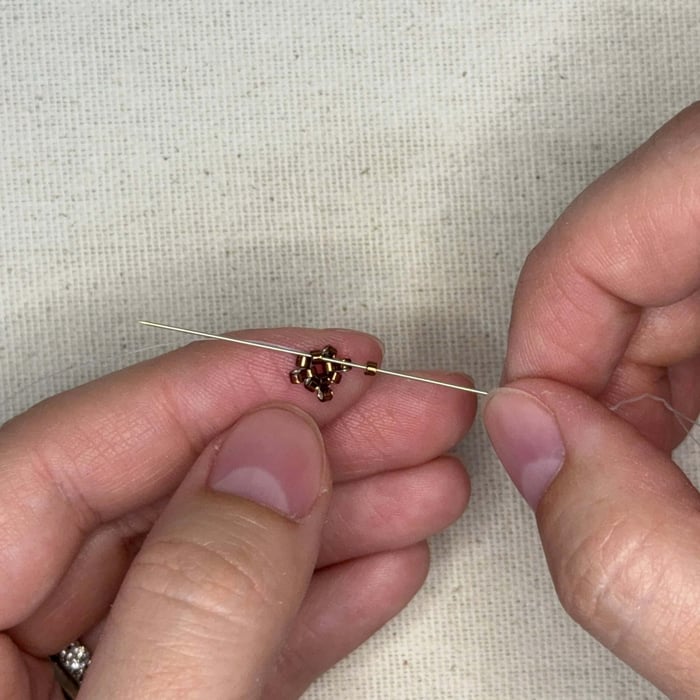
15. Now add a bead and thread the needle through the bead you went through in the previous step. Pull tight.
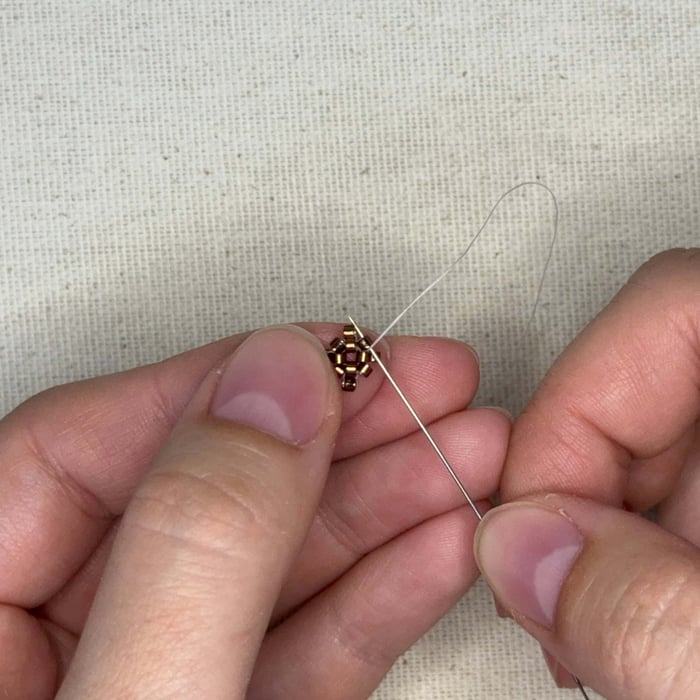
16. You're going to thread your needle through the following bead counter clockwise to start the next layer in your granny square
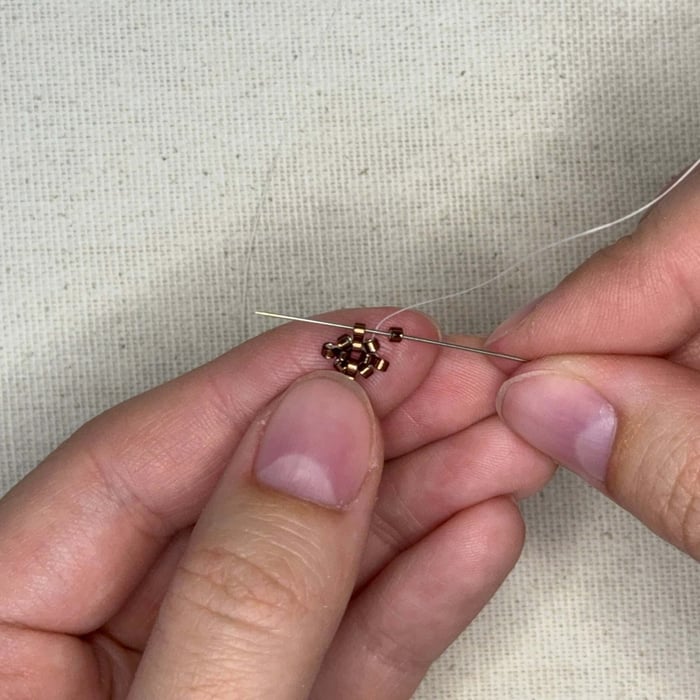
17. Add a bead onto your needle and thread it through the following bead shown, pull tight to lock the bead into place, along with every other bead from now on.
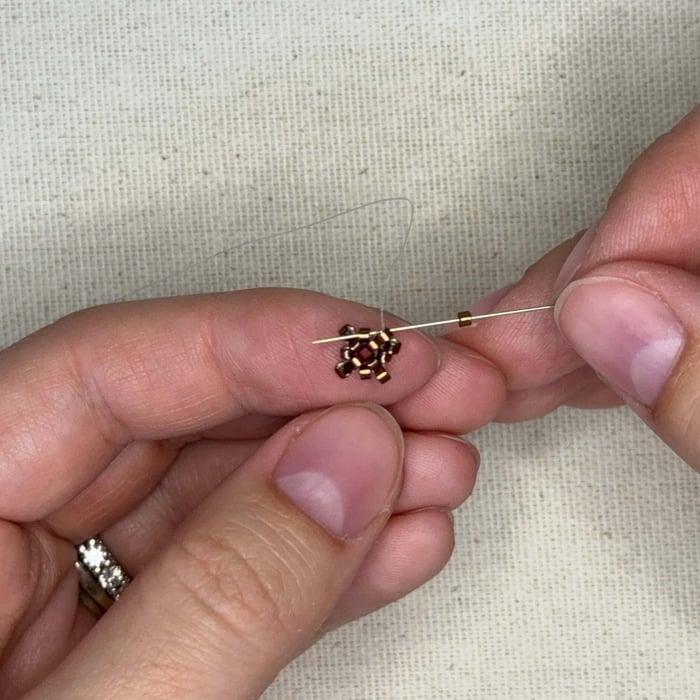
18. Add a bead onto your needle and thread it through the following bead shown
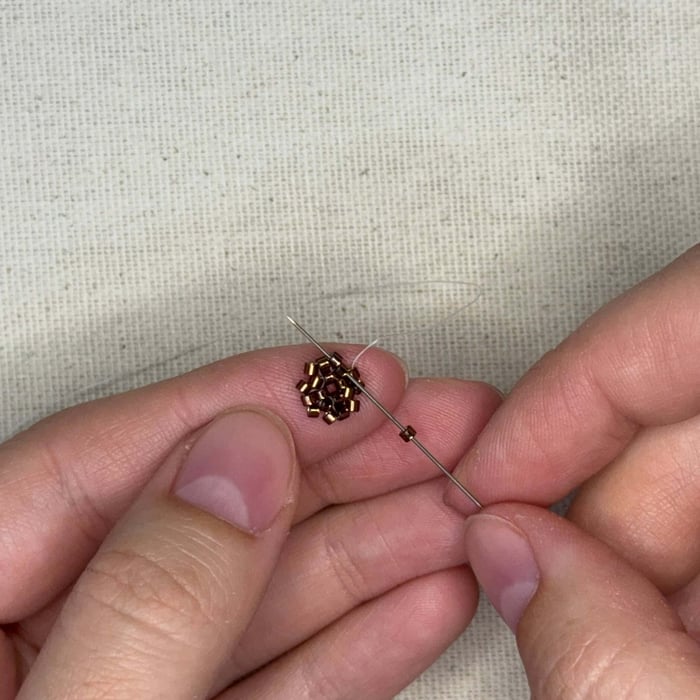
19. Keep going around, adding a bead until you have completed a circle. It is easy to miss the last bead needed in this layer so don't forget!
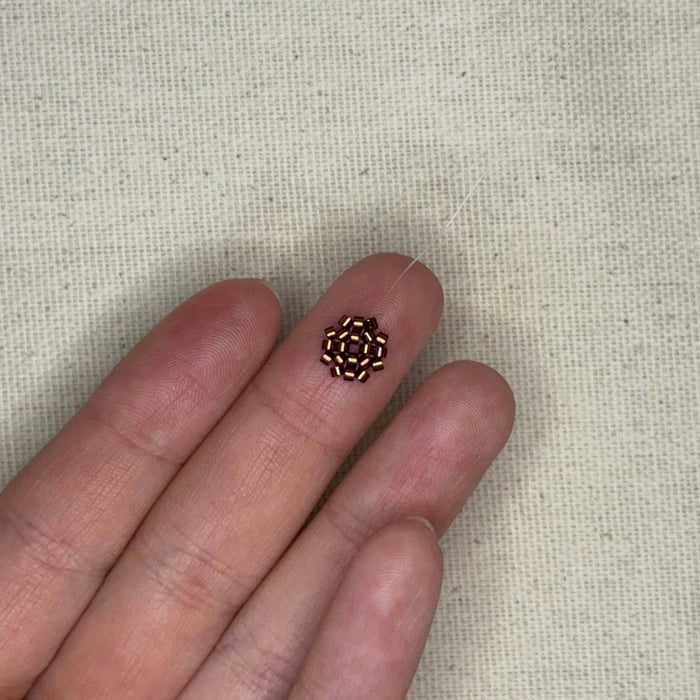
20. Your project should look like this so far. Tight, even, symmetrical. If it is not like this, your finished granny square will end up wonky. But don't worry, everyone needs a practice run when learning a new skill or pattern. Keep following on or start over, there is no pressure!
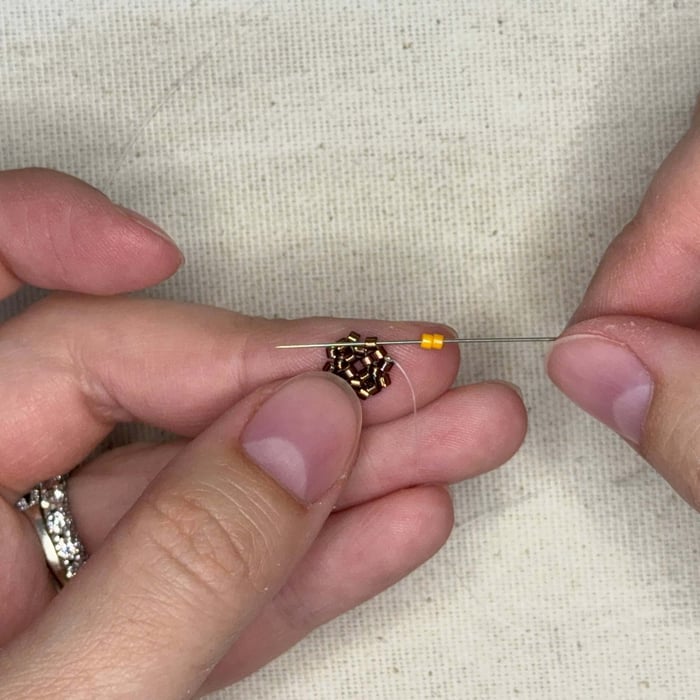
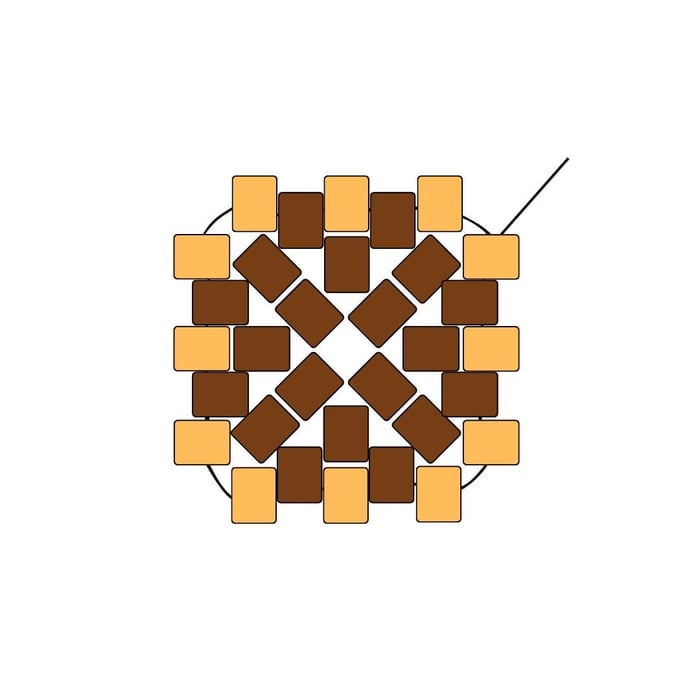
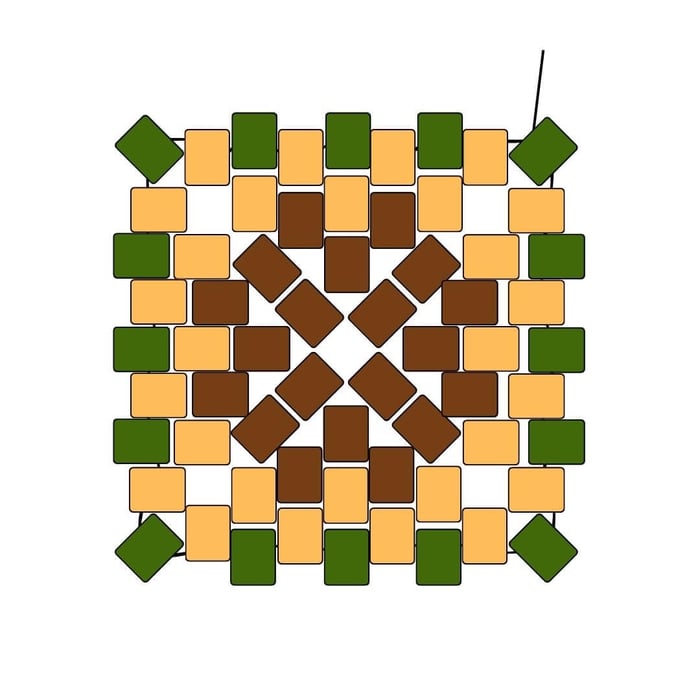
21. Now for the yellow layer! Thread on two 651 Delica beads, skip over the next bead, then thread your needle down through the following bead (shown above)
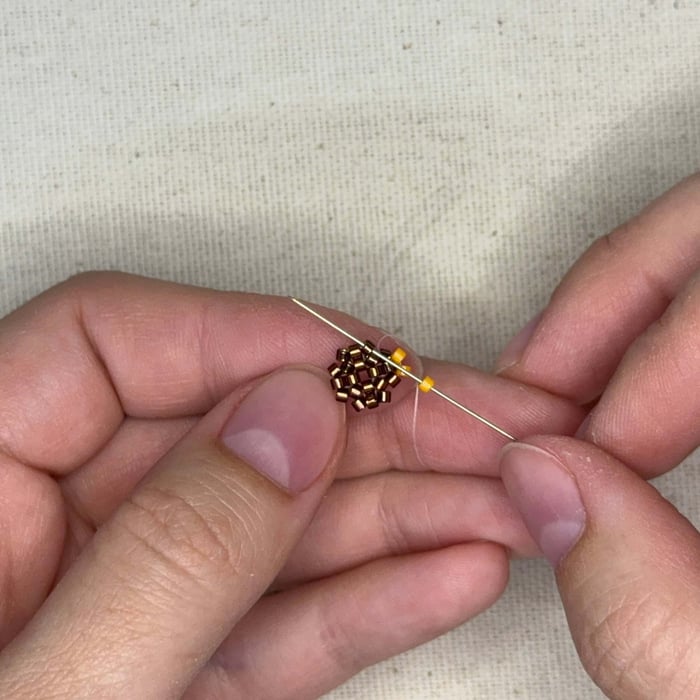
22. Now add just one 651 bead to your needle and thread it through two beads over, filling the space between the two brown delicas
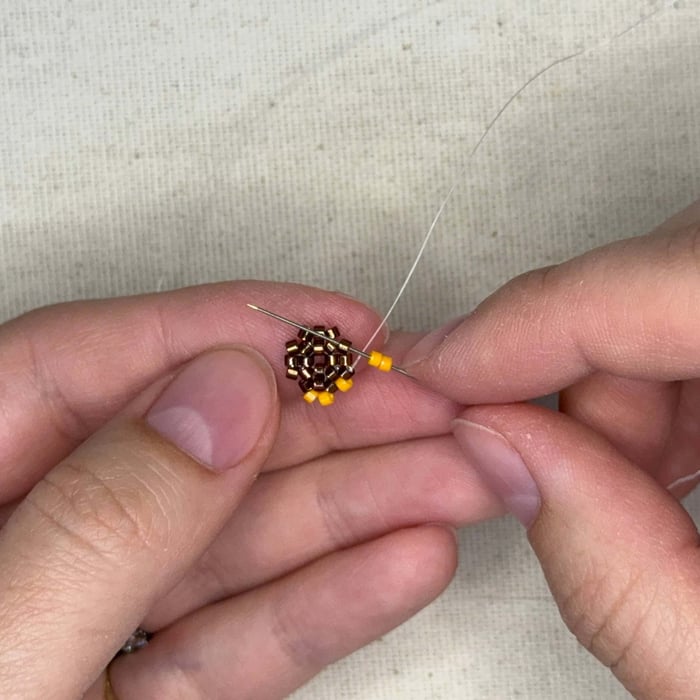
23. Add on 2 651 beads and then thread the needle through not the next brown delica but the one after that.
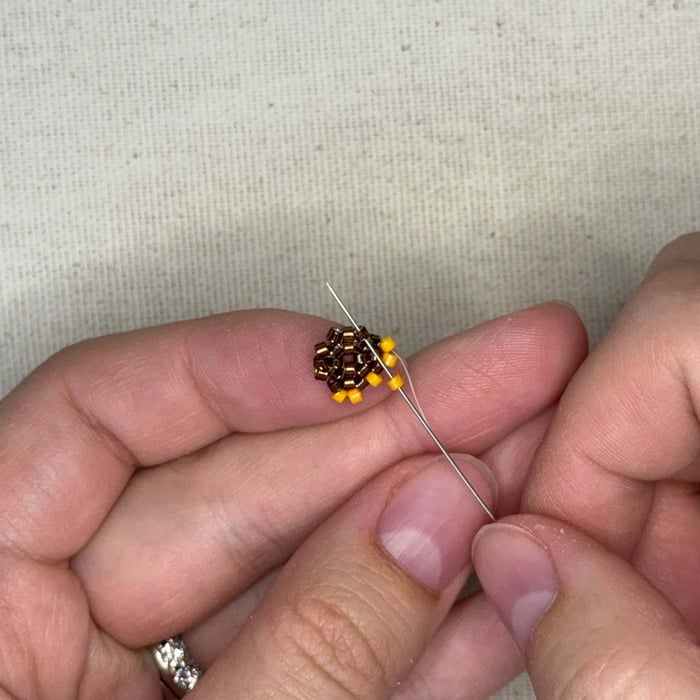
24. Now one 651 bead
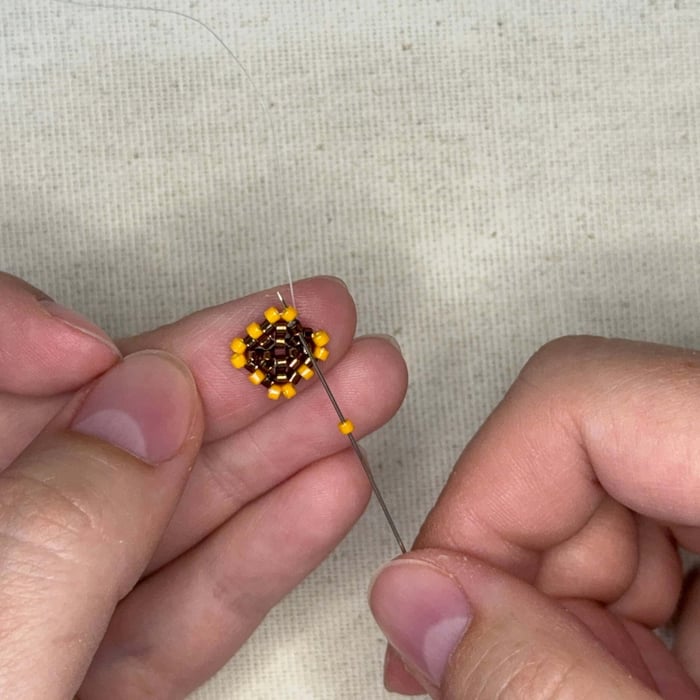
25. Keep following the pattern, 2, 1, 2, 1, etc. until you have made a complete counter clockwise circle. Finish the yellow layer of 651 with one final bead and then thread your needle up through the following brown delica and the first 651 delica you had strung on.
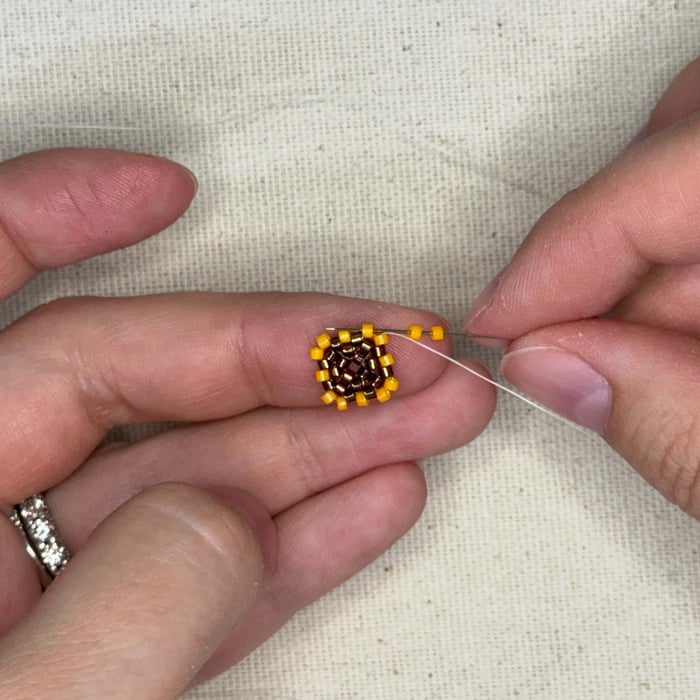
26. Now for the second yellow delica layer. You will essentially be doing the same thing with this circle of delicas. This step you will add 2 651 delicas and thread the needle through the very next yellow delica counter clockwise.
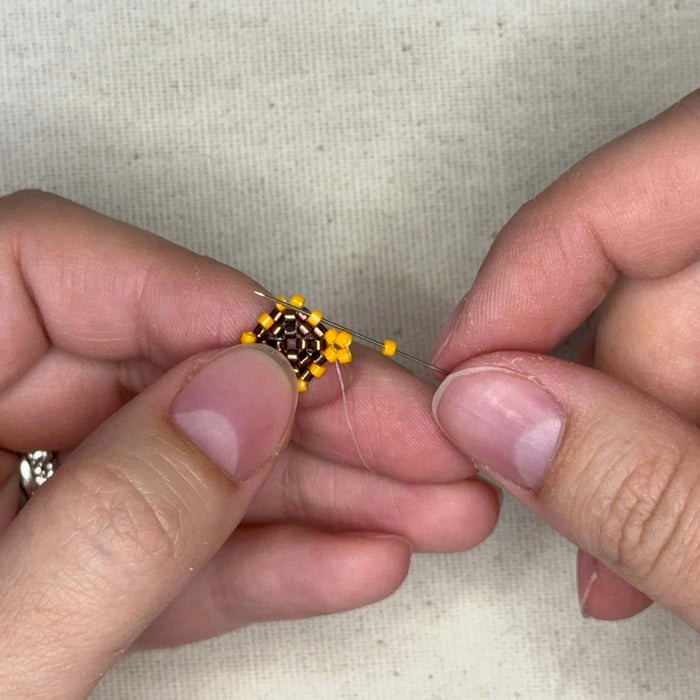
27. Now add one yellow delica and thread the needle through the next yellow delica
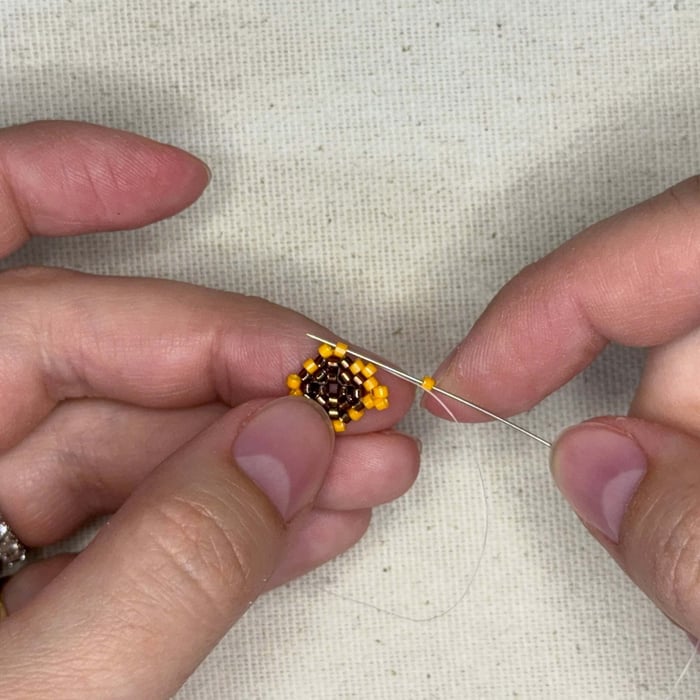
28. And one yellow delica through to the next yellow delica
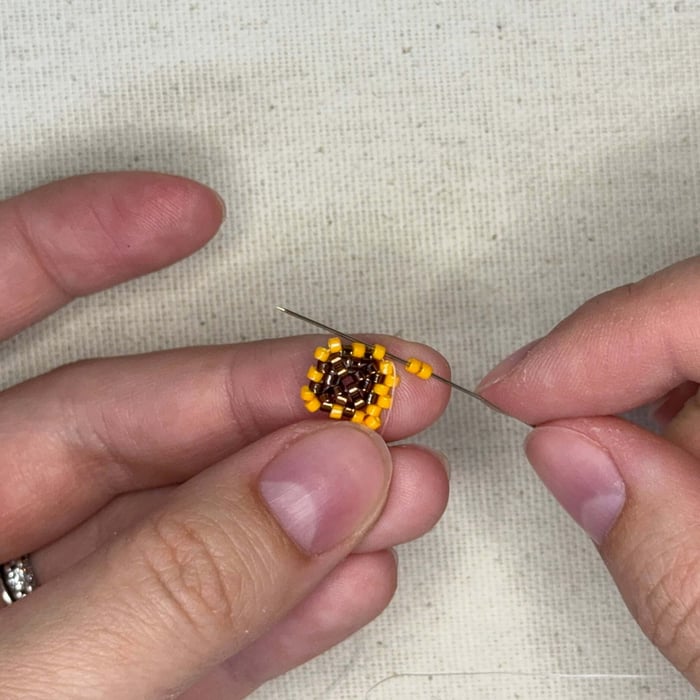
29. Then two, just like in step 26
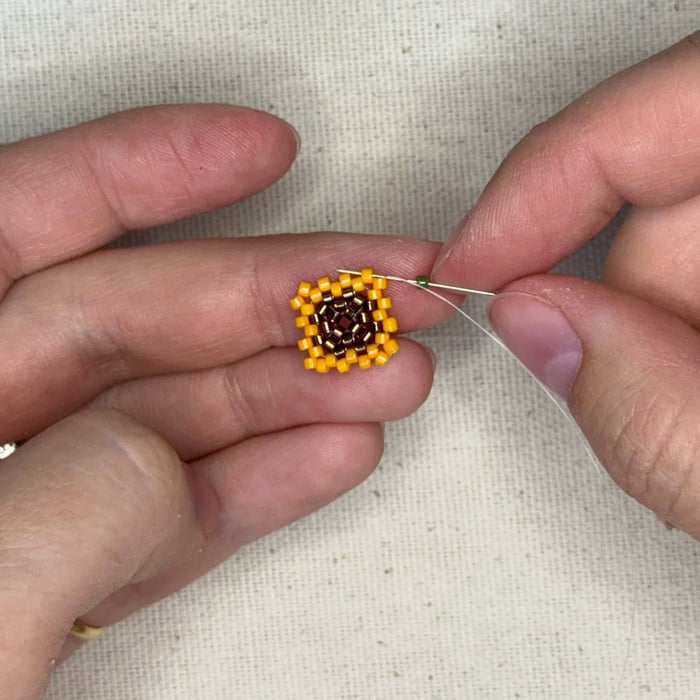
30. Keep following the pattern, 1, 1, 2, 1, 1, 2, and so on until you make your way back around counter clockwise, your thread coming out of the first yellow bead in the top right corner shown.
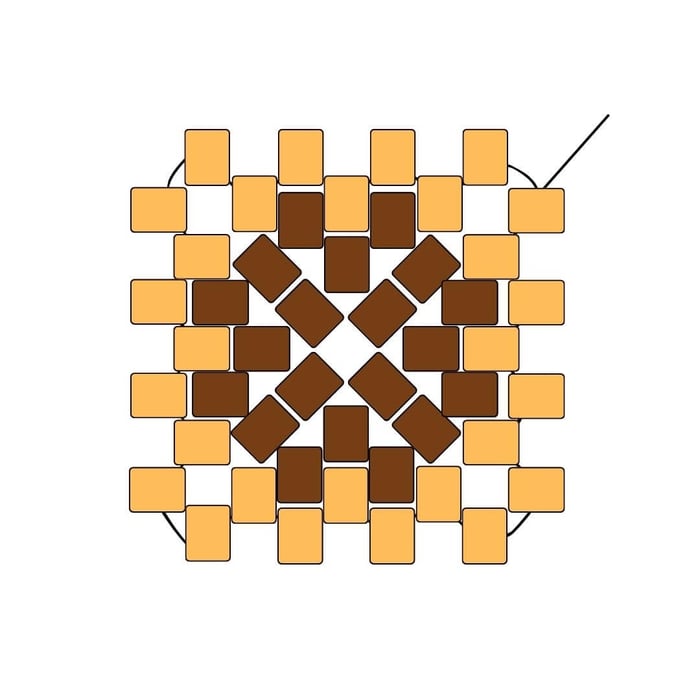
You'll now add a green 1135 delica bead onto your needle and thread it through the following yellow bead. Remember to pull tight!
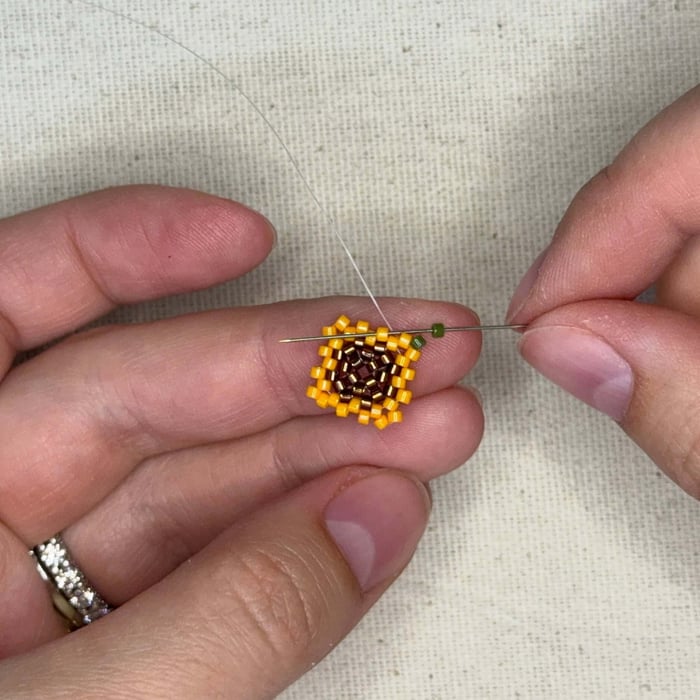
31. Now thread your needle into the the delica shown, filling the gap between the two yellow delicas with a green
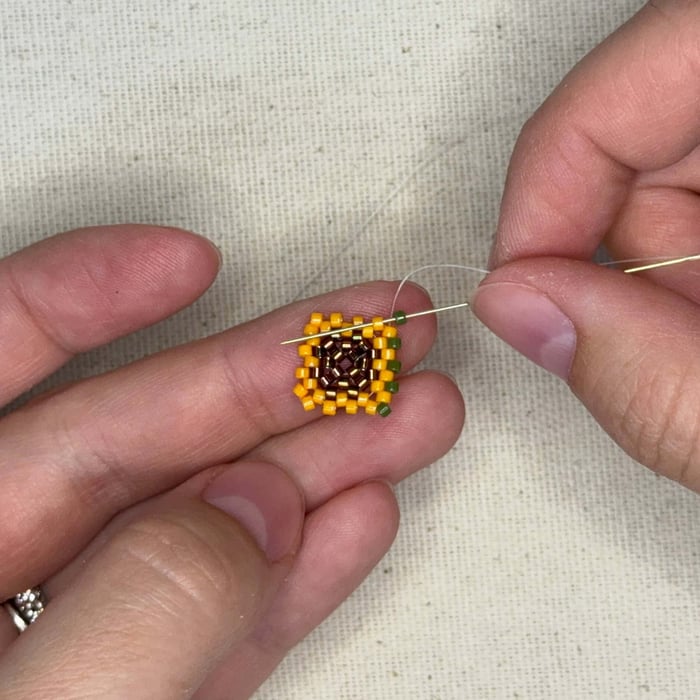
32. Keep going around in a counter clockwise circle, threading on one 1135 bead at a time
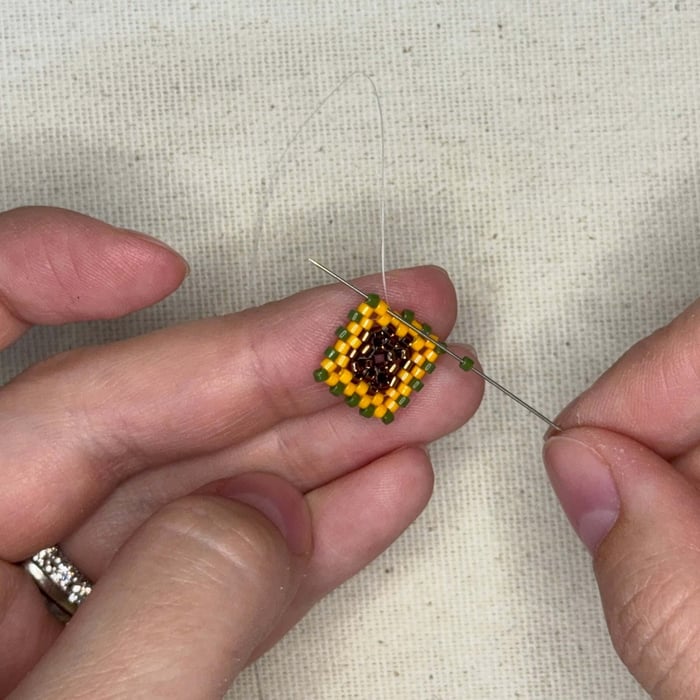
33. Complete the circle (now square) by threading your needle through the final yellow bead and the first green bead added to your project
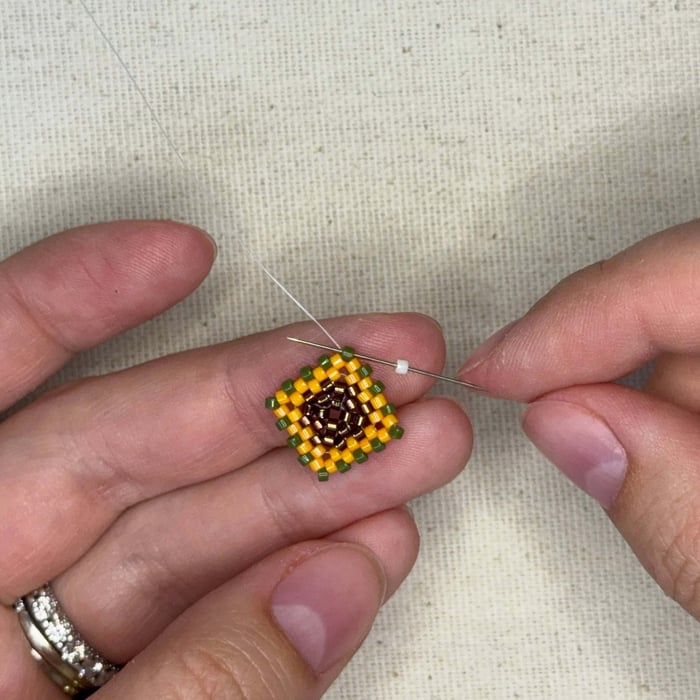
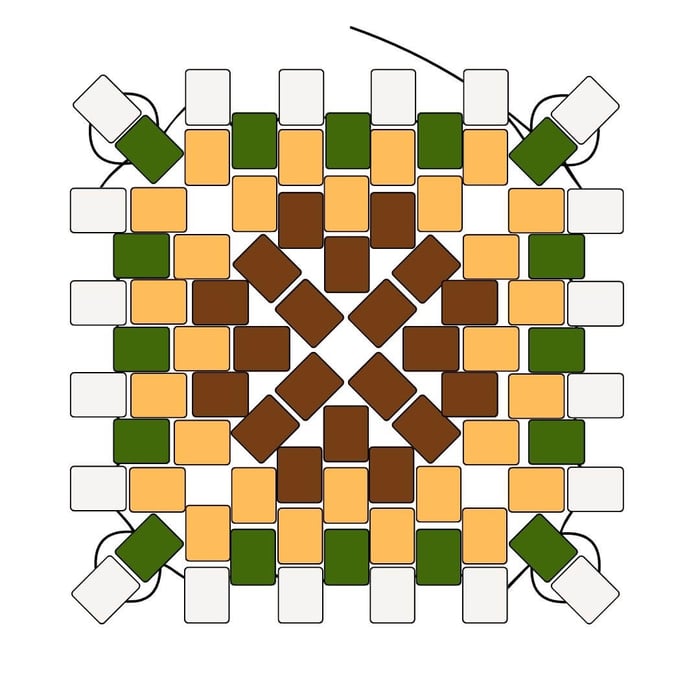
34. Now for our white layer! You're going to be doing exactly the same technique here (and will be for all 4 corners) as step 6. Add a 203 Ceylon Light Yellow Delica onto your needle and thread it back through the corner green delica you had just added, just from the opposite side of where your fireline is exiting, creating a loop
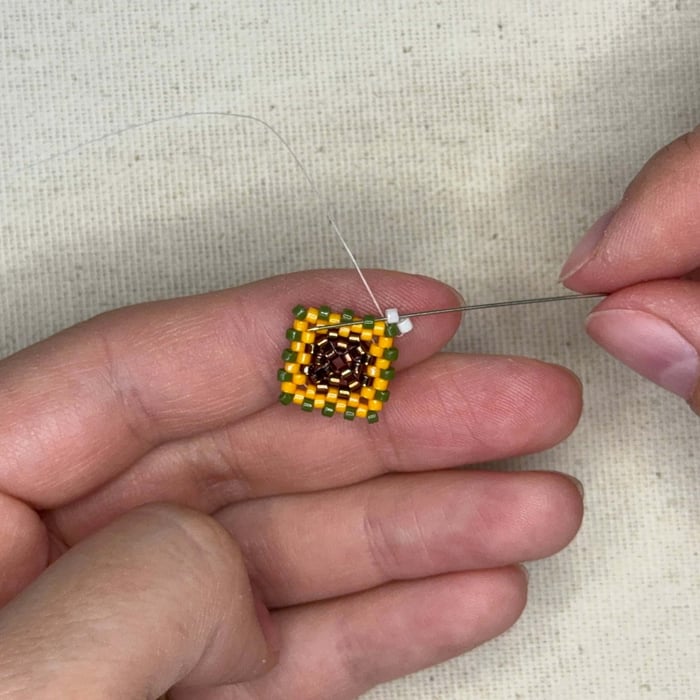
35. Add another 203 delica onto your needle and thread it through
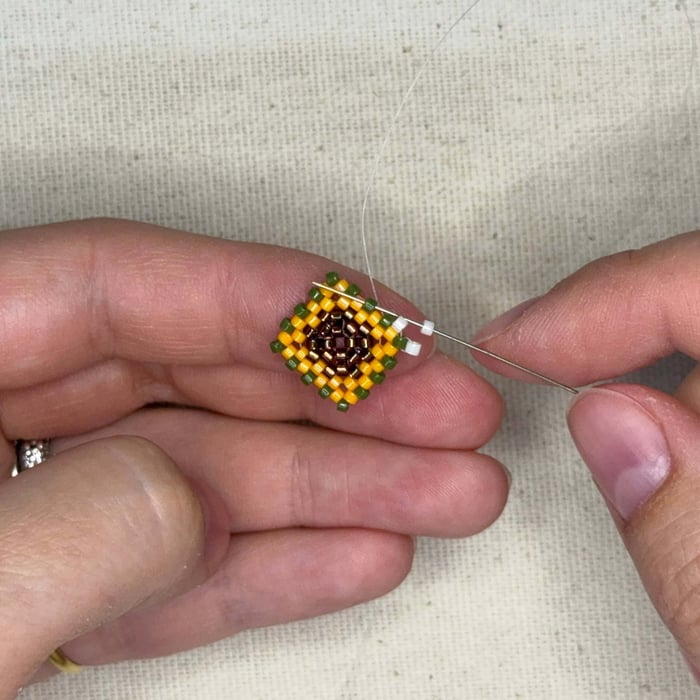
36. Now add another 203 delica and thread your needle through the next green delica, going clockwise.
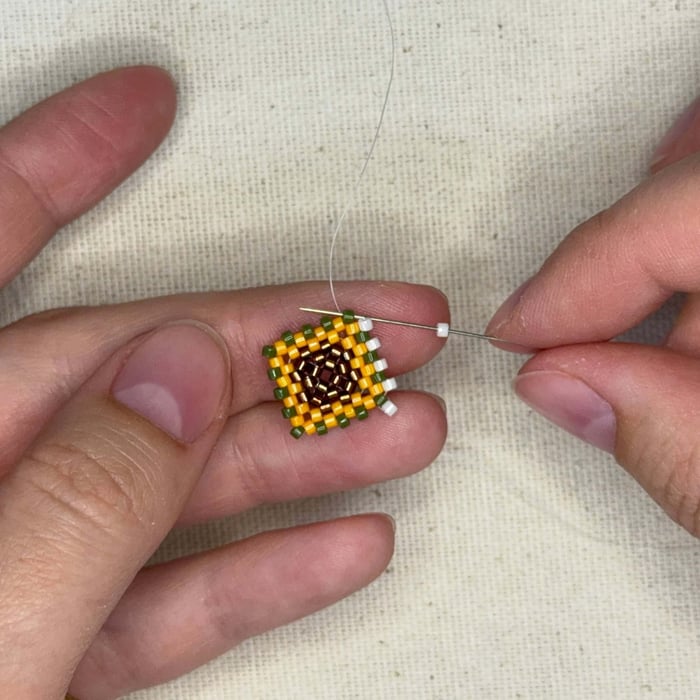
37. Keep adding 203 delica beads in between each green delica bead. When you get to each corner, repeat step 34
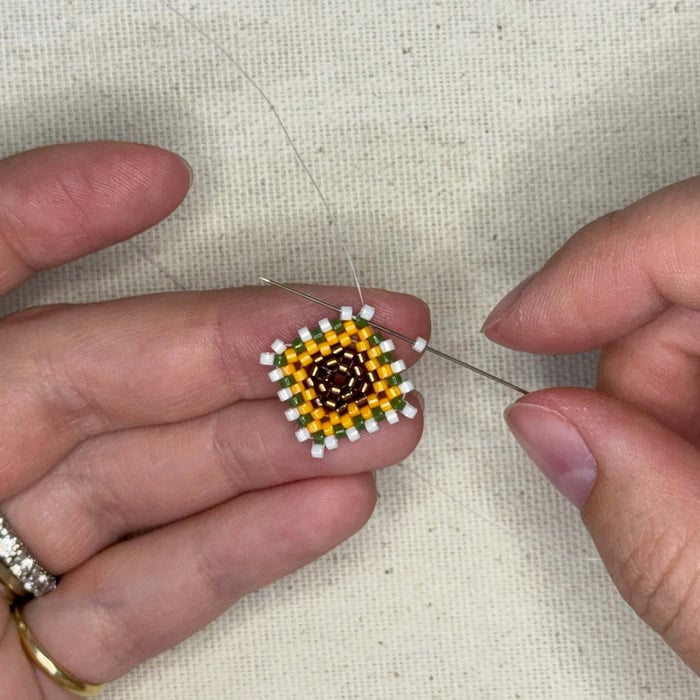
38. When you get completely around the square adding 203 beads, for the last 203 delica added for this layer, you will want to thread your needle through the corner green bead and also through the second 203 delica bead you had added (the bead stitched on in step 35)
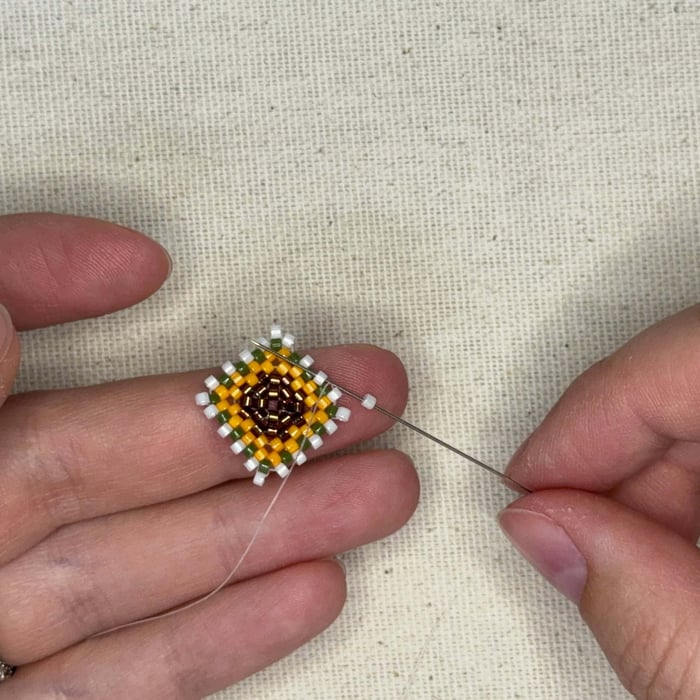
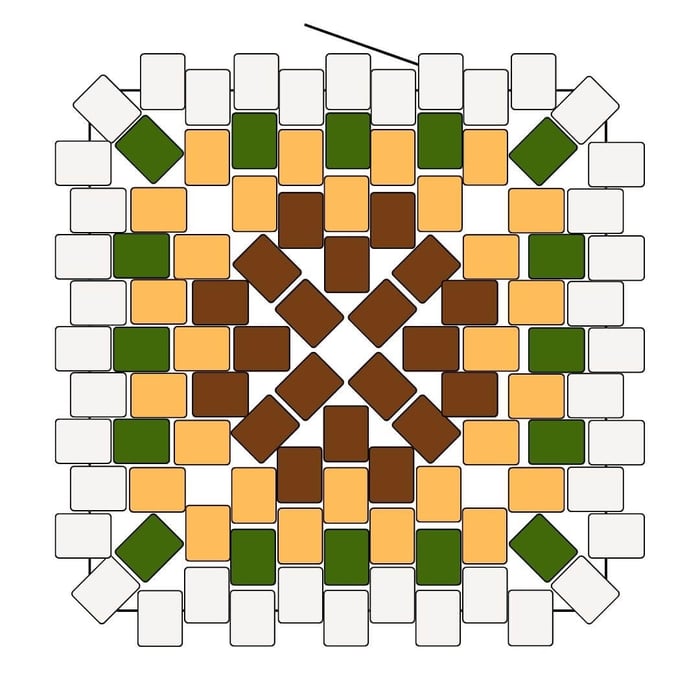
39. Now for the second layer of 203 delica beads. Add another 203 delica one at a time in between each delica of the previous layer
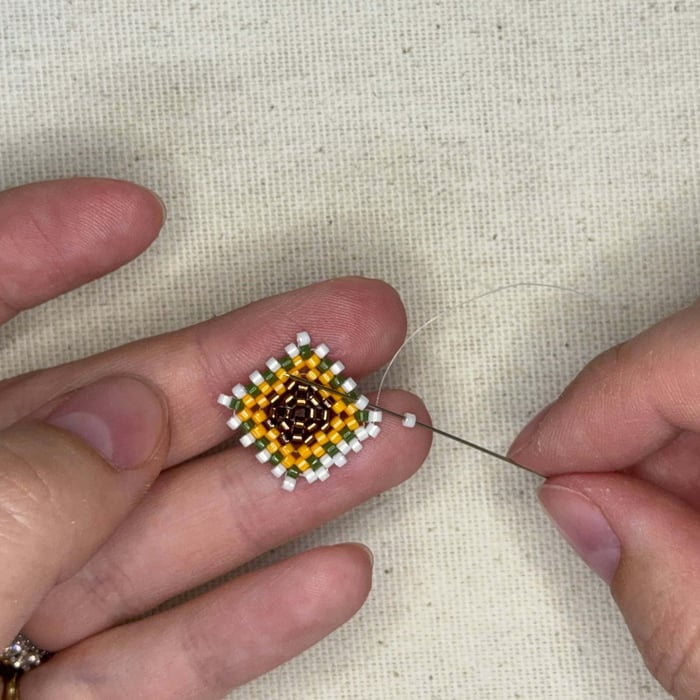
40. Keep going around counter clockwise adding one 203 delica at a time. (even around the corners)
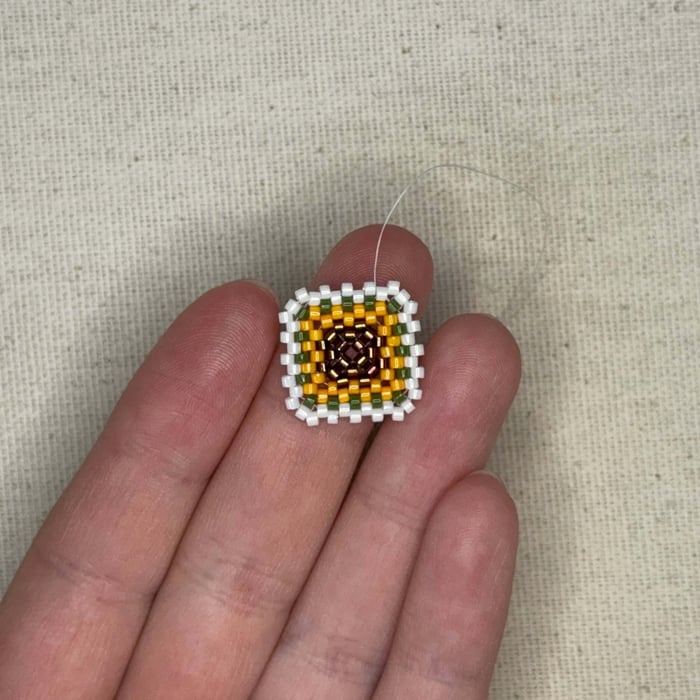
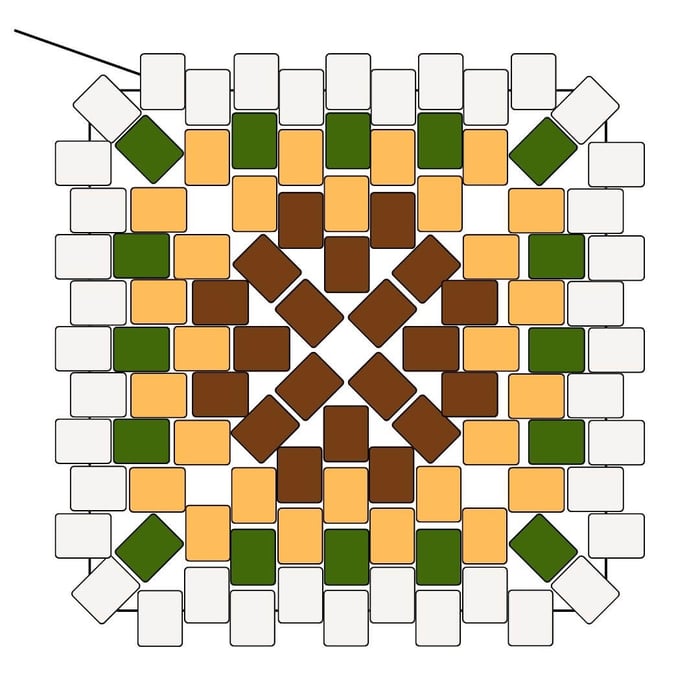
41. Your finished granny square will look like this. You will create a total of 9 granny squares to complete a 6.75" bracelet. I would recommend creating all 9 squares at once, when you complete the first one the following 8 are a breeze!
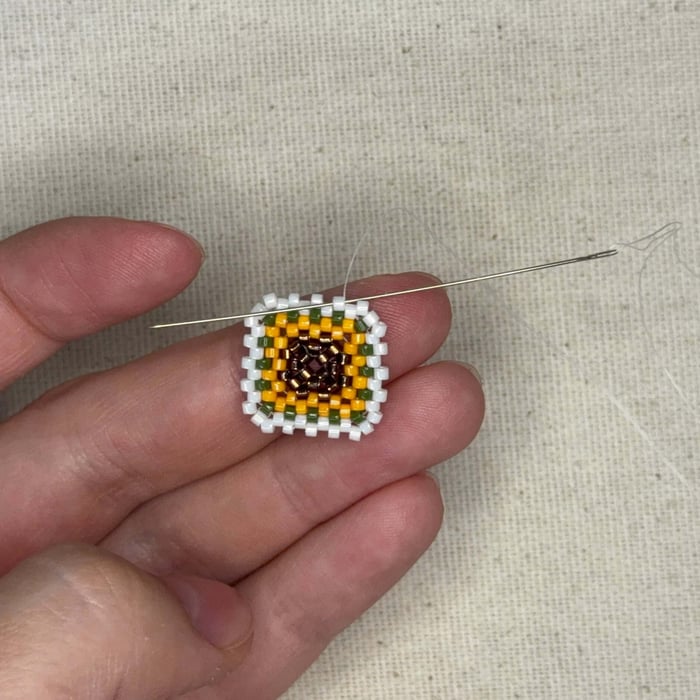
42. Now take one of those granny squares you've completed, we will now create the attachment that will hold onto the clasp. Thread your needle through the bead shown and pull tight.
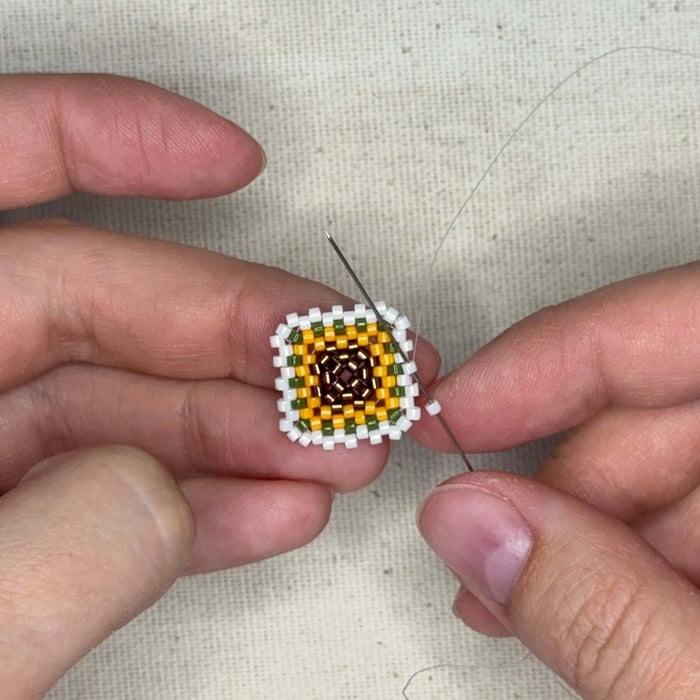
43. Add a 203 bead and thread the needle up through the next bead shown
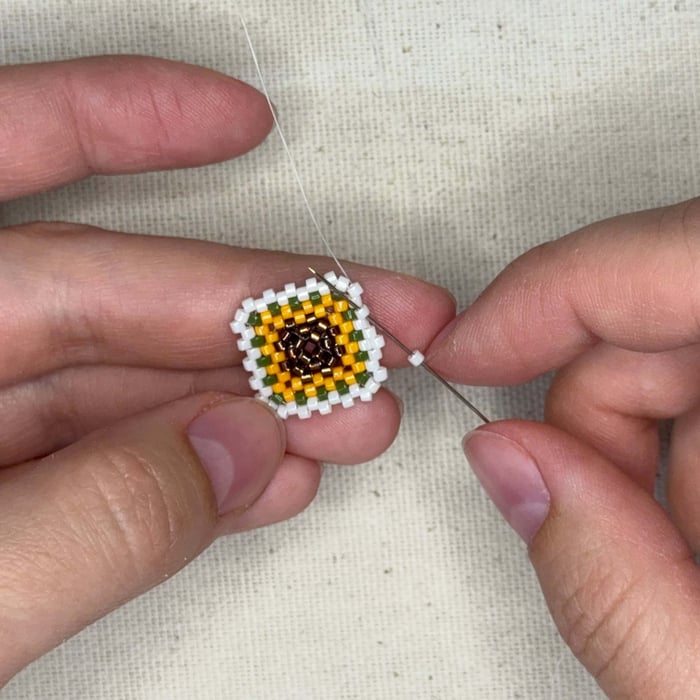
44. Now add another 203 bead
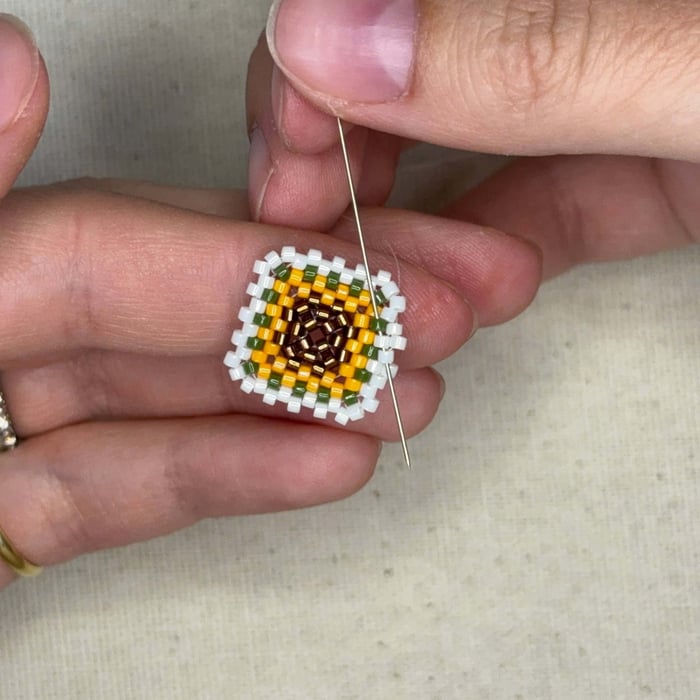
45. Now down the bead directly next to the delica your thread is coming out of
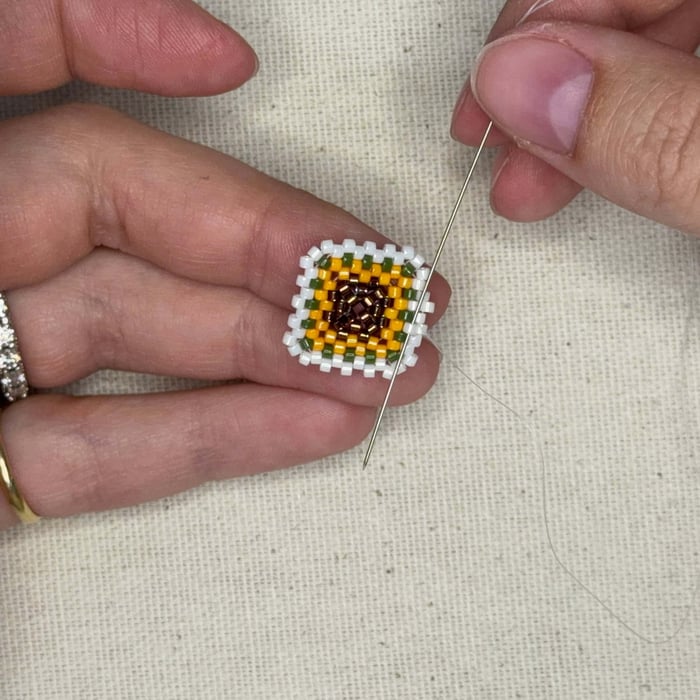
46. Now diagonally through the bead shown
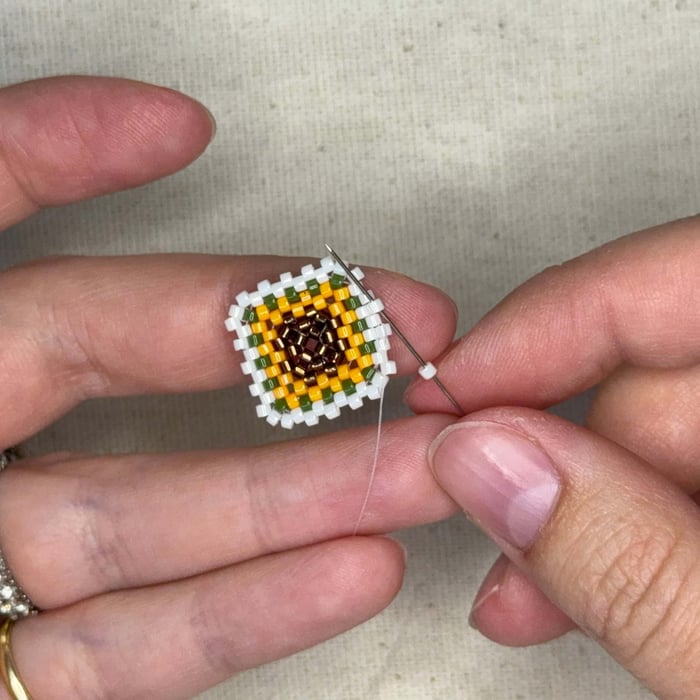
47. Then up through the delica directly to the right in step 46 and then add a 203 bead onto your needle then thread it up through the bead shown to "fill in the gap"
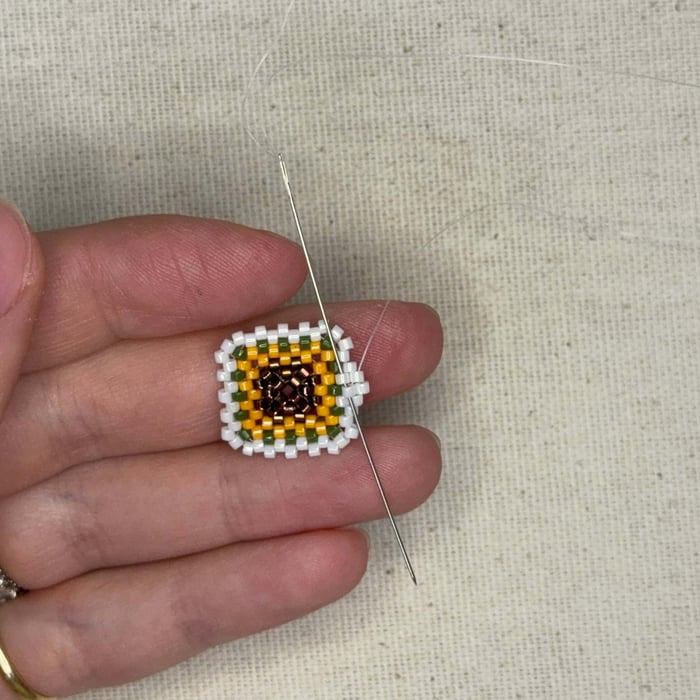
48. Now thread down through the 2 beads shown
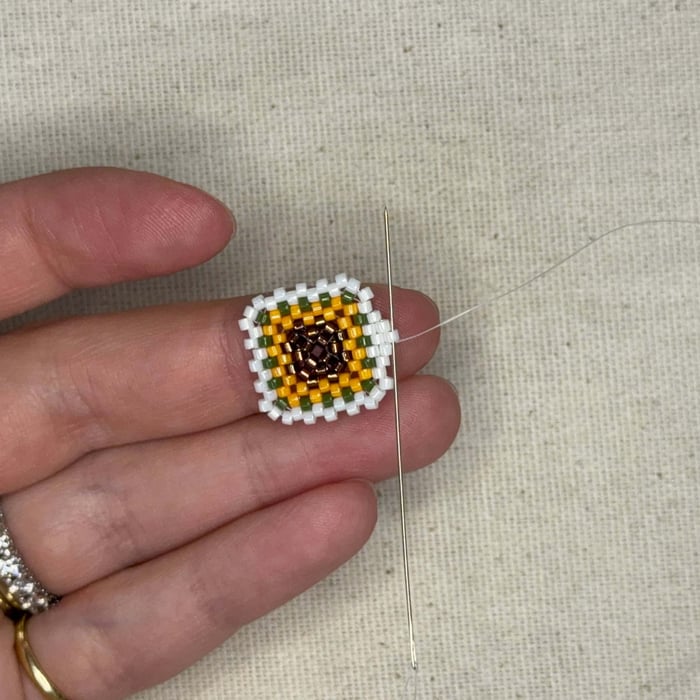
49. and then up through the bead added in step 47
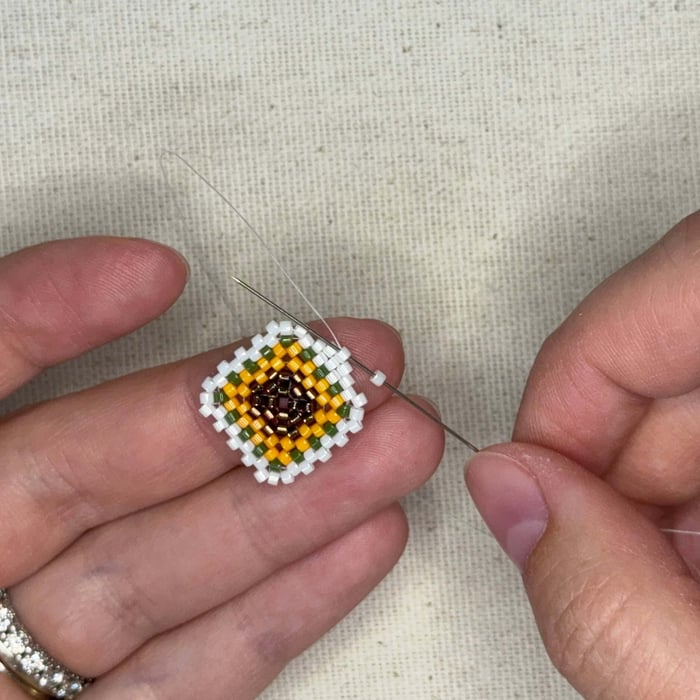 50. Add another 203 bead and loop it around the bead, needle going in the opposite side
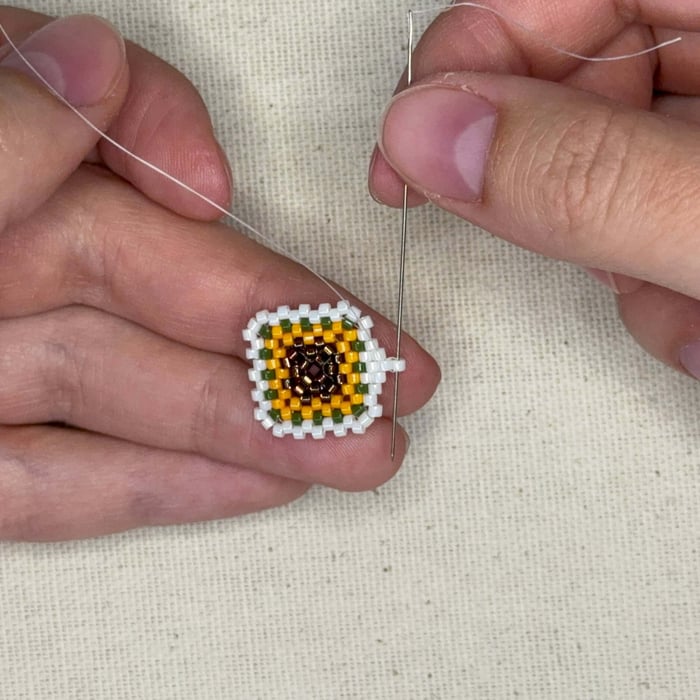
51. Loop around the bead 3 times to secure
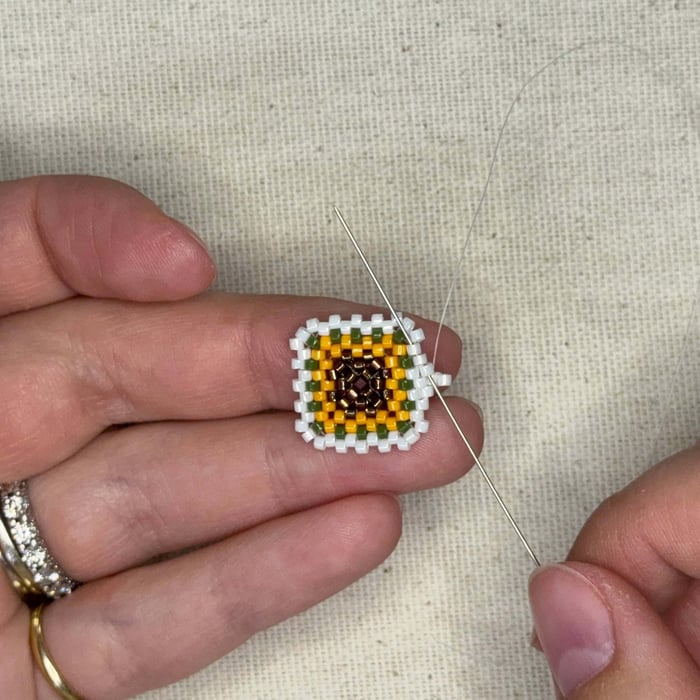
52. Then up through the 3 beads shown
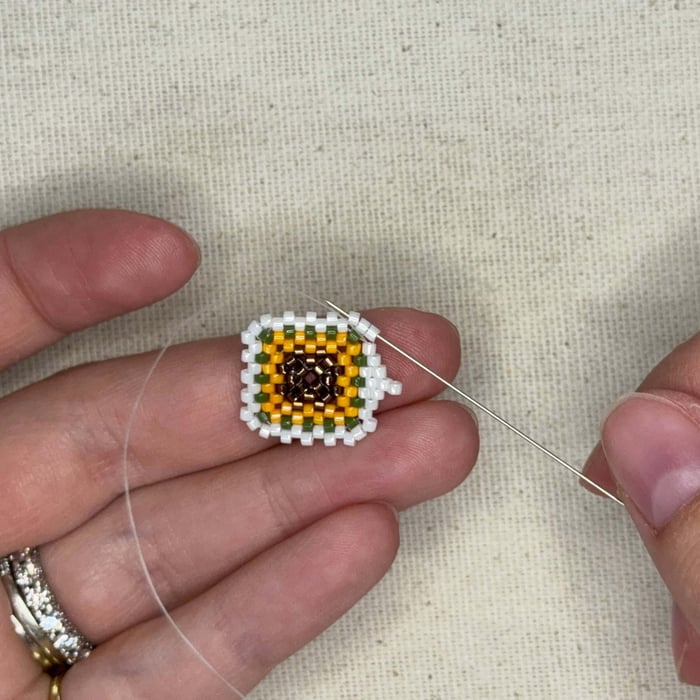
53. Keep going around the granny square, we will be getting out needle and thread to the opposite side this way
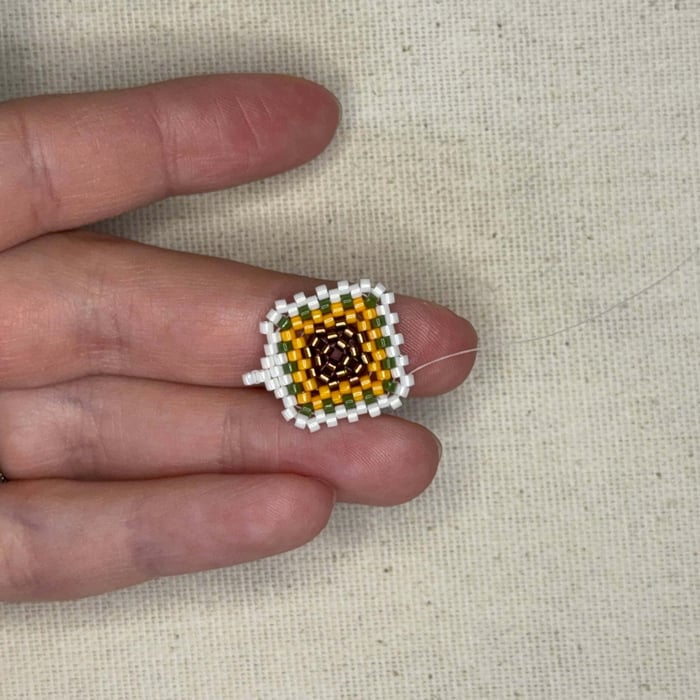
54. Turn your granny square around and stop when your needle is coming out of the edge shown
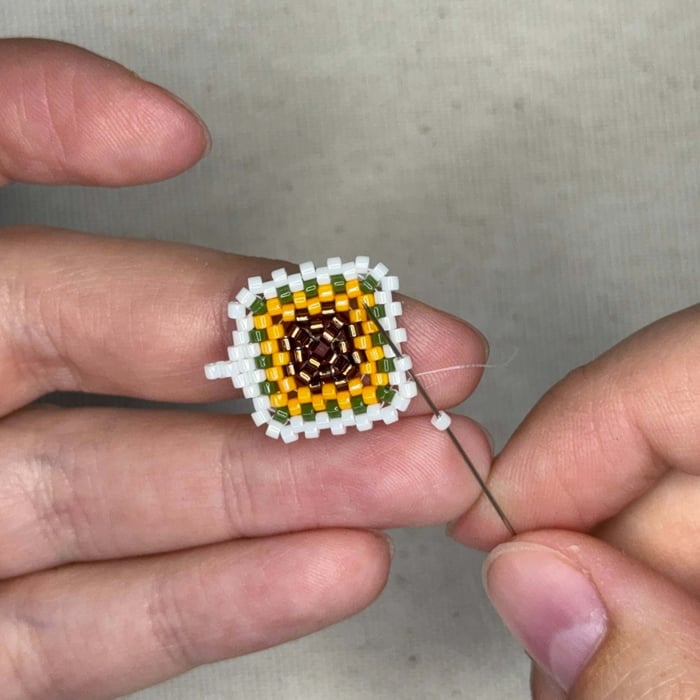
55. Add a 203 bead and thread the needle up through the following bead. You might notice this is pretty much a peyote stitch to fuse each granny square together
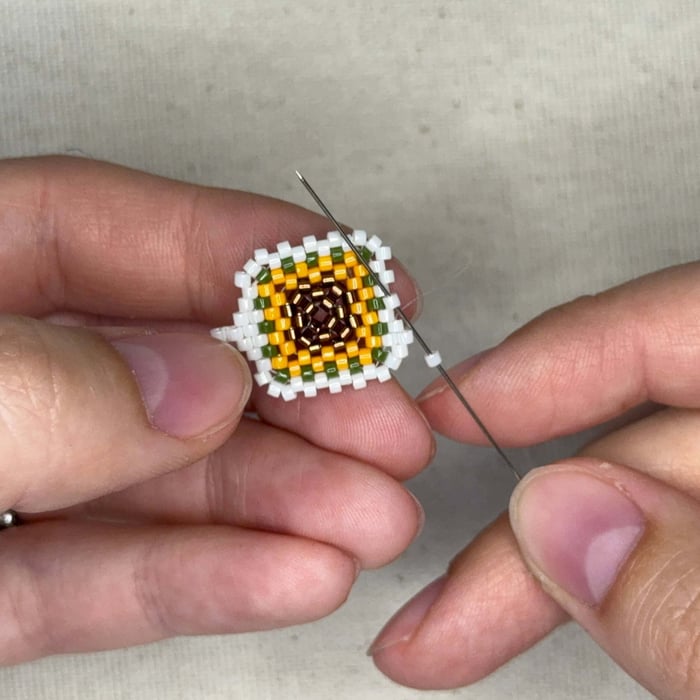
56. Add another 203 bead
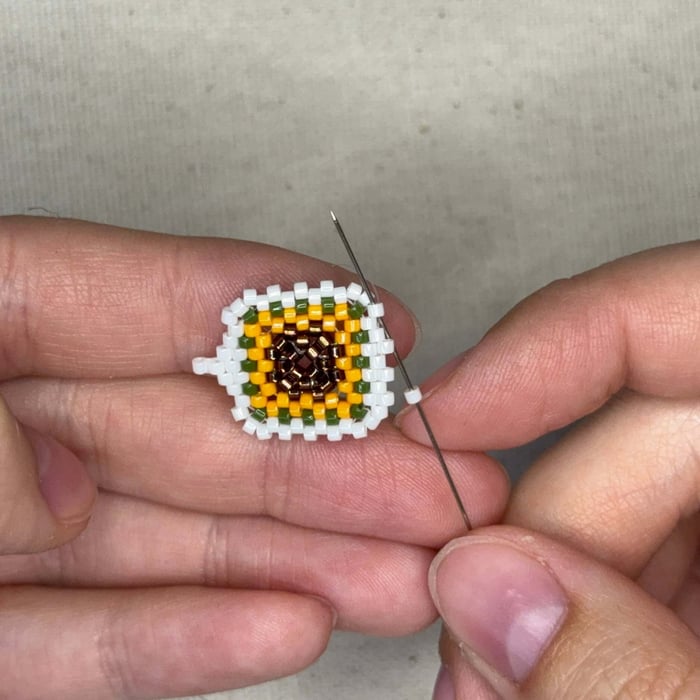
57. Keep going up adding 4 203 beads in total
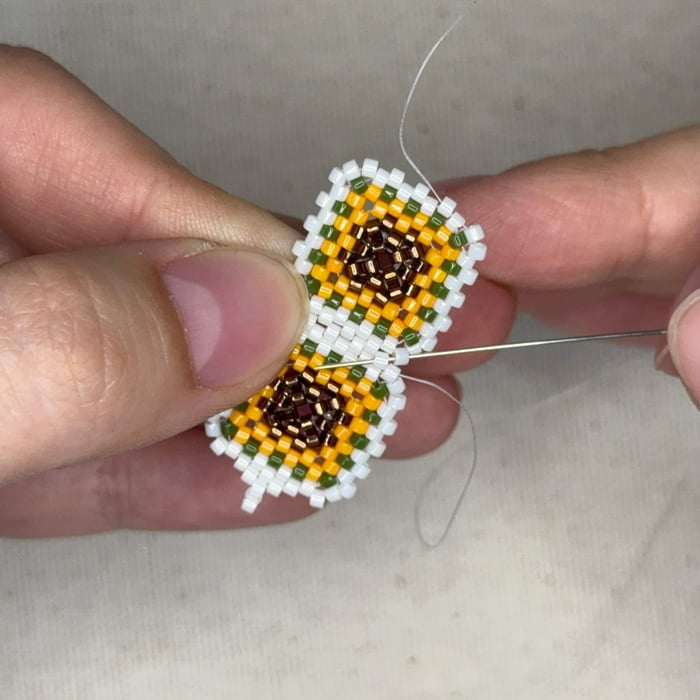
58. Grab a second granny square and begin to stitch them together, very similar to a "zipper"
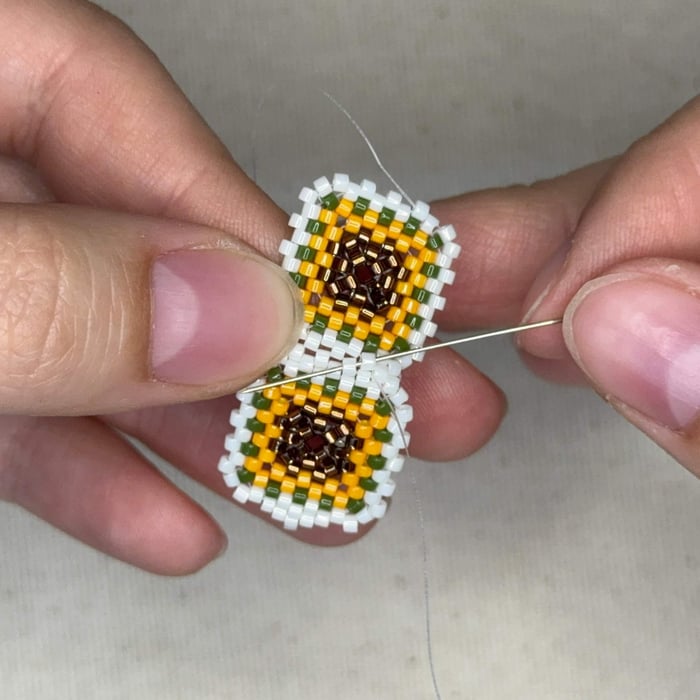
59. Keep stitching, "zipping" in diagonal motion
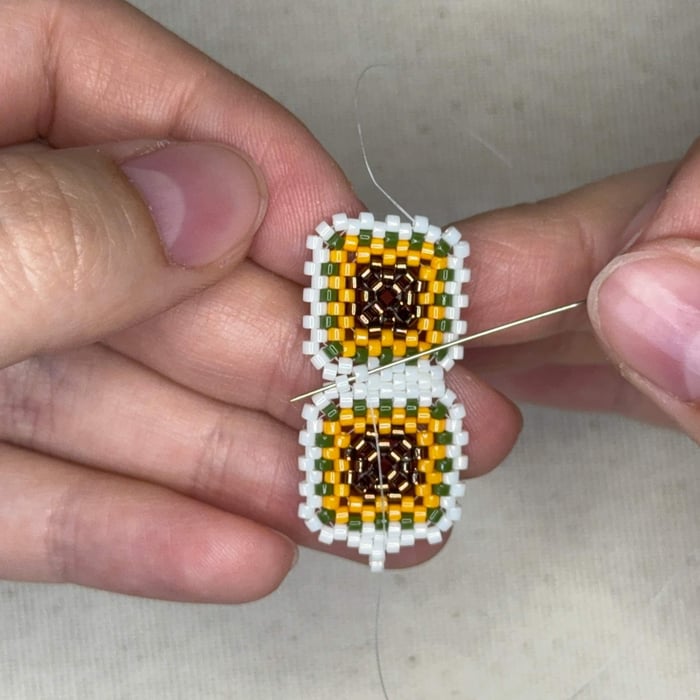
60. Almost to the end
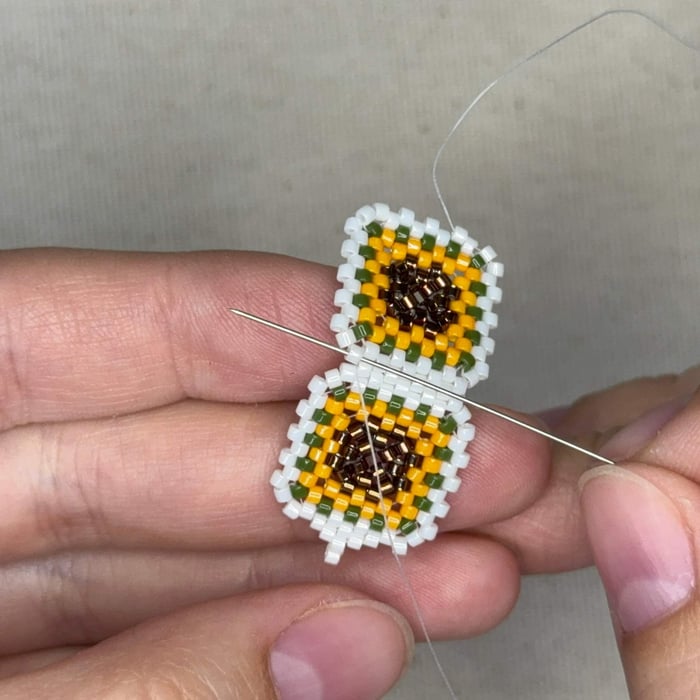
61. Now to secure, go through the top bead shown
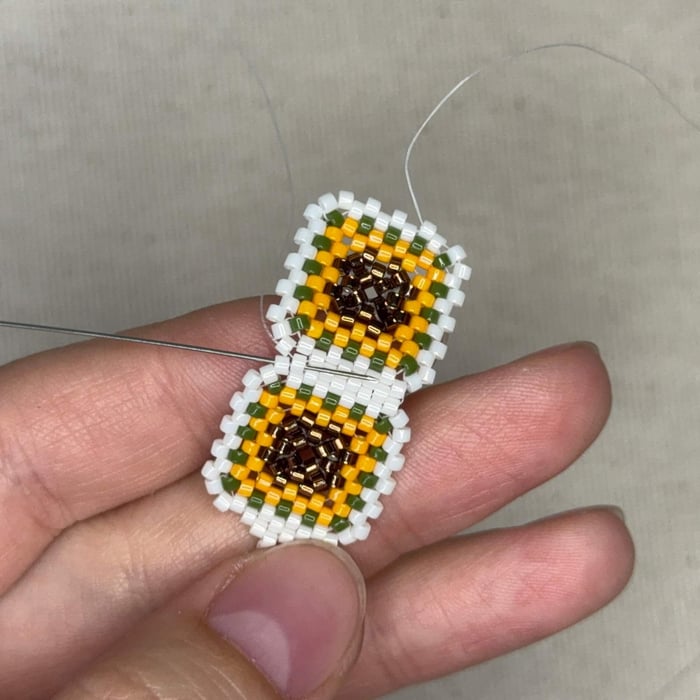
62. And then down through the 2 beads shown
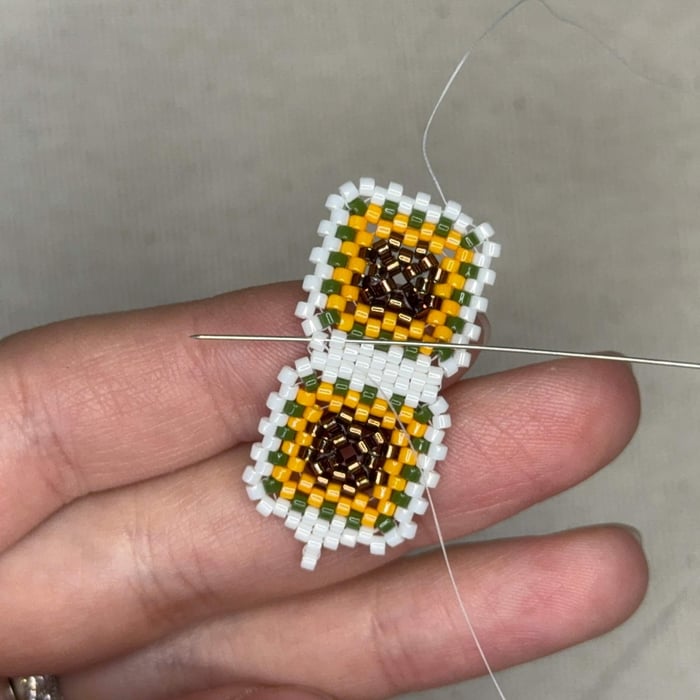
63. And then back up the 2 beads shown
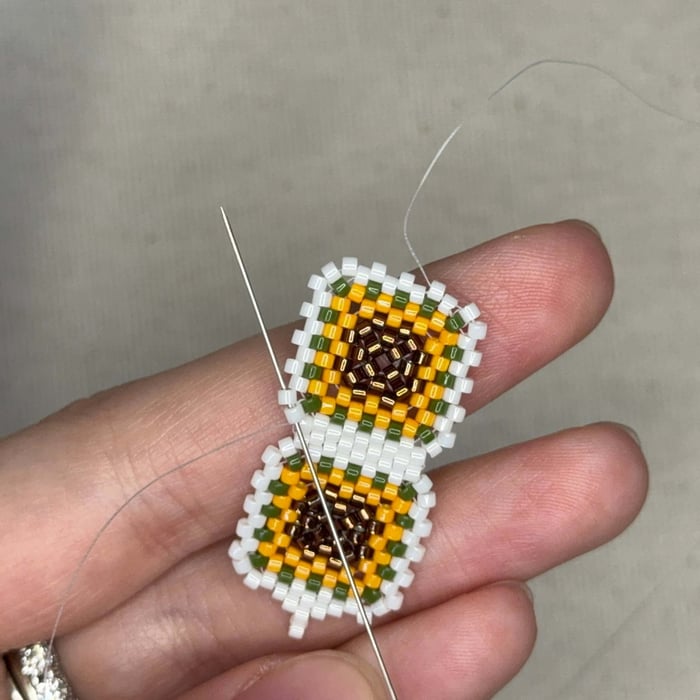
64. Pull tight and then thread your needle through the edge beads of the granny square
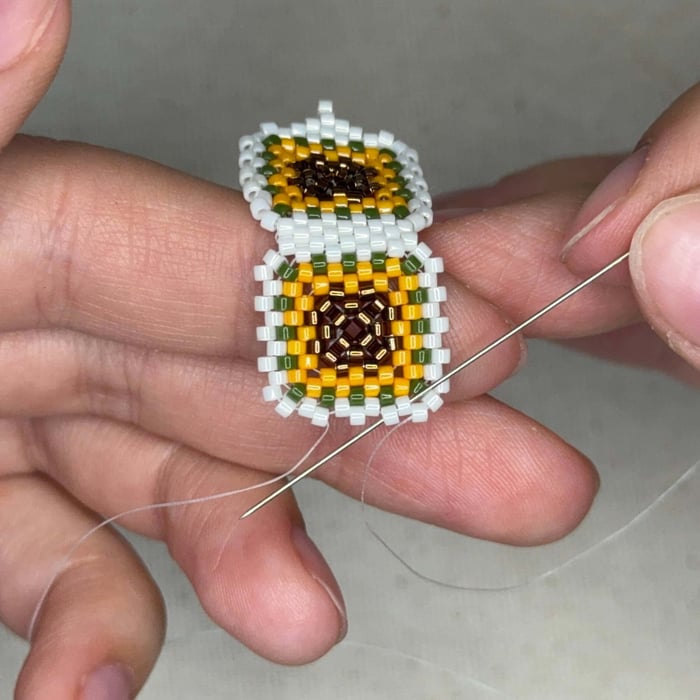
65. Keep threading your needle around the border of the granny square
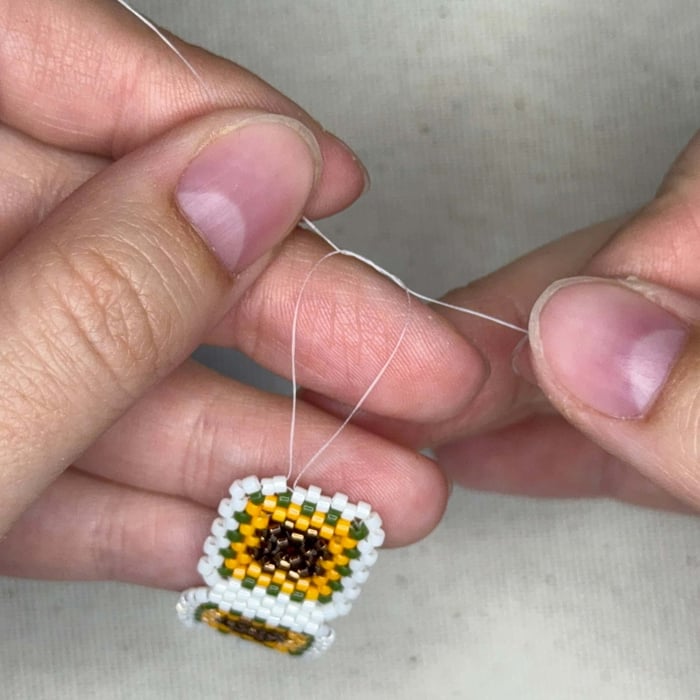
66. Until you get to the other "tail" of fireline. Tie 2 surgeon's knots and then trim whichever fireline tail is shorter.
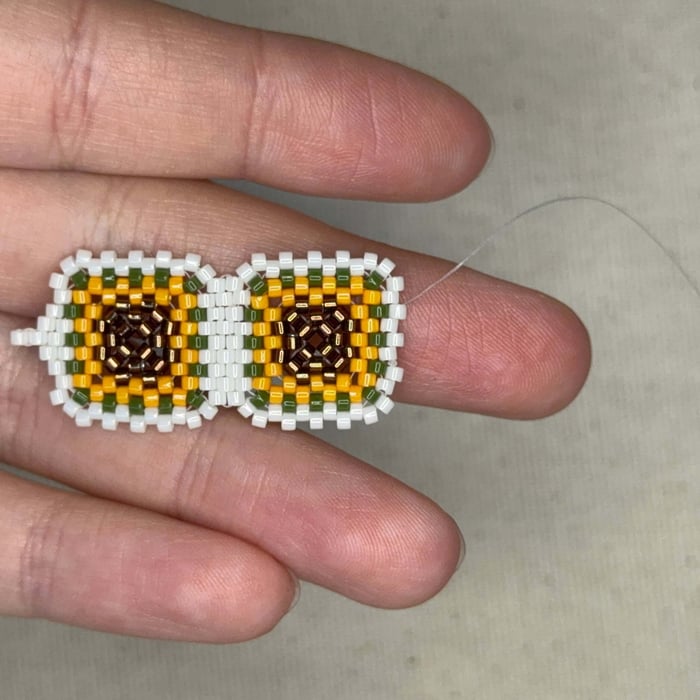
67. Thread your needle and thread back up to this point shown here in the above picture
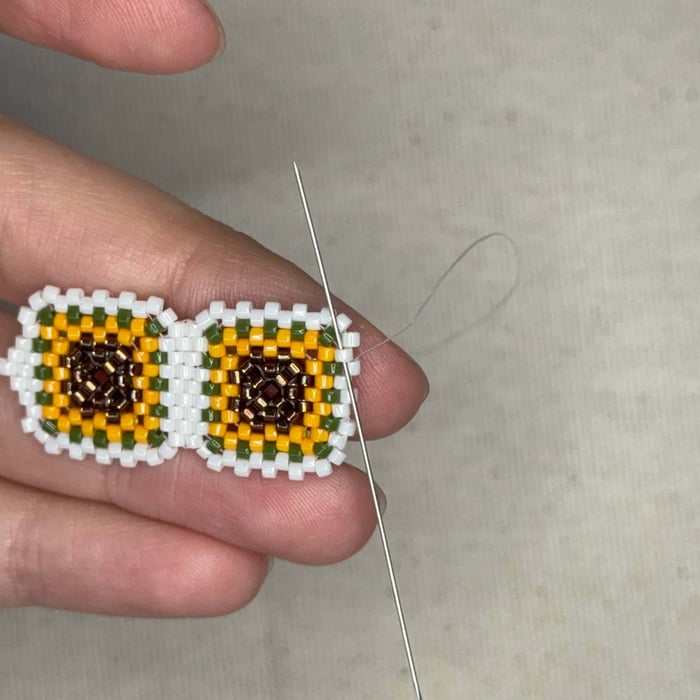
68. Then up one more bead
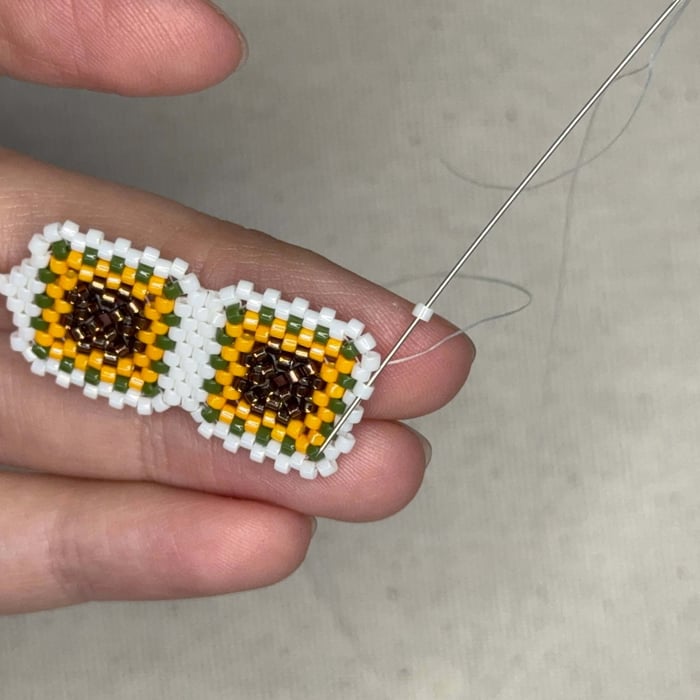
69. Add a 203 bead and then thread the needle down the bead shown
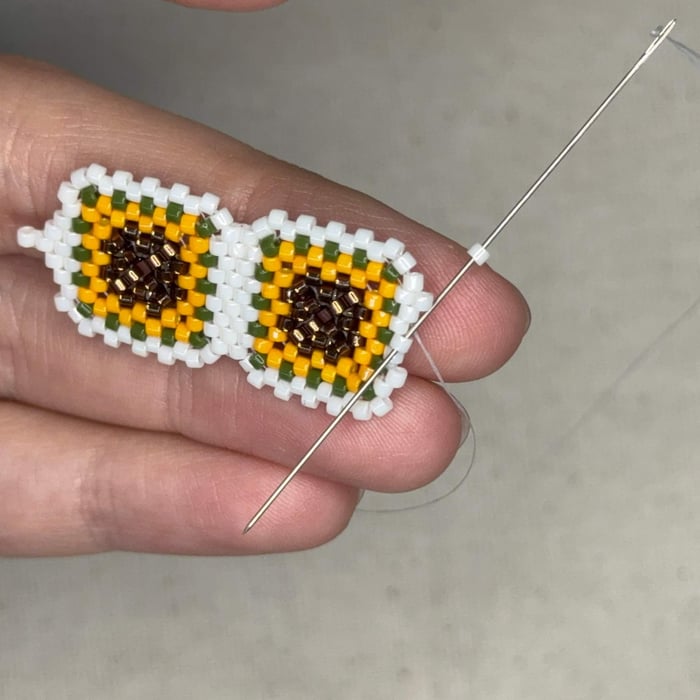
70. And another 203 bead
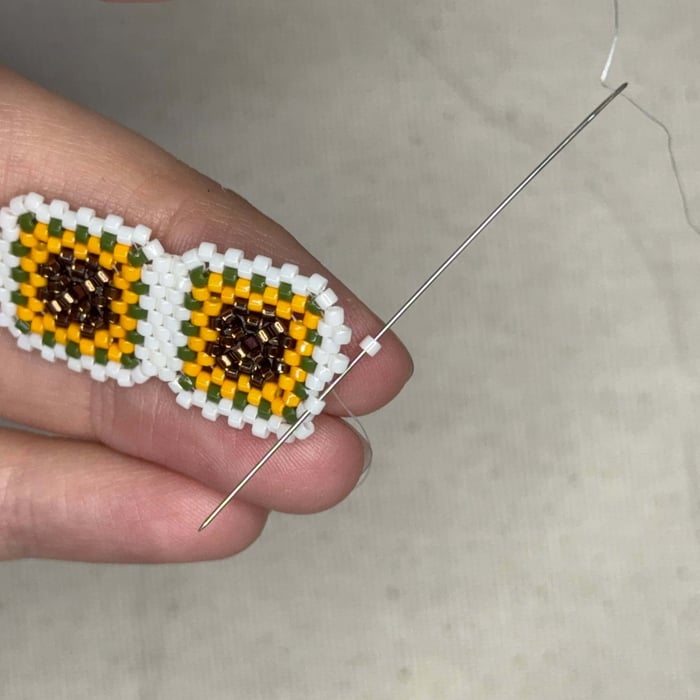
71. And another
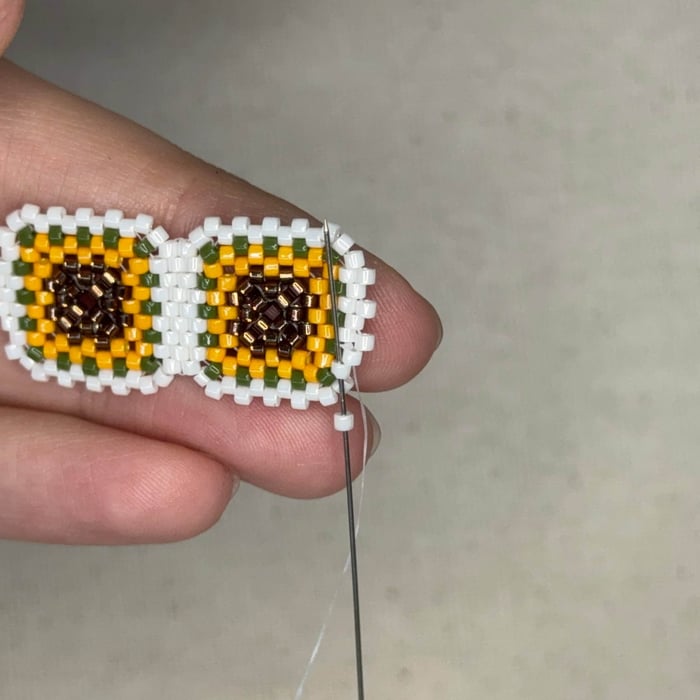
72. Add the 4th bead by threading your needle up through the bead shown
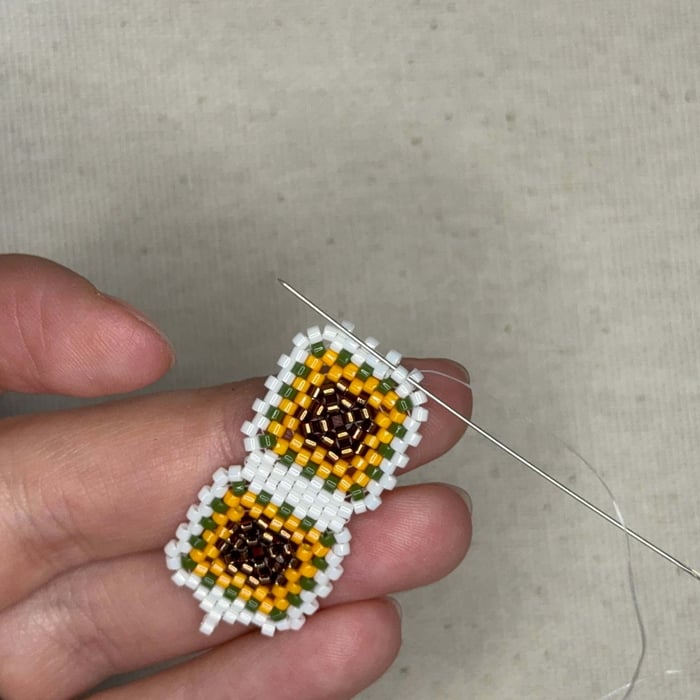
73. Then up through the following 203 bead diagonal
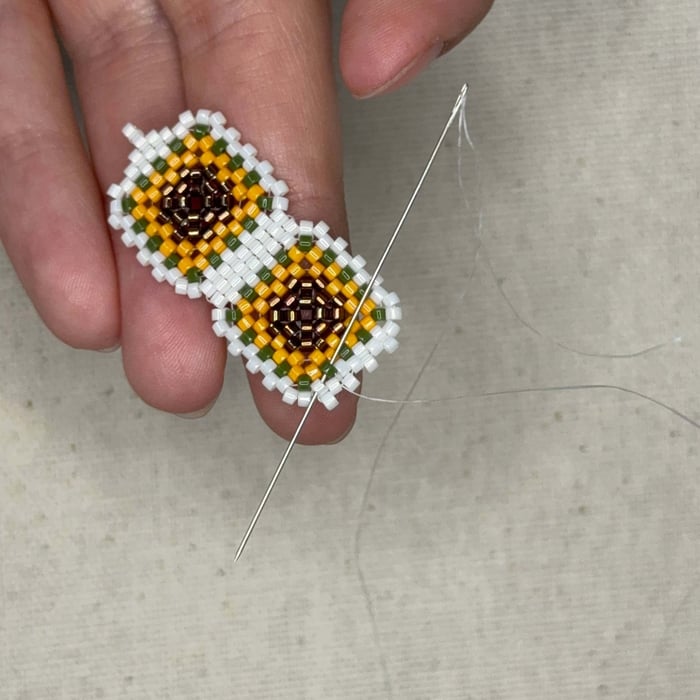
74. Then down through the green bead and the 203 bead shown
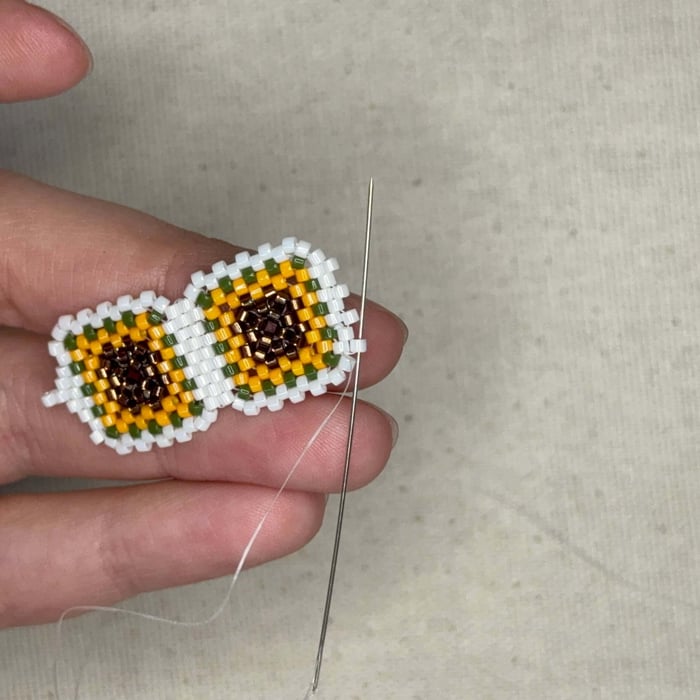
75. And then back up the last (4th) bead added in step 72
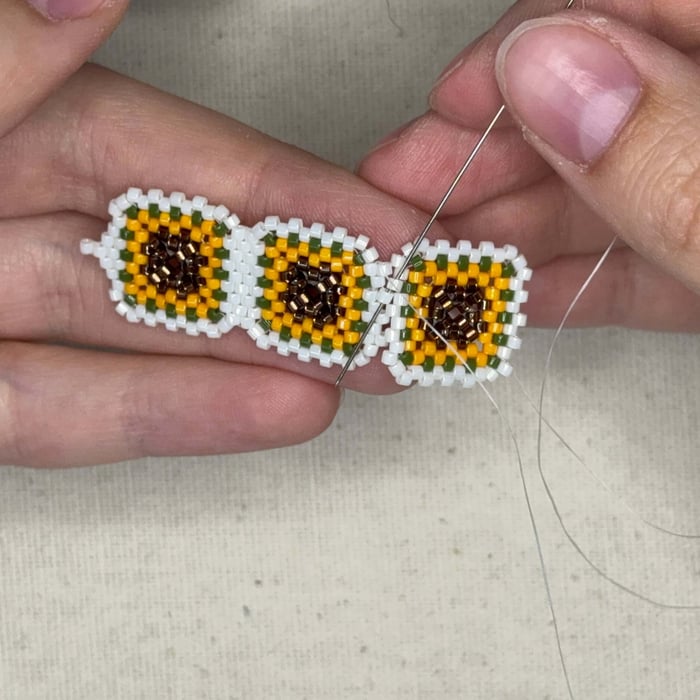
76. Turn your project around, grab another granny square and start to stitch the two squares together, like the zipper before in step 58. Line them up, you'll see that the top 2 beads don't fully align, that's okay we will will line them up soon
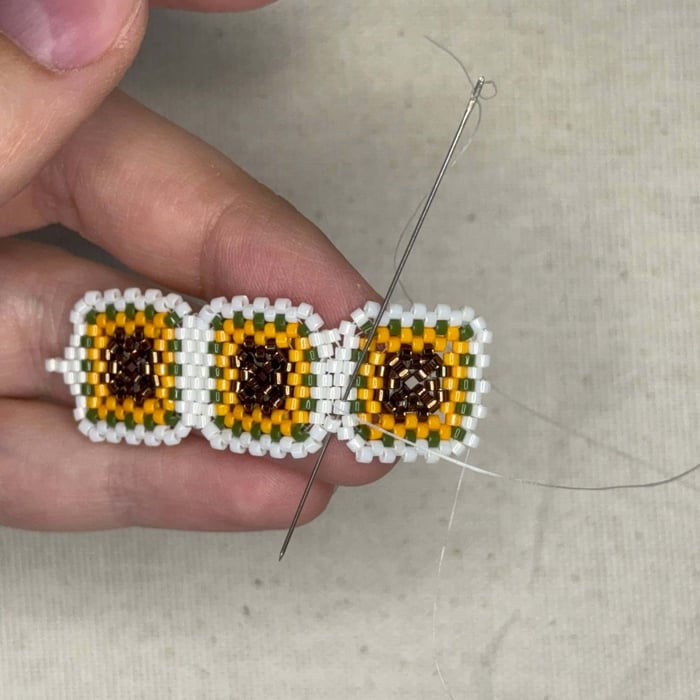
77. Keep zipping down
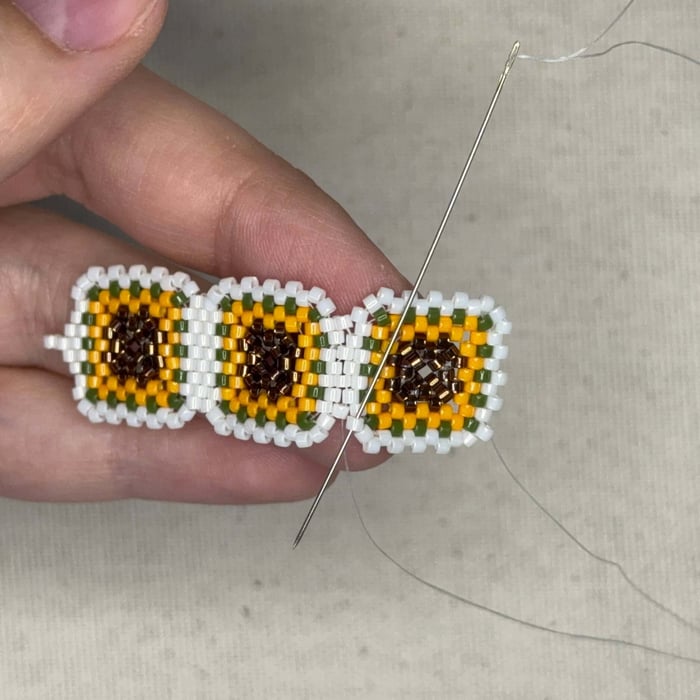
78. Thread through the final bead to the right
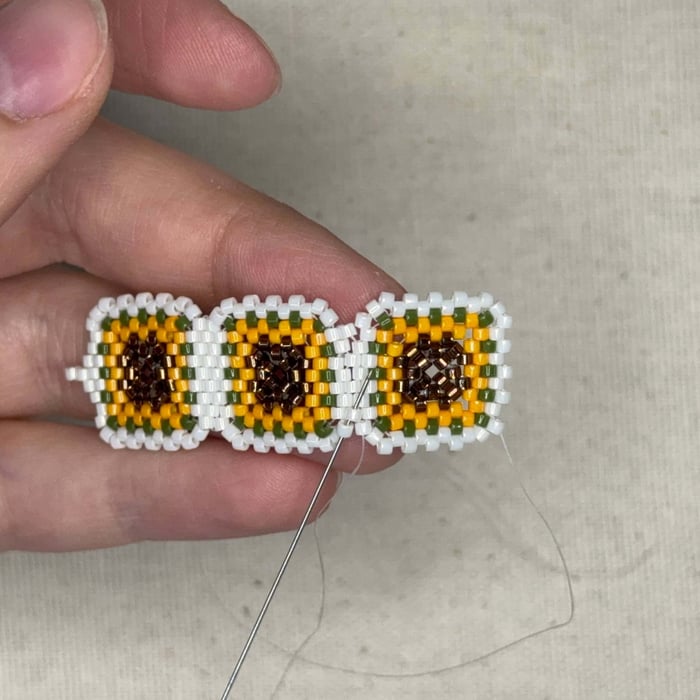
79. And then up through the bead to the left and then up diagonally to the right
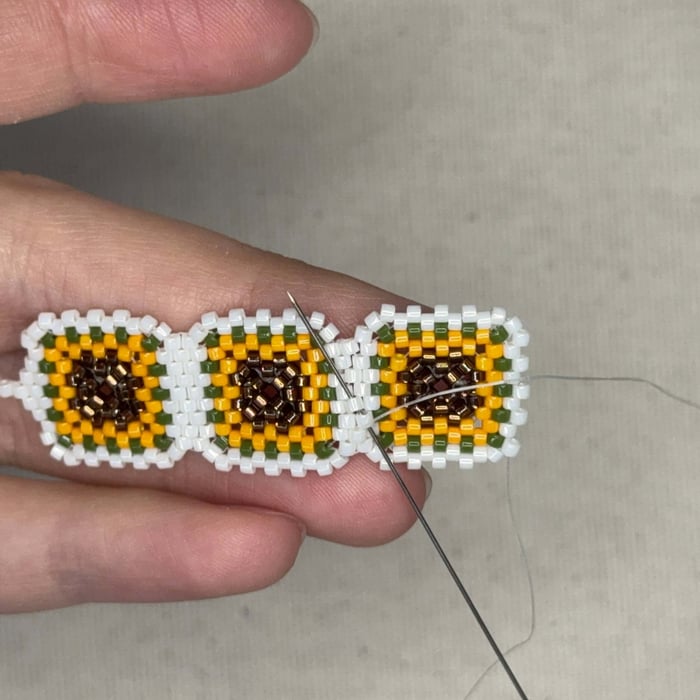
80. Now in an opposite diagonal motion, stitch back up the beads
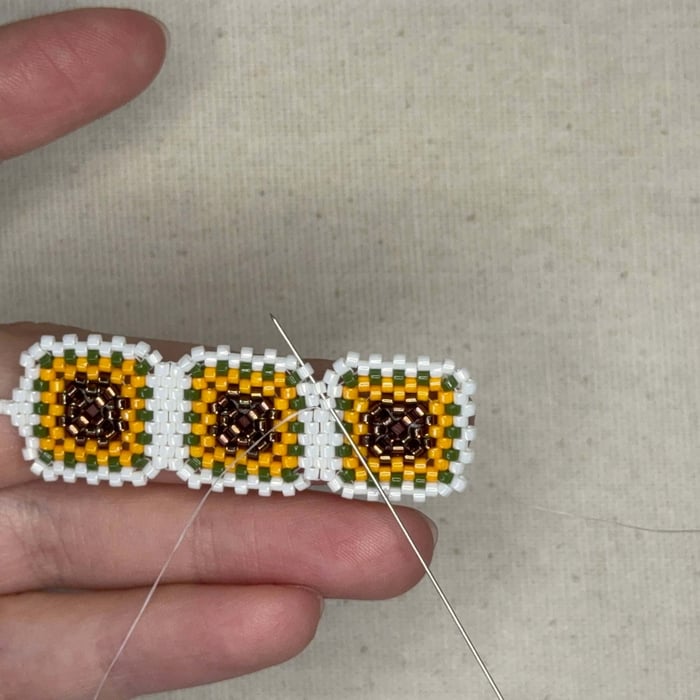
81. Then up through the 3 beads shown
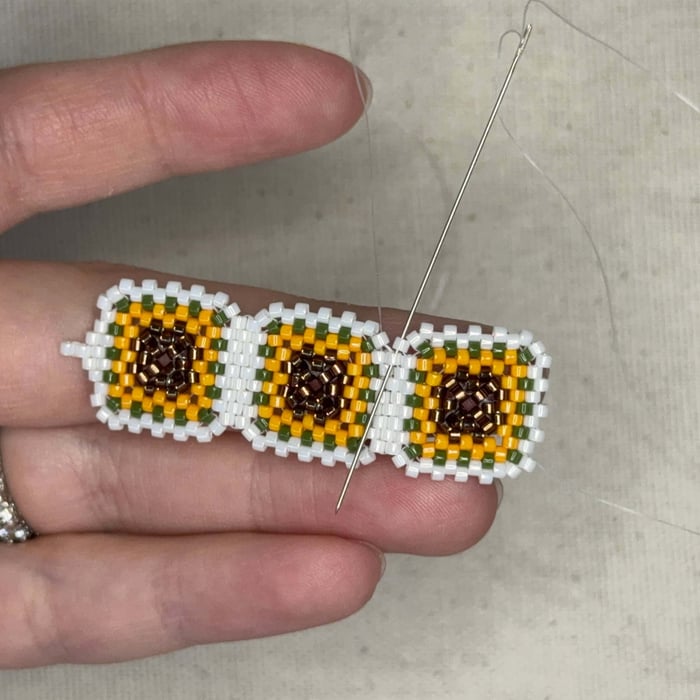
82. Then down the 2 beads shown
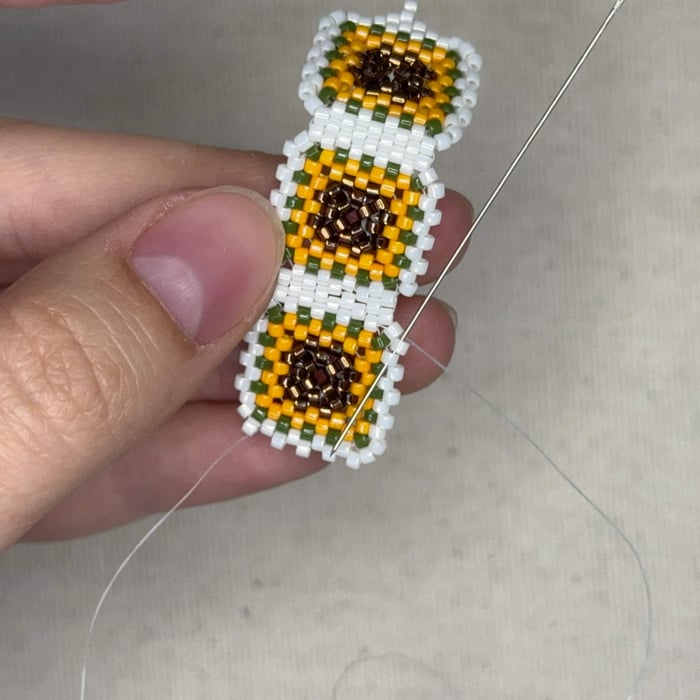
83. Follow along the border of 203 beads
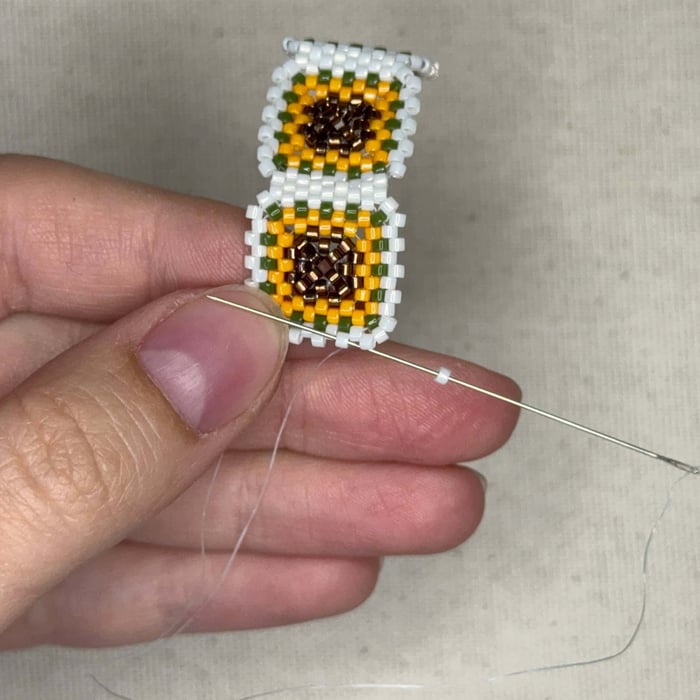
84. Okay time to change it up here. We will add the connecting parts of the granny square once we get around to the opposite end
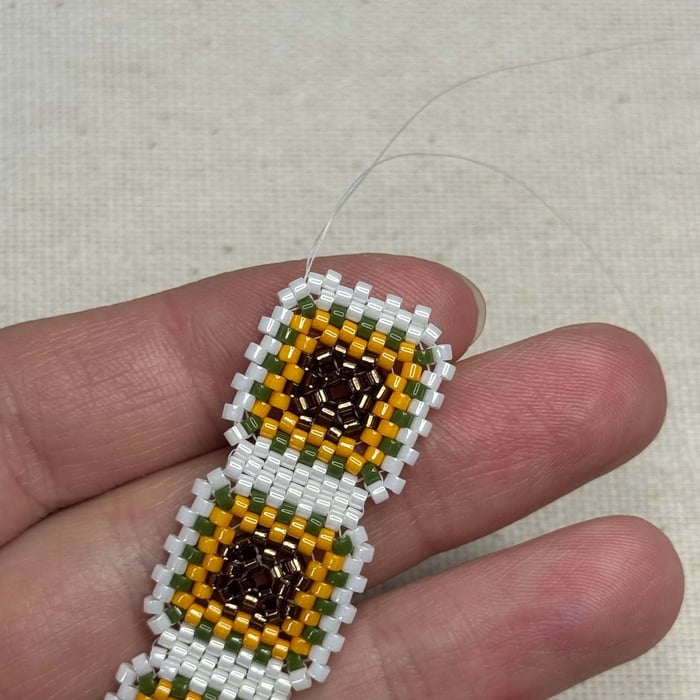
85. Keep going, adding 4 beads total and then go through the beads shown and tie 2 surgeon's knots. Cutting the smaller tail of fireline and leaving the longer strand to use.
Repeat steps 76 through 85 to add the rest of the granny squares except for the final 9th square. We will attach that in the next steps.
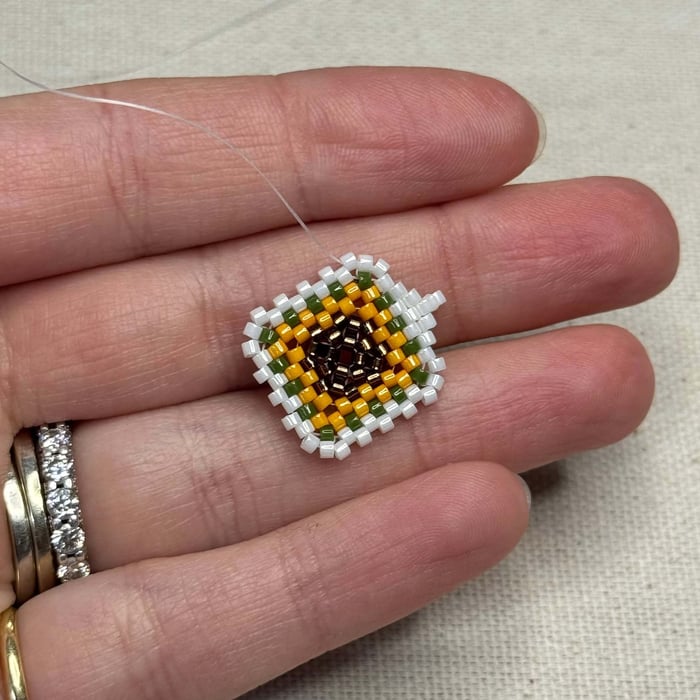
86. Take your final granny square and repeat steps 42 through 54
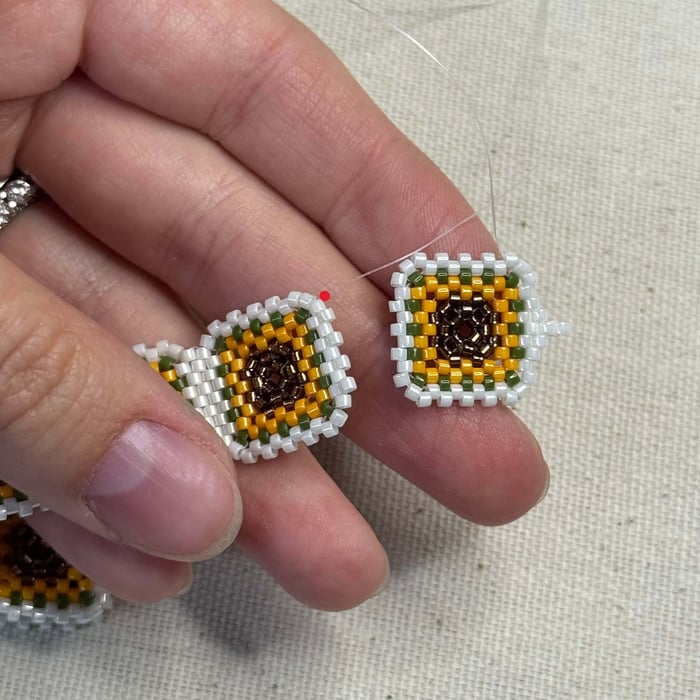
87. Using the fireline thread indicated by the red dot, stitch the final two granny squares together.
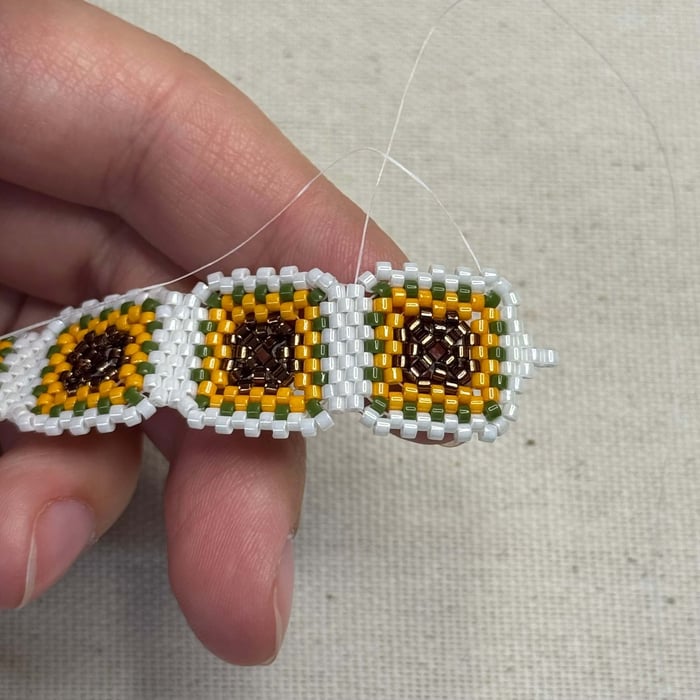
88. Your project will look like this once stitched up
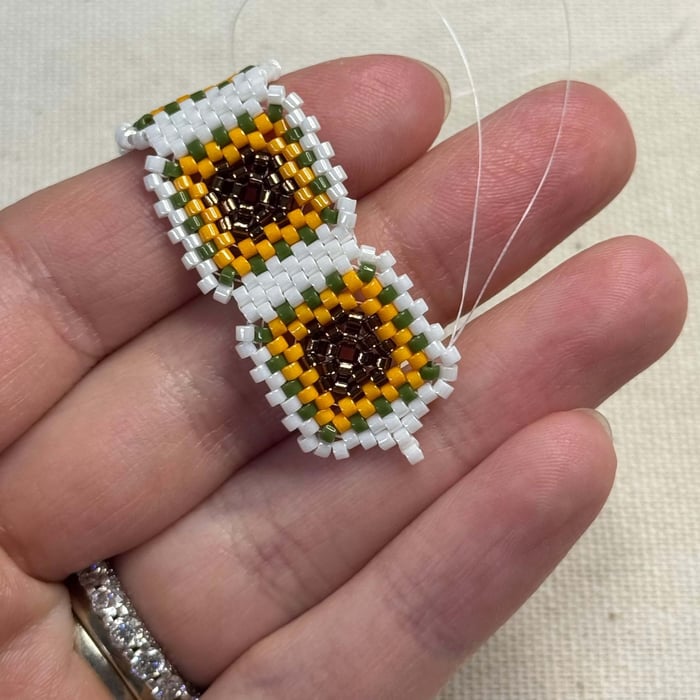
89. Thread the fireline you were just using over to the other tail of fireline and tie together using 2 surgeon's knots. Cut the tails off and use a dab of GS-Hypo Cement (red tube) to secure.
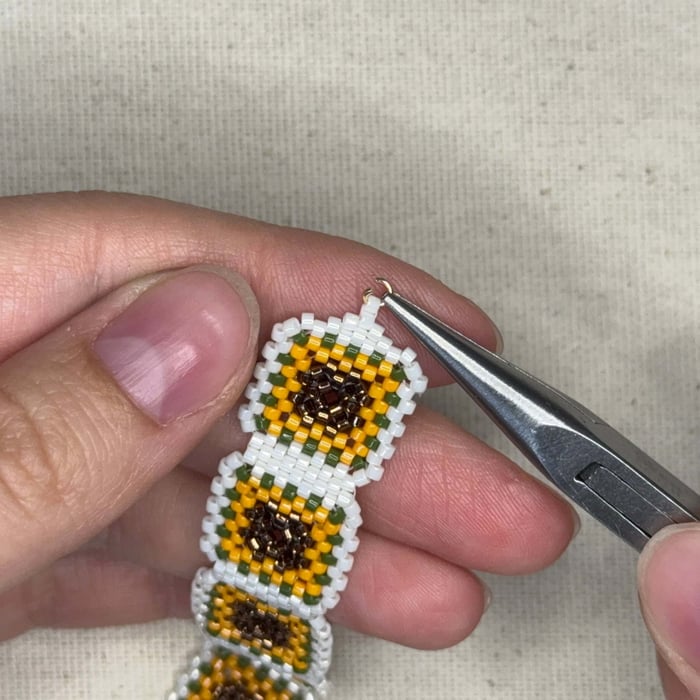
90. Using your chain nose pliers, very gently thread on your 3mm 22 gauge jump ring onto the end of your project.
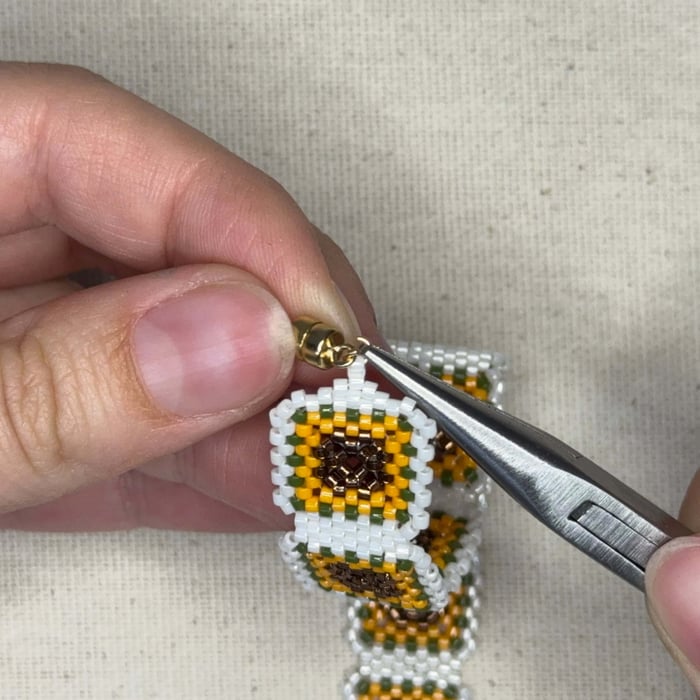
91. Before you close the jump ring, be sure to add your clasp. Using a gold filled (or sterling silver if you prefer) is essential to use when using magnetic clasps so your bracelet lays well.
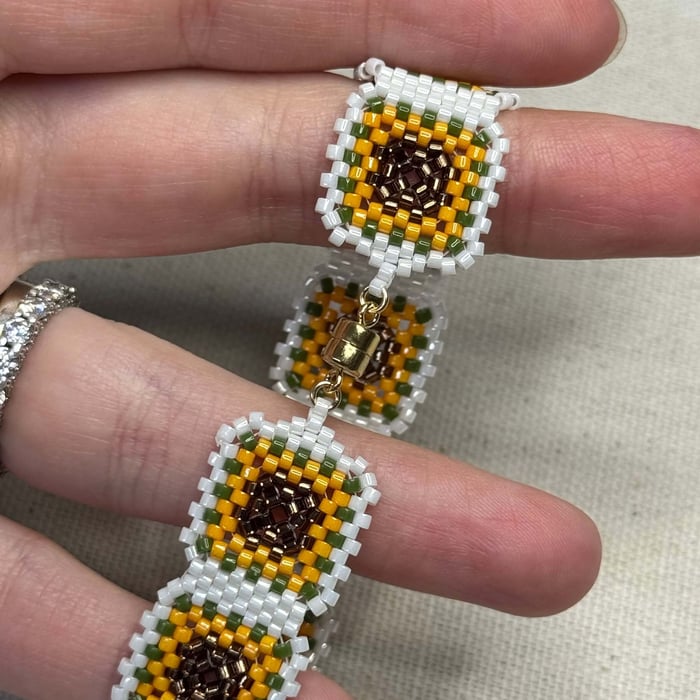
92. Complete on both sides and you're done!
Step by step pattern instructions:
Related Articles
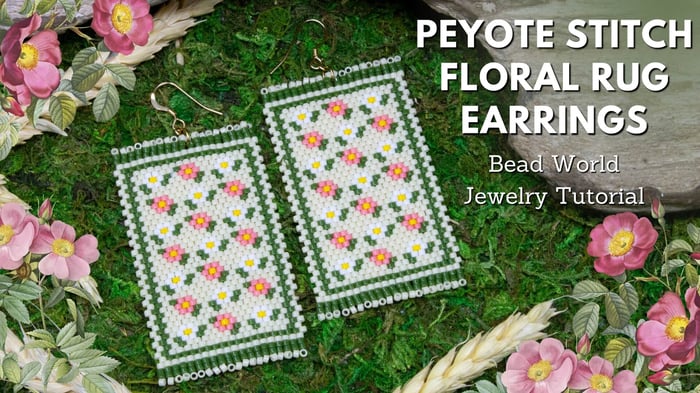
DIY Peyote Stitch Earrings Tutorial – Floral Rug Pattern with Double-Row Technique
DIY Peyote Stitch Earrings Tutorial – Floral Rug Pattern with Double-Row Technique These peyote...

Cherry Blossom Flower 3D Brick Stitch Earrings
Cherry Blossom Flower 3D Brick Stitch Earrings These earrings use size 11 Delica beads arranged in the...

Citrus Slice Brick Stitch Earrings
Citrus Slice Brick Stitch Earrings Citrus fruits are known for their vibrant and bright colors, which can...