
Tutorials
DIY Body Chain Tutorial – Adjustable Waist or Hip Chain
DIY Body Chain Tutorial – Adjustable Waist or Hip Chain
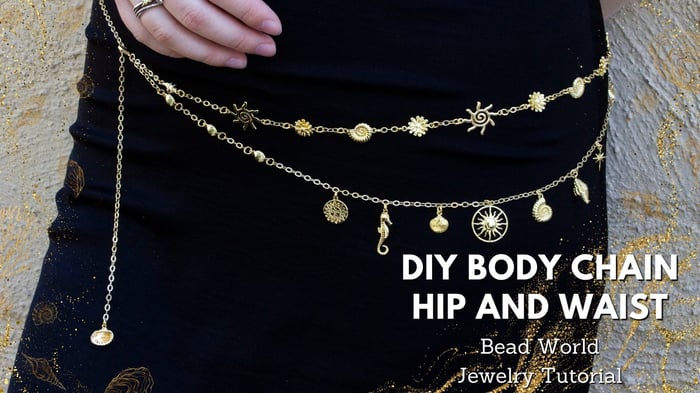
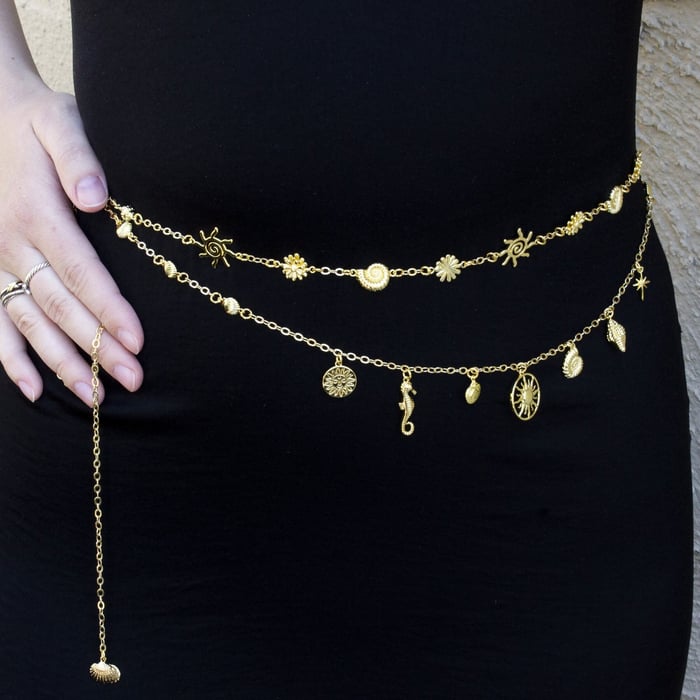
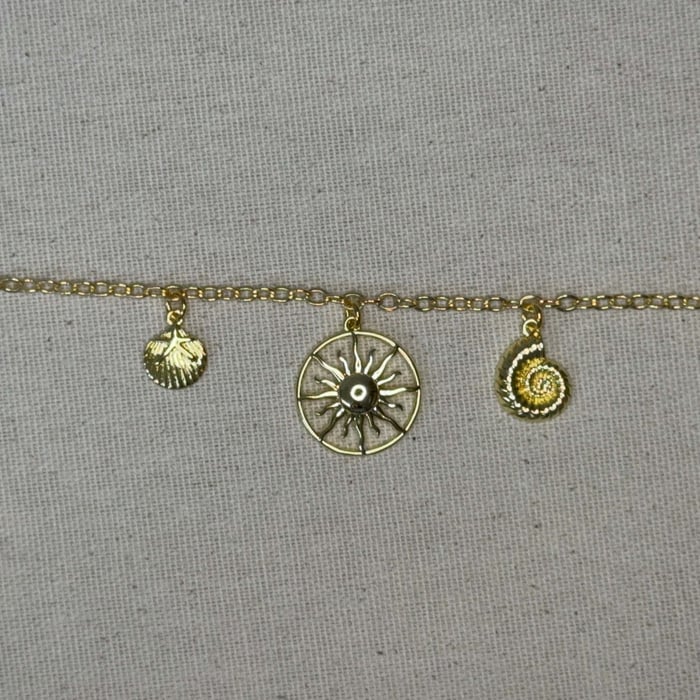
Create your own stunning body chain with this easy-to-follow tutorial! Designed to be worn around the waist or hips like a belt, this layered body chain adds an eye-catching boho-chic flair to any outfit. The design features gold chain adorned with an eclectic mix of charms—sunbursts, seashells, flowers, and seahorses—for a playful yet elegant beachy vibe.
This project is fully customizable to fit your unique size. Simply adjust the length of chain before assembling to ensure a comfortable and flattering fit, whether worn high at the waist or low on the hips. Add or remove charms to match your personal style.
Perfect for festivals, vacations, or as a statement accessory for your everyday look—this body chain brings a touch of sunshine wherever you go.
Measures Approx.: 43"
 DIY Body Chain Tutorial – Adjustable Waist or Hip Chain
Materials Needed:
- Gold 3x4mm Classic Cable Chain (46 inches total)
- 18K Gold Plated Stainless Steel 5mm Round 18 Gauge OPEN Jump Rings (48)
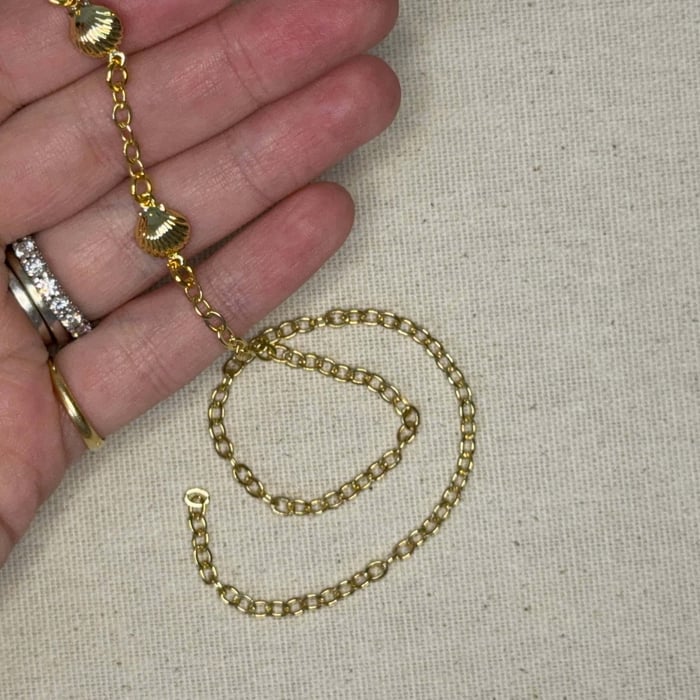
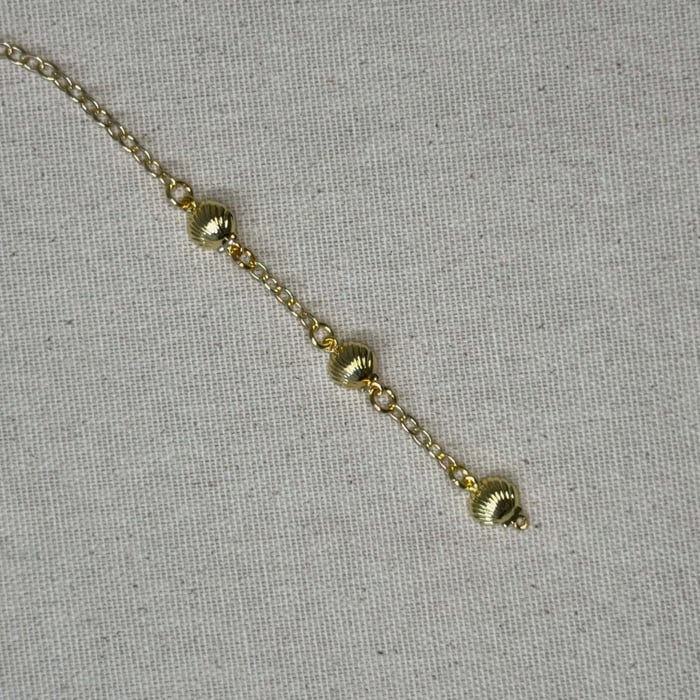
- 18K Gold Plated 16x7mm Conch Shell Link (2)
- 18kt Gold Plated 26x19.5mm Sun Link (5)
- 18K Gold Plated 18x12mm Flower Link (4)
Tools Needed:
Instructions on Construction:
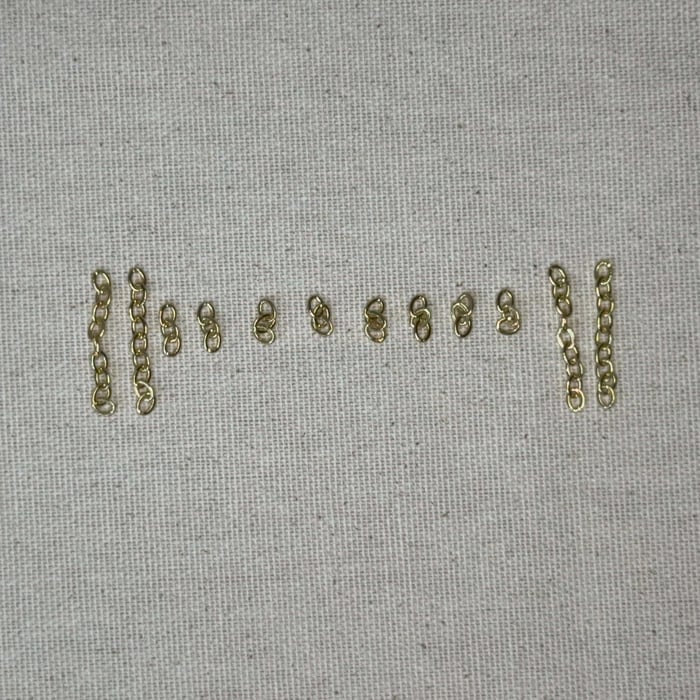
1. Take your 46" of chain and cut off the sections above one by one - a total of 4 sections measuring 9 links and 8 sections measuring 3 links
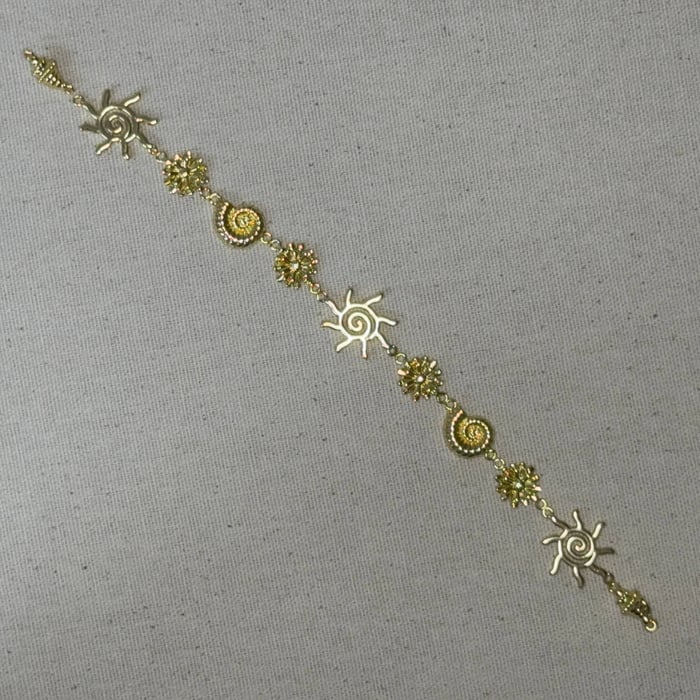
2. For the first part of our body chain, this will be our pattern of links, you are welcome to change them for any other kind of link you like! Check out our selection here

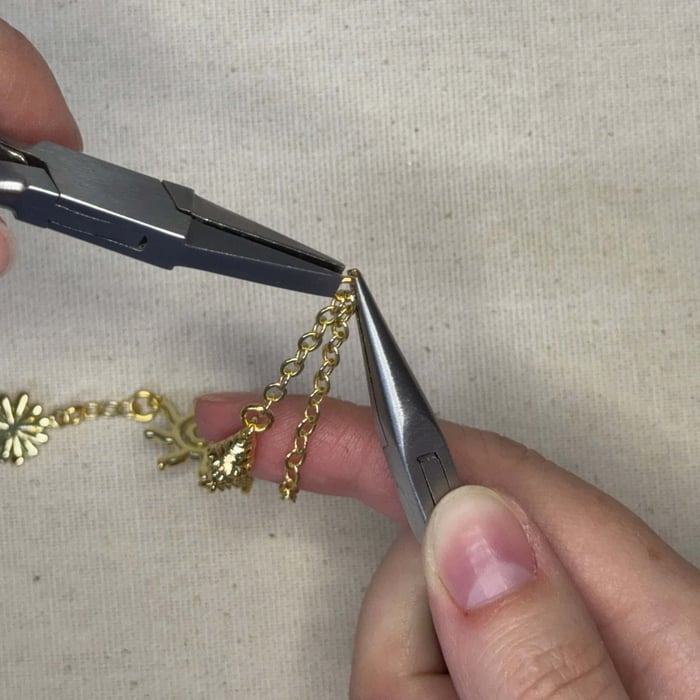
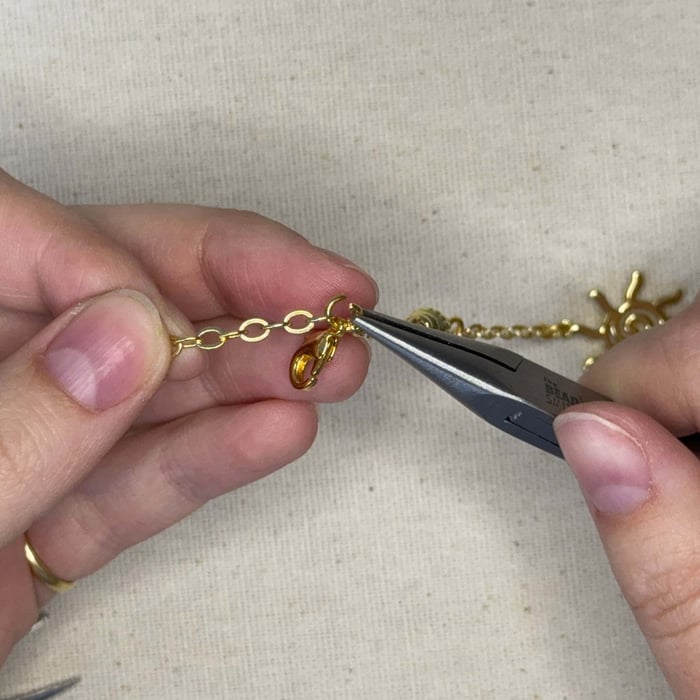
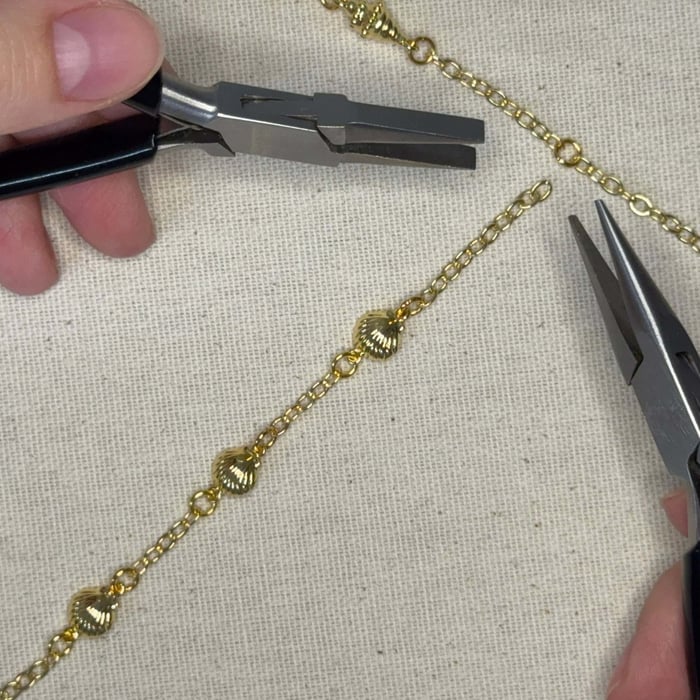
3. Open your first jump ring and attach one section of 9 links and your clasp. (If you are right handed, switch if left handed) Hold your chain nose pliers in your right hand and flat nose in your left and gently move the ends of the jump ring back and forth until they are flush **You will hear an audible click**
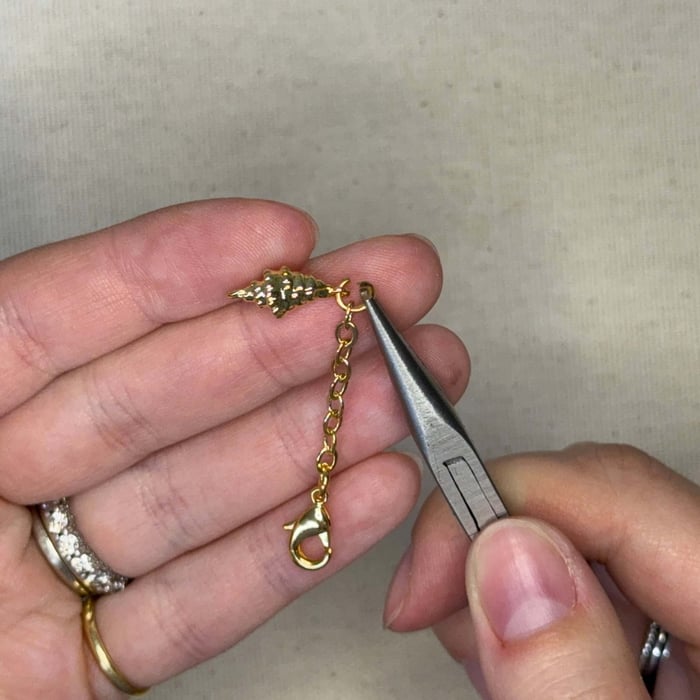
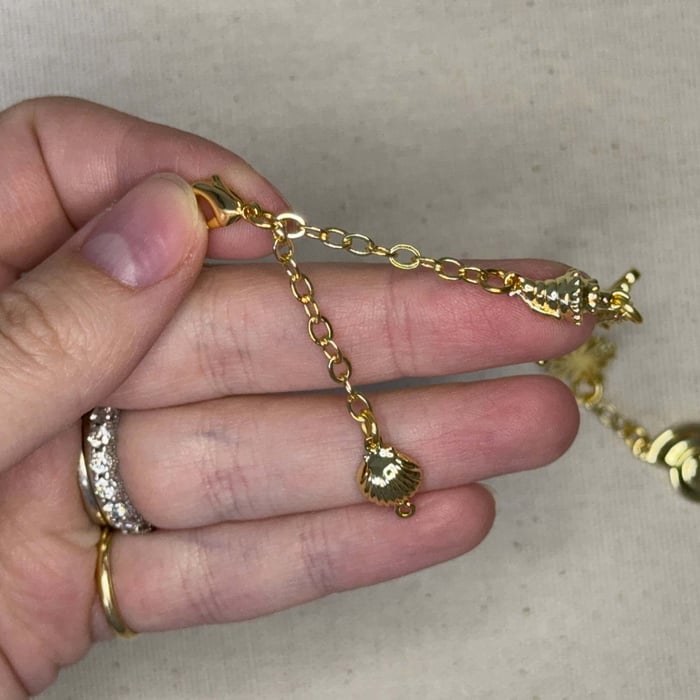
4. Open another jump ring and attach your conch shell link to the other end of the chain, close the jump ring

5. Open another jump ring and attach it to the shell link and then add another 9 link section of chain, close jump ring
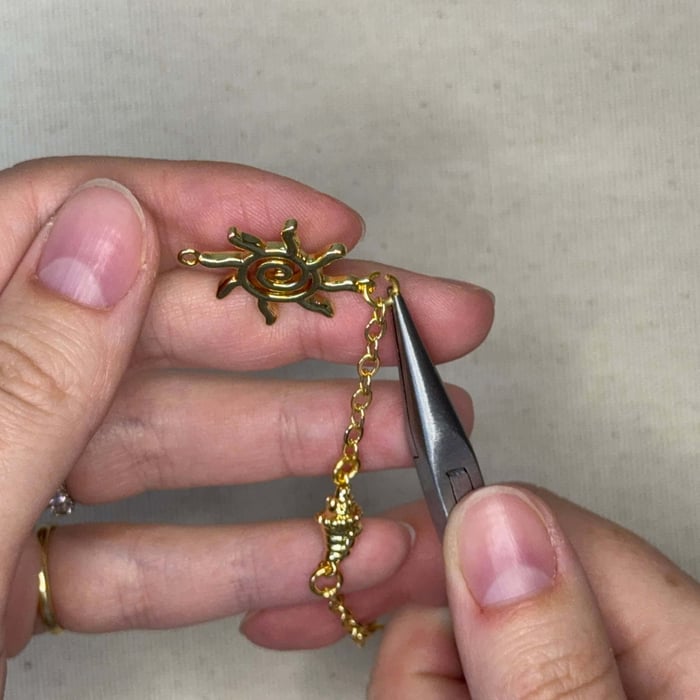
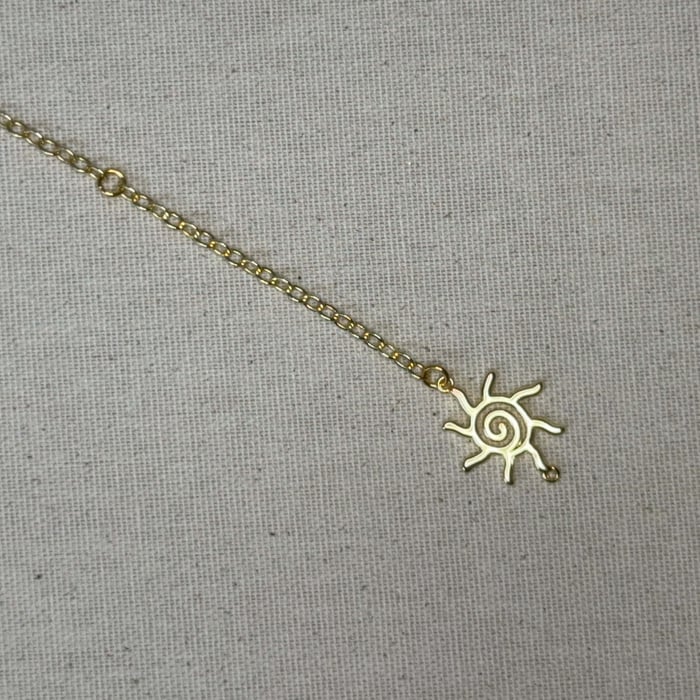
6. Open jump ring and attach to end off 9 link chain and then thread on a sun link, close jump ring
7. Open jump ring and attach onto other end of sun charm and then put on one 3 link section of chain, close jump ring
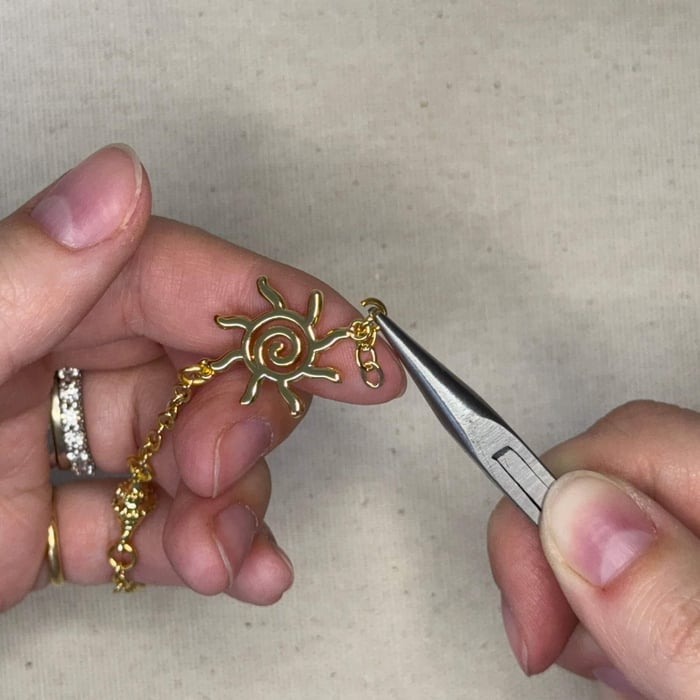
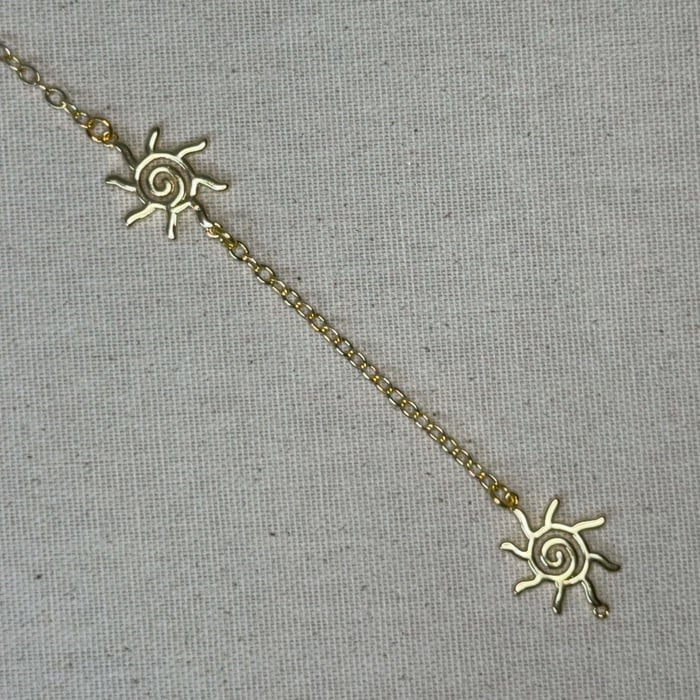
8. Alright let's speed things up! You'll follow along with the order in step 2 using 3 link sections of chain in between each link, connected by jump rings
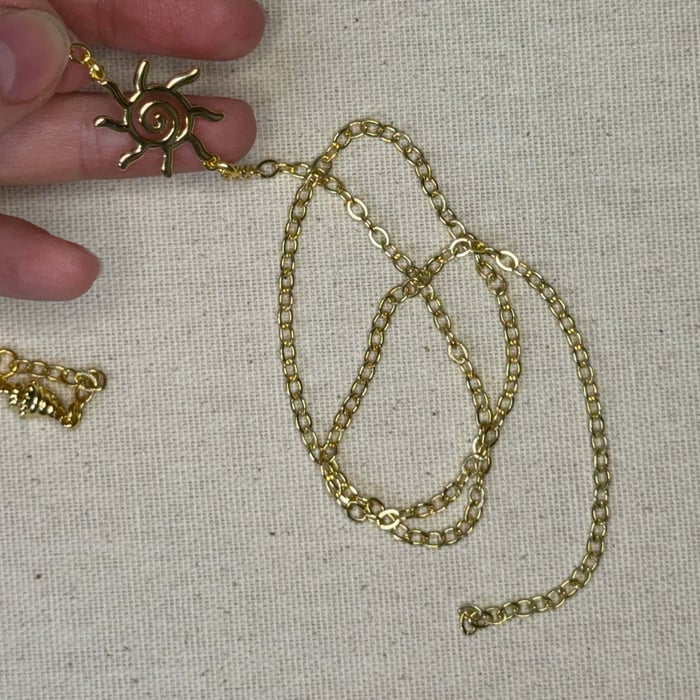
9. When you have run out of 3 link chains and have attached your 3rd sun link, the next pattern will be: 9 link chain, conch shell link, 9 link chain. Once you have attached your last 9 link chain section, connect that section to the remaining length of chain you have using a jump ring.
10. Count out 20 links and cut on the 21st link. Attach a sun link using a jump ring.
11. Repeat previous step.
12. Attach the remaining chain to the sun link with a jump ring and measure out 17 inches and then cut (or longer, it is up to you - This project's measurements will fit someone well between a size 0 to 10, if you need to add more chain, add more/less here as well as step 18 - if you would like to add more chain to this project, please adjust accordingly when purchasing the amount you need)
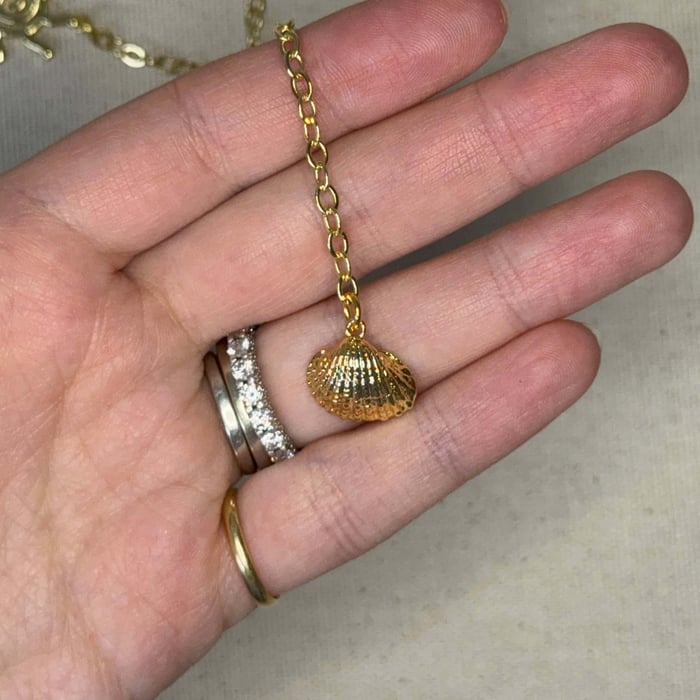
13. Using a jump ring, attach the clam shell charm to the end of the 17 inch chain

14. Now for the second part of the body chain that "hangs down." Cut 2 sections of chain measuring 10 links and 4 sections of chain measuring 5 links
15. Open the jump ring connected to the clasp and string on one section of 10 link chain
16. Using a jump ring, attach one of the shell links to the 10 link chain section
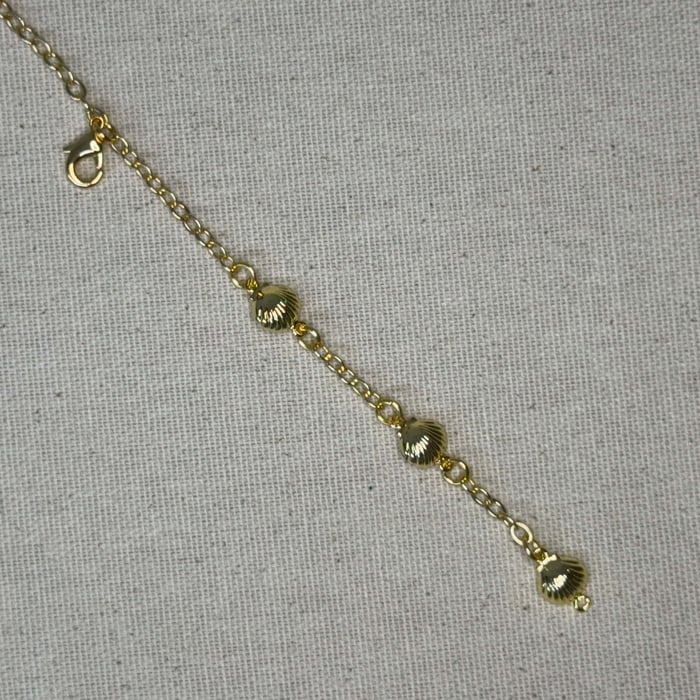
17. Attach two more shell links with the 5 link chain section between, using jump rings
18. Attach the remaining length of chain and cut to measure 10 inches (or you can leave it so it dangles lower, it is up to you - This project's measurements will fit someone well between a size 0 to 10, if you need to add more chain, add more/less here as well as step 12)

19. On the opposite end of the chain (try to keep the chain taught so you can place the link correctly facing up), attach a shell link
20. Using jump rings and your pre cut 5 link chain sections, attach two more shell links.
21. Attach your last 10 link section of chain to the jump ring you added in step 9 (you'll need to open that jump ring - make sure the section you're adding lays perpendicular)
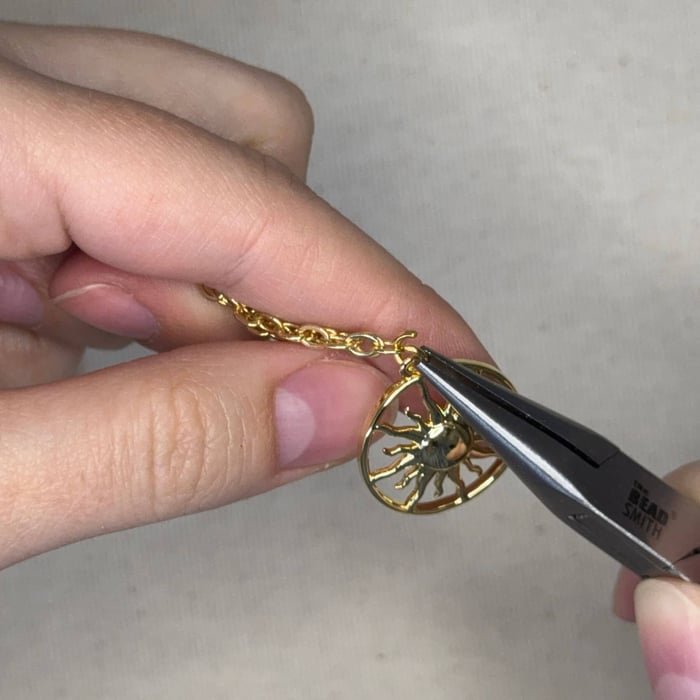
22. Now to add the charms! Grab the section of chain you added in step 18 and find the middle link and attach your sun pendant with a jump ring
**TIPS FOR ADDING CHARMS**
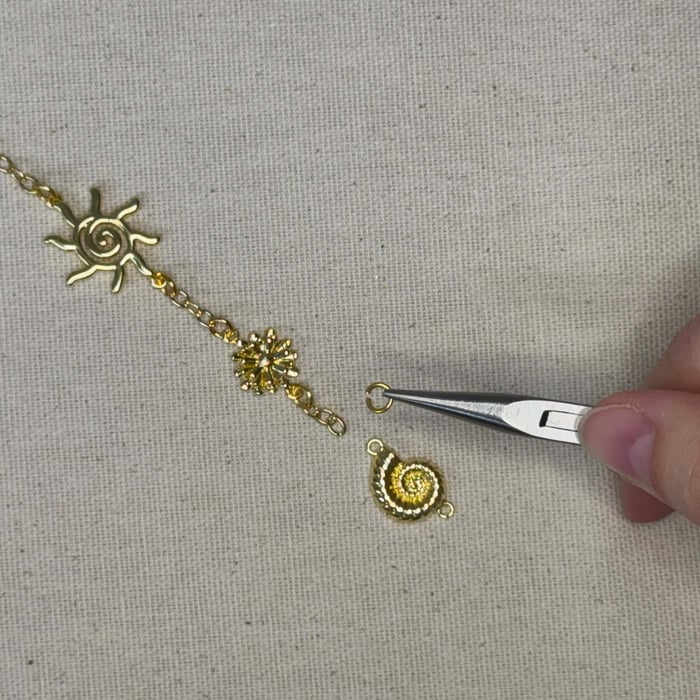
- I like to replace all the jump rings that come with each charm with a new jump ring so they are all uniform in looks and strength
- Lay your chain flat and taught so you can find the "top" and "bottom of the link of chain you will be attaching the charm to. If you attach it to the top end of the link, your charm will lay wonky and will twist your chain, if you attach it to the bottom link, the weight of the charm will keep the chain laying smooth along your body
23. Not counting the link the sun pendant is attached to, count over 10 links to the right and attach your nautilus charm using a new jump ring to the bottom of that link. Repeat with the starfish shell charm but to the left.
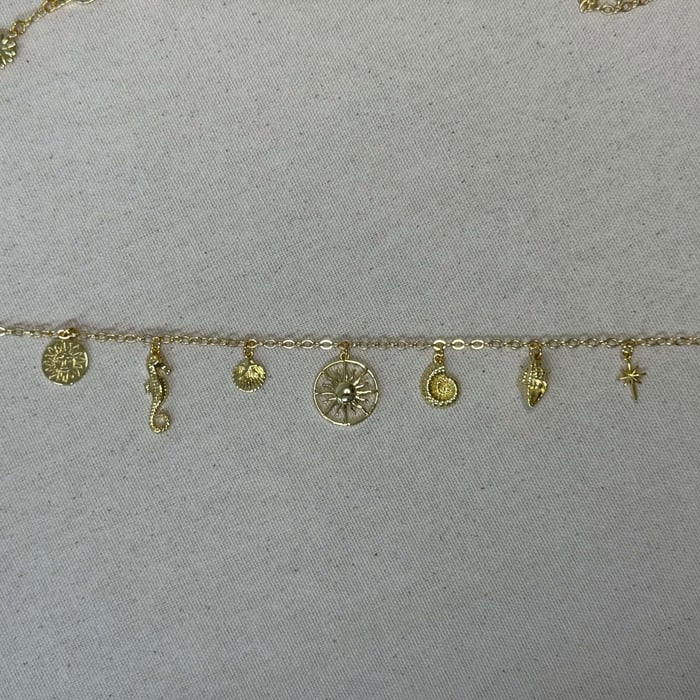
24. Do the same with the charms pictured above, counting over 10 links (skipping the link the charm is on)
25. Your DIY Body Chain Tutorial – Adjustable Waist or Hip Chain is done!
Related Articles

"Crochet" Granny Square Delica Bracelet - Sunflower
The "Crochet" Granny Square Delica Bracelet – Sunflower blends vintage crochet style...
Beachy Multi 5 Wrap Bracelet Tutorial
Beachy Multi 5 Wrap Bracelet Tutorial Create your own beautiful Beachy Multi 5 Wrap Bracelet, perfect for...

Leather Wrap Hat Band - Western Delica Pattern
Leather Wrap Hat Band - Western Delica Pattern This tutorial teaches you how to make a leather wrap hat...