

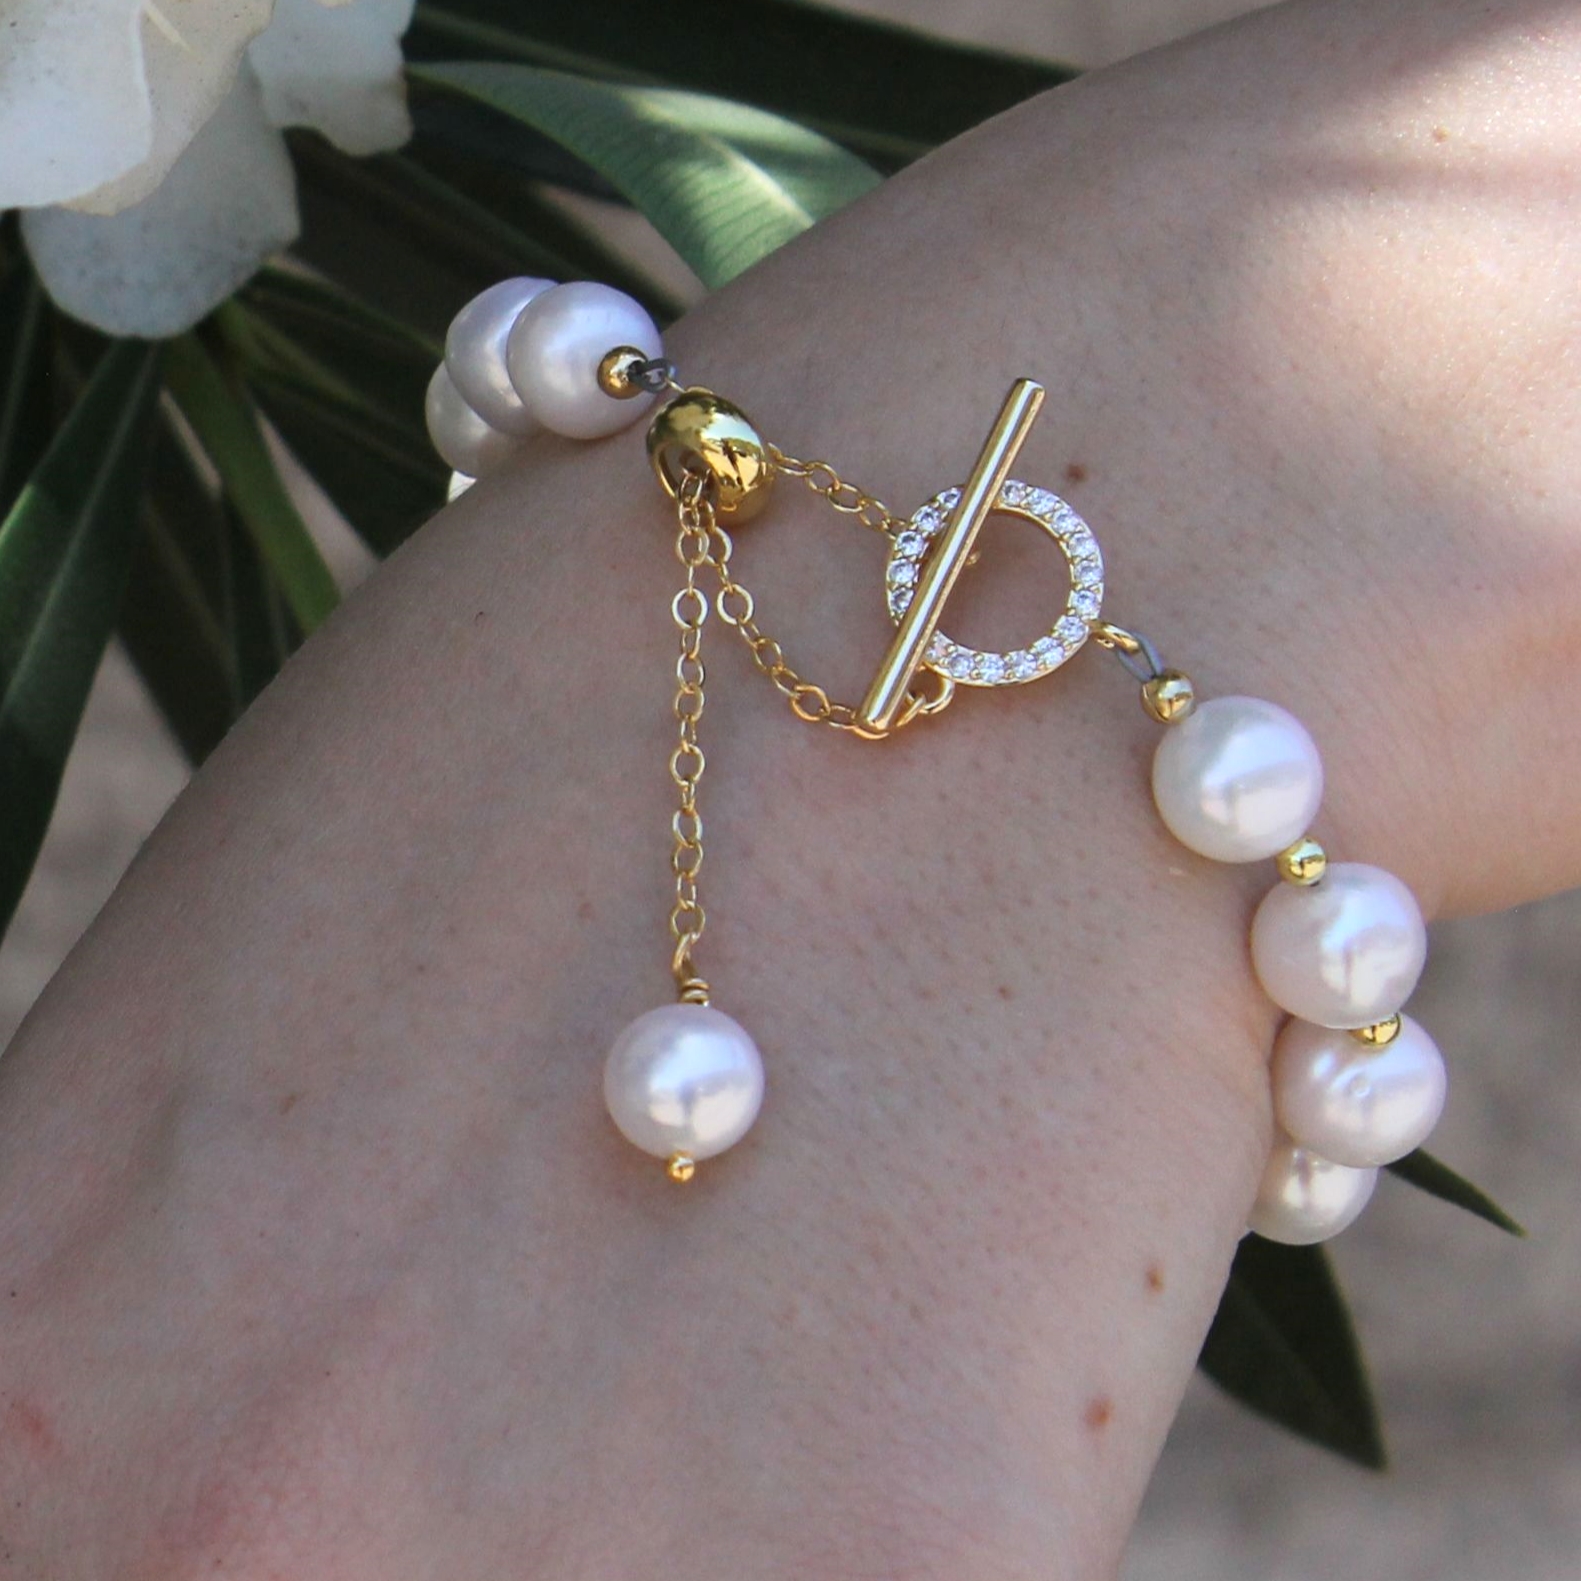
"Little Bit of Bling" - Pearl Toggle and Slide Bracelet
"Little Bit of Bling" - Pearl Toggle and Slide Bracelet
Materials Needed:
- Freshwater Pearls A Grade 9mm Potato (15)
- 14kt Gold Plated 3mm Round Anti Tarnish Coating - 25 Beads (13)
- Gold Filled 2x2 Crimps (2)
- 18K Gold Plated 3mm Crimp Covers (2)
- 12mm Gold Micro Pave Ring Link Toggle (1)
- Gold Plated 3mm 22 Gauge OPEN Jump Rings (2)
- 18K Gold Plated 35mm Long 22 Gauge Ball End Head Pins (1)
- Silicone Rondel Bead - 8x4mm Gold (1)
- Soft Flex - Satin Silver - Medium (10")
- Gold 2x1mm Petite Chain (3" cut into 1.5" sections)
Finished Length 8” (adjustable)
Tools Required
Instructions on Construction:
1. Cut a 10" section of beading wire (or whatever length you prefer) using your soft flex cutter, thread on crimp tube, attach to end of toggle hoop & then back through crimp tube. I used the two-part folded crimp method with this design, cut excess soft flex, then covered with the 3mm crimp cover. Gently close crimp cover with your needle nose pliers.
***Please note whichever way you choose to crimp, keep your wires parallel when crimping, this makes for a more secure attachment & it’s also wise to give a test pull on your wire to make sure you have secured the crimp :)
2. Pick the pearl beads you would like to use. *This way you can pick your favorites, as pearls often have minor imperfections from bead to bead.
3. The bead sequence on this bracelet is as follows: Pearl - gold 3mm bead - Pearl - gold 3mm bead - Pearl - gold 3mm bead - Pearl. Repeat pattern until you get to about 6 inches or your preferred length.
* You can continue with the pattern if you would like to make it longer
4. Add your crimp tube & thread the beading wire through the end of one of the 1.5" sections chain.
5. At this stage lay the bracelet on your worktop flat & make sure you leave enough slack in the wire so that your beads have enough room to sit nicely. It is important to leave this slack because if you crimp your wire too tightly the bracelet will be rigid with no flow & there is a strong chance that the beading wire may break!
5. Close the crimp using the two-part folded method, cut excess soft flex, and add crimp cover.
6. Thread the attached section of chain through the silicone slide bead.
* I find it easiest to do so with threading the end of the chain onto a piece of wire to make a makeshift needle
7. Wire wrap a pearl charm directly onto the end of the chain using a head pin.
8. Open jump ring and attach to bar end of toggle and add the other section of chain before you close the jump ring.
9. Thread the section attached to the bar end of the toggle through the silicone bead.
10. Straighten up the chain so the chain holding the charm is towards the left side and the chain holding the toggle is towards the right side inside the silicone bead.
11. Take the unfinished chain section and attach a jump ring.
12. Take the jump ring and chain and attach it to the empty loop at the bottom of the toggle eye. Close the jump ring.
13. Put the toggle bar through the eye and adjust to your preferred size bracelet.
14. Done!
Jewelry designed by Kiara Thompson
Recent Posts
-

Back to Basics: Stack of Stretch Bracelets Including How to Make a Daisy Chain Stretch Bracelet
Back to Basics: Stack of Stretch Bracelets Including a Daisy Chain Stretch BraceletFollow our "Back …24th Jul 2024 -

Seed Bead Starfish Bracelet
Seed Bead Starfish BraceletThis project is perfect for both beginners and seasoned crafters looking …19th Jun 2024 -

DIY Personalized Layered Charm Necklace
DIY Personalized Layered Charm NecklaceEmbrace individuality with our Personalized Charm Necklace tu …29th May 2024