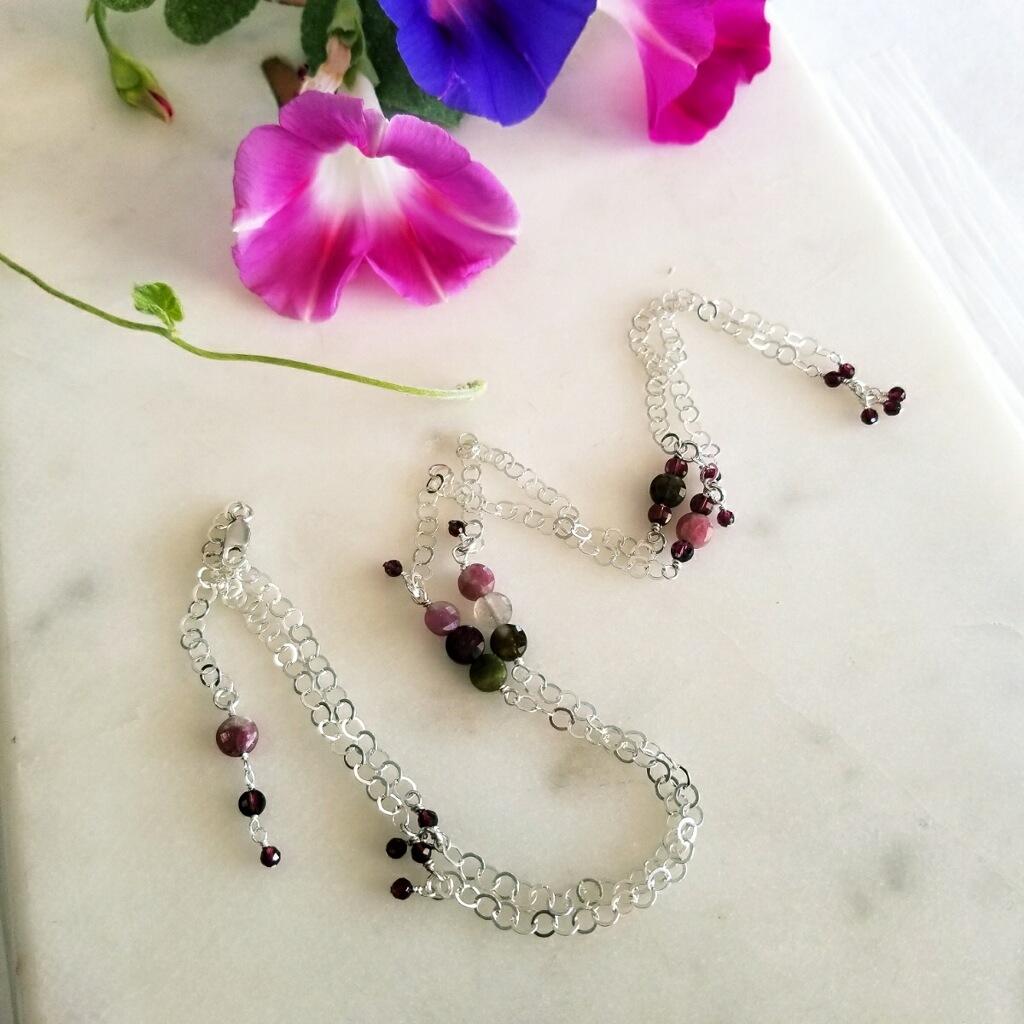
Sweet Tourmaline, Garnet and Sterling Silver Chain Necklace
Sweet Tourmaline, Garnet and Sterling Silver Chain Necklace

Materials Needed:
- 5.8mm Tourmaline Faceted Coins (9)
- 4mm AA Grade Garnet Faceted Coins (5)
- 3mm Garnet Faceted Round (13)
- Sterling Silver Chain 3.6mm Flat Cable Chain (Approx. 27’) or Chain of your choice
- 4mm Rd 19g Sterling Silver Jump Rings (8)
- 4.5x12mm Lobster Claw Clasp (1)
- 3” 24g Sterling Silver Head Pins (5) or Optional 24g SS Wire (approx. 14”)
- 1.5” 26g Sterling Silver Head Pins (14) or Optional 26g SS Wire (approx. 22”)
Finished Length 28 -30”
Tools Required
Needle Nose Pliers (also known as chain nose)
Key Code:
A = Tourmaline 5.8mm Coin B = Garnet 4mm Coin C = Garnet 3mm Round
Instructions on Construction:
1. Start by cutting chain into eight equal sections. With this chain there were twenty-seven links per section, which measured approx. 3.25” each.
2. Using flat nose and needle nose pliers undo jump ring that comes with clasp and attach to the end of first segment of chain. Close carefully making sure that both sides of jump ring come together and form a closed ring.
3. Take a 26g head pin and remove the flat end cap with cutter, thread on C (1) and center on your wire, this will show you how much wire you have on either side to form the loops. You can now remove the stone and using your needle nose and round nose pliers create a small loop. You will now thread chain (with clasp on other end) into the wire loop just created and then wrap wire once
*Do NOT trim wire yet. Thread on C (1) and form second loop, thread the second section of chain into the loop just created and wrap wire once. Working alternately on either end wrap a half turn at a time until space is filled. This should give you an equal number of wraps on either side of this connecting link. Trim wires closely and tamp in ends if needed.
* You may find that you can create more delicate loops and wraps by putting aside your needle nose pliers and just using your round nose pliers. You will work close to the end of your pliers and that enables you to make the smallest loops. It is also worth mentioning that you can buy different size pliers so if you are making lots of delicate wraps it may be worth investing in a new pair.
4. Take a 24g head pin and remove the flat end cap, thread on A (3) and center on your wire, this will show you how much wire you have on either side to form the loops. You can now remove the stones and using your needle nose and round nose pliers create a small loop. You will now thread the end of second section of chain into the wire loop just created and then wrap wire once
*Do NOT trim wire yet. Thread on A (3) and form second loop, thread the third section of chain into the loop just created and wrap wire once. Now complete the wire wraps as you did in 3.
5. Take a 24g head pin and remove end cap, thread on B (1), A (1), B (1), and center on wire to check what amount of wire you have on either side. You can now remove the stones and using your needle nose and round nose pliers create a small loop. You will now thread the end of third section of chain into the wire loop just created and then wrap wire once
*Do NOT trim wire yet. Thread on B (1), A (1), B (1) and form the second loop, thread the fourth section of chain into the loop just created and wrap wire once. Now complete the wire wraps.
6. Take a 26g head pin, remove end cap and thread on C (1), and center on wire to check what amount of wire you have on either side. You can now remove the stone and using your needle nose and round nose pliers create a small loop. You will now thread the end of fourth section of chain into the wire loop just created and then wrap wire once Thread on C (1), and form the second loop, and wrap wire once. Now complete the wire wraps on both sides of stone.
* This is the mid-point of the necklace. The second side is a mirror image of the first side. The two “C” links will attach with a jump ring (with dangle) through the end wire wrapped loop.
7. The necklace has a three stone dangle that attaches with a jump ring to the final section of chain. Take a 24g head pin and remove the cap and make first loop, wrap wire once, add A (1) and make second loop, wrap wire once. Complete both the wire wraps in this segment, trim wires and tamp in ends. Take a 26g head pin, remove the flat end cap, and make a loop, connect this loop to the segment just completed and wrap wire once. Add B (1), make second loop and wrap wire once, complete wraps and trim wires. Take a 26g head pin but do NOT remove the flat end cap, thread on C (1), make loop and connect loop to the segment just completed, complete wrapping and trim wire.
8. Using flat nose and needle nose pliers open a jump ring and connect the three-part dangle to the last section of chain. Close the jump ring being careful that the sides come together and there are no gaps.
* These are heavy gauge jump rings so the dangles should be secure if jump rings are completely closed.
9. The next step is to complete the nine petite dangles that will attach to this necklace via jump rings. Take 26g head pin thread on C (1), form small loop, complete wire wraps, trim and tamp end as needed.
* Repeat so that you have nine dangles.
10. Take a jump ring and using flat nose and needle nose pliers open jump ring and thread on three dangles, attach this to the wire-wrapped loops at the two mid-point sections of the necklace (this will join the necklace together to make one unit. Take another jump ring and thread on one dangle and attach this jump ring to the bottom wire wrapped loop, of the first section you come to.
* Repeat this on the bottom wire wrapped loop for each of the beaded sections.
11. You are now ready to try on your new necklace & admire your handiwork!
12. Enjoy!
Jewelry designed by Steph Stirniman at magpiecollectives.com
Recent Posts
-
"Gem Keeper" Chain Cage Pendant Necklace
"Gem Keeper" Chain Cage Pendant NecklaceNo hole no problem! Keep anything from gems with no holes, b …29th Mar 2024 -
Layered Beaded Charm Necklaces
Layered Beaded Charm NecklacesLayered necklaces are a fashion staple that adds depth and dimension t …26th Feb 2024 -
"Be Mine" Necklace and Stretch Bracelet Set
"Be Mine" Necklace and Stretch Bracelet SetValentine's jewelry, crafted with love and precision, ser …17th Jan 2024


