Tutorials

Black Cat Stretch Bracelet
Black Cat Stretch Bracelet
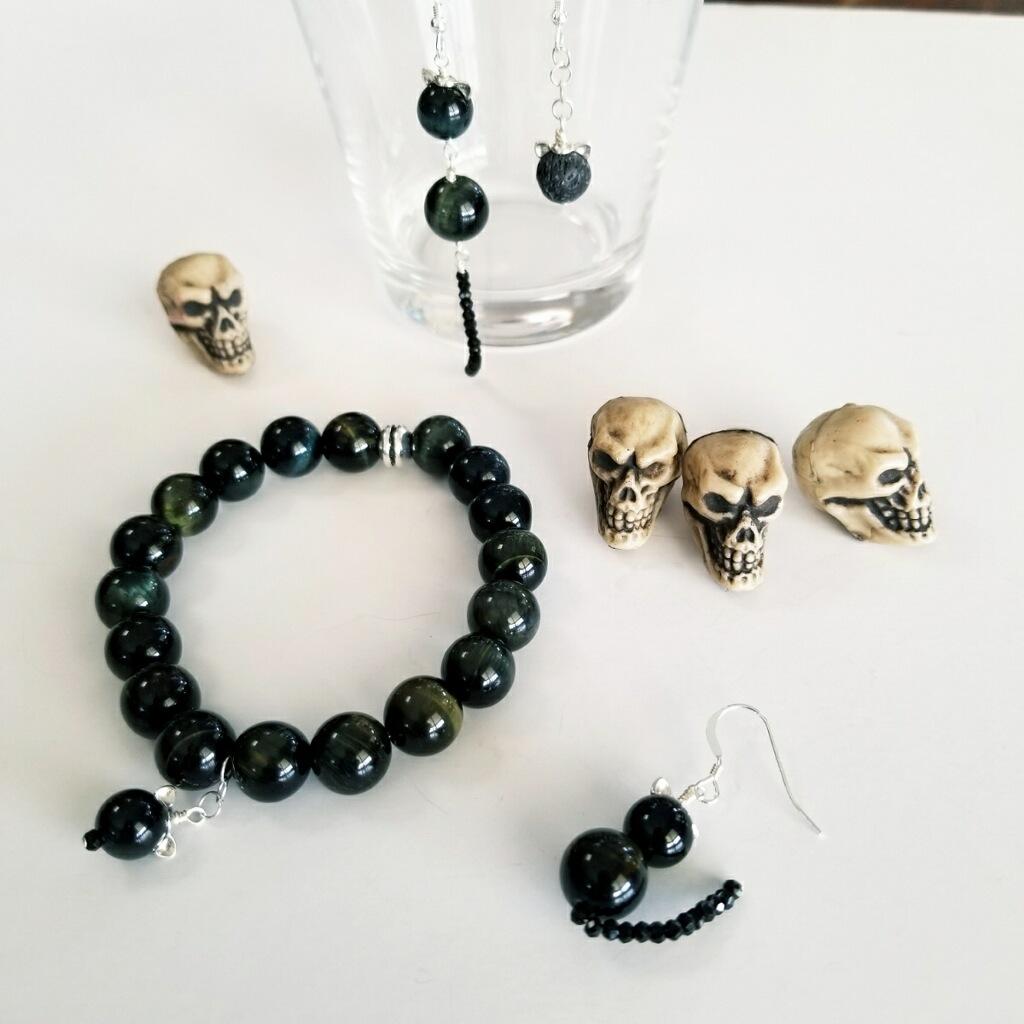
- 10mm Blue Tiger Eye (18)
- 8mm Blue Tiger Eye (1)
- 3mm Chinese Crystal – Black (1) or Option 2mm Black Spinel Faceted Round (1)
- 3” Long 24g Sterling Silver Headpins (1)
- Amoracast – Cat Ear Caps, Sterling Silver (1)
- Sterling Silver 2.3x3mm Cable Chain (3 links) or Option: 4mm Round 21g Silver Plated Jump Rings Open (3)
- TierraCast – Large Hole Bead, Silver Plated (1) For covering knot
- 1mm Stretch Magic, Crystal (12”)
- G-S Hypo Cement
Size Approx. 6 ½ - Custom size for required fit.
Tools Required:
Key Code for Beads:
A = 10mm Blue Tiger Eye B = 8mm Natural Blue Tiger Eye C = 2mm Spinel or Chinese Crystal D = Amoracast – Cat Ear Cap E = TierraCast - Large Hole Bead F = Cat Head Dangle
Instructions on Construction:
1. Start by making the dangle so that it will be ready to string with the rest of beads. Take headpin and string C (1), B (1), D (1). Use needle nose and round nose pliers to make a small wire wrapped loop, if using chain thread loop into last link before completing wrap, then trim and tamp pointy end if necessary. * If using jump rings finish wire wrap, and then connect to jump ring using flat nose and needle nose pliers. Then make a chain of three jump rings with cat head attached to the bottom link.
2. Cut 1 x 12” piece of Stretch Magic, pre-stretch cord then attach bead stop to one end of stretch cord about 2 1/2” from end.
3. String as follows: E (1) (used to hide knot), A (9), F (1), A (9)
4. Tie two to three square knots and tighten firmly between each knot. * Check the size of the hole in the bead that you are using to hide the knot, it is ideal to get a snug fit so that the glue will hold the knot in place.
5. Thread one of the tails back through the metal bead add a dab of hypo cement onto the knot (from all sides). Pull tail to center knot in the middle of the bead, you should have one tail sticking out either side of the bead.
6. Leave the bracelet for at least a couple of hours for the hypo cement to set up, then trim tails. You can hold onto one tail, pull the opposite tail & trim close as you can. The other side you just trim as close as you can as you have nothing to hold onto.
7. Try on your new bracelet & admire your handiwork. Enjoy!
Jewelry designed by Steph Stirniman at magpiecollectives.com


