Tutorials
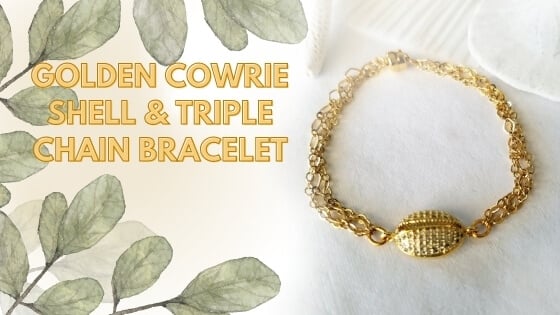
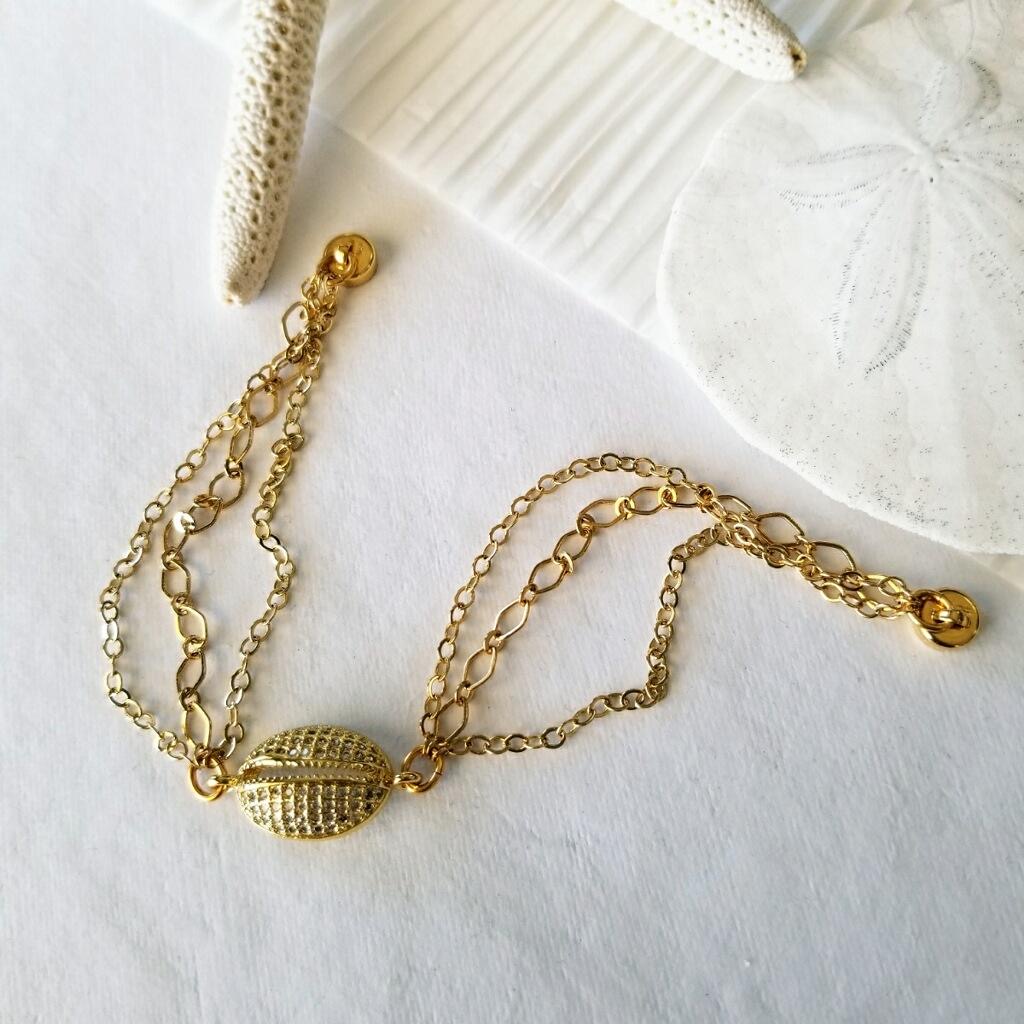
Golden Cowrie Shell & Triple Chain Bracelet
Golden Cowrie Shell & Triple Chain Bracelet
Materials Needed:
- Gold Micro Pave Cowrie/Puka Shell Connector (1)
- Satin Hamilton 2 x 1mm Petite Cable Chain (12”- this will give enough for larger sizes if needed)
- Gold Plated 6 x 5mm Oval Cable (6”)
- 14k Gold Plated Small Magnetic Clasp(1)
- Small Oval Jump Ring Gold Plated (4)
Finished Approx. 6 ½” * Size can be easily altered for a custom fit.
Tools Required:
Knot Cutter (for cutting Chain)
Optional but Highly Recommended EZ Bracelet Sizer – makes sizing your bracelets worry free
Instructions on Construction:
1. Measure your wrist to determine the size you require and adapt accordingly, the instructions given here will produce a bracelet with inside measurement of 6 ½” * If you measure it flat it will look like 7”, which is the reason the EZ Bracelet Sizer is such a handy tool!
2. Cut four (2 ¾”) sections of the smaller link chain and two (2 ¾”) sections of the larger link chain.
3. Lay your chain out on beading mat in the following pattern: Make three rows with the small link chain on top and bottom and larger link chain in the middle. * This will be repeated for second side of bracelet.
4. Open jump ring using your flat nose and needle nose pliers being careful not to unround jump rings (this means that you open to the side). Thread into one of the loops on the cowrie connector and then thread into last link of chain in the pattern they are laid out (small, large, small chain). Close the jump ring carefully making sure the two sides match up and you have no gaps. * Repeat for second side of bracelet.
5. Add jump ring to other end of chains being careful that you keep them in the same pattern and that they do not twist.
6. Now it is time to attach the magnets and I will warn you this can be the most frustrating part of making this bracelet! These are great magnets that are very secure, but they will want to cling to your tools as you are working! * I find it easier to separate the magnets into two pieces before I attach them, the best way to open them is to slide them apart sideways. Once open, keep them well apart or they will spring back together. Thread the jump ring through the loop on magnet then close in the same manner as before. * Repeat for second side of bracelet.
7. You are now ready to try on bracelet & admire your handiwork
8. Enjoy!
Jewelry Designed by Steph Stirniman at magpiecollectives.com

