
Tutorials

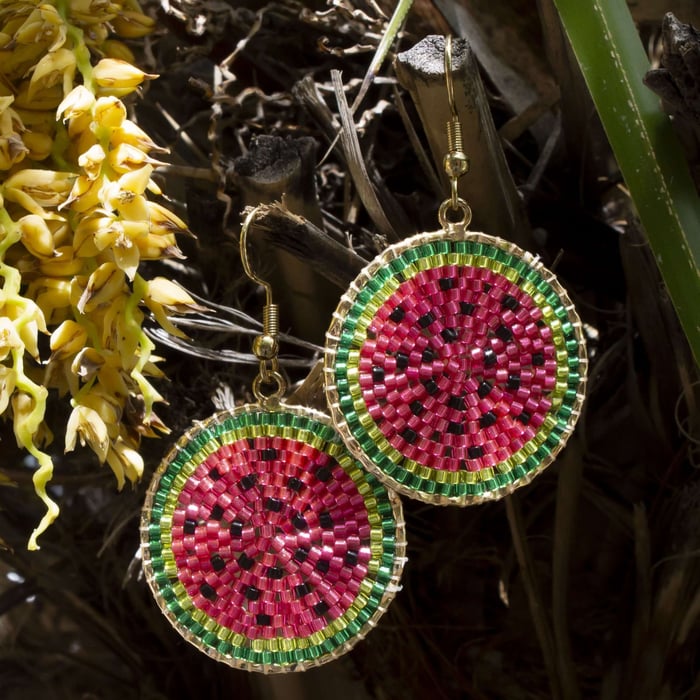
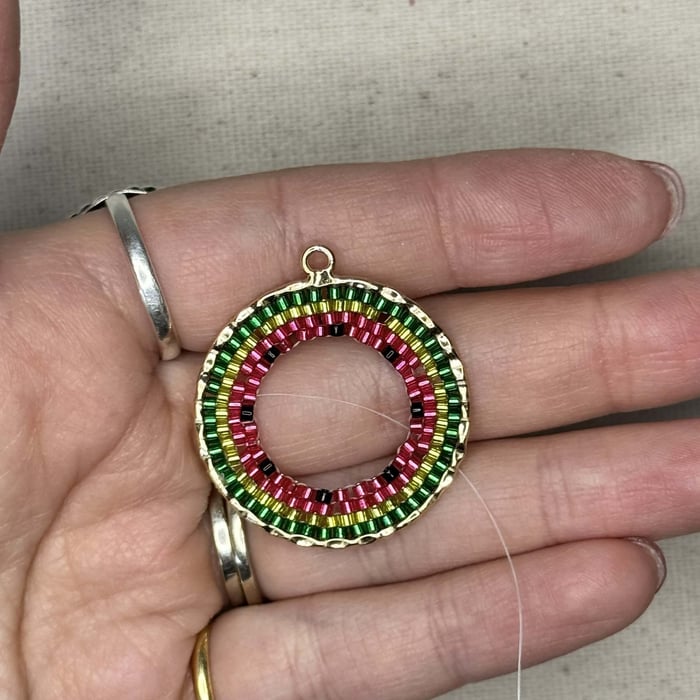
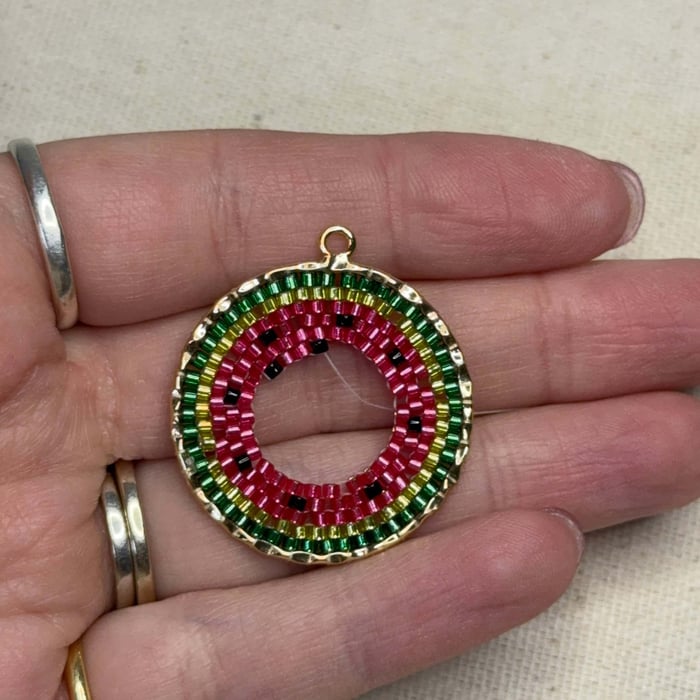
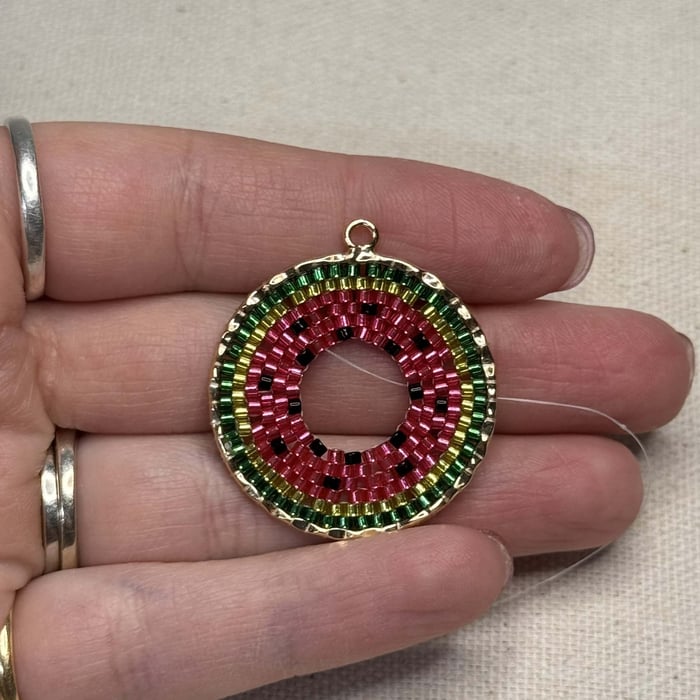
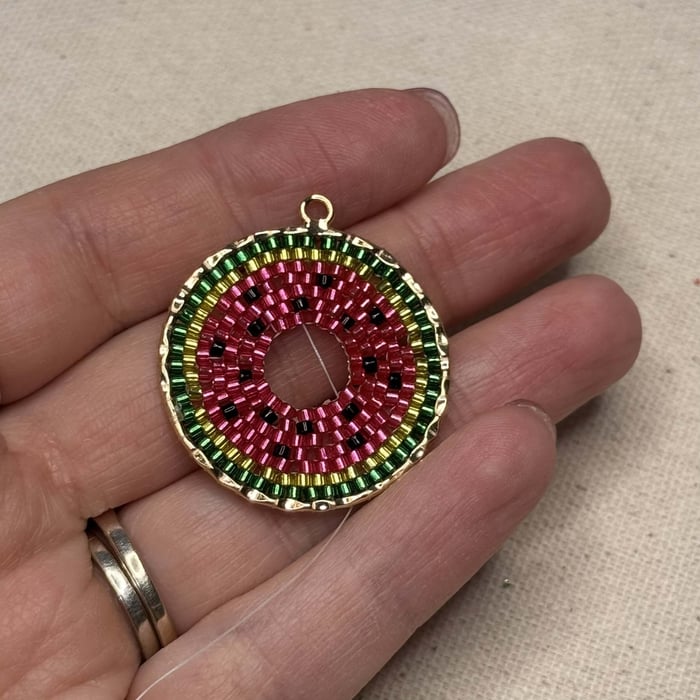
Watermelon Slice - Internal Circular Brick Stitch Hoop Earrings
Watermelon Slice - Internal Circular Brick Stitch Hoop Earrings
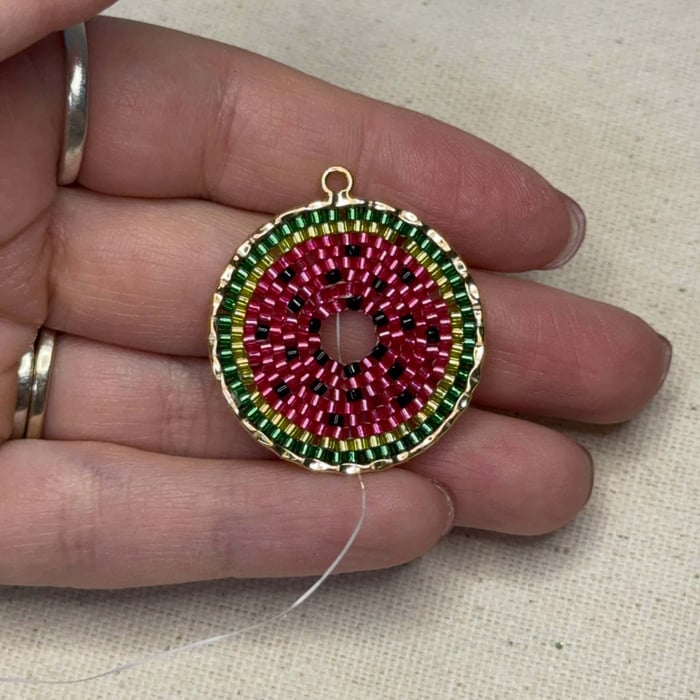
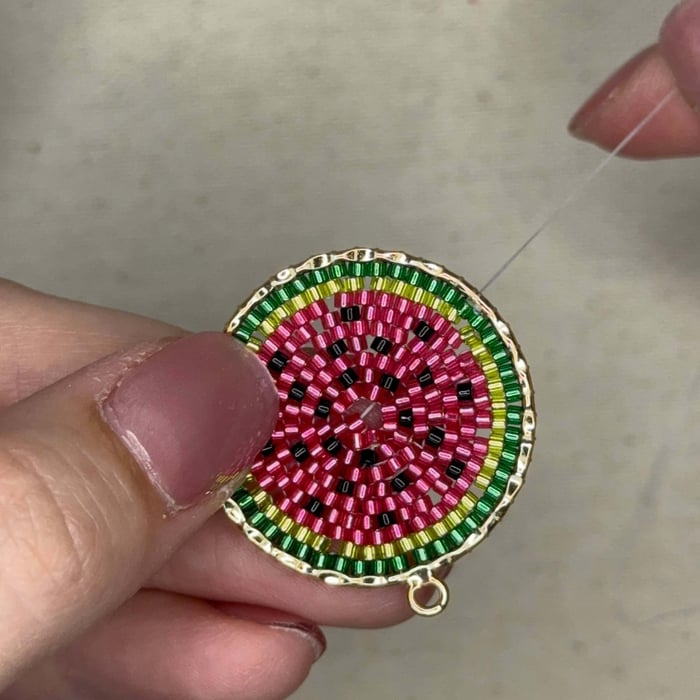
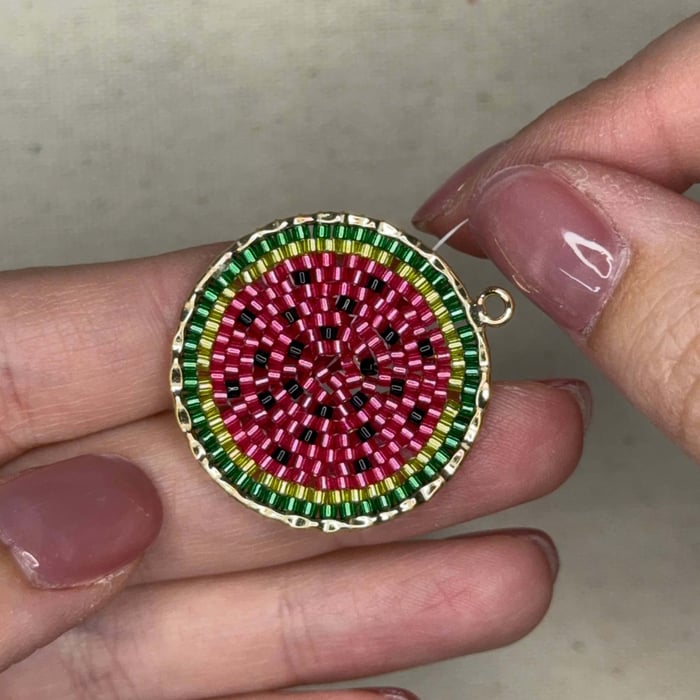
These little watermelon slices are one of those projects that's just plain fun to make. The tutorial walks you through stitching a pair of hoop earrings using internal circular brick stitch, working from the inside of the hoop in so you end up with a neat, flat slice of watermelon dangling from your ears.
You'll start with the green rind around the inner edge, with the addition of each following row explained clearly, with notes on tension, where to add or skip beads to keep things flat, and how to handle the tricky bits without your thread showing. If you've stitched external circular brick stitch before, you'll still get something out of it by working from the inside, it changes the feel of the stitch and opens up a lot of design possibilities for your future pieces.
By the end you'll have a wearable pair of watermelon earrings and a stitch you can use for all sorts of other things - fruit, flowers, mandalas, spirals, you name it!
Materials Needed:
- Delicas Size 11 Miyuki Seed Beads -- 147 Chartreuse / Silver Lined (you can also use 1206 Lime / Silver Lined)
- Delicas Size 11 Miyuki Seed Beads -- 010 Black
- Delicas Size 11 Miyuki Seed Beads -- 2154 Duracoat Hibiscus / Silver Lined
- Delicas Size 11 Miyuki Seed Beads -- 605 Dyed Emerald / Silver Lined
- Tulip Beading Needles Size #12 (1) (John James #12 work as well)
- Fireline® - Crystal - 50 Yards - 6lb (5 feet per earring - 10 feet total)
- 18kt Gold Plated 30mm Textured Hoop (2)
- 18K Gold Plated Stainless Steel Earring Wires with Bead (1 pair)
Tools Needed
Instructions on Construction:
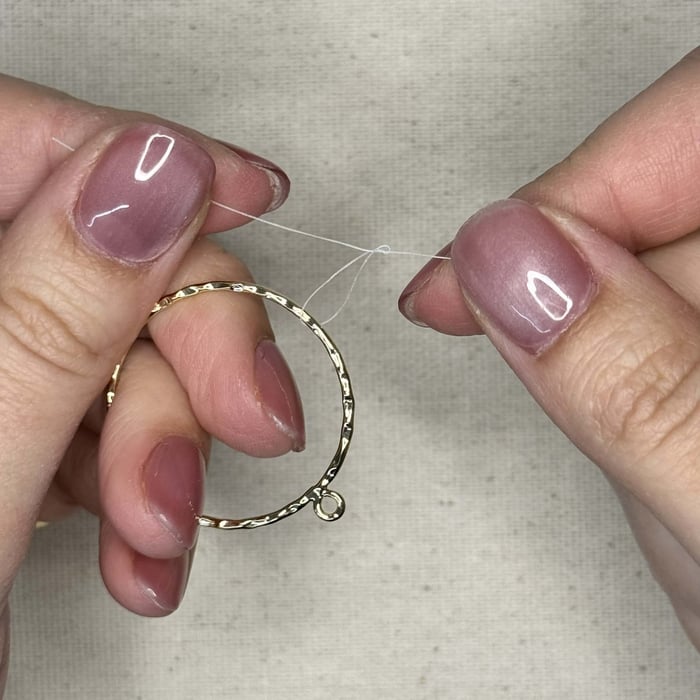
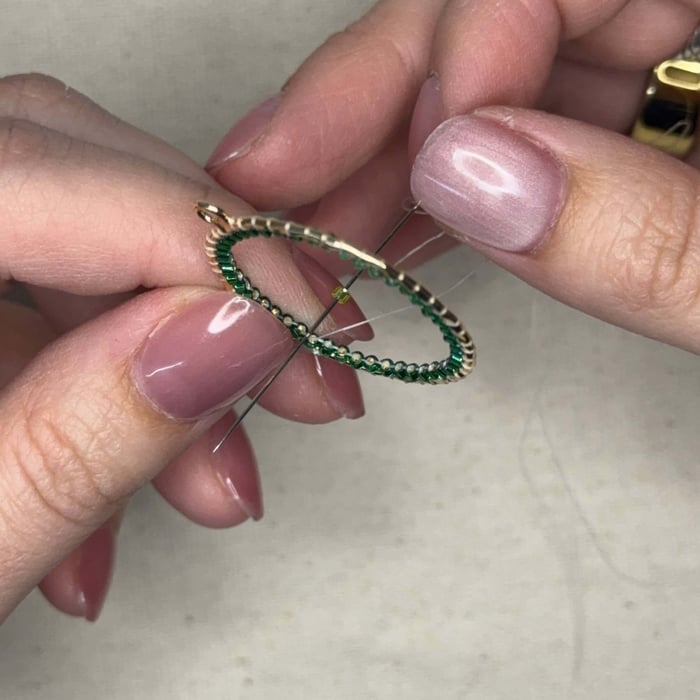
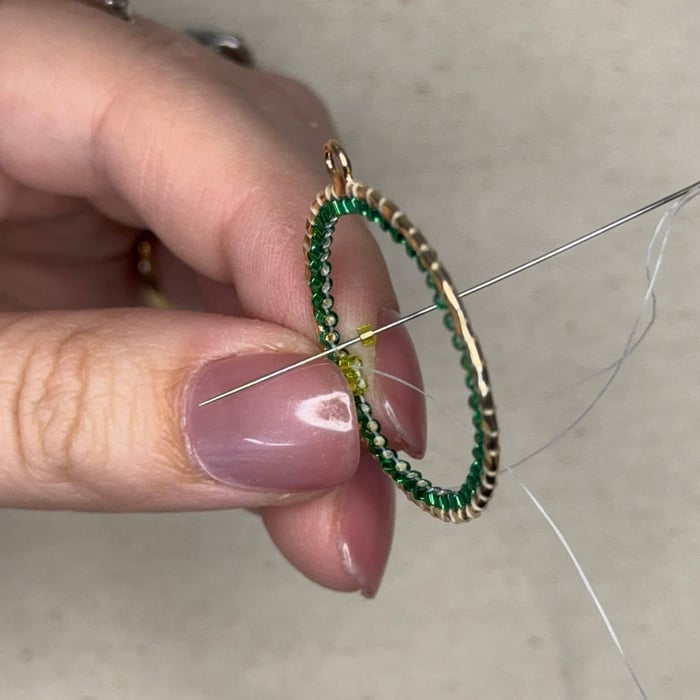
1. Cut 5 feet of fireline and tie a tight surgeon's knot around your hoop at about 9 o'clock (12 being where the loop is at the top of the hoop). Leave about a 2-3 inch tail
2. String on a 605 delica bead and bring it down to the edge of the hoop - have the fireline in front of the hoop
3. Take your needle and place it behind the hoop and then up through the delica bead
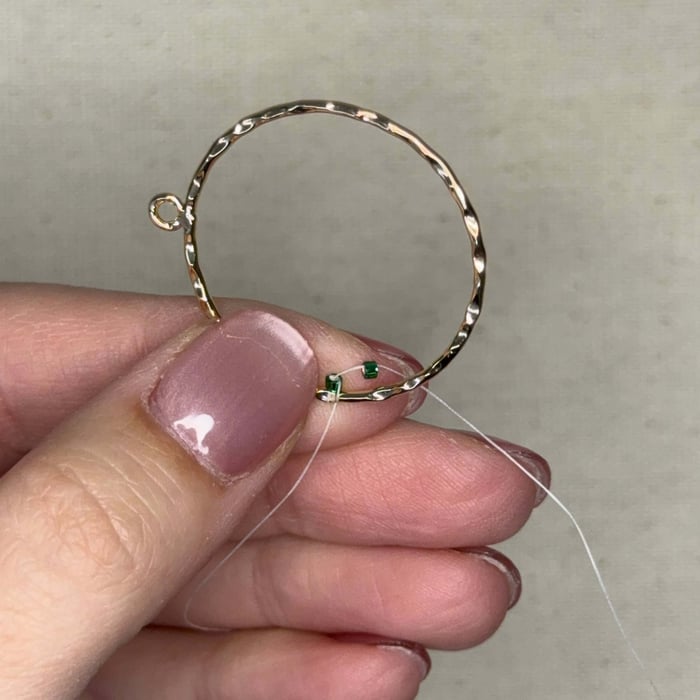
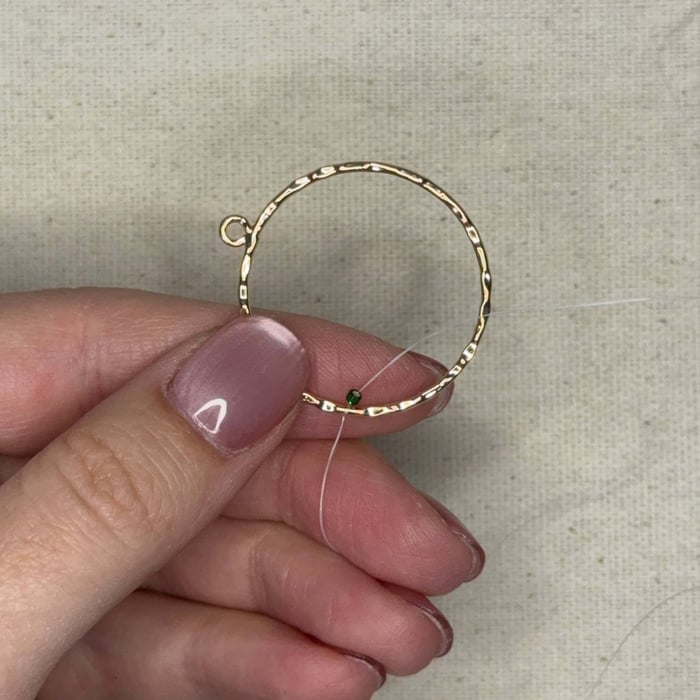
4. String on another 605 delica but now have the fireline behind the hoop
5. Take your needle and (in-front of the hoop) thread the needle up through the delica bead

6. Repeat, add a 605 delica, keep the fireline behind the hoop then thread your needle up through the bead, in-front of the hoop. You are essentially looping around the hoop with a bead in-between.
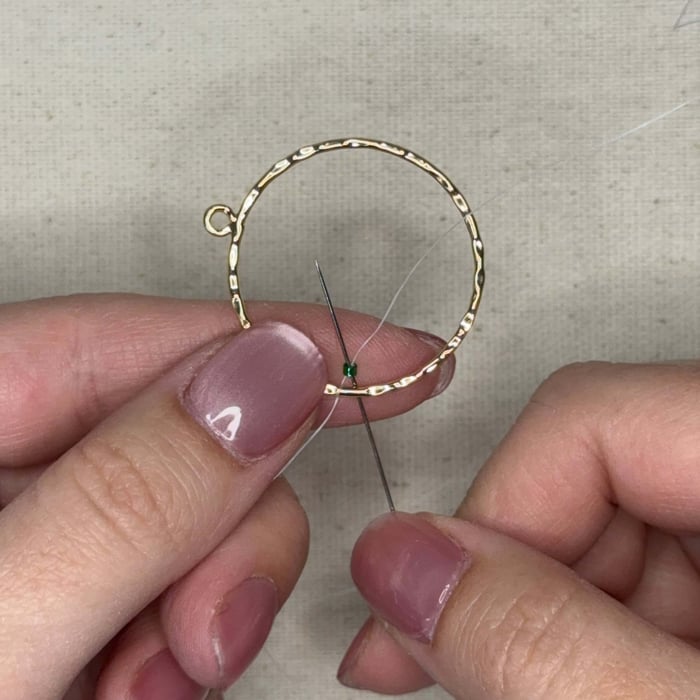
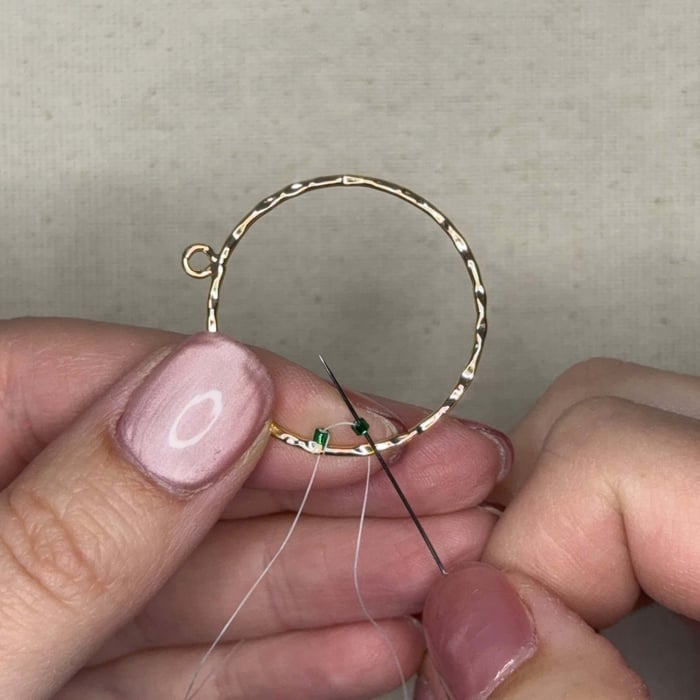
7. Keep going around the hoop until you get close to the original bead. Notice that there is a small space between the first and last bead? This is perfectly fine. In-fact, as we continue along this tutorial, you'll find that we actually want a gap instead of overcrowding the beads to fill the space. But more on that later!
Thread your needle down through the first bead and pull tight.

8. Take your fireline and original fireline tail (remember how you left 2-3 inches?) and tie a surgeon's knot.
9. Thread your needle up through the last bead added and then cut the excess tail so you only have one length of fireline
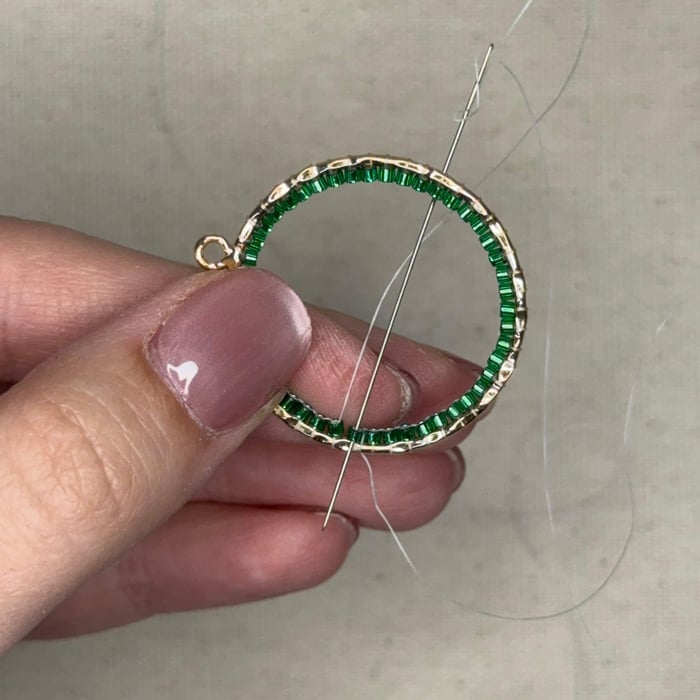
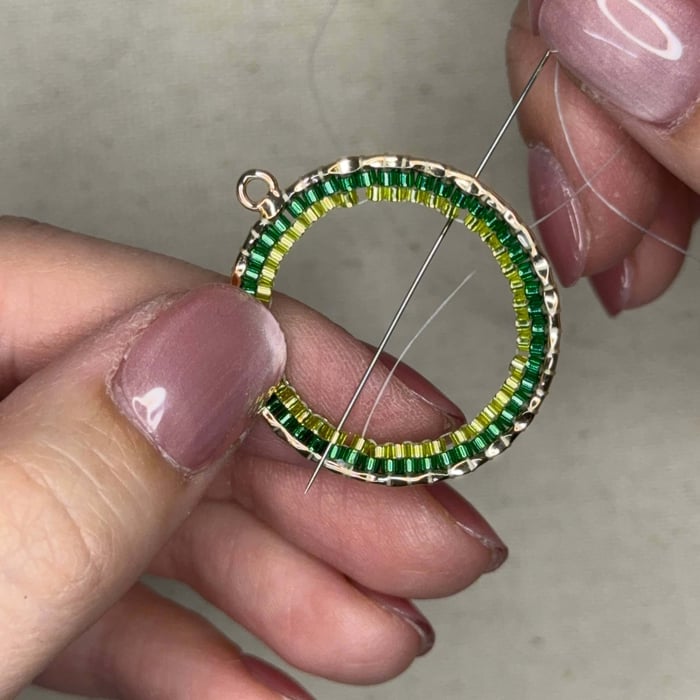
10. Now for our second row. We will be doing a variation of brick stitch!
Take a 147 Delica onto your needle. Carefully poke your needle through the thread connecting the bead your fireline is exiting and the bead to the left (counter clockwise).
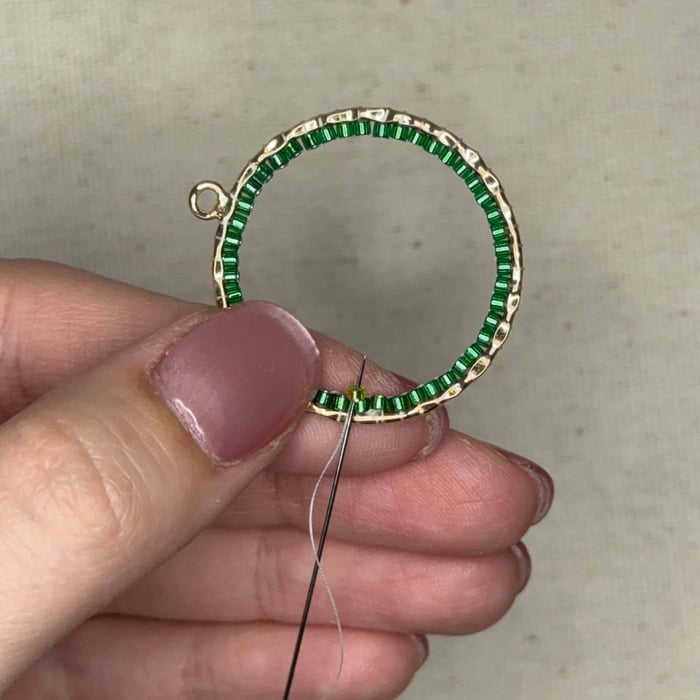
11. Pull the fireline through and position your 147 bead so it is sitting in line with the 605 beads. Take your needle and thread it up through the 147 bead
12. Repeat step 10, with a 147 bead, poke your needle through the following connecting thread between the row of 605 delicas and pull the thread through
13. Position your 147 bead in line and thread your needle back up through the added 147 bead
14. And add another
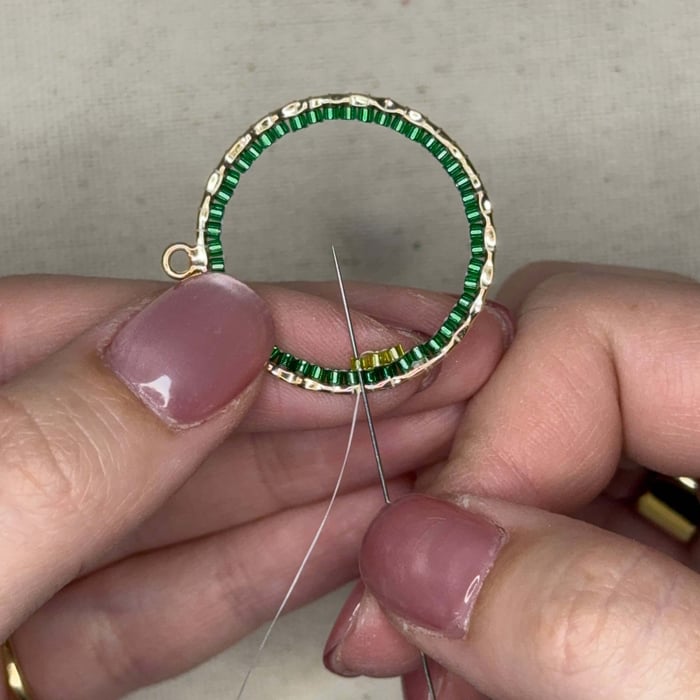
15. And back up through
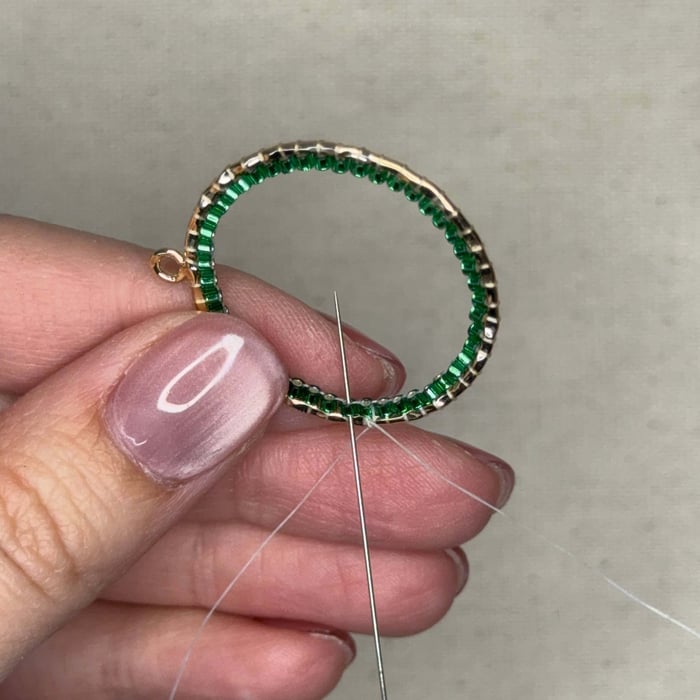
16. Keep going around weaving on 147 beads, until your most recent added 147 bead sits almost parallel to the 605 bead below. This tells you that you need to "skip" the next bead. Skipping beads allows you to keep your watermelon project flush and not overcrowded. As you add more and more rows, you will weave less and less beads. Skipping beads will create small holes, but your project will be much more professional looking than if it were to be overcrowded and highly textured with excess beads.
***One thing to note about skipping beads. You might skip +/- beads than shown in this tutorial. The amount skipped is all based on the beads used and how tight or loose you weave your beads. No worries though, as long as you keep it roughly close, your project will turn out great!
17. Skip the closest thread and string a 147 bead onto the next connecting thread

18. And then thread your needle back up, notice the slight gap?
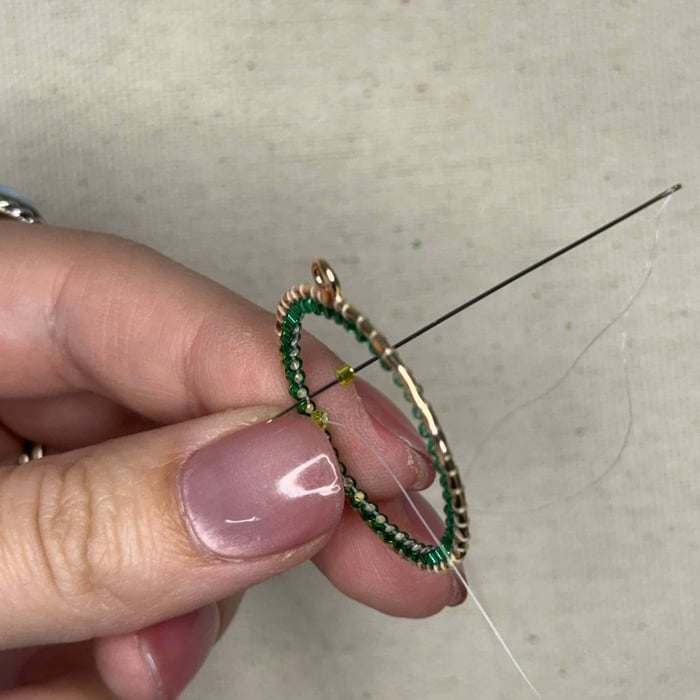
19. Keep weaving around the hoop until you make it back to the original 147 bead and then thread your needle down through the original bead
20. Thread your needle back up through the following bead to the left (clockwise), and pull tight
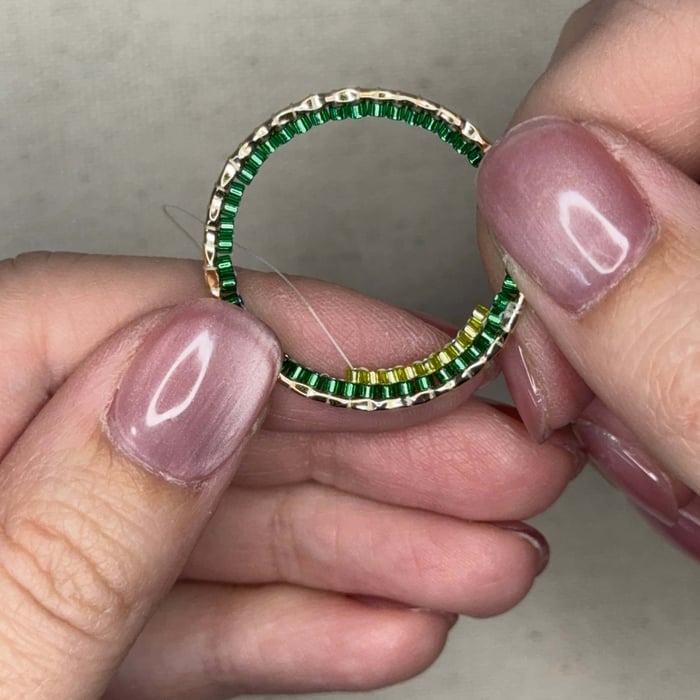
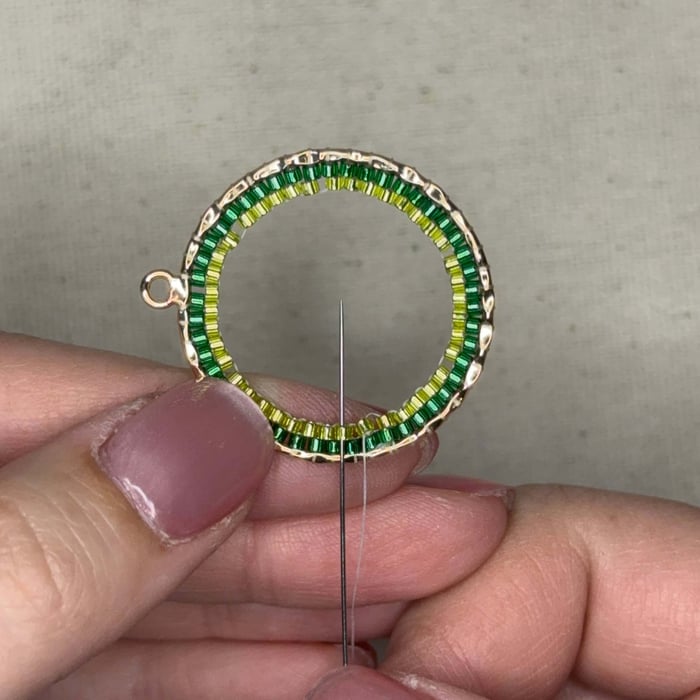
21. Now to start our row of 2154 beads! Repeat steps 10-12 with just the 2154 beads. Remember to skip a bead when they start to crowd

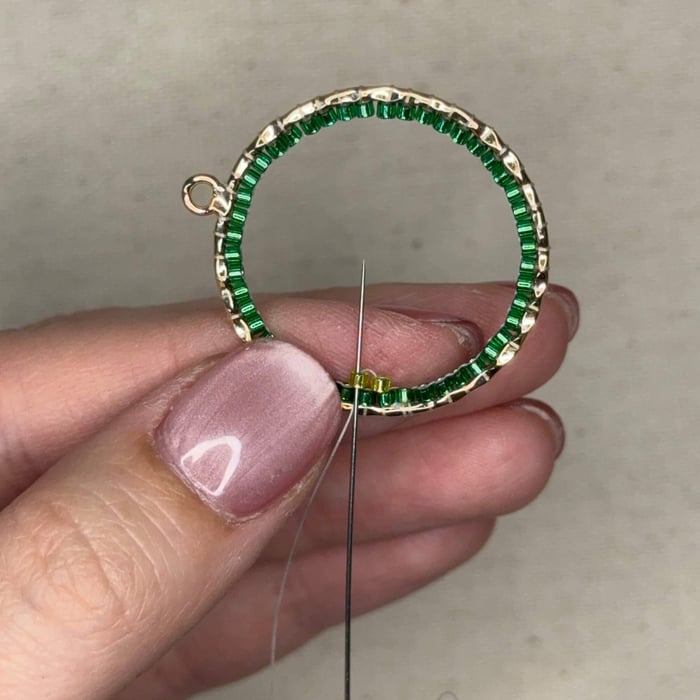
22. Go back down and up through the first and second beads in the row once completed and your project will look like this!
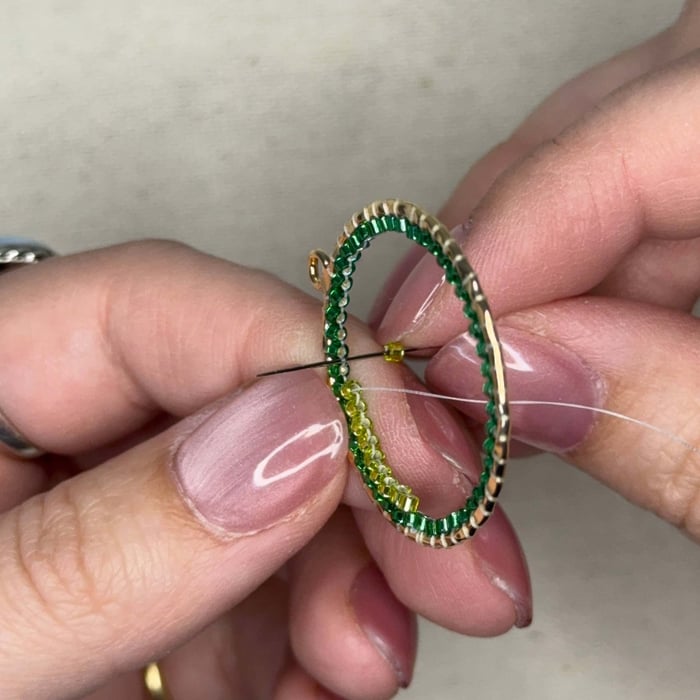
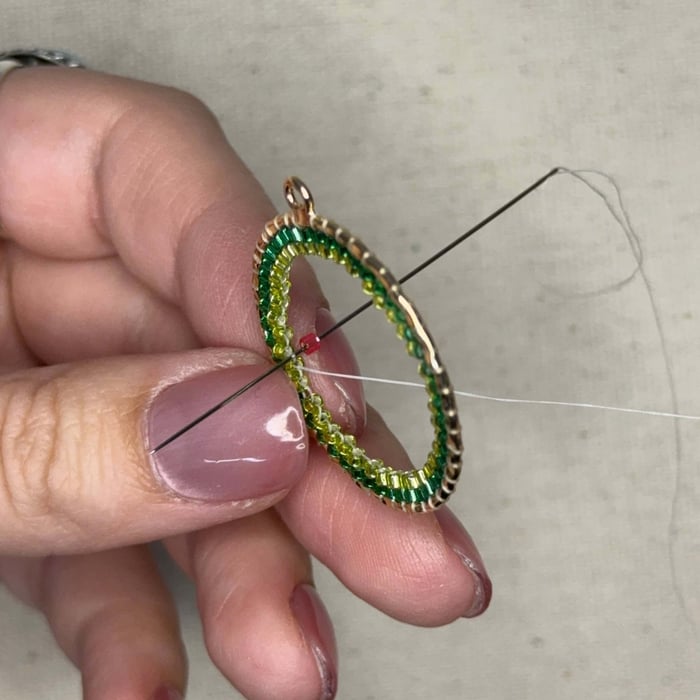
23. Now for our first row with watermelon seeds! The pattern will be ONE 010 Delica, THREE 2154 Delicas, ONE 010 Delica, THREE 2154 Delicas, and so on. You may or may not need to do the last part with TWO 2154 delicas. I ended up using TWO 2154 delicas at the end of the row. Like I said prior, it is better to leave gaps than it is to overcrowd.
24. Finish your fourth row by going down the first bead in the row and then back up the second
25. For the firth row, only use 2154 Delicas. For the 6th row, your watermelon seed pattern will be ONE 010 Delica, TWO 2154 Delicas, ONE 010 Delica, TWO 2154 Delicas, and so on.
26. You may or may not need to do part of the pattern with ONE 2154 delicas. I ended up using ONE 2154 delica for a part of the pattern. It is more important to keep each of the black delicas centered between the black delicas from row 4.
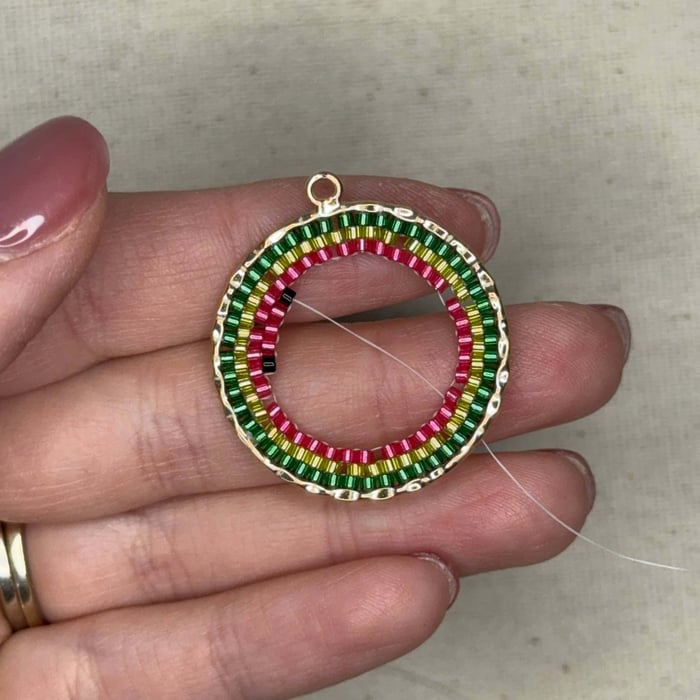
27. Row 7 will be just 2154 delicas
28. Row 8 will be ONE 010 Delica, ONE 2154 Delica, ONE 010 Delica, ONE 2154 Delica, and so on. You may need to have TWO 2154 delicas in the pattern like I ended up using
29. Weave one more row (row 9) of 2154 delicas. For row 10, brick stitch one 2154 delica normally
30. Skip a bead and brick stitch on another 2154 delica
31. Then for our very last 2154 delica, thread it onto your needle and then poke the needle through the bead shown
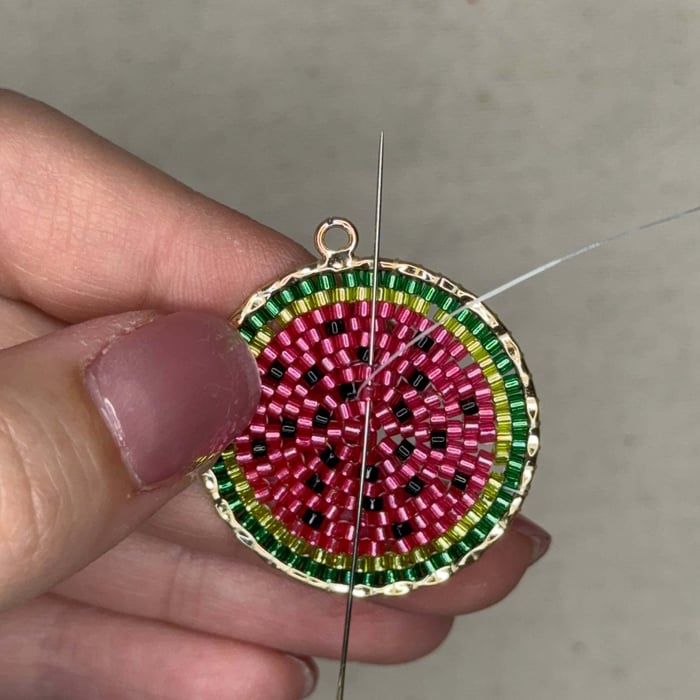
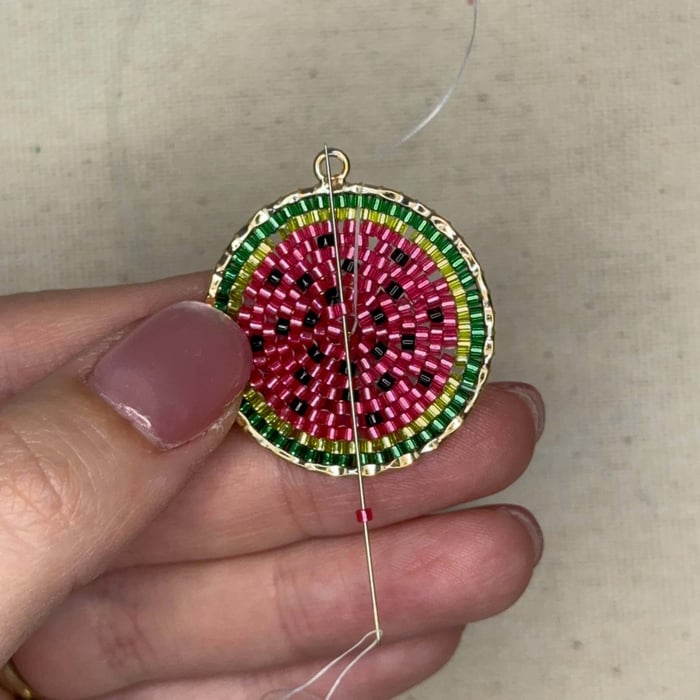
32. Pull your thread tight then start weaving your way through the watermelon's beads until you get to the edge. It doesn't matter which way you go, as long as you're hiding the thread as you go
33. Keep going!

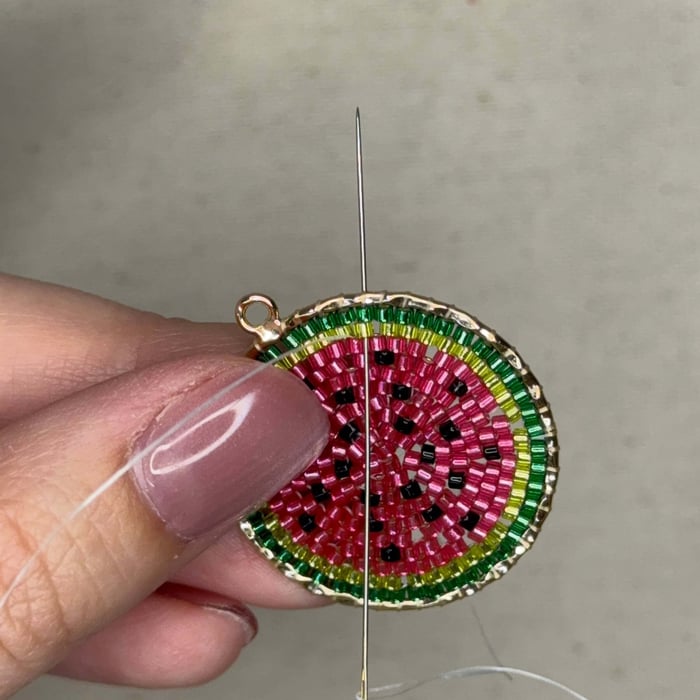
34. Loop your needle and thread back around the opposite end of the hoop
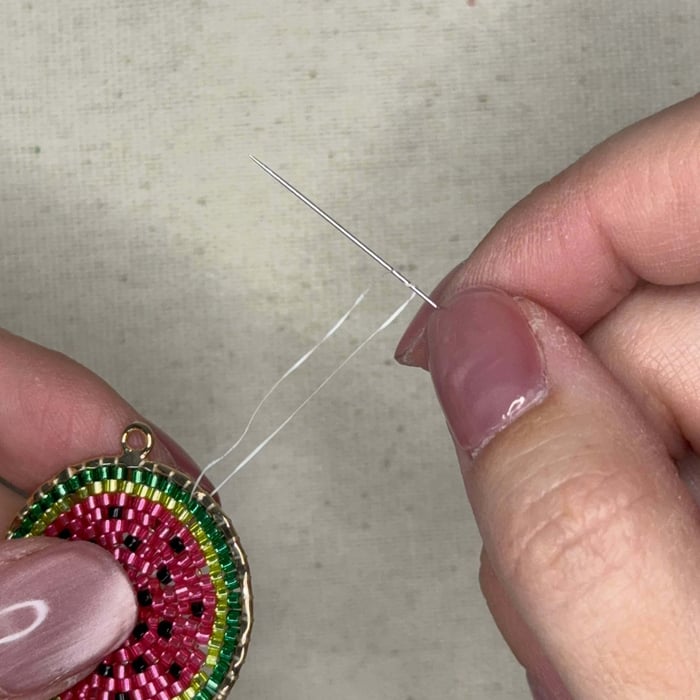
35. Before you pull the thread through, wrap the thread around your needle twice (surgeon's knot) and pull tight. You are welcome to do this one more time if you wish to secure! Cut excess and glue the first and last knot with gs-hypo cement
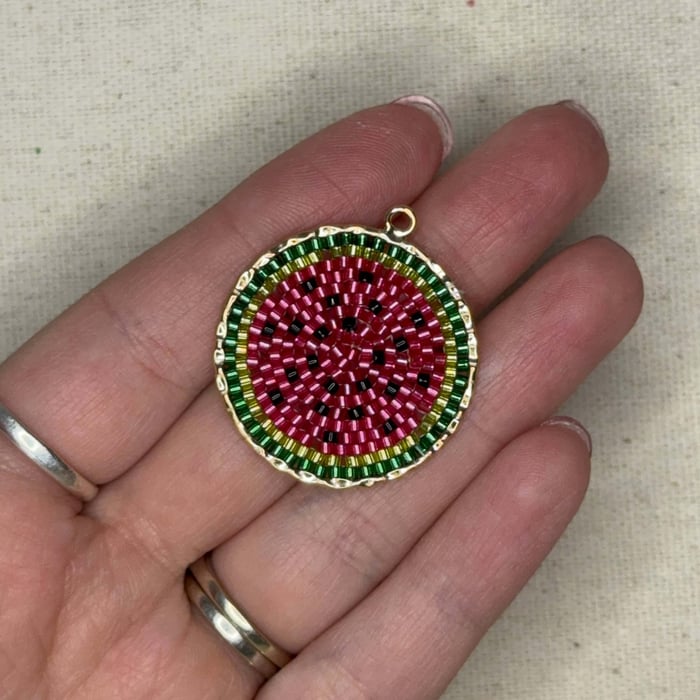
36. The first slice of watermelon is done! Repeat all previous steps to complete a second slice for matching earrings, then using two needle nose pliers, attach your ear wires.
37. Done!
FAQs
How long does each slice take?
Each watermelon slice takes roughly two hours to complete. If you are an avid brick stitch beader. You may be able to complete each slice in about an hour.
Why are there gaps between the beads in the pattern?
The gaps are skipped beads along the brick stitch. This allows your project to sit flat and flush. Filling the gaps will overcrowd your project which will make it look wonky and unprofessional. Take it from me, my first few tries with overcrowded beads looked quite messy!
Can I use other colors?
Of course! Just remember, coatings or plating, or lack there of, may end up in a slightly different amount of beads used
Related Articles

How to: Tubular Herringbone Stitch Bracelet and Necklace
How to: Tubular Herringbone Stitch Bracelet and Necklace Learn to create these flowing, color-blocked...

How to Square Stitch: Sardine Fish Pendant Necklace
How to Square Stitch: Sardine Fish Pendant Necklace Learn how to square stitch with this step-by-step...

Beaded Wildflower Bouquet Keychain
Learn how to create a stunning beaded wildflower bouquet keychain with this easy-to-follow DIY seed bead...