Tutorials

DIY Personalized Layered Charm Necklace
DIY Personalized Layered Charm Necklace
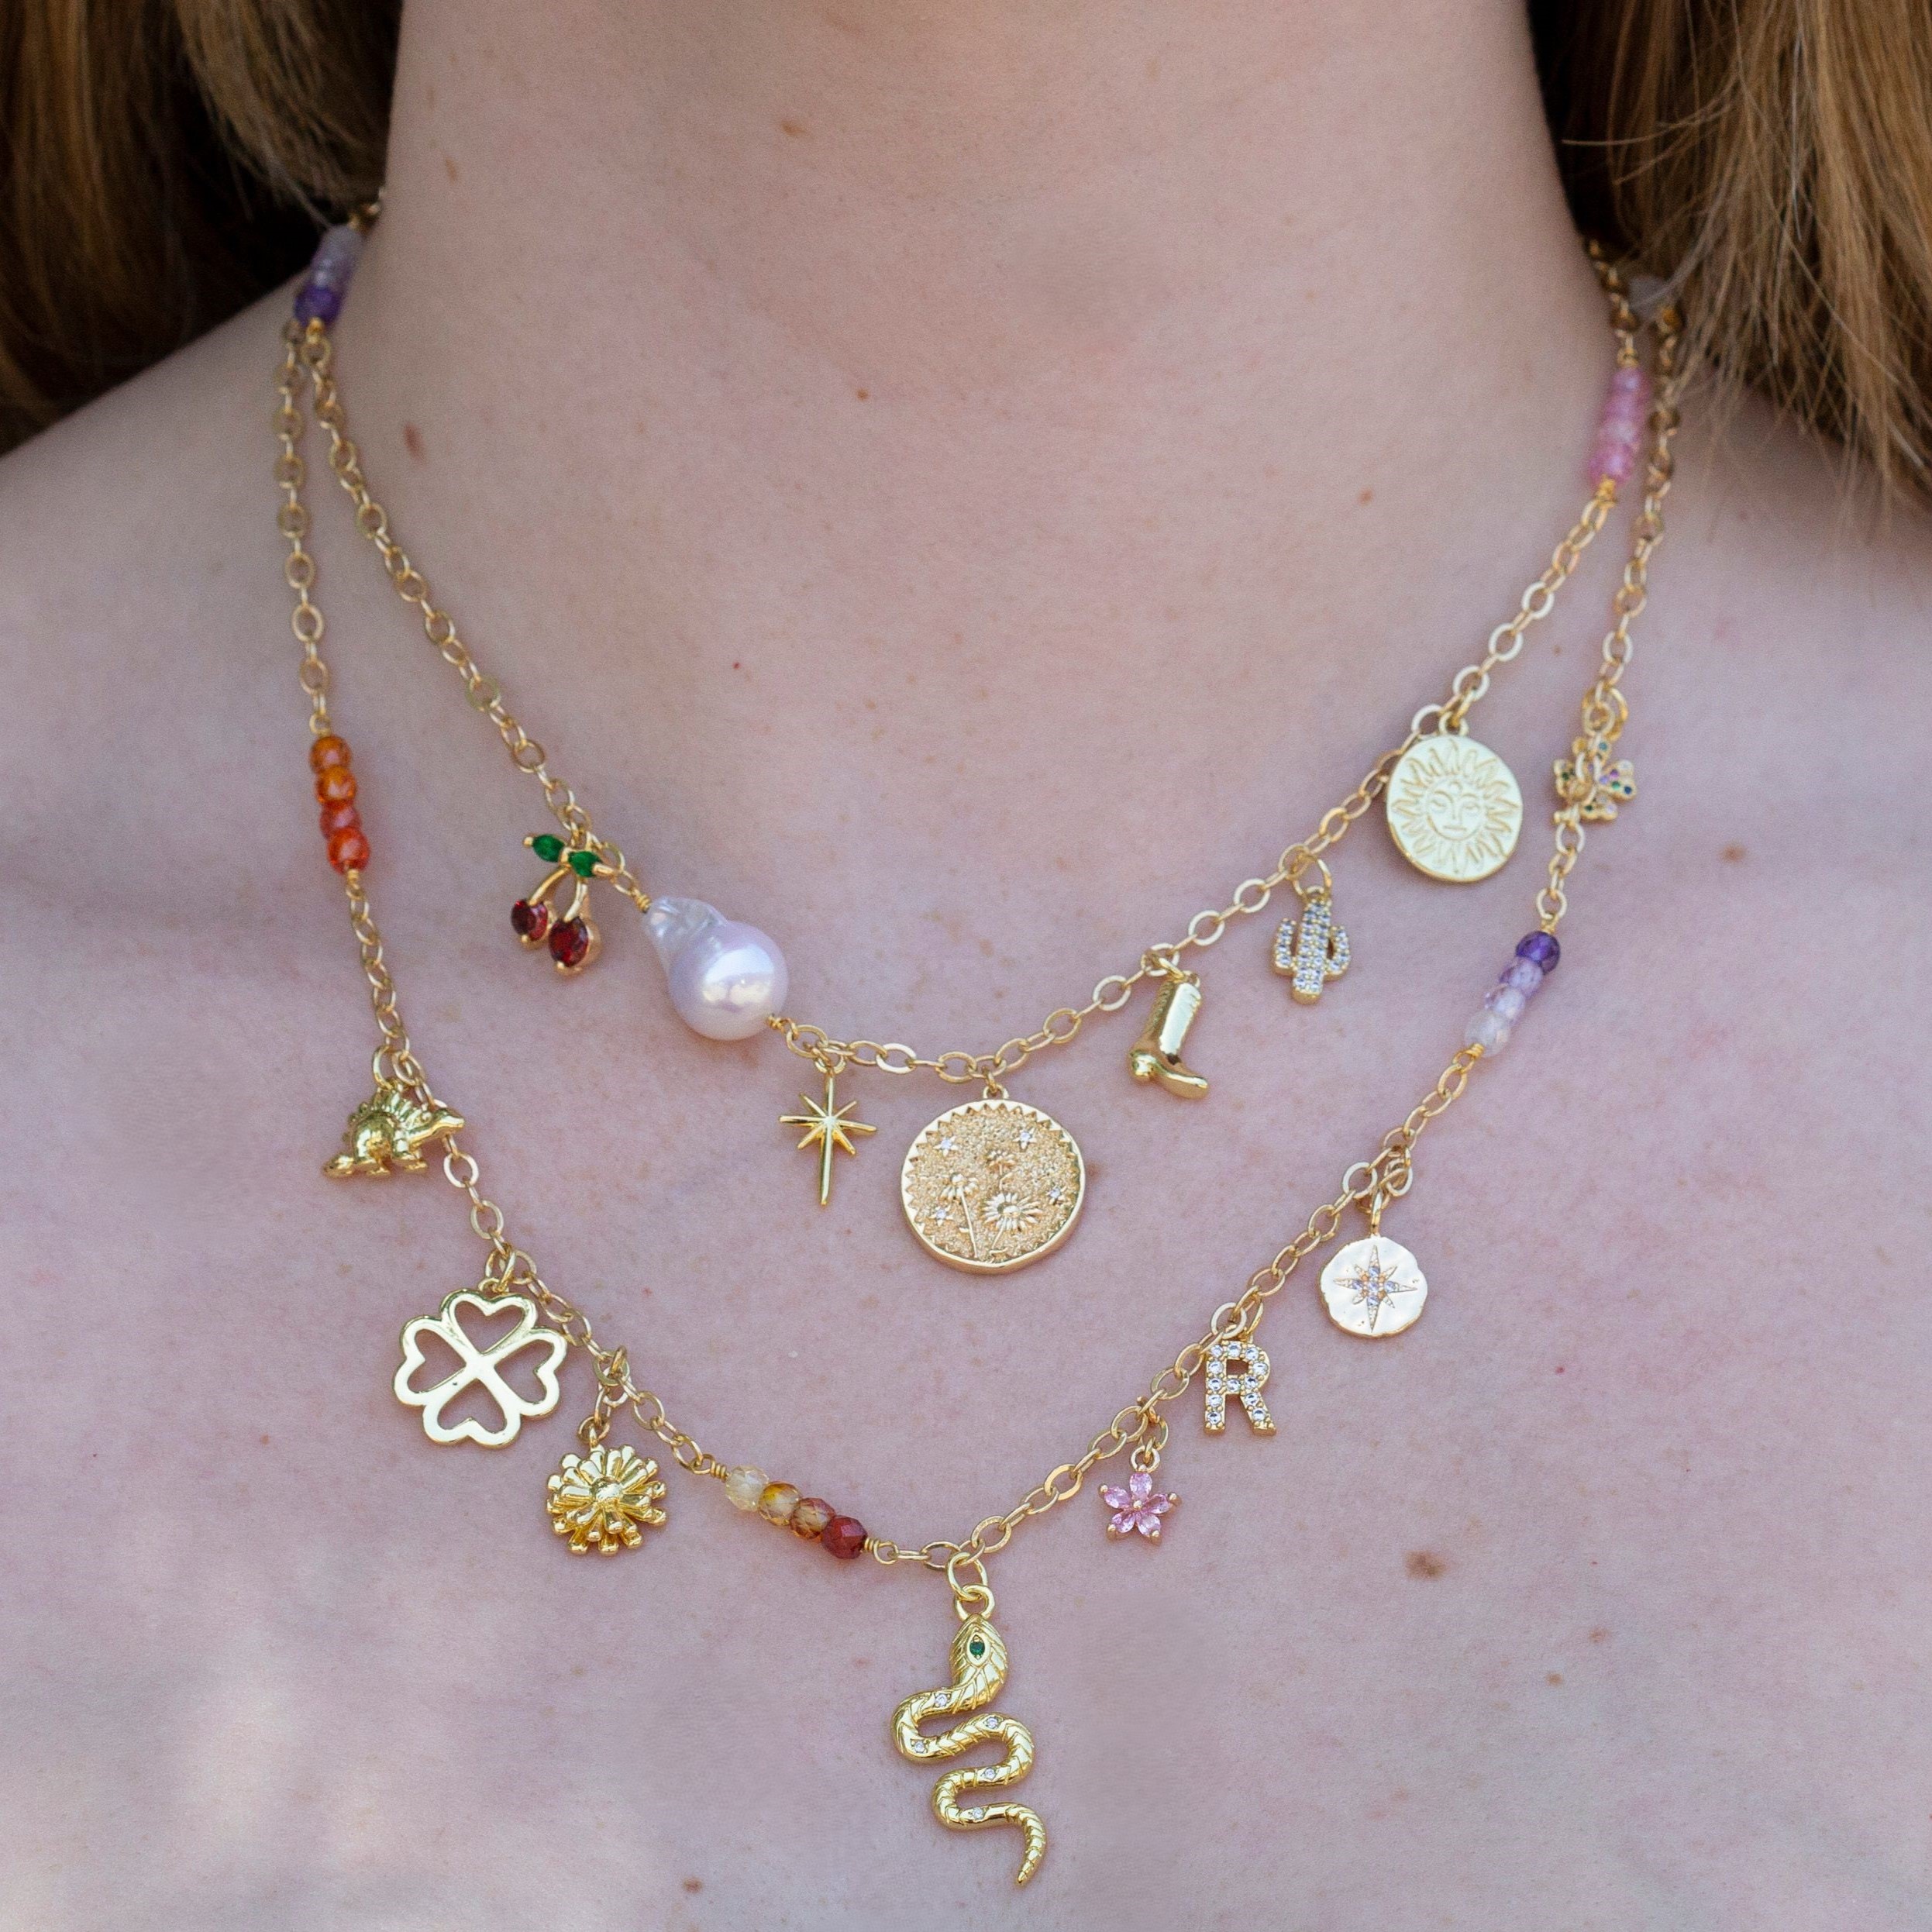
Embrace individuality with our Personalized Charm Necklace tutorial, a perfect blend of elegance and self-expression. Select each charm to reflect different aspects of your personality. Whether you’re adventurous, artistic, or sentimental, this necklace allows you to curate a collection of charms that tell your unique story.
Key Features:
Customizable Charms: Choose from a wide variety of charms, each representing different traits and passions.
Premium Quality: Made with durable, high-grade materials to ensure long-lasting wear.
Elegant Design: Sleek and stylish, perfect for any occasion from casual outings to formal events.
Perfect Gift: Ideal for birthdays, anniversaries, or any special occasion to celebrate someone’s unique personality.
 DIY Personalized Layered Charm Necklace
Materials Needed:
Necklace (approx. 20"):
- Gold Plated 3x4mm Classic Cable Chain (3ft)
- Multi Color Zircon CZ 3.5x4mm Faceted Rondel (1 strand) - Or any gemstone you wish
- Gold Plated 14x10mm 2-Hole Magnetic Slide Clasp (1)
- Gold Plated 3mm 22 Gauge Jump Rings (12) You need a minimum of 4 jump rings, any more will depend on the charms you choose to use
- 18K Gold Plated 50mm Long 24 Gauge Head Pins (7)
- Freshwater Pearl 15x23mm White Baroque (1)
Charms Used:
Use the charms listed or select your own charms that resonate with you, find all our charms and pendants here
- Micro Pave Gold / Red 13x12mm Cherries Charm (1)
- 14K Gold Plated 16x9mm North Star Charm (1)
- Micro Pave Gold 17mm Double Sided Daisy Coin Charm (1)
- 14K Gold Plated 13x9mm Cowboy Boot Charm (1)
- Gold Micro Pave Saguaro Cactus Charm (1)
- 14K Gold Plated 14mm Sun Face Coin Charm (1)
- 14K Gold Plated 9.5x15.5mm Dinosaur Charm (1)
- 14K Gold Plated 16mm 4 Leaf Clover Charm (1)
- 14K Gold Plated Plated 12mm Flower Charm (1)
- Micro Pave Gold 30x12mm Green Eye Snake Charm (1)
- Micro Pave 8mm Pink Bauhinia Flower Charm (1)
- Gold Plated Micro Pave "R" Letter Charm (1)
- Micro Pave Gold 10.5mm North Star Coin Charm (1)
- Micro Pave Gold 7x12mm 4 Leaf Clover Charm (1)
Scroll to the bottom of the page to learn the reasons why I chose each charm!
Tools Required:
Needle Nose Pliers (also known as chain nose)
Instructions on Construction:
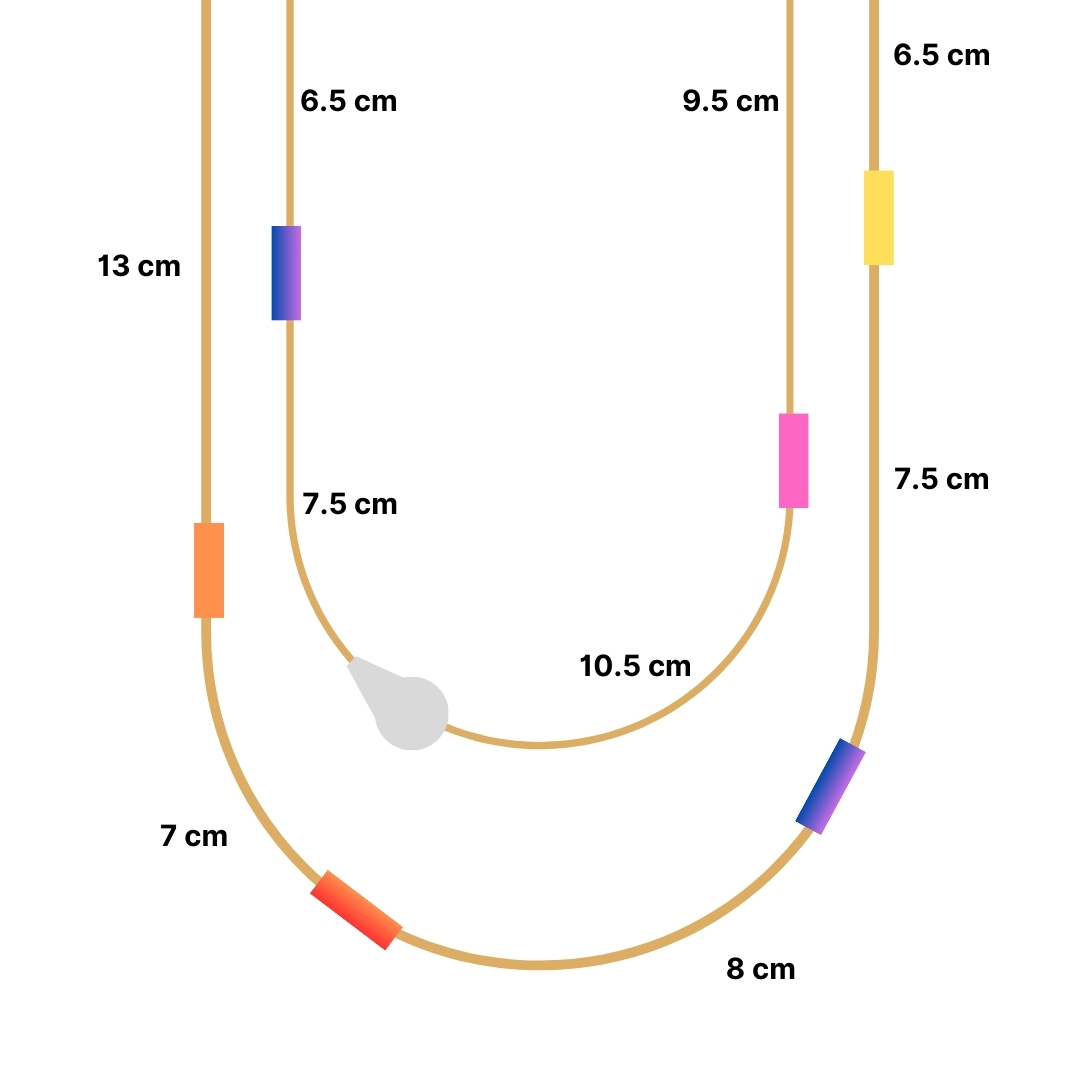
1. We will start with the shorter first layer of the necklace. Take your chain and cut a section of 6.5 cm.
*** Follow the above reference photo for the chain measurements in between each zircon (or pearl) wire wrapped link
First layer should measure approx. 16 inches and the second layer should measure approx. 20 inches once complete
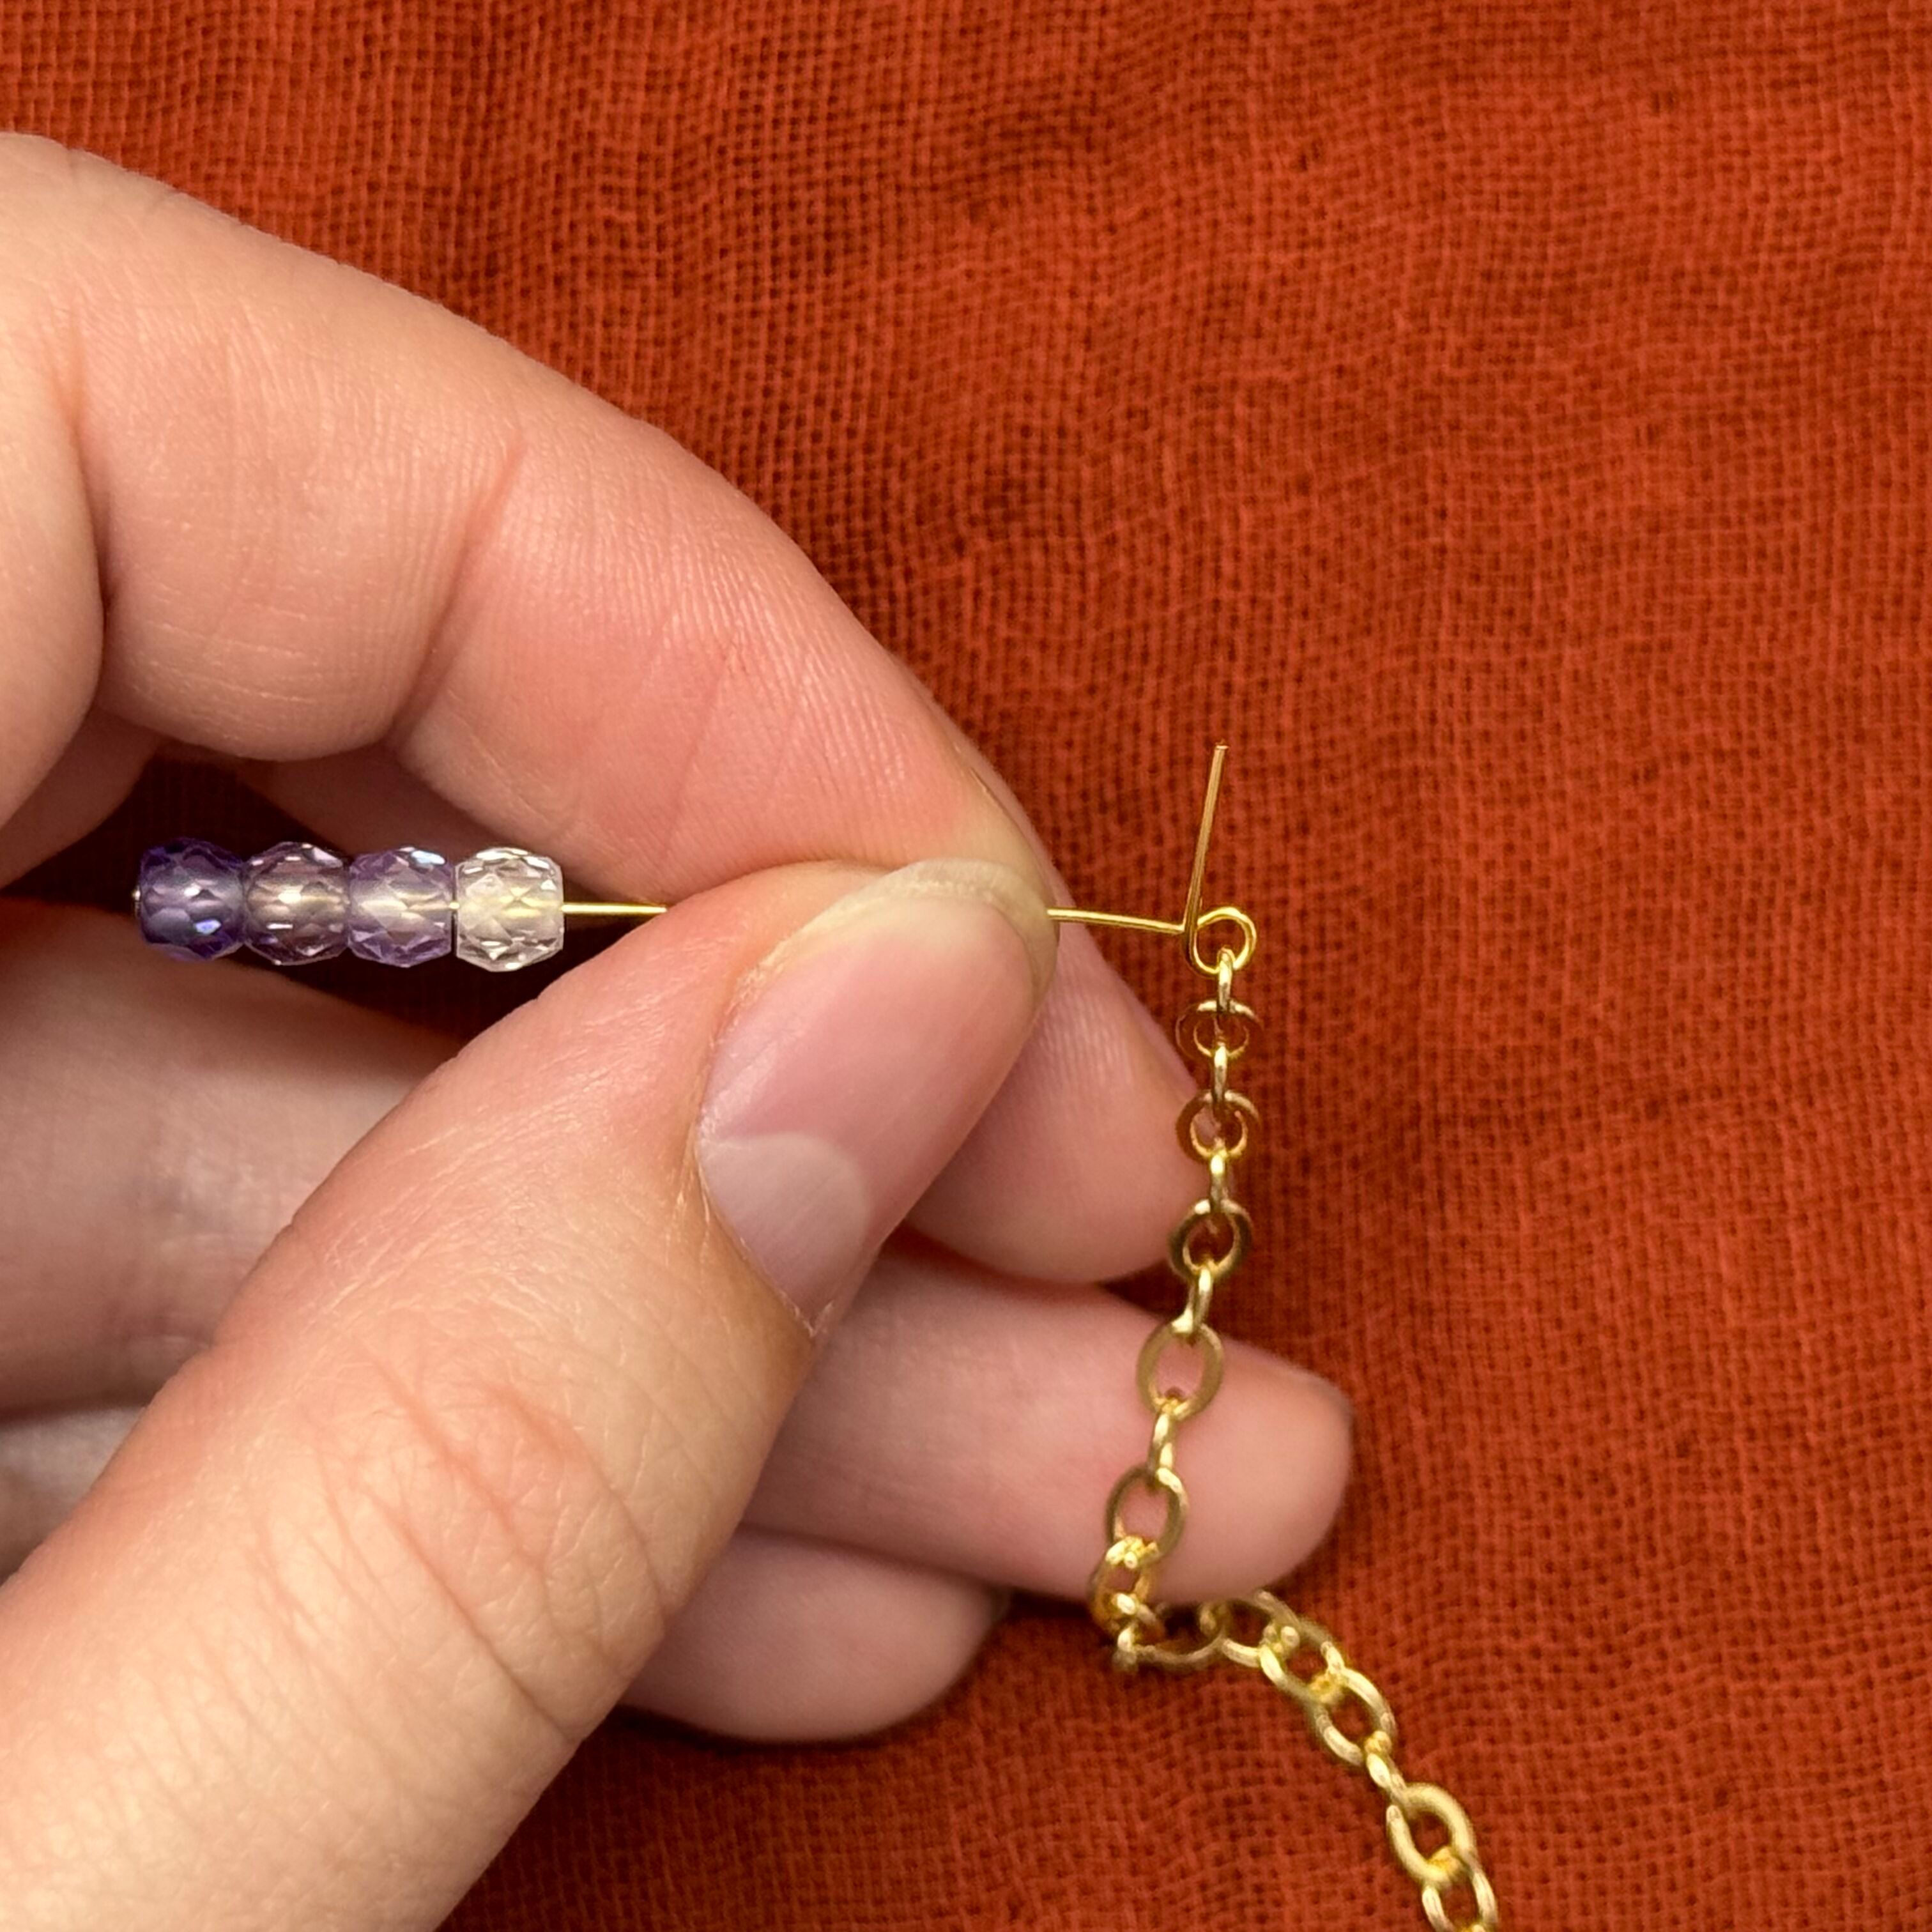
2. String on 4 zircon beads in a purple ombre pattern on a head pin, with the darkest bead at the bottom of the head pin. Start to create your loop about 3/4th the way up from the base of the head pin. Thread the end of the 6.5cm section of chain on this loop
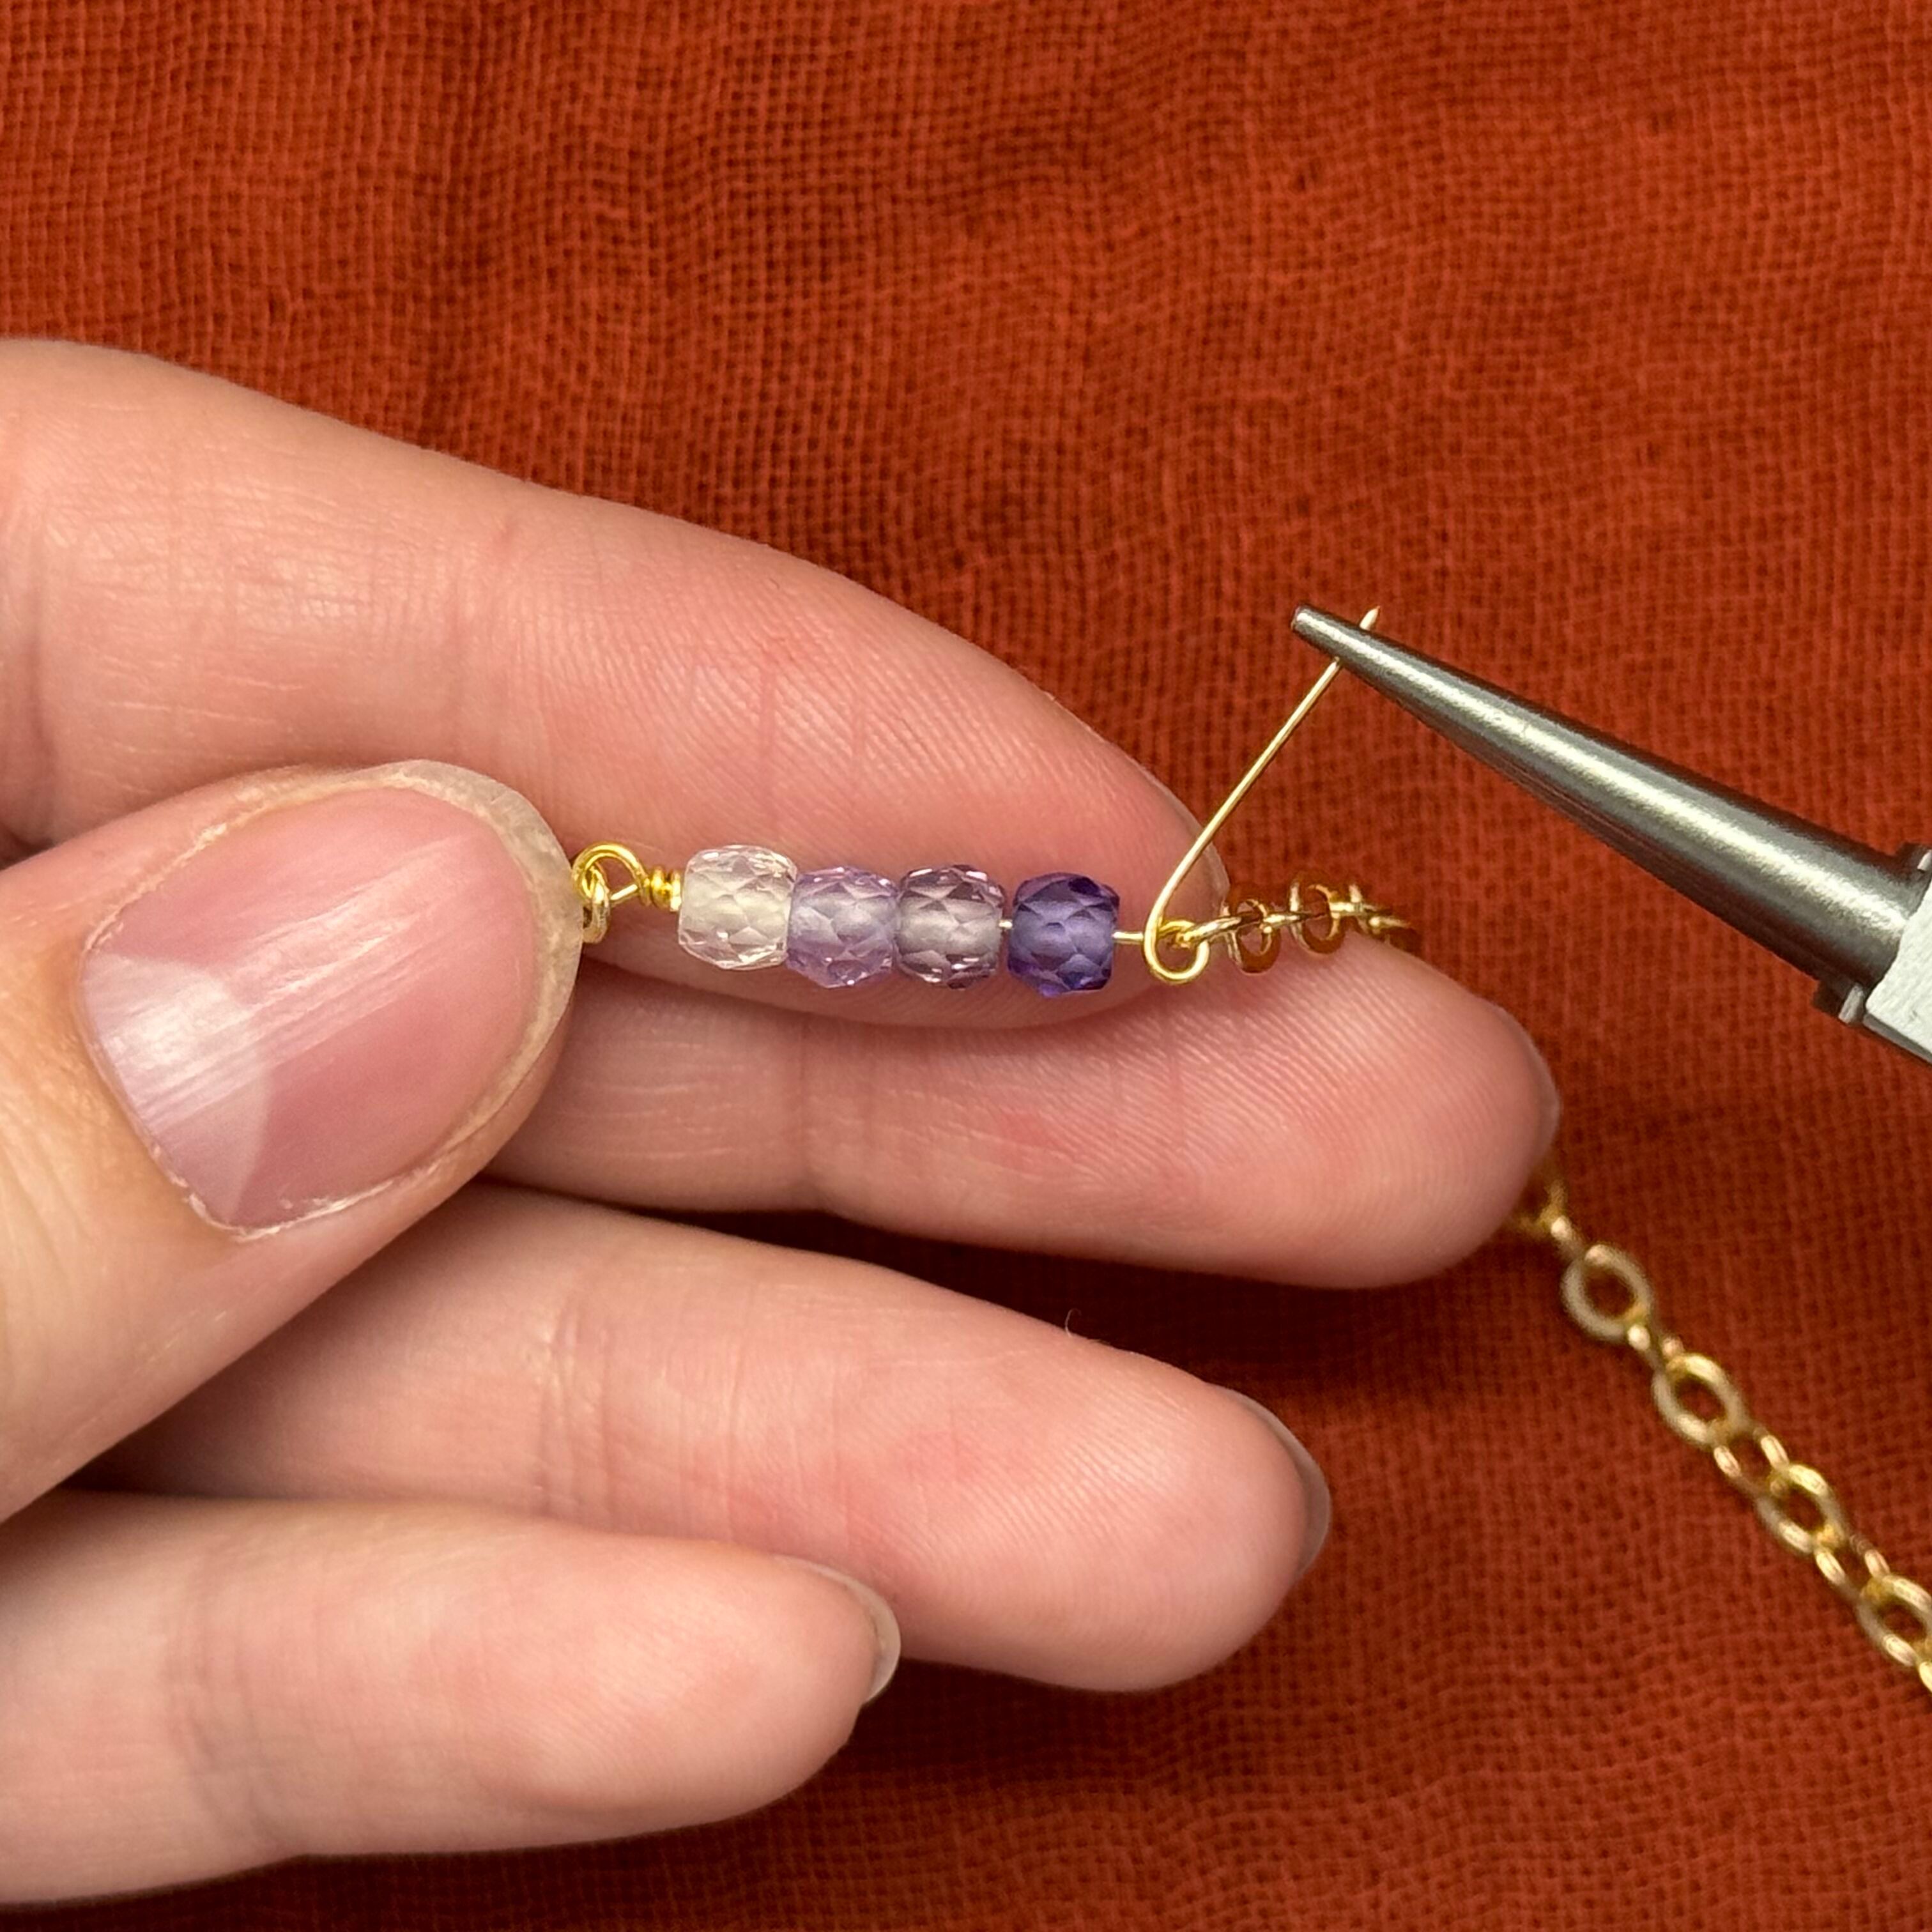
3. Close the loop and wrap the wire around 2-3 times. Cut the flat end of the head pin and create a loop at the base of the dark purple zircon bead. Thread on the rest of the chain through the last link
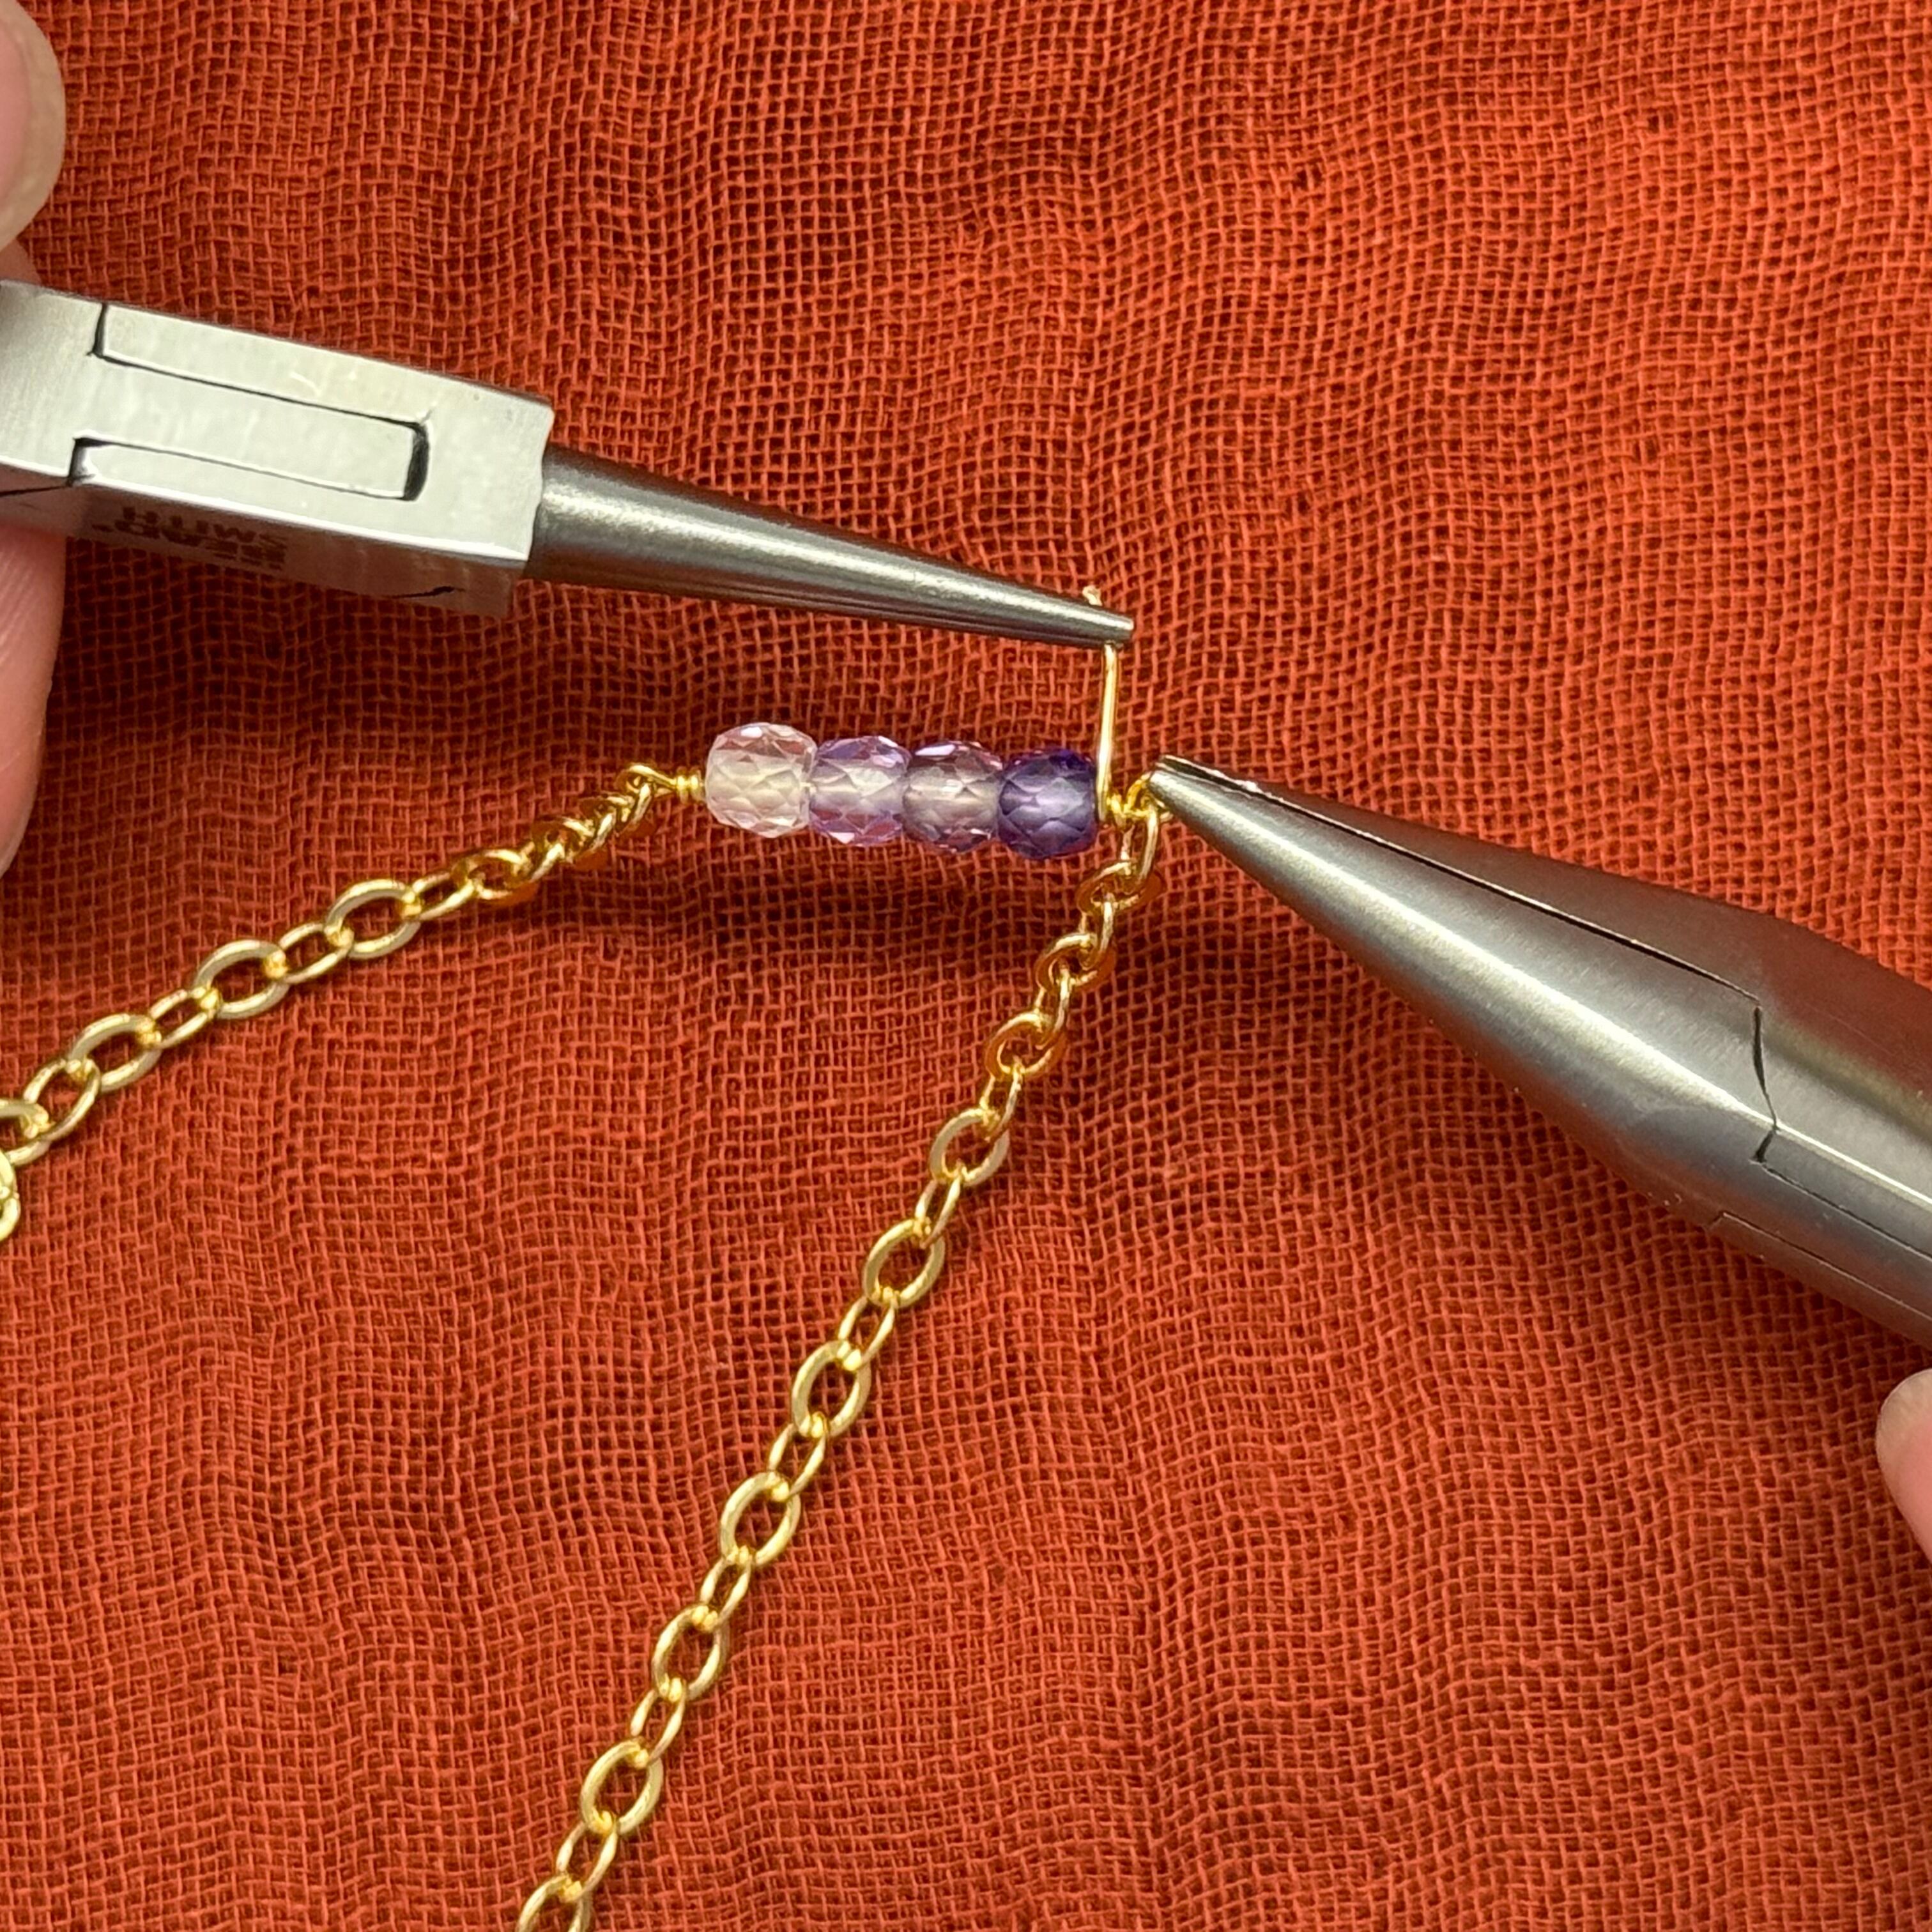
4. Wrap the wire 2-3 times until the beads are secure and do not move
5. Taking the long length of chain attached to the zircon, measure 7.5cm of links and cut.
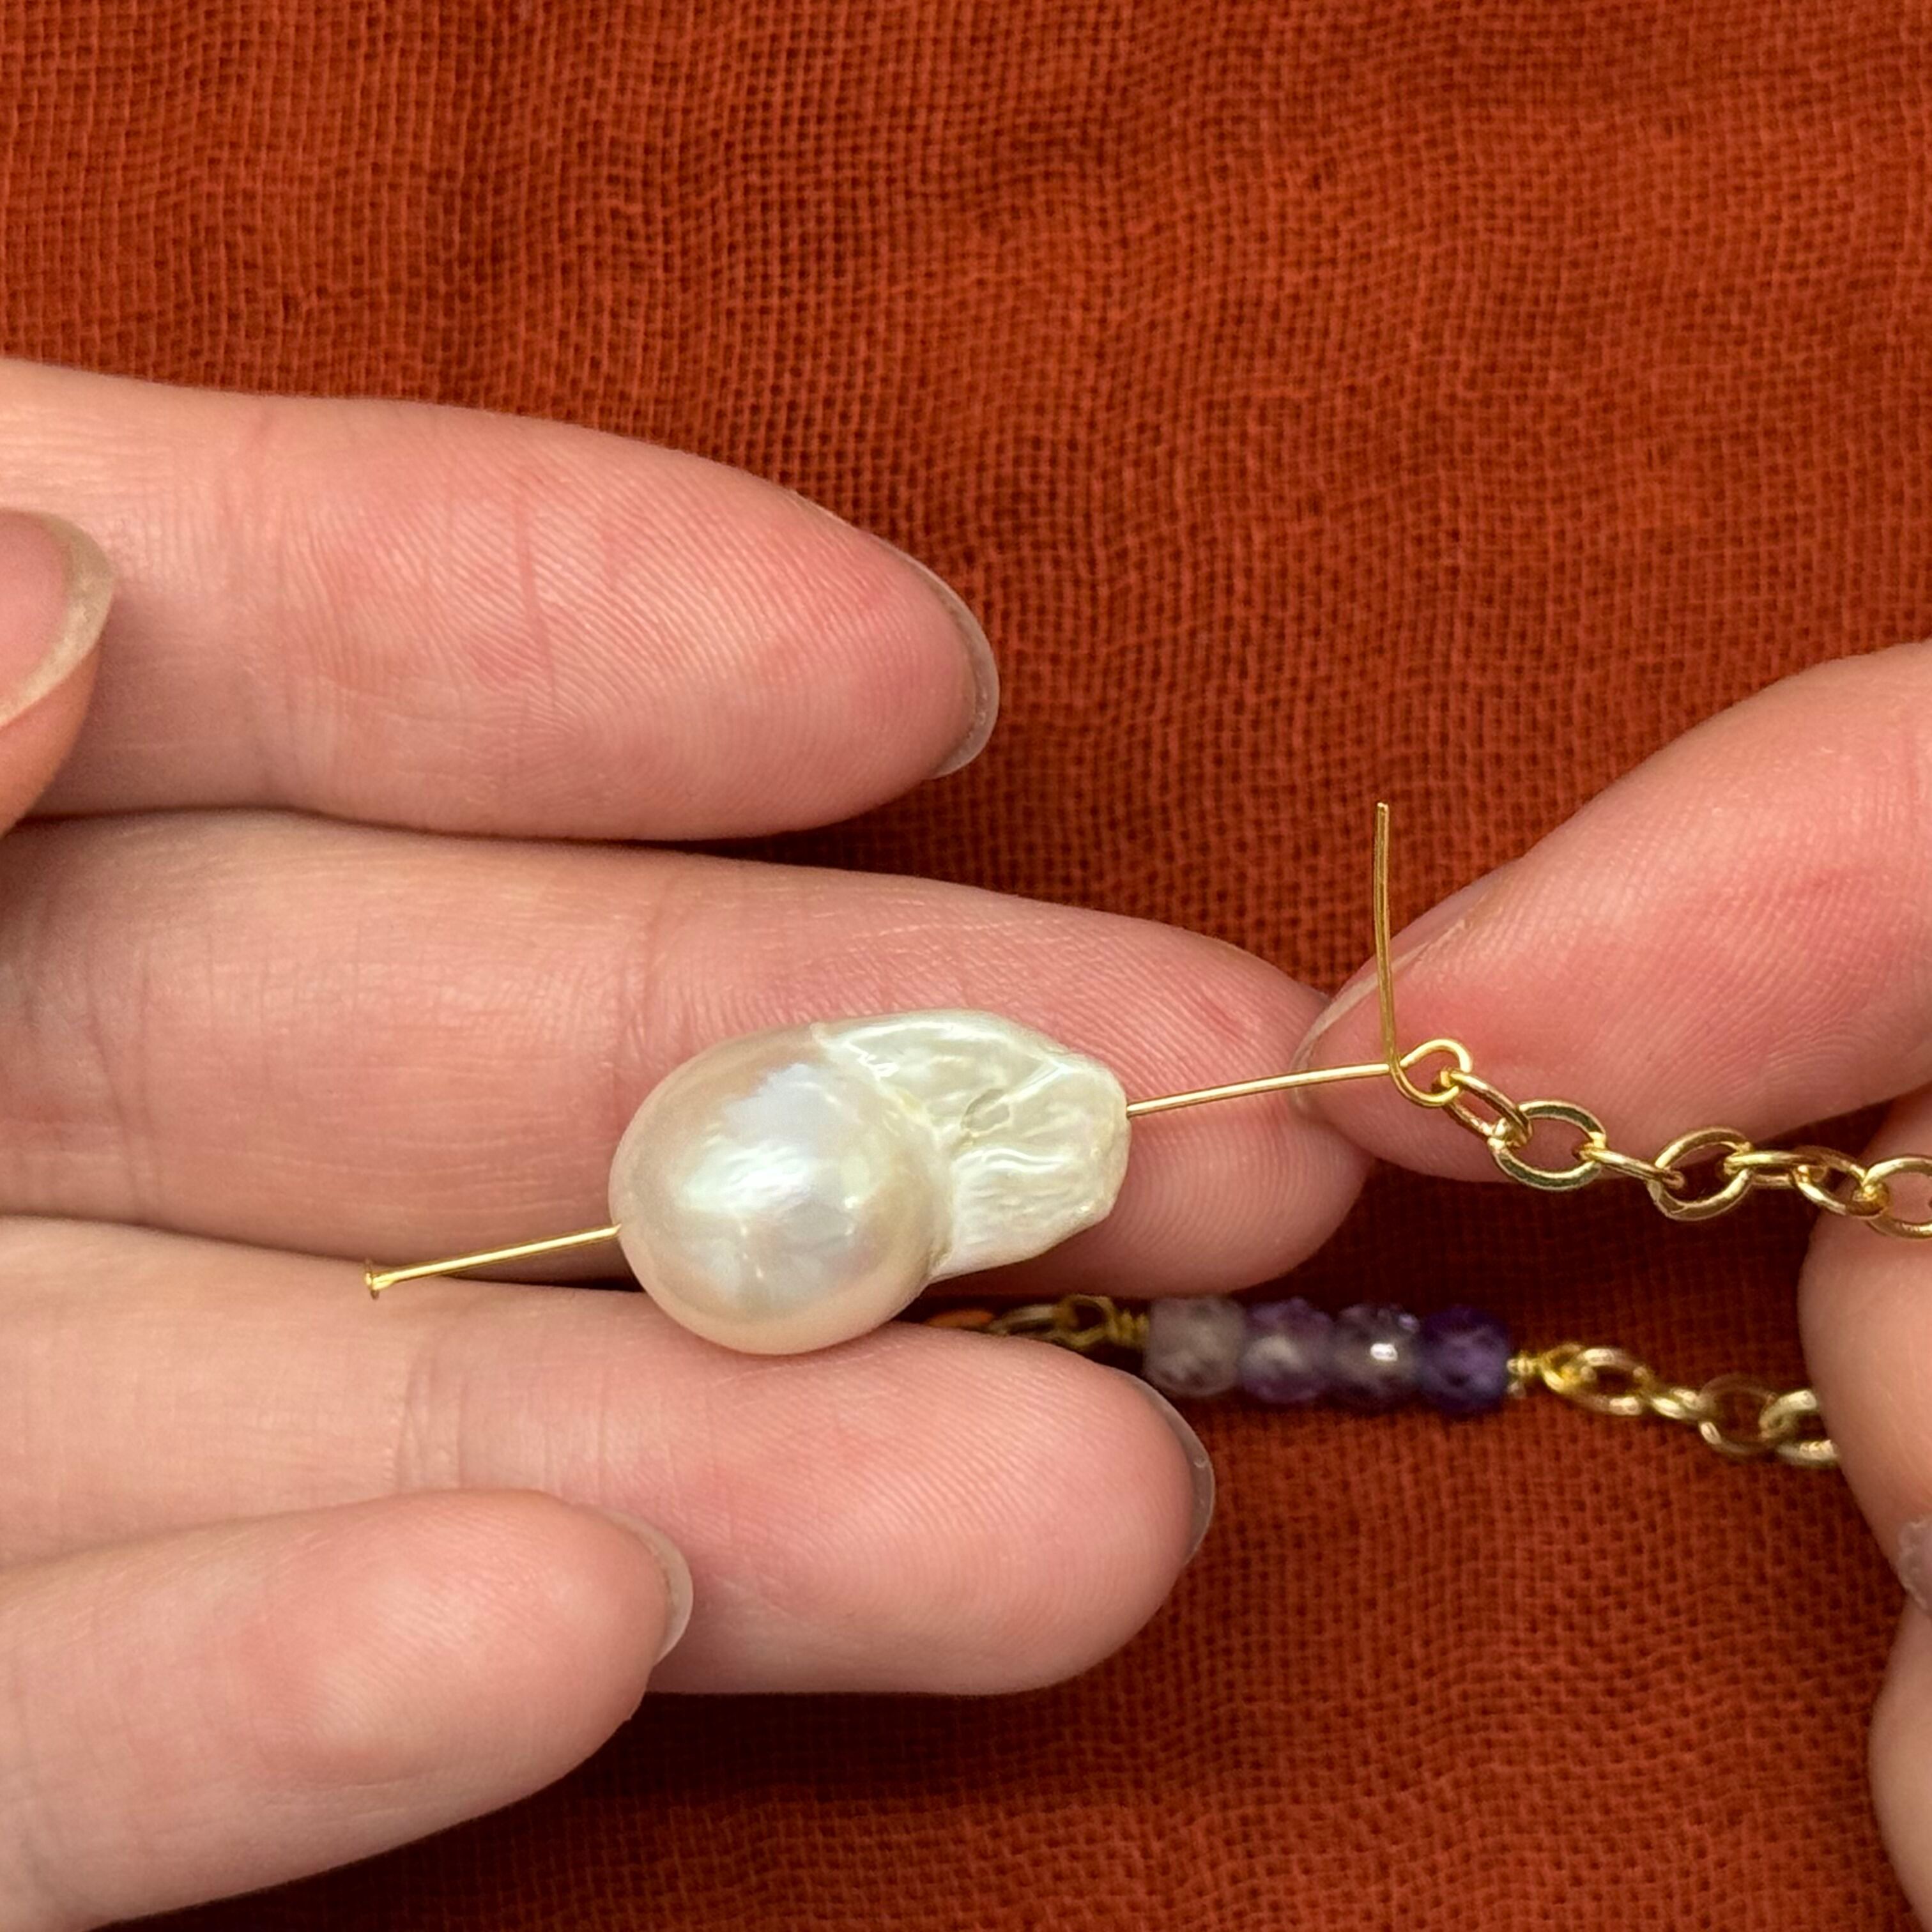
Take another head pin add a baroque pearl (drop end towards the flat end of the head pin) and create a loop 3/4ths up on the head pin. Thread on the end of the 7.5cm section
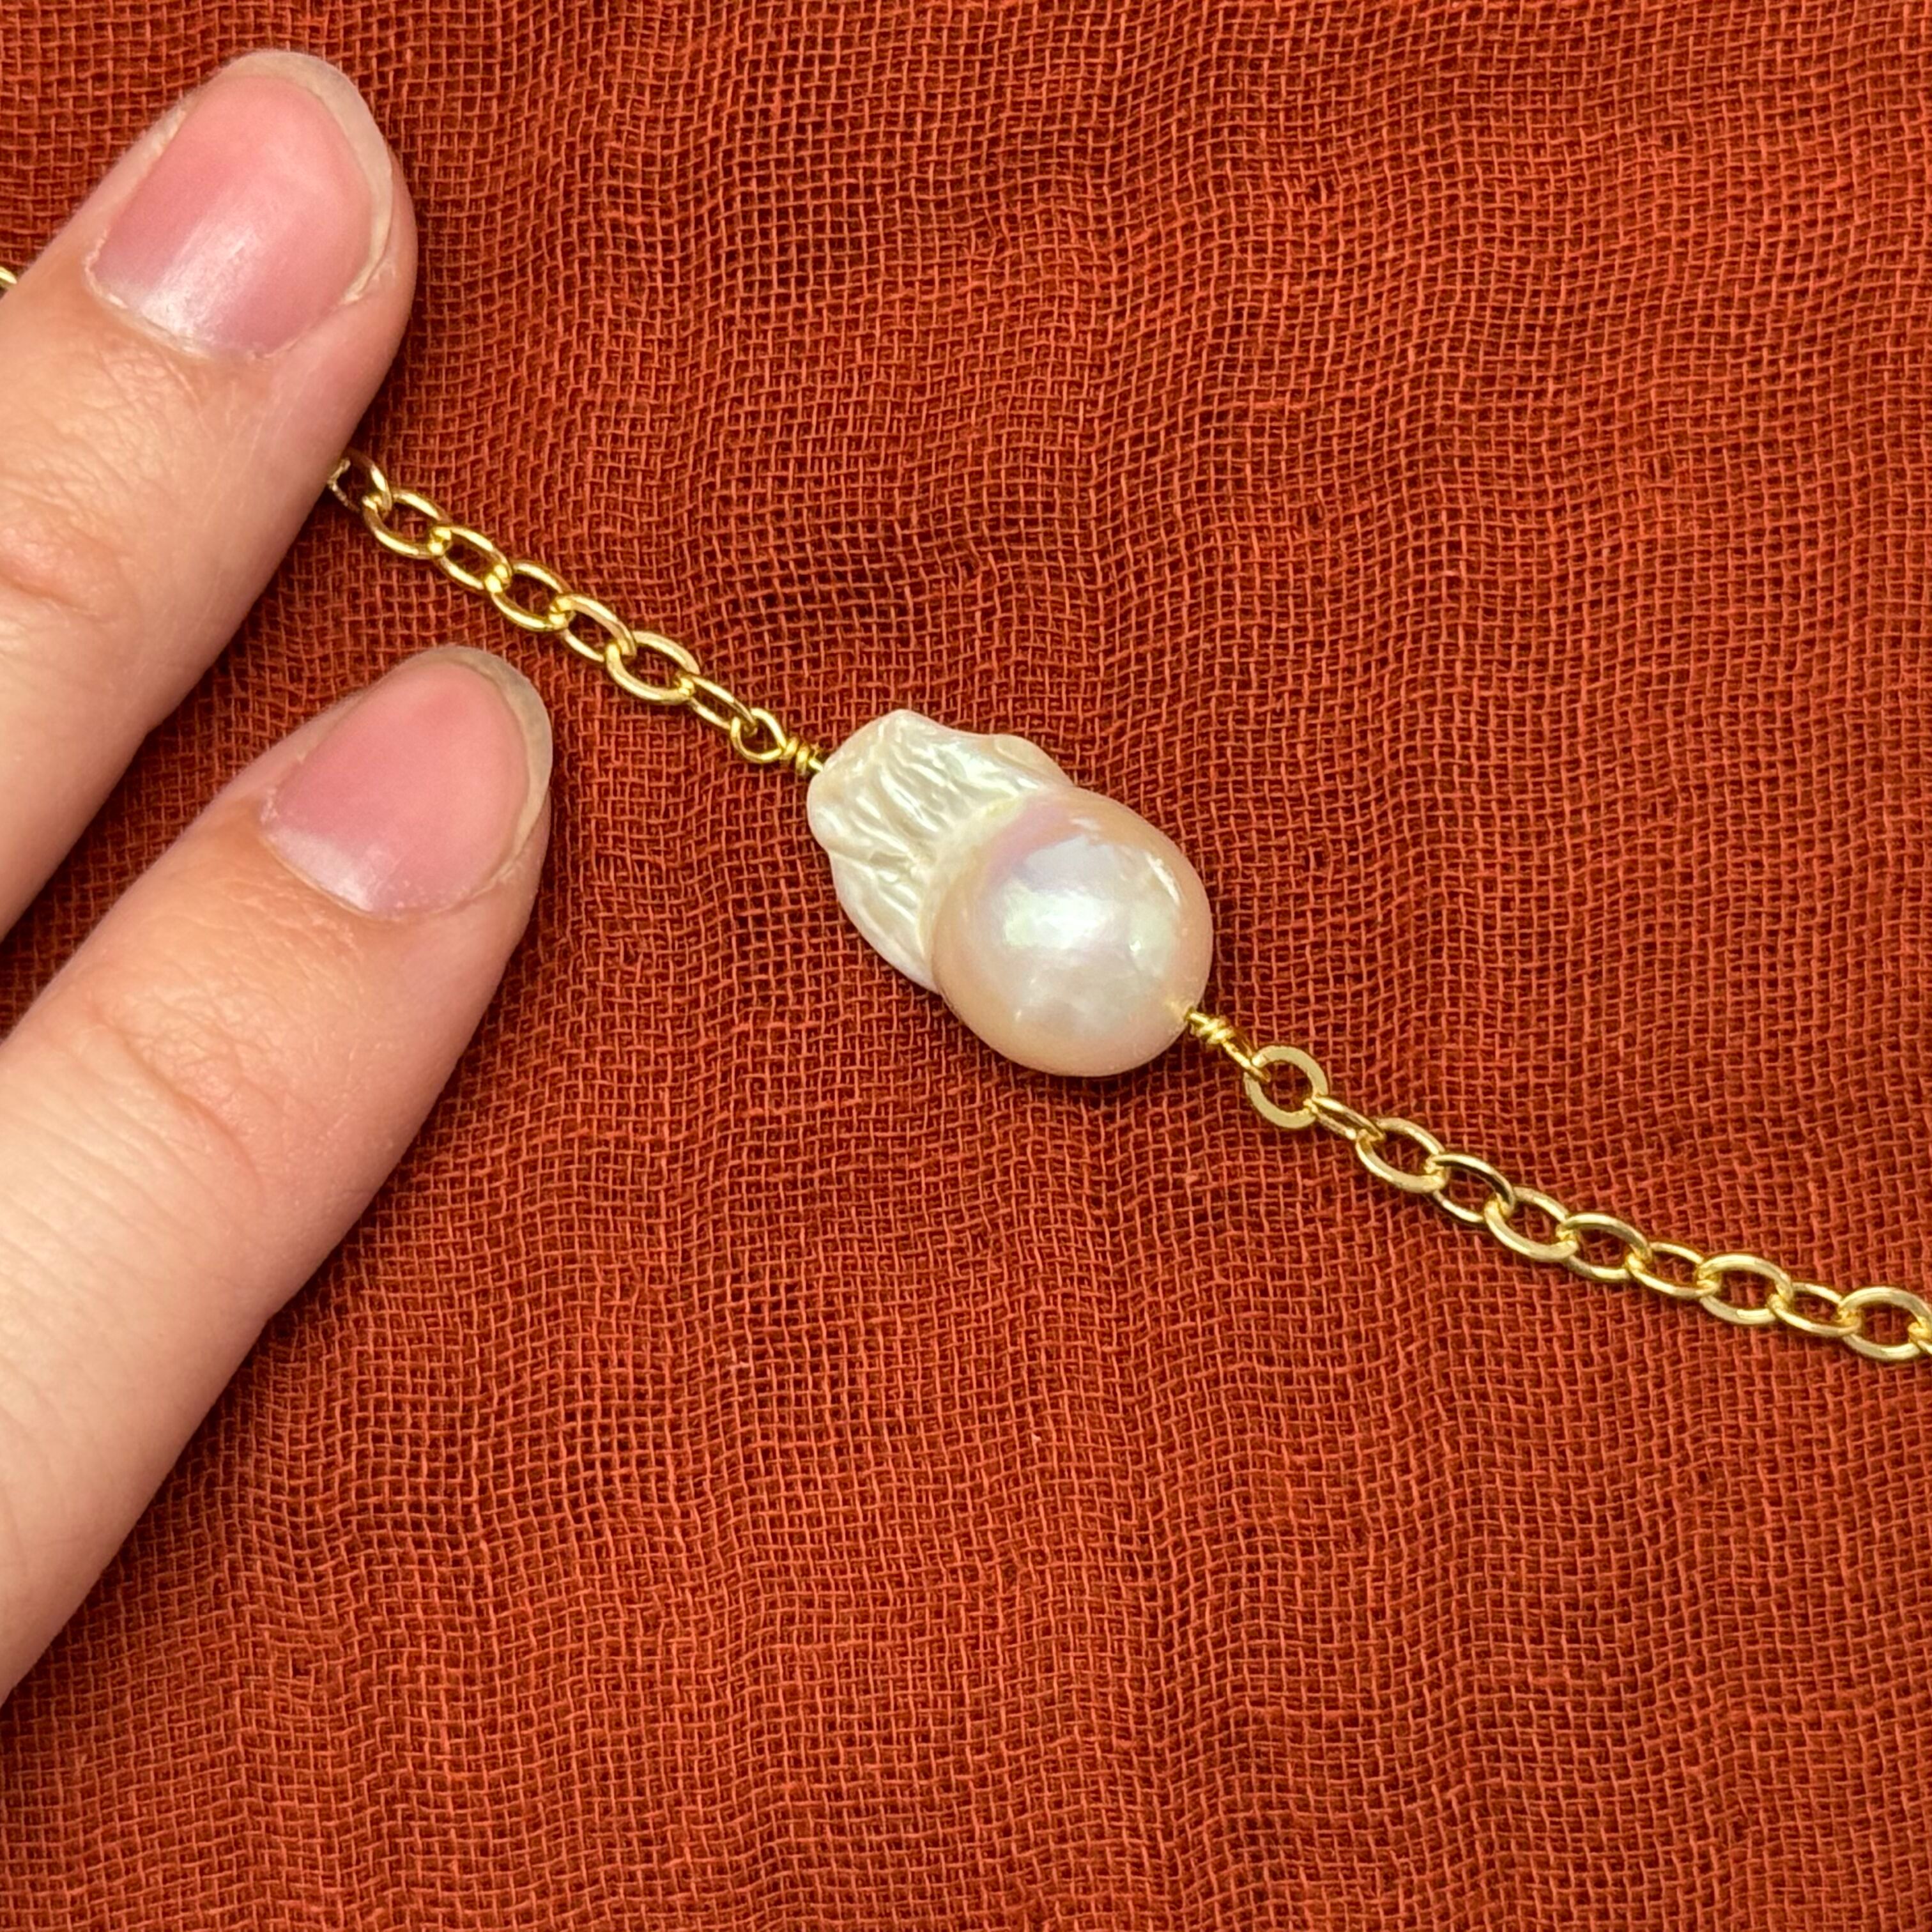
6. Wire wrap the top loop closed and then cut the flat end of the head pin off. Create a loop, attach the rest of the chain, and then wire wrap the loop closed
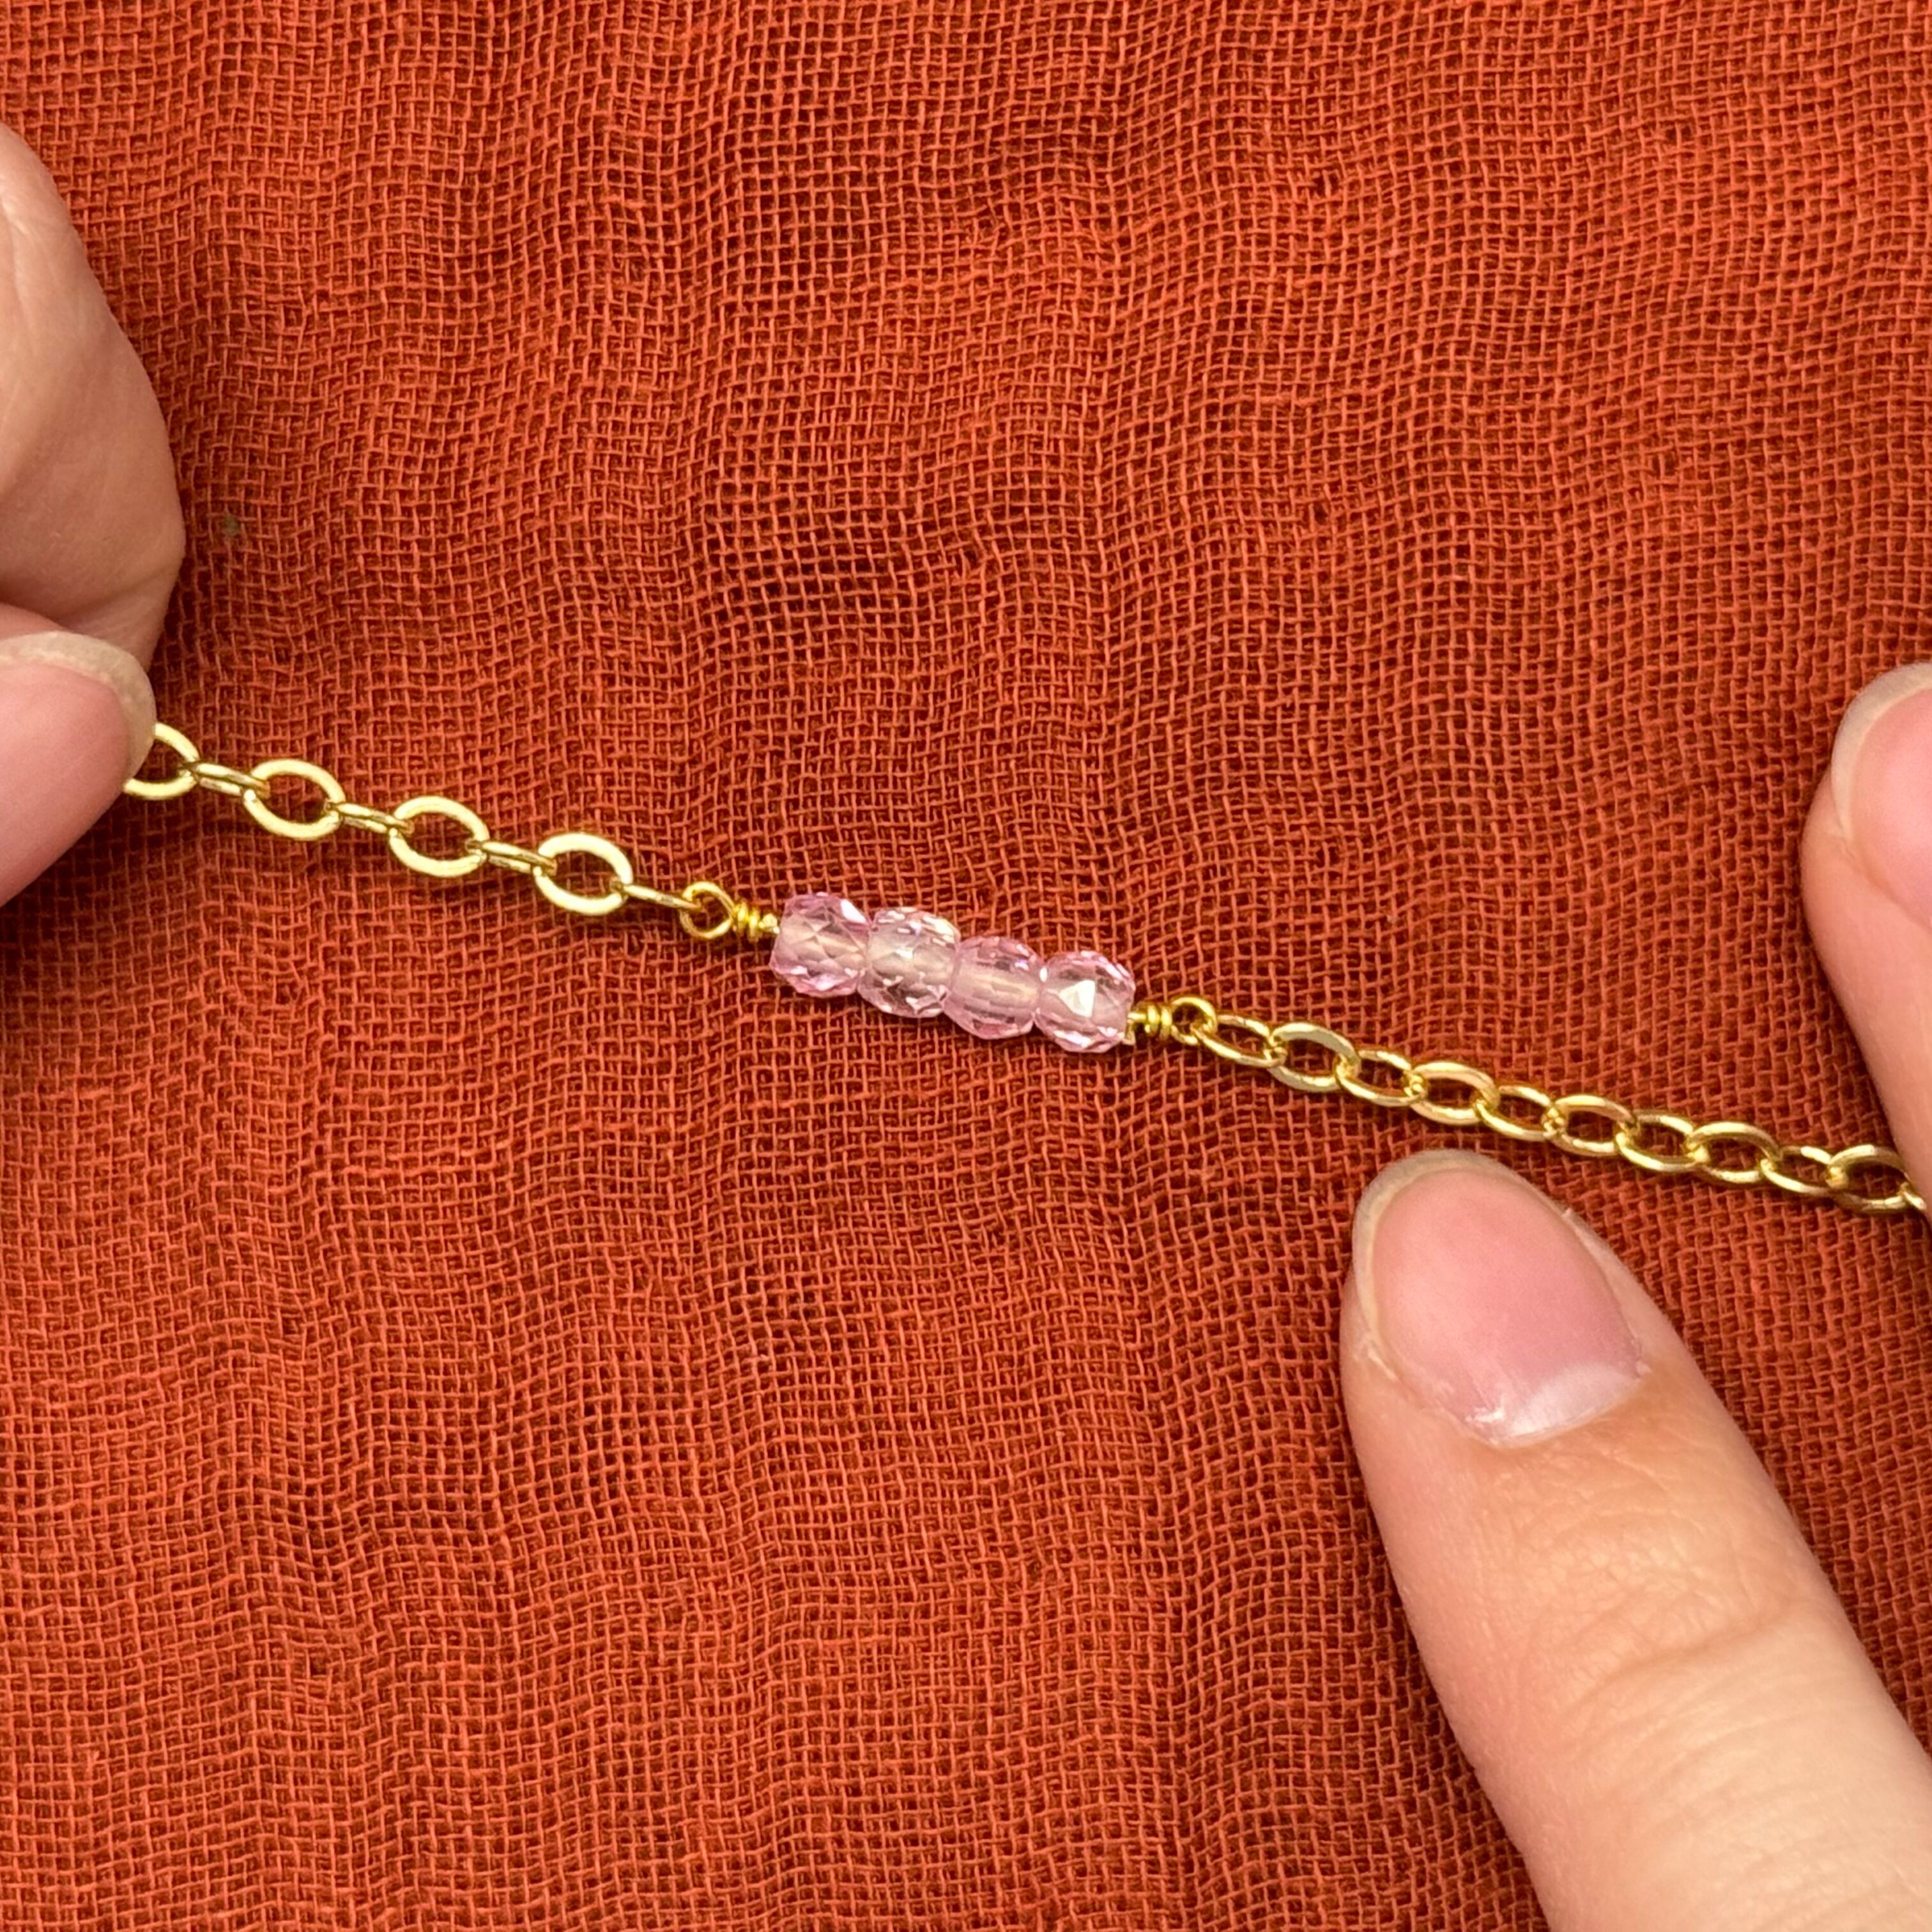
7. Measure 10.5 cm of chain and cut. Wire wrap a loop with a head pin connecting the end of the 10.5 cm section, thread on 4 pink zircon beads, and wire wrap a loop around the rest of the chain. Close the loop.
We will cut the remaining chain for a section of 9.5 cm
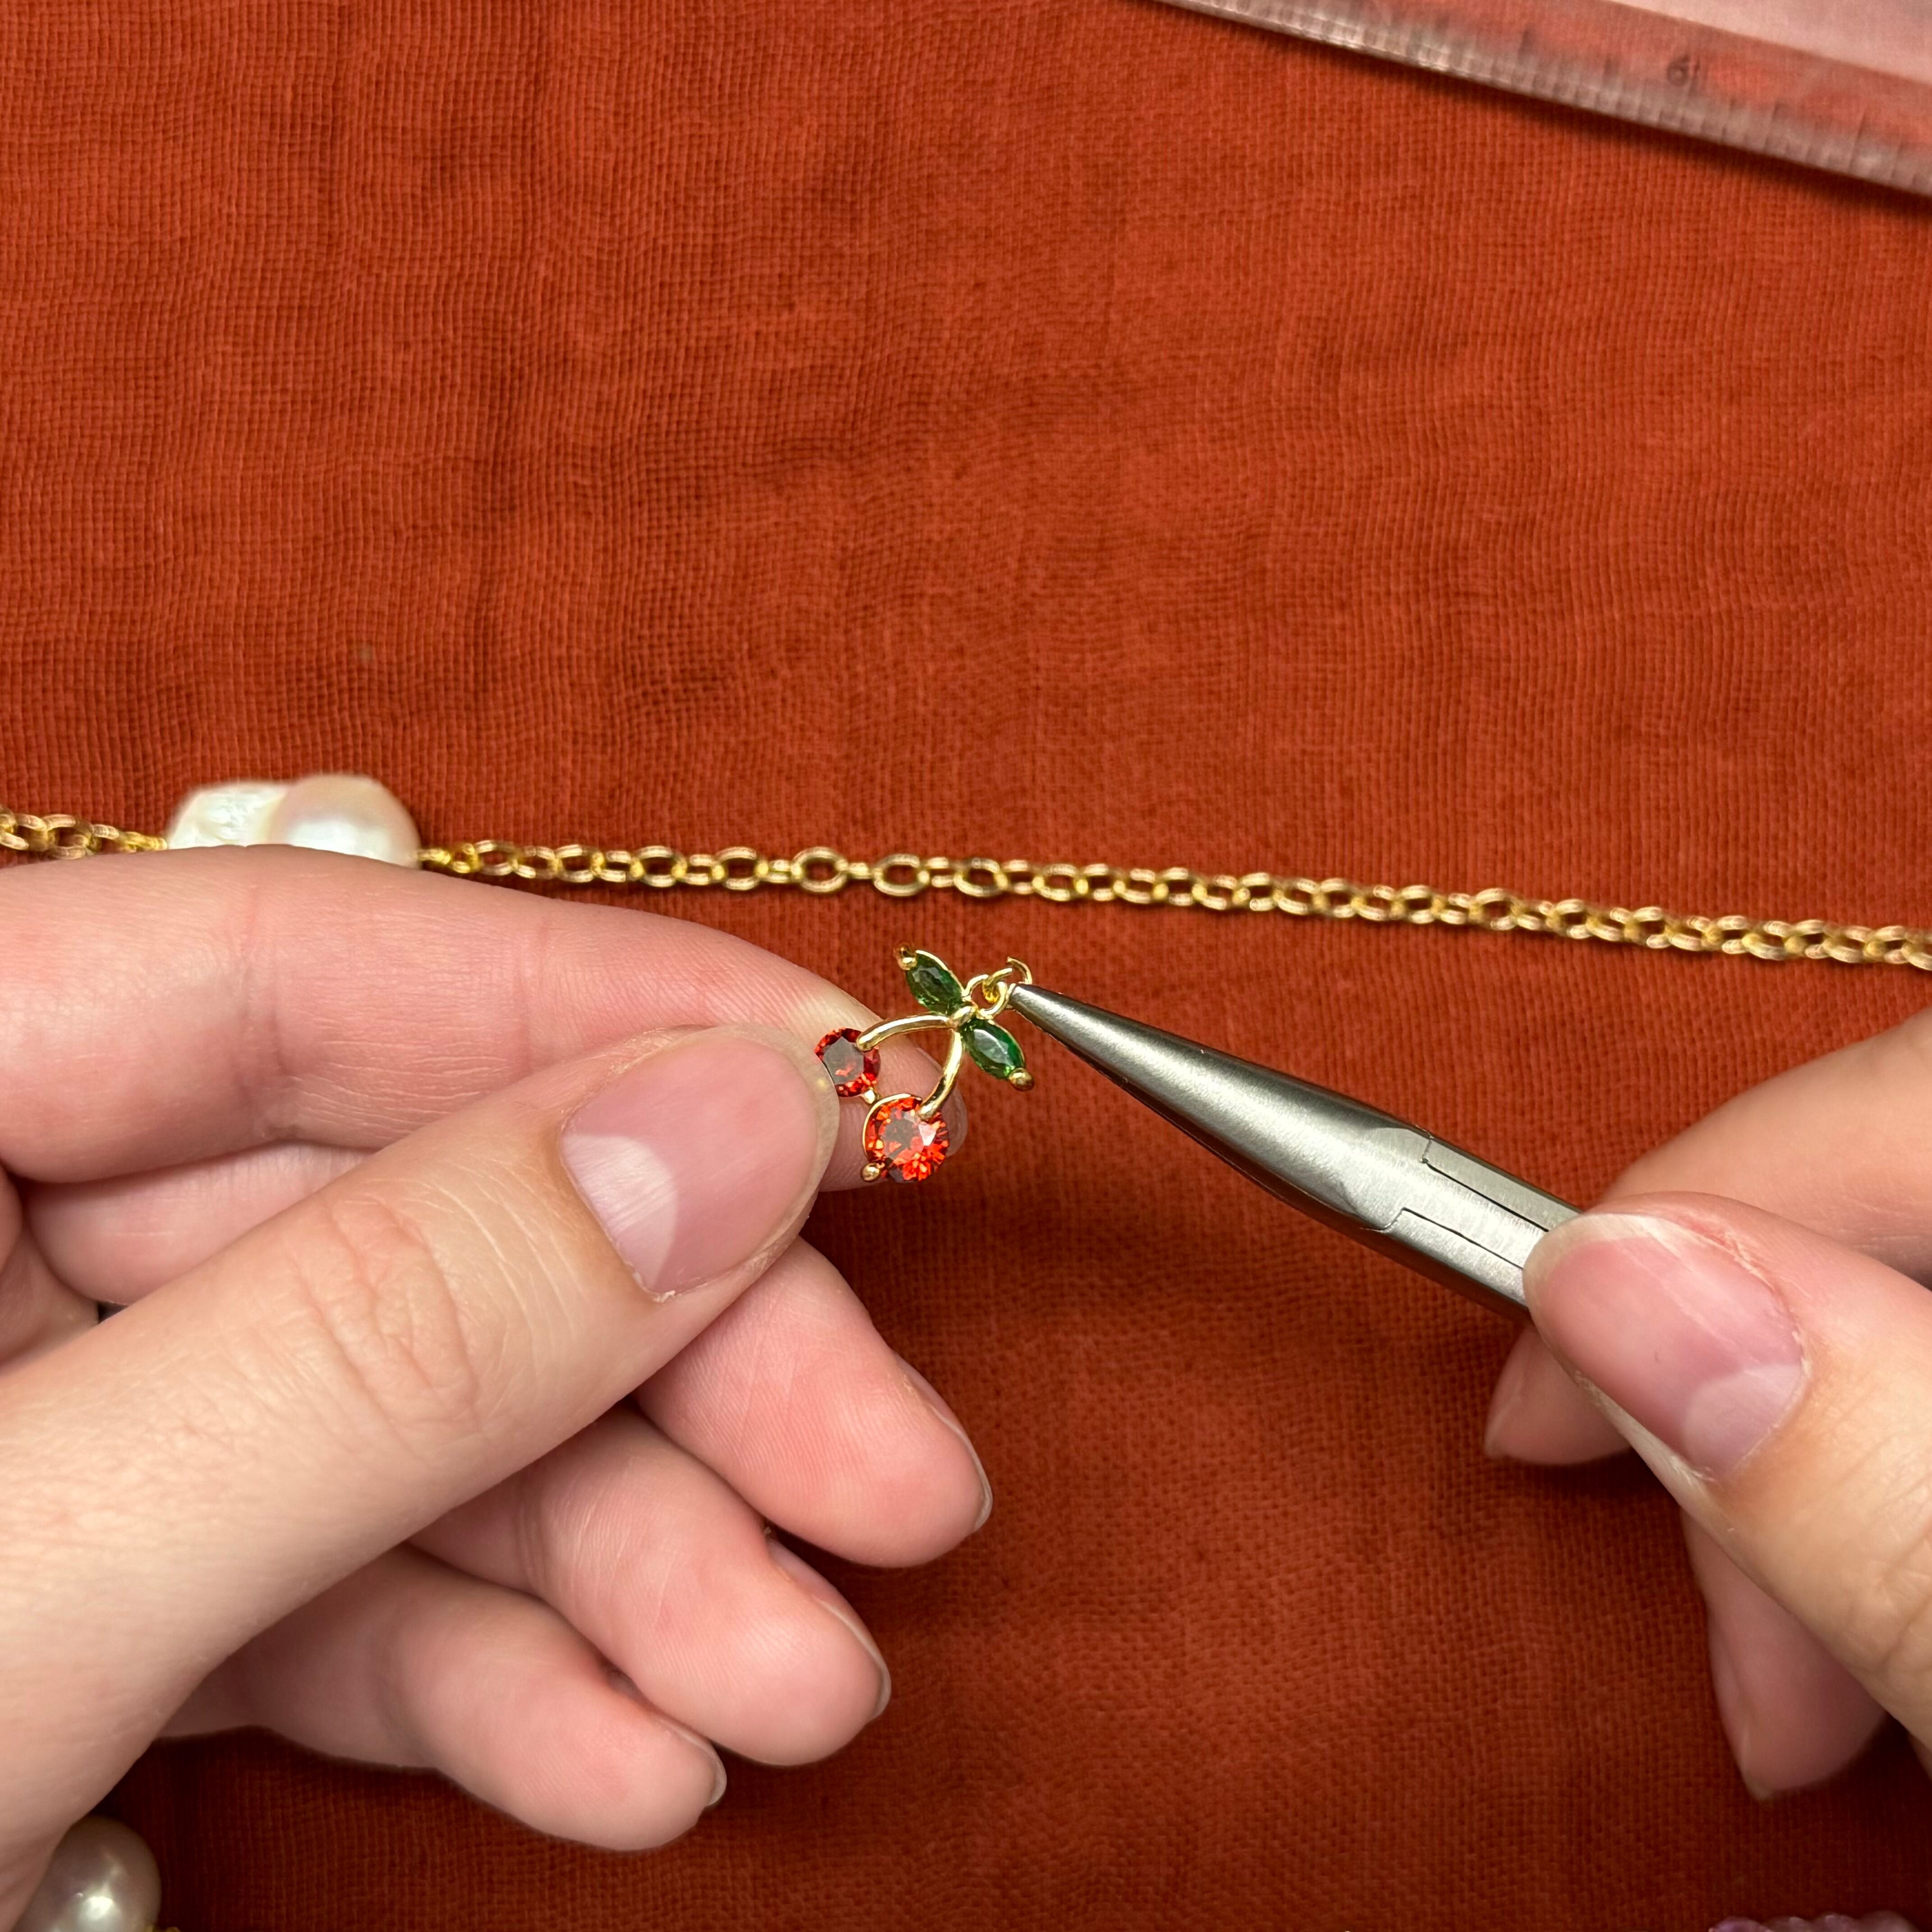
8. Moving on to the charms. Open a 3mm jump ring and attach to the loop on the cherry charm
** you will need to attach each charm with a jump ring, some charms come with a jump ring you can use, others might need a jump ring added
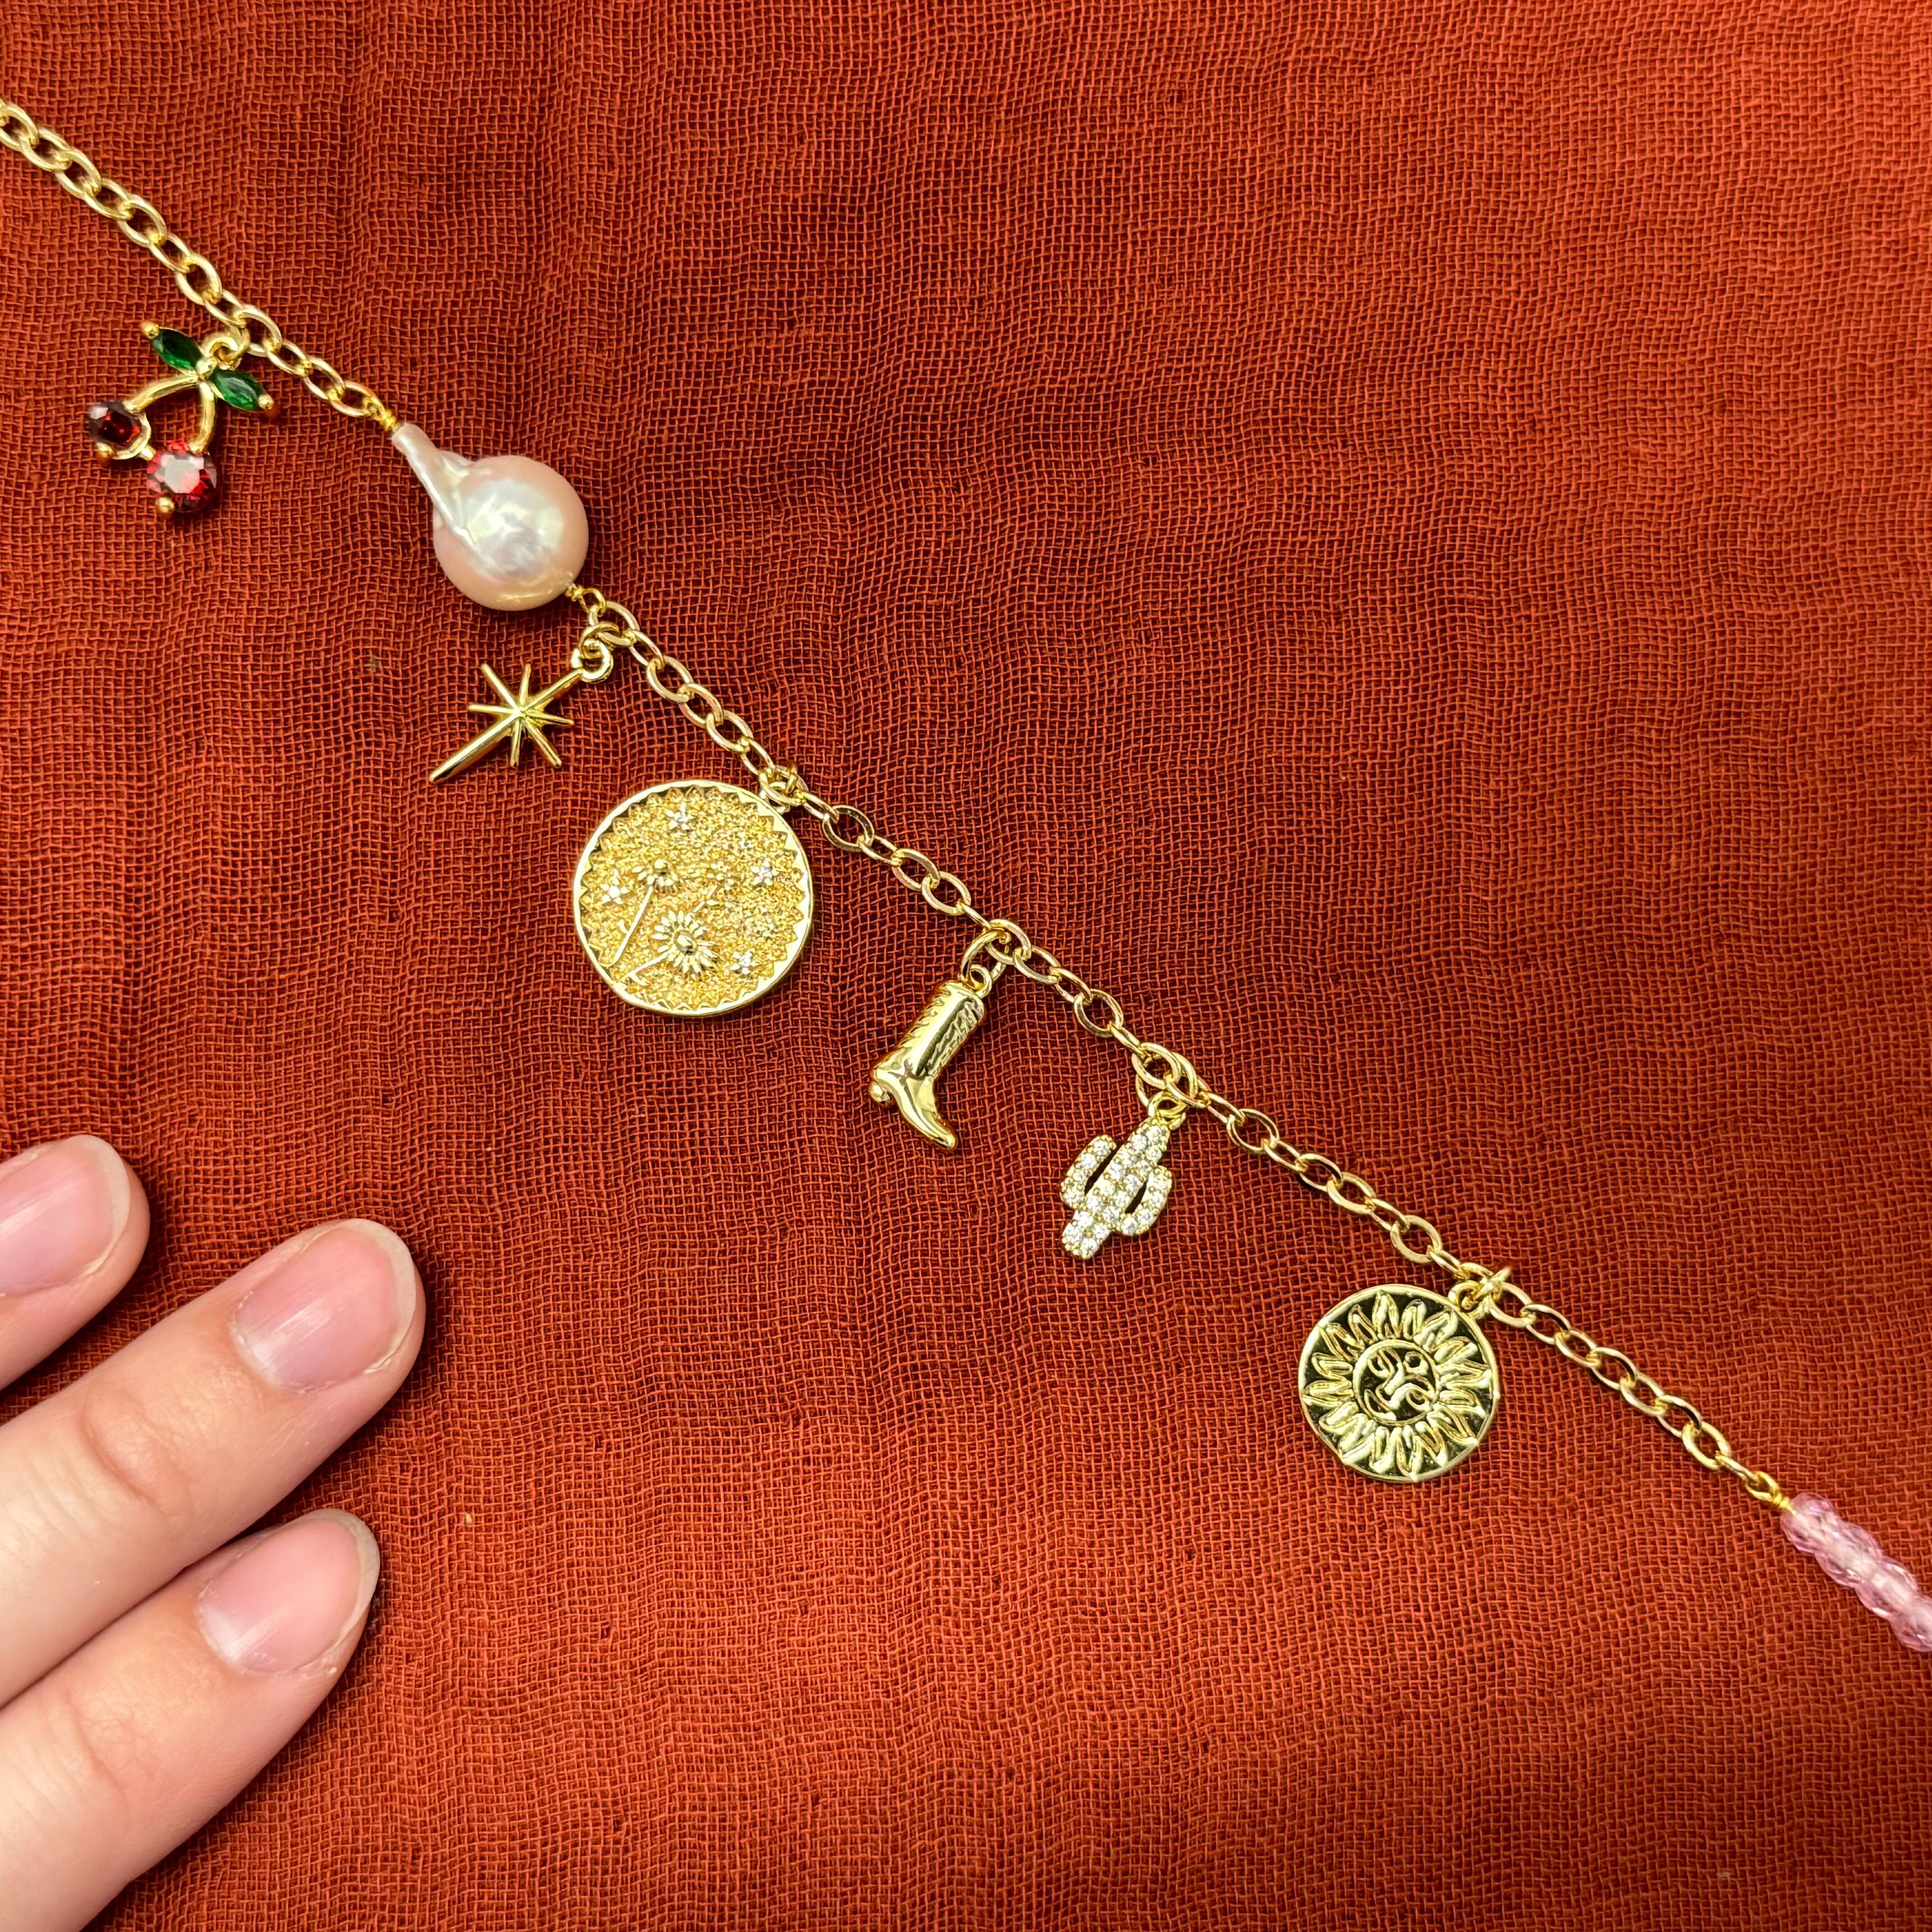
9. Here's where your charms will go:
Cherry: 4 chain links to the left of the baroque pearl
North star: first chain link
Double sided daisy coin: 7th link to the right of the baroque pearl (you will need a jump ring)
** the double sided daisy coin is the center of the first layer, be sure this charm hangs in the center by holding the necklace upside down by the charm, you may need to cut a link or two on one or both sides to ensure that it lays in the center - this happens due to a link added in measuring or a longer wire wrapped loop. Don't worry if it's not perfect, we are going for an "abstract" look!
Boot: 8th link to the right of the double sided daisy coin
Cactus: 7th link to the right of the boot charm
Sun charm: 10th link to the right of the cactus charm
Done with the first layer of our charm necklace!
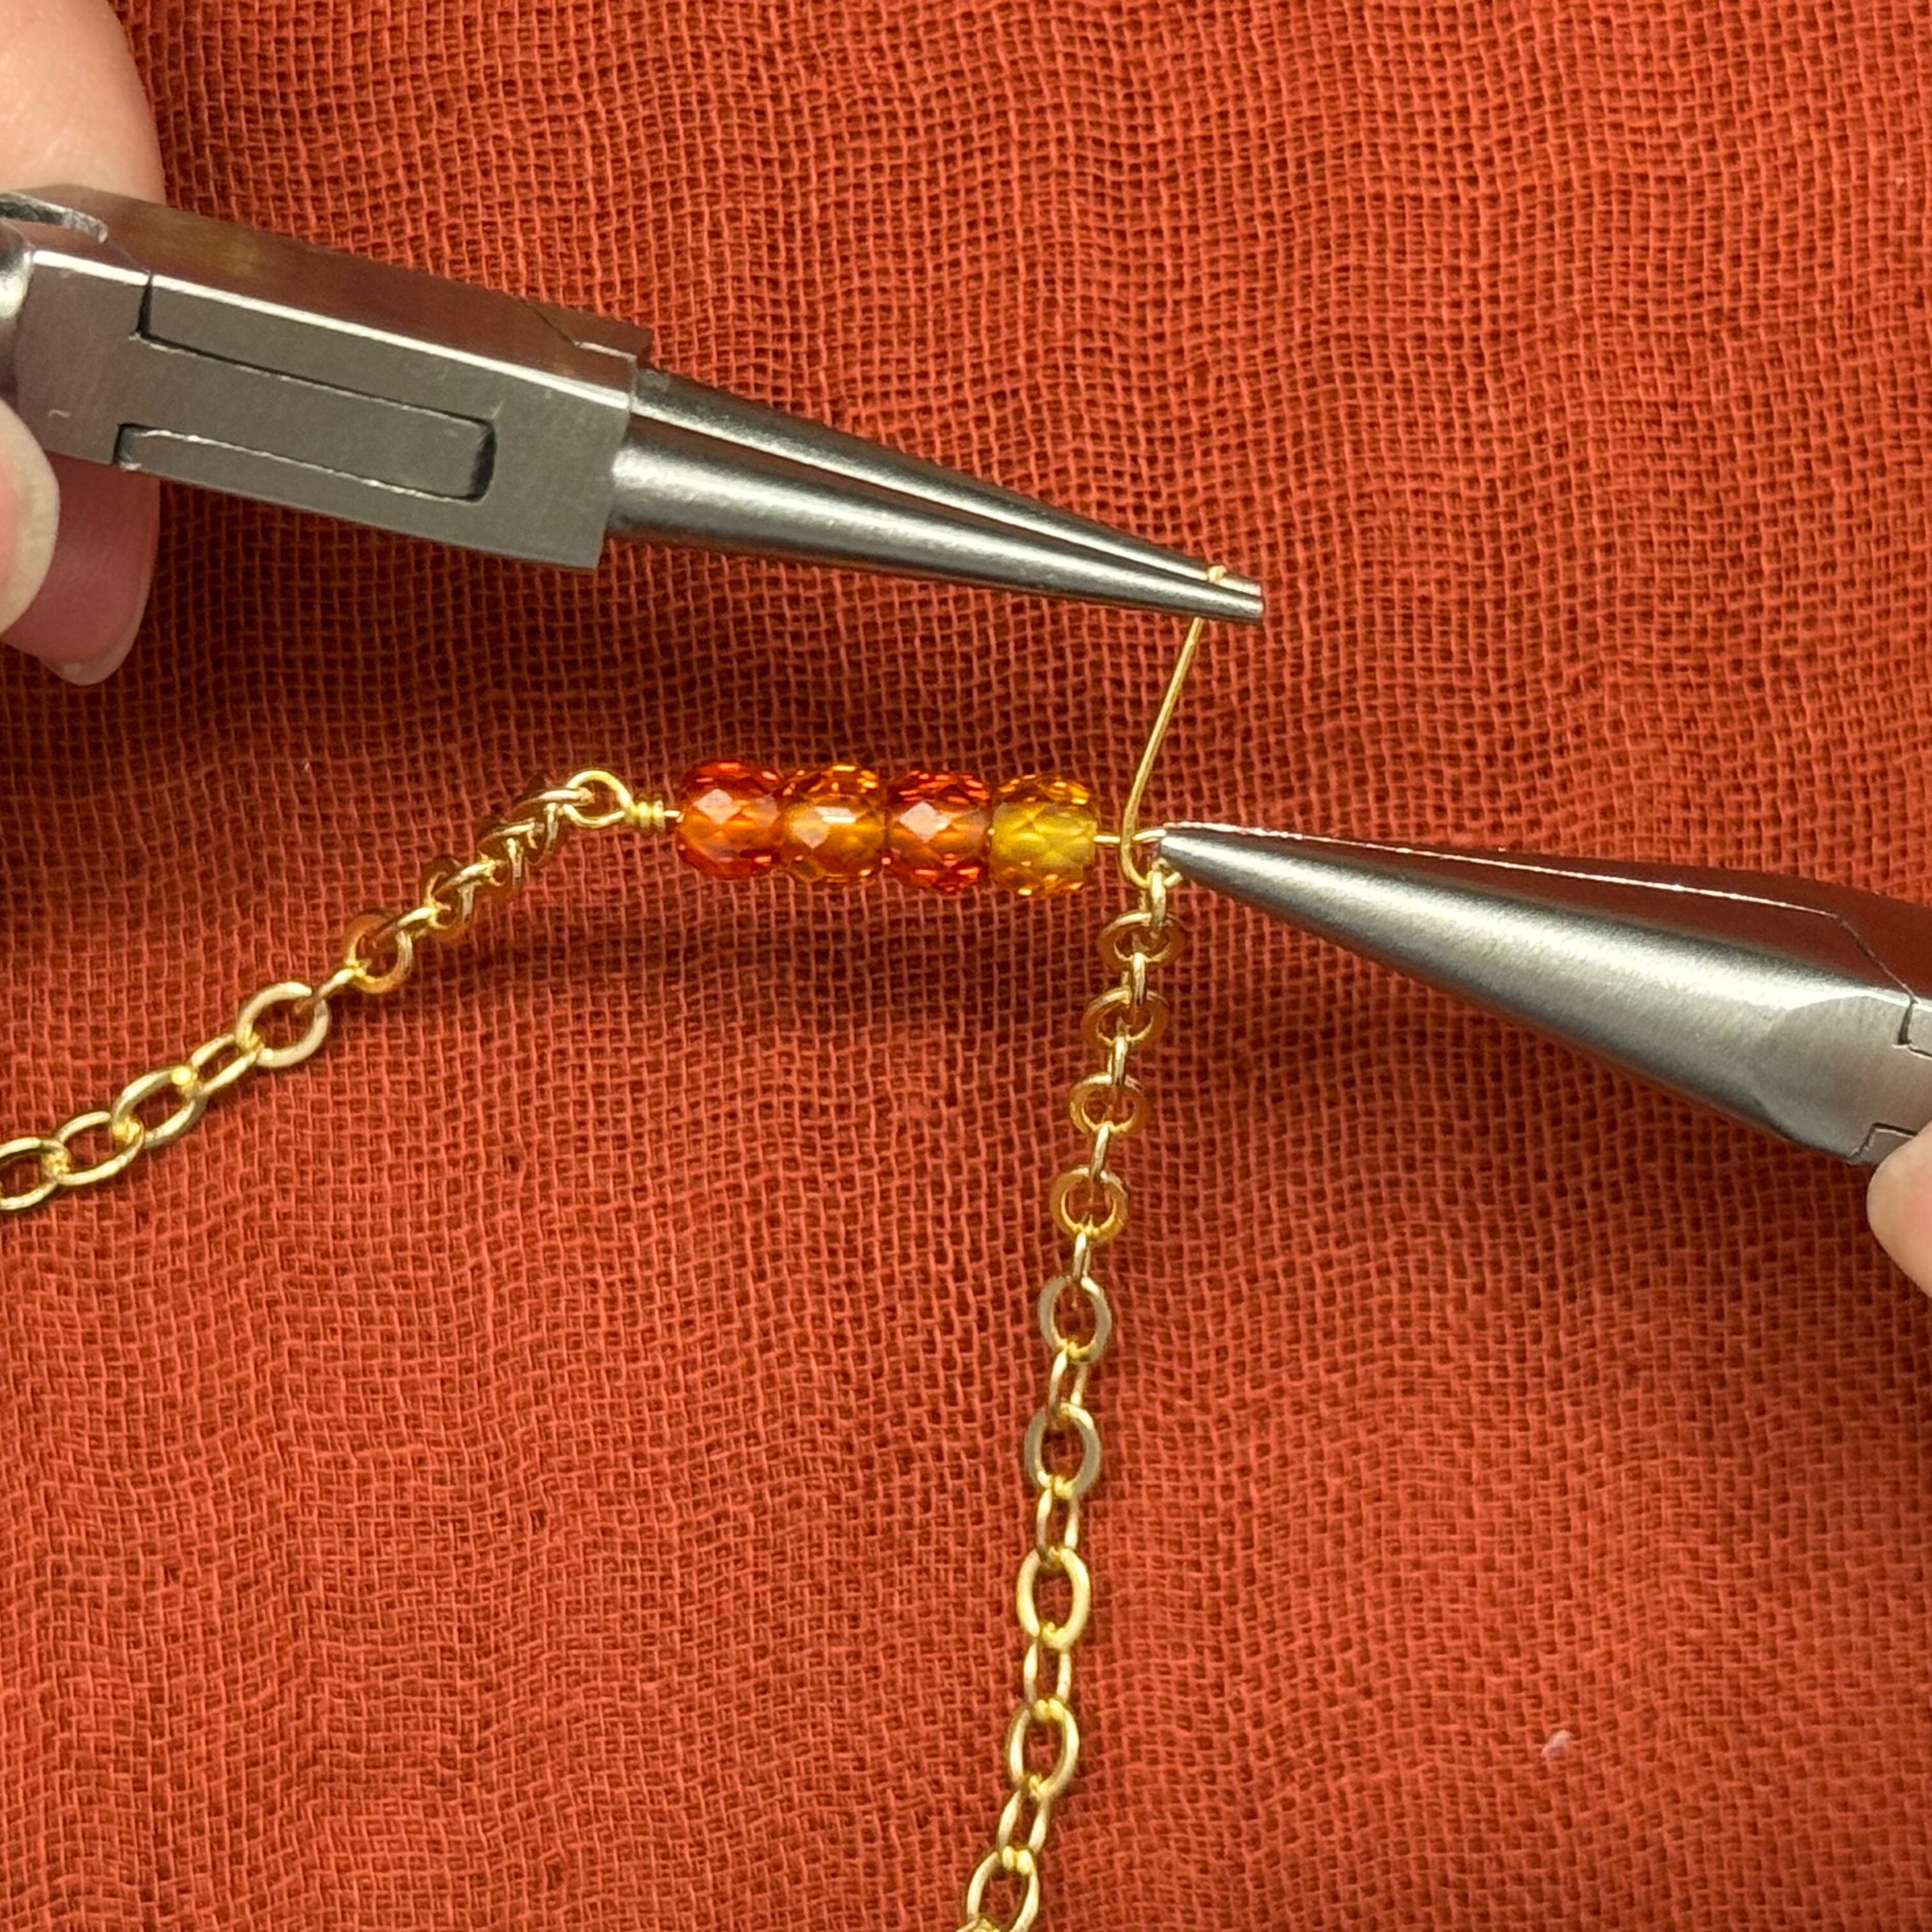
10. Starting with the second layer of the necklace, cut a 13 cm section of chain. Wire wrap a loop using a head pin onto the end of the section of chain, thread on 4 orange zircon beads and wire wrap a loop containing the rest of the chain.
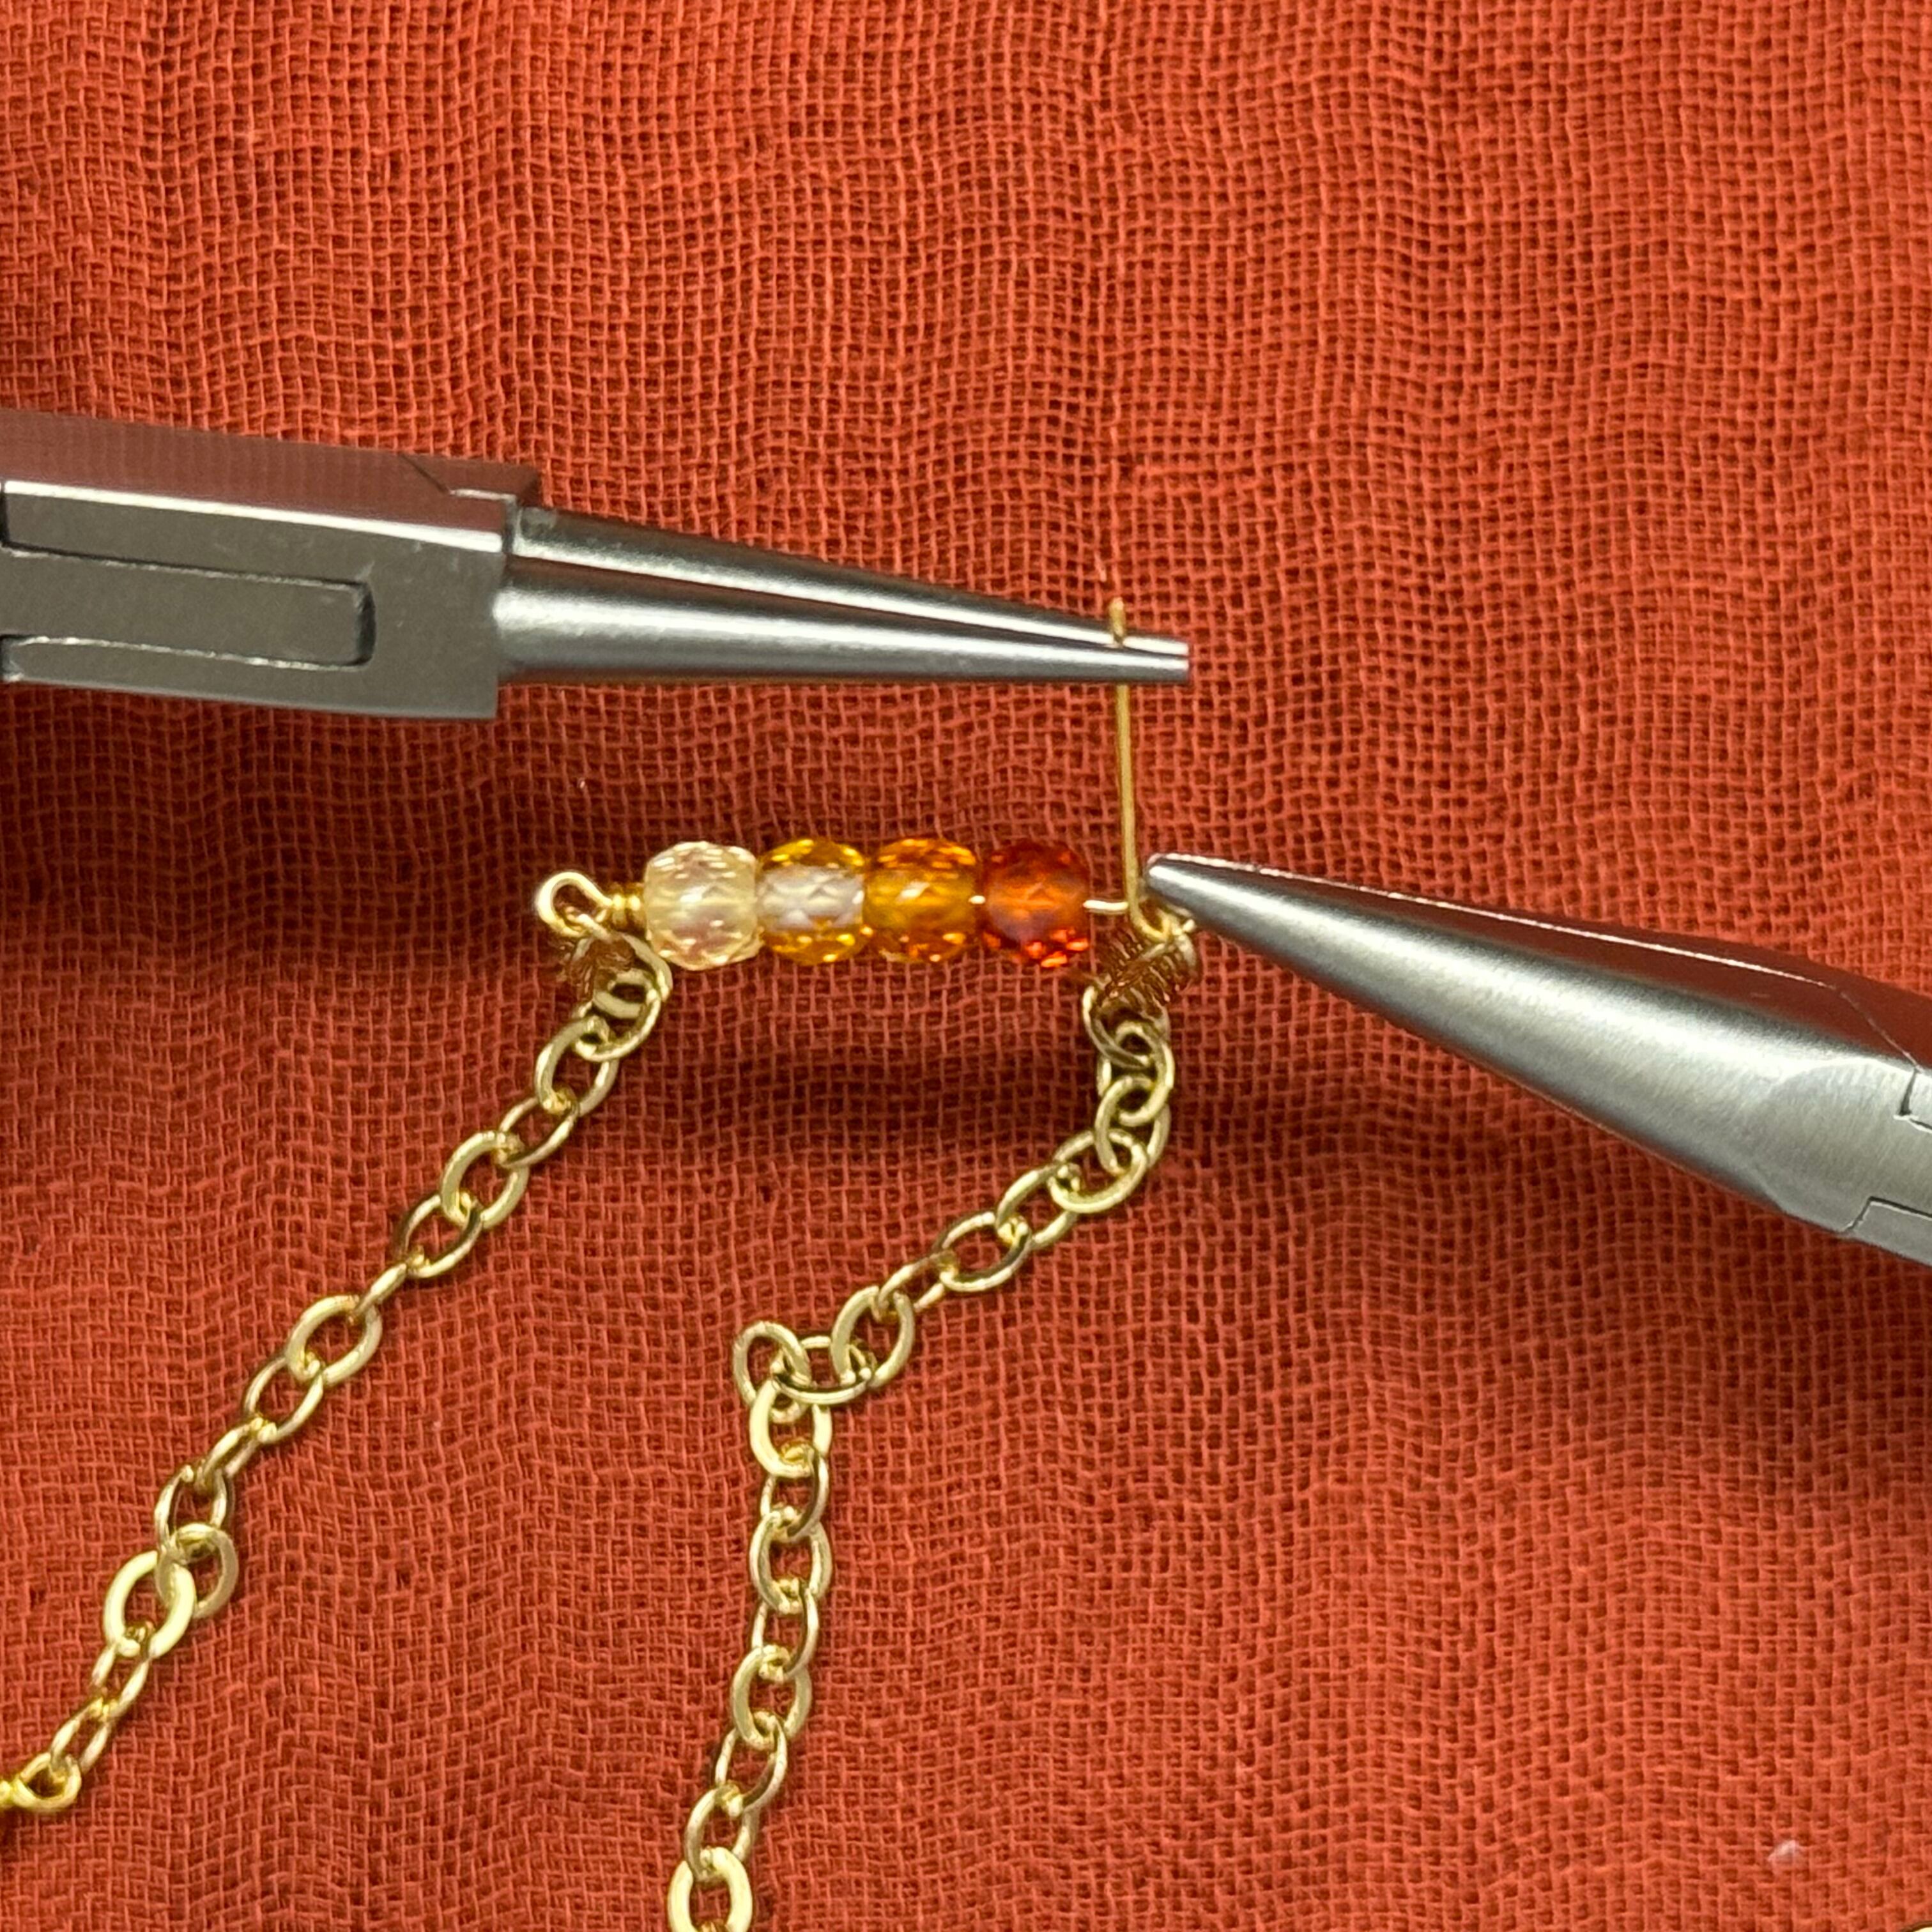
11. Take the remaining chain and cut a 7 cm section. Wire wrap a loop using a head pin onto the end of the section of chain, thread on 4 zircon beads in an ombre pattern (order: light yellow, yellow orange, orange, dark orange) and wire wrap a loop containing the rest of the chain.
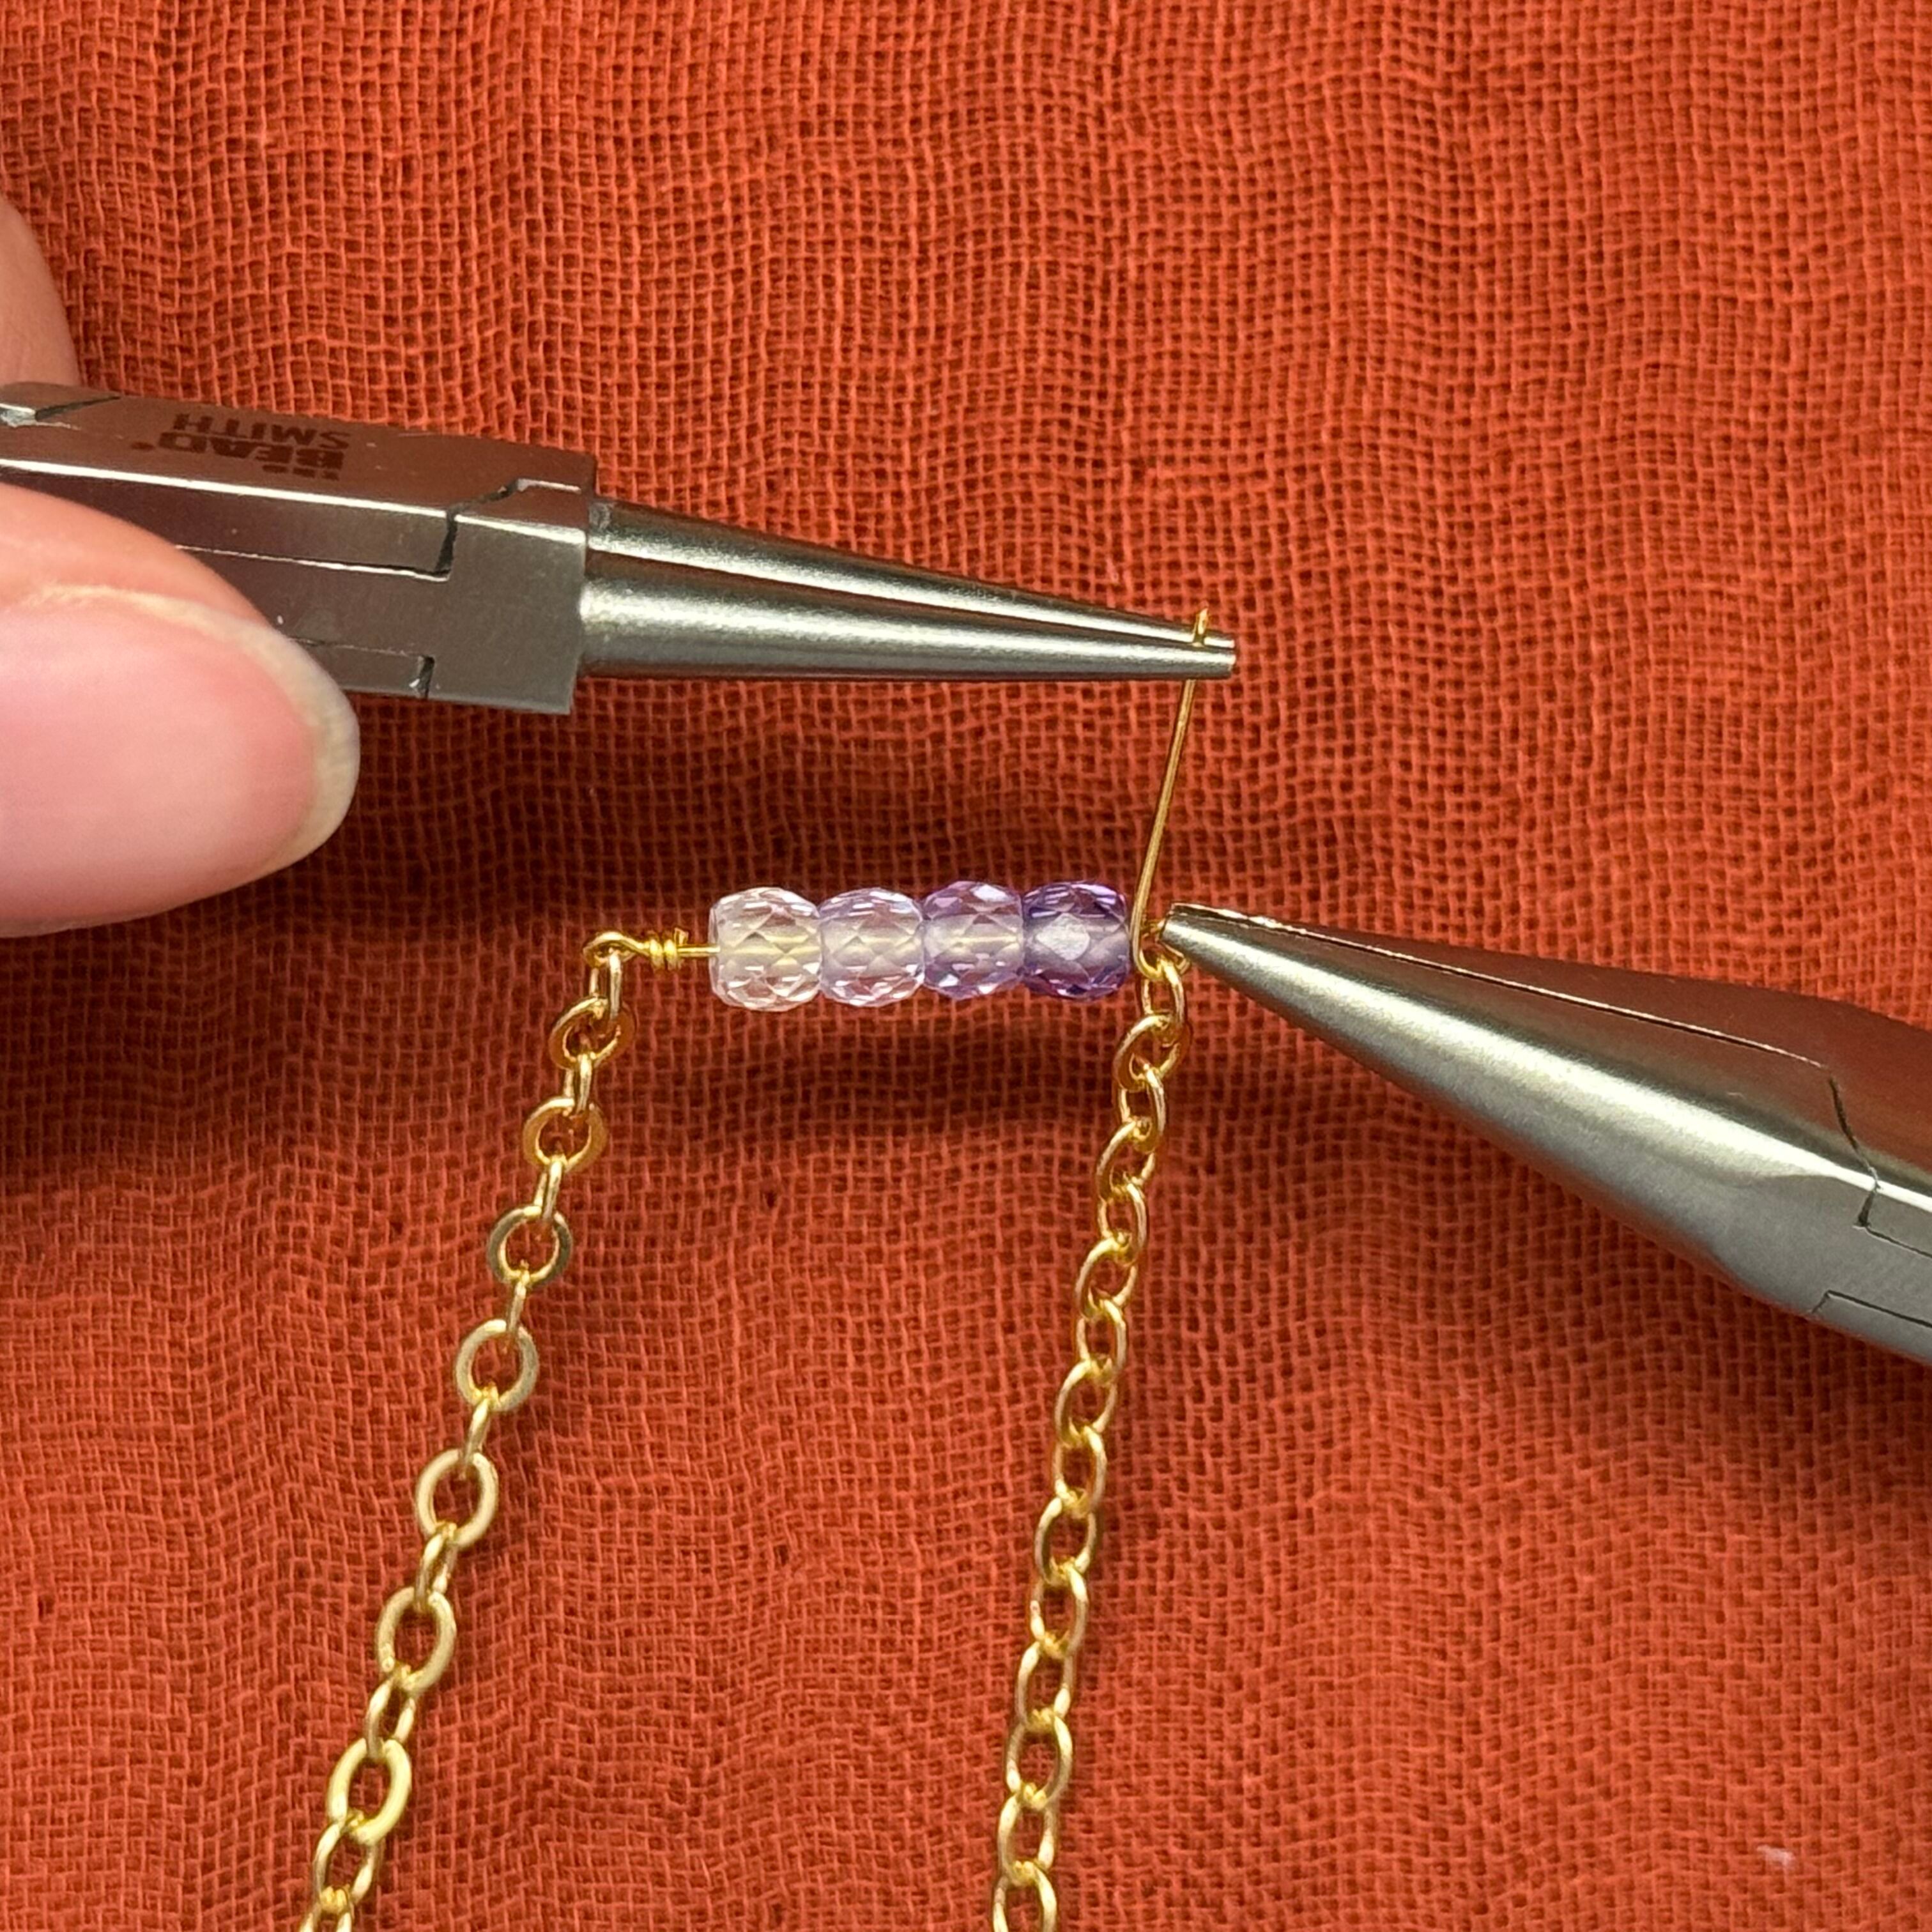
12. Take the remaining chain and cut a 8 cm section. Wire wrap a loop using a head pin onto the end of the section of chain, thread on 4 zircon beads in an ombre pattern (order: clear, light purple, medium purple, dark purple) and wire wrap a loop containing the rest of the chain.
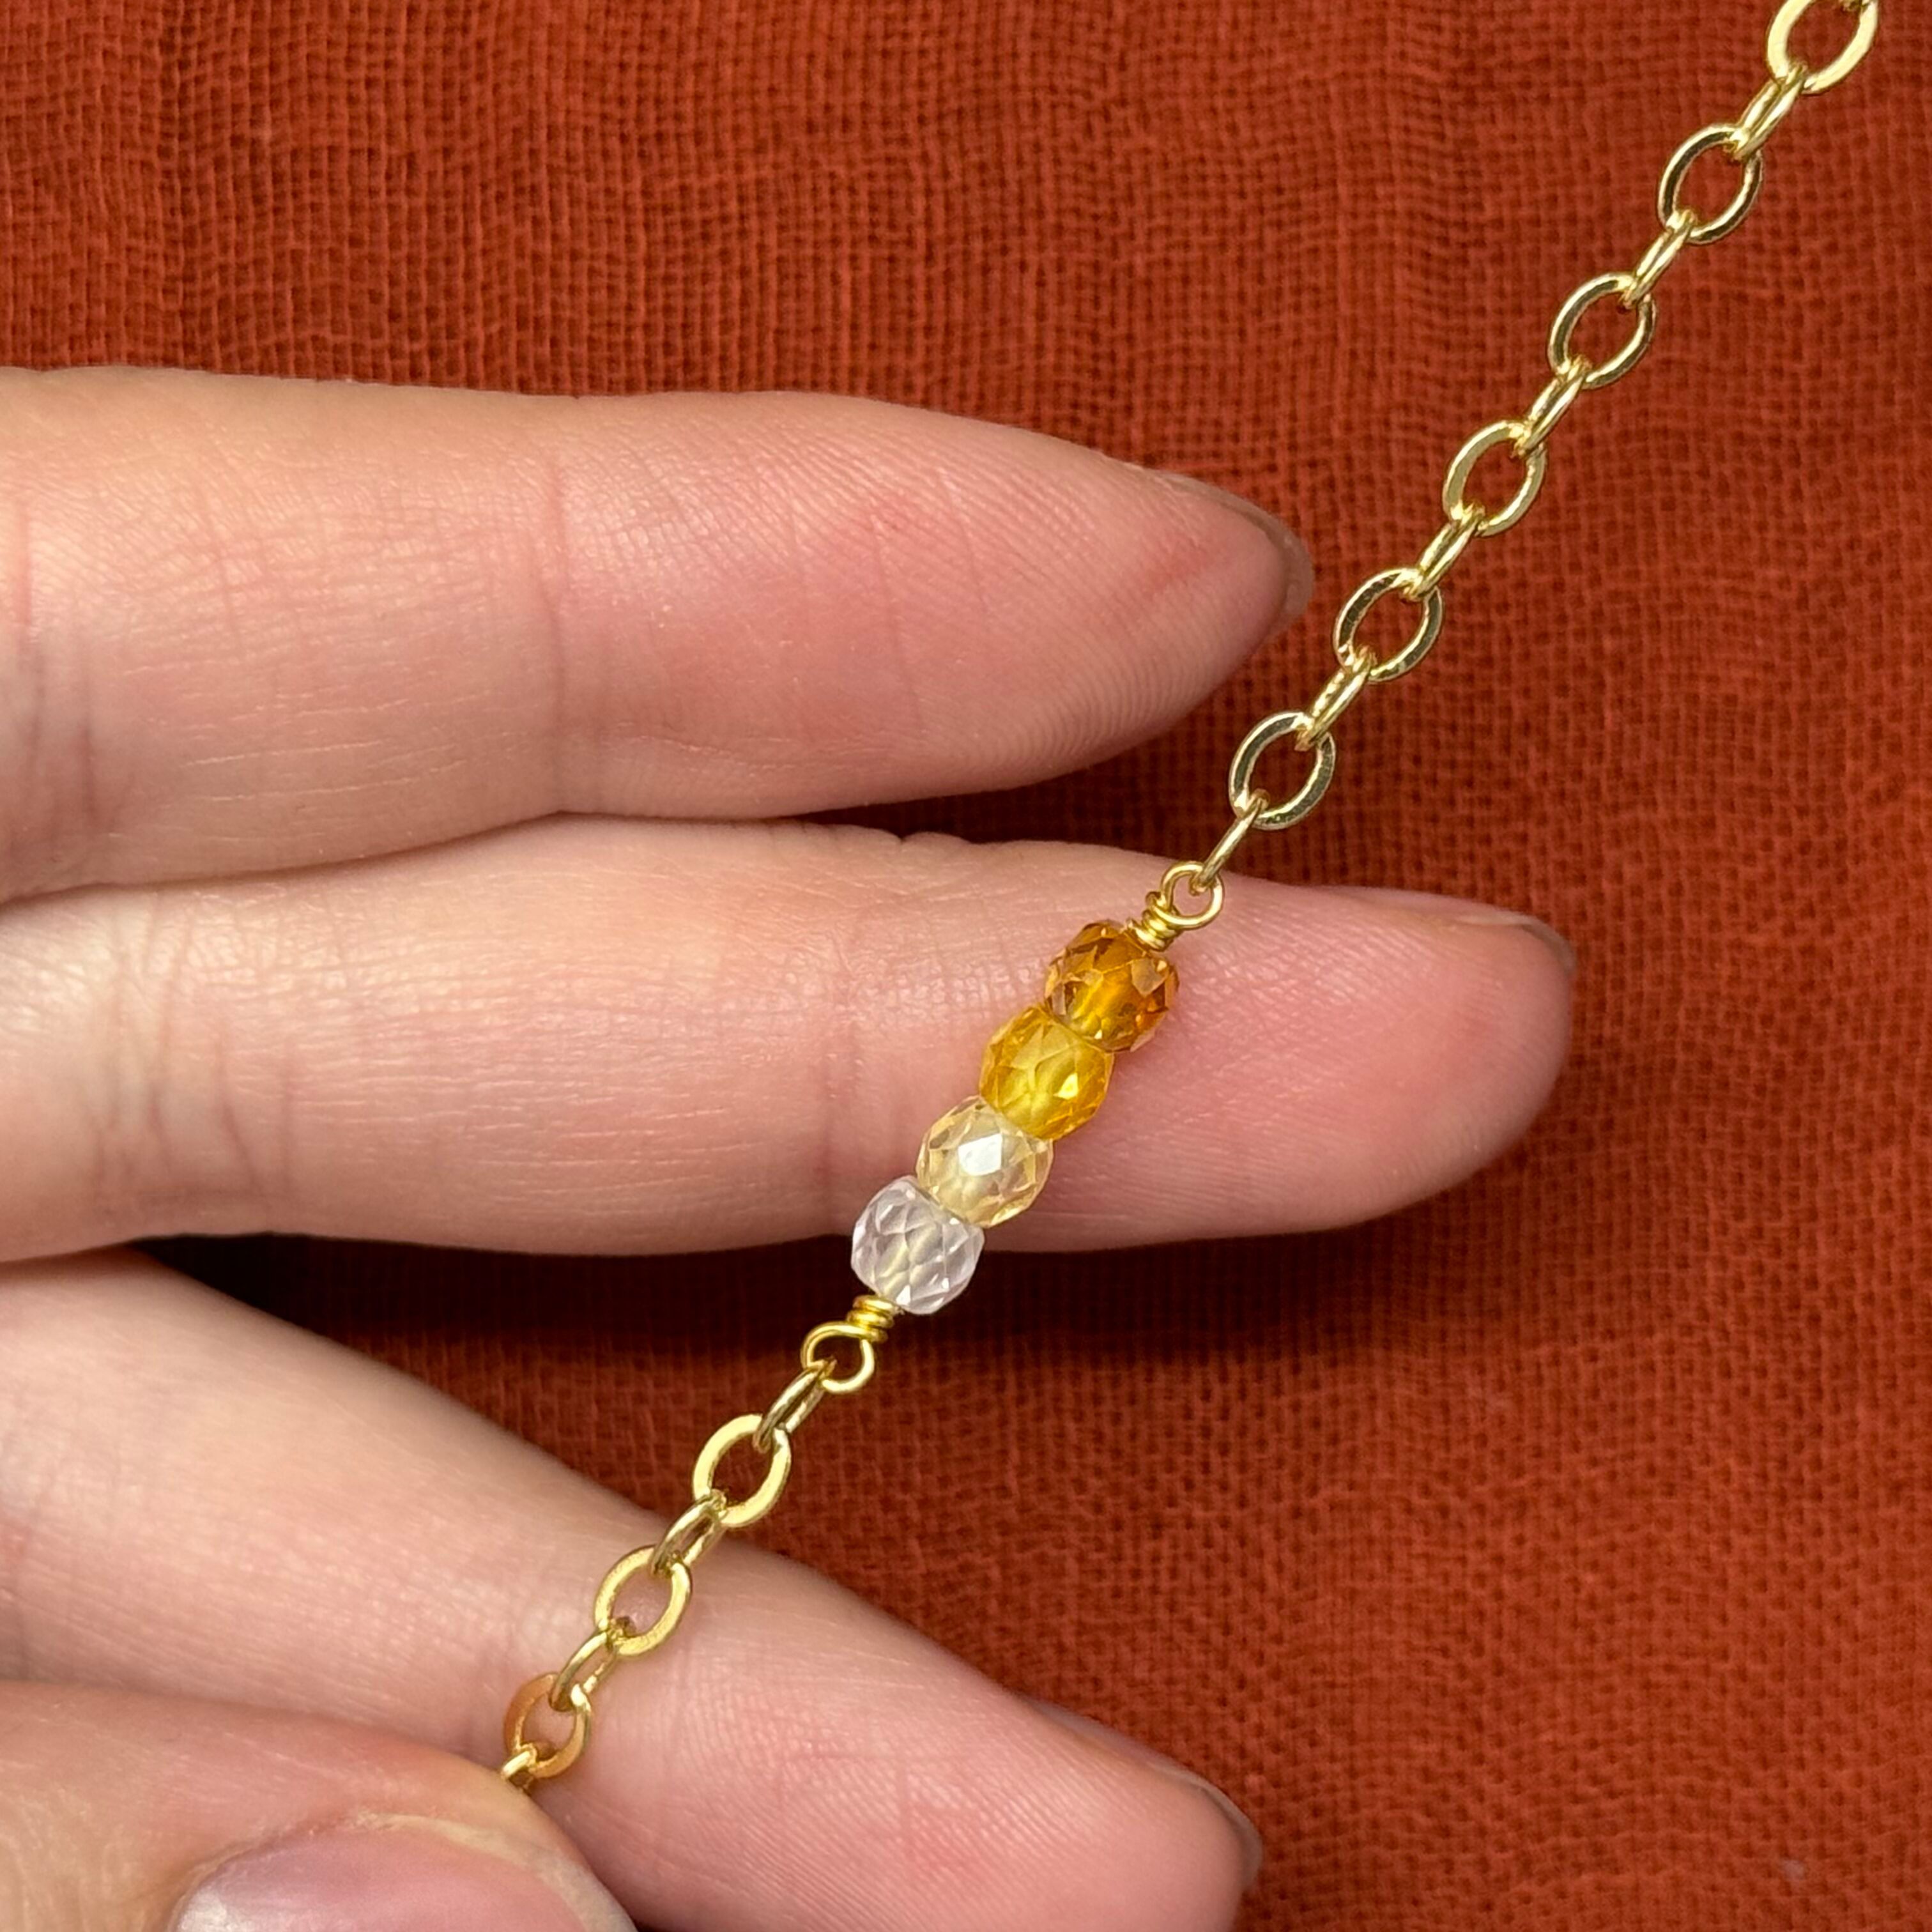
13. Take the remaining chain and cut a 7.5 cm section. Wire wrap a loop using a head pin onto the end of the section of chain, thread on 4 zircon beads in an ombre pattern (order: clear, light yellow, medium yellow, dark yellow) and wire wrap a loop containing the rest of the chain.
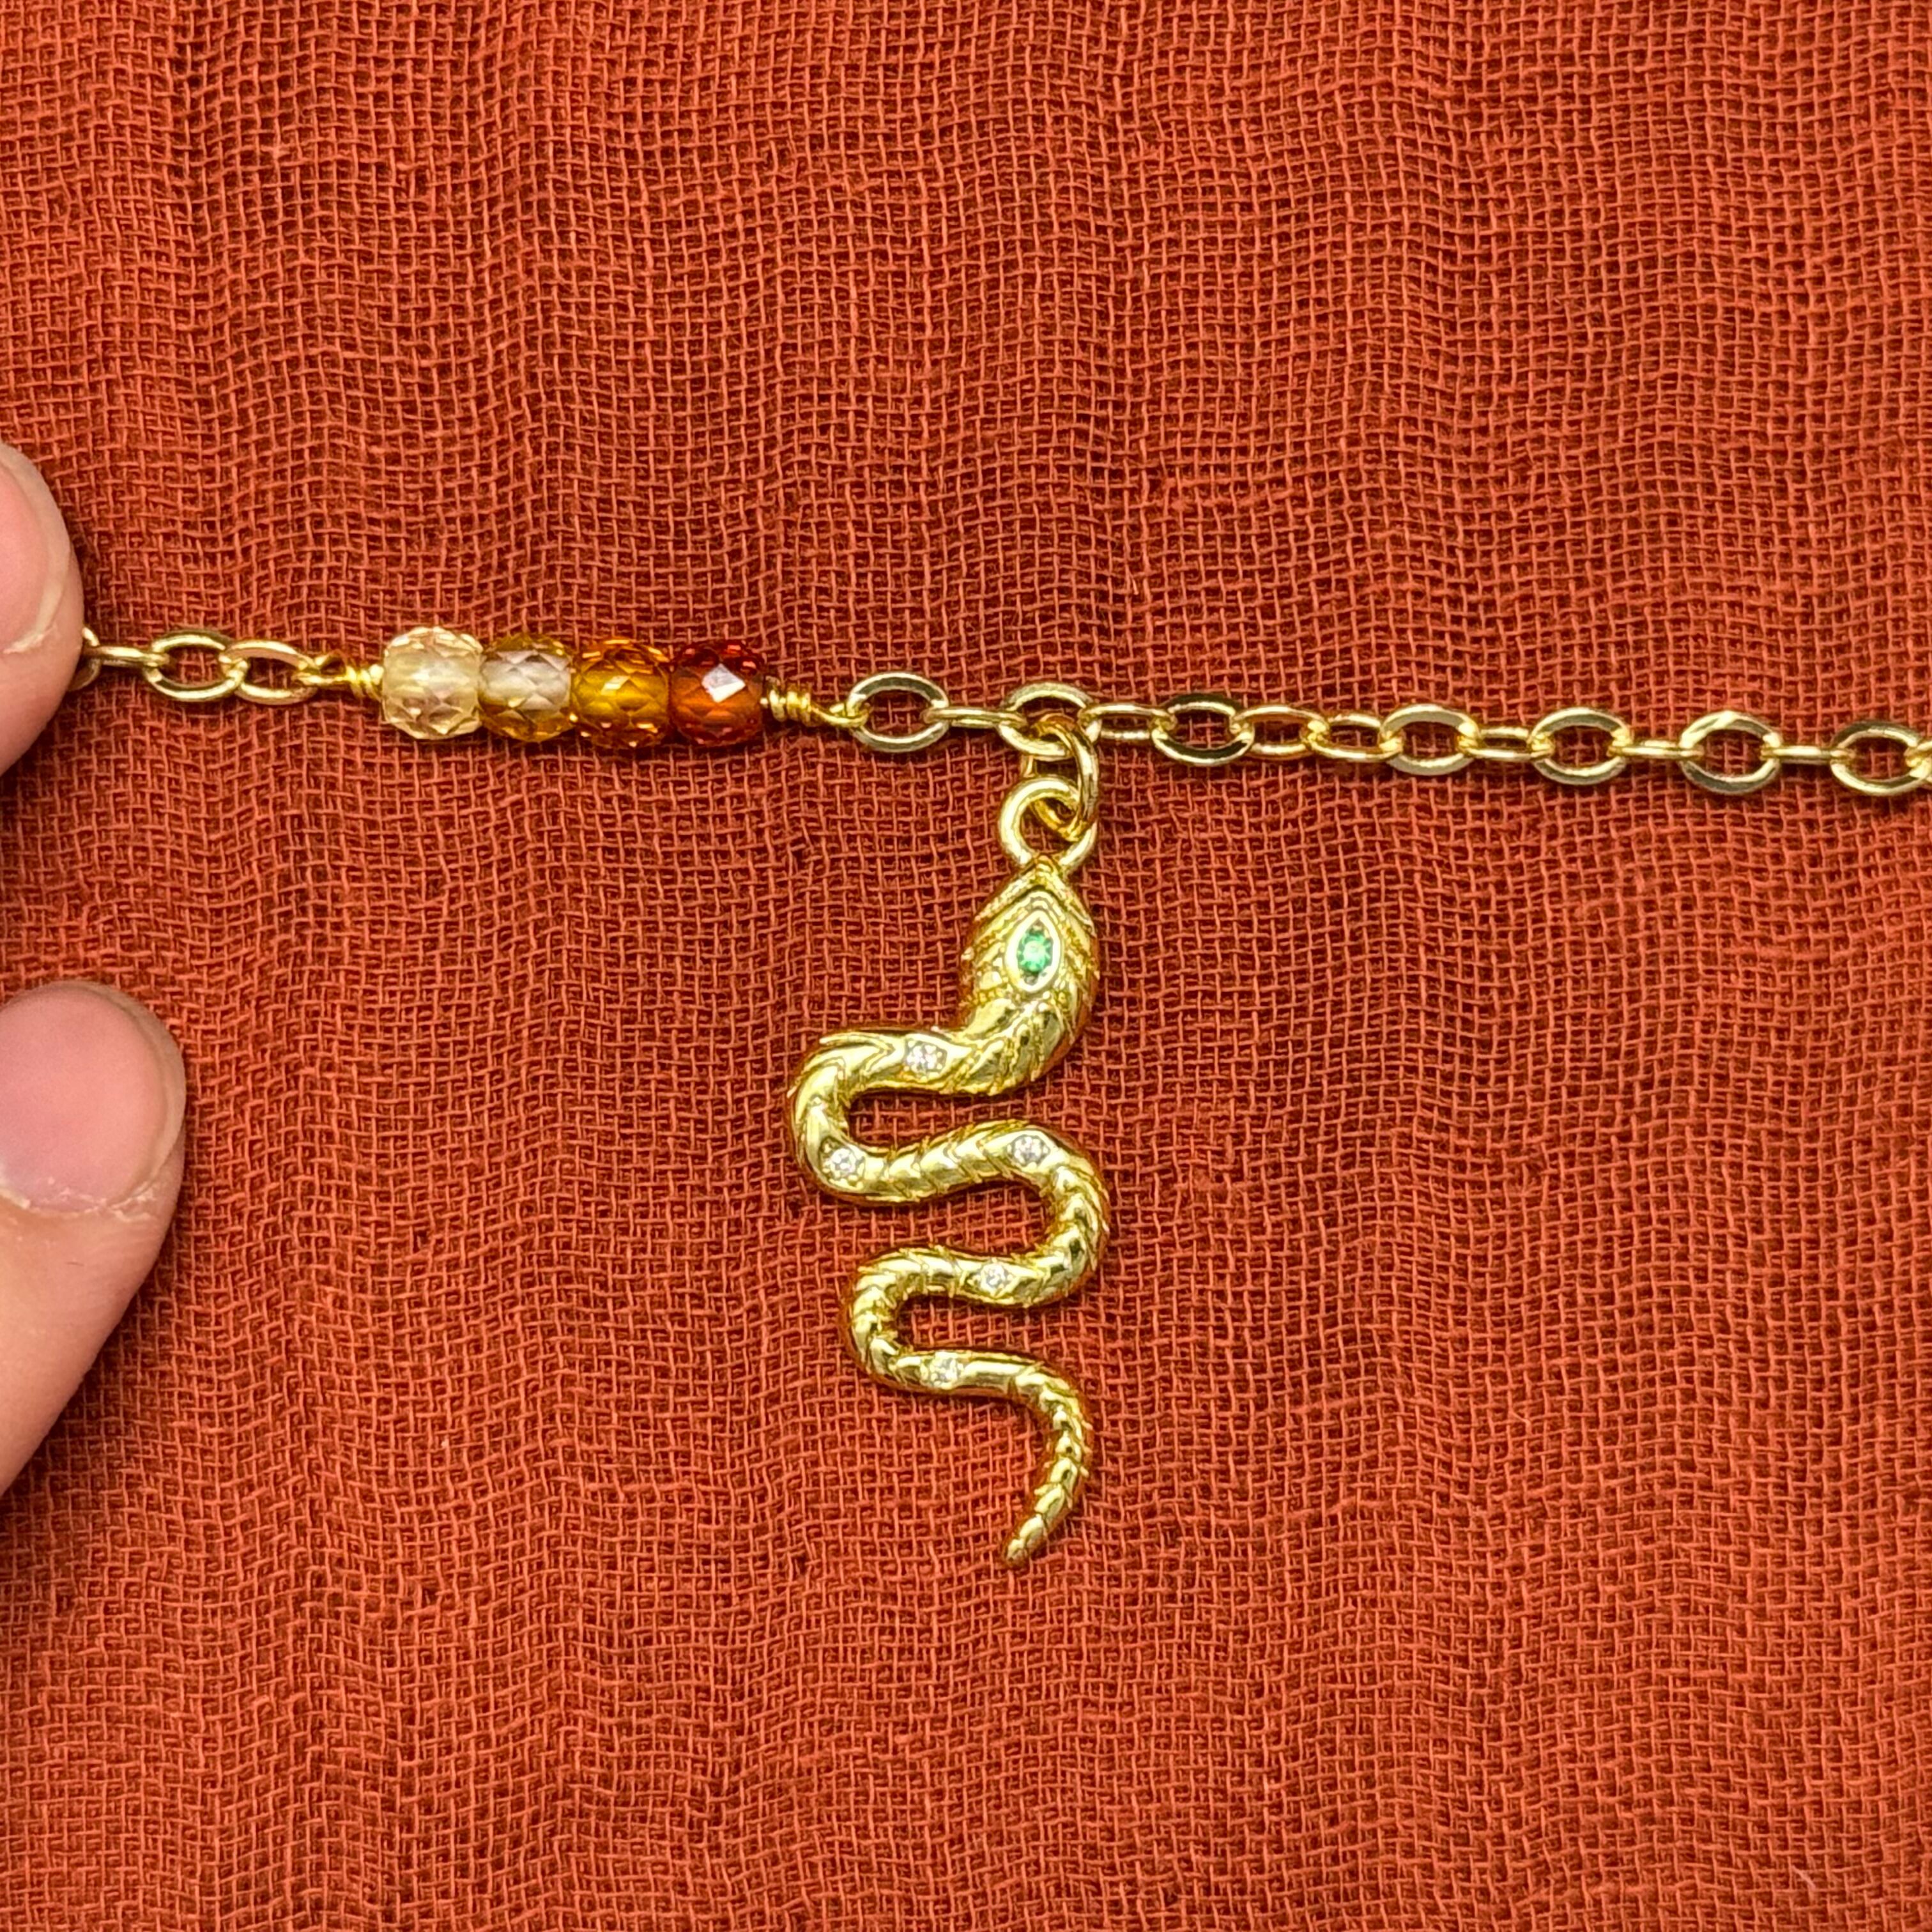
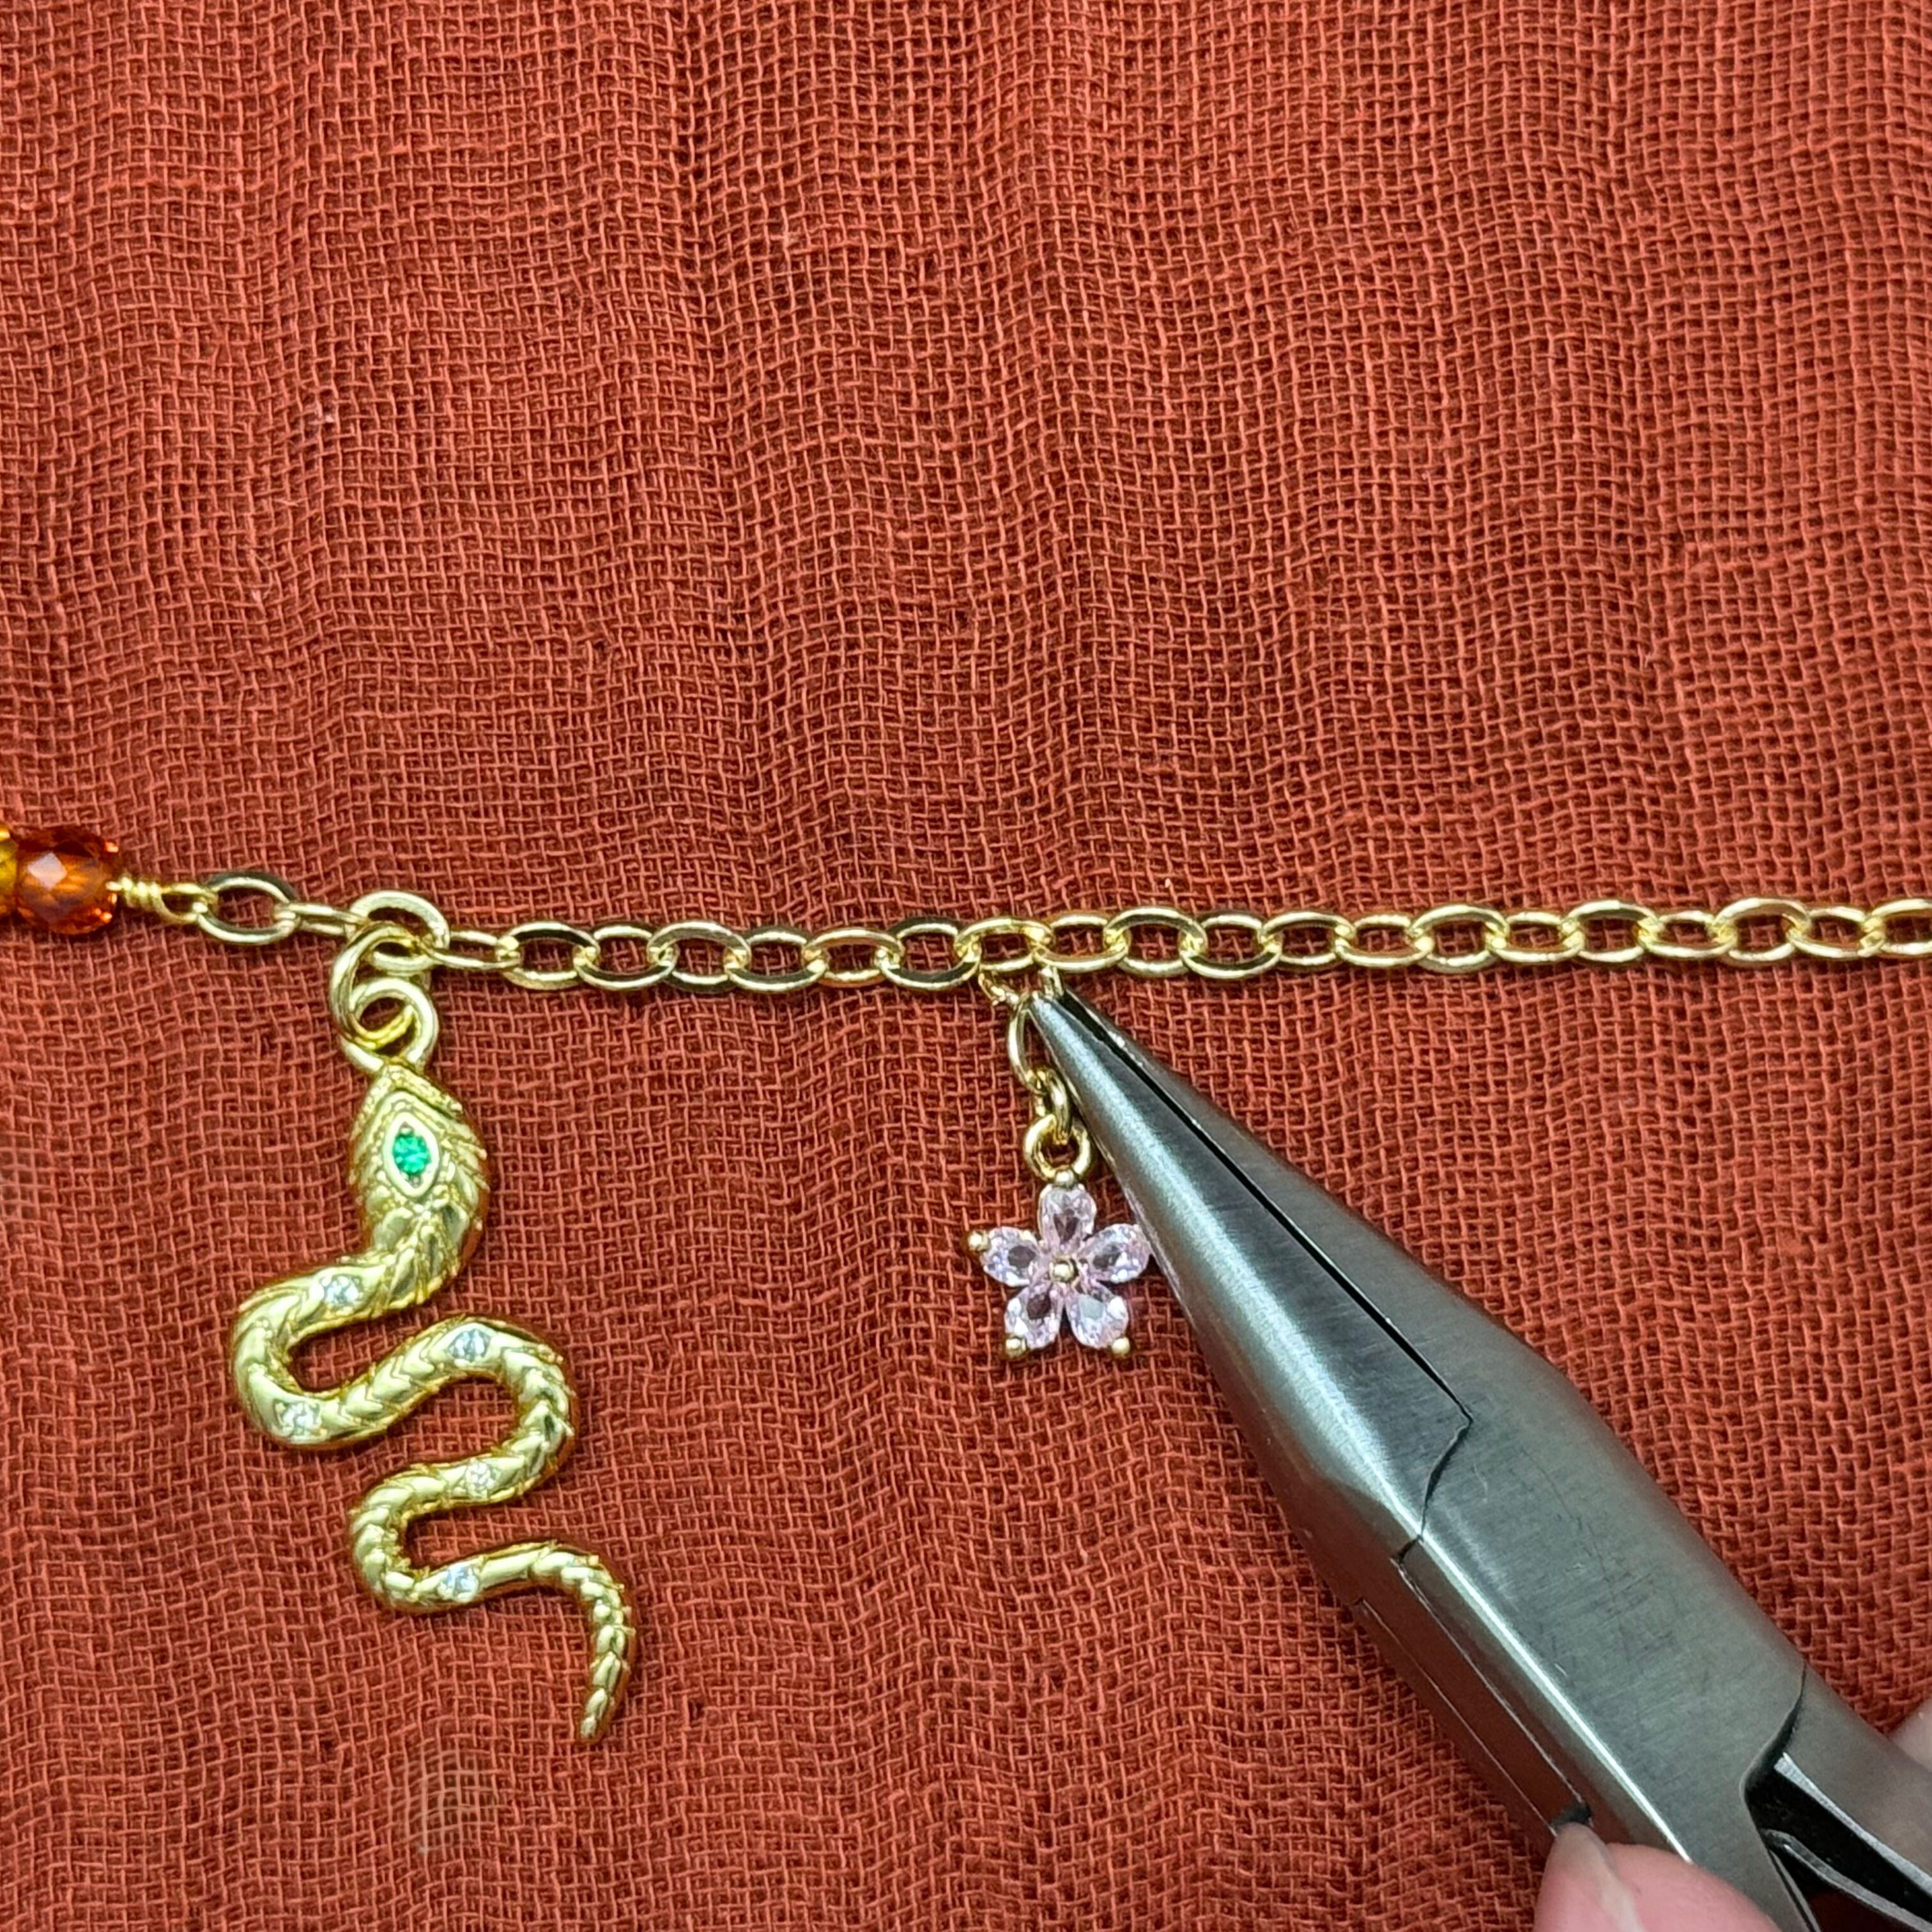
14. Now for the charms of the second layer!
The snake charm will be attached on the 3rd link to the right of the orange ombre zircon beads
**The snake charm is the center of the first layer, be sure this charm hangs in the center by holding the necklace upside down by the charm, you may need to cut a link or two on one or both sides to ensure that it lays in the center - this happens due to a link added in measuring or a longer wire wrapped loop. Don't worry if it's not perfect, we are going for an "abstract" look!
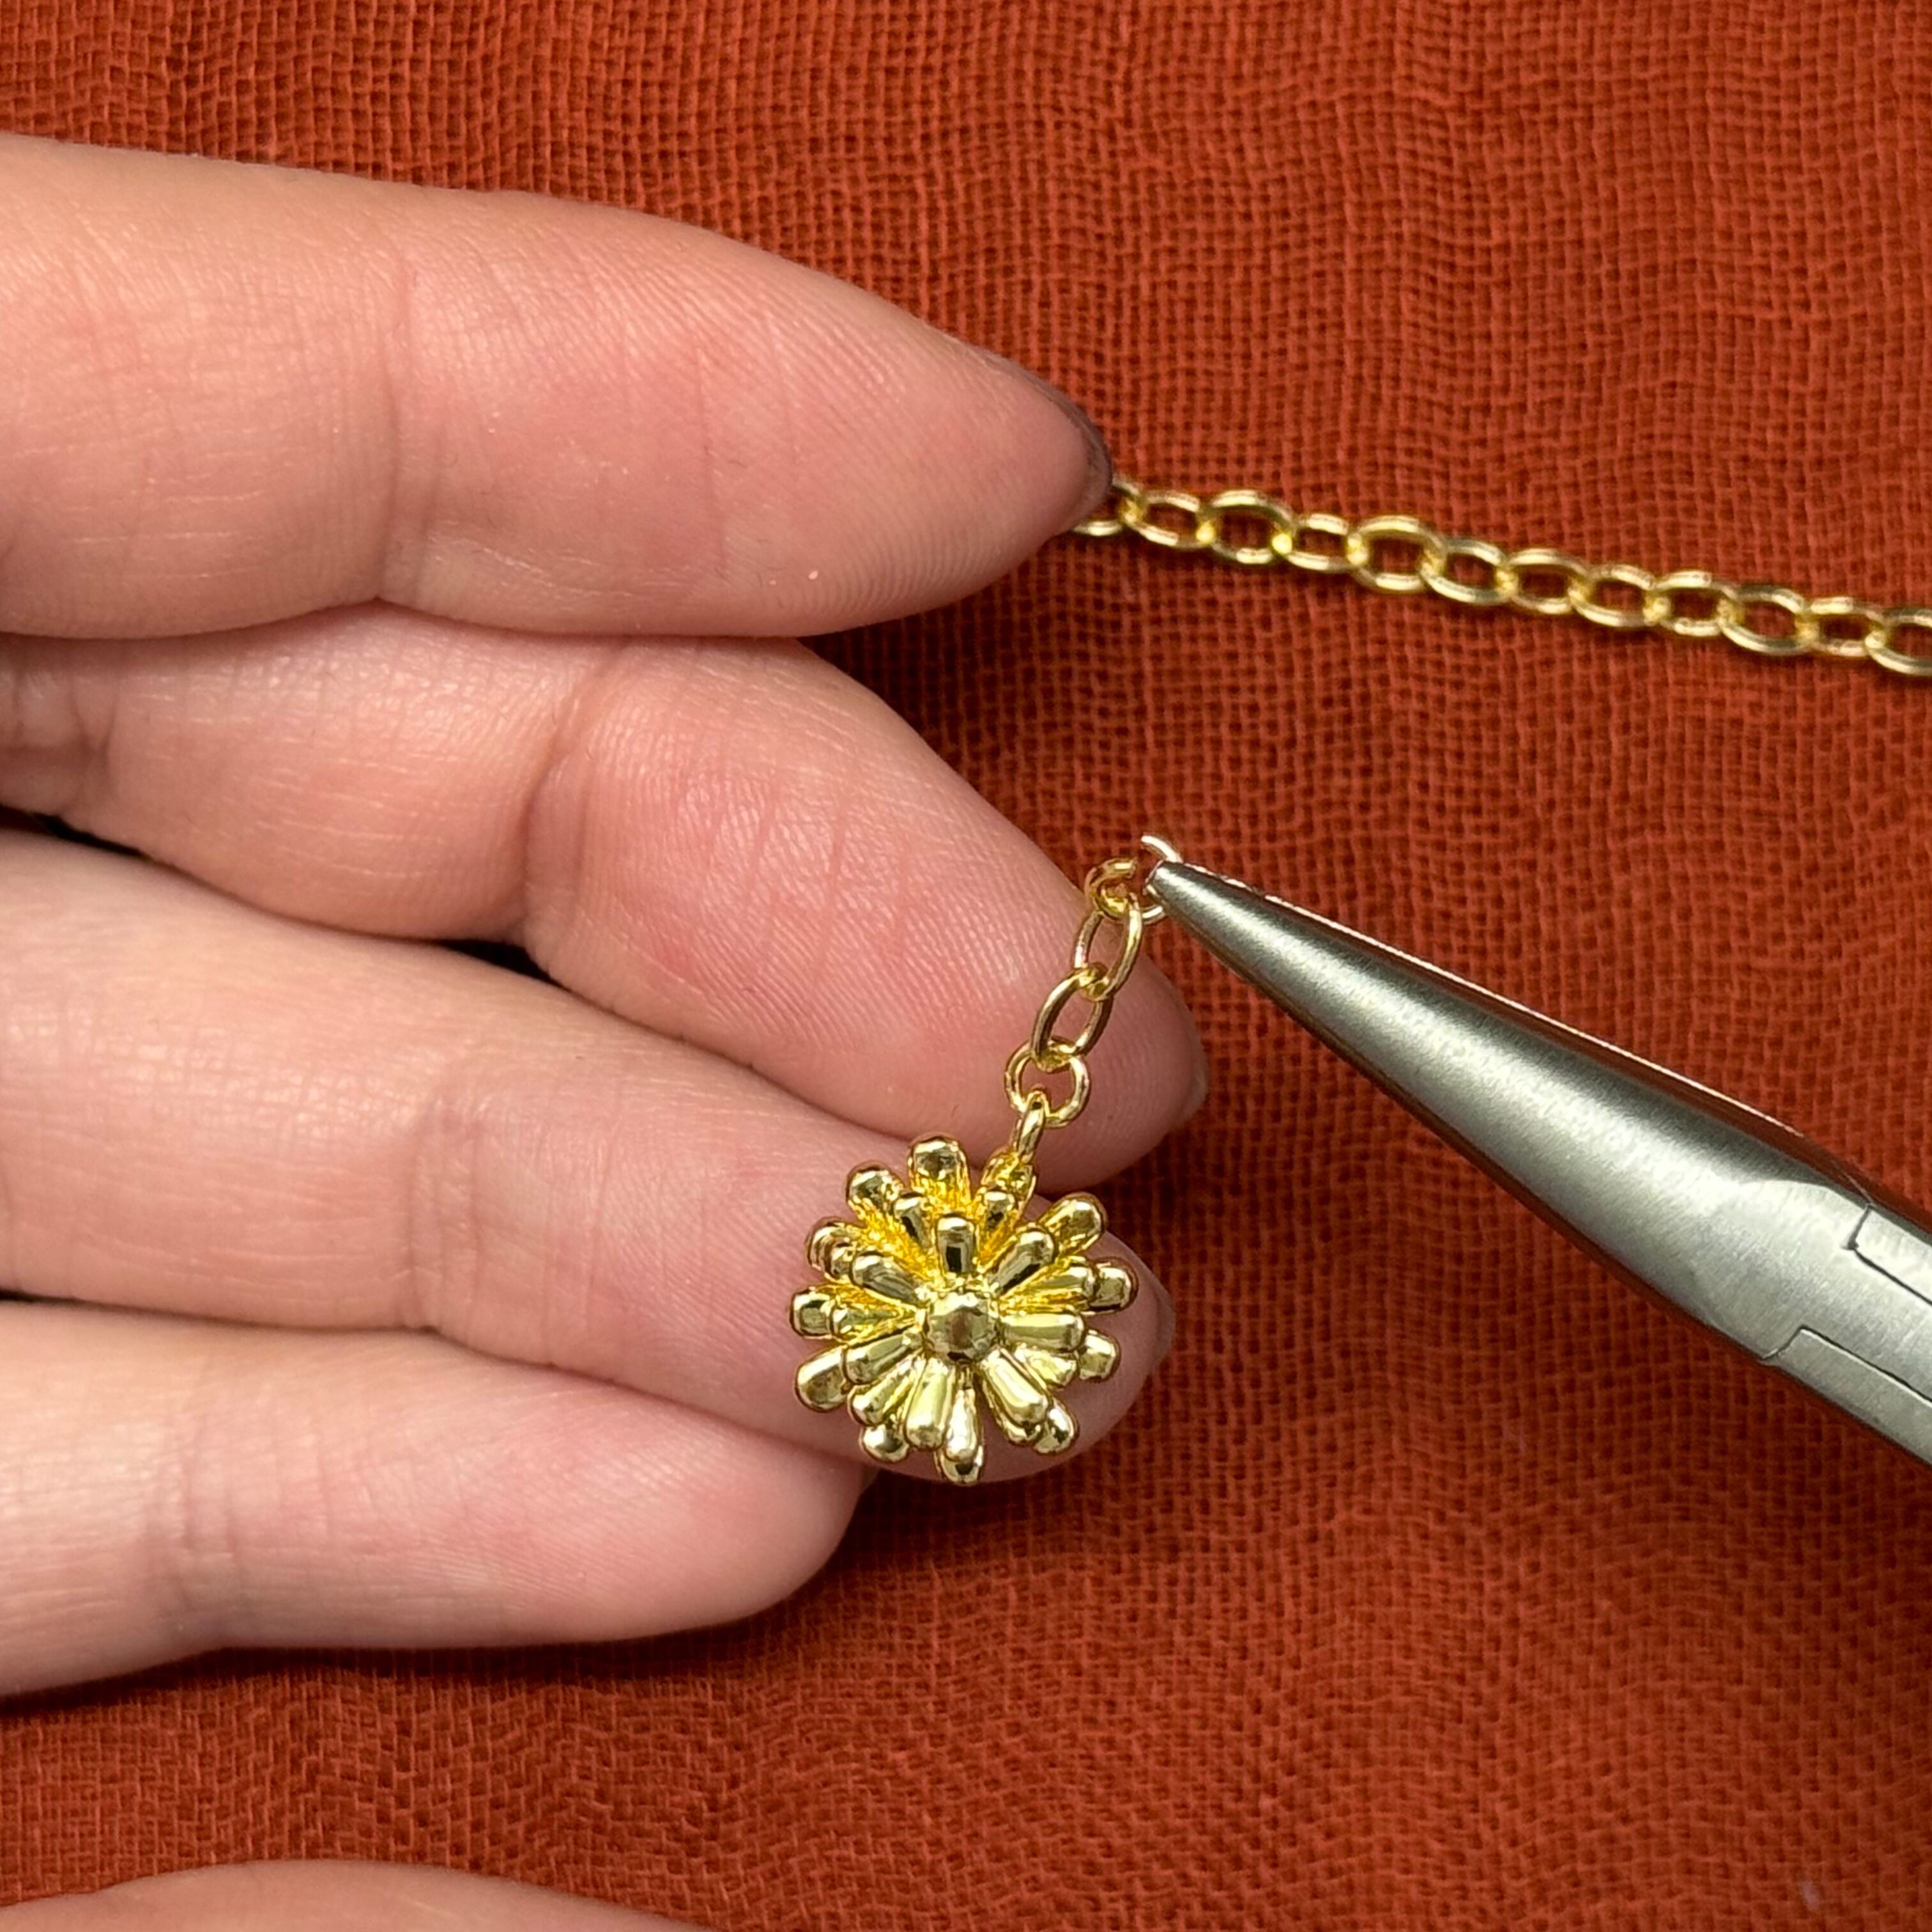
15. We'll attach the 12mm flower charm on the 5th link to the left of the orange ombre zircon beads (important to follow the steps below)
For all charms with a perpendicular loop, you will need to attach 2 links of chain (cut from remaining chain) with a jump ring, as well as a second jump ring to connect to the necklace.
**You can forgo the links and just use 2 jump rings or add more links to make the charm hang lower. Just be sure to use an even amount of links and jump rings so the charm lays flat
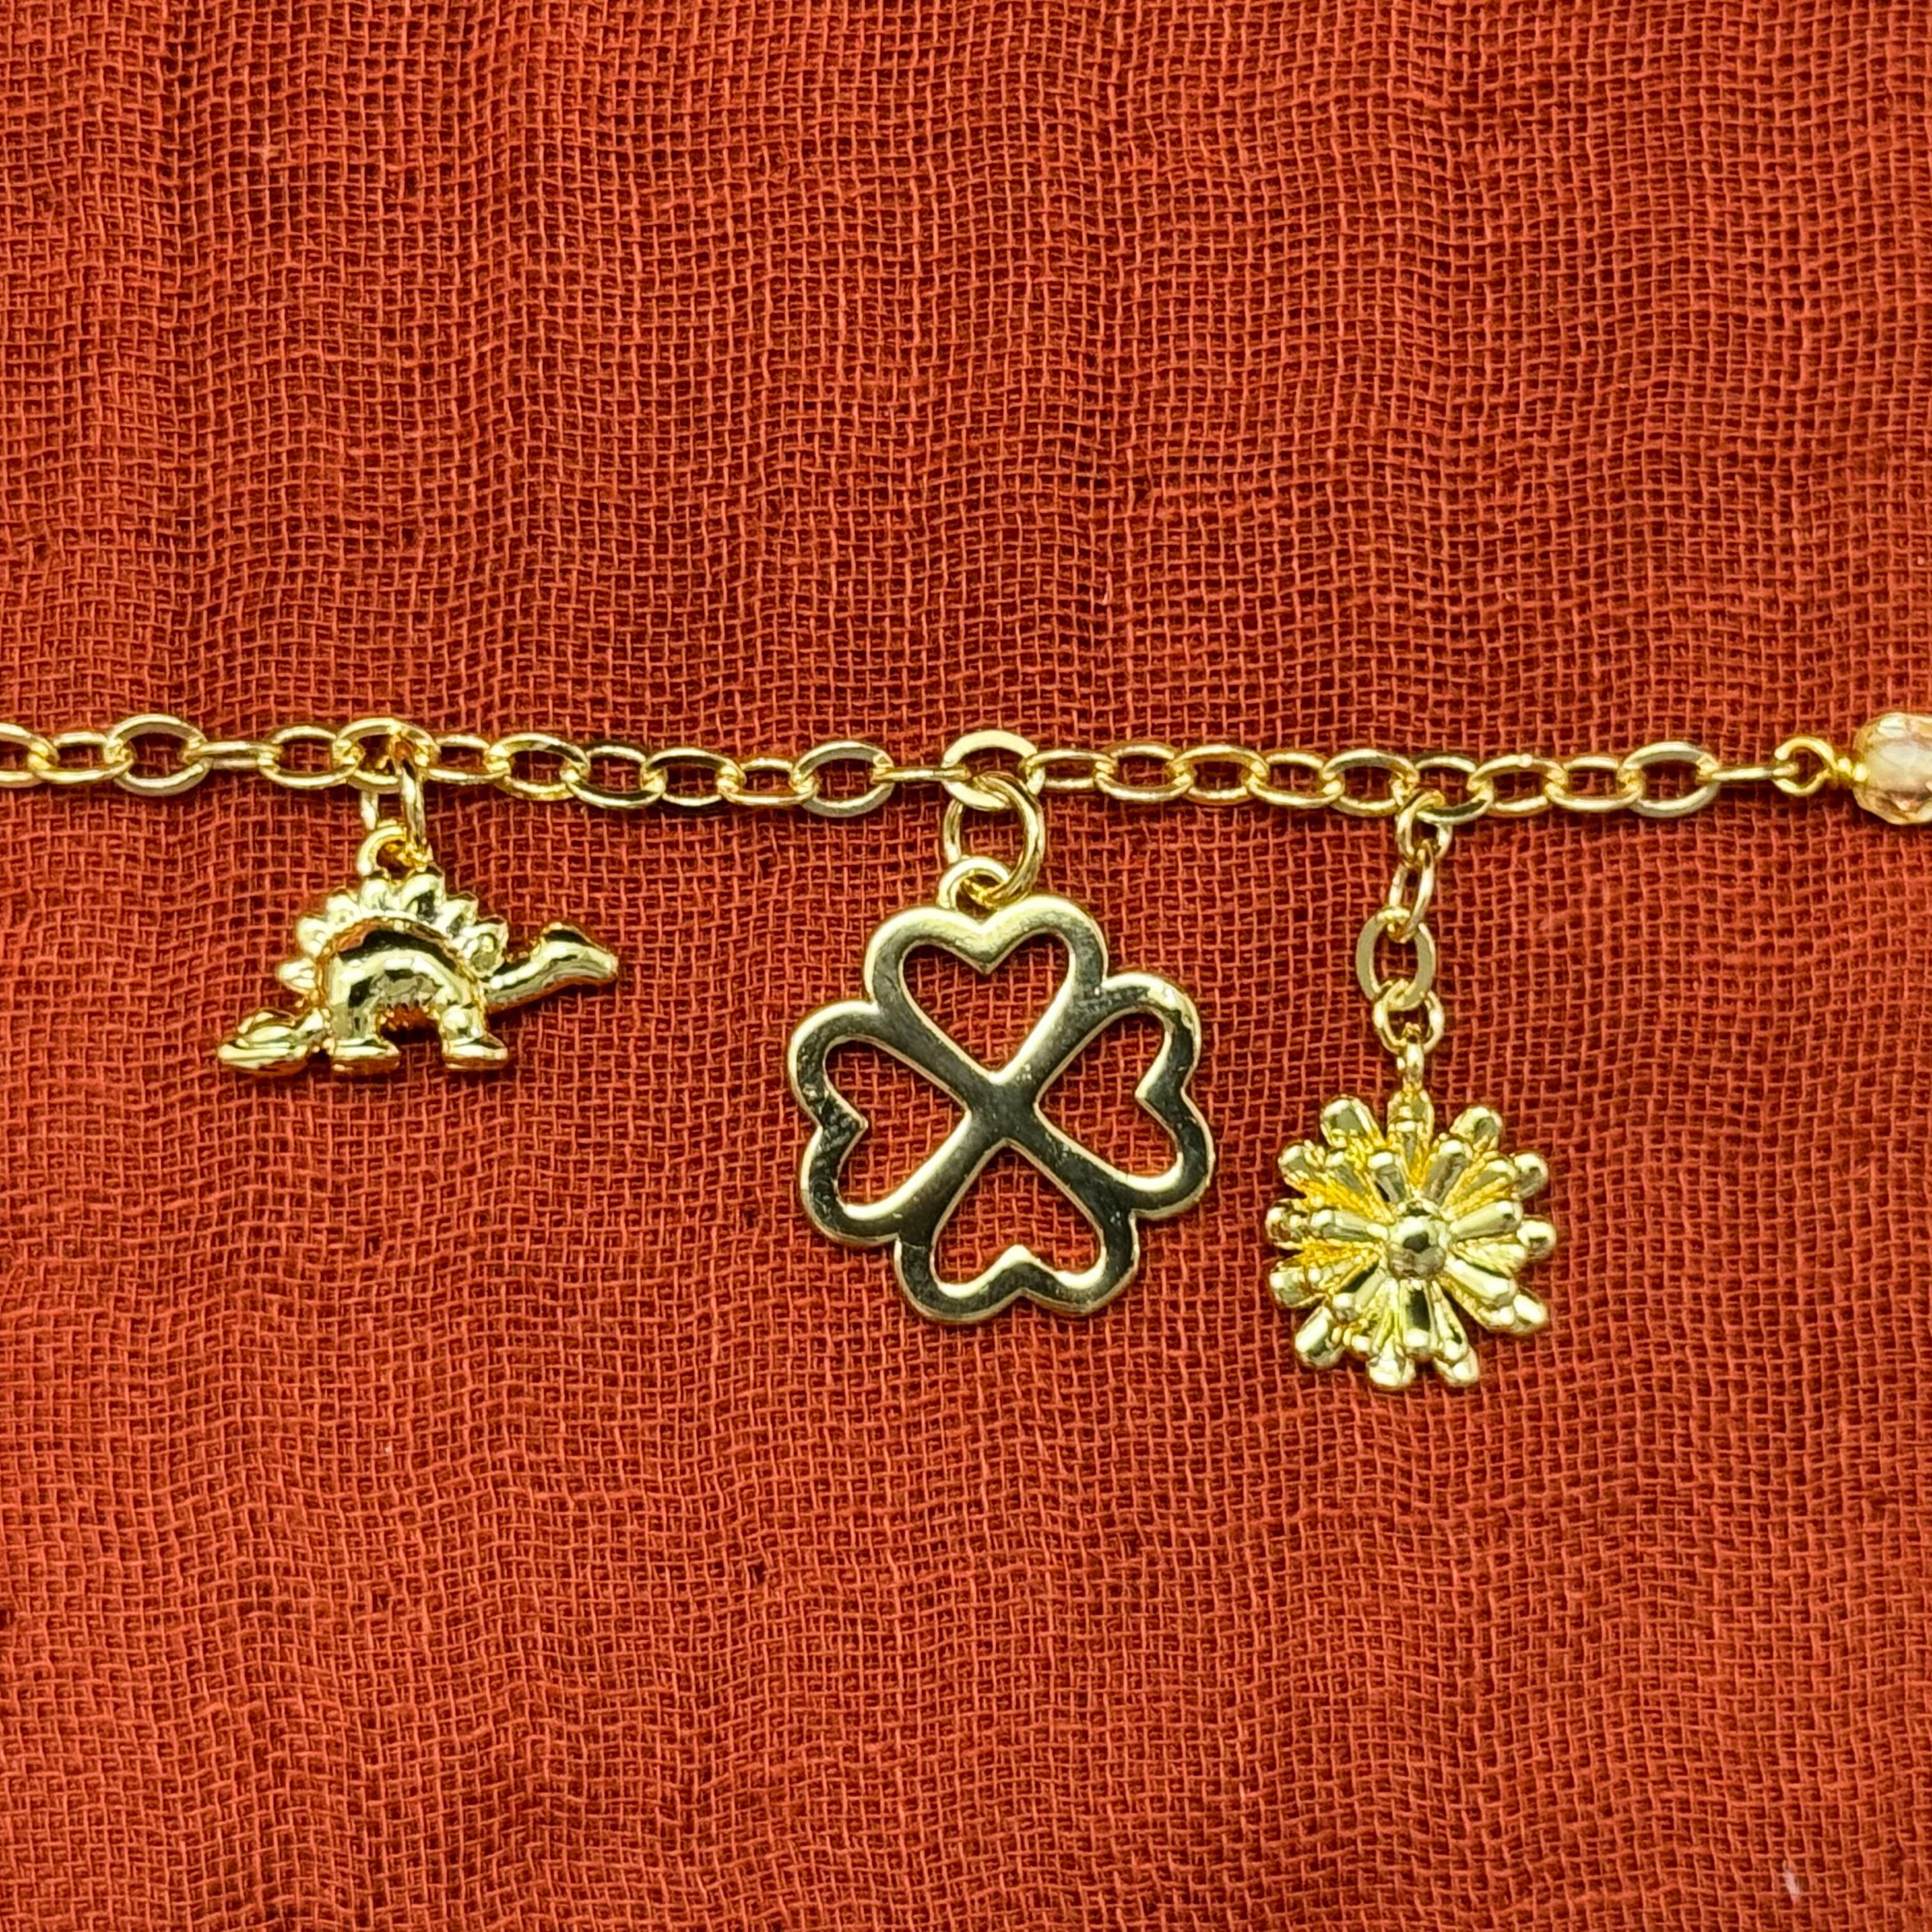
16. Connect the 16mm 4 leaf clover charm 7 links to the left of the 12mm flower charm and then connect the dinosaur 9 links to the left of the 4 leaf clover charm
17. I wanted the Bauhinia flower charm to hang down a little so I attached a single chain link (cut from remaining chain) to the charm with a jump ring and then attached the chain to the necklace using a second jump ring (there is a total of 3 links - 2 jump rings and 1 link of uncut chain)
This charm will be placed 9 links to the right of the snake charm
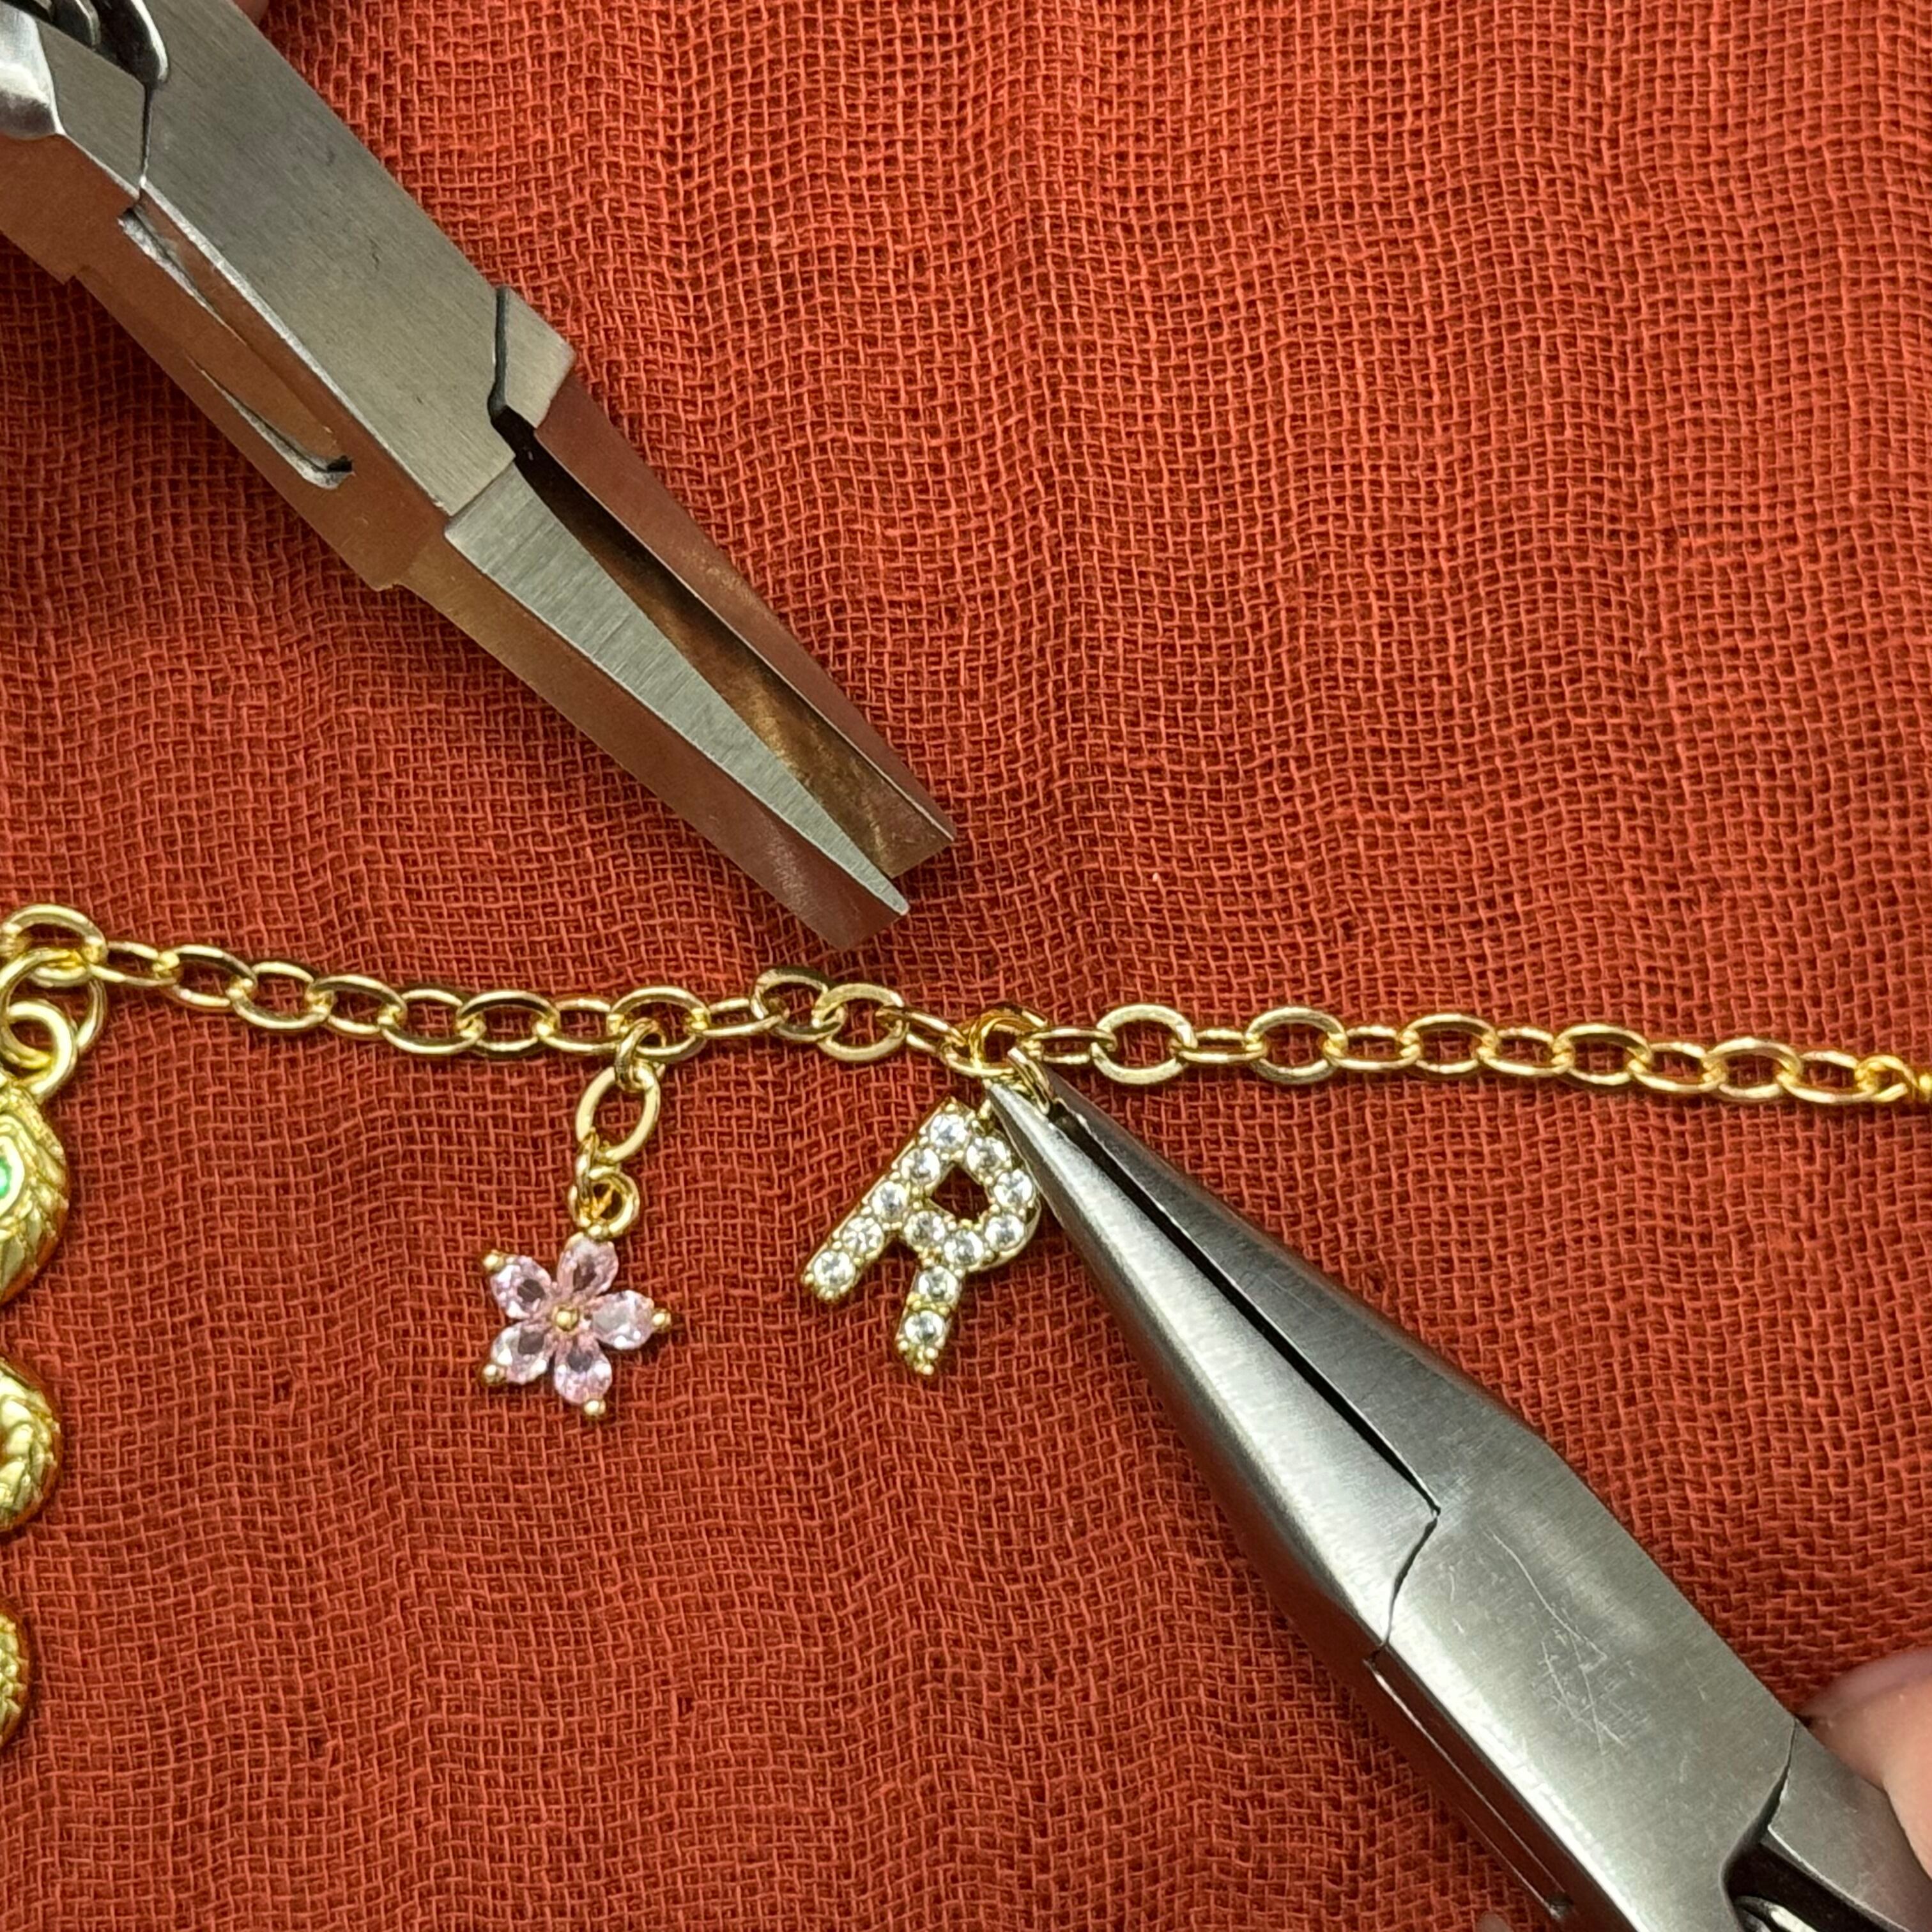
18. Connect the "R" letter charm 6 links to the right of the bauhinia flower charm
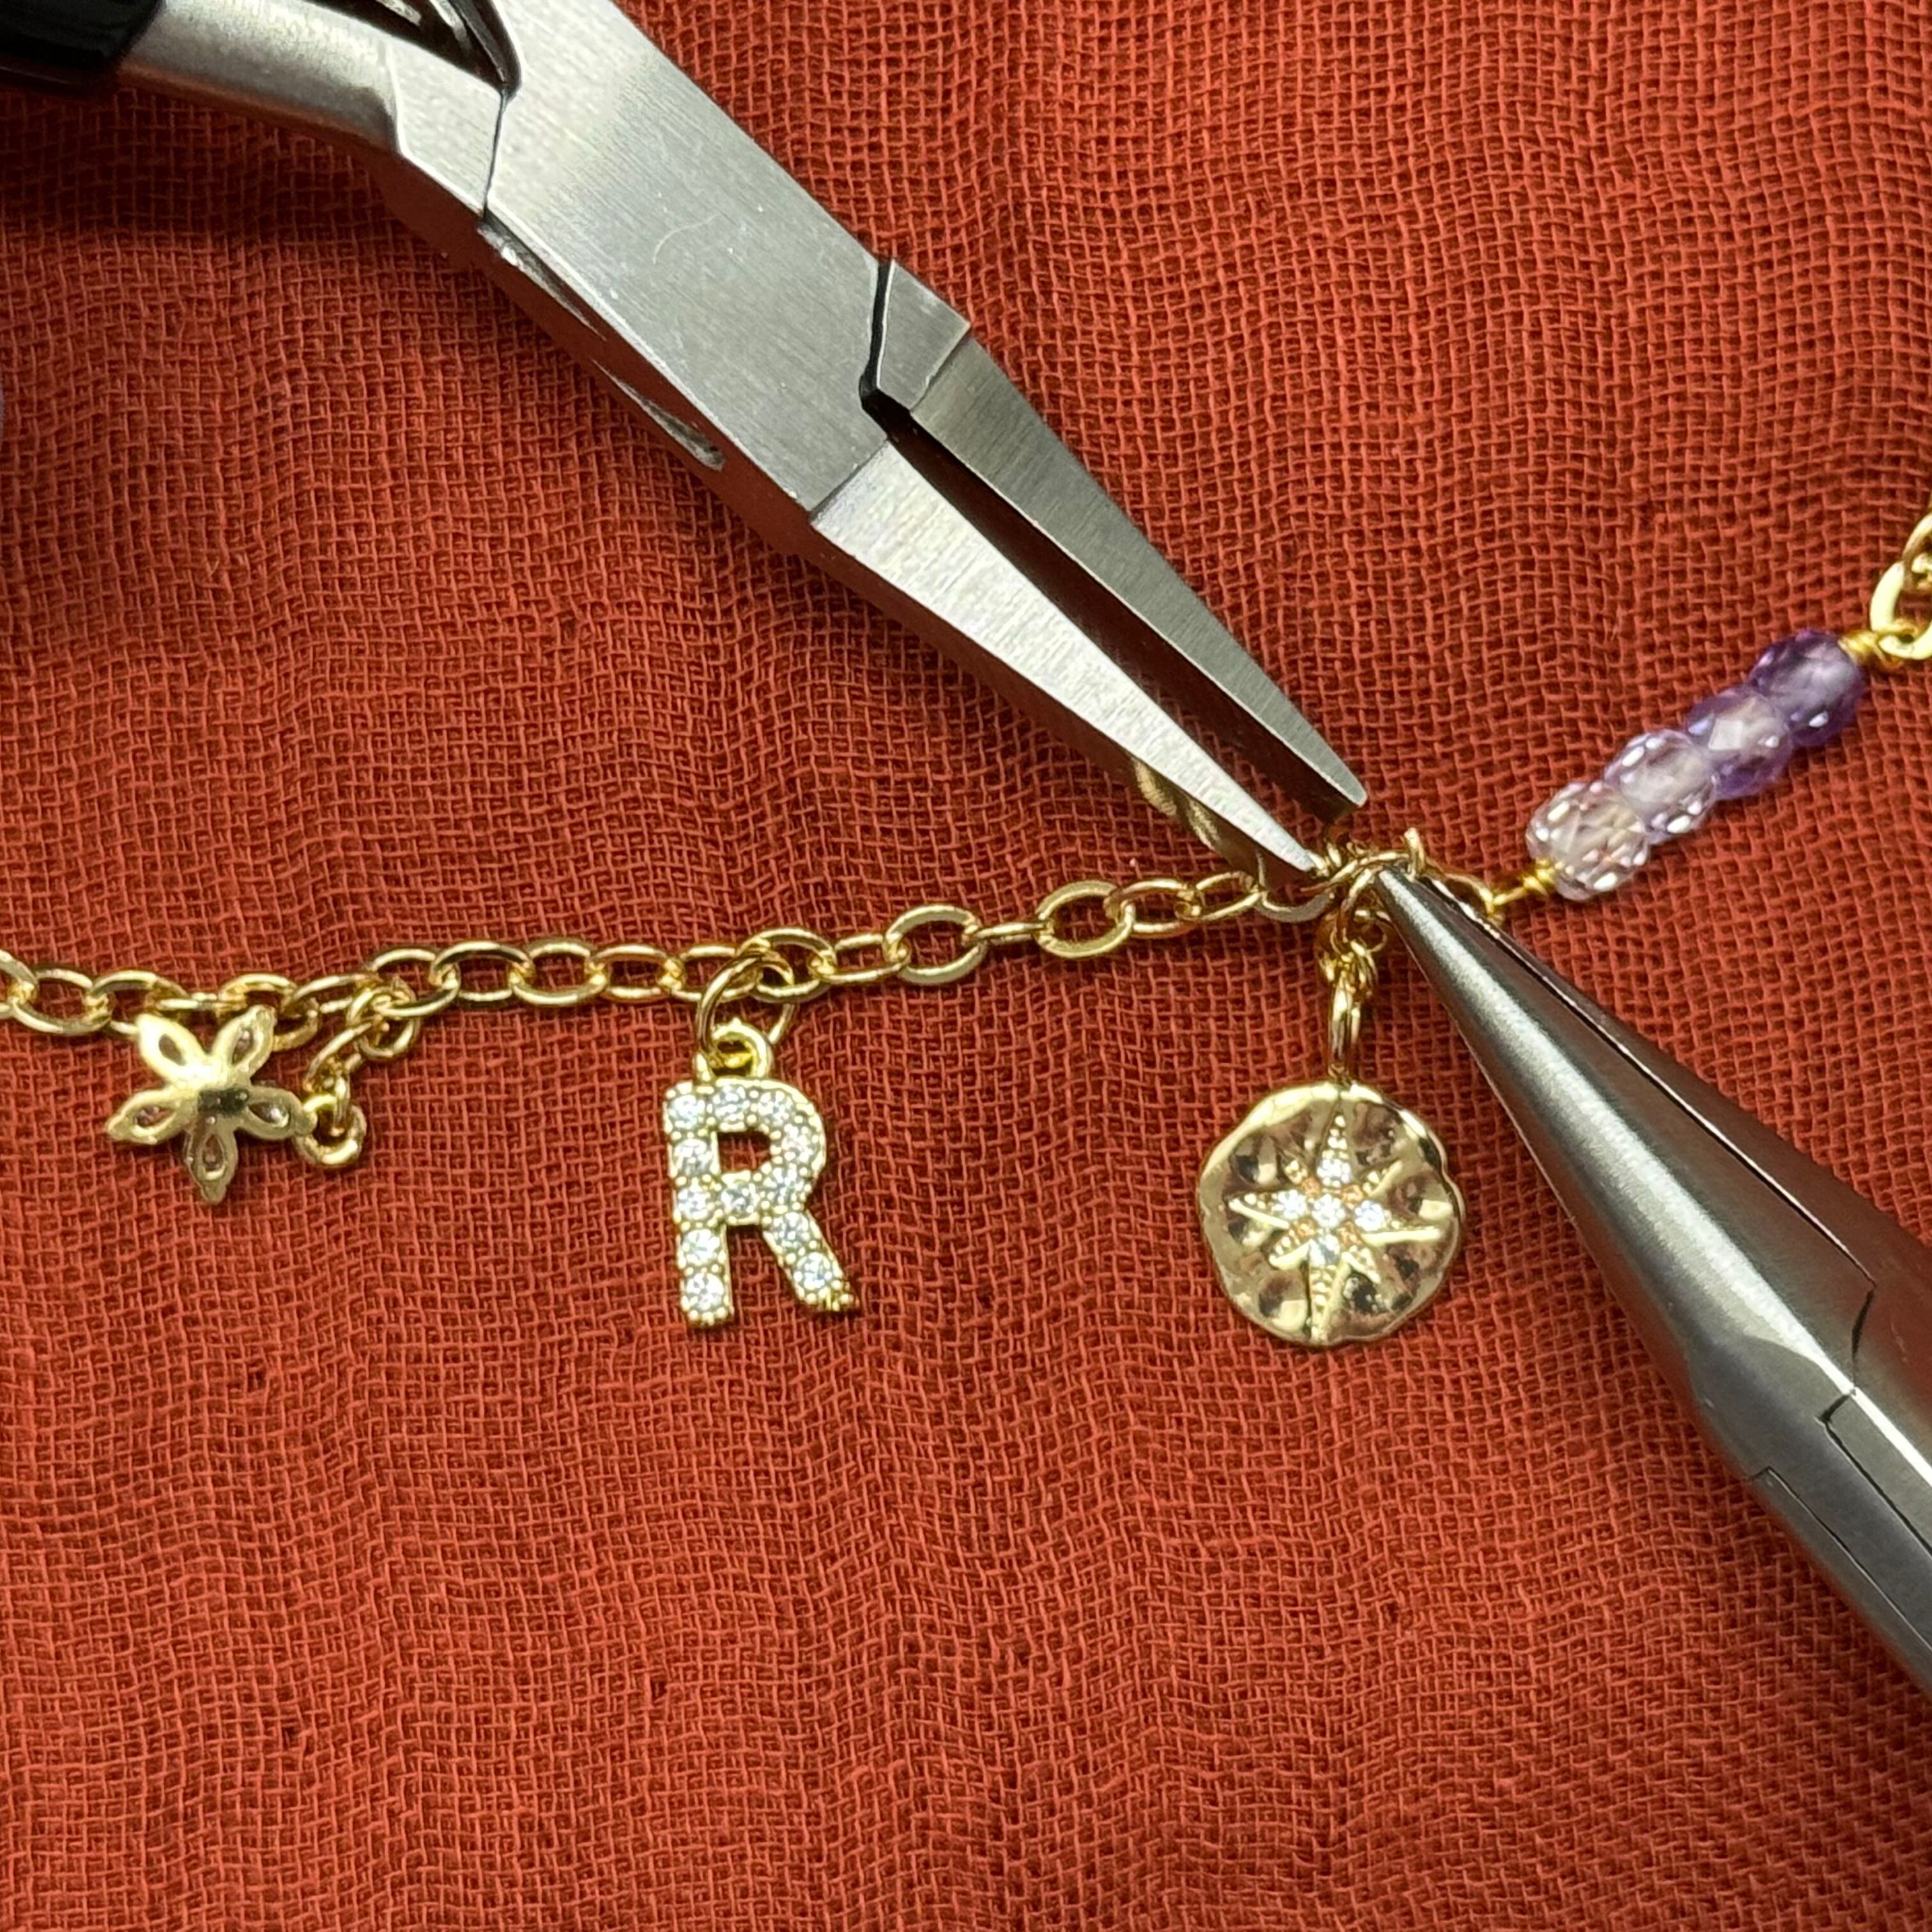
19. Connect the north star coin charm 9 links to the right of the "R" letter charm, using 2 links of chain and 2 jump rings
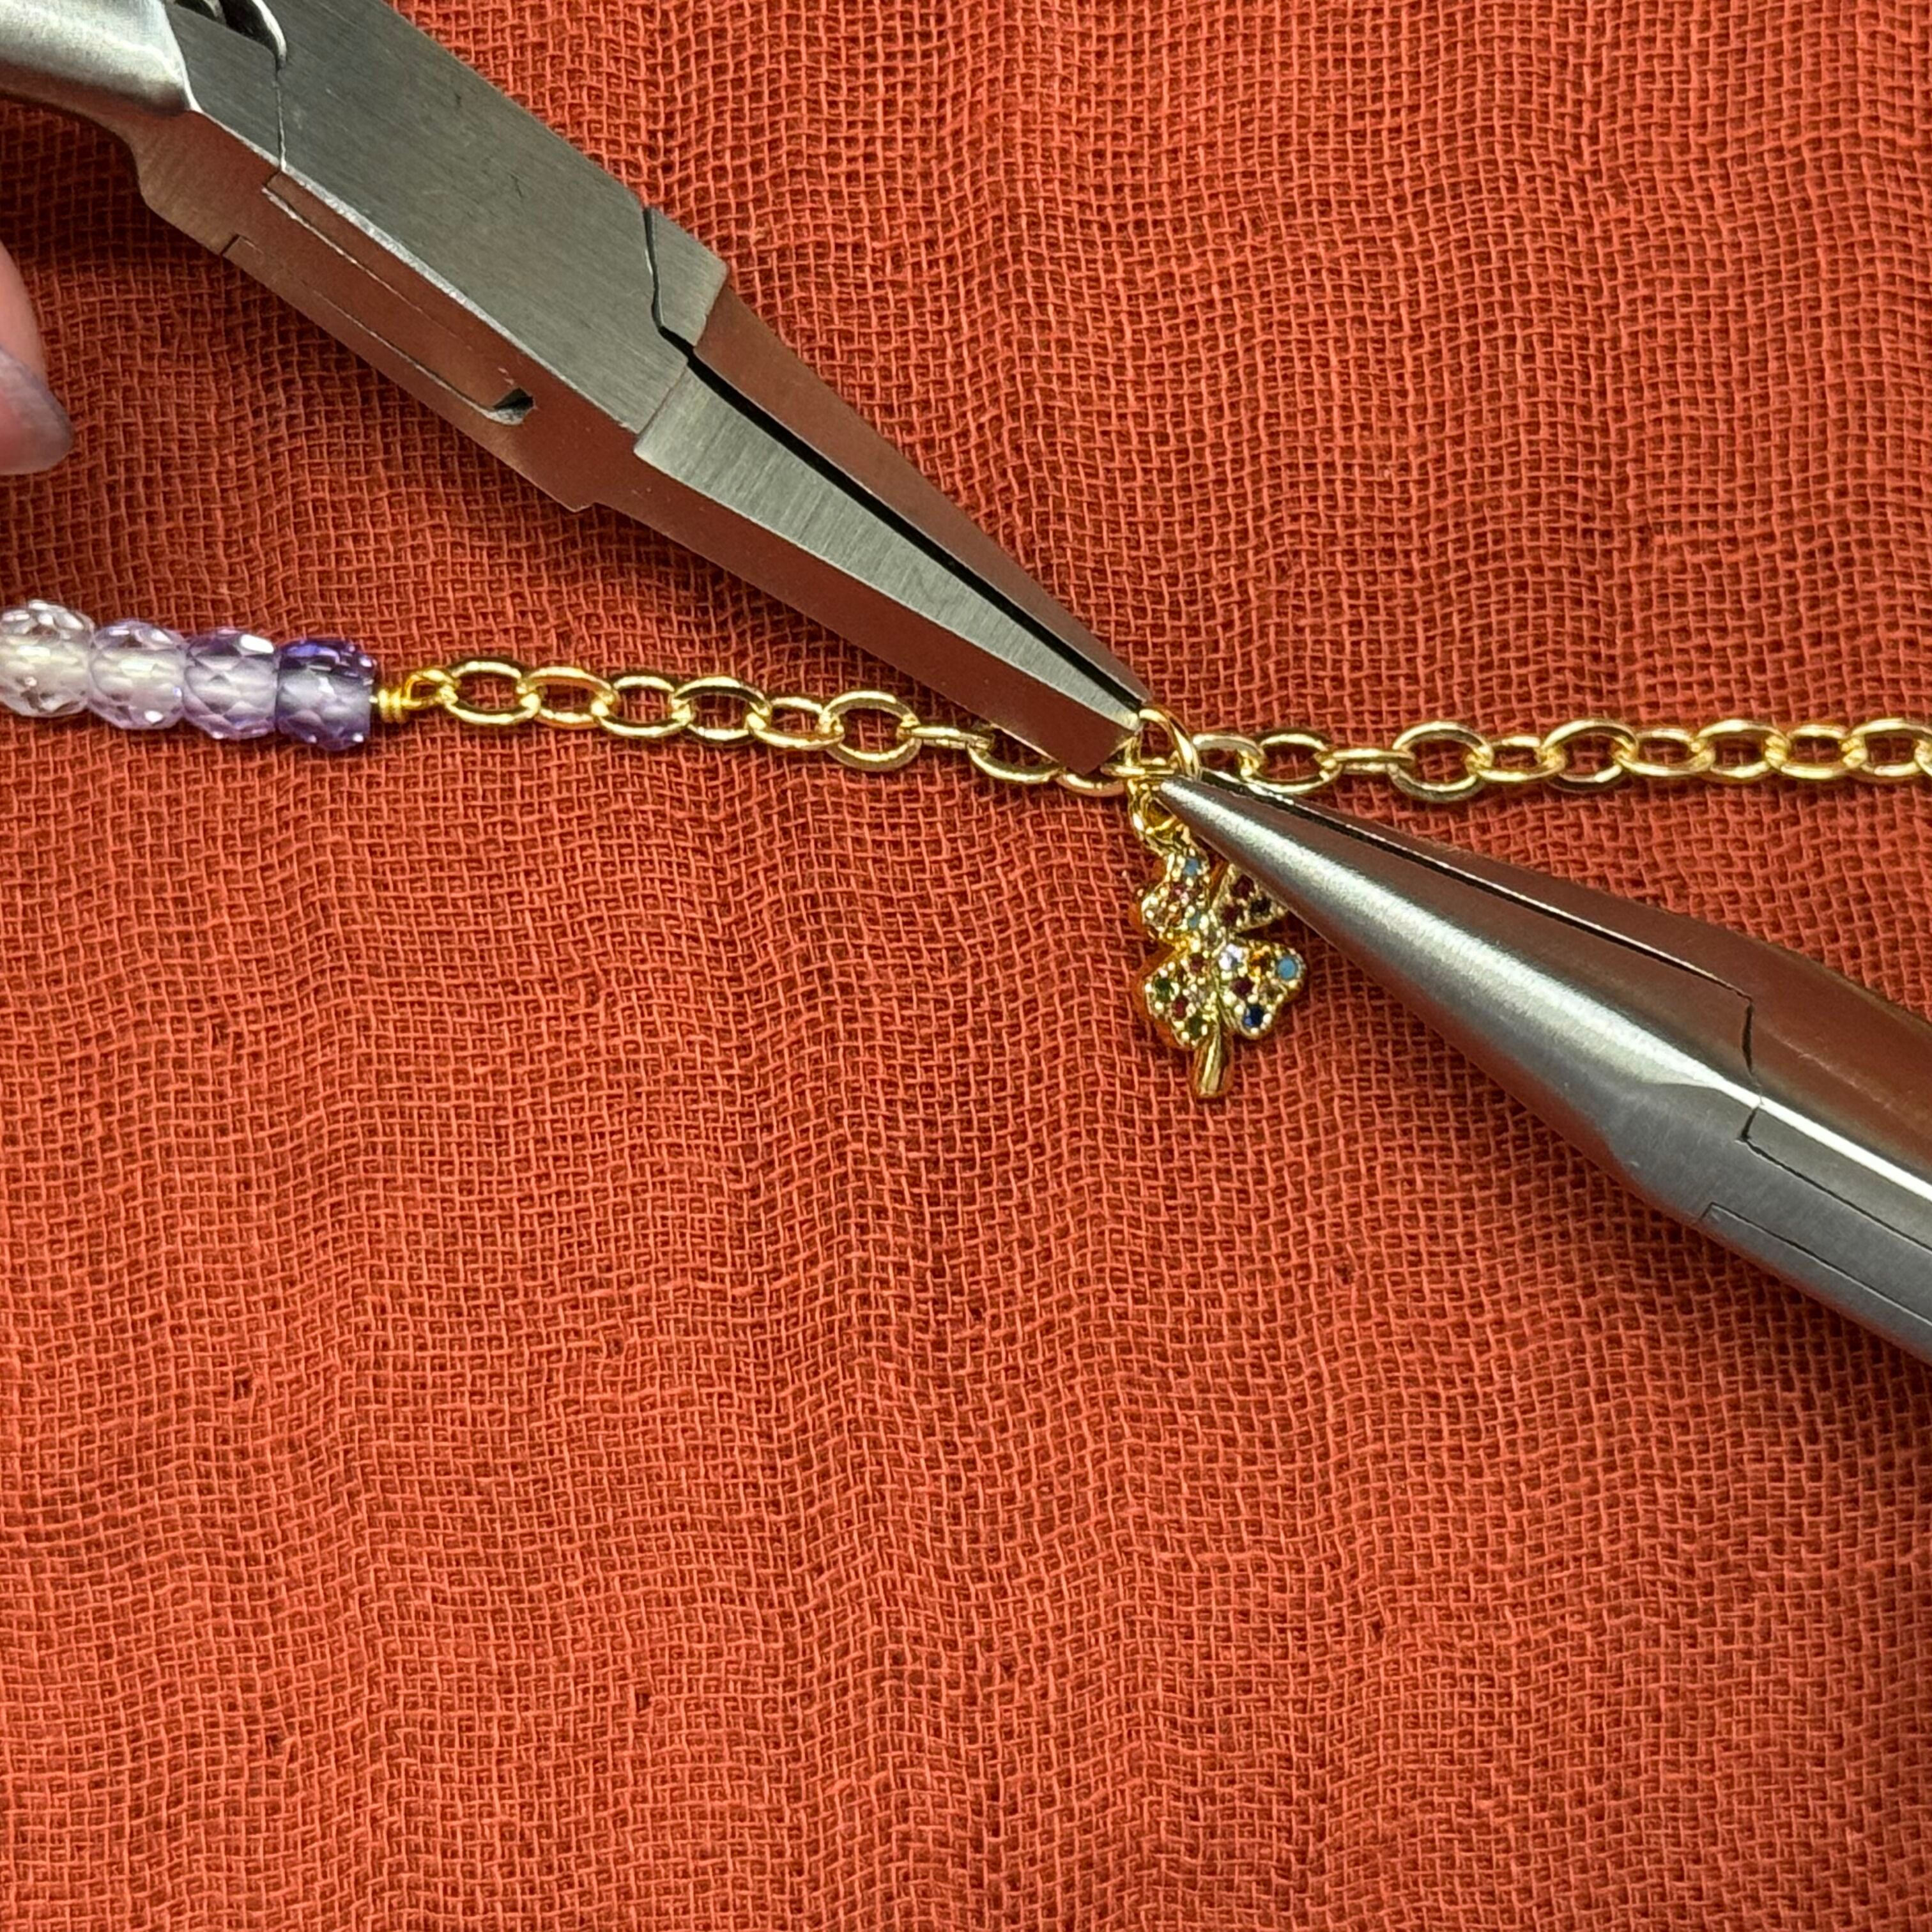
20. Connect the final multi color clover charm 10 links to the right of the purple ombre zircon beads
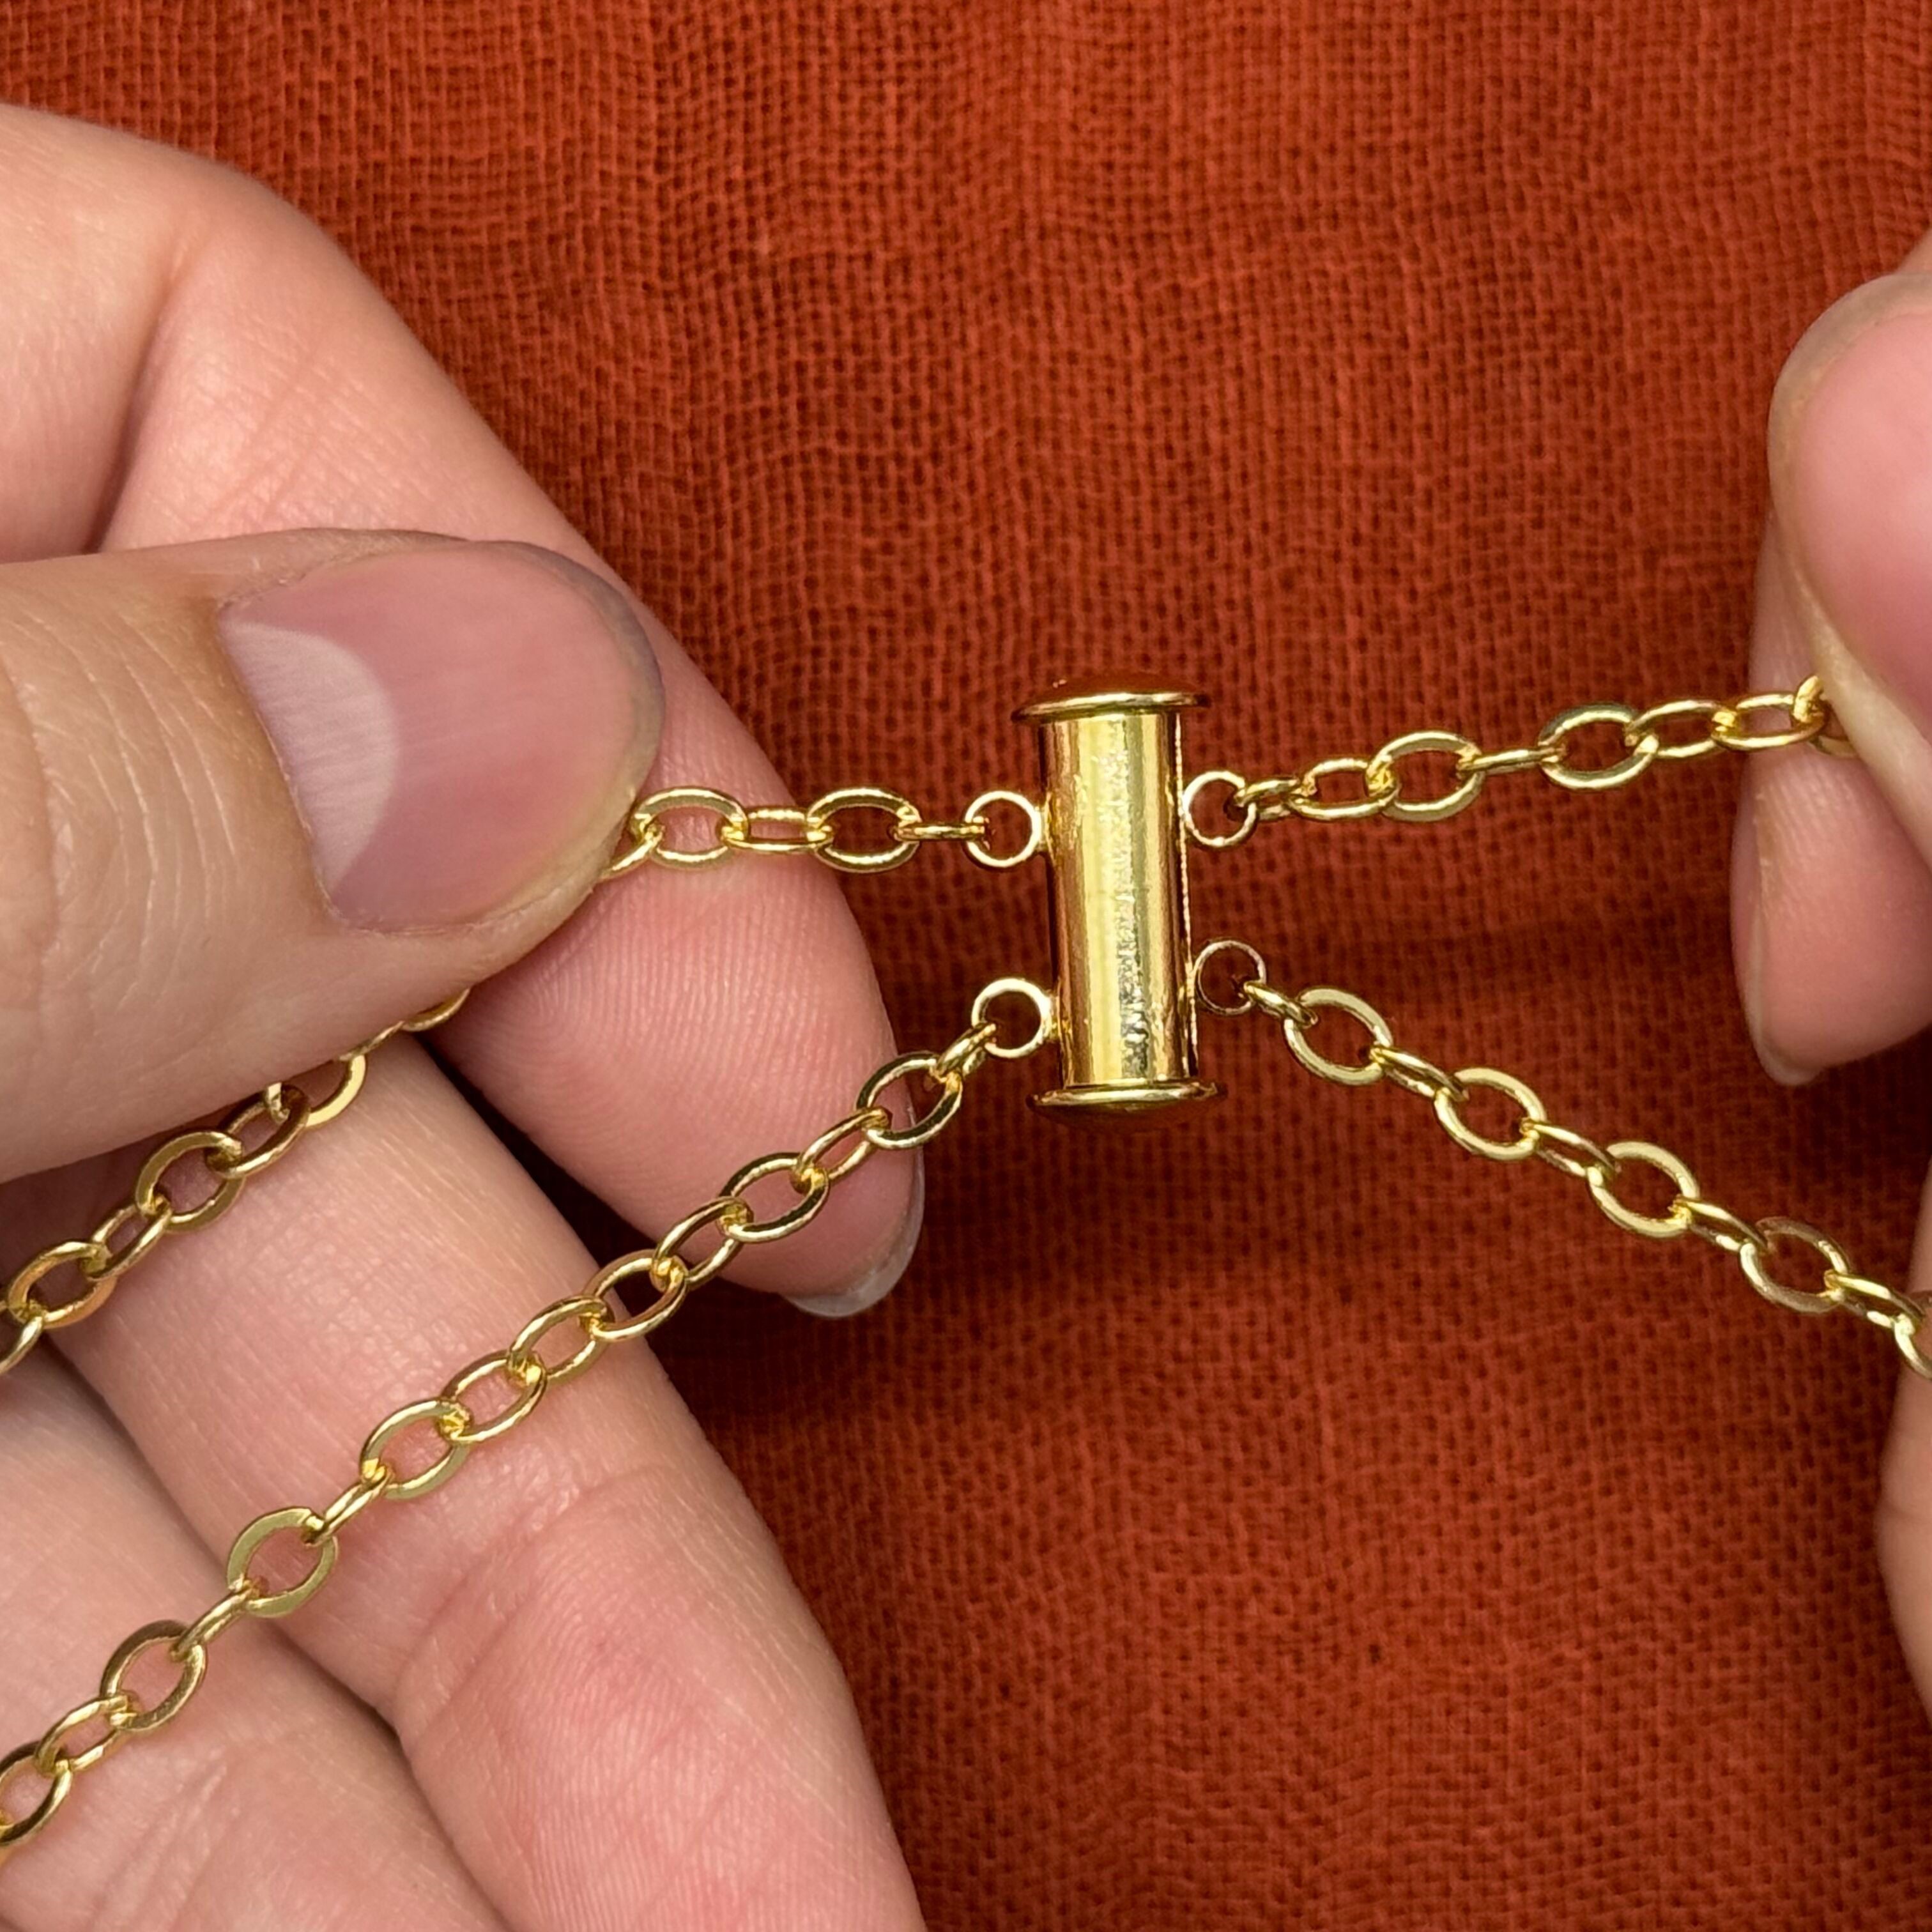
21. Using jump rings, connect the first layer of the necklace to the lower two links of the clasp and then connect the second longer layer to the upper links of the clasp
Done!
The reason why I chose each charm:
- Micro Pave Gold / Red 13x12mm Cherries Charm - Cherries are my favorite fruit
- 14K Gold Plated 16x9mm North Star Charm - A north star to me represents my goals
- Micro Pave Gold 17mm Double Sided Daisy Coin Charm - I love flowers, especially this charm!
- 14K Gold Plated 13x9mm Cowboy Boot Charm - I have a recent obsession with wearing cowboy boots
- Gold Micro Pave Saguaro Cactus Charm - Arizona is my home!
- 14K Gold Plated 14mm Sun Face Coin Charm - Representing Arizona!
- 14K Gold Plated 9.5x15.5mm Dinosaur Charm - I loved dinosaurs as a kid
- 14K Gold Plated 16mm 4 Leaf Clover Charm - My dad is from Ireland
- 14K Gold Plated Plated 12mm Flower Charm - More flowers!
- Micro Pave Gold 30x12mm Green Eye Snake Charm - I really enjoyed this charm and thought it would make for a great center piece
- Micro Pave 8mm Pink Bauhinia Flower Charm - Again, more flowers!
- Gold Plated Micro Pave "R" Letter Charm - The first letter of my son's name
- Micro Pave Gold 10.5mm North Star Coin Charm - Guiding me along the way
- Micro Pave Gold 7x12mm 4 Leaf Clover Charm - I really do love Ireland!
Enjoy choosing each charm that represents your personality, or charms that just look pretty!
Related Articles
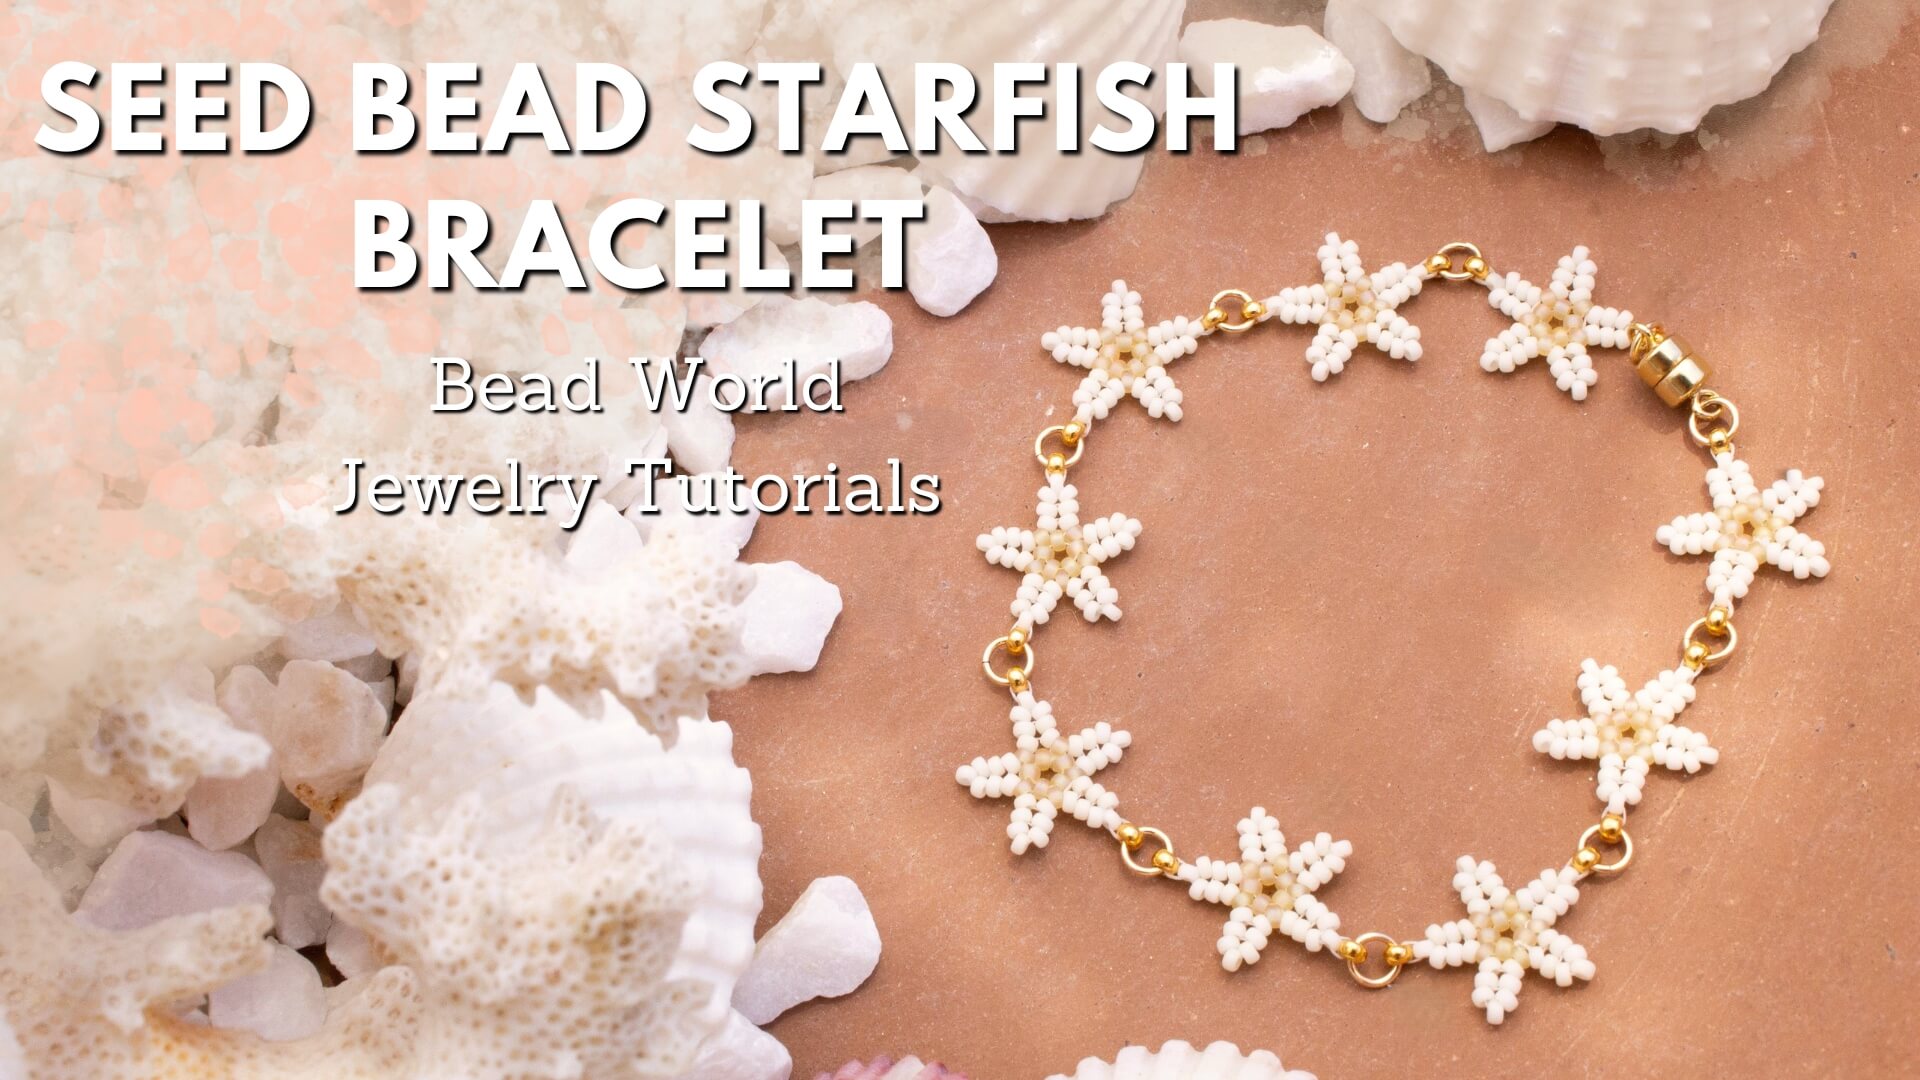
Seed Bead Starfish Bracelet
Seed Bead Starfish BraceletThis project is perfect for both beginners and seasoned crafters looking to...

Cherry Blossom Flower 3D Brick Stitch Earrings
Cherry Blossom Flower 3D Brick Stitch EarringsThese earrings use size 11 Delica beads arranged in the...
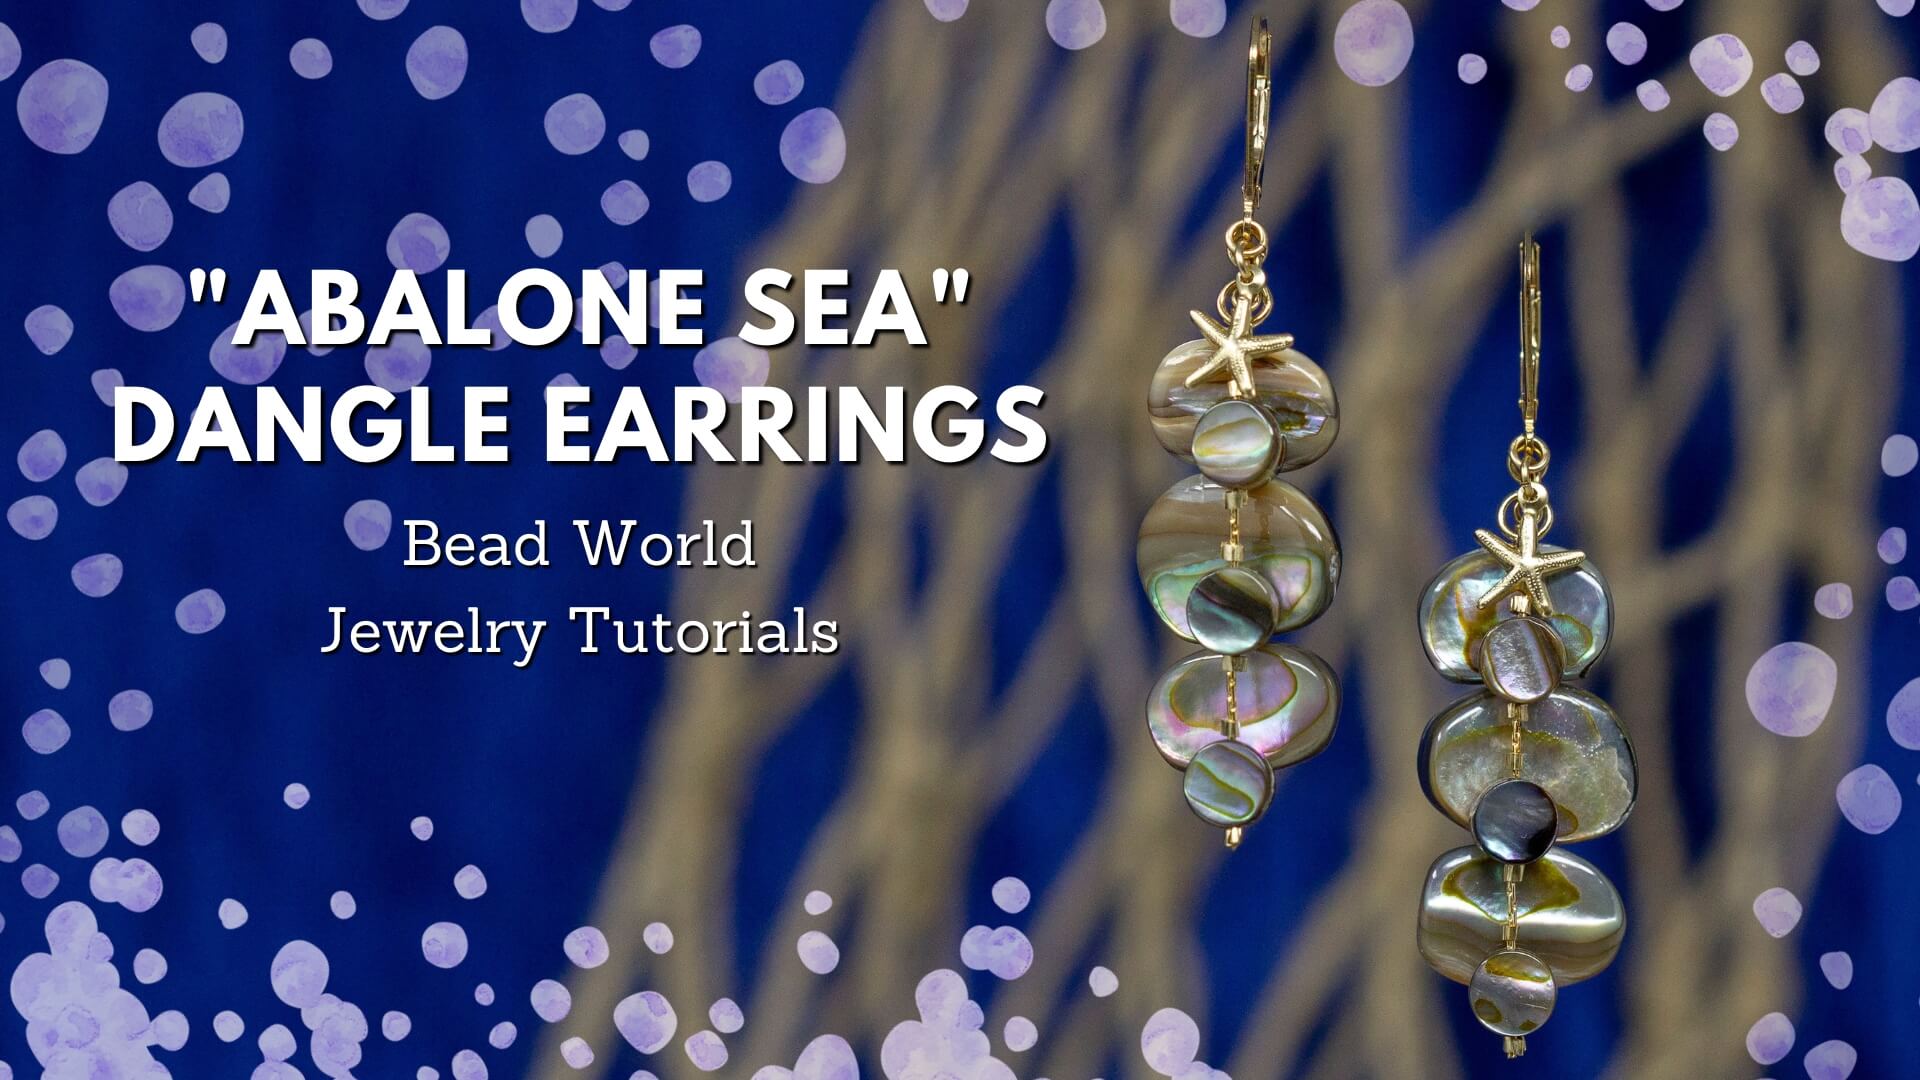
"Abalone Sea" Dangle Earrings
"Abalone Sea" Dangle EarringsIn this tutorial, you'll blend delicate design with the luminescent...