
Tutorials
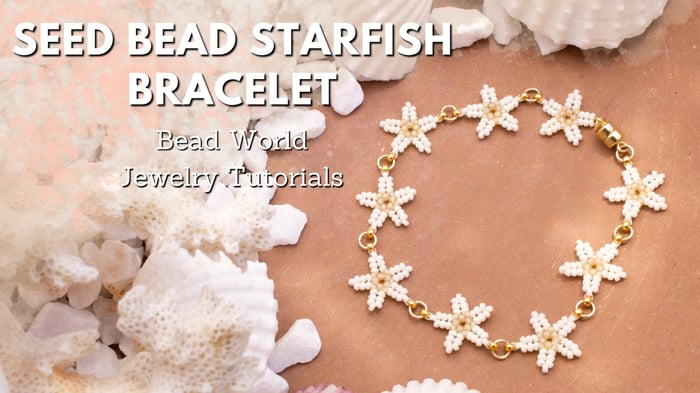
Seed Bead Starfish Bracelet
Seed Bead Starfish Bracelet
This project is perfect for both beginners and seasoned crafters looking to add a touch of the ocean to their jewelry collection. You'll learn how to intricately weave seed beads into the shape of a starfish, combining various techniques to achieve a beautiful and delicate design. We love how these look like almost real tiny starfish. By the end of the tutorial, you'll have a charming starfish bracelet that showcases your creativity and craftsmanship, perfect for wearing or as a gift.
*Please use caution while creating this project, it is very easy to poke yourself with the needle*
To watch our time lapse video making this bracelet, please scroll to the bottom of this page.
 Seed Bead Starfish Bracelet
Materials Needed:
- Fireline Crystal 4lb (11.5 feet total, but you will use less - each star fish uses about 15 inches of fireline)
- John James Needle Size 12 (1)
- 14K Gold Filled 4mm 22 Gauge Jump rings (10)
- 4.5mm 14K Gold Filled Magnetic Clasp (1)
- Size 15 Miyuki Seed Beads - 2021 Cream Matte (315 beads)
- Size 15 Miyuki Seed Beads - 132FR Cantaloupe AB Matte (90 beads)
- Size 11 Miyuki Seed Beads - 465 24K Gold Plated (18)
Tools Required:
Needle Nose Pliers (also known as chain nose)
GS-Hypo Cement (optional)
Pattern:
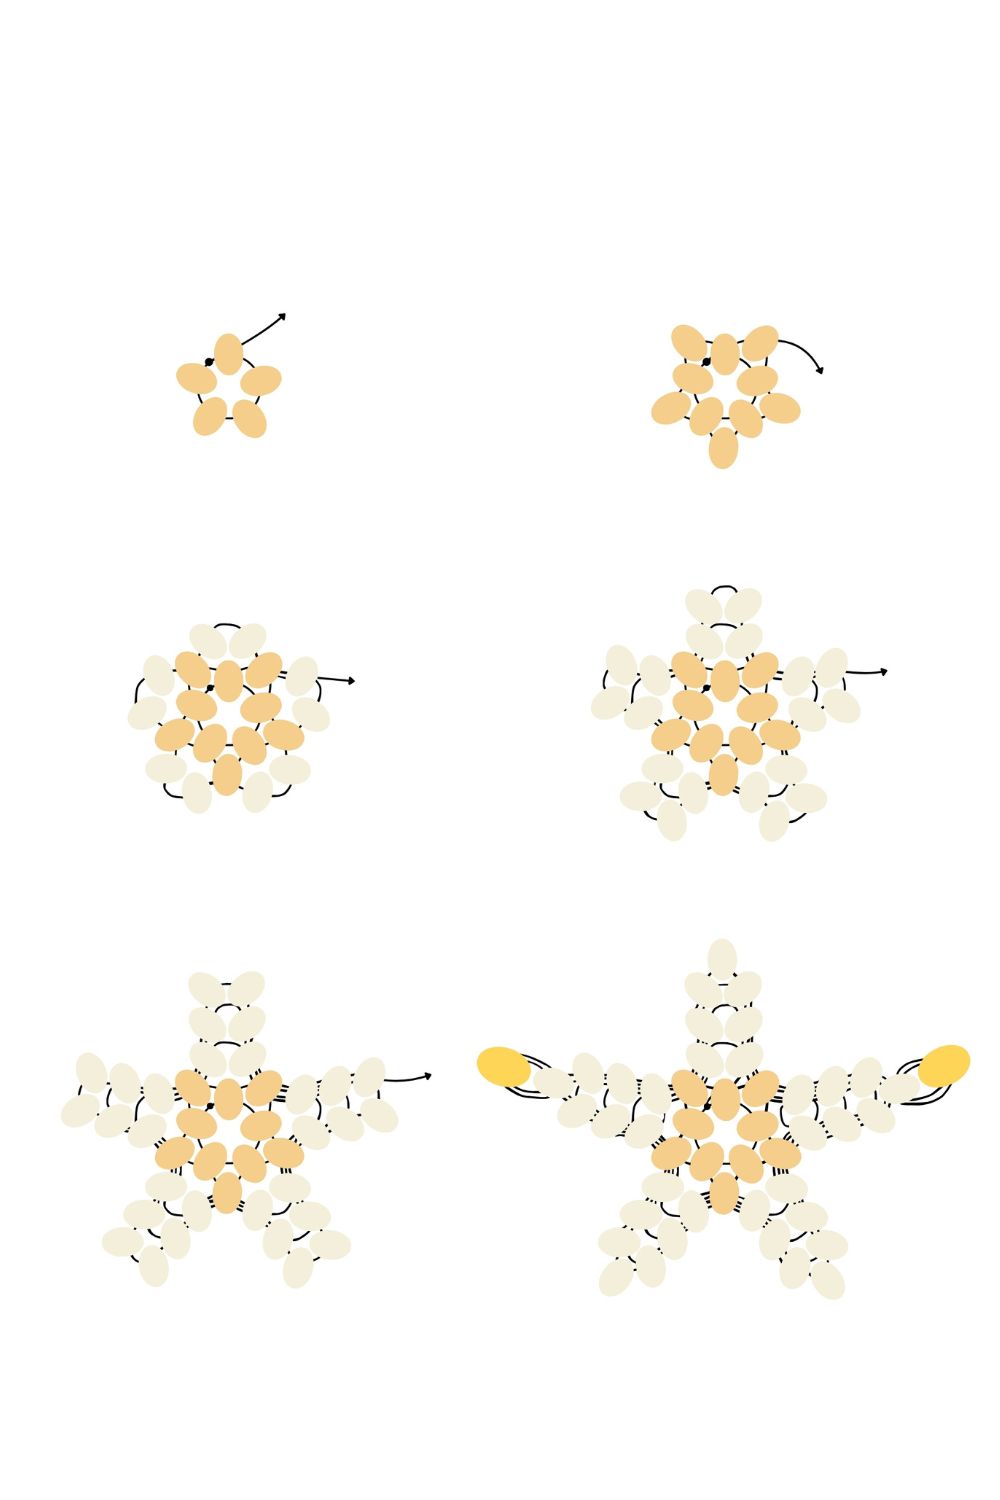
Instructions on Construction:
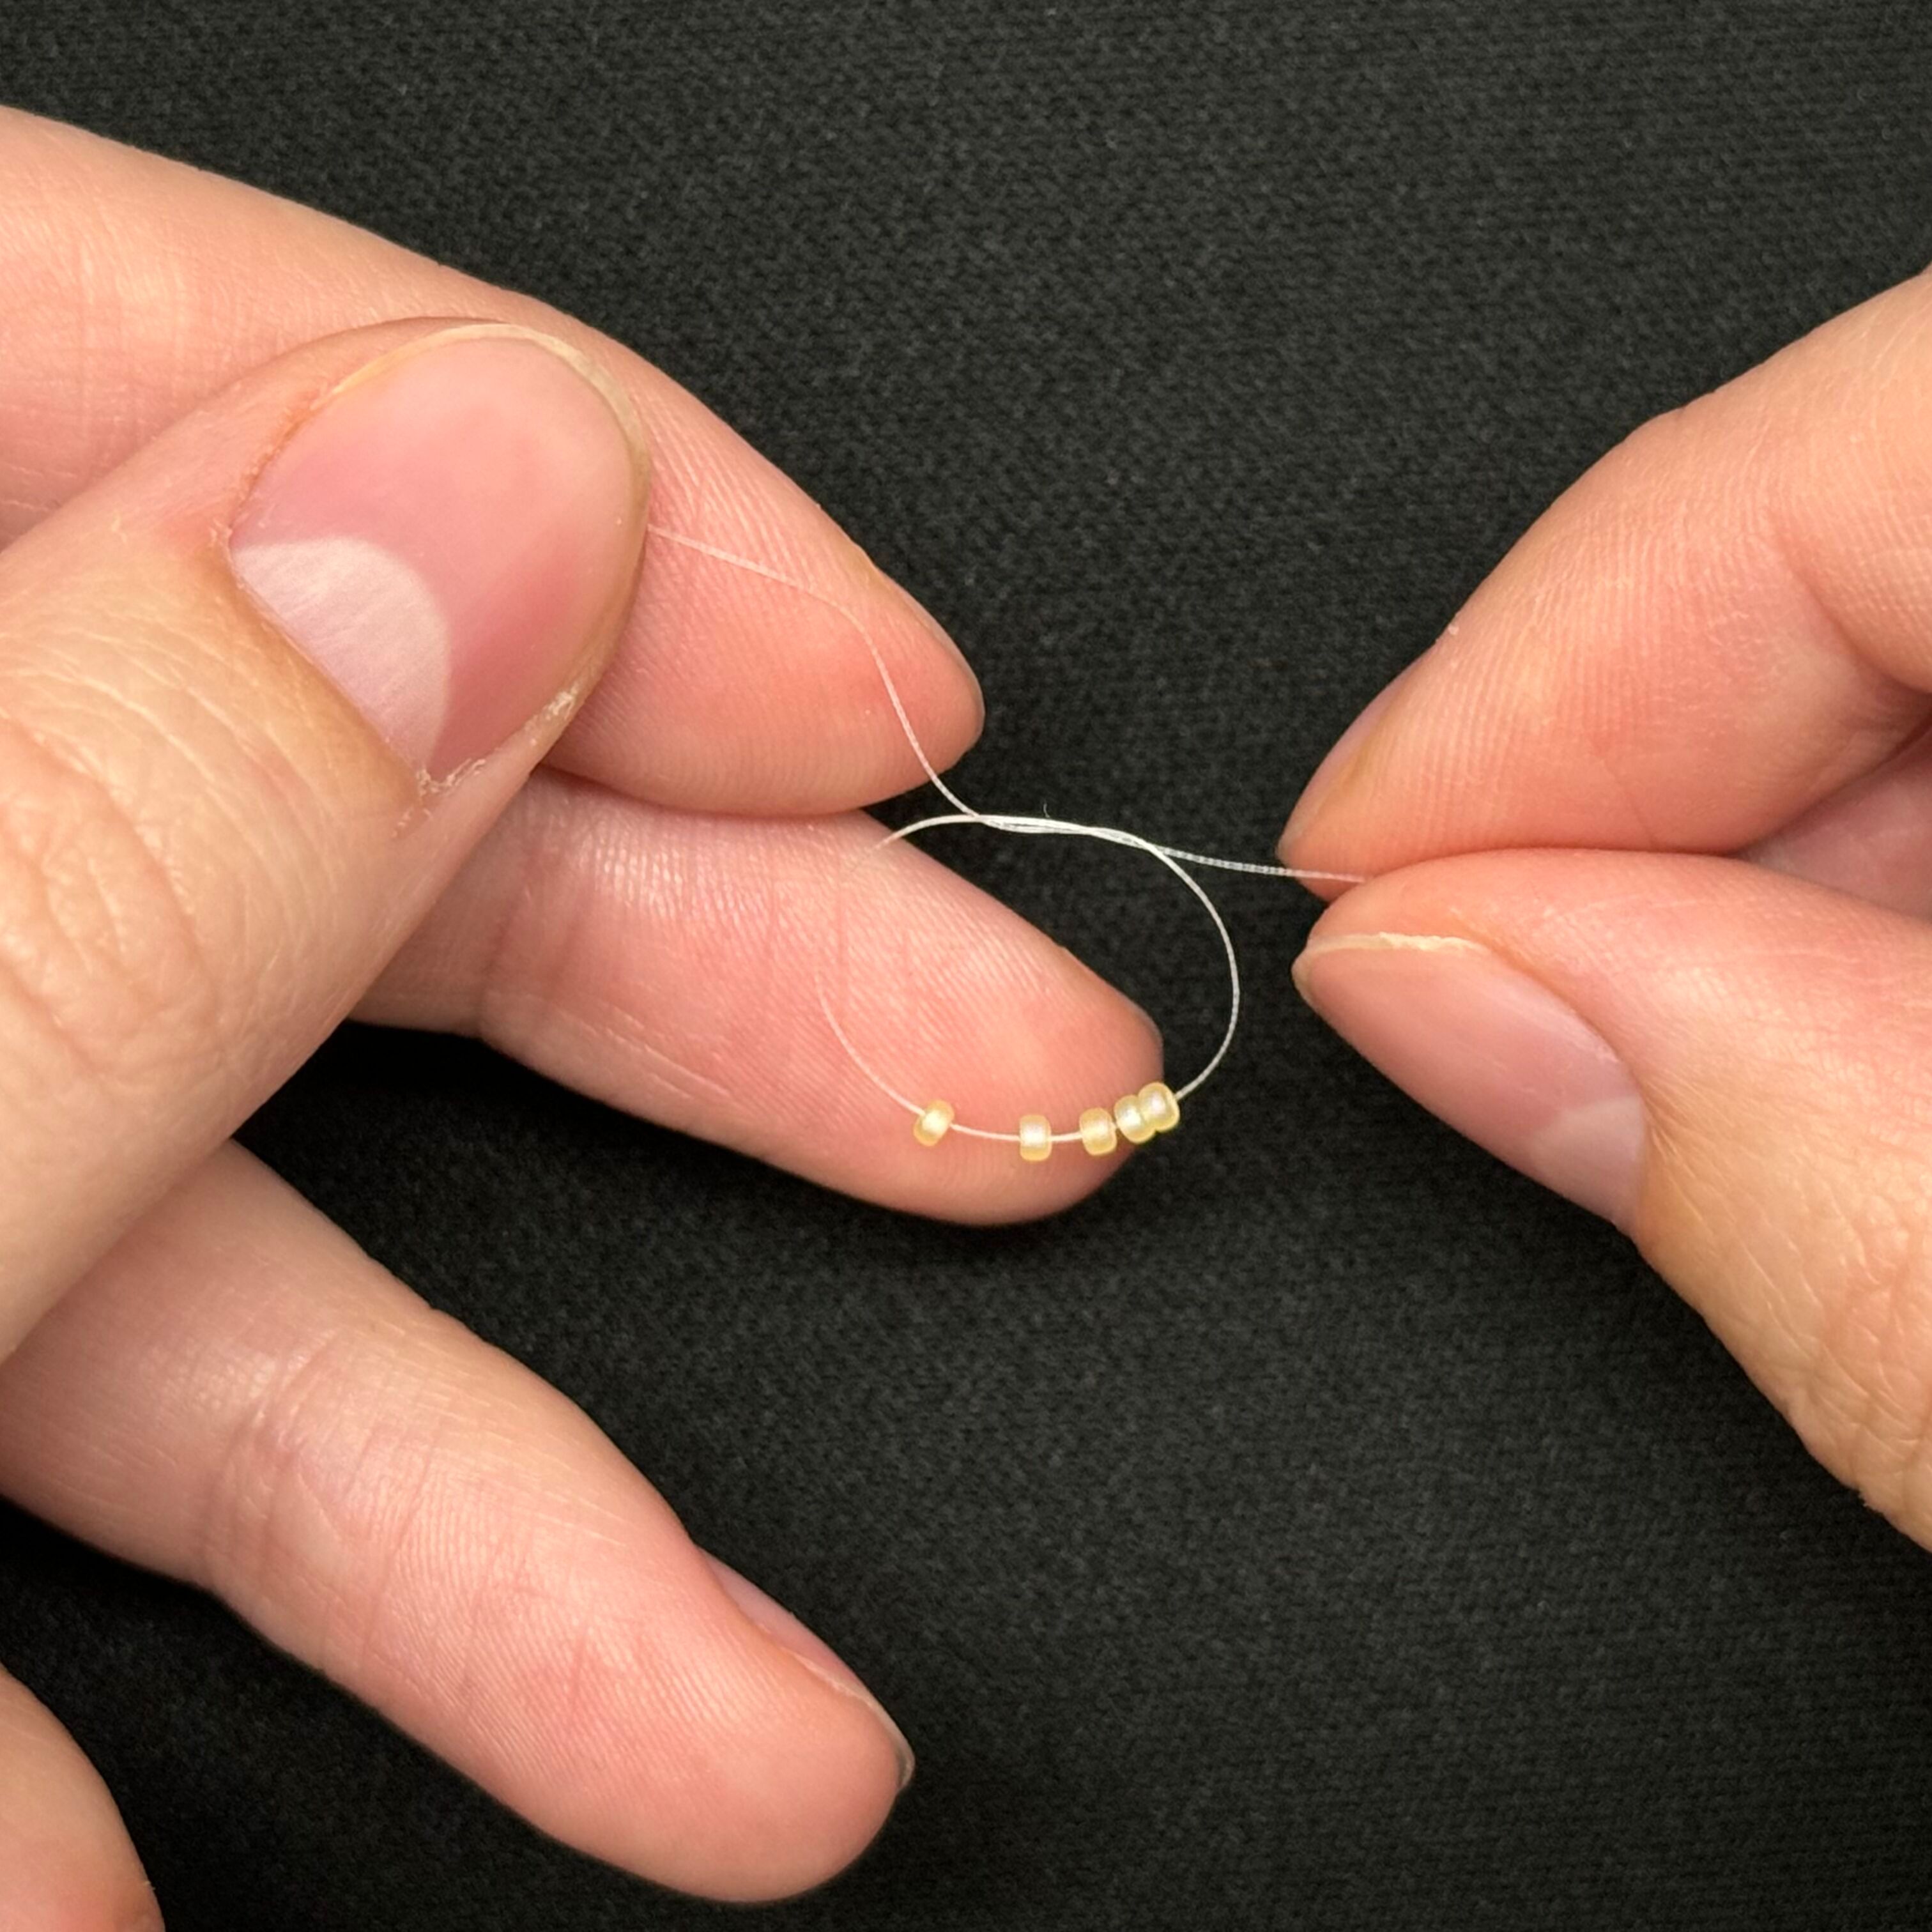
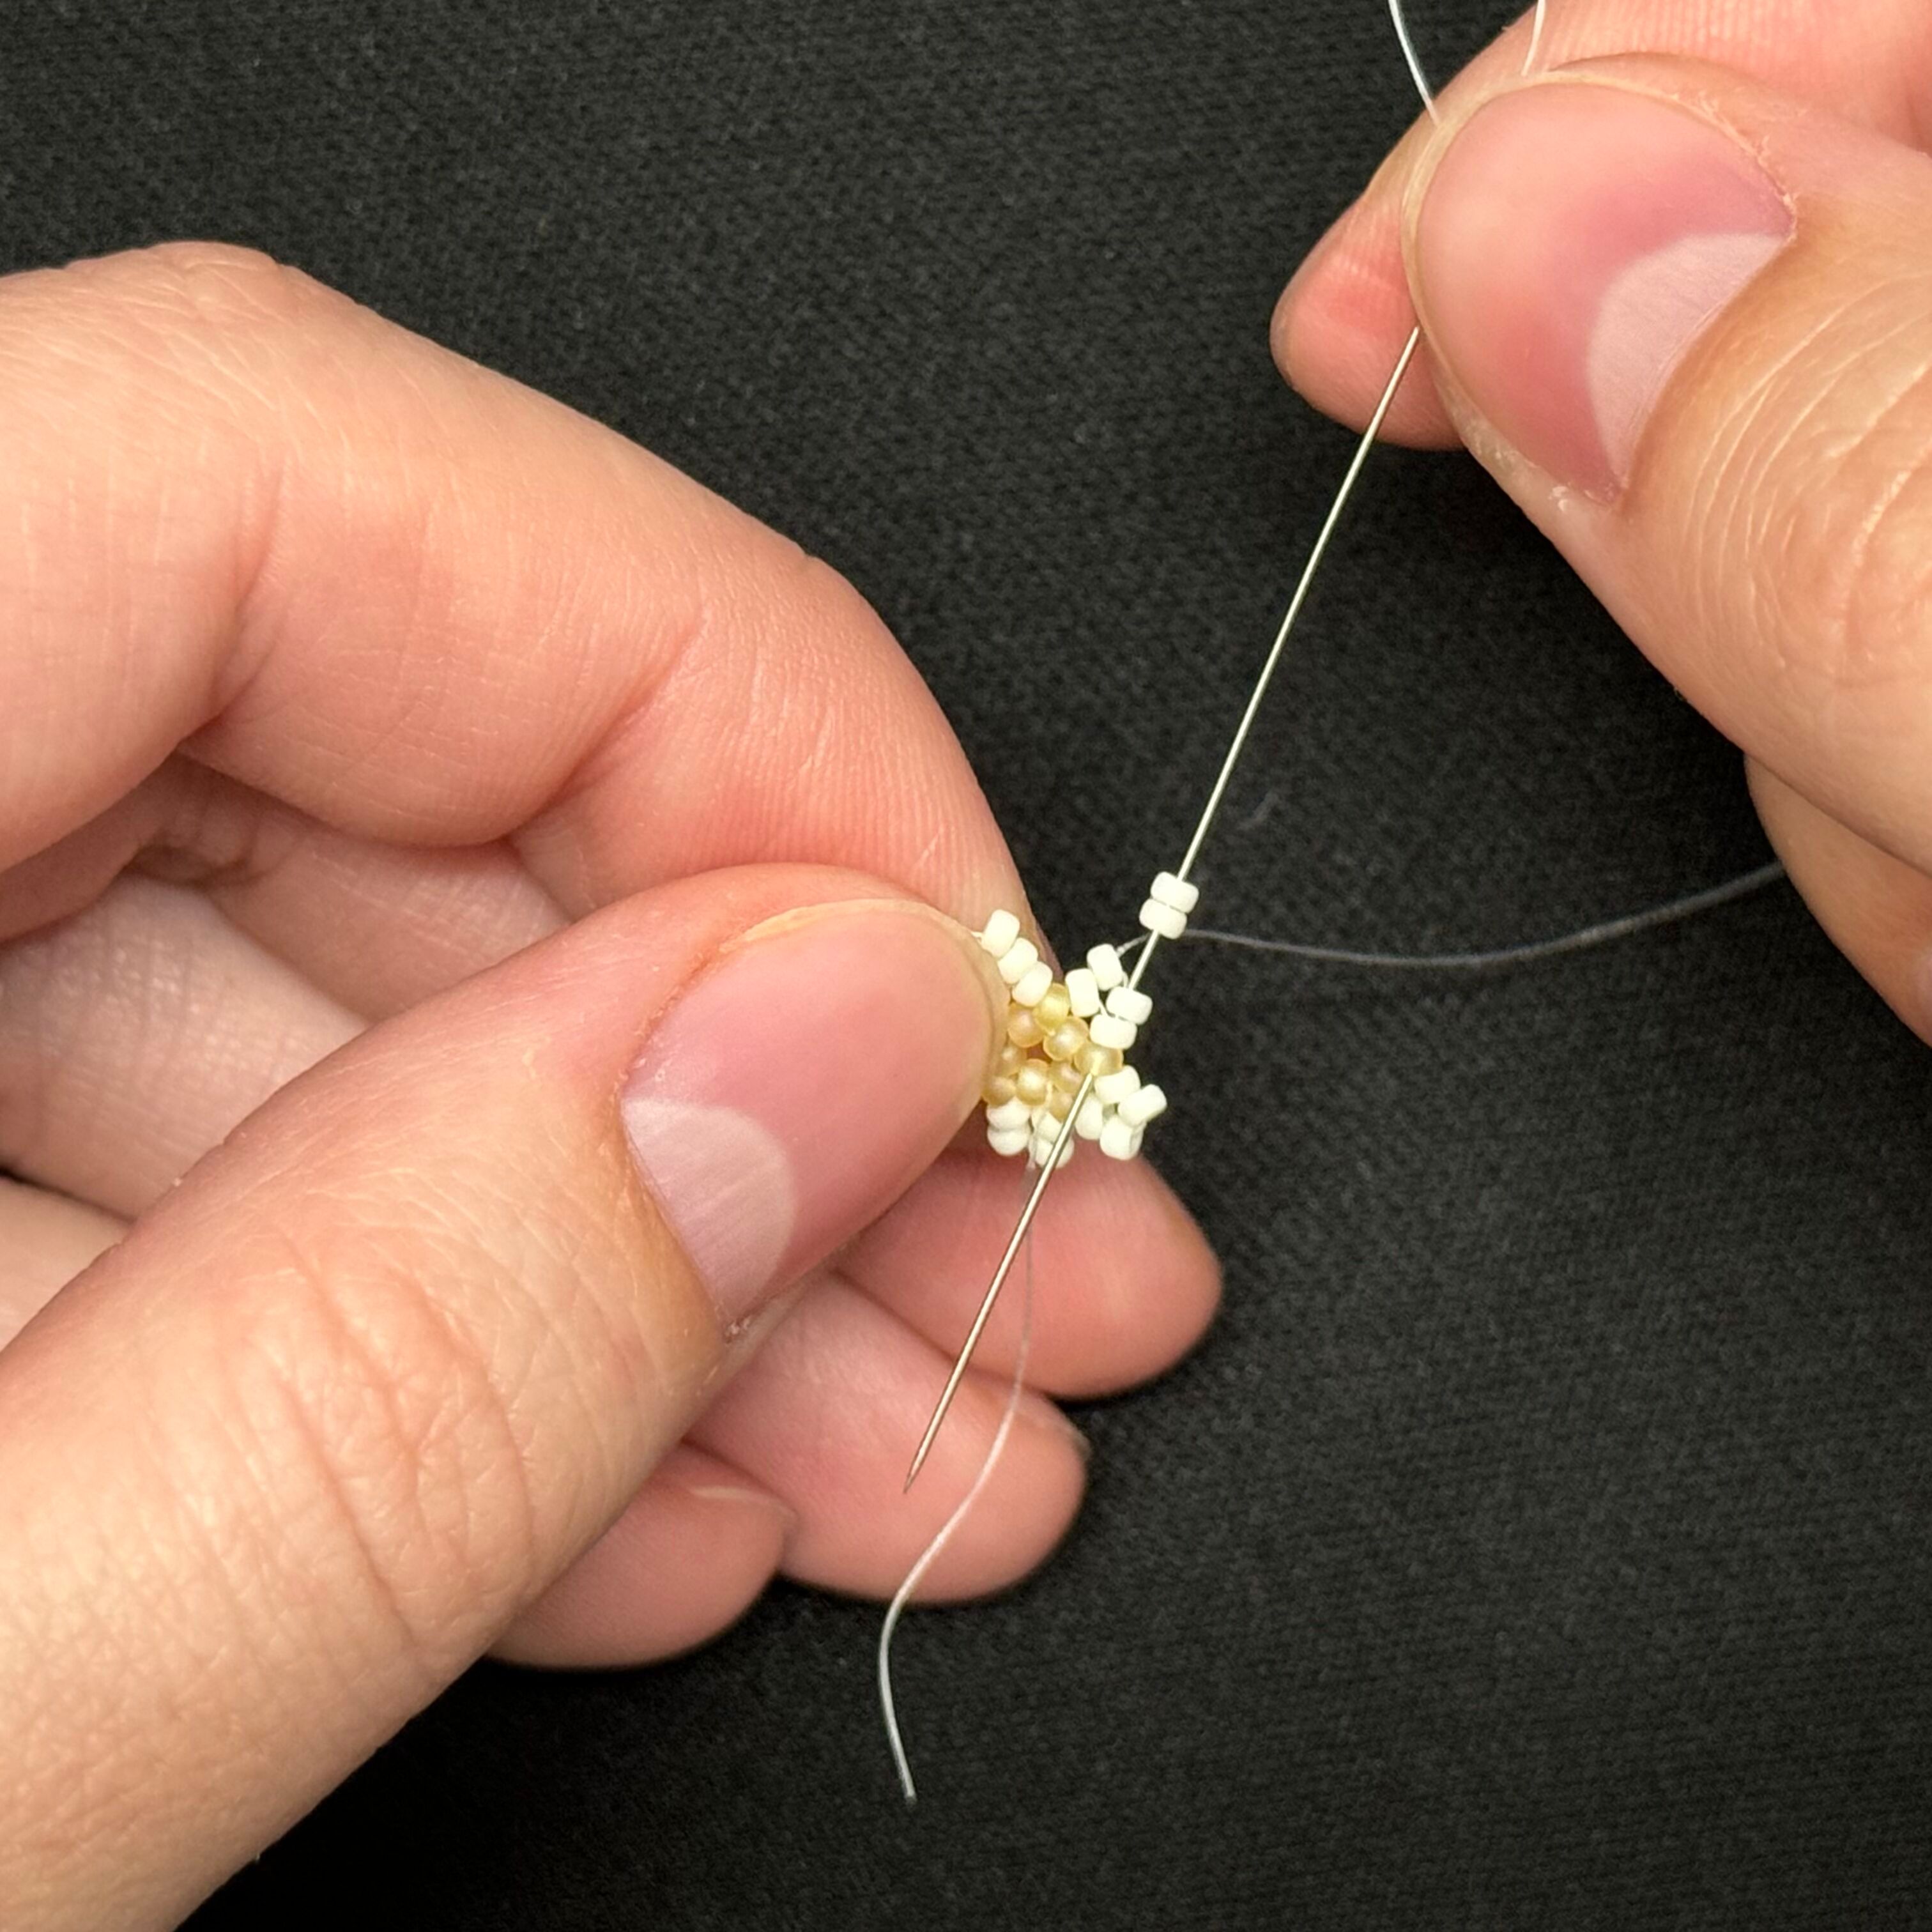
1. Cut 15 inches of fireline and thread onto a needle, string on five - Size 15 132FR Cantaloupe AB Matte beads and tie two surgeon knots - leave about 1.5 to 2 inches for a tail (we will use the tail in the last step to secure everything together)
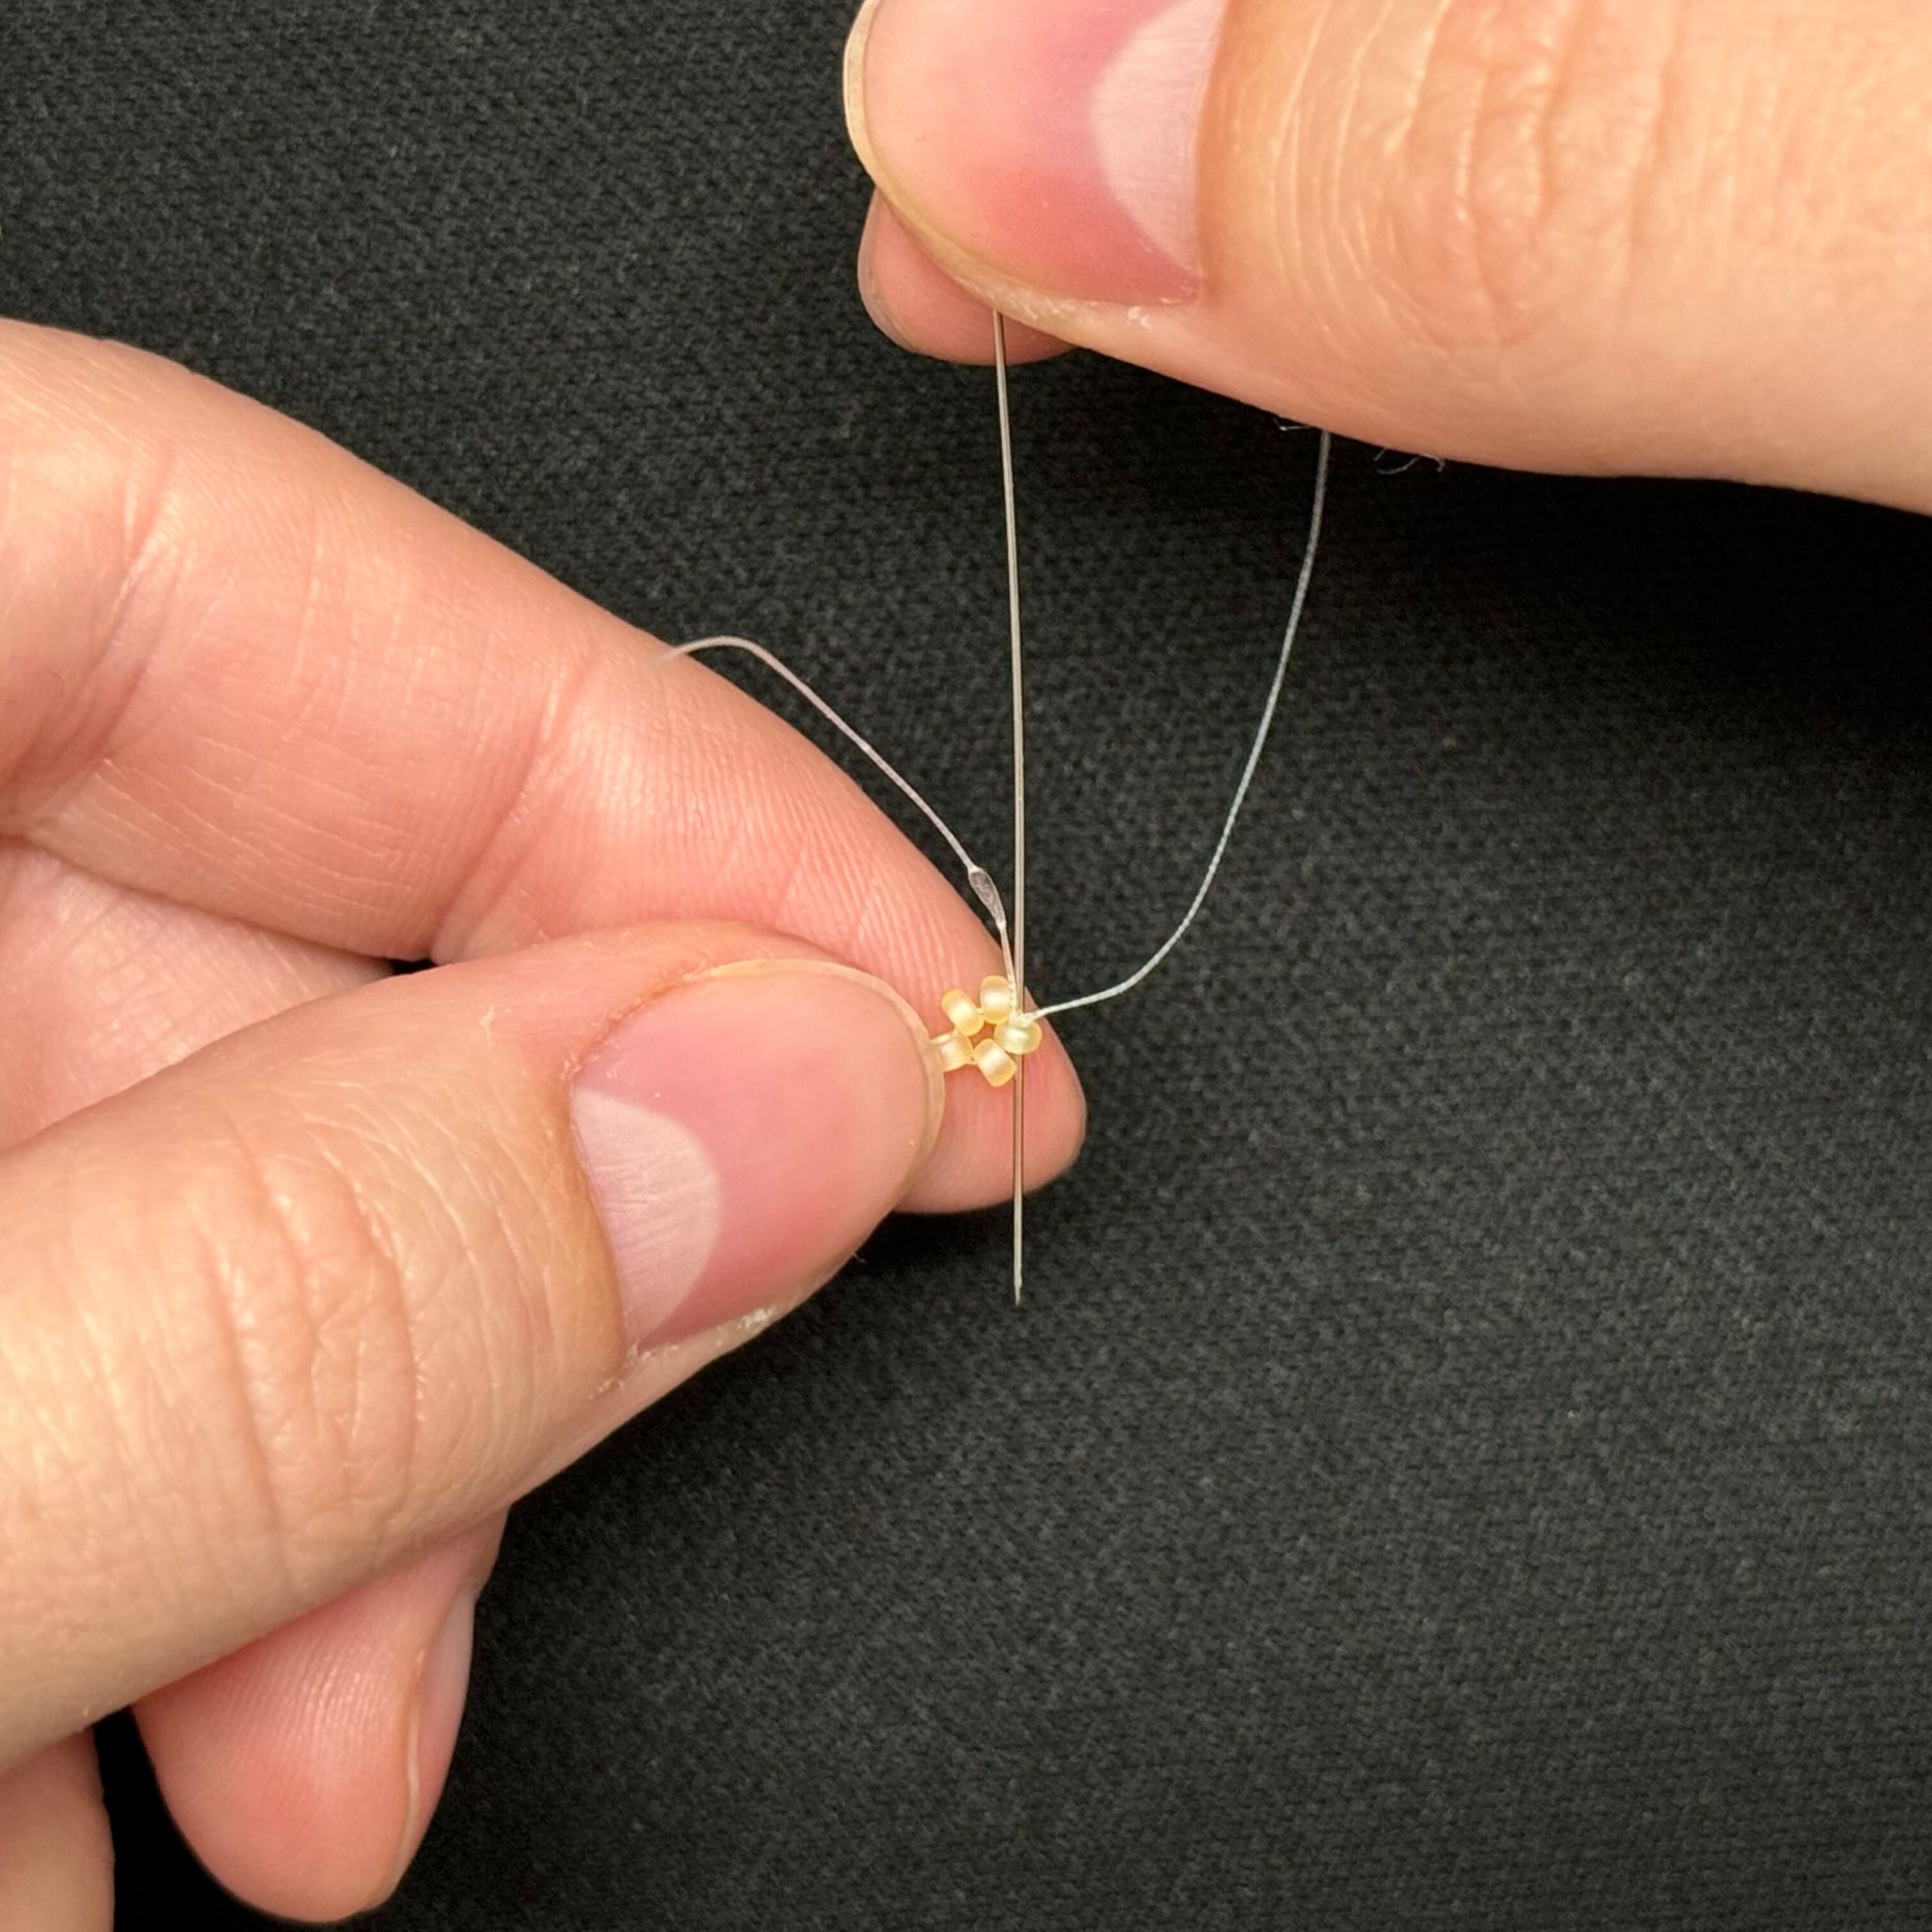
2. Thread the needle through the seed bead to the right of the knot and pull the thread
3. Add a 132FR seed bead to your needle and thread it through the next seed bead to the right (shown), pull tight
4. Repeat with another 132FR seed bead, Keep adding seed beads until you make a complete circle
5. With the 5th 132FR seed bead, thread the needle through the next two seed beads. Pull tight.
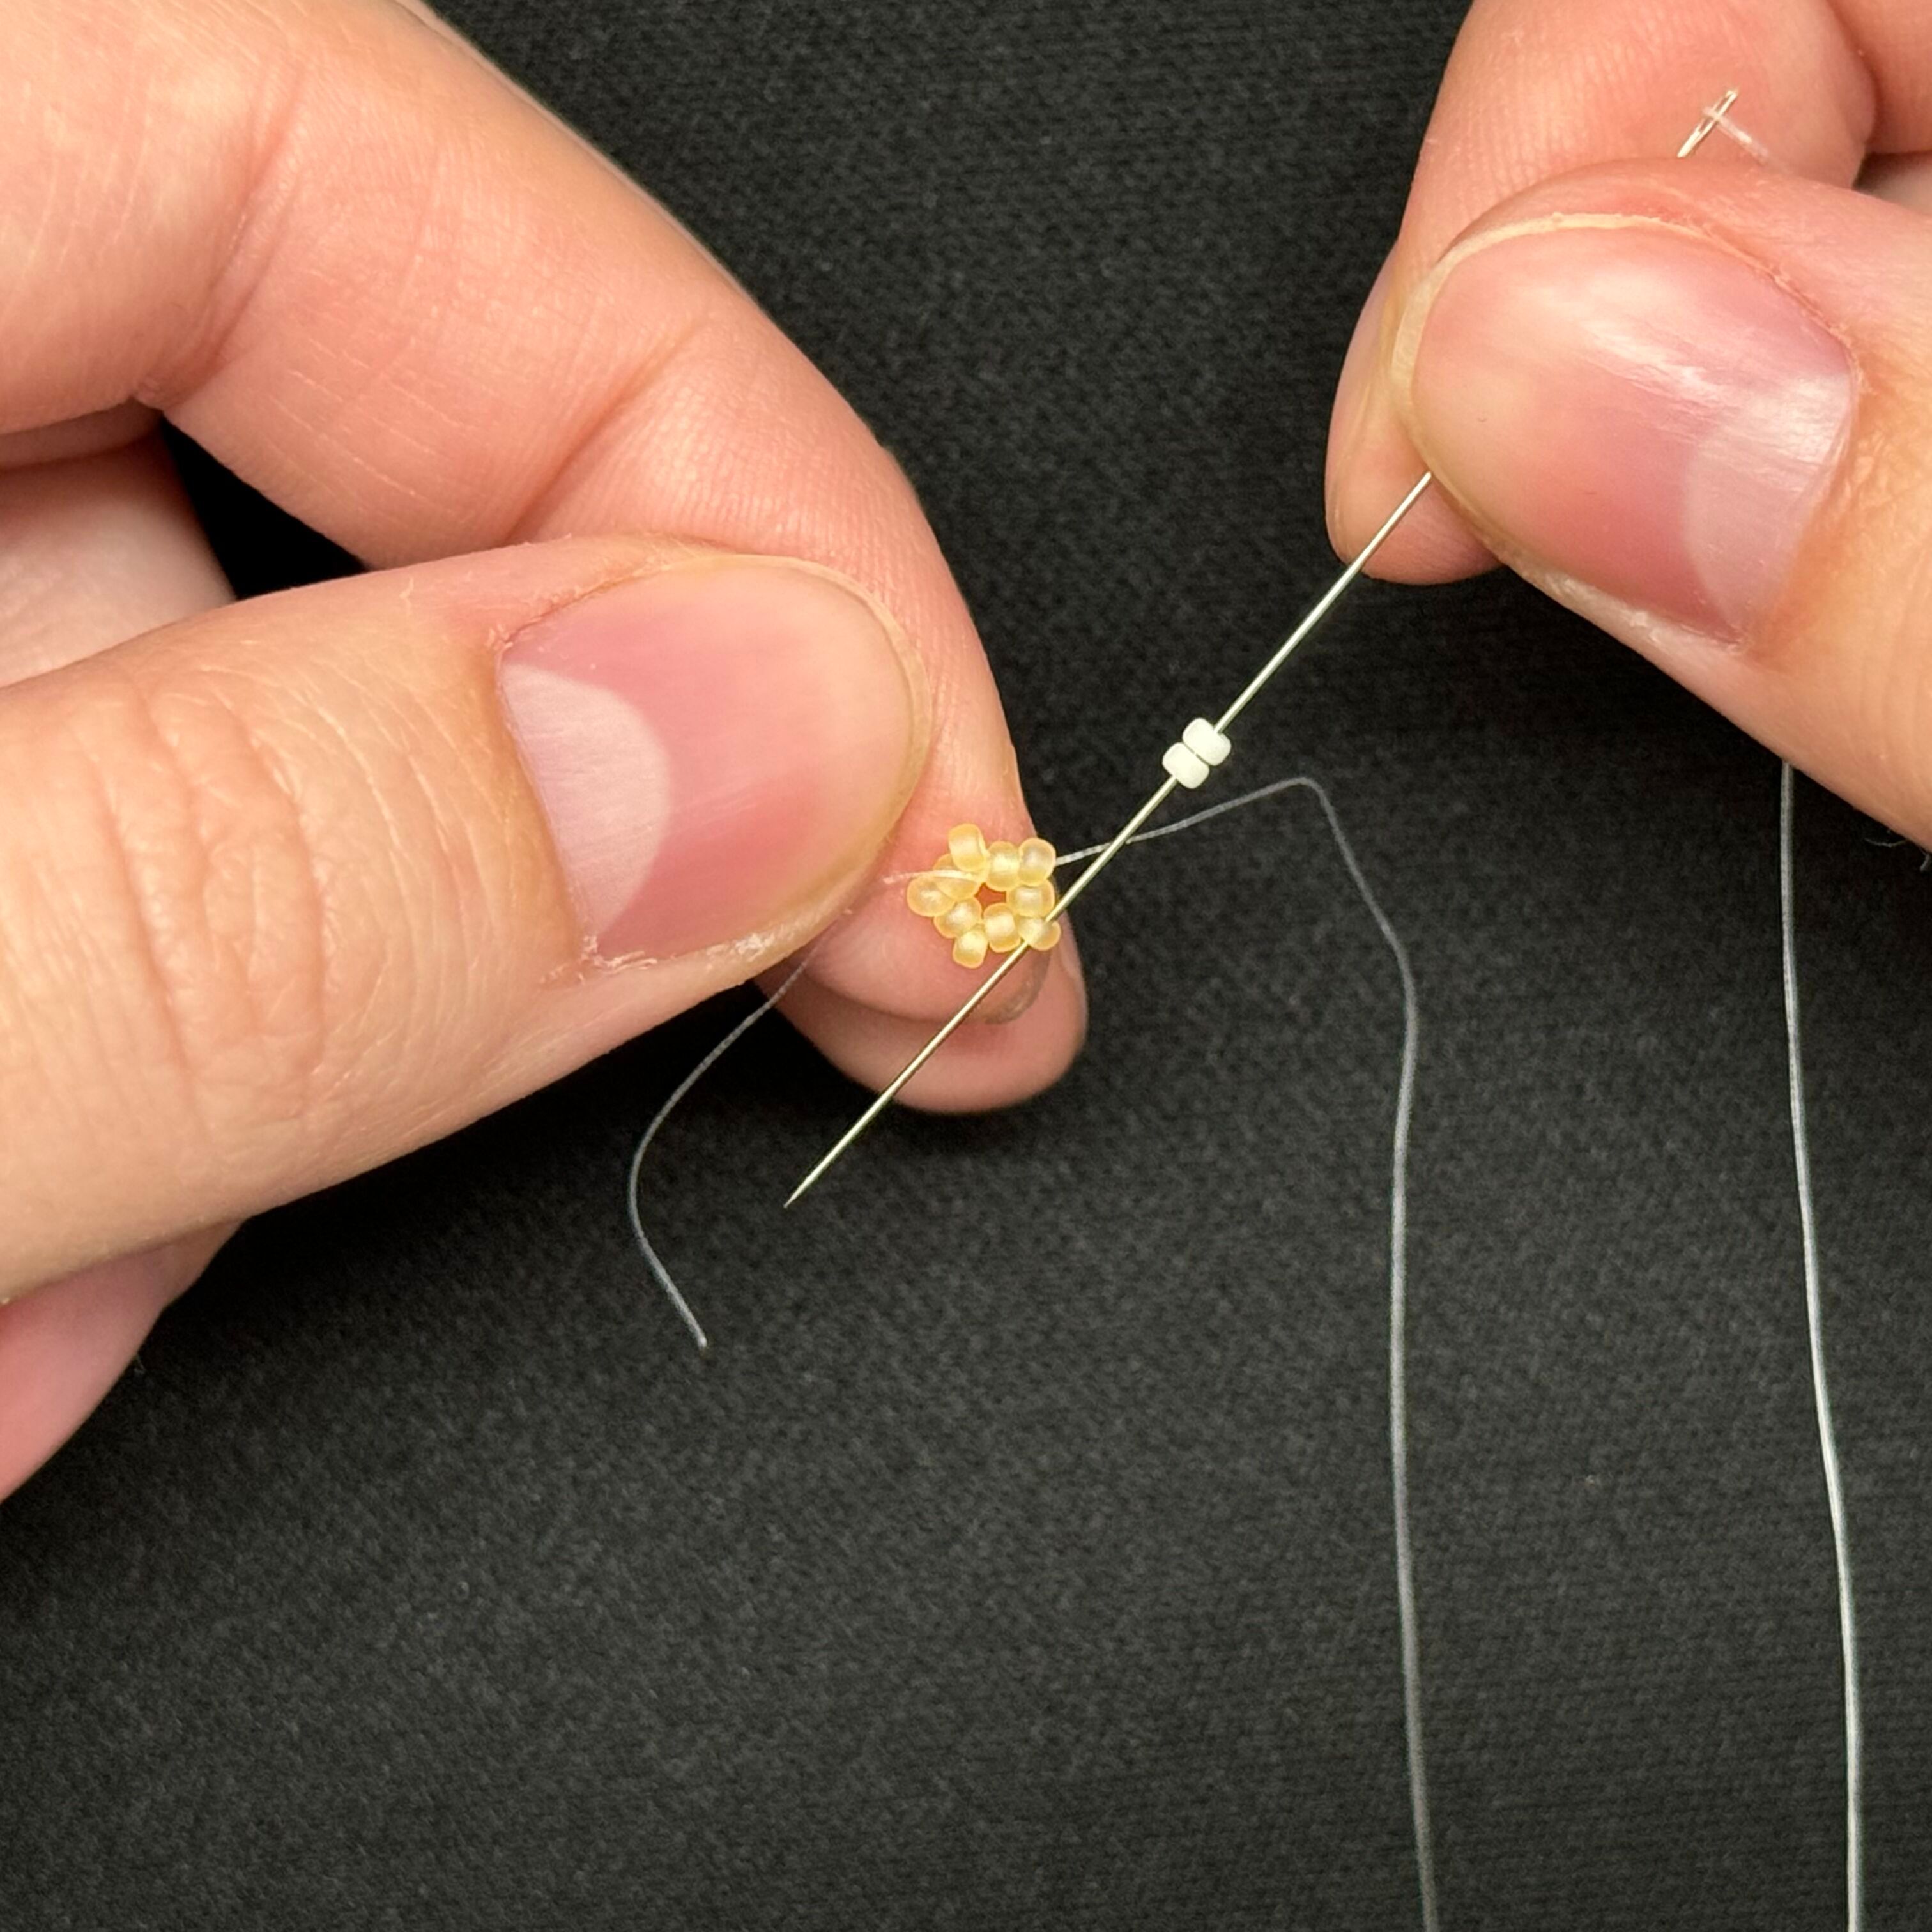
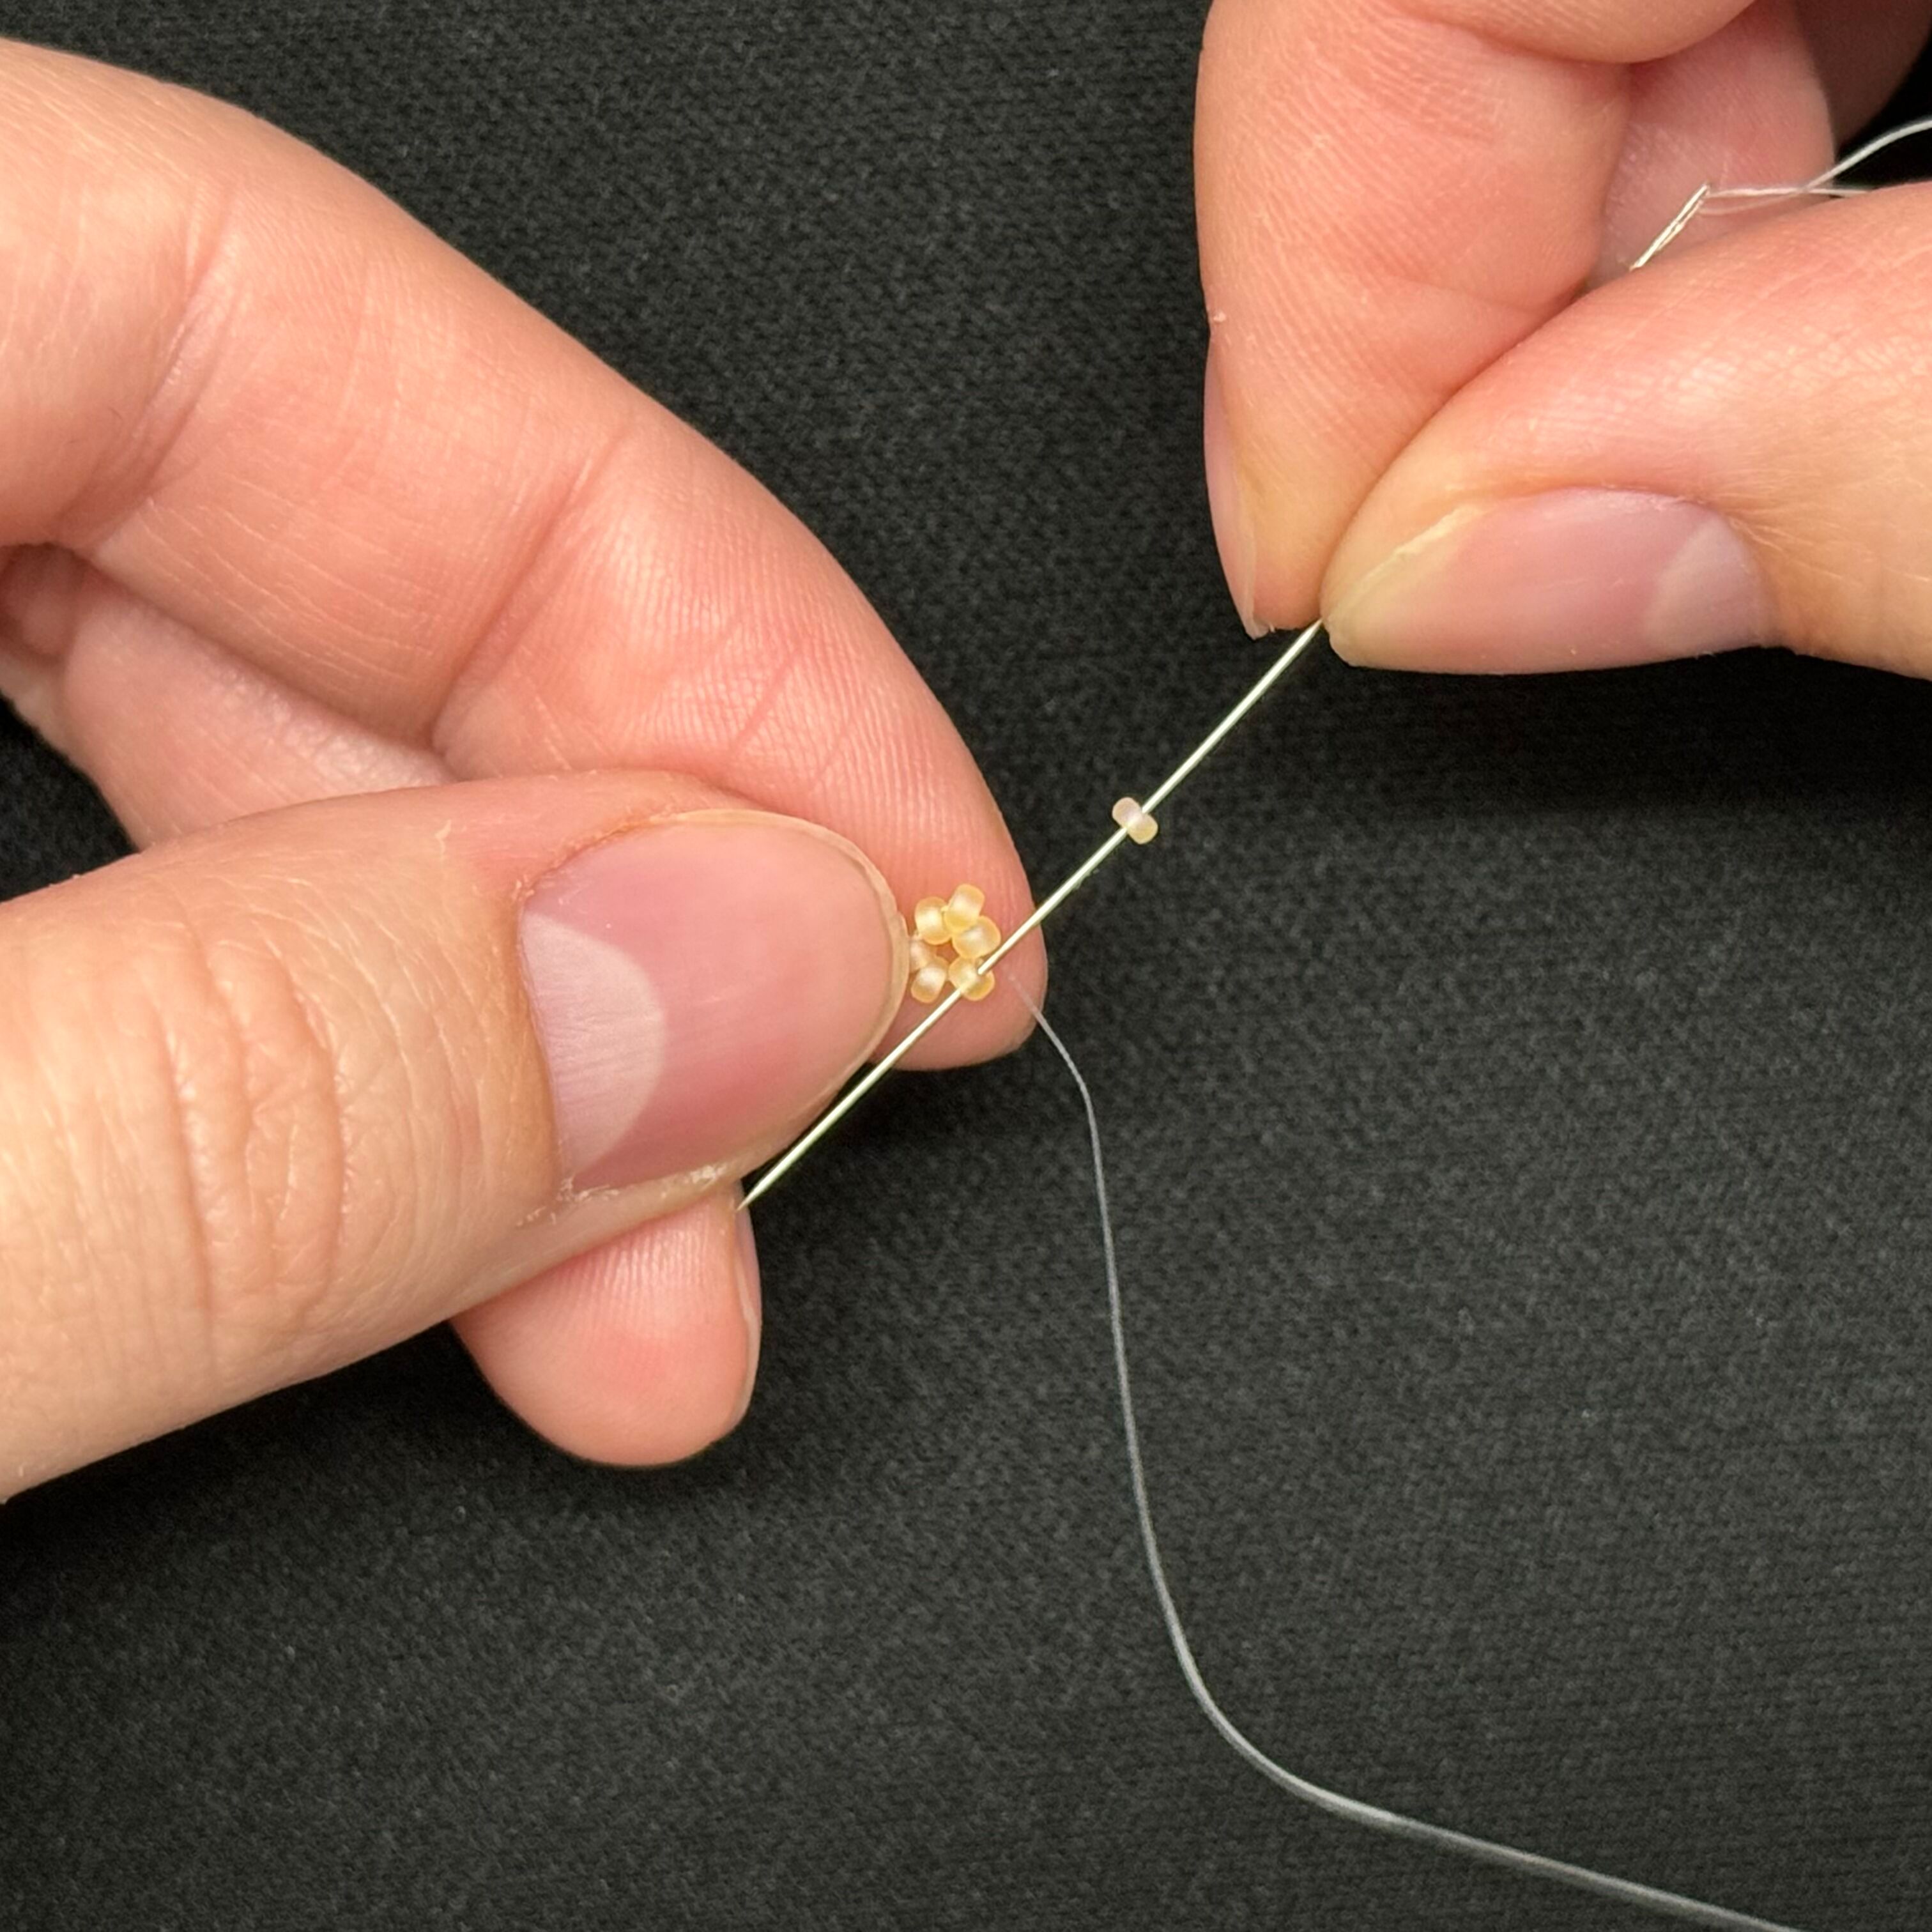
6. Add two Size 15 2021 Cream Matte seed beads to your needle and thread it through the 132FR bead shown (you skip over one bead and thread through the bead that "sticks out"). Pull tight
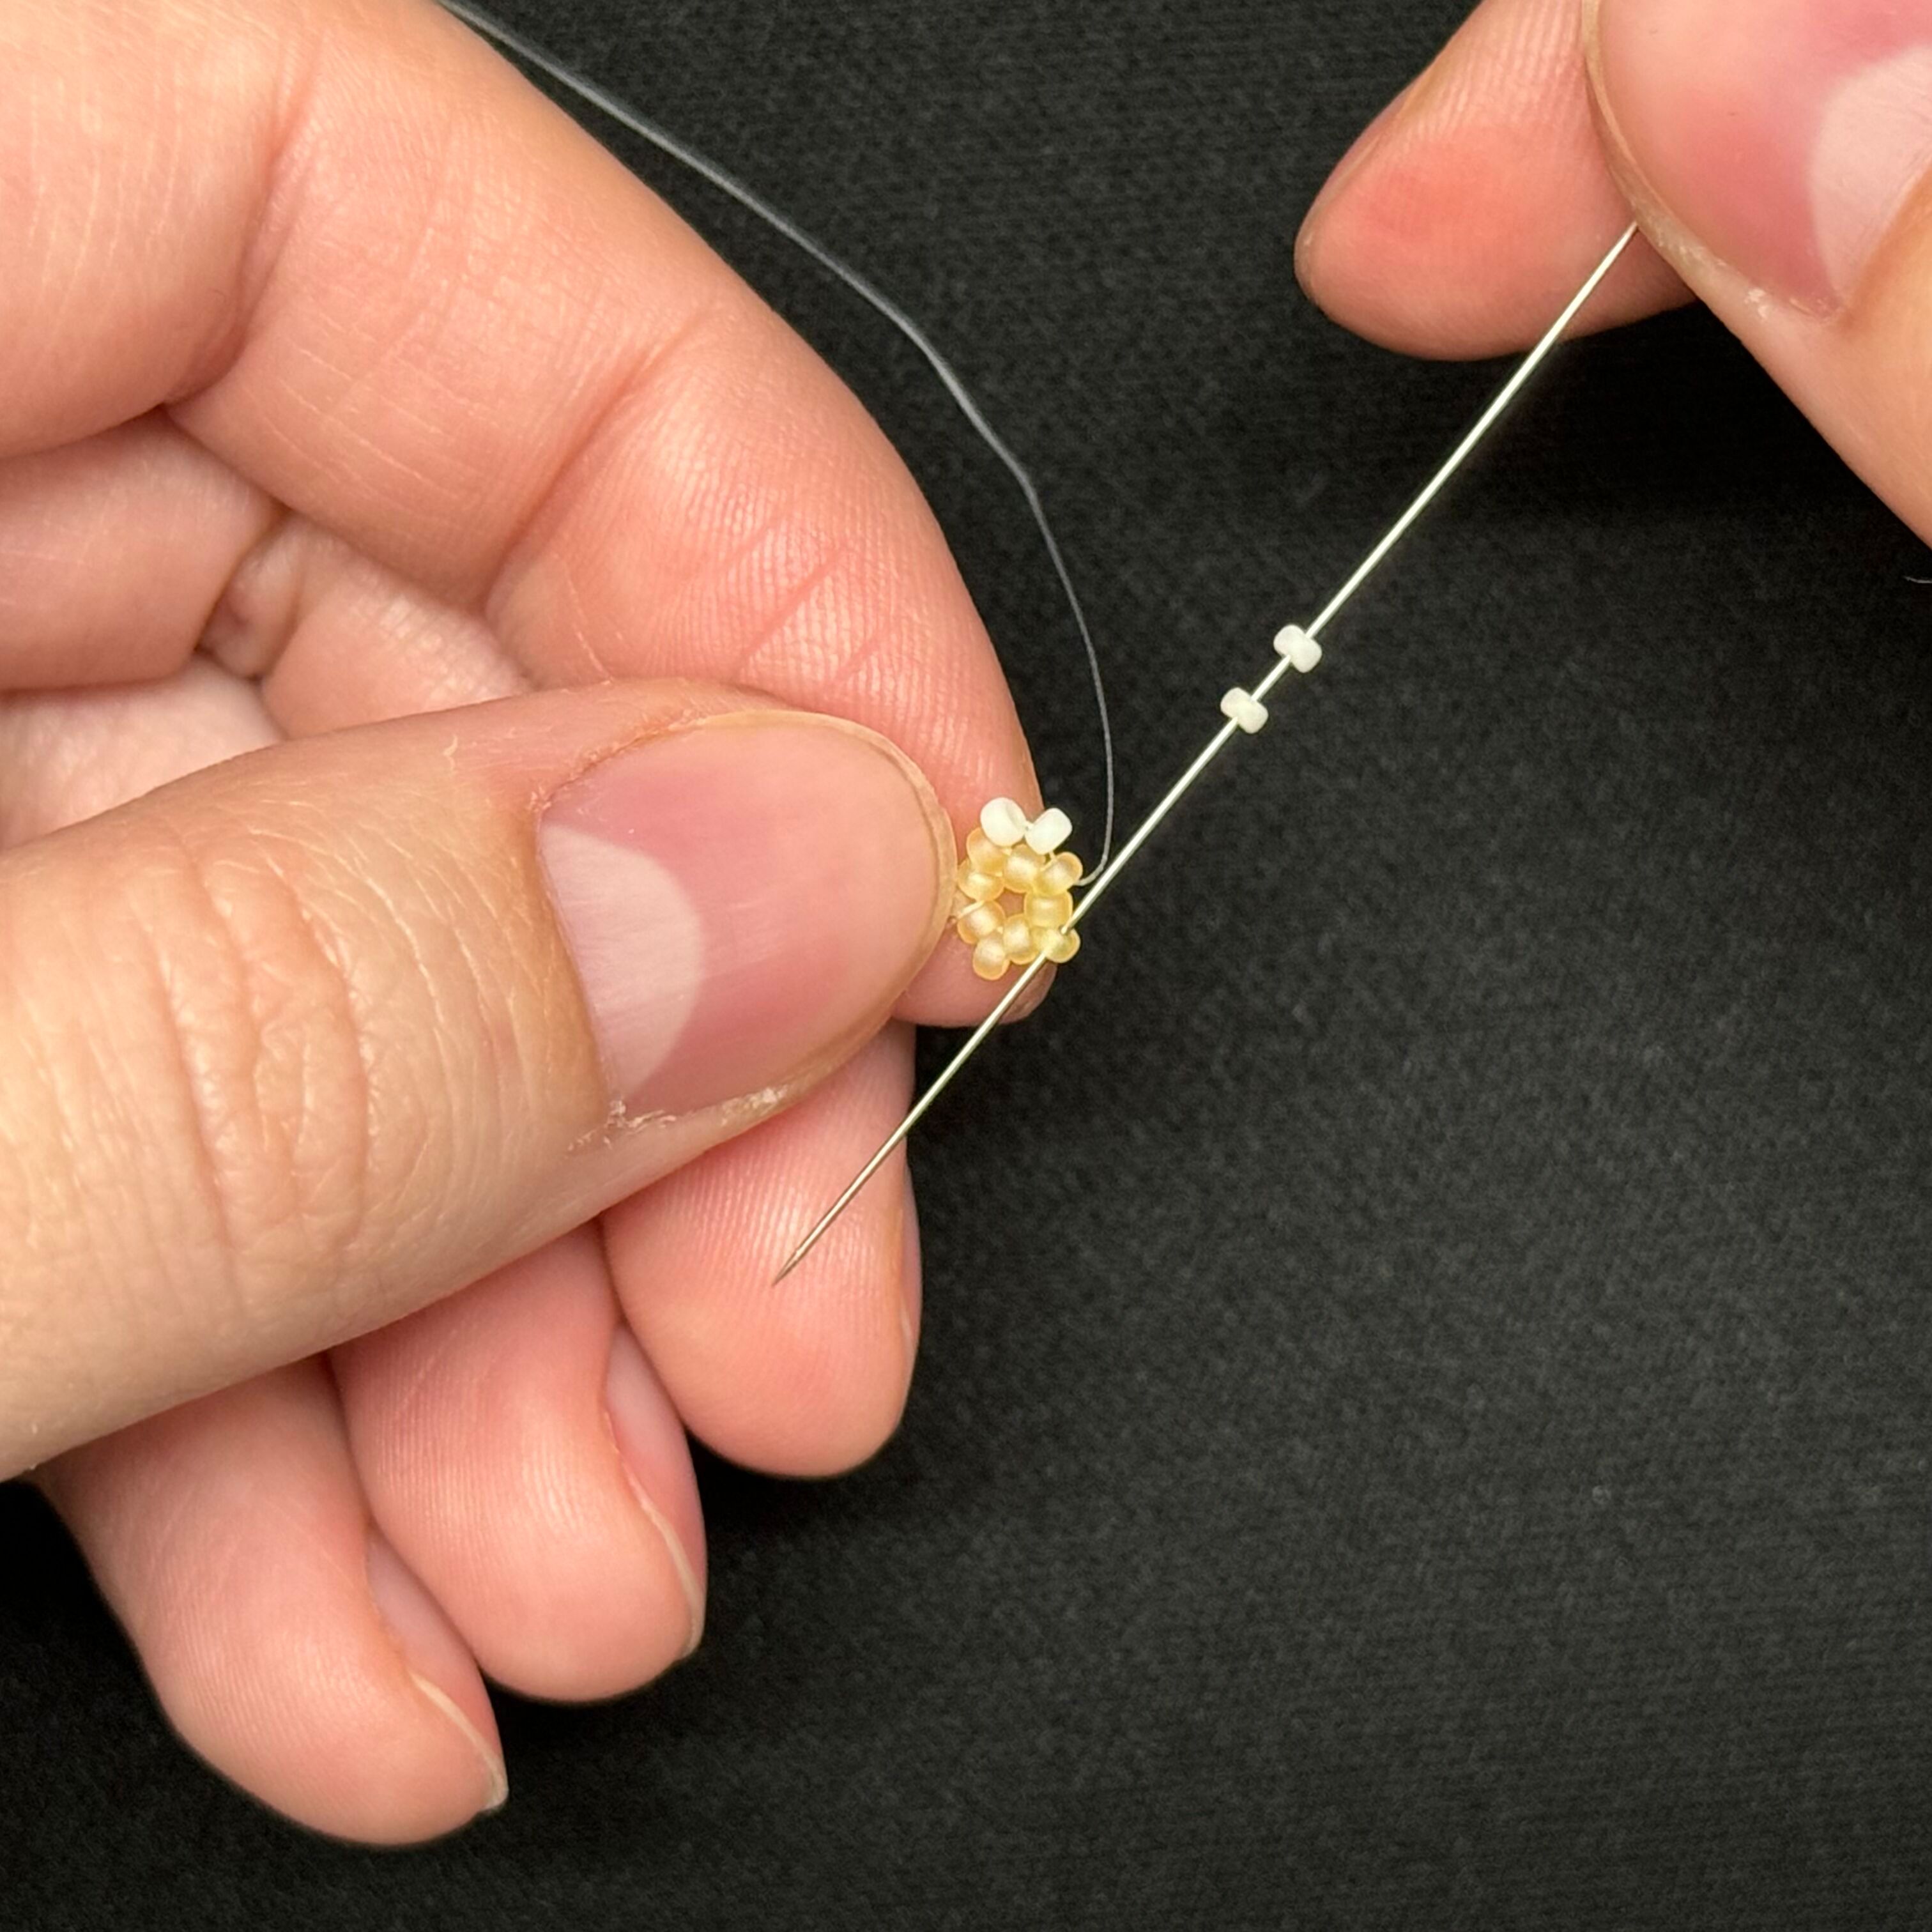
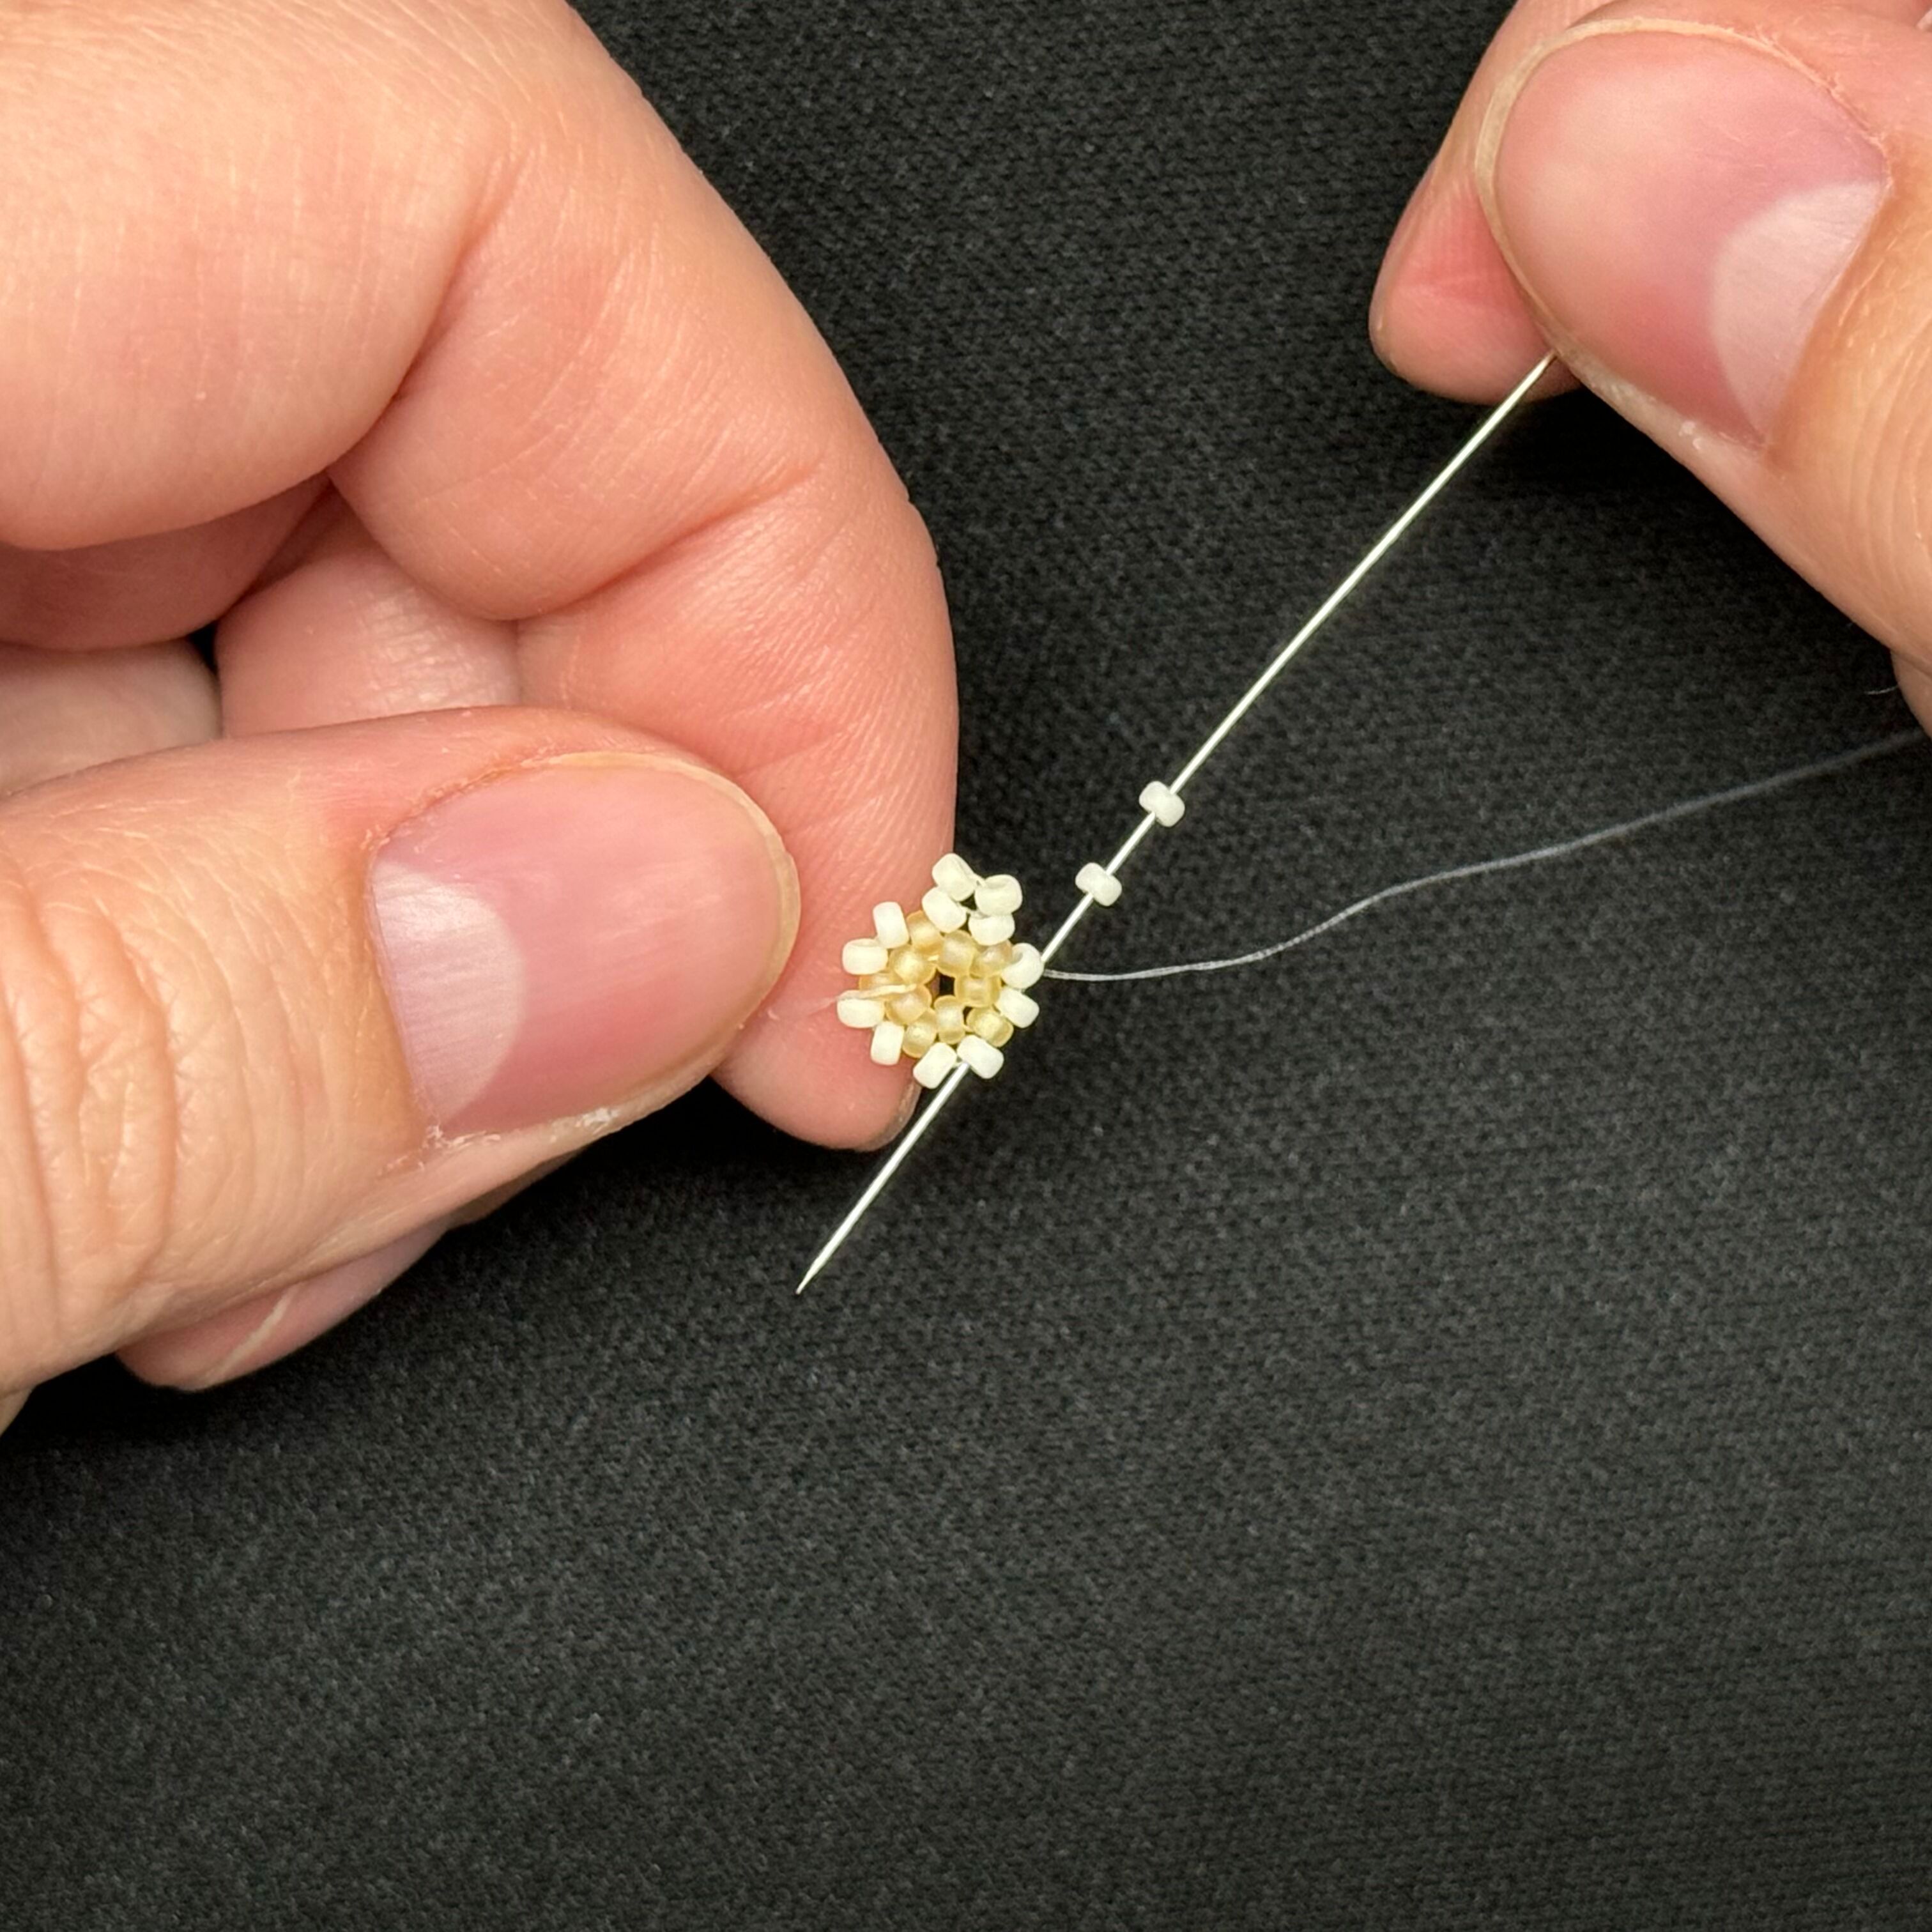
7. Repeat previous step, keep going around in a clockwise circle until you get back to where you started with the 2021 beads
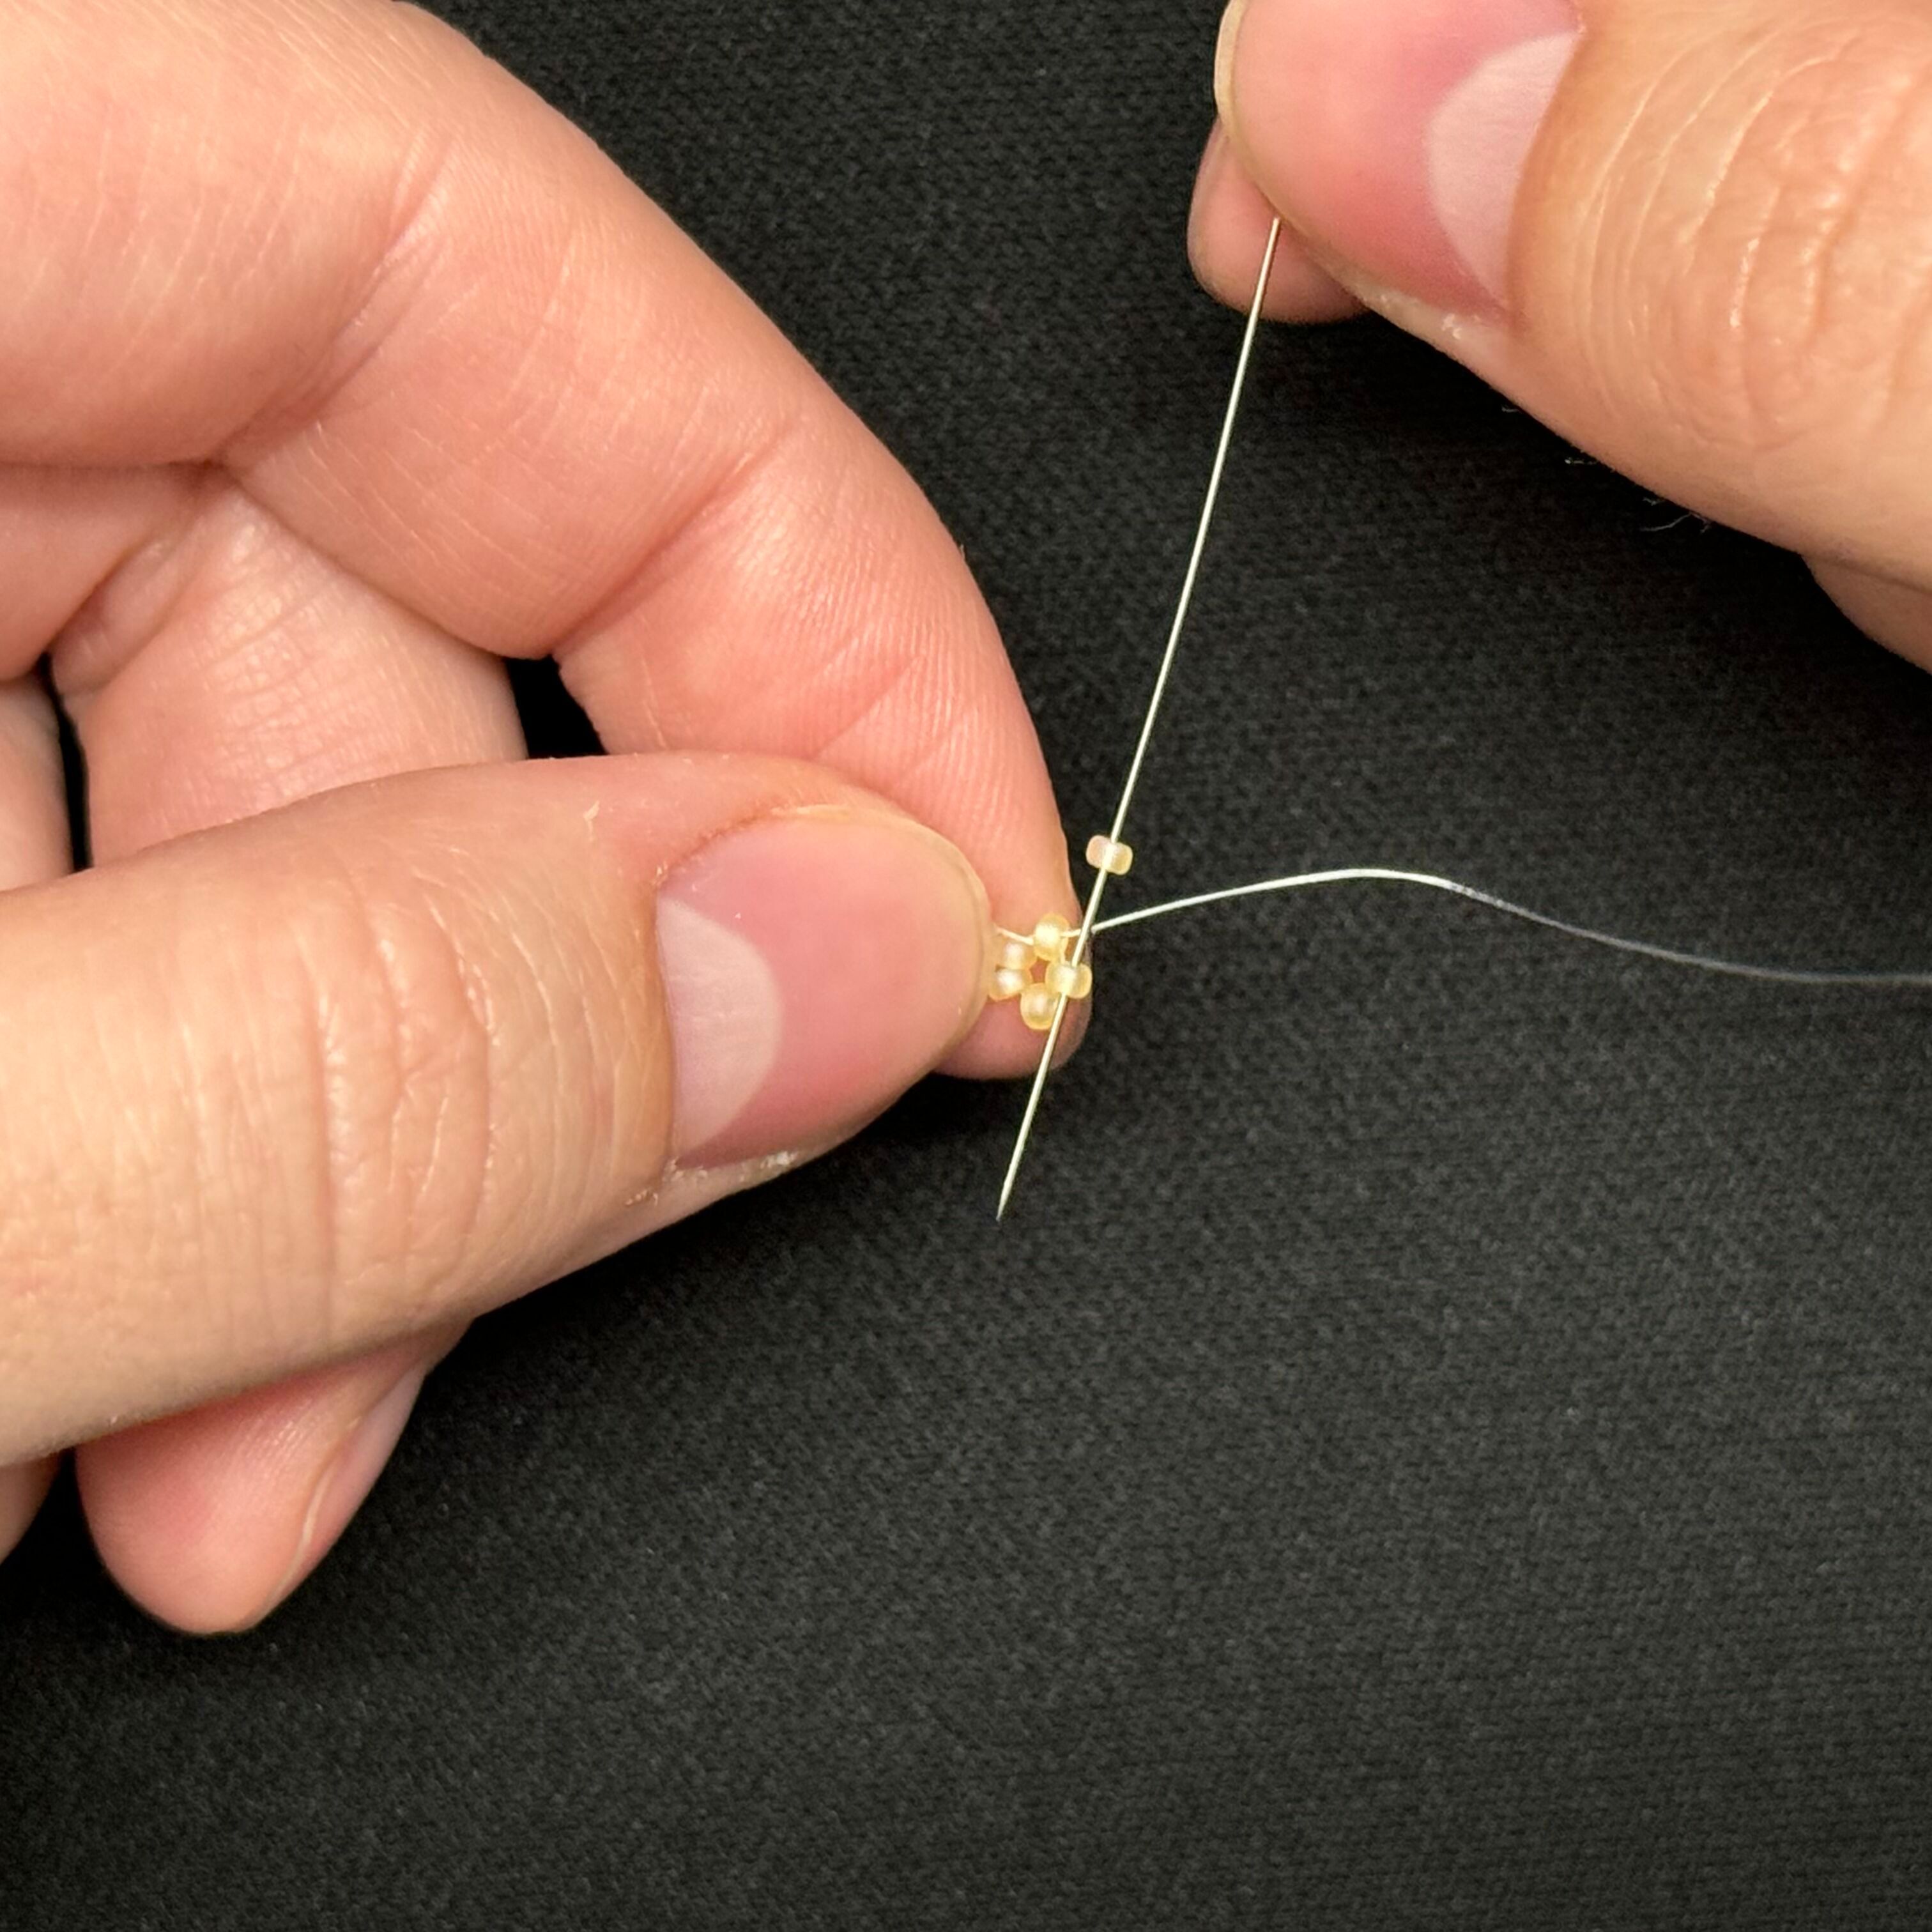
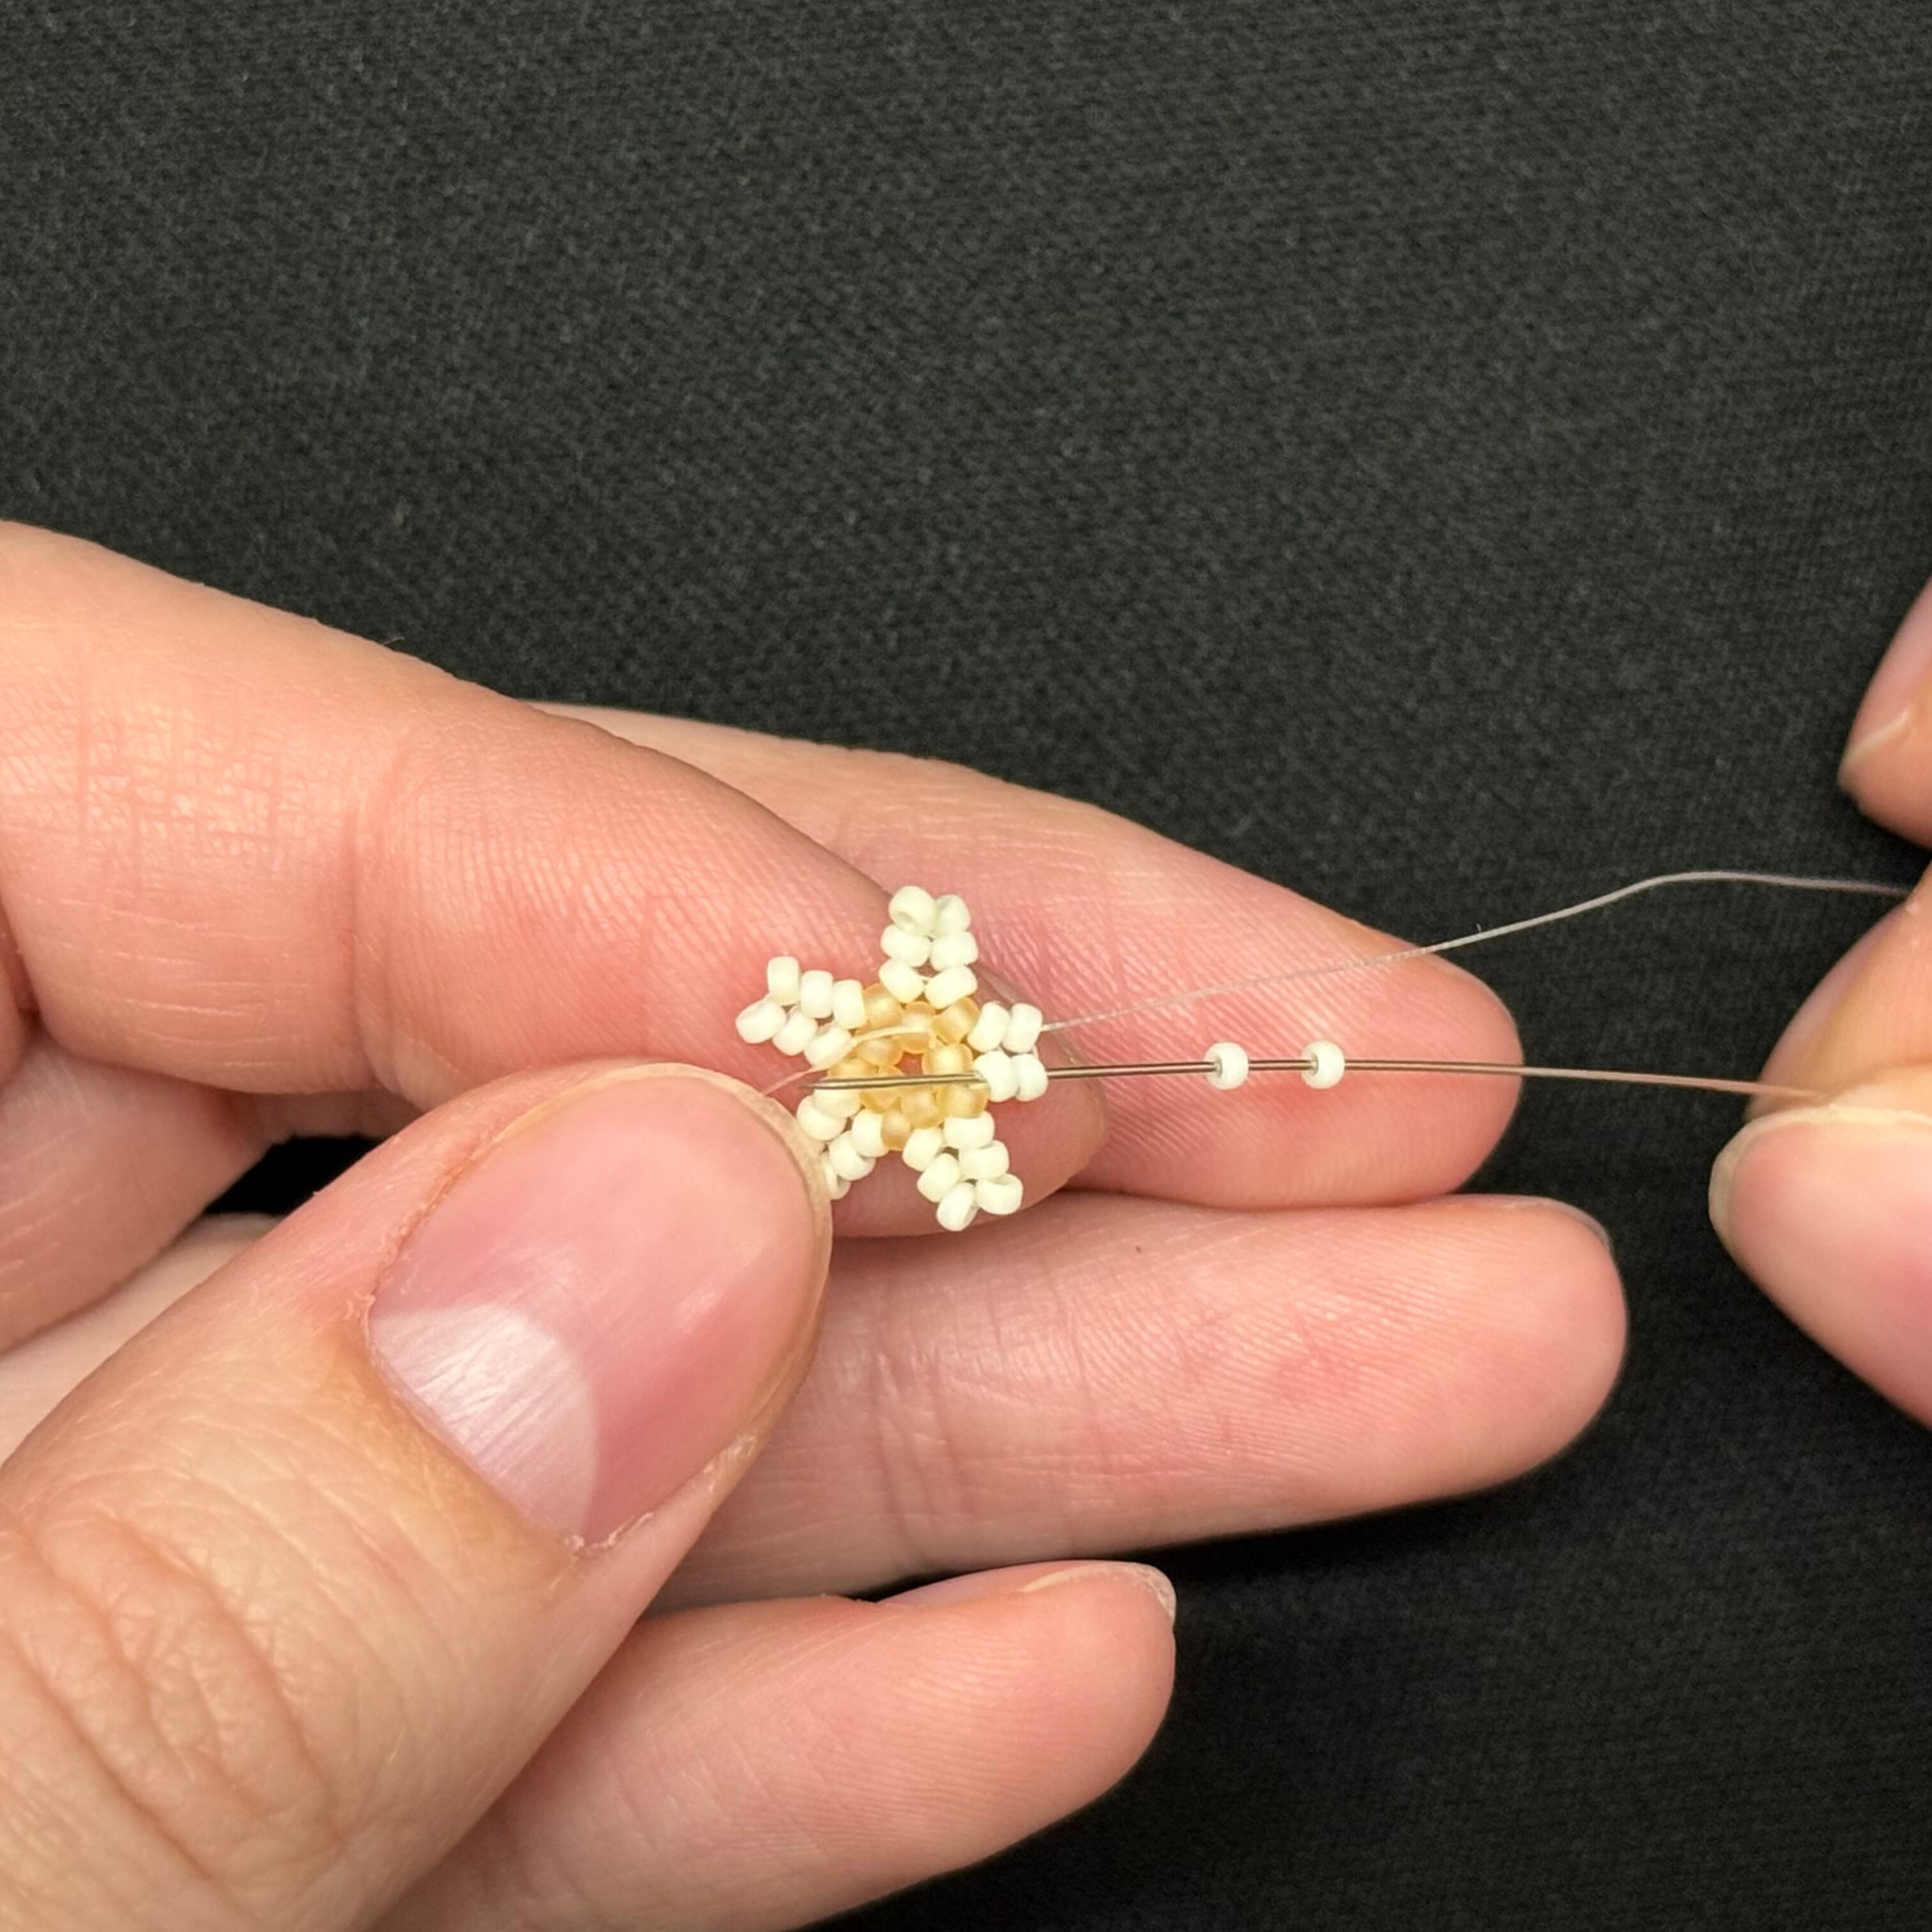
8. When adding the last set of 2021 beads, thread the needle through the two beads shown, this will start the second layer of the starfish arms
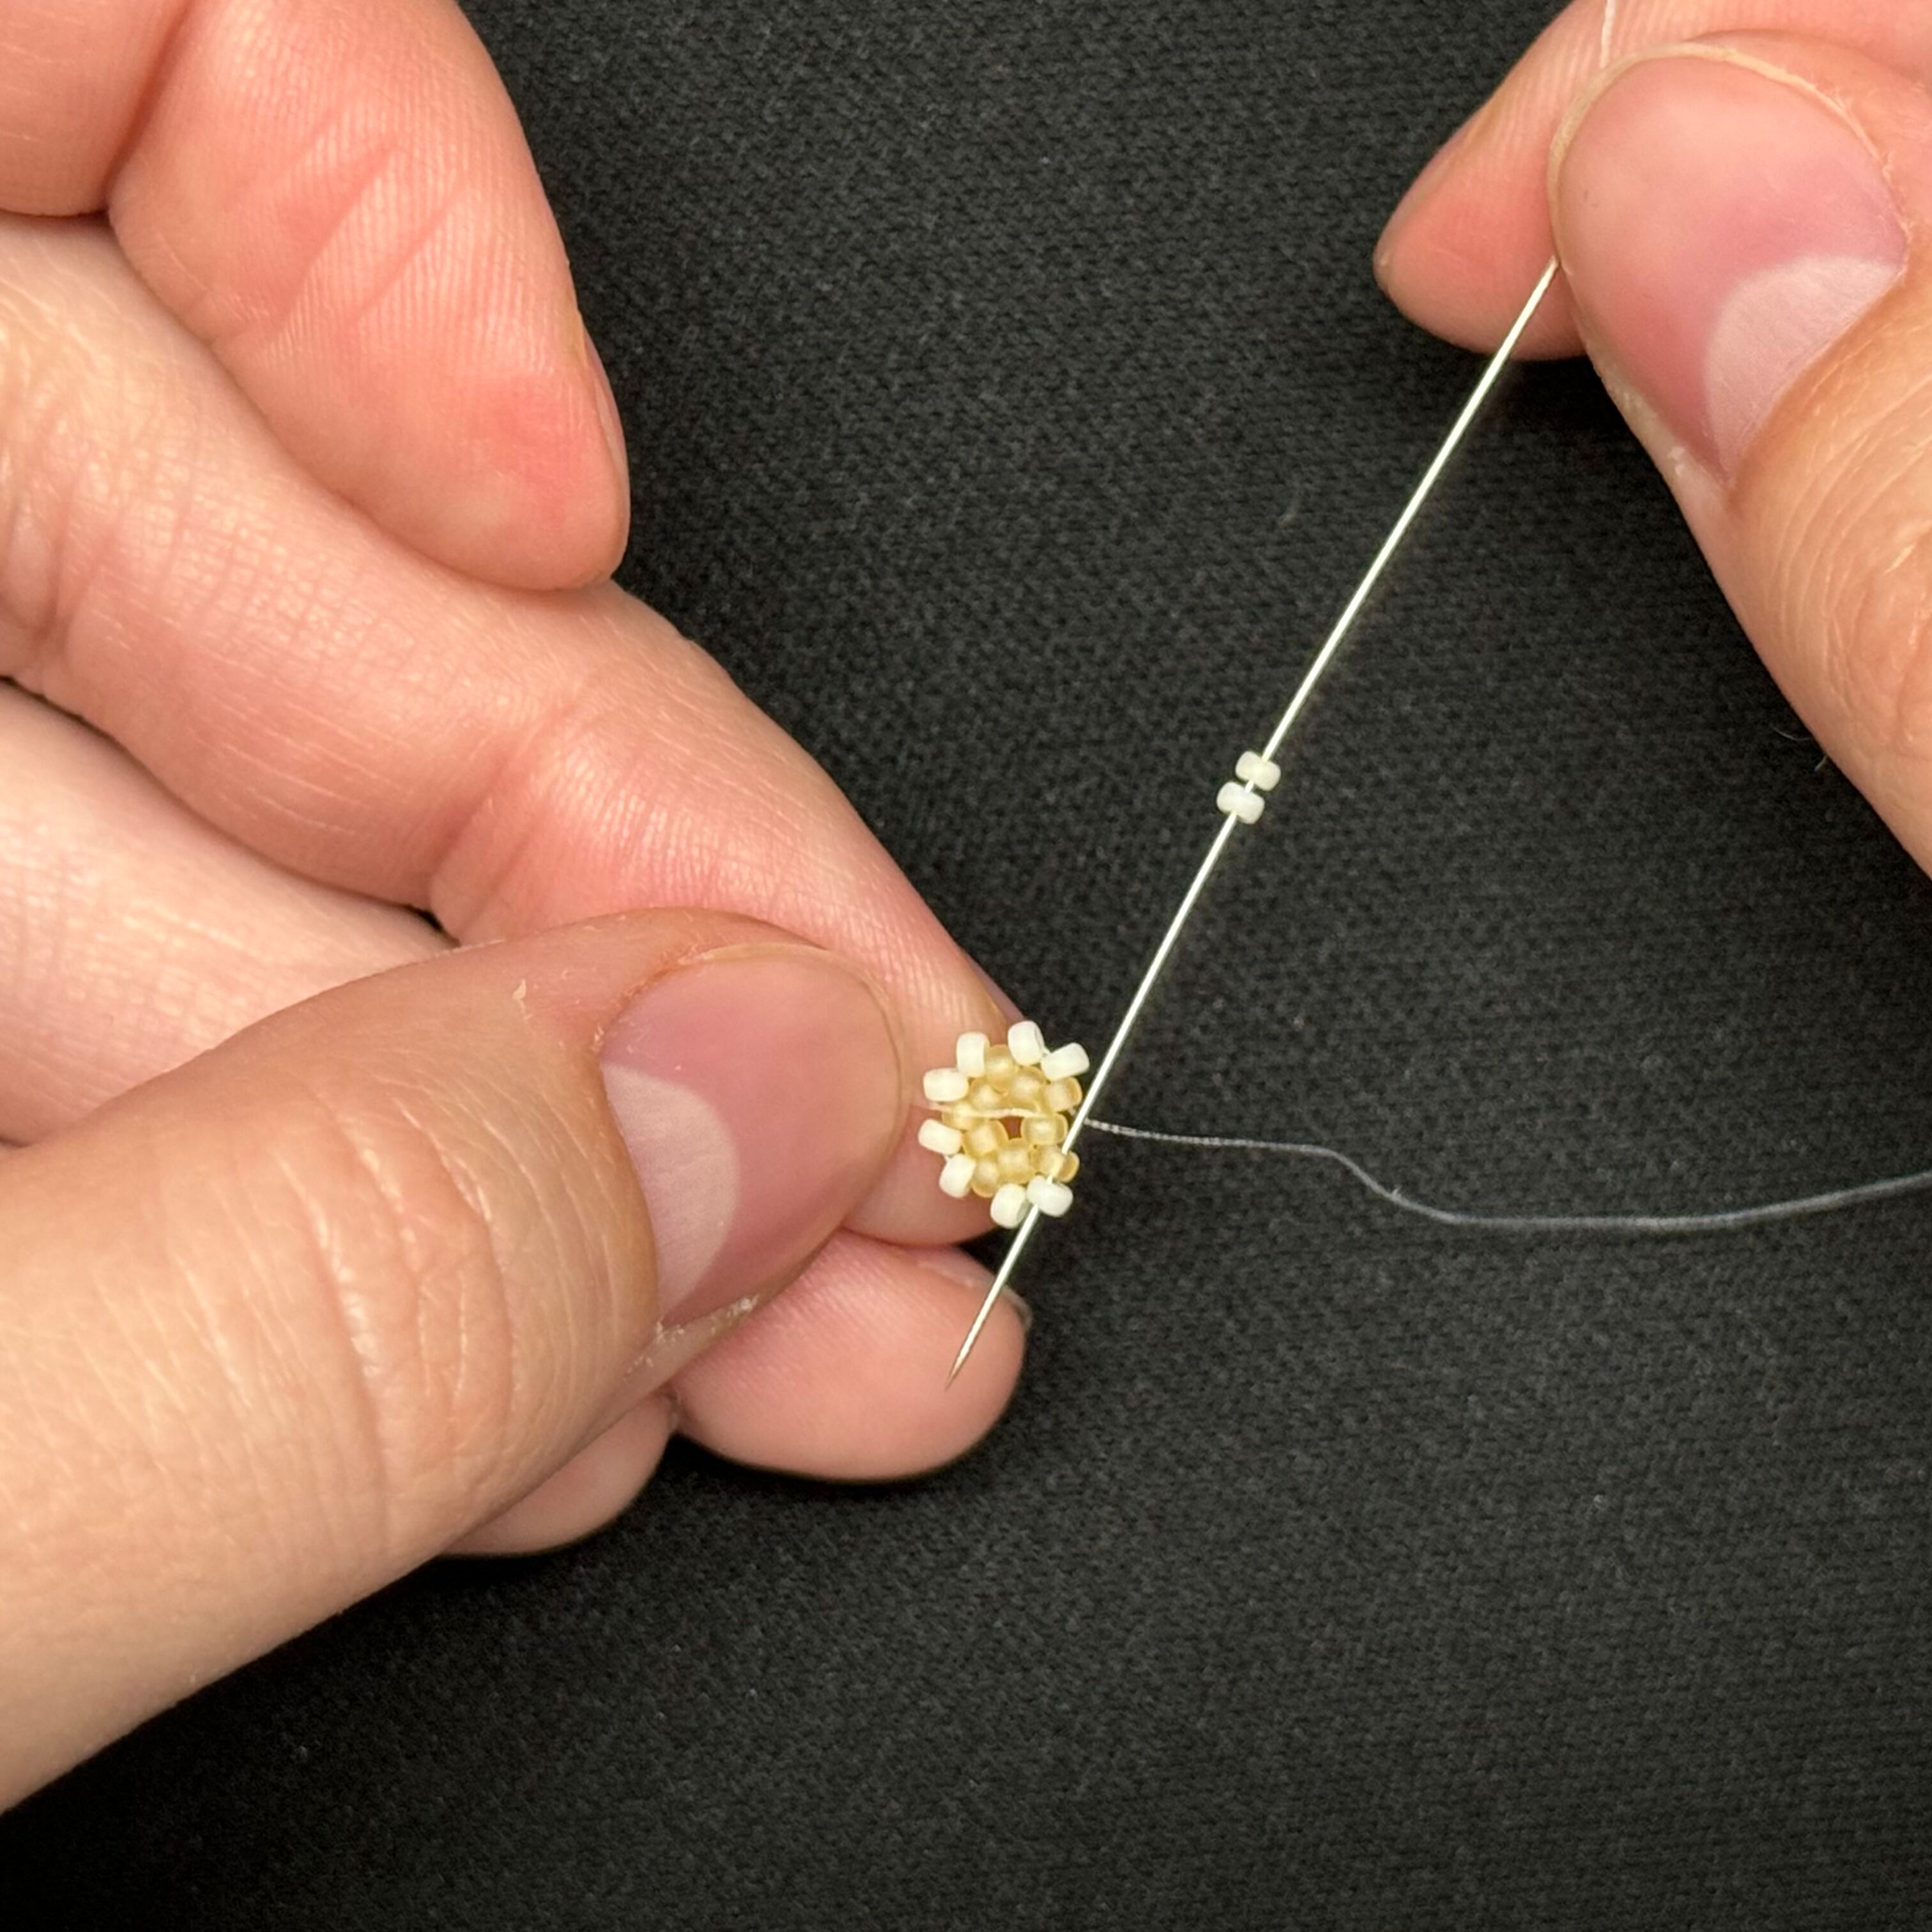
9. When finished with the first row of the star fish arms, add 2 2021 beads to your needle and thread through the 3 beads shown **you may thread through them one at a time if that is easier for you
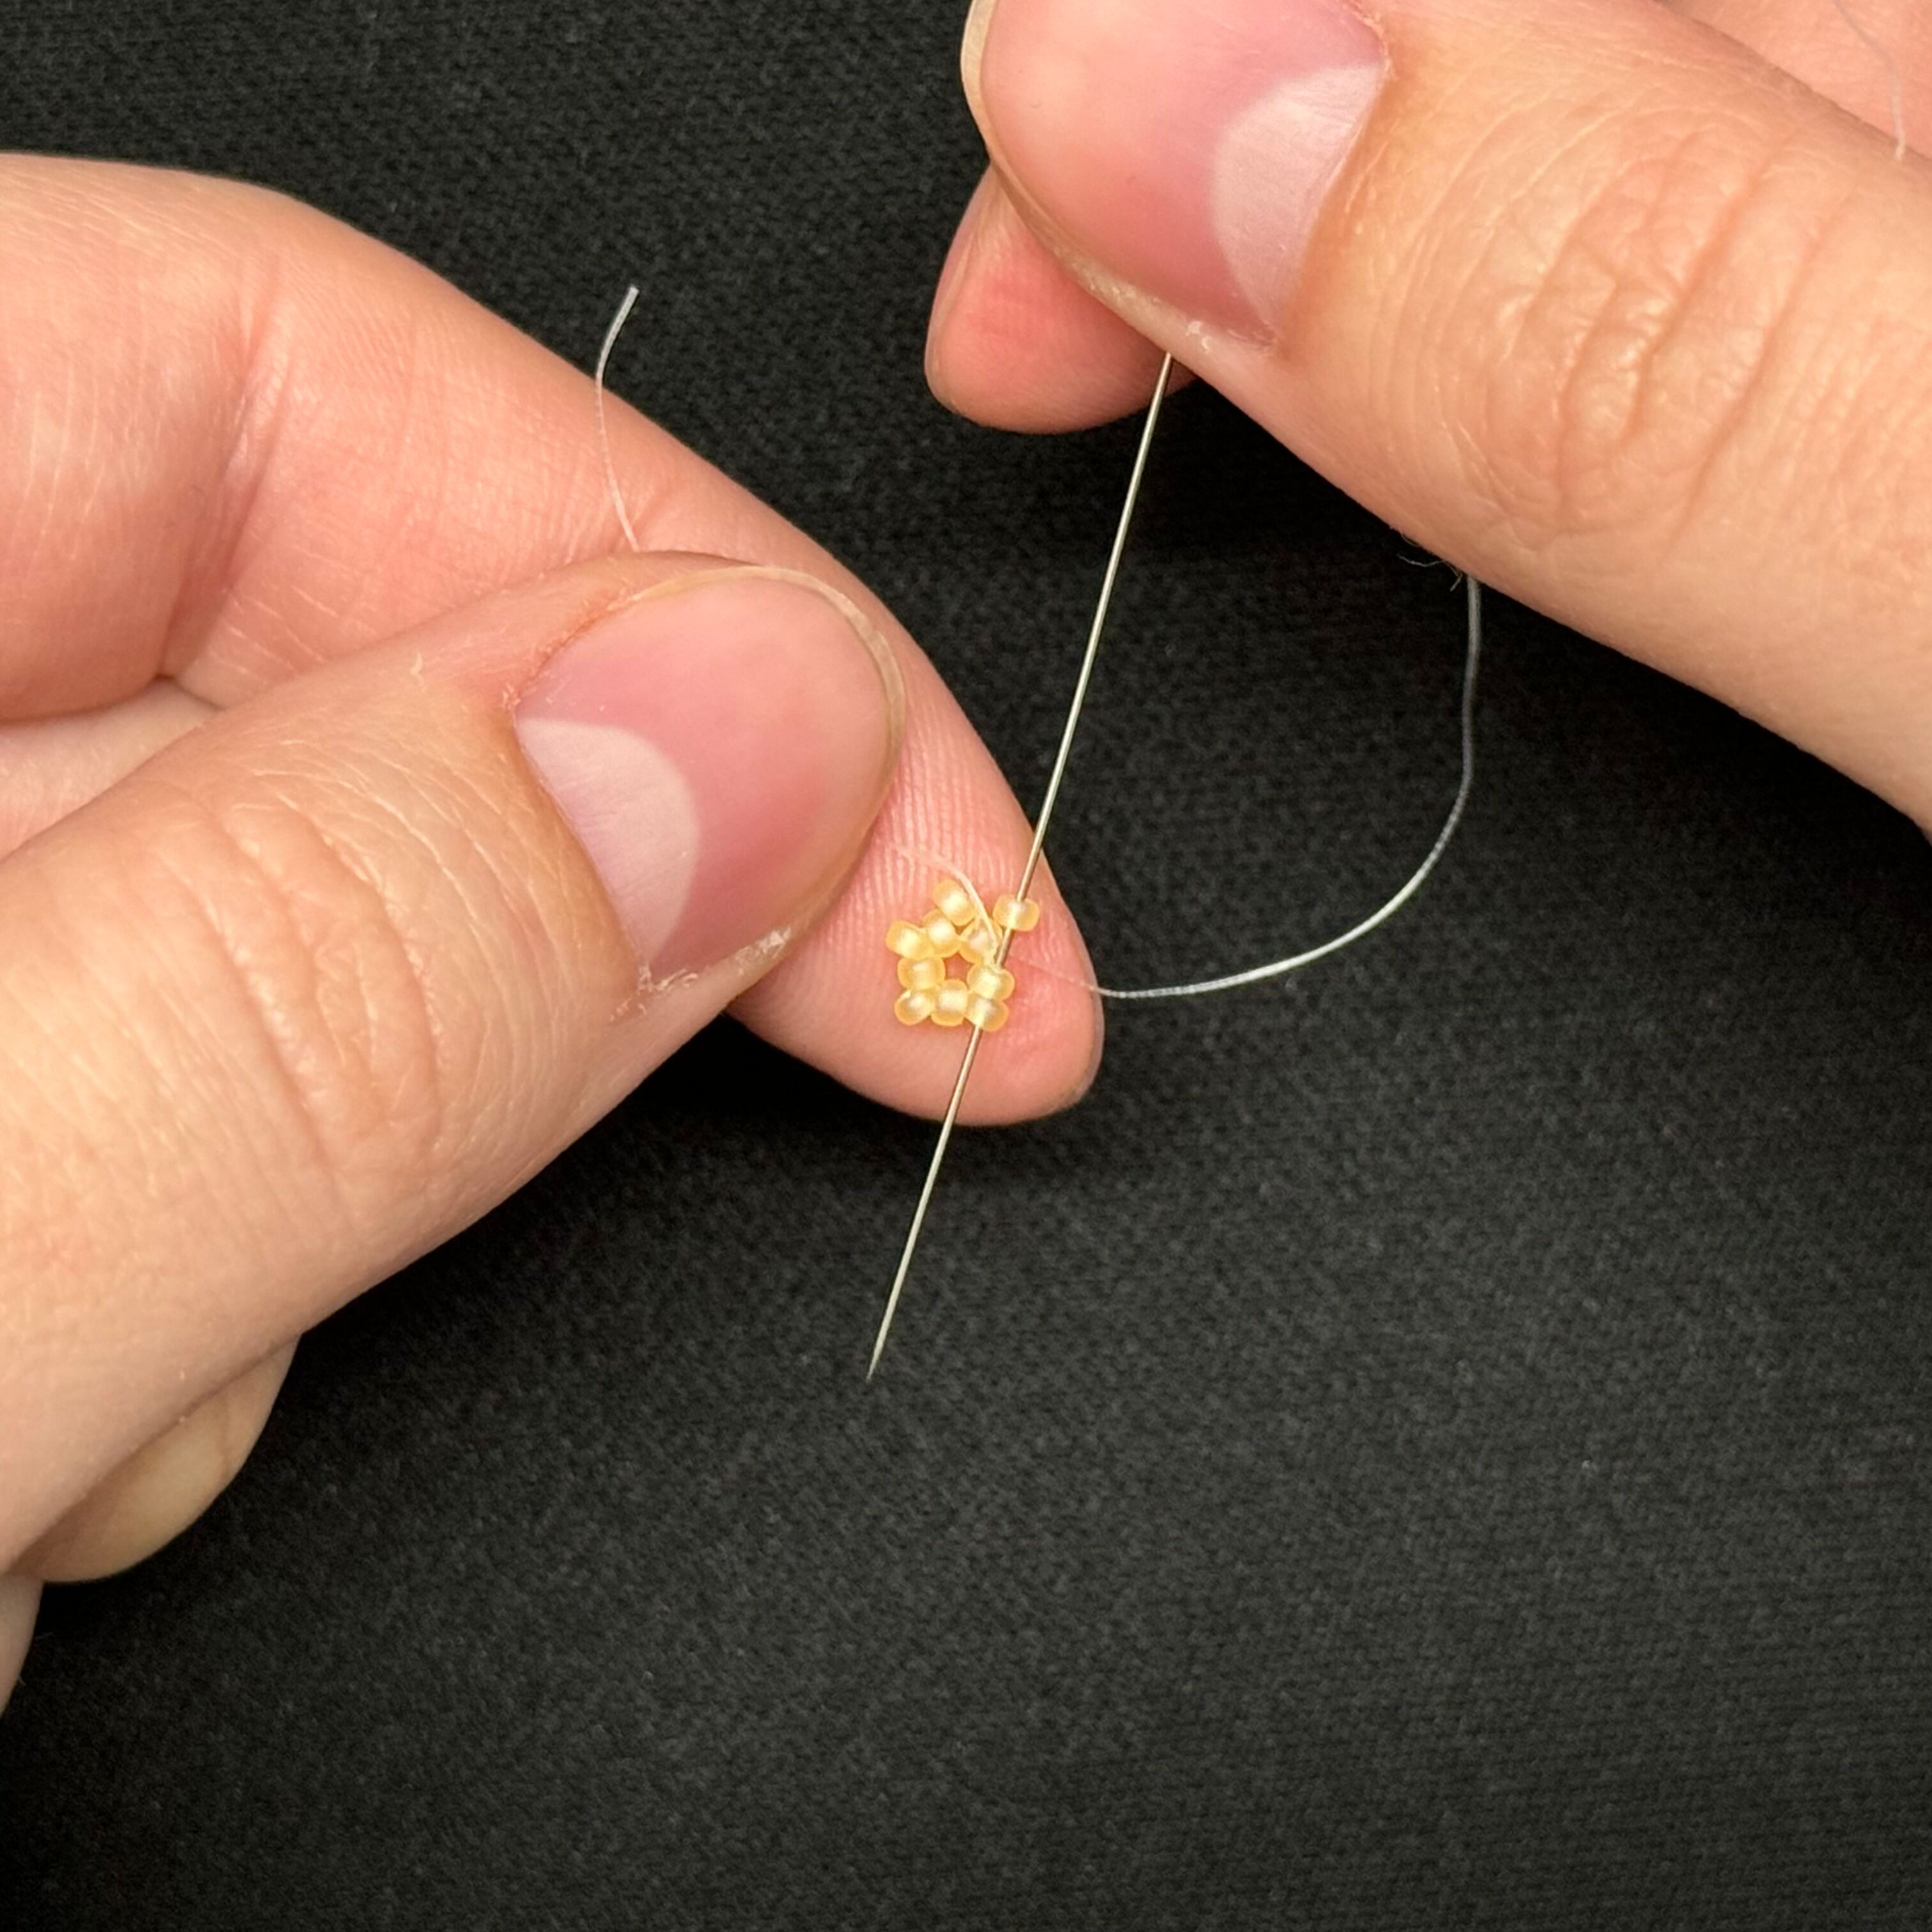
10. Repeat previous step, keep repeating until you make a complete circle
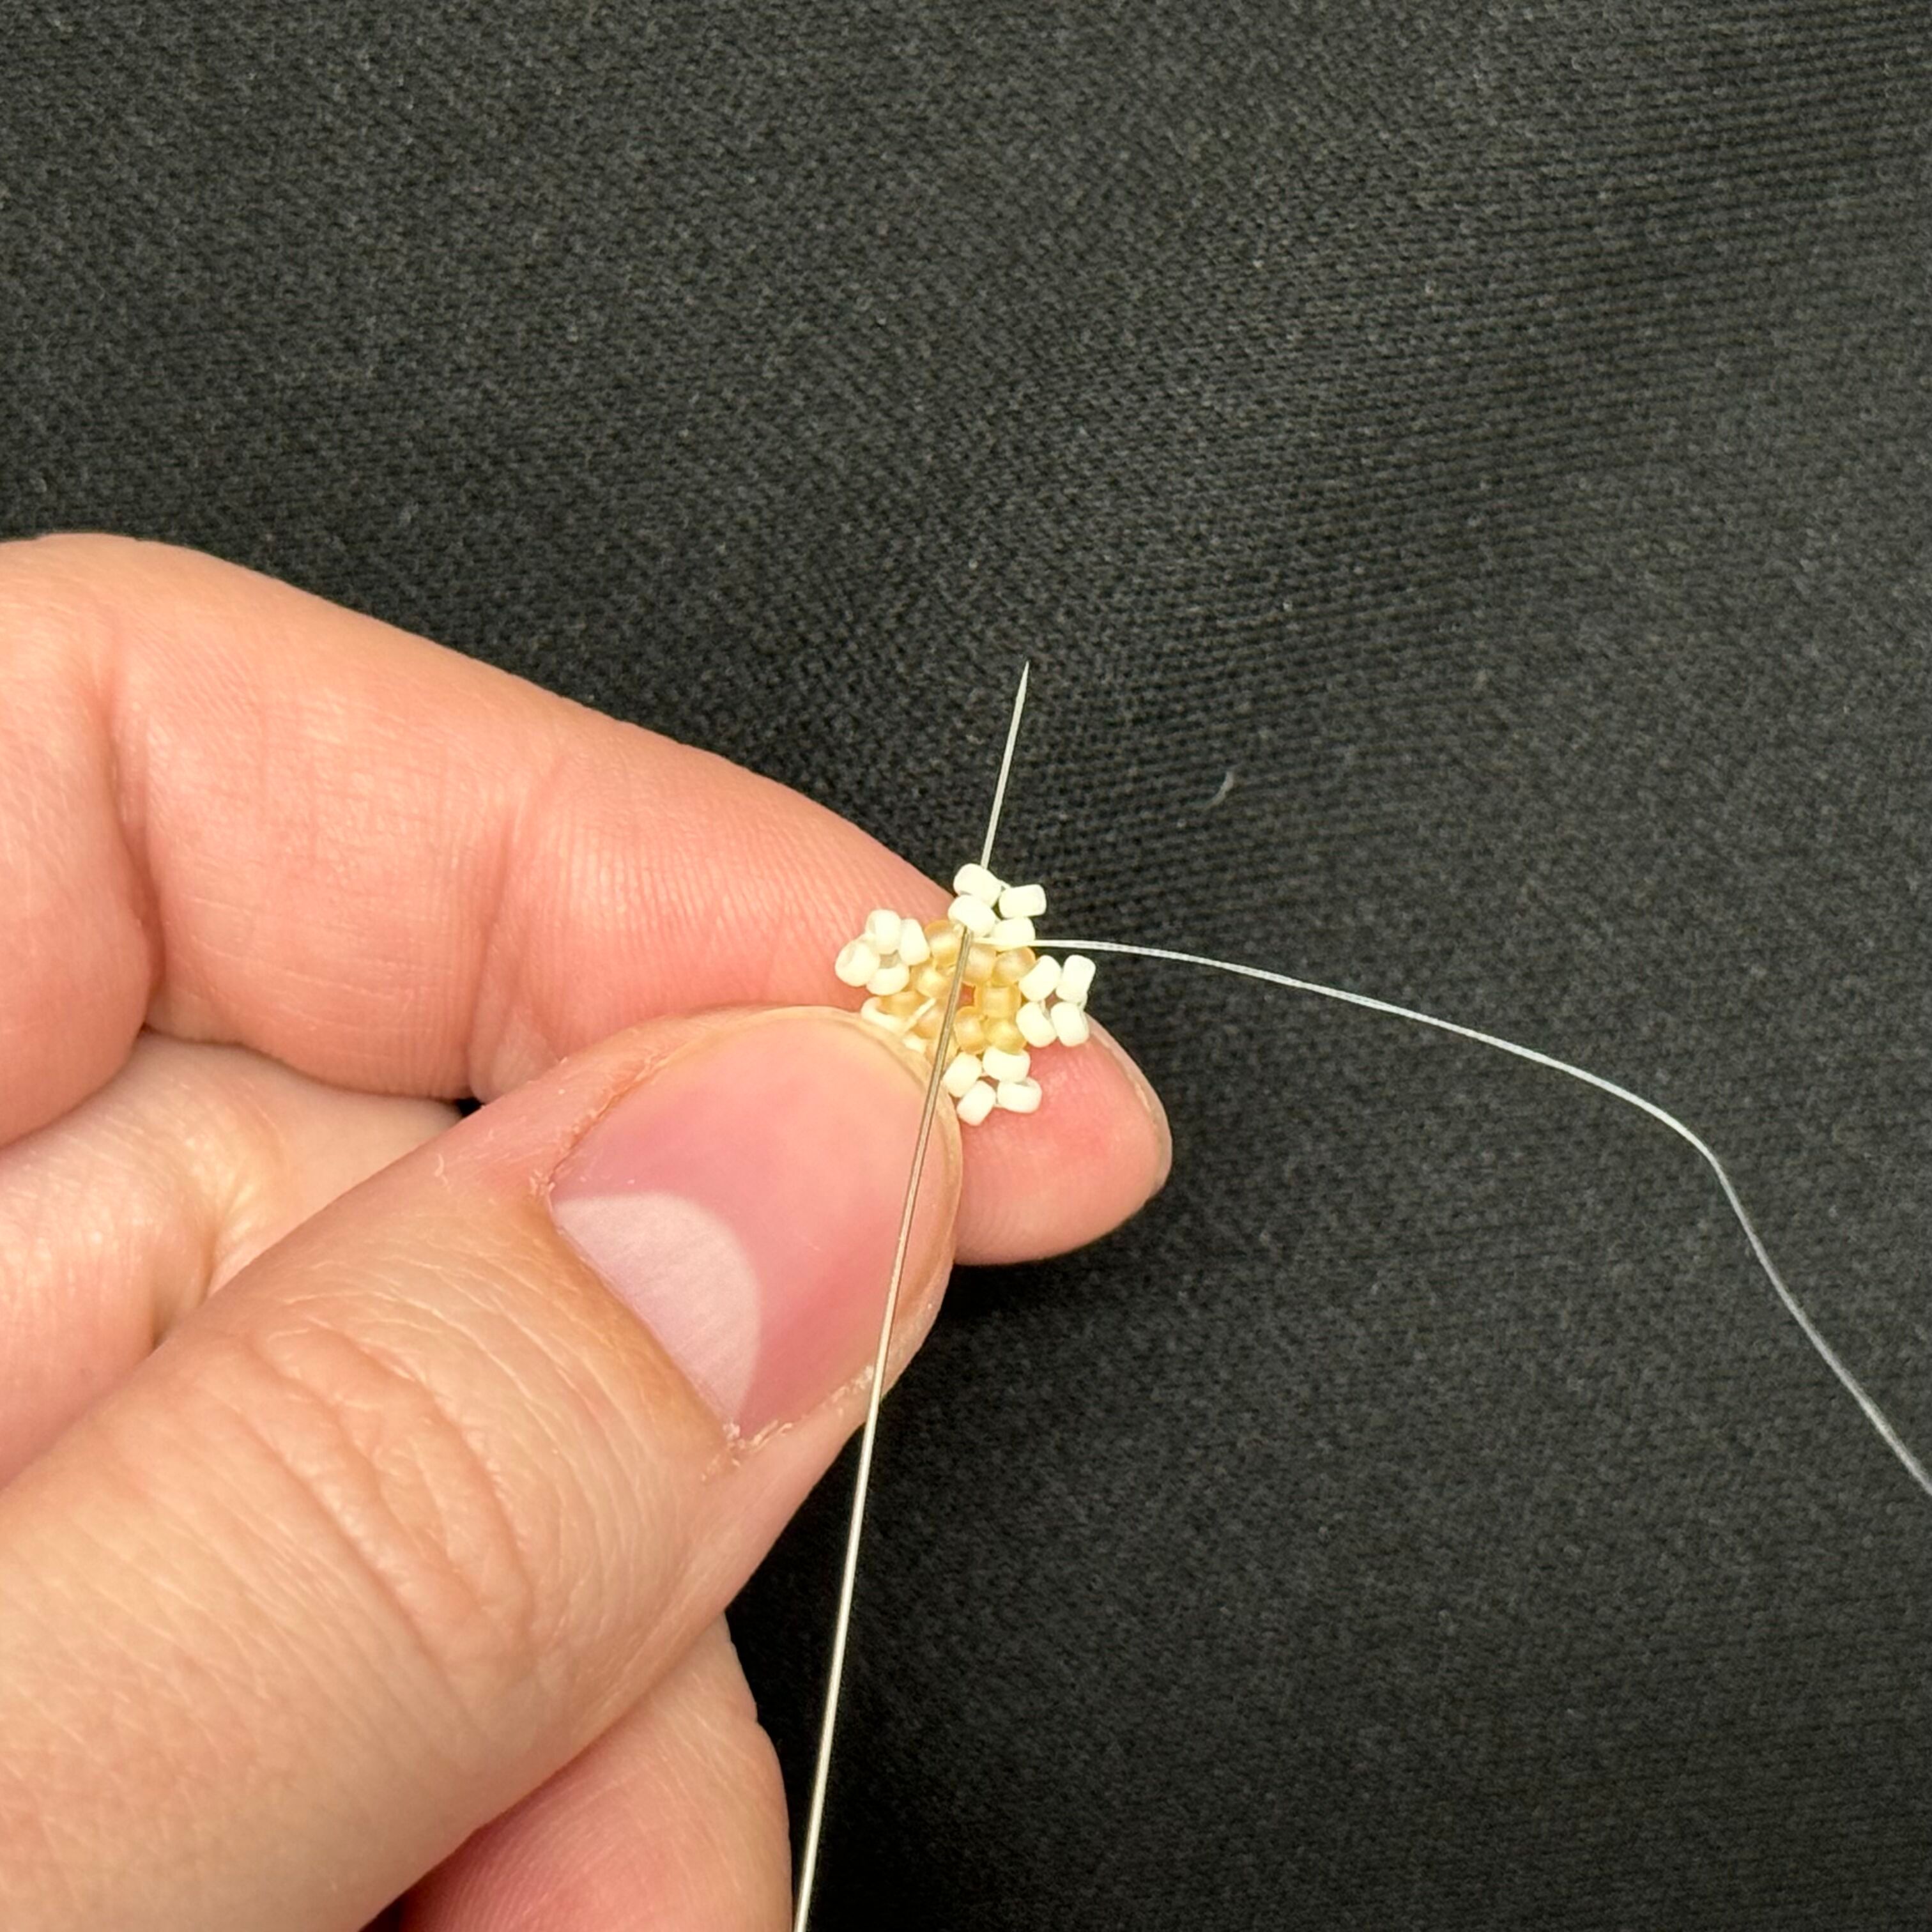
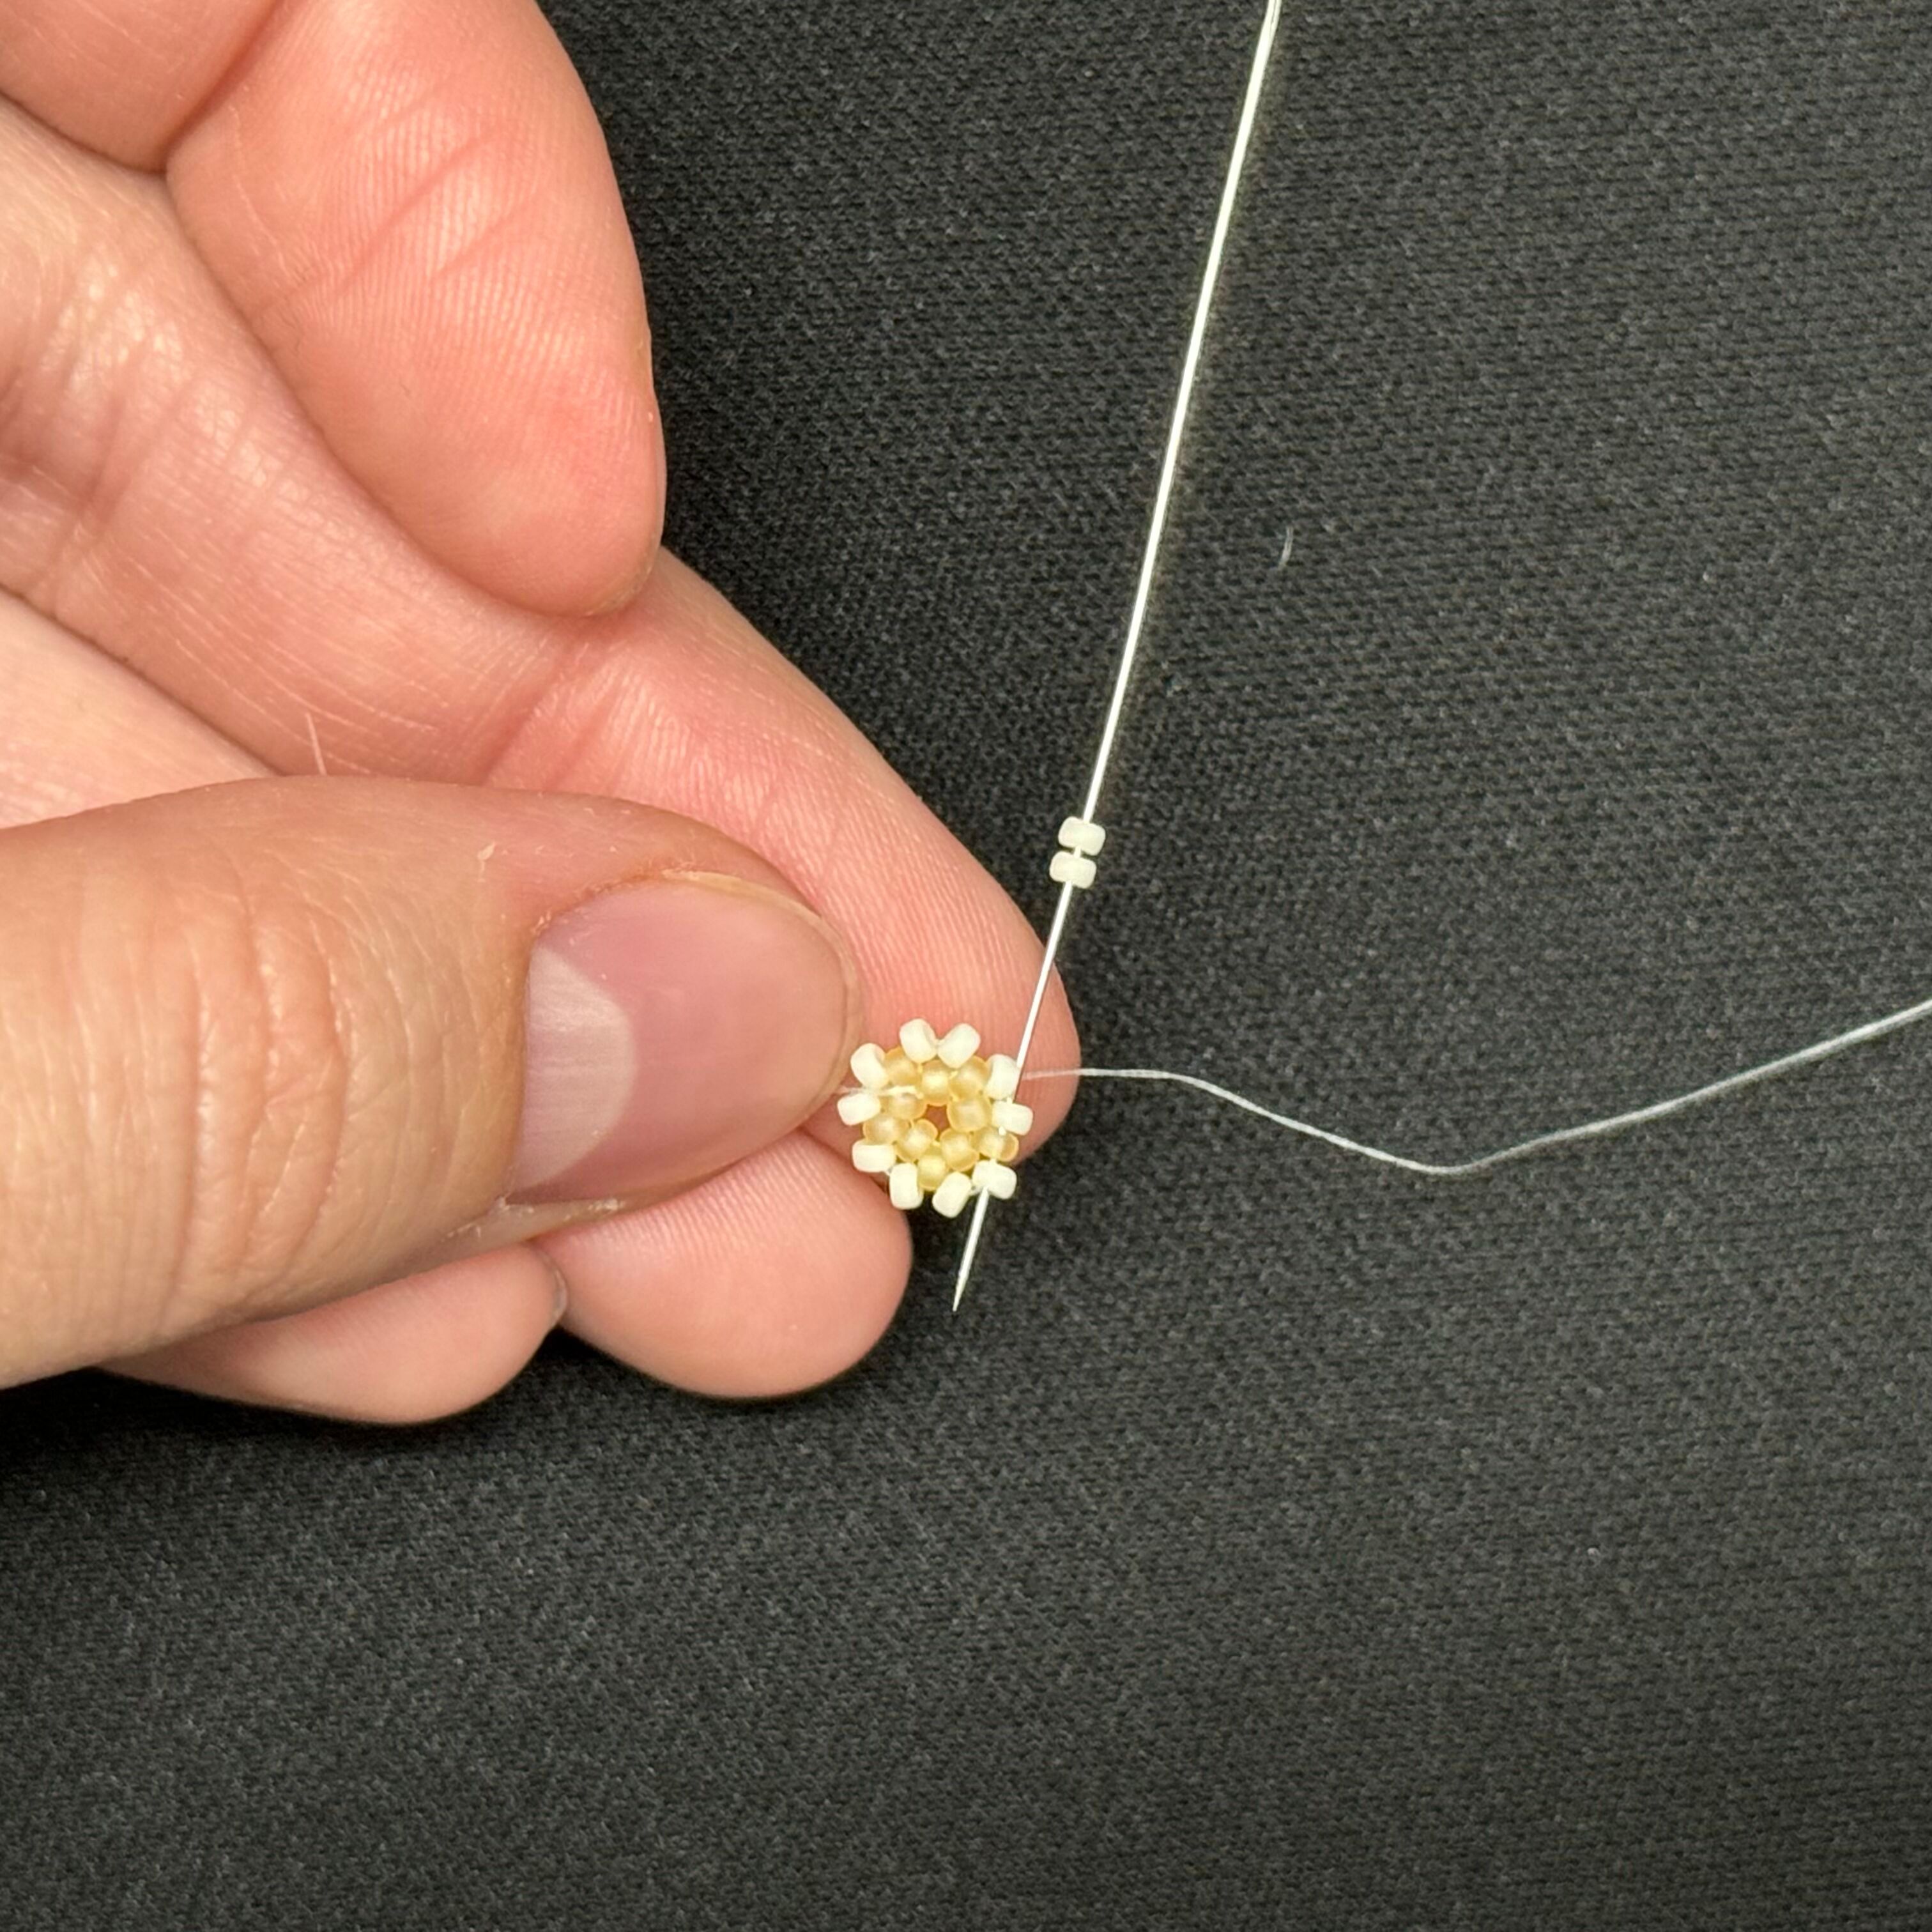
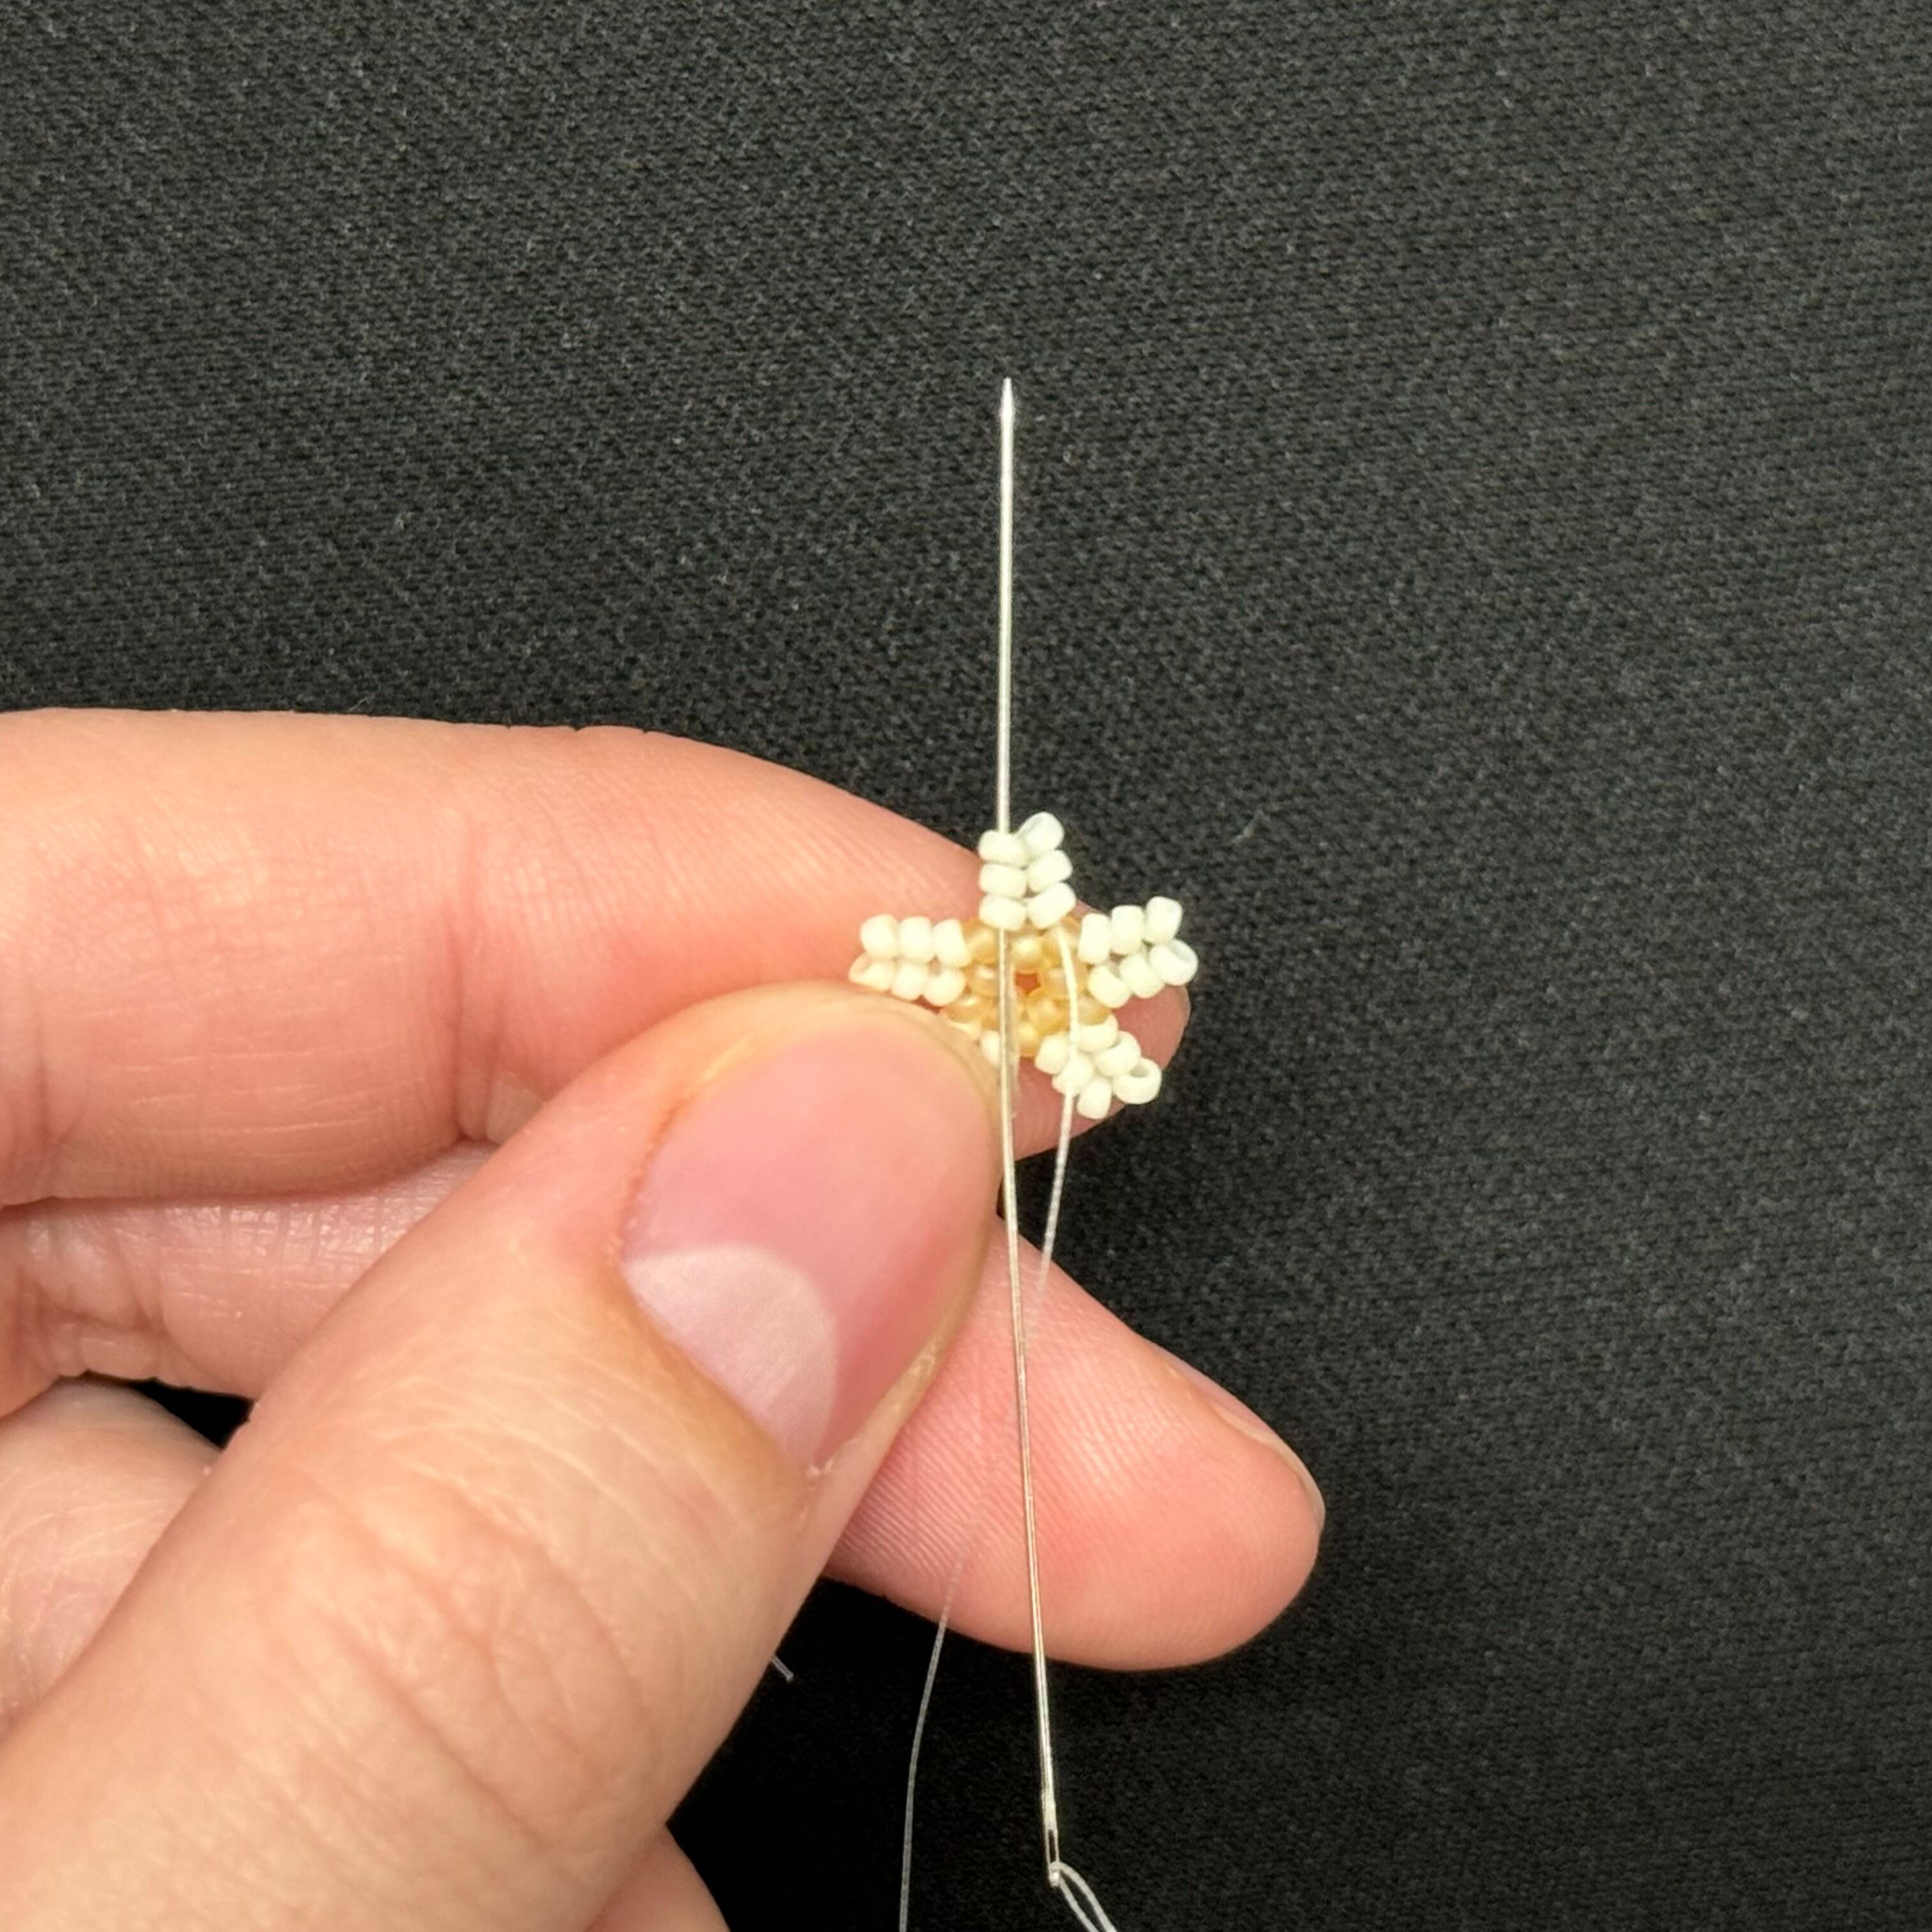
11. Once you have completed the second row, thread the needle up through the two 2021 beads shown. Remember to pull tight after each stitch!
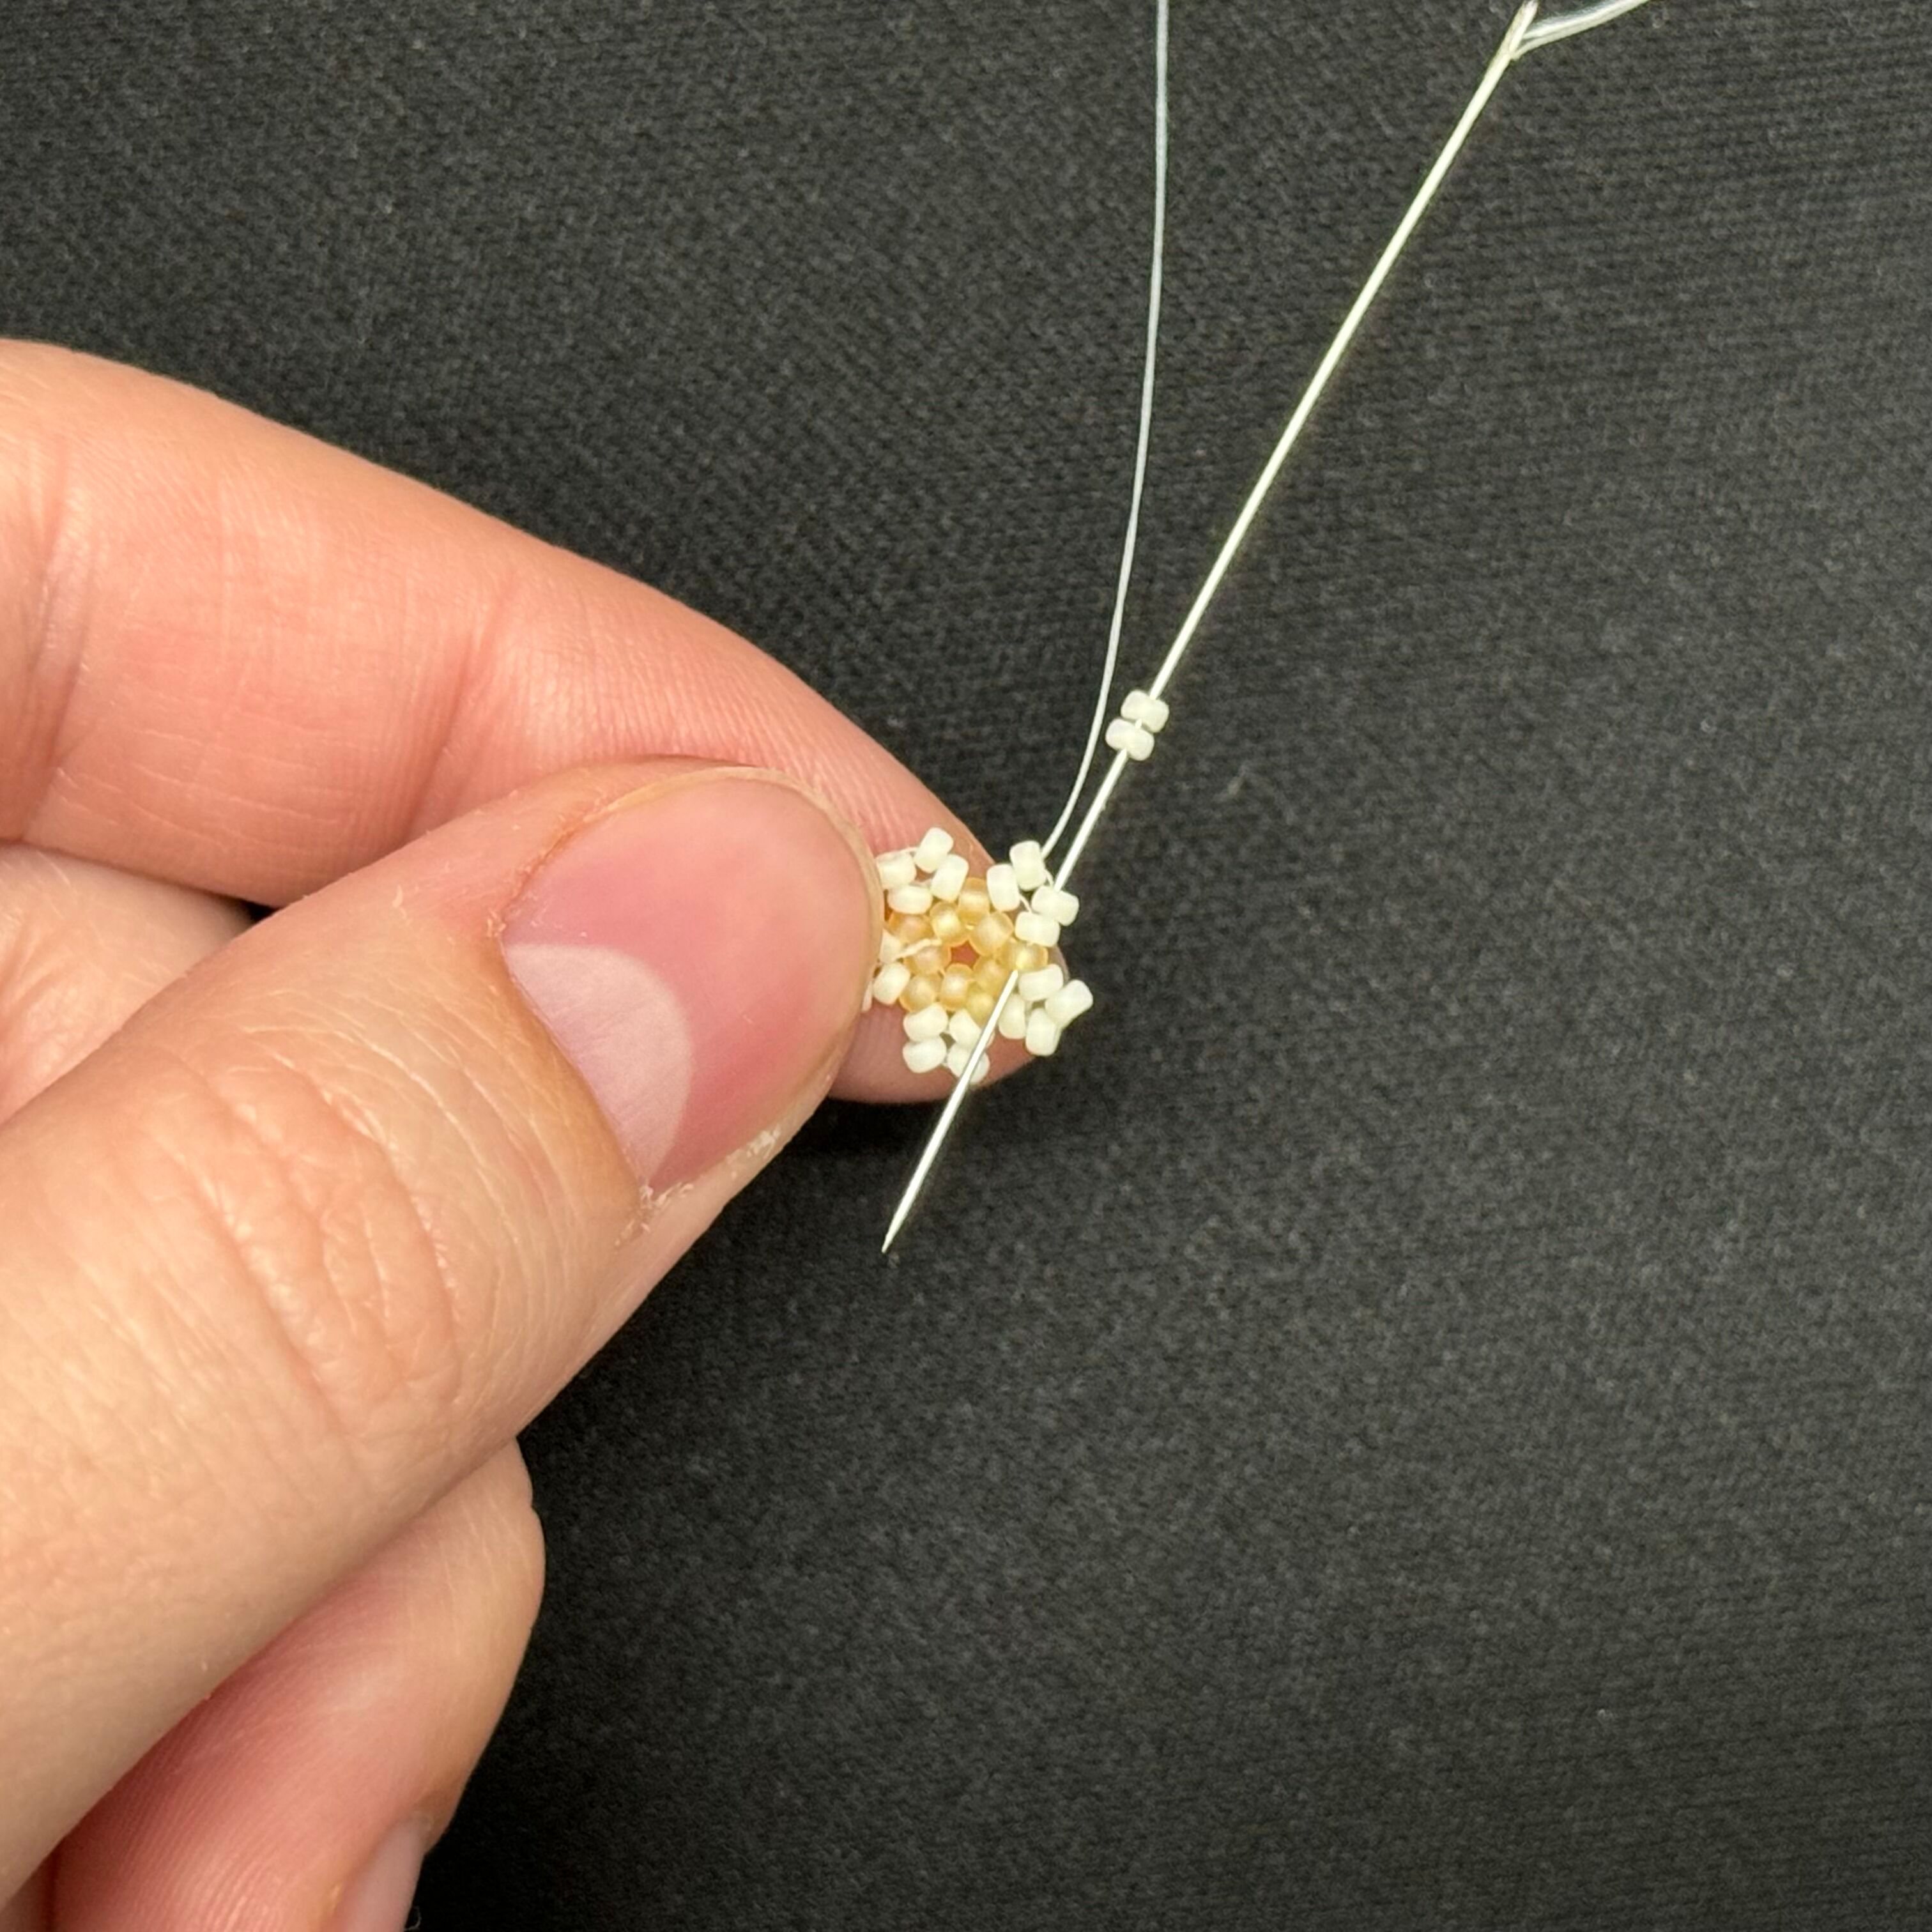
12. Add 2 more 2021 beads onto your needle and thread it through the three beads shown
13. Then up the two beads shown
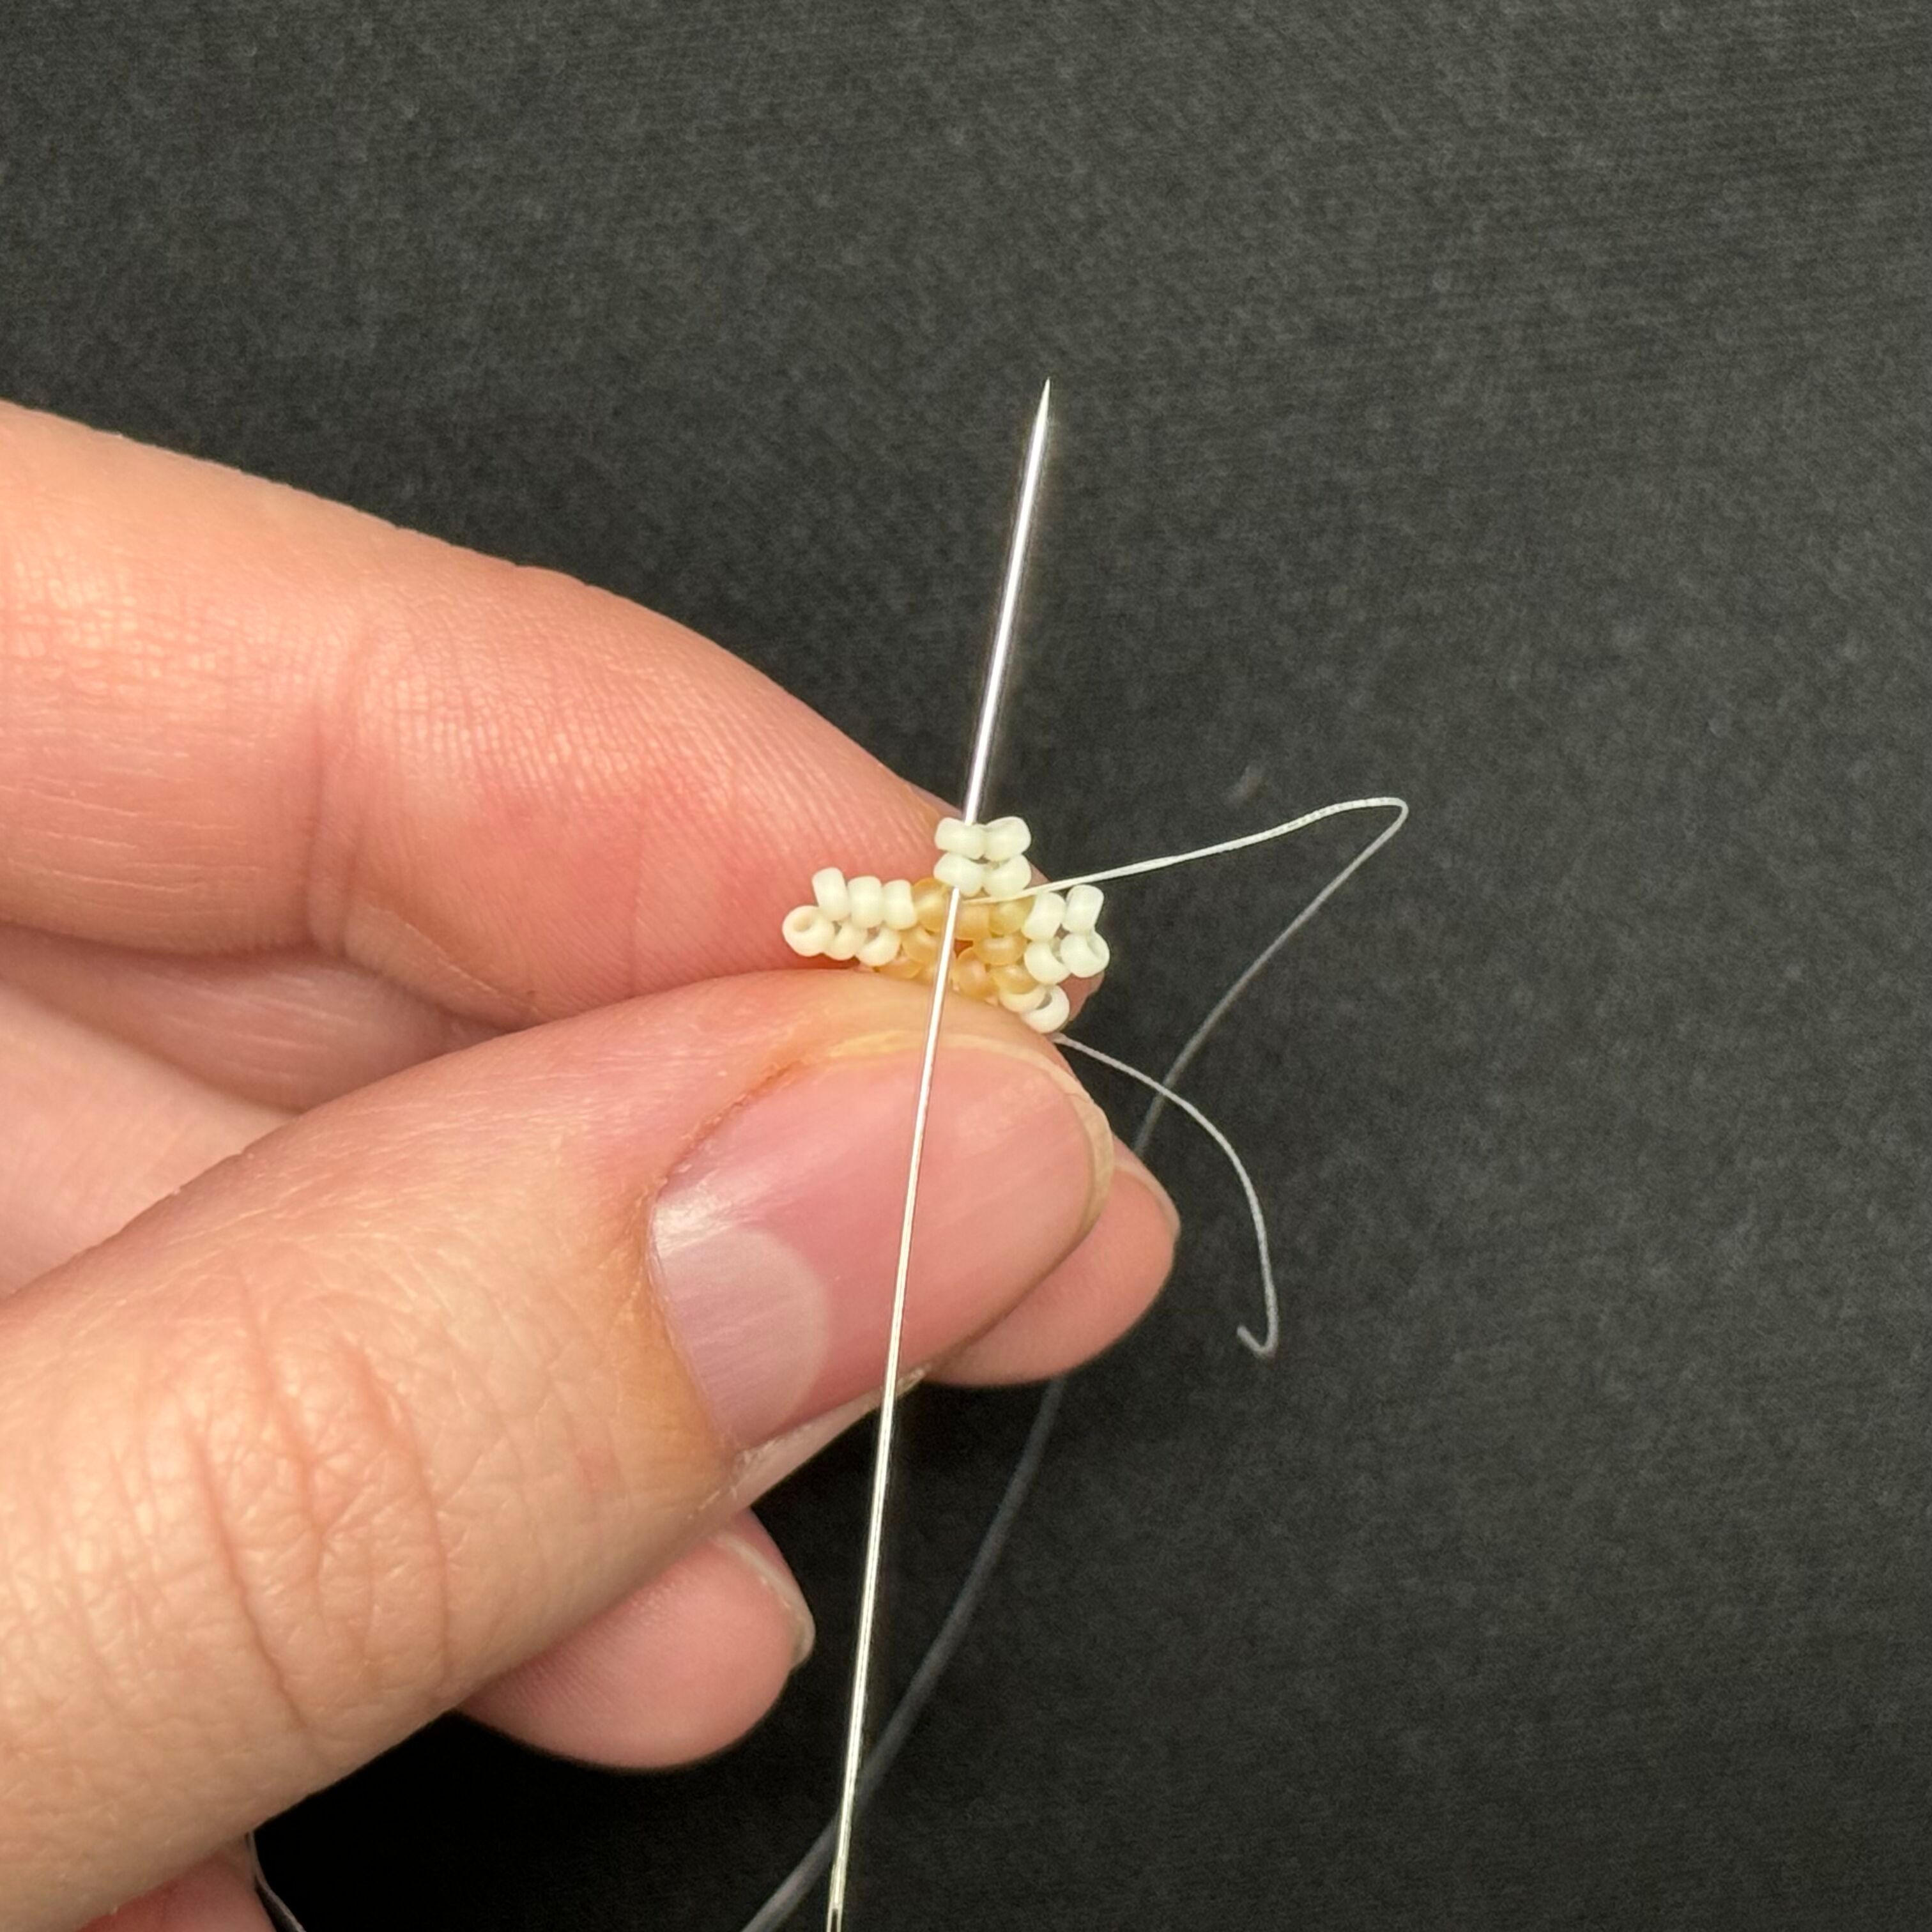
14. Then back down the next three beads adding two more 2021 seed beads. Repeat the previous steps until you have completed the third row's circle
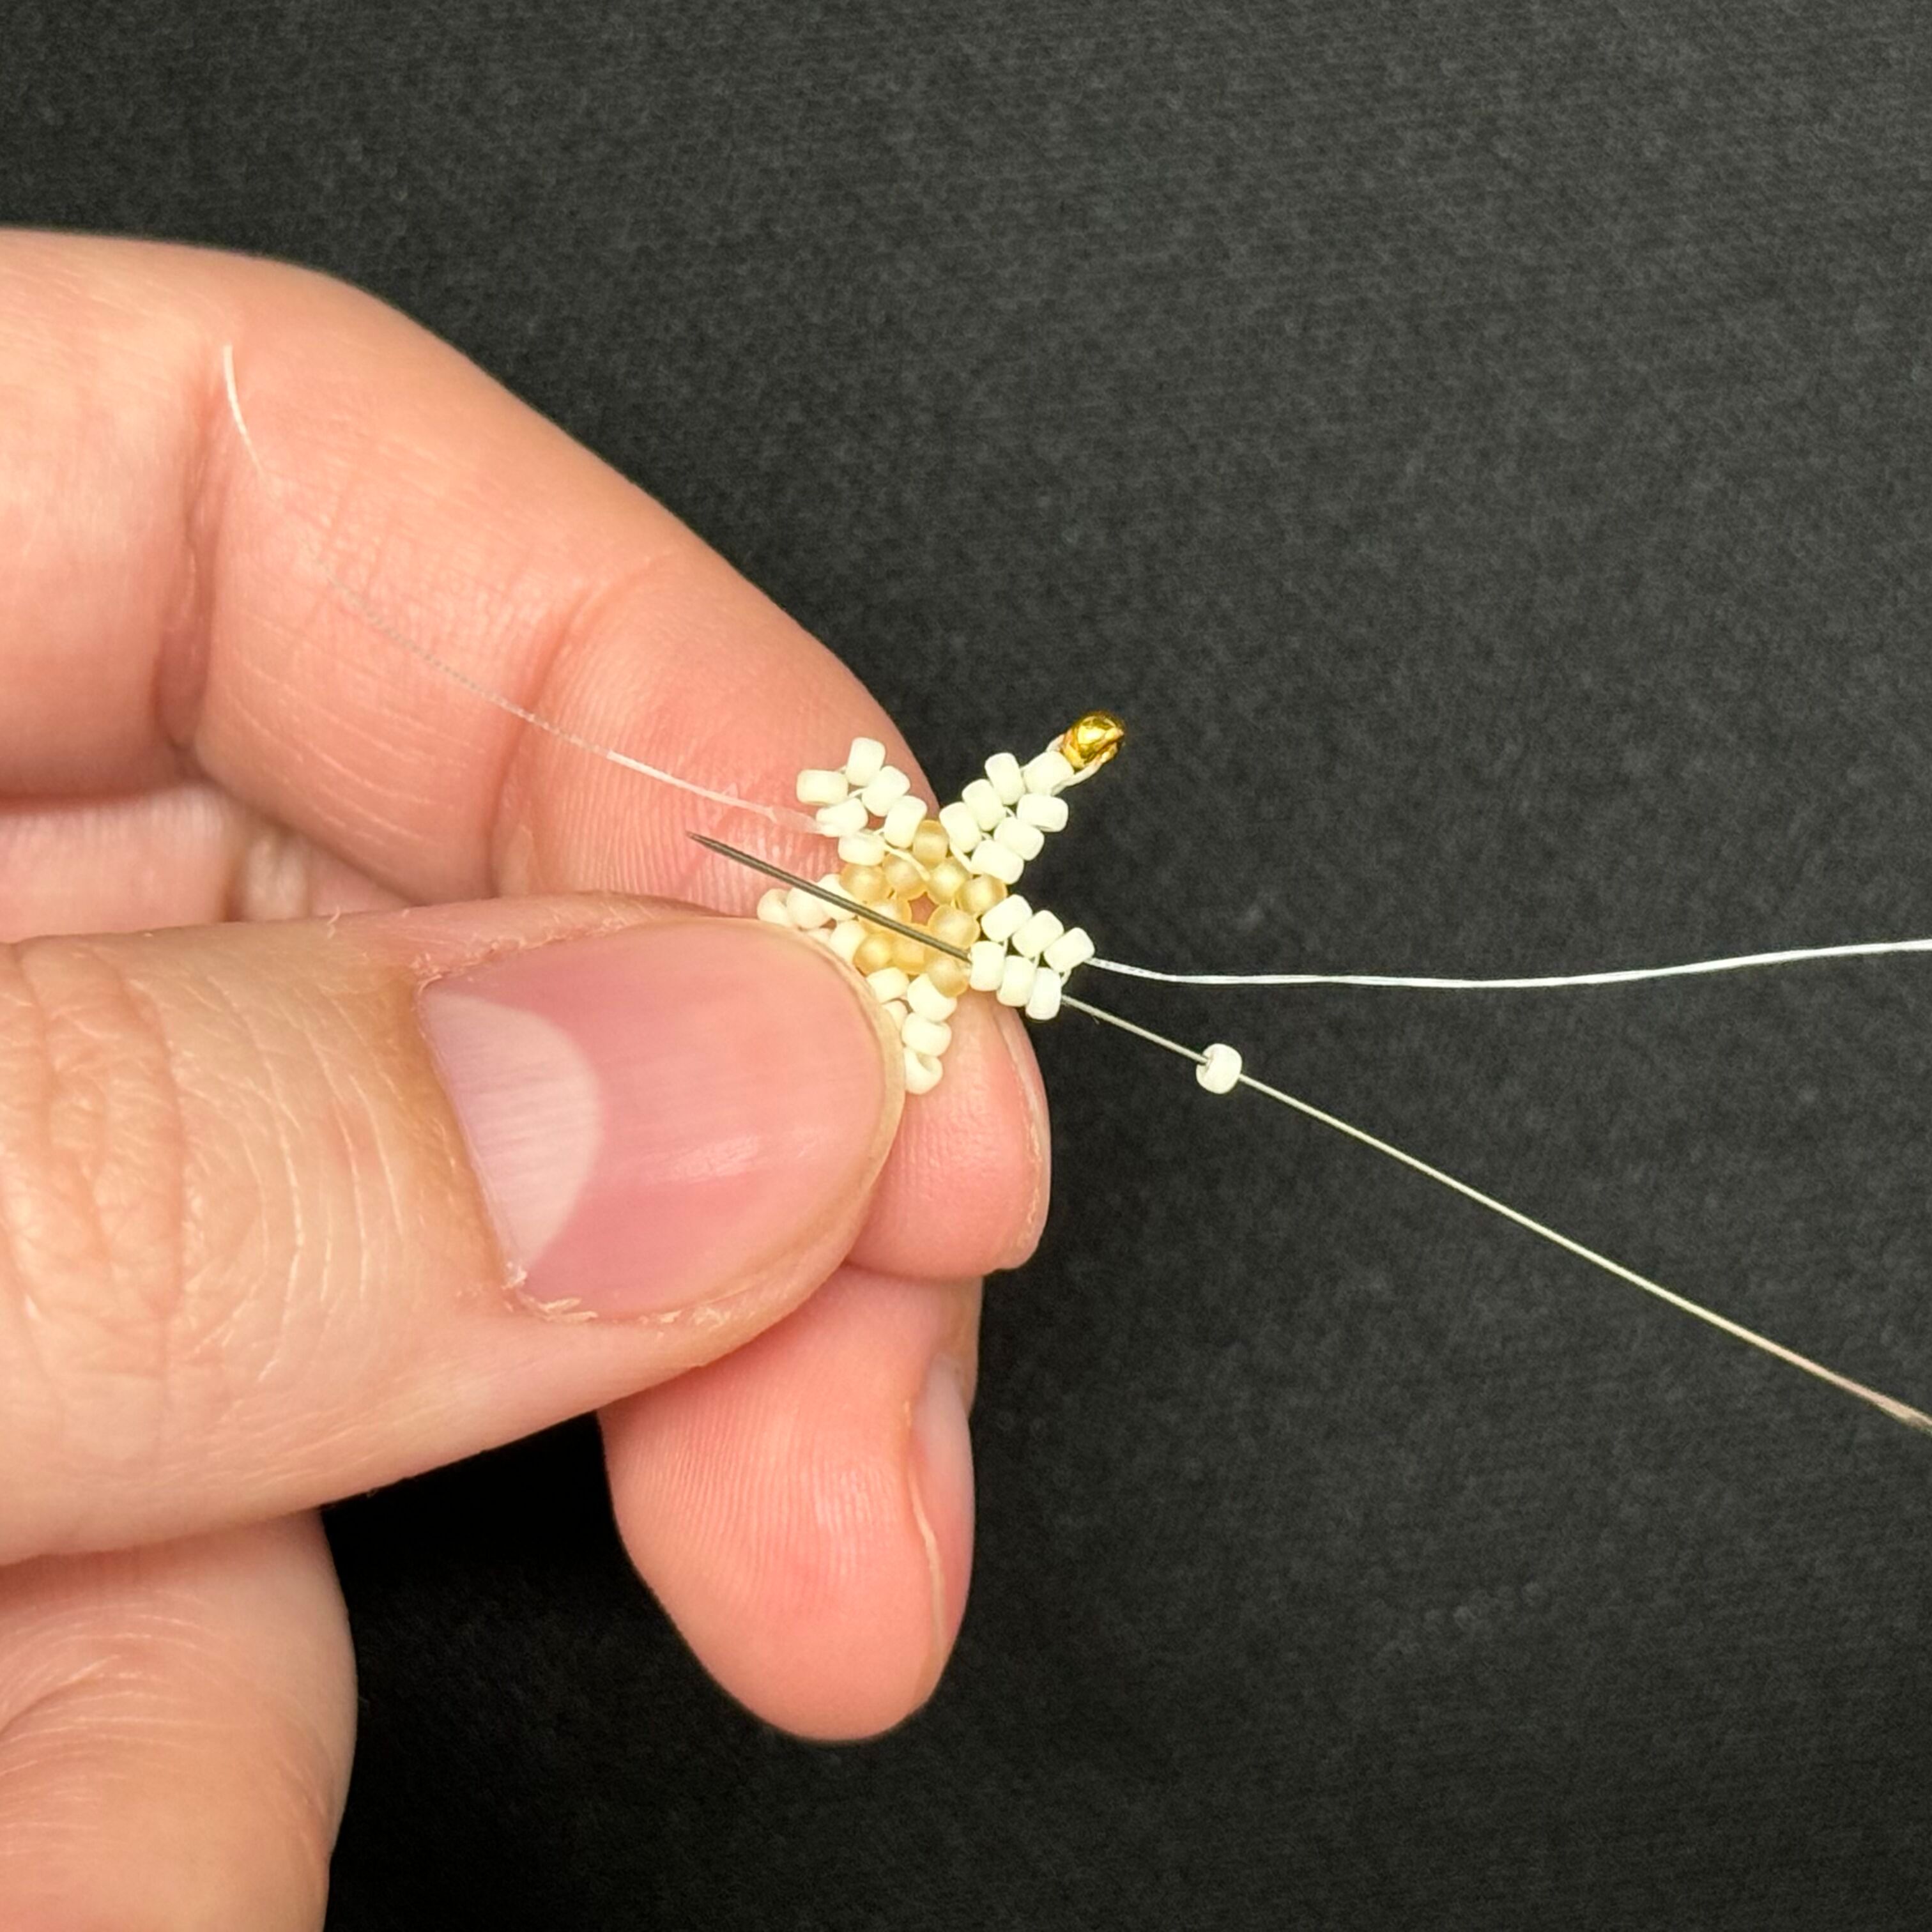
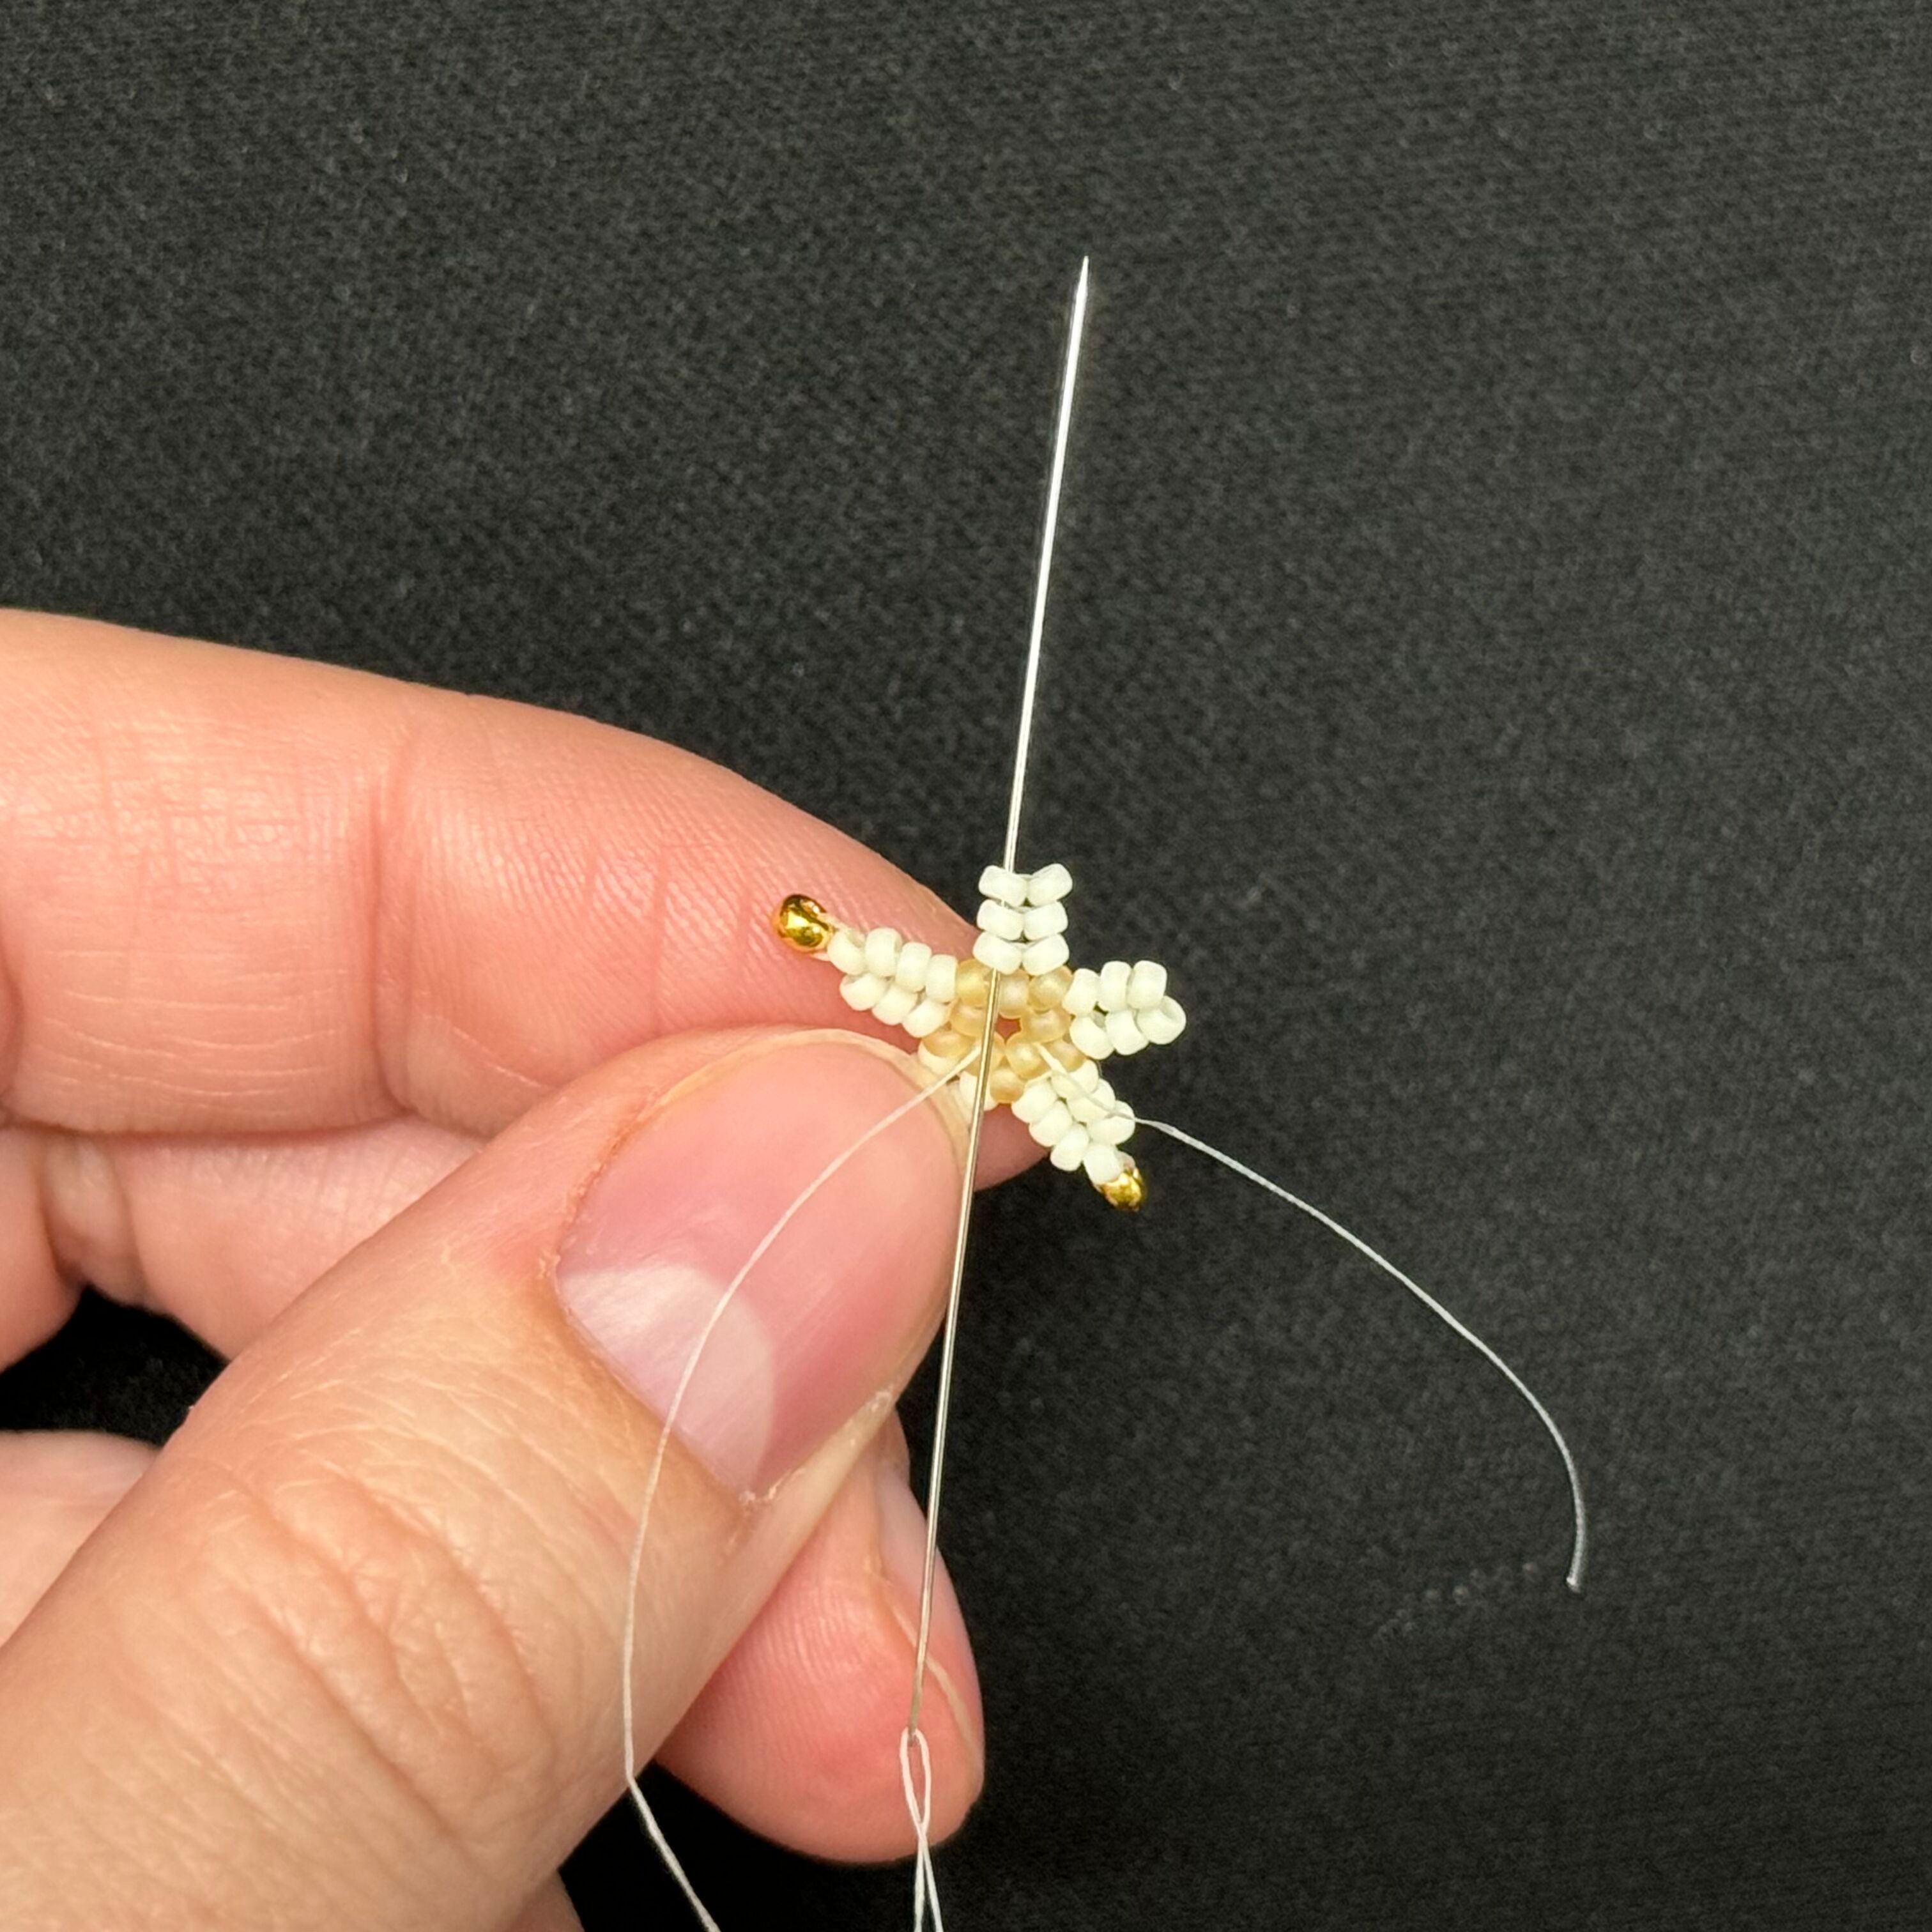
15. On the last arm of the third row, finish by adding the two 2021 beads and threading just through the two 2021 beads shown above, pull tight
16. Thread your needle up through the three beads to the left
17. Add one 2021 bead to your needle and thread it through the three 2021 beads shown
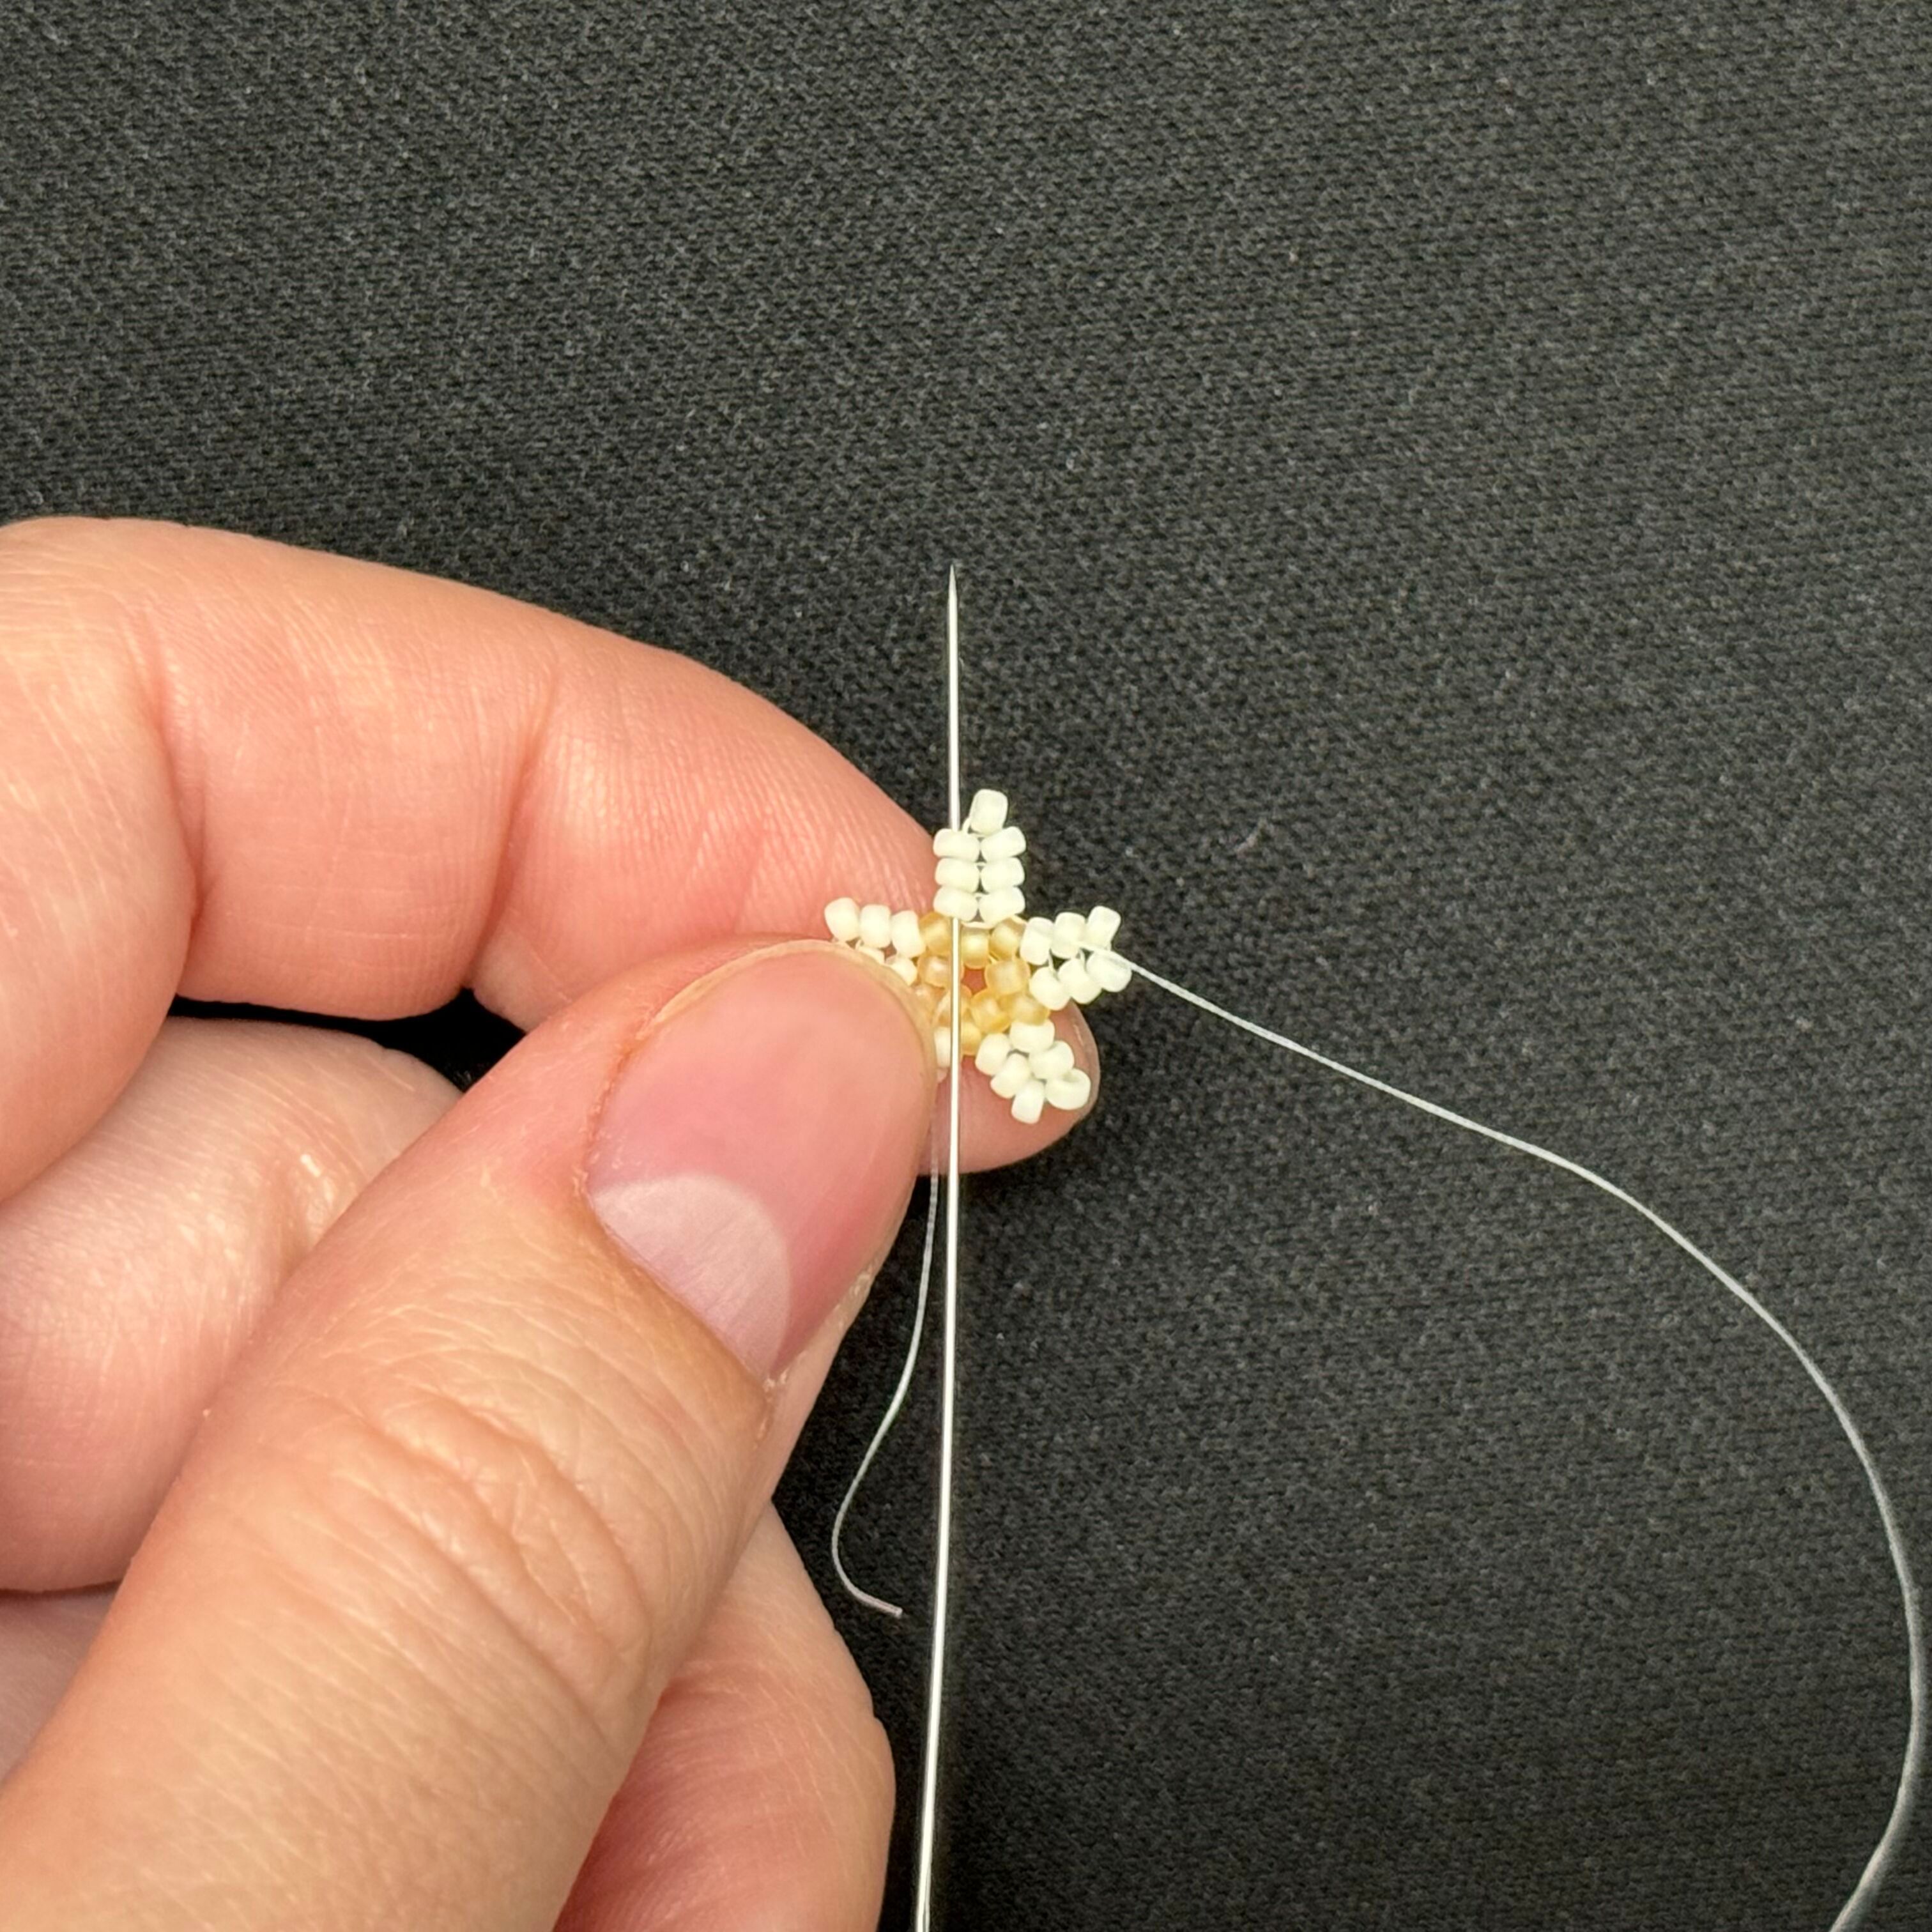
18. Thread the needle back up the three beads to the left
19. And through the tip of the starfish arm
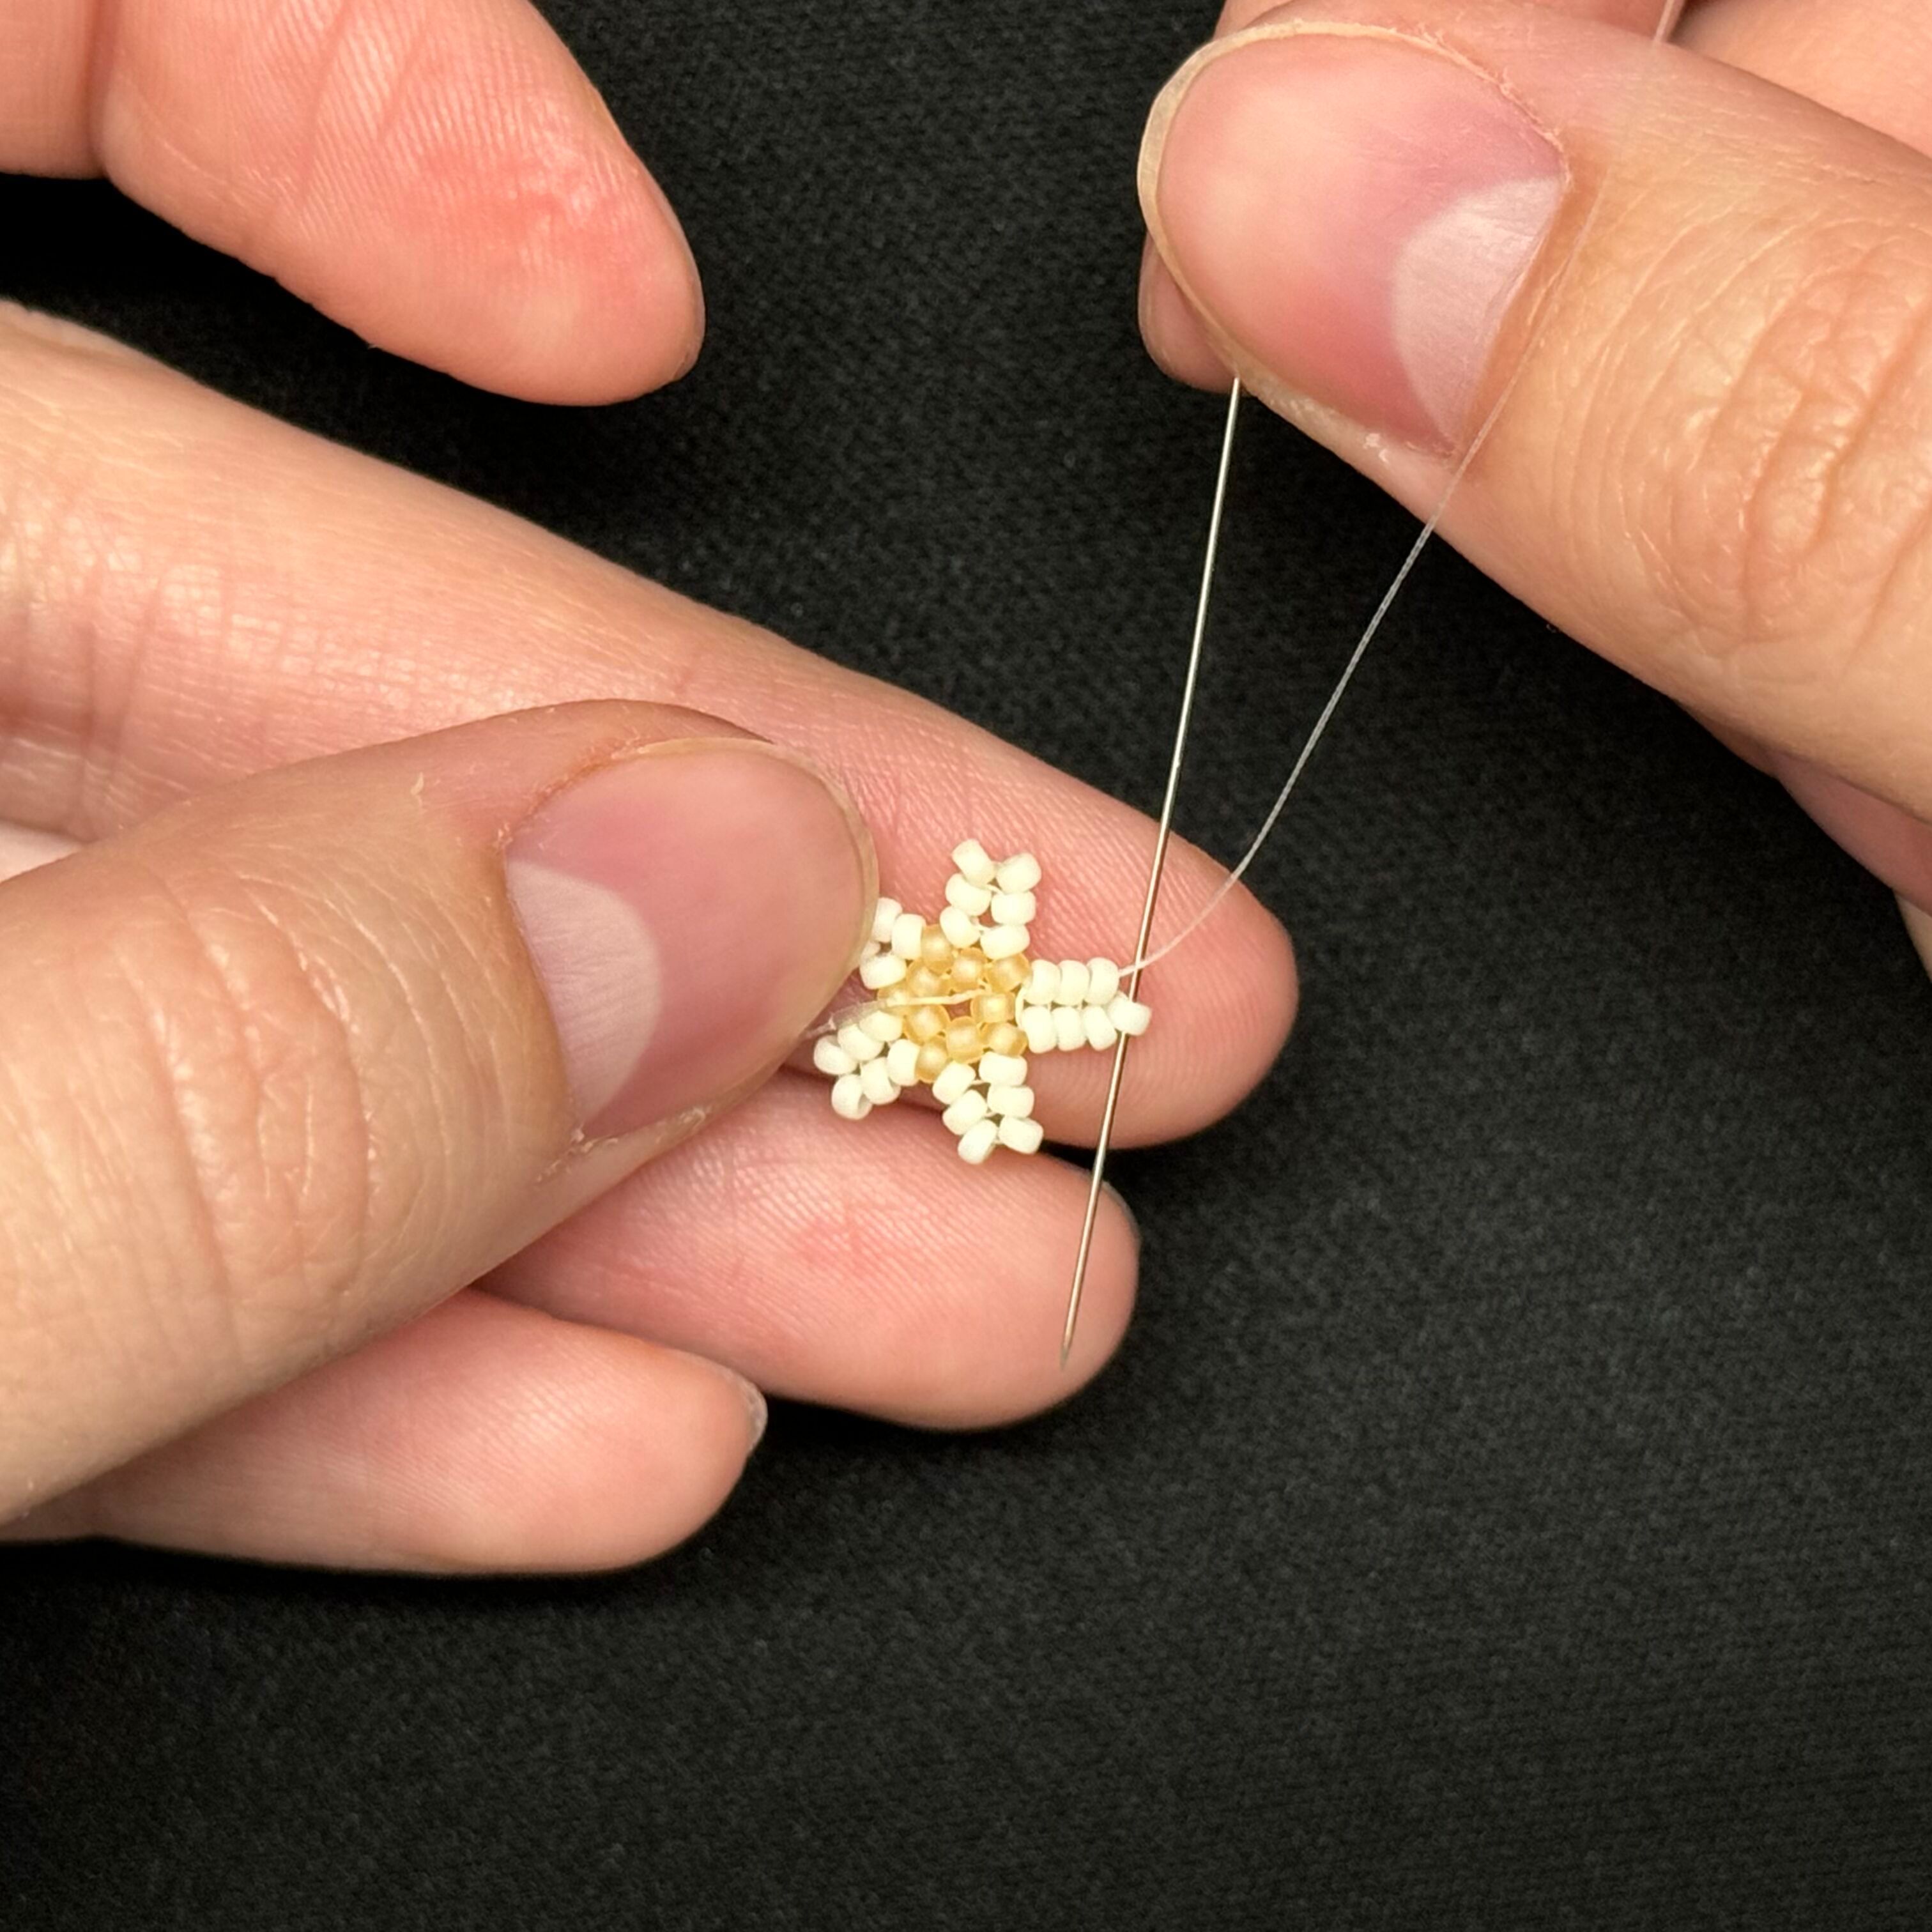
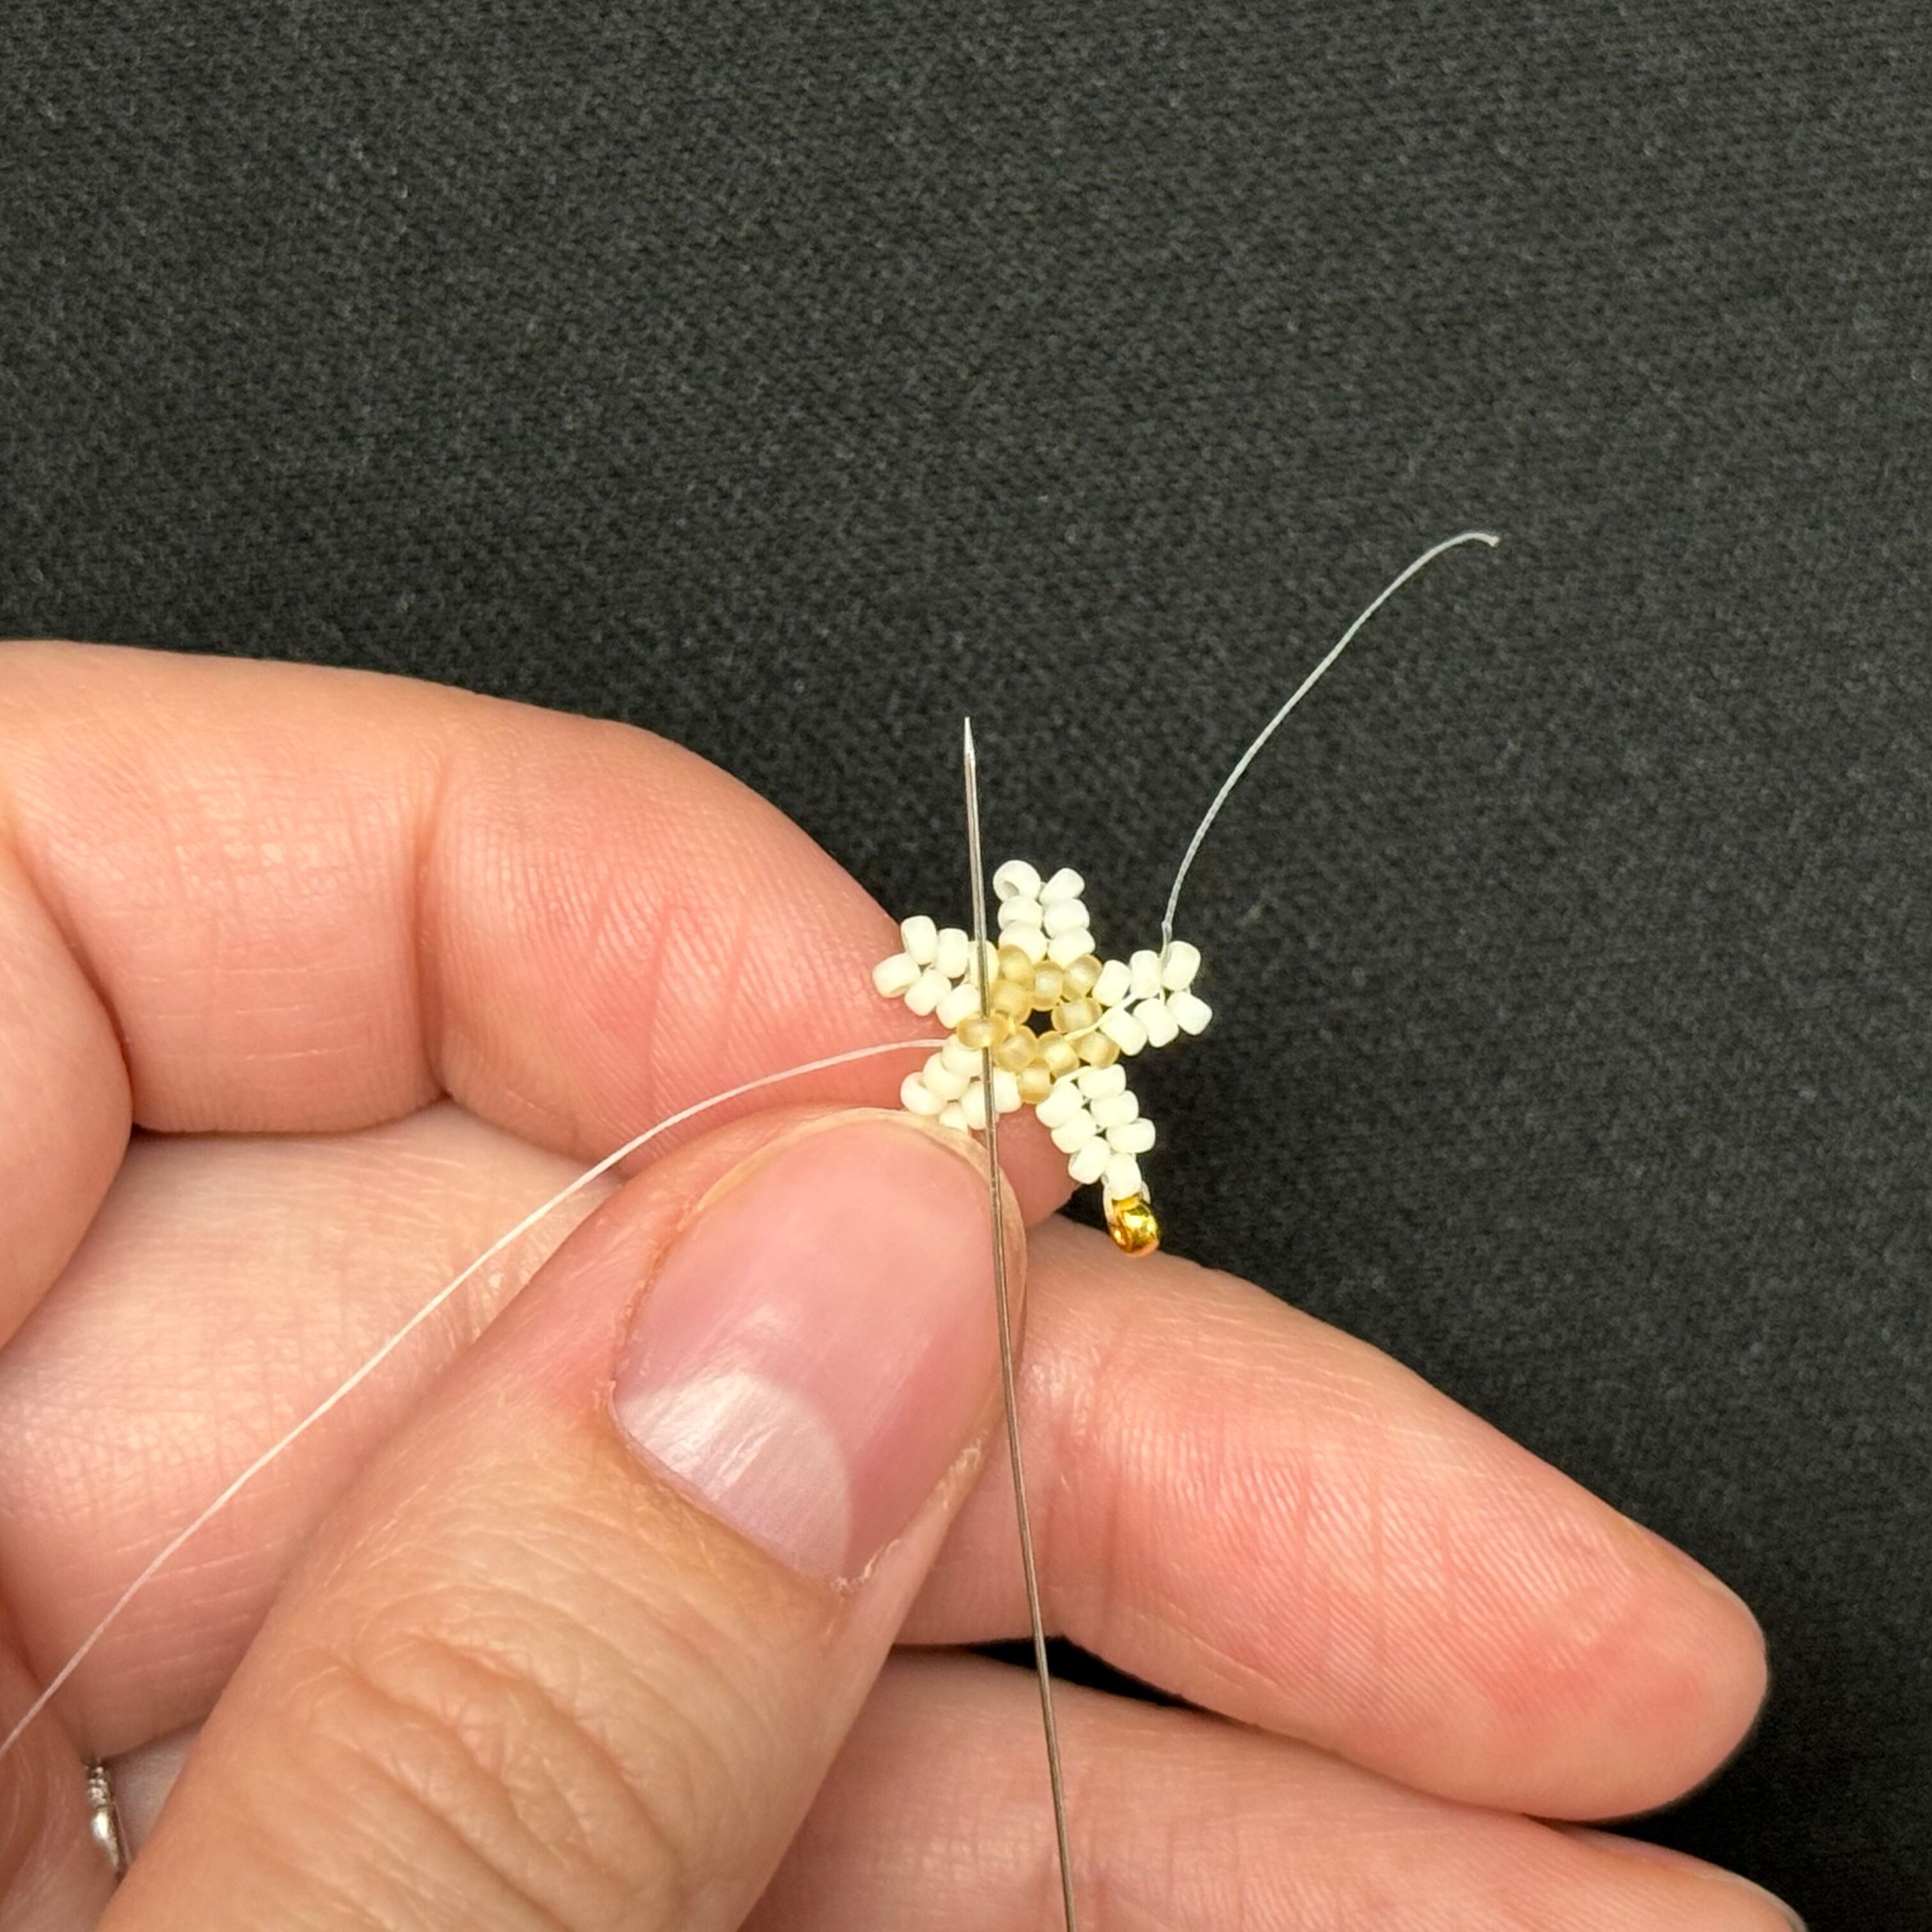
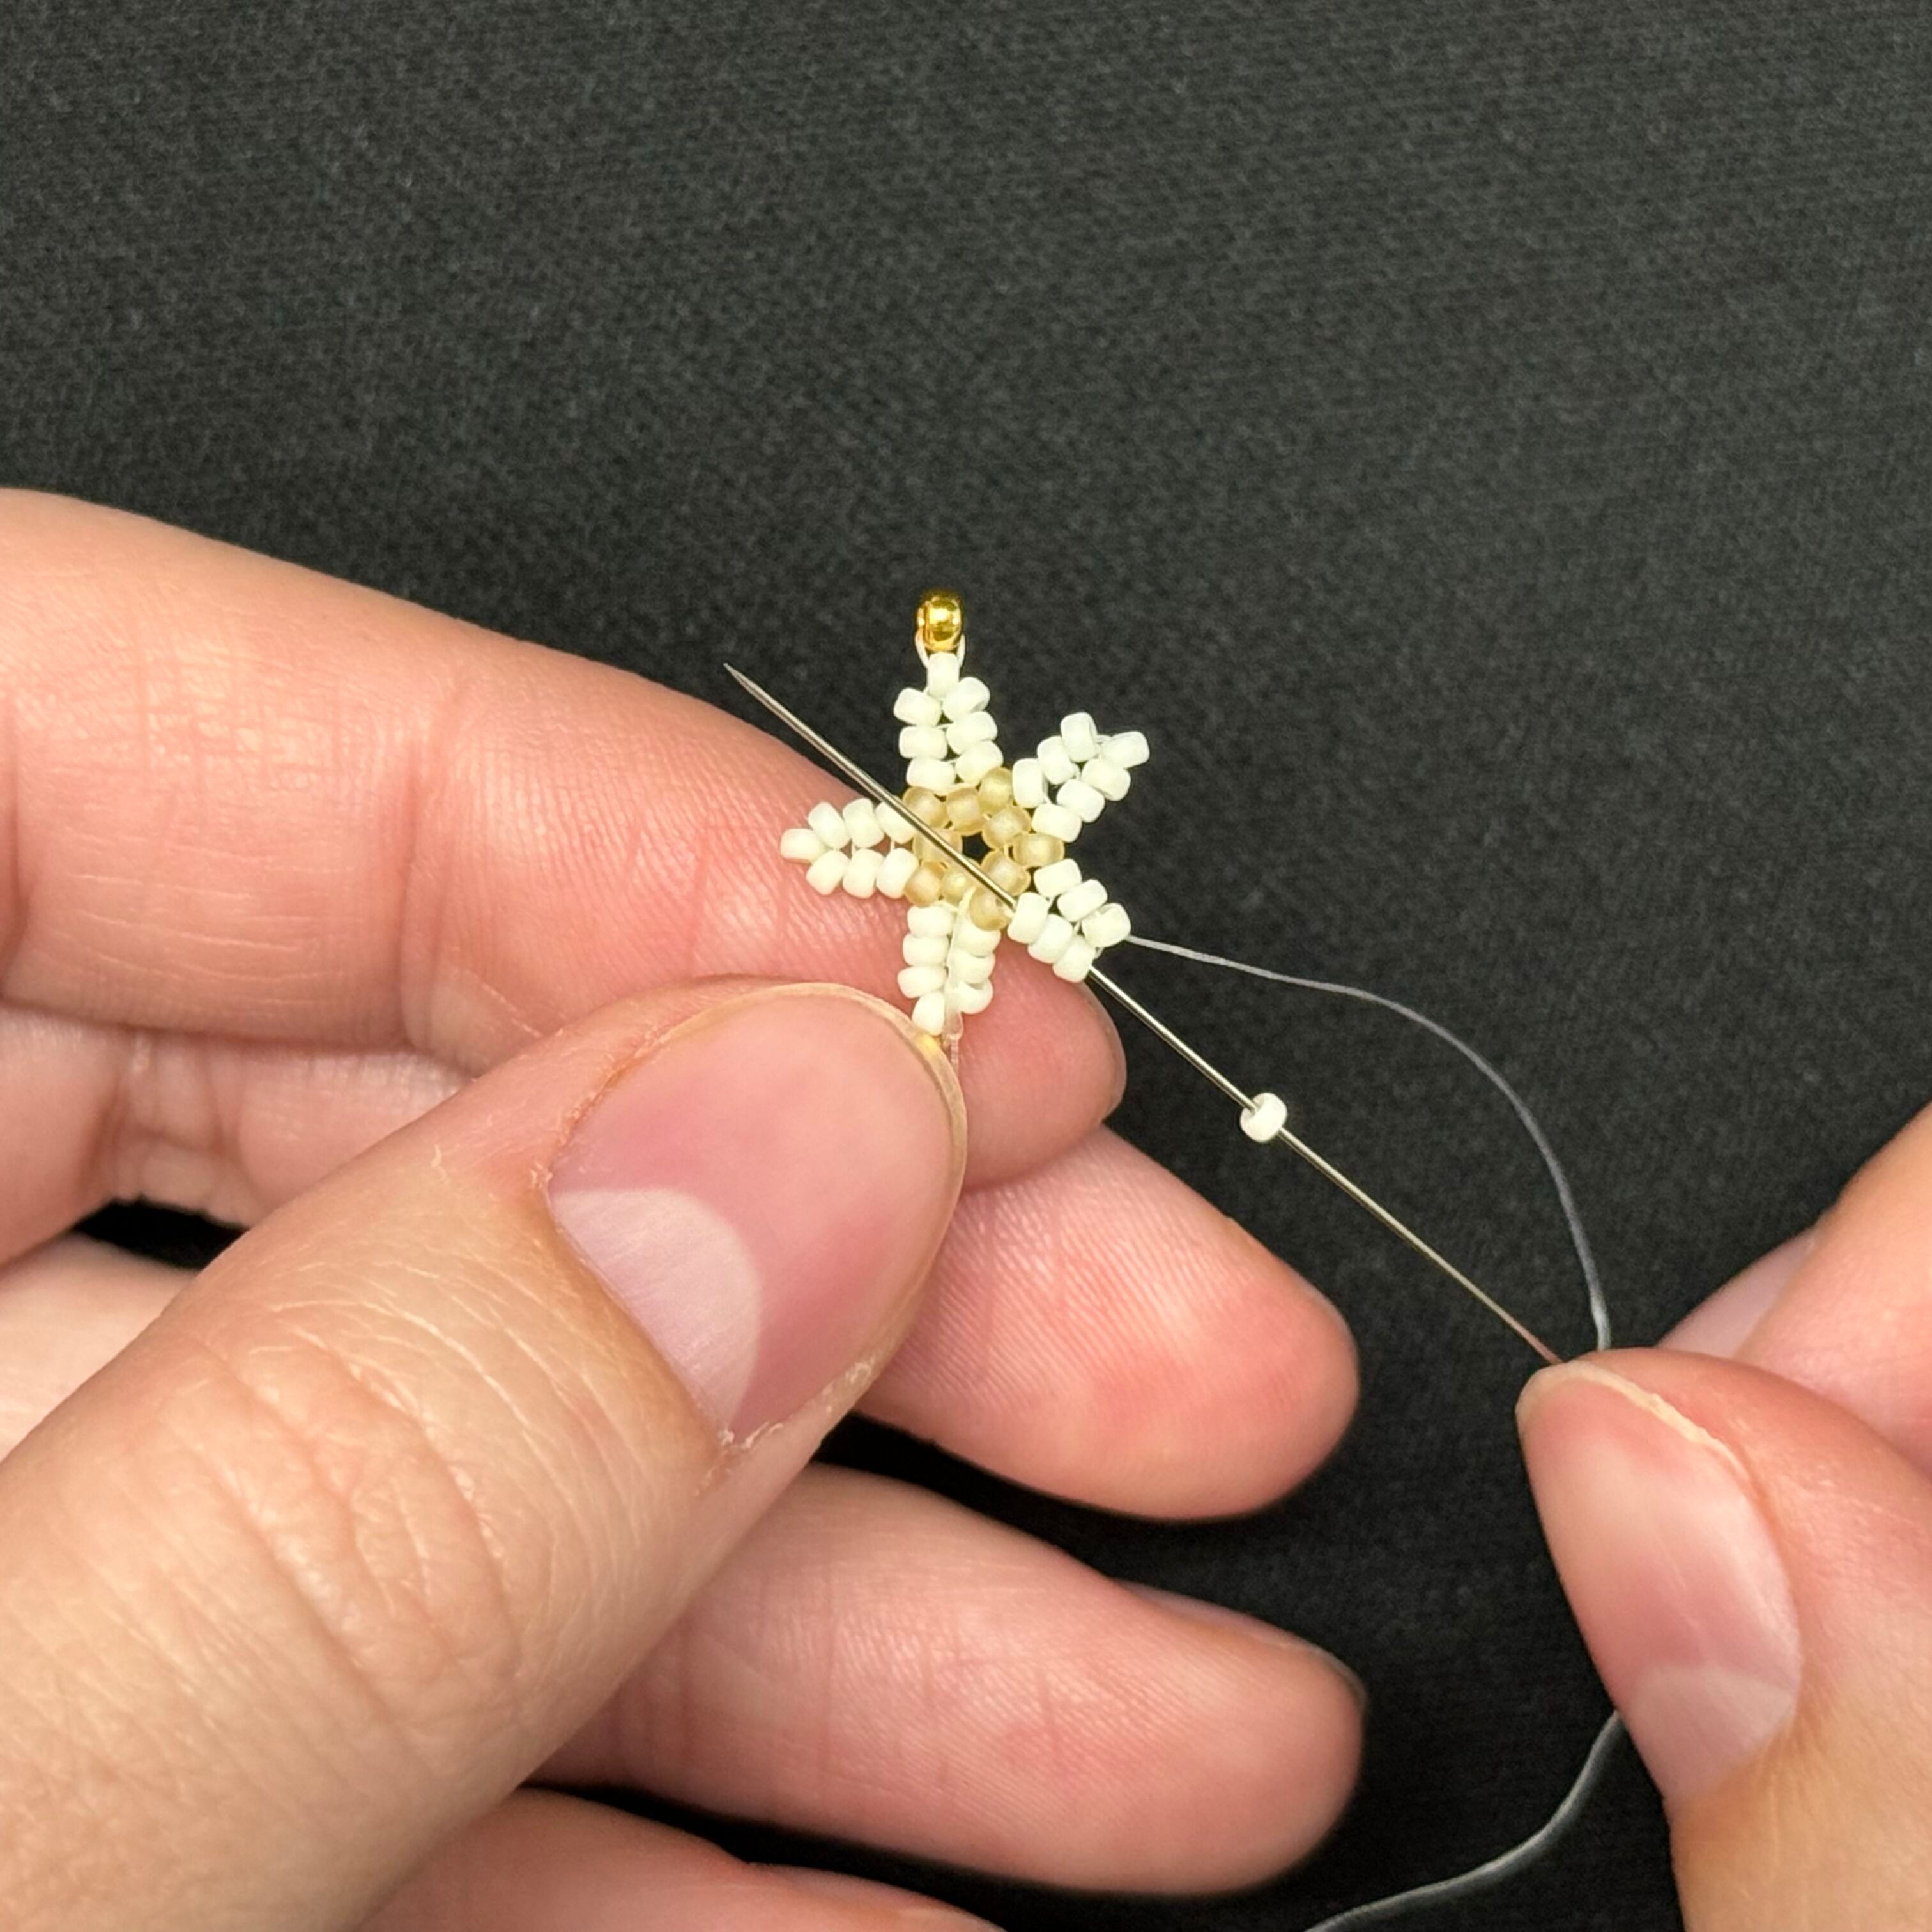
20. String on a 465 size 11 seed bead onto your needle and thread it in a loop back through the bead at the tip of the starfish arm
21. Loop back up through the 465 bead, pulling tight
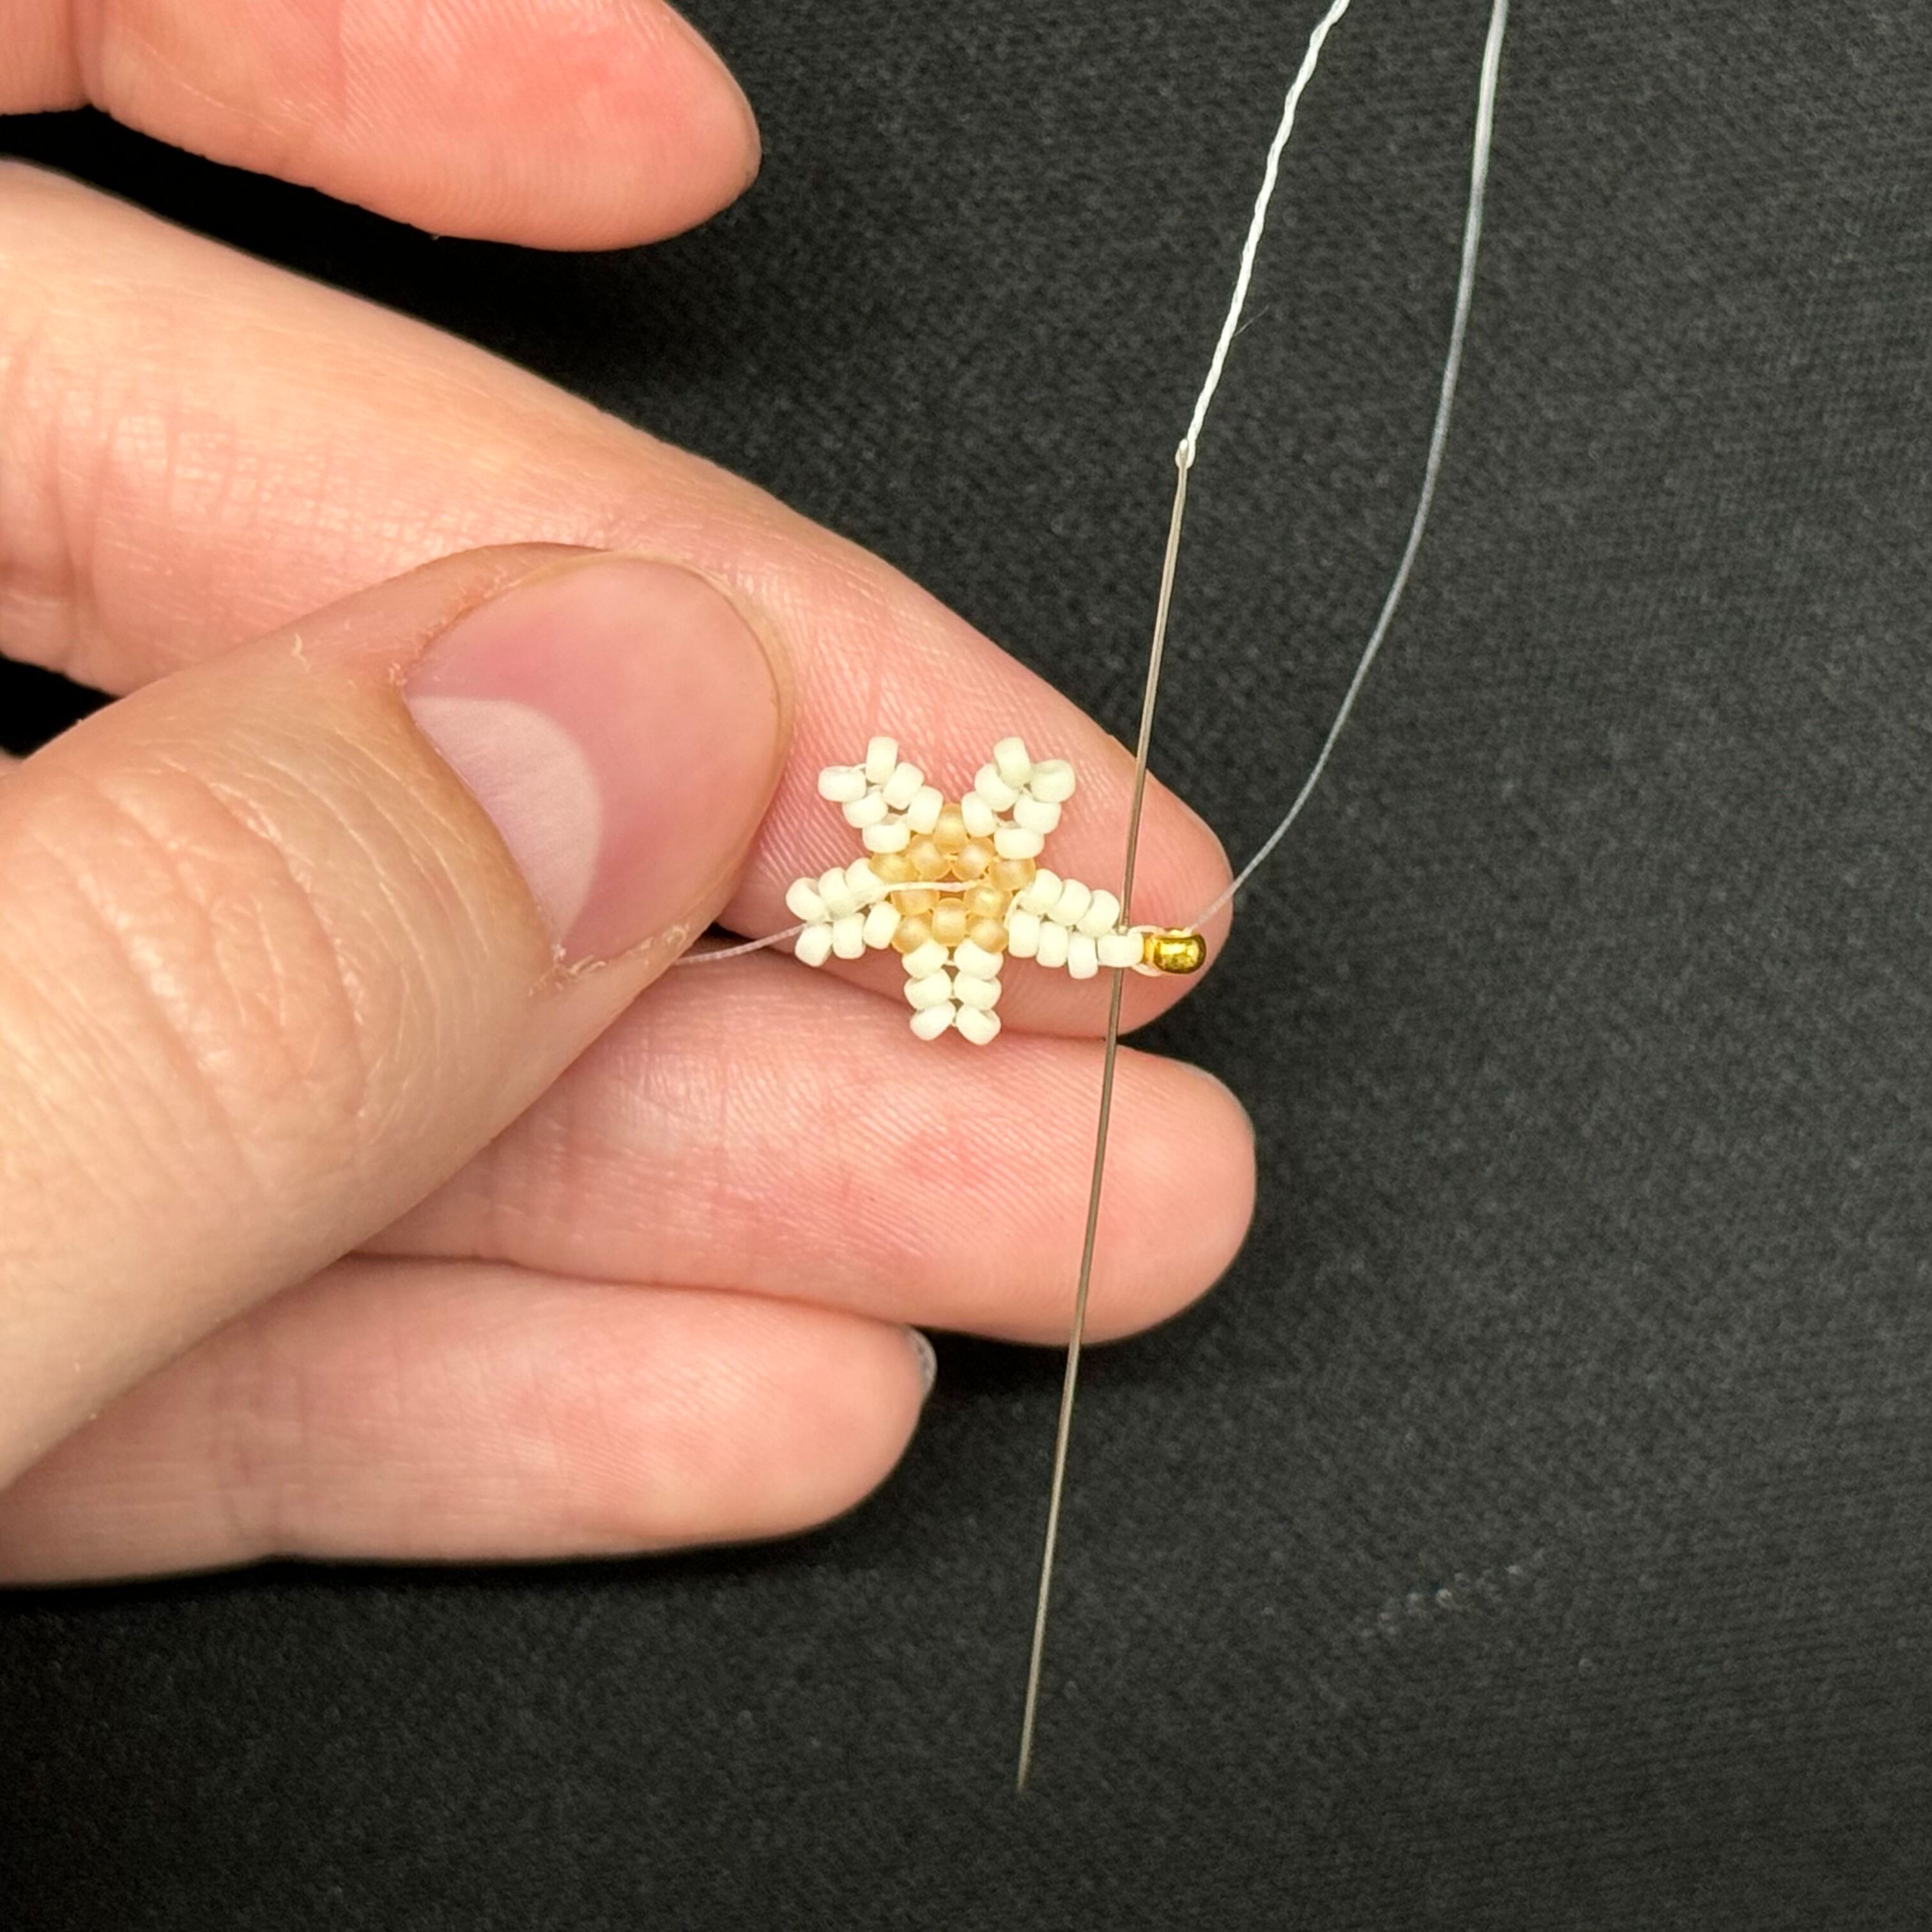
22. And then back down through the bead at the tip of the starfish arm
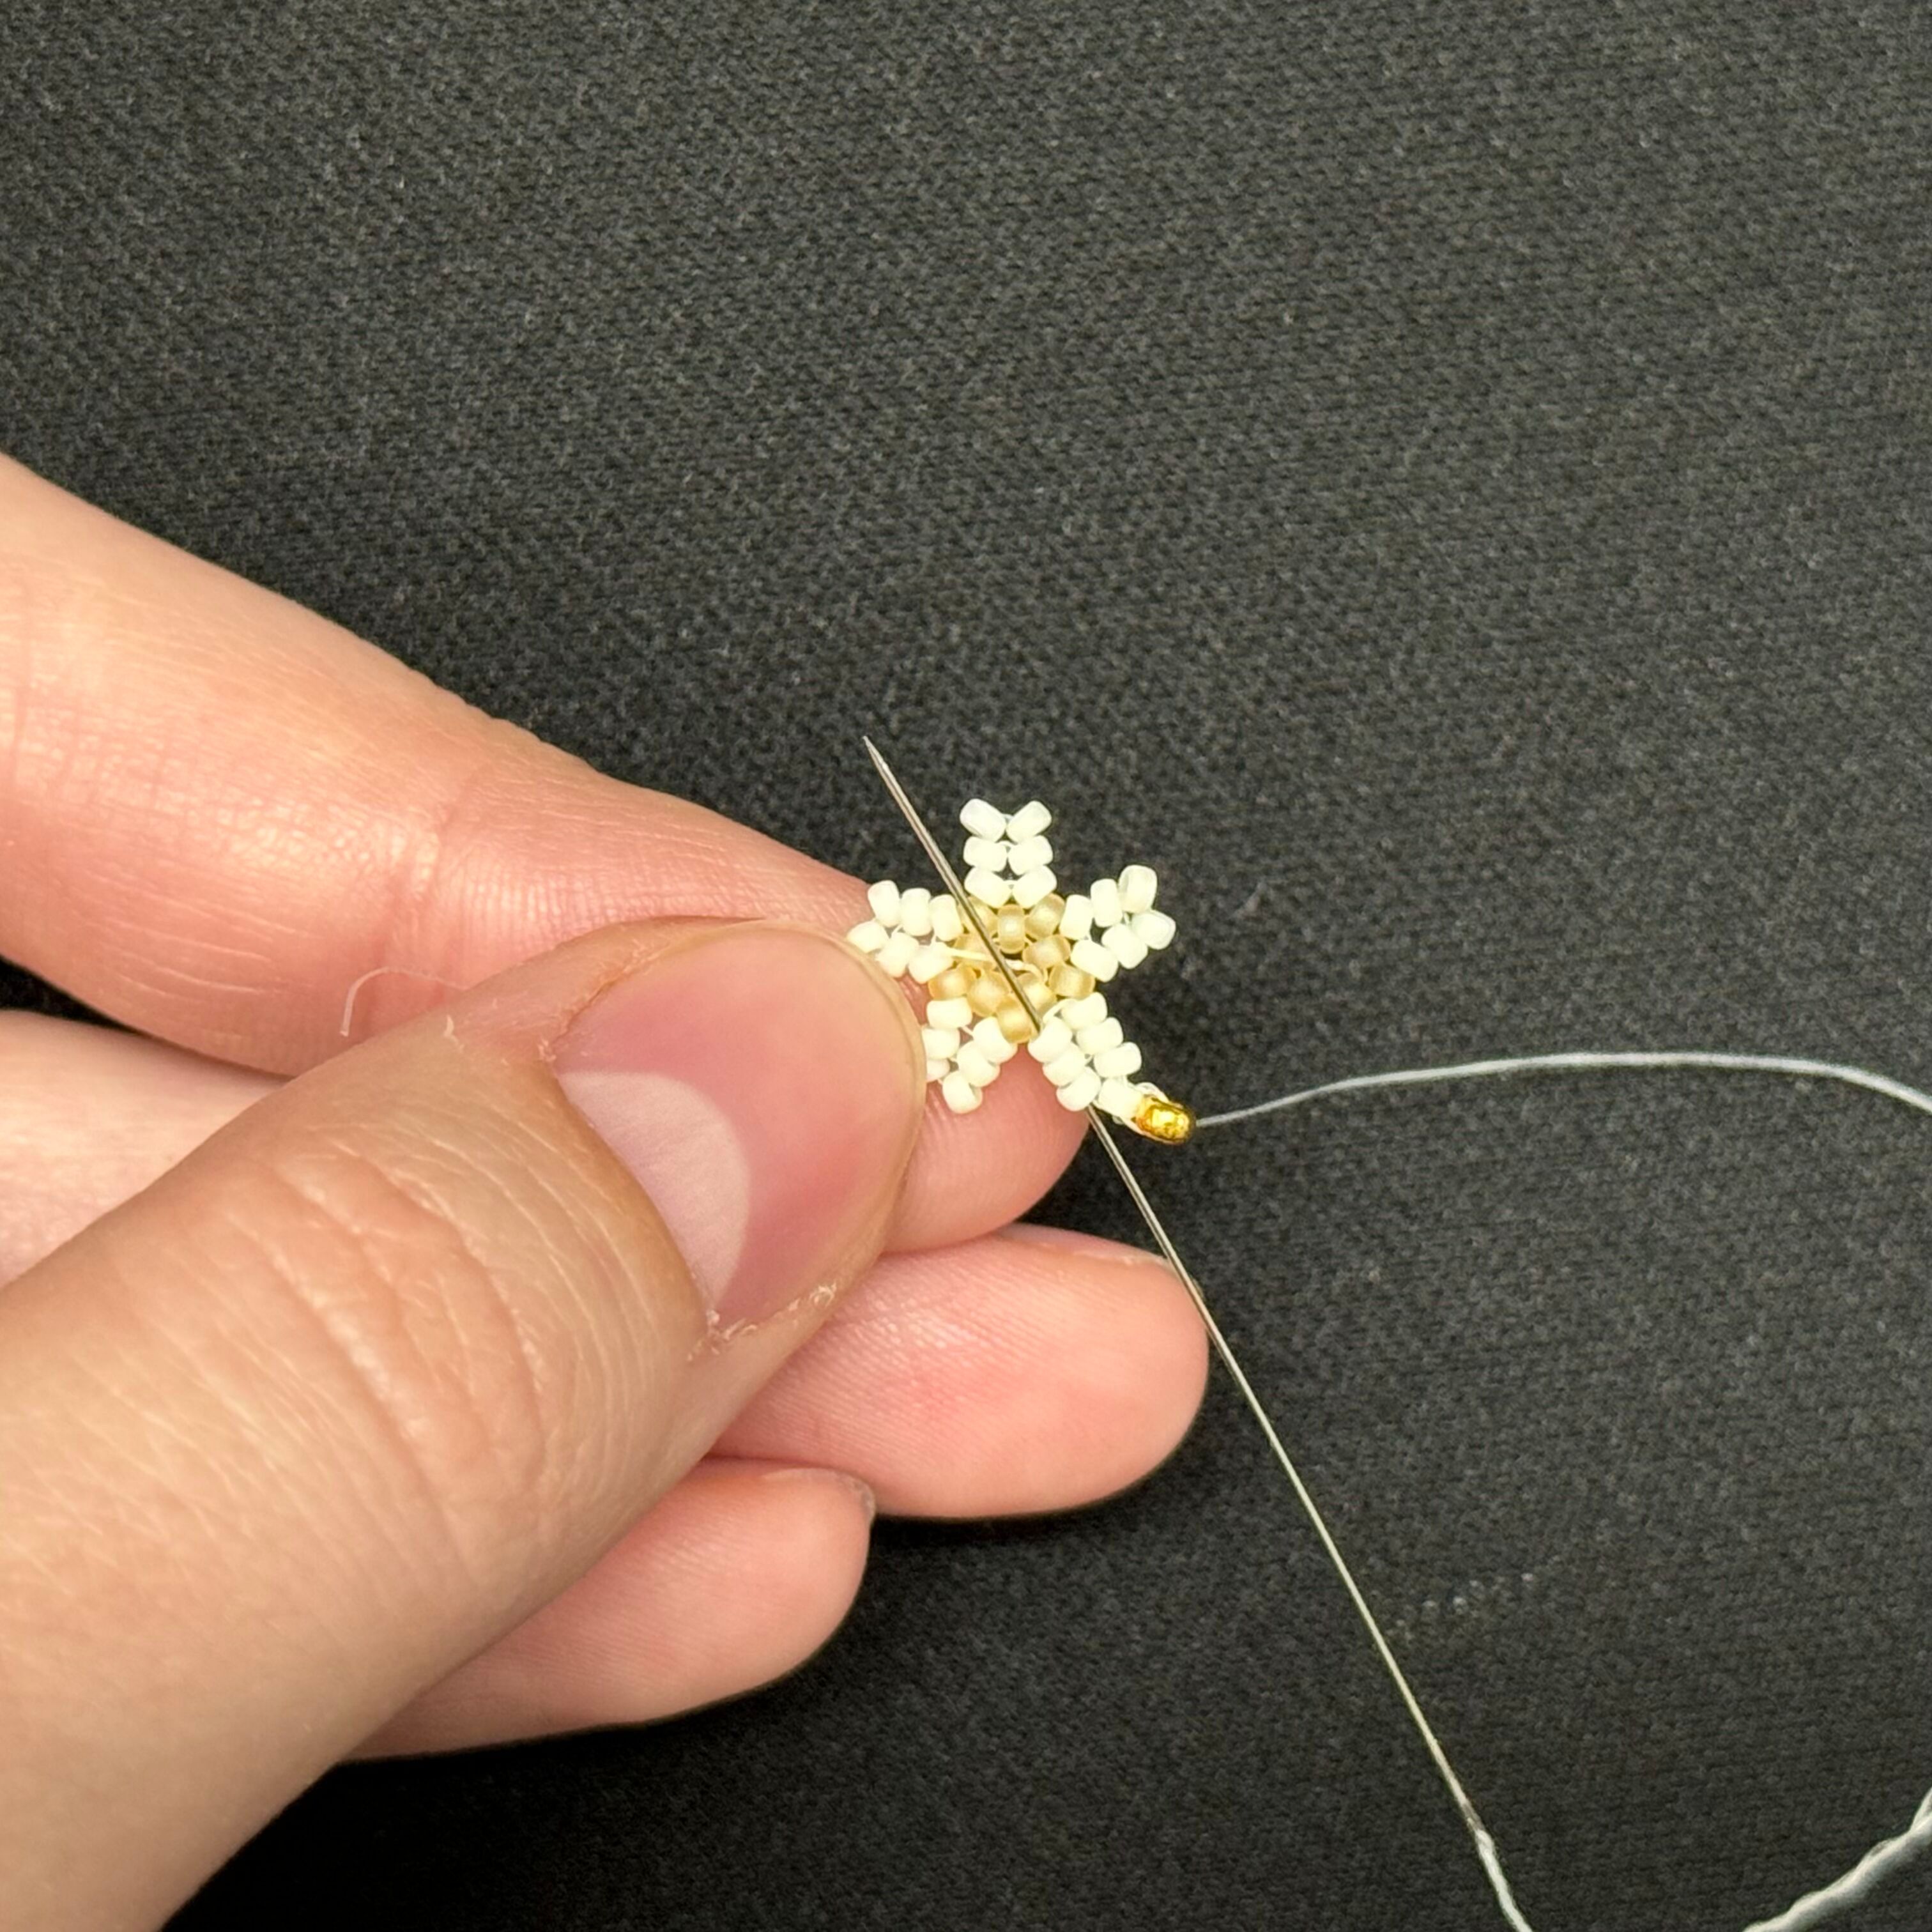
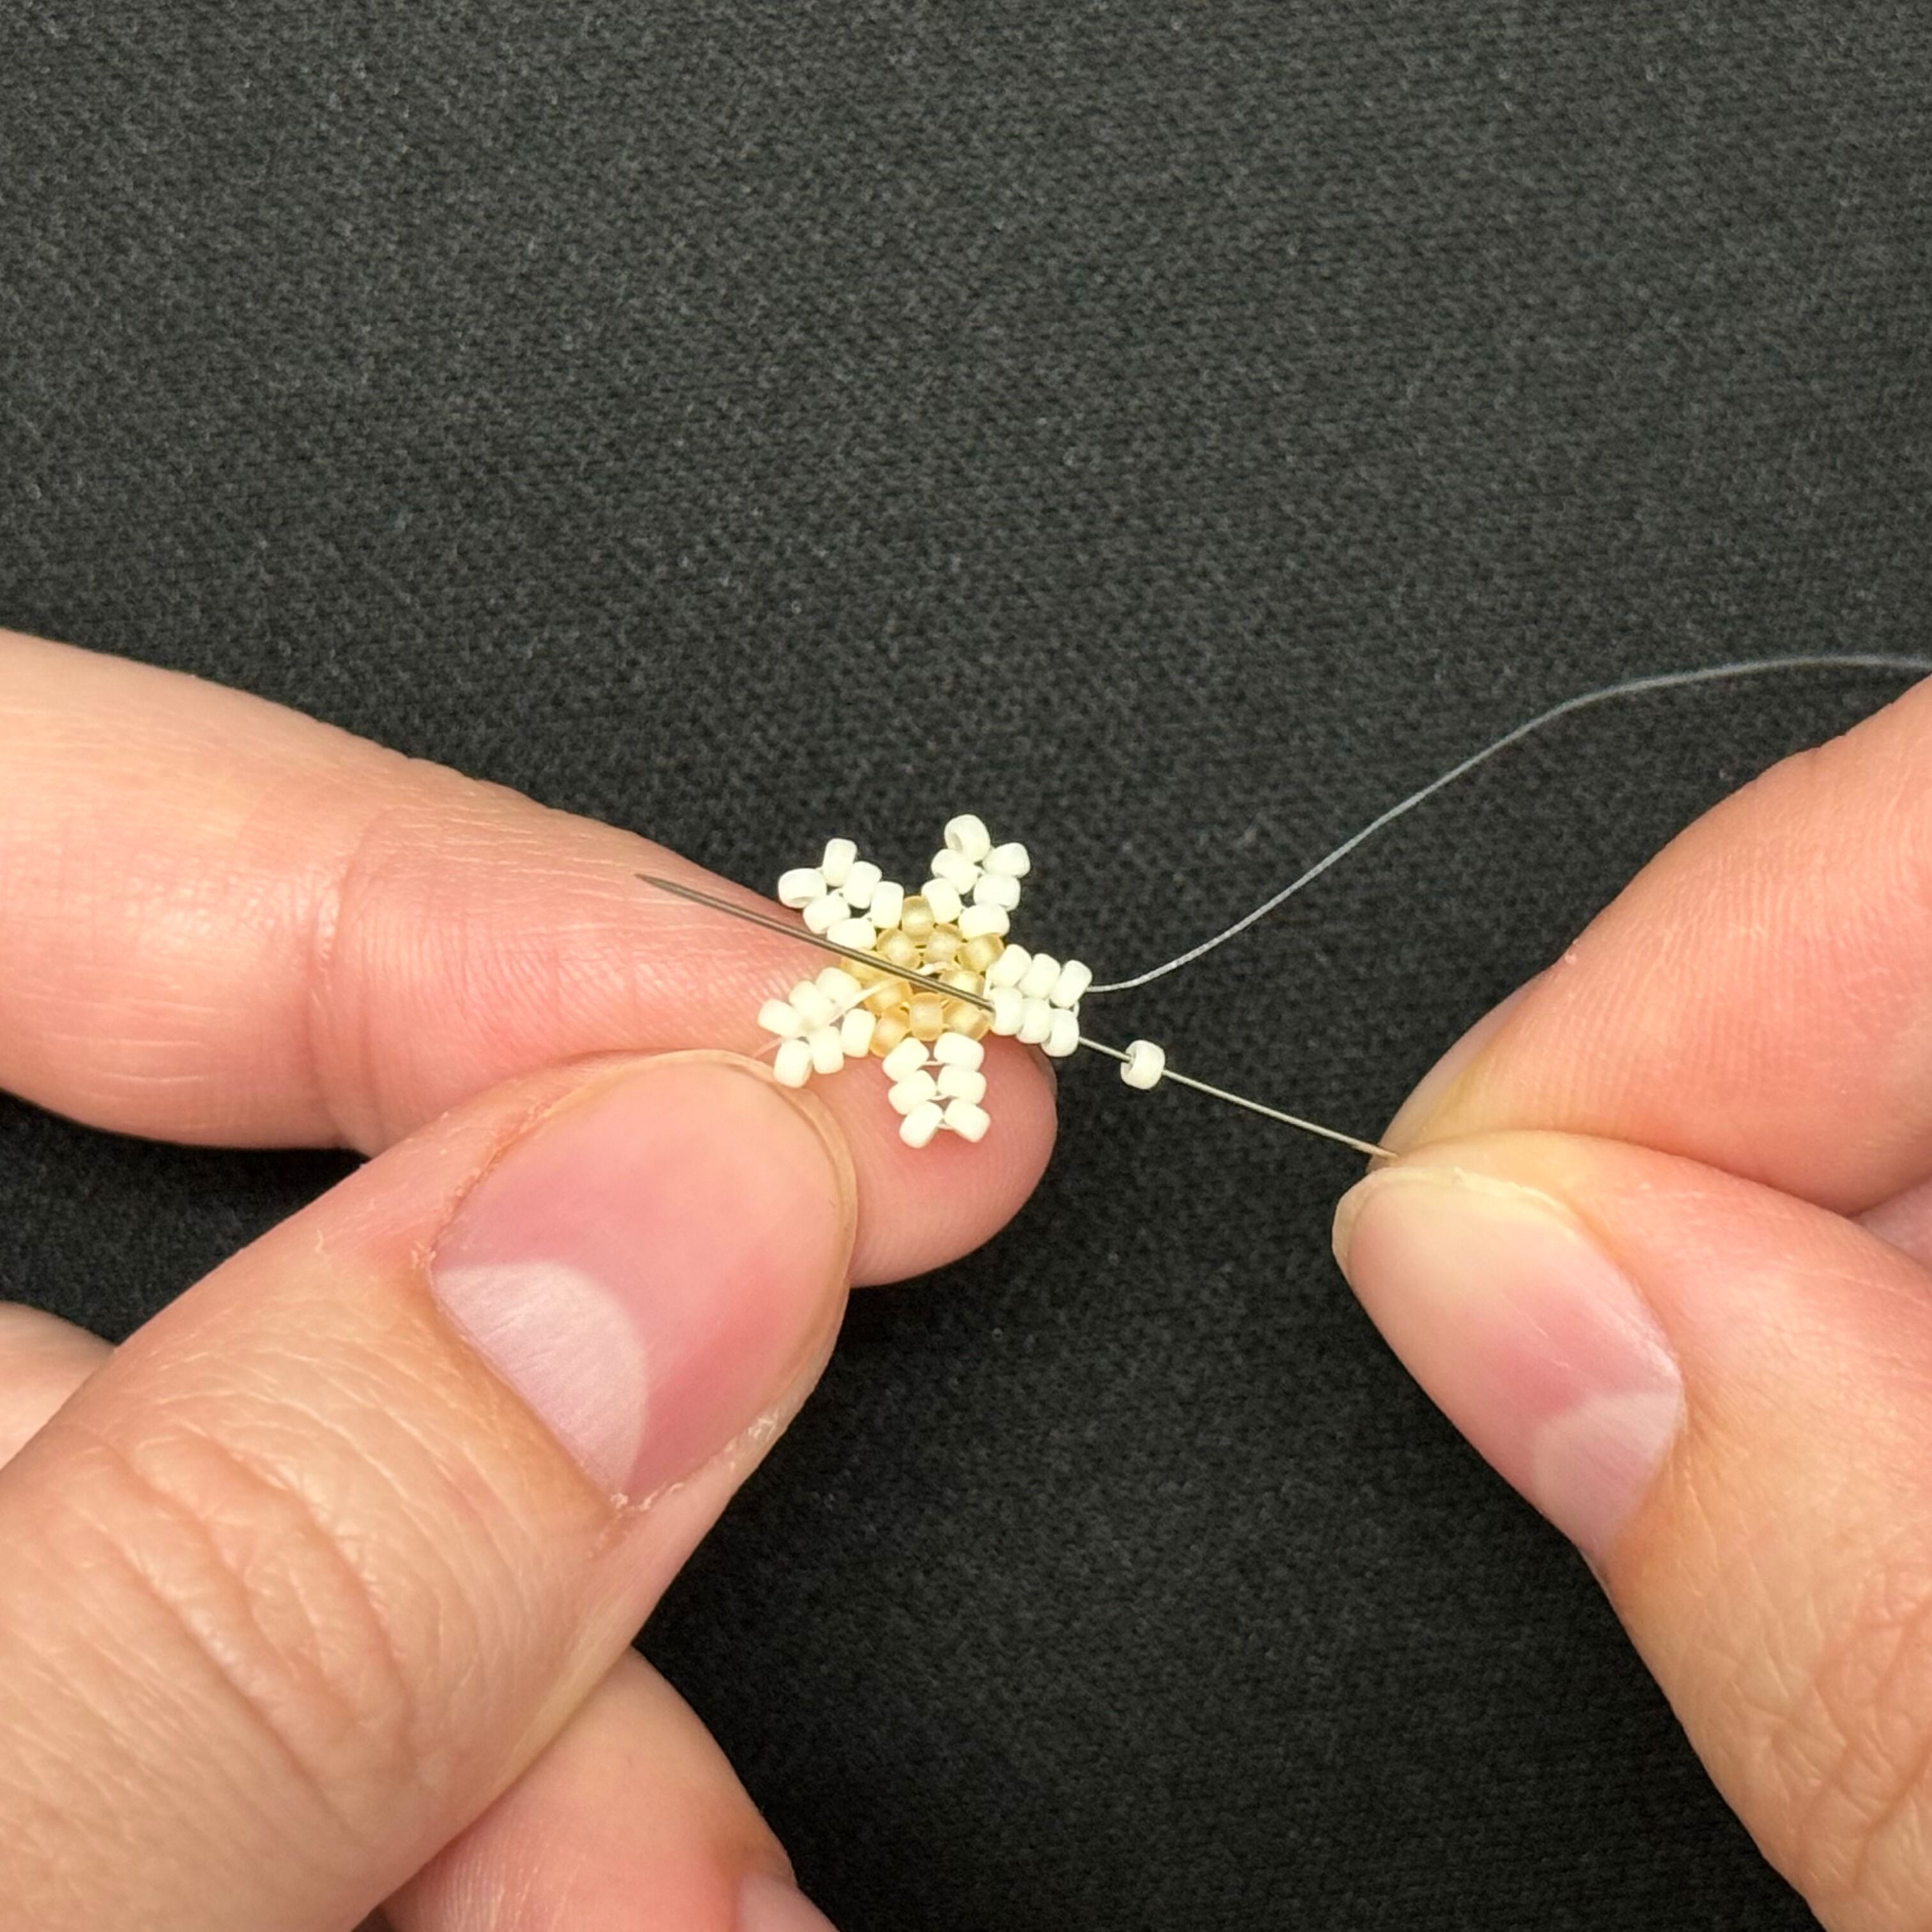
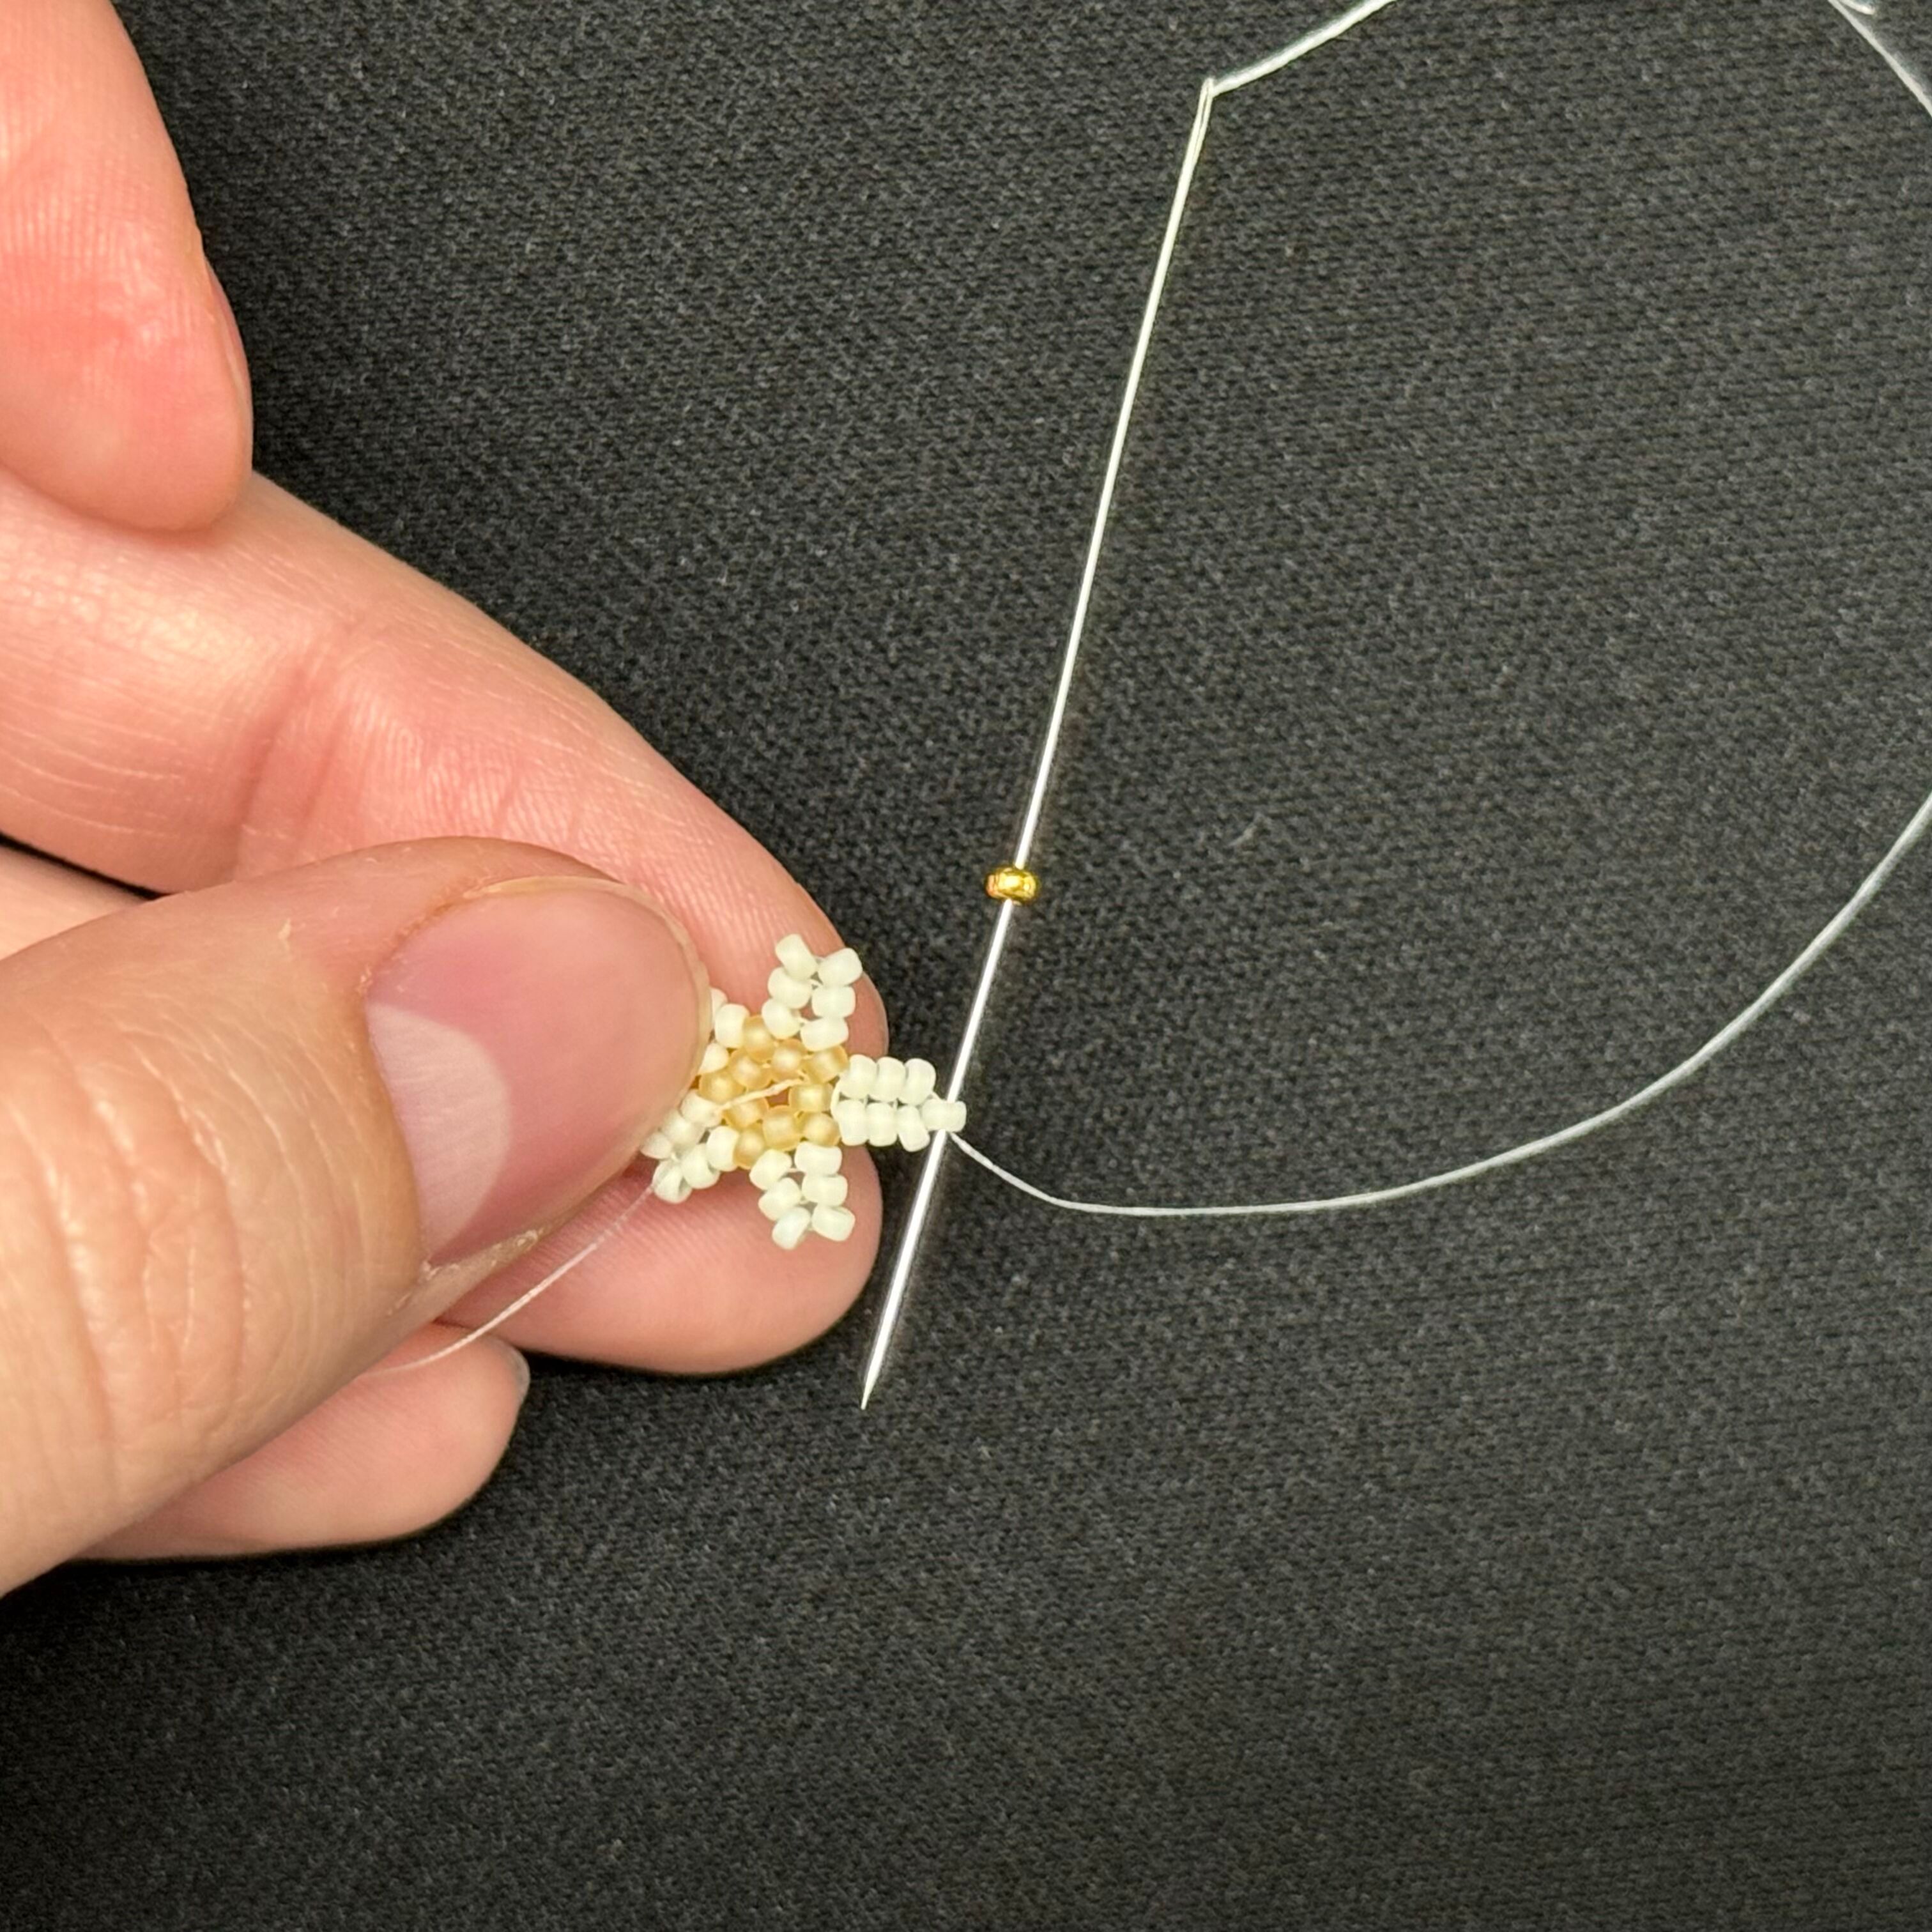
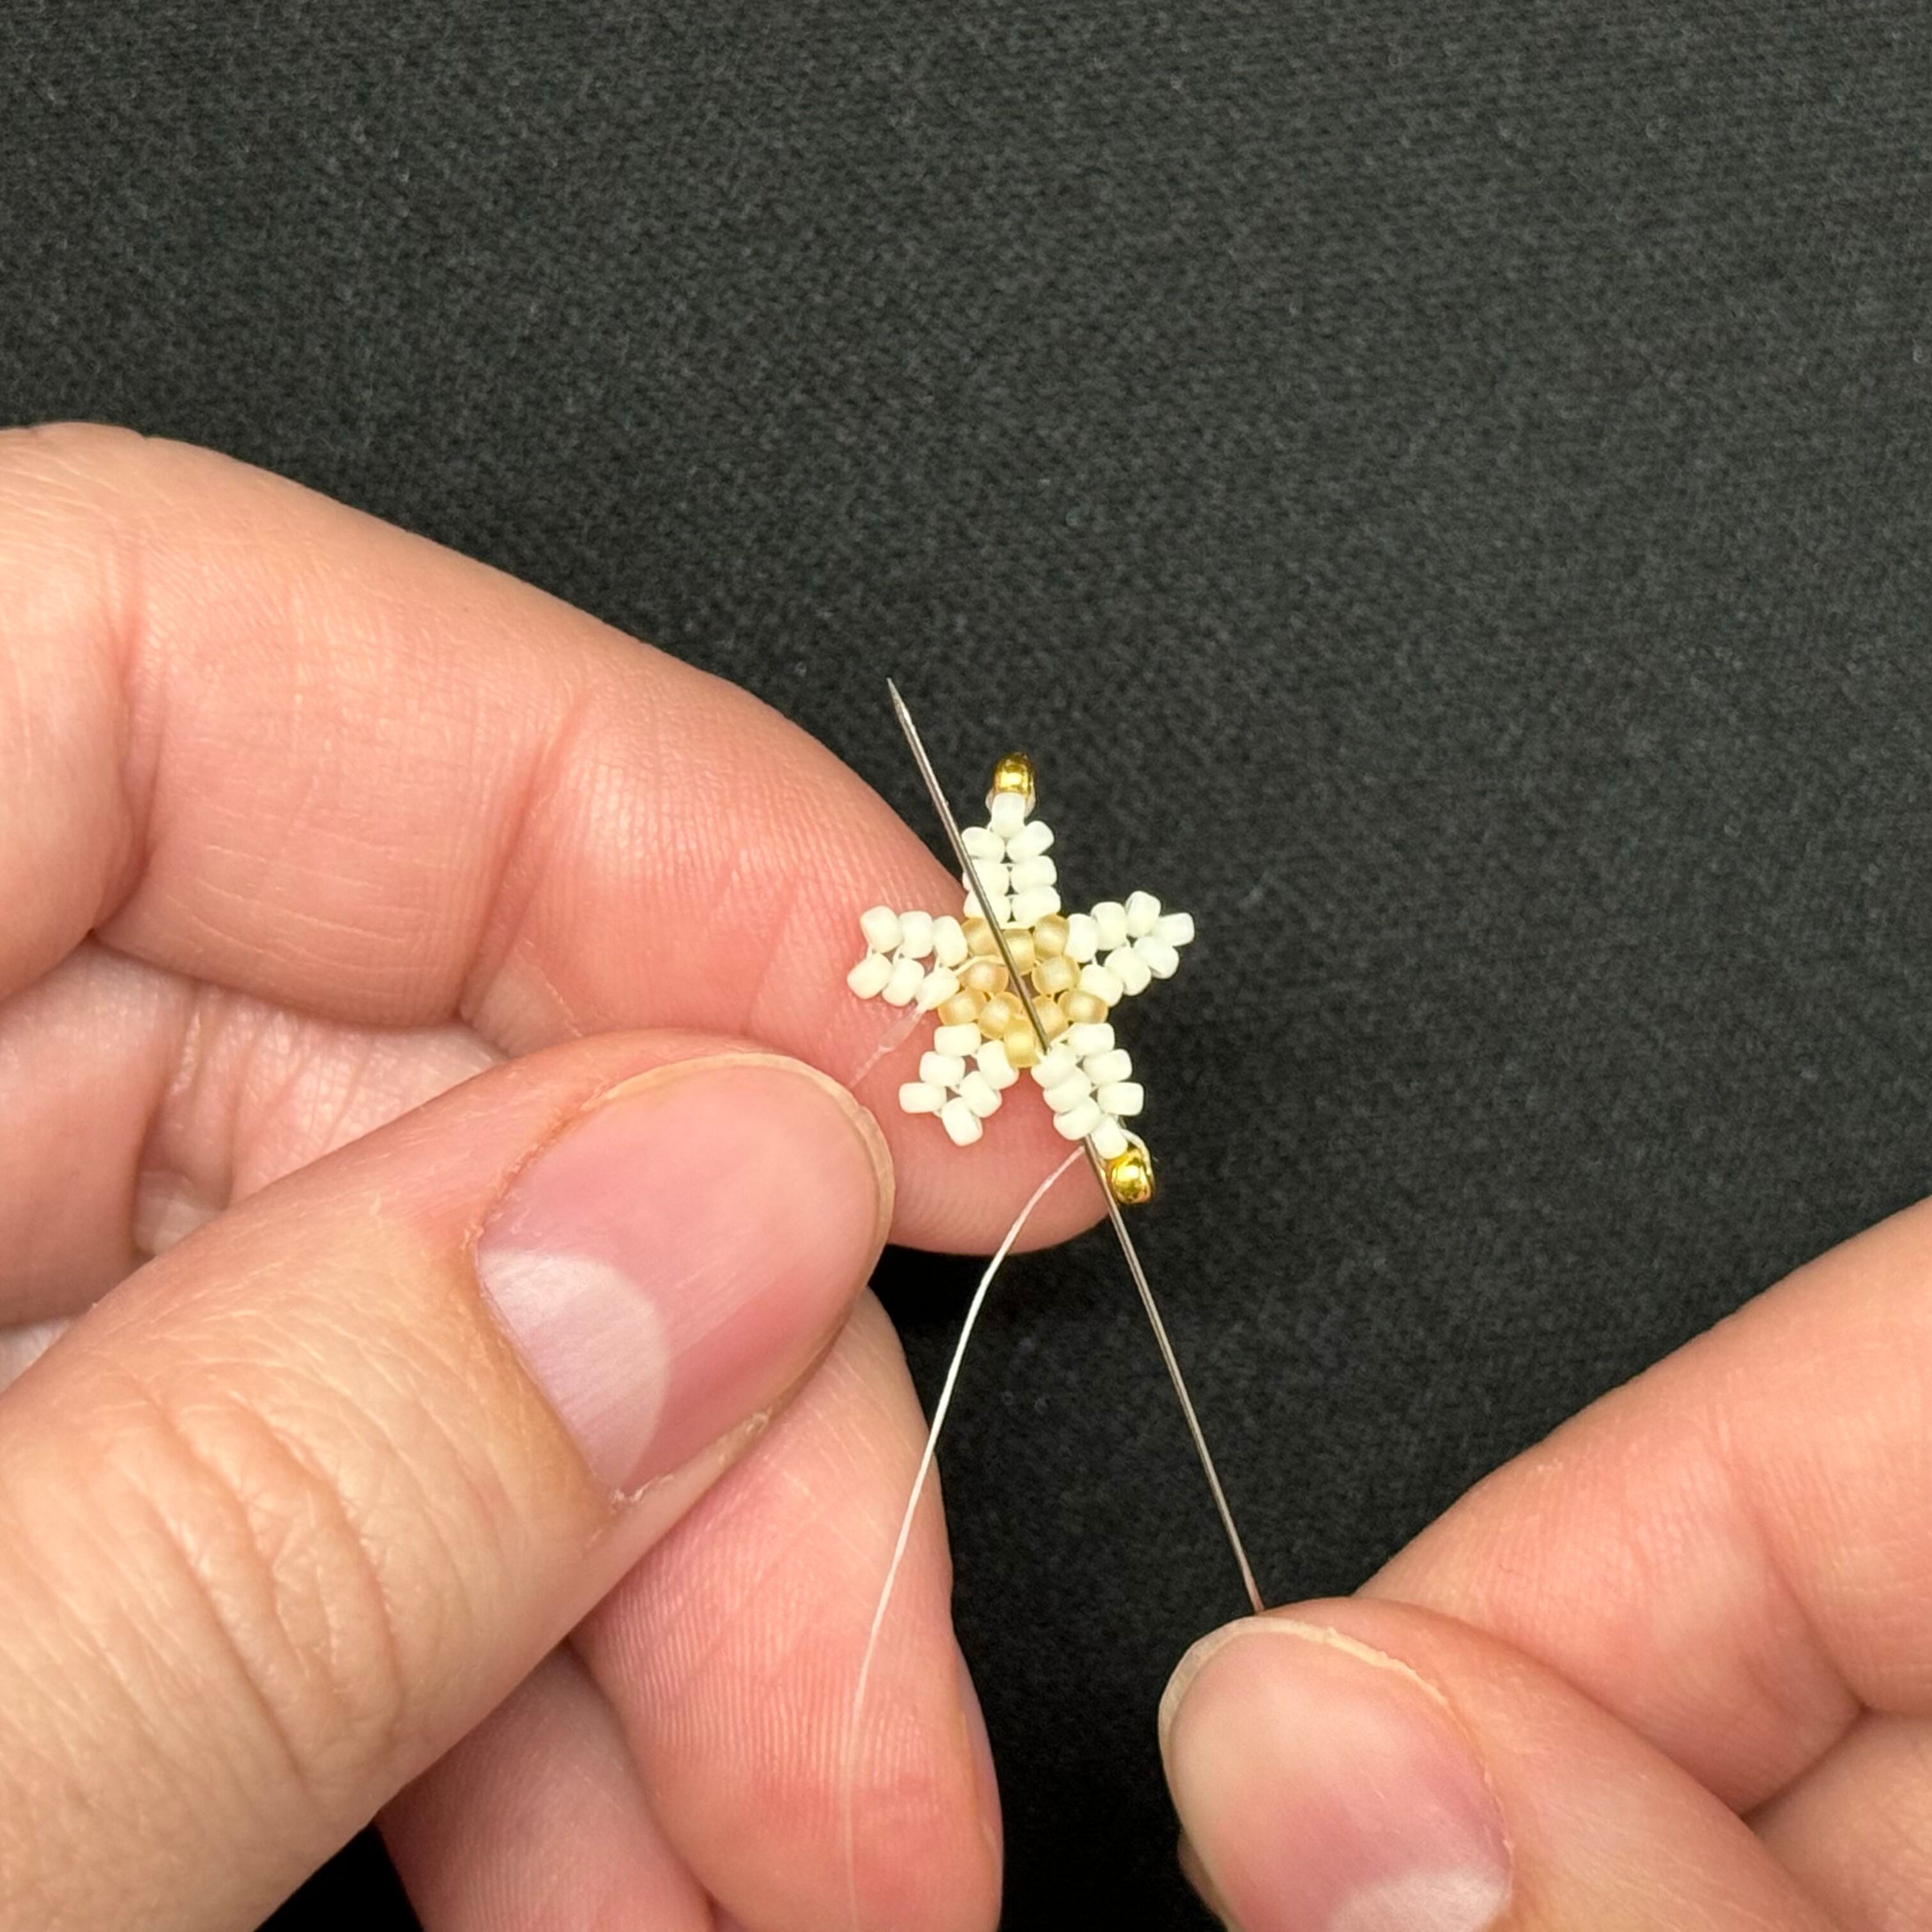
23. Thread the needle down through the three 2021 beads to the right of the new gold bead
24. Thread through the 132FR bead shown
25. And then up through the three 2021 beads
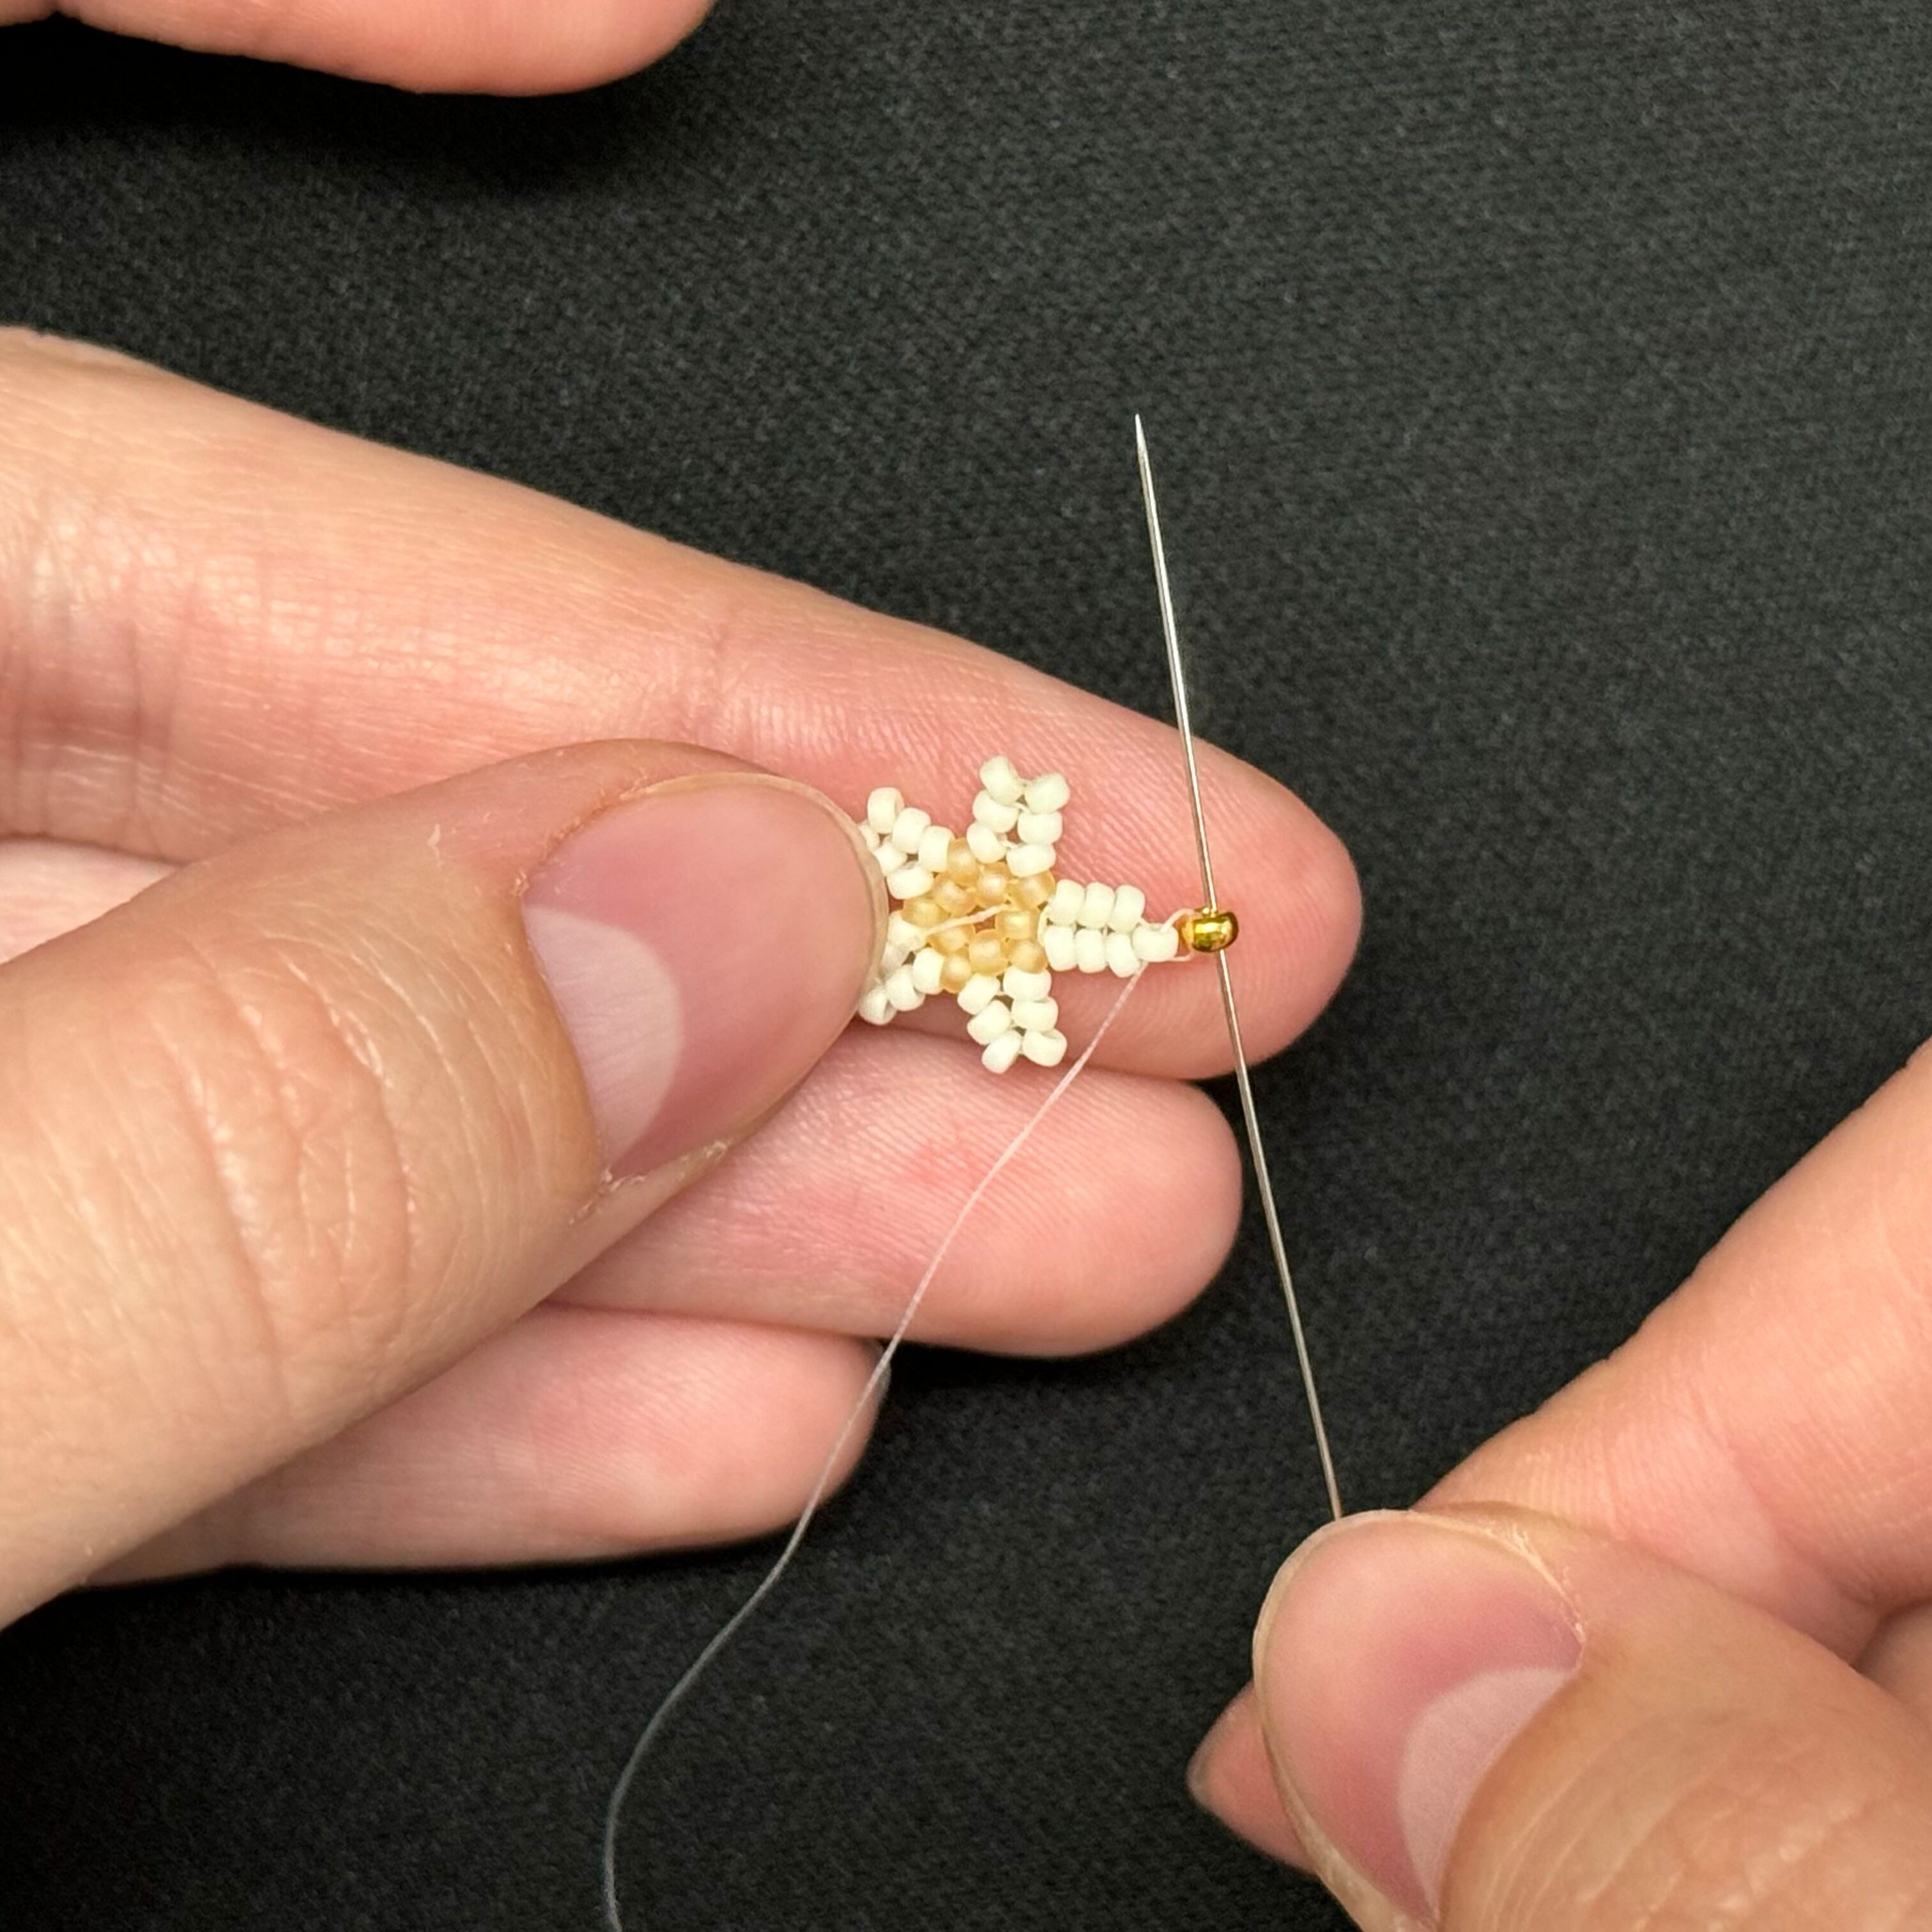
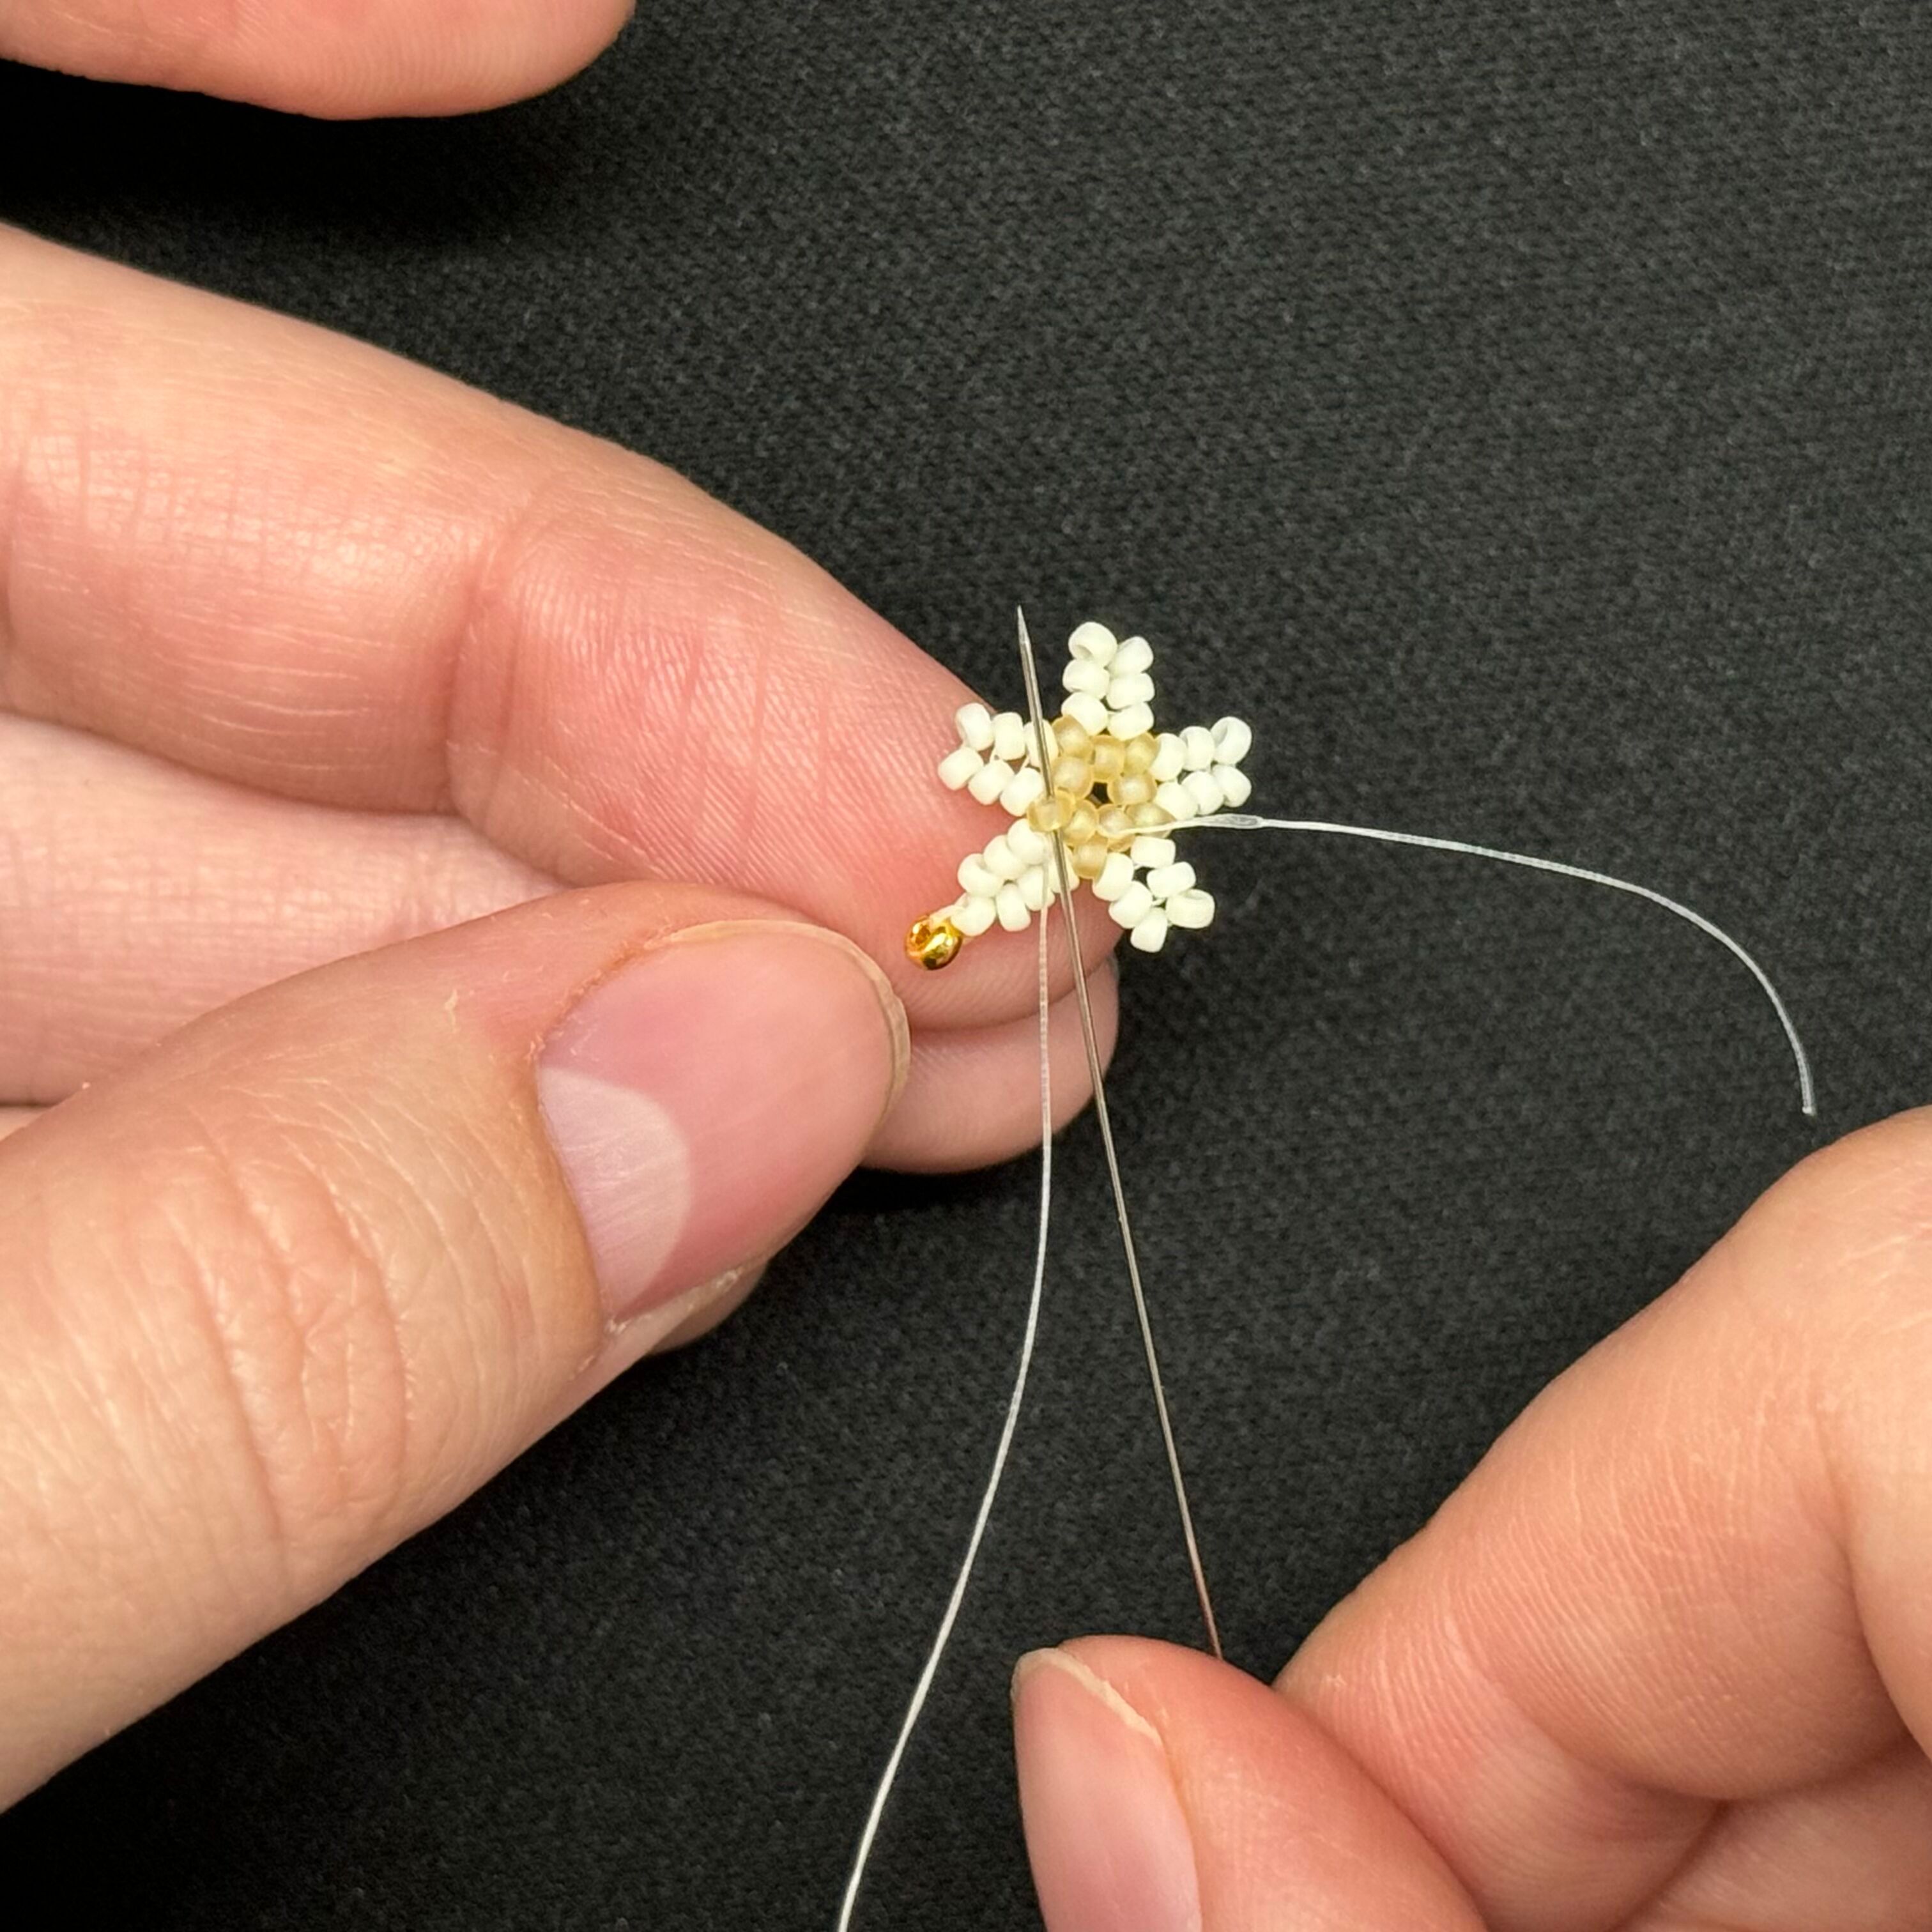
26. String on one 2021 bead and thread the needle down through the three 2021 beads shown
27. Thread the needle through the next 132FR bead
28. Repeat steps 16 through 23 to create the third arm of the starfish with a gold bead at the tip
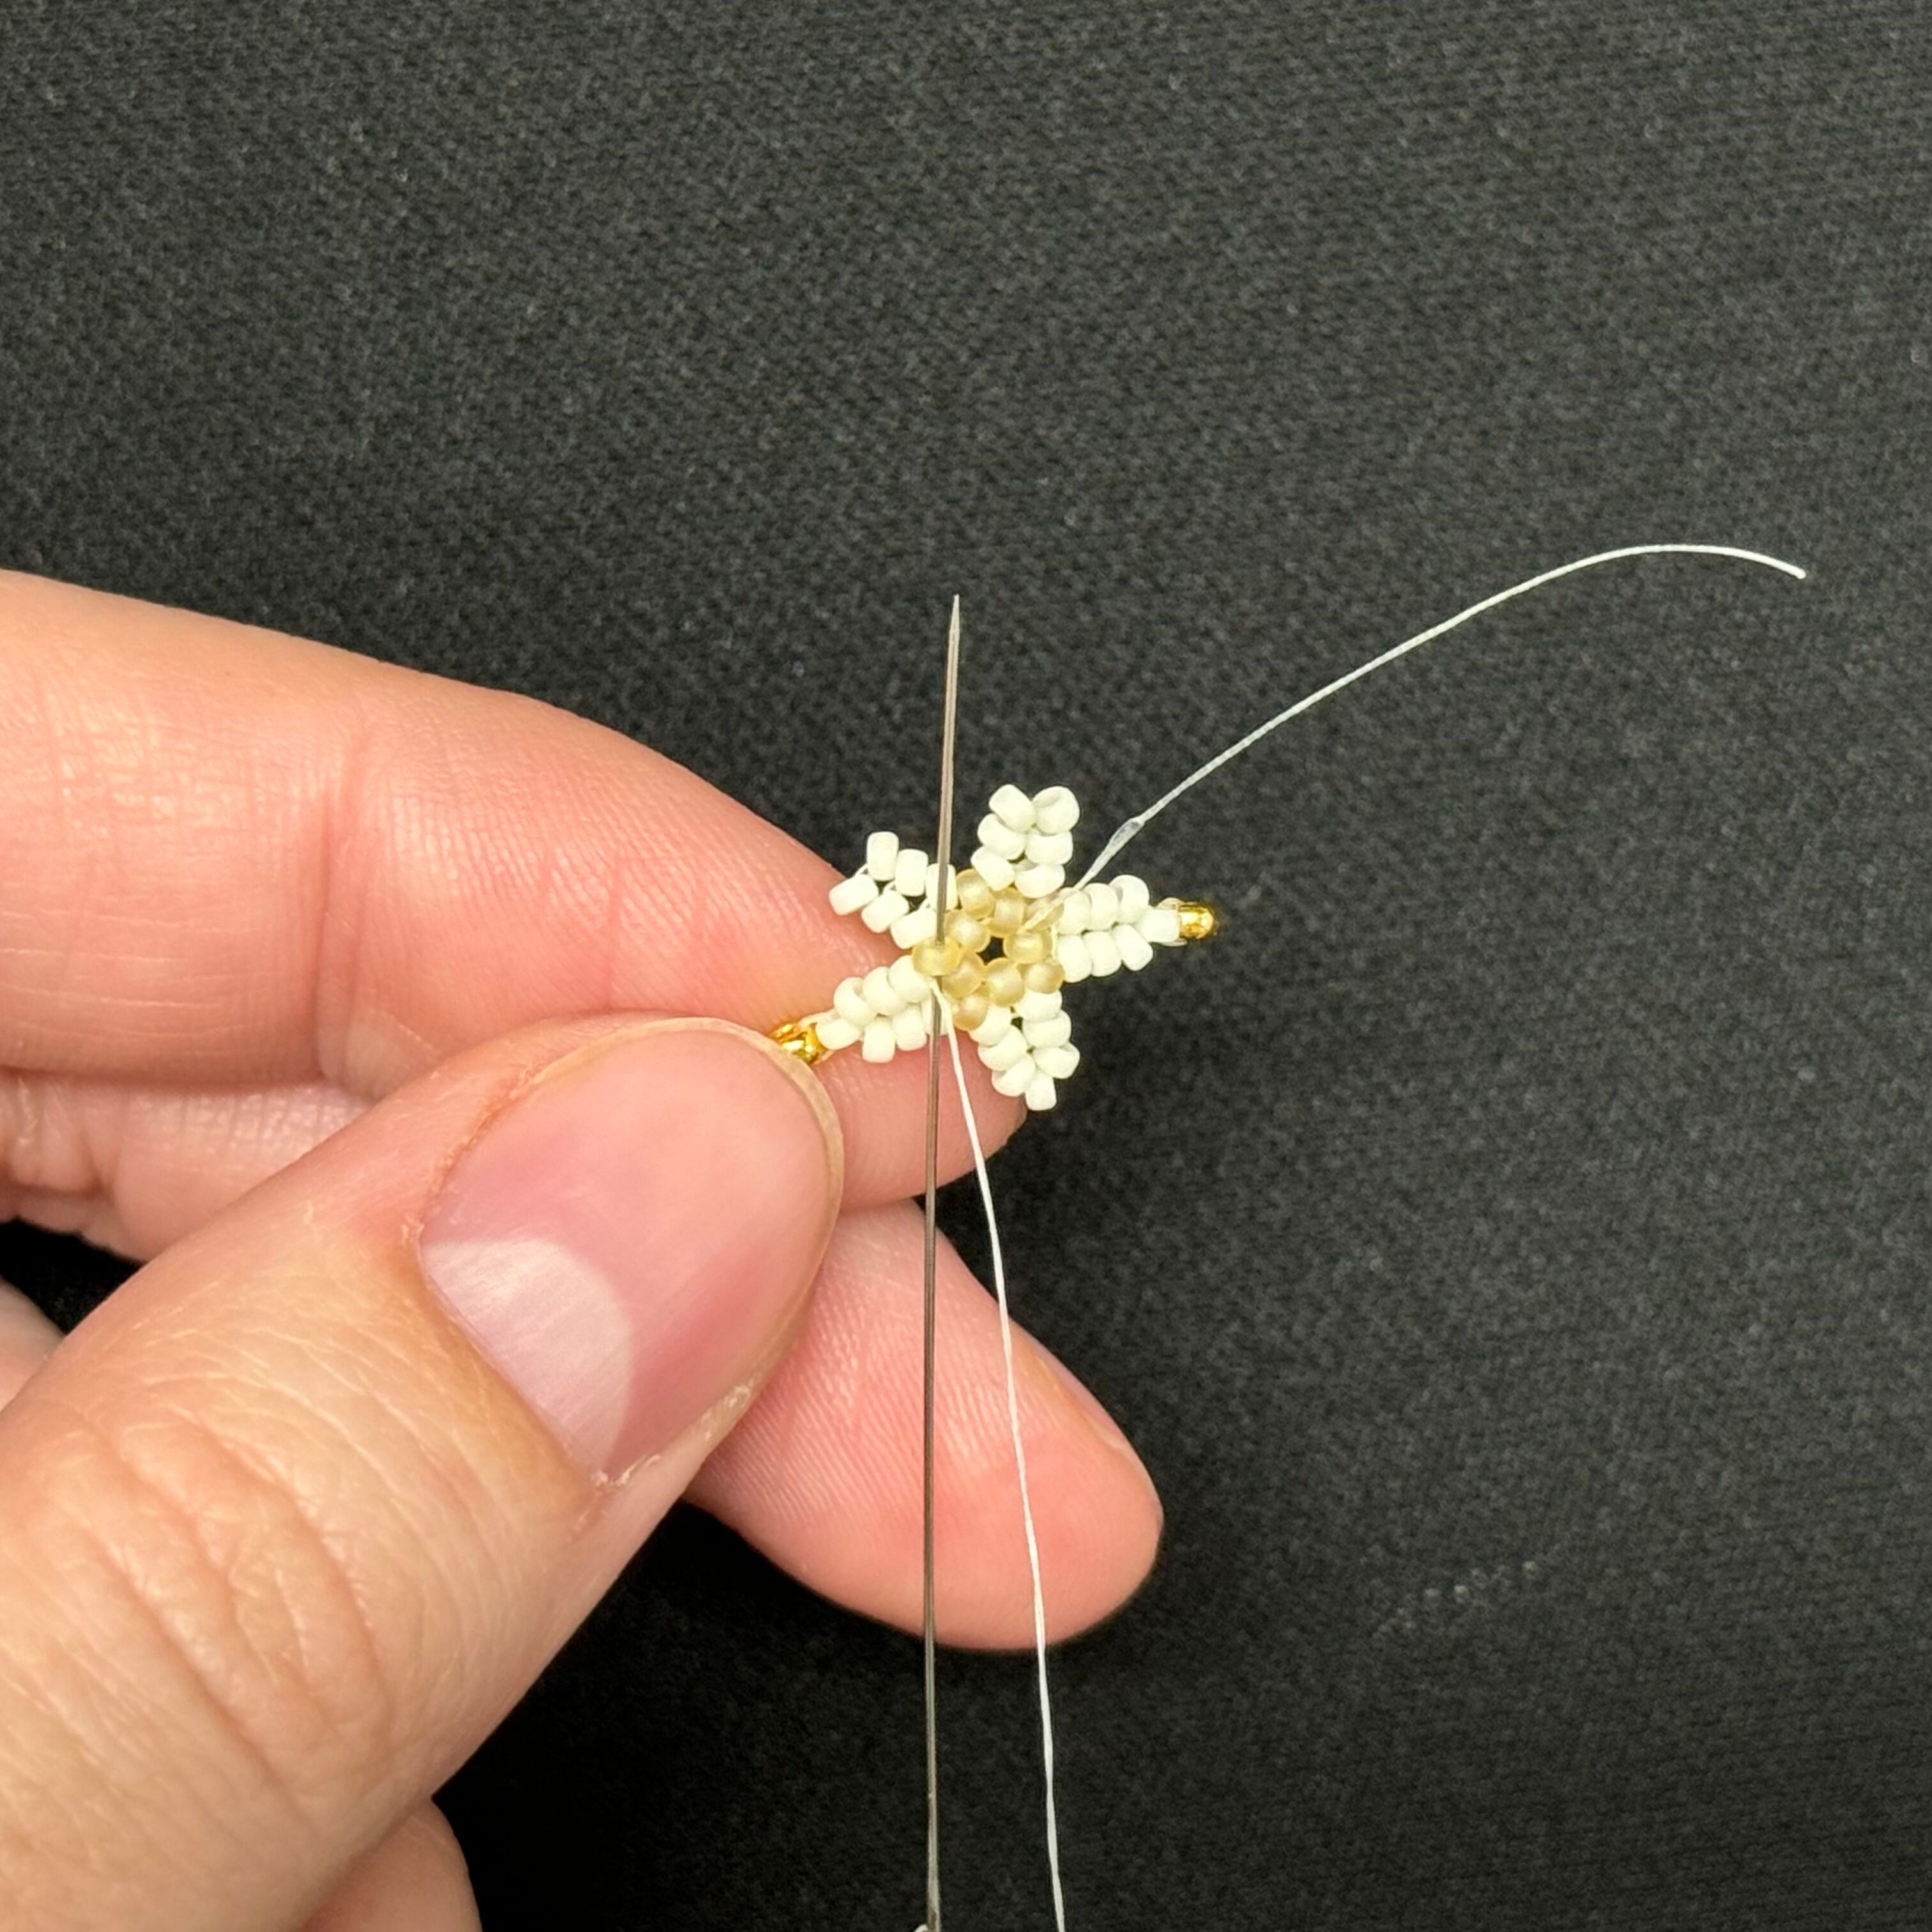
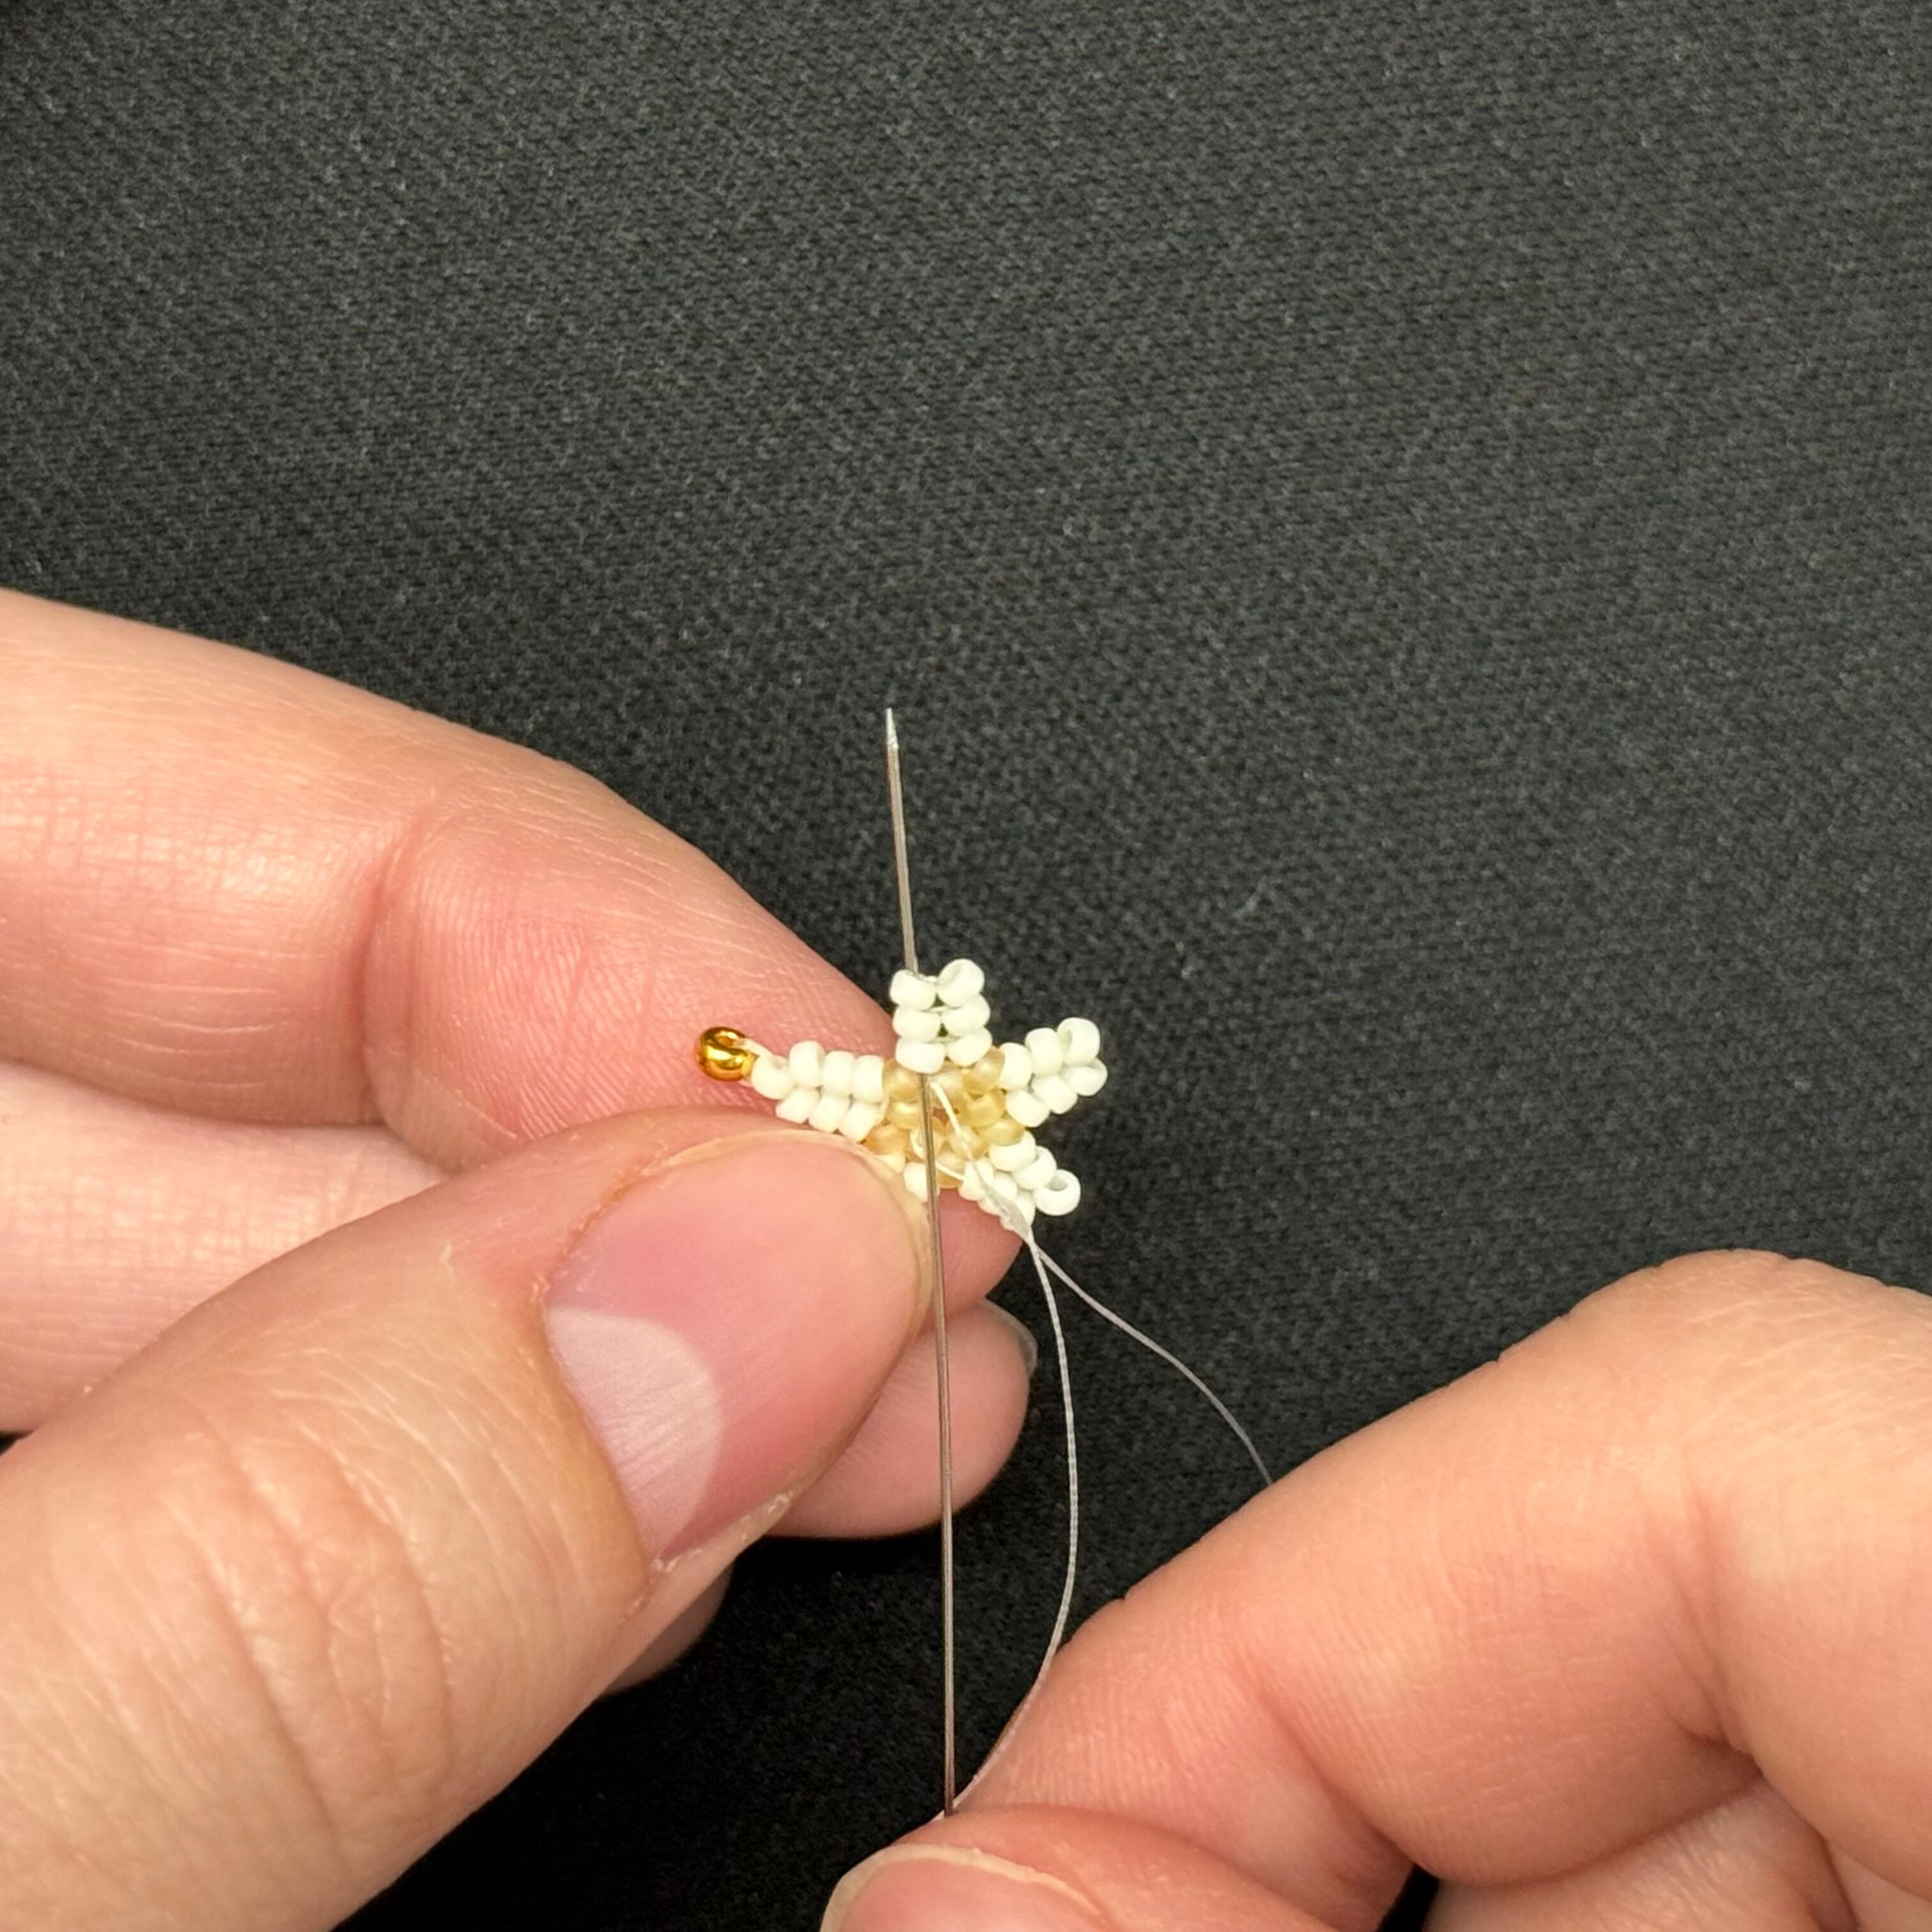
29. Continue along with the pattern by threading the needle through the next 132FR bead
30. And up the next three 2021 beads, add another 2021 bead here and repeat for the next arm of the star
31. Complete the next (and last) arm of the starfish
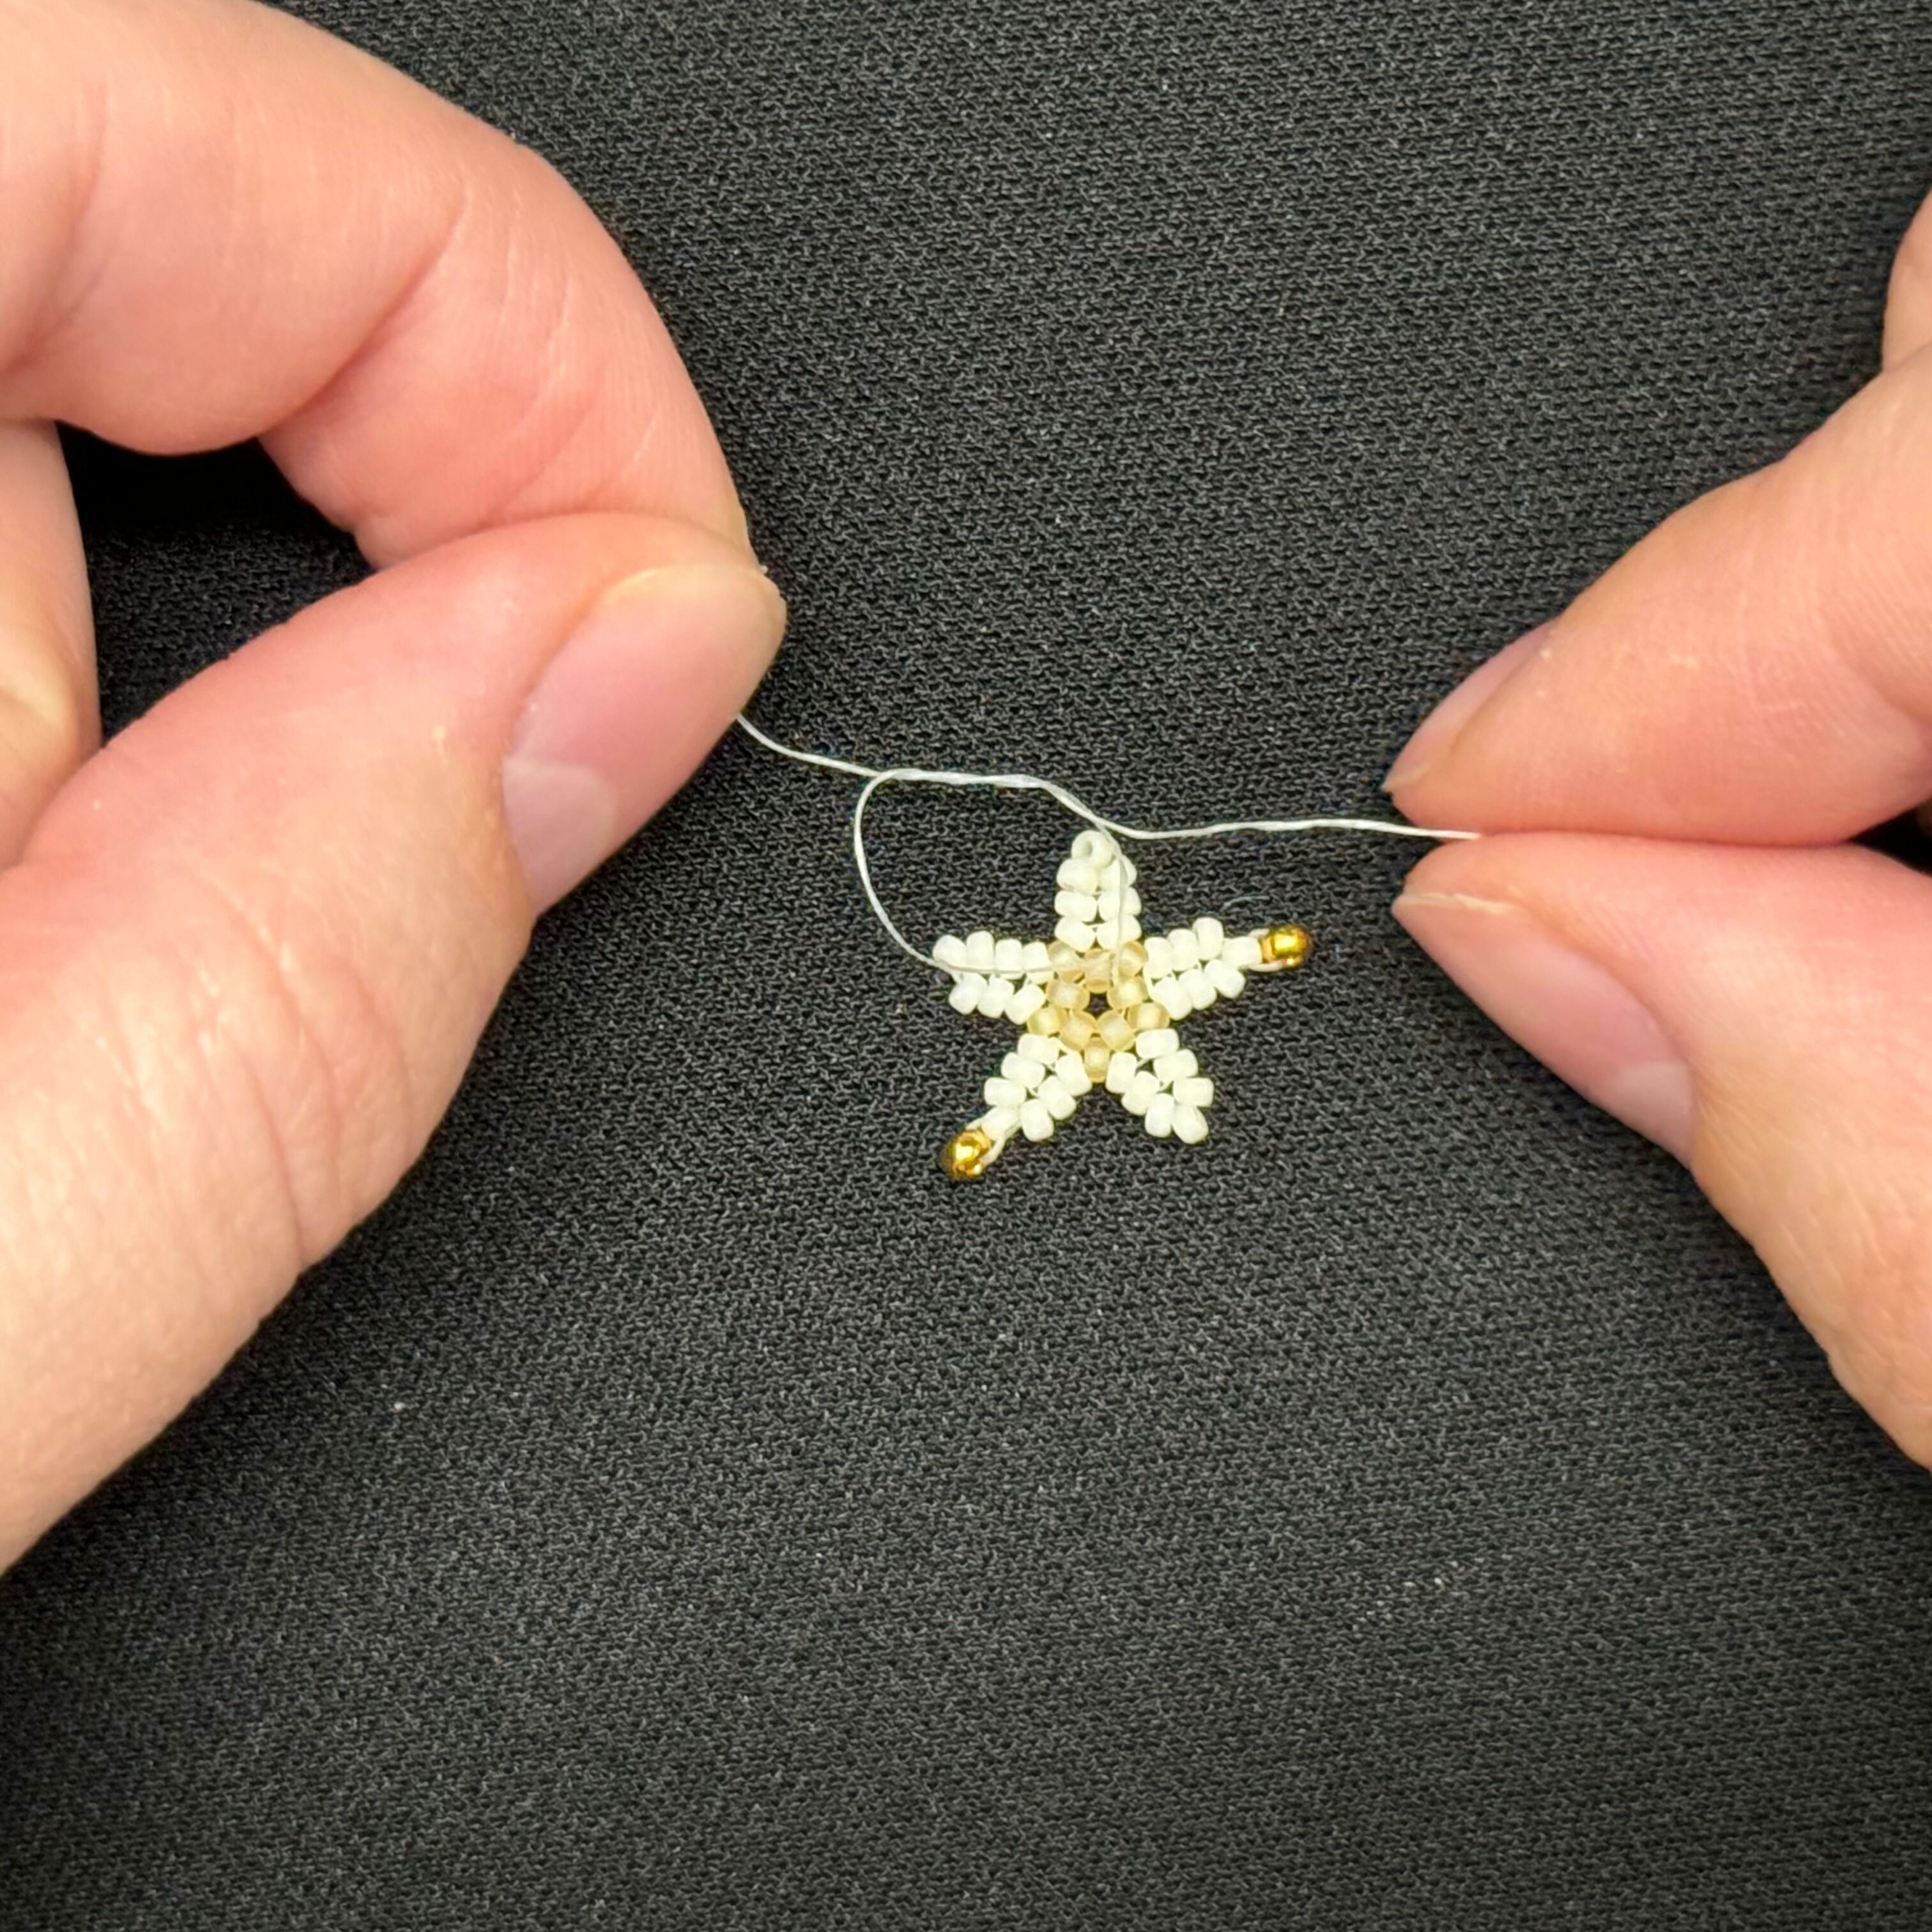
32. Take the two "tails" of fireline and tie two surgeon knots. You may glue with GS-Hypo Cement if you wish, and then carefully cut the ends off, avoiding the knot
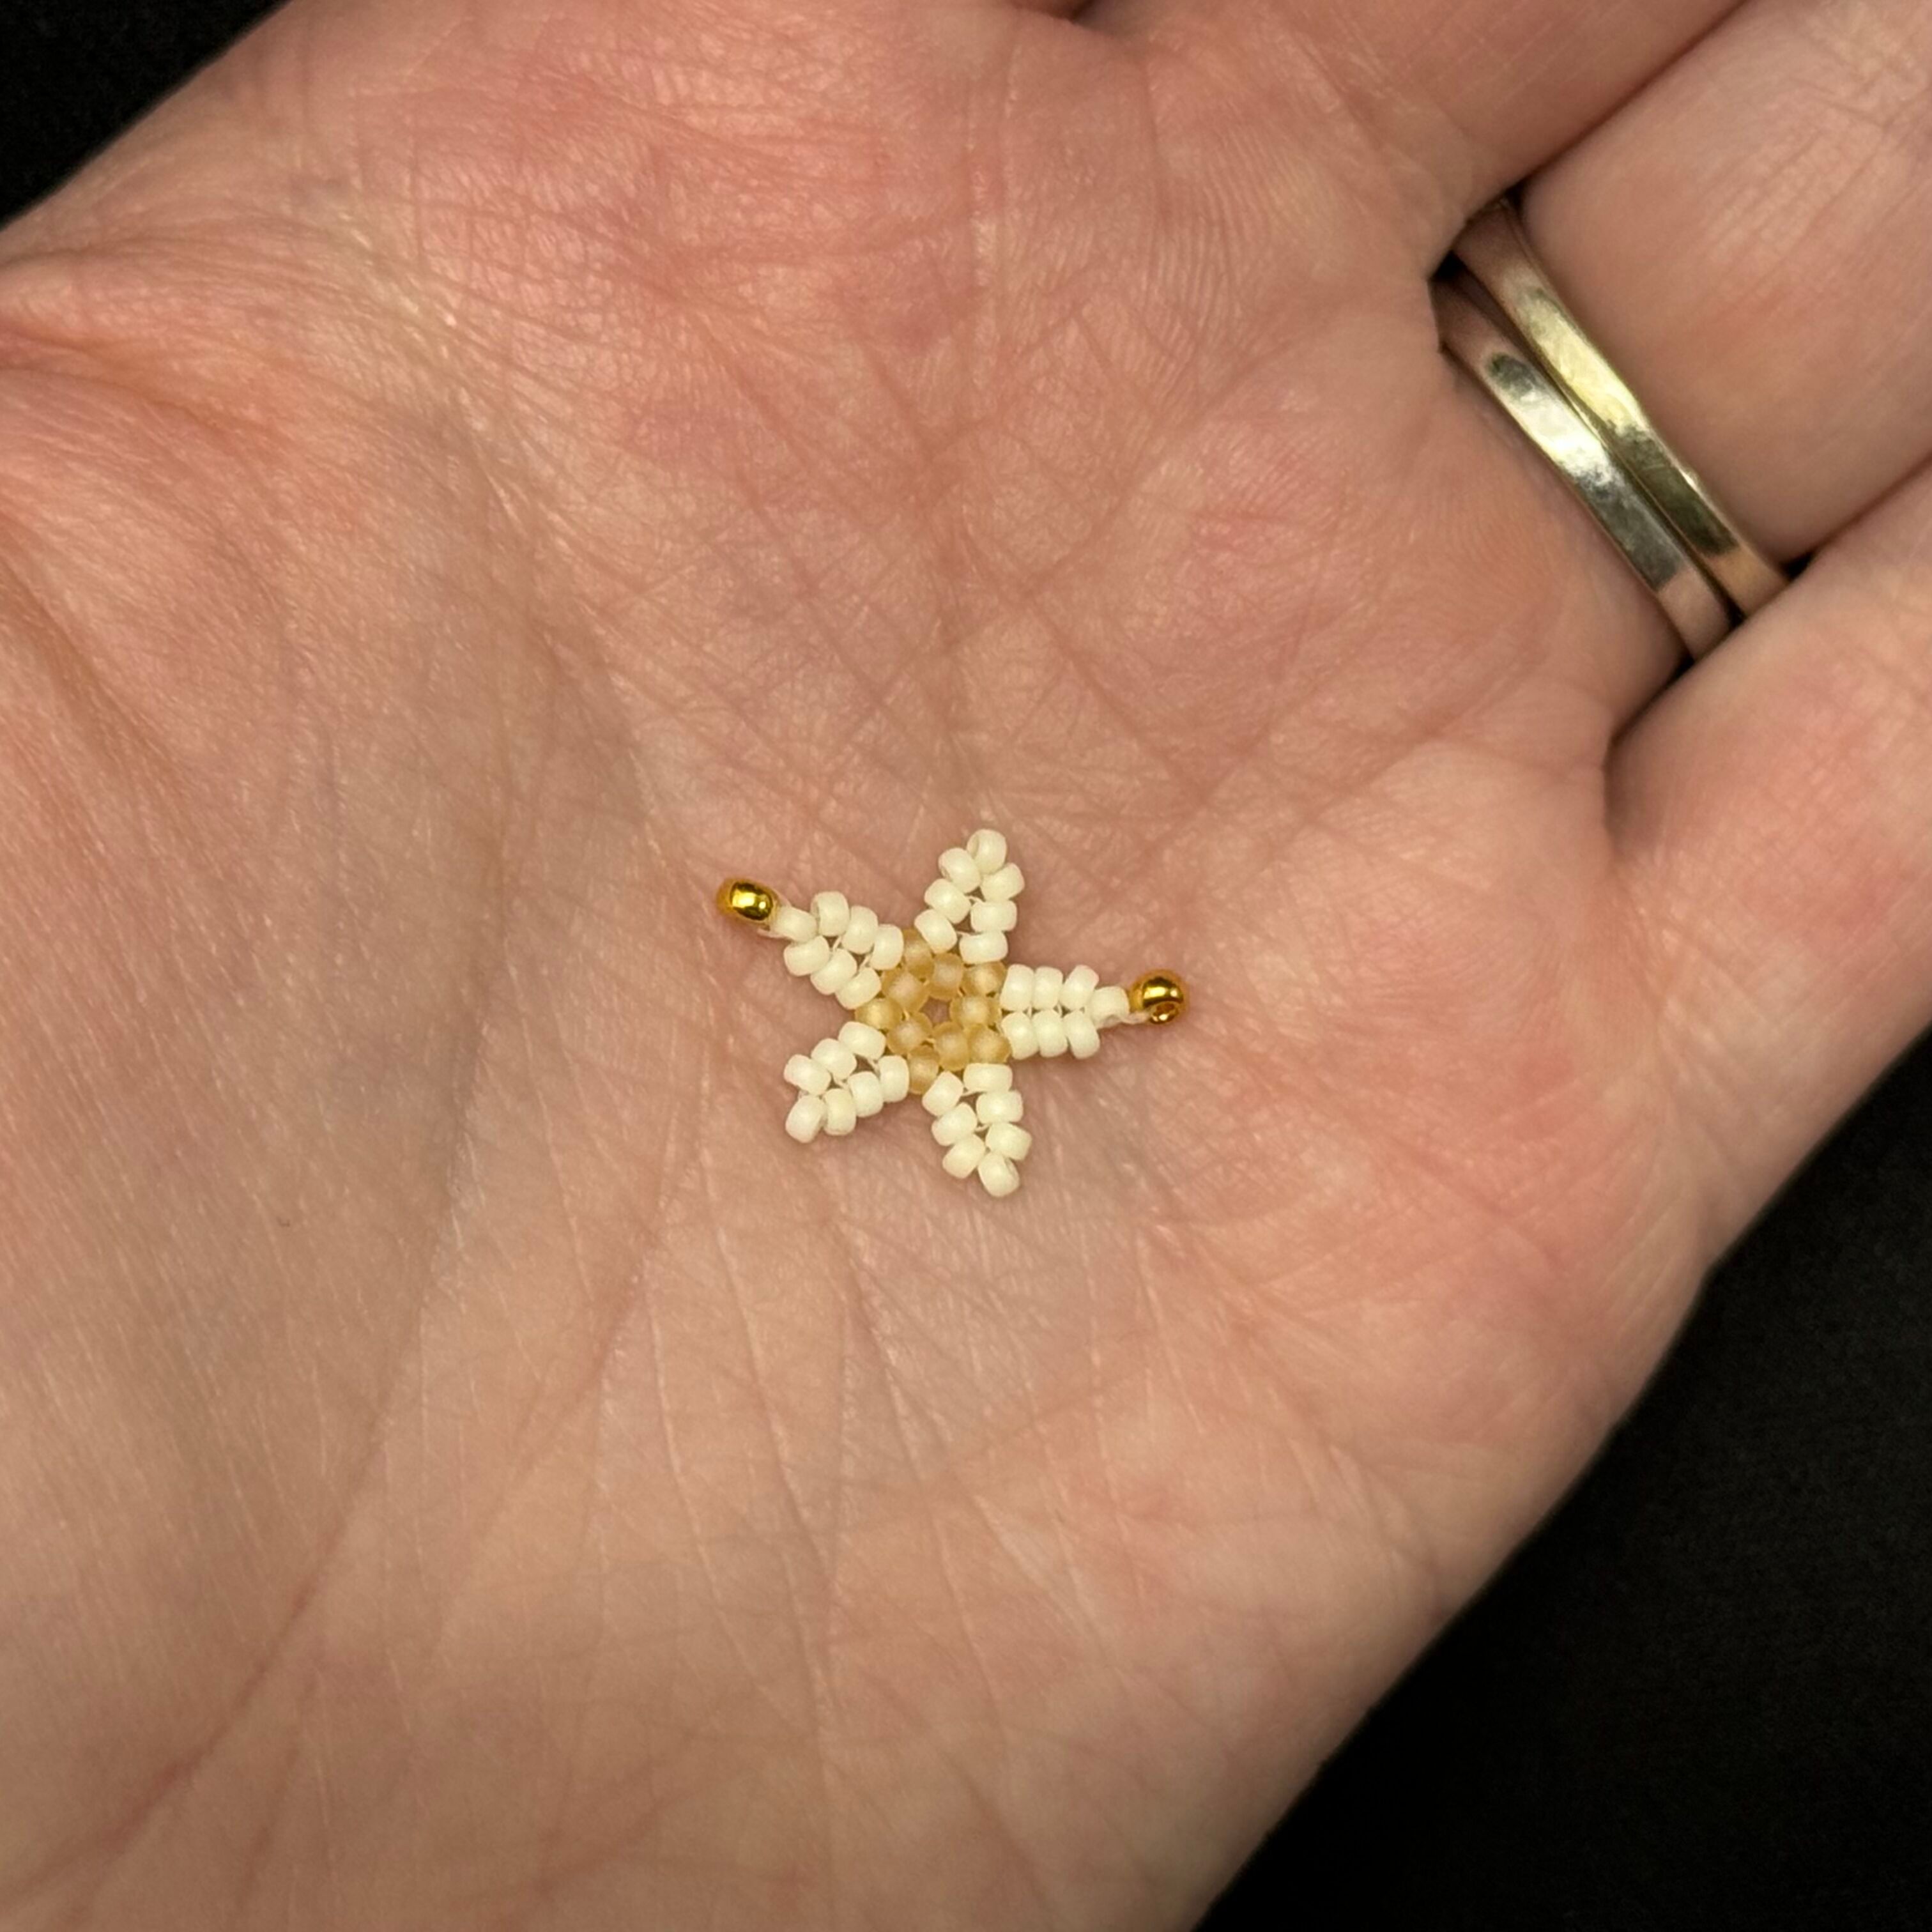
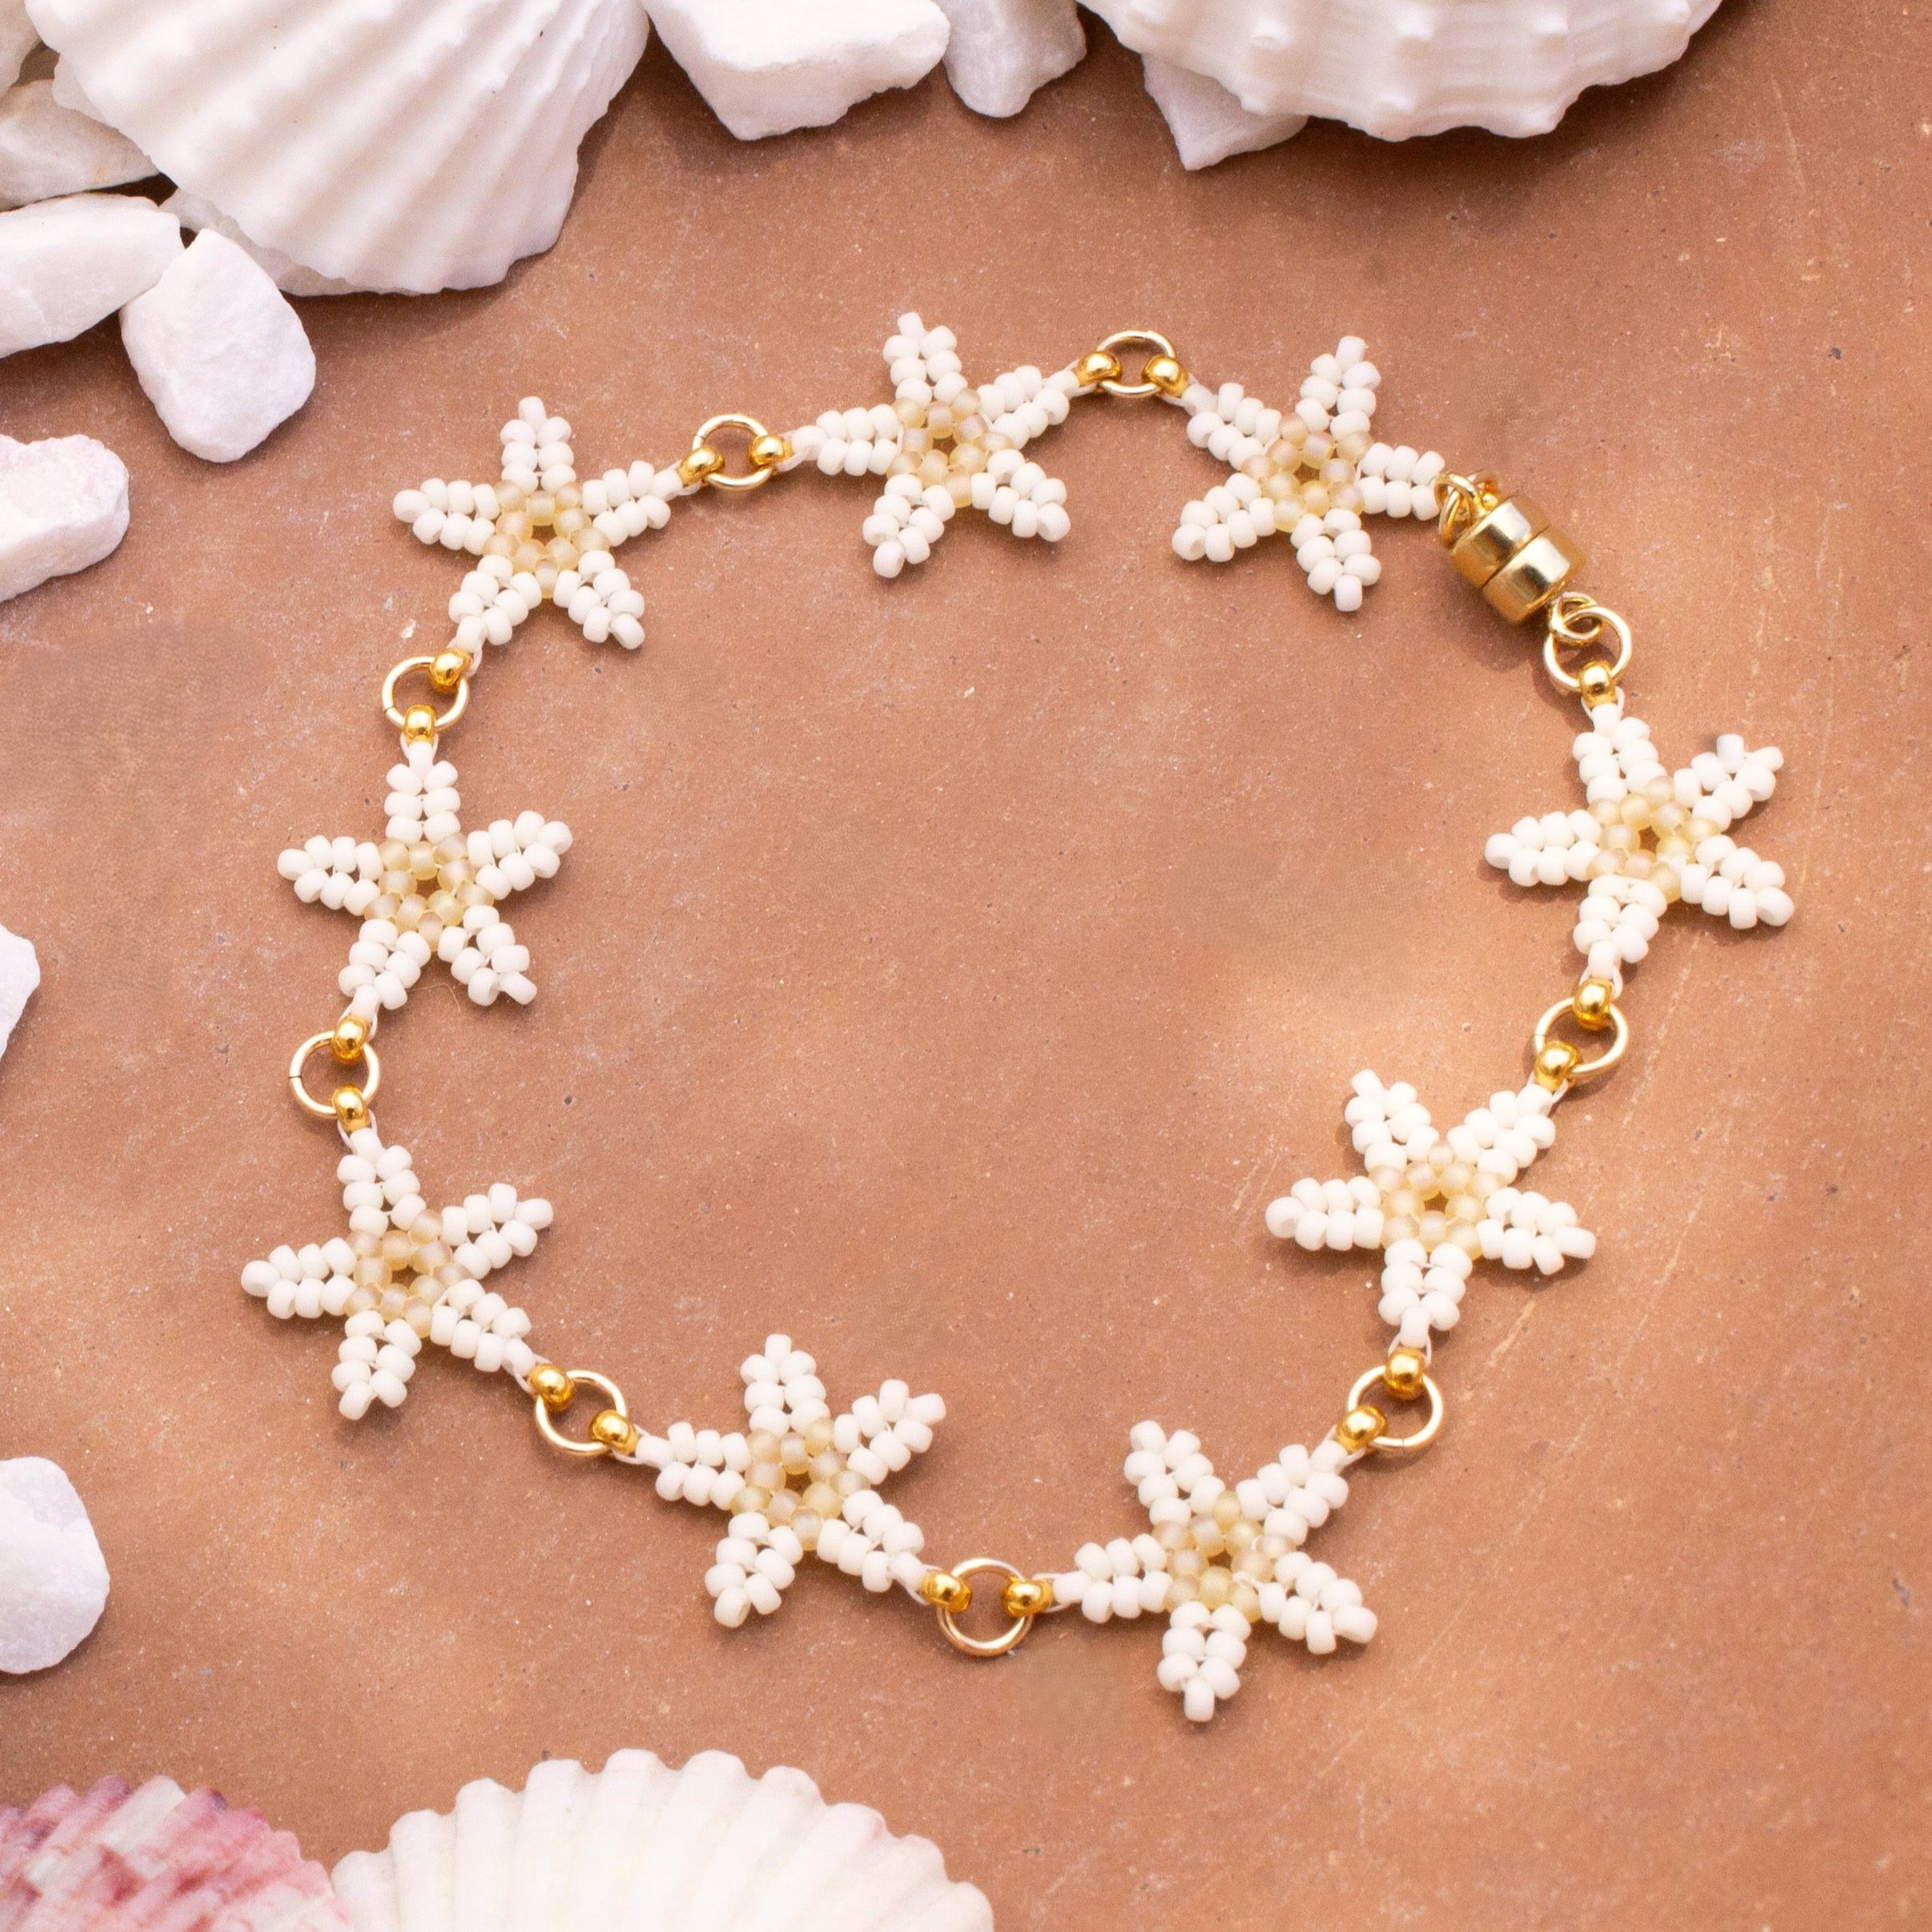
33. Finished with our first starfish! Repeat all the steps above until you have created 9 little starfish (or however many you need for your project if you wish to create something else using these little guys!)
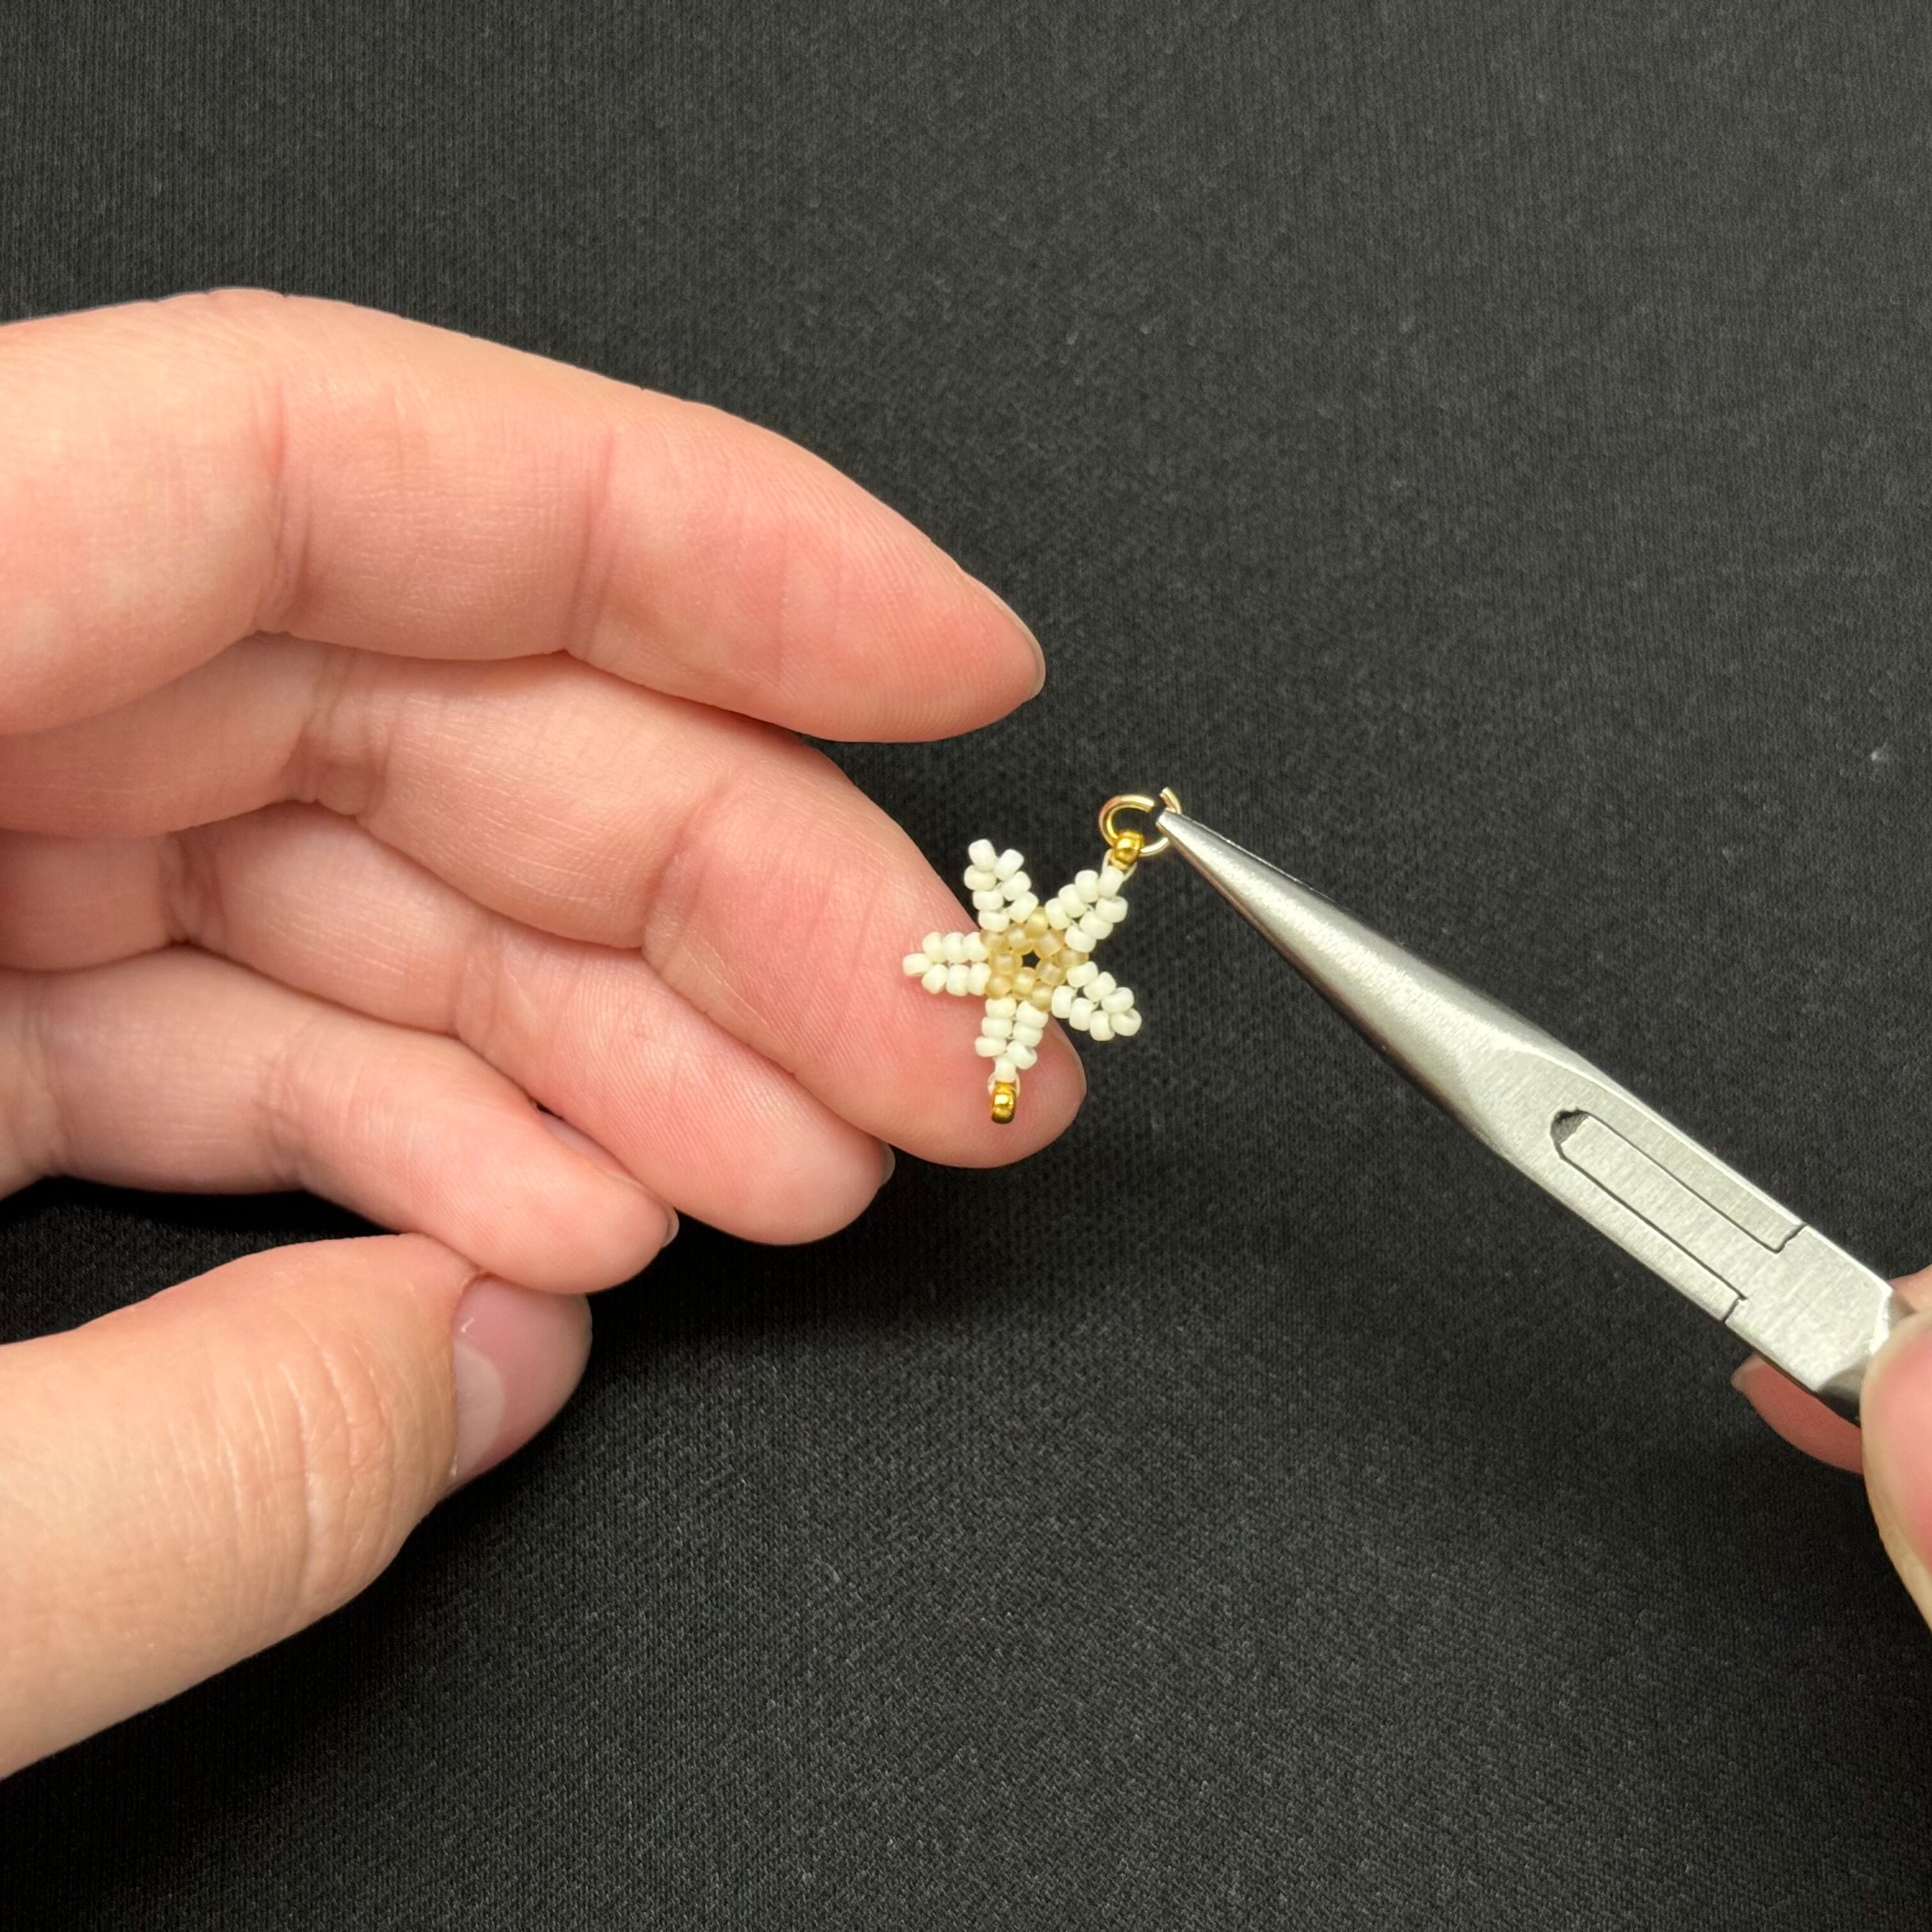
34. Once you have created all 9 starfish, gently attach a 4mm 22 gauge jump ring (must be 22 gauge) through one of the gold seed beads
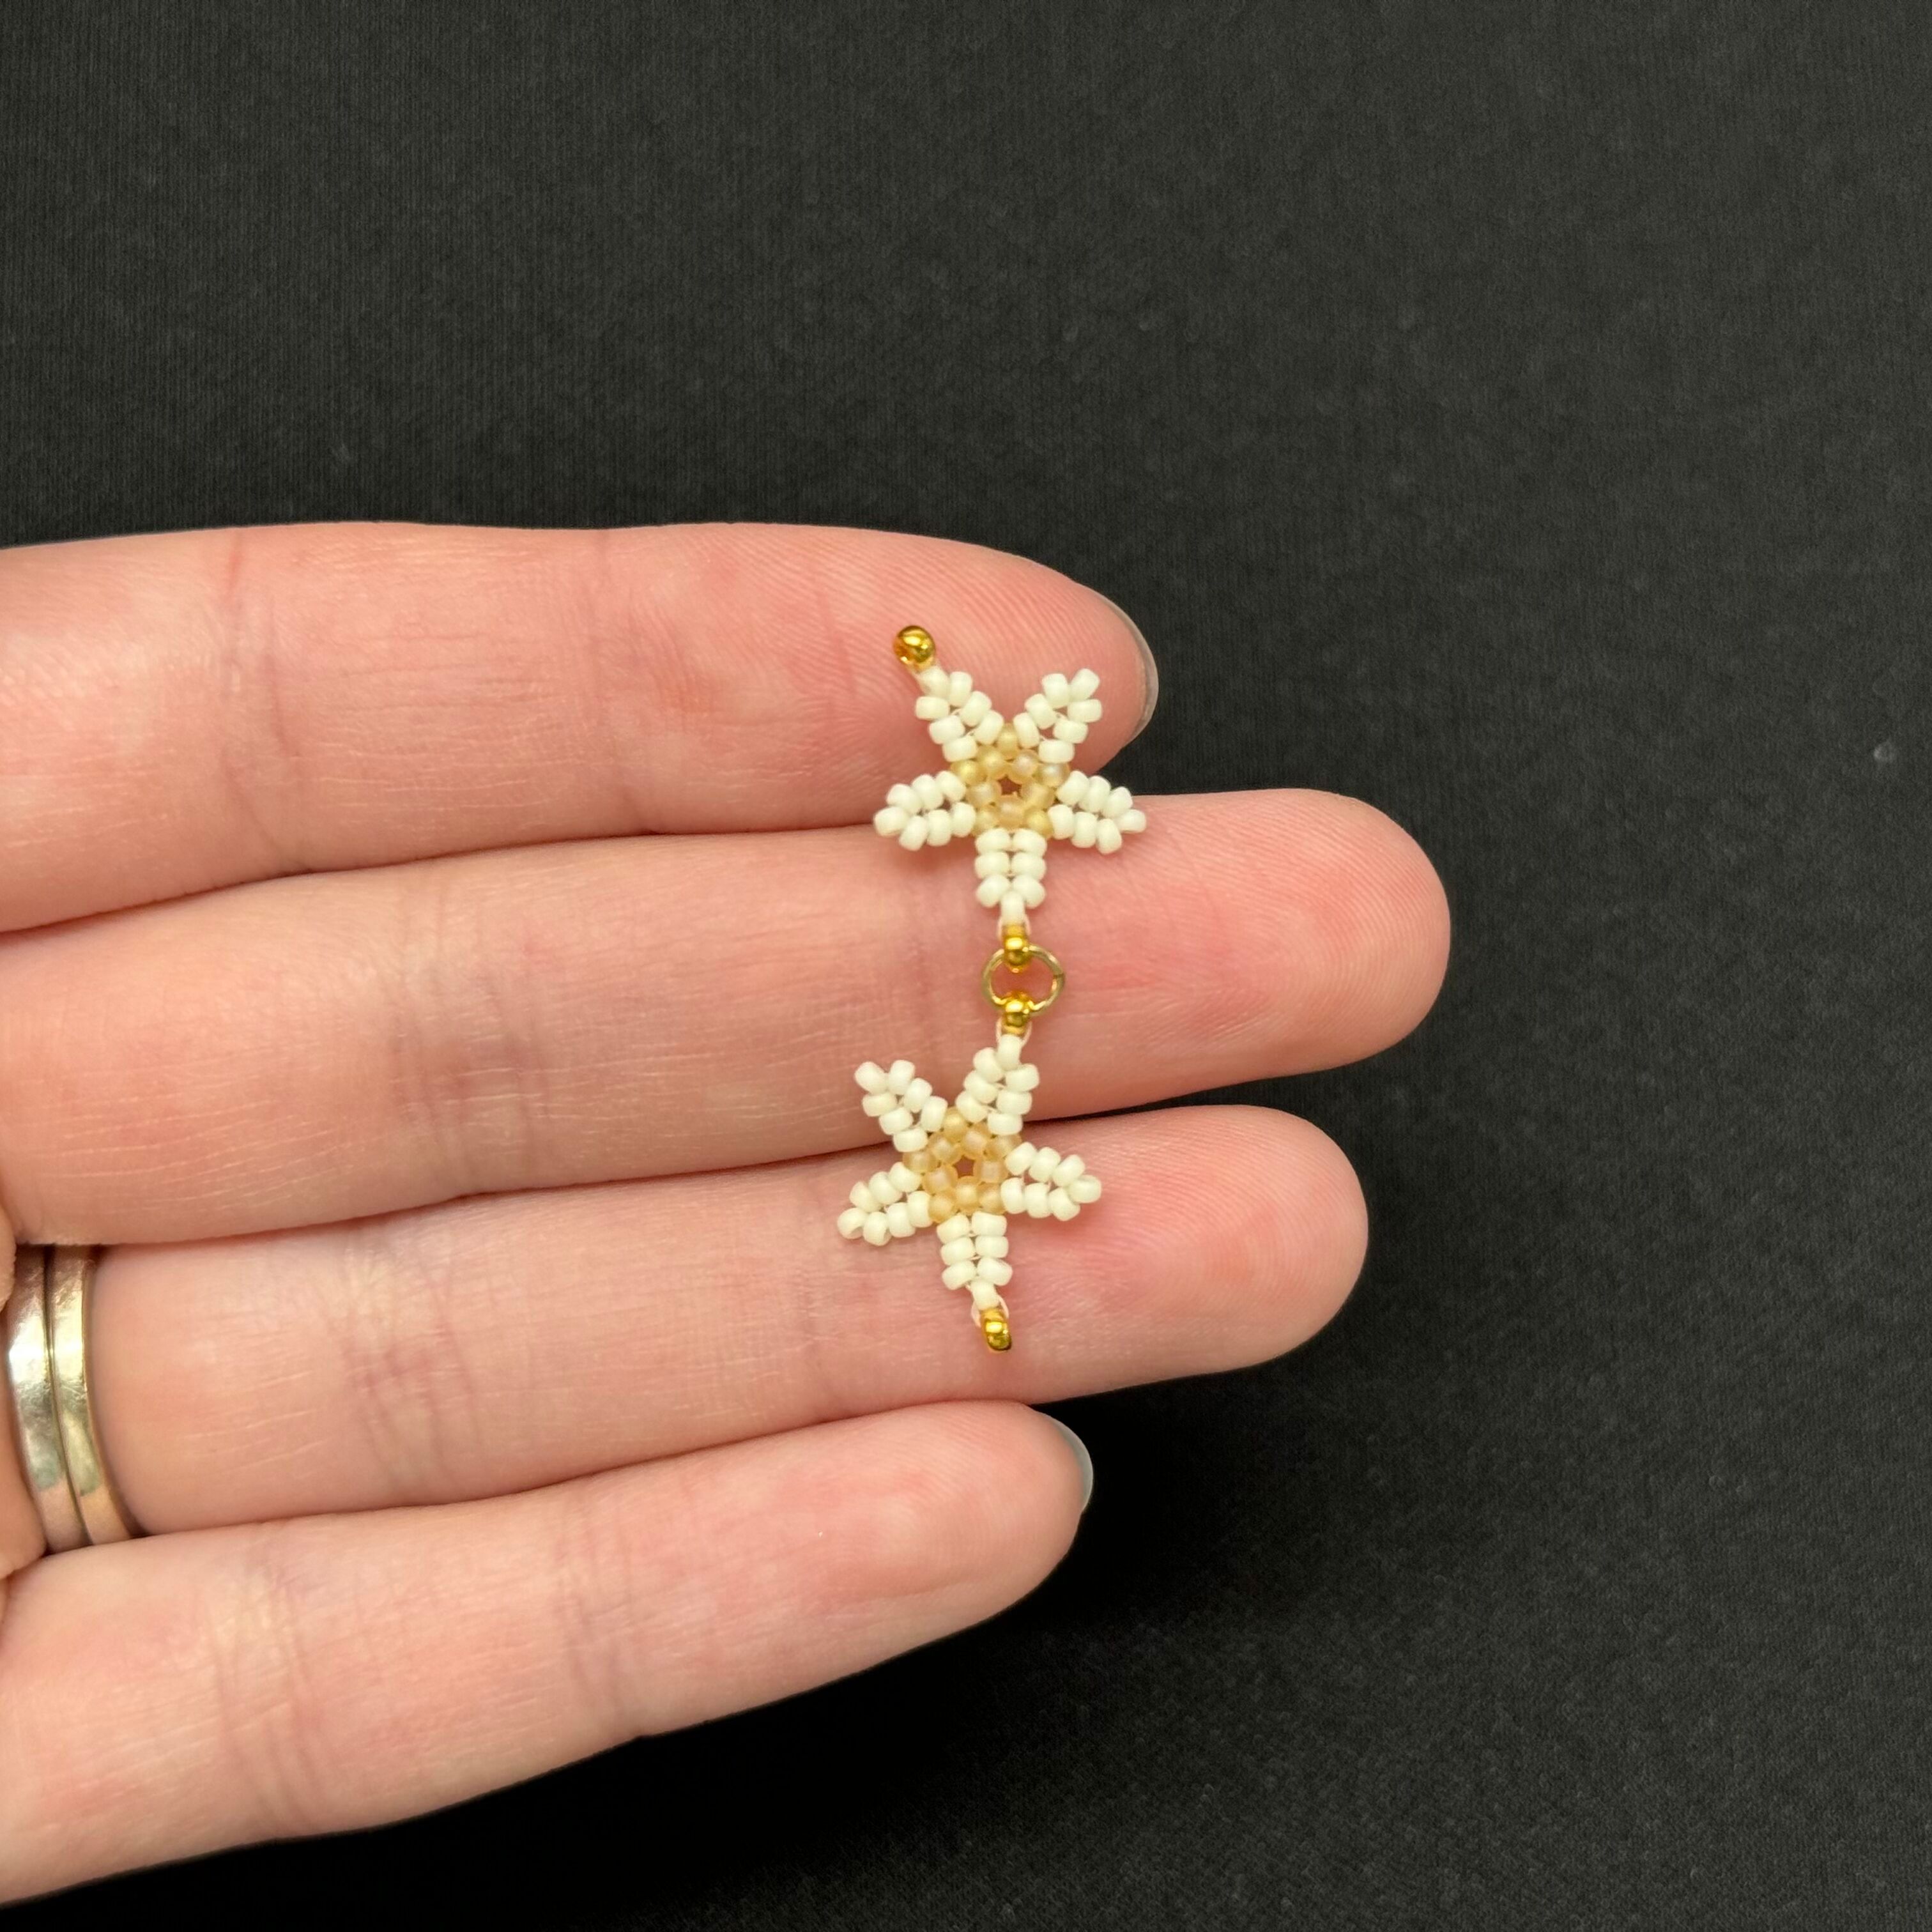
35. Gently add on a second starfish to the same jump ring and close
***IMPORTANT*** make sure the starfish are alternating in arms on each side for example: 1 arm without a gold bead pointing to the right then the next is 2 arms without a gold bead pointing to the right
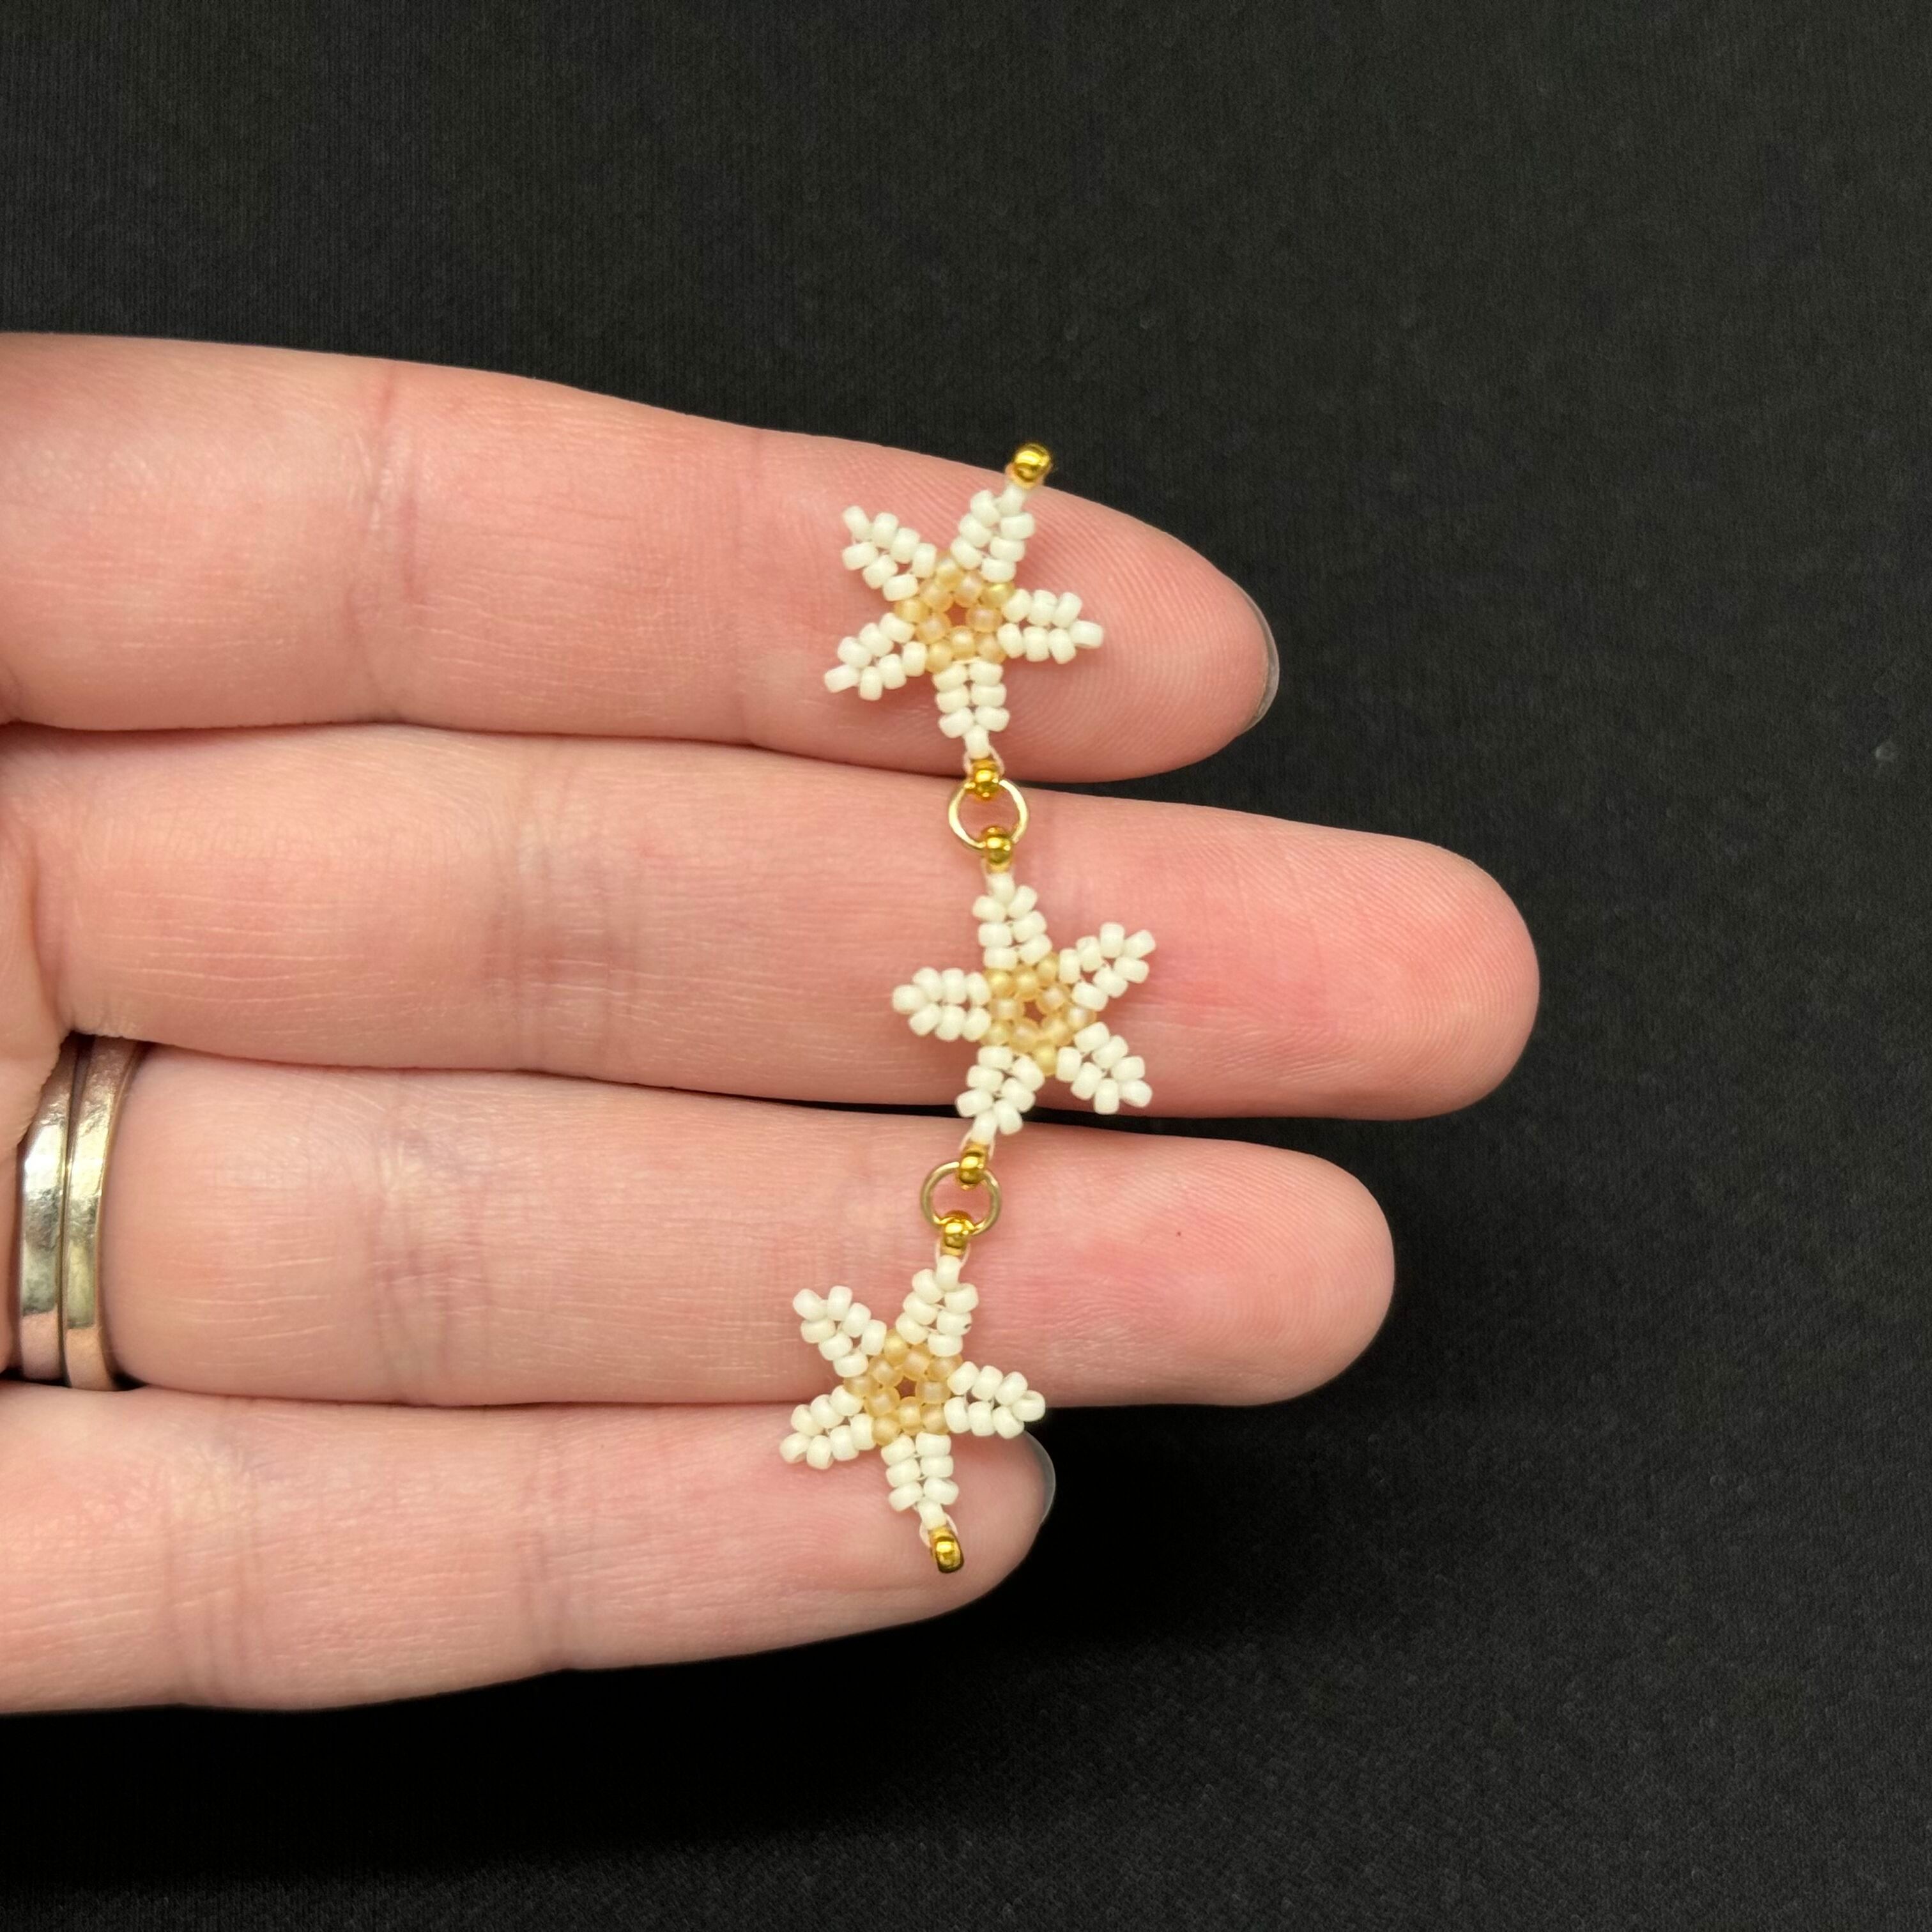
36. Continue with the pattern and a jump ring in between each starfish
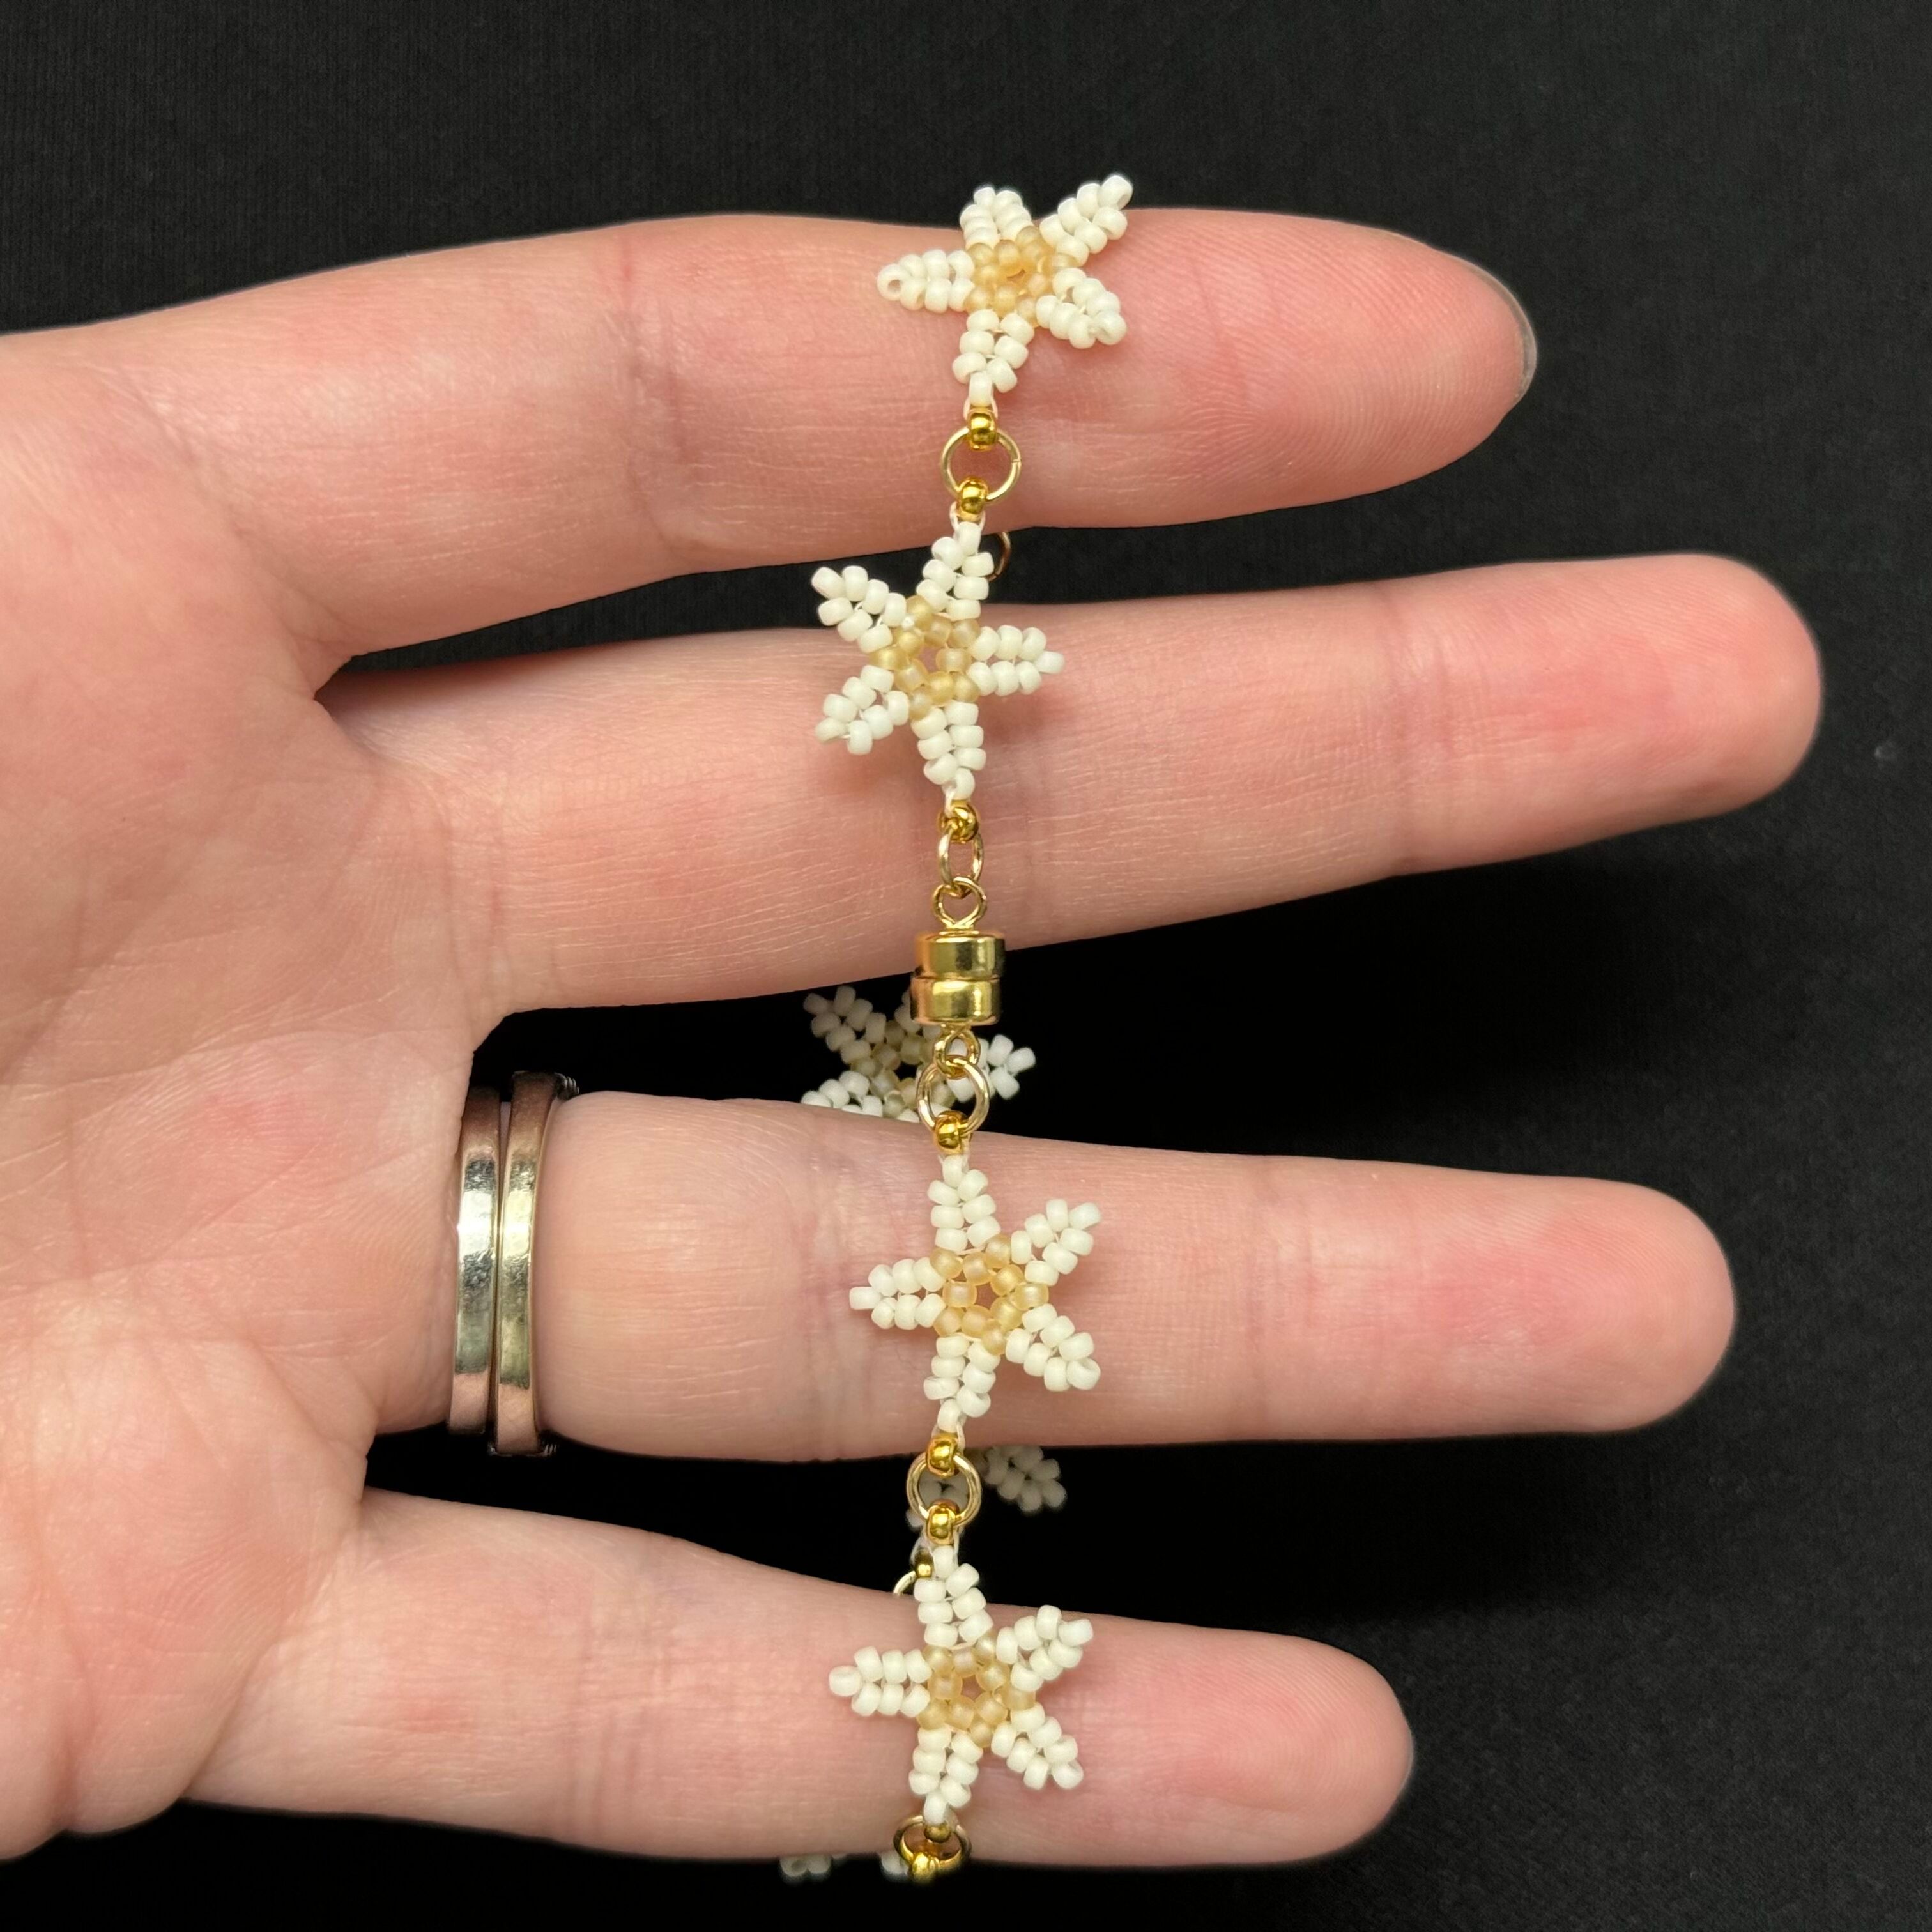
37. Continue until you have reached your desired length and attach a clasp using jump rings to complete your bracelet!
\\
Related Articles
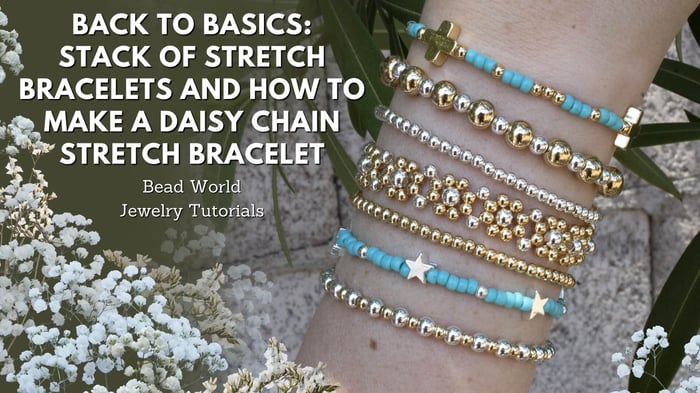
Back to Basics: Stack of Stretch Bracelets Including How to Make a Daisy Chain Stretch Bracelet
Back to Basics: Stack of Stretch Bracelets Including a Daisy Chain Stretch Bracelet Follow our...
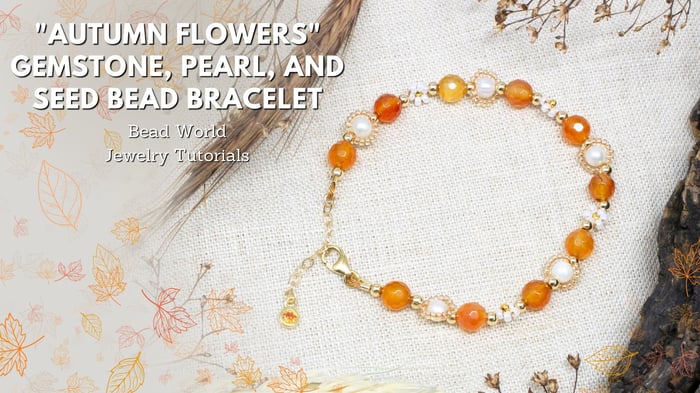
"Autumn Flowers" Gemstone, Pearl, and Seed Bead Bracelet
"Autumn Flowers" Gemstone, Pearl, and Seed Bead Bracelet This tutorial guides you through creating an...

Skeleton Hand Beaded Earrings
Skeleton Hand Beaded Earrings These earrings are crafted from white seed beads, intricately assembled to...