
Tutorials
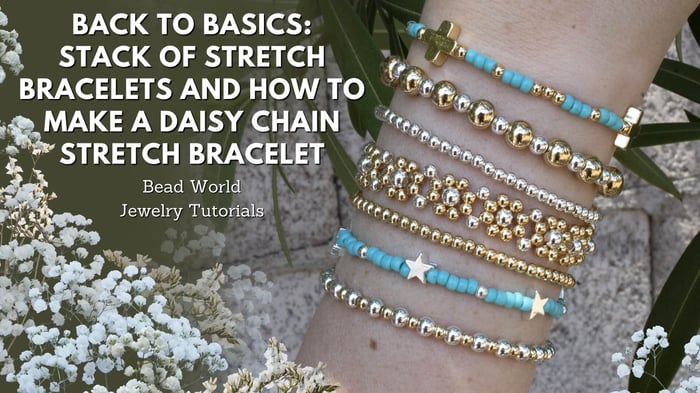
Back to Basics: Stack of Stretch Bracelets Including How to Make a Daisy Chain Stretch Bracelet
Back to Basics: Stack of Stretch Bracelets Including a Daisy Chain Stretch Bracelet
Follow our "Back to Basics" tutorial and learn how to make a stack of 7 stretch bracelets. We’ll show you how to mix gold and silver with turquoise seed beads for a stylish, trendy look. Perfect for beginners, this easy-to-follow tutorial covers the basics of making stretch bracelets. By the end, you’ll have a great set of bracelets to wear together or on their own. It's a fun and simple way to start making your own jewelry!
Materials Needed:
- 18K Gold Plated 3mm Round Anti Tarnish Coating - 100 Beads (you will need 2 packets)
- Sterling Silver Plated 3mm Round Anti Tarnish Coating - 100 Beads (1 pack)
- Sterling Silver Plated 4mm Round Anti Tarnish Coating - 100 Beads (1 Pack)
- 18K Gold Plated 6mm Round Anti Tarnish Coating - 20 Beads (1 pack - is enough for one bracelet up to 7 inches in length)
- .8mm Clear Stretch Magic (40 inches unstretched - 10 inches per bracelet is enough for a 6 or 7 inch bracelet after stretching)
- .5mm Clear Stretch Magic (32 inches for a 6 inch bracelet, 36 inches for a 7 inch bracelet)
- GS Hypo Cement (Red Tube)
- Size 8 Toho Seed Beads - 412D Opaque Turquoise
- 18K Gold Plated 9mm Square Cross Anti Tarnish (3)
- Sterling Silver Plated 6mm Star Anti Tarnish Coating (6)
Tools Required
Instructions on Construction:
Simple Stringing Bracelet
1. Cut 1 x 10” pieces of .8mm Stretch Magic, pre-stretch cord then attach a bead stop to one end of stretch cord - about 2 1/2” from end.
***Why do we stretch our elastic before making our bracelets?
Stretching elastic cord before stringing a bracelet is crucial for several reasons. It prevents future stretching, ensuring the bracelet maintains its original size and fit over time. Pre-stretching also ensures consistent tension, allowing beads to sit snugly against each other for a neat and professional look. Additionally, it helps identify any weak spots in the cord, reducing the risk of breakage and improving the security of knots tied at the end. Overall, taking a few moments to stretch the elastic cord results in a more durable, attractive, and well-fitting bracelet.
2. String on your beads until you have reached your desired length for your bracelet. For this bracelet, we strung on 6 inches of the 3mm gold beads
3. Now, we will learn how to secure with a "Surgeon's Knot." Holding your strung beads as they can easily get caught in the knot, create a single square / overhand knot and hold it there for the next step.
**A surgeon's knot is a popular and reliable knot used in beading, especially when working with stretchy cords or when you need an extra secure hold. It's a variation of the square knot but with an extra loop for added security.
4. Create another square / overhand knot above the first knot, except this time loop the stretch cord twice through the knot. *See second example below*
5. Pull this knot tight
6. Thread one of the tails back through a gold bead, add a dab of hypo cement onto the knot (from all sides). Pull tail to center knot in the middle of the stardust bead, you should have one tail sticking out either side of the bead.
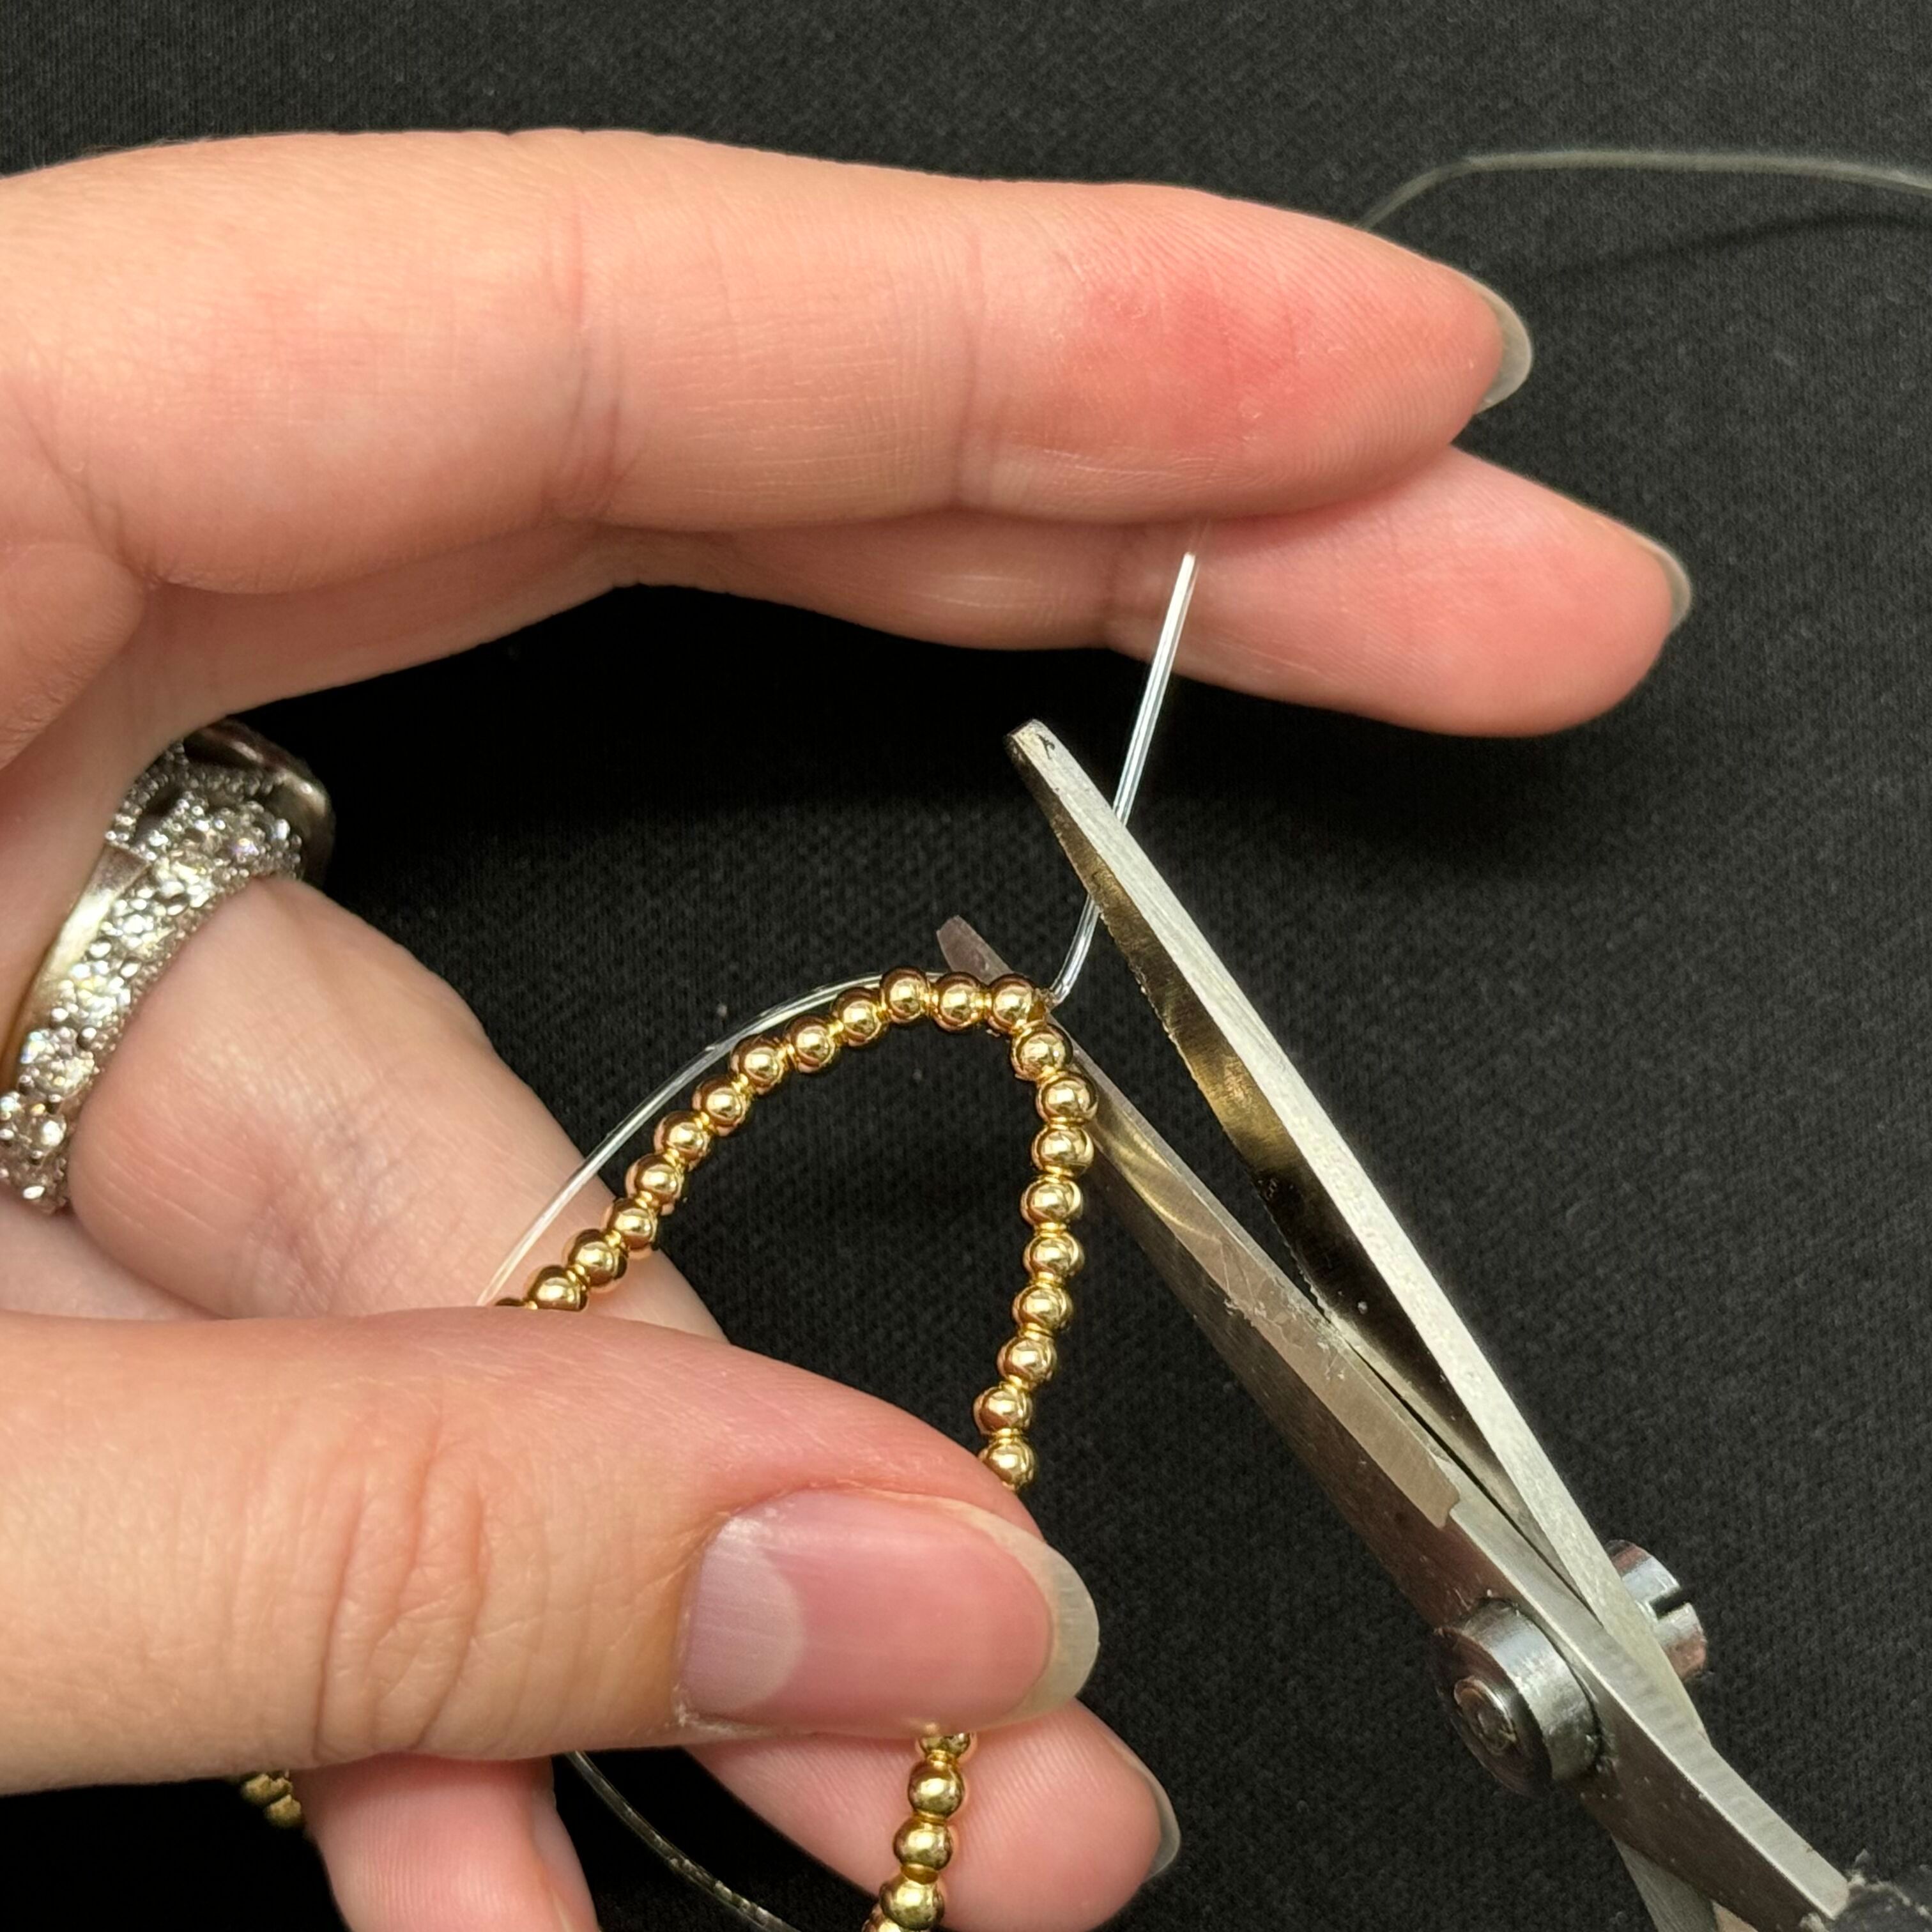
7. Leave the bracelet for at least a couple of hours for the hypo cement to set up, then trim tails. You can hold onto one tail, pull the opposite tail & trim close as you can. The other side you just trim as close as you can.
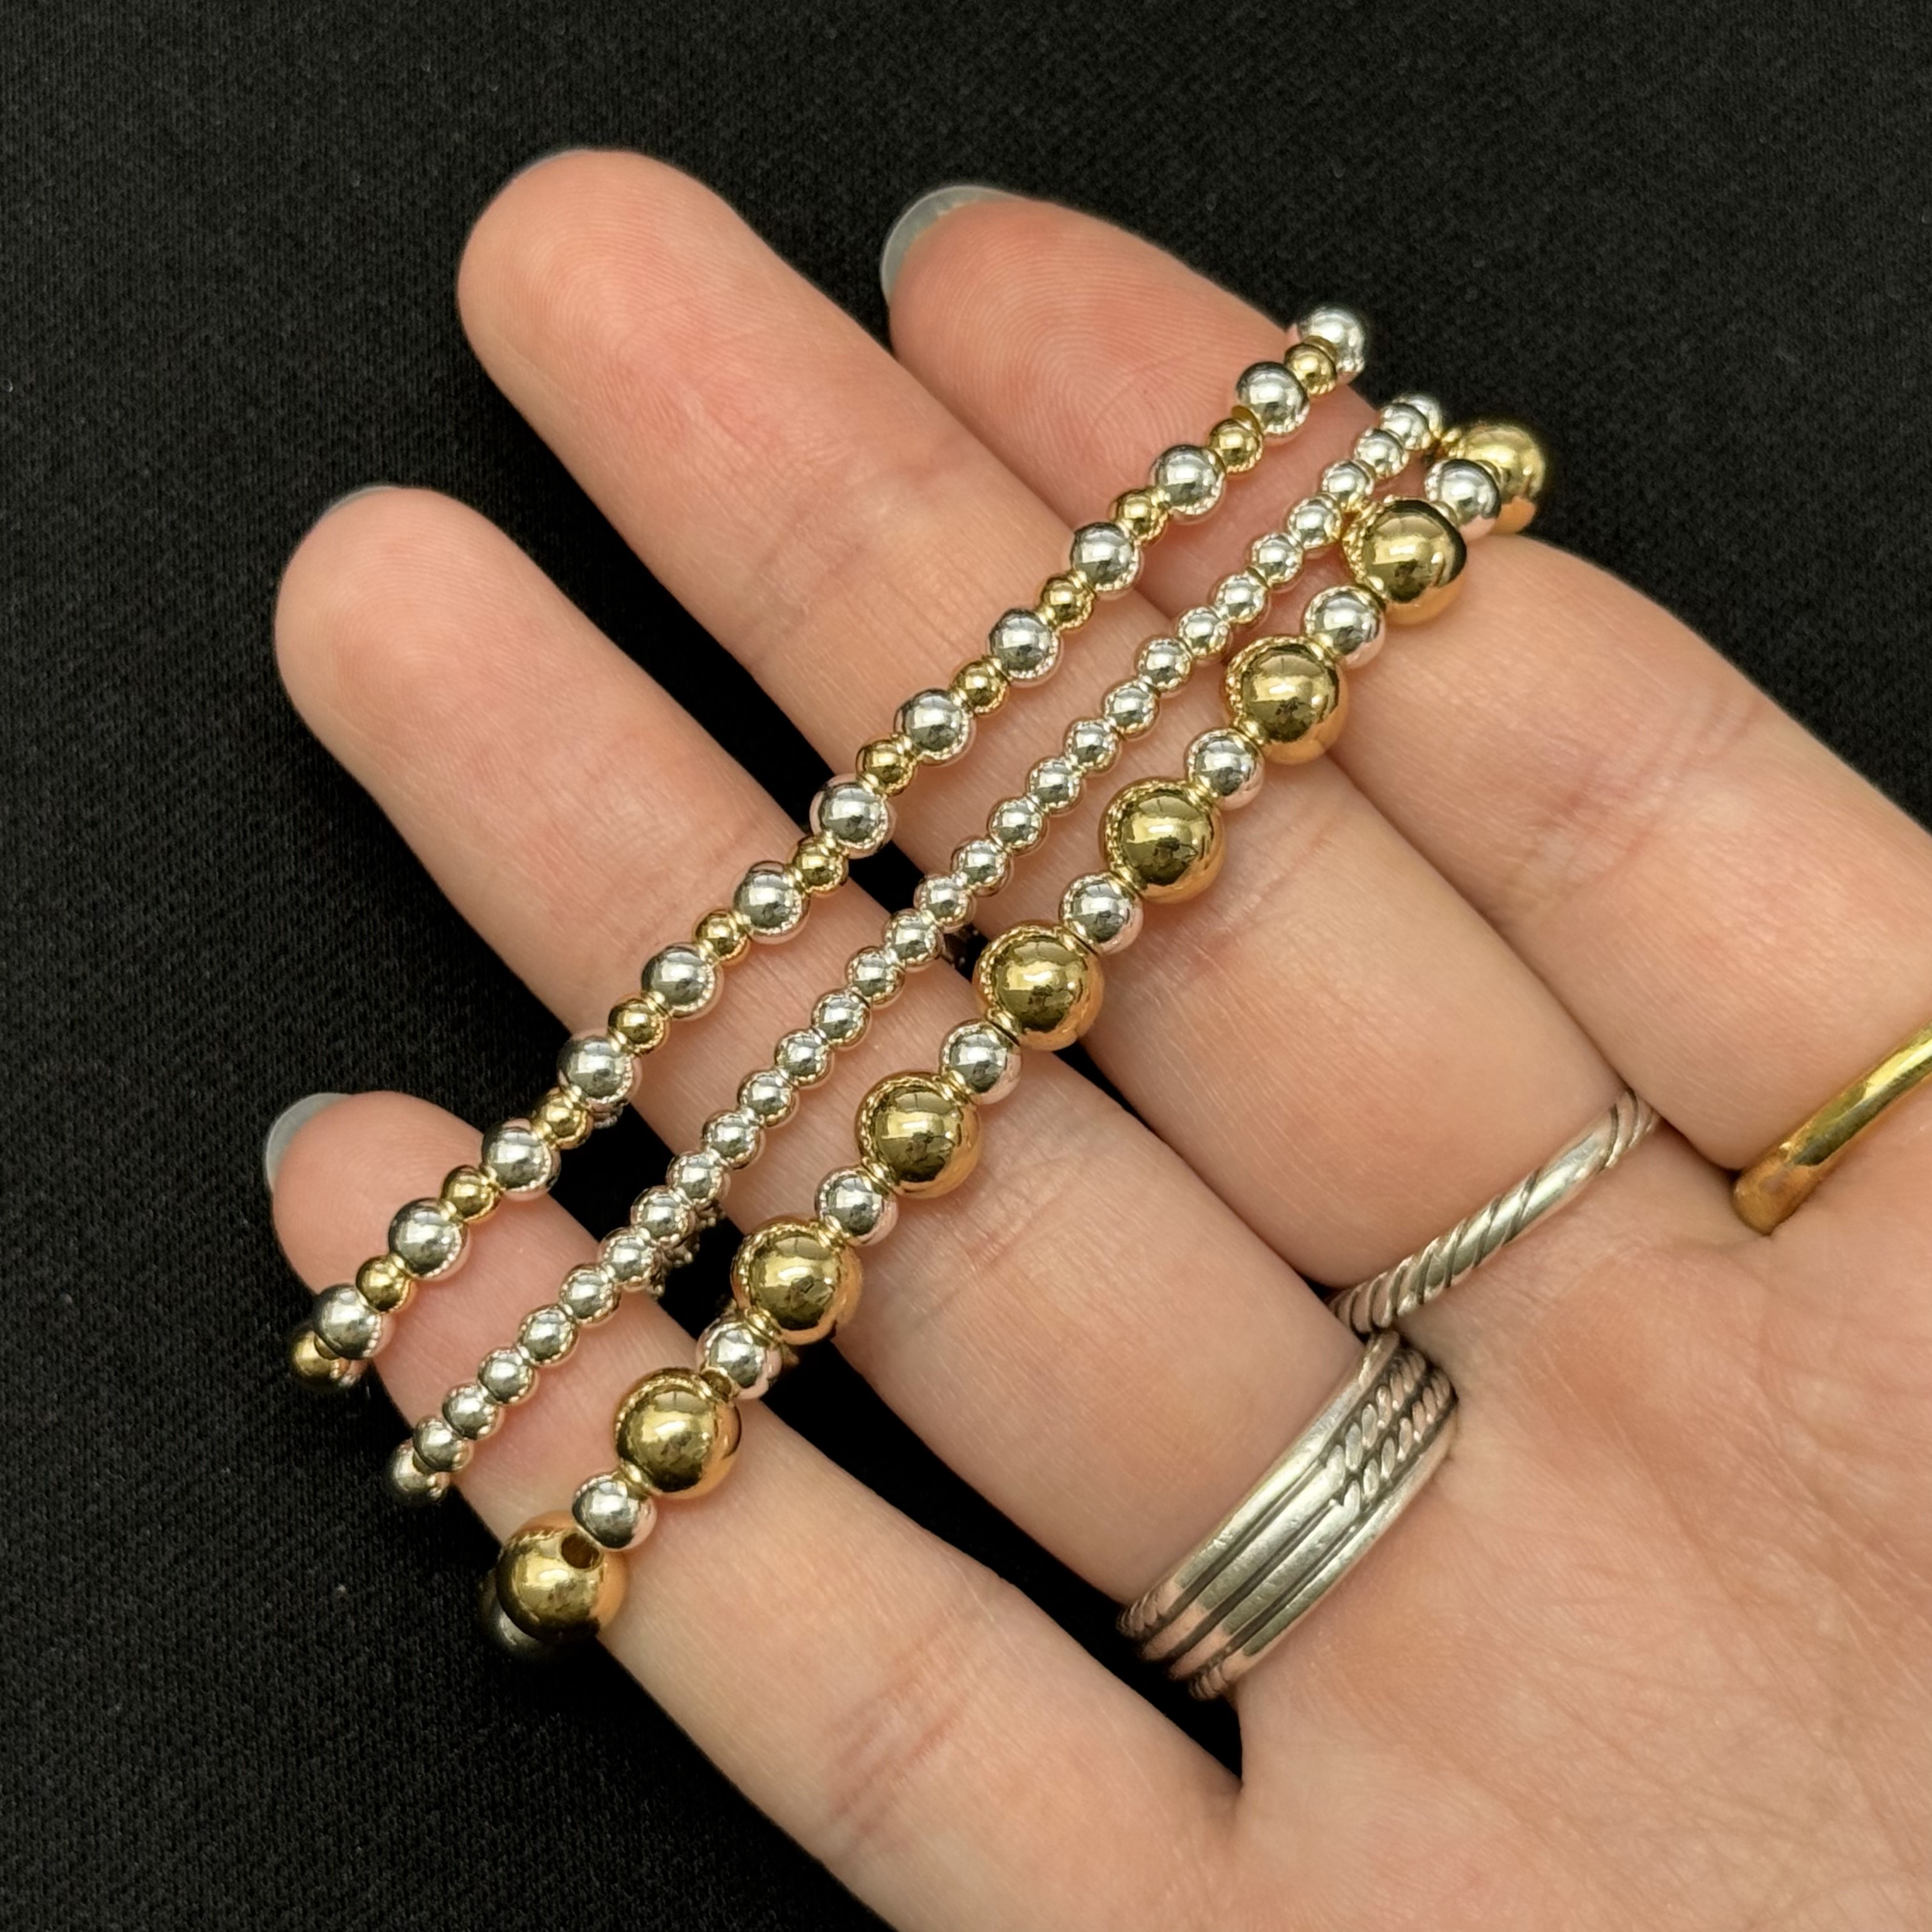
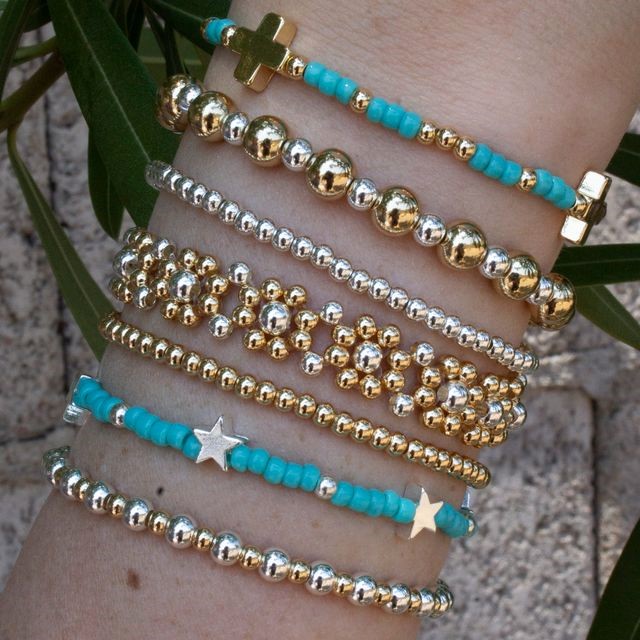
8. Repeat steps to create the rest of the simple stringing stretch bracelets. You can change it up with a simple, A-B-A-B Pattern as shown with the first and third bracelet shown above. The first (top) bracelet uses 4mm Silver bead, 3mm Gold bead, 4mm Silver bead, 3mm Gold bead and so on. The center bracelet uses just 3mm silver beads. The third (bottom) bracelet uses 6mm Gold bead, 4mm Silver bead, 6mm Gold bead, 4mm Silver bead and so on.
Turquoise and Gold Cross Stretch Bracelet

1. Cut 10 inches of .8mm stretch magic and pre stretch the cord. Place a bead stop at one end of the cord. Now, follow the pattern for the turquoise and gold Cross bracelet: 3 3mm gold beads - 3 turquoise beads - 1 gold bead - 3 turquoise beads - 1 gold bead - 1 gold cross bead - 1 gold bead - 3 turquoise beads 1 gold bead - 3 turquoise beads - 3 gold beads - and so on, continuing the pattern until you have your desired length.
*This bracelet is 6 inches in long, to add more length you have a few options to keep the integrity of the pattern:
1. Keep stringing until you have a total of 4 crosses on your bracelet - this will make the bracelet 8 inches in length
2. Use 4 turquoise beads instead of 3 in the pattern, this will add a little more than an inch to the length of your bracelet
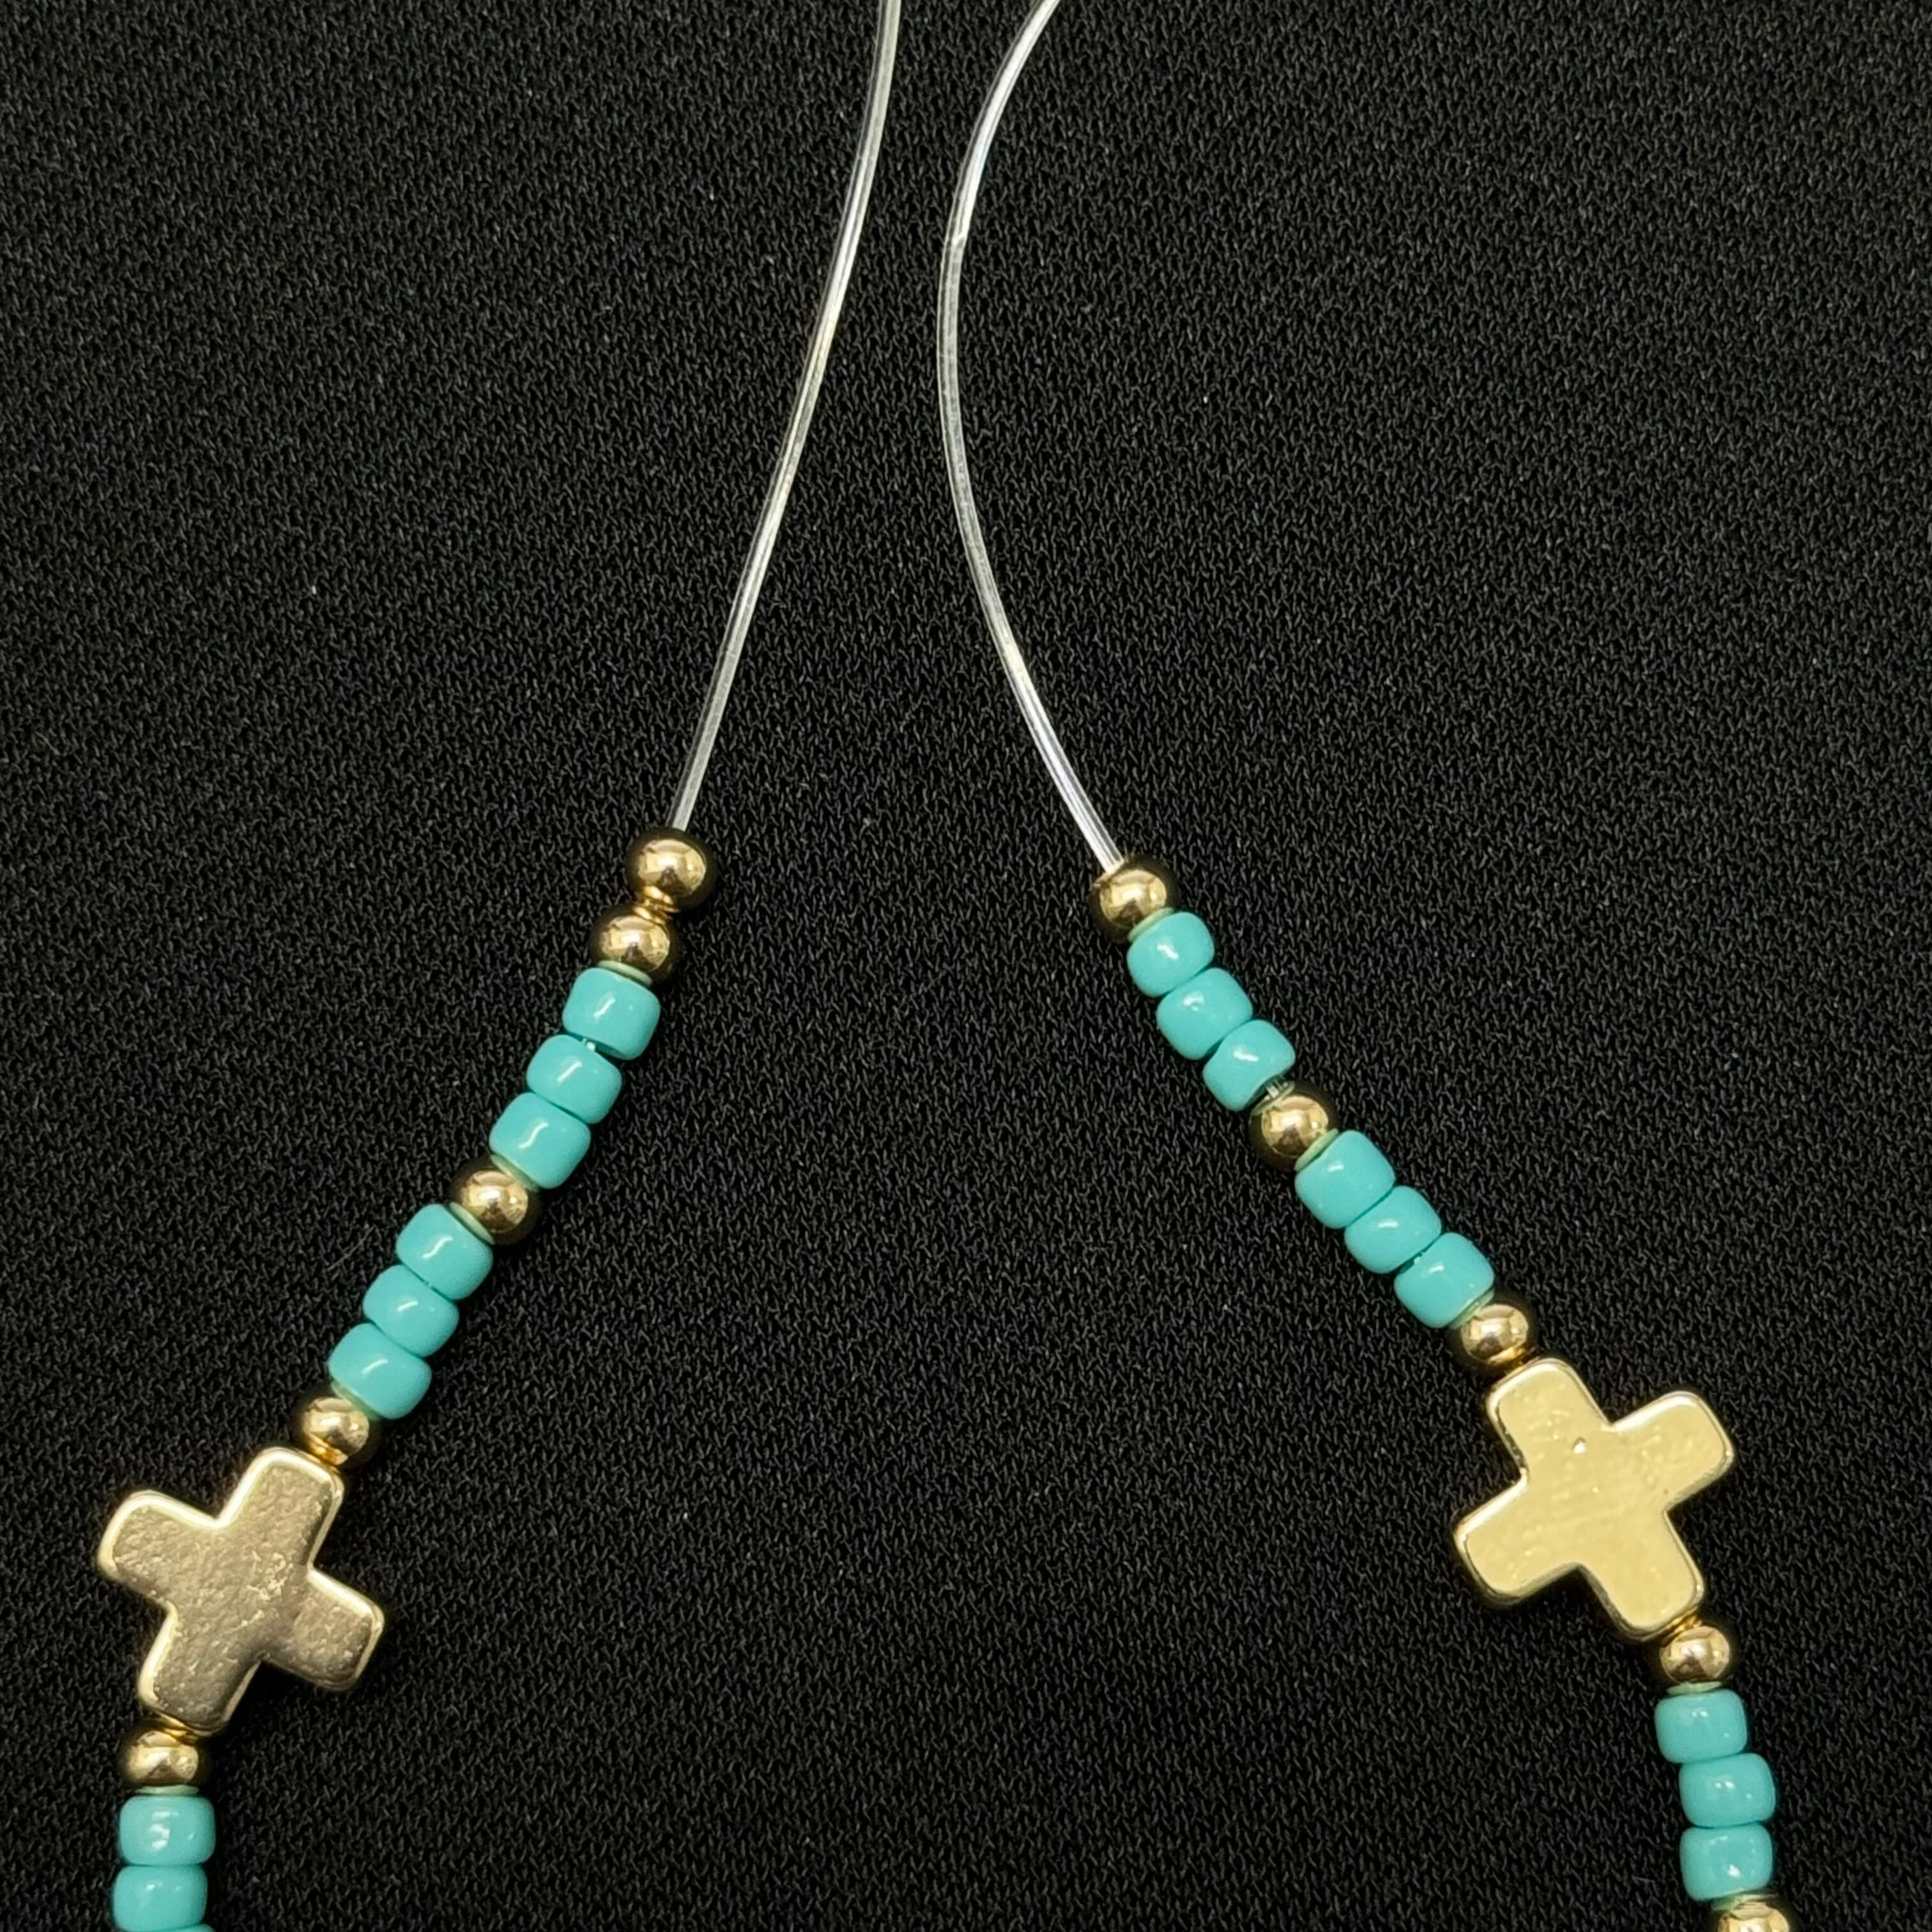
2. When you've completed stringing your bracelet and are happy with the length. Take off one of the gold beads on the left and string it on the right strand (we will be pulling the knot into the center of the 3 gold beads)
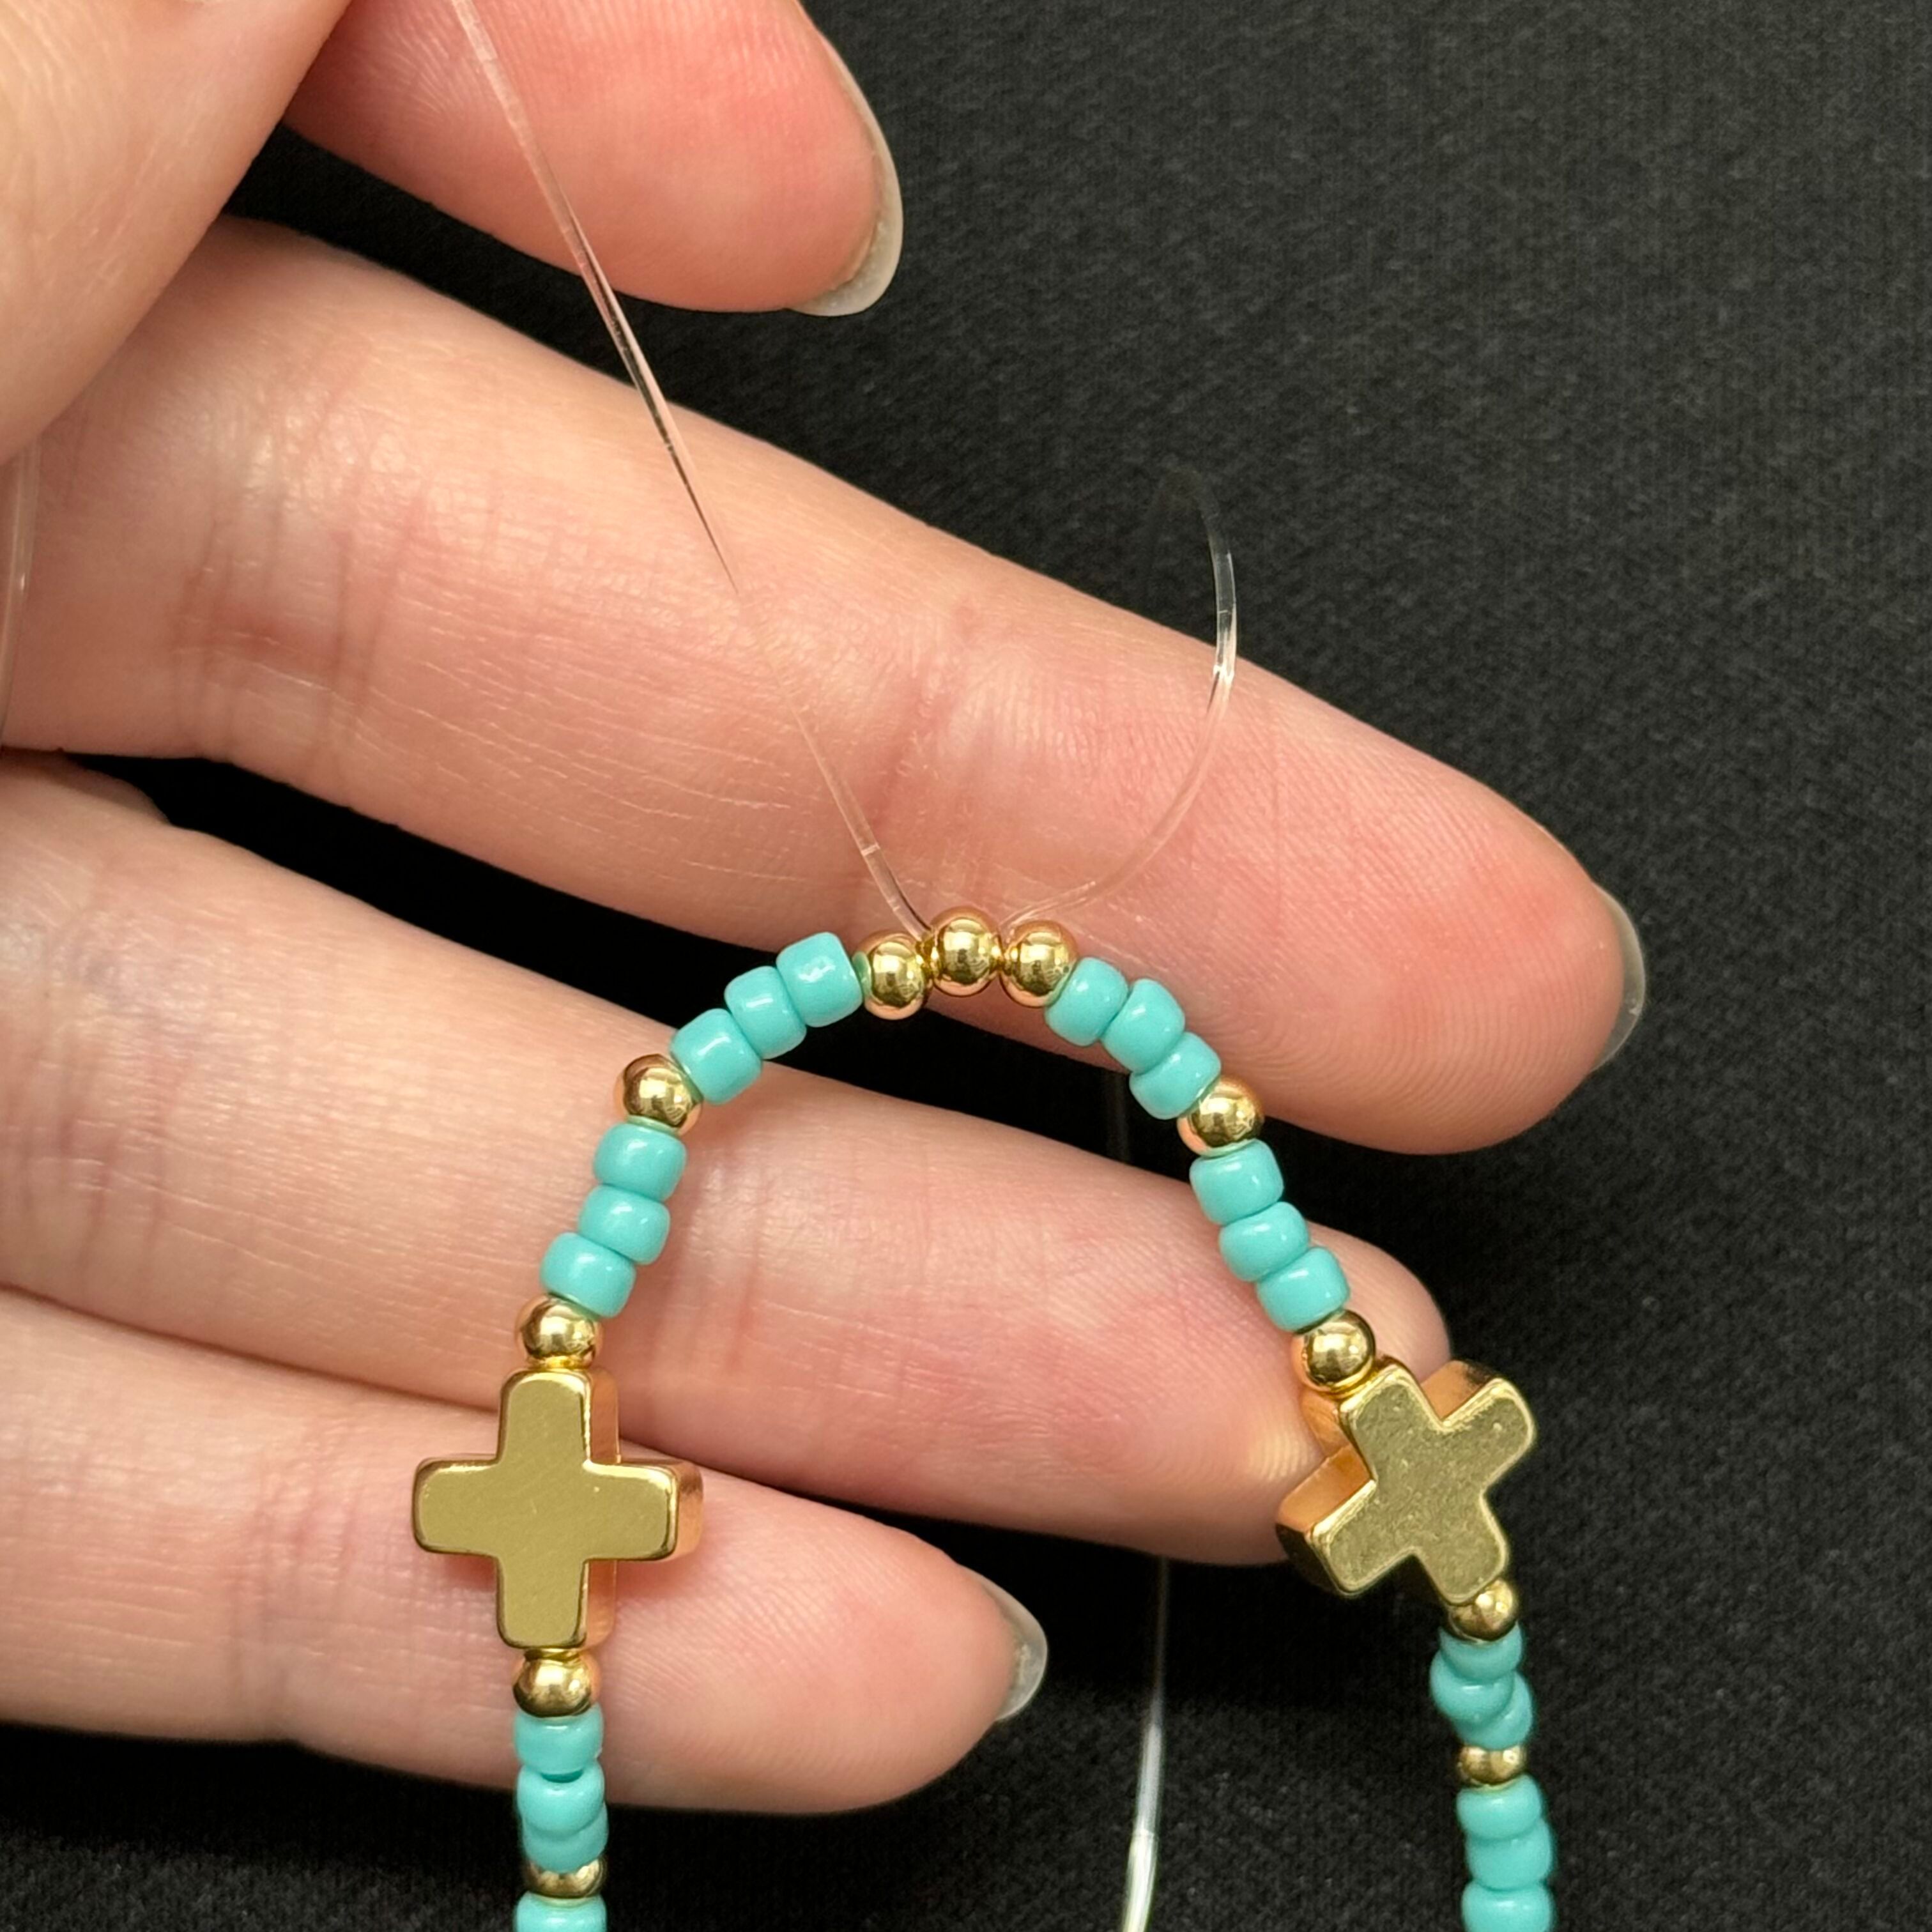
3. Tie a tight surgeon's knot and pull the knot into the hole of the center gold bead after you've glued the knot. Once the glue is dry, you may trim the tails of the stretch cord.
Turquoise and Silver Star Stretch Bracelet
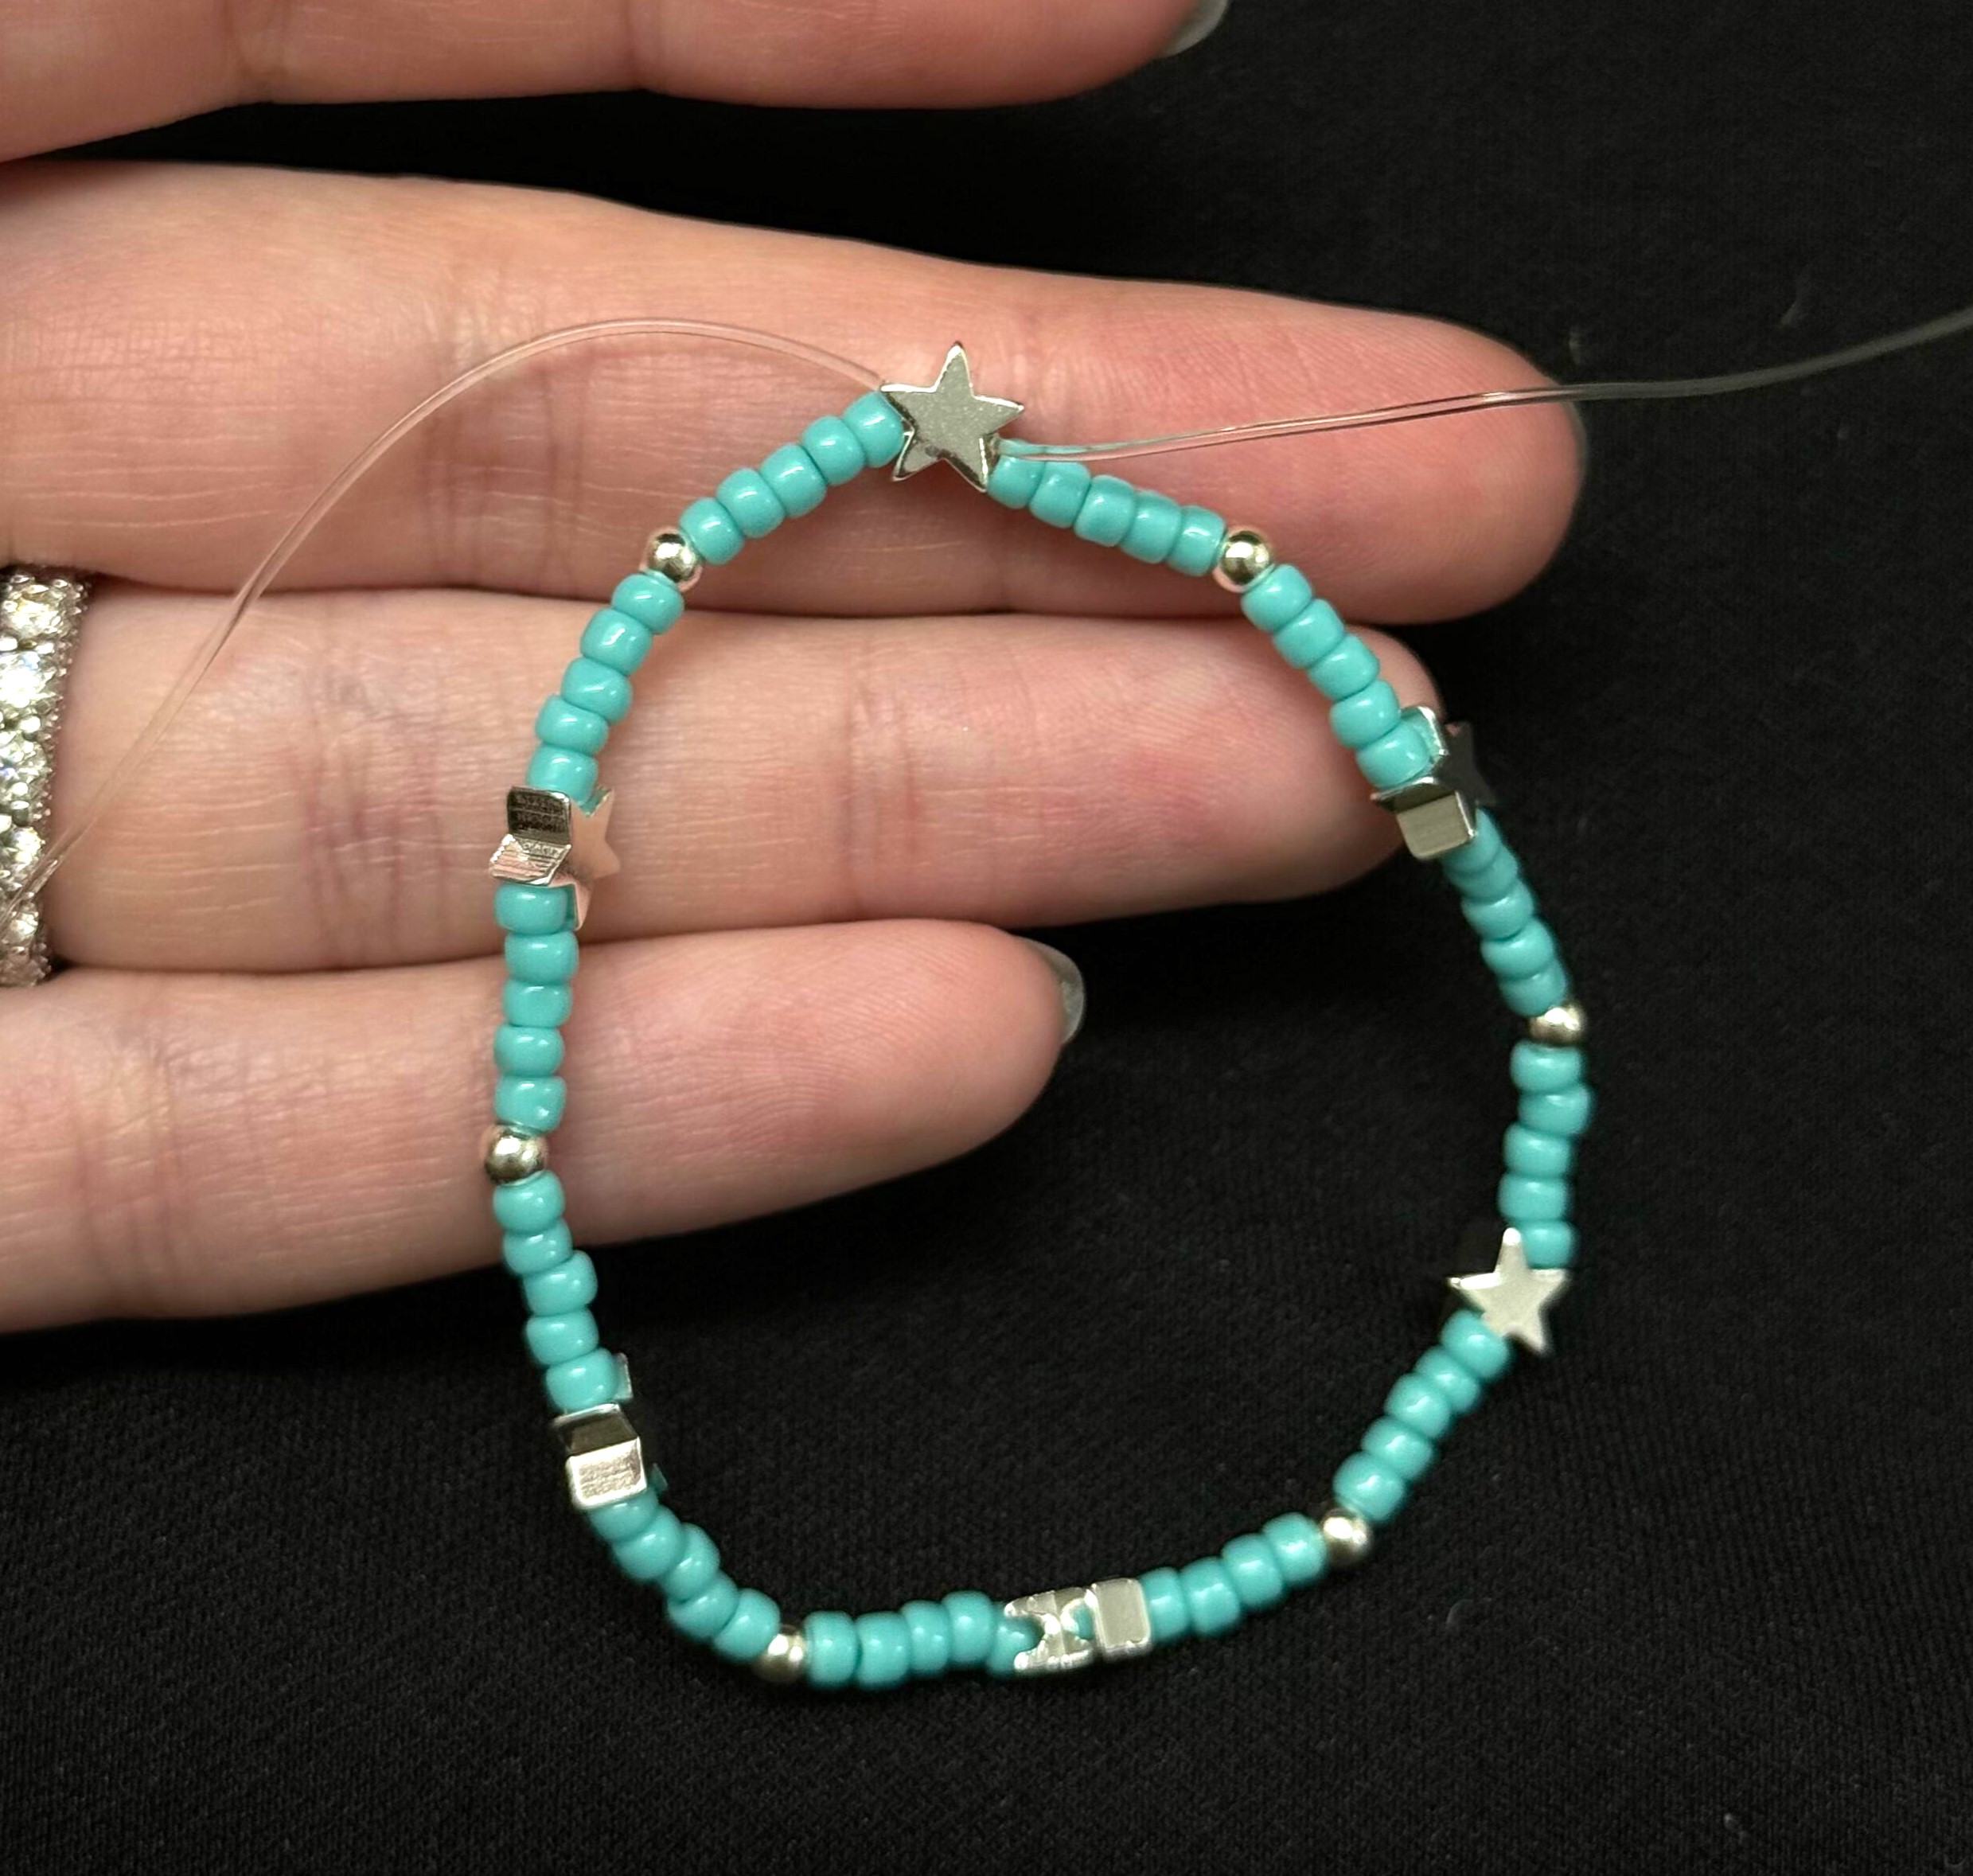
1. To create the Turquoise and Silver Star Stretch Bracelet, Cut 10 inches of .8mm stretch cord, pre stretch, attach bead stop and then complete the following pattern: 1 star bead, 5 turquoise beads, 1 3mm silver bead, 5 turquoise beads, 1 star bead, and so on until you have reached your desired length. Tie a tight surgeon's knot and pull the knot into the hole of the center silver star bead after you've glued the knot. Once the glue is dry, you may trim the tails of the stretch cord.
*This bracelet is 6 inches in long, to add more length you have a few options to keep the integrity of the pattern:
1. Keep stringing until you have a total of 7 stars on your bracelet - this will make the bracelet 7 inches in length
2. Use 6 turquoise beads instead of 5 in the pattern, this will add an inch to the length of your bracelet
Mixed Metal Daisy Chain Stretch Bracelet
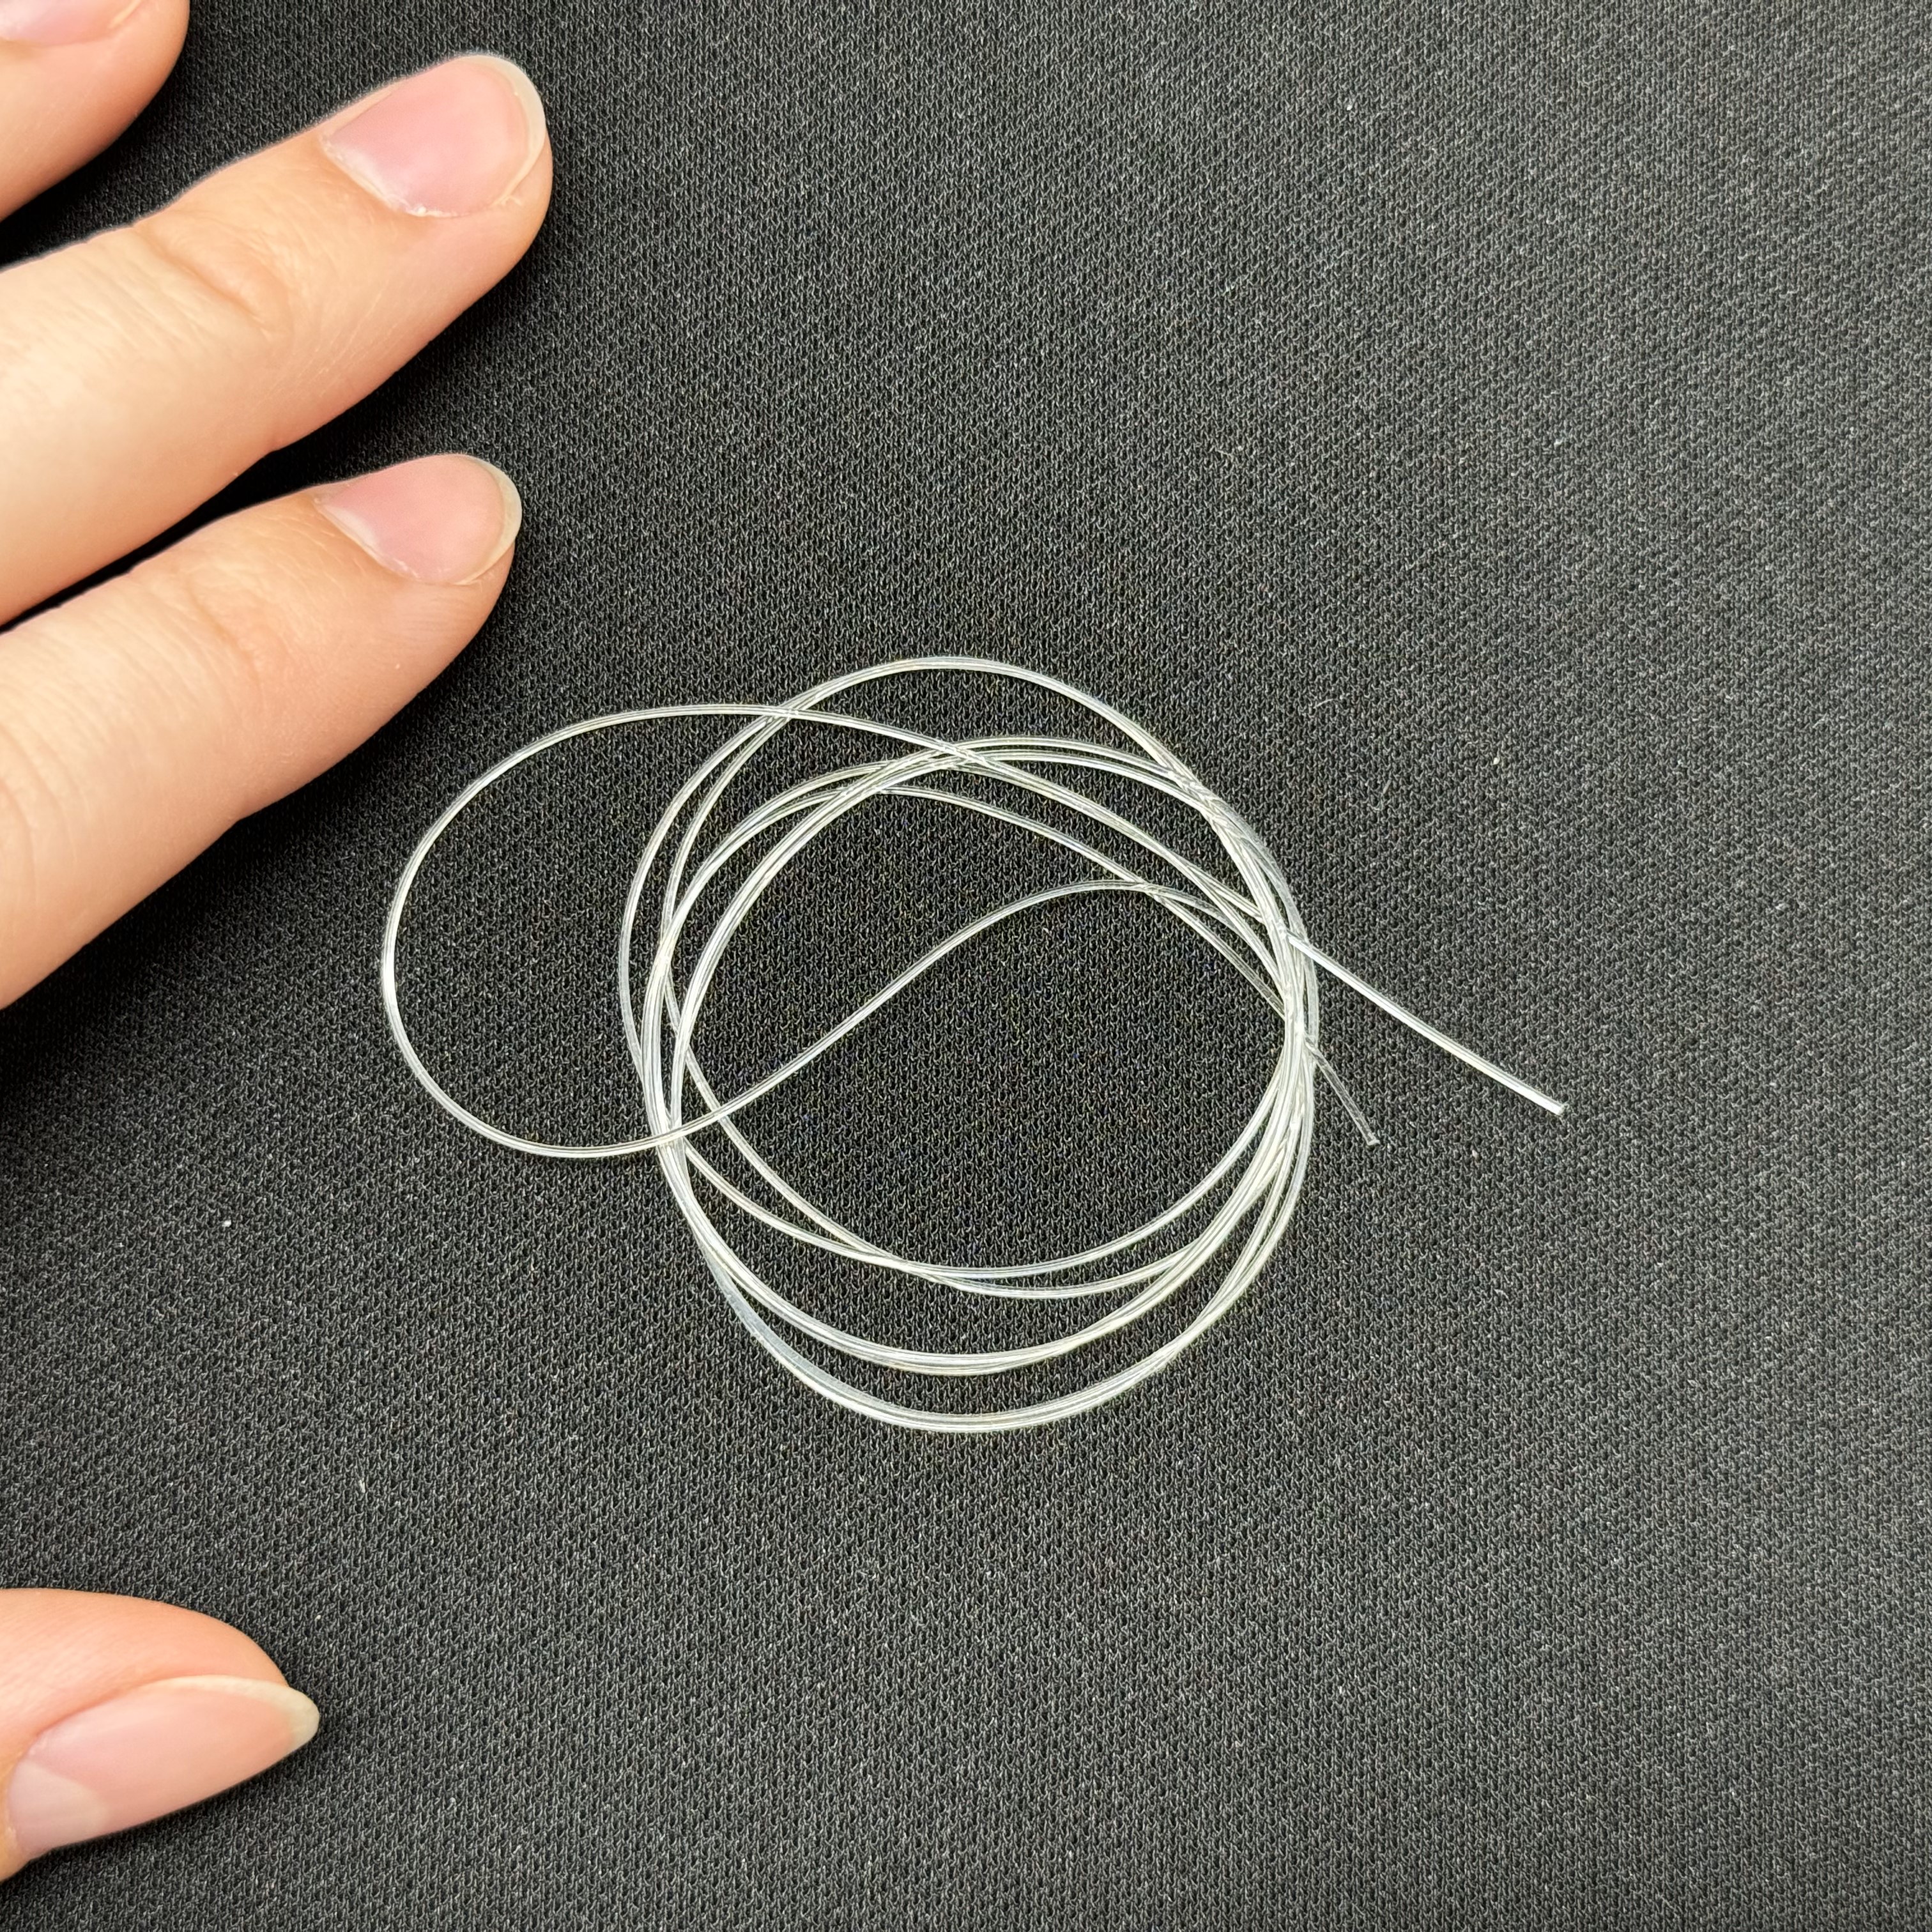
1. Cut 32 inches of .5mm stretch magic and pre stretch. (32 inches will make a 6 inch bracelet - add 4 more inches for every inch you want the bracelet to be)
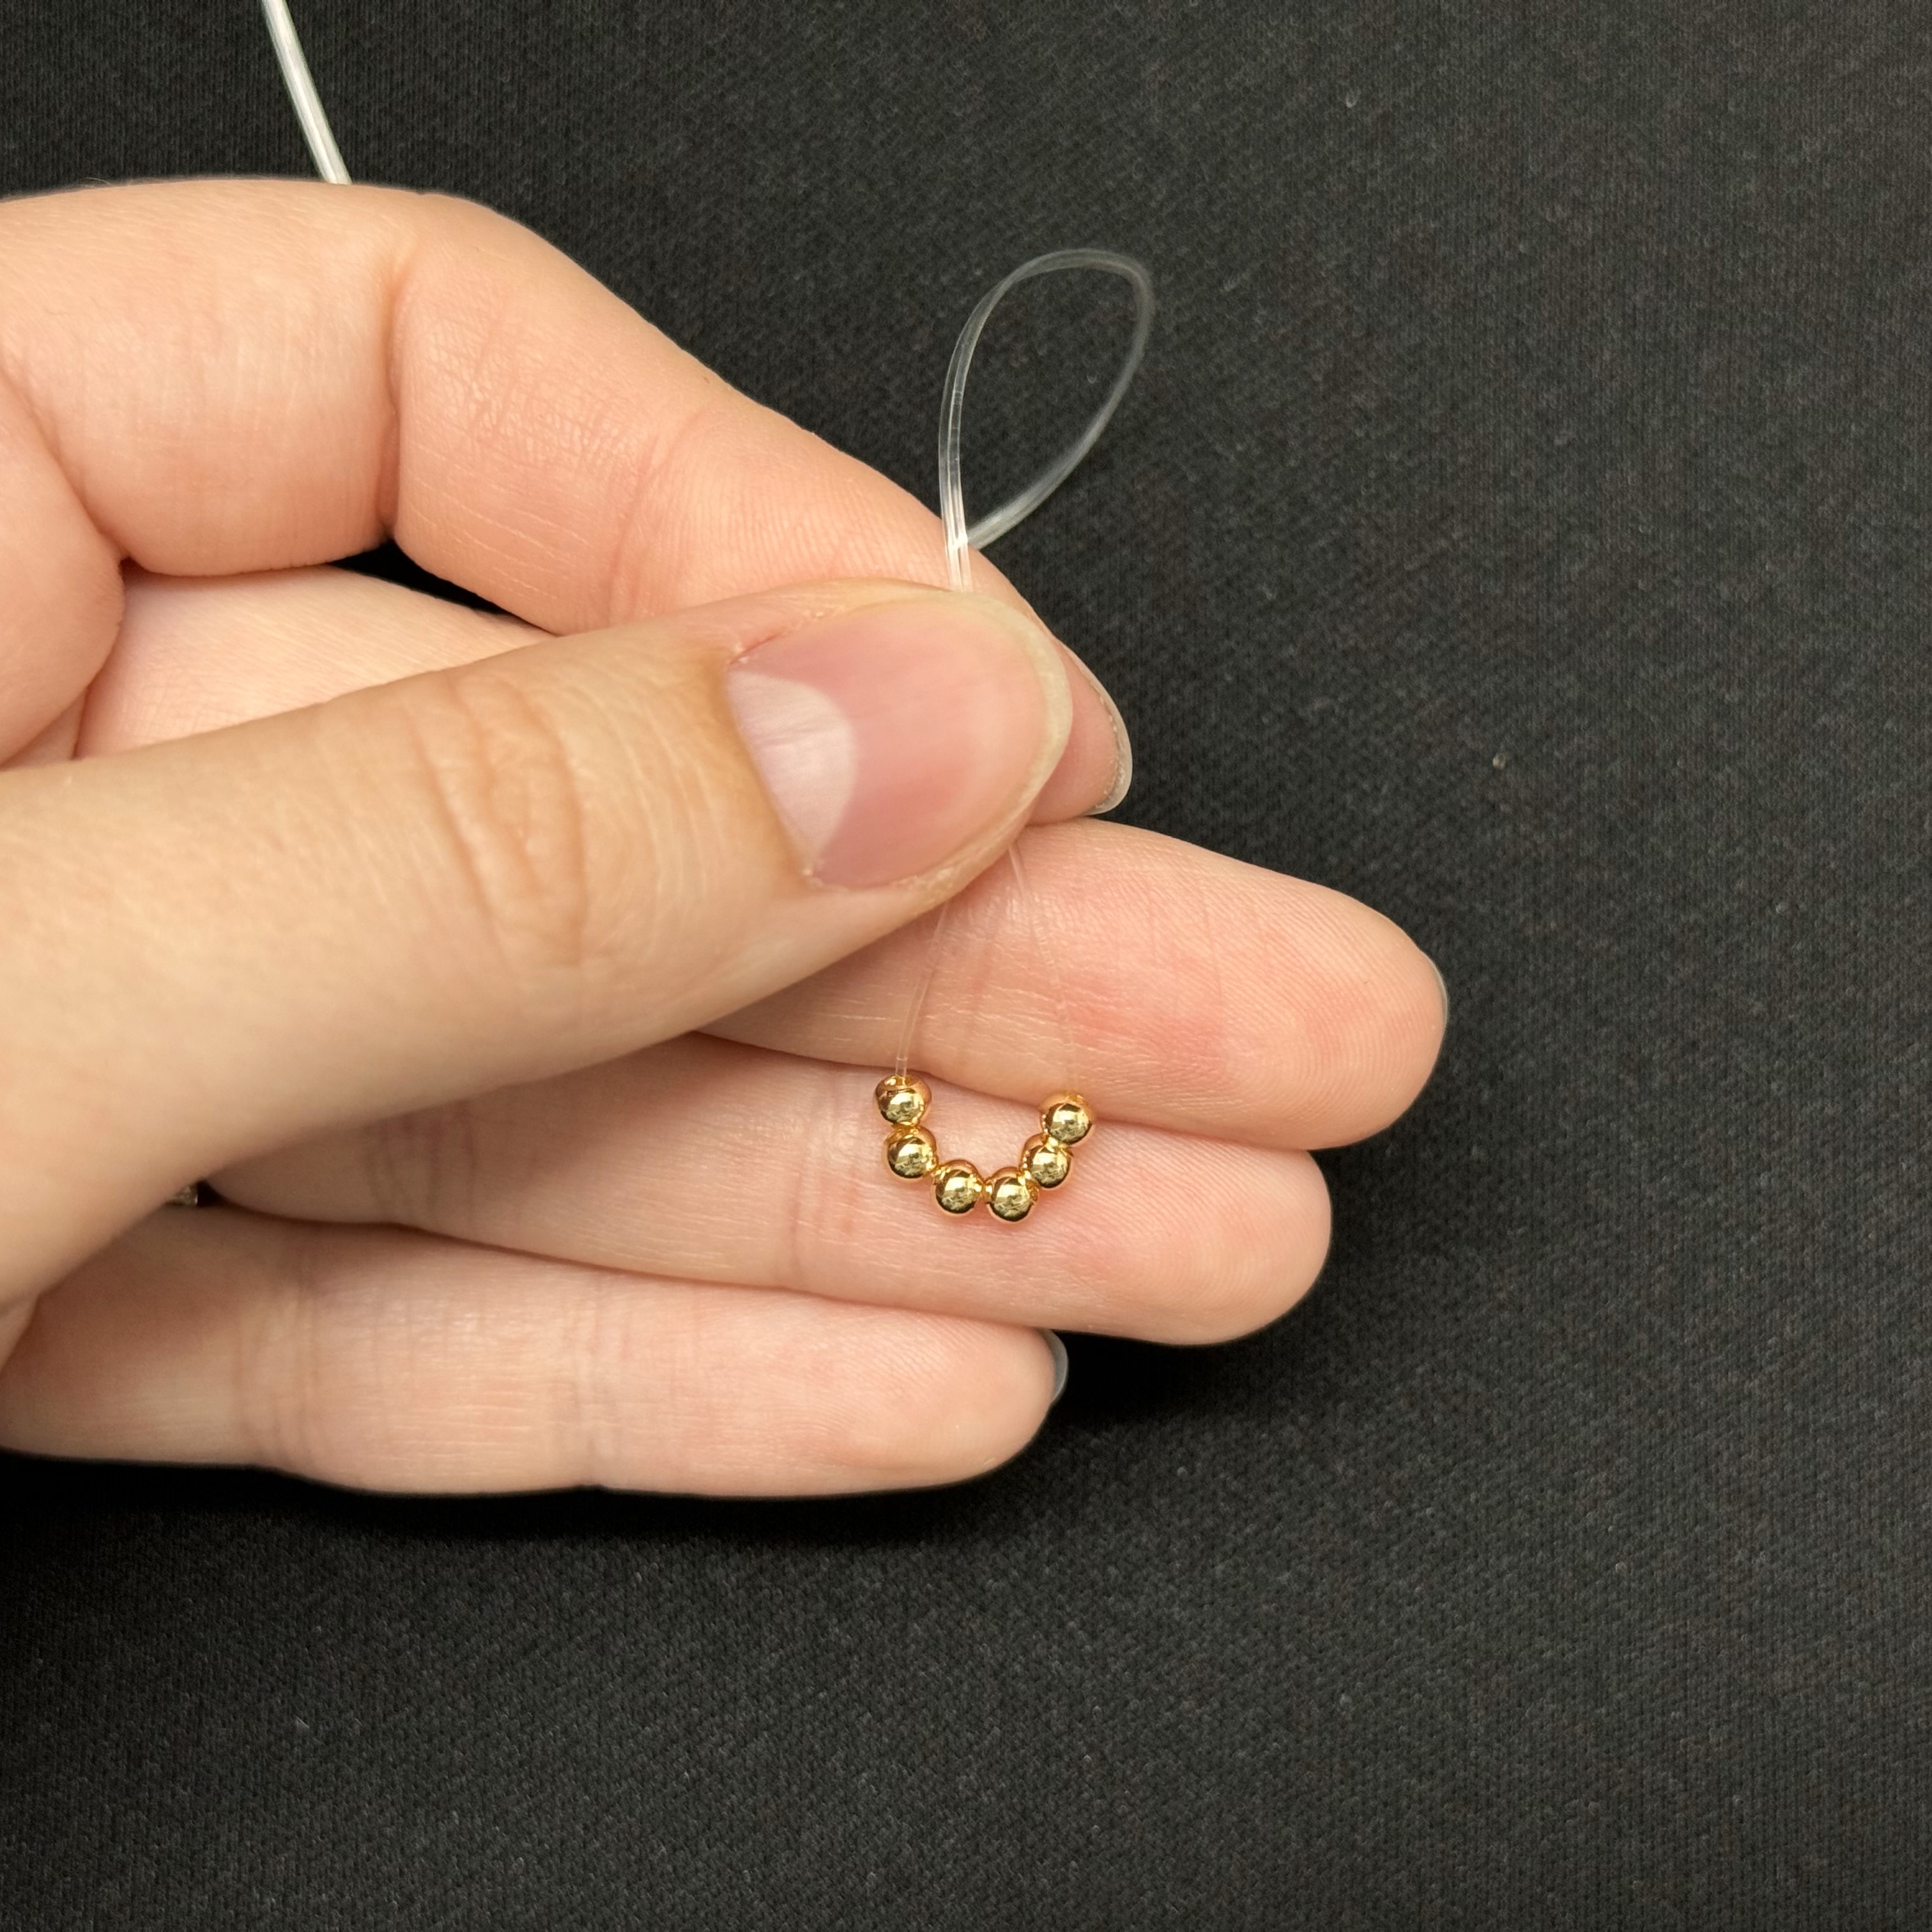
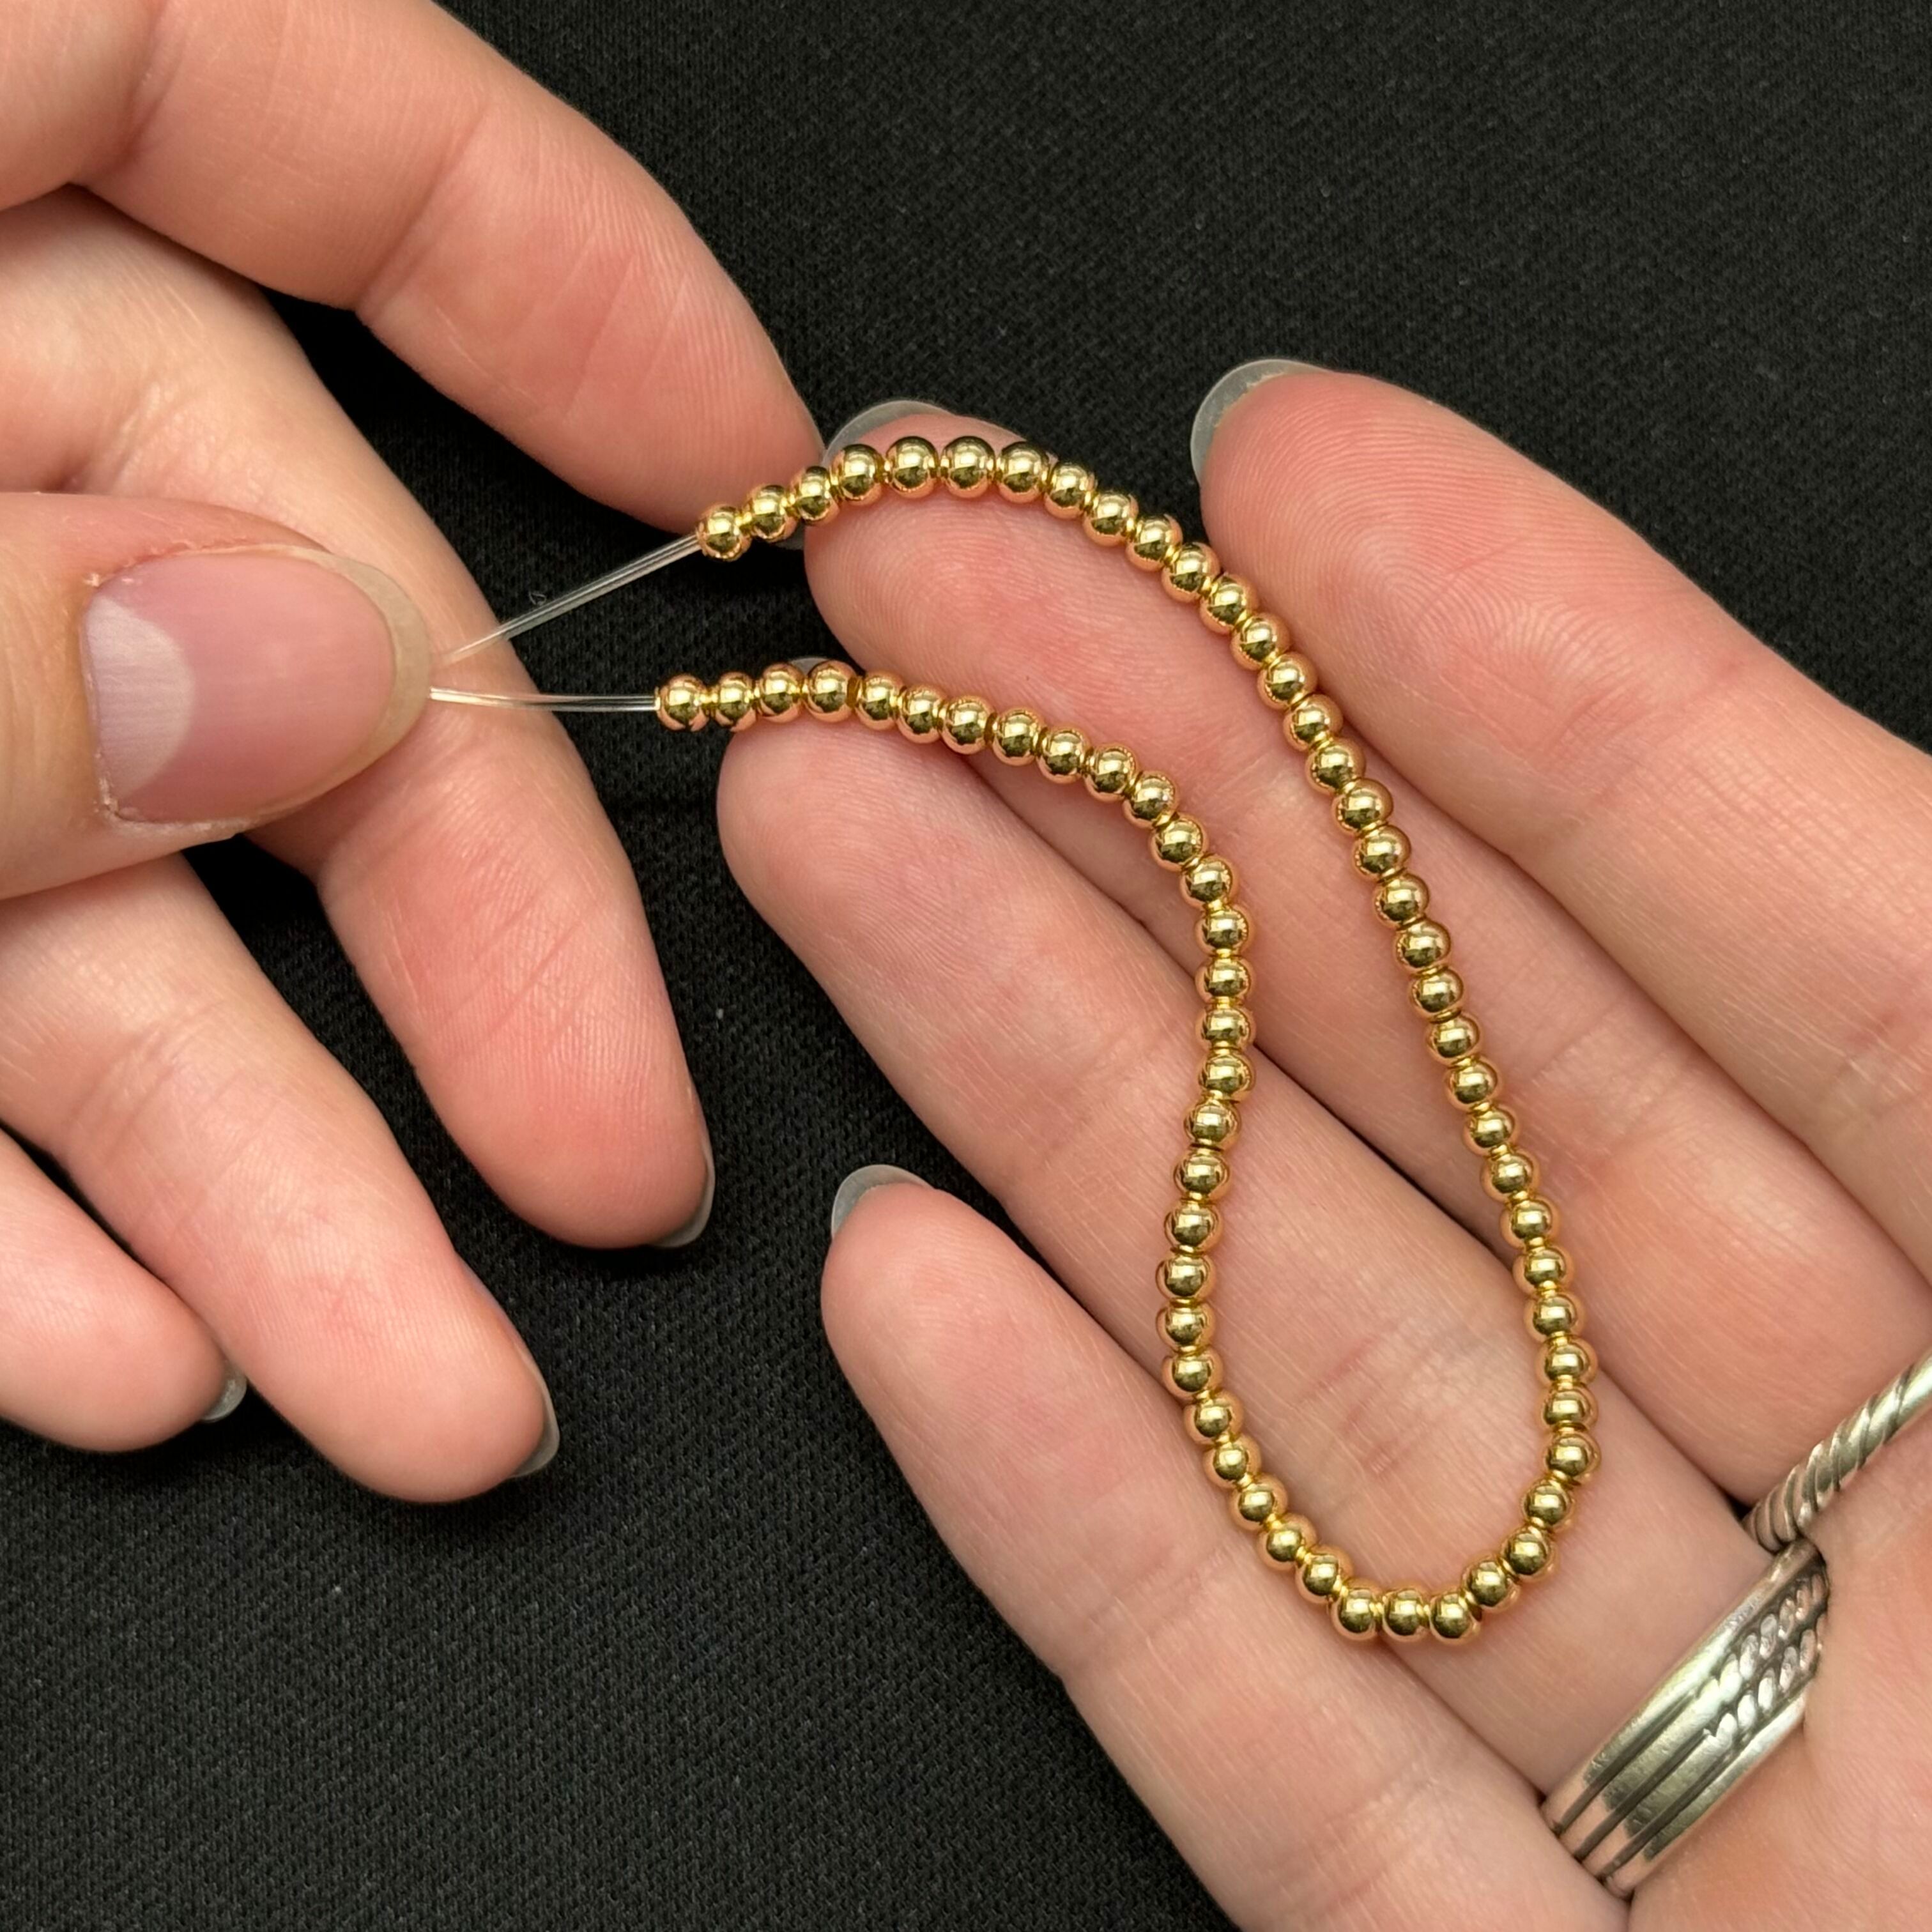
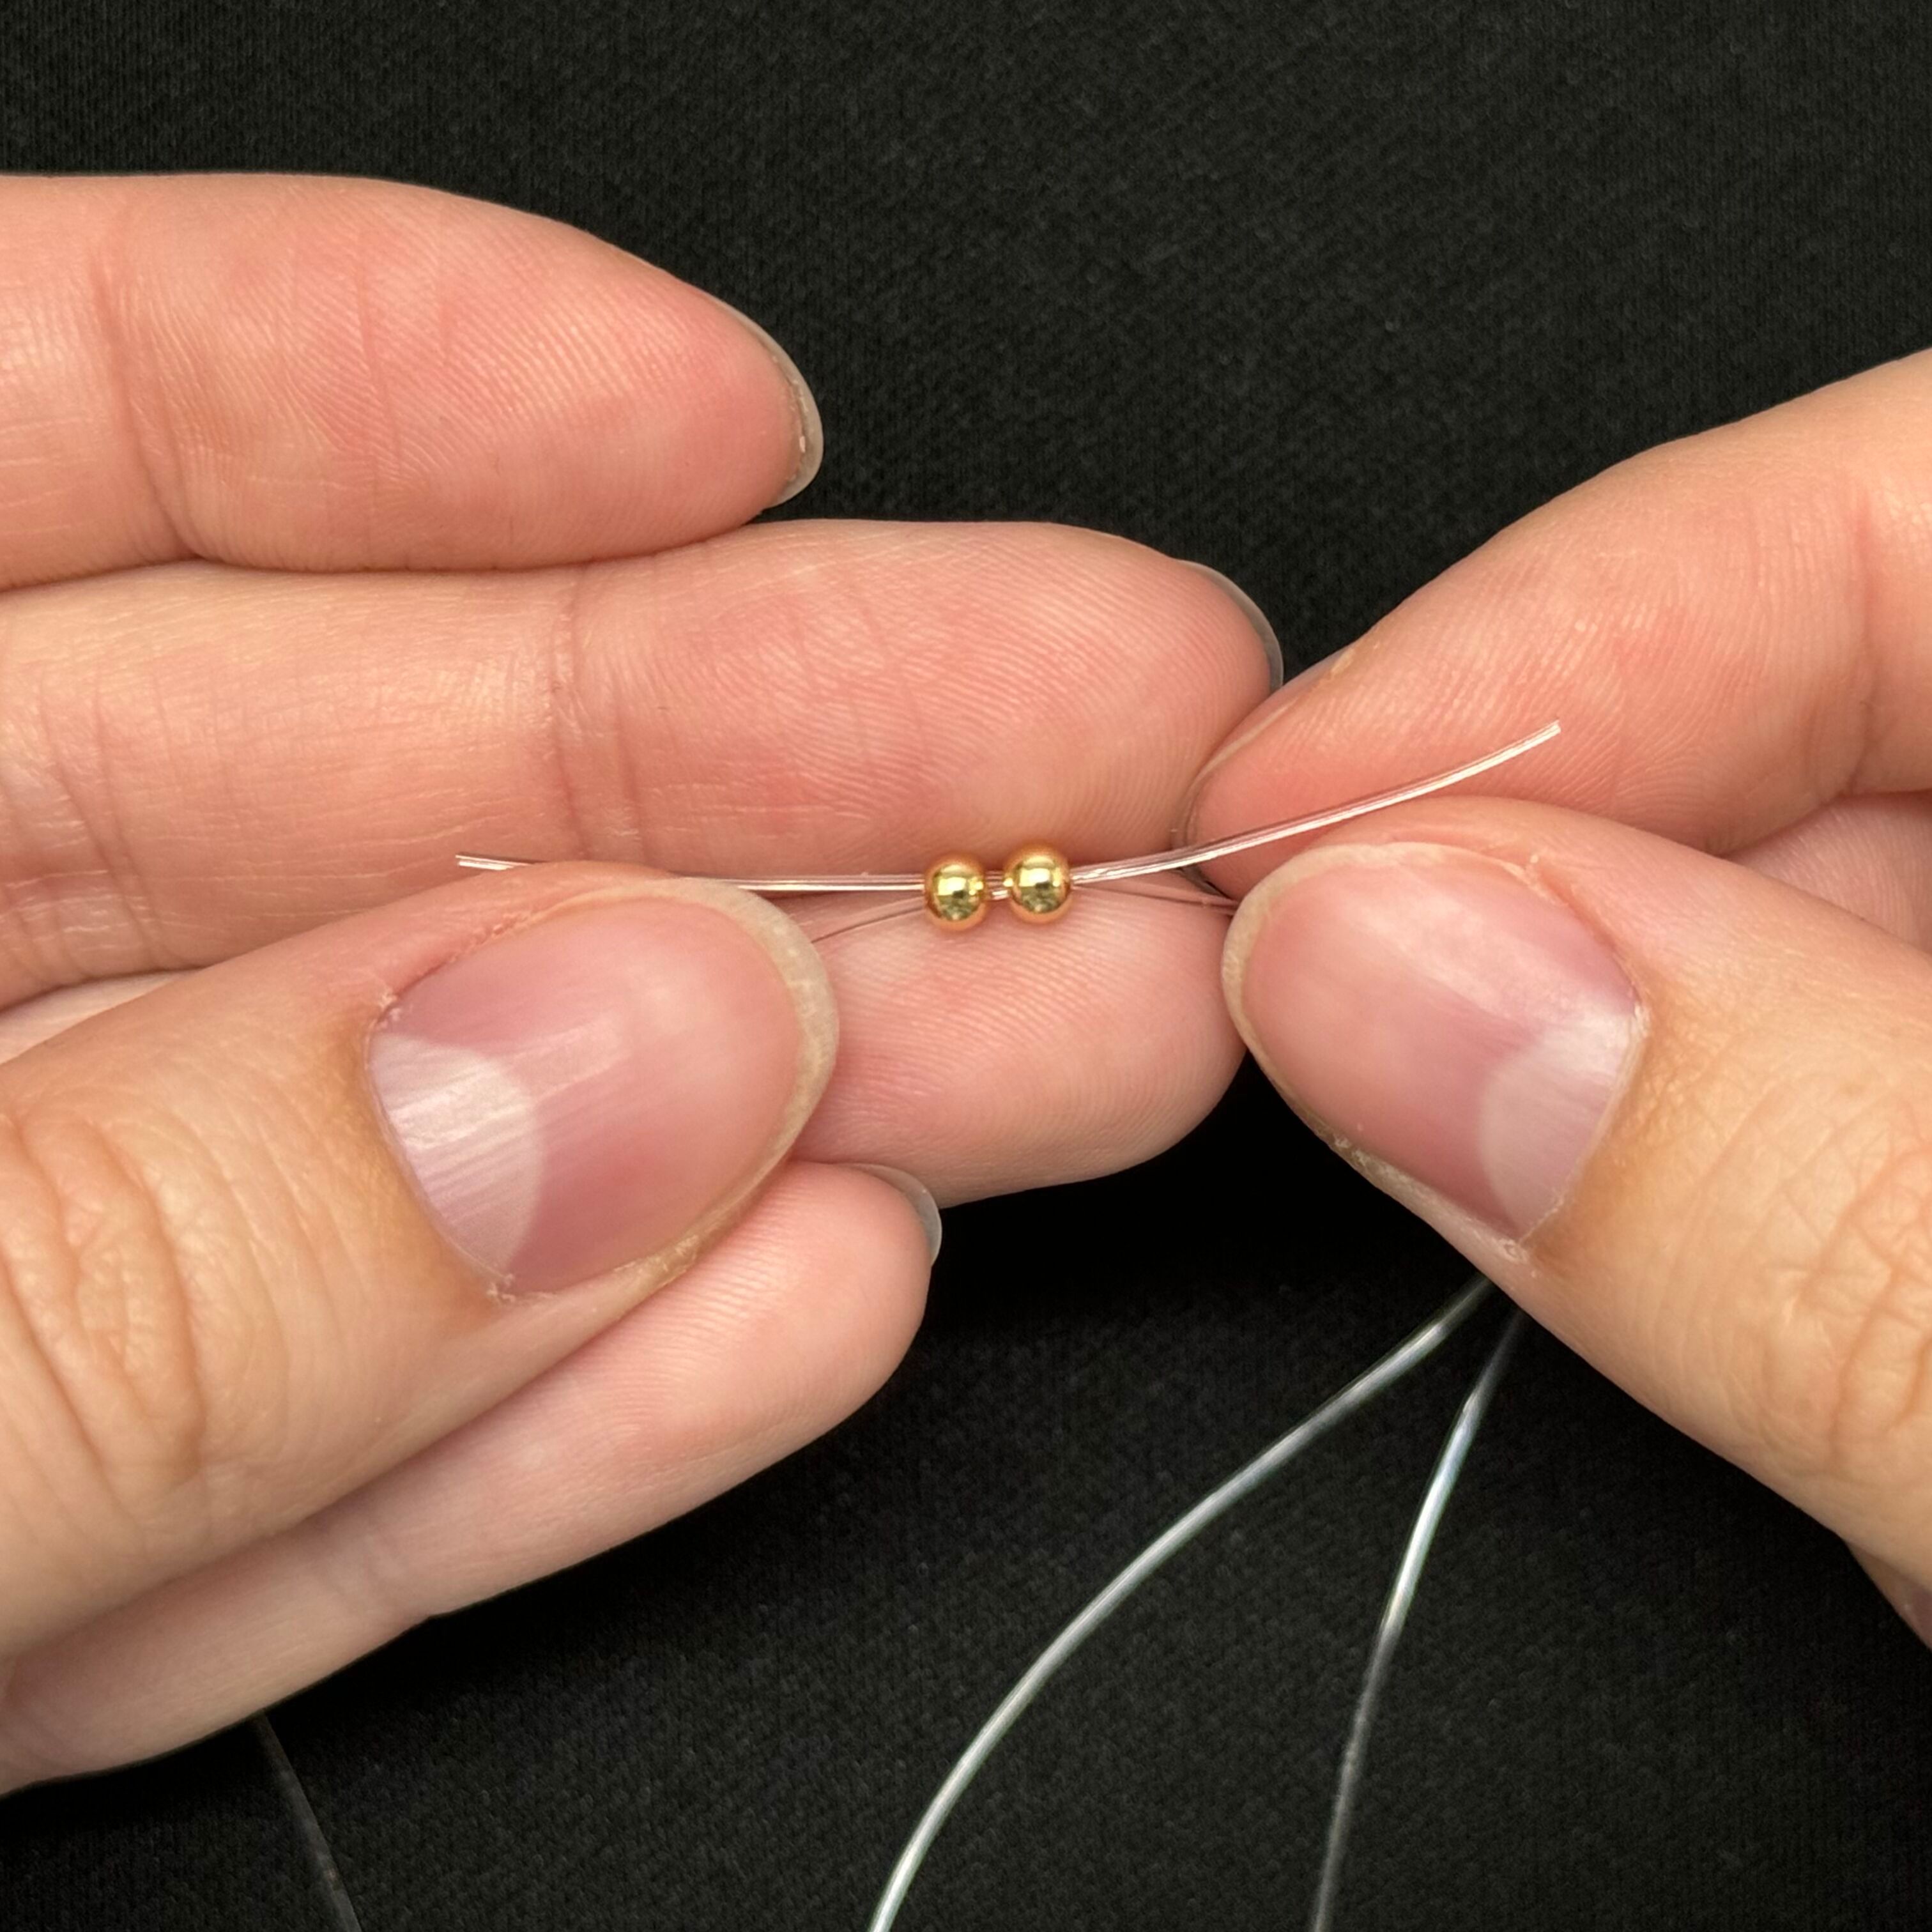
2. String 6 3mm gold beads to the center of the stretch cord

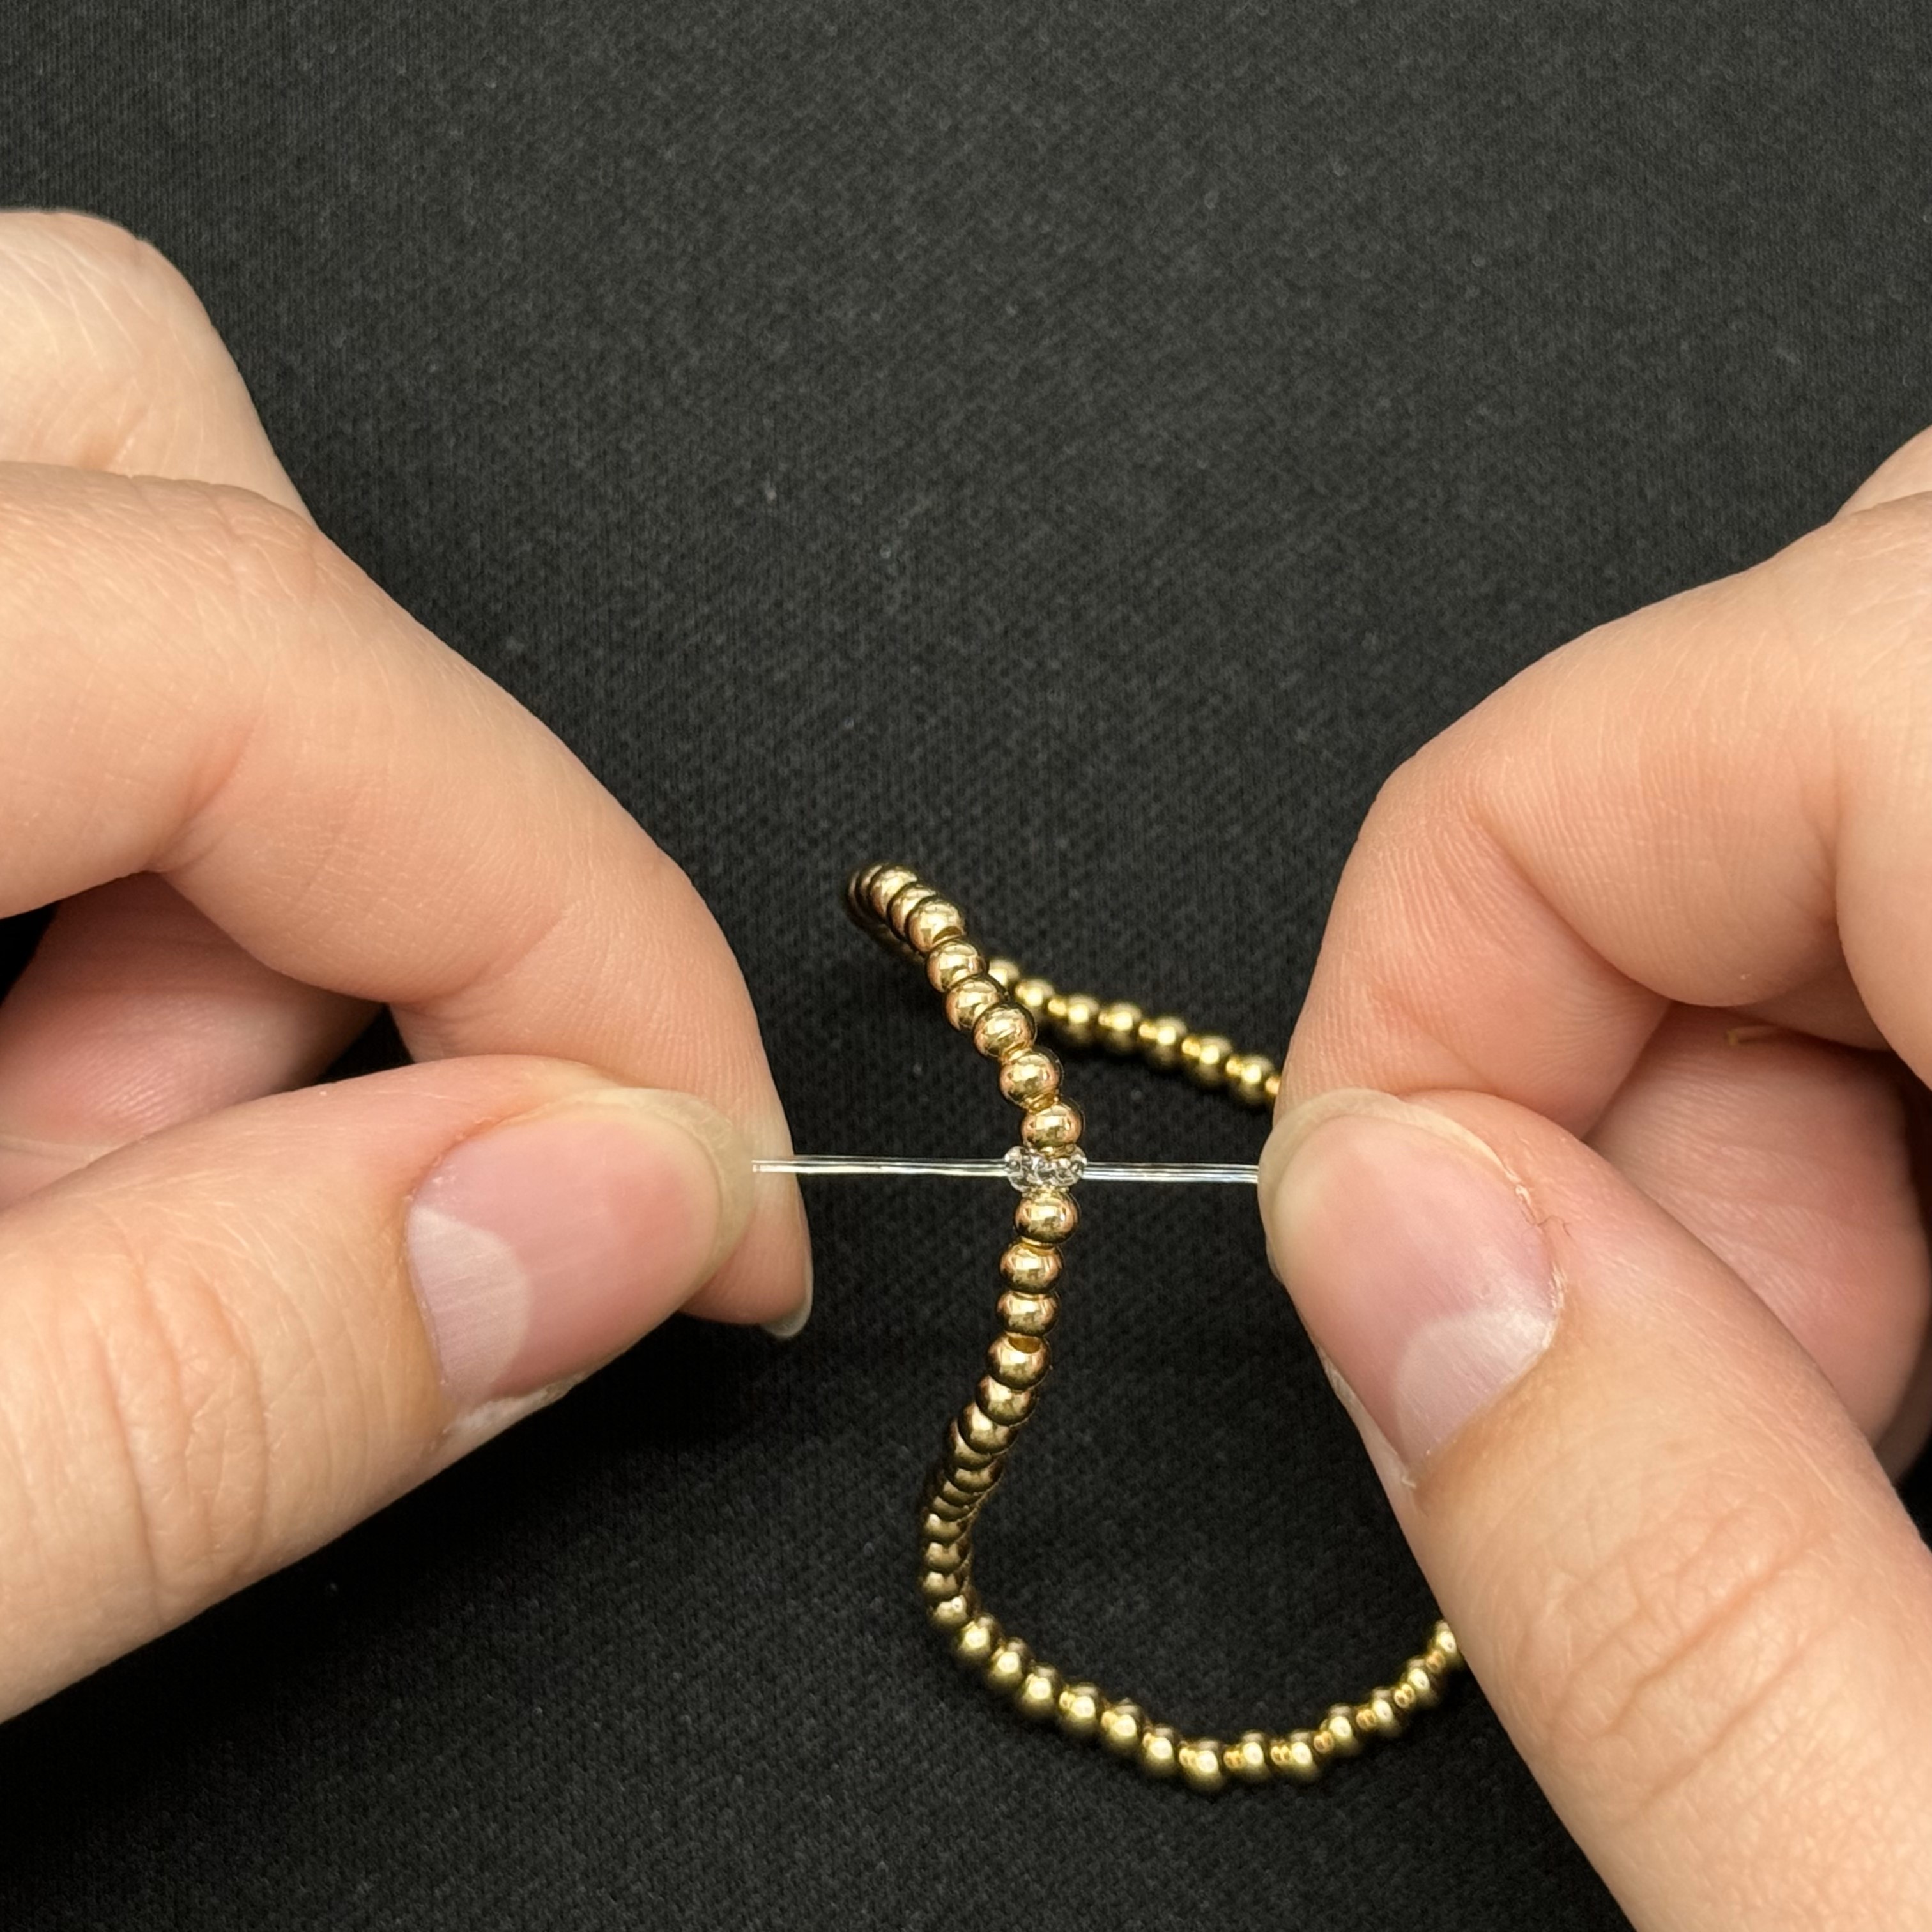
3. Then 1 4mm silver bead

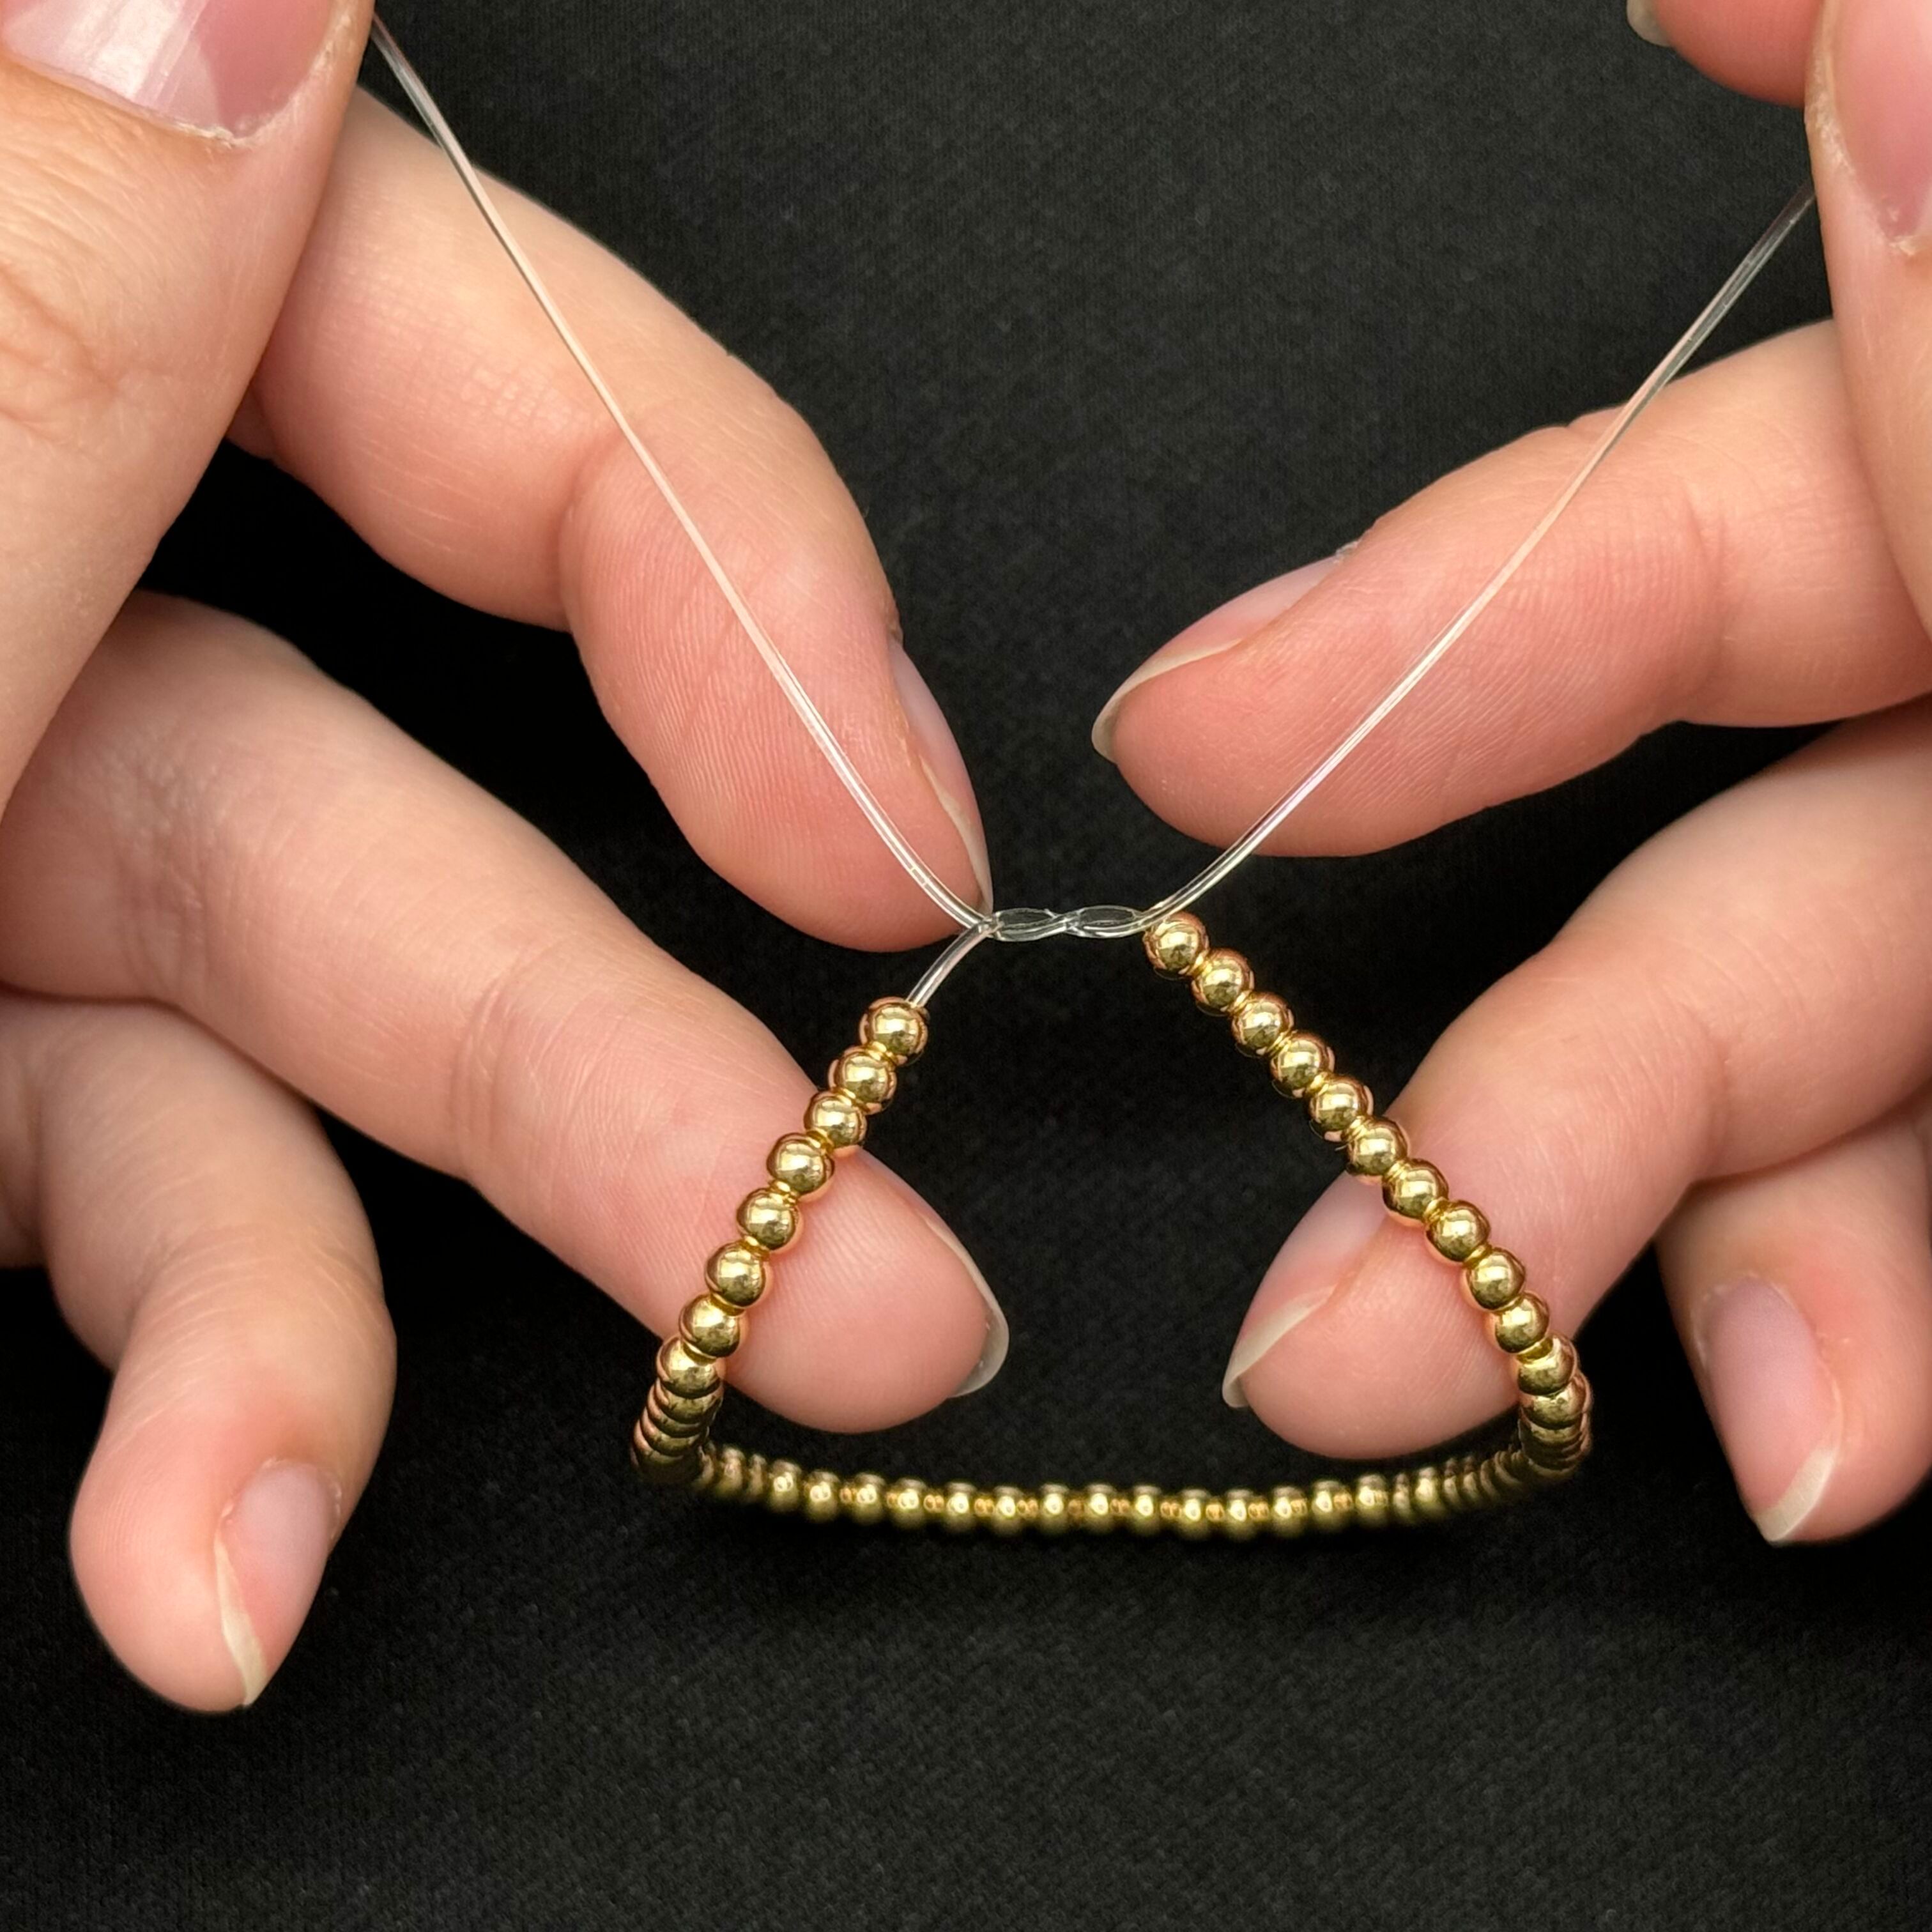
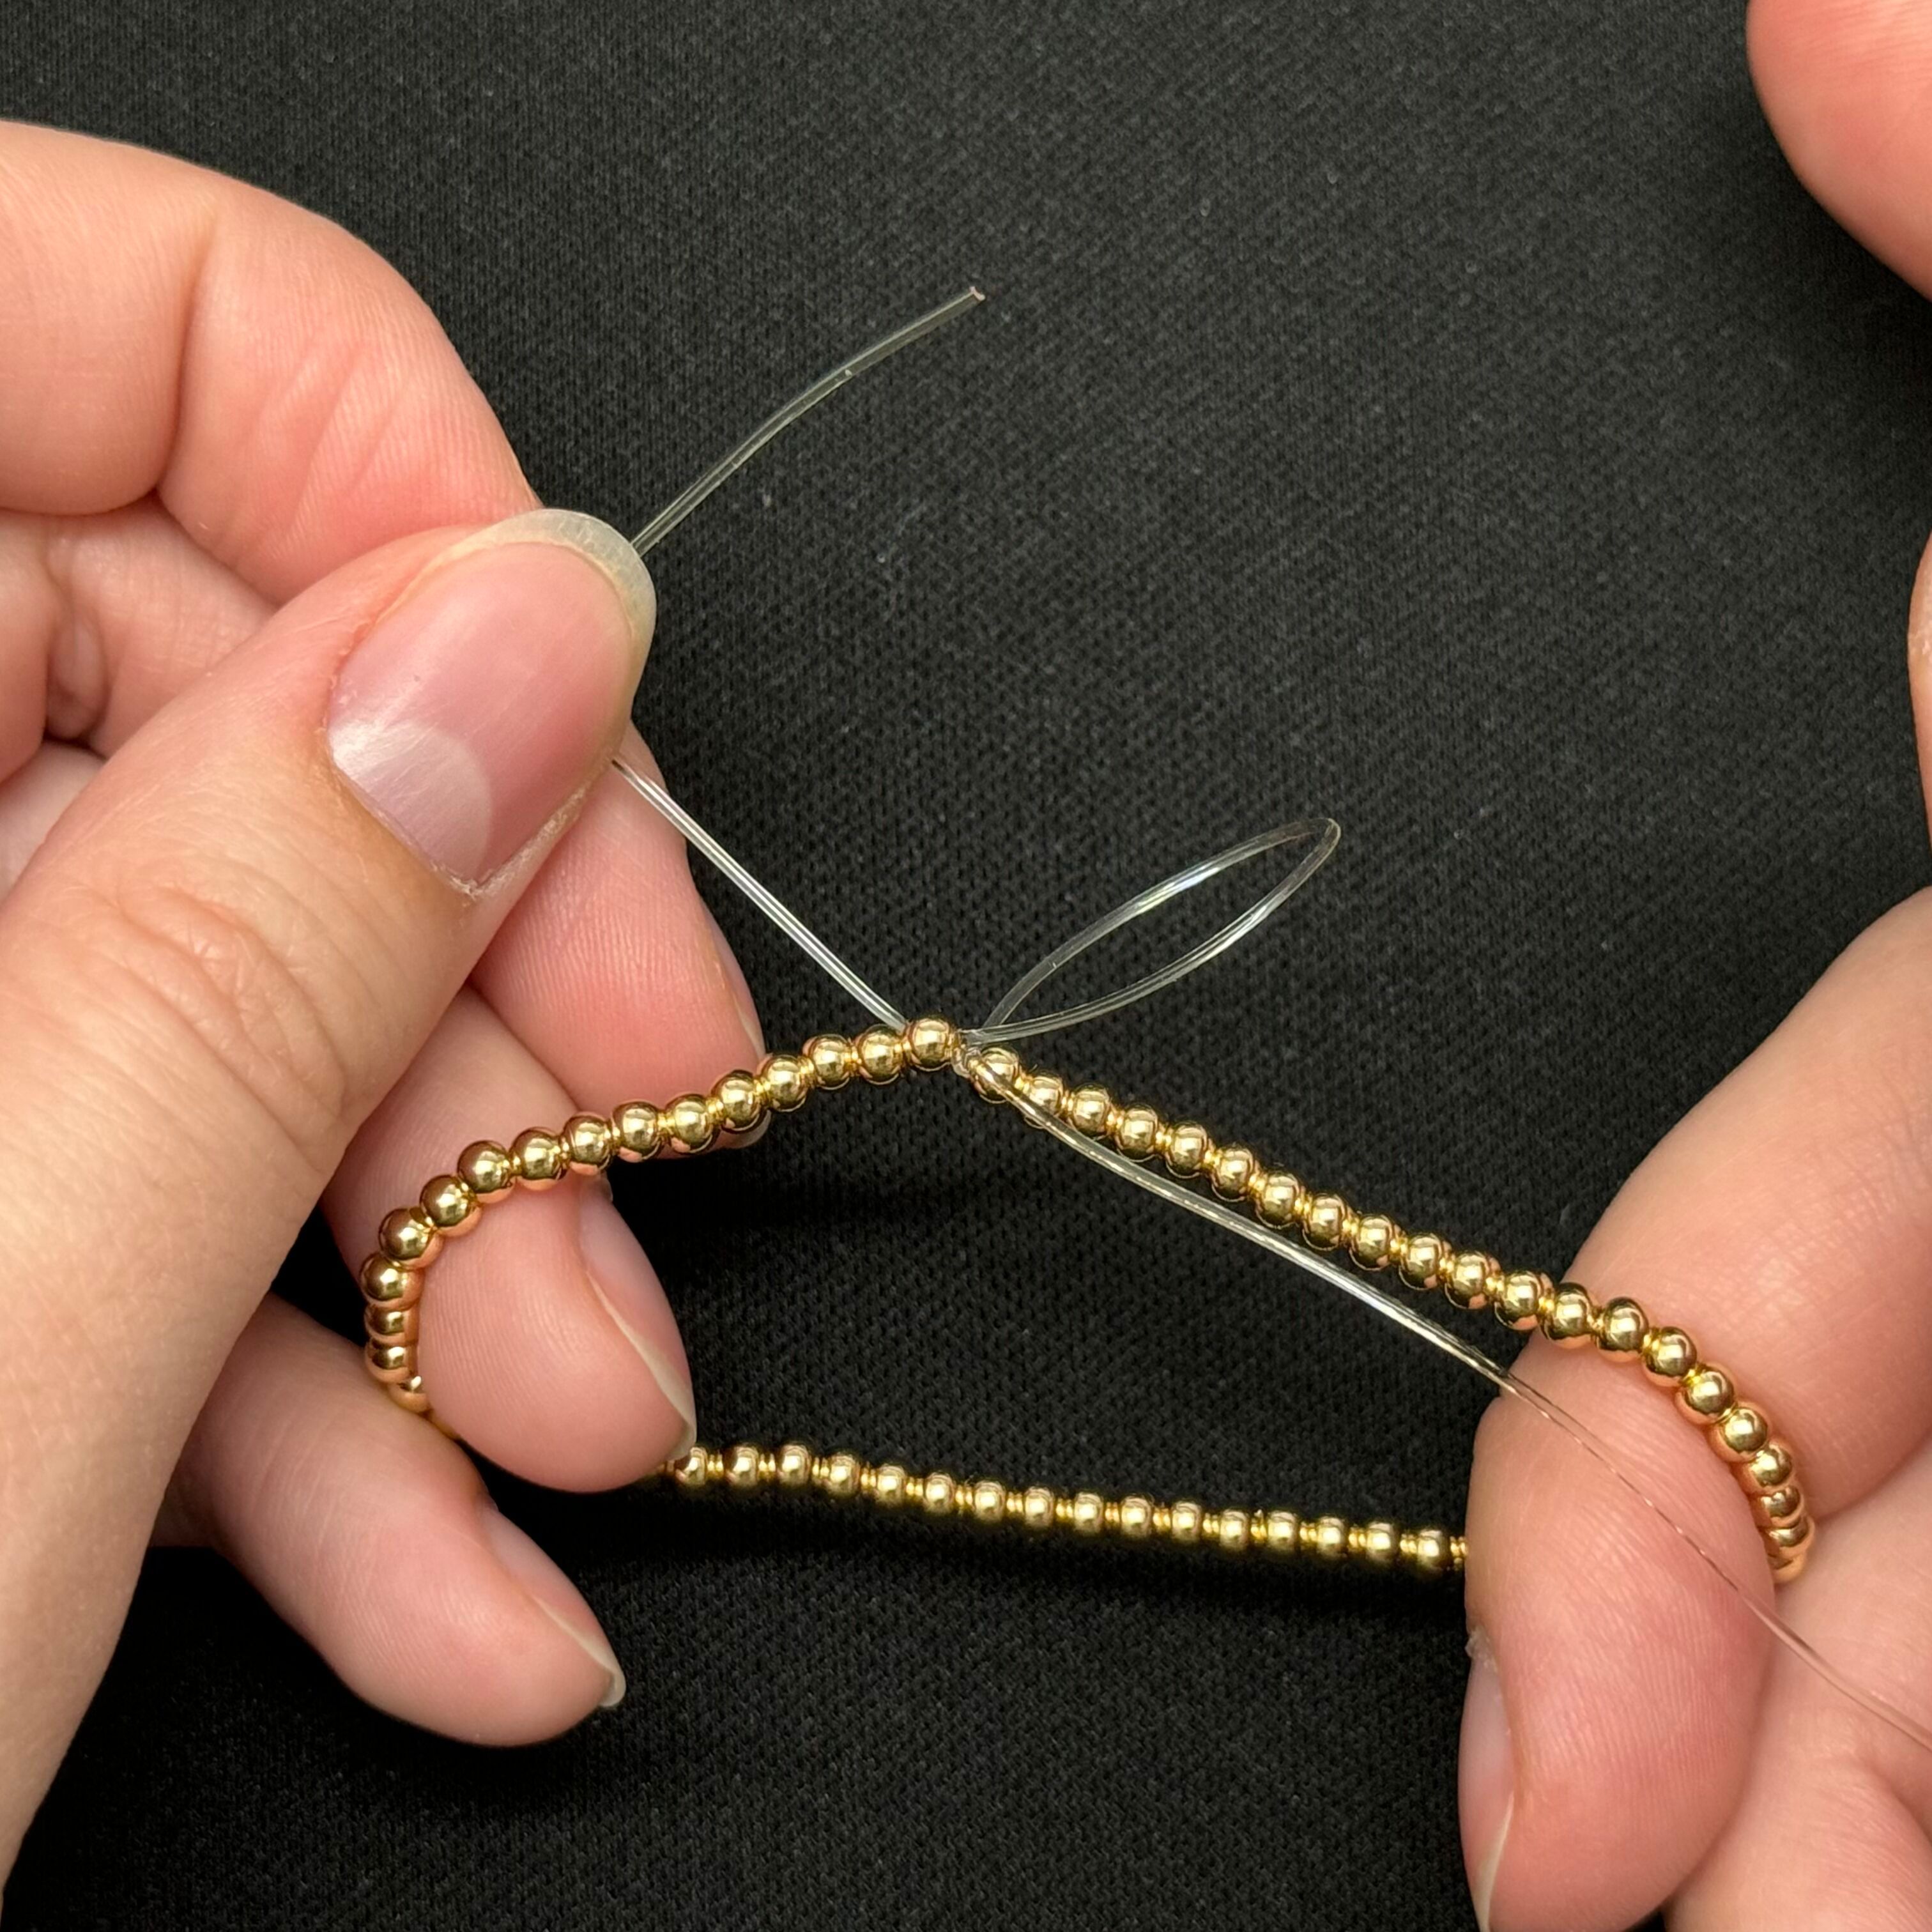
4. Take the right cord and thread it up through *only* the two gold beads shown above (don't pull all the way through just yet)
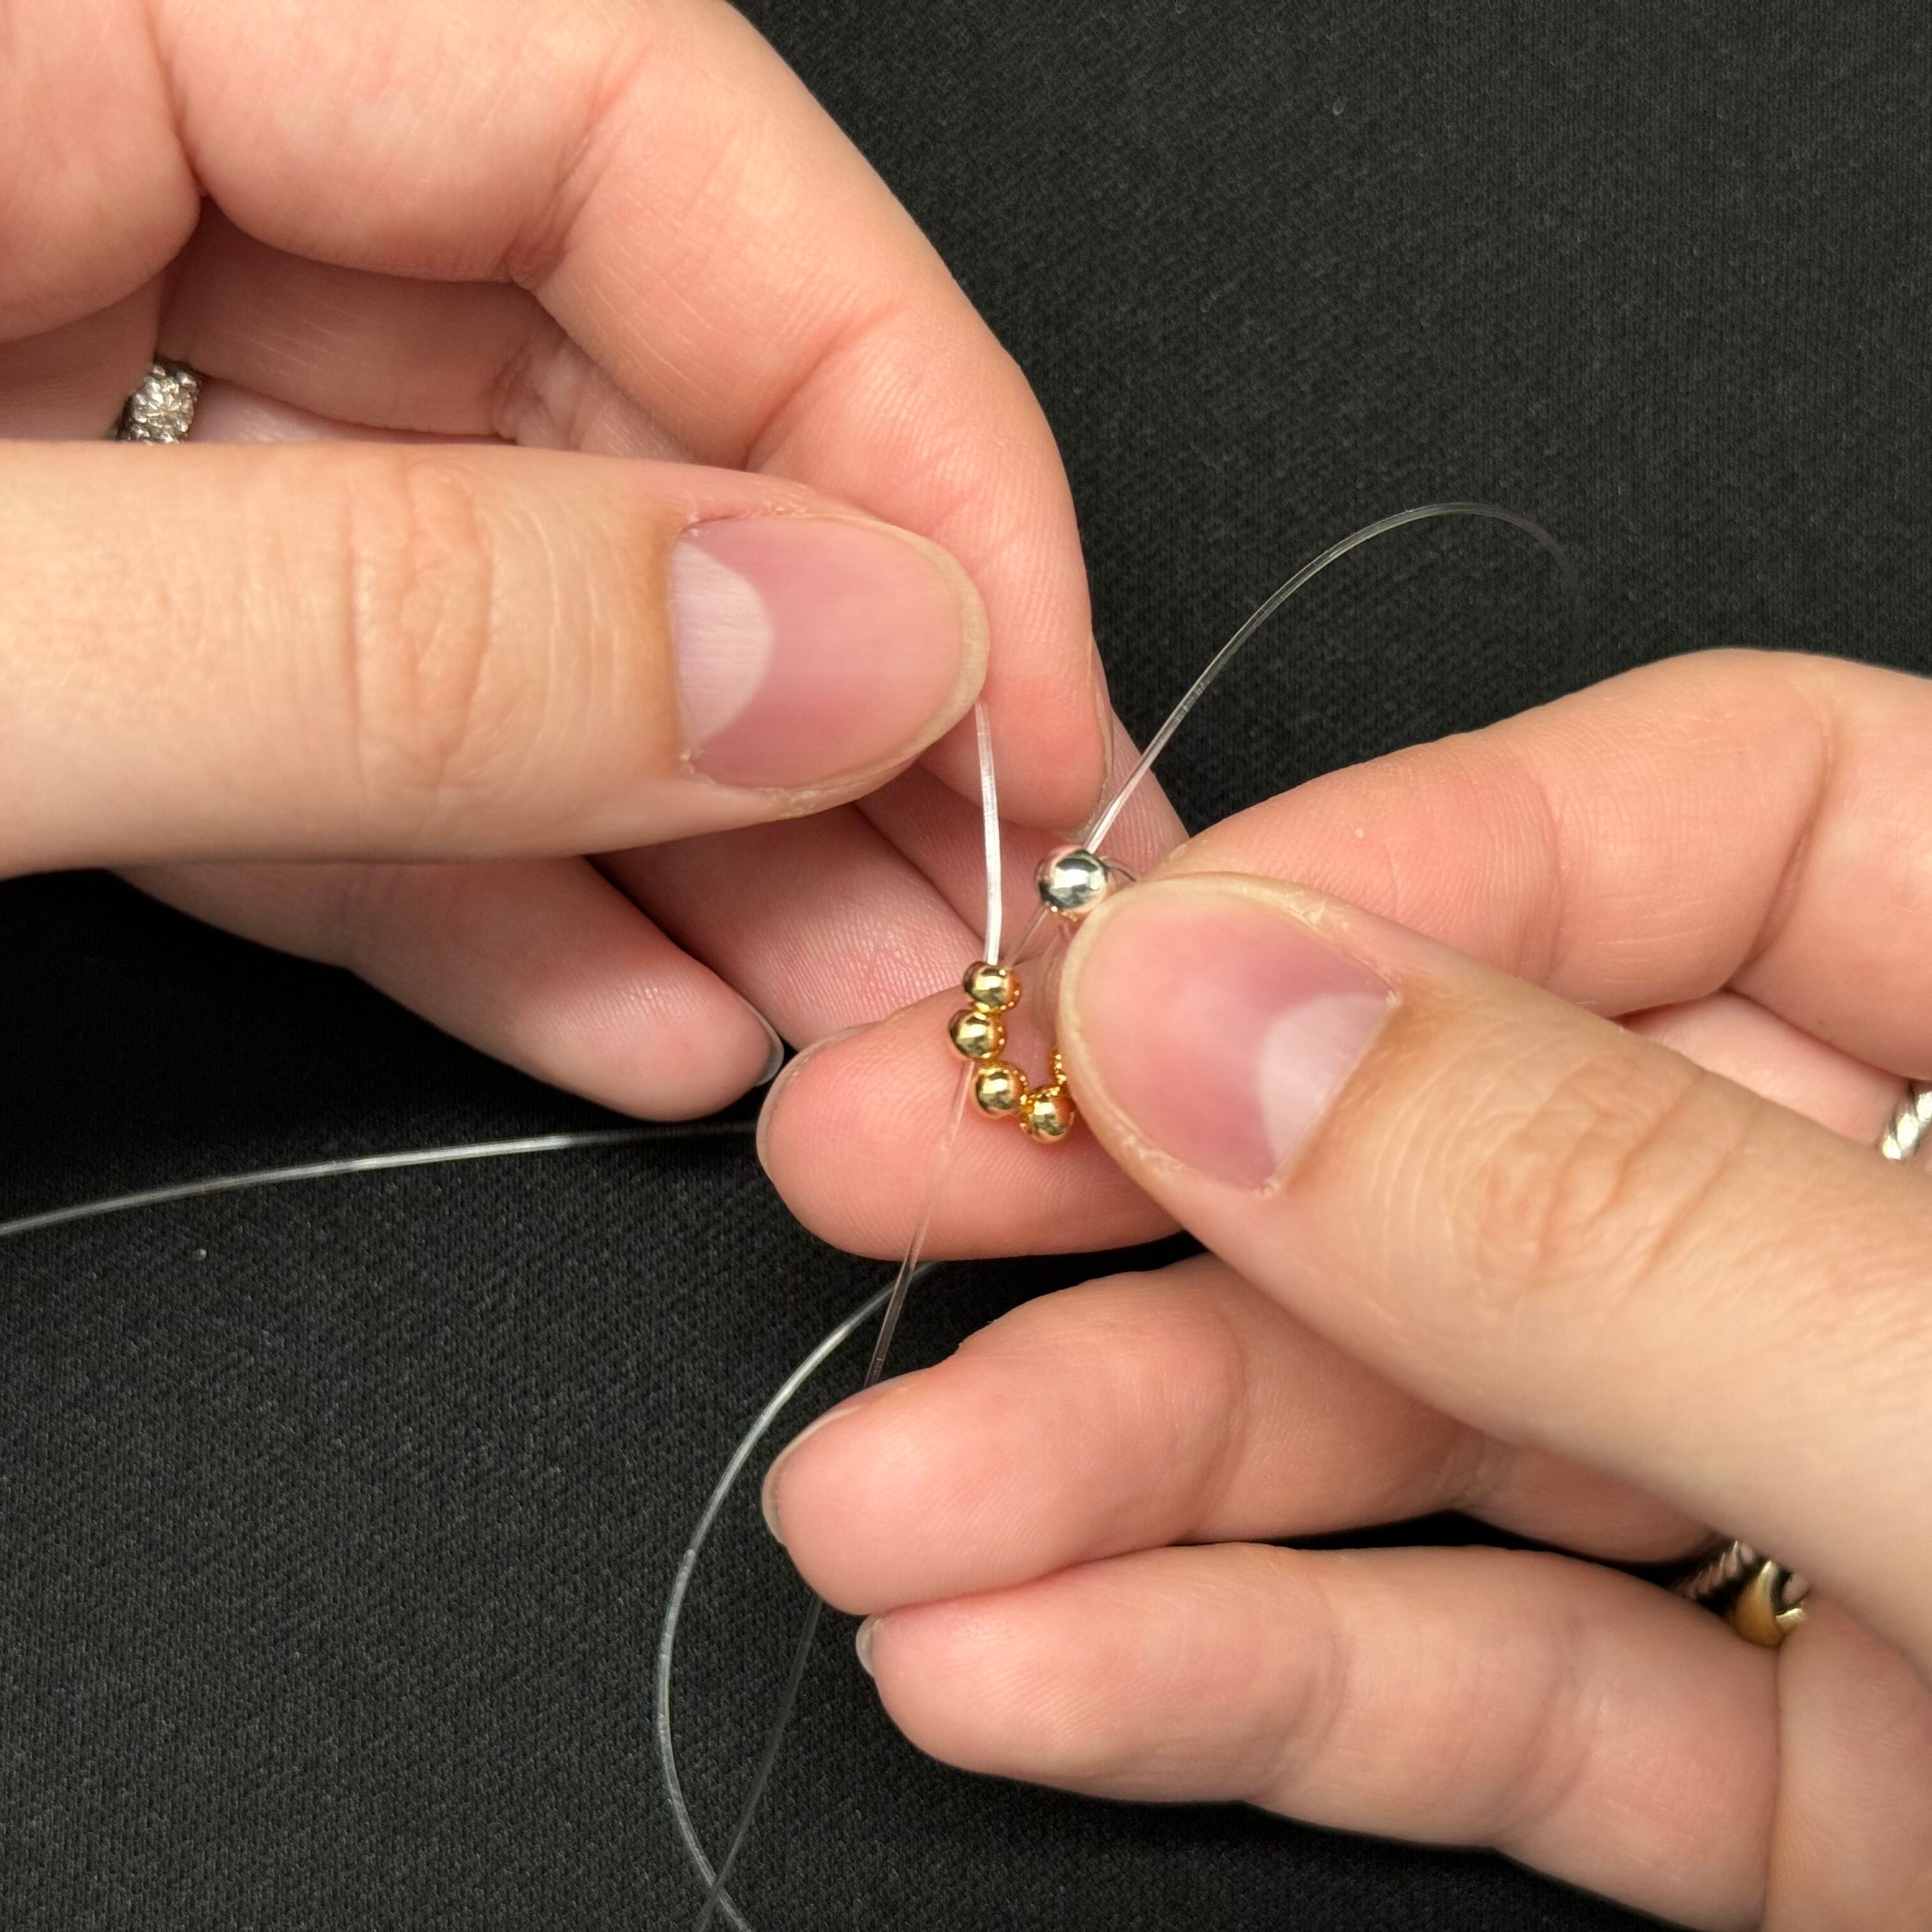
5. Repeat with the left cord with the two beads shown
6. Now you can pull the cord tight
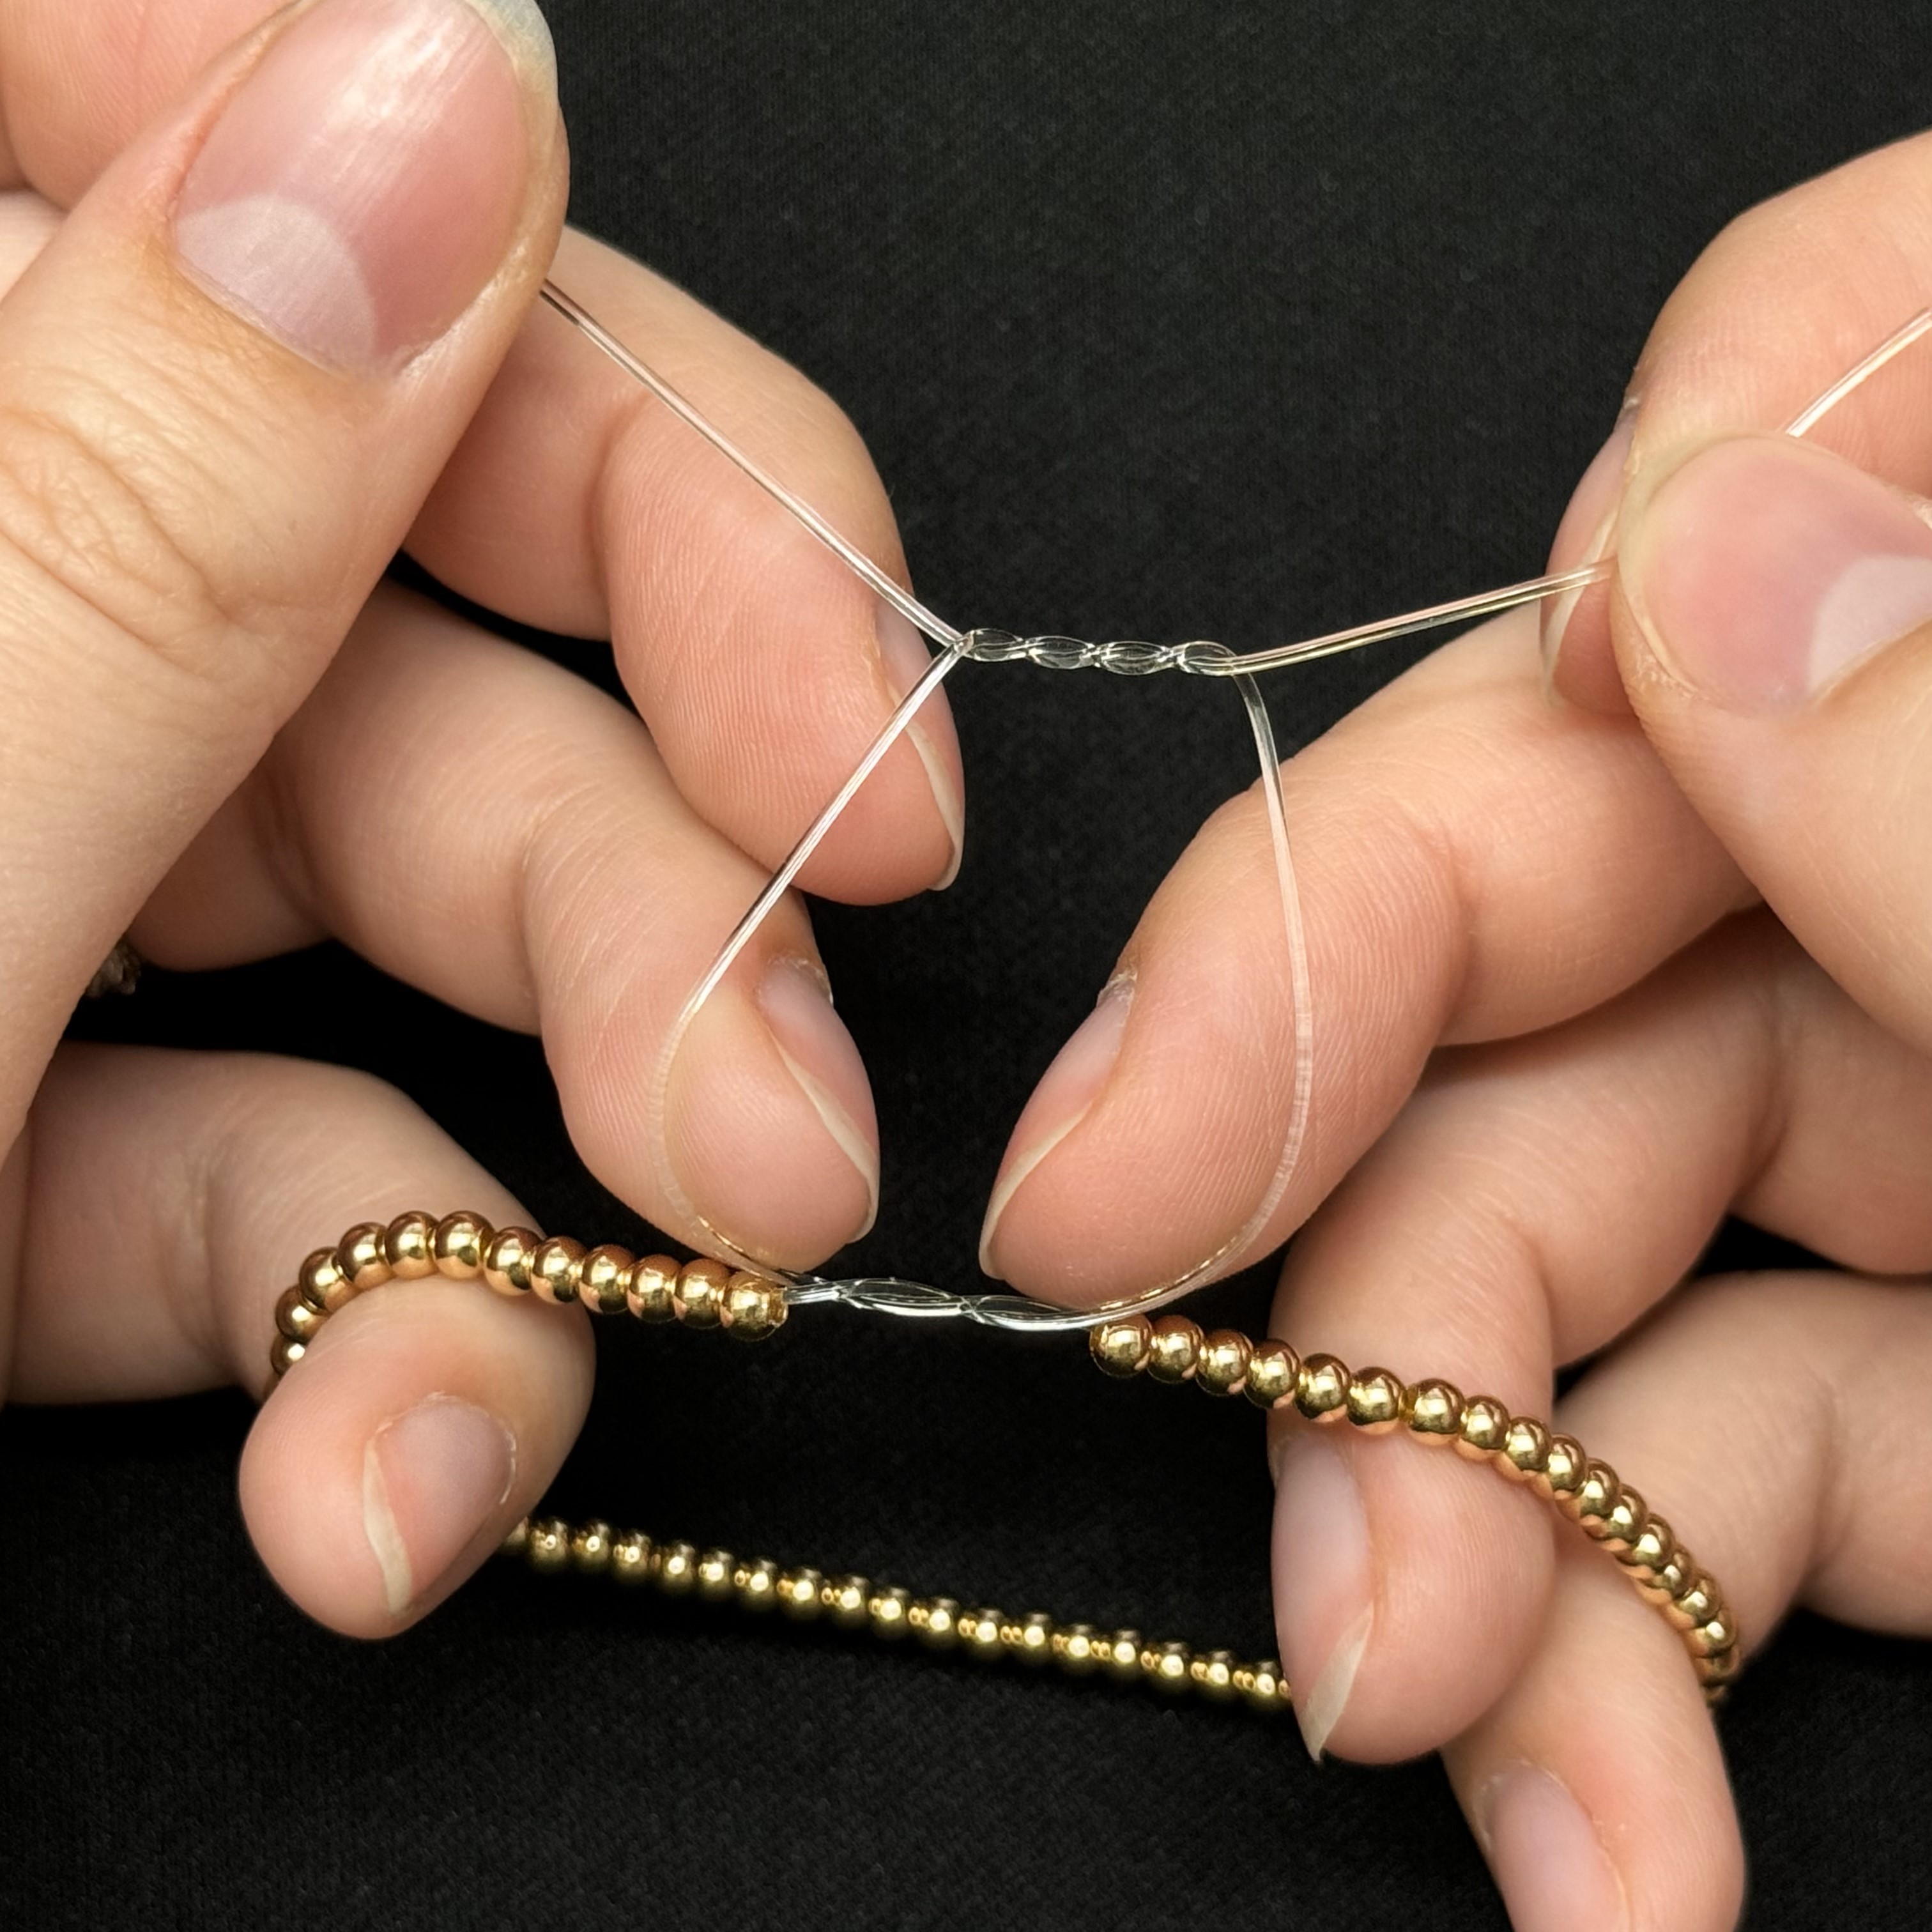
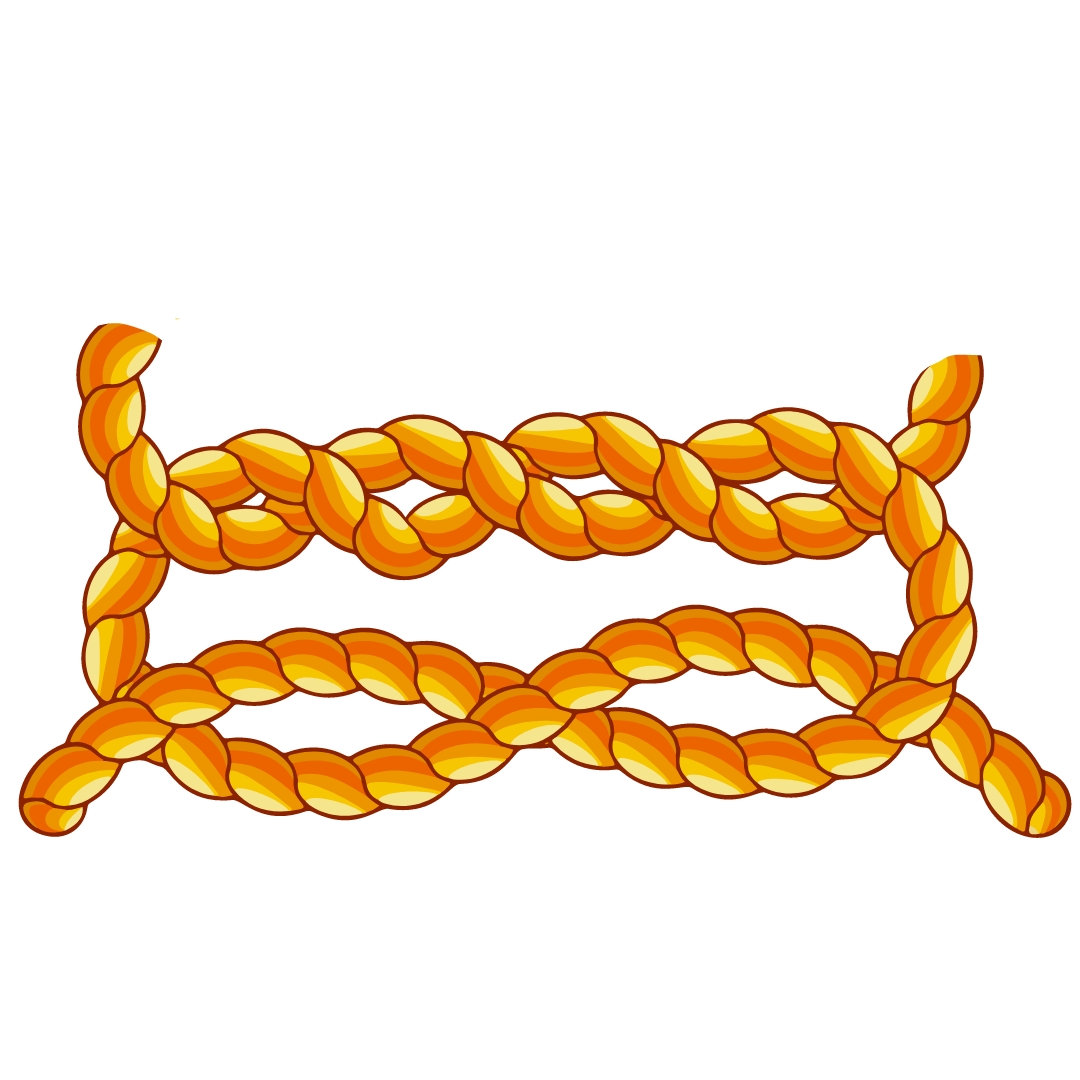
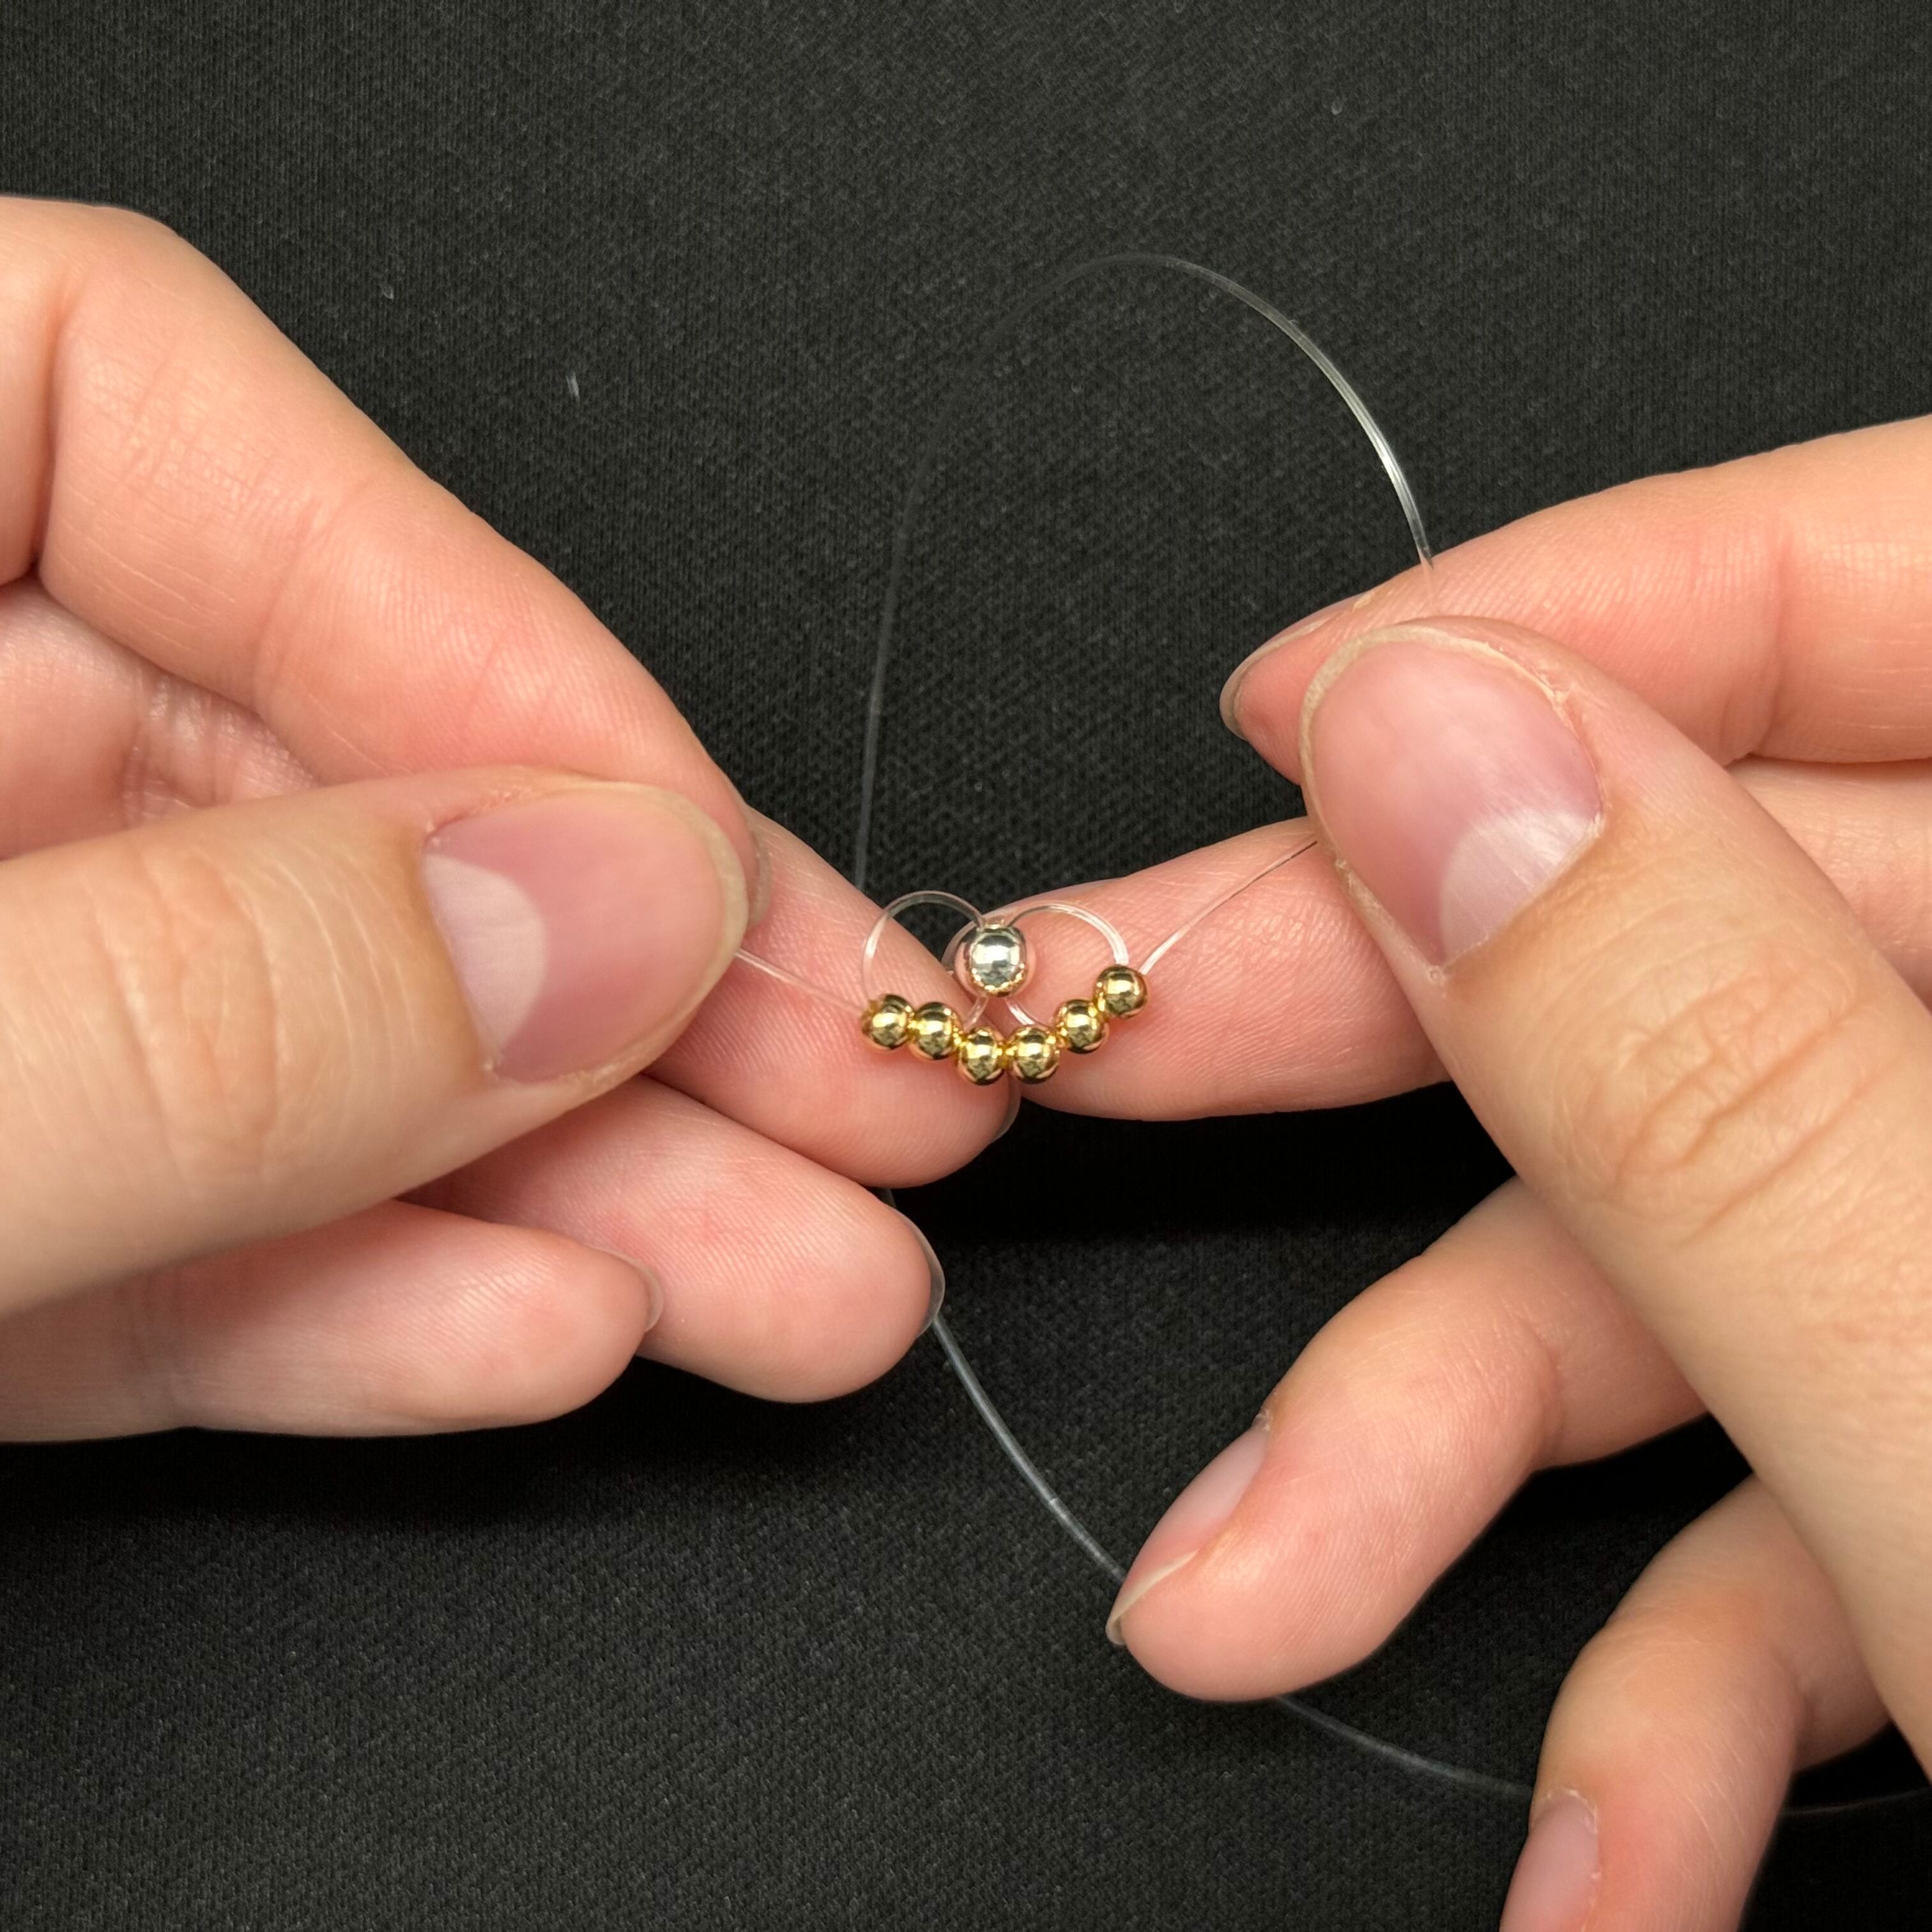
7. With both cords, thread through 2 gold beads like an X. I find it easiest to thread the 2 beads onto one cord first and then push the other cord through the opposite end
8. Pull the cord tight to create the first flower in your "daisy chain"
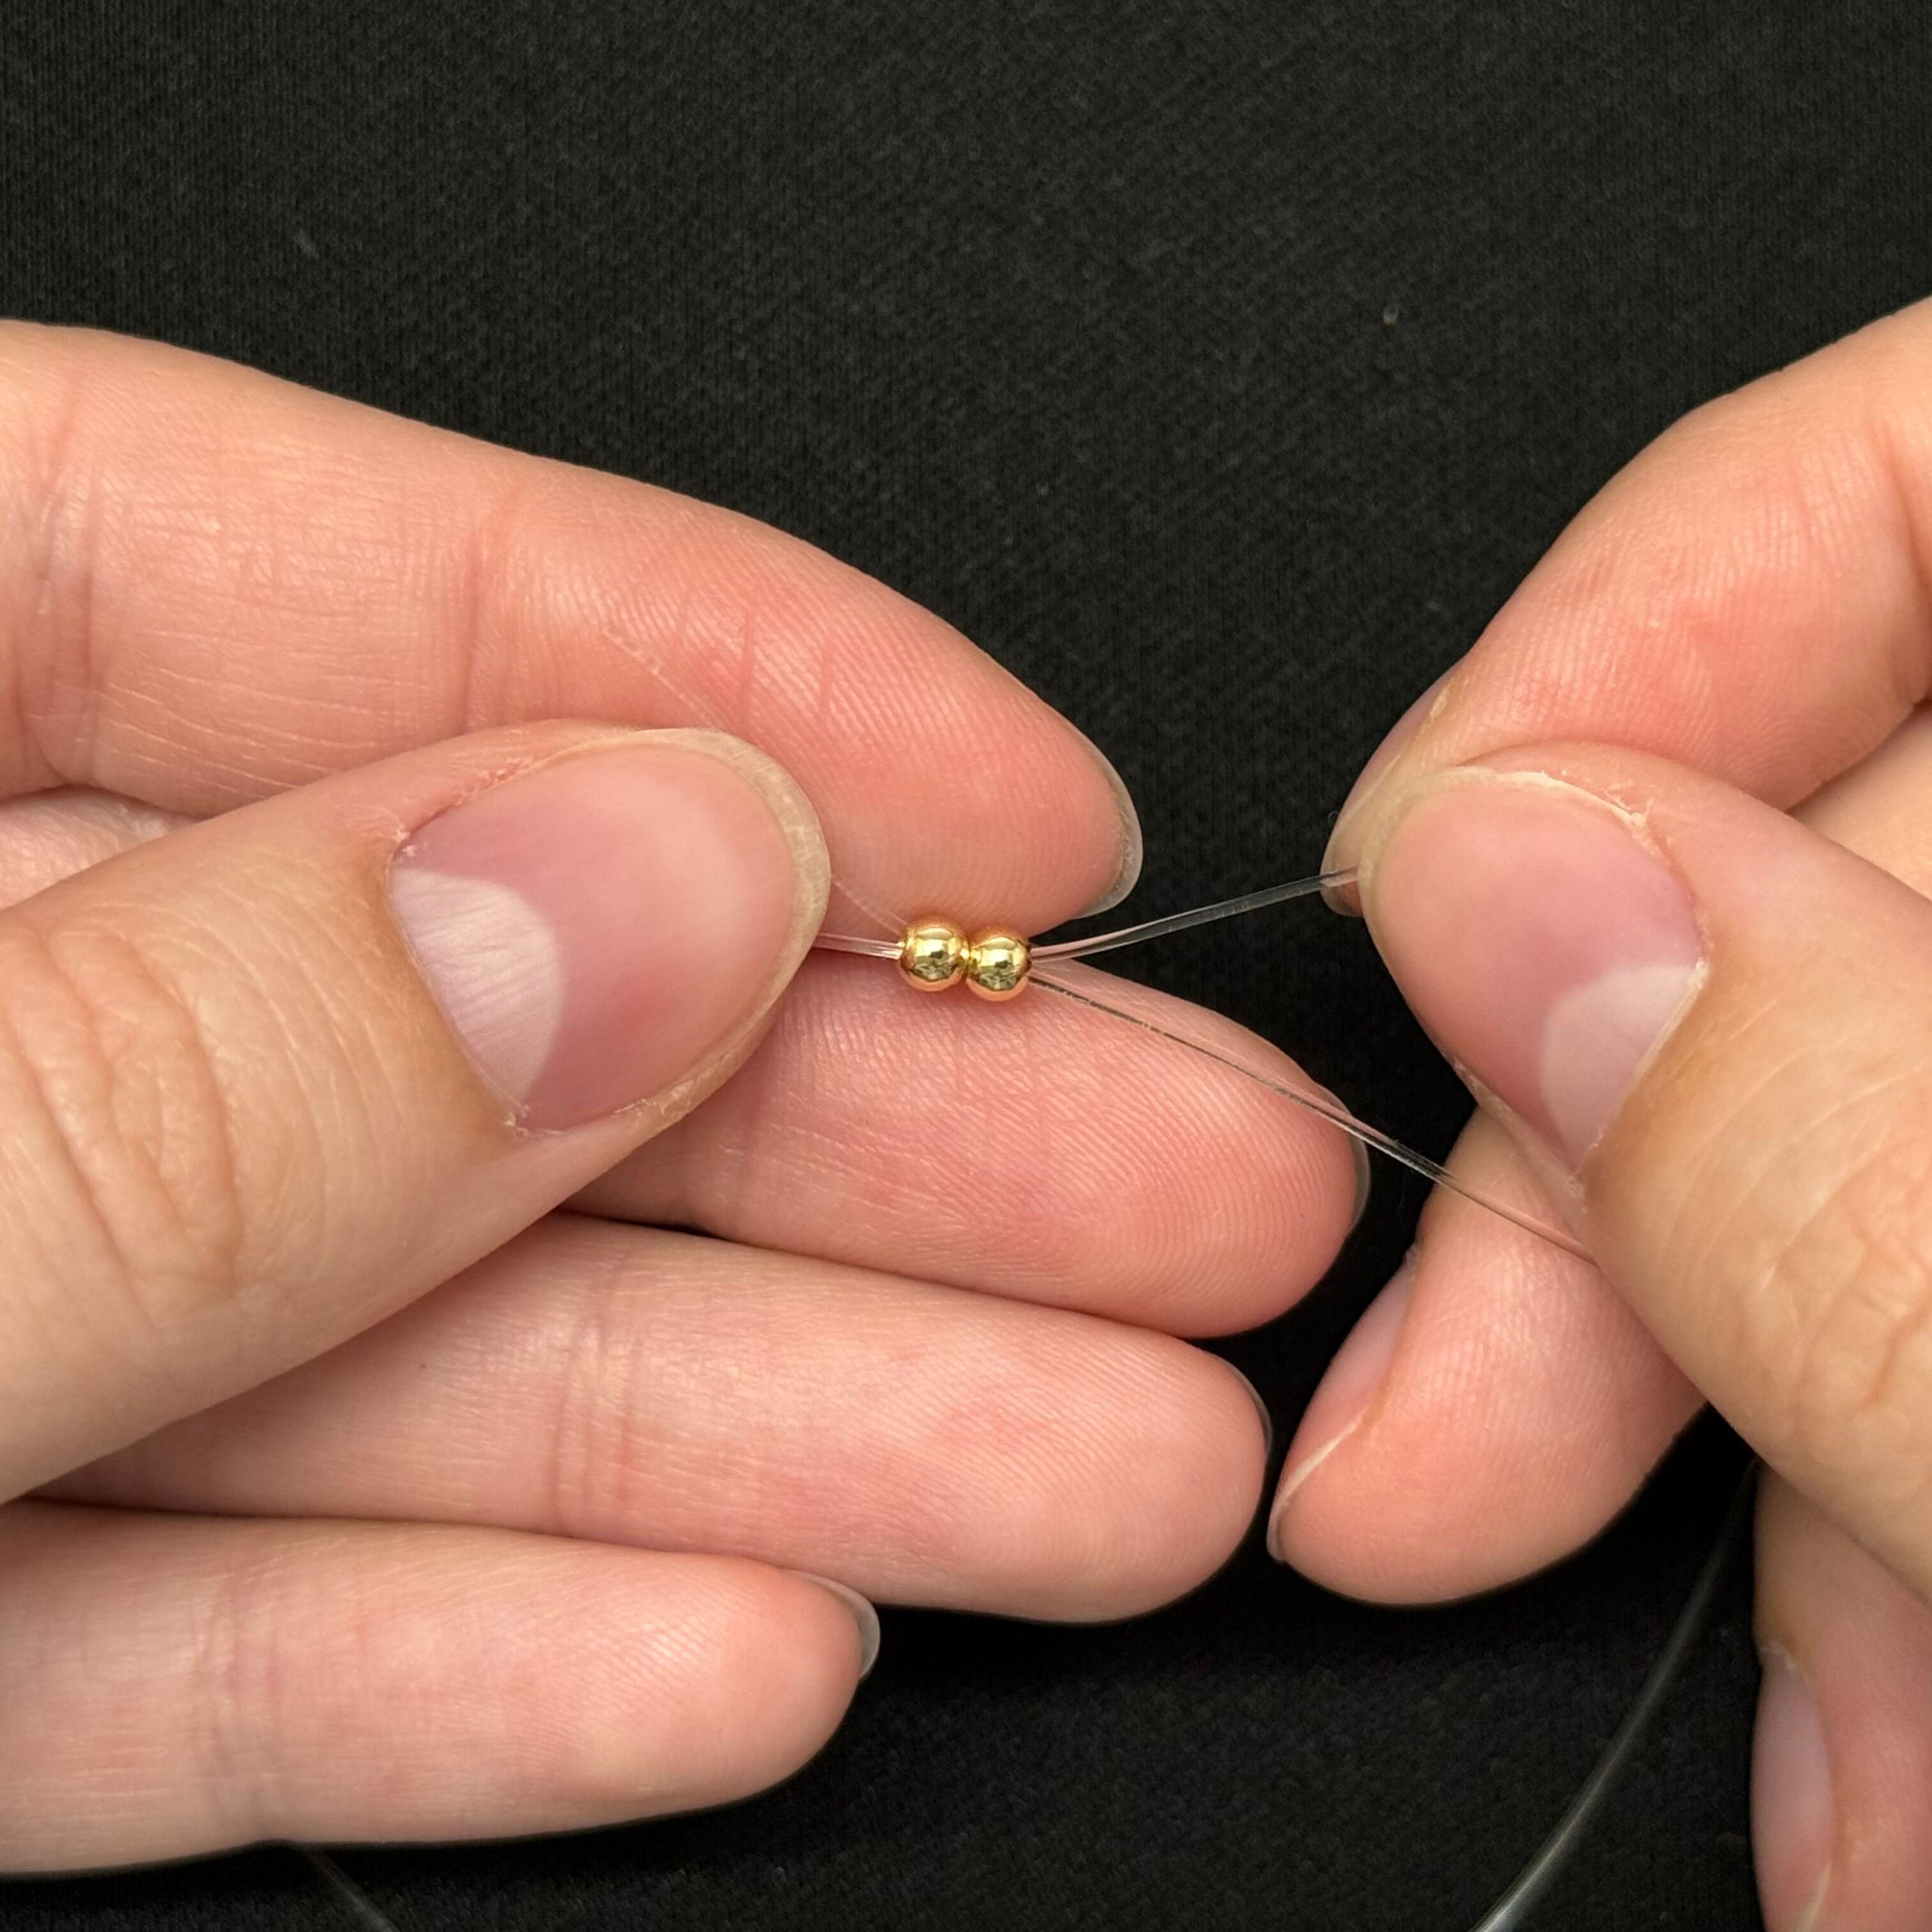
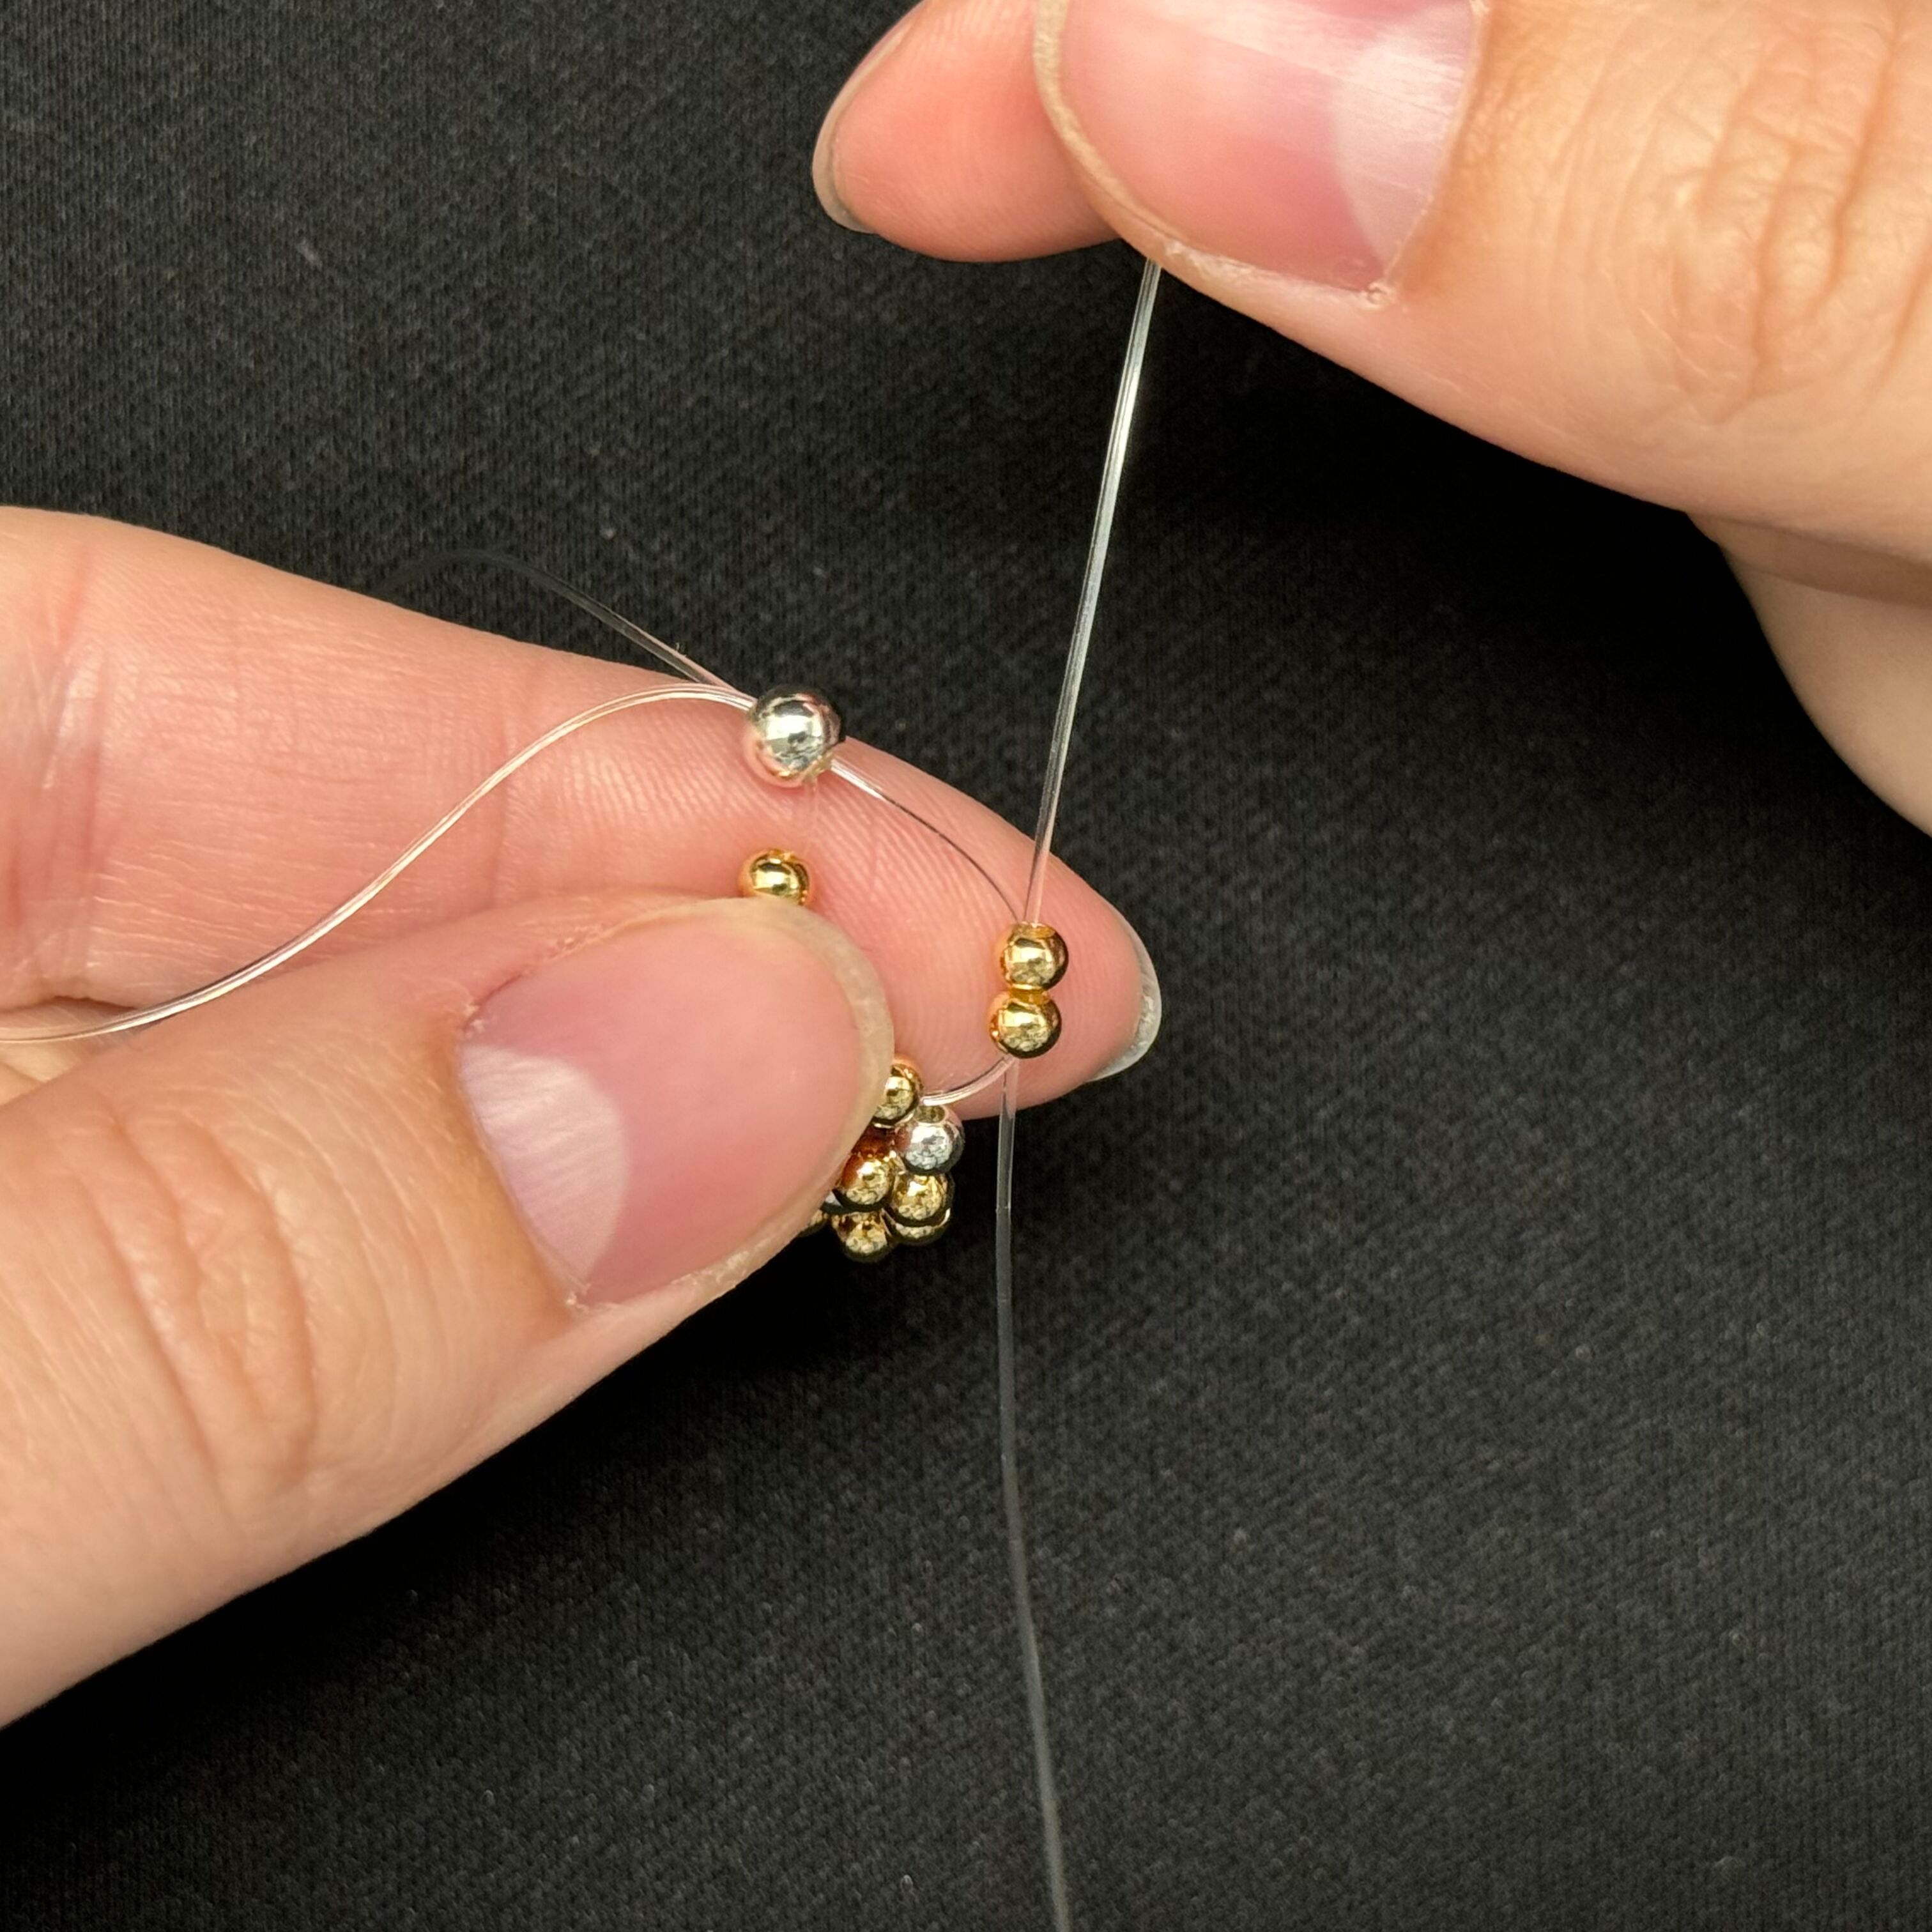
9. String on one 3mm silver bead on each of the stretch cords (2 beads total)
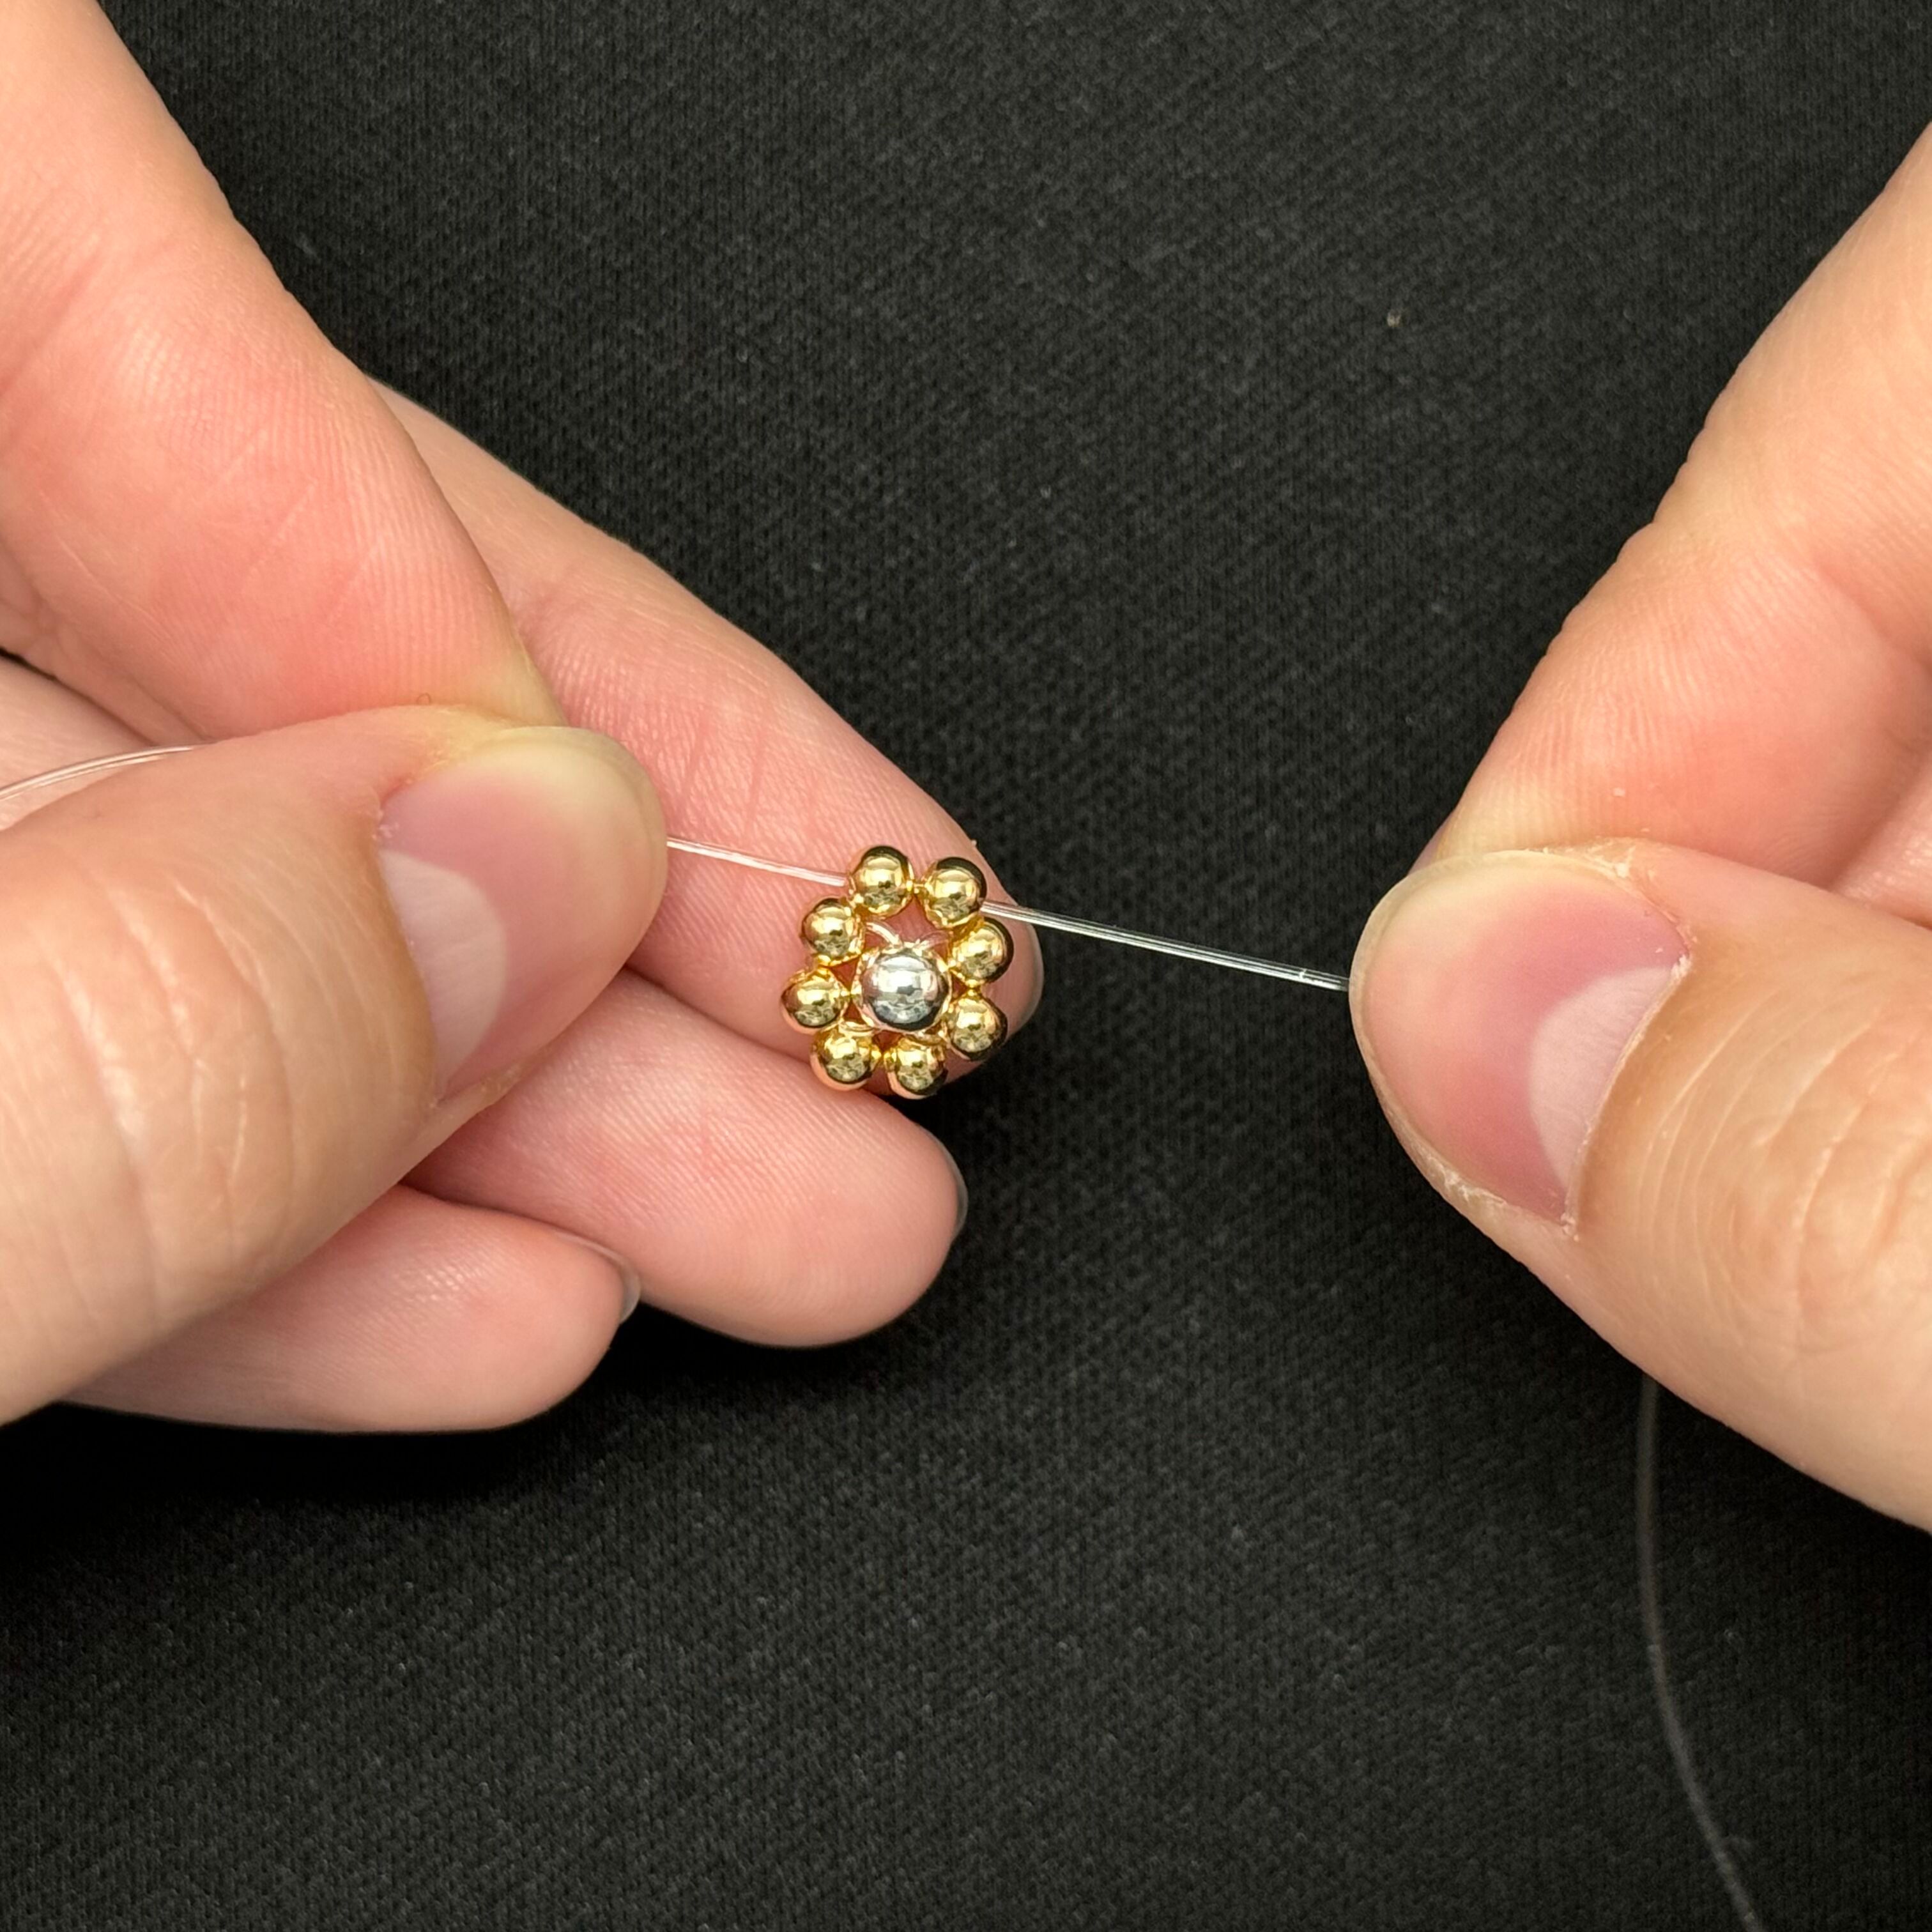
10. With both cords, thread through 2 gold beads like an X. Pull the two beads down and pull the cord tight
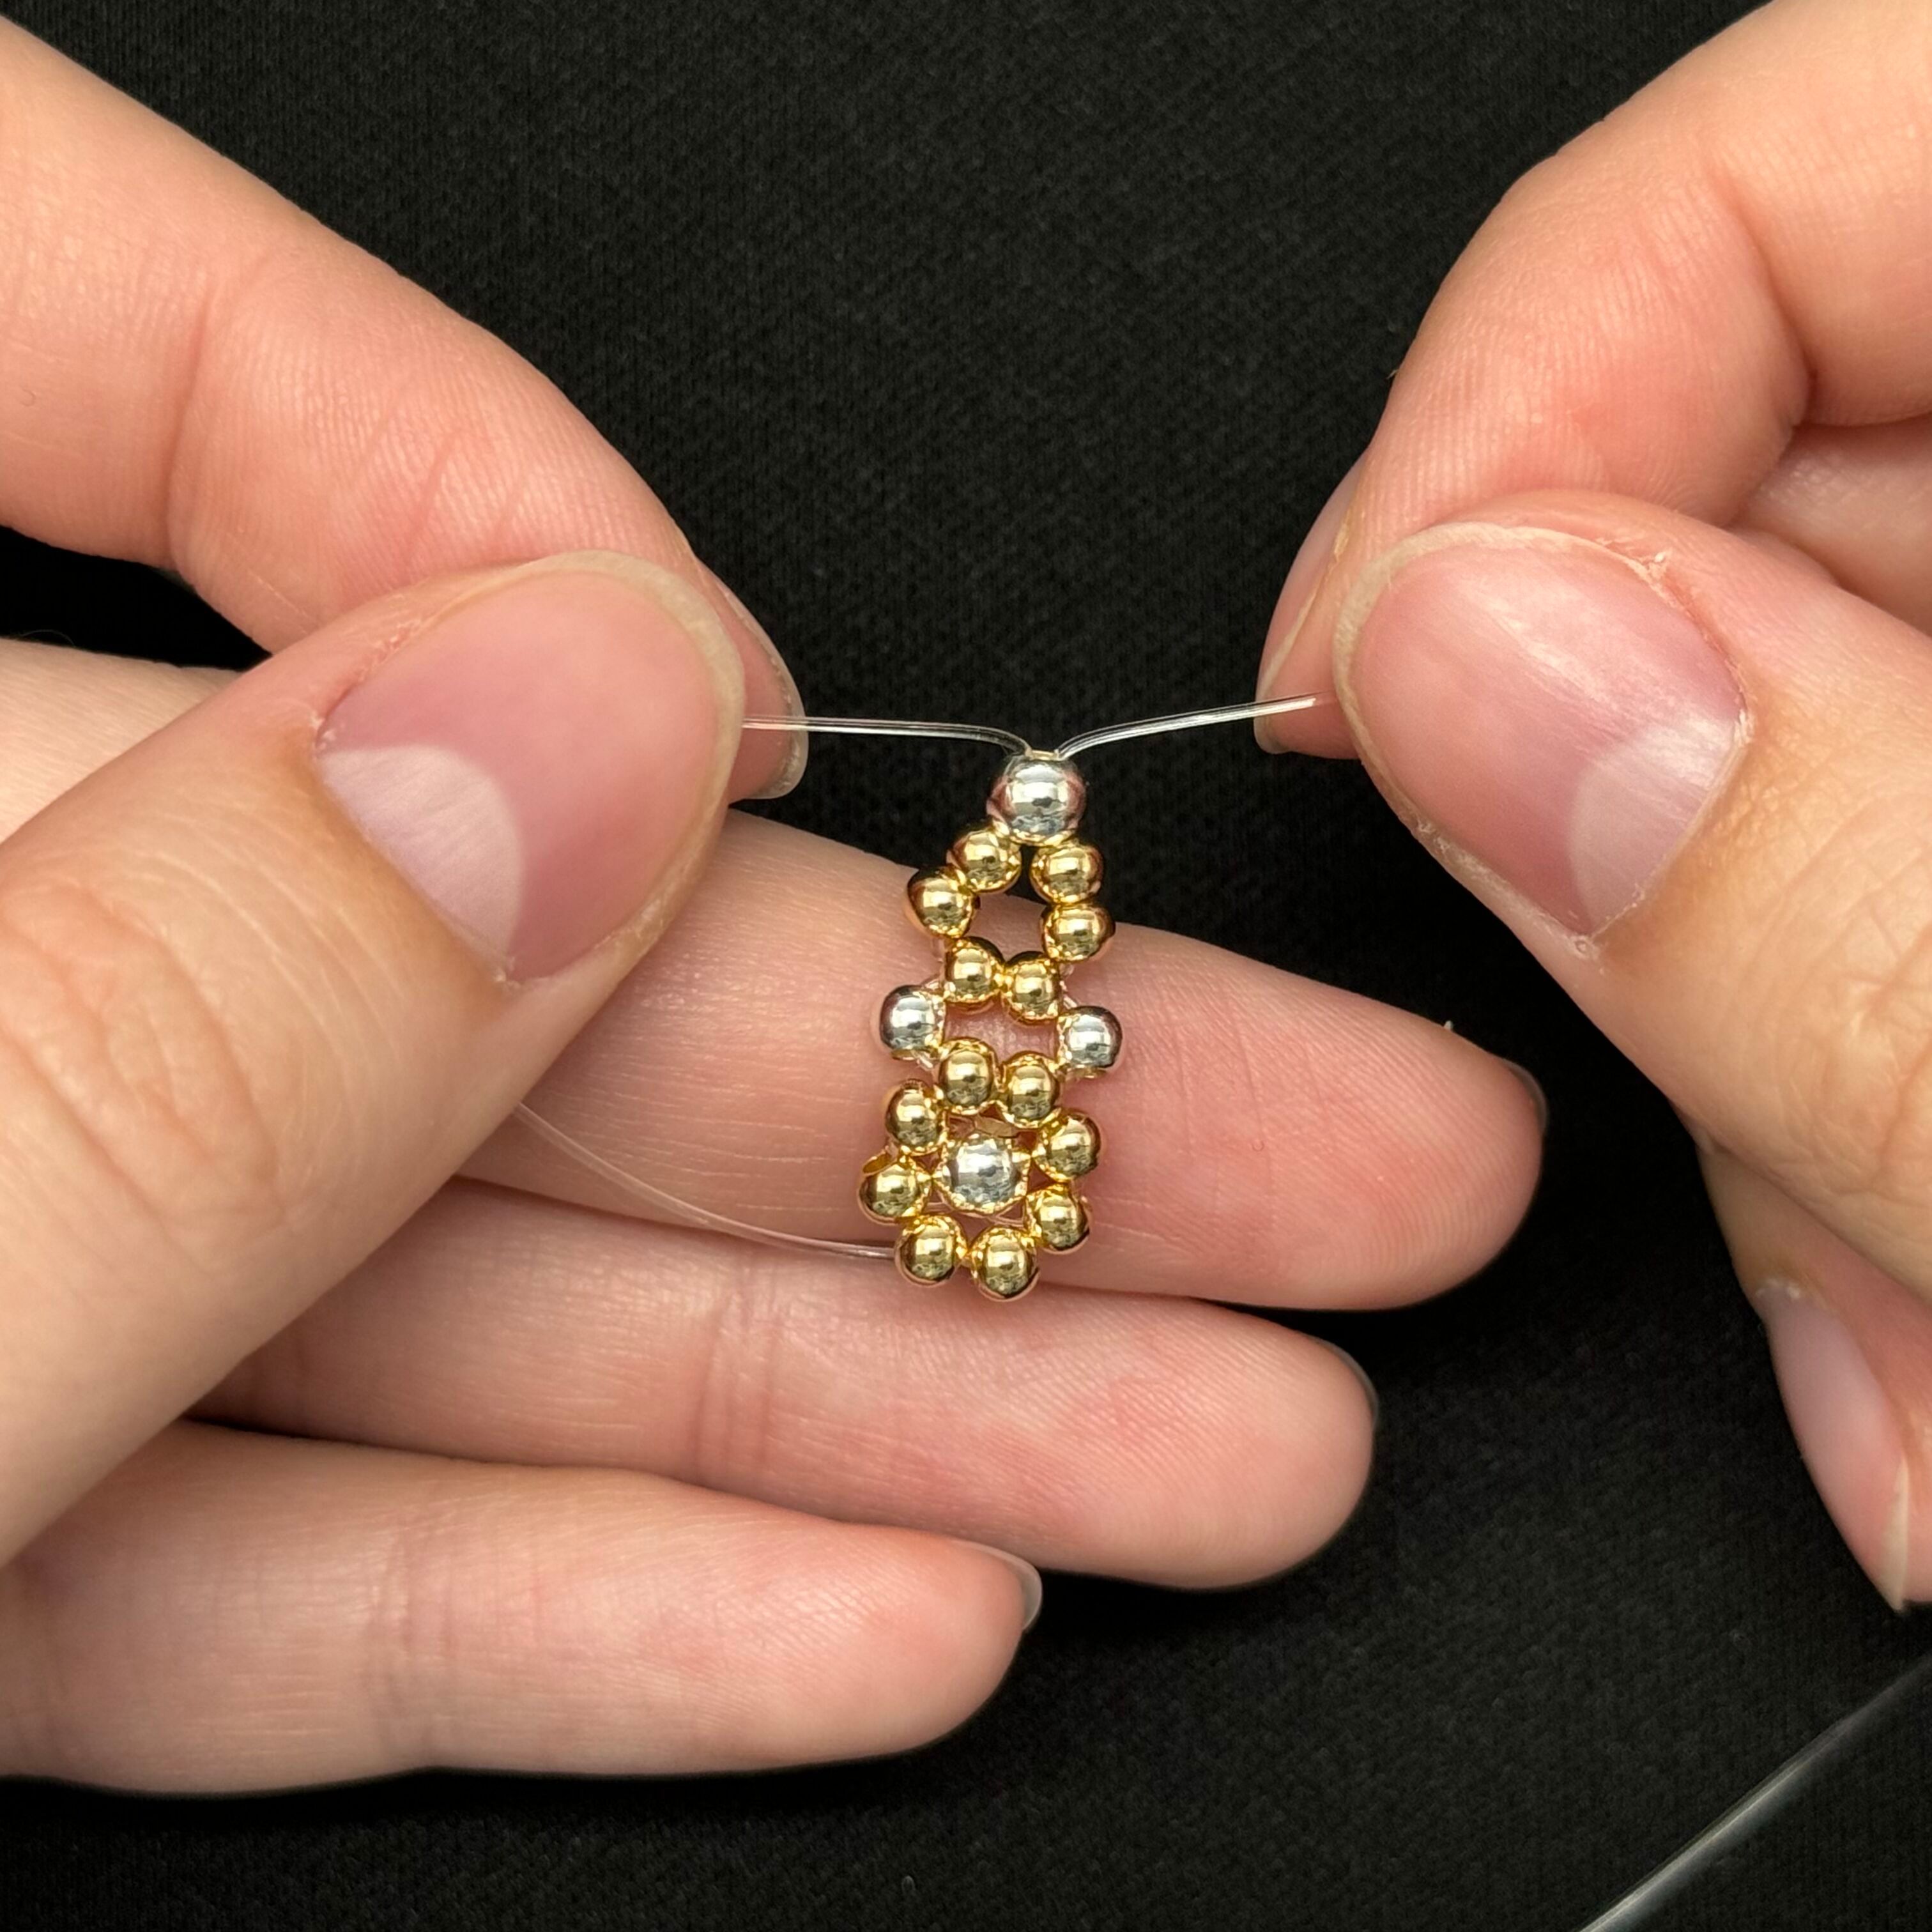
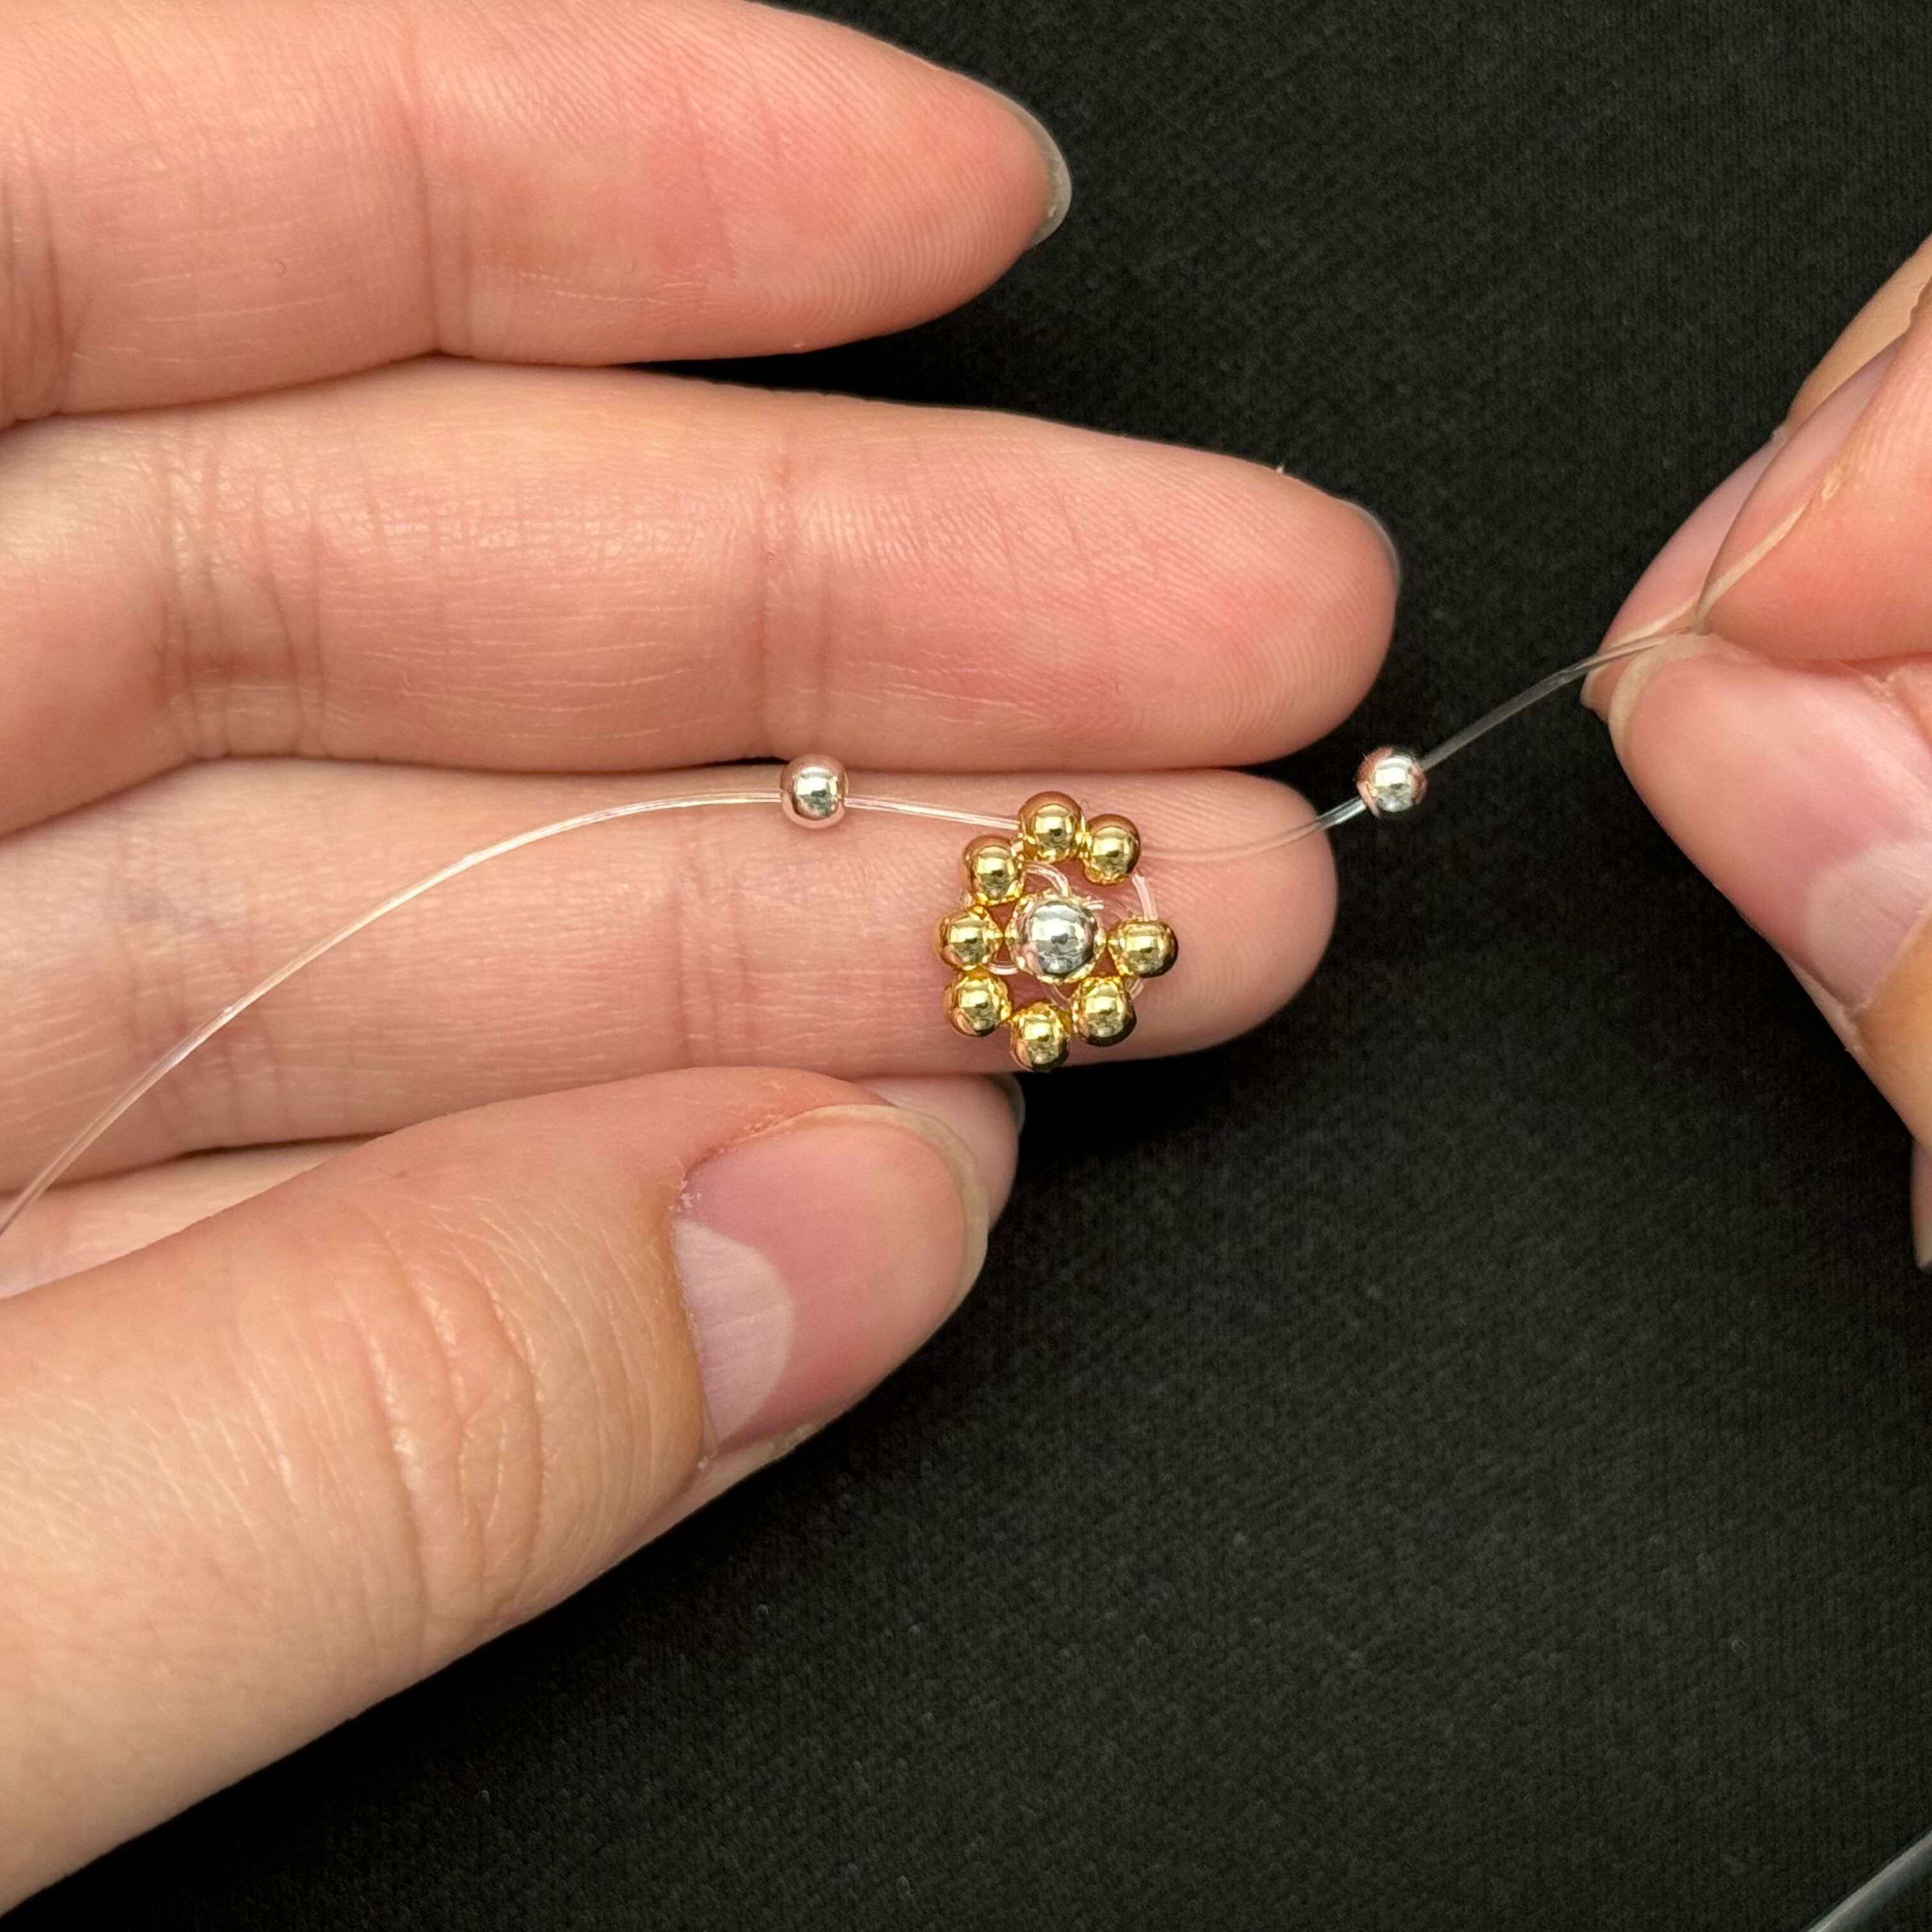
11. String on 2 gold beads on each end of the cord (4 gold beads total) and then 1 4mm silver bead through both cords as shown above. *try and keep track which is the right and left cord so they don't get tangled, if it does - no worries you can adjust as you go
12. Take the right cord and thread it up through *only* the two gold beads shown above (don't pull all the way through just yet)
13. Repeat with the left side and pull the cord tight
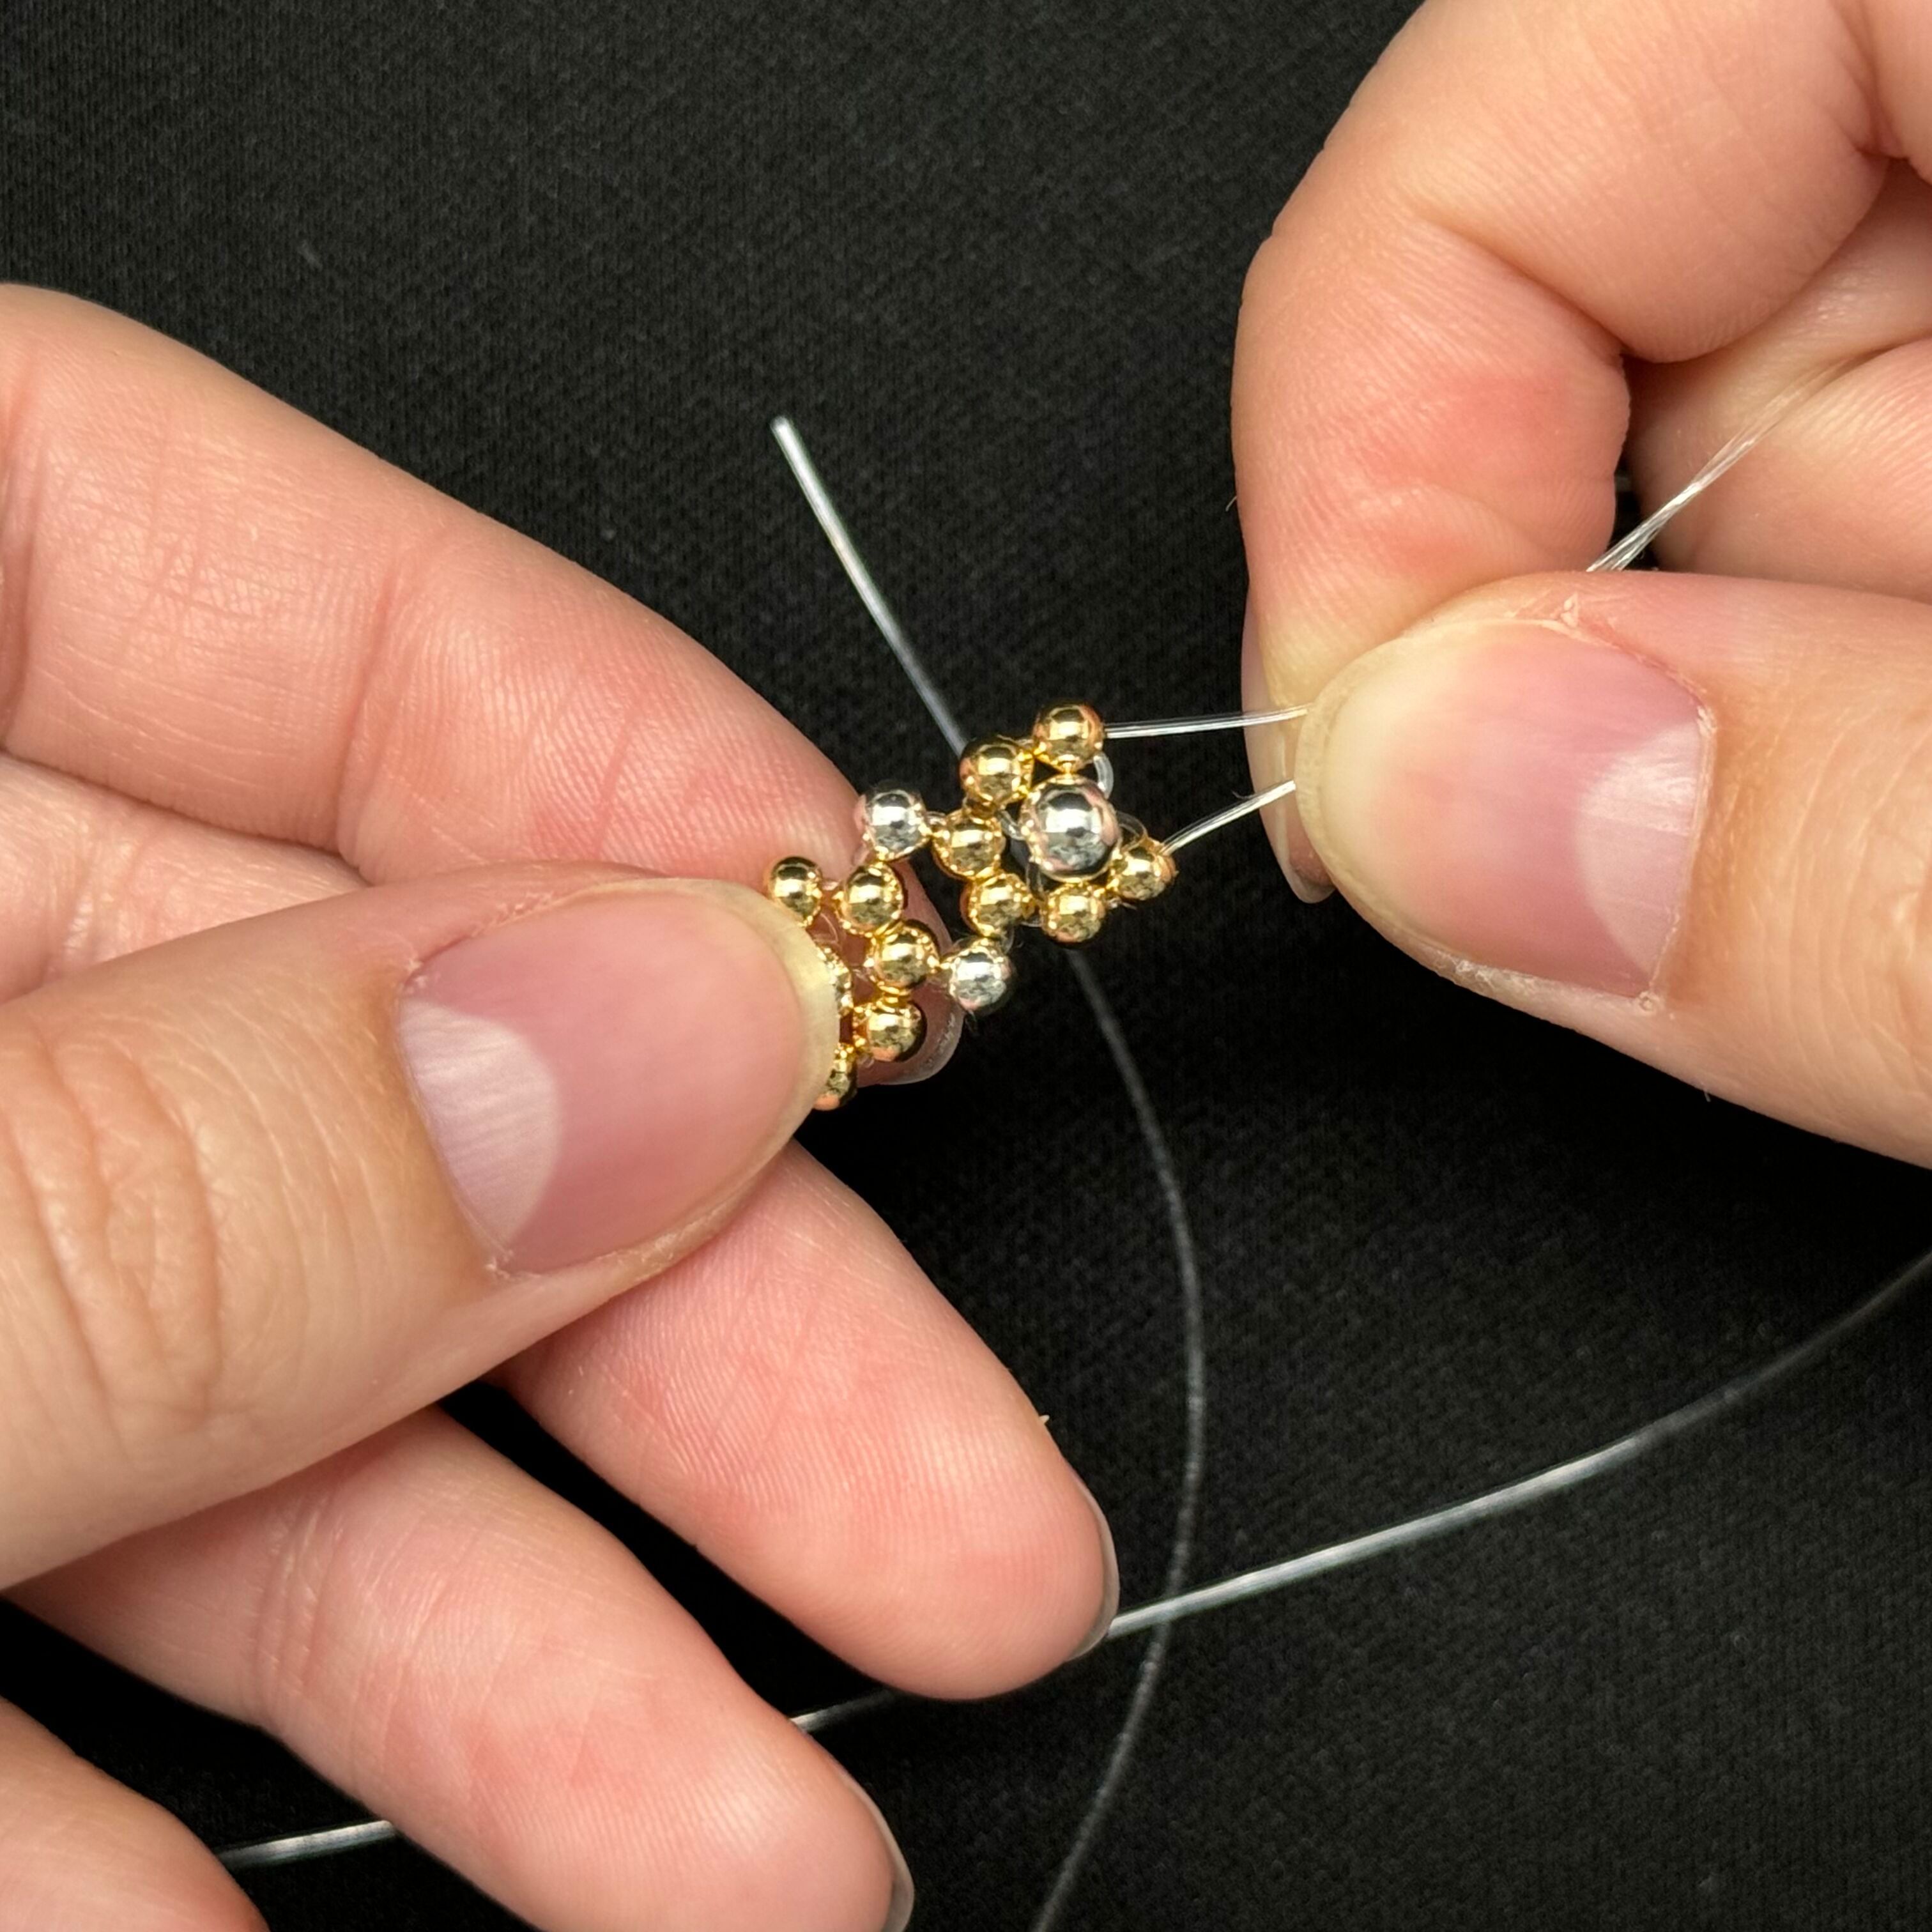
14. With both cords, thread through 2 gold beads like an X. Pull the two beads down and pull the cord tight
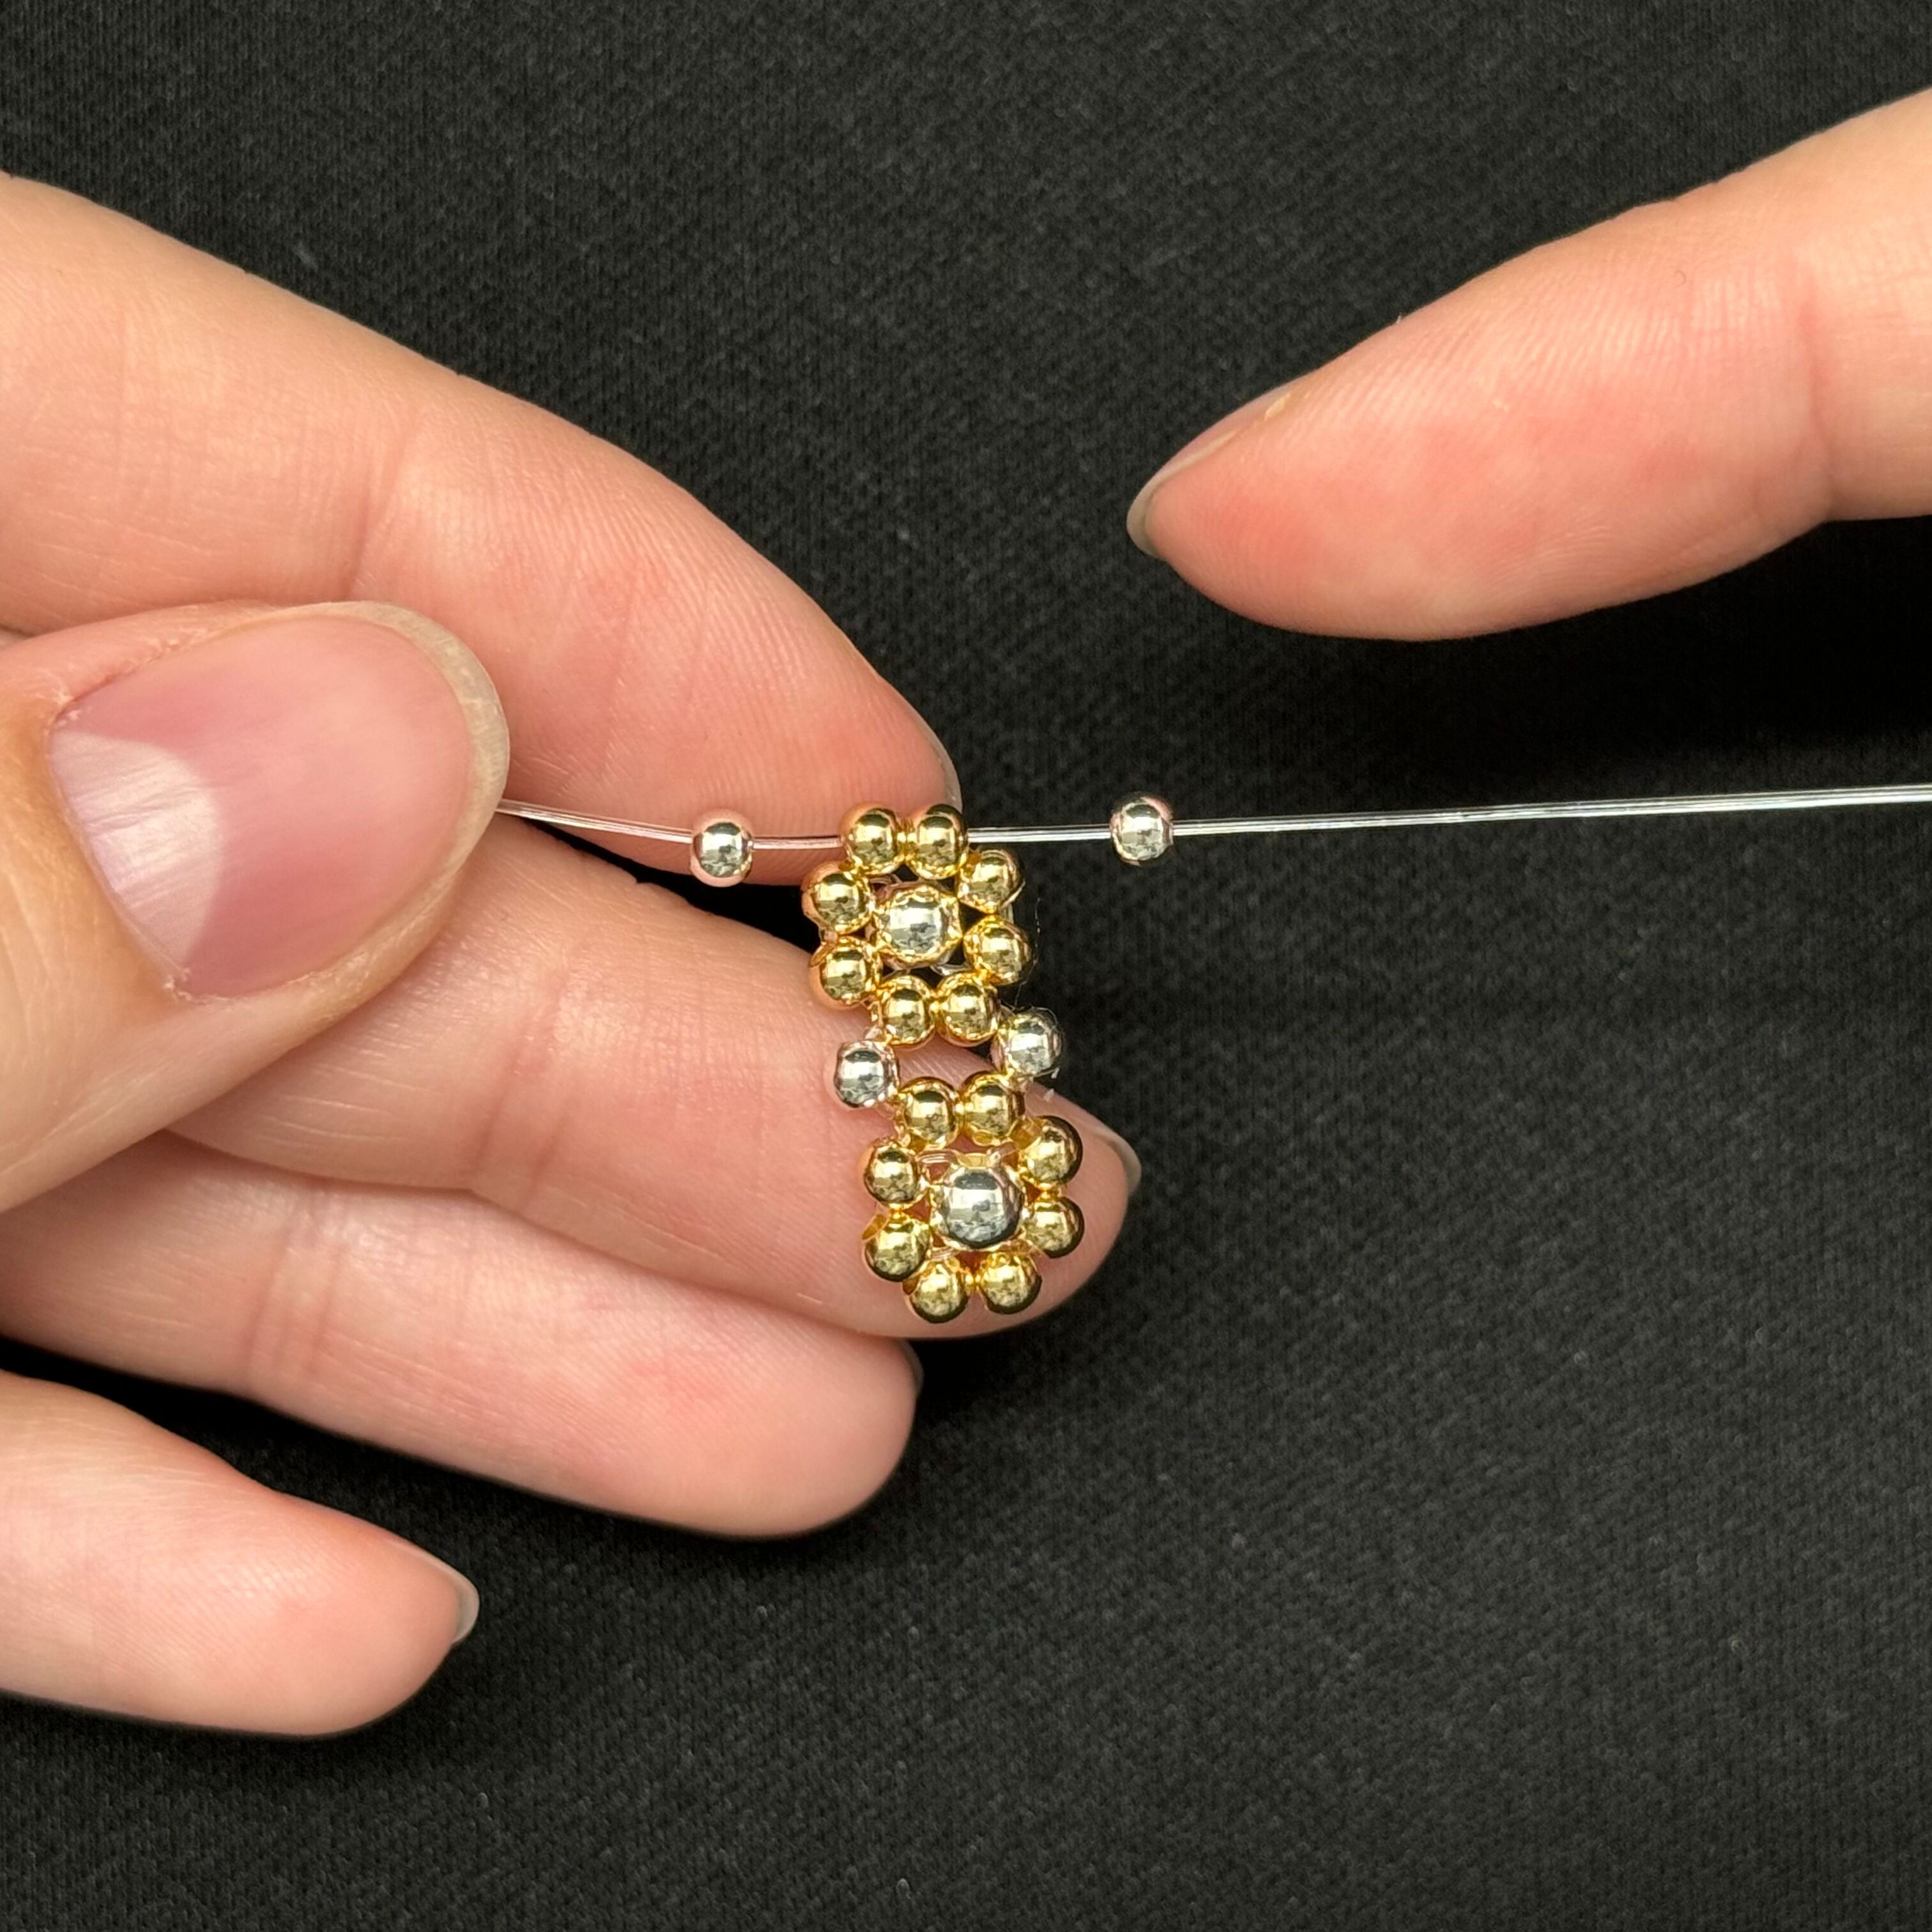
15. String on one 3mm silver bead on each of the stretch cords (2 beads total) - Keep the pattern going until you have your desired length
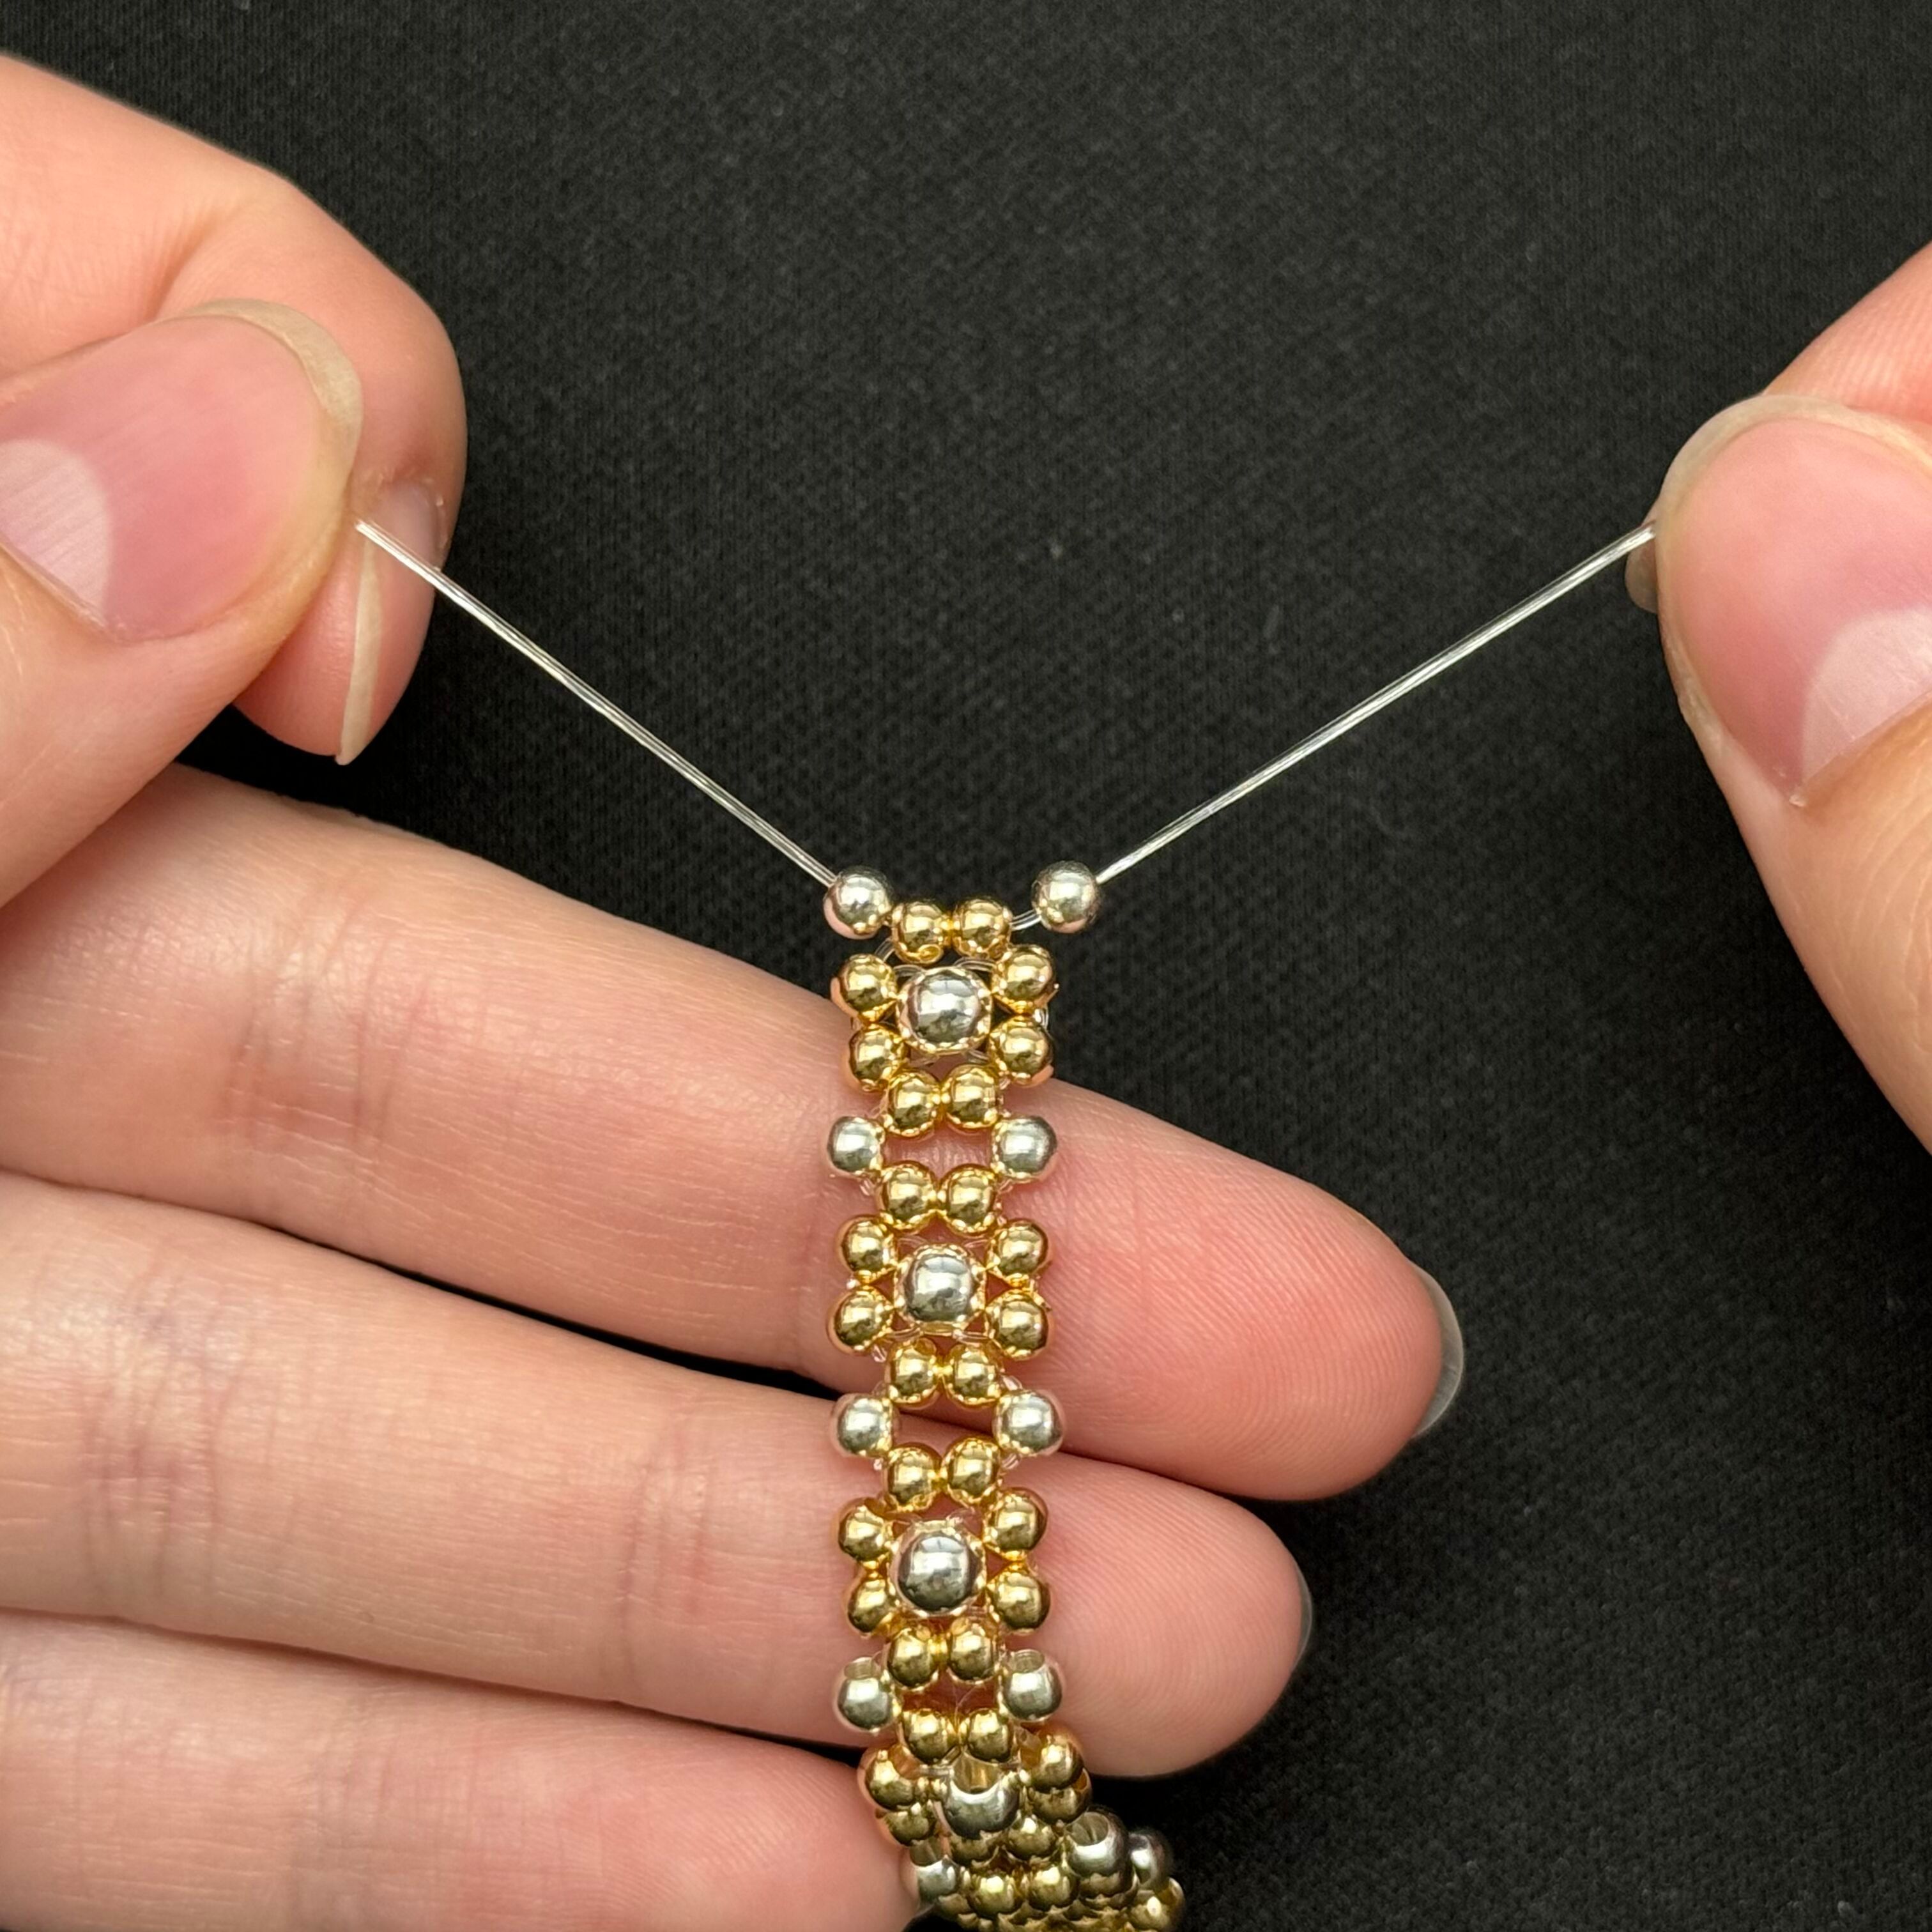
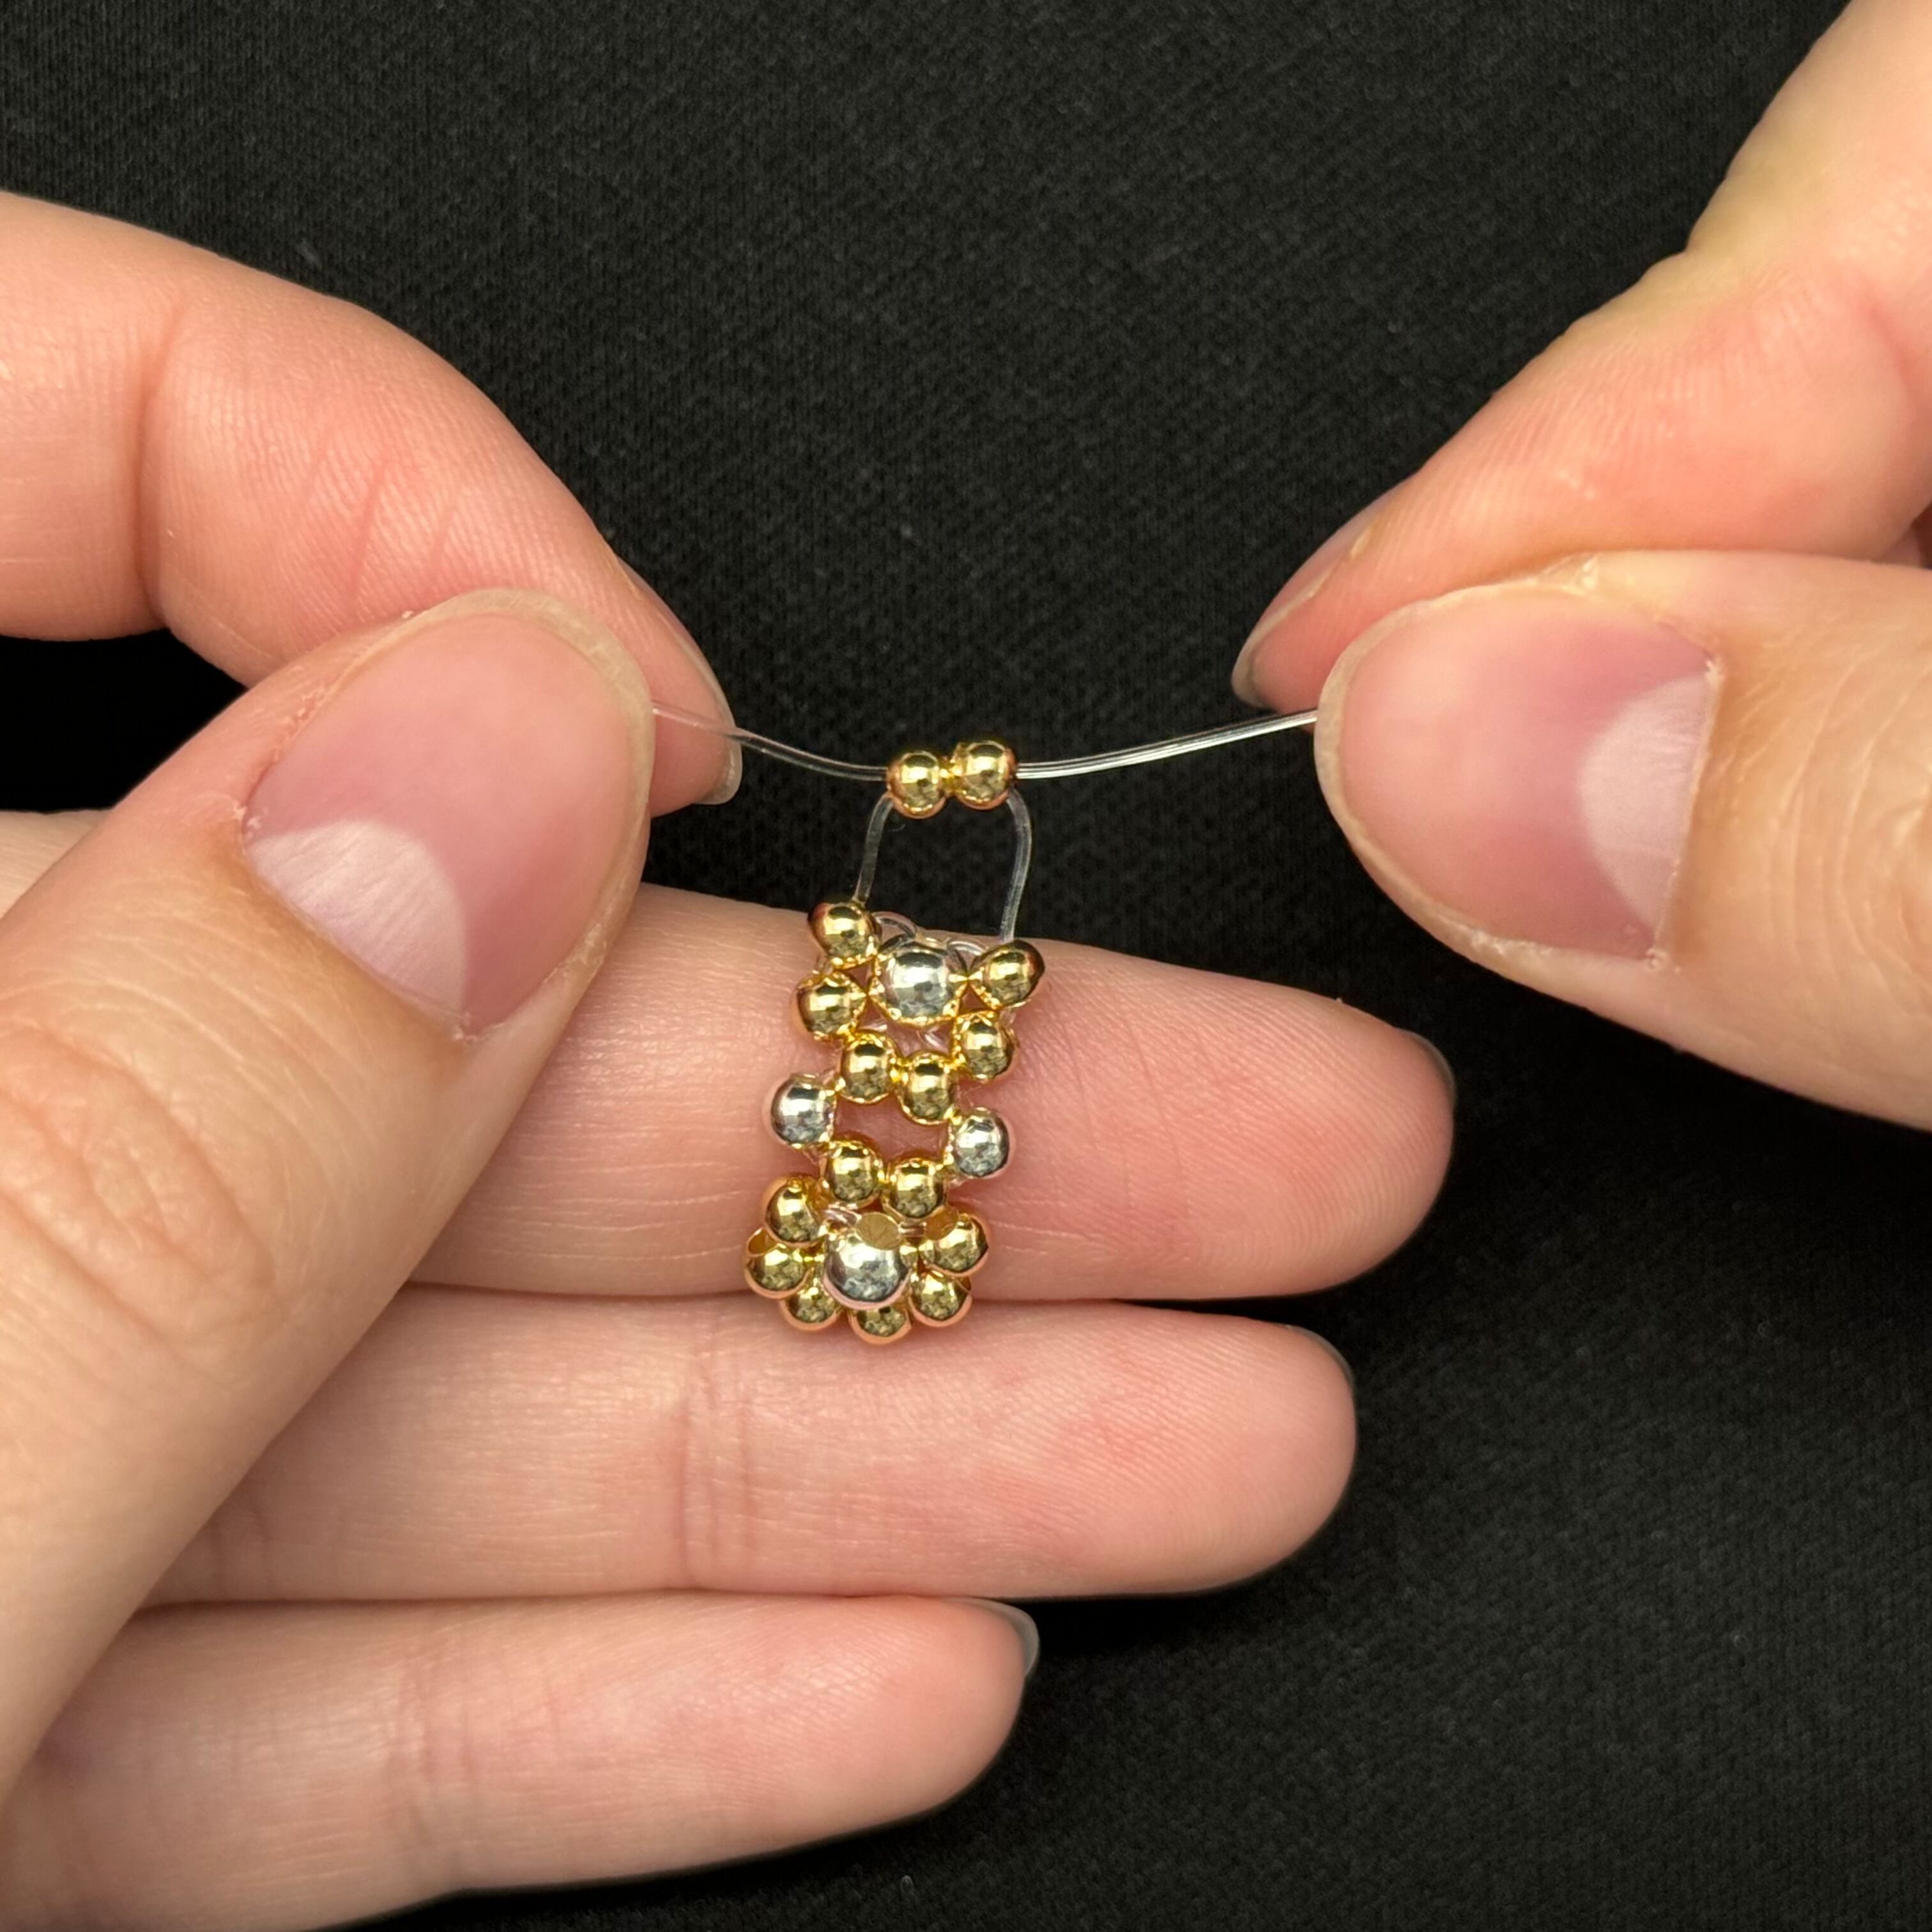
16. Once you've reached your desired length, make sure you have one 3mm silver bead on each of the stretch cords
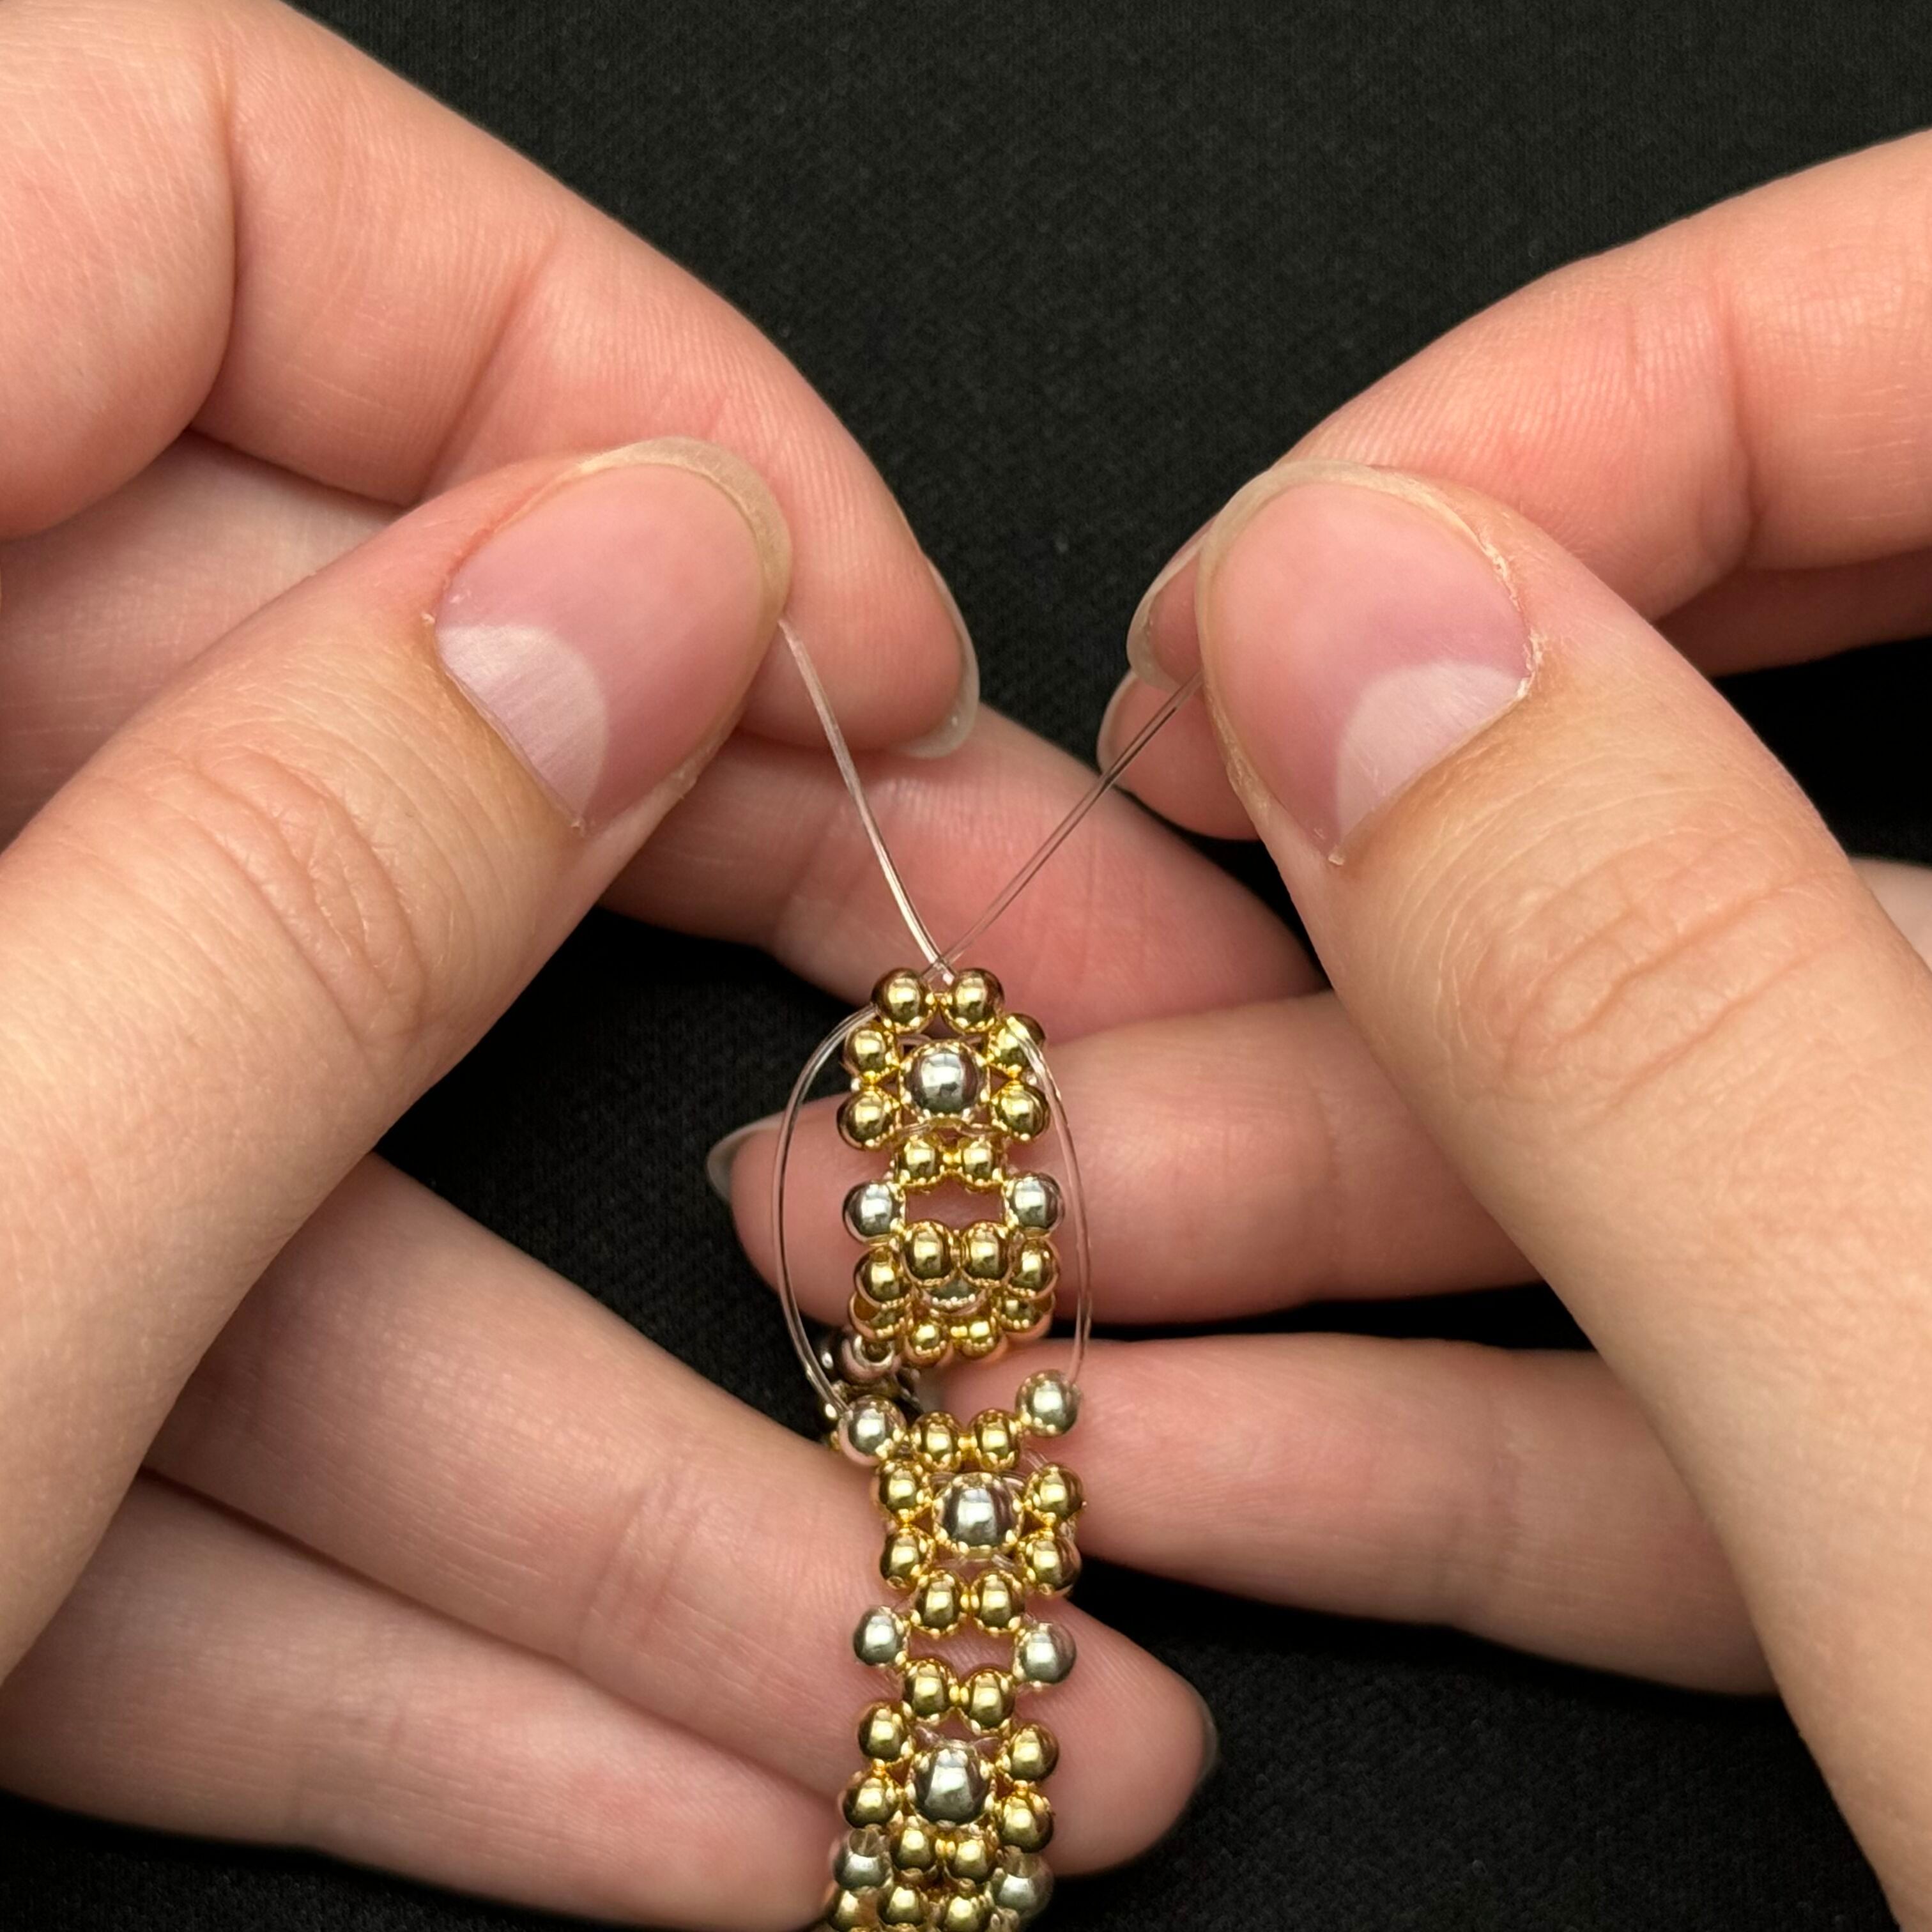
17. Pull the cords in an X through the two beads at the other end of the bracelet. Make sure the center of the X is in the center of these two beads
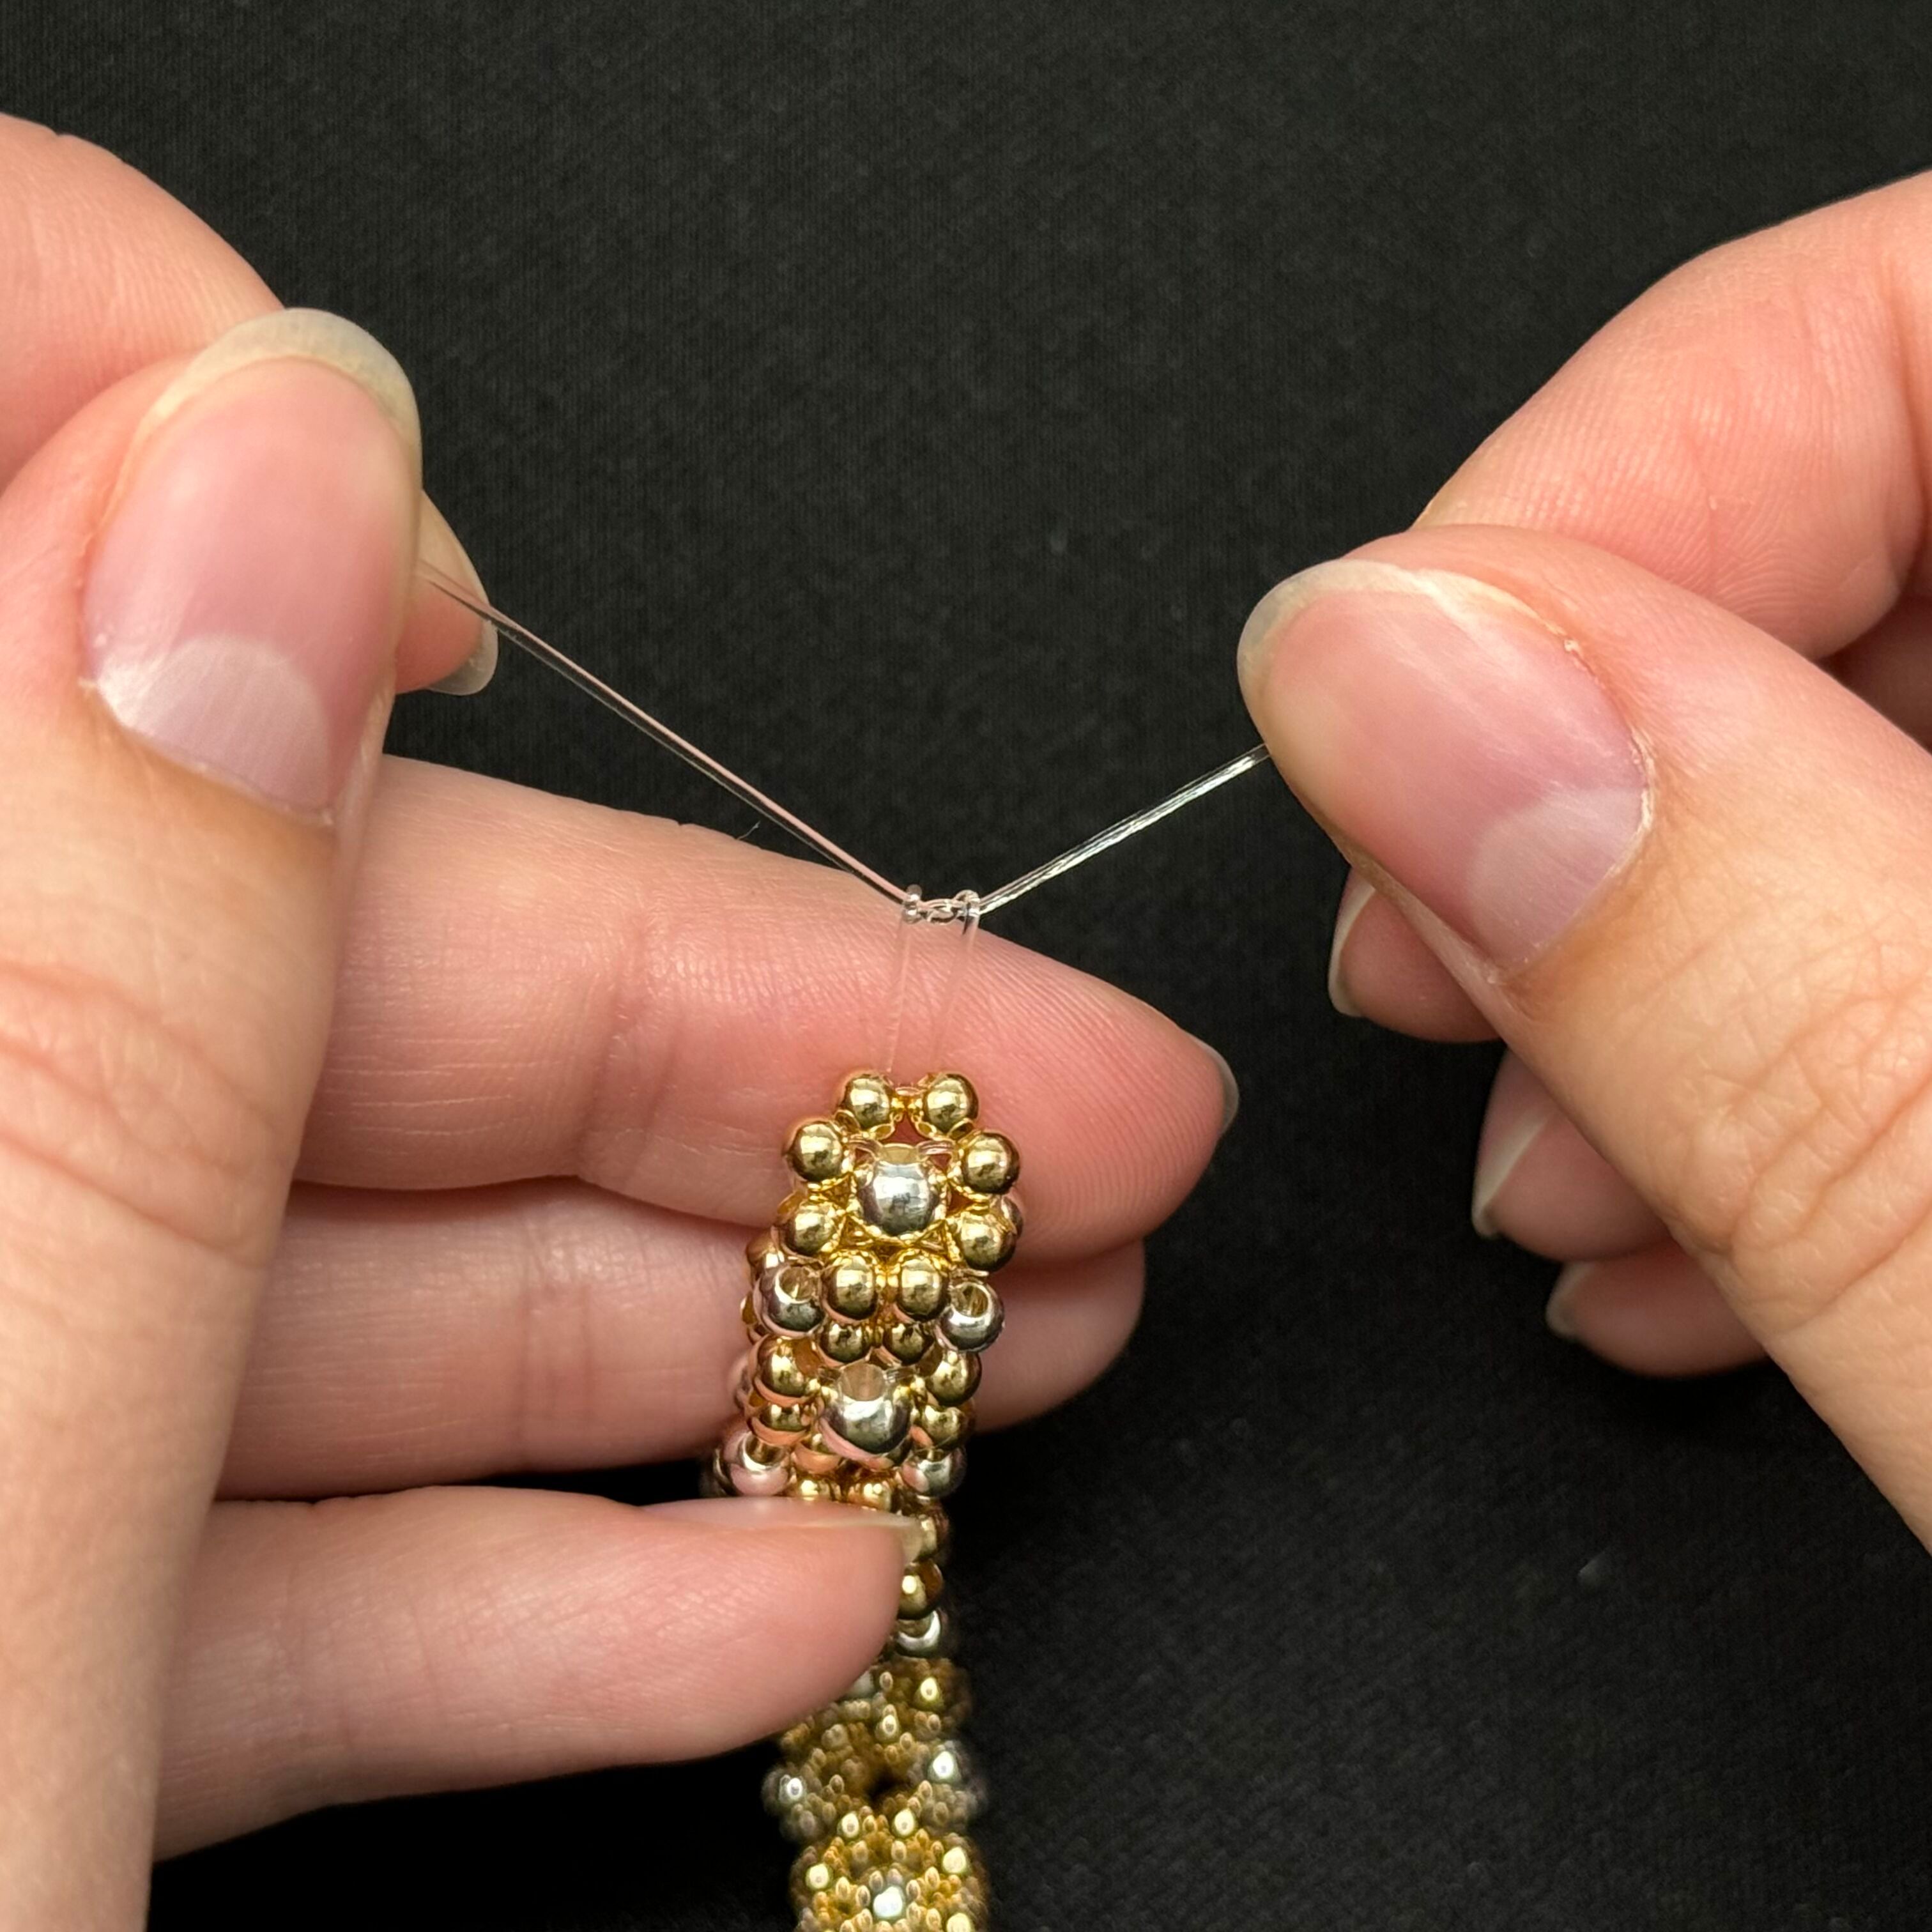
18. Tie an overhand knot
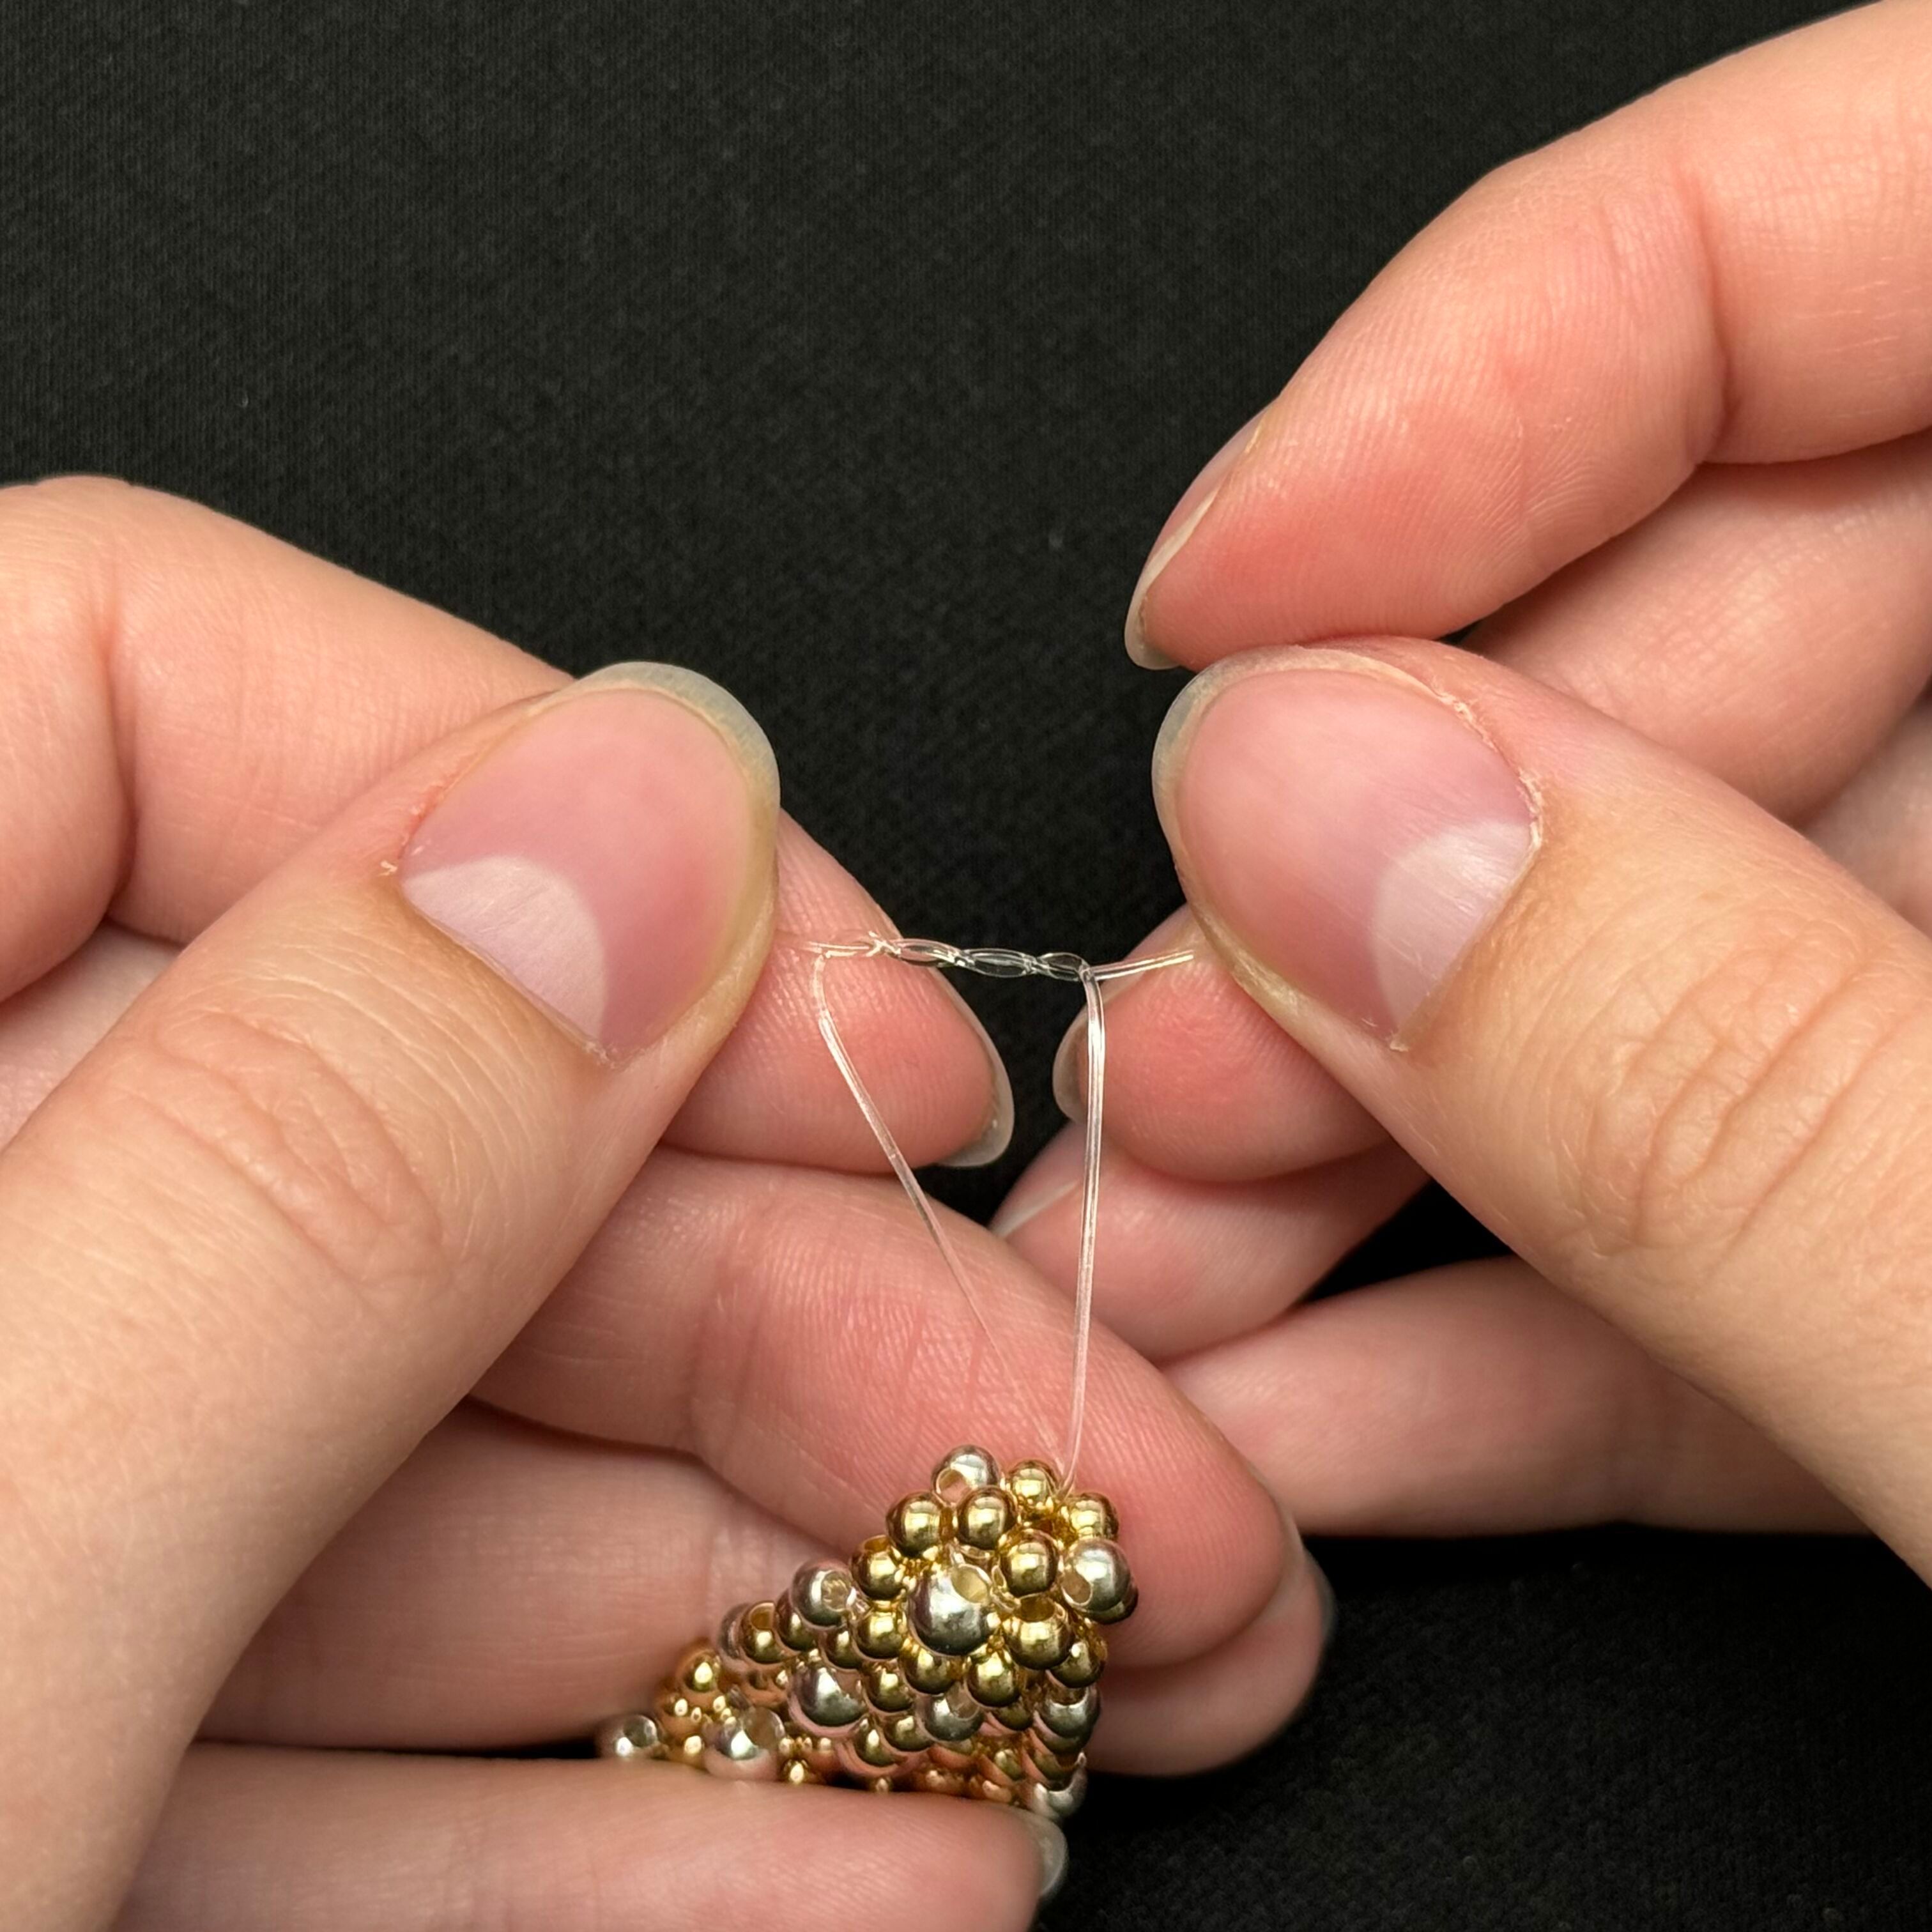
19. And then a surgeon's knot. Pull tight!
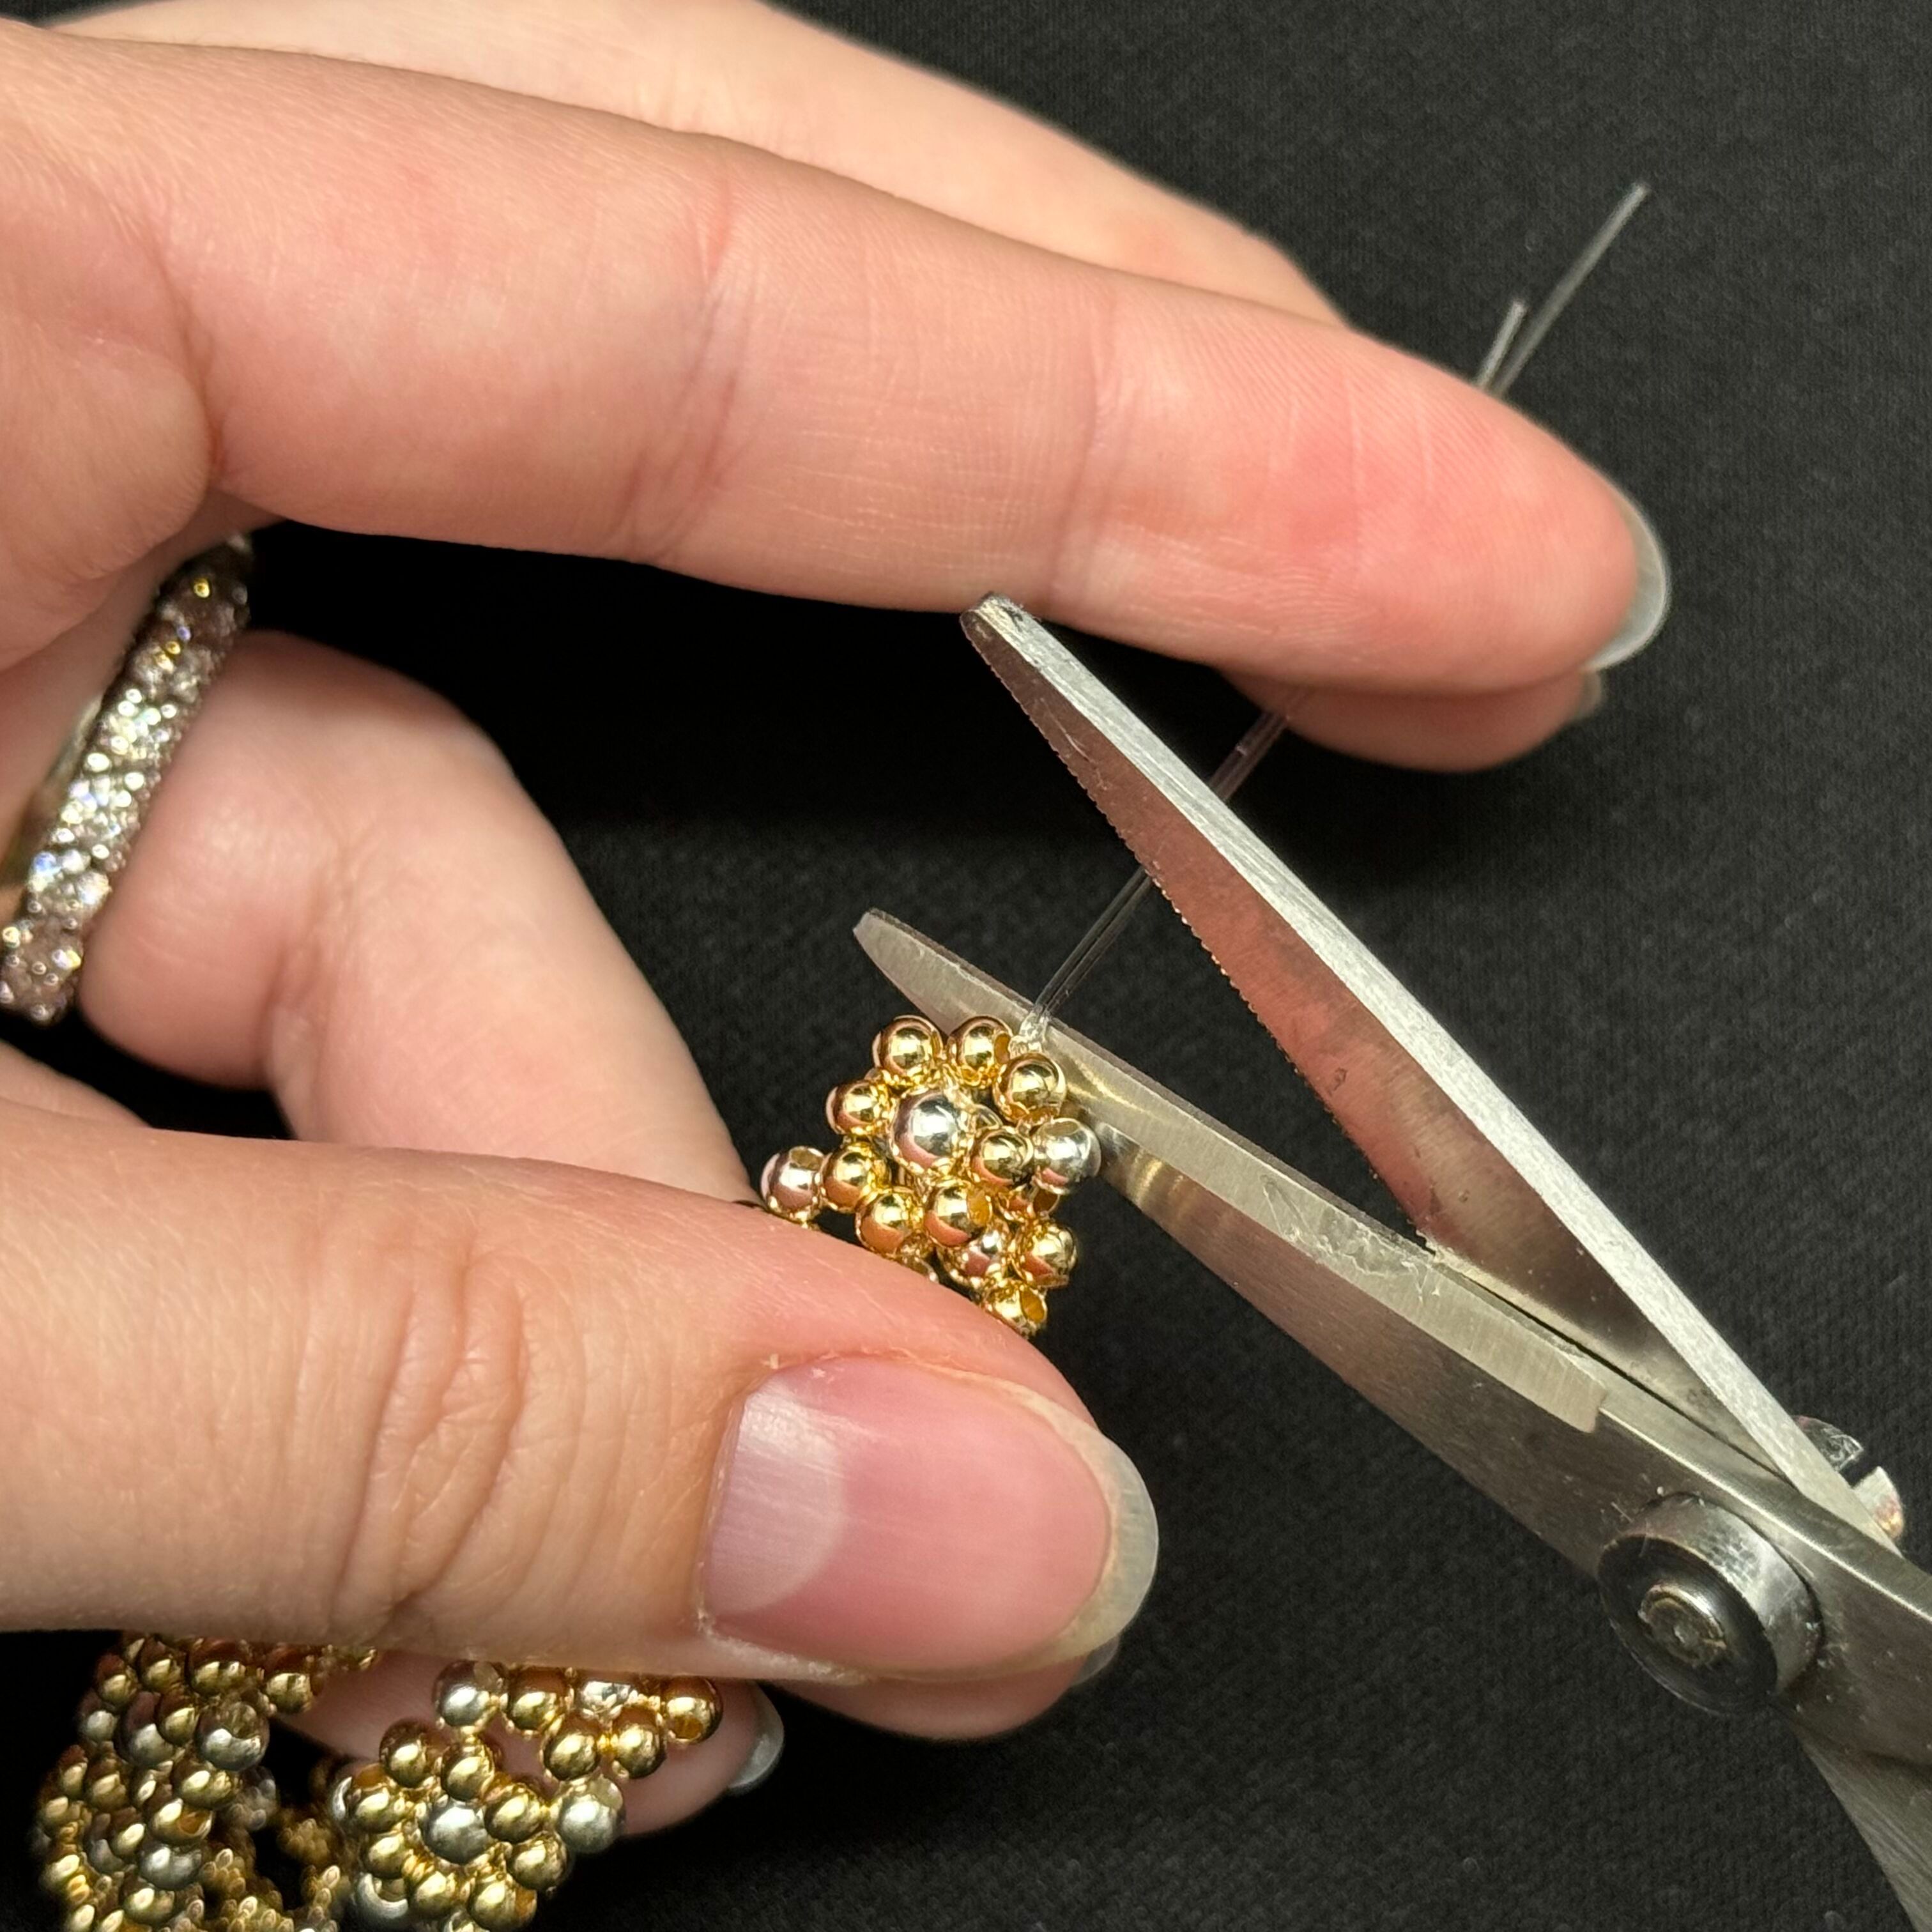
20. Add a dot of Gs-hypo glue and then cut the excess cord once the glue is dry. Done!
Related Articles
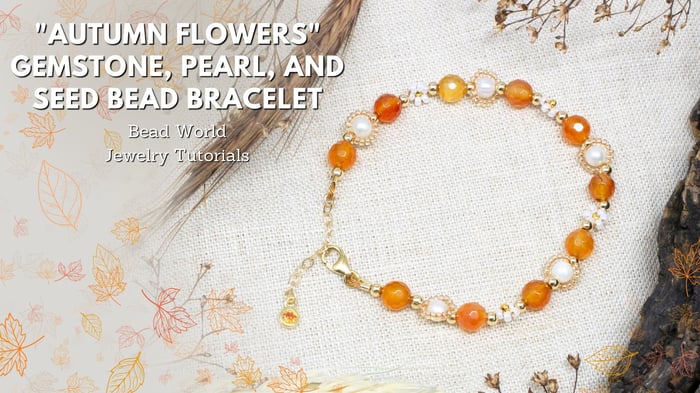
"Autumn Flowers" Gemstone, Pearl, and Seed Bead Bracelet
"Autumn Flowers" Gemstone, Pearl, and Seed Bead Bracelet This tutorial guides you through creating an...
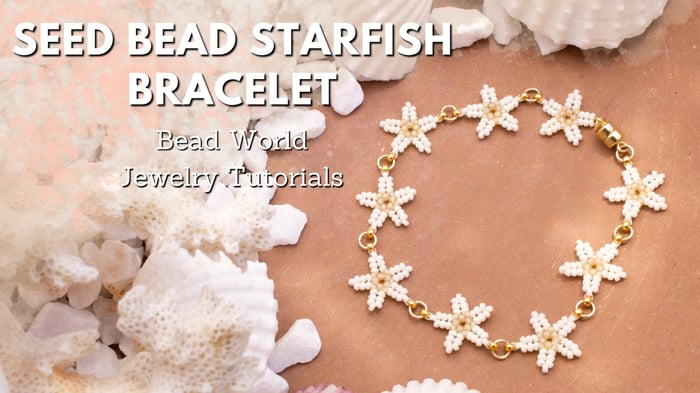
Seed Bead Starfish Bracelet
Seed Bead Starfish Bracelet This project is perfect for both beginners and seasoned crafters looking to...
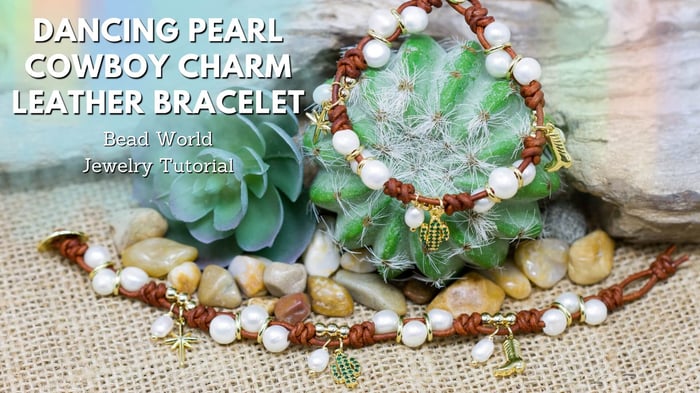
Dancing Pearl Cowboy Charm Leather Bracelet
Dancing Pearl Cowboy Charm Leather Bracelet This tutorial is a spin of our Dancing Gemstone Bracelet...