
Tutorials
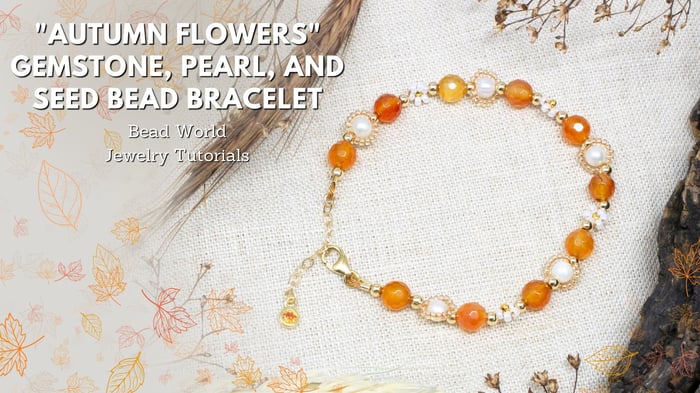
"Autumn Flowers" Gemstone, Pearl, and Seed Bead Bracelet
"Autumn Flowers" Gemstone, Pearl, and Seed Bead Bracelet
This tutorial guides you through creating an elegant bracelet that combines warm-toned carnelian beads with delicate gold and pearl accents. A key feature of this design is a new technique used to secure Griffin silk cord, ensuring both durability and a professional finish. This bracelet features multiple techniques, so feel free to adjust and use them in your own unique ways to change up the design.
Materials Needed:
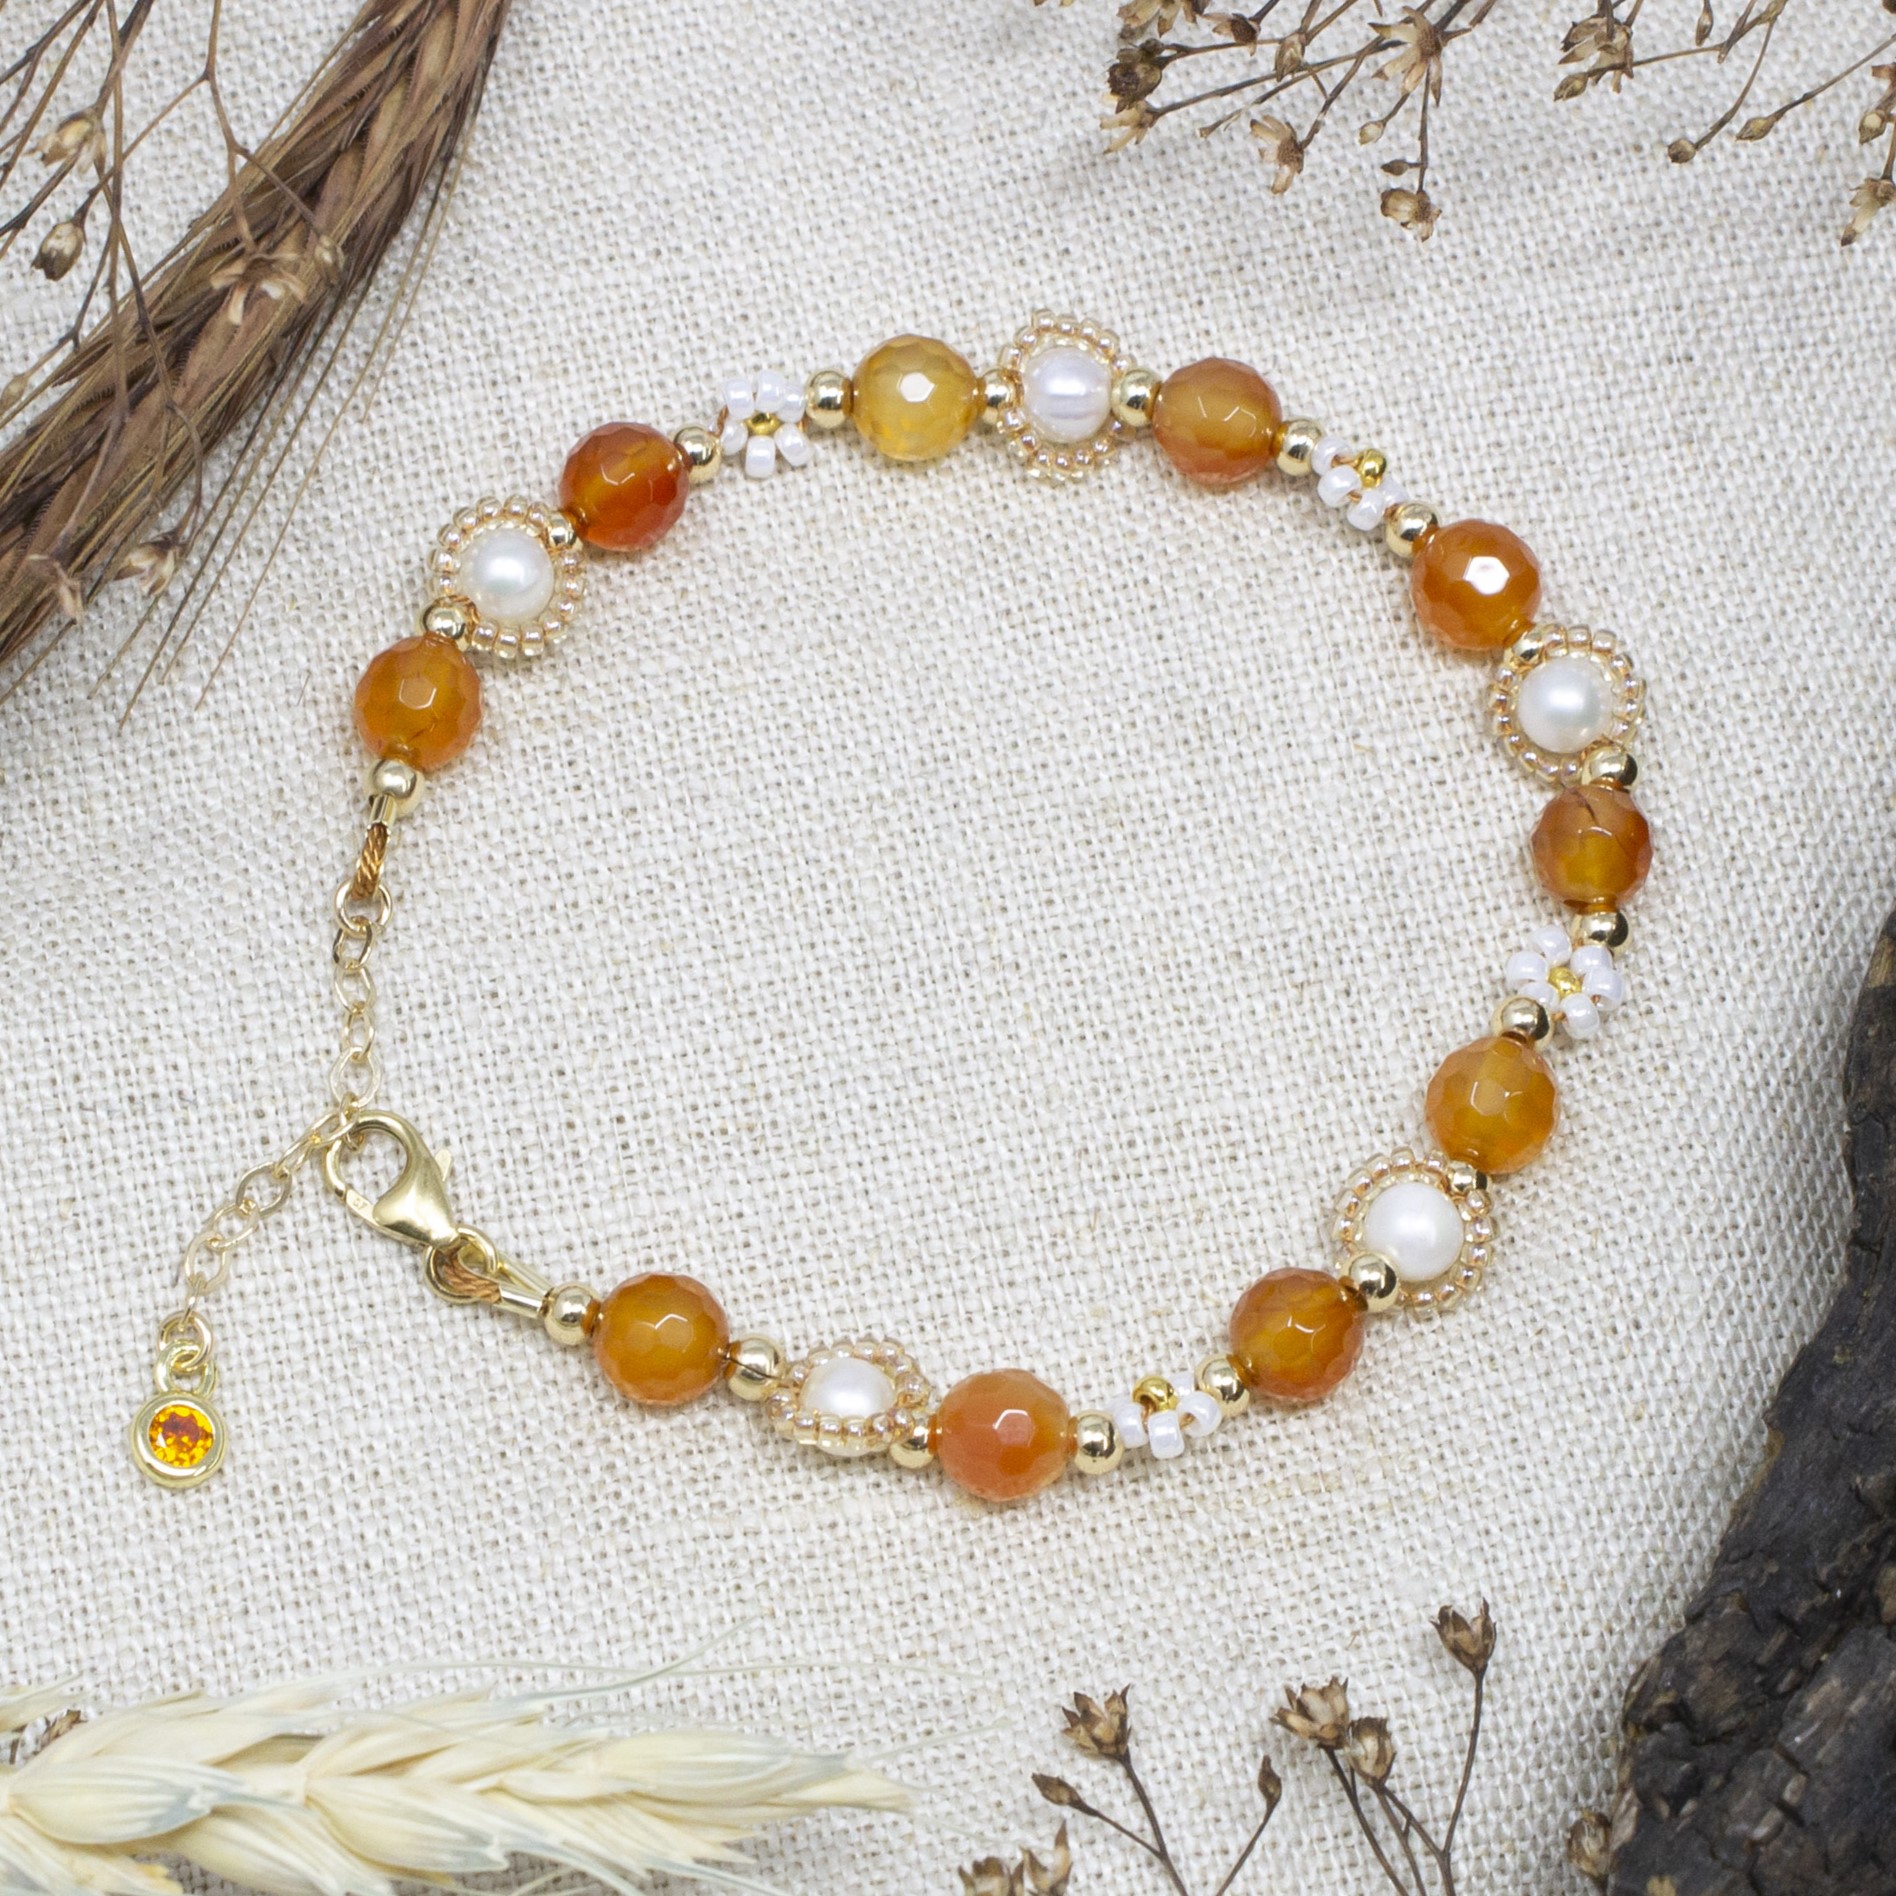
Bracelet (adjustable approx. 6.5 - 8"):
- 14K Gold Filled 3mm 22 Gauge Jump Rings (2)
- 14K Gold Filled Cable Thimbles .031" Hole (2)
- 14K Gold Filled 3mm Crimp Covers (2)
- Griffin® Silk Cord Cornelian #2 (1)
- Natural Carnelian 6mm Faceted Round or any 6mm Faceted Round Gemstone of your choice (10 beads)
- 18kt Gold Plated 3mm Round Anti Tarnish Coating - 25 Beads (18 beads needed)
- Freshwater Pearls 4-5mm Round Potato (5) full strand linked here
- Size 15 Miyuki Seed Beads 2439 Light Topaz Luster (70)
- Size 11 Miyuki Seed Beads 591 Pearl Ceylon (20)
- Size 11 Miyuki Seed Beads 465 24K Gold Plated or D4202 Galvanized Gold (4)
- 14K Gold Filled 2.3x3mm Flat Cable Chain (1 inch)
- Gold Plated Micro Pave 4.5mm Orange Coin Charm (1)
Tools Required:
Needle Nose Pliers (also known as chain nose)
GS-HYPO Cement (red tube)
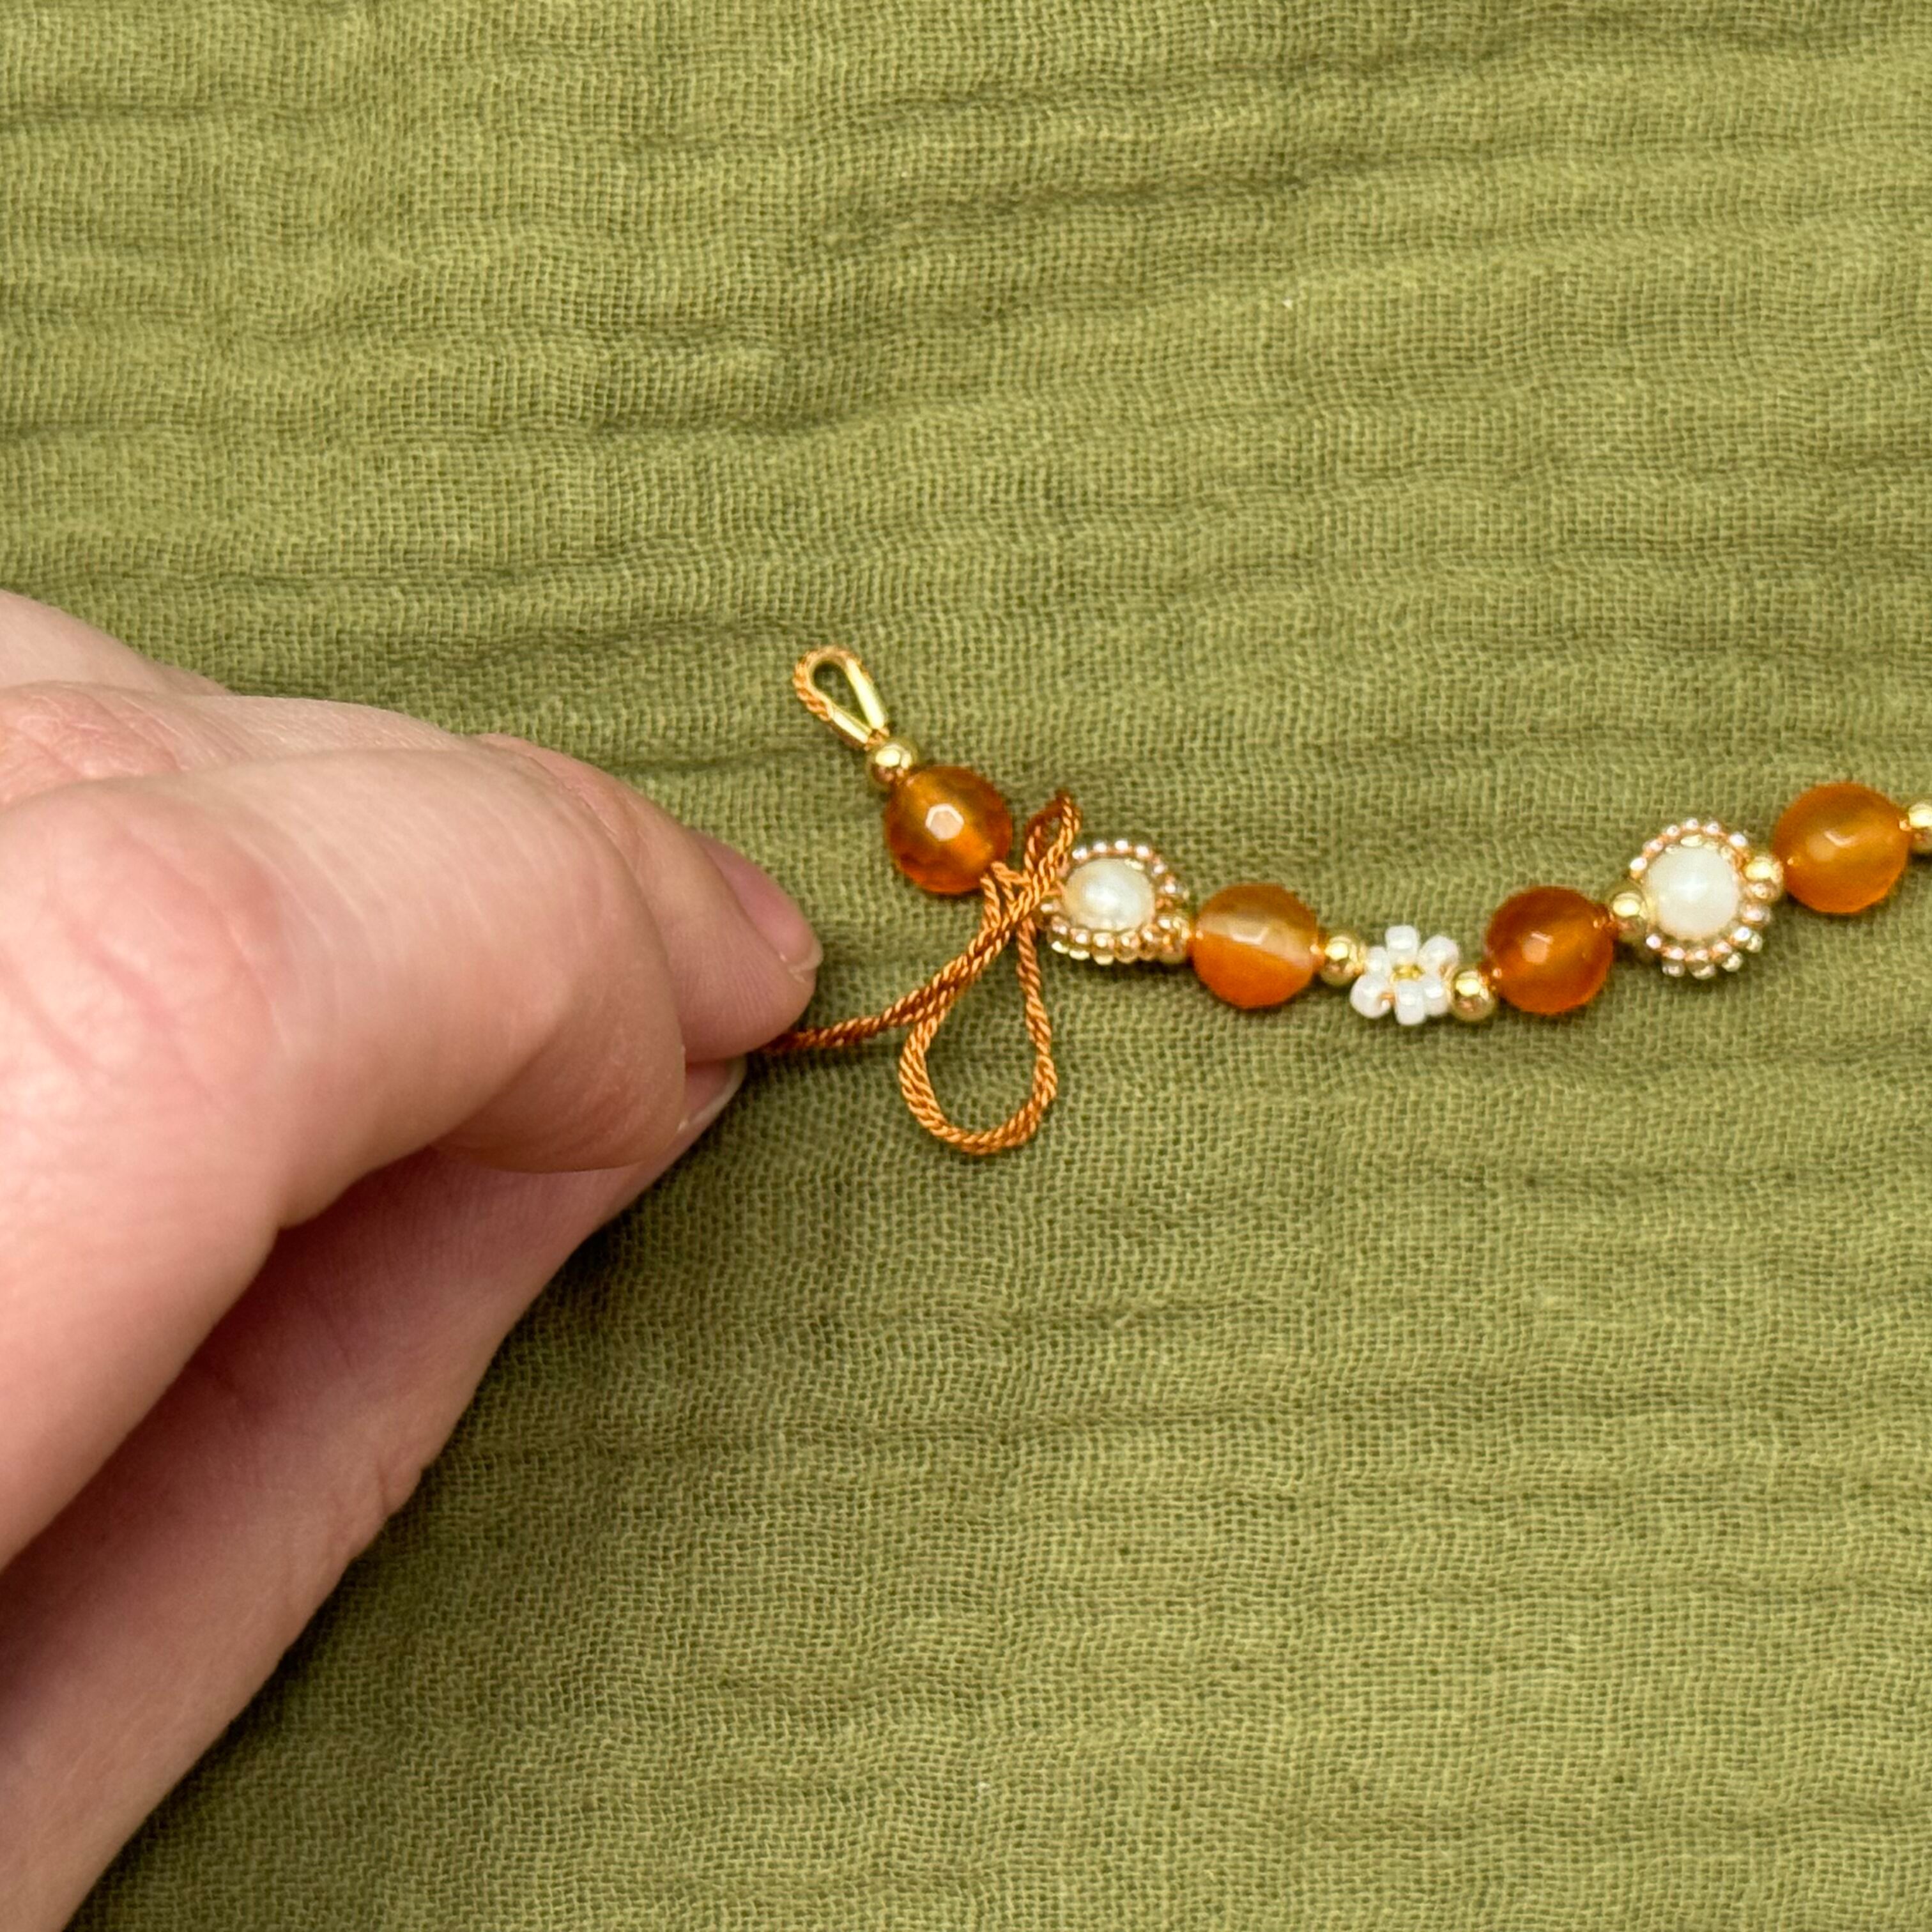
Instructions on Construction:
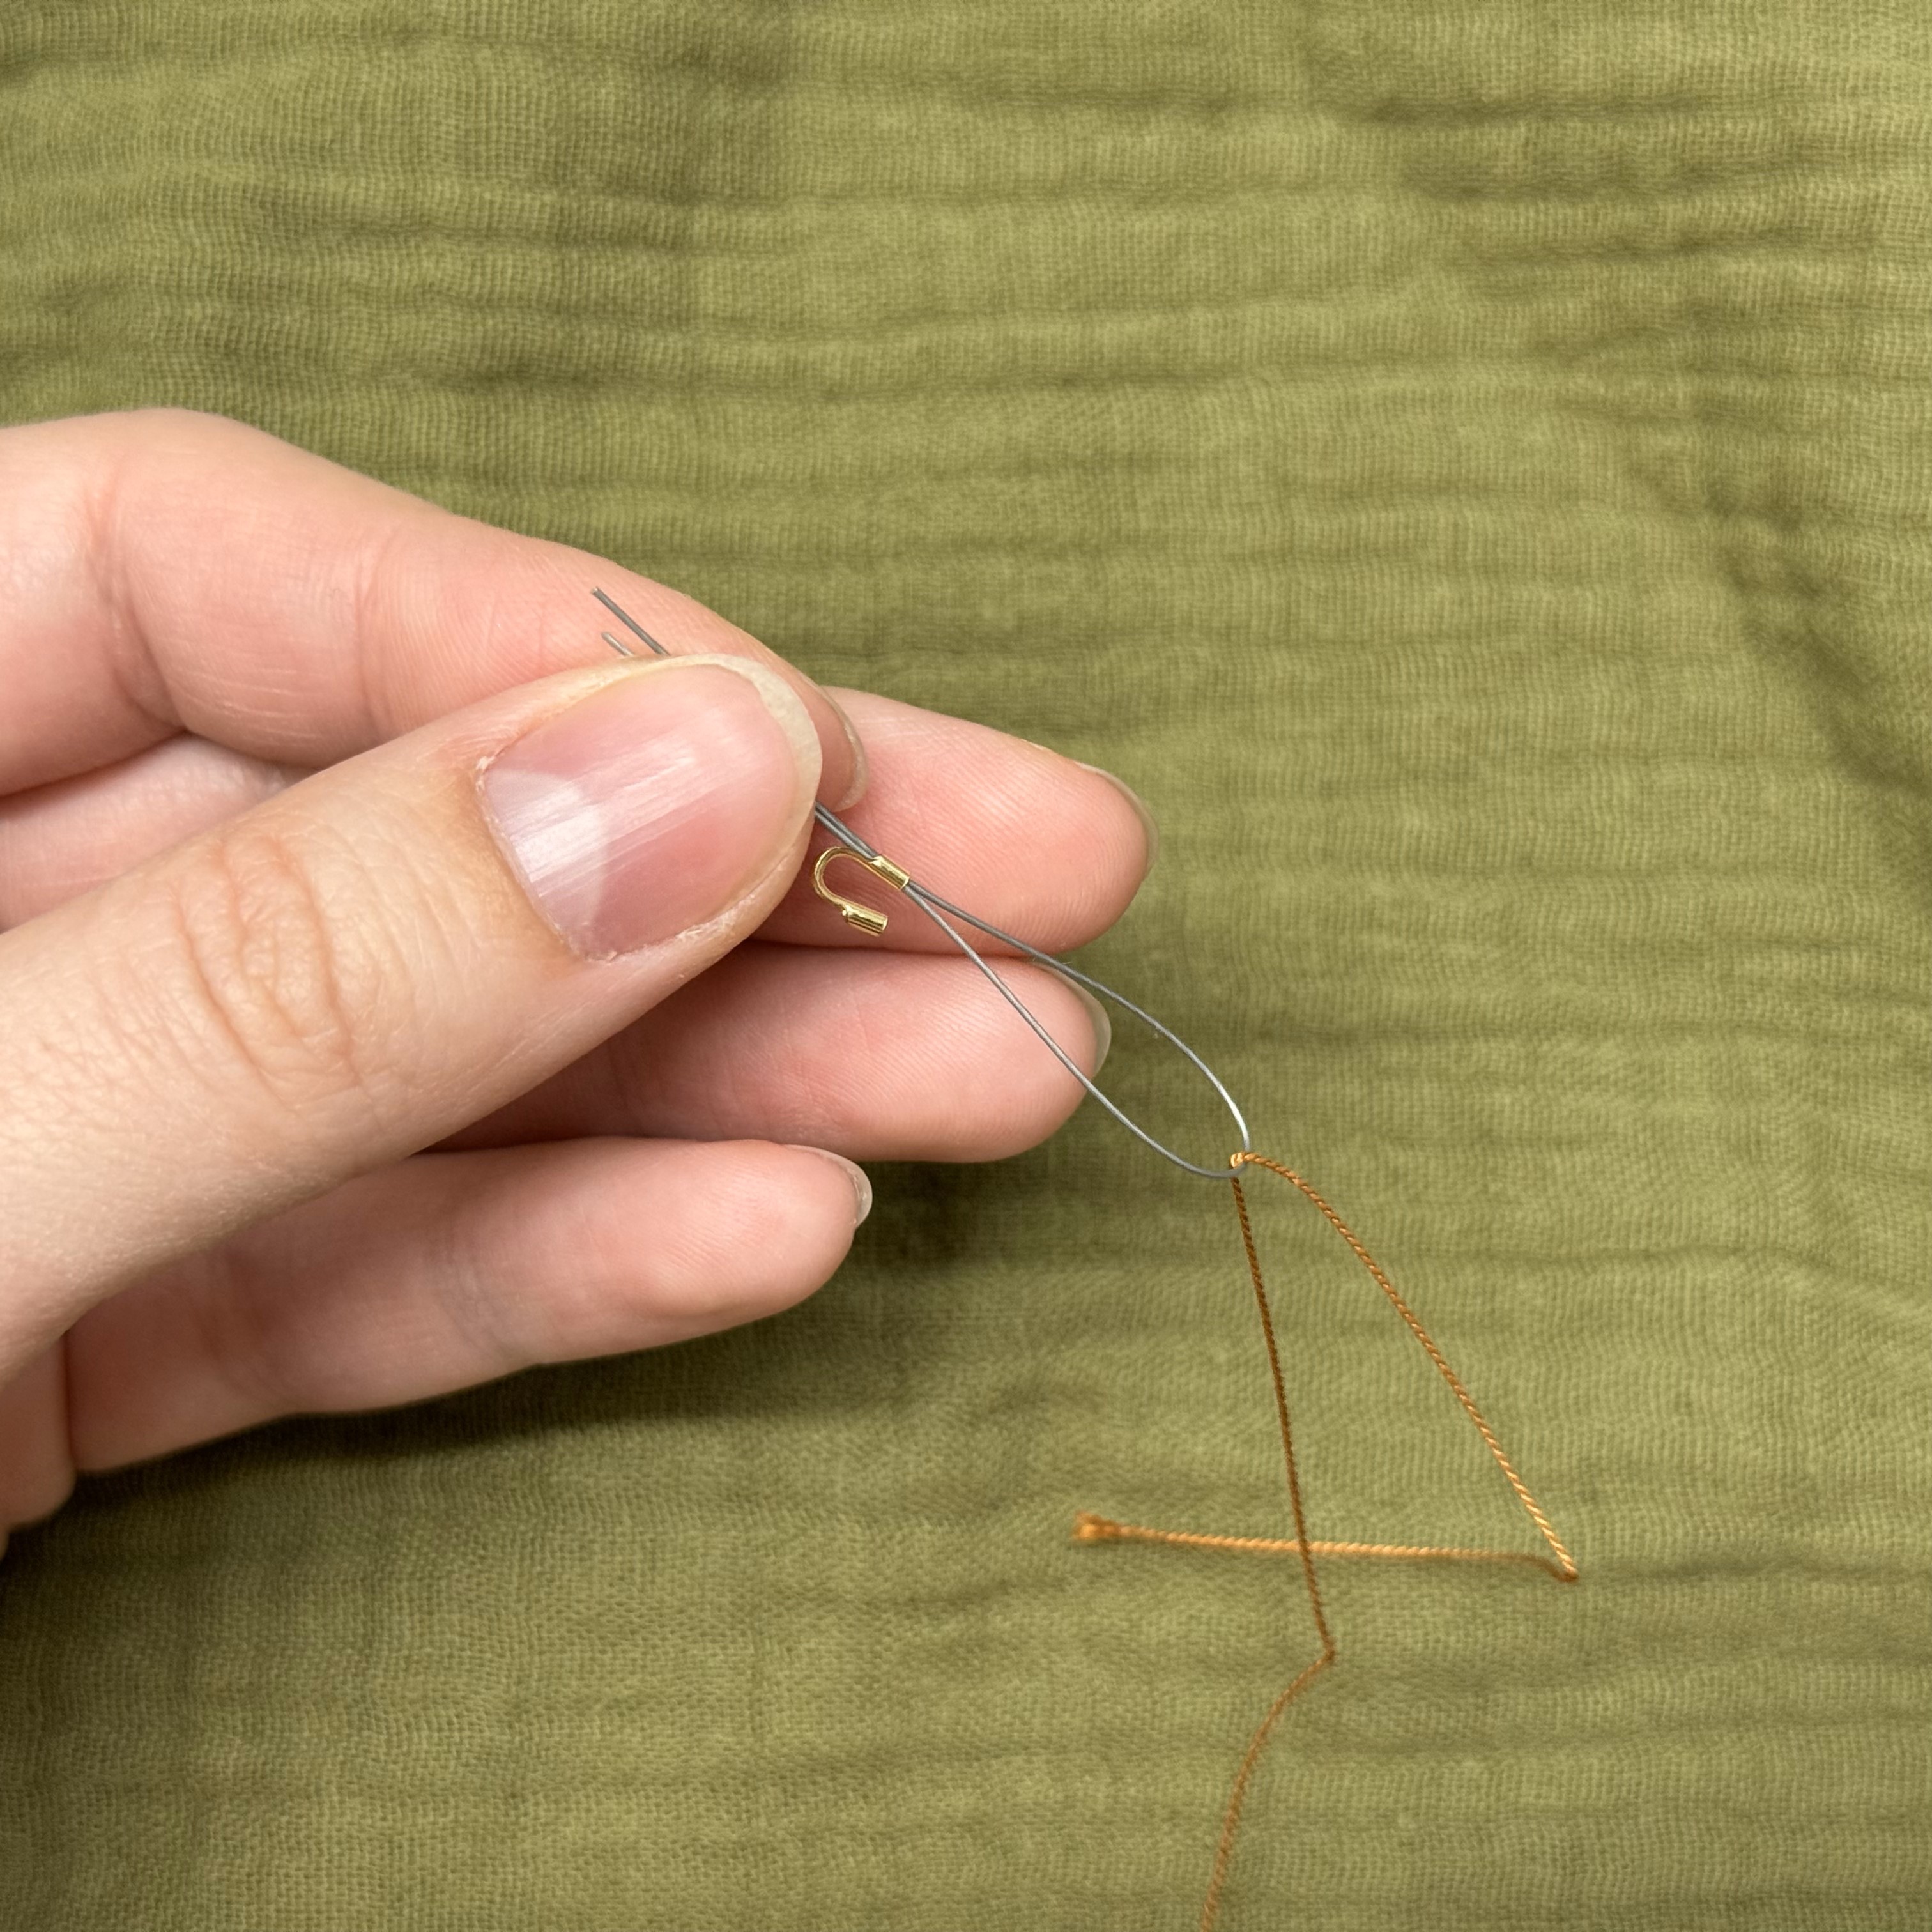
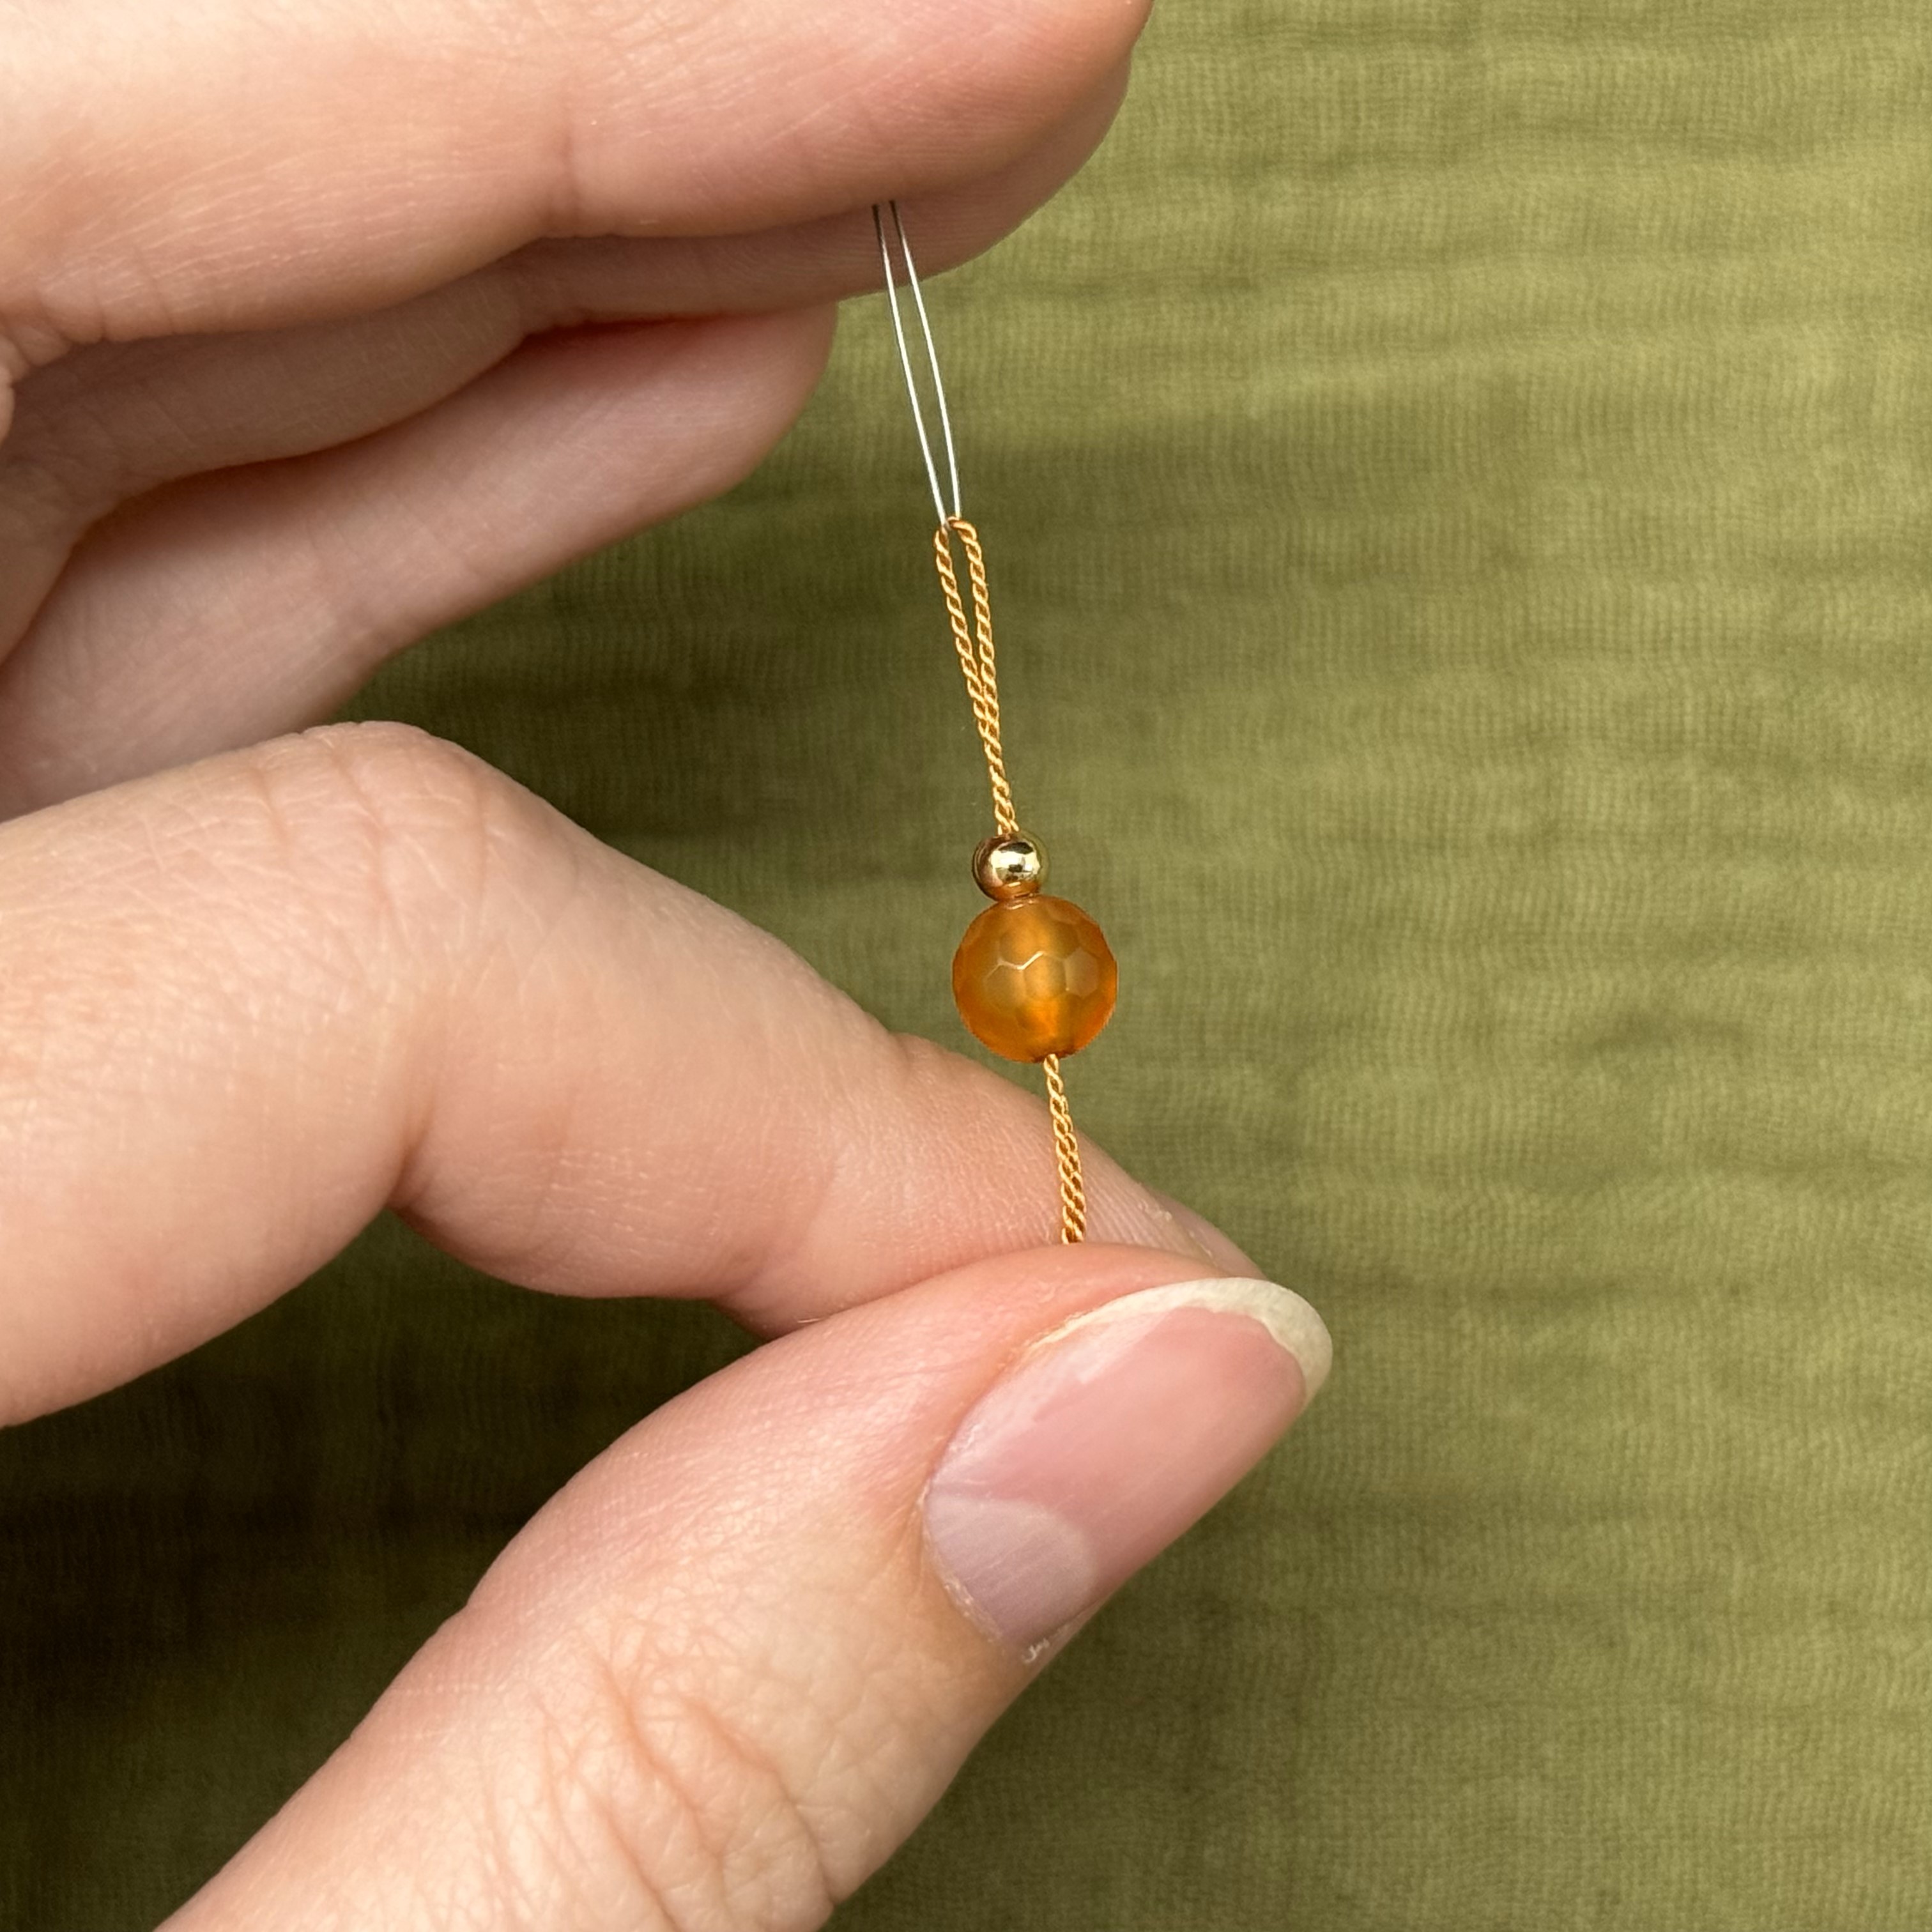
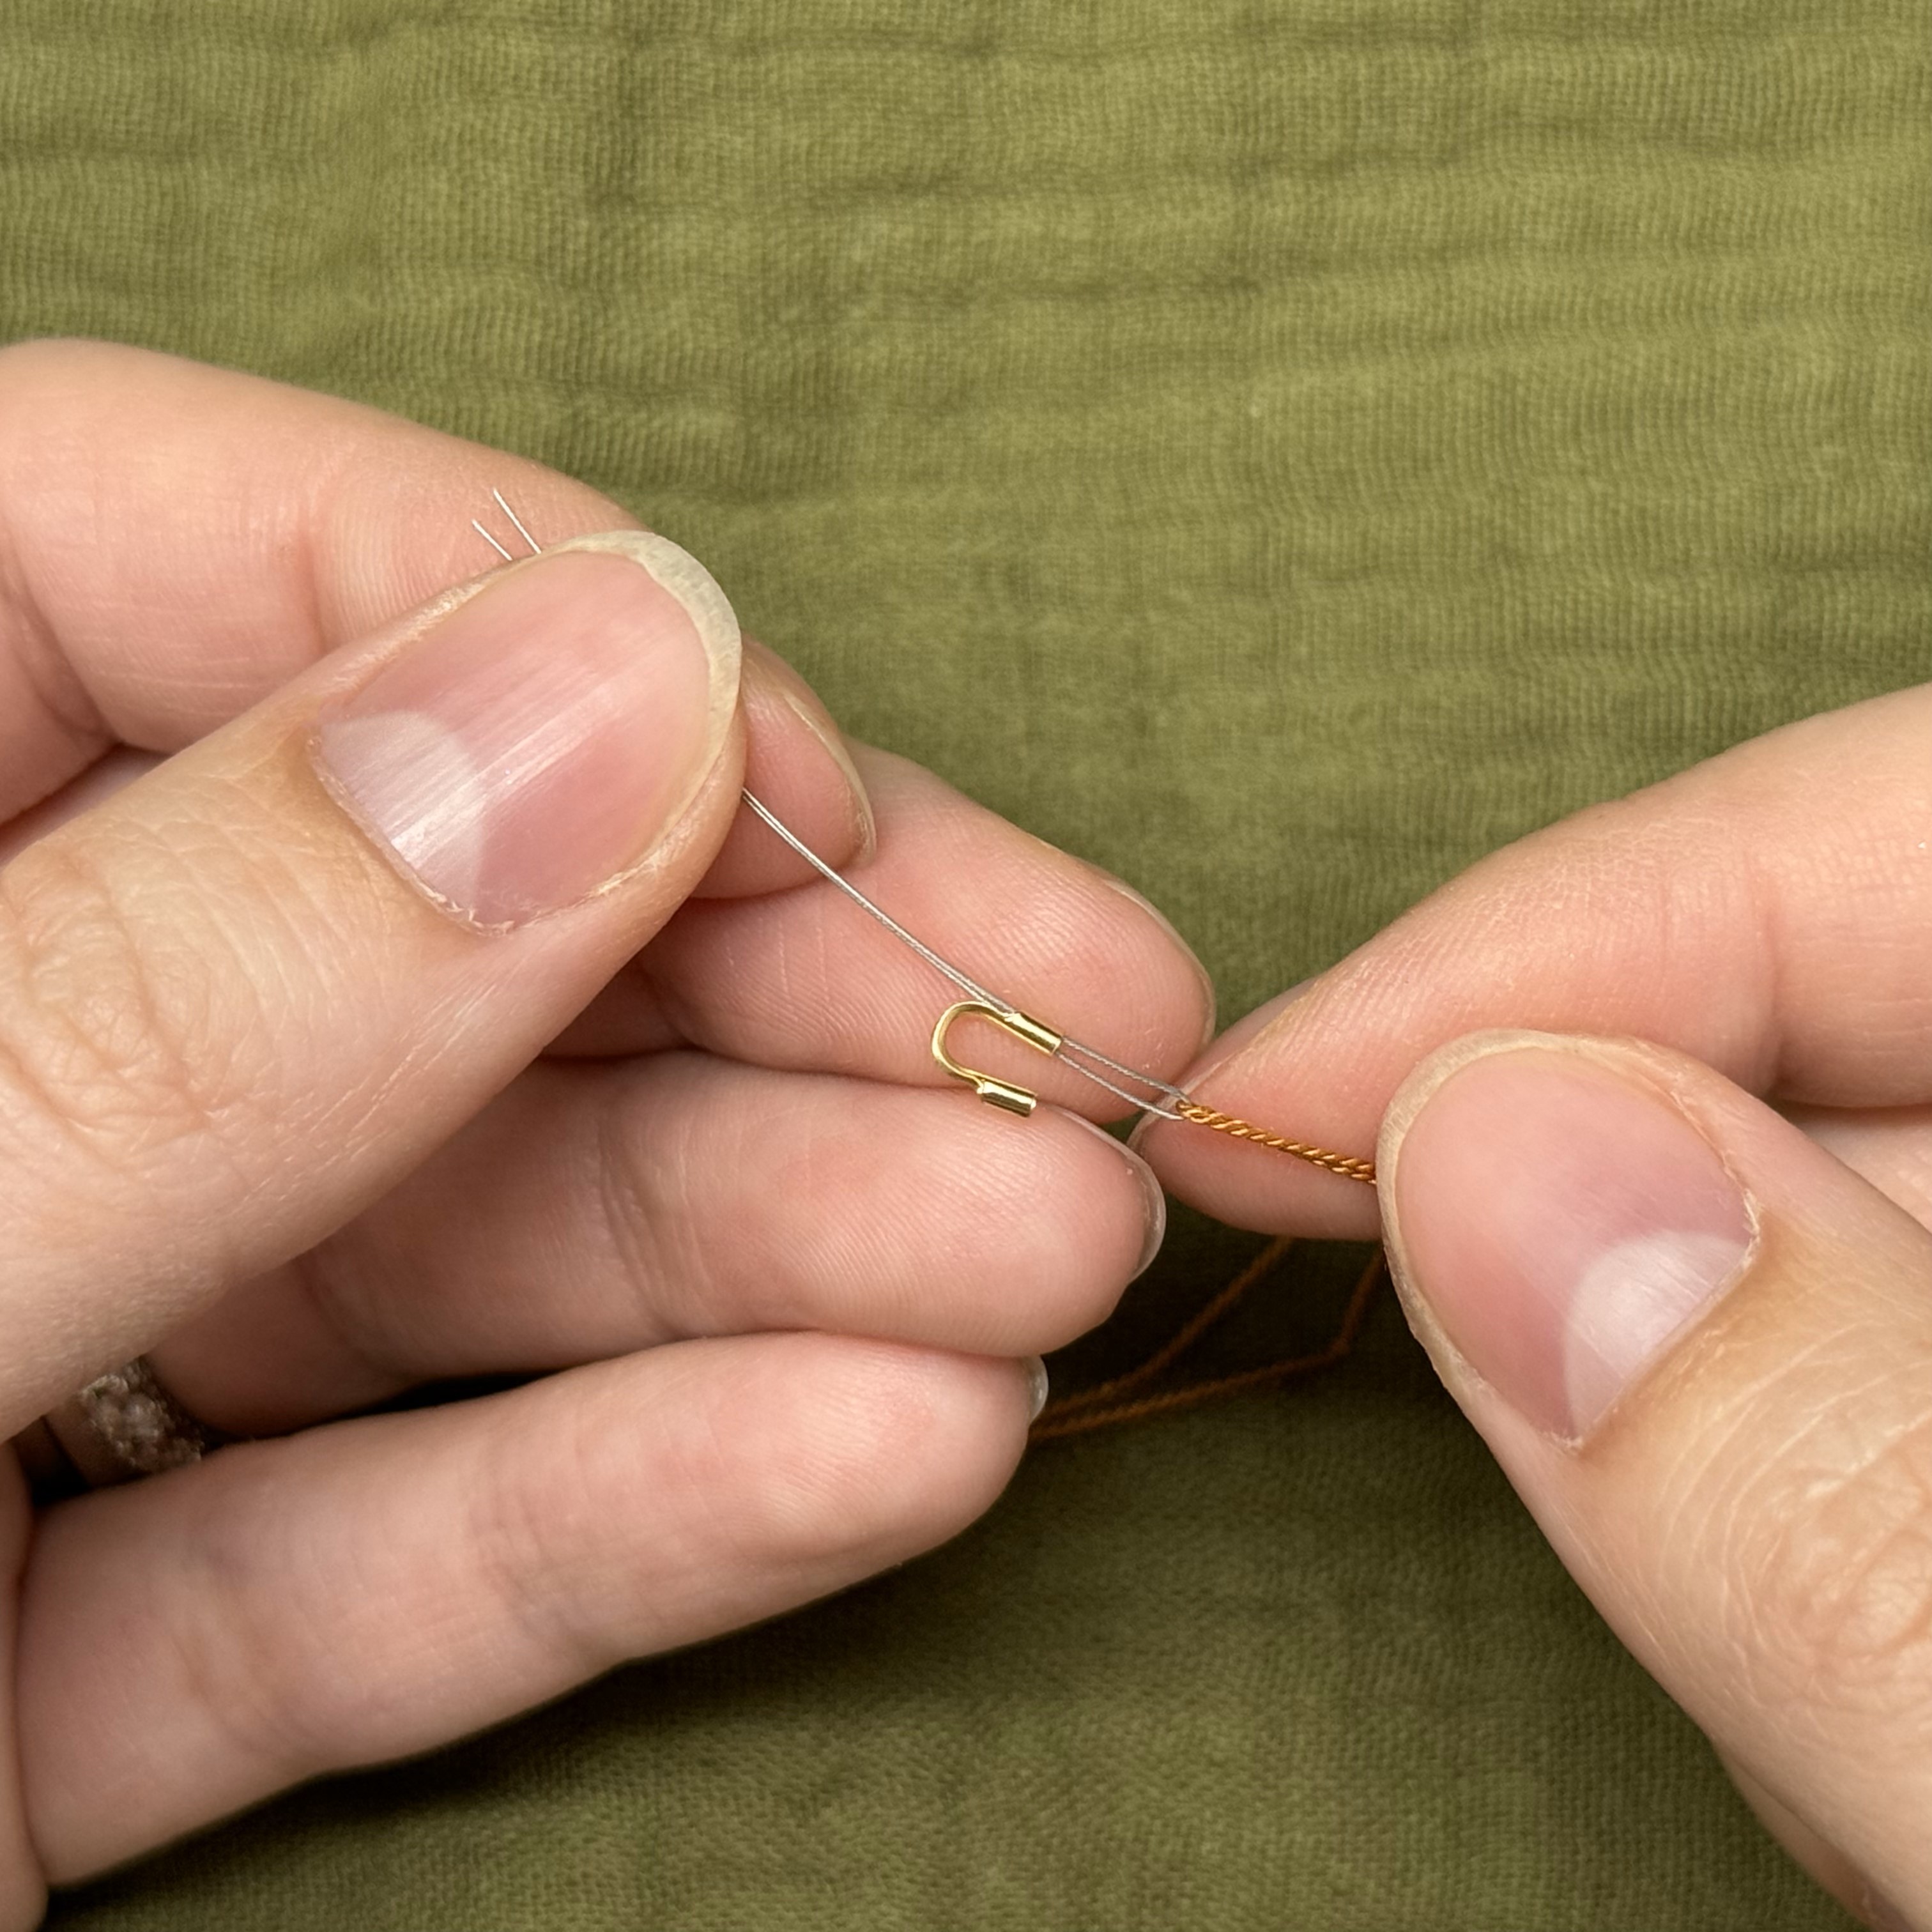
1. Create a "needle" out of some scrap wire or soft touch (anything very thin and stiff will do), thread the silk cord through the eye of the needle and then thread the needle through one of the holes of the cable thimble
2. Thread the needle down through the other hole and pull a some of the thread through so you have a tail of about 2-3 inches
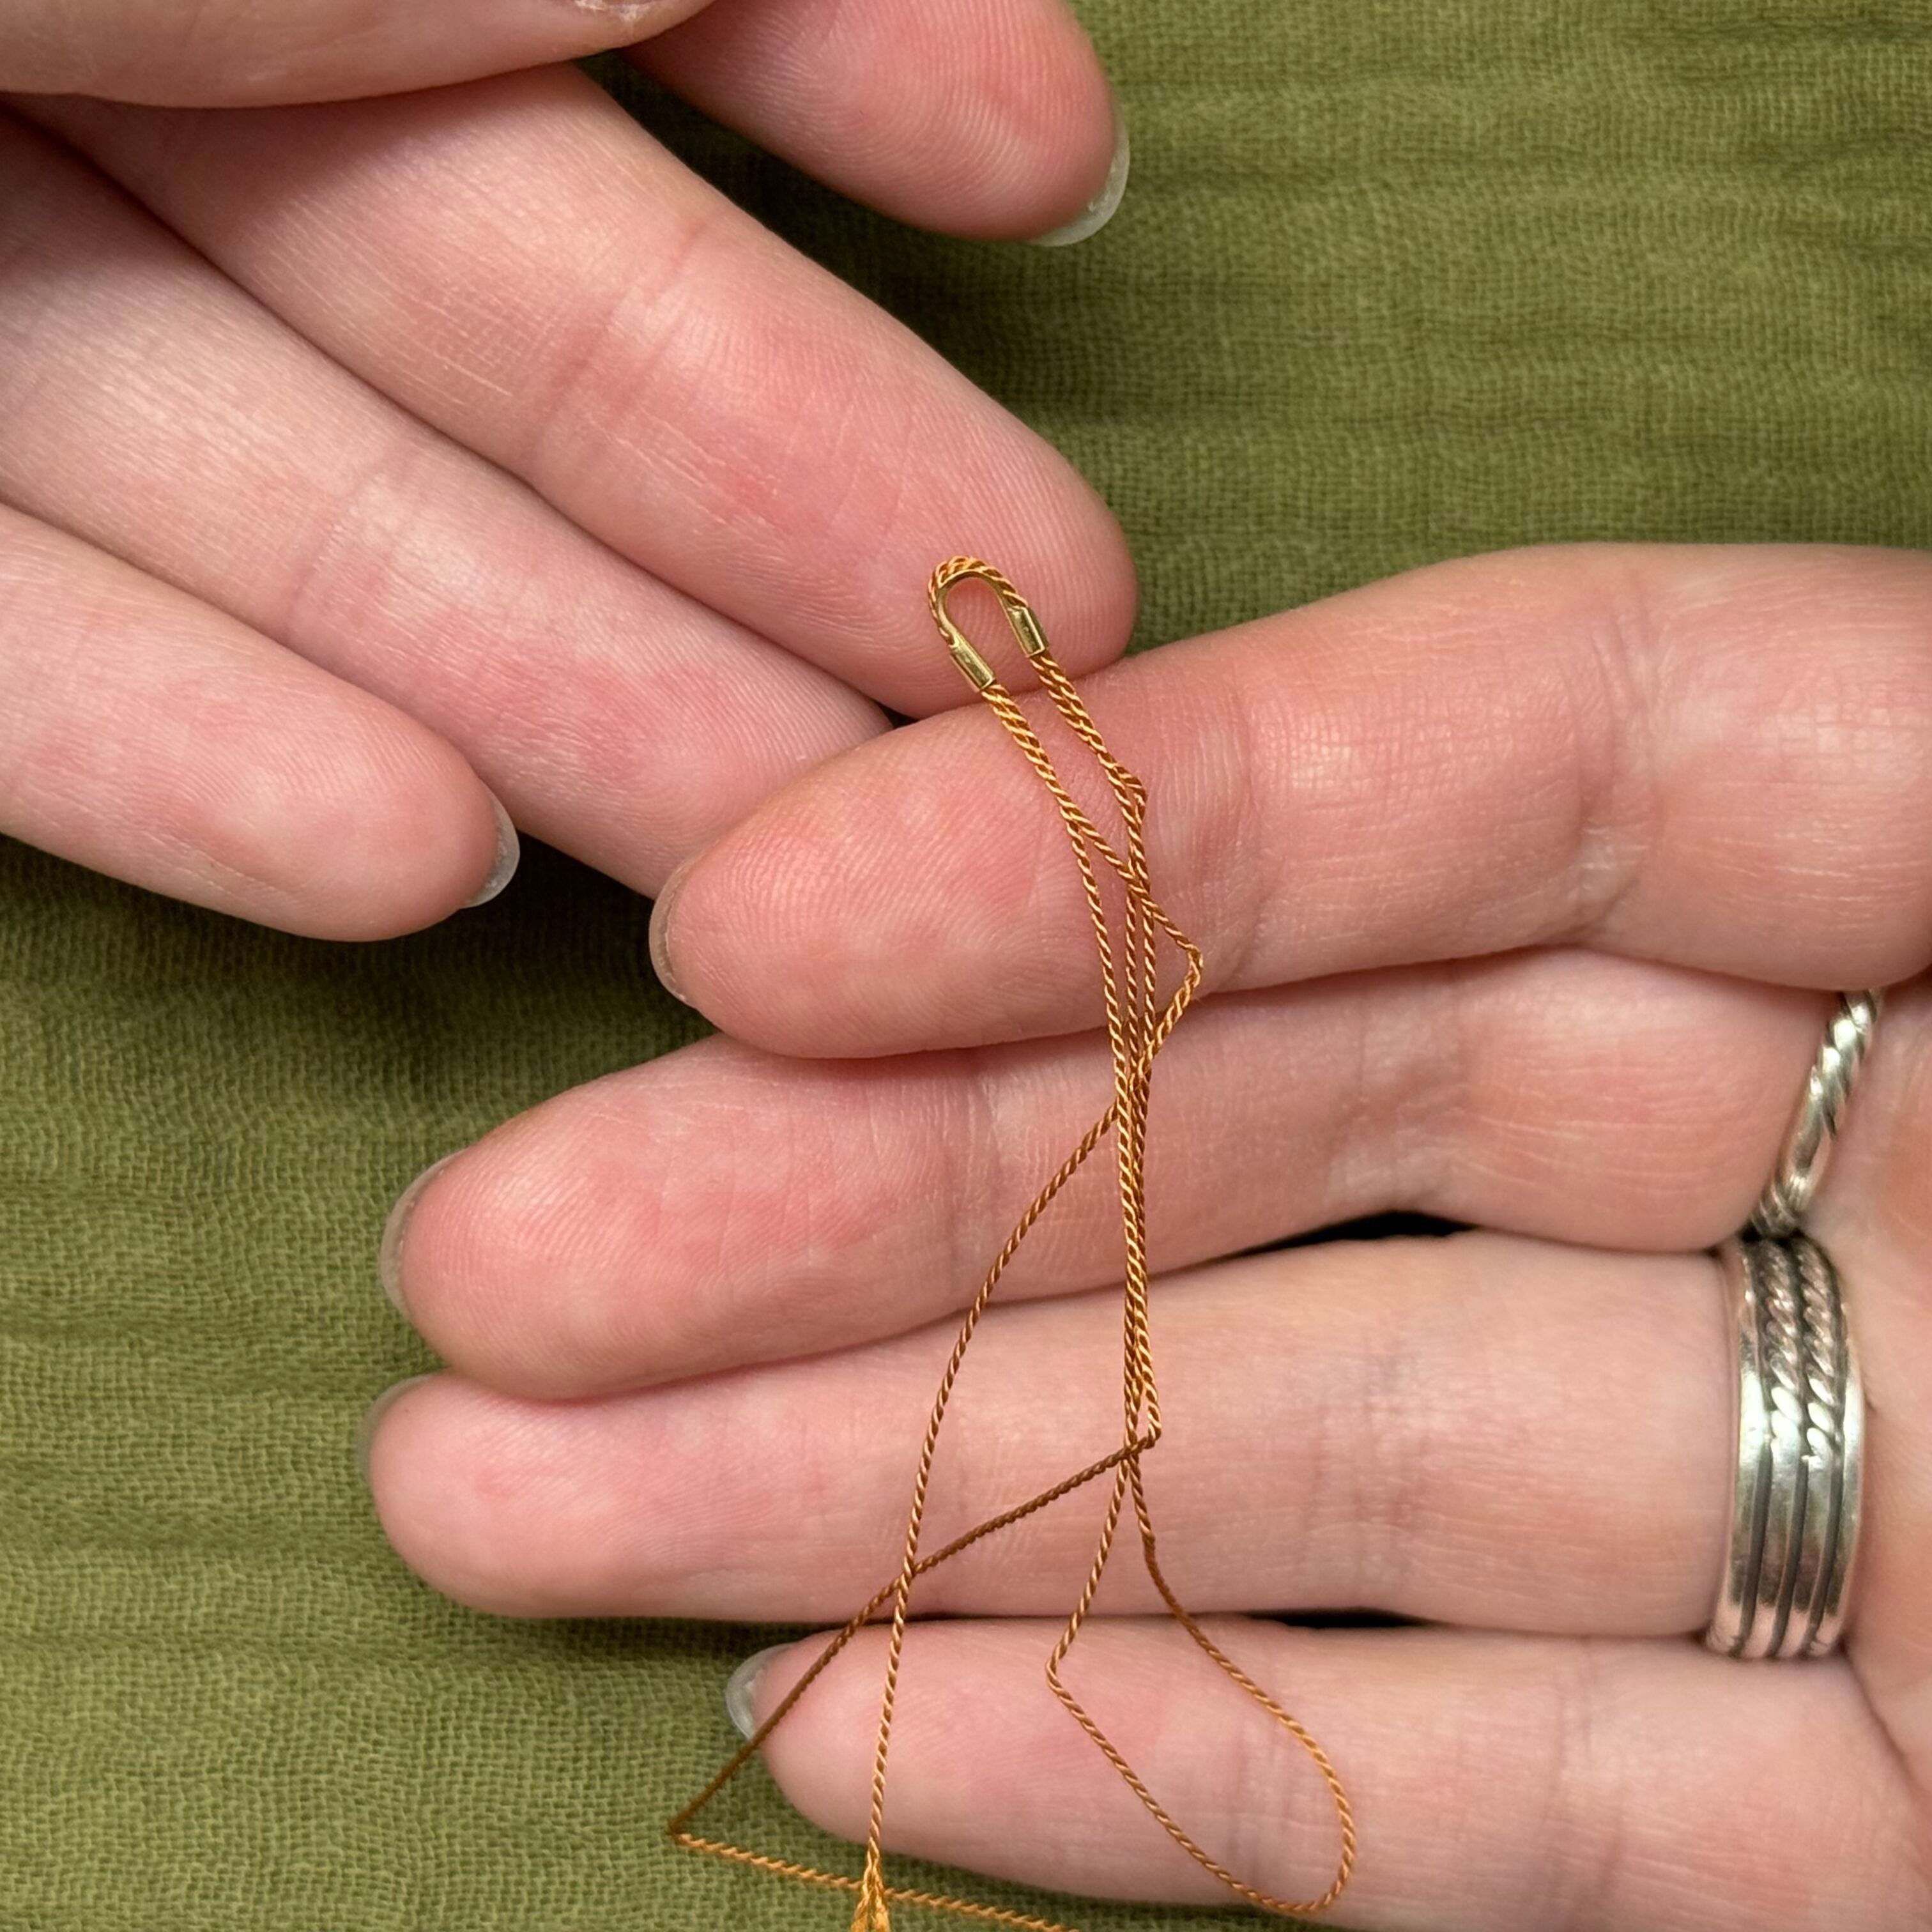
3. Make sure you have two cords coming through each hole (4 total)
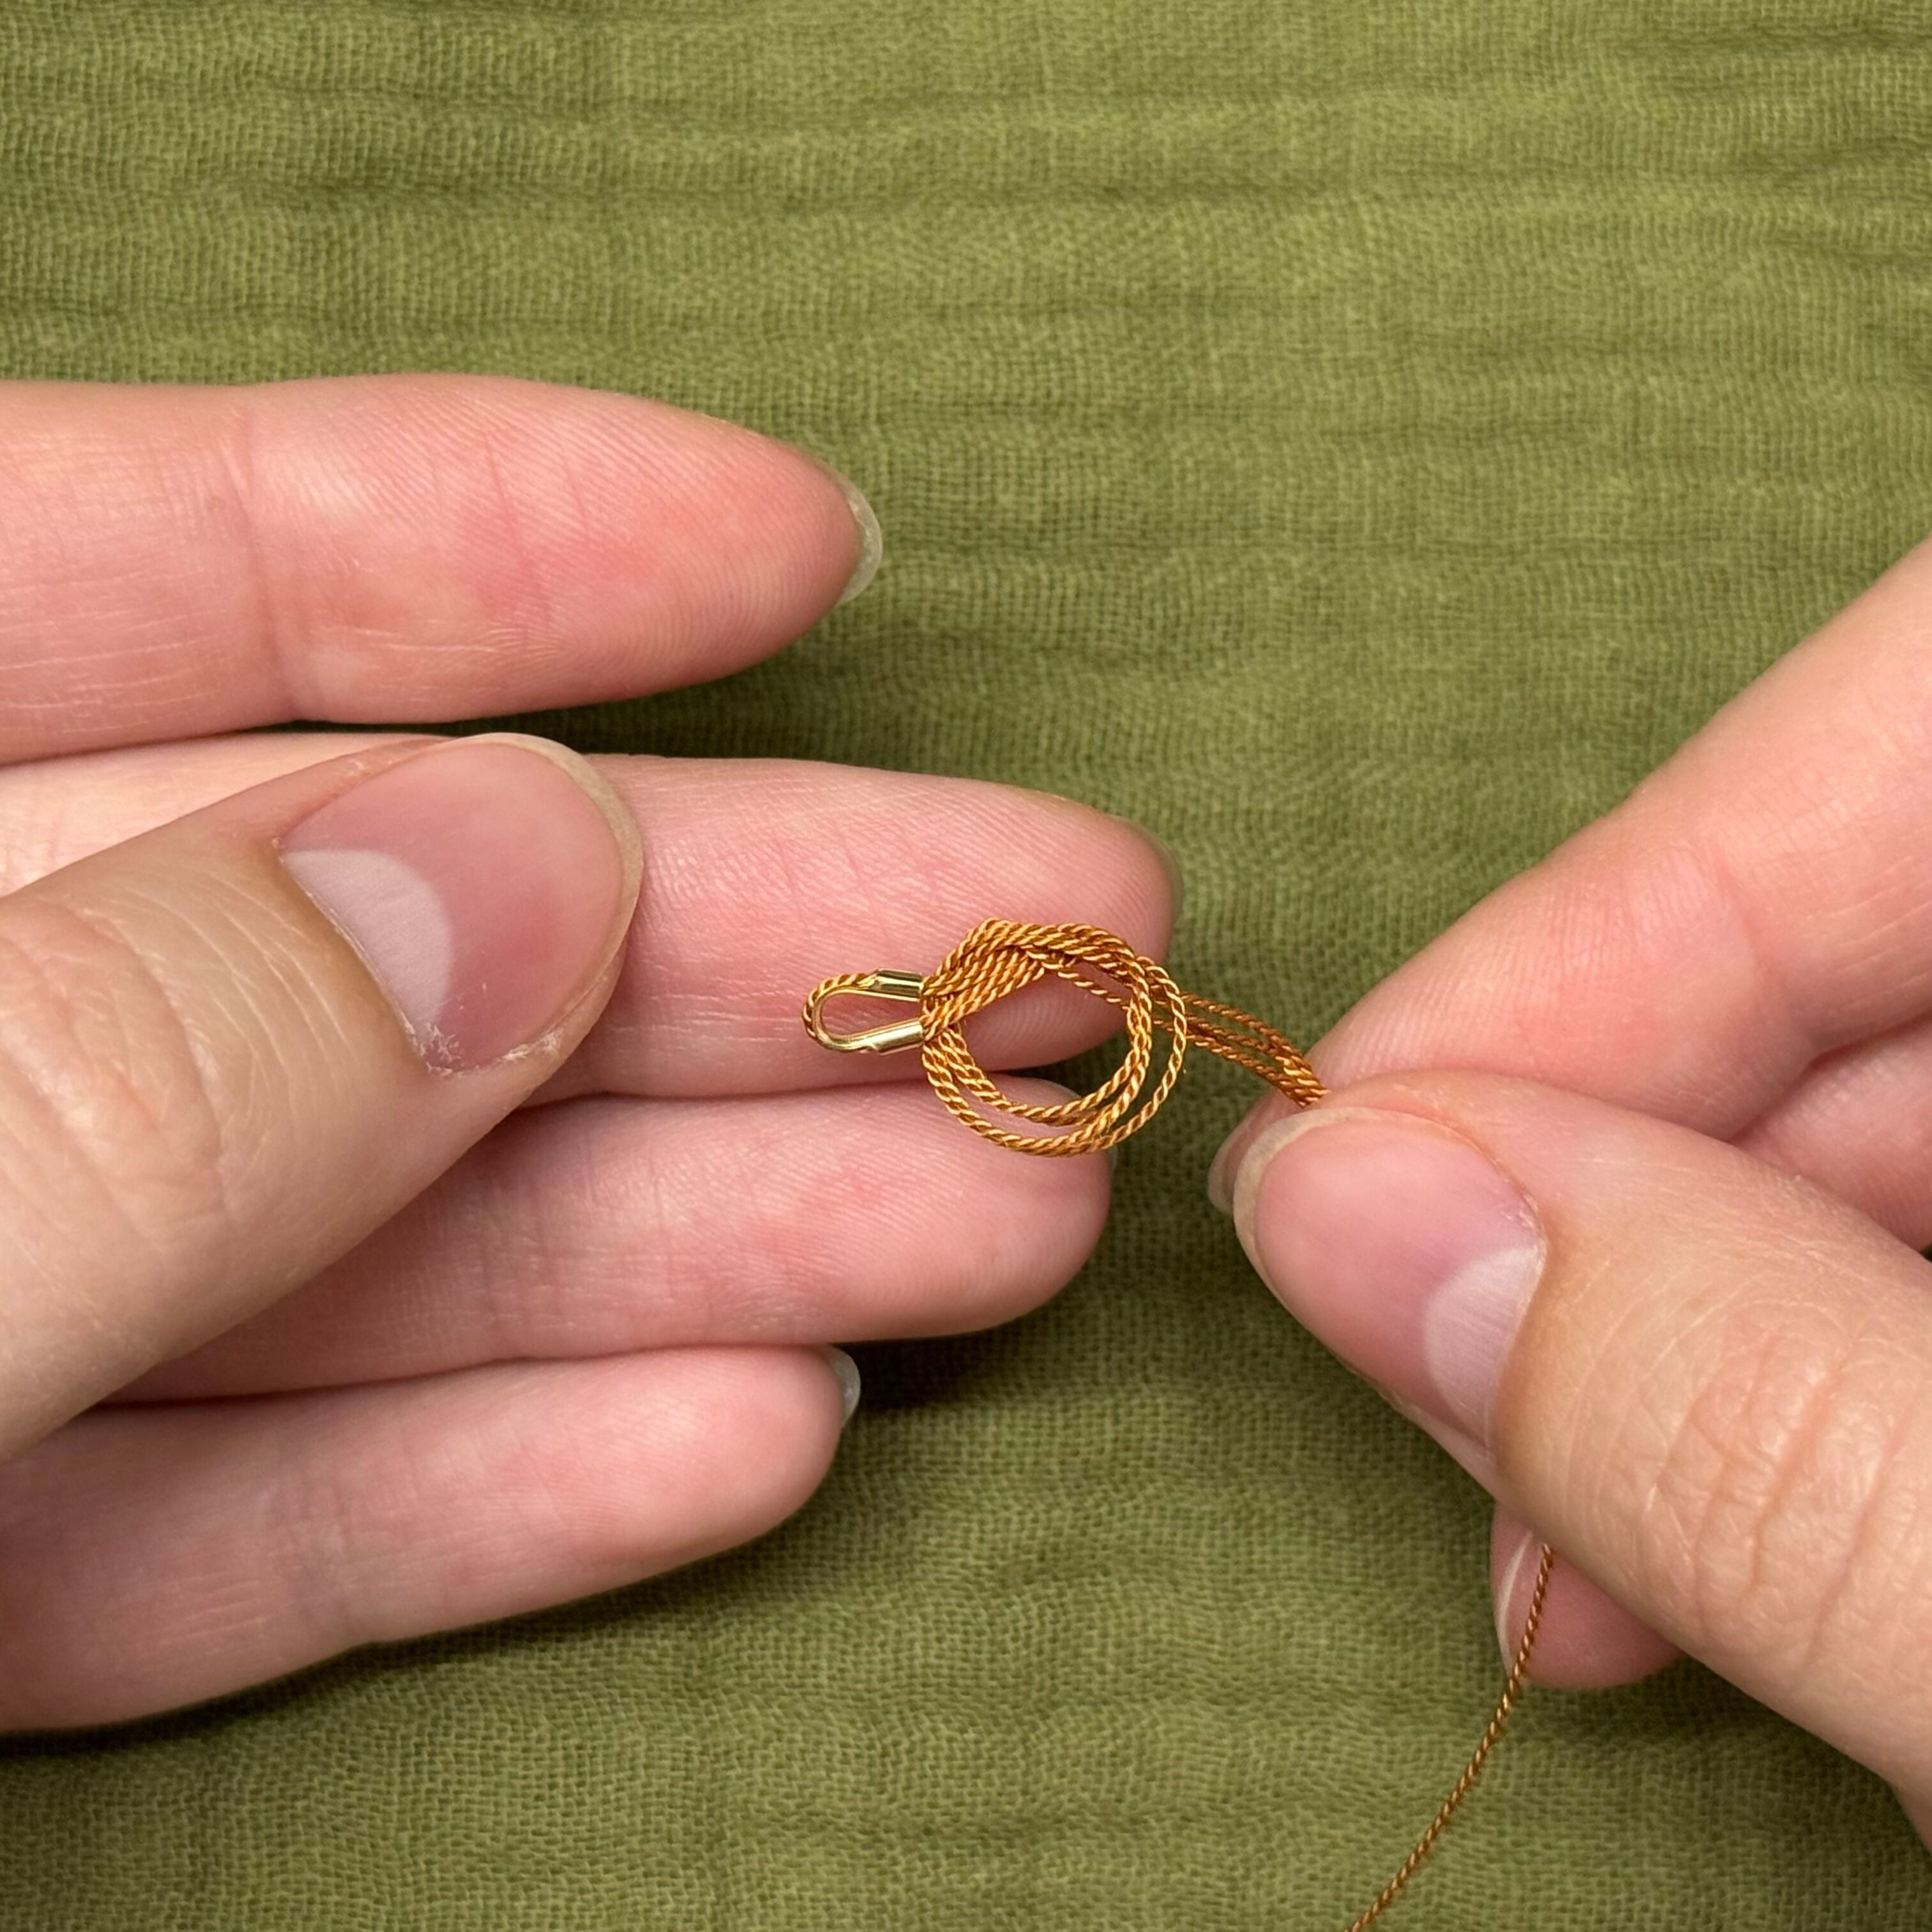
4. Tie a simple overhand knot
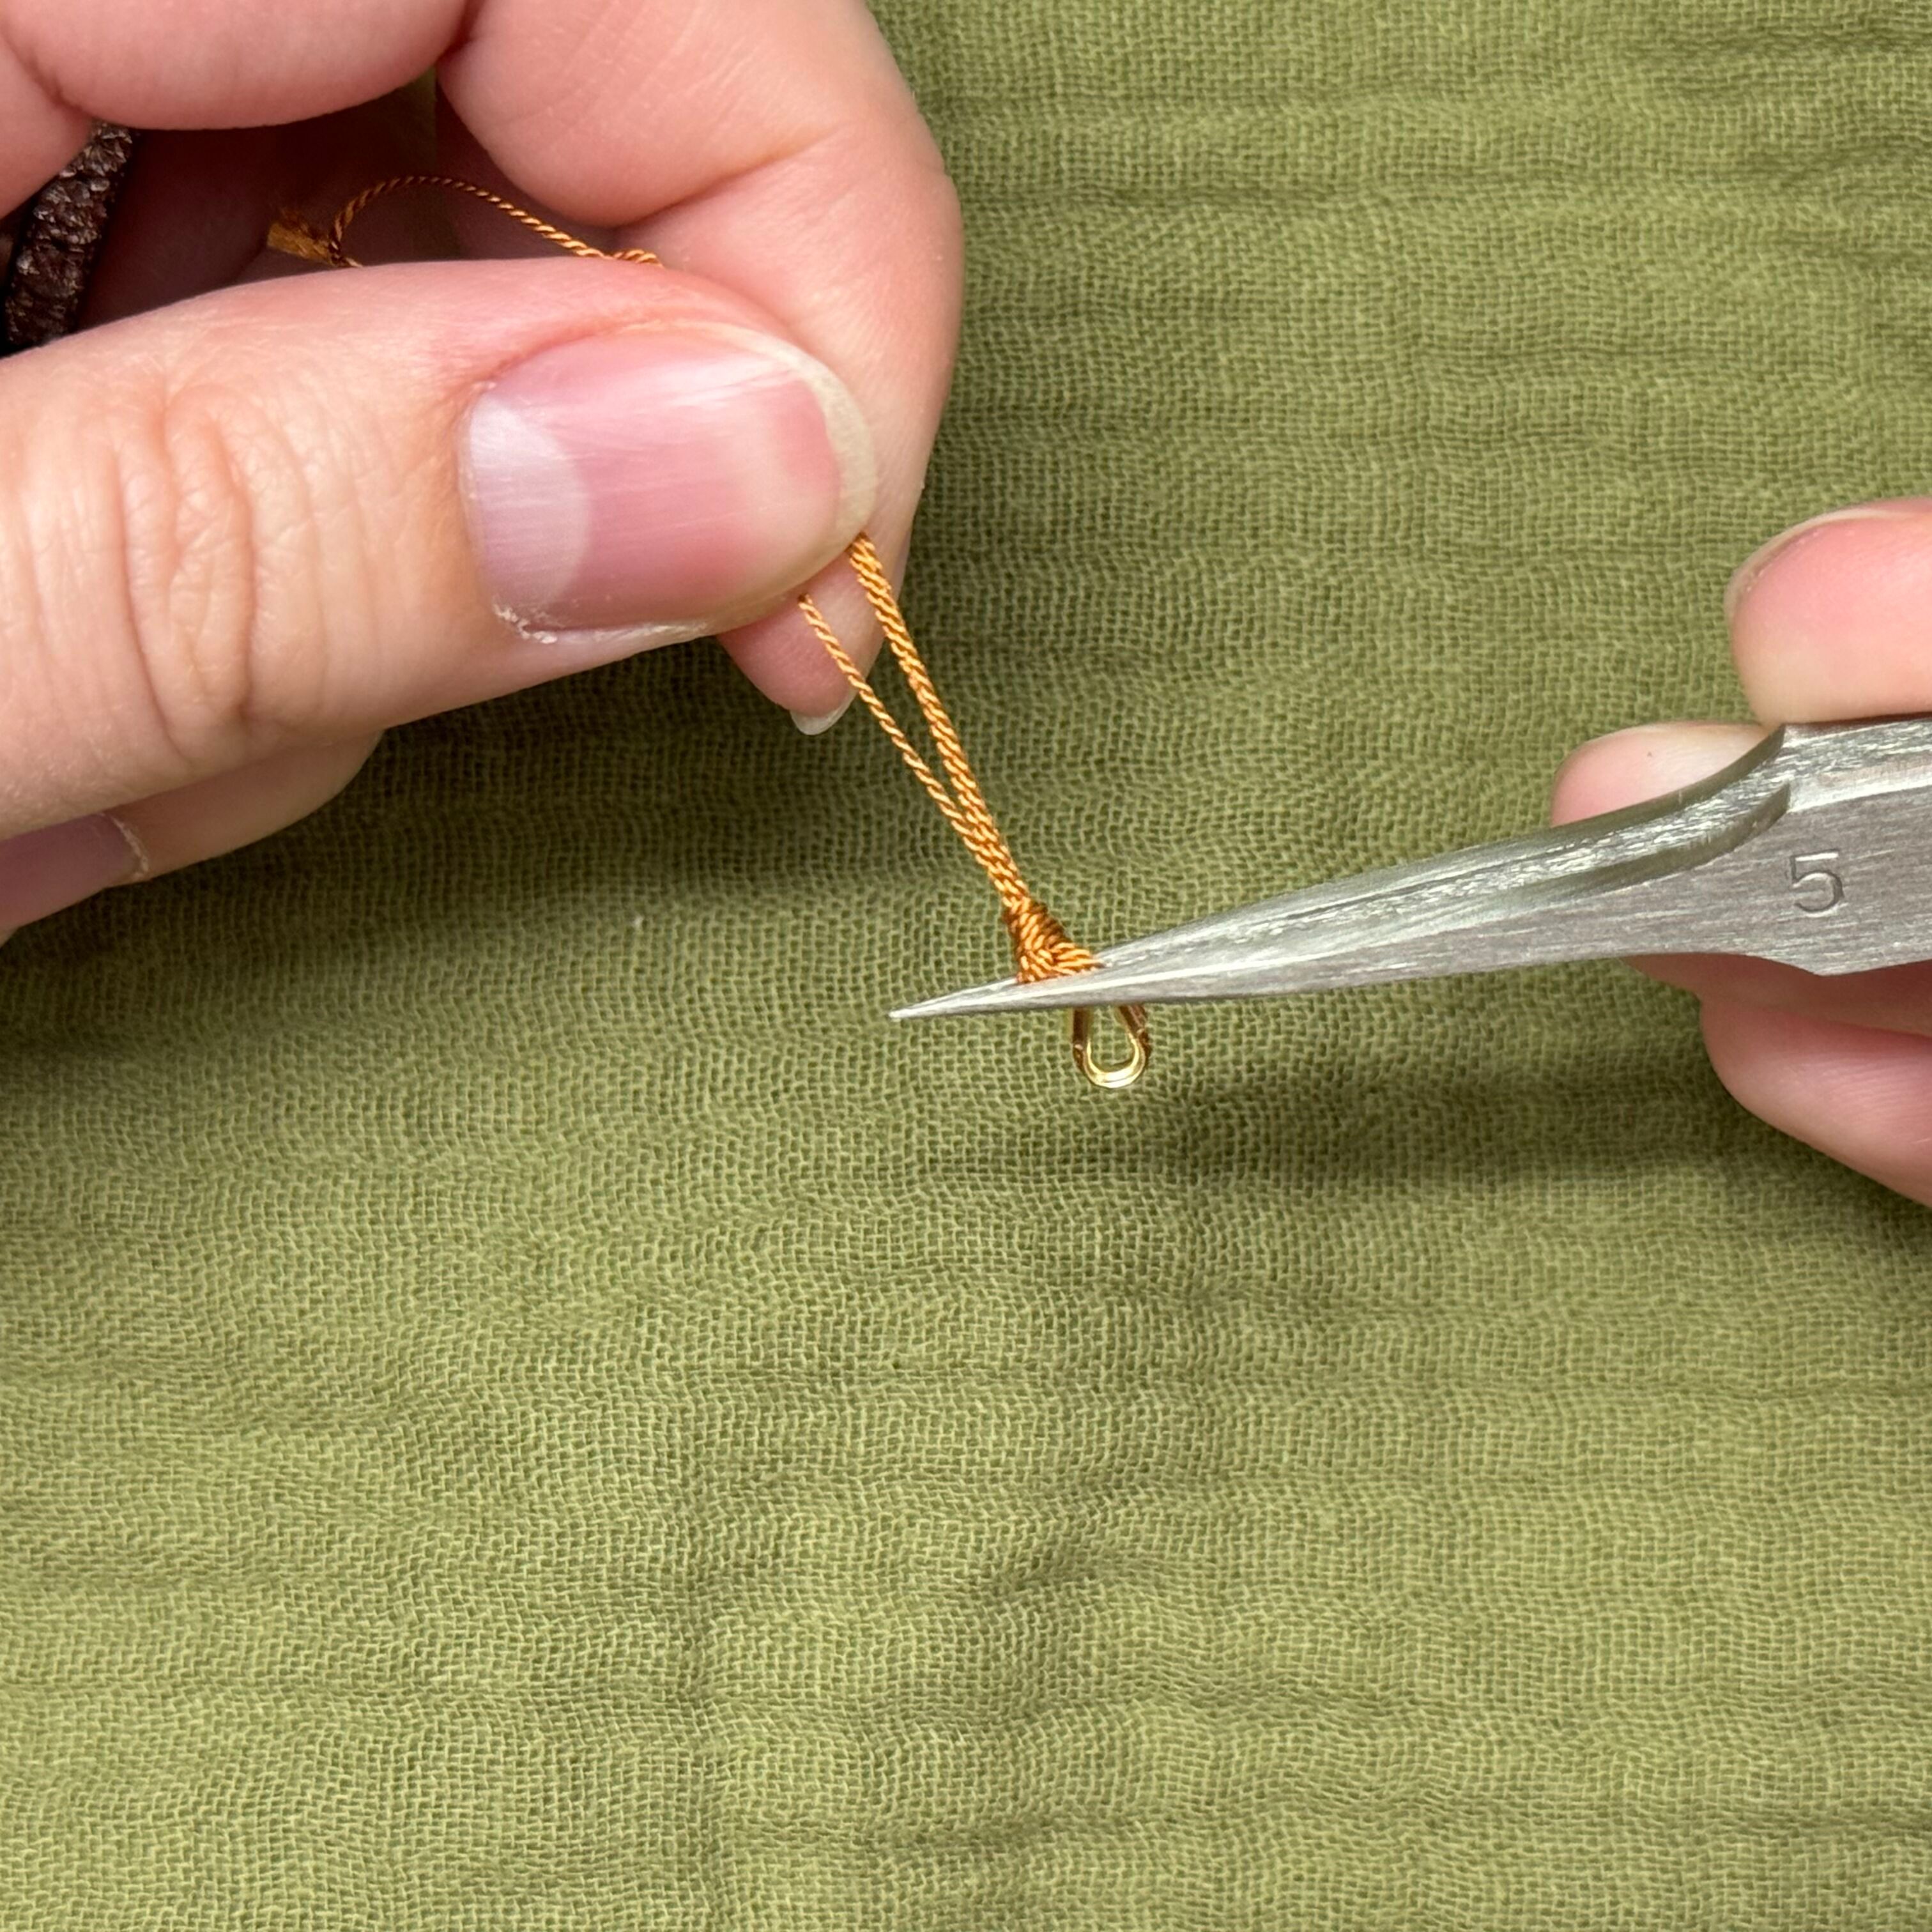
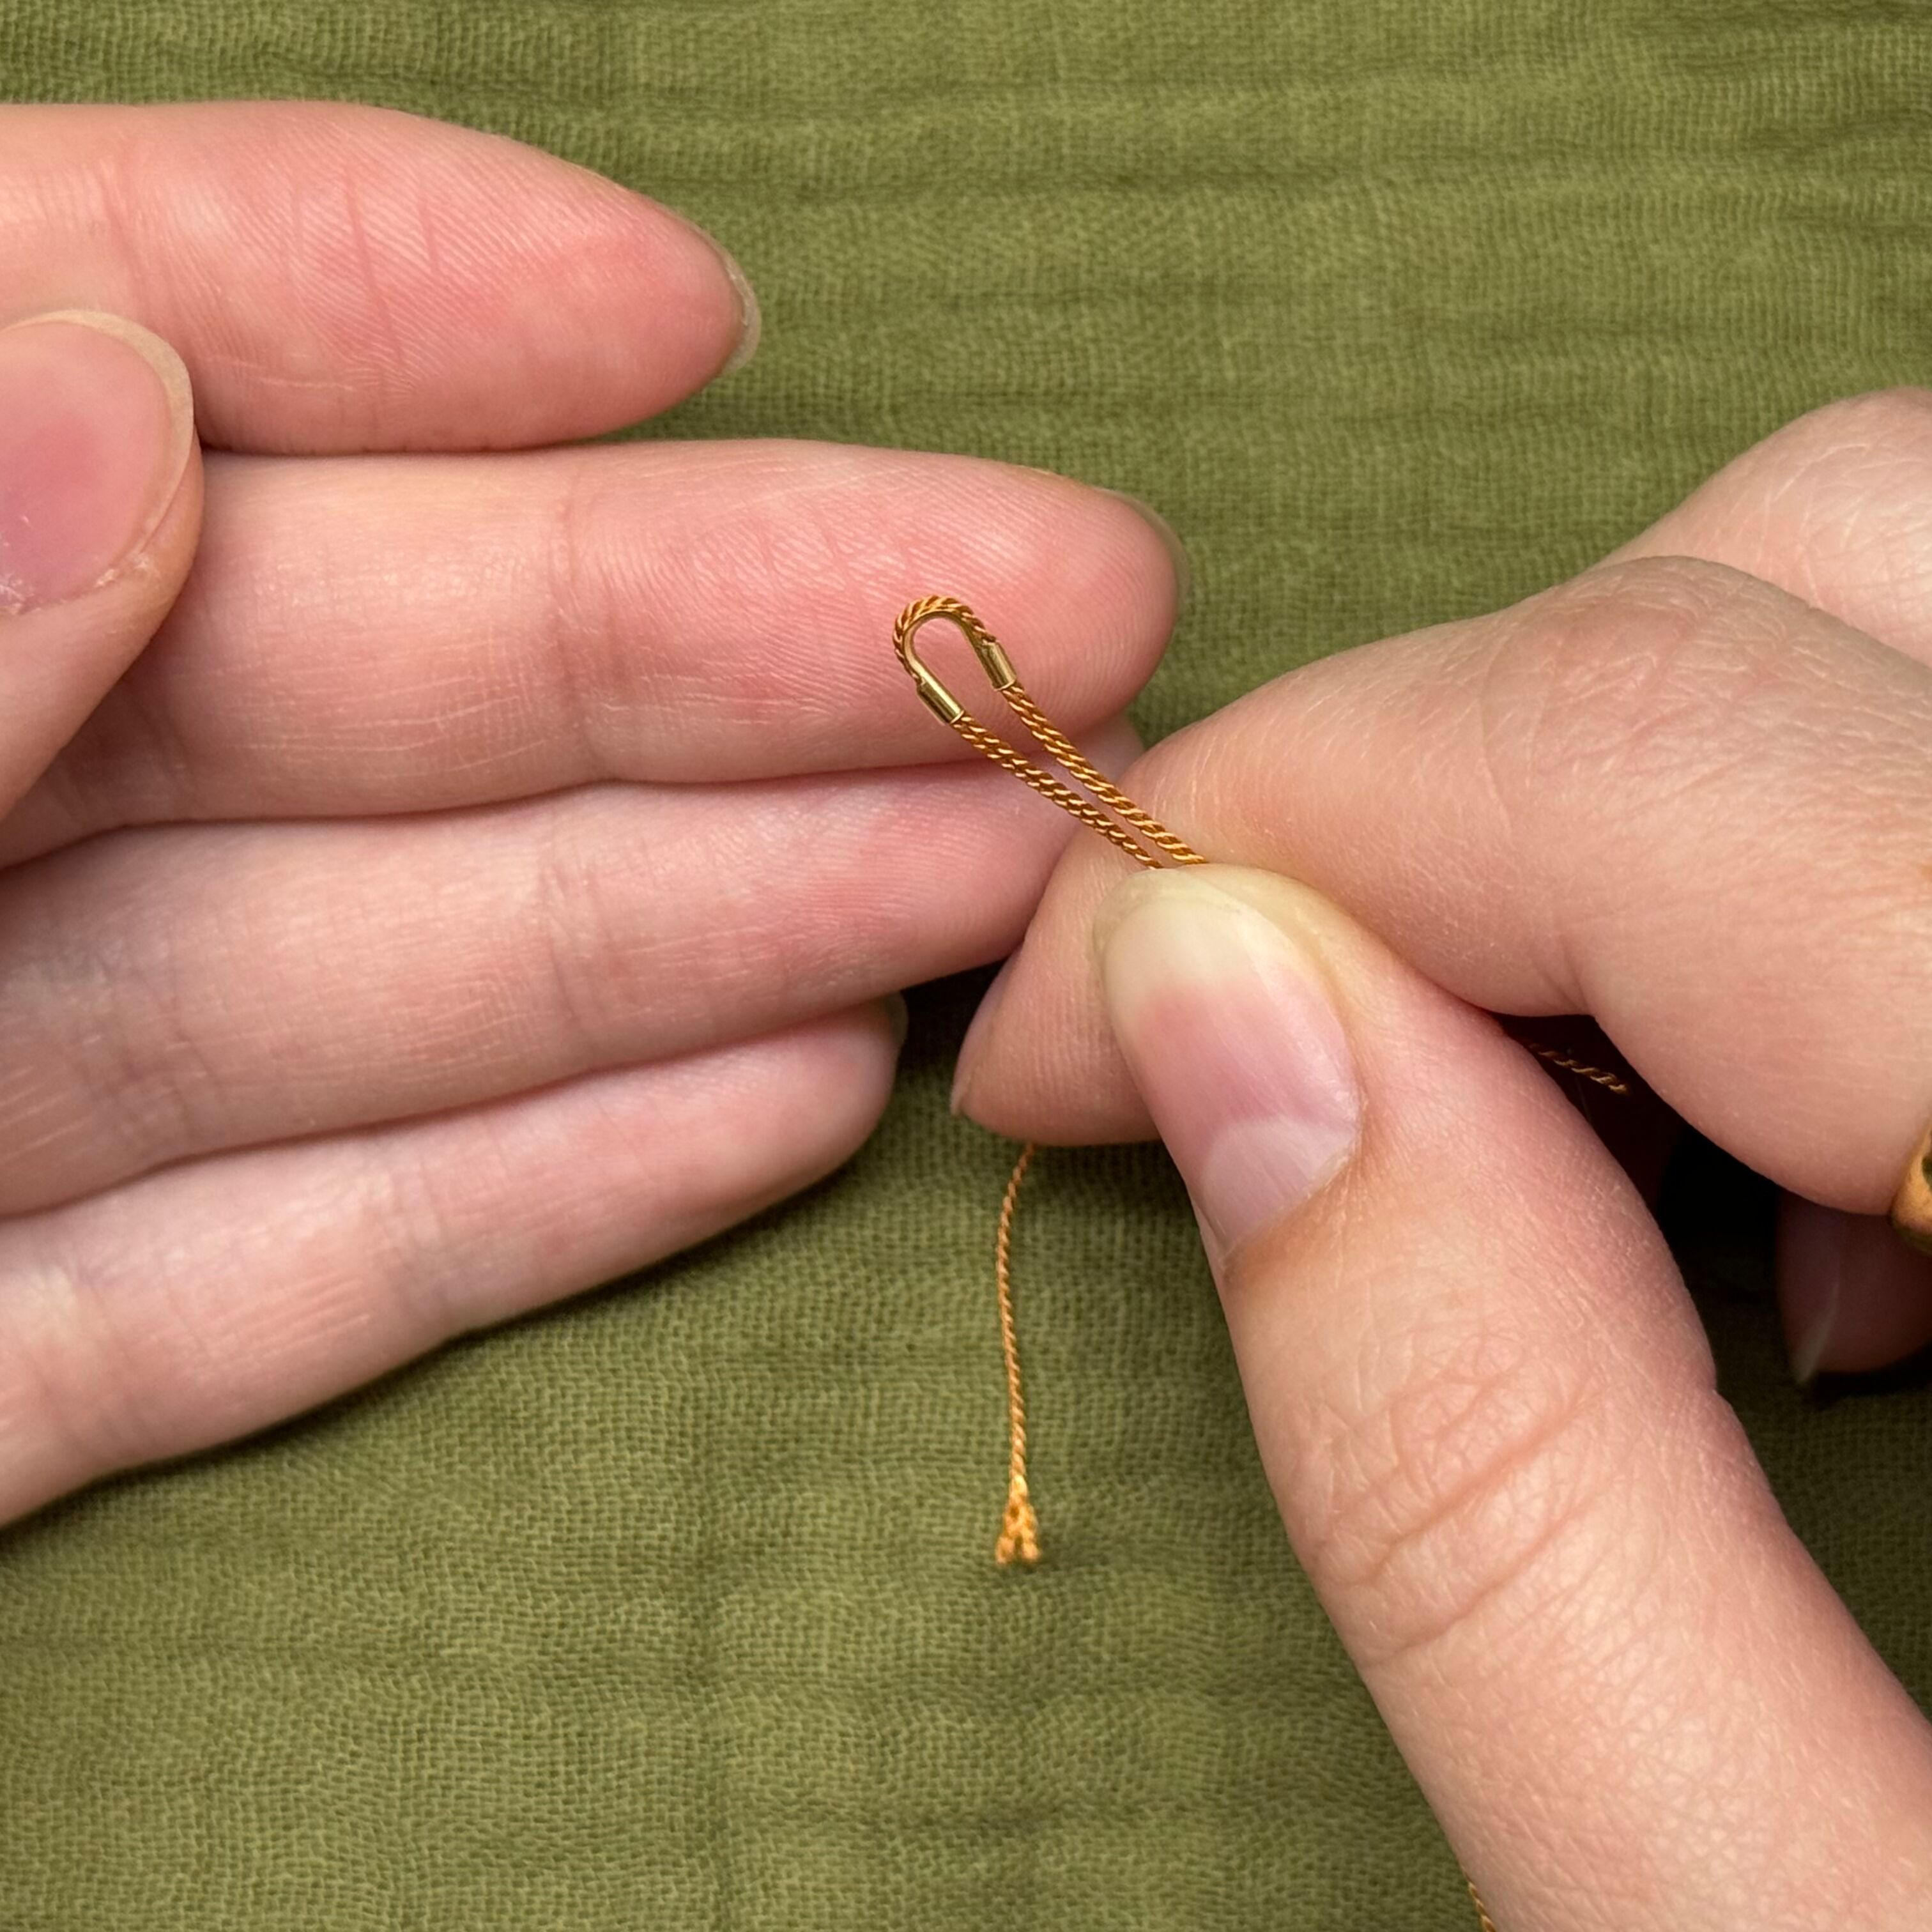
5. Using tweezers (or an awl if you prefer) tighten the knot as close as possible to the base of the cable thimble. Add a dab of glue and cut
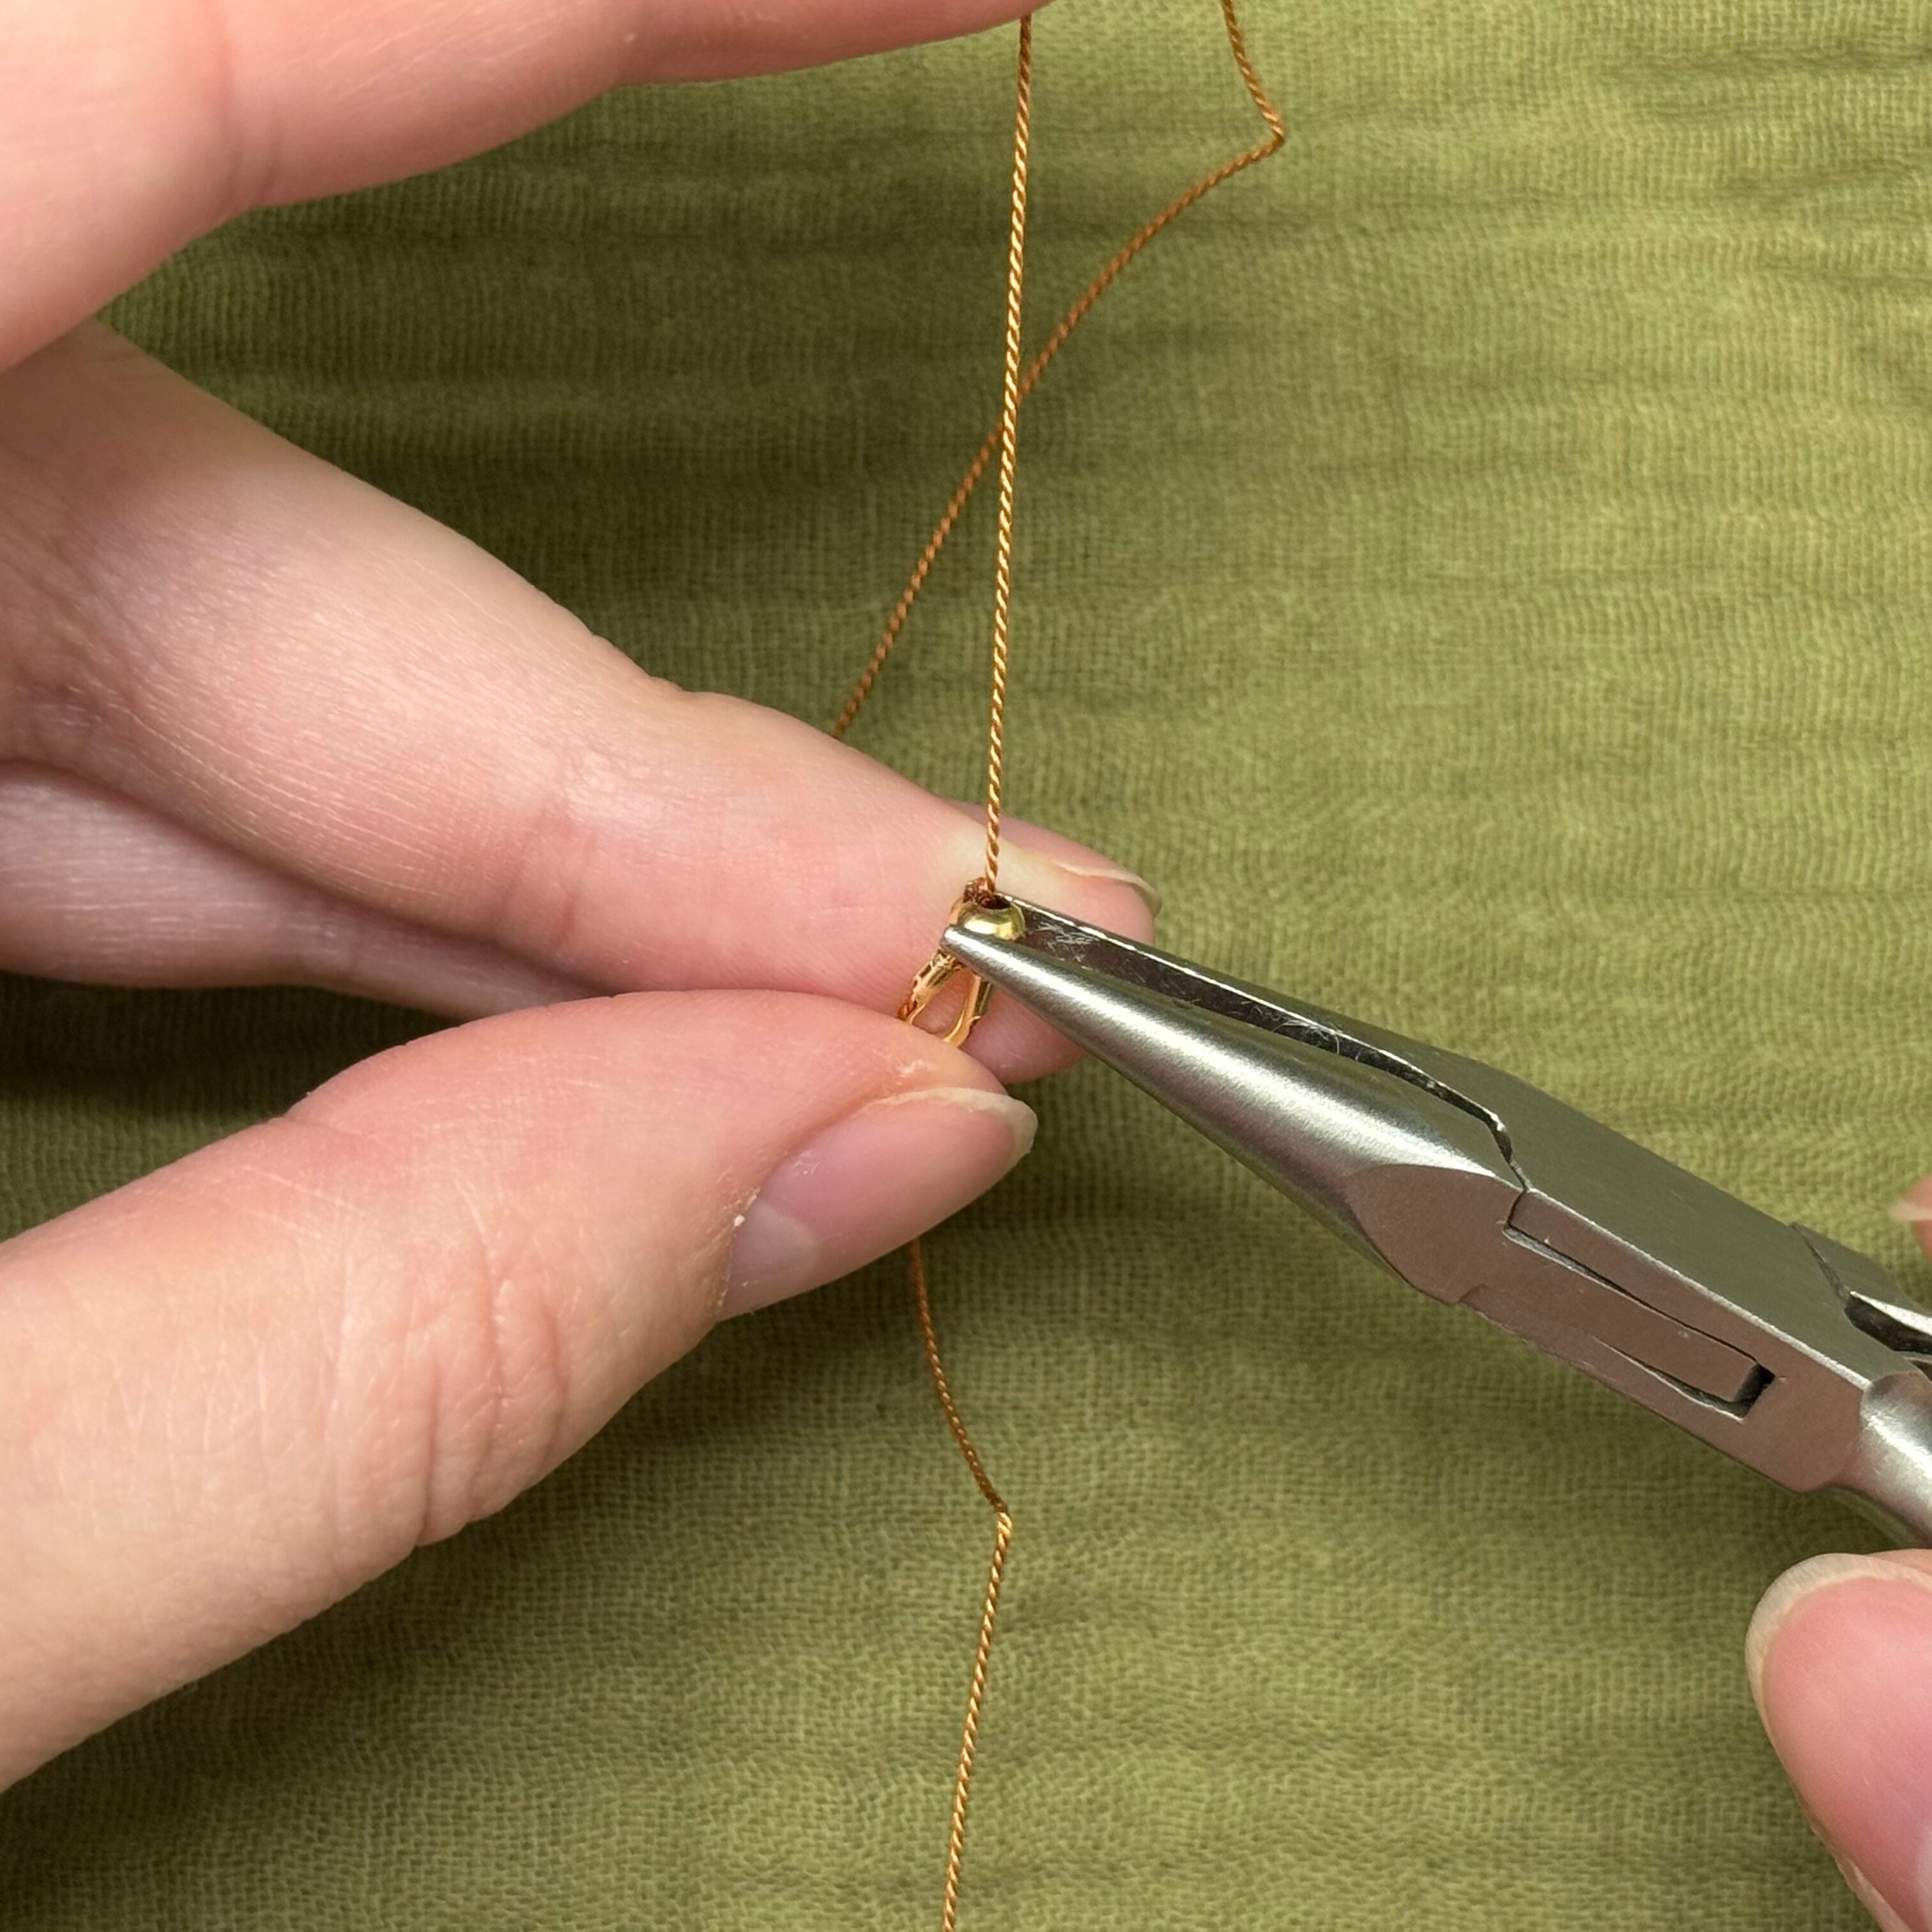
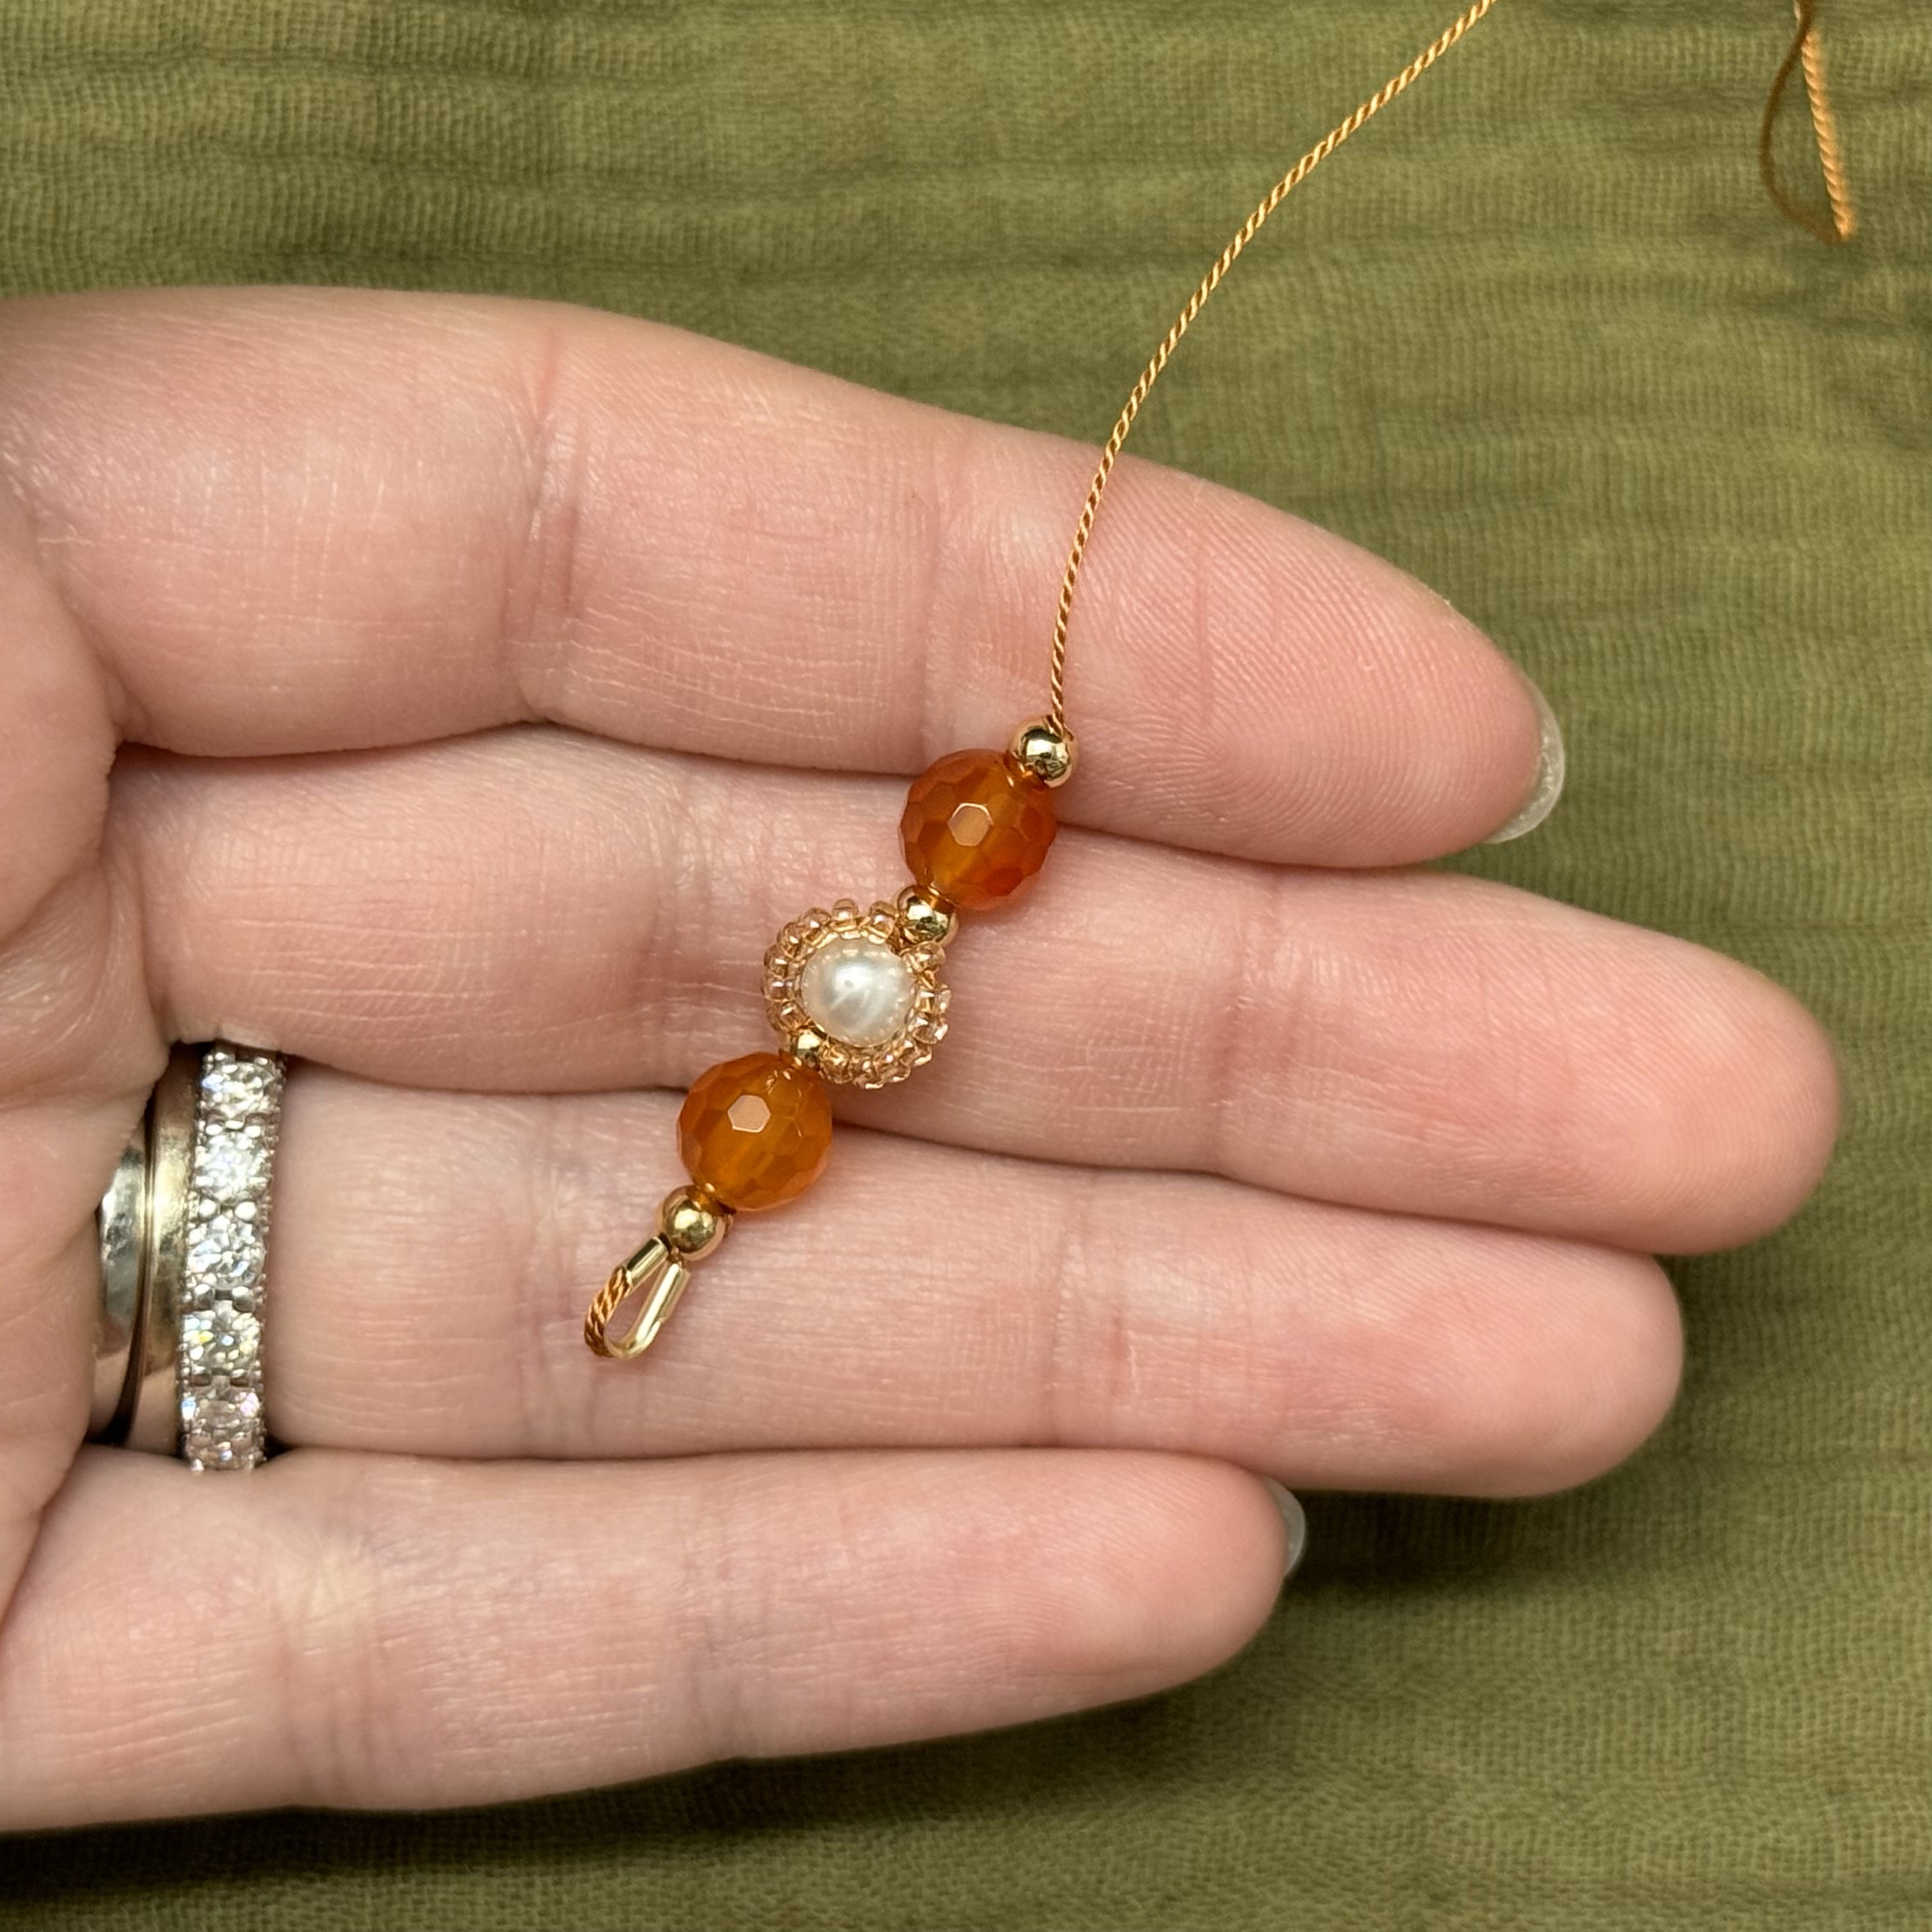
6. Cover knot with crimp cover
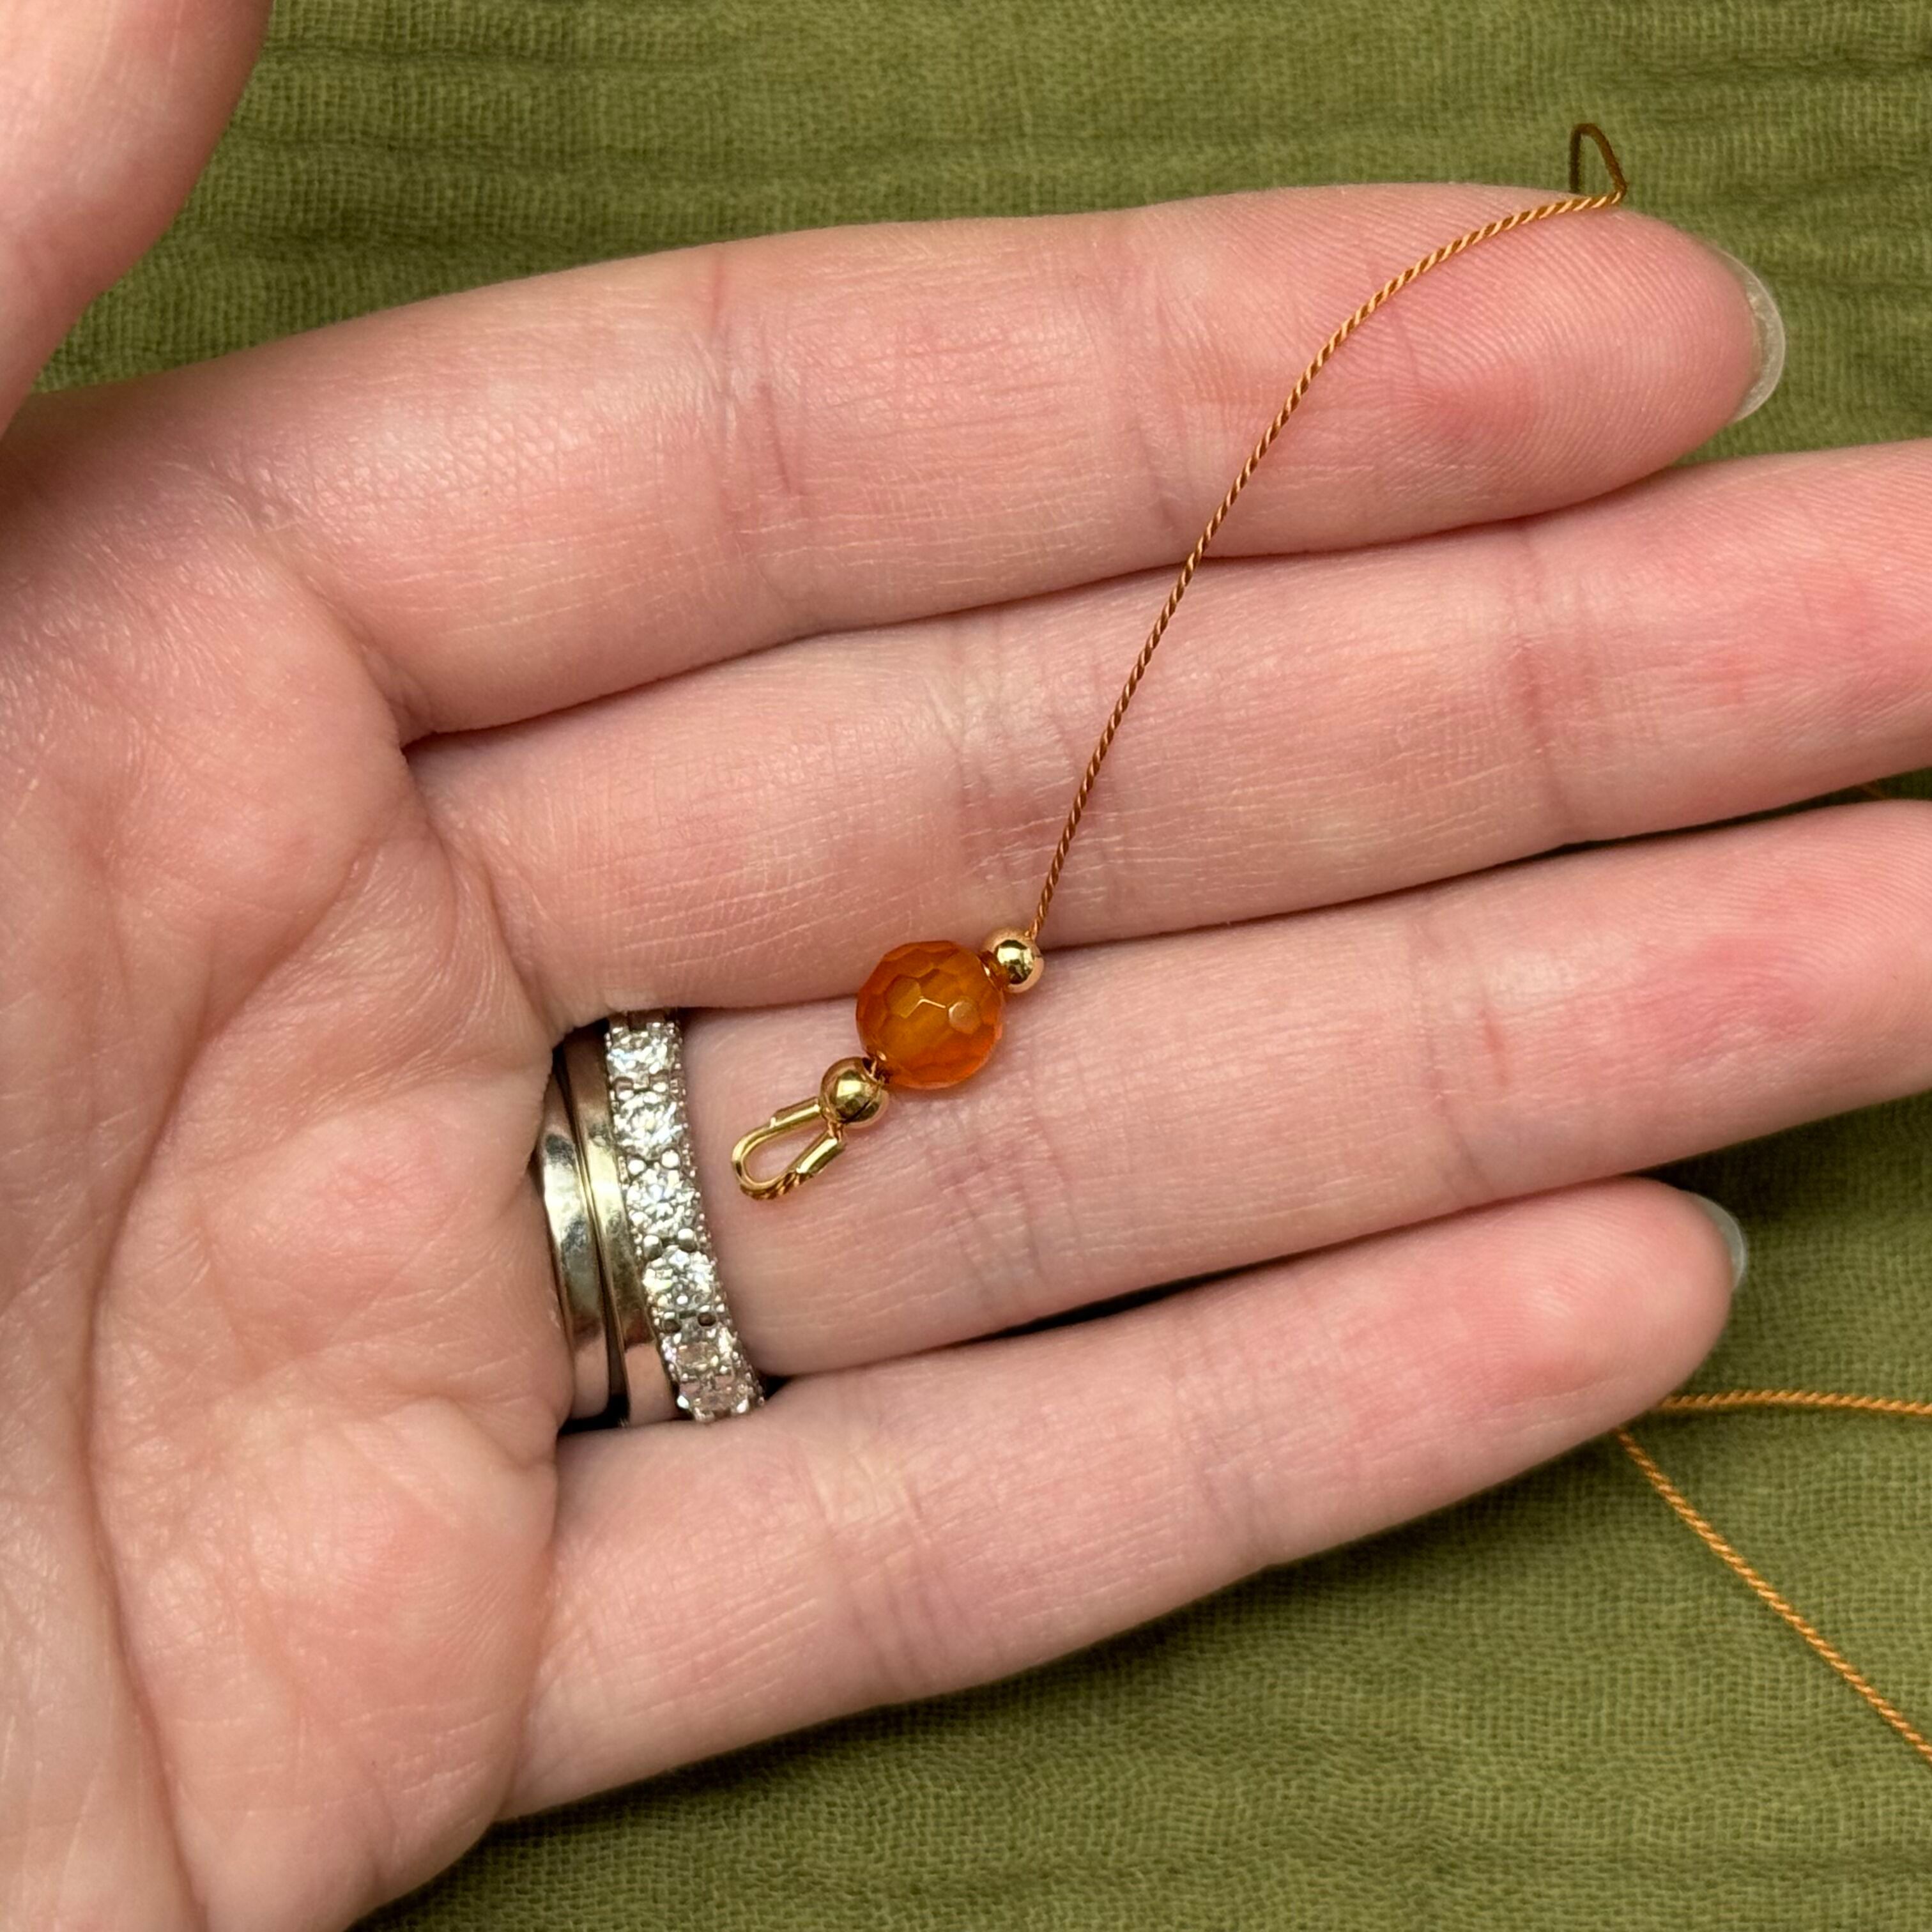
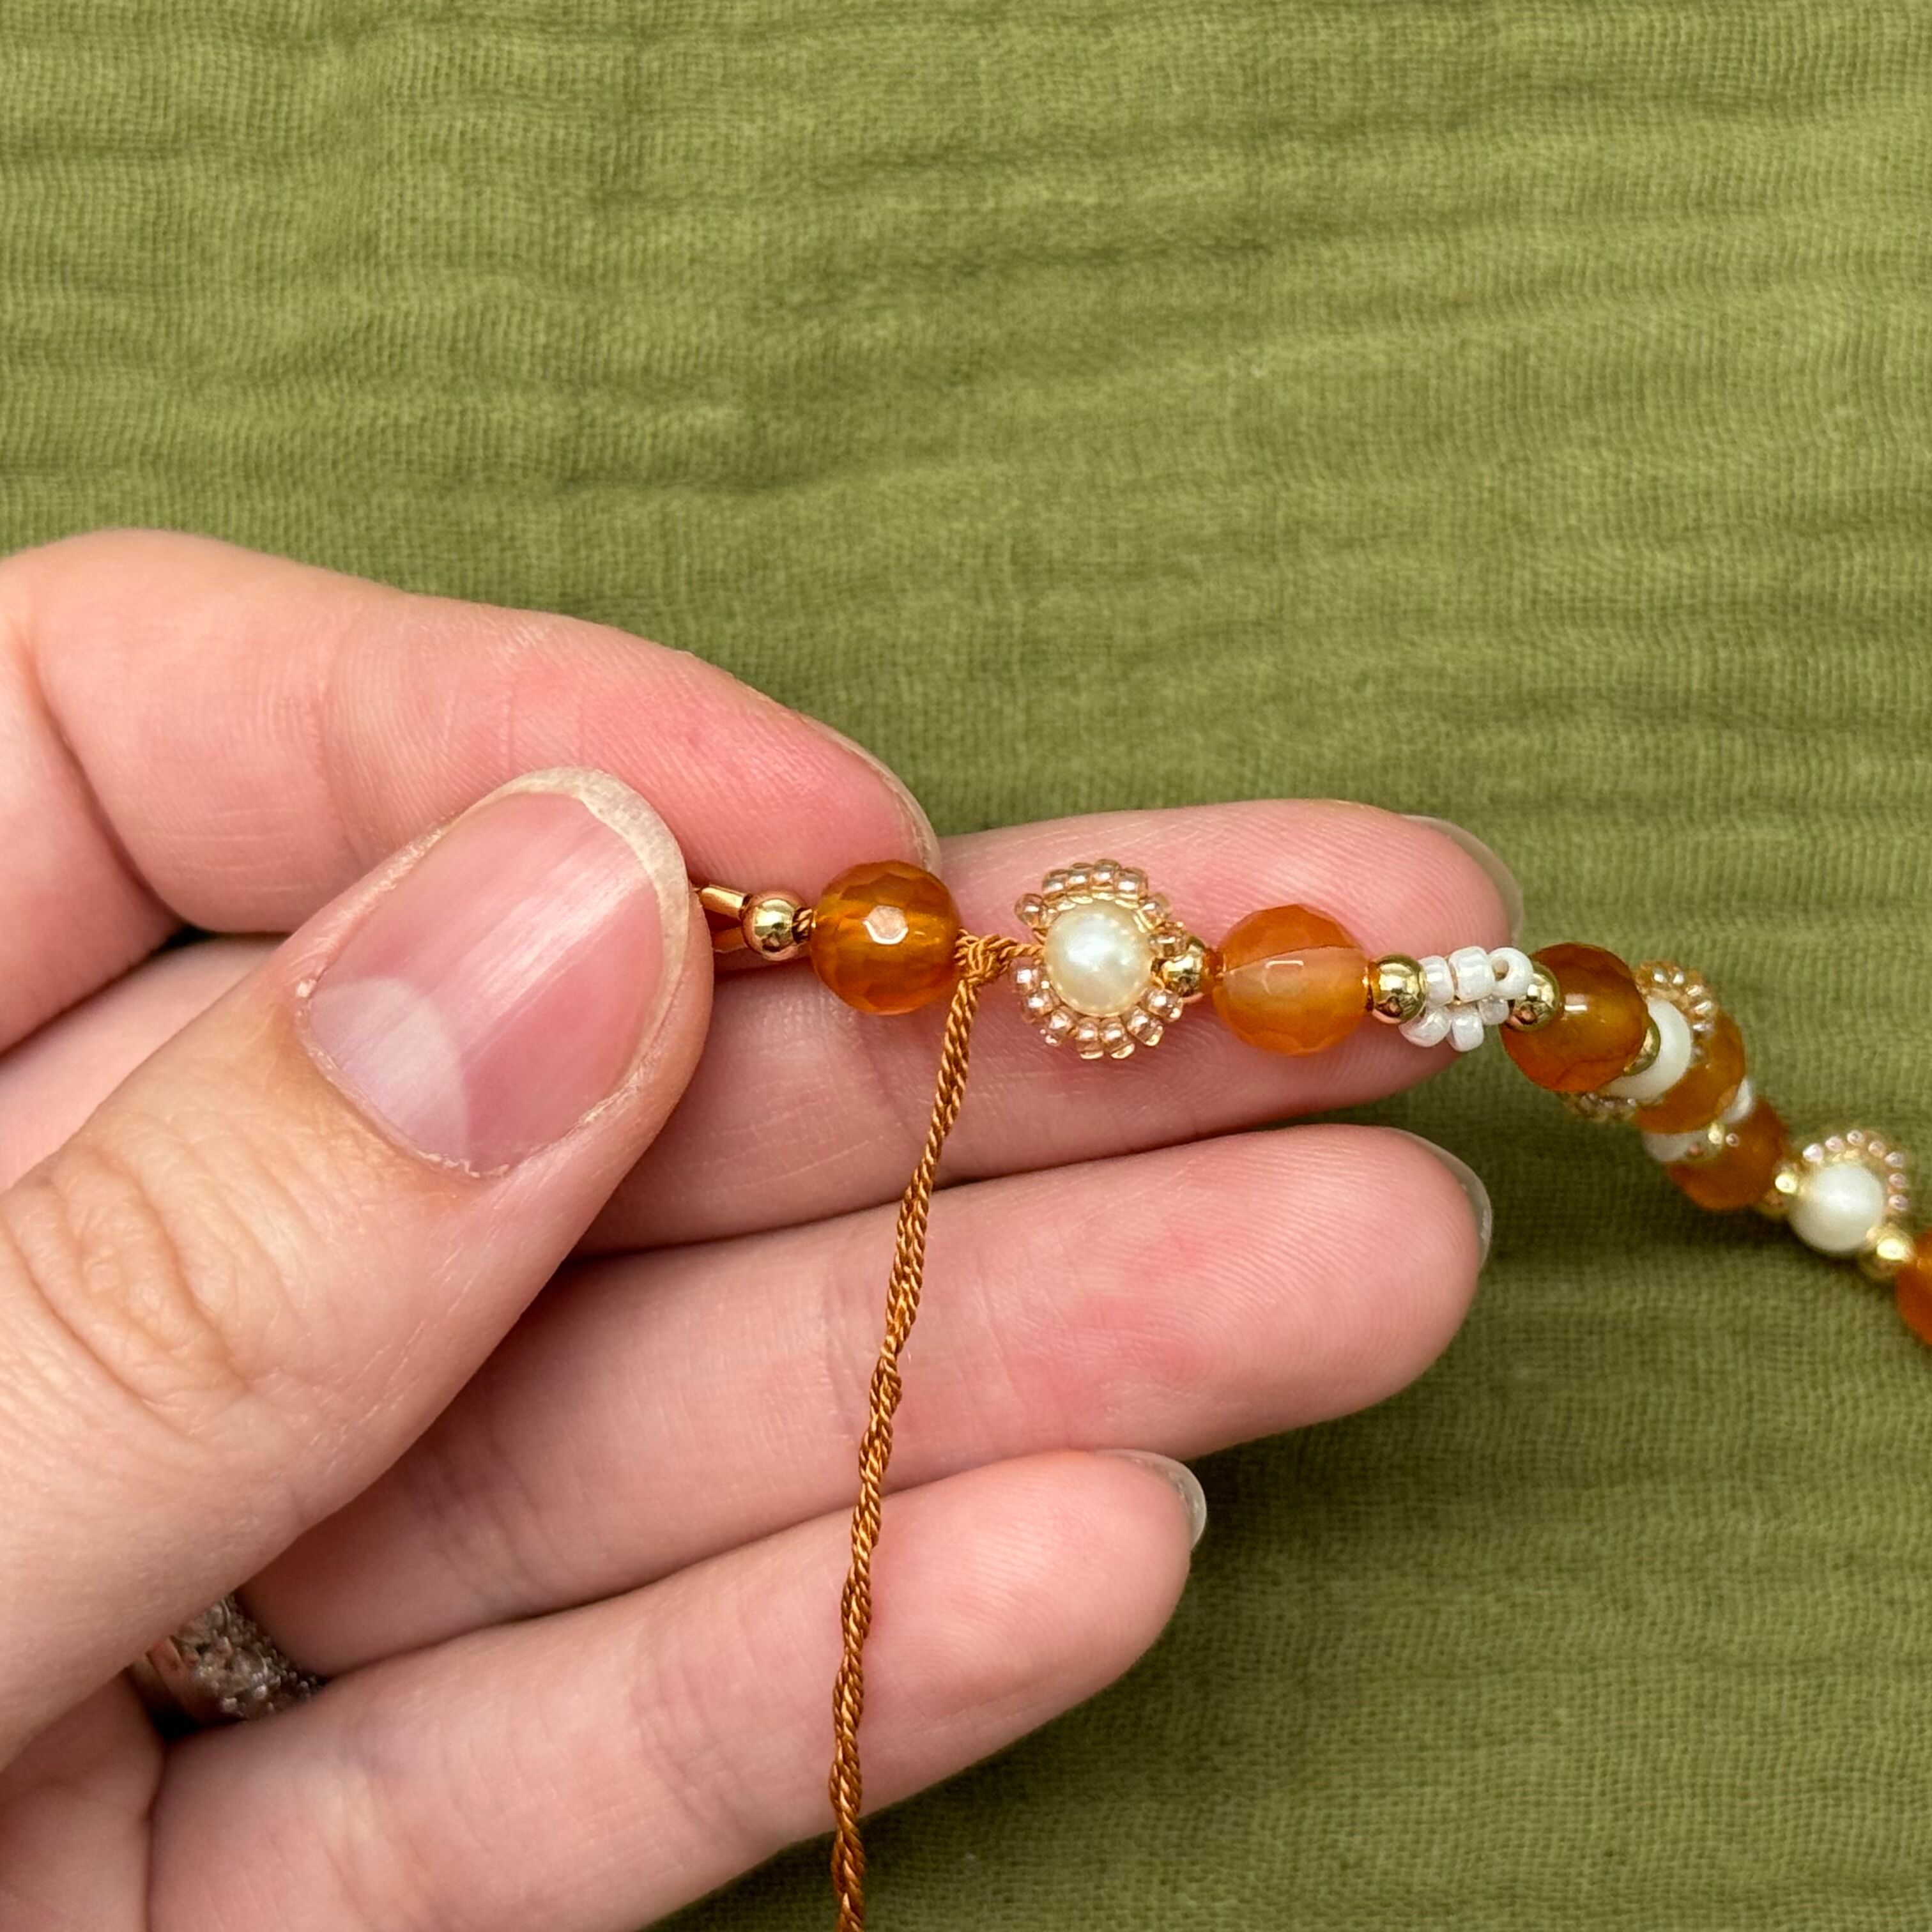
7. String on a carnelian bead and a 3mm gold bead
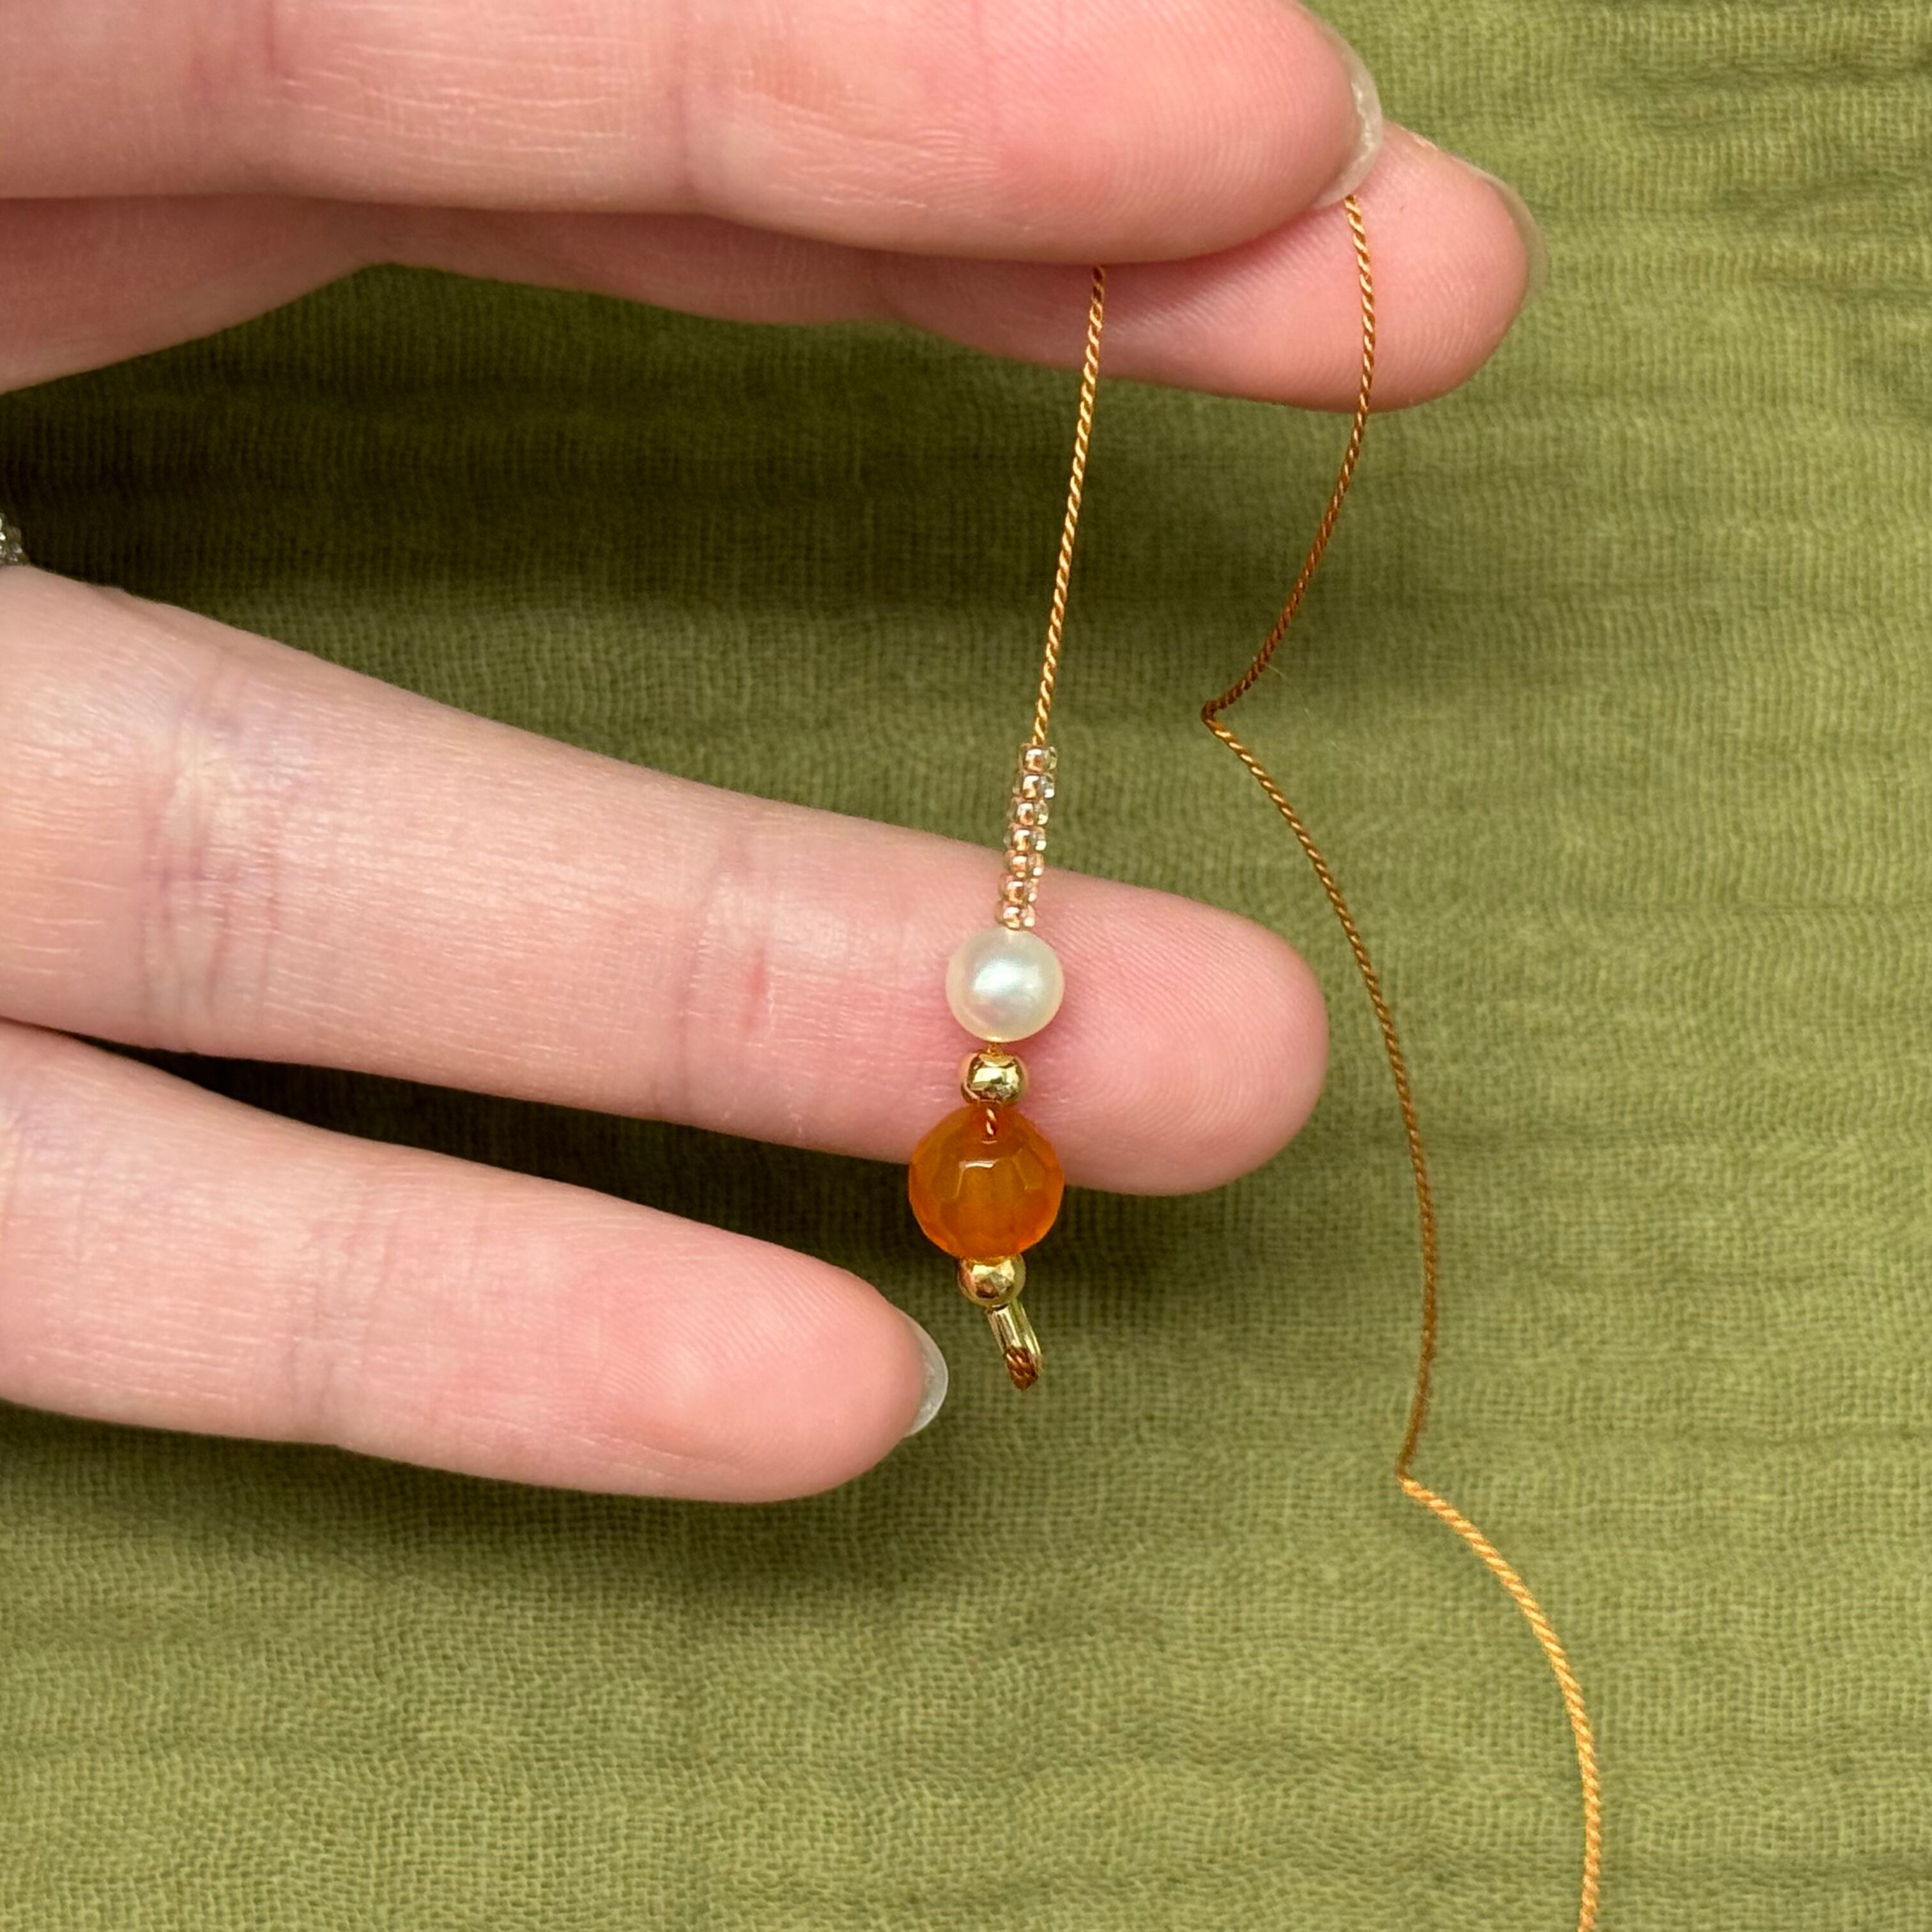
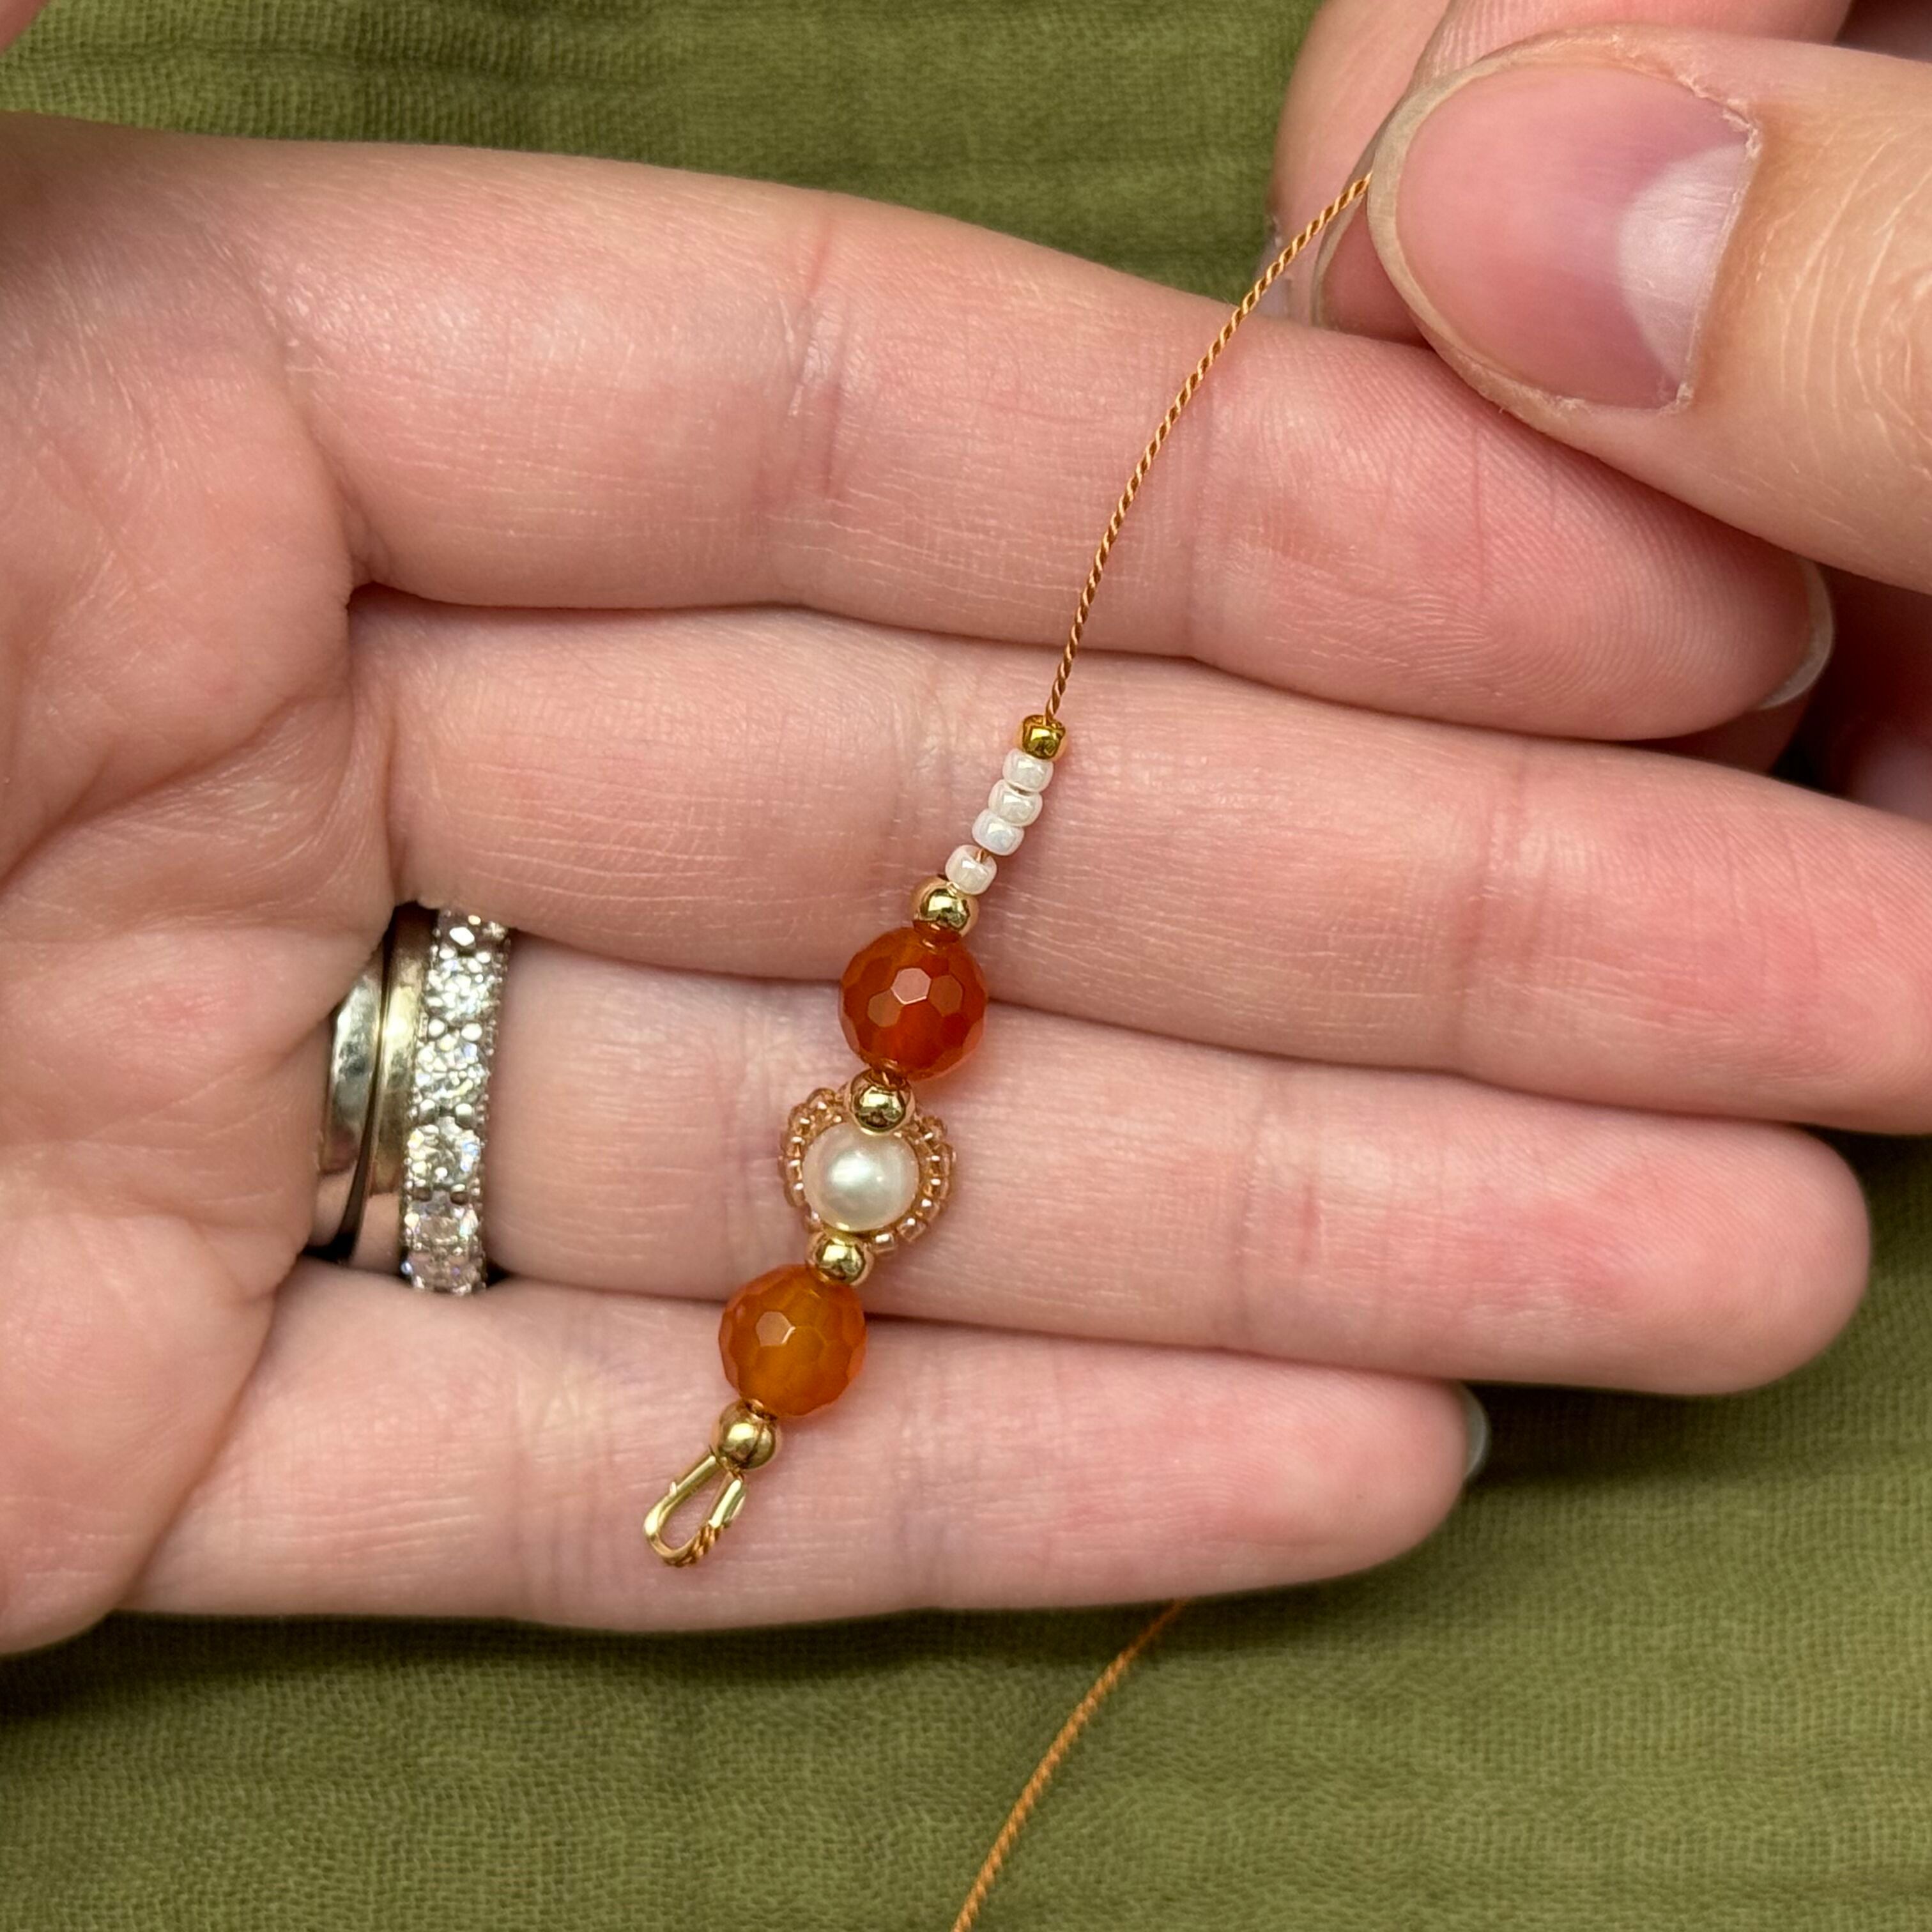
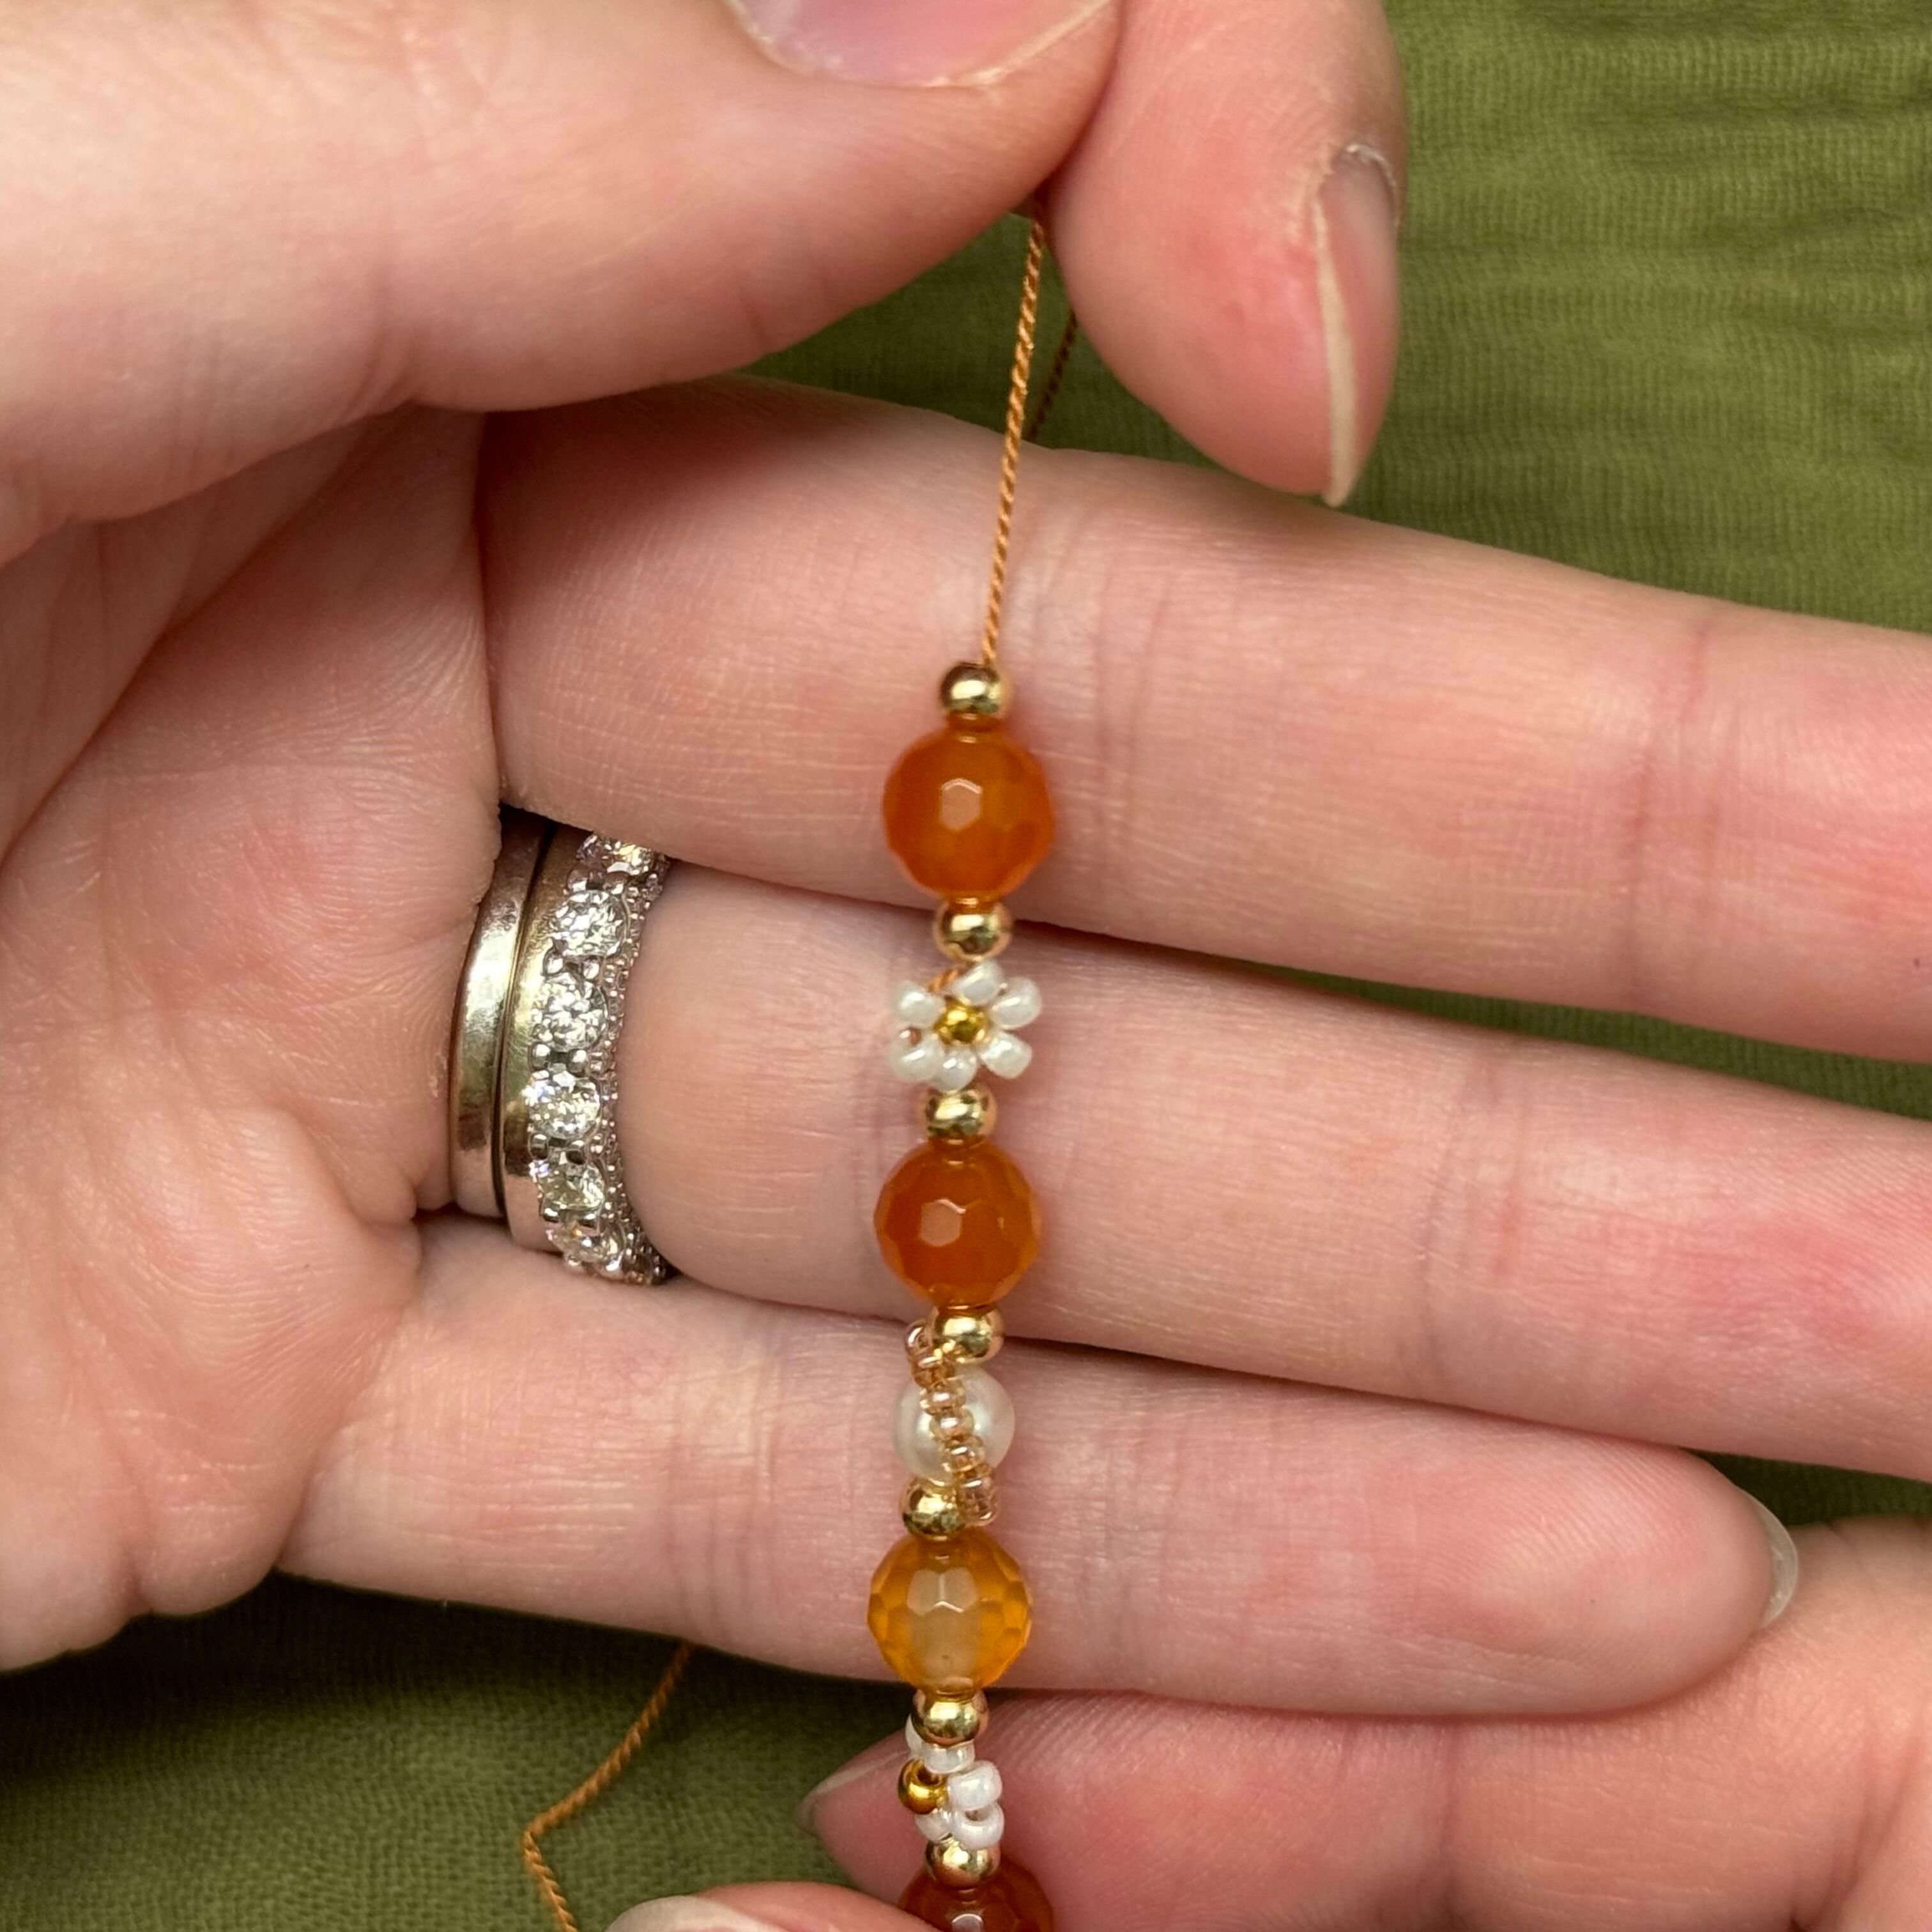
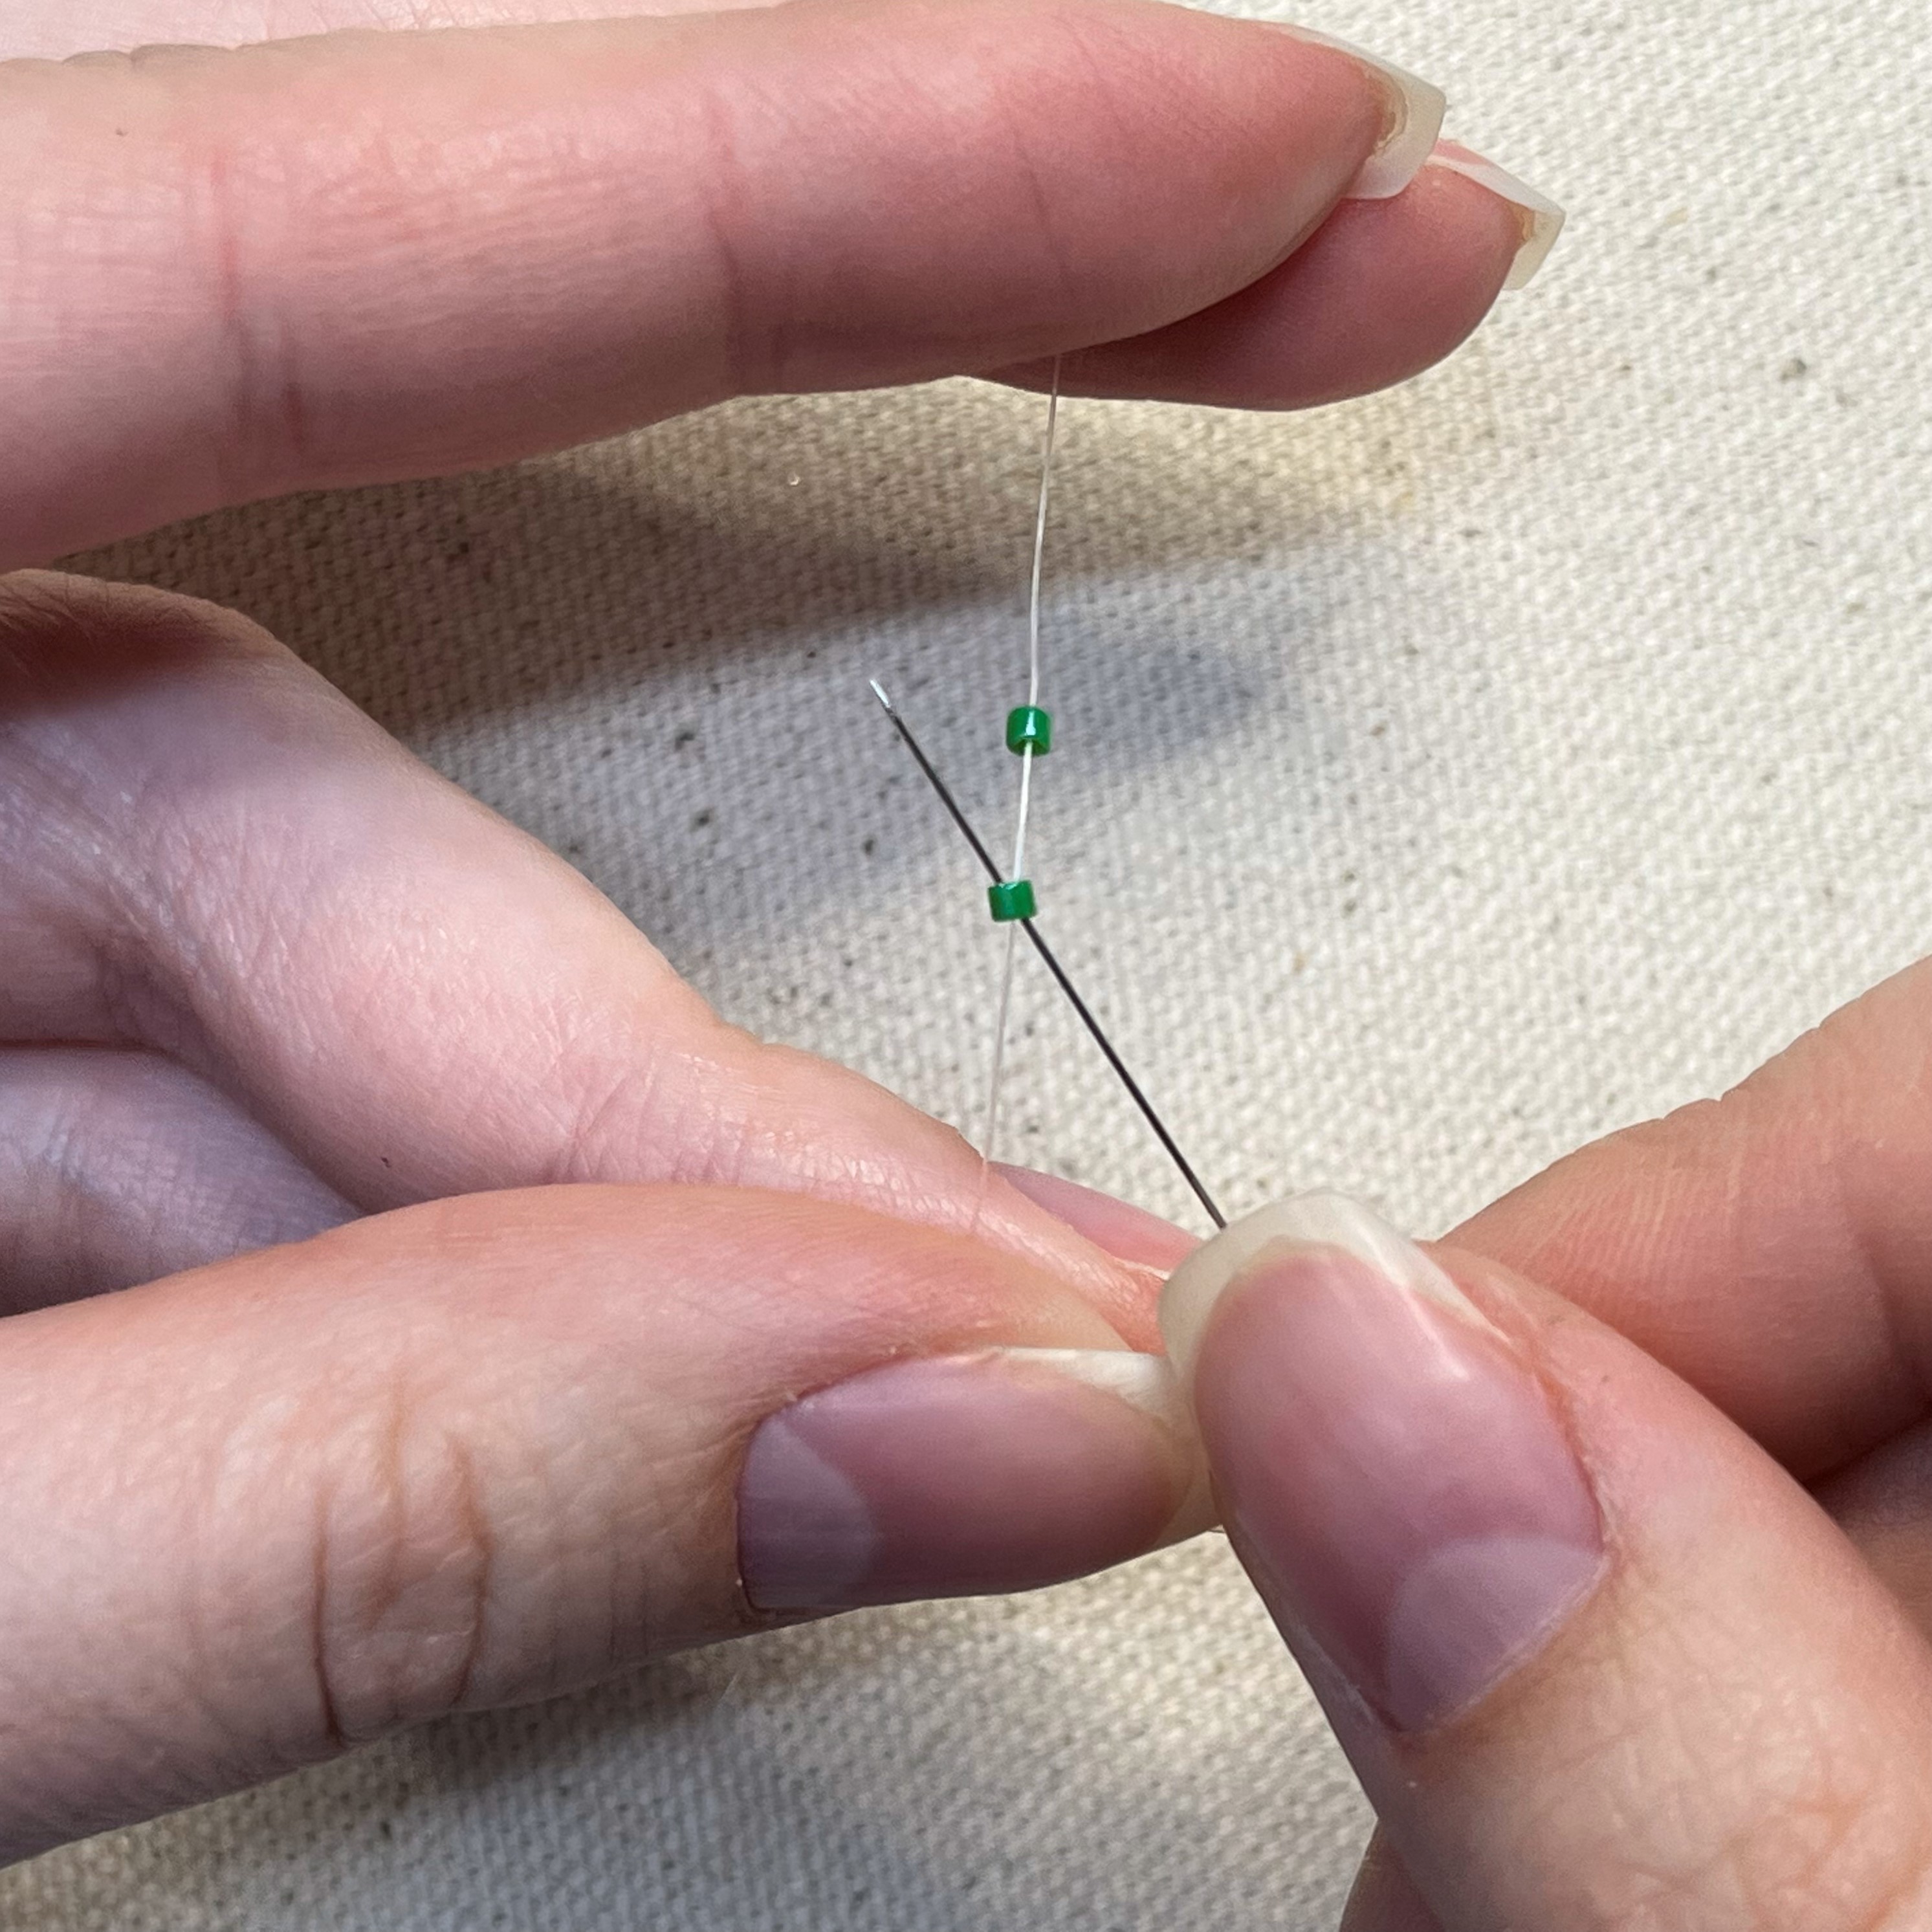
8. String on a pearl bead followed by 7 Size 15 Miyuki Seed Beads 2439 Light Topaz Luster beads
9. Thread the griffin needle back up through the pearl as shown
10. String on 7 more 2439 Light Topaz Luster beads and thread the needle up through the pearl bead as shown
***Keep the pearl as close as possible to the base of the gold bead as you pull tight, or else it will get stuck farther down the cord where you don't want it to be
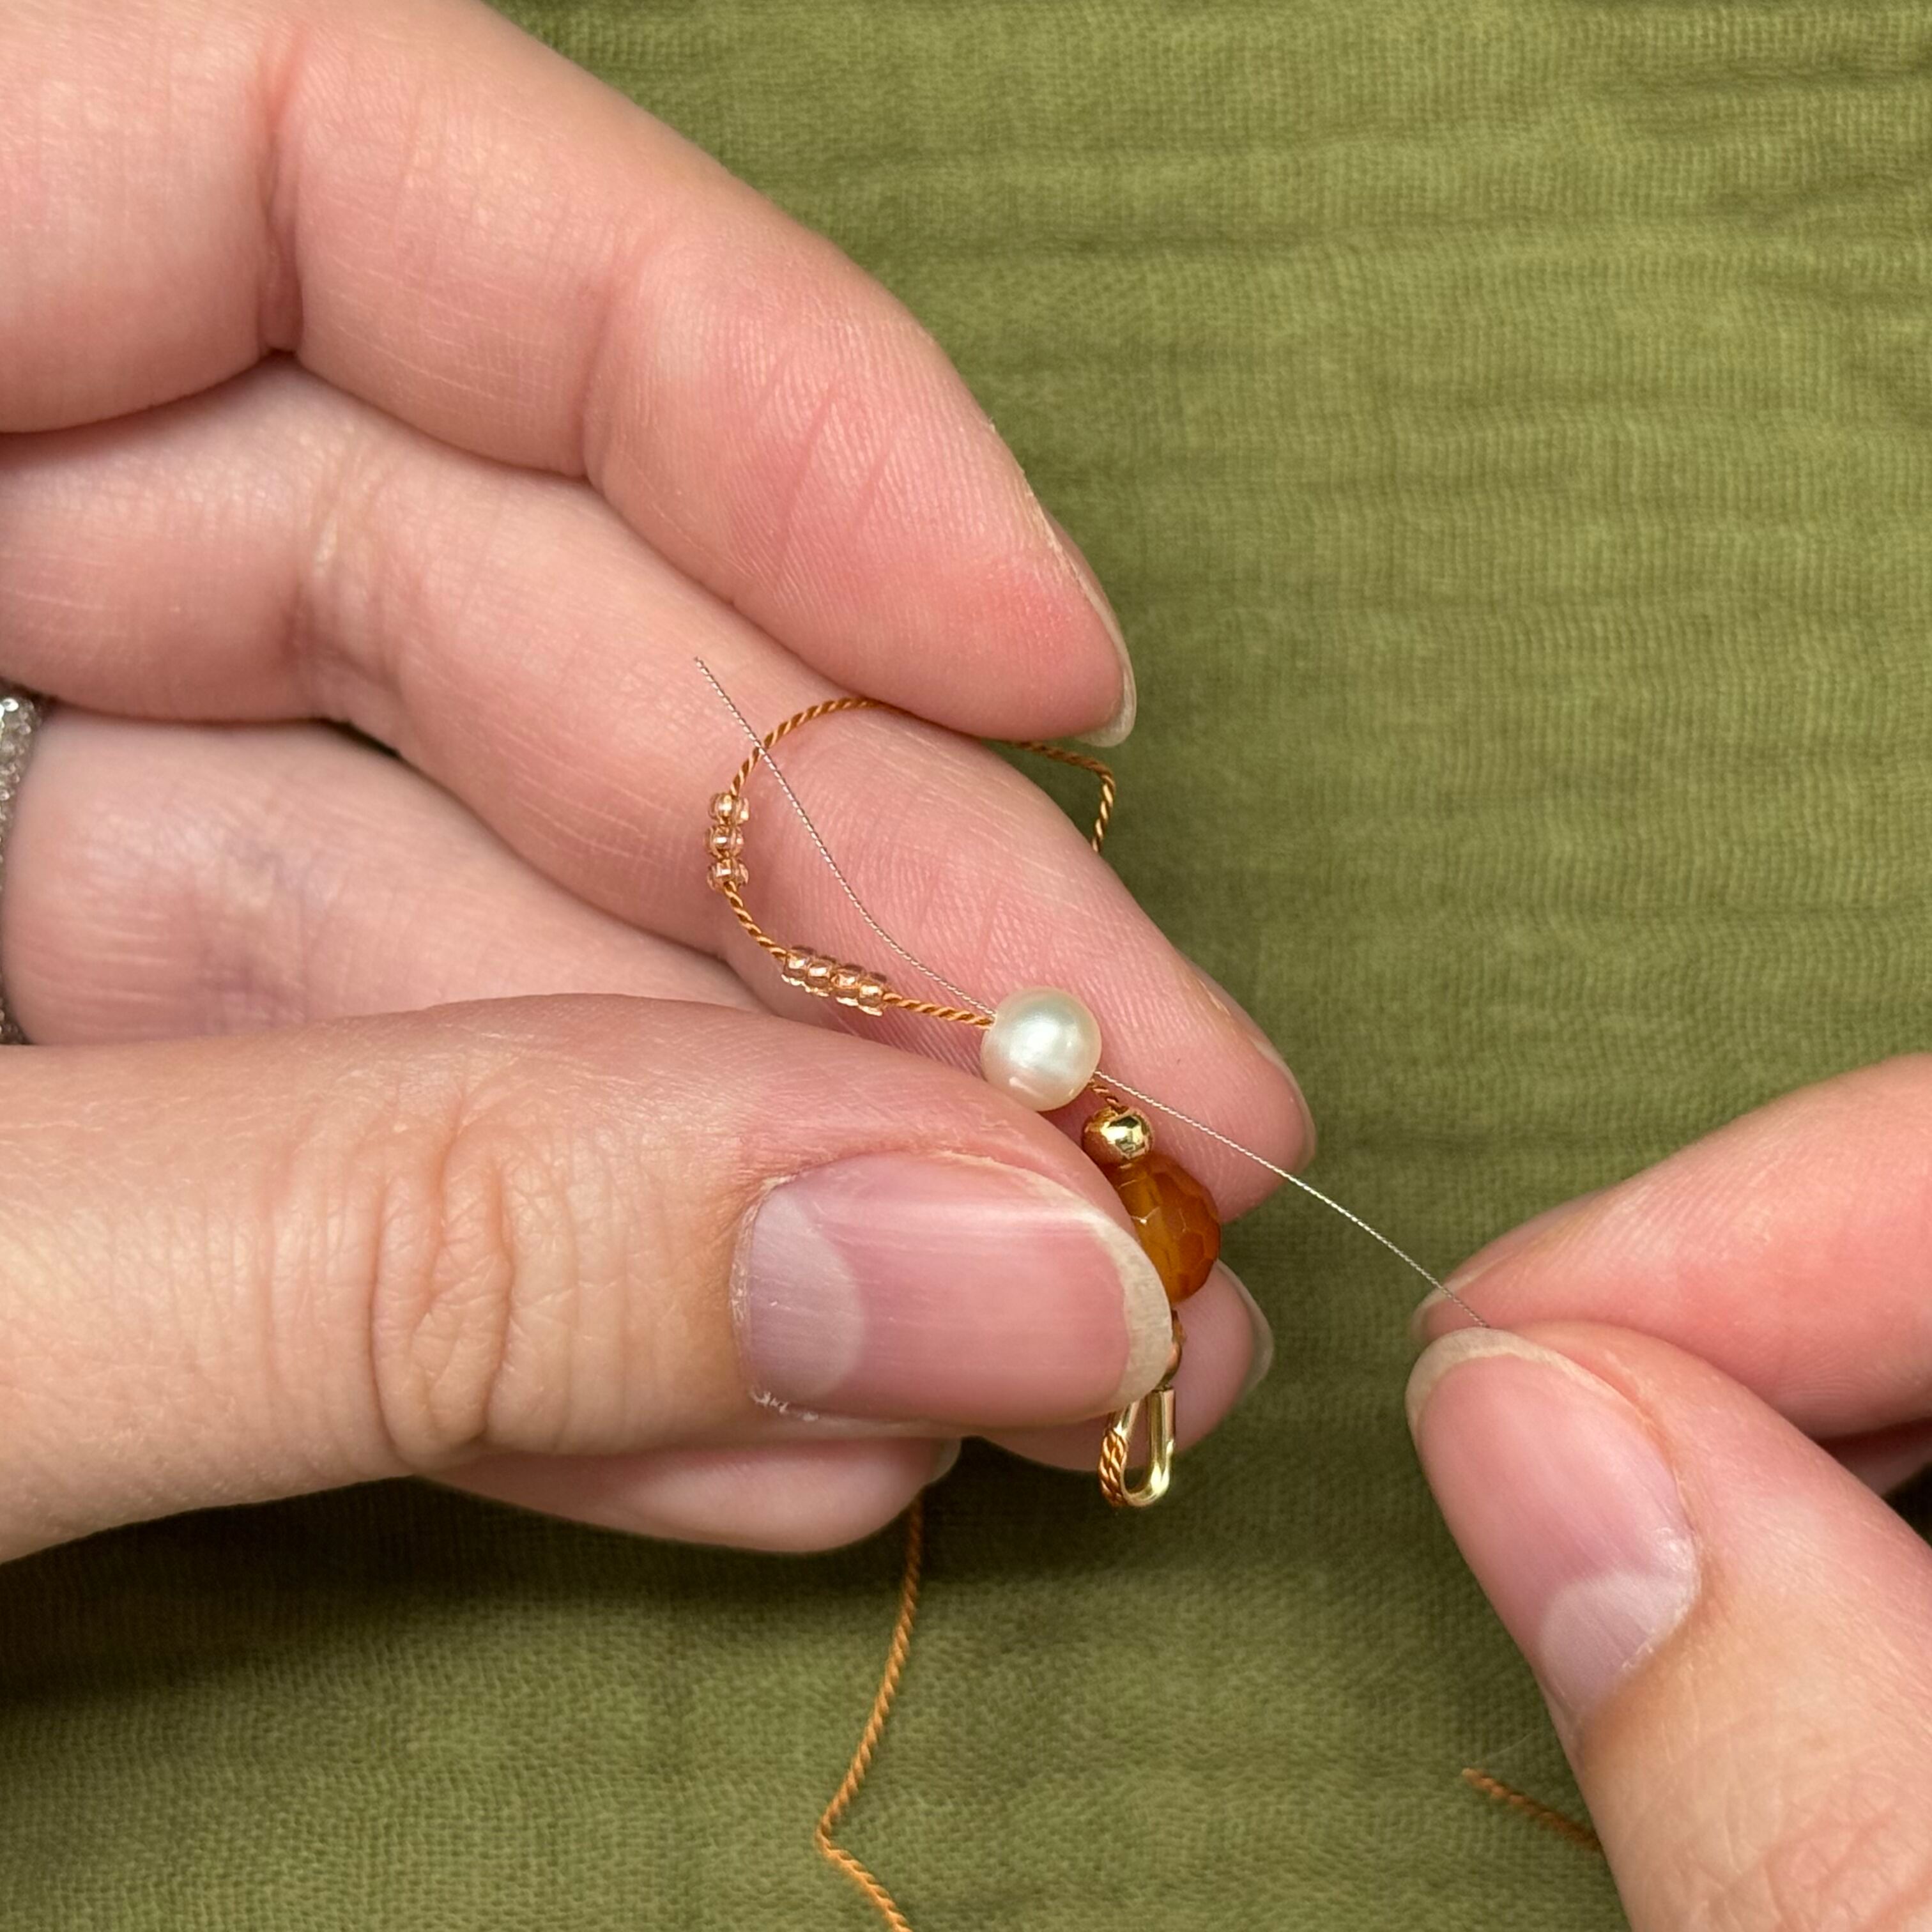
11. String on another gold bead, carnelian bead, and a gold bead
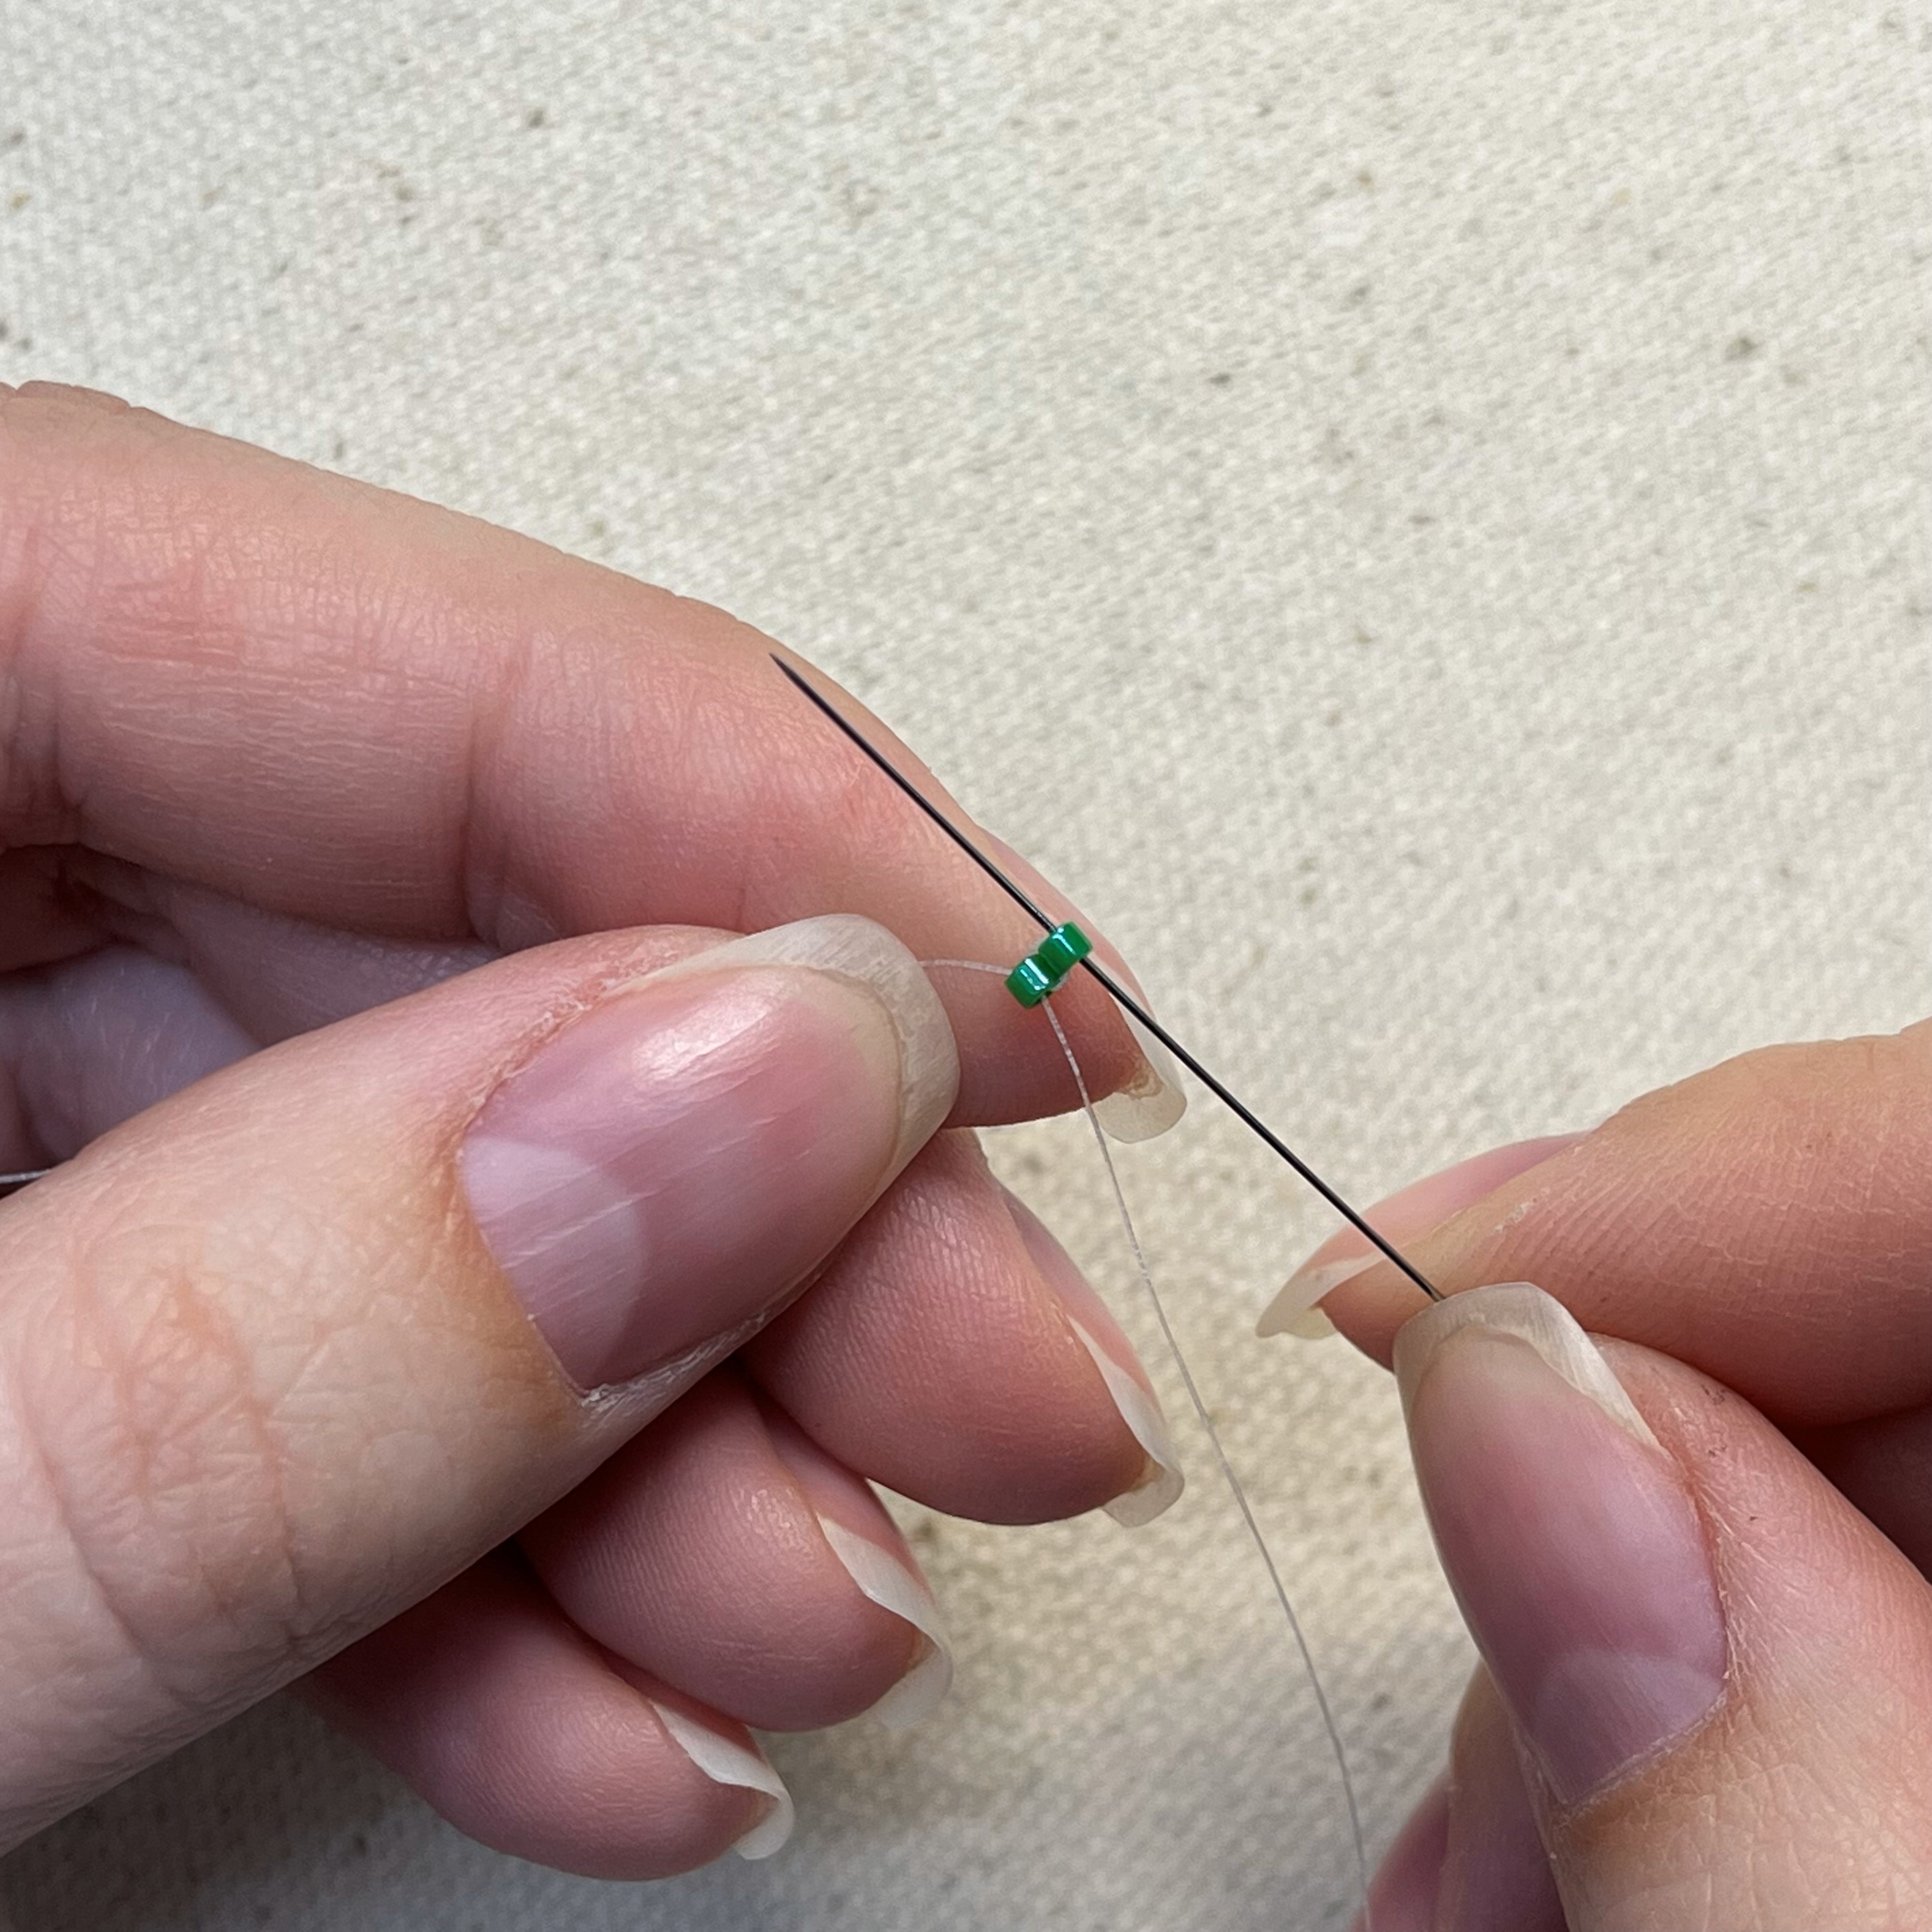
12. String on 4 Size 11 Miyuki Seed Beads 591 Pearl Ceylon and one 465 24K Gold Plated
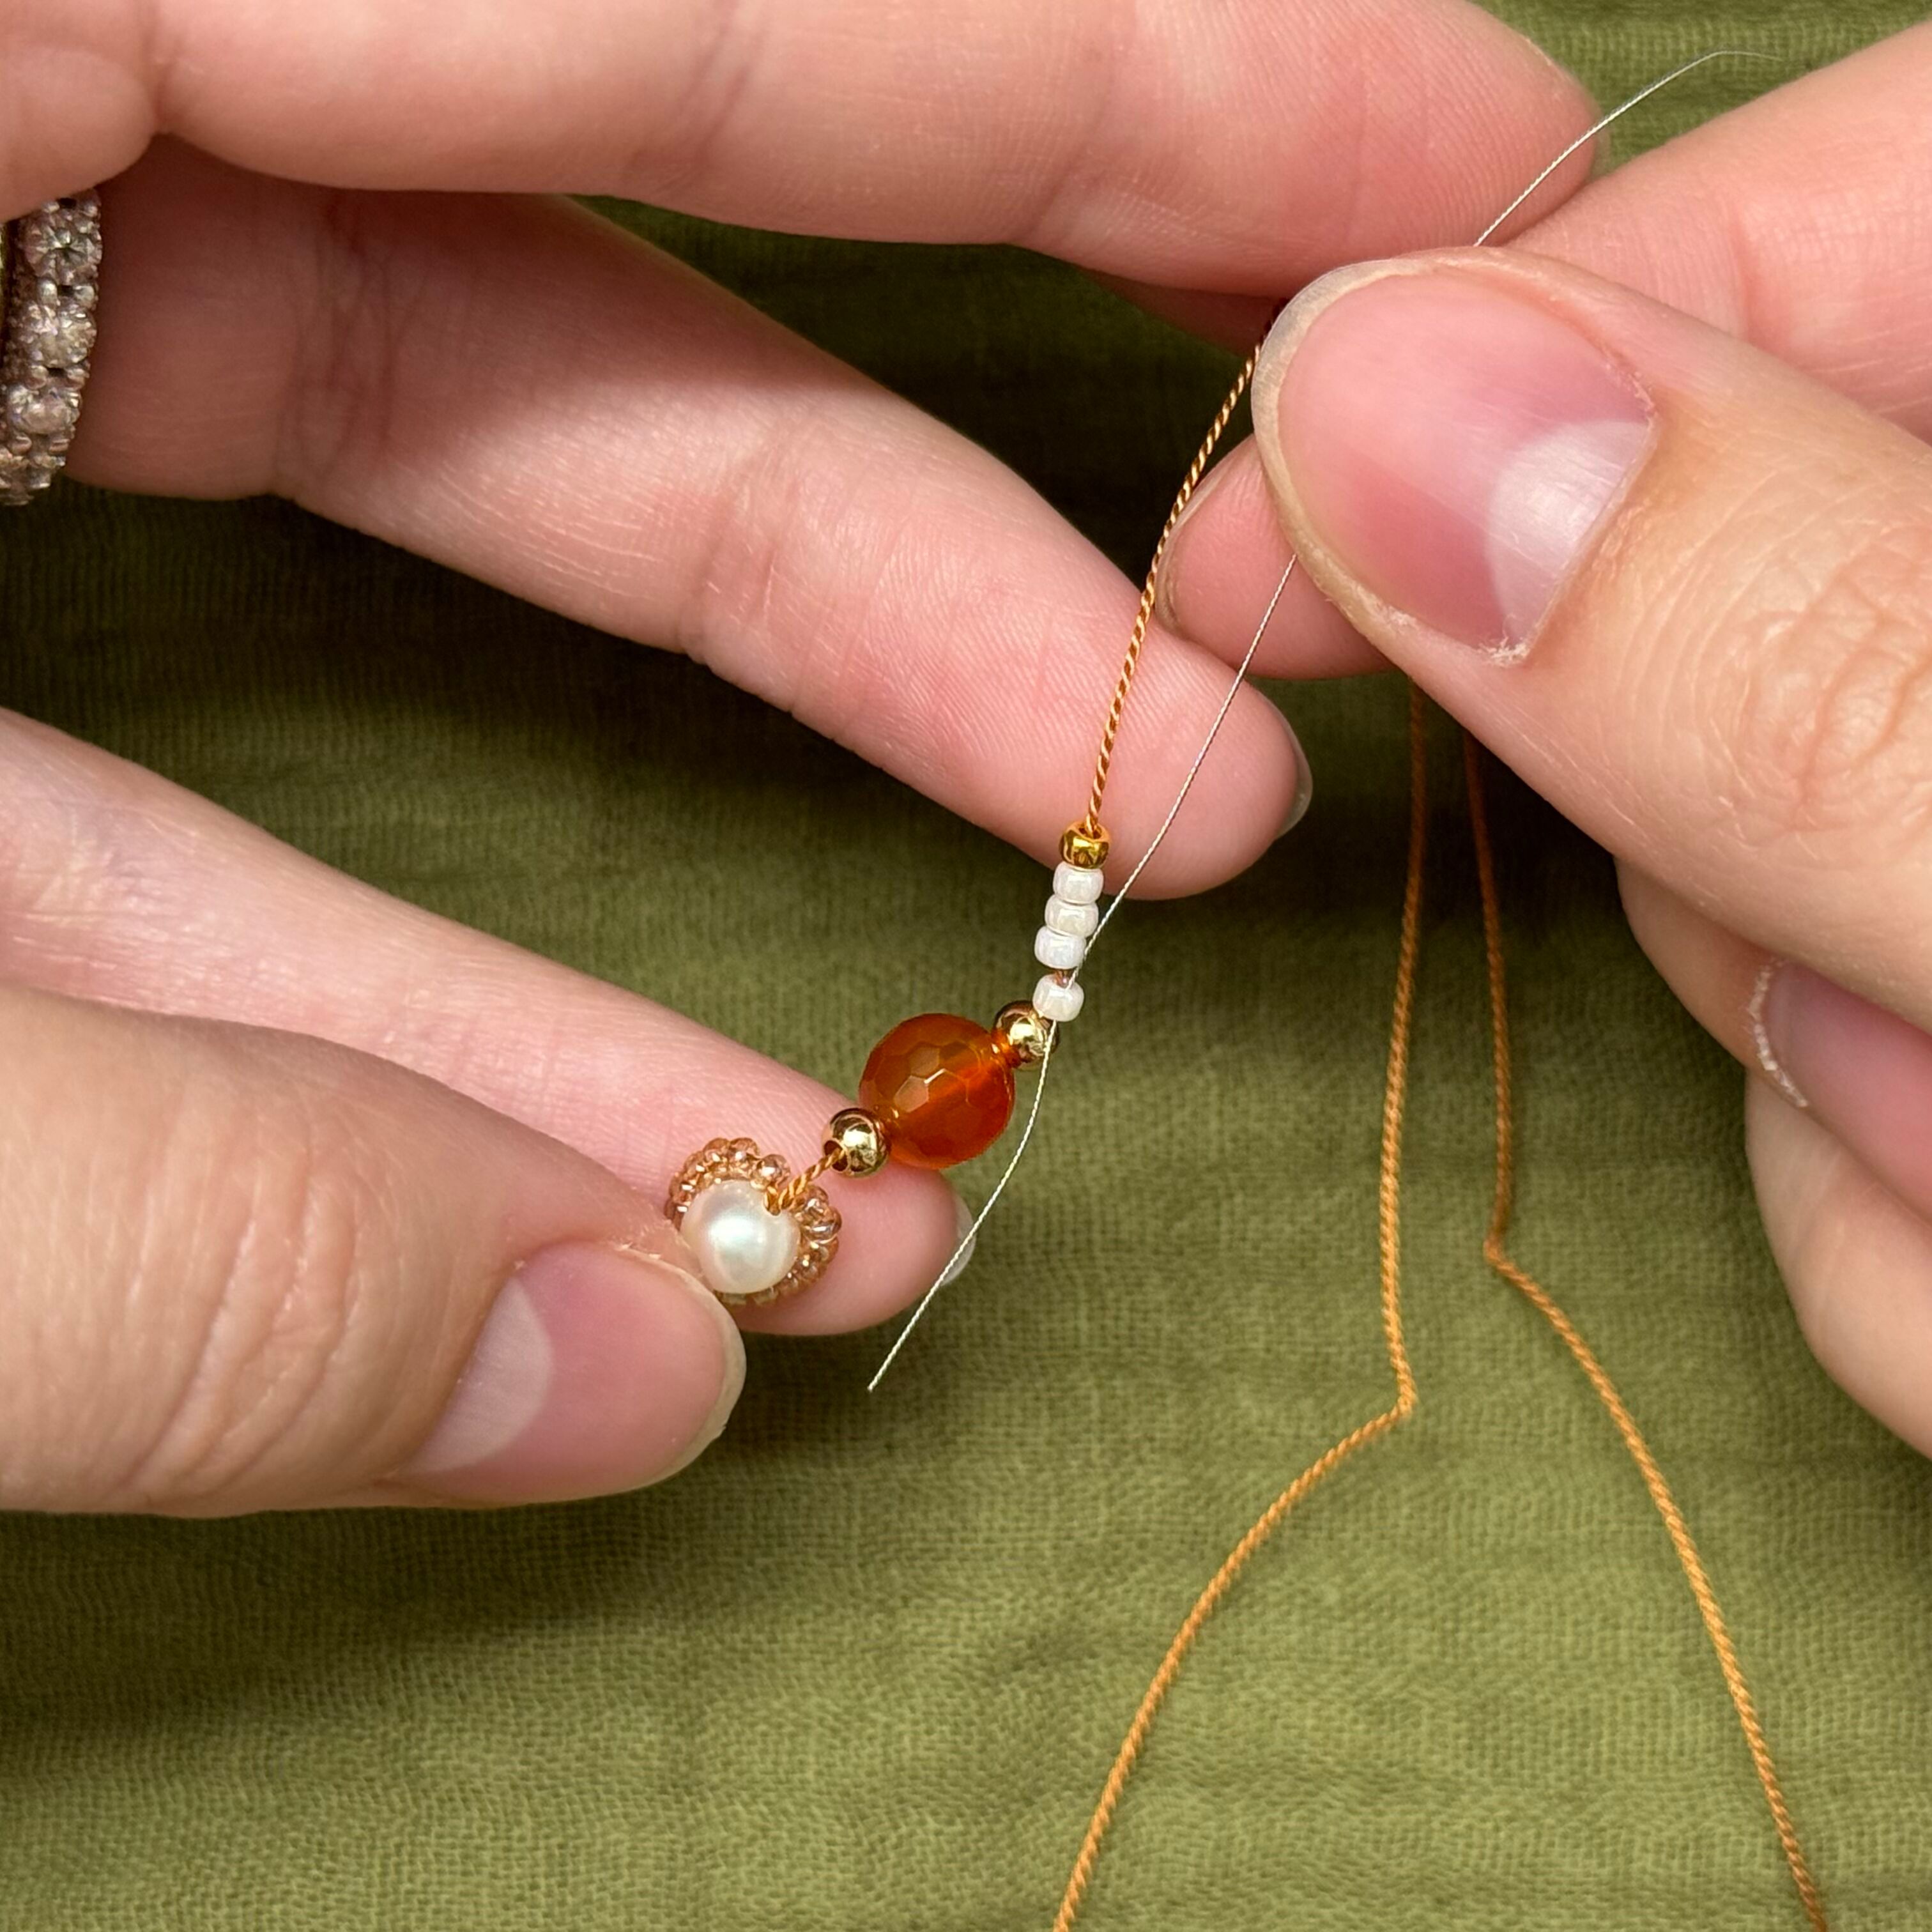
13. Thread the needle through the first of the 591 beads and pull tight so the beads stay as close as possible to the previous 3mm gold bead
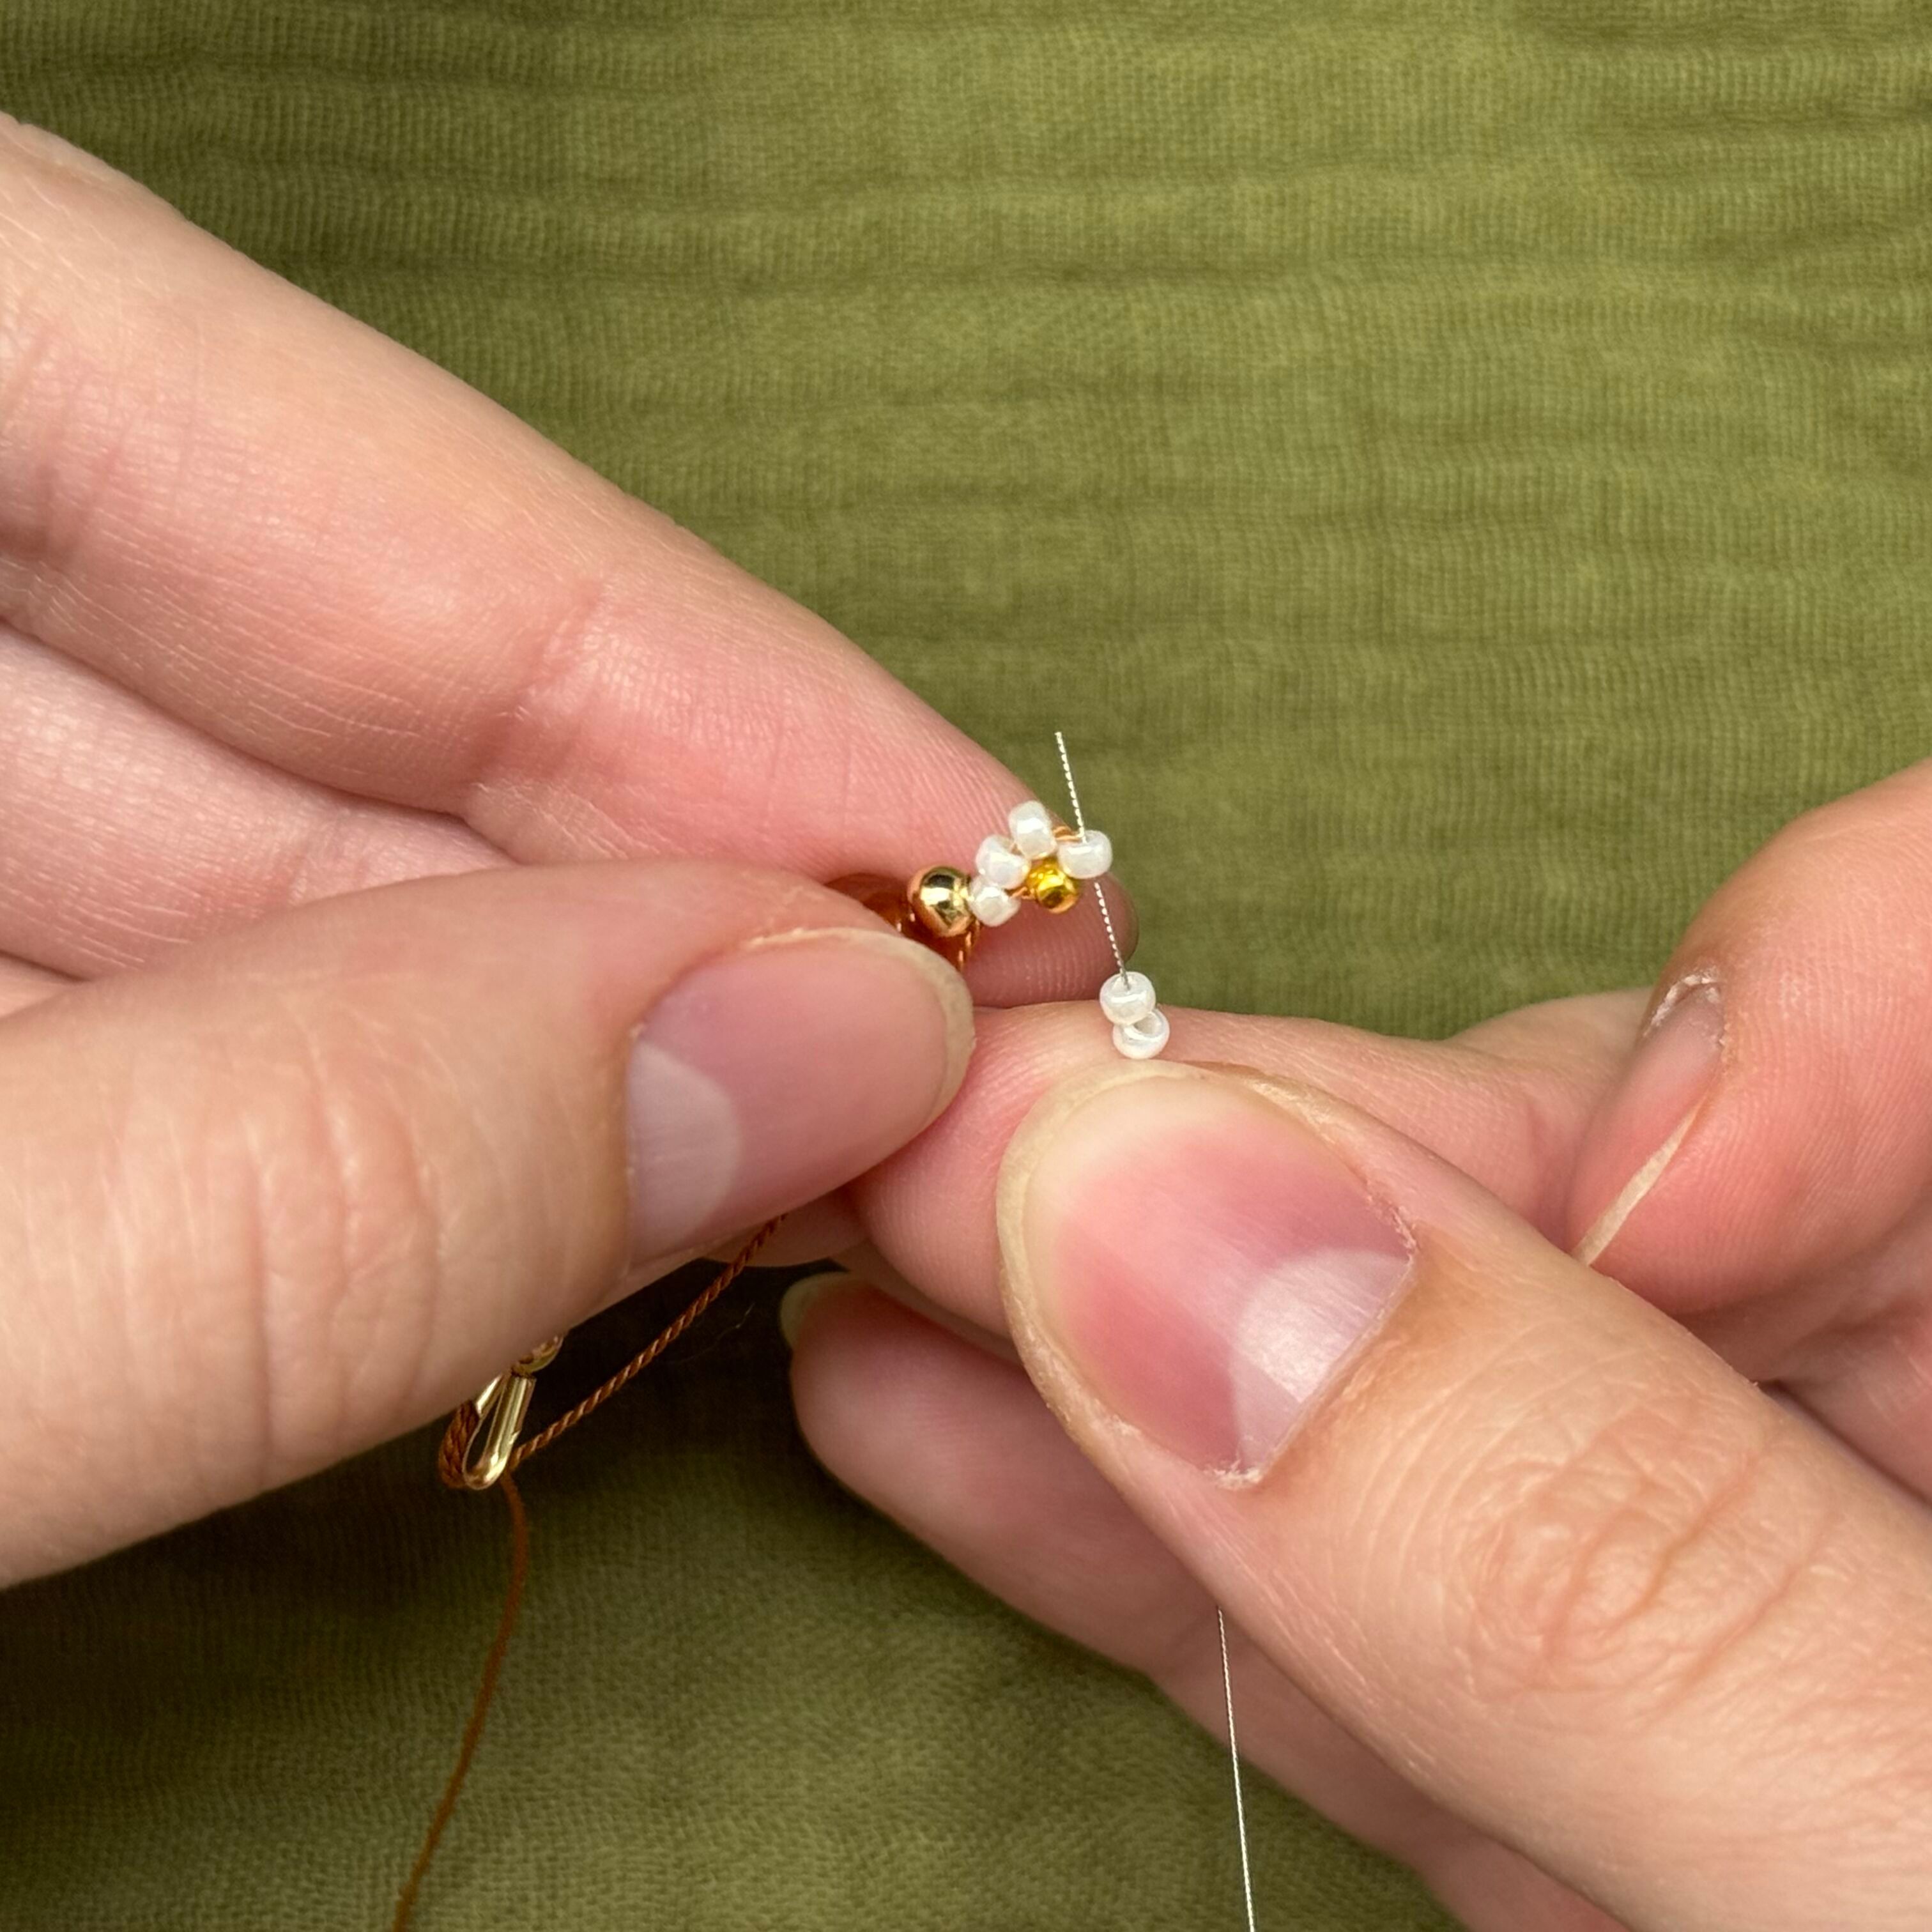
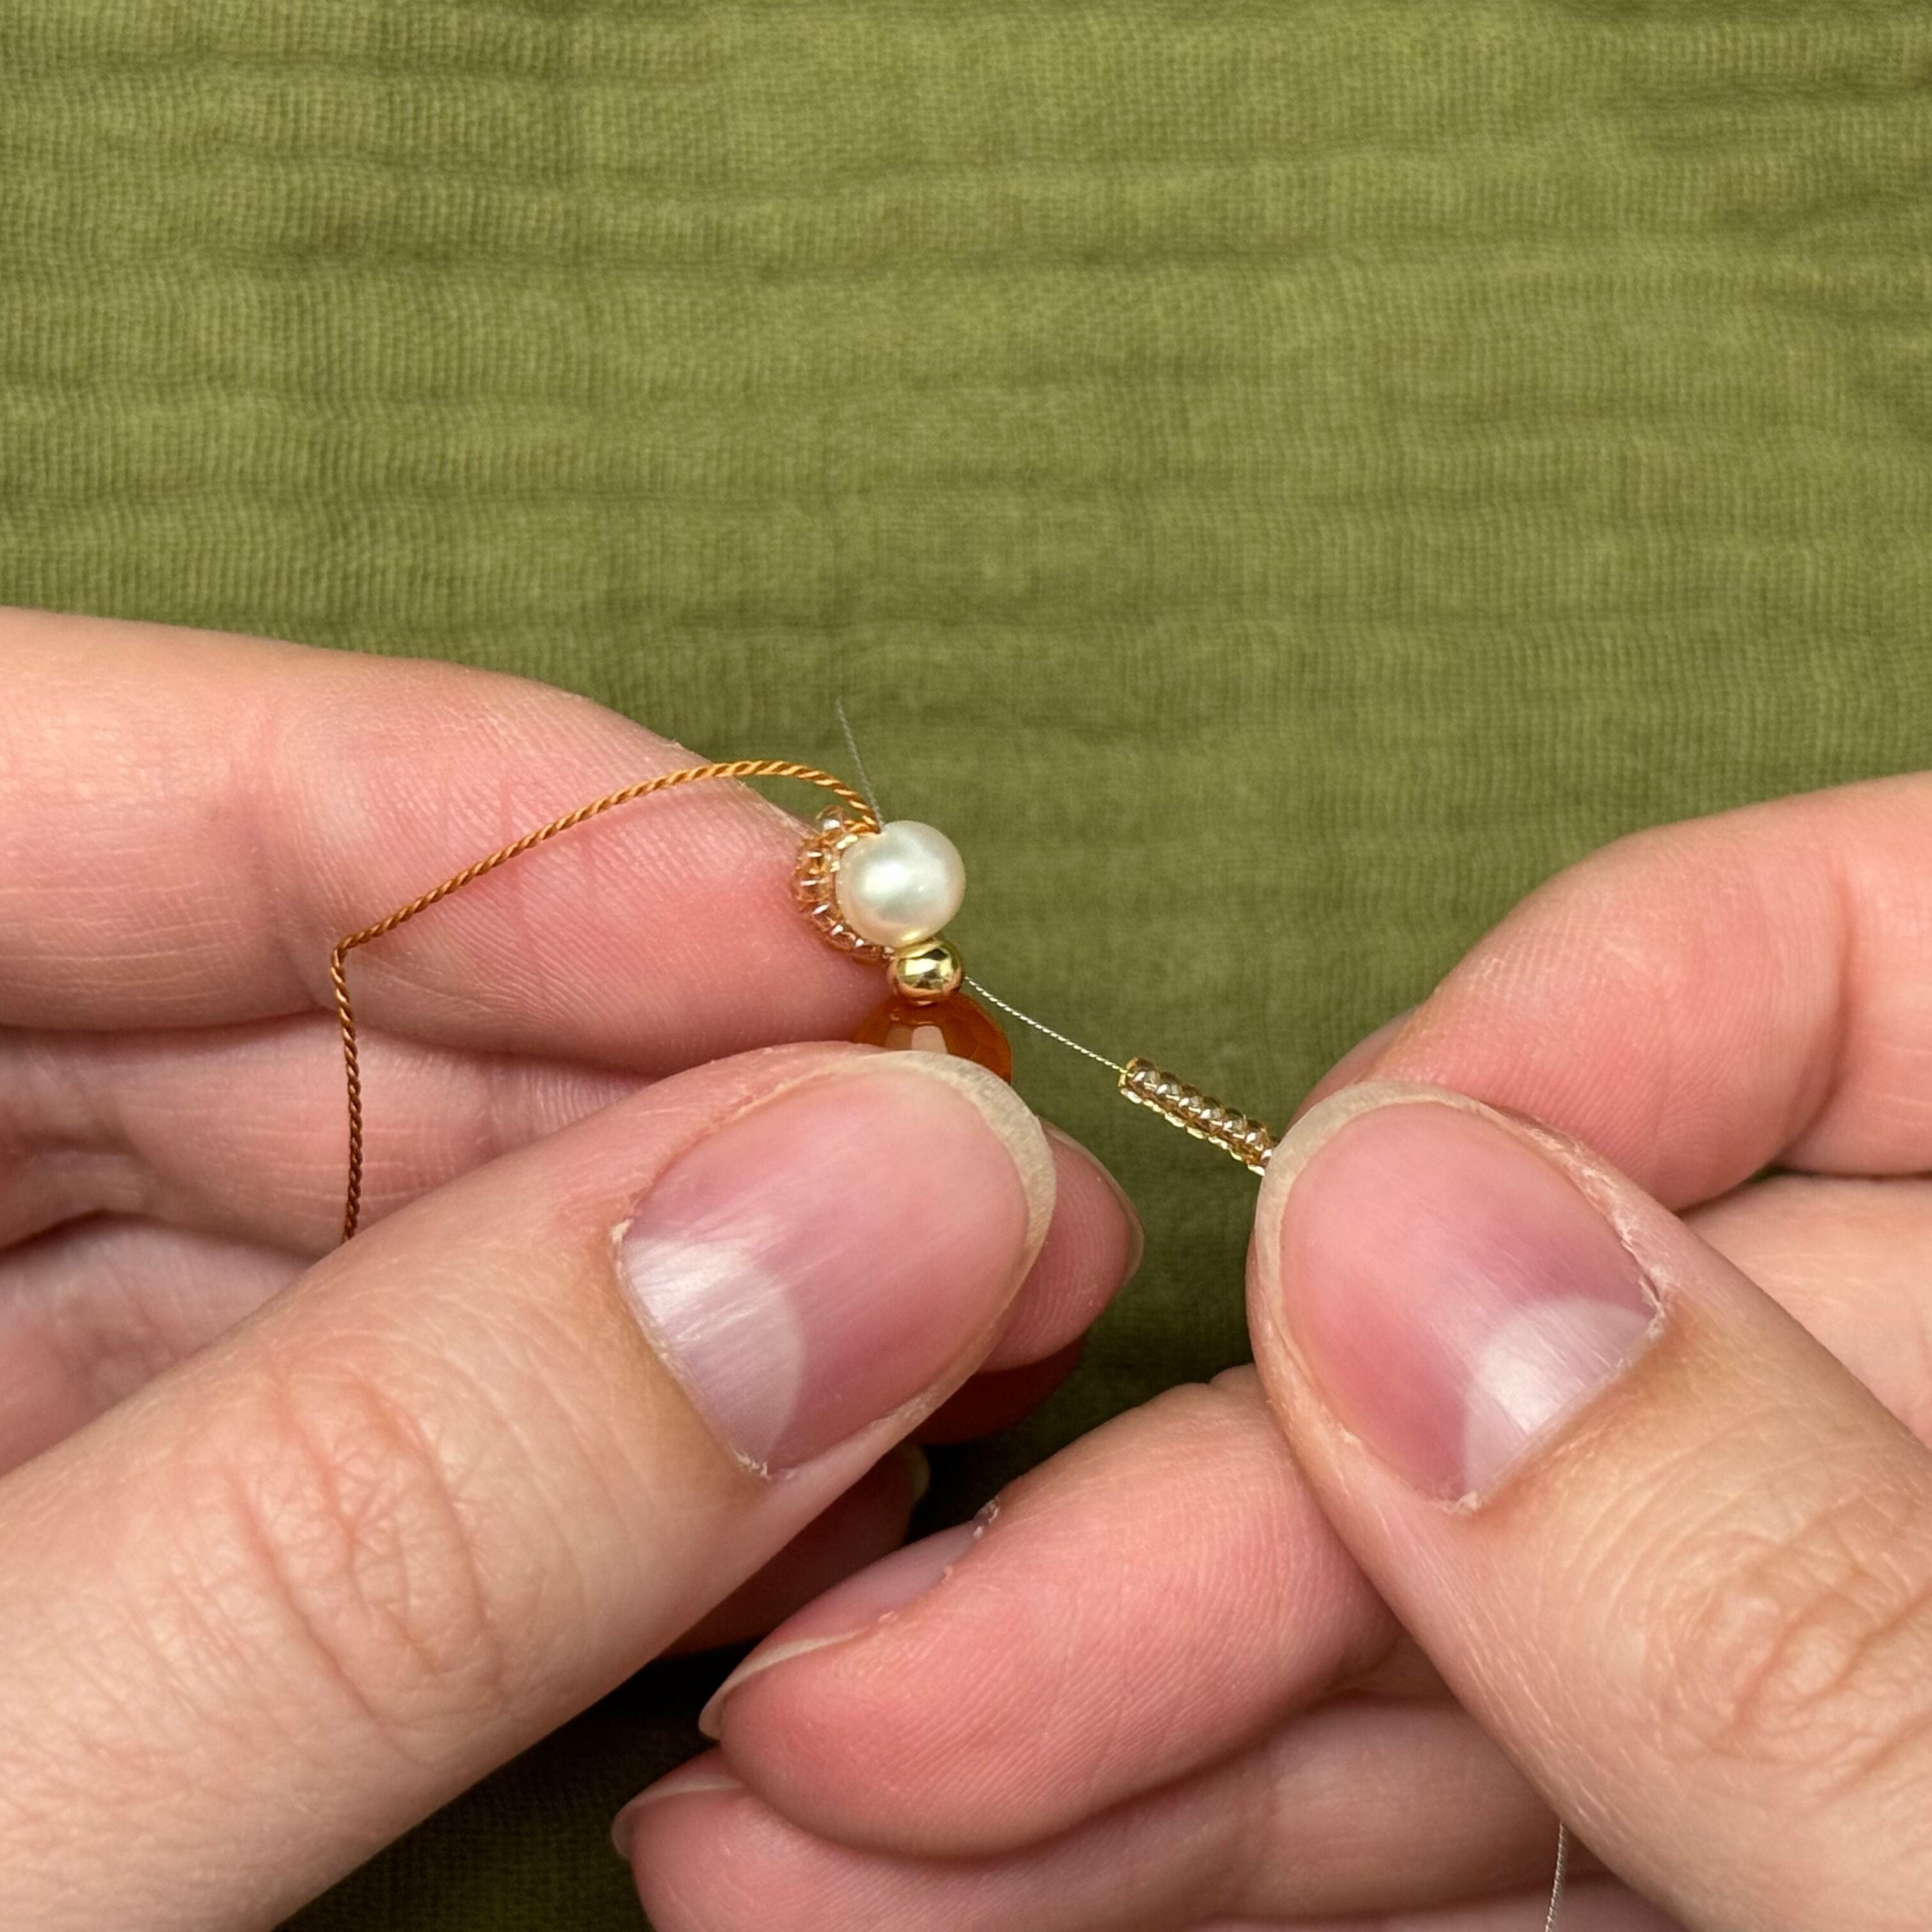
14. Holding the thread so your flower doesn't float farther down the cord than you wish, string on 2 more 591 beads and thread the needle up through the 4th bead added from step 12. Follow photo above.
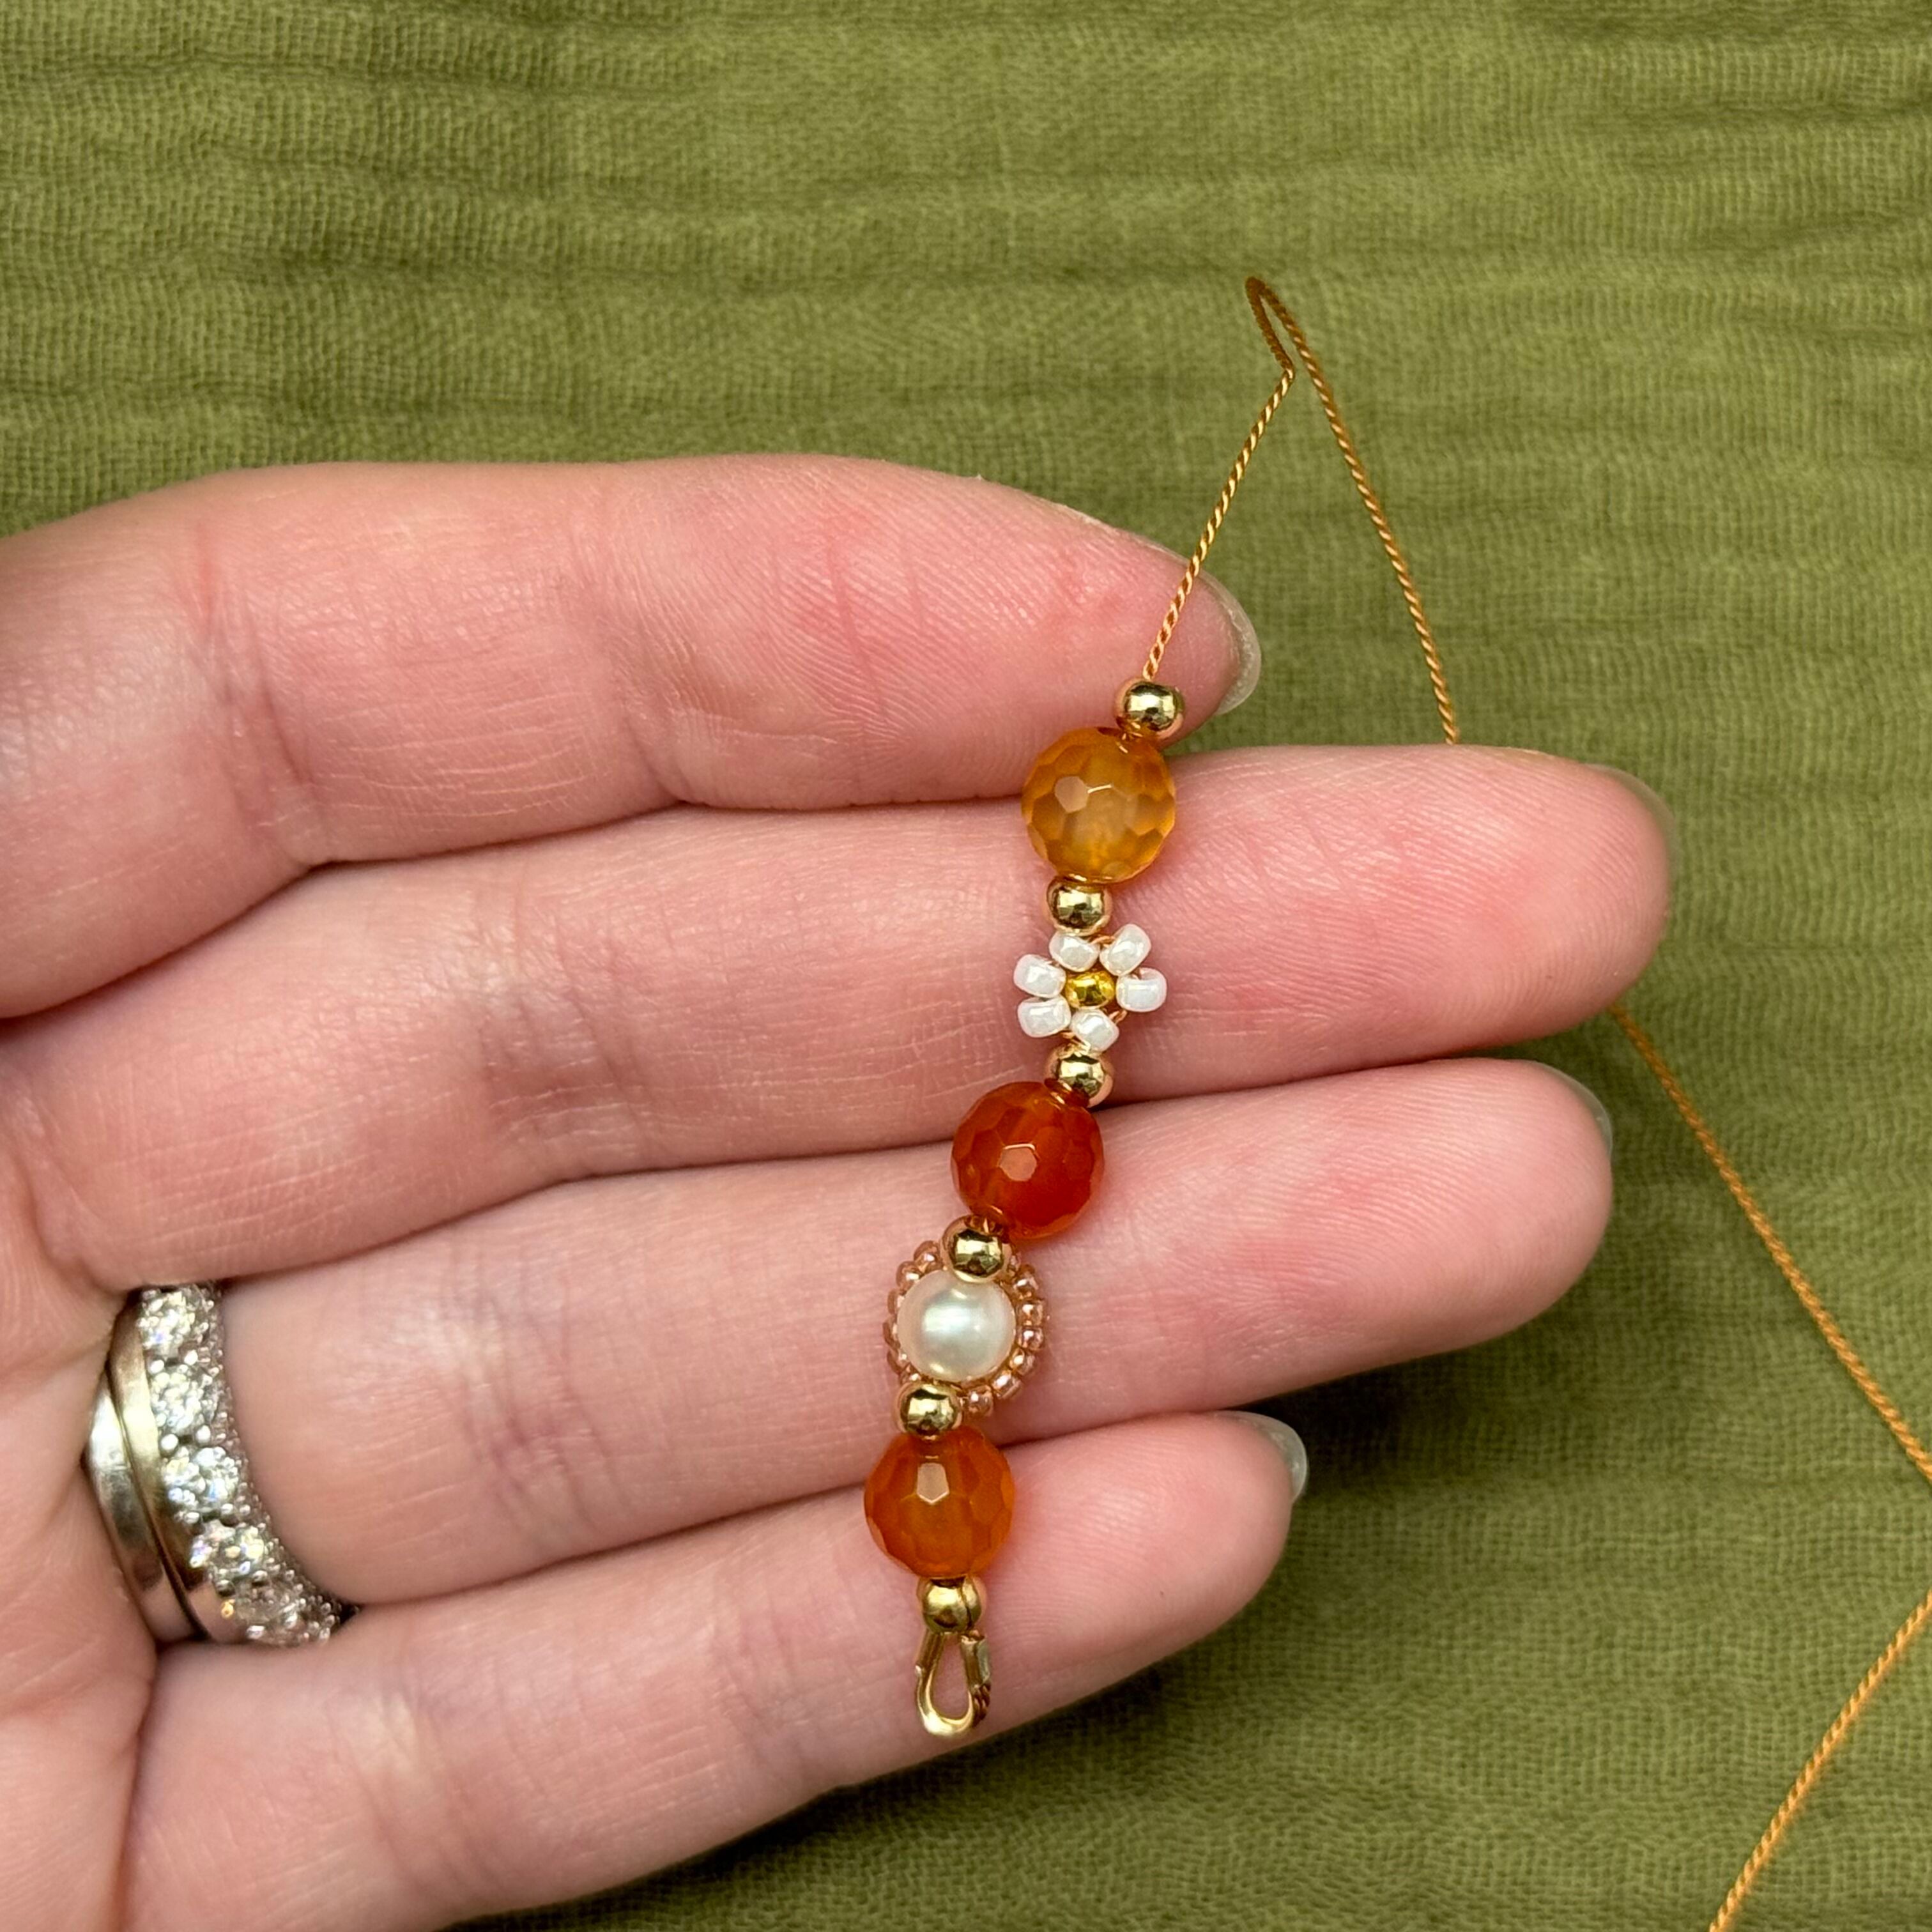
15. String on a gold 3mm bead, a carnelian bead, then a 3mm gold bead
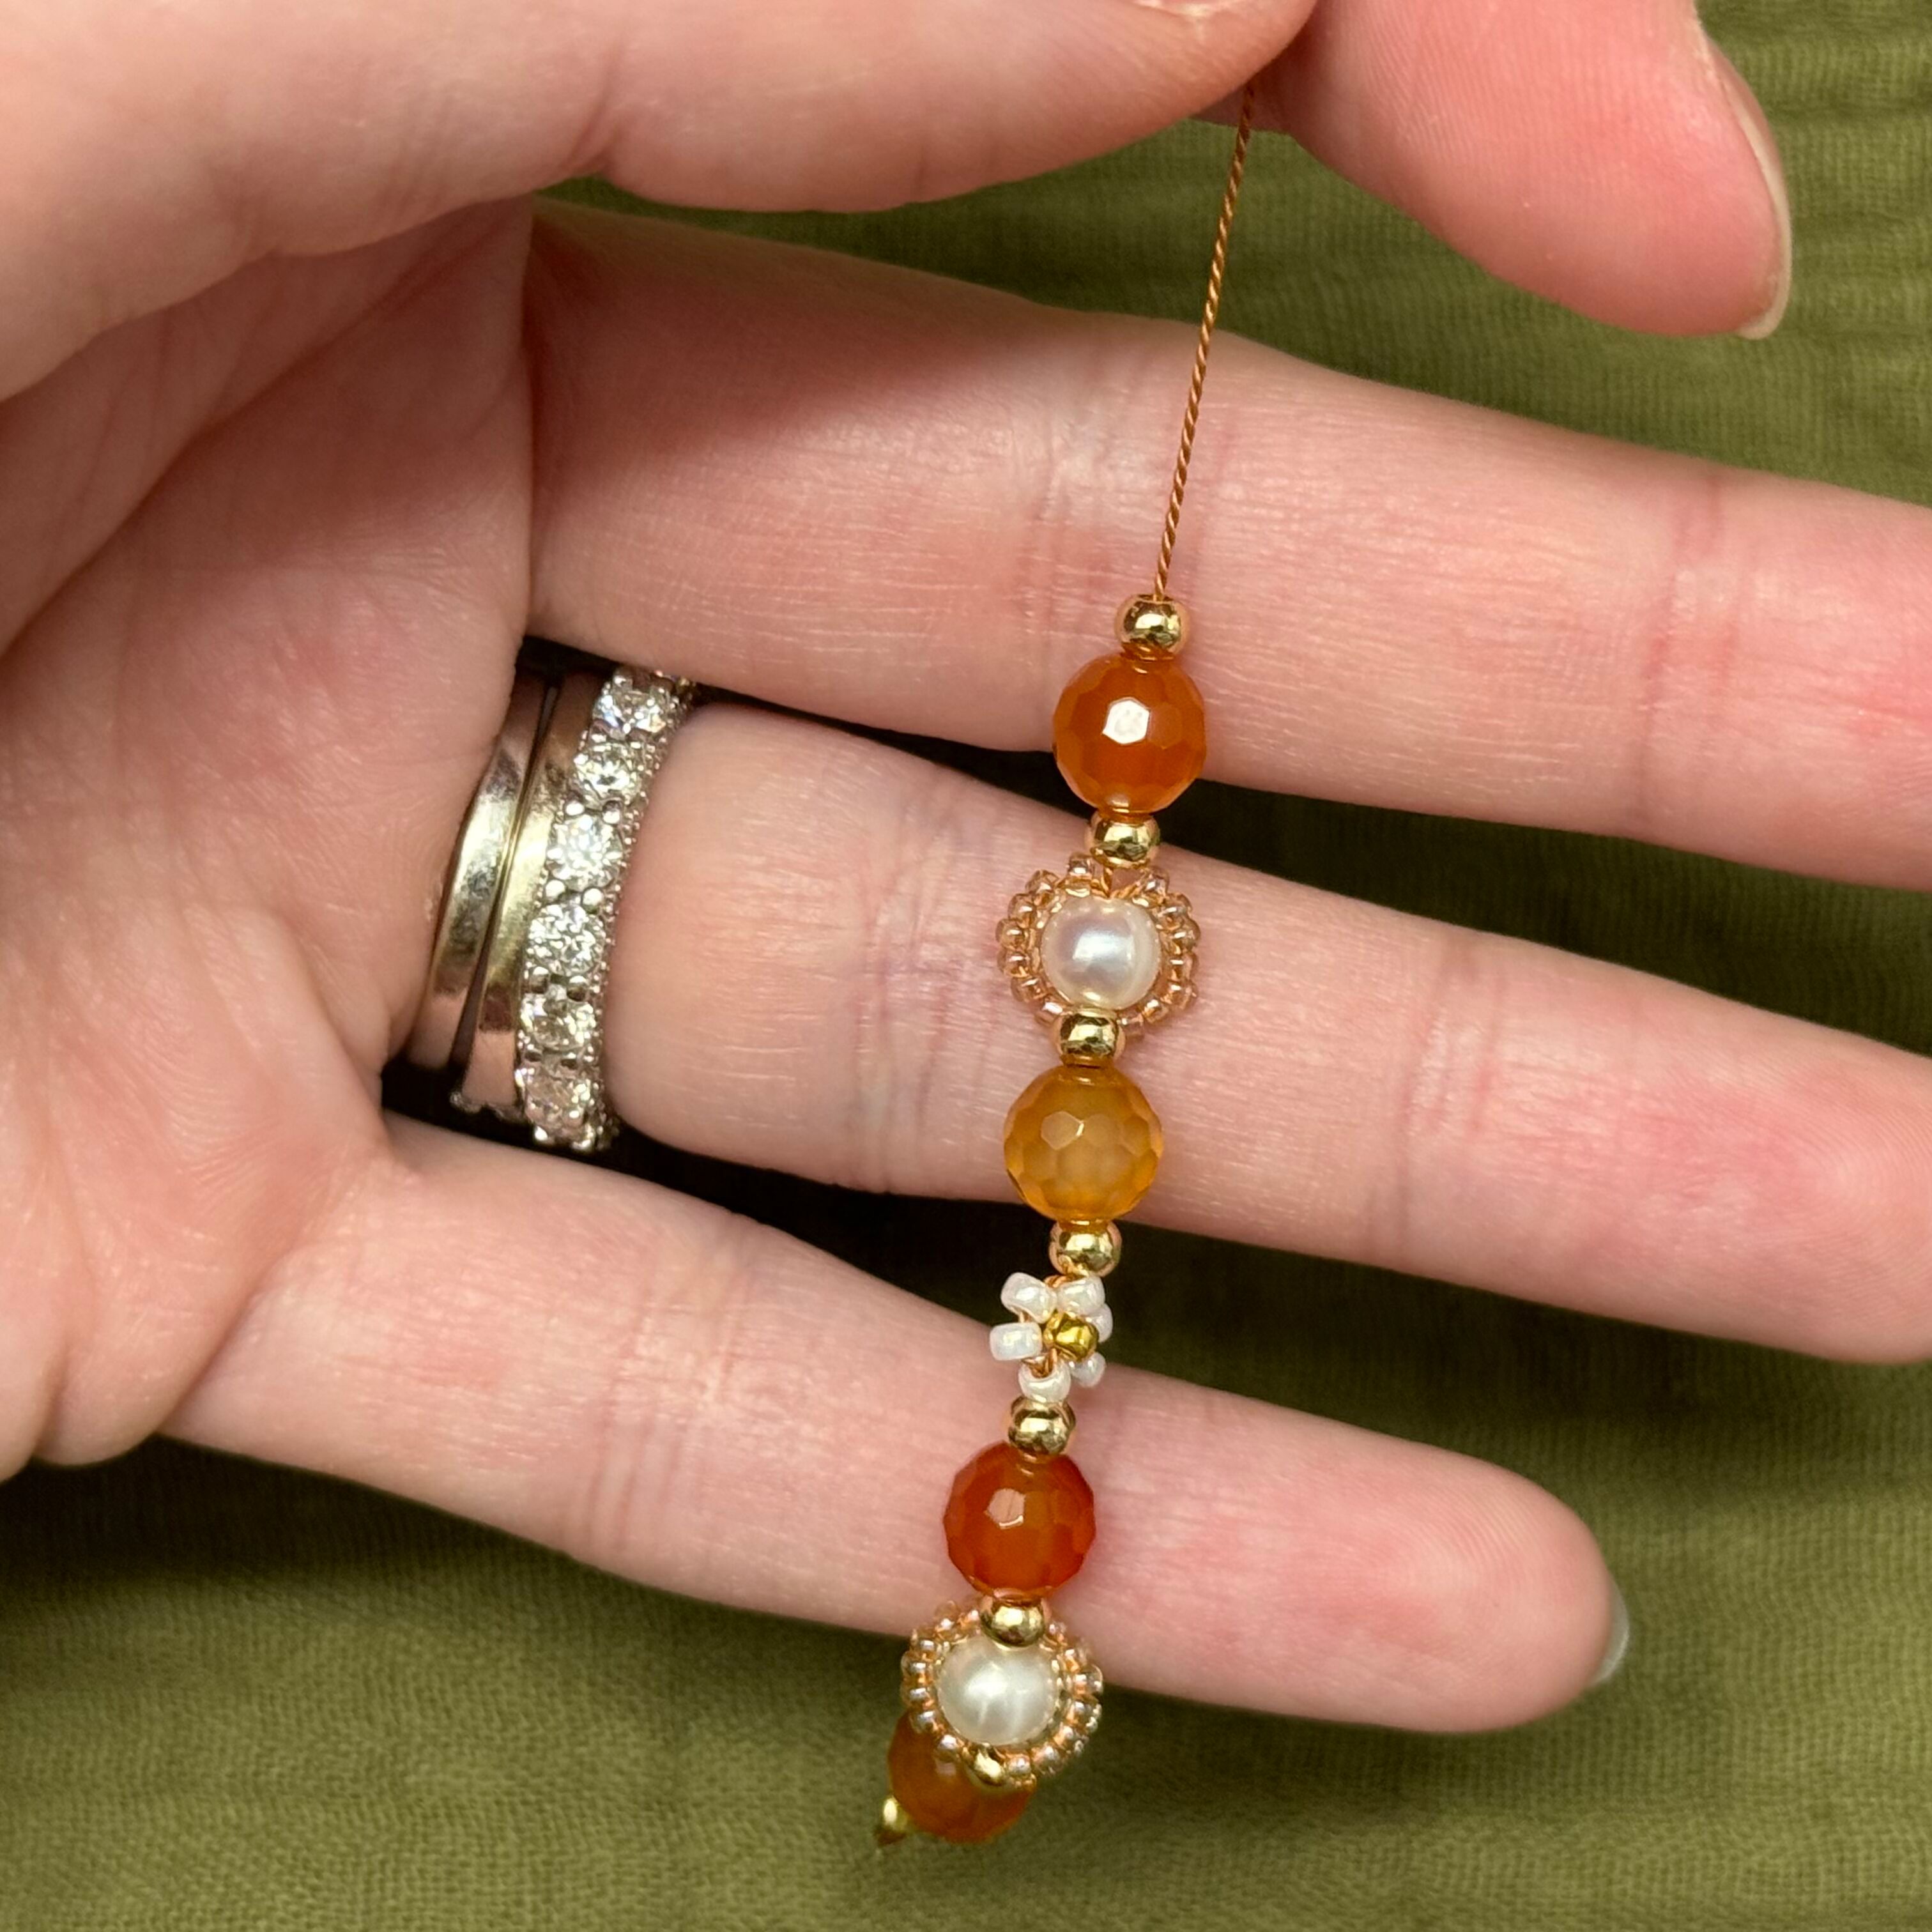
16. Repeat steps 8 through 10 and then string on a gold bead, carnelian bead, and then a gold bead
17. Repeat steps 12 through 14 and then string on a gold bead, carnelian bead and then a gold bead. Keep repeating the interchanging pattern until you have reached your desired length
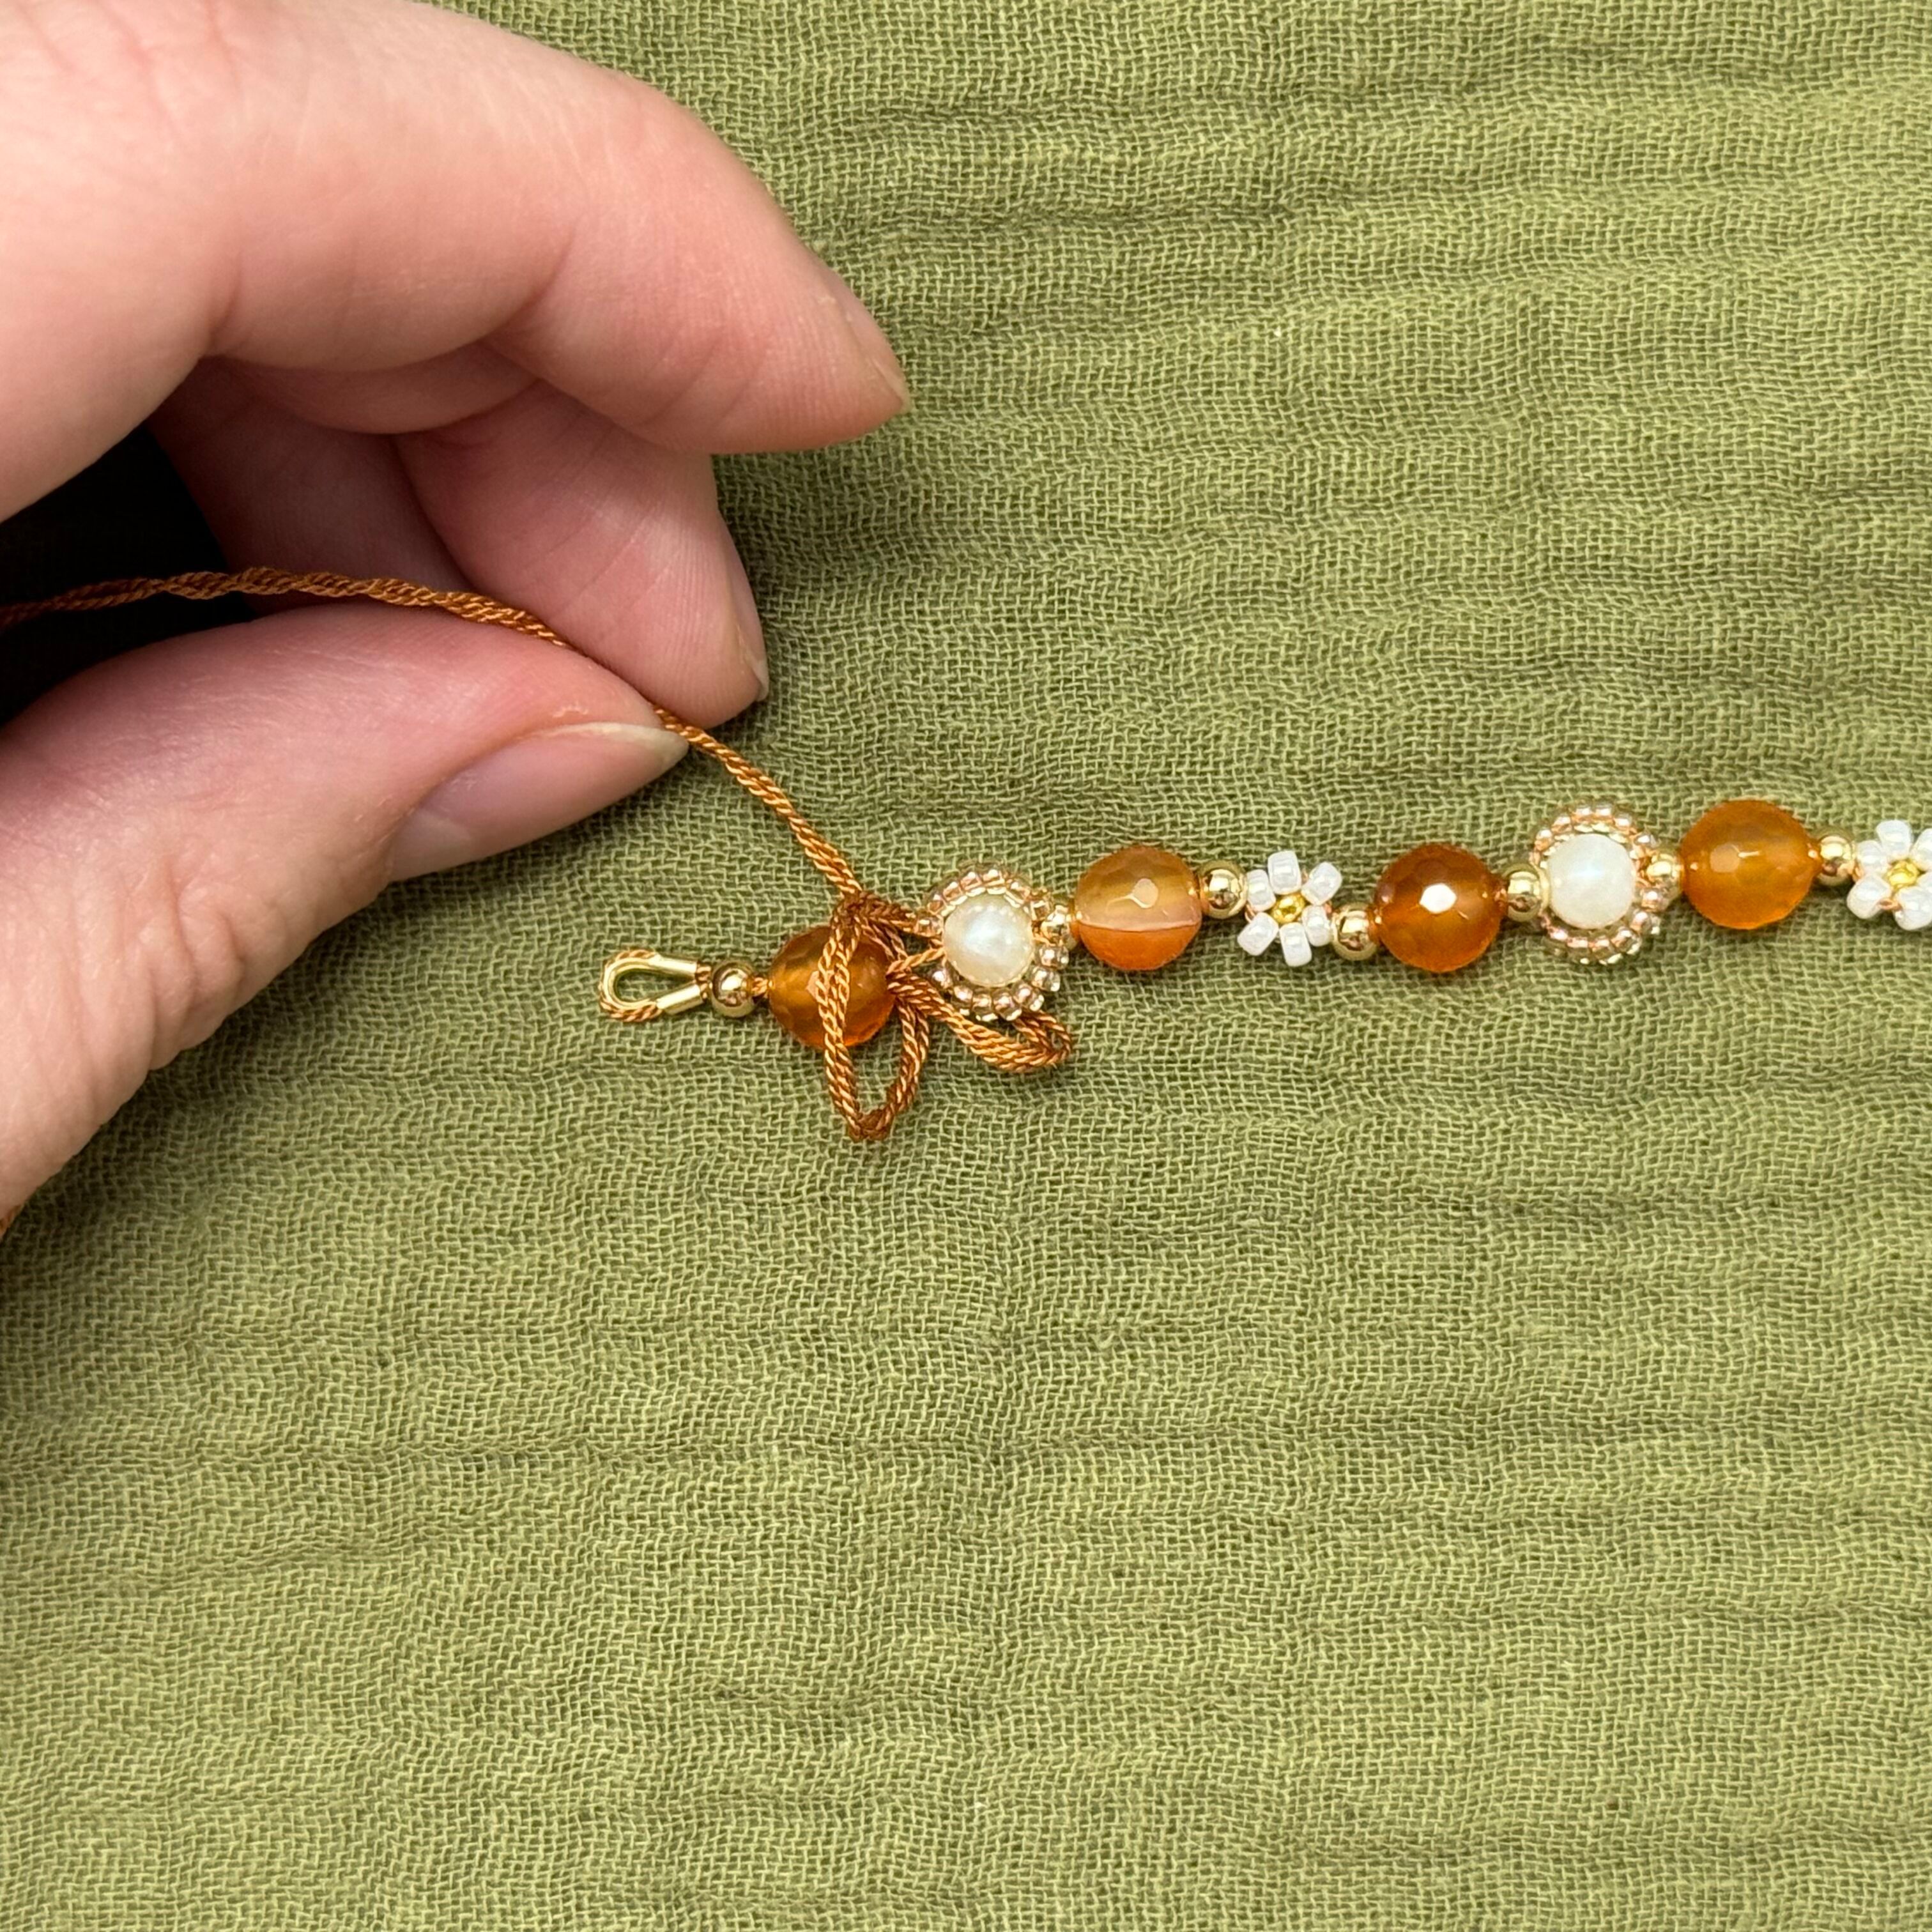
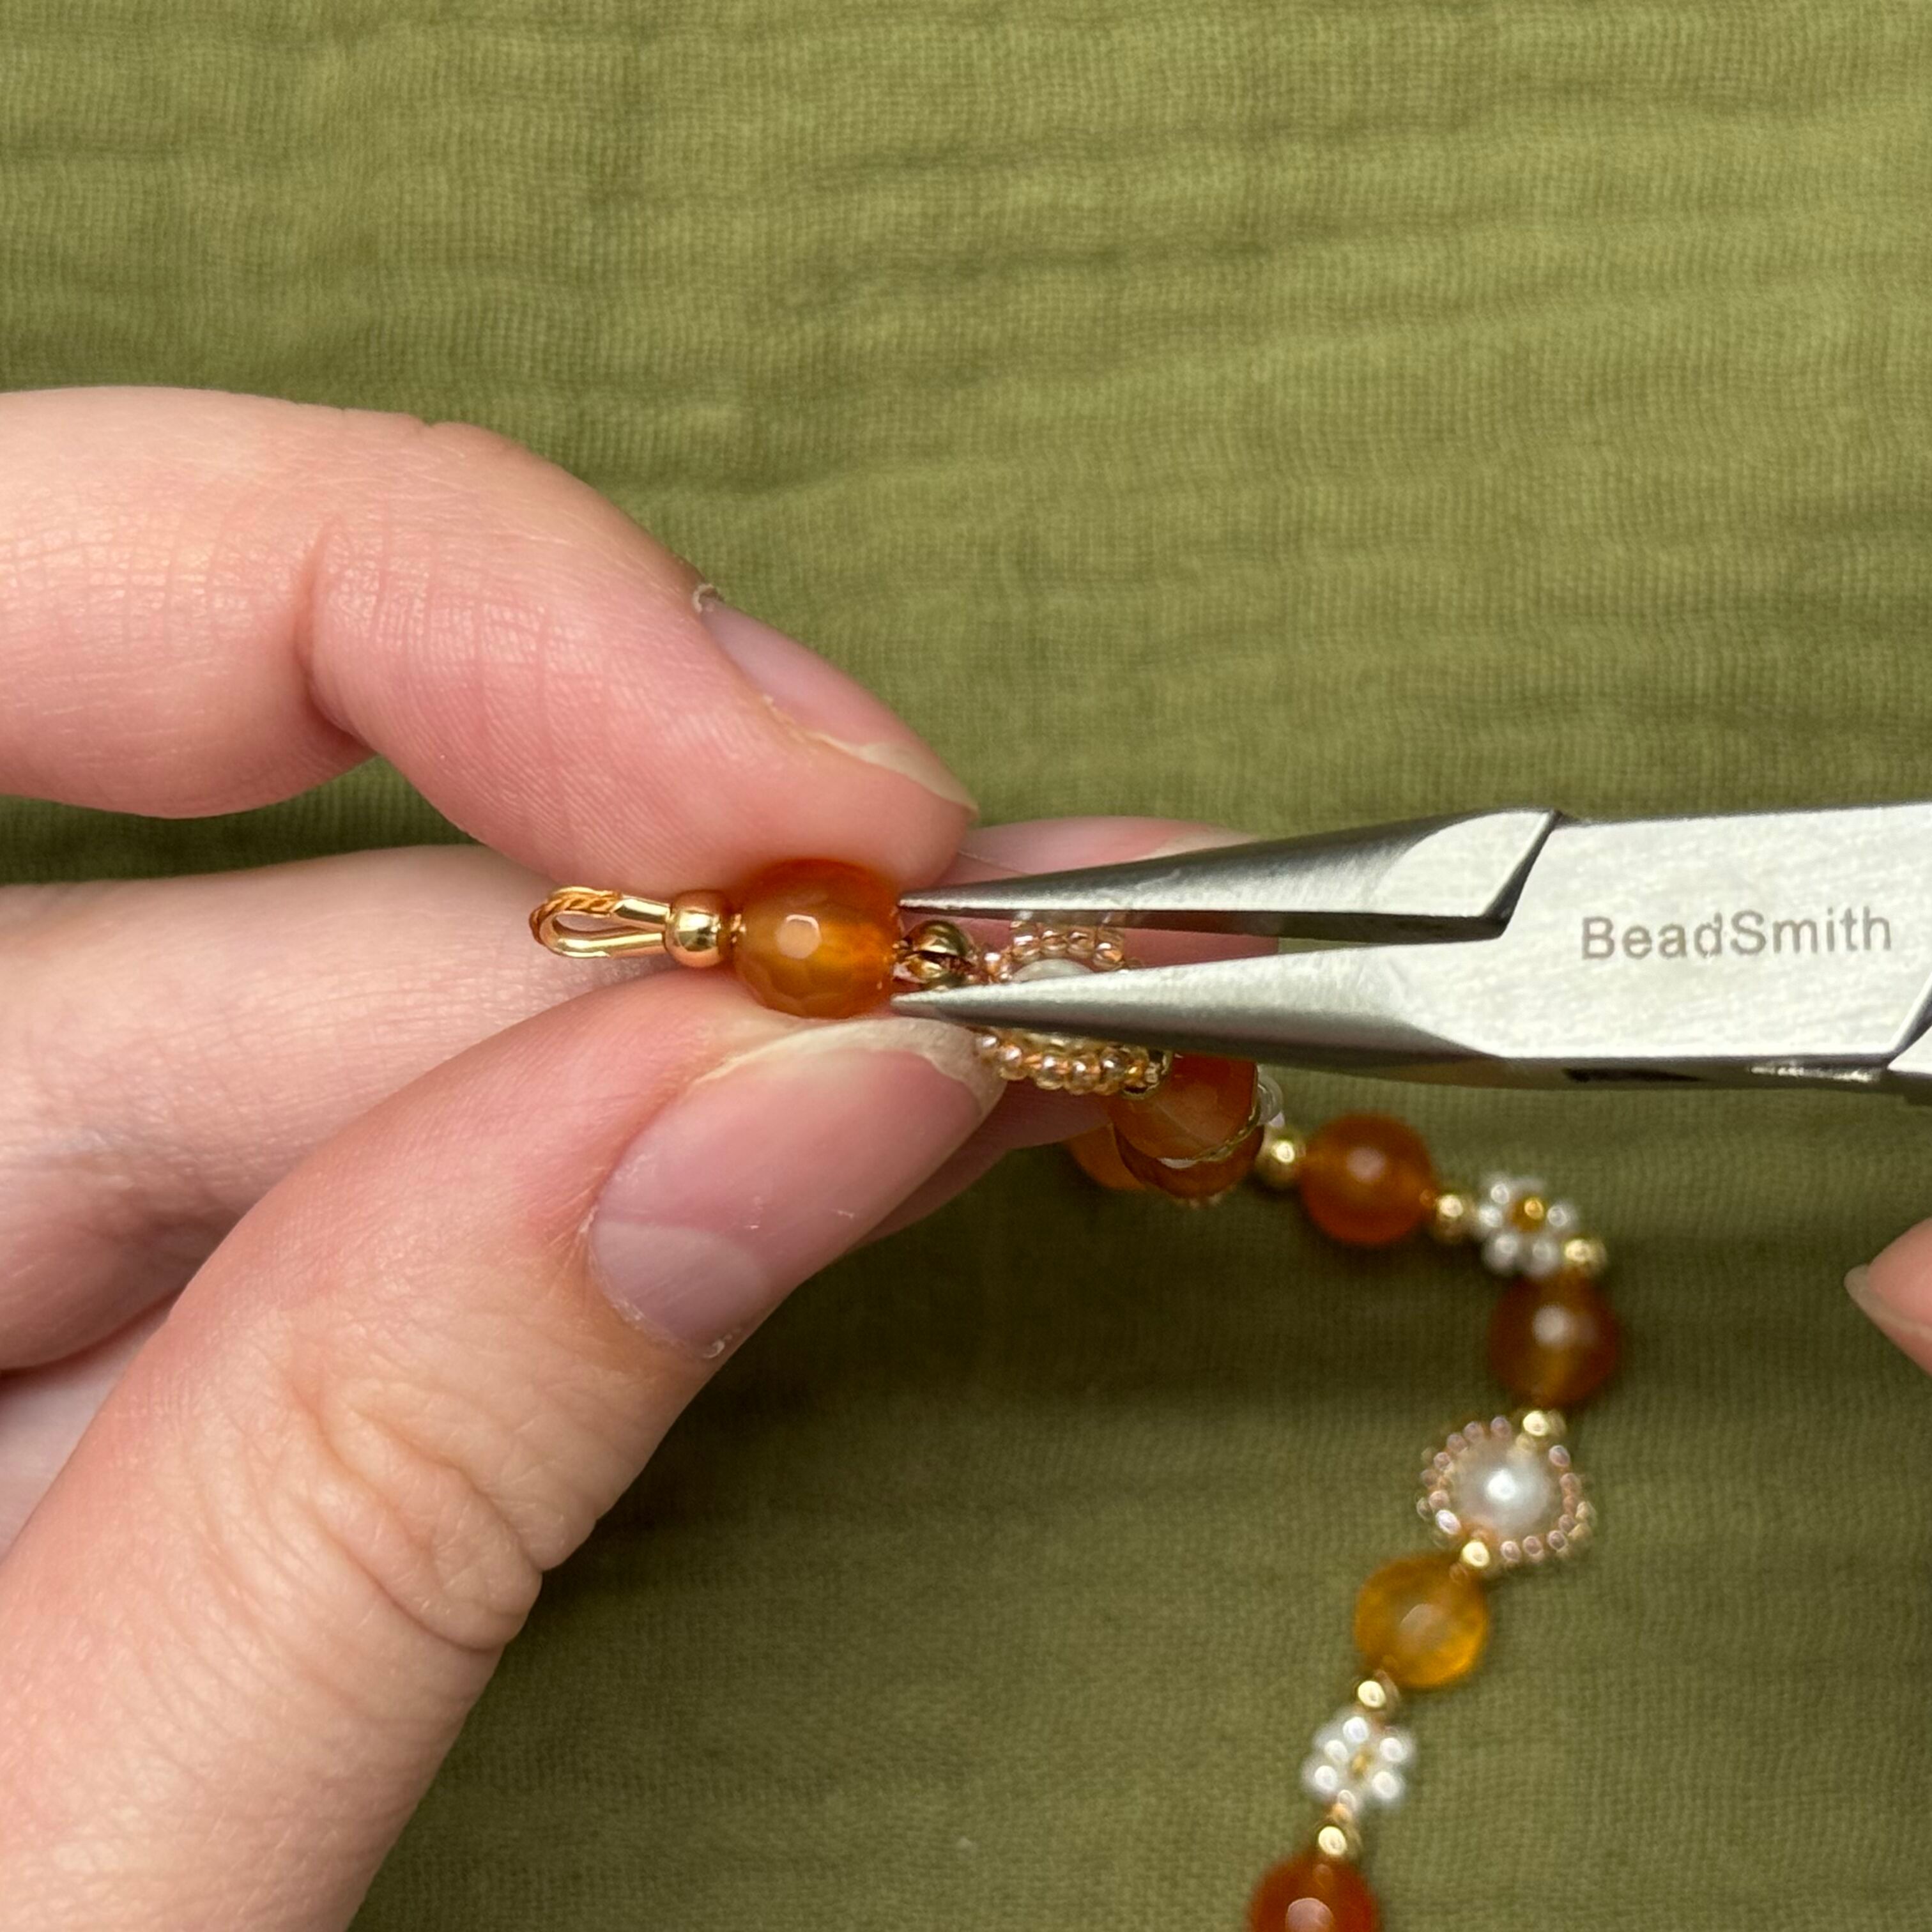
18. Once you have almost reached your desired length and your next bead in the pattern is a carnelian bead (just under an inch - for example: if you want a 7 inch long bracelet, stop once you have reached a length of 6 inches from the first cable thimble to complete this next step), fold the remaining thread and reuse the needle you made in step 1 to string on a carnelian bead and then a 3mm gold bead
***IMPORTANT - make sure that you do not have a 3mm gold bead strung before the carnelian bead, we will be creating a knot in place and covering it with a crimp cover
19. Using the "needle" - thread through the second cable thimble. Up then down.
20. Thread through the 3mm gold bead and the carnelian bead. Leave about a 3-4mm space between the carnelian bead and the flower bead you created - this is where the knot will go
21. To tie the knot to secure the bracelet, I find it easiest to loosely braid the 3 strands together (you can cut the looped strand at the end of the loop to create 3 separate cords), so you can easily tie the semi complex knot in the next few steps
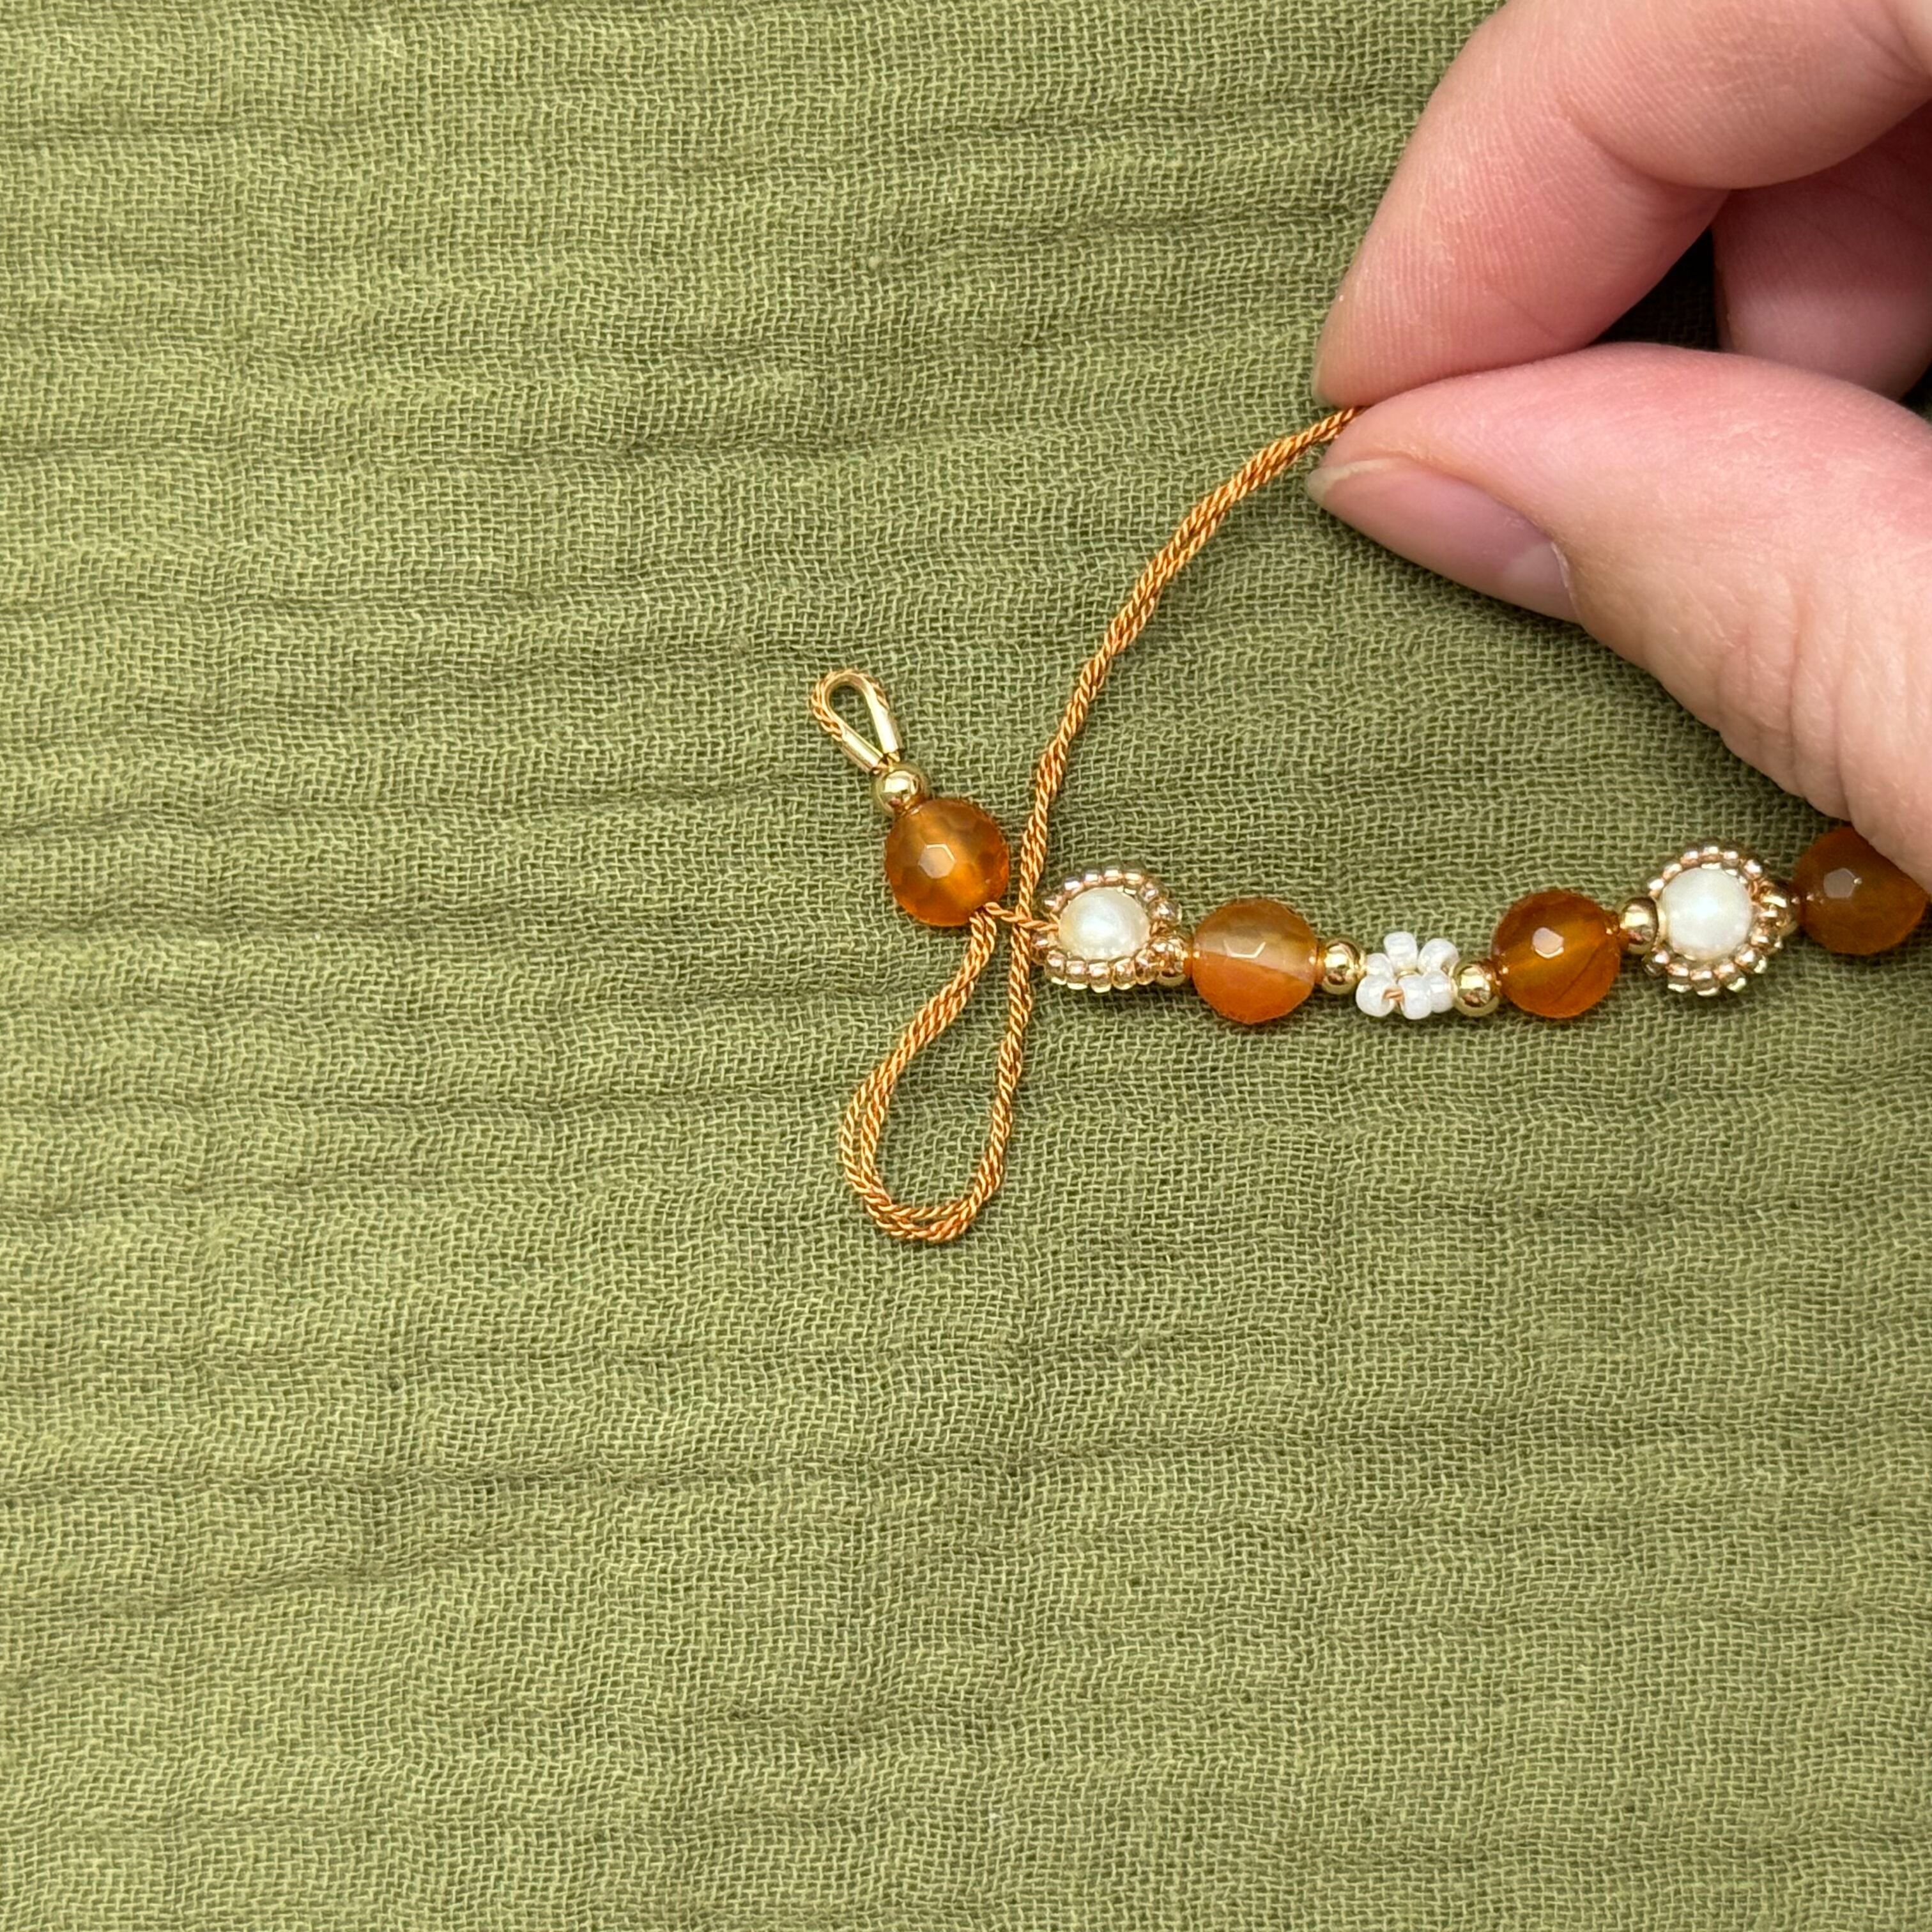
22. Take the braid and leave a loop as you pull the braid behind the bracelet
23. Pull the braid over the bracelet and to the left
24. And then around the bracelet so there are two loops
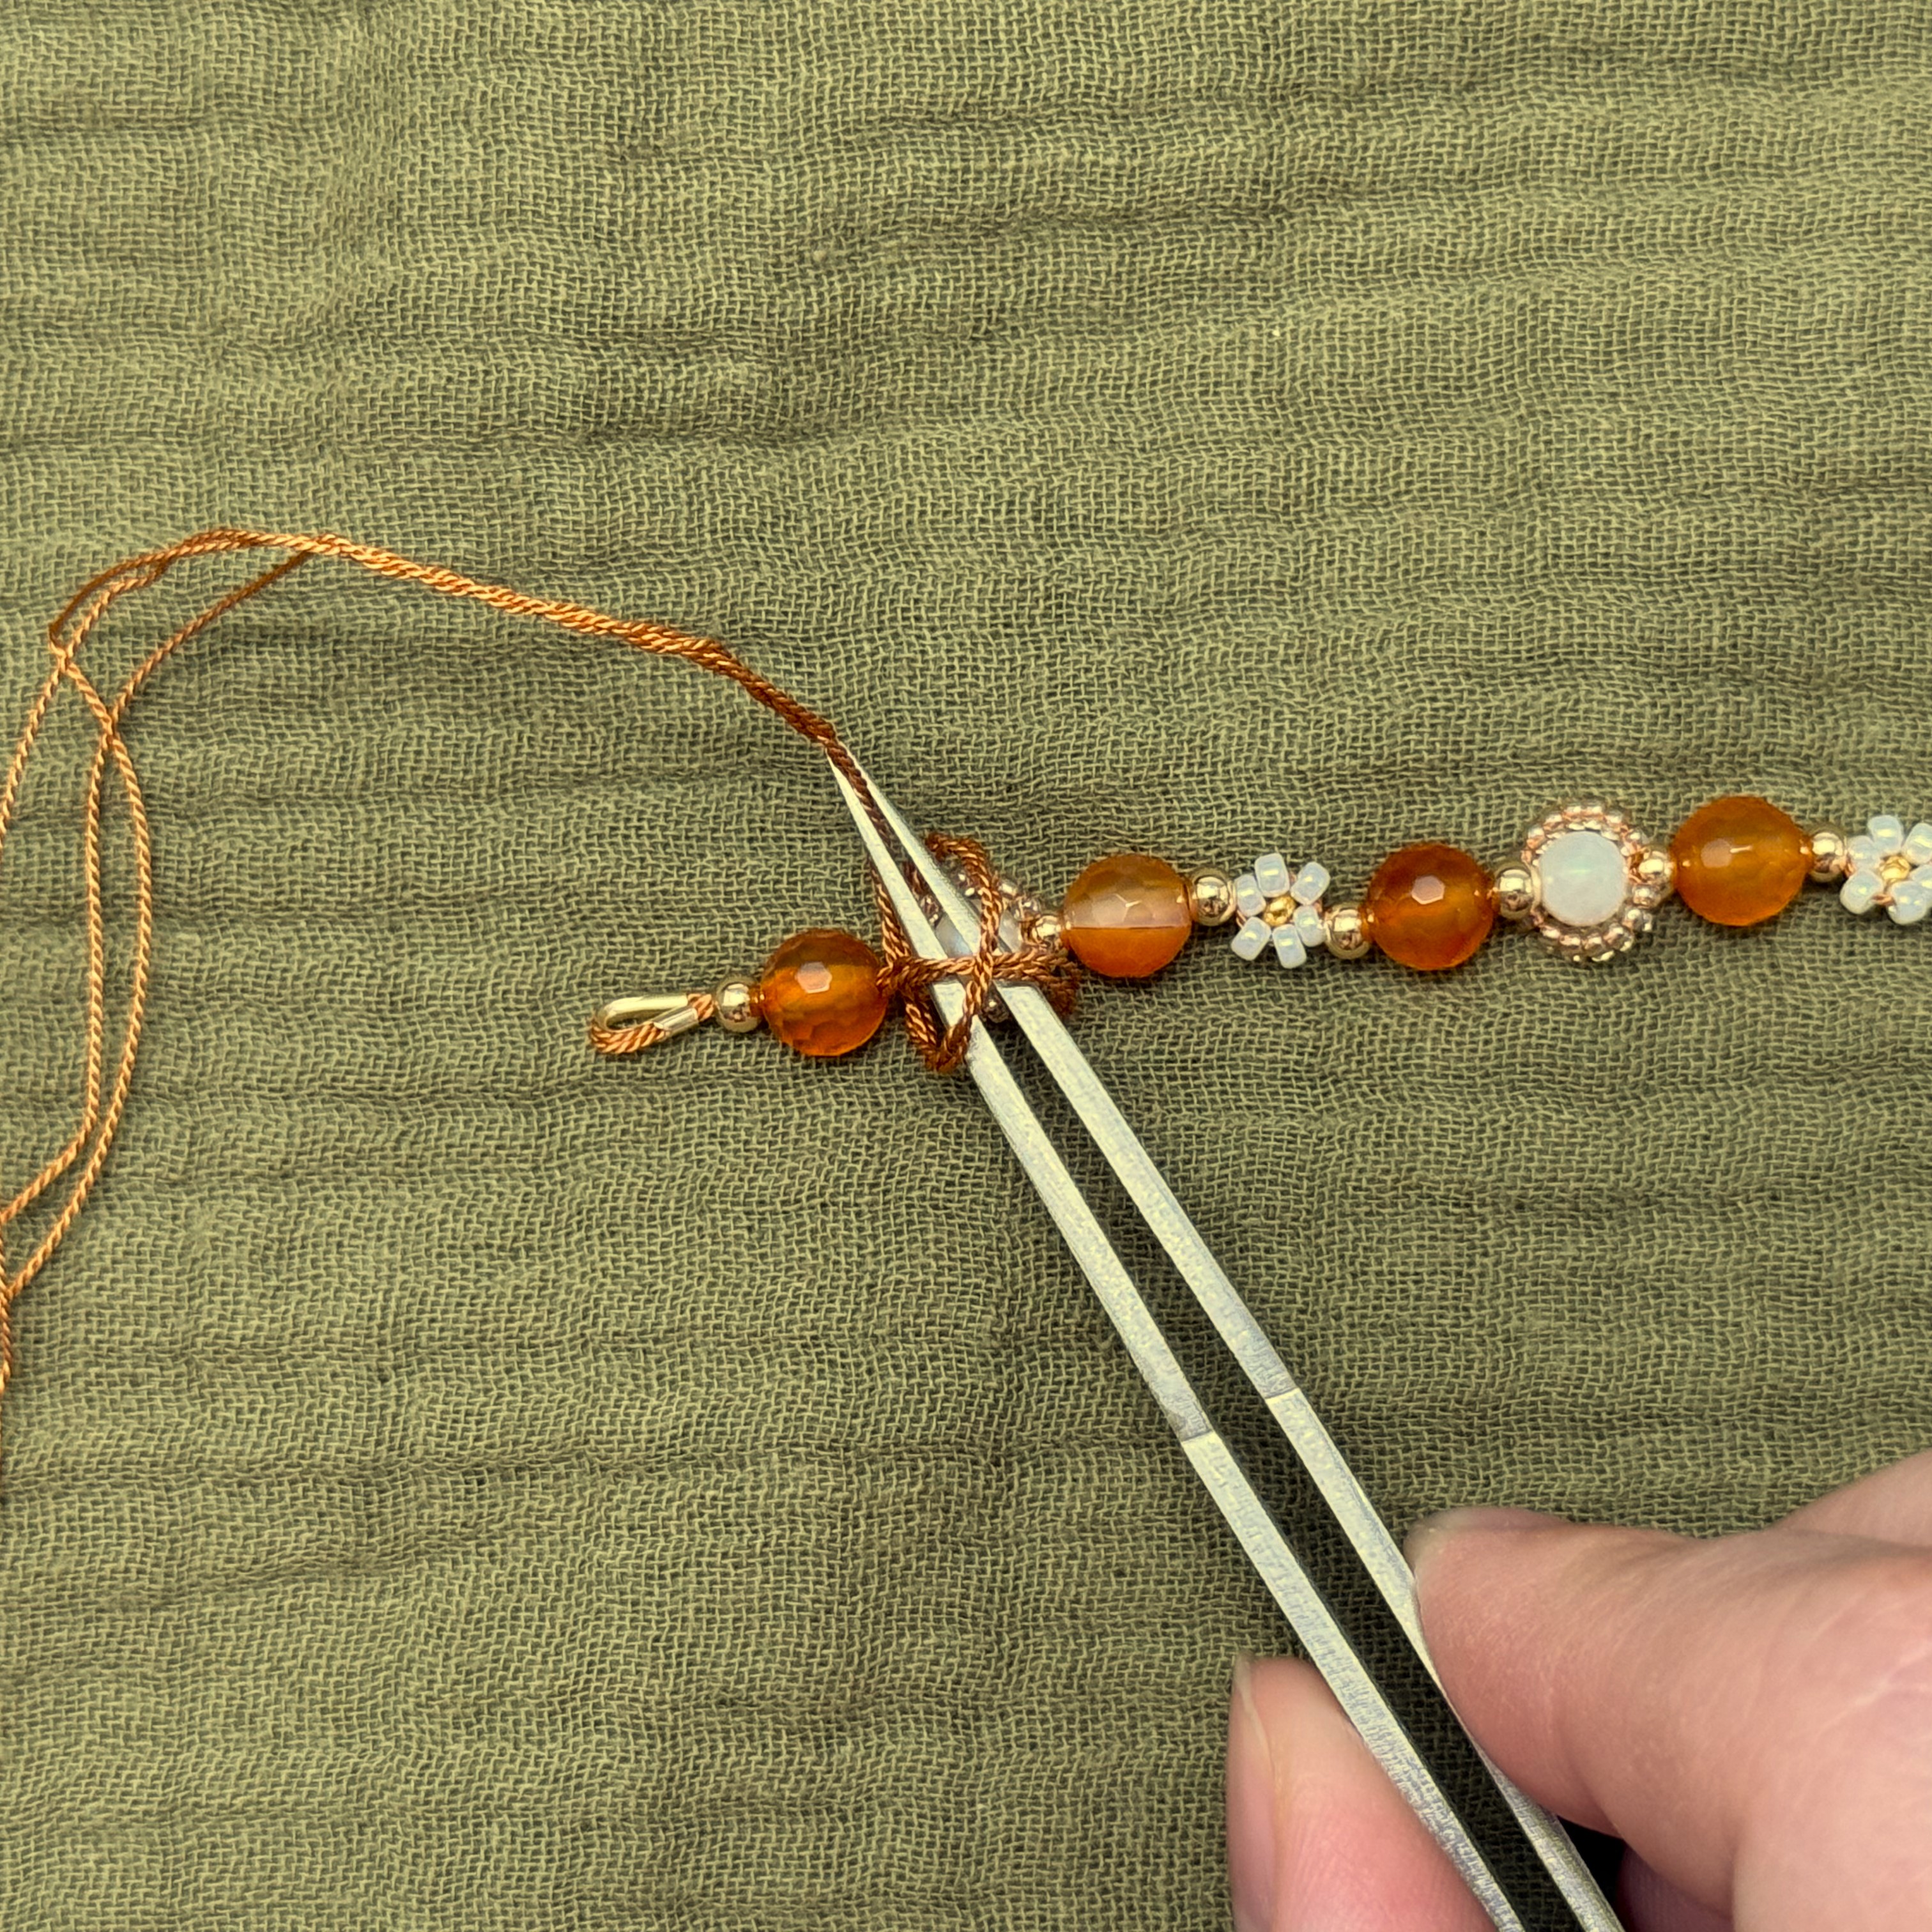
25. Take your tweezers through the X from the bottom and grab the braided cord
26. Pull the knot
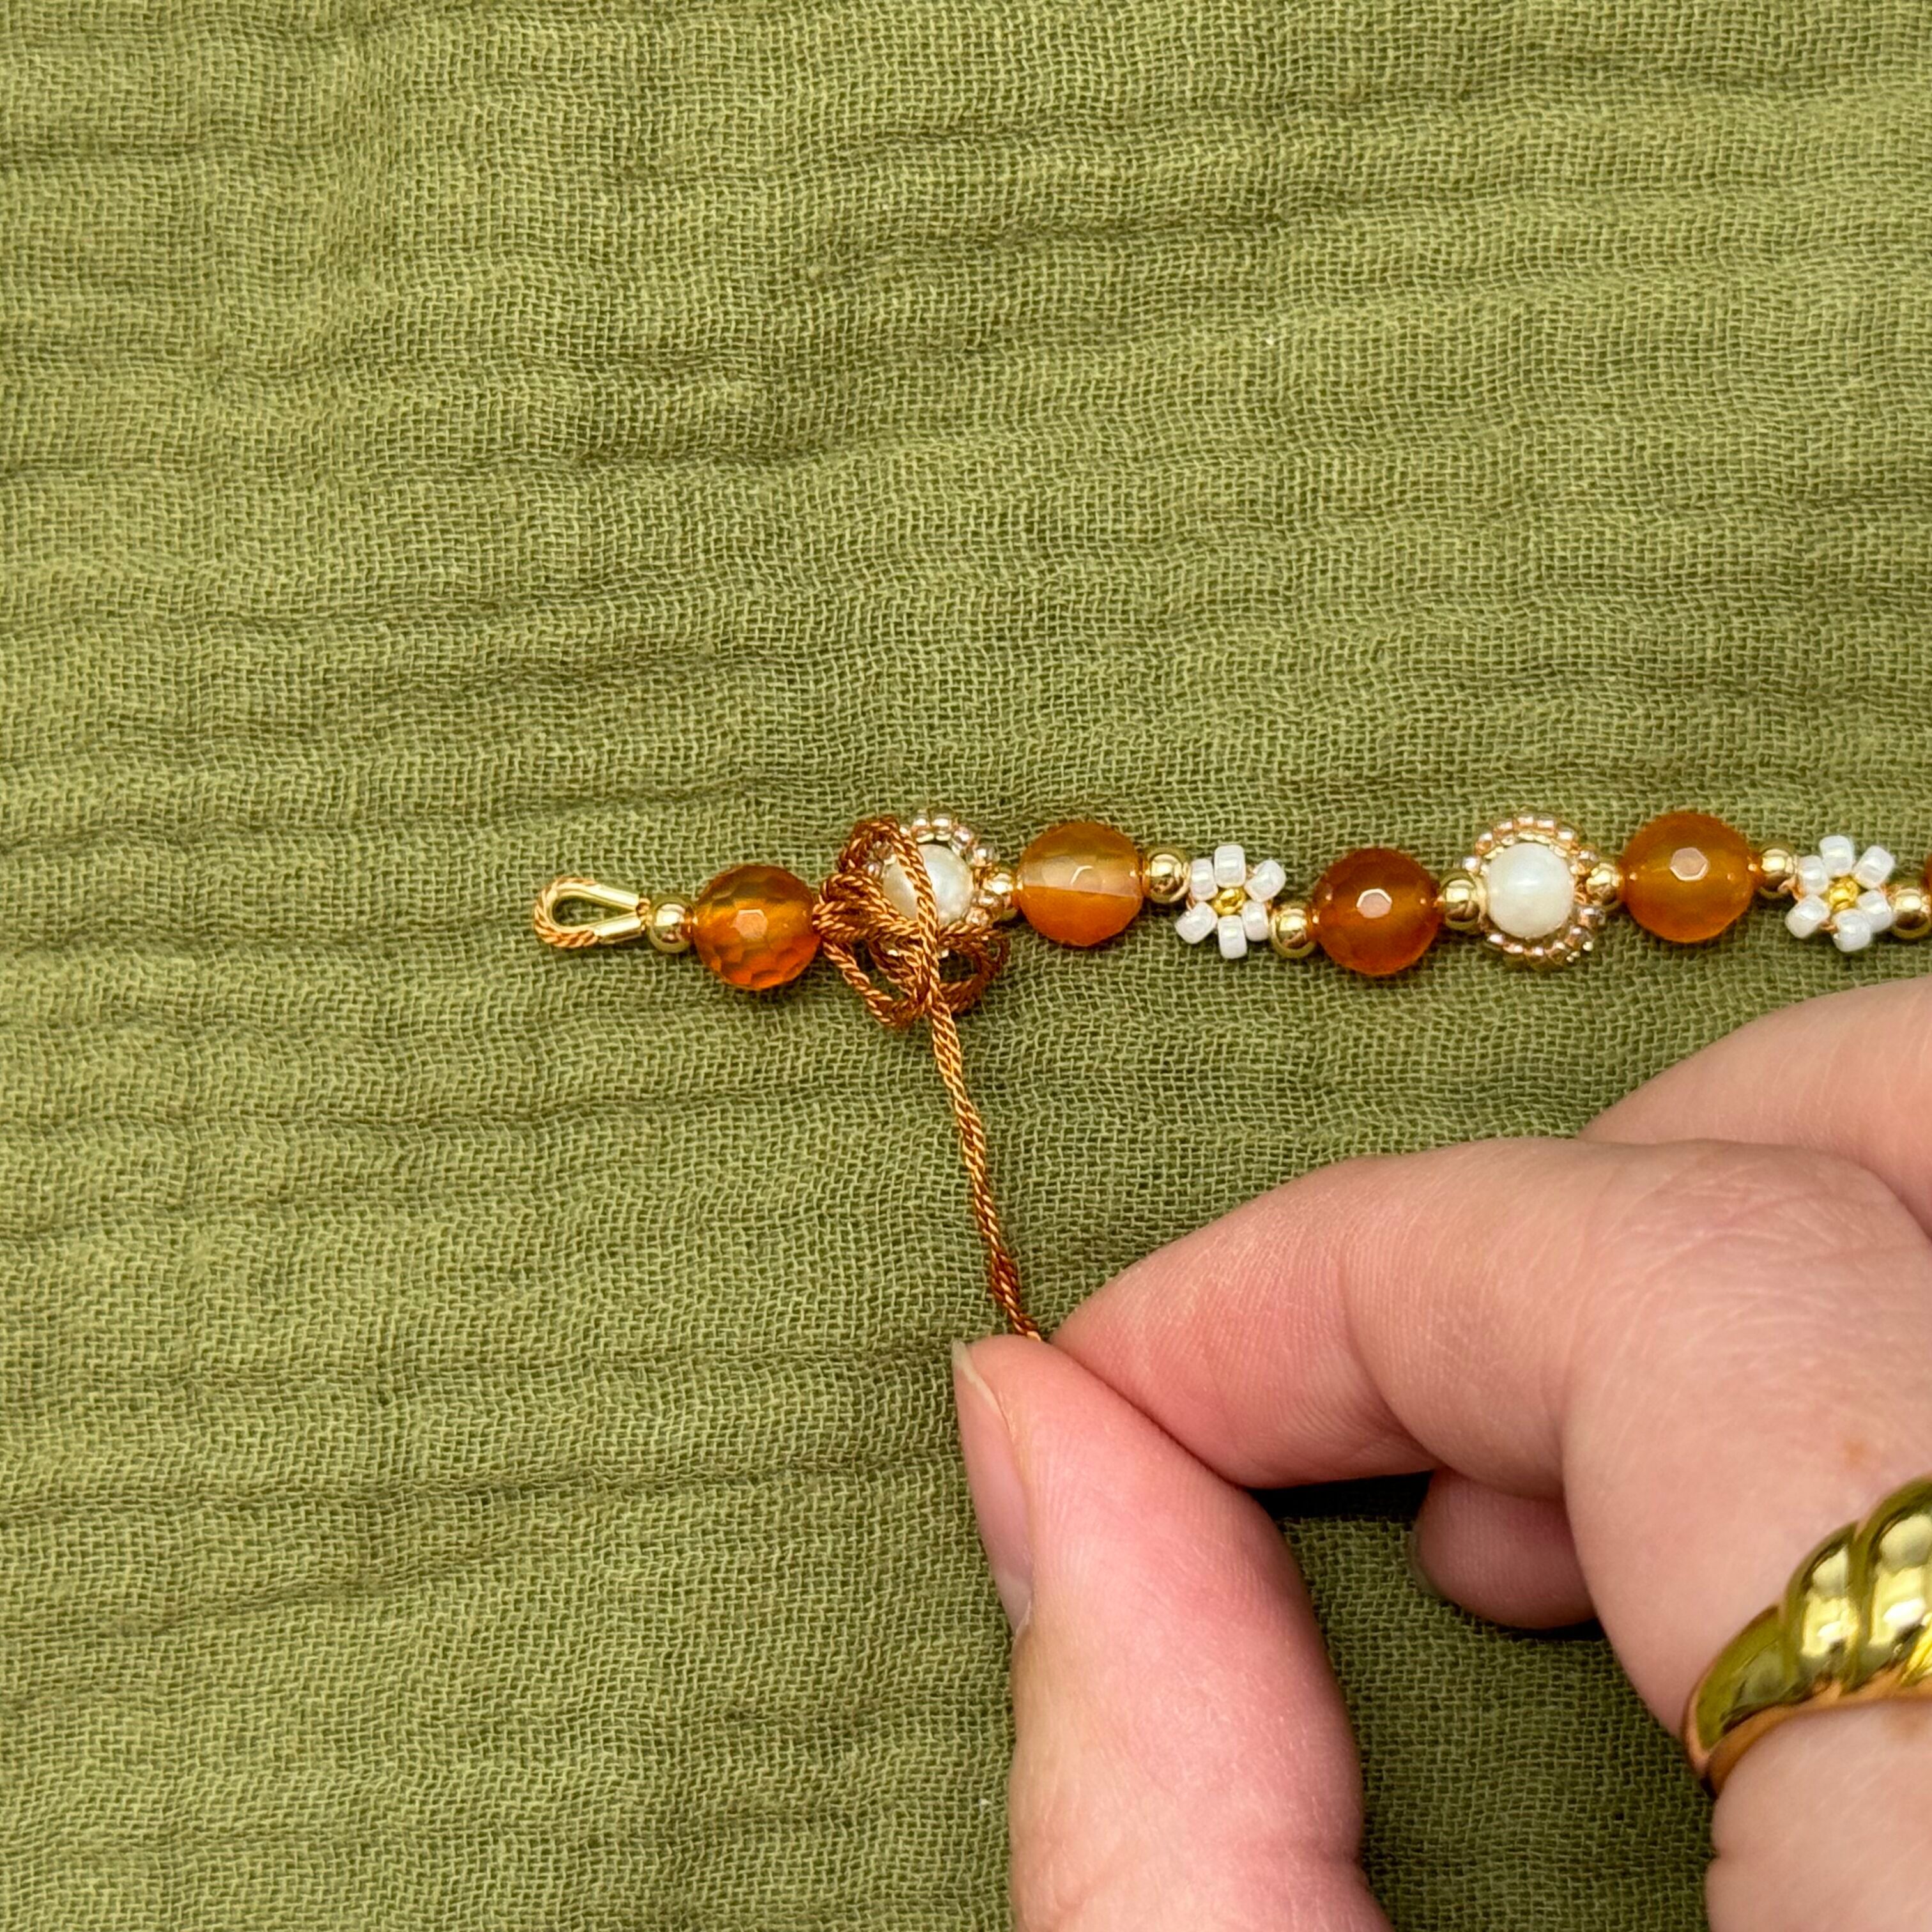
27. Your knot will look like this, now add a dab of glue and cut the tail close to the knot.
***If you would like another source to learn this knot, please visit the link here
28. While the glue is still tacky / wet, gently cover knot with a crimp cover
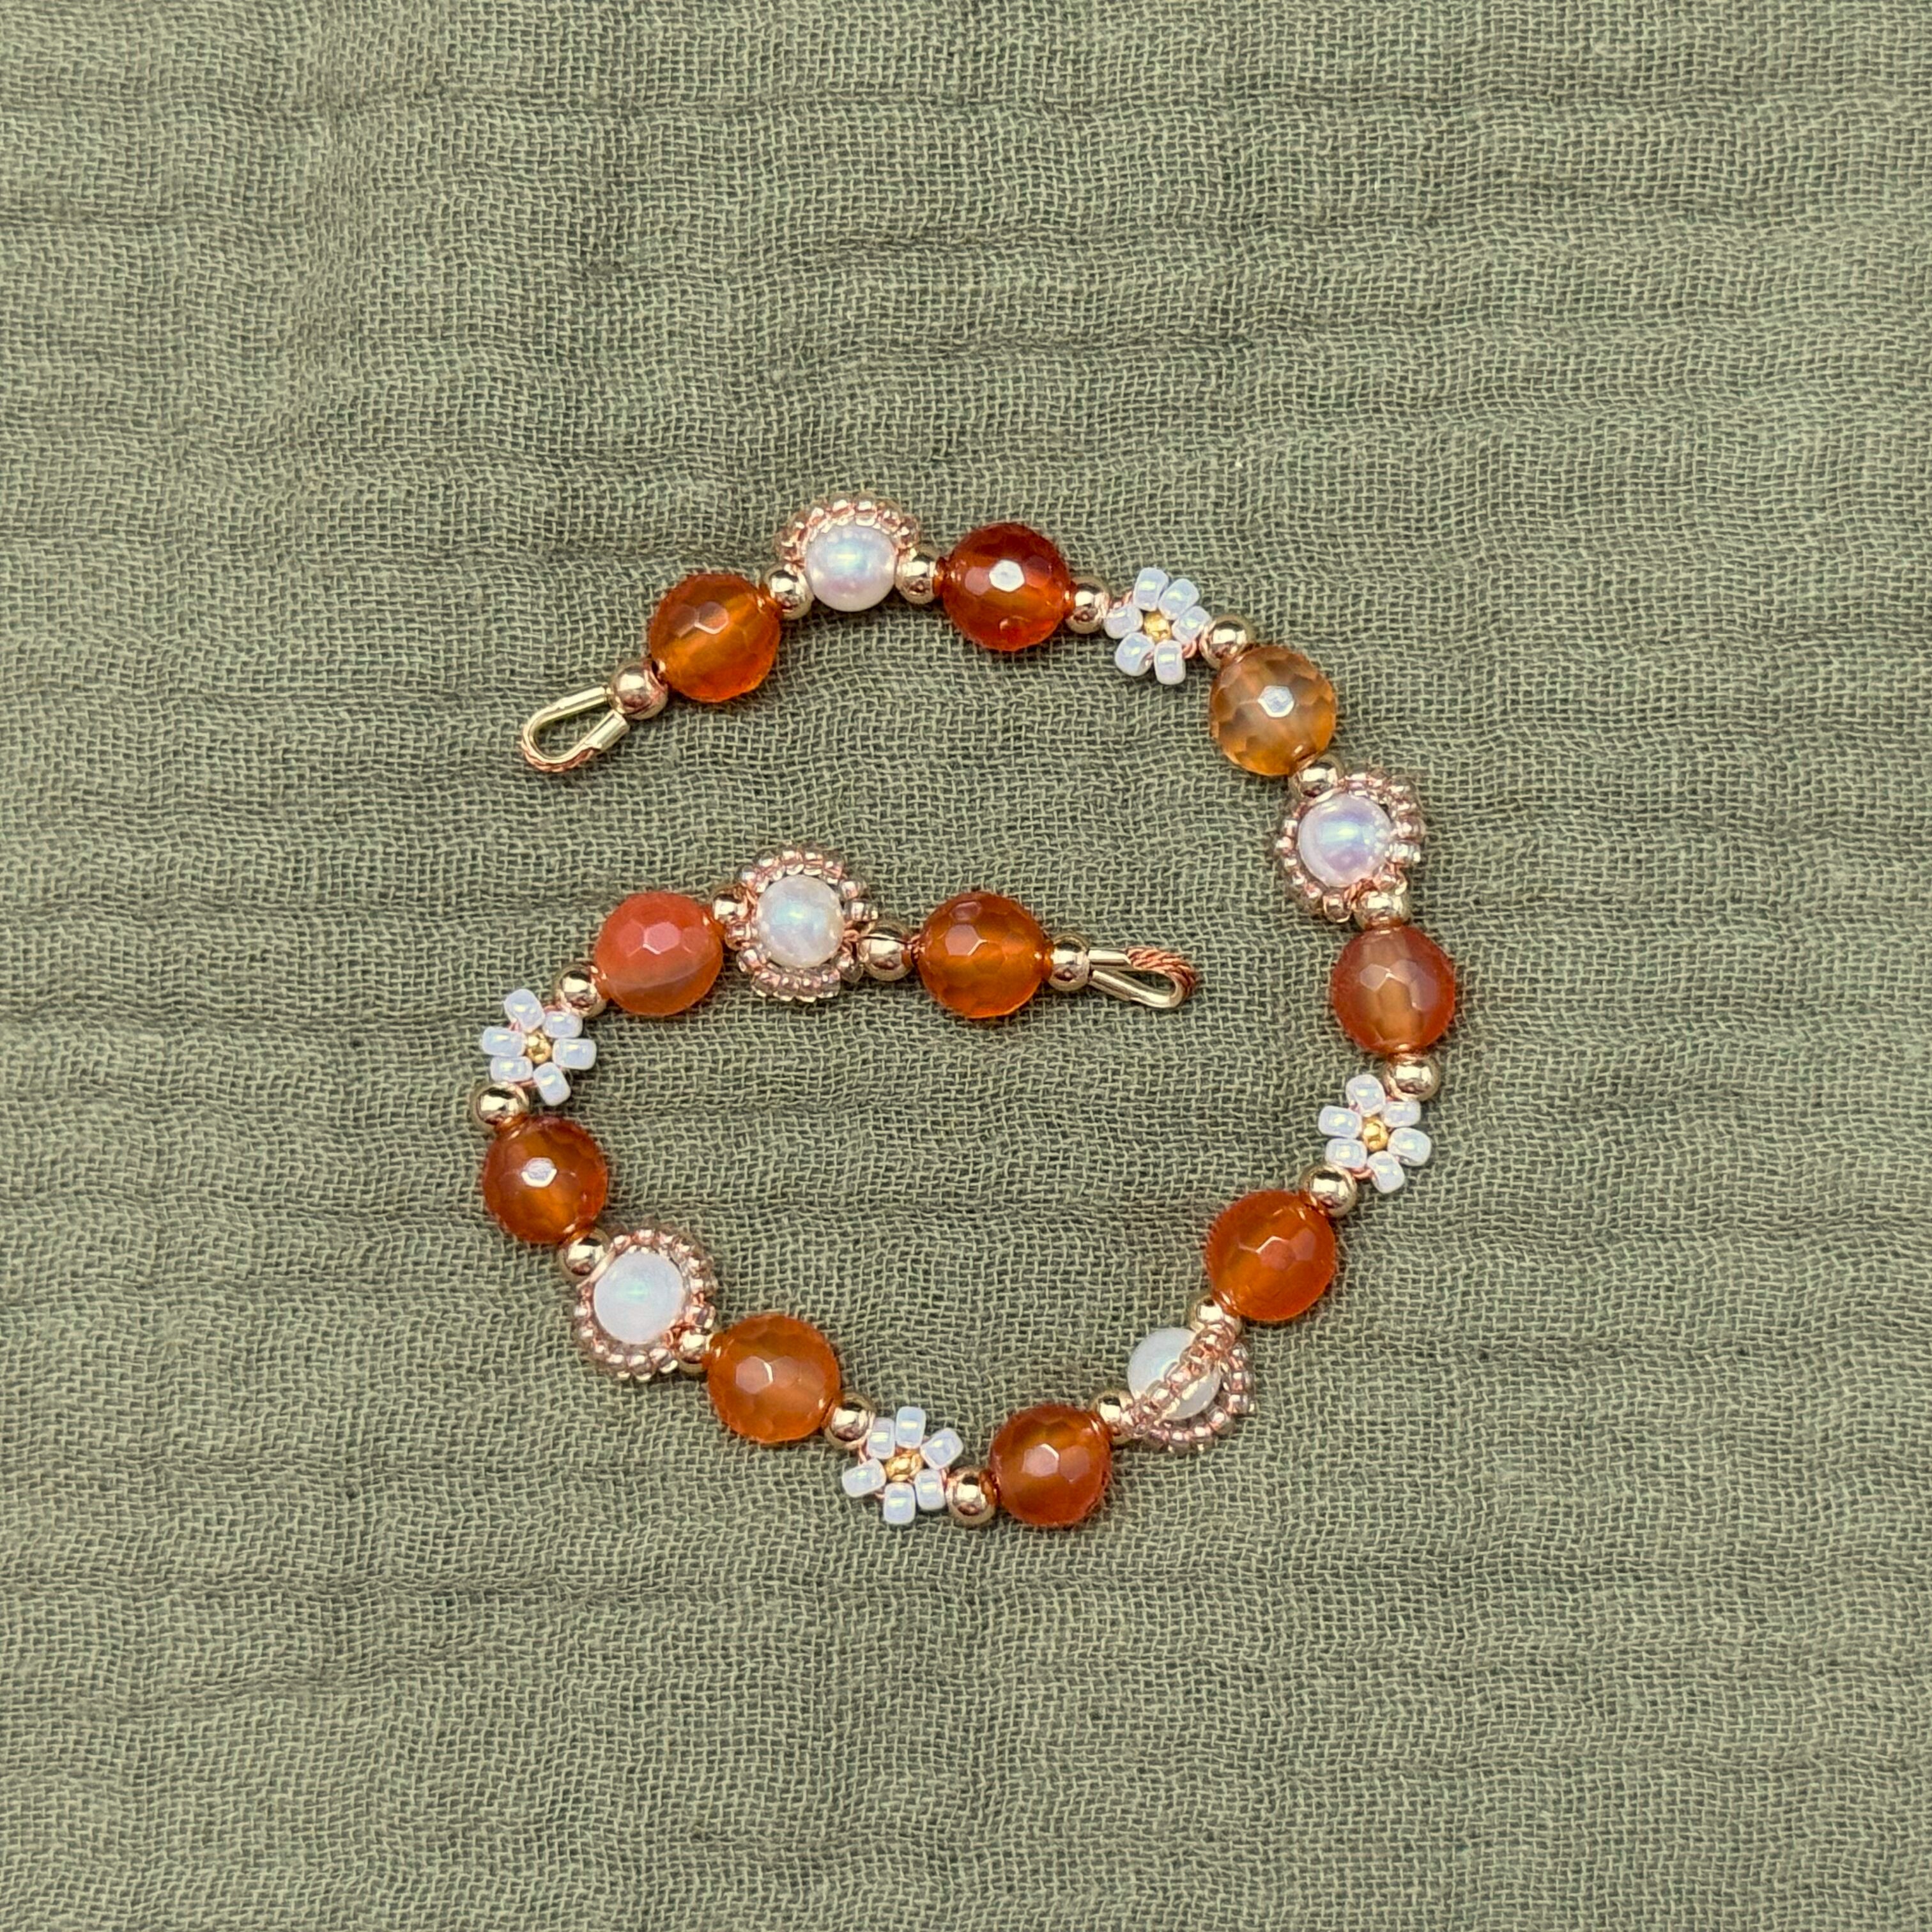
29. Your project will look like this so far
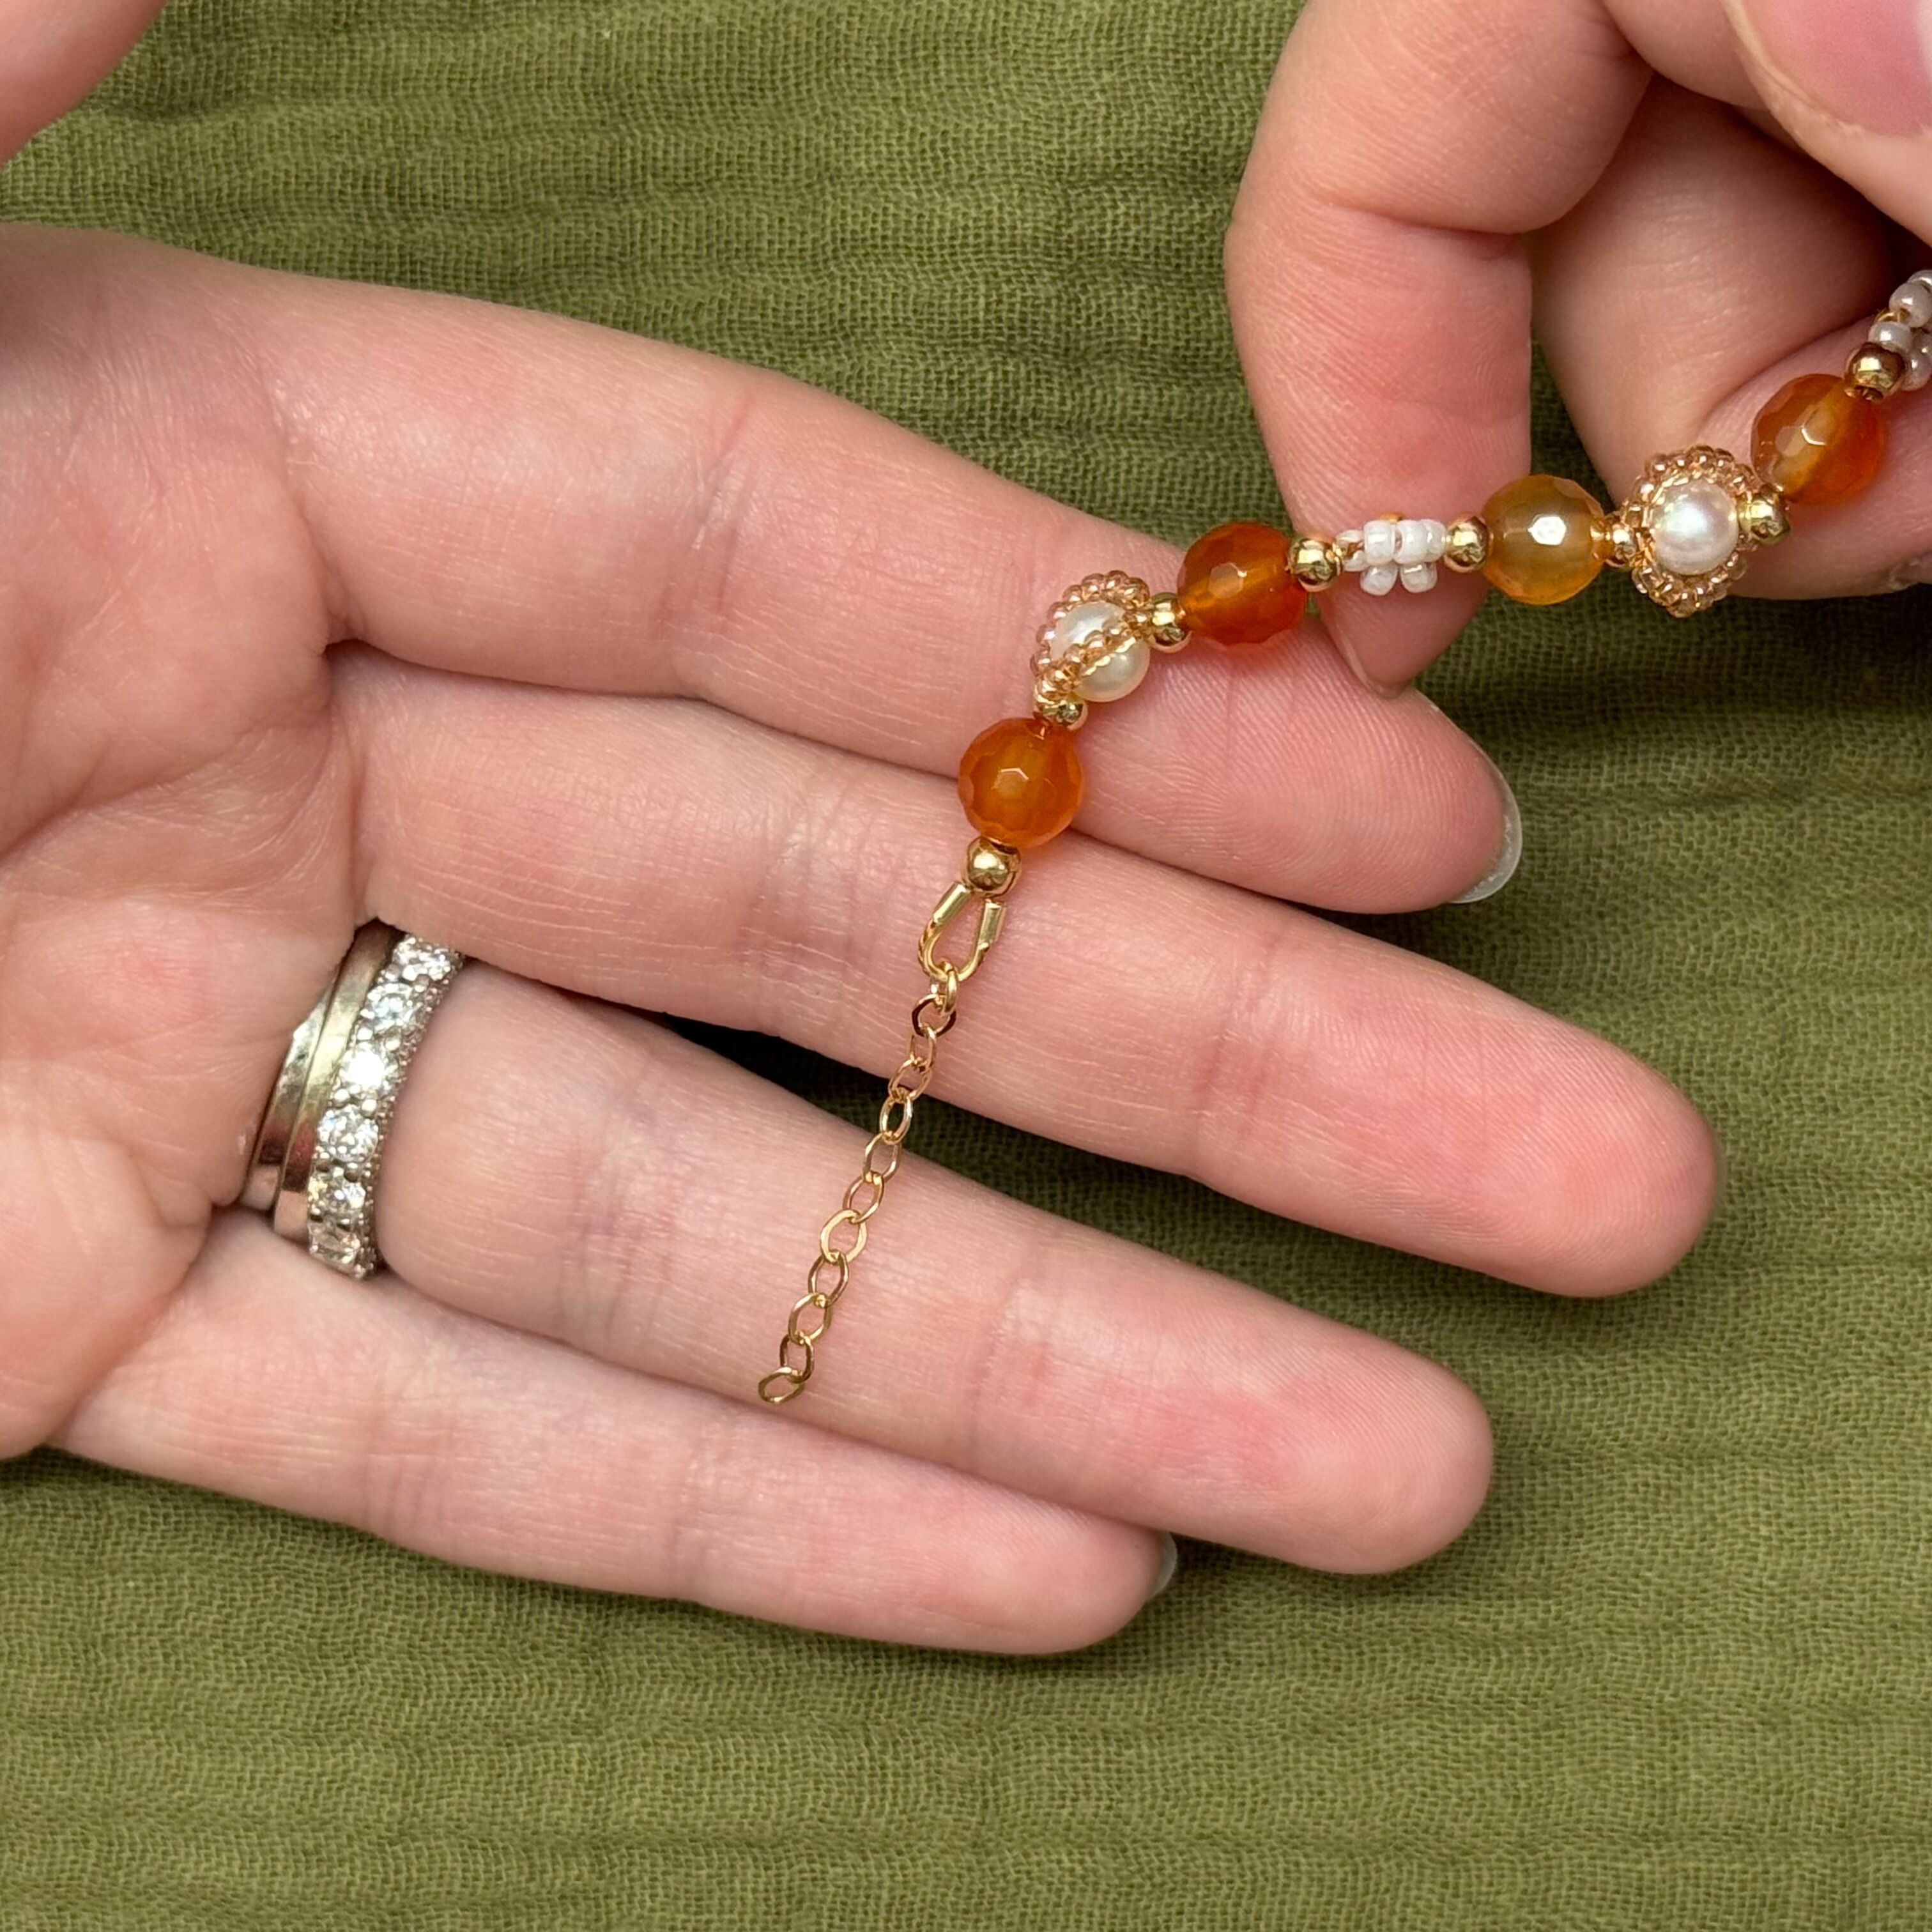
30. Attach the chain with a jump ring on one end
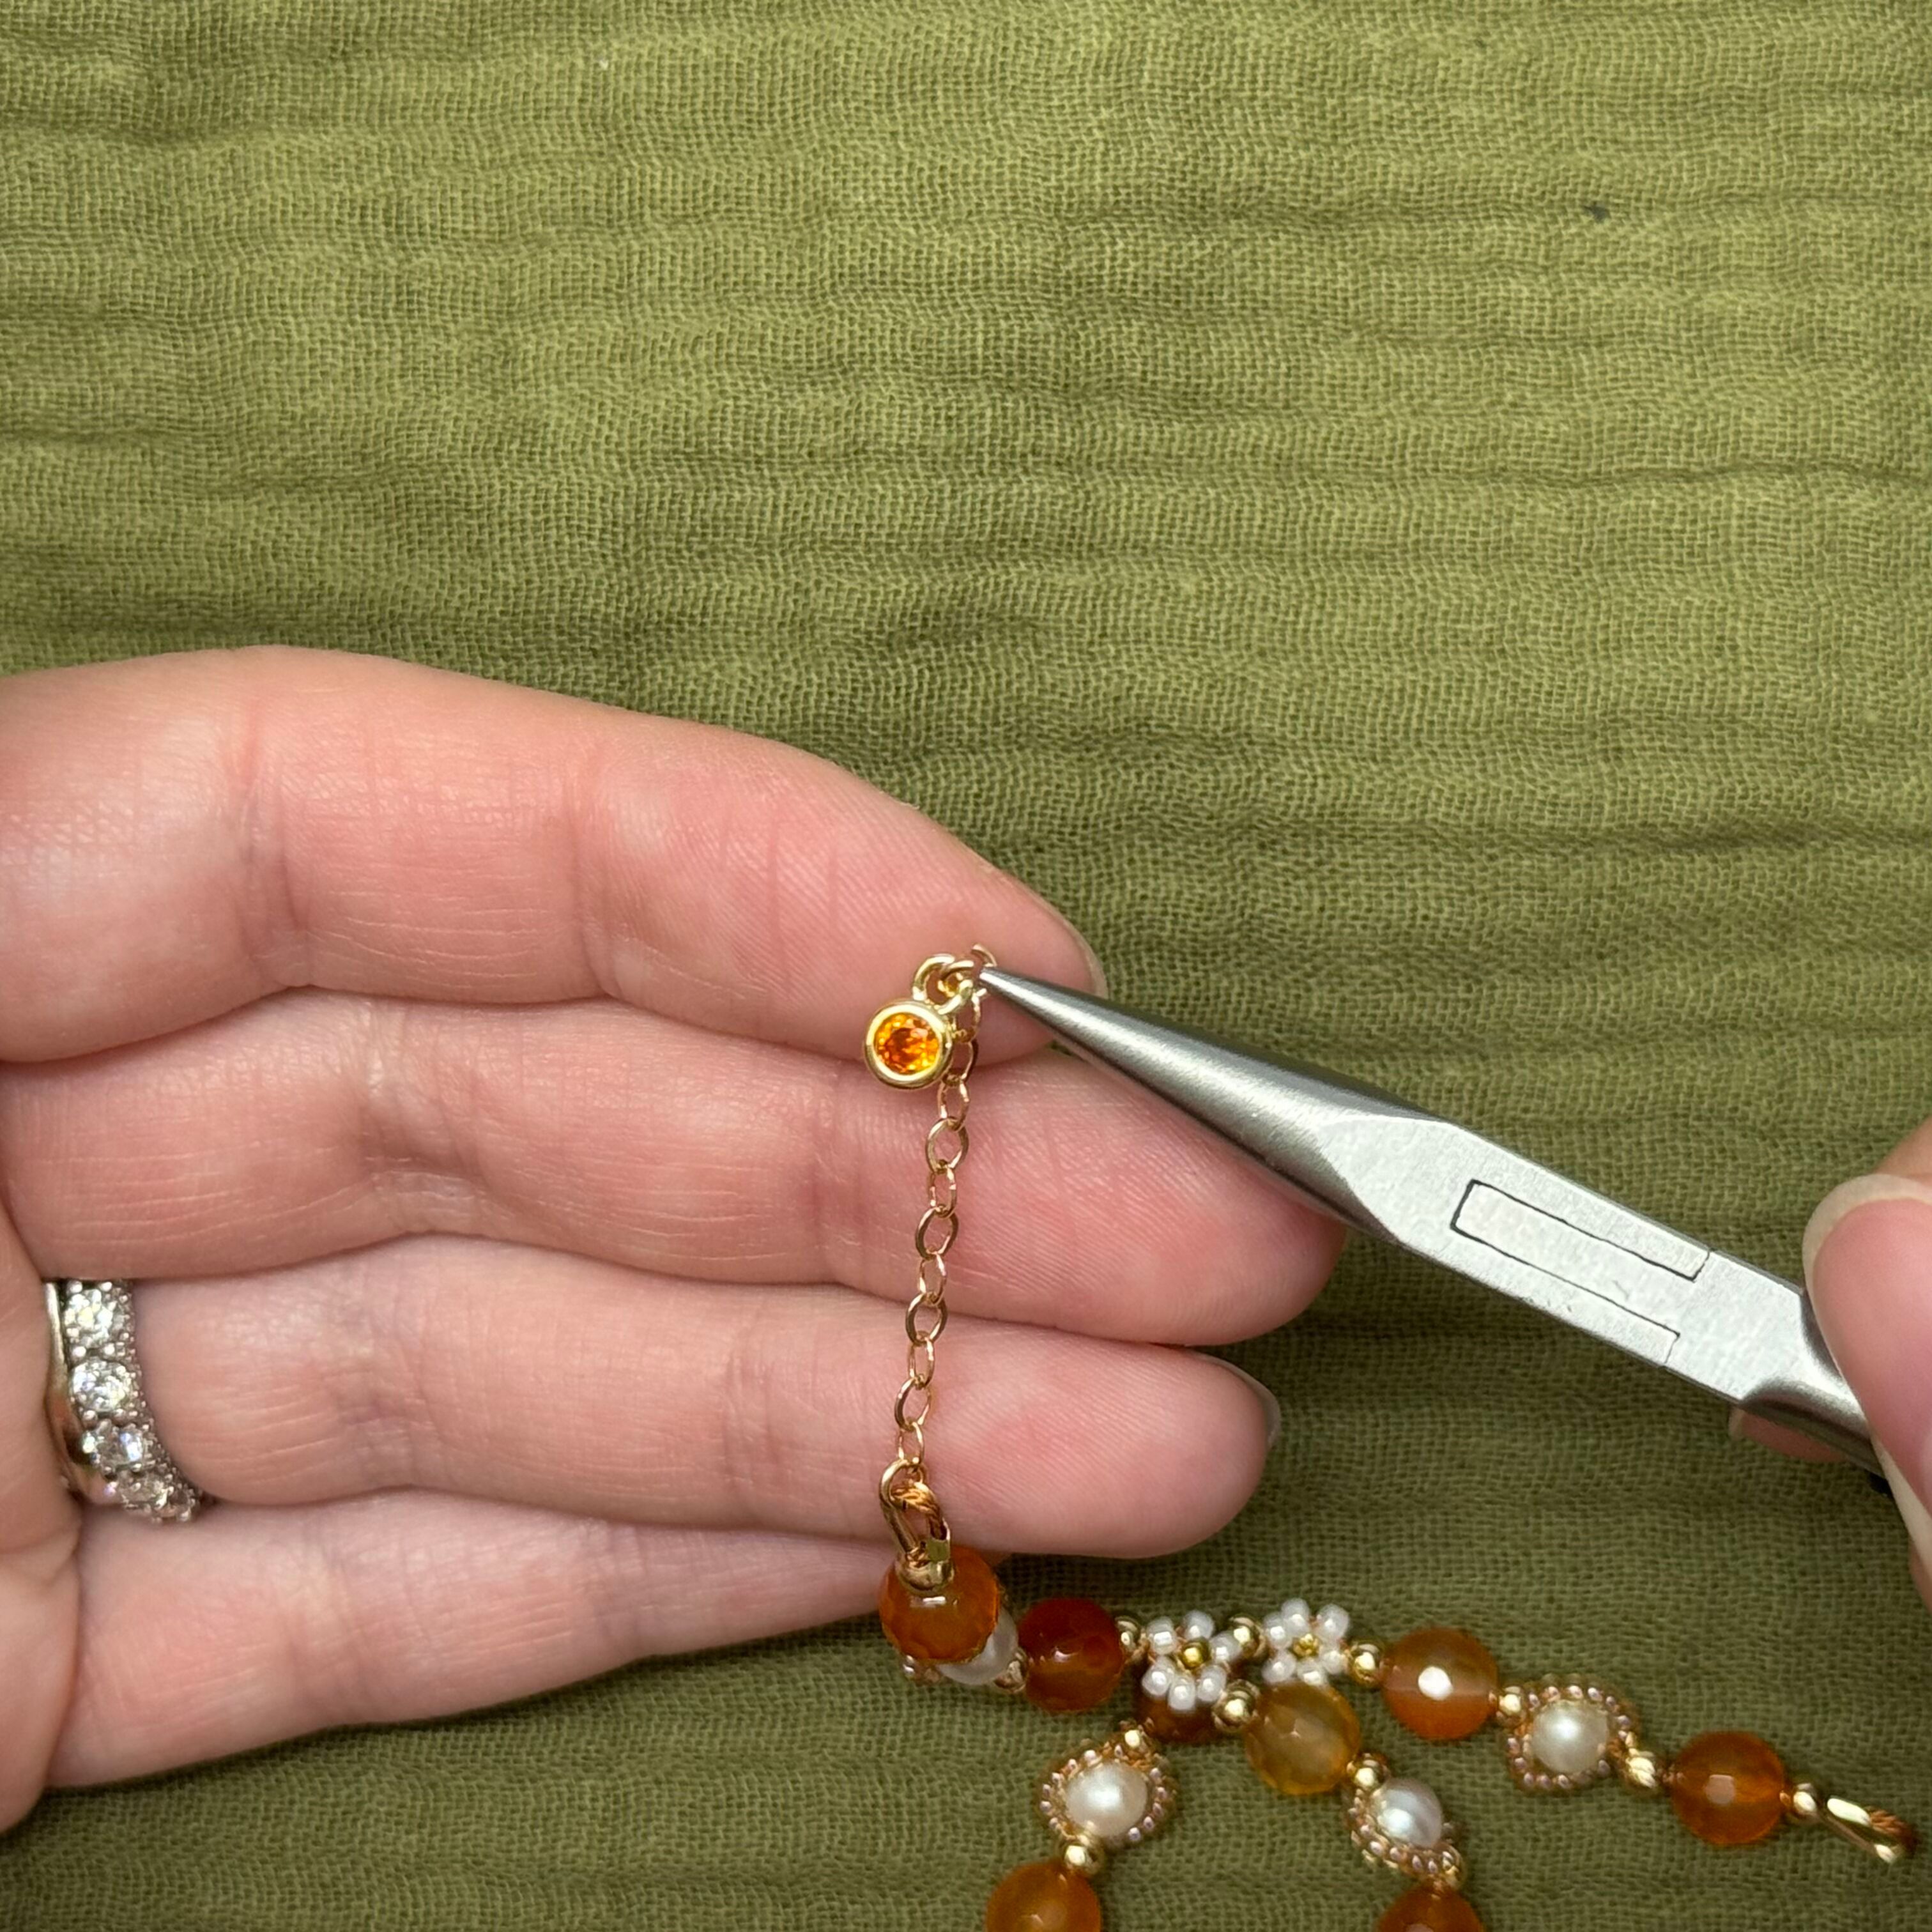
31. And at the end of that chain, attach the orange micro pave charm with another jump ring
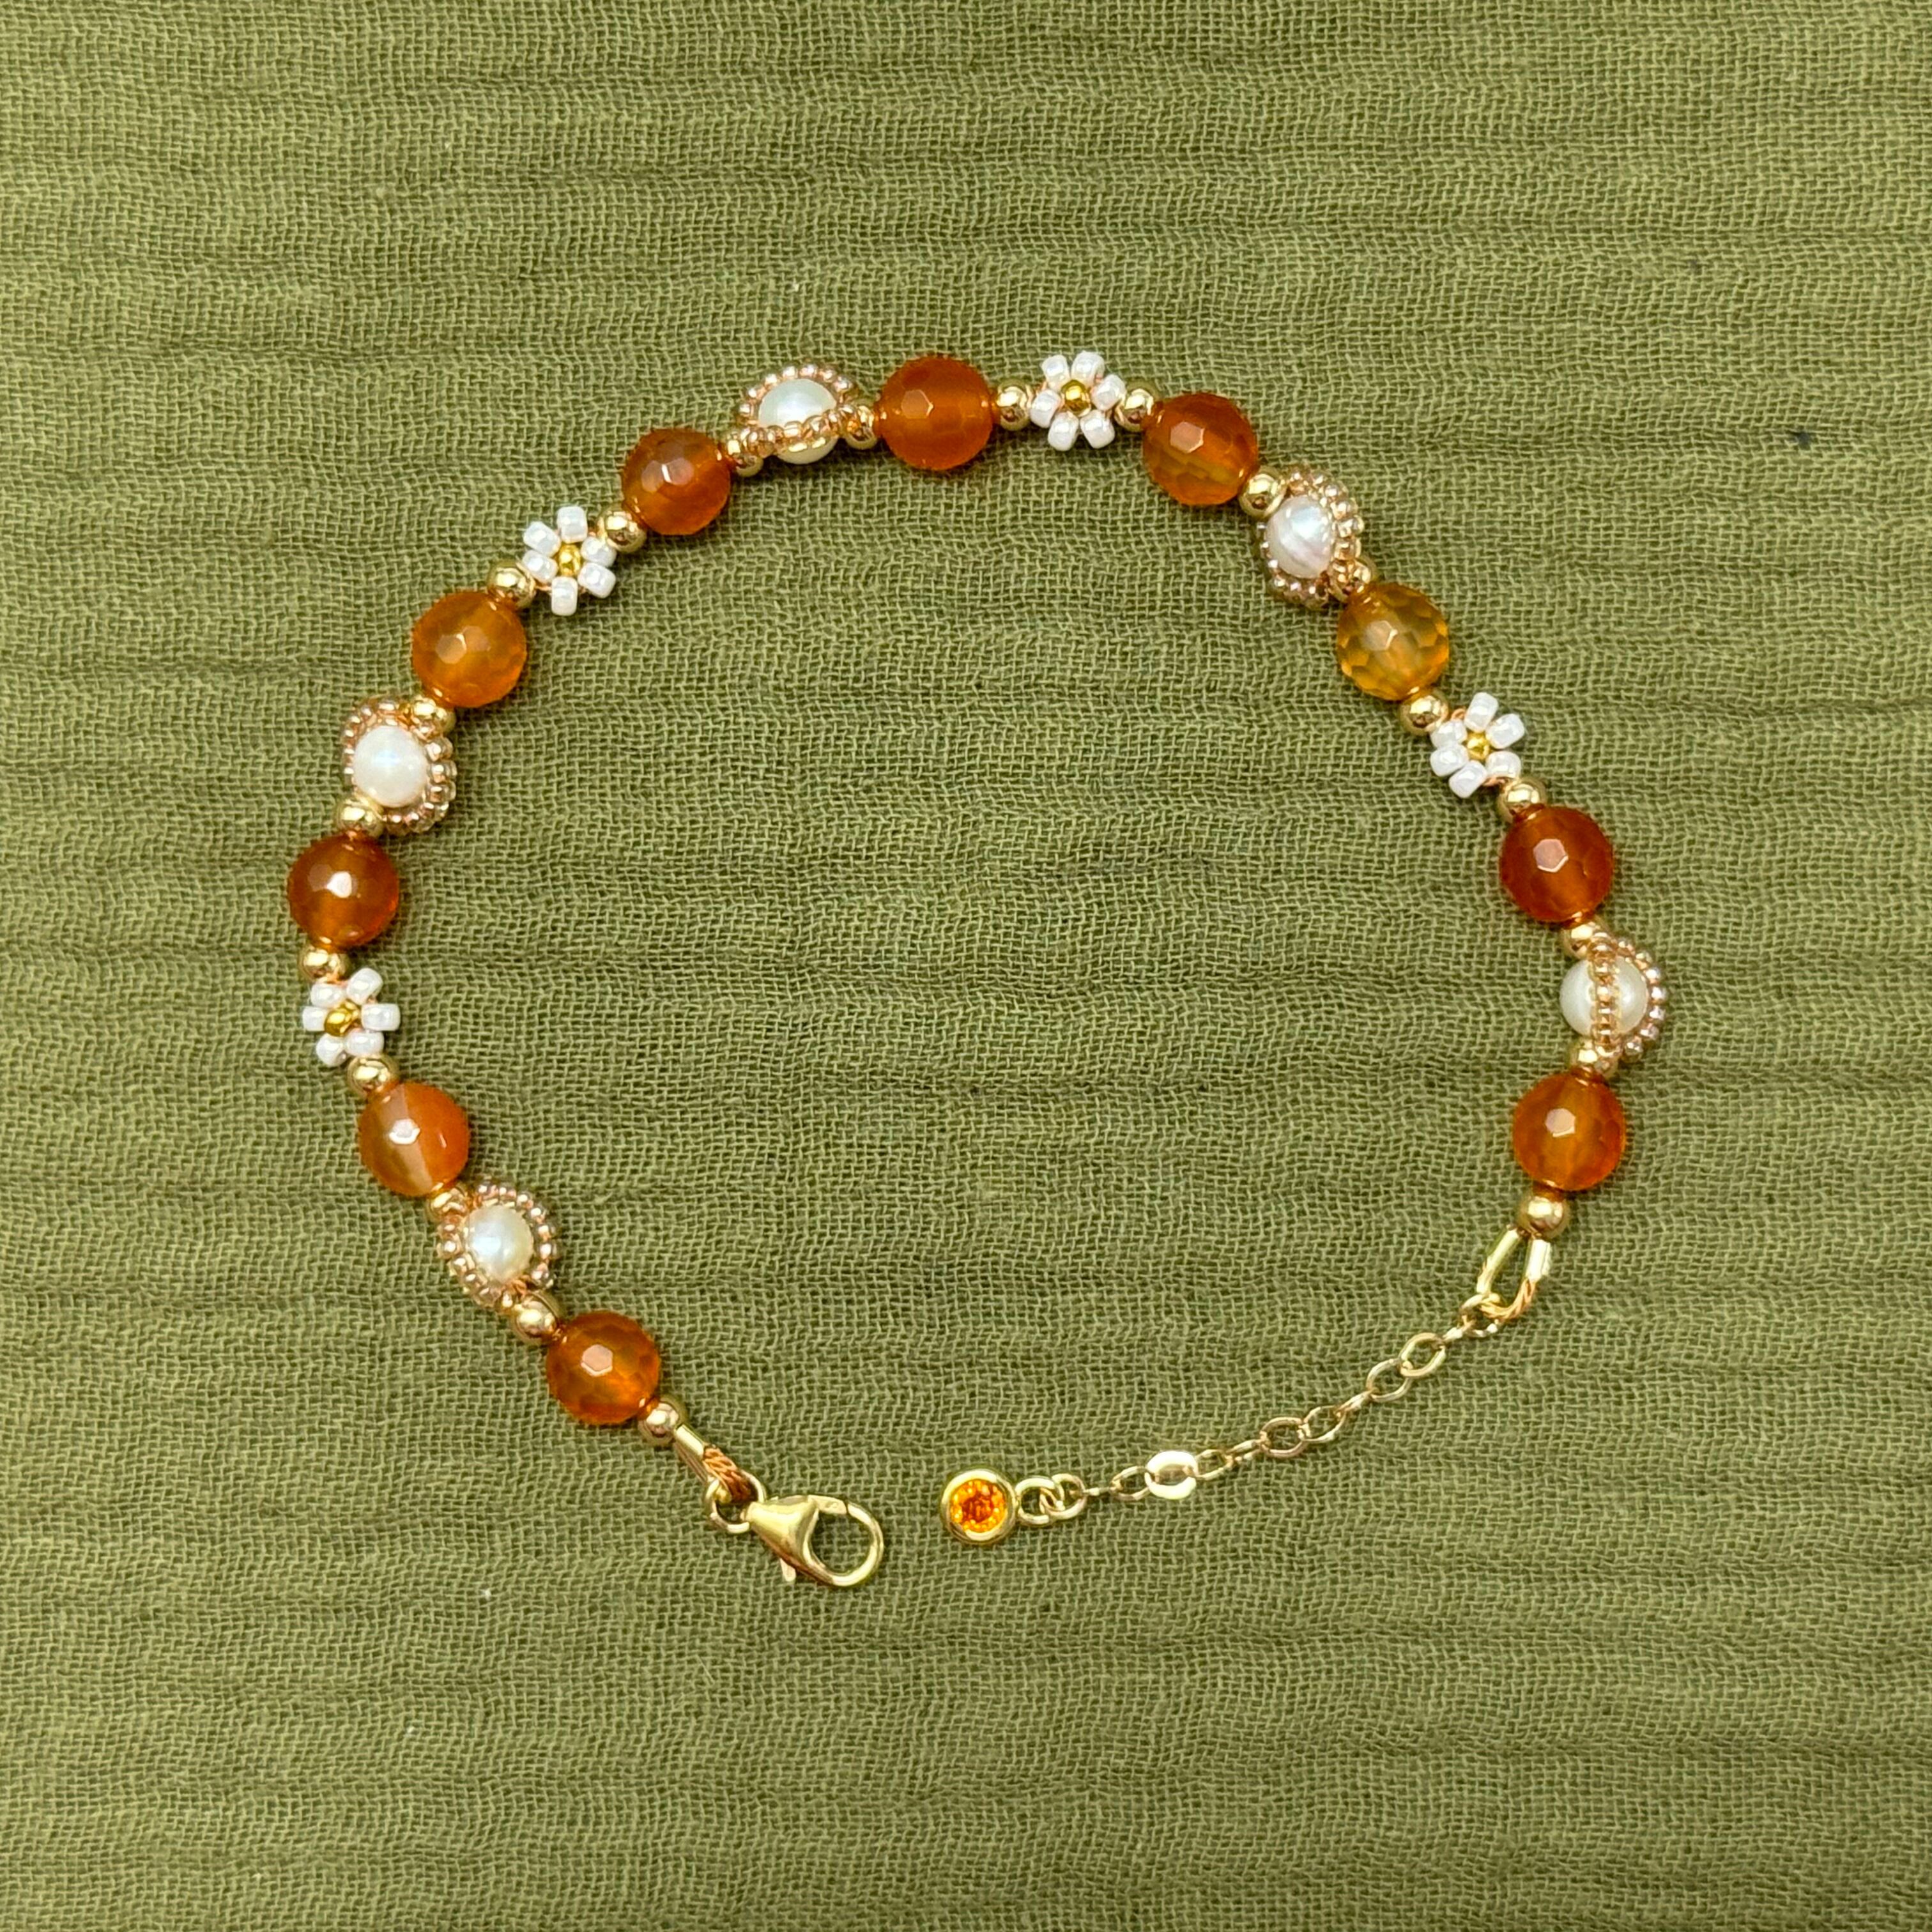
32. On the opposite end of the bracelet, attach the trigger clasp with a jump ring, and then you're done!
Related Articles
Back to Basics: Stack of Stretch Bracelets Including How to Make a Daisy Chain Stretch Bracelet
Back to Basics: Stack of Stretch Bracelets Including a Daisy Chain Stretch Bracelet Follow our...
Seed Bead Starfish Bracelet
Seed Bead Starfish Bracelet This project is perfect for both beginners and seasoned crafters looking to...
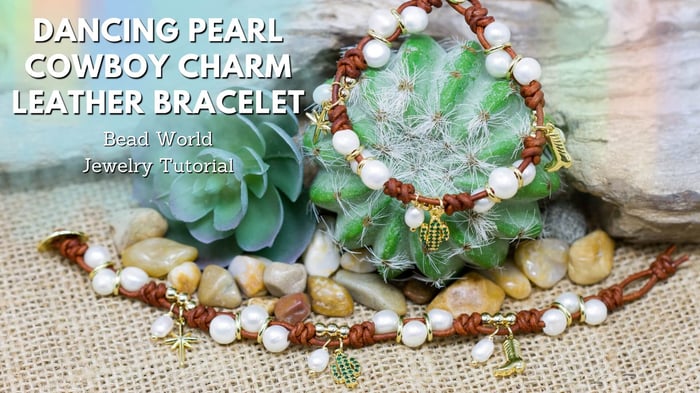
Dancing Pearl Cowboy Charm Leather Bracelet
Dancing Pearl Cowboy Charm Leather Bracelet This tutorial is a spin of our Dancing Gemstone Bracelet...