Tutorials

Beaded Shield Earring Tutorial
Beaded Shield Earring Tutorial

I adore the look of our Beaded Shield Earrings! They are fierce and powerful, just the right earrings for a woman taking on the world. Follow along with our tutorial, combining brick stitch, ladder stitch, and fringe, to make your own ferocious Beaded Shield Earrings.
.
You will need:
Size 11 Miyuki seed beads, ghost grey luster (4 grams)
Size 11 Miyuki seed beads, gunmetal (2 grams)
Silamide, light grey (12 feet)
Size 12 beading needle
5mm closed sterling silver jump rings (2)
Sterling silver ear wires (2)
Scissors
.
1. Begin with approximately 6 feet of Silamide. We’re going to begin with ladder stitch for our foundation row. String on two grey beads.

2. Slide it down the thread, leaving AT LEAST a 12 inch tail. You will need this thread to weave in the tail securely later. Working from the tail end, pass your needle through the first bead again. This will form a loop.

3. Pull the thread tight.

4. Now pass the needle down through the second bead again to complete the ladder stitch.

5. Continue building your ladder stitch row by picking up a gunmetal bead. Pass your needle down through the second bead.

6. Pull the thread all the way through. Pass your needle up through the third bead again.

7. Repeat steps 4-6 to continue building your ladder stitch foundation row until there are 2 ghost grey beads, 10 gunmetal beads and 2 ghost grey beads in the row.

8. Now we’re going to zig zag back through the foundation row to strengthen it and make it even. Just pass the needle one way through the next bead in the row.

9. Then pass the needle the other way through the next bead.

10. Keep zig zagging until your needle is exiting the first bead.

11. Now it’s time to start the brick stitch portion at the top of the earring. Pick up two grey beads bead.

12. Pass your needle under the thread bridge between beads 2 and 3. (You’ll add two beads at the beginning of each brick stitch row so the thread doesn’t show on the first bead. All other beads will be added one at a time.)

13. Pull the thread tight. Pass your needle up through the second grey bead.

14. Pull the thread tight.

15. Pick up one black bead. Pass your needle under the next thread bridge.

16. Pull the thread tight. Pass your needle up through the gunmetal bead.

17. Repeat Steps 15-16 eight times to add eight more gunmetal beads.

18. Repeat Steps 15-16 two times to add two more grey beads.

19. Now it’s time to move up to the next row. Pick up two grey beads. Pass your needle under the thread bridge between bead 2 and 3 of the previous row.

20. Pull the thread tight. Pass your needle up through the second grey bead.

21. Repeat Steps 15-16 to add eight gunmetal beads, two grey beads.

22. Repeat Steps 12-14 to start the third brick stitch row. Then Repeat Steps 15-16 to add seven gunmetal beads and two grey beads. Continue repeating steps 12-17 to complete six more rows, decreasing one gunmetal bead per row.

23. Repeat Steps 12-17 to complete tenth and eleventh brick stitch rows with all grey beads.

24. Pass needle through the closed jump ring and stitch down through the second bead.

25. Pass your needle up through the third bead and through the jump ring. Then stitch back down through the third bead.

26. Pass your needle up through the third bead and through the jump ring.

27. Then stitch back down through the second bead.

28. Pass your needle up through the first bead and through the jump ring.

29. Then stitch back down through the first bead.

30. Stitch down through the center of the triangle, working your way down to the bottom of the triangle. You’ll want your needle to emerge from bead seven (counting from the left). Be careful that you don’t leave any thread exposed.

31. Now it’s time to create the beaded swag! Pick up five grey beads and stitch back up through bead eight of the foundation row.

32. Pull the thread tight. Pass your needle down through bead nine of the foundation row.

33. Pick up 11 grey beads and stitch back up through bead six of the foundation row.

34. Pull the thread tight. Pass your needle down through bead five of the foundation row.

35. Pick up 17 grey beads and stitch back up through bead ten of the foundation row. Pull the thread tight.

36. Pass your needle down through bead eleven of the foundation row. Pick up 23 grey beads and stitch back up through bead four of the foundation row. Pull the thread tight.

37. Pass your needle down through bead three of the foundation row. Pick up 29 grey beads and stitch back up through bead twelve of the foundation row. Pull the thread tight.

38. Pass your needle down through bead thirteen of the foundation row. Pick up 35 grey beads and stitch back up through bead two of the foundation row. Pull the thread tight. Pass your needle down through bead one of the foundation row.

39. Pick up 42 grey beads and stitch back up through bead fourteen of the foundation row. Pull the thread tight.

40. Stitch down through bead thirteen of the foundation row and back up through bead fourteen of the foundation row to sure the final swag.

41. Pass the needle through all of the beads on the right edge of the brick stitch portion. Pass the needle through the jump ring.

42. Pass the needle down through all of the beads on the left edge of the brick stitch portion.

43. Stitch up through bead two of the foundation row.

44. Stitch down through bead three of the foundation row. Continue zig zagging until the thread is anchored. Then thread your needle onto the tail from Step 2. Stitch the tail thread through the foundation row in a zig zag manner until it is also anchored.

45. Carefully trim off any excess threads.

46. Open the loop on the ear wire and string on the closed jump ring. Carefully close the loop. Repeat all steps for the second earring.

Your finished earrings will look like this:

Alright, put on your warrior woman Beaded Shield Earrings and go take on the day!
Happy Beading!!
Related Articles

Gemstone of the Month: Jade
Gemstone of the Month: JadeOne of the most well-known gemstones, Jade actually refers to two different...

Gemstone of the Month: Howlite
Gemstone of the Month: HowliteHowlite was first discovered in Nova Scotia in 1868 by Canadian mineralogist,...
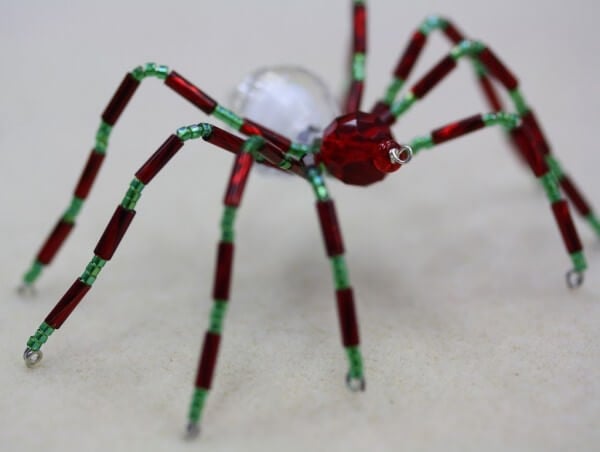
The Legend of the Christmas Spider
The Legend of the Christmas SpiderSome of our favorite, and most popular, Christmas kits are our...