

Modern Gemstone Bracelet Tutorial
Modern Gemstone Bracelet Tutorial

It is a beautiful combination of gemstone beads and sleek spacer beads, giving our gemstone stringing bracelet a modern, minimalist design.
.
You will need:
8mm Round Gemstones, Color A (approximately 18) - Pictured is our matte tiger eye beads
8mm Round Gemstones, Color B (5) - Pictured is our matte black onyx beads
7mm Nugget Spacers (2)
4mm Hex Spacers (2)
3mm Faceted Nuggets (2)
12x7mm Trigger Clasp (1)
6mm 21gauge Closed Jump Ring (1)
2x2mm Crimps (2)
4mm Crimp Covers (2)
Medium Oval Jump Rings (3)
Charm (1)
Medium Soft Flex Beading Wire(1 foot)
Bead Stoppers (2)
.
1. Place a bead stopper onto one end of the Soft Flex wire.
2. String nine color A gemstones.

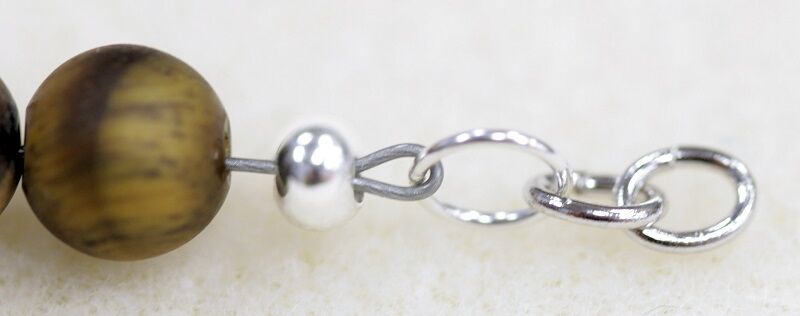
3. String one 3mm faceted nugget, one color B gemstone, one 4mm hex spacer, one color B gemstone, one 7mm nugget spacer, one color B gemstone, one 7mm nugget spacer, one color B gemstone, one 4mm hex spacer, one color B gemstone, and one 3mm faceted nugget.

4. String 9 color A gemstones.

5. Attach a bead stopper onto the other end of the Soft Flex wire to secure the beads. Wrap the bracelet around your wrist to check the bracelet size.
6. Leaving approximately 1” for the clasp, remove beads evenly from both sides until you reach your desired length.

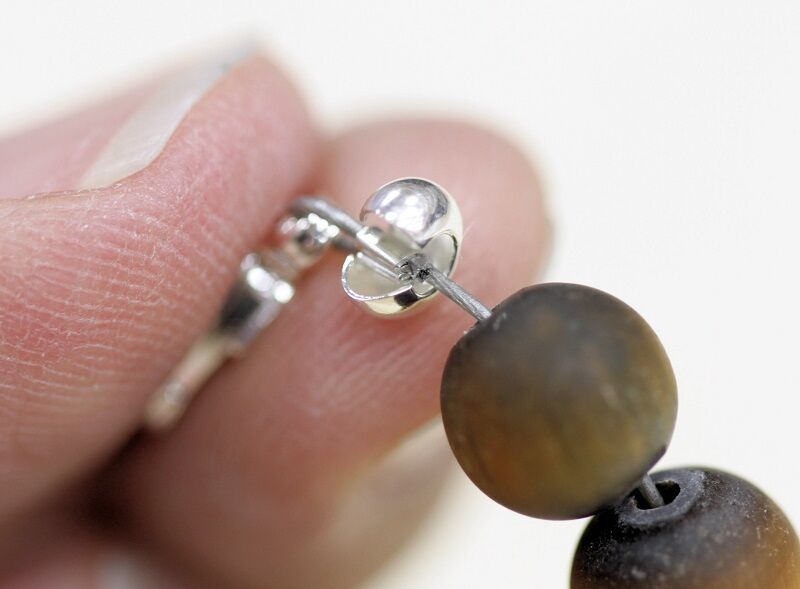
7. Remove the bead stopper from one end. String a crimp onto the wire. Pass the wire through the jump ring and then back down through the crimp.
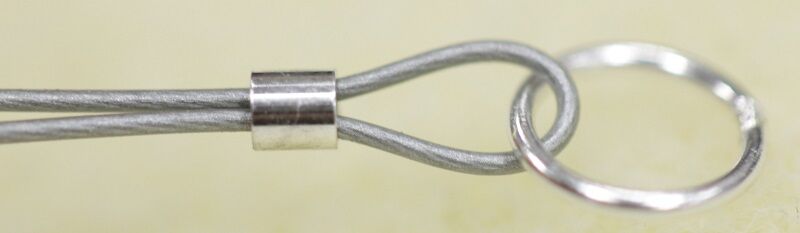
8. Keep the wires parallel to each other and use your crimping skills to close the crimp. Cut off any excess wire.

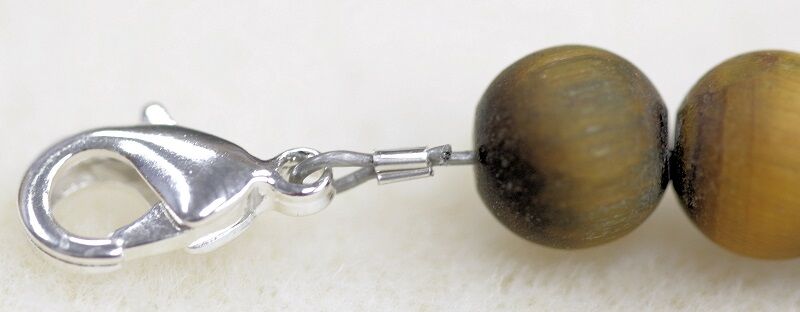
9. Repeat steps 7-8 to attach the trigger clasp on the other end of the bracelet, making sure you leave a little space so you can clasp the bracelet closed.
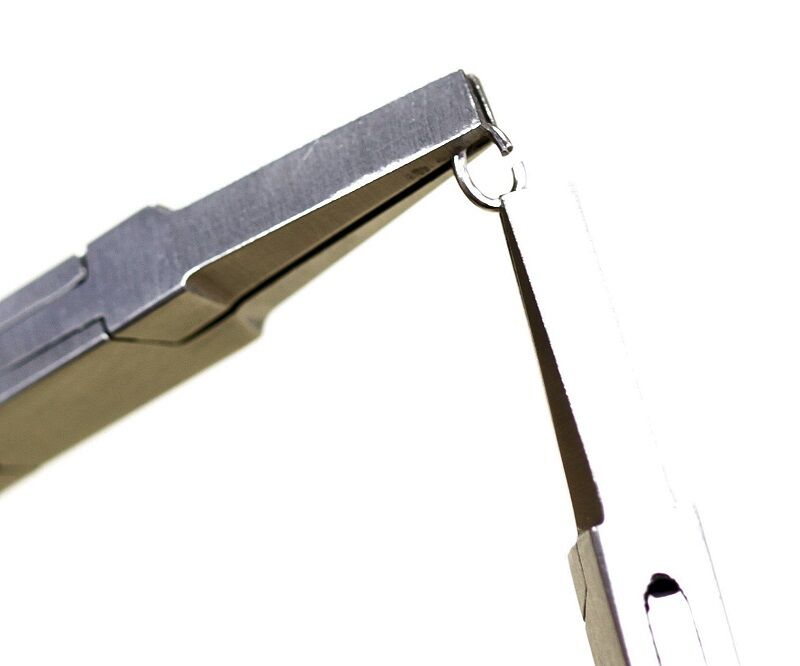
10. Place a crimp cover over one of the crimps.
11. Using needle nose pliers, gently tap the crimp cover.

12. Keep tapping the crimp cover until it is closed.

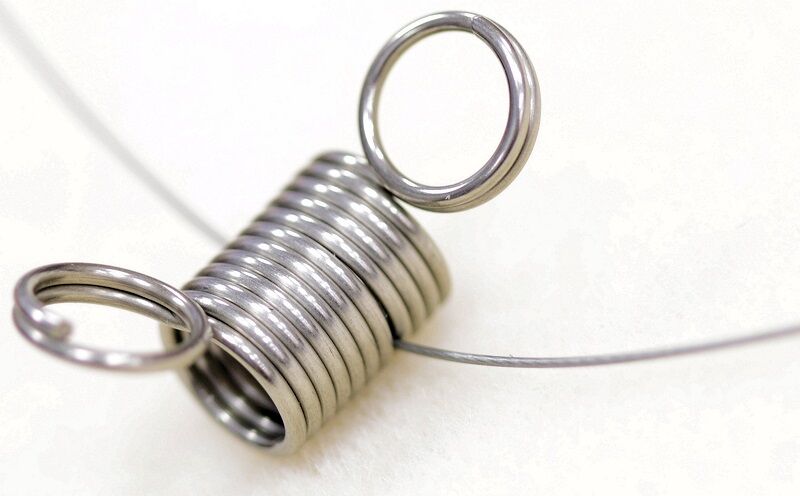
13. With flat nose pliers in each hand, grasp each side of the jump ring opening.
14. To close the jump ring, carefully twist the sides back and forth until you hear the sides click together. Never pull open or push together the sides of the jump ring – always twist back and forth so you do not un-round it.

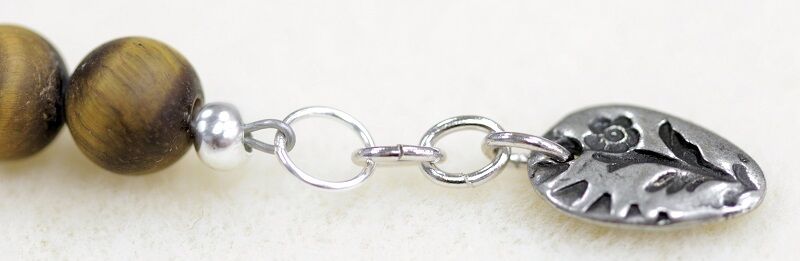
15. Pick up another jump ring with your flat nose pliers. Twist the two sides apart to open the jump ring, then add the jump ring you just closed and the jump ring on the bracelet.

16. Twist to close the jump ring.
17. Pick up your third jump ring with your flat nose pliers. Twist the two sides apart to open the jump ring, then add your charm and the last jump ring on the bracelet.
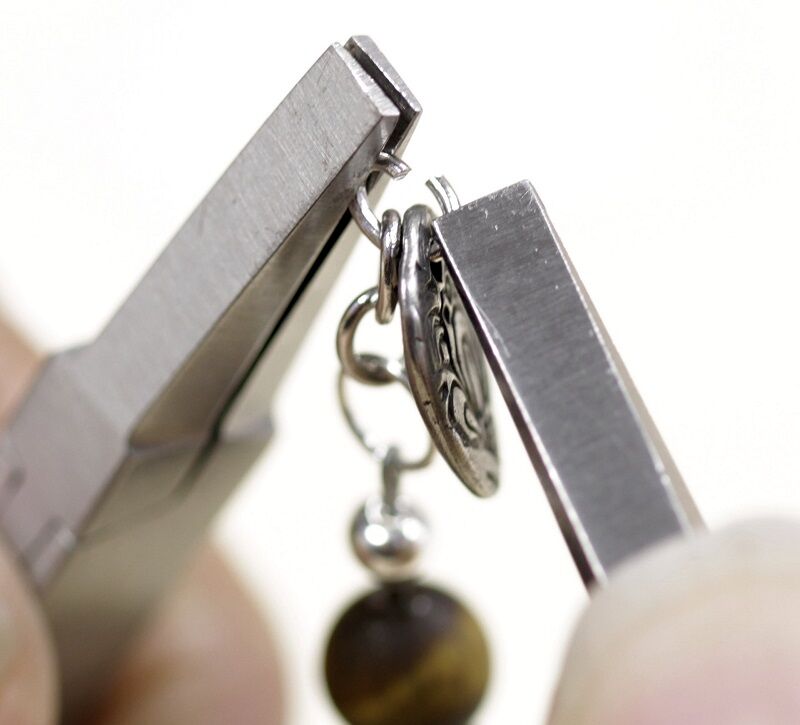
18. Twist to close the jump ring.
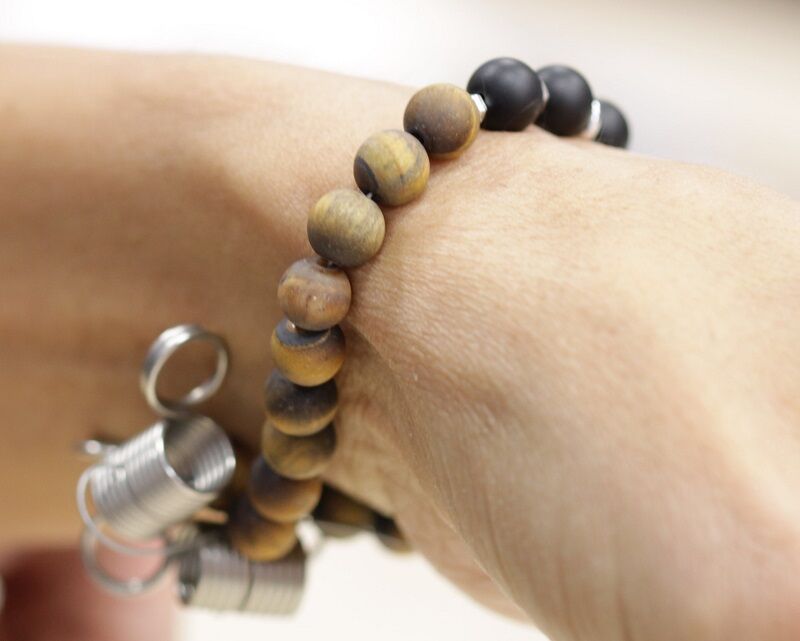
19. Your finished Modern Gemstone Bracelet will look like this:
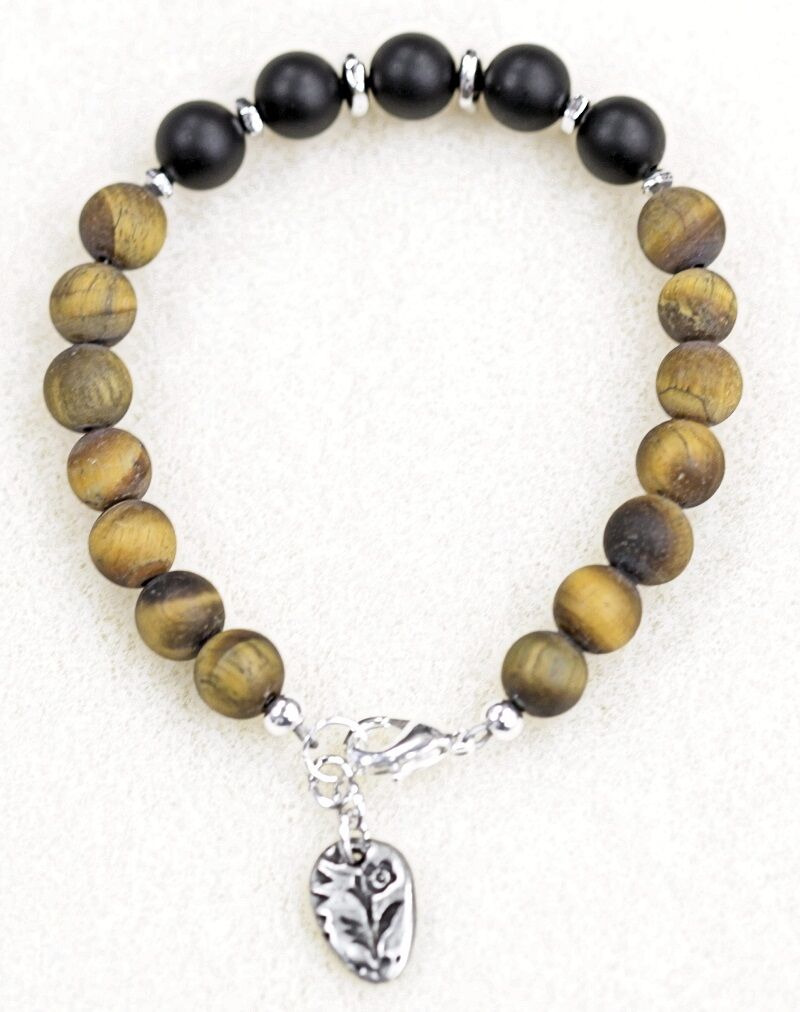
Ta-Da!!! Now you can “rock” your new gemstone bracelet. Check in next month for another bracelet variation using our crimping techniques.
Happy Beading!!
Recent Posts
-

Cherry Blossom Flower 3D Brick Stitch Earrings
Cherry Blossom Flower 3D Brick Stitch EarringsThese earrings use size 11 Delica beads arranged in th …29th Apr 2024 -

"Abalone Sea" Dangle Earrings
"Abalone Sea" Dangle EarringsIn this tutorial, you'll blend delicate design with the luminescent bea …24th Apr 2024 -

"Gem Keeper" Chain Cage Pendant Necklace
"Gem Keeper" Chain Cage Pendant NecklaceNo hole no problem! Keep anything from gems with no holes, b …29th Mar 2024