

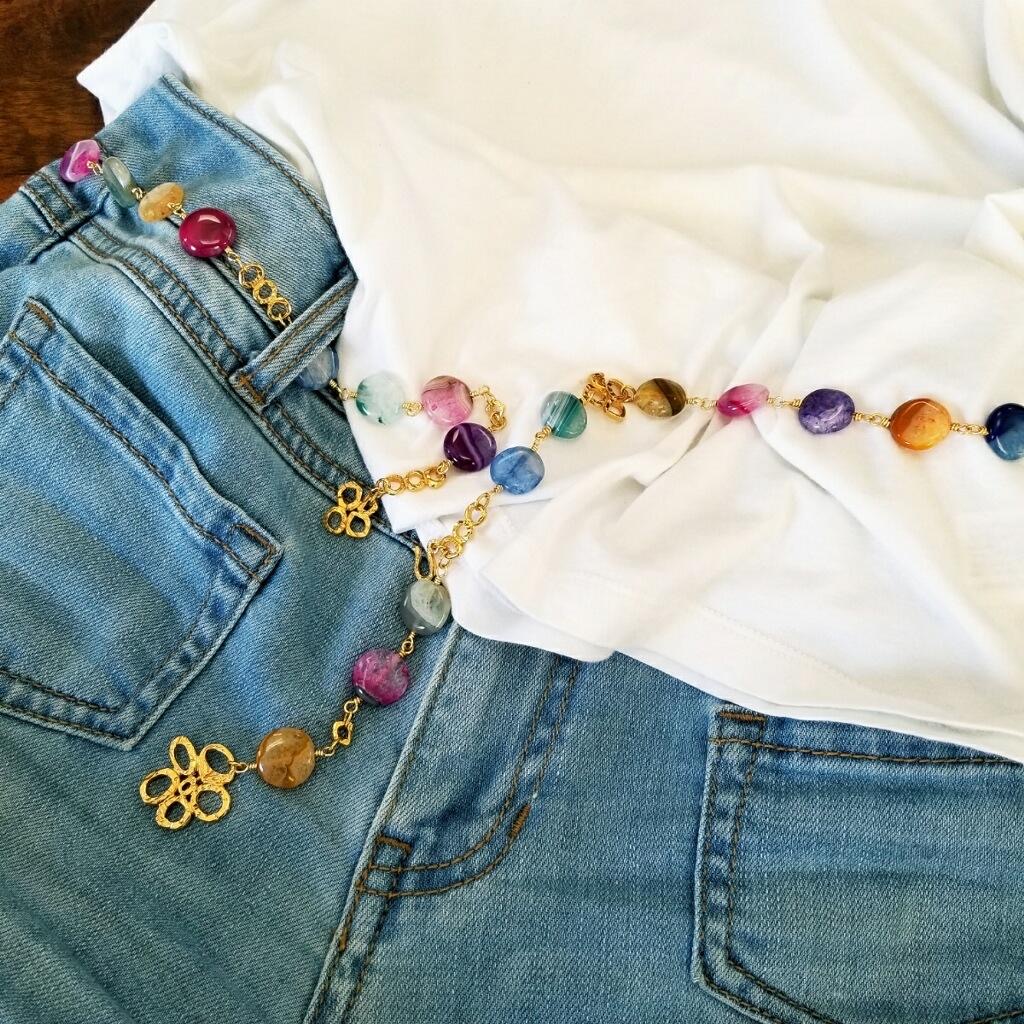
Magic Garden Jewel Tone Gem Chain Necklace/Belt
Magic Garden Jewel Tone Gem Chain Necklace/Belt
Skills needed: Wire wrapping – there are 64 wire wraps in this piece if you follow the pattern and make the same size necklace, this gives you lots of good wire wrapping practice!
Materials Needed:
- Mixed Color 15mm Cracked Agate Coins (32) * This is approx. 1 ½ strands
- 22g Gold Craft Wire
- TierraCast:
- 5 Ring Links Bright Gold Plated - (Flower) (1)
- 4 Ring Links Bright Gold Plated – (Flower) (3)
- 3 Ring Bar Bright Gold Plated - (4)
- 1 Ring Bright Gold Plated – (5)
- Hammered Hook & Eye Gold Plated (1)
- Medium Oval Jump Rings Gold Plated (25)
Finished Length 39” * You can adjust this pattern to make to your desired Length
Tools Required
Optional:
Large Bead Board
Sharpie
Key Code for Beads: If you have a bead board you can lay the beads in correct sequence before wire wrapping, a bead mat will also work.
A = Agate Coins TC5 = Tierra Cast 5 Ring Links TC4 = Tierra Cast 4 ring Links TC3 = Tierra Cast 3 Ring Bar TC1 = Tierra Cast 1 Ring JR = Jump Ring
Instructions on Construction:
1. Cut (32) 3” sections of craft wire (one for each coin that is going to form a wire wrapped segment).
2. *In this necklace I have wire wrapped one coin segment directly into the next coin segment, but if there is a TierraCast link in between, I have made a “closed wrap” coin segment and then attached it to the TierraCast link with a jump ring, this makes for a flexible free flowing necklace.
3. Starting at the 5-petal flower end this is the layout: TC5 (1), JR (1), A (1), JR (1), TC1 (1), JR (1), A (2), JR (1), TC3 (1), JR (1), A (2), JR (1), TC4 (1), JR (10), A (13), JR (1), TC3 (1), JR (1), A (3), JR (1), TC1 (1), JR (1), A (1), JR (1), TC1 (1), JR (1), A (1), JR (1), TC1 (1), JR (1), A (1), JR (1), TC4 (1), JR (1), A (4), JR (1), TC3 (1), JR (1), A (3), JR (1), TC1 (1), JR (1), A (1), JR (1), TC3 (1), JR (3), TC4 (1)
4. Before you start wire wrapping determine the size you want for your loops, then take a sharpie and put a guide line on your round nose pliers (on both top and bottom prong), you can use this mark as a guide each time you form a loop then you will have consistent sizing throughout your necklace.
5. Take you first section of wire and form your wire wrapped segment with the coin centered in the middle. * The best way to get an equal number of wraps on either side of the coin is to start by making the loop on the first side and only do one wrap (just to give it a little structure), then start on the other end and form the second loop, and do one wrap. Now you can alternate wrapping on either side of the coin so that you have an equal number of wraps on each side.
6. Connect this segment to the 5-petal flower with a jump ring (using your needle nose and flat nose pliers). On the other side of coin use a jump ring to connect to the TC1.
* If you have your beads laid out in the correct sequence it will make it easy for you to know if you are using a jump ring to connect sections (which is any time you are attaching to a TierraCast link).
** Any time there is a string of agate coins you will connect one section into the next, so do not forget to connect loops before you finish wire wrapped coils!
***If you still need clarification take a quick look at photo.
7. Work your way down the length of the chain and remember to try on for size as you proceed, you may find that you want to alter the length.
8. When you have reached desired length use your flat and needle nose pliers to undo the jump ring that holds the hook and eye clasp together (you will only be using the hook part for this project). Using a jump ring attach the hook to the bottom hole in the first TC3 link. This will give a 5” dangle when you fasten into your desired position along the chain.
* Option: You could also place this hook into one of the other TC Links if you wish to alter the length of the dangle. I do suggest that you attach it to one of the TC links though and NOT a wire wrapped loop as this will be a stronger point of attachment.
9. Now it’s time for the fun, if you have kept this necklace long you will be able to hook into any of the TierraCast links which will give a variety of looks & you could also loop it around your waist and wear as a belt. Take a moment to admire your handiwork.
10. Enjoy!
Jewelry Designed by Steph Stirniman at magpiecollectives.com
Recent Posts
-

"Abalone Sea" Dangle Earrings
"Abalone Sea" Dangle EarringsIn this tutorial, you'll blend delicate design with the luminescent bea …24th Apr 2024 -

"Gem Keeper" Chain Cage Pendant Necklace
"Gem Keeper" Chain Cage Pendant NecklaceNo hole no problem! Keep anything from gems with no holes, b …29th Mar 2024 -

Layered Beaded Charm Necklaces
Layered Beaded Charm NecklacesLayered necklaces are a fashion staple that adds depth and dimension t …26th Feb 2024