

Wire Crochet Cuff Bracelet Tutorial
Wire Crochet Cuff Bracelet Tutorial
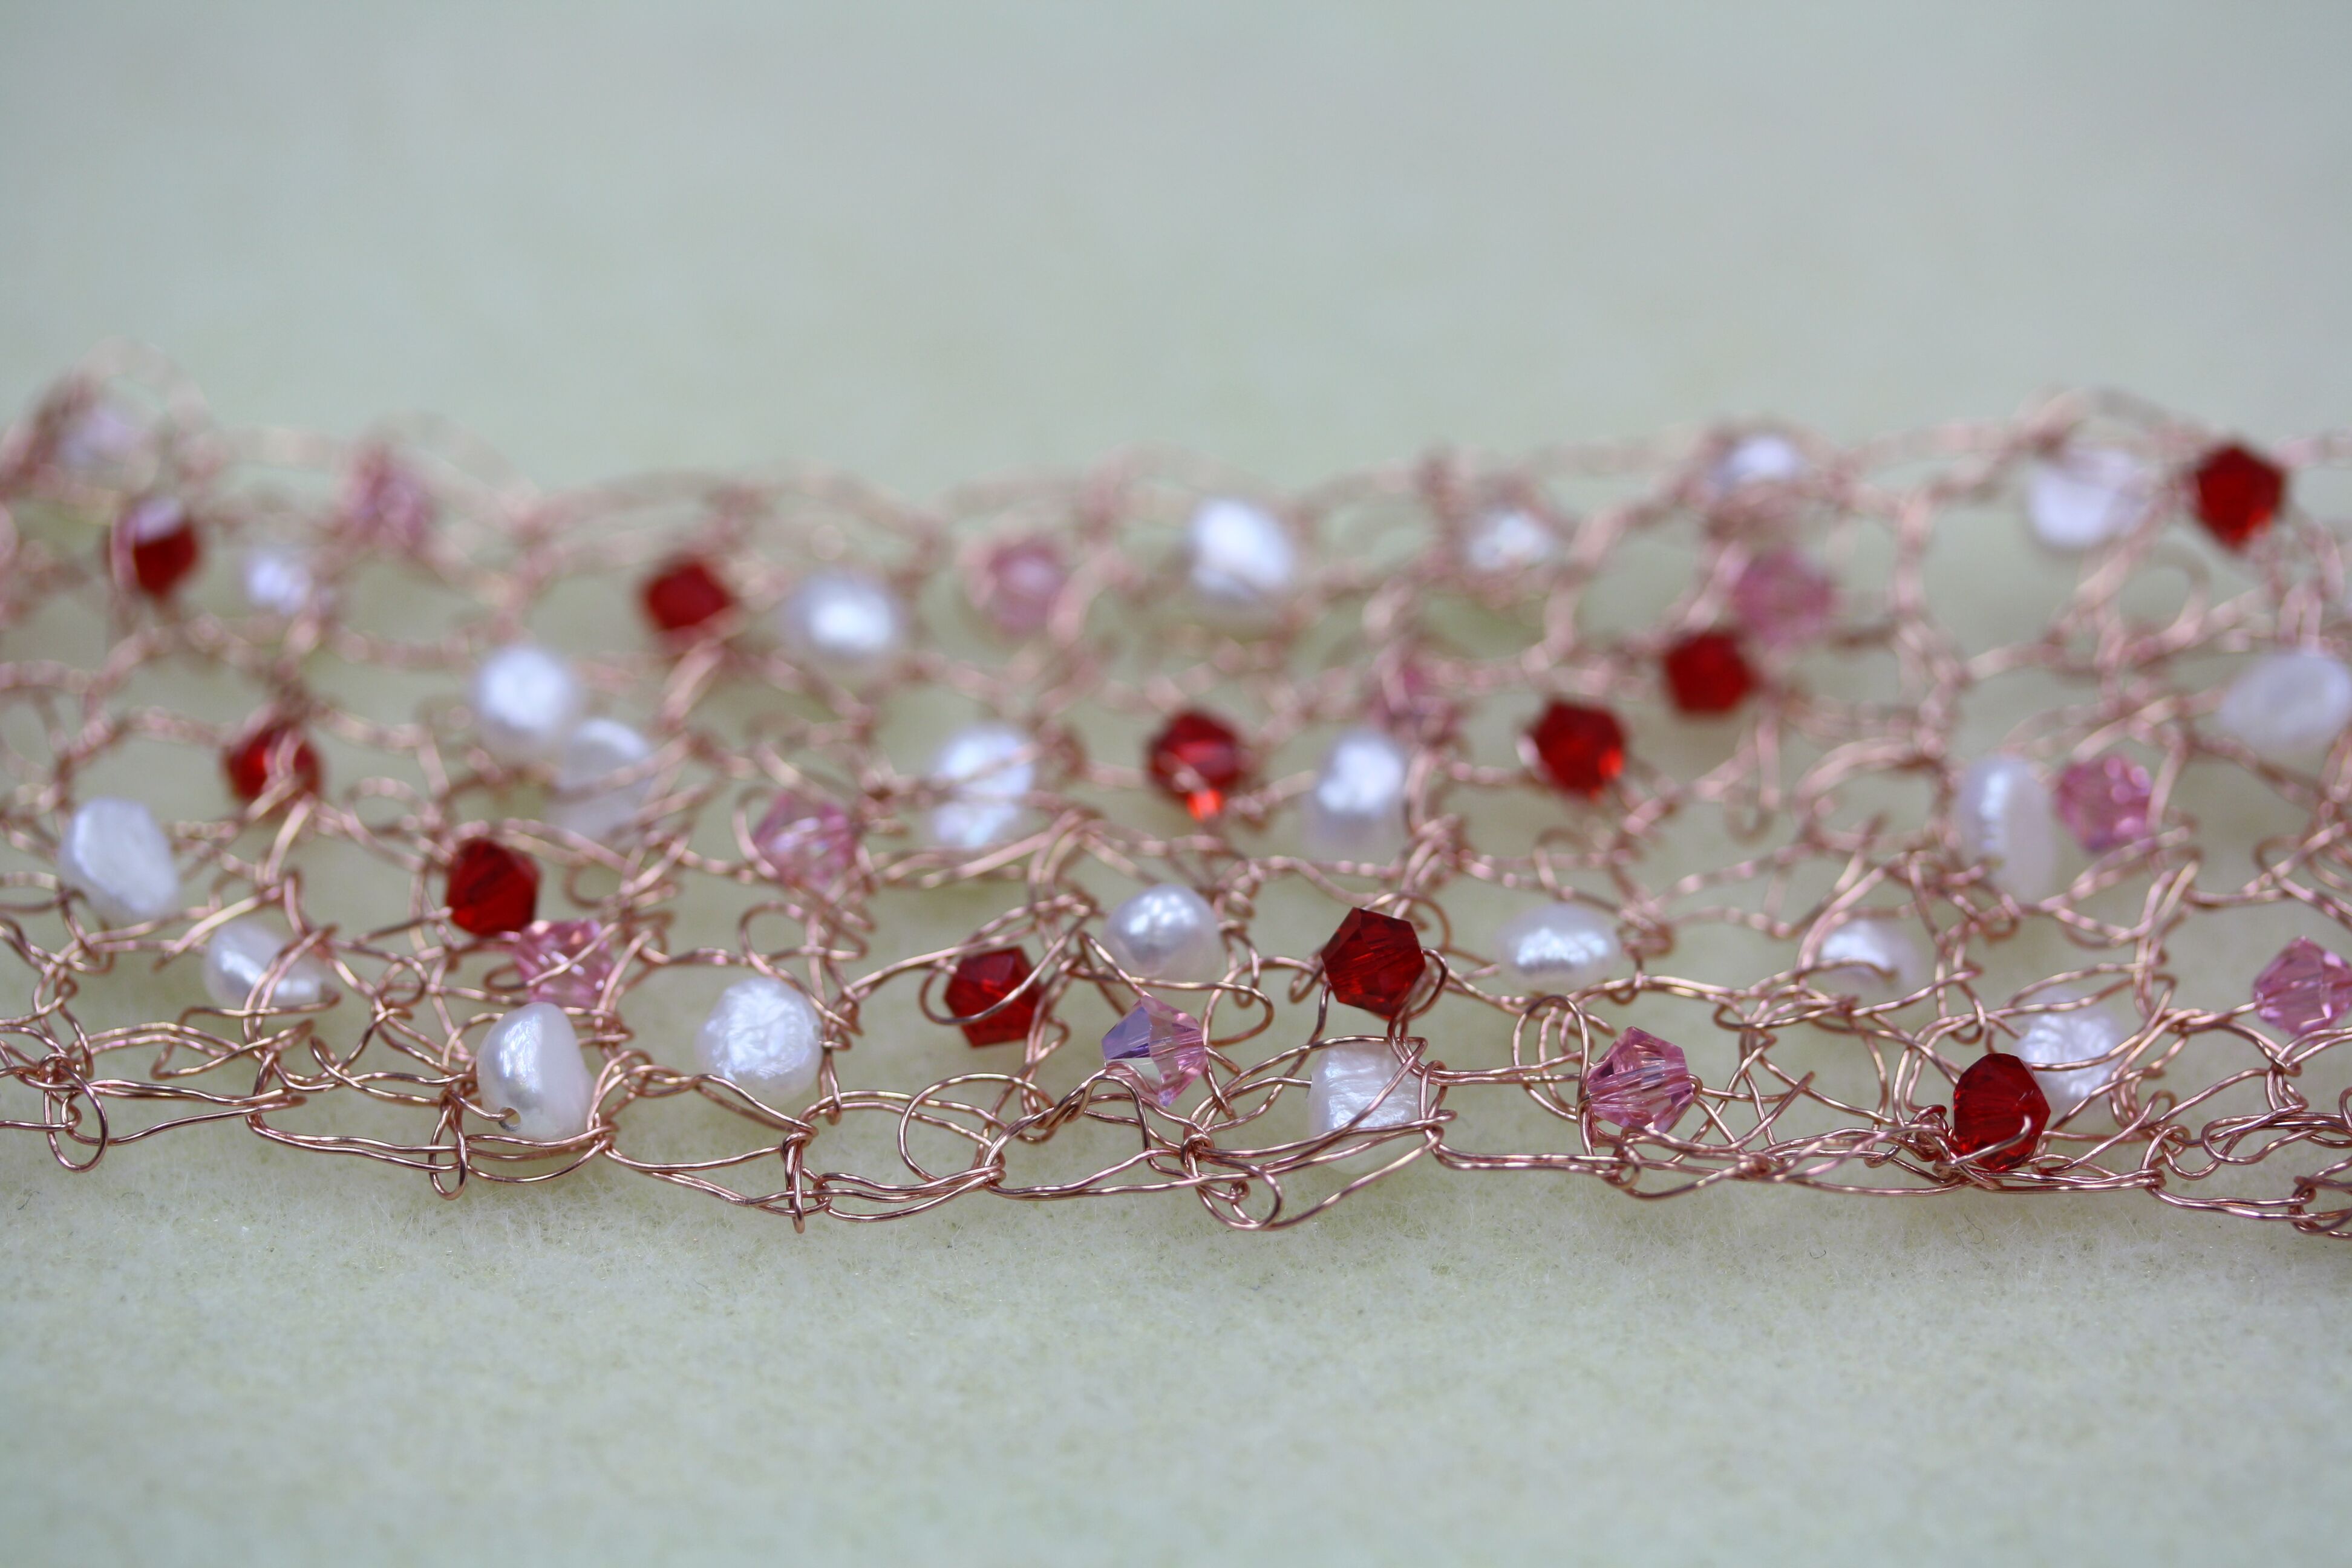
Yet another fabulous wire crochet jewelry project, our Wire Crochet Cuff takes wire crochet up a level by adding in single crochet stitch. This turns the piece into a rectangle that makes a beautiful cuff bracelet. You will need to know how to do single crochet to complete this project. Just as with other wire crochet, this is an ideal jewelry project to take with you on your travels — string your beads on your spool of wire before you go and tie your slip knot. Then all the beads are trapped onto the wire. All you have to do is grab the spool of wire with the beads, your tools, and a clasp and you’re good to go!!
.
.
You will need:
28 gauge wire – craft wire or a tarnish resistant wire is preferred
4-5mm freshwater pearls (16″ strand)
4mm Swarovski bicones (56)
4-6 strand slide clasp (1)
Crochet hook – G or H is preferred
Wire cutters
.
1. Lay out all of your beads in piles, alternating crystals, pearls, crystals, pearls.
 .
.
2. String all of the beads onto the 28 gauge wire. Keep the wire on the spool and DO NOT cut the wire off! This will take a while.
 .
.
3. Leaving a 12 inch tail, form a slip knot at the end of the 28 gauge wire.
 .
.
4. Crochet a chain of eight stitches to match the width of your slide clasp. If you want your bracelet to be narrower, choose to start with a smaller slide clasp and fewer stitches. Keep the stitches loose enough to easily slide over the crochet hook. Remember, wire doesn’t stretch like yarn.
 .
.
5. Turn the piece and begin crocheting the second row. Single crochet one stitch. (Do not add the typical “chain up” stitch, as it is not needed. Simply single crochet into the first available chain.) On the next stitch, slide one bead up the wire.
 .
.
6. Pass the crochet hook into the empty chain stitch.

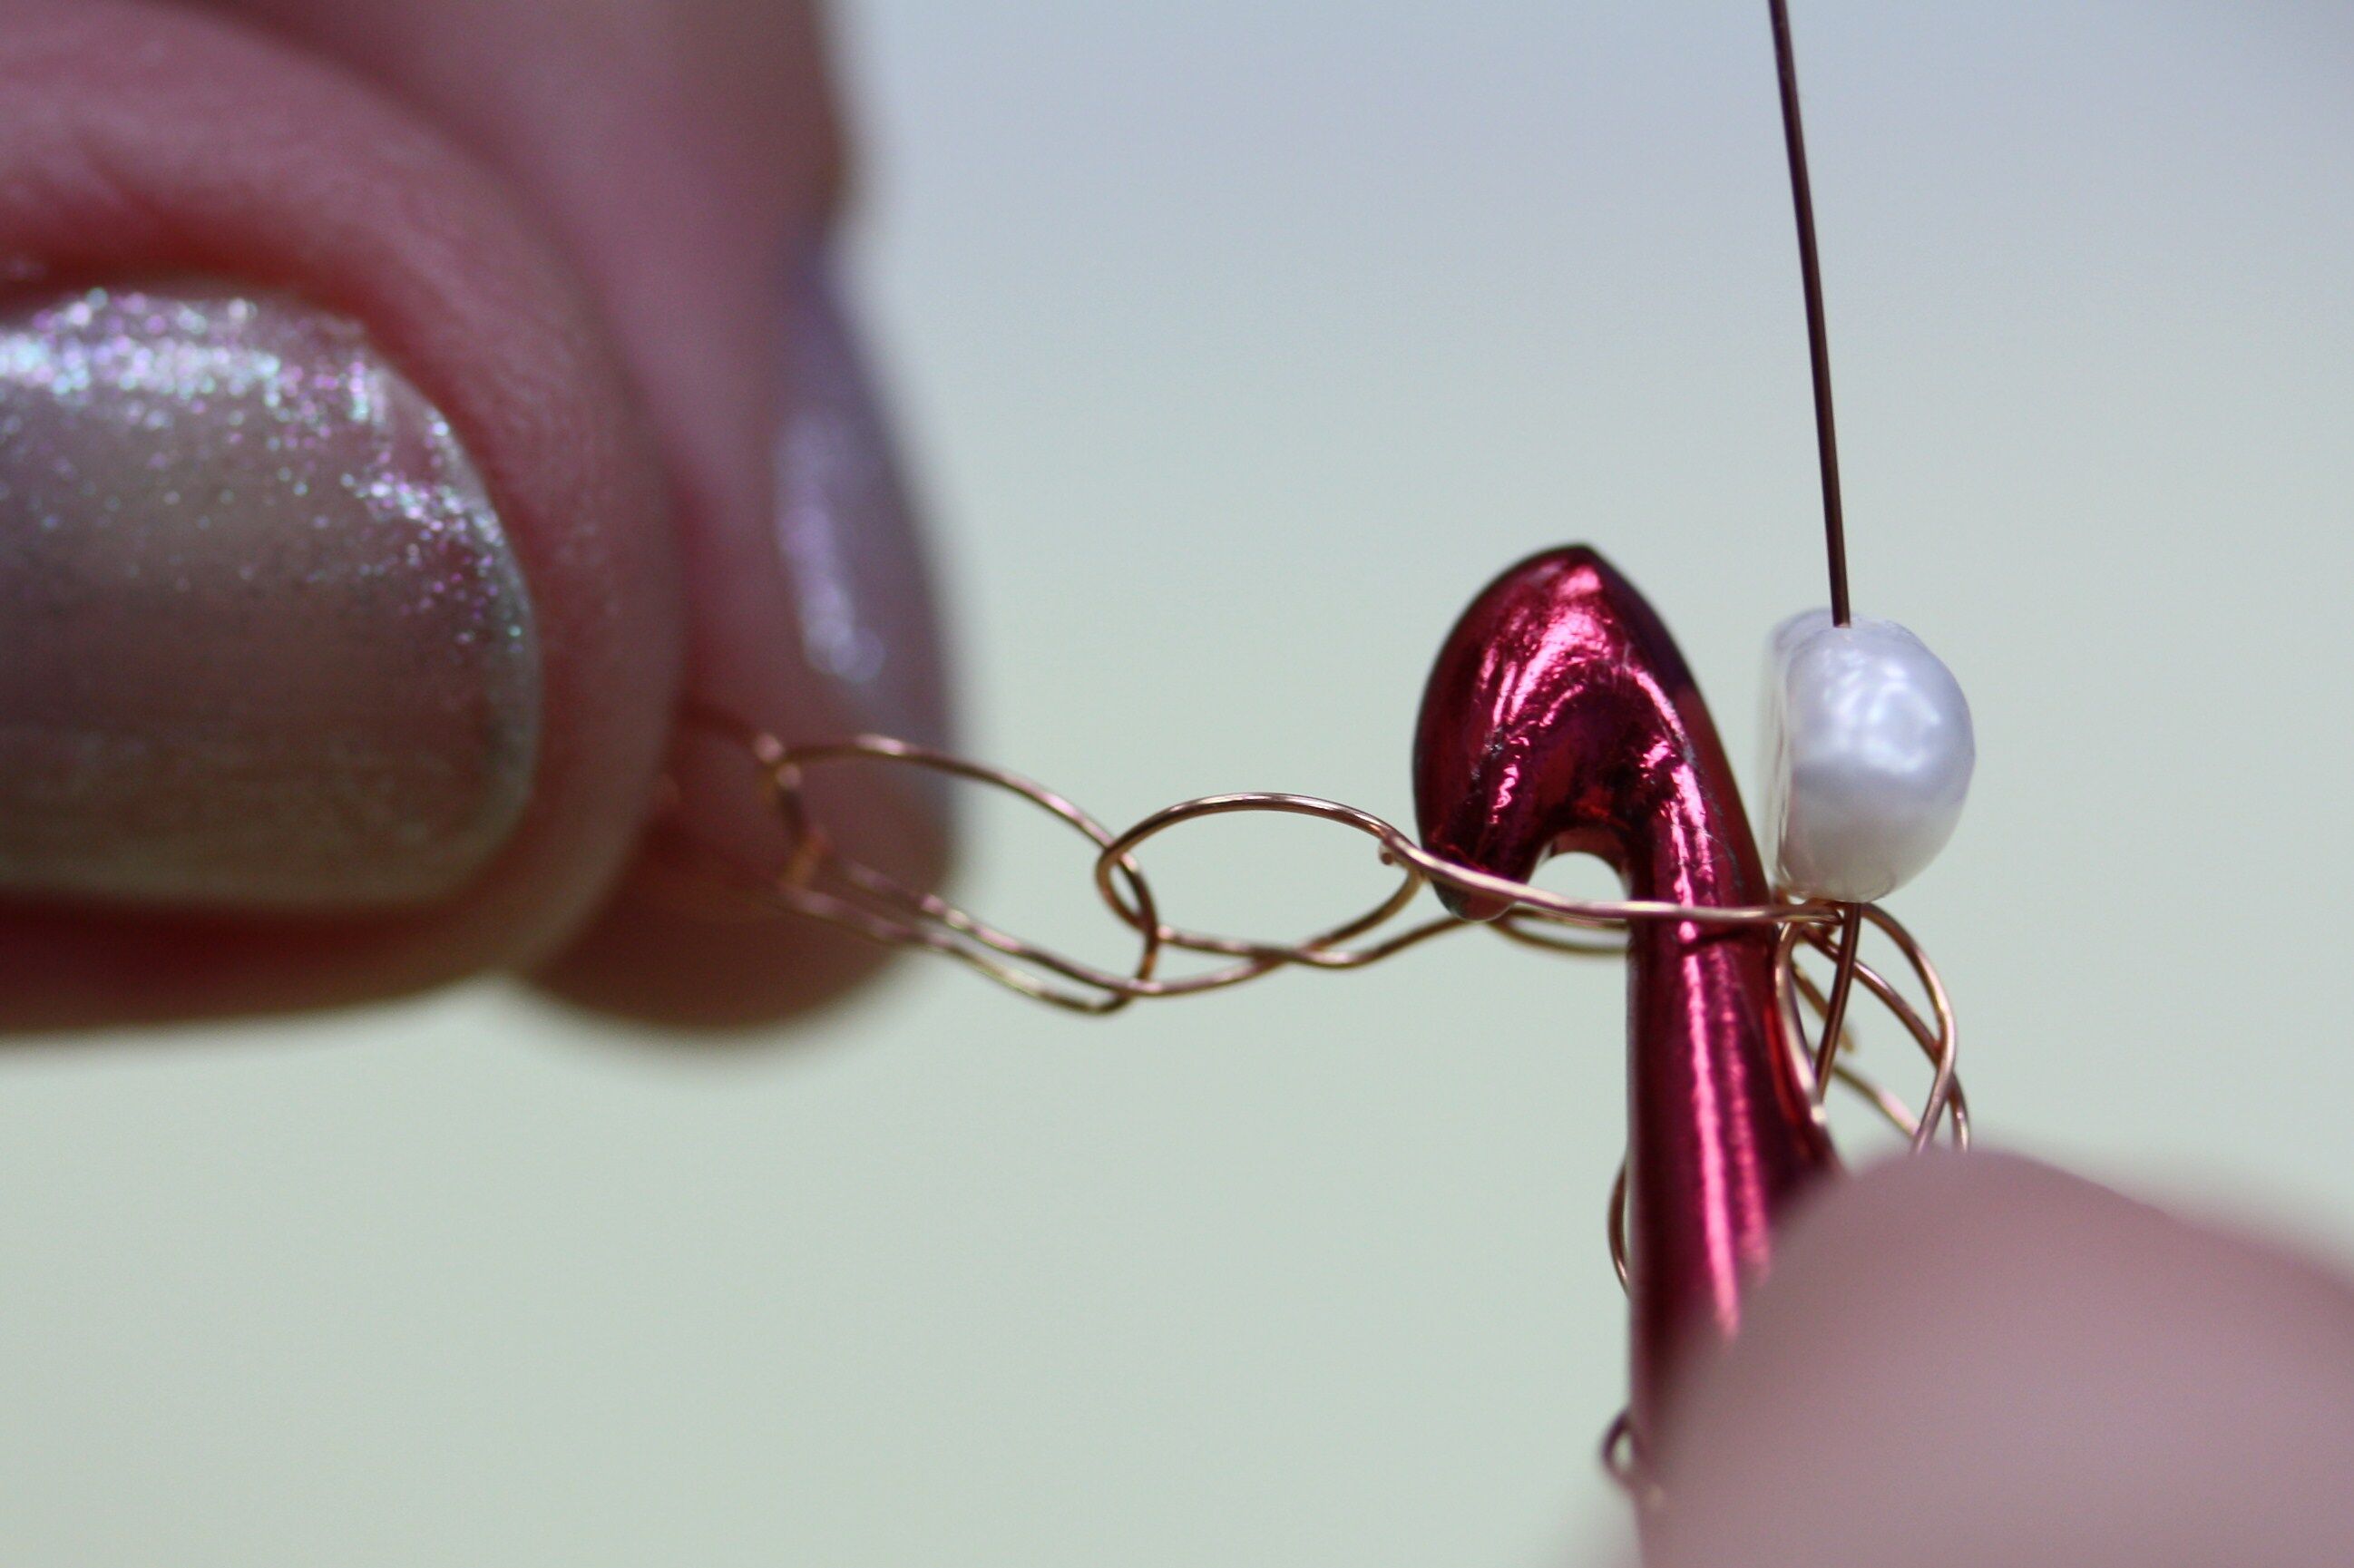 .
.
7. Wrap the spool end of the wire around the crochet hook.
 .
.
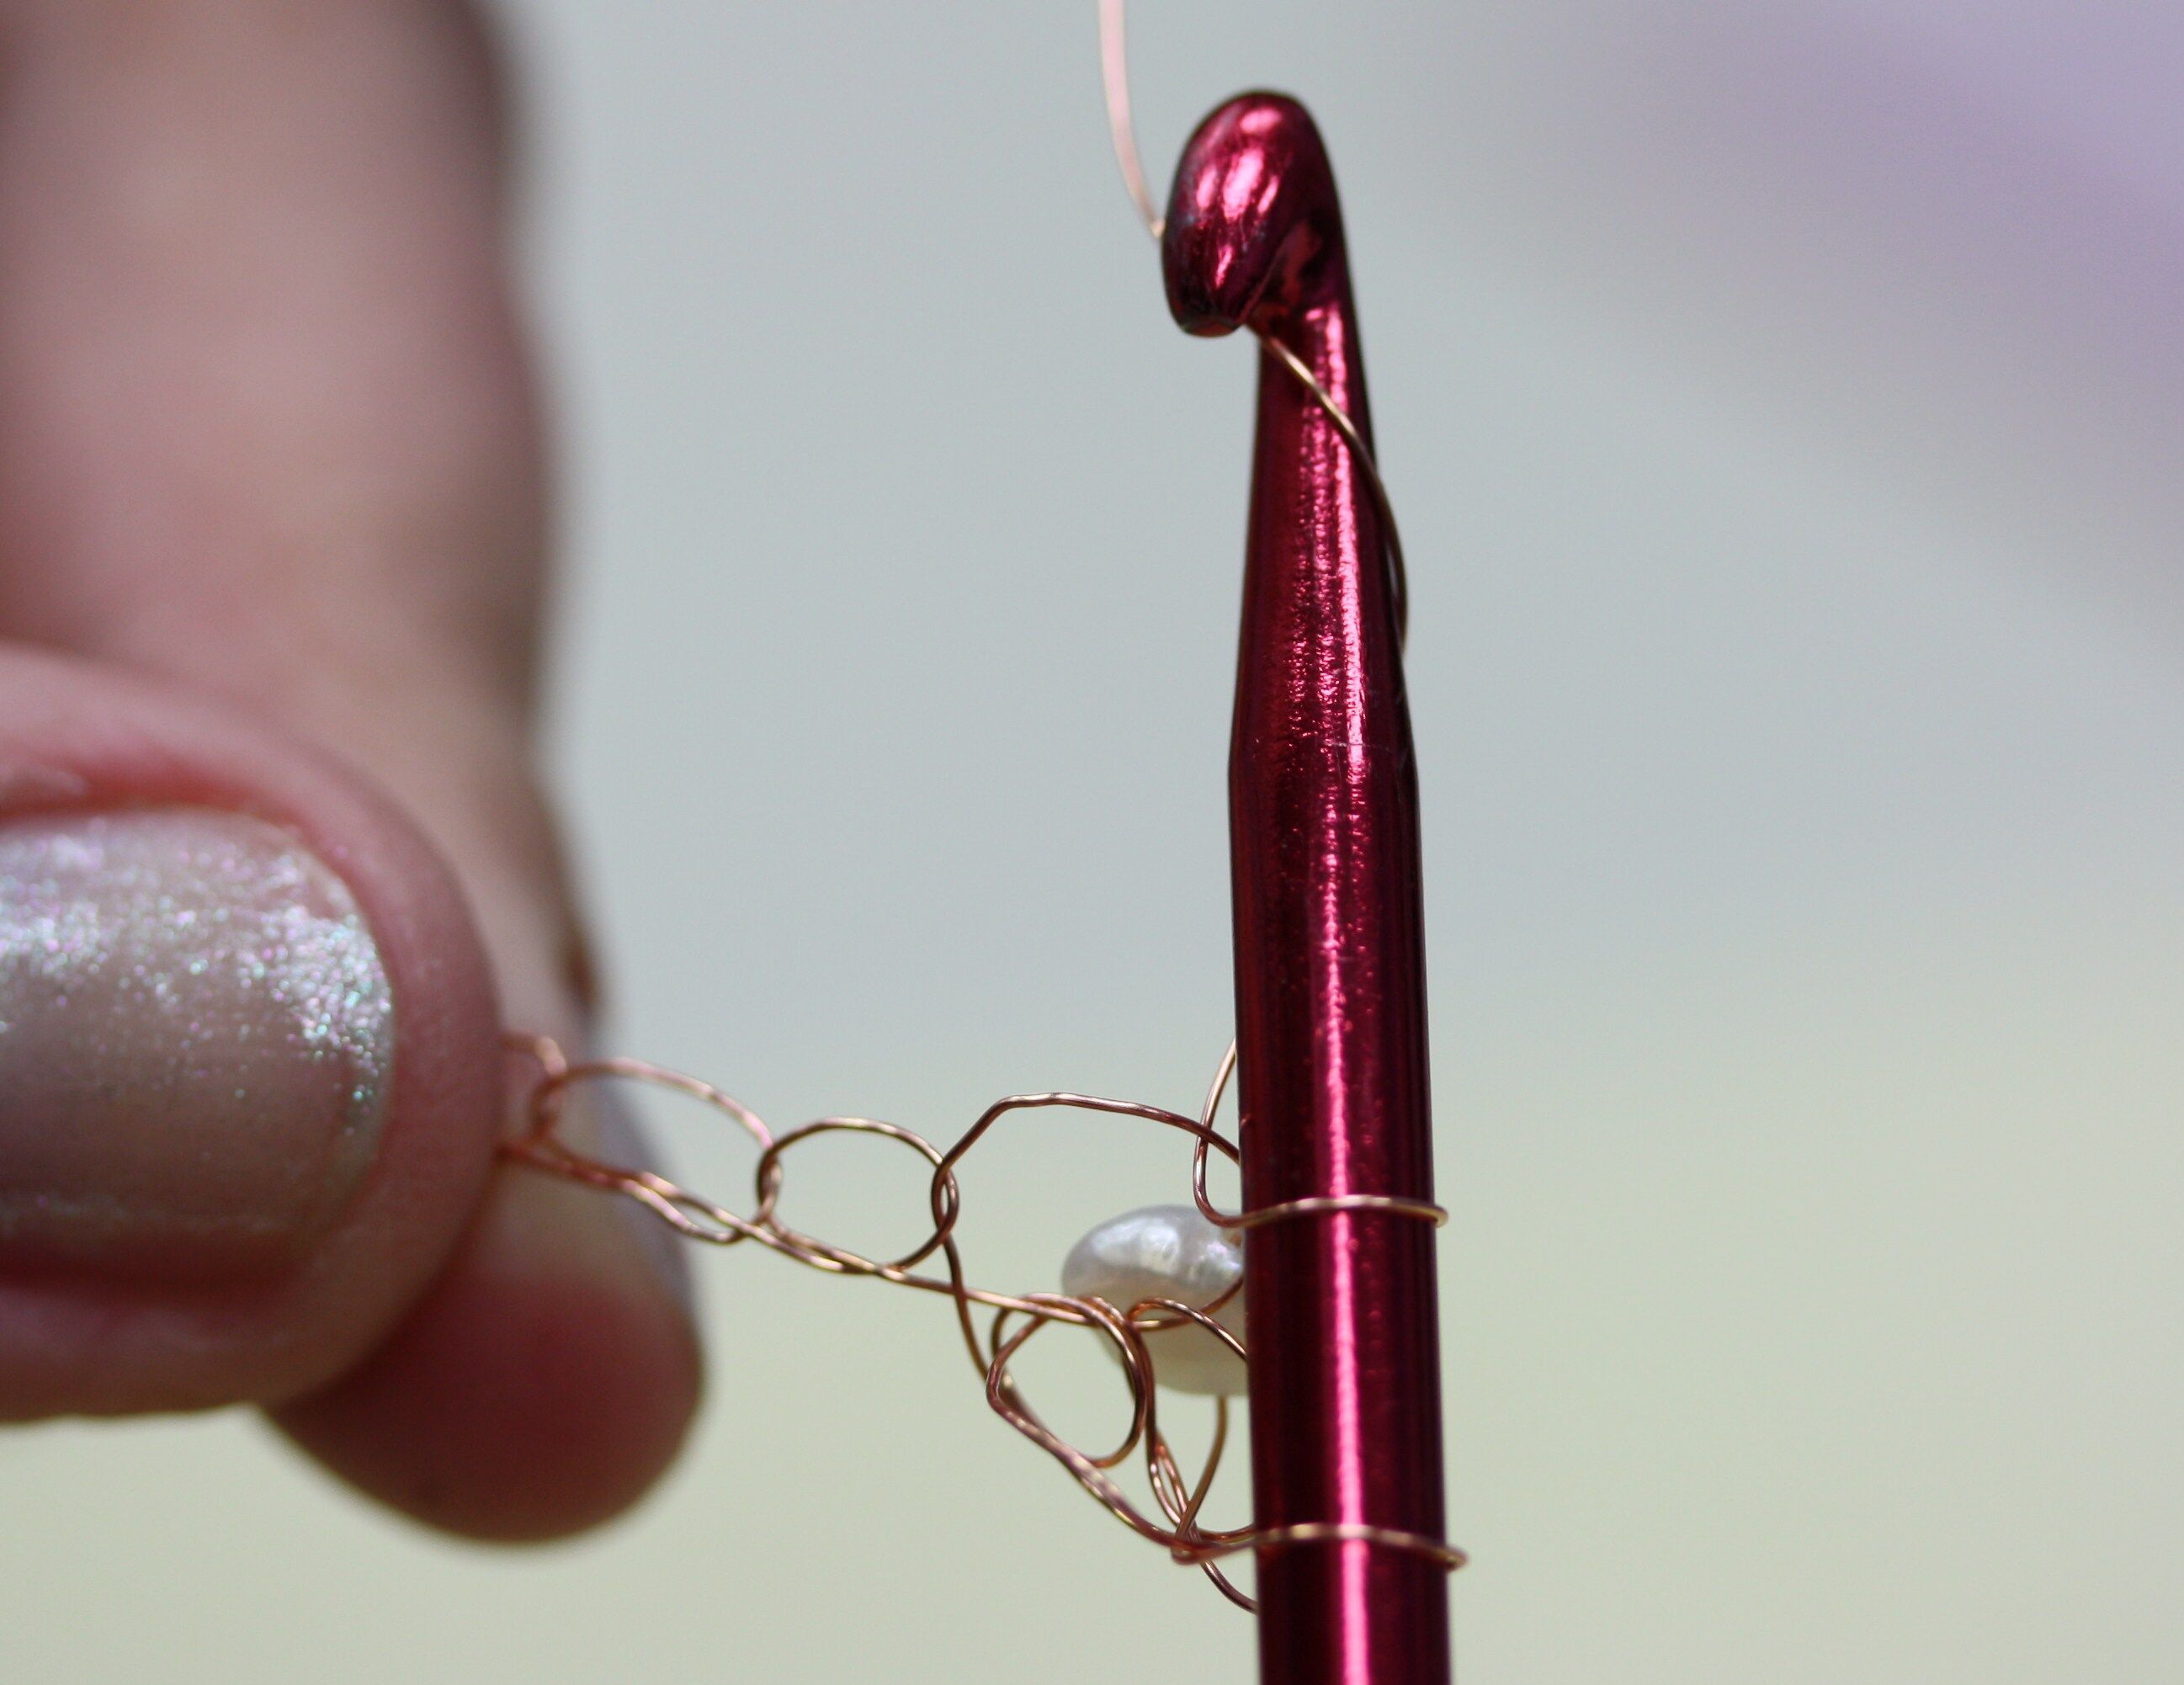
8. Twist the crochet hook, catching the wire on the hook, and pull it through the loop. The bead will be captured in the chain stitch, and there will be two loops on your crochet hook.
 .
.
9. Wrap the wire around the crochet hook again.

 .
.
10. Pull the wire through both loops to complete your single crochet stitch.
 .
.
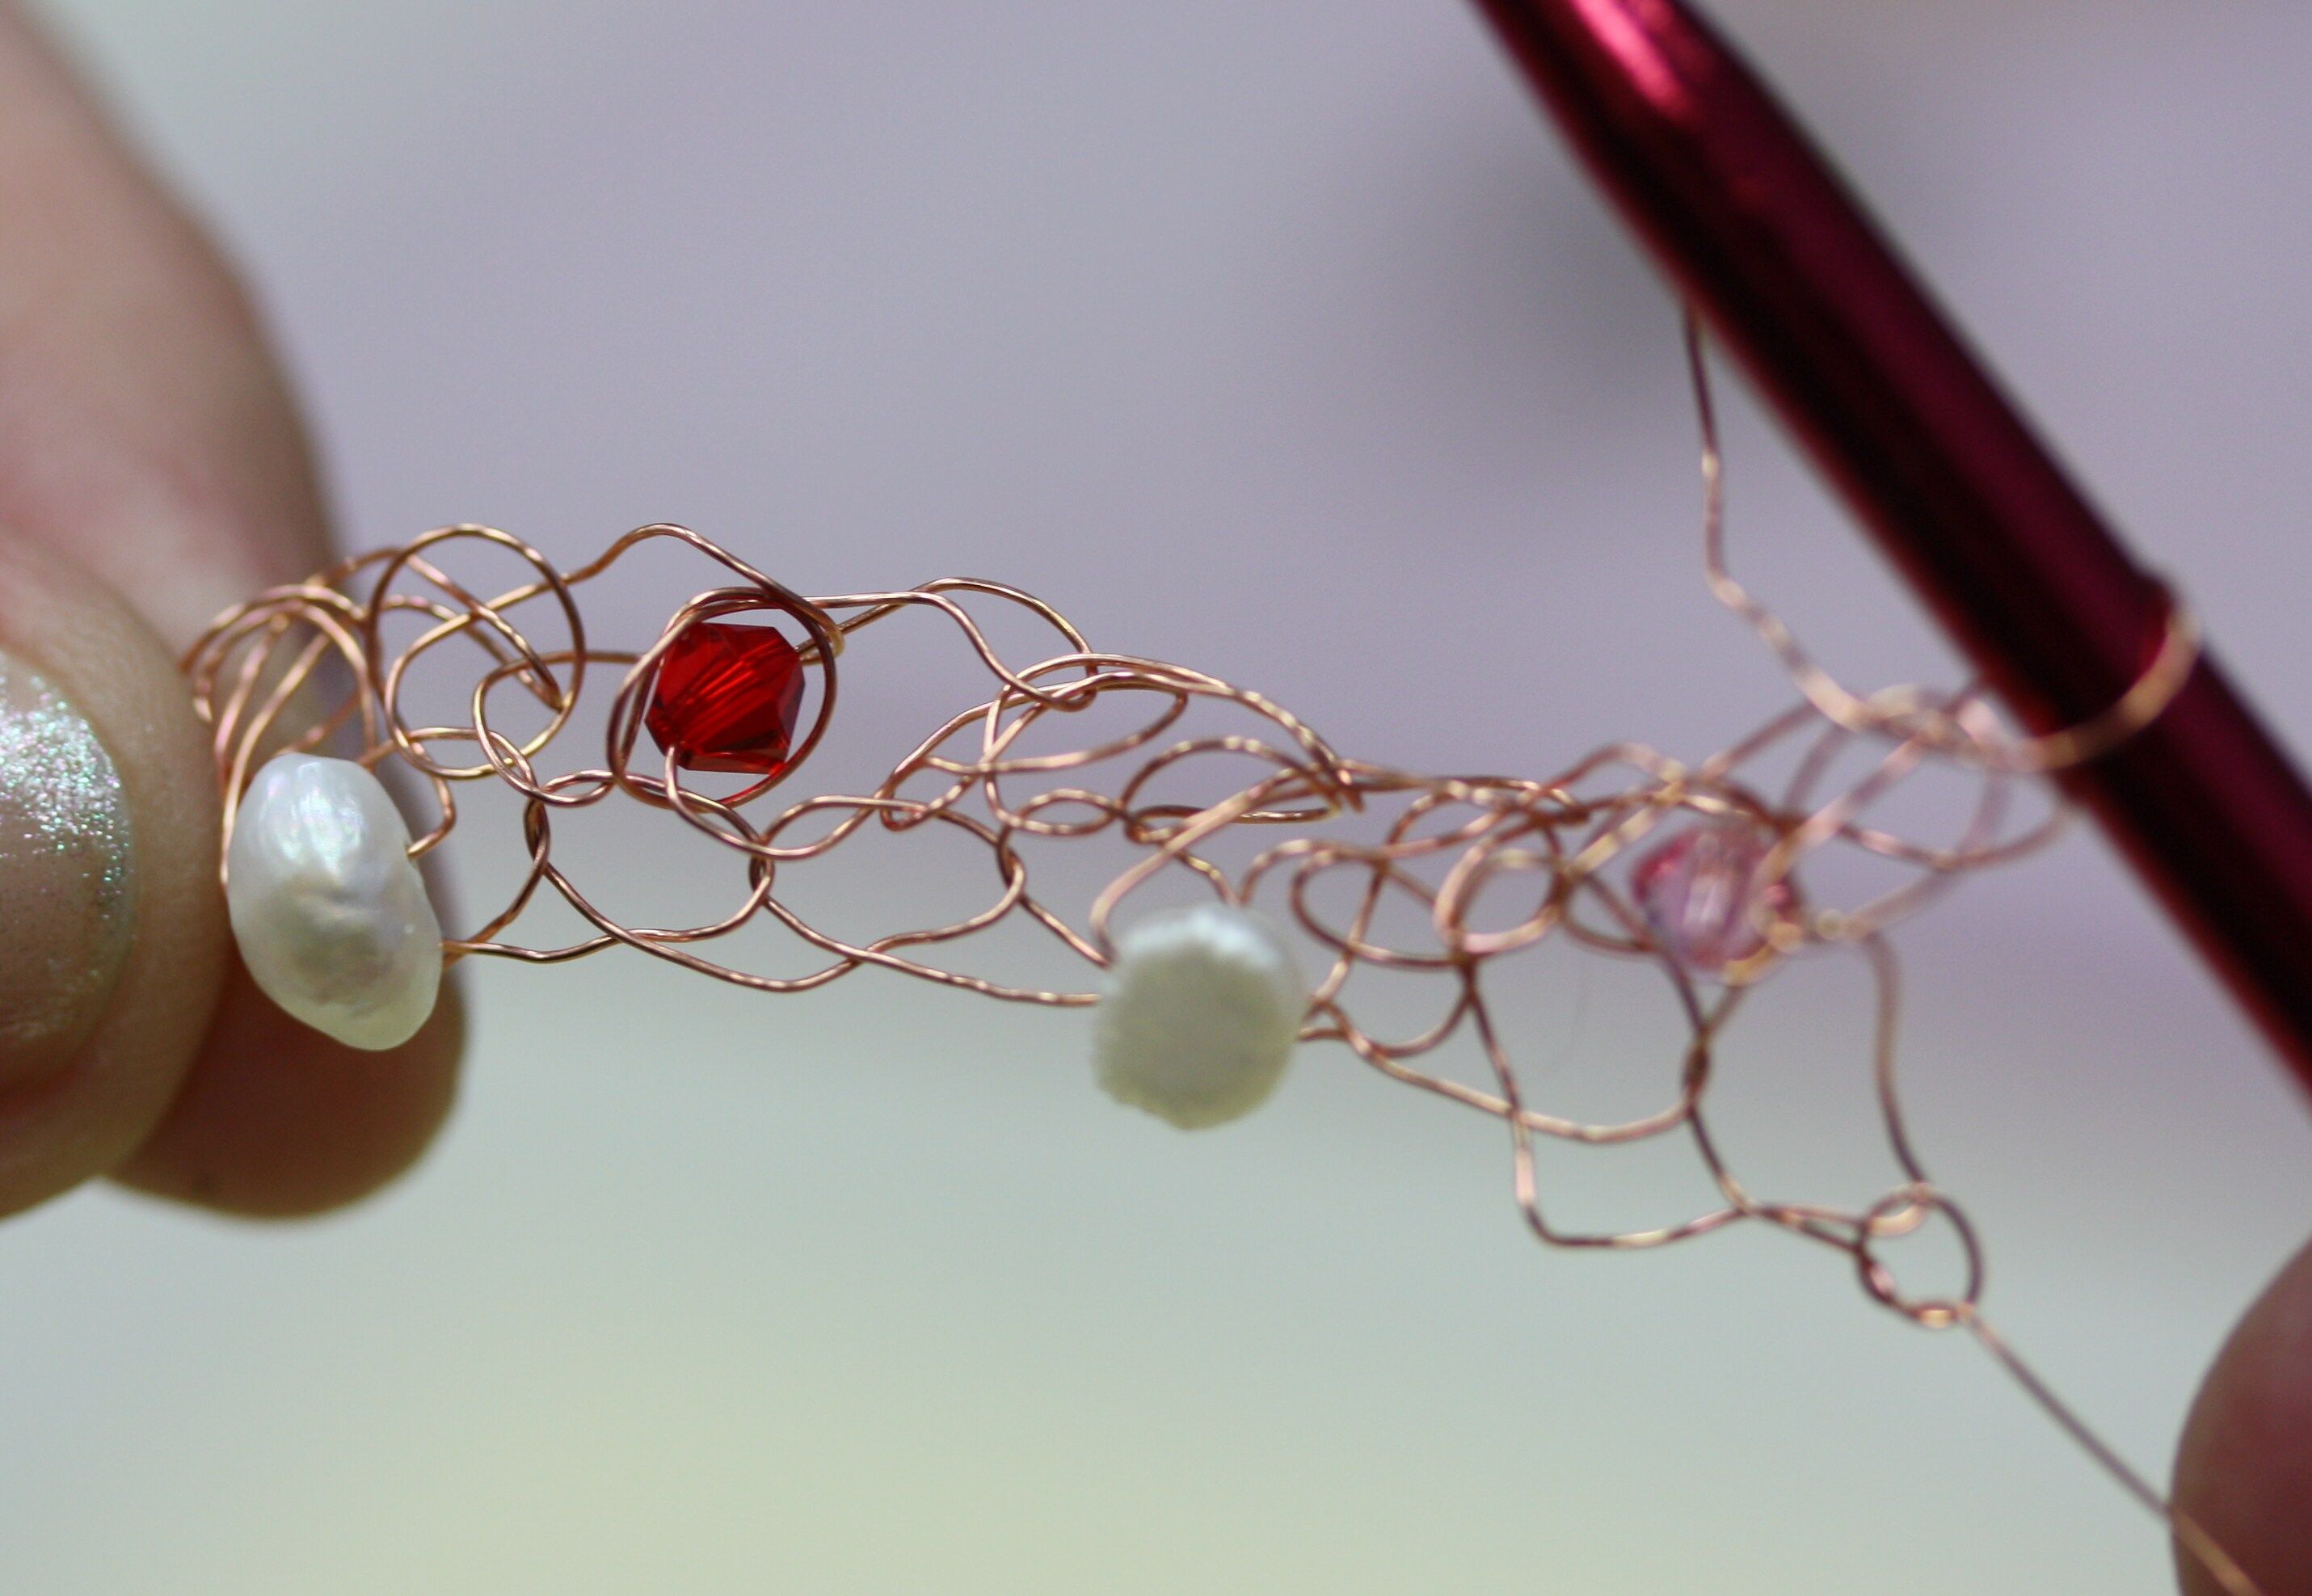
11. Continue crocheting, sliding a bead up approximately every third stitch.
 .
.
12. Continue crocheting until every stitch on the original chain is filled.

 .
.
13. Turn the piece over.
 .
.
14. Continue stitching the next row. It is sometimes helpful to use the crochet hook to “open up” the stitches, making it easier to find the correct place to locate each stitch. You may find that you want to add beads in specific places to fill empty spaces. Each bracelet will be different.
 .
.
15. Continue turning the piece and crocheting rows until the bracelet is the desired length – usually 6 to 8 inches. When selecting your length, be sure to factor in ½ inch for your clasp. Cut off the wire about 12 inches away from the bracelet. Pass the wire through the last stitch on the bracelet and pull it tight to secure.
.
16. Pass the tail of the wire through the first loop on the slide clasp..
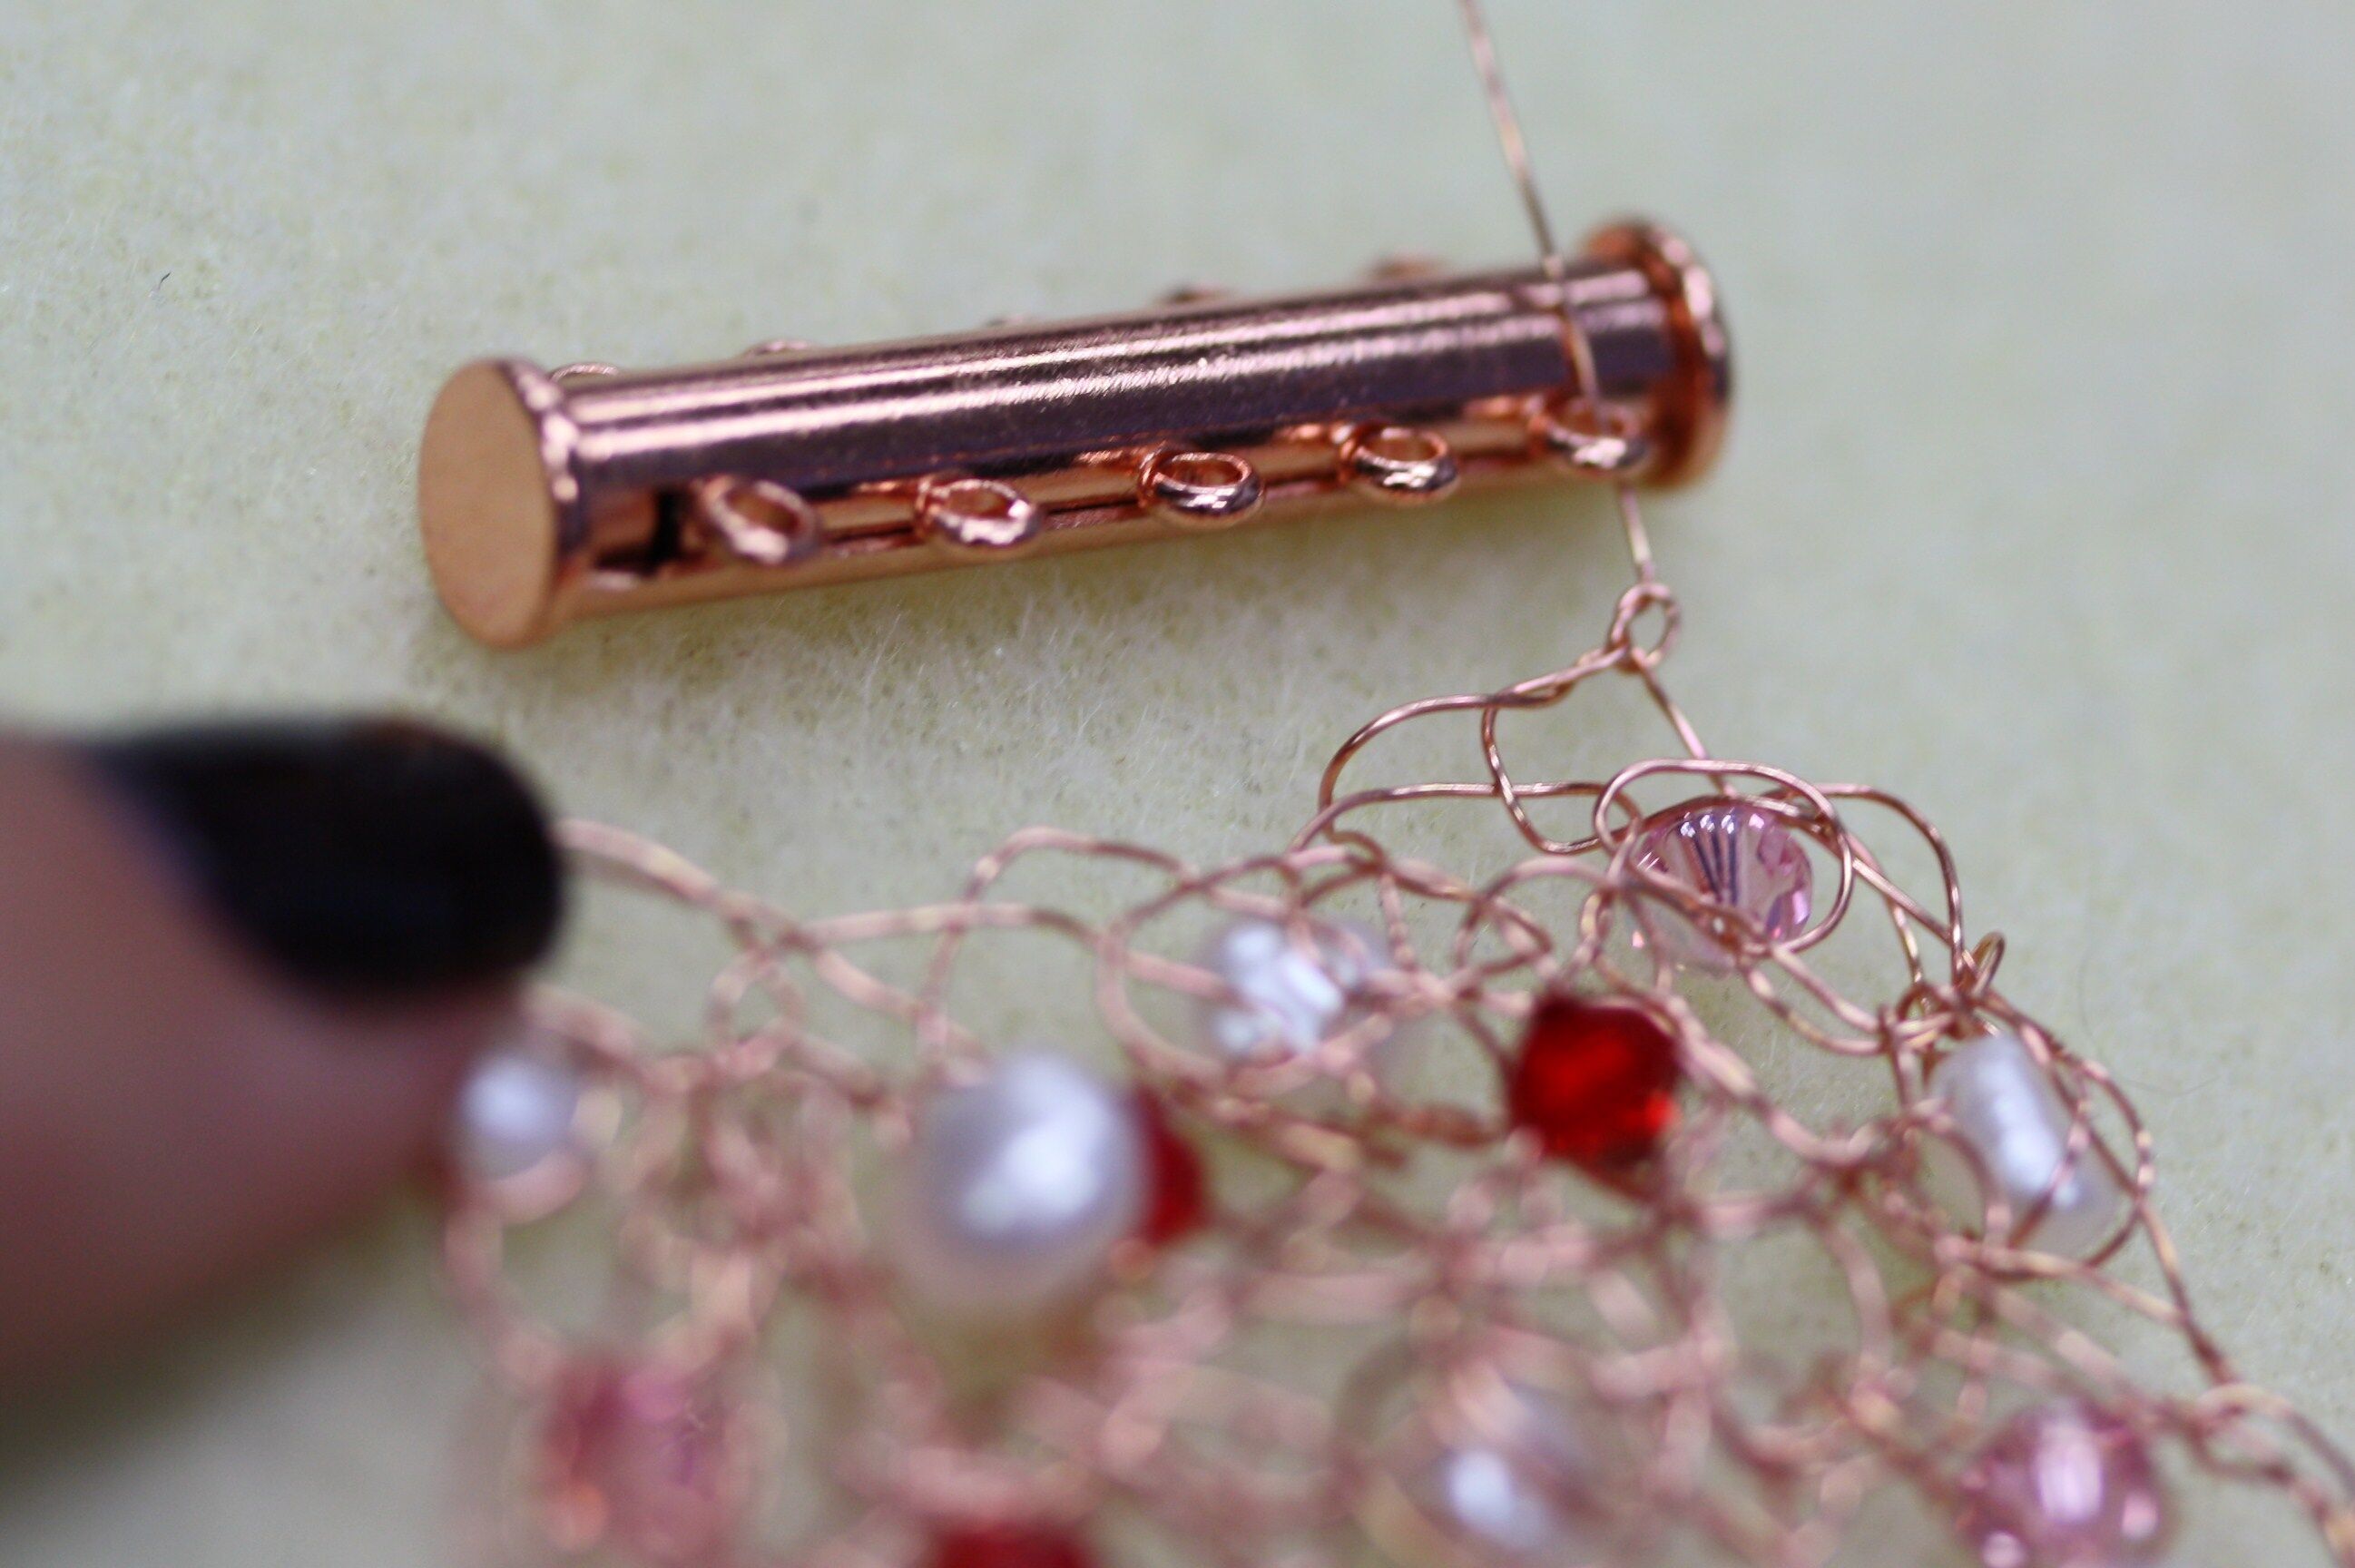
17. Pass the wire through the first stitch of crochet and pull it tight to make a whip stitch.
.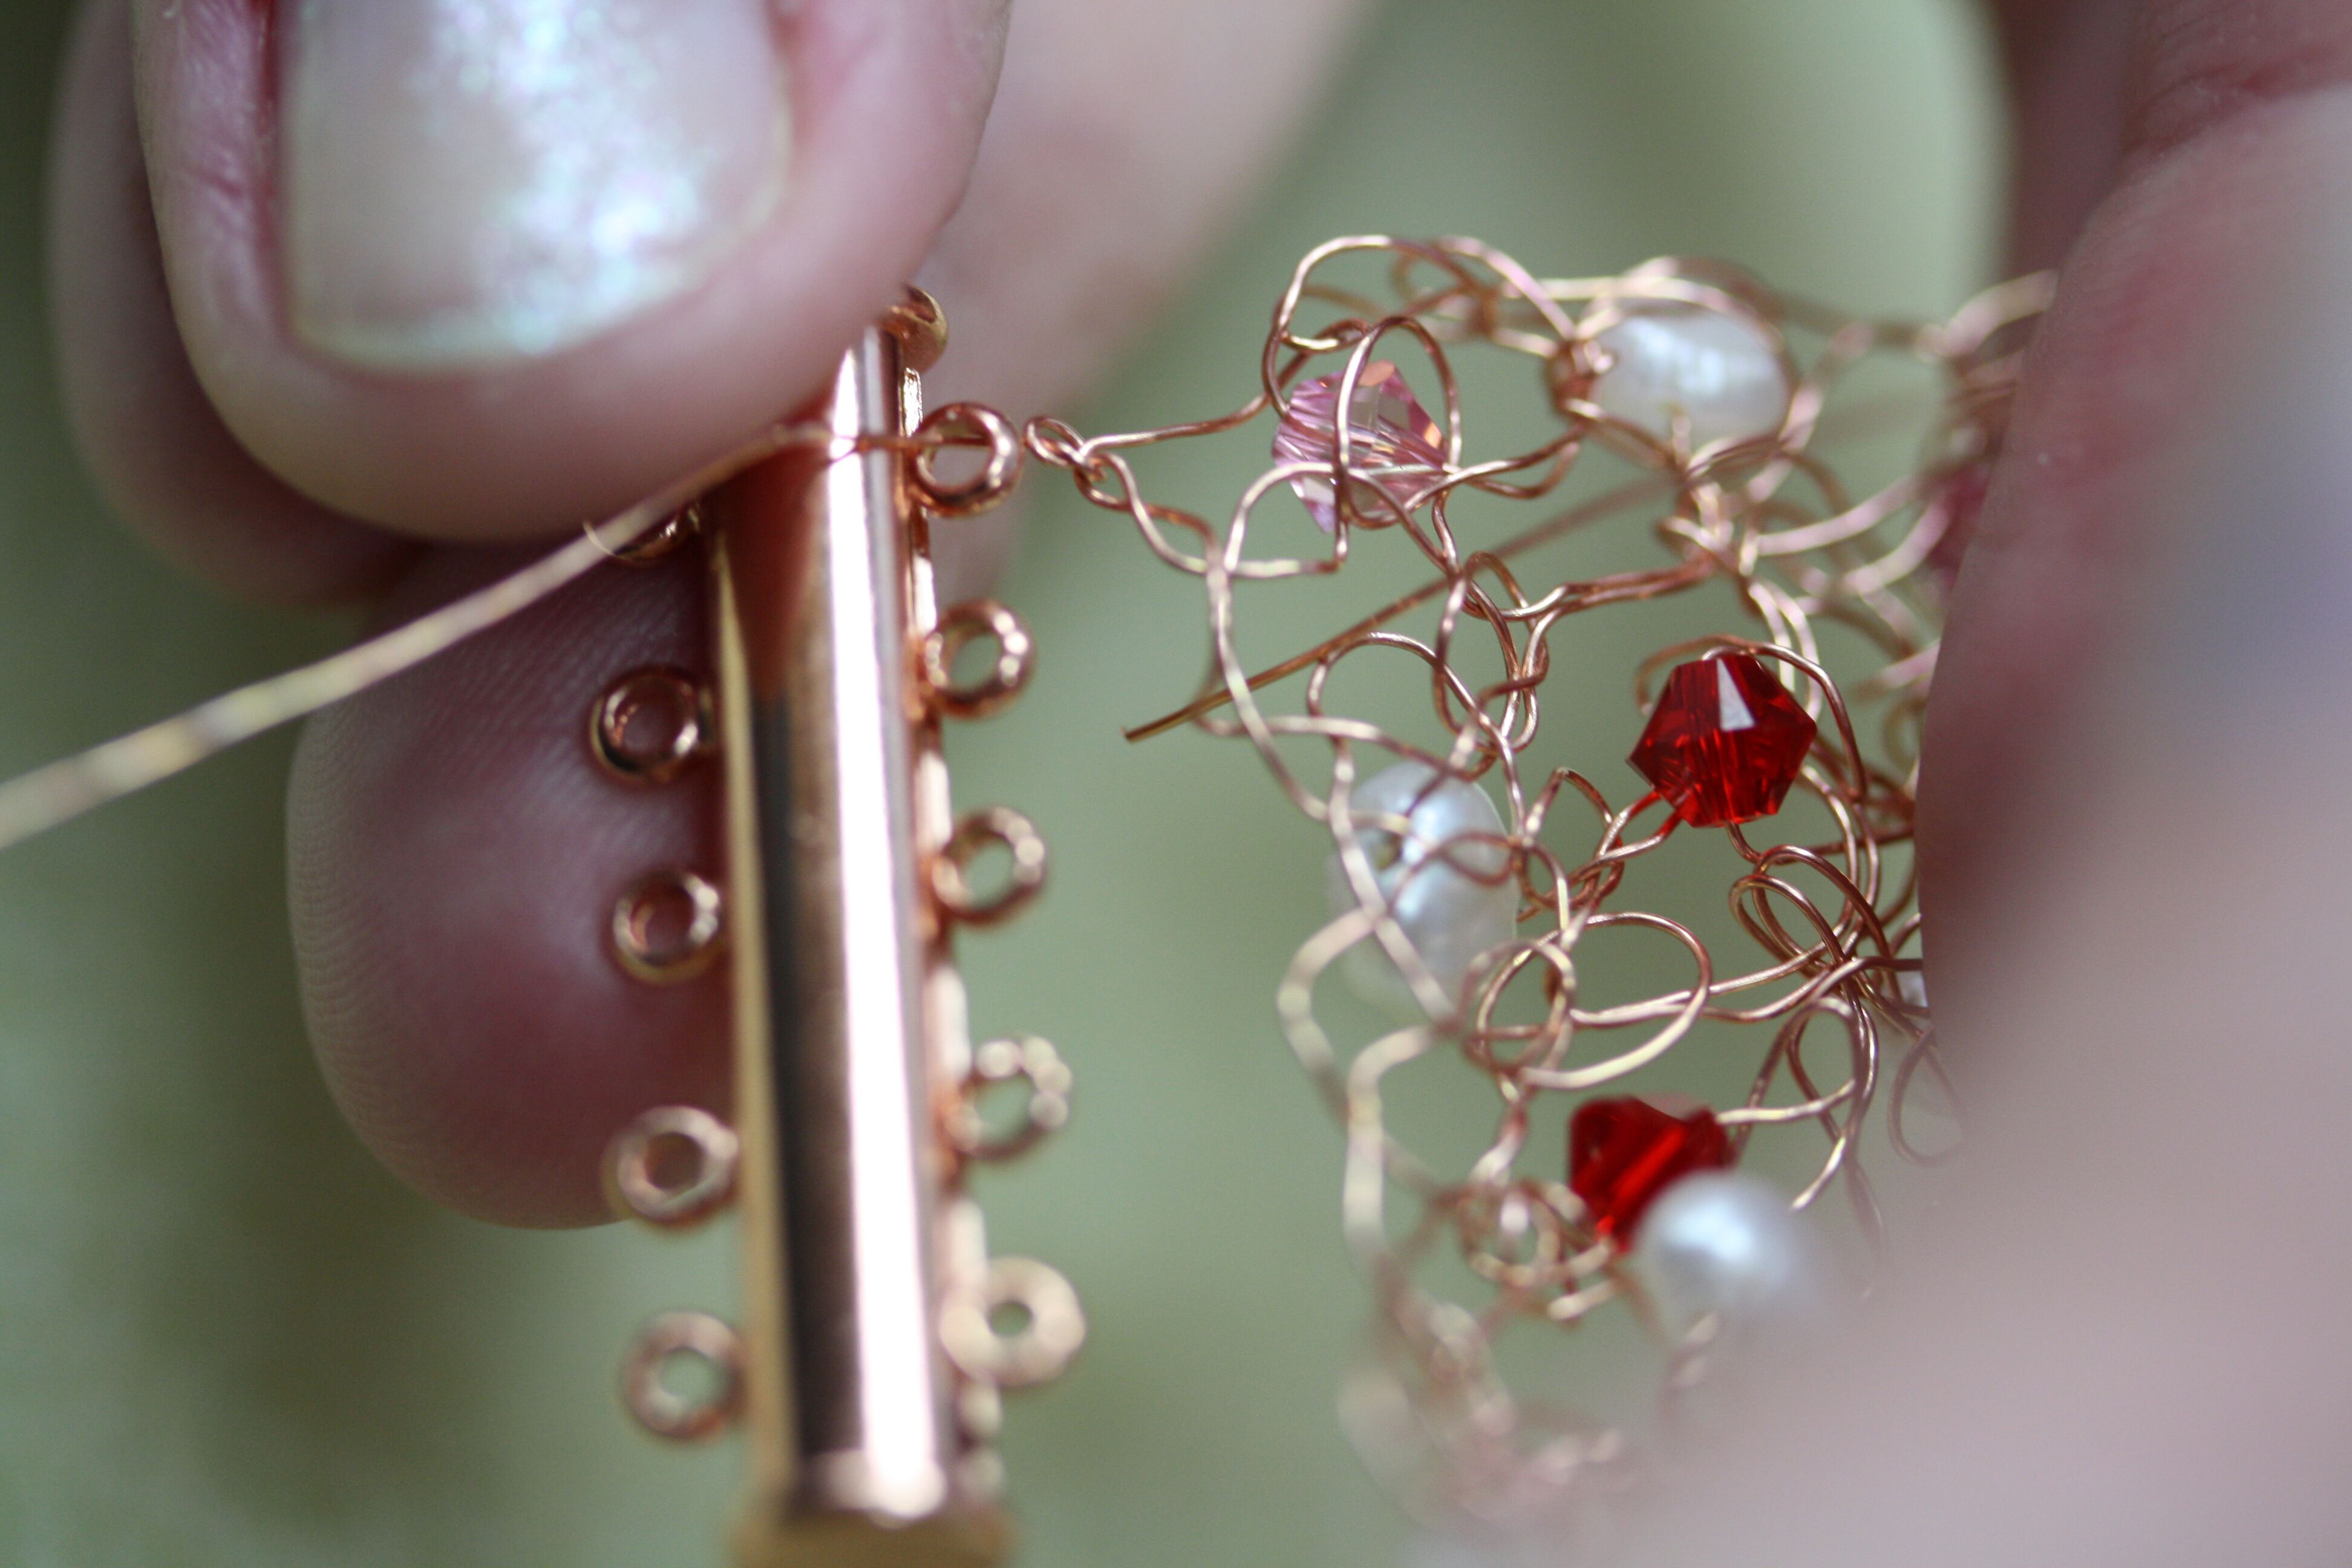
18. Continue passing through each loop of the clasp, working your way across the ending edge of the bracelet. This connects the bracelet to the clasp. Continue working your way up and down the ending edge of the bracelet until you run out of wire. Trim off any excess wire and tap the ends down firmly with needle nose pliers.
.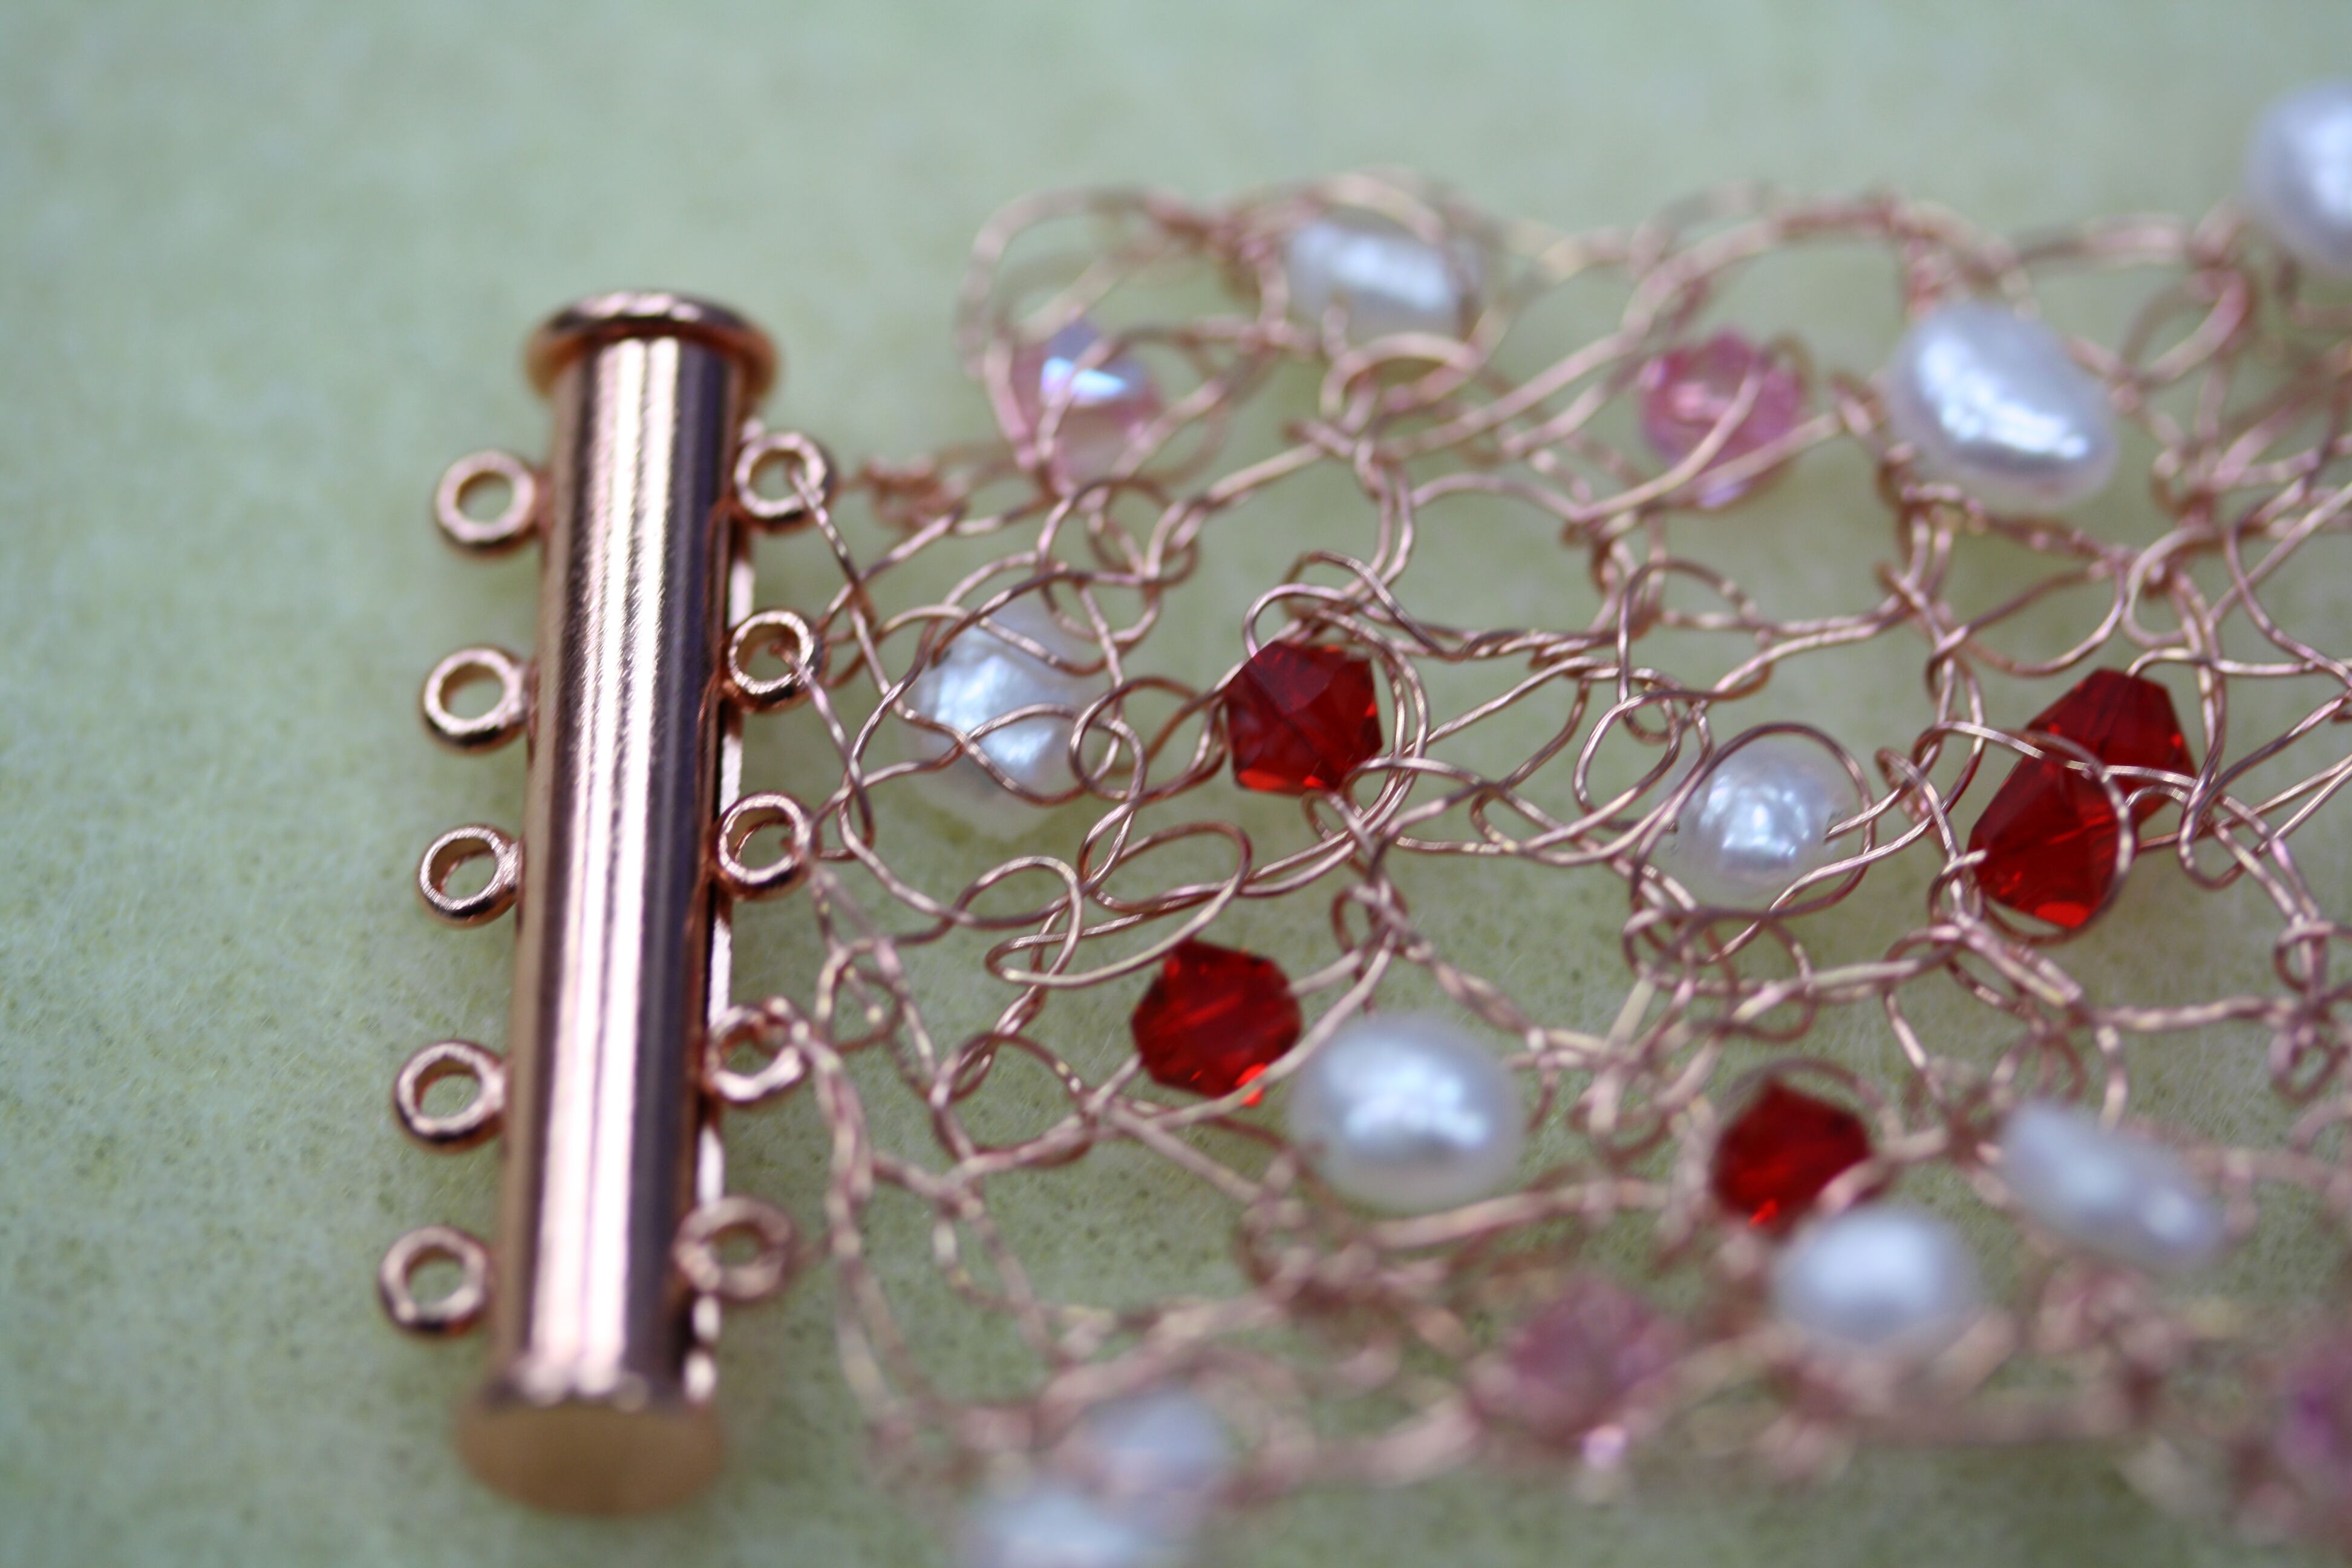
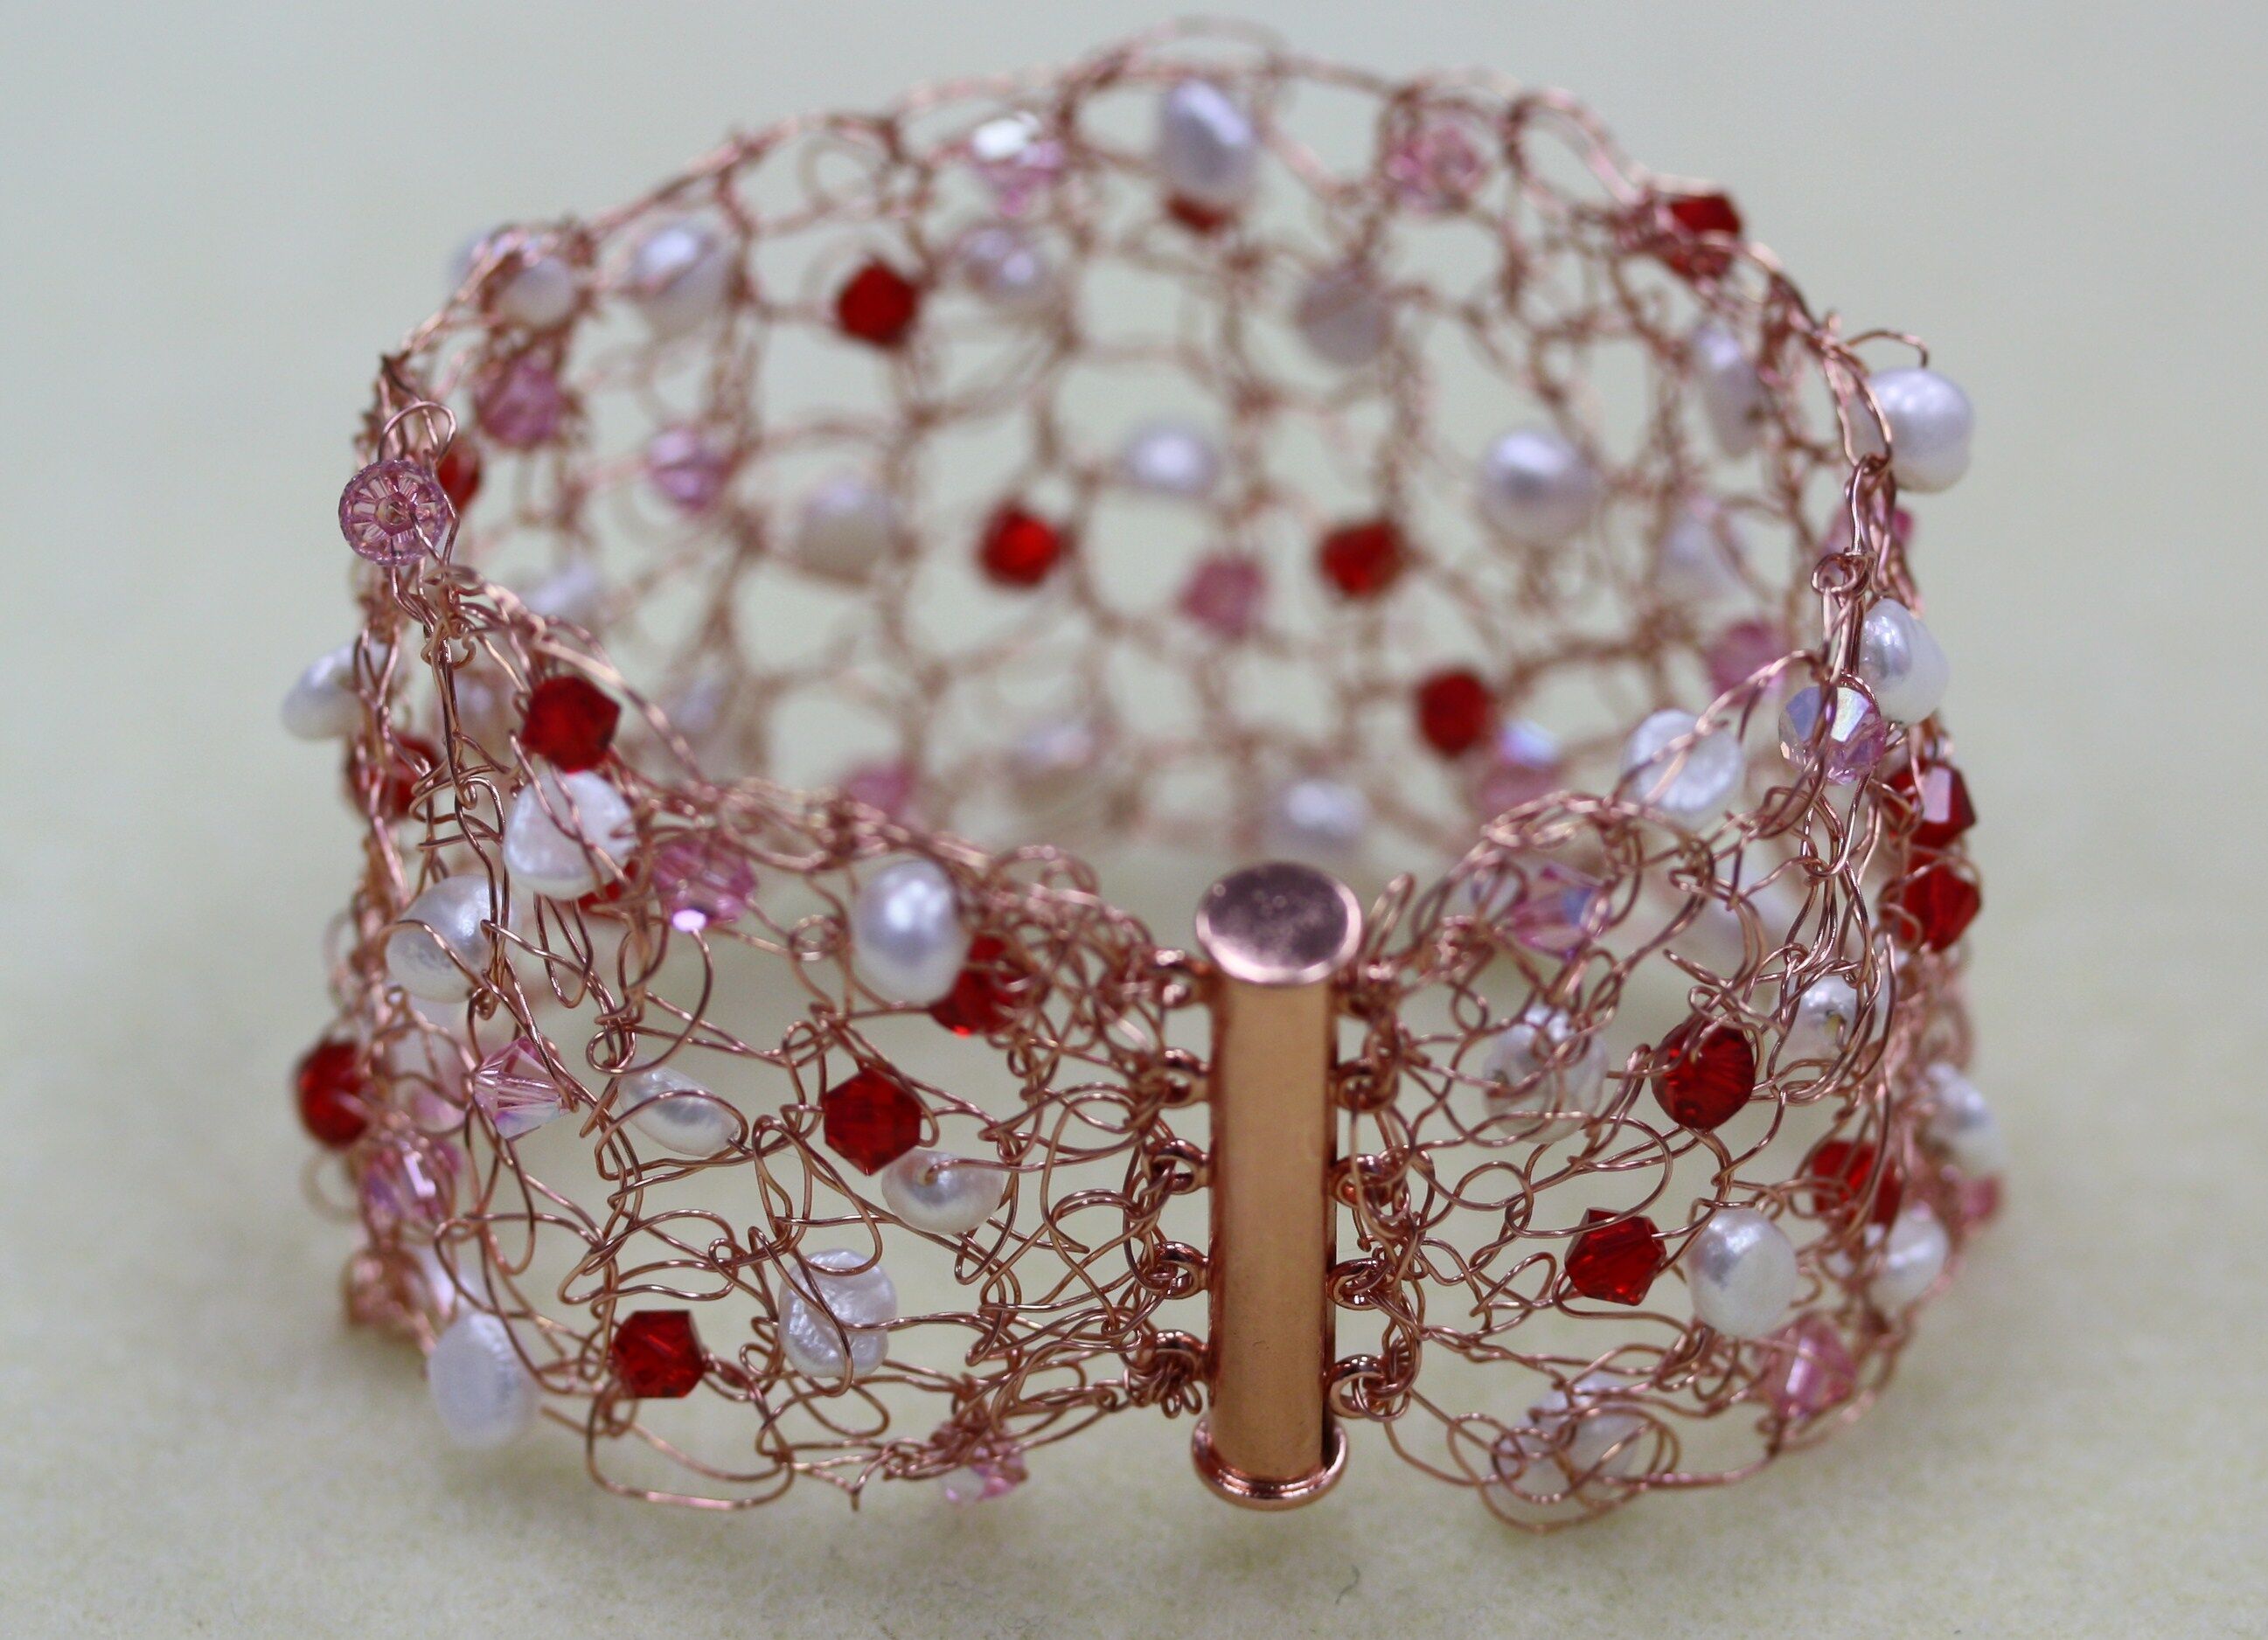
19. Repeat steps 16-18 on the other end of the bracelet with the opposite side of the clasp. The finished bracelet is shown below.
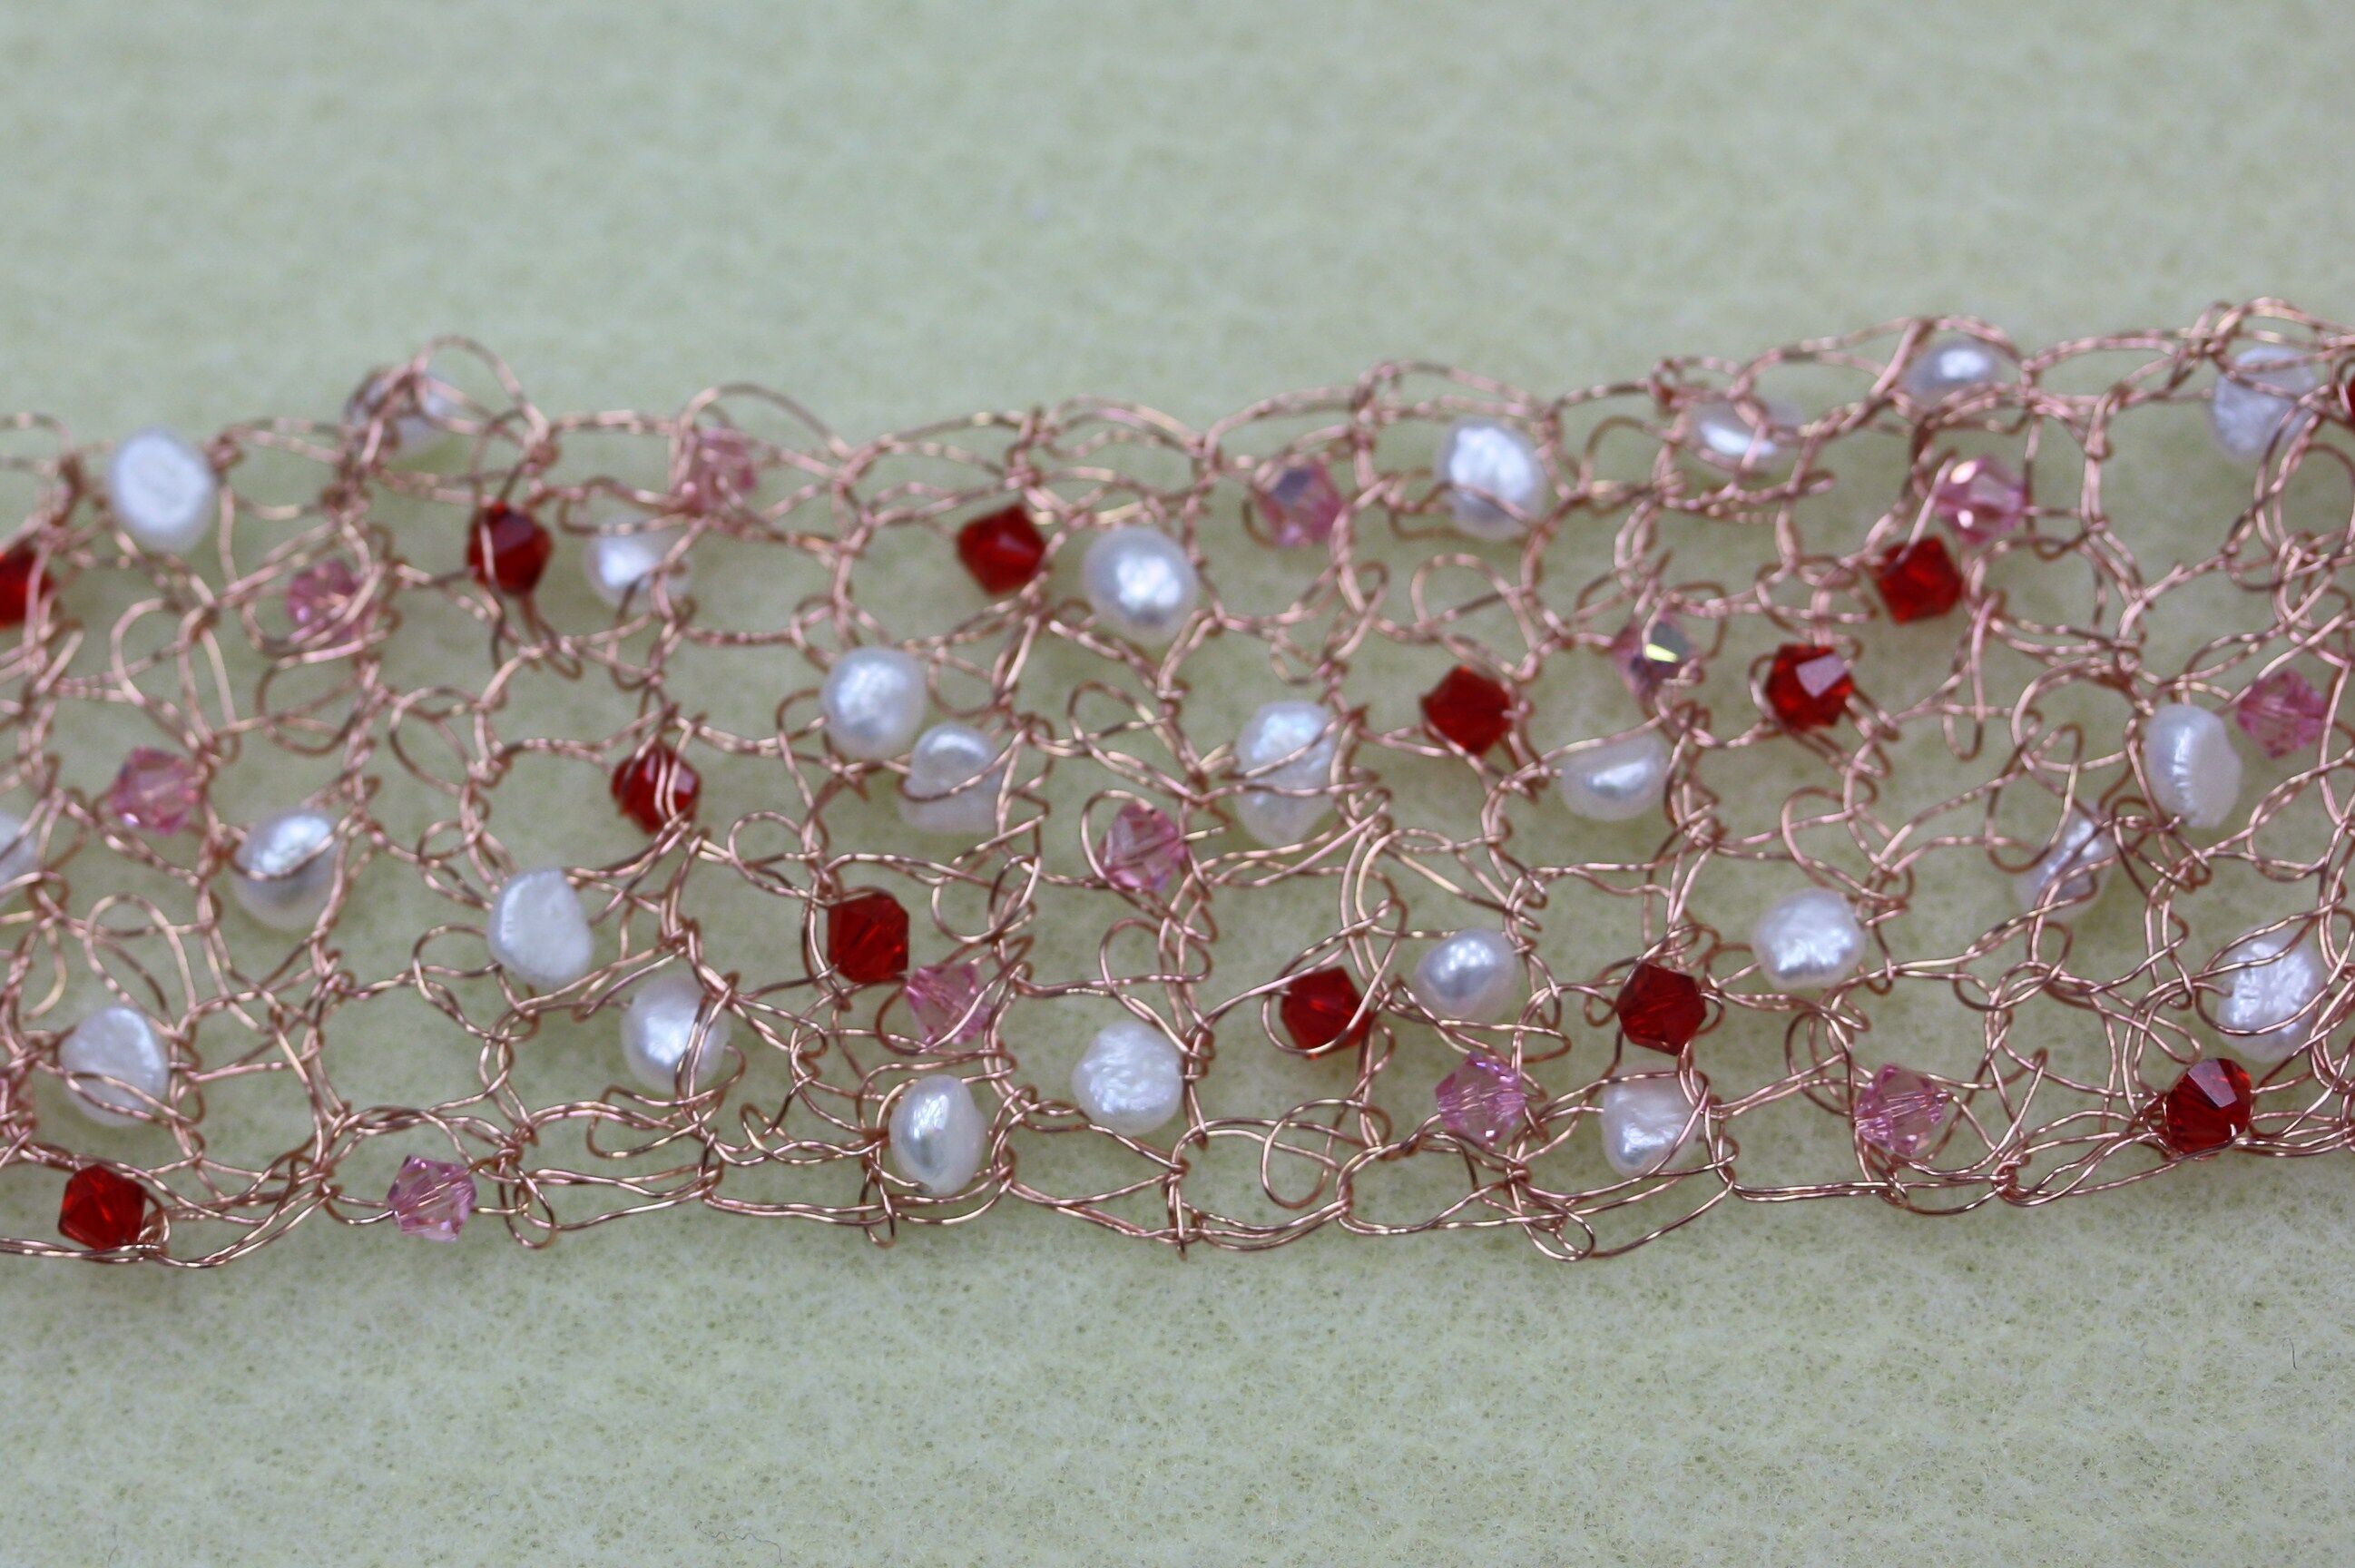

Fun, Right?? I have a special place in my heart for this bracelet – our former Creative Director, Lezli, made me this bracelet for my birthday many years ago. I love that it looks like a painting, a little messy when you look up close but absolutely beautiful when you step back and look at the whole piece. Have fun playing with this new technique to see what you can create…thin bracelets, wide bracelets, rings, collar necklaces, chokers…the possibilities are endless!
Happy Beading!!
Recent Posts
-

"Abalone Sea" Dangle Earrings
"Abalone Sea" Dangle EarringsIn this tutorial, you'll blend delicate design with the luminescent bea …24th Apr 2024 -

"Gem Keeper" Chain Cage Pendant Necklace
"Gem Keeper" Chain Cage Pendant NecklaceNo hole no problem! Keep anything from gems with no holes, b …29th Mar 2024 -

Layered Beaded Charm Necklaces
Layered Beaded Charm NecklacesLayered necklaces are a fashion staple that adds depth and dimension t …26th Feb 2024